Review
Panda Hobby : M1 Abrams MBT
In_War_and_Peace
 Associate Editor
England - South West, United Kingdom
Joined: September 26, 2015
KitMaker: 116 posts
Armorama: 32 posts
Posted: Tuesday, December 05, 2017 - 10:49 PM UTC
Adie Roberts takes his first look at the latest new tooled M1 Abrams MBT from Panda Hobby to see how it compares to the others on the market with a feature build to follow.
Read the ReviewIf you have comments or questions please post them here.
Thanks!
Florida, United States
Joined: May 16, 2002
KitMaker: 17,694 posts
Armorama: 13,742 posts
Posted: Tuesday, December 05, 2017 - 11:07 PM UTC
It does look to be a pretty good kit. I have one in the mail that should be here any day now.
It does have some errors though:
The biggest is the tracks. The outer part has the correct chevron pattern of T156 tracks, however, Panda molded the inner side of the tracks as T158 tracks. It can't be both and should be the T156 tracks. Trumpeter made/makes a set of indi-link T156 tracks to replace them with.
Next, the barrel is too short by about 2mm forward of the bore evacuator. Right now there is no AM replacement barrel for it, but you can take the Def Model late M68 barrel (35015) for an M60A3 and cut it off behind the bore evac and swap those sections. You will also have to add the muzzle reference sensor on the new barrel.
Also, the road wheels are a little off in that they are M1A1 wheels that have thinner rubber parts. Vodnik has done 3D roadwheels of the correct type that are available on Shapeways. This is a minor issue though as most can't tell the difference between them. I don't plan on replacing them on mine.
Lastly, the left rear fuel filler cap is molded 90 degrees off from where it should be. This can be shaved off and repositioned (if done carefully) or replaced by an AM one.
Other than that, it is pretty nice and should build up nicely.
Field Artillery --- The KING of BATTLE!!!
"People sleep peaceably in their beds at night only because rough men stand ready to do violence on their behalf." -- George Orwell
Showcase
Pennsylvania, United States
Joined: May 09, 2009
KitMaker: 561 posts
Armorama: 553 posts
Posted: Wednesday, December 06, 2017 - 12:47 AM UTC
Something that immediately caught my eye, in photo 7 of the review is what looks like a scepter fuel can. Don't think these were in use when the M1 was in service.
Sean
Florida, United States
Joined: May 16, 2002
KitMaker: 17,694 posts
Armorama: 13,742 posts
Posted: Wednesday, December 06, 2017 - 01:08 AM UTC
Good catch. The Scepter plastic fuel can was adopted in the '80s. The question is, when (how early) in the '80s and how quickly? 1 CAV still had a lot of metal fuel cans bouncing around in the mid '90s ('94-'95) when I got there. We had a mass turn-in of metal cans and exchanged them all for plastic cans. There were all sorts of metal ones stashed in connexes and on vehicles.
With all that said, I will still be swapping it out with a metal fuel can.
Field Artillery --- The KING of BATTLE!!!
"People sleep peaceably in their beds at night only because rough men stand ready to do violence on their behalf." -- George Orwell
Showcase
In_War_and_Peace
Associate Editor England - South West, United Kingdom
Joined: September 26, 2015
KitMaker: 116 posts
Armorama: 32 posts
Posted: Wednesday, December 06, 2017 - 01:54 AM UTC
Hi, Arty and Sean thank you for reading my review I do honestly think the kit is a good looking kit with plenty of detail and a simplistic look for the build which is nice. I did think that a metal barrel would be better, not because it is too short I am not going to lie and say I knew that, just something about it I guess but other than that a genuine nice kit. Thanks again Adie
Warszawa, Poland
Joined: March 26, 2003
KitMaker: 4,342 posts
Armorama: 3,938 posts
Posted: Wednesday, December 06, 2017 - 01:20 PM UTC
Is it just me, or none of the photos show the upper hull? There is another flaw in that part, as the rear left fuel filler cap is molded incorrectly (some of the cap details are molded rotated 90 degrees).
Pawel "Vodnik" Krupowicz
Professional Certified Rivet Counter.
Manitoba, Canada
Joined: January 03, 2016
KitMaker: 3,791 posts
Armorama: 3,778 posts
Posted: Thursday, December 07, 2017 - 02:47 AM UTC
Looks like another great addition to the modern stuff, would be interesting to know how these kits compare with the Dragon kits released several years ago.
Warszawa, Poland
Joined: March 26, 2003
KitMaker: 4,342 posts
Armorama: 3,938 posts
Posted: Friday, December 08, 2017 - 12:37 AM UTC
Quoted Text
Looks like another great addition to the modern stuff, would be interesting to know how these kits compare with the Dragon kits released several years ago.
Dragon kits were released ten years ago. And it is difficult to compare directly as they are very different versions of the tank.
Pawel "Vodnik" Krupowicz
Professional Certified Rivet Counter.
European Union
Joined: January 28, 2015
KitMaker: 2,099 posts
Armorama: 1,920 posts
Posted: Friday, December 08, 2017 - 03:29 AM UTC
How would they compare? This Panda kot is a very differant vesion of the Abrams than any of the version by Dragon.
Never gonna' give EU up, never gonna' let EU down.
Wisconsin, United States
Joined: January 03, 2005
KitMaker: 279 posts
Armorama: 262 posts
Posted: Friday, December 08, 2017 - 10:31 PM UTC
Quoted Text
How would they compare? This Panda kot is a very differant vesion of the Abrams than any of the version by Dragon.
A better comparison might be with the old Tamiya Kit. I built a couple of those back in the day.....pretty spartan.
I found the tires/rims and have to pass on them. That is a very steep price point (more than the kit).
Alberta, Canada
Joined: January 19, 2005
KitMaker: 4,085 posts
Armorama: 3,917 posts
Posted: Saturday, December 09, 2017 - 04:27 AM UTC
To summarize the identified issues to date:
1. Road wheels- To be completely accurate the road wheels should be thicker and narrower. Noticeable?
2. Main Gun Barrel- To be accurate the barrel forward of the bore evacuator needs to be 2mm longer. Noticeable?
3. Left Rear Fuel Filler Cap- To be accurate needs to be repositioned 90 degrees.
4. Tracks- To be accurate should be correct T156 tracks.
5. Mantlet Bracket- Use the straight bracket, Part B56, instead of the optional angled bracket, Part B1.
6. Fuel Can- To be accurate replace the Scepter plastic can with a metal can.
Anything else glaring to be corrected/replaced?
Valkryie Miniatures is currently working on a Modern US Army Tank Crew - 1980s era set....how timely.
I sense aftermarket sets in 4, 3, 2, 1...
"We're not the public service of Canada, we're not just another department. We are the Canadian Forces, and our job is to be able to kill people."
July 2005- General R.J. Hillier (Retired), Former Chief of the Defence Staff
Florida, United States
Joined: May 16, 2002
KitMaker: 17,694 posts
Armorama: 13,742 posts
Posted: Saturday, December 09, 2017 - 06:11 AM UTC
Sounds like you captured all the corrections.
Field Artillery --- The KING of BATTLE!!!
"People sleep peaceably in their beds at night only because rough men stand ready to do violence on their behalf." -- George Orwell
Showcase
Oklahoma, United States
Joined: March 01, 2002
KitMaker: 6,043 posts
Armorama: 4,347 posts
Posted: Saturday, December 09, 2017 - 06:26 AM UTC
Does this version suppose to have anti slip on it?
Florida, United States
Joined: May 16, 2002
KitMaker: 17,694 posts
Armorama: 13,742 posts
Posted: Saturday, December 09, 2017 - 06:36 AM UTC
No, anti-slip wasn't introduced until the M1A1.
Field Artillery --- The KING of BATTLE!!!
"People sleep peaceably in their beds at night only because rough men stand ready to do violence on their behalf." -- George Orwell
Showcase
England - East Anglia, United Kingdom
Joined: November 24, 2008
KitMaker: 364 posts
Armorama: 363 posts
Posted: Saturday, December 09, 2017 - 01:59 PM UTC
Quoted Text
To summarize the identified issues to date:
1. Road wheels- To be completely accurate the road wheels should be thicker and narrower. Noticeable?
2. Main Gun Barrel- To be accurate the barrel forward of the bore evacuator needs to be 2mm longer. Noticeable?
3. Left Rear Fuel Filler Cap- To be accurate needs to be repositioned 90 degrees.
4. Tracks- To be accurate should be correct T156 tracks.
5. Mantlet Bracket- Use the straight bracket, Part B56, instead of the optional angled bracket, Part B1.
6. Fuel Can- To be accurate replace the Scepter plastic can with a metal can.
Anything else glaring to be corrected/replaced?
Valkryie Miniatures is currently working on a Modern US Army Tank Crew - 1980s era set....how timely.
I sense aftermarket sets in 4, 3, 2, 1...
There are a couple more details that don't gel compared to references and the old Tamiya M1 kit:
- The orientation of the front LH fuel filler cap.
- The hinges on the rearmost battery compartment cover.
Florida, United States
Joined: May 16, 2002
KitMaker: 17,694 posts
Armorama: 13,742 posts
Posted: Saturday, December 09, 2017 - 05:44 PM UTC
Quoted Text
There are a couple more details that don't gel compared to references and the old Tamiya M1 kit:
- The orientation of the front LH fuel filler cap.
- The hinges on the rearmost battery compartment cover.
I'm not following. The front fuel filler covers are separate pieces and can be placed whichever way you want. The battery box hinges look fine to me.
Field Artillery --- The KING of BATTLE!!!
"People sleep peaceably in their beds at night only because rough men stand ready to do violence on their behalf." -- George Orwell
Showcase
England - East Anglia, United Kingdom
Joined: November 24, 2008
KitMaker: 364 posts
Armorama: 363 posts
Posted: Saturday, December 09, 2017 - 08:51 PM UTC
Quoted Text
Quoted Text
There are a couple more details that don't gel compared to references and the old Tamiya M1 kit:
- The orientation of the front LH fuel filler cap.
- The hinges on the rearmost battery compartment cover.
I'm not following. The front fuel filler covers are separate pieces and can be placed whichever way you want. The battery box hinges look fine to me.
The front fuel filler caps look keyed to both angle outwards, but on the M1 the left hand one angles front-to-back:
https://www.cybermodeler.com/armor/m1/images/hayward_m1_08.jpgAnd the hinges to the battery compartment were different on the M1 from the M1A1. I don't have access to my photos at the moment, but this model picture from Vodnik's site shows the pattern.
http://vodnik.republika.pl/pages/m1-comparison/abrams_40.jpgPretty minor, but still ones to add to a tweaks list.
New Jersey, United States
Joined: December 08, 2003
KitMaker: 2,864 posts
Armorama: 2,497 posts
Posted: Sunday, December 10, 2017 - 02:02 AM UTC
Quoted Text
No, anti-slip wasn't introduced until the M1A1.
And re-manufactured M1 circa 1990 began to get it as part of the refurbishment program. But that's a later beast than this kit. There was also paint on the top being mixed with sand to give it texture so guys with Cocoran jump boots or some varieties of tanker boots (with no tread on the sole) wouldn't fall off the tank.
And one really minor thing, there are no lifting rings on the TC cupola or at least the holes they fit into.
"The only thing a man should take seriously is the fact that nothing should be taken seriously."
Samuel Butler, Victorian satirist
Steve Willoughby
Alberta, Canada
Joined: January 19, 2005
KitMaker: 4,085 posts
Armorama: 3,917 posts
Posted: Sunday, December 10, 2017 - 03:20 AM UTC
Quoted Text
And one really minor thing, there are no lifting rings on the TC cupola or at least the holes they fit into.
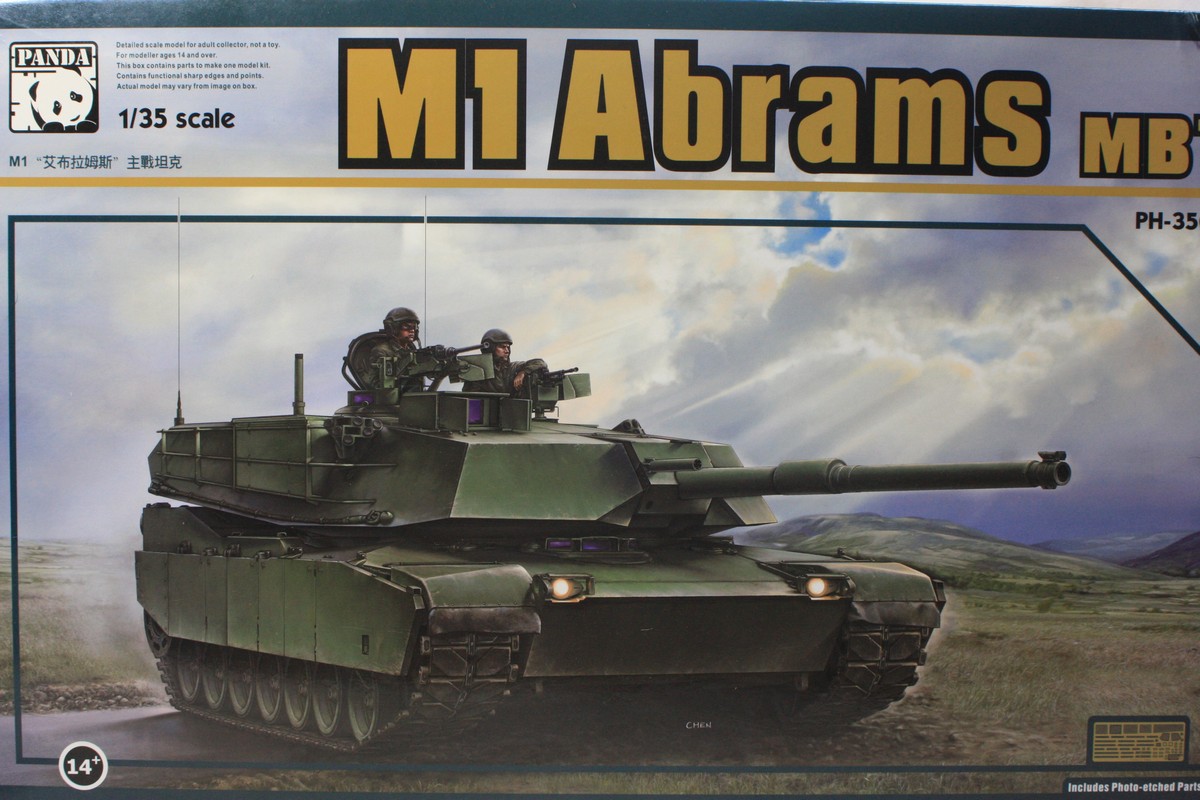
It does appear the box art shows the cupola lift rings...at least the thought was there.
"We're not the public service of Canada, we're not just another department. We are the Canadian Forces, and our job is to be able to kill people."
July 2005- General R.J. Hillier (Retired), Former Chief of the Defence Staff
Alabama, United States
Joined: October 21, 2005
KitMaker: 310 posts
Armorama: 302 posts
Posted: Friday, December 15, 2017 - 07:55 AM UTC
According to some "Border Legion" guys I have talked to, all M1's sent to Europe we're in overall forest green, so MERDC may be out of the question for an 11ACR track. Although 2ACR had one painted in Dual Tex aka "Dueler Dots" that was quickly painted back to overall green.
"Lead me, Follow me, Or get out of my way!" --GEN George S. Patton
United States
Joined: December 16, 2017
KitMaker: 3 posts
Armorama: 3 posts
Posted: Friday, December 15, 2017 - 11:24 PM UTC
I can confirm that scheme B is 3/67 armor. US Battle Tanks Today (Tanks Illustrated No. 8 ) by Steve Zaloga and Michael Green has photos of tanks from both this unit and 1/67 armor taken at Ft. Hood in 1983. Unfortunately the registration numbers are not included on the decal sheet, but shouldn't be too hard to cobble together using decals from other kits or aftermarket.
Colorado, United States
Joined: February 10, 2008
KitMaker: 730 posts
Armorama: 616 posts
Posted: Saturday, December 16, 2017 - 04:40 AM UTC
Washington, United States
Joined: November 11, 2015
KitMaker: 59 posts
Armorama: 58 posts
Posted: Saturday, December 23, 2017 - 10:25 PM UTC
The first thing I noticed after I opened my instruction book was that the tracks are illustrated on the tank backwards. That may lead more than a few people to actually add them onto the model backwards.
Figure Painting Moderator - Genessis Models
Washington, United States
Joined: November 11, 2015
KitMaker: 59 posts
Armorama: 58 posts
Posted: Saturday, December 23, 2017 - 10:26 PM UTC
There is also a slight sink mark in the wind sensor so make sure you fill that.
Figure Painting Moderator - Genessis Models
Utah, United States
Joined: February 05, 2004
KitMaker: 163 posts
Armorama: 160 posts
Posted: Friday, December 29, 2017 - 02:26 AM UTC
In the 80's there was a nonslip coating available in the field. It was a "brownish" OD enamel paint that came in gal cans. Basically it was paint with about 2 inches of sand in the bottom of the can. In the 90's a forest green color epoxy based coating was available.(it was called flight deck coating) It is very thick and had to be spread on with a trowel about a 1/4 inch thick.
Remember, "It's only a hobby"


