I picked up my Lanchester Armoured Car, CSM 35001, earlier this week and this evening I got some spare time to take a look in the box.
Impressed is the only word I can use.
I wish Dragon could send their assembly instruction designers to Latvia for a course in how to make assembly instructions.
Small steps, very clear diagrams, added parts tinted blue, descriptive text, hints about important things to check.
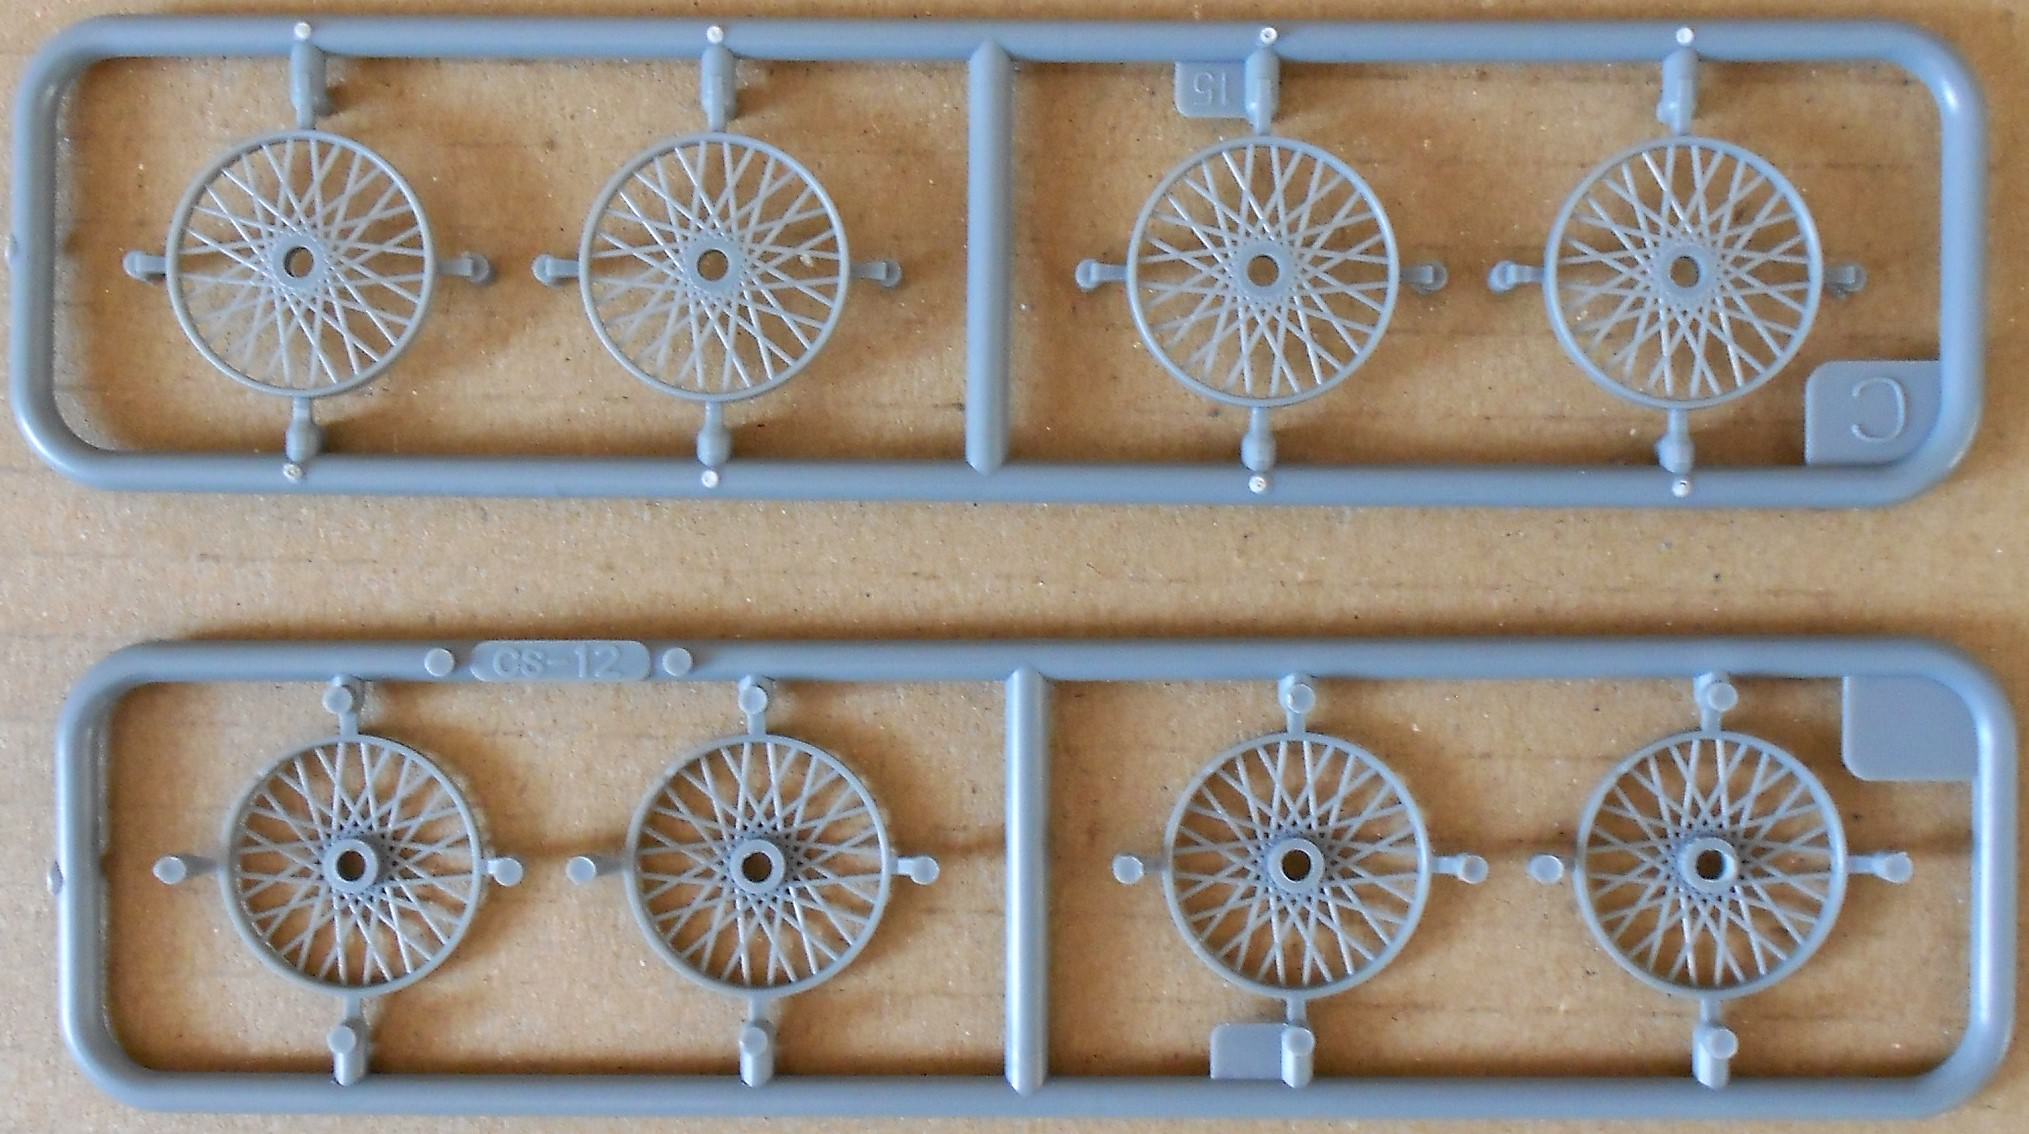
There is no interior which suits me just fine (less work ...) so the parts count isn't huge. The parts are very well molded, very little flash and a normal amount of mold boundary lines. The spoked wheels are impressive, there is even small parts for the air valves (that will be fiddly, tweezer launch warning!!).
Five marking options, four RNAS without camo and one Belgian. The Belgian disruptive camo would probably disrupt my mind. Very artistic but would probably drive me crazy so I think I'll stay with the Admiralty Light Grey RNAS. The other two are Admiralty Dark Grey and something close to RAF Light Earth (with the British red-white-blue aircraft roundels).
Hmm, that little patch of colour is attractive in a way ...
I'll post sprue images and a page from the instruction booklet later.
/ Robin
Armor/AFV
For discussions on tanks, artillery, jeeps, etc.
For discussions on tanks, artillery, jeeps, etc.
Hosted by Darren Baker, Mario Matijasic
Lanchester Mk I, Copper State Models :)

RobinNilsson

Joined: November 29, 2006
KitMaker: 6,693 posts
Armorama: 5,562 posts

Posted: Thursday, February 01, 2018 - 04:34 AM UTC
GaryKato

Joined: December 06, 2004
KitMaker: 3,694 posts
Armorama: 2,693 posts

Posted: Thursday, February 01, 2018 - 05:20 AM UTC
I was interested in that. Nice to hear that it looks like a good kit.
Posted: Friday, February 02, 2018 - 04:48 AM UTC
Robin, you may want to consider this with your build:
https://armorama.kitmaker.net/news/27931
Cheers,
Tat
https://armorama.kitmaker.net/news/27931
Cheers,
Tat
Darkin

Joined: July 08, 2011
KitMaker: 56 posts
Armorama: 51 posts

Posted: Friday, February 02, 2018 - 05:52 AM UTC

RobinNilsson

Joined: November 29, 2006
KitMaker: 6,693 posts
Armorama: 5,562 posts

Posted: Friday, February 02, 2018 - 02:19 PM UTC
Yup!! I have been looking at it. Very interesting!!

/ Robin

RobinNilsson

Joined: November 29, 2006
KitMaker: 6,693 posts
Armorama: 5,562 posts

Posted: Friday, February 02, 2018 - 02:21 PM UTC
Quoted Text
Robin, you may want to consider this with your build:
https://armorama.kitmaker.net/news/27931
Cheers,
Tat
Hi Tat,
I never complicate my builds with figures

Hatches closed, no figures. You can think of my display cabinet as a museum with just the vehicles parked in rows.
/ Robin
Darkin

Joined: July 08, 2011
KitMaker: 56 posts
Armorama: 51 posts

Posted: Friday, February 02, 2018 - 04:34 PM UTC
Quoted Text
Yup!! I have been looking at it. Very interesting!!

/ Robin
Hi Robin on the Polish modeling forum someone is already working with him
http://modelwork.pl/viewtopic.php?f=87&t=60613


RobinNilsson

Joined: November 29, 2006
KitMaker: 6,693 posts
Armorama: 5,562 posts

Posted: Friday, February 02, 2018 - 04:40 PM UTC
That resin looks really good!
goofmuilwijk

Joined: April 19, 2013
KitMaker: 179 posts
Armorama: 117 posts

Posted: Saturday, February 03, 2018 - 12:47 AM UTC
One of the modellers at my local modelling club had one today. I can only echo what Robin said: impressed. The packaging is solid and gives a "luxurious" impression. The instructions looks like a manual, with again a deluxe appearance. Having the parts to add in blue with the rest in grayscale looks great 
I was particularly impressed with the wheel-spokes. Very thin!
Of course that's without seeing any parts glued together so i have no idea about the fit of the kit

I was particularly impressed with the wheel-spokes. Very thin!
Of course that's without seeing any parts glued together so i have no idea about the fit of the kit

Posted: Saturday, February 03, 2018 - 03:24 AM UTC
Quoted Text
Quoted TextRobin, you may want to consider this with your build:
https://armorama.kitmaker.net/news/27931
Cheers,
Tat
Hi Tat,
I never complicate my builds with figures
Hatches closed, no figures. You can think of my display cabinet as a museum with just the vehicles parked in rows.
/ Robin
Same here. To me, it goes for interiors as well. Keeping it simple to get one finished soonest, otherwise the interest may just wane, thus end up as another trophy on the shelf of unfinished builds.


JavierDeLuelmo

Joined: February 29, 2016
KitMaker: 189 posts
Armorama: 186 posts

Posted: Monday, February 12, 2018 - 07:24 PM UTC
Got mine yesterday: a beautiful model!
Copper State Models has made a truly fine kit, hope it has good sales and helps them for future WW1 projects. Maybe a Lanchester wagon?
Good coverage on the Lanchester saga can be found in "War Cars" by David Fletcher and the superb article he wrote for "Wheels & Tracks" magazine moons ago.
Copper State Models has made a truly fine kit, hope it has good sales and helps them for future WW1 projects. Maybe a Lanchester wagon?
Good coverage on the Lanchester saga can be found in "War Cars" by David Fletcher and the superb article he wrote for "Wheels & Tracks" magazine moons ago.
TAFFY3

Joined: January 21, 2008
KitMaker: 2,531 posts
Armorama: 859 posts

Posted: Tuesday, February 13, 2018 - 04:22 AM UTC
Got mine in the mail and I have a question. On the left hand side, near the front, there is a round 'holder'. In the few period photos that I've found it contains some sort of round canister or pail. Anyone out there know what it was, or what it looks like? Any help would be appreciated.  Al
Al
 Al
AlTAFFY3

Joined: January 21, 2008
KitMaker: 2,531 posts
Armorama: 859 posts

Posted: Wednesday, February 14, 2018 - 03:20 PM UTC
Quoted Text
Got mine in the mail and I have a question. On the left hand side, near the front, there is a round 'holder'. In the few period photos that I've found it contains some sort of round canister or pail. Anyone out there know what it was, or what it looks like? Any help would be appreciated.Al
After further research, I'm reasonably certain that I'm able to answer my own question. Said holder is for a pail, or bucket, sometimes two, nested within each other.


Google is my friend.
 Al
AlTAFFY3

Joined: January 21, 2008
KitMaker: 2,531 posts
Armorama: 859 posts

Posted: Thursday, February 15, 2018 - 08:57 PM UTC
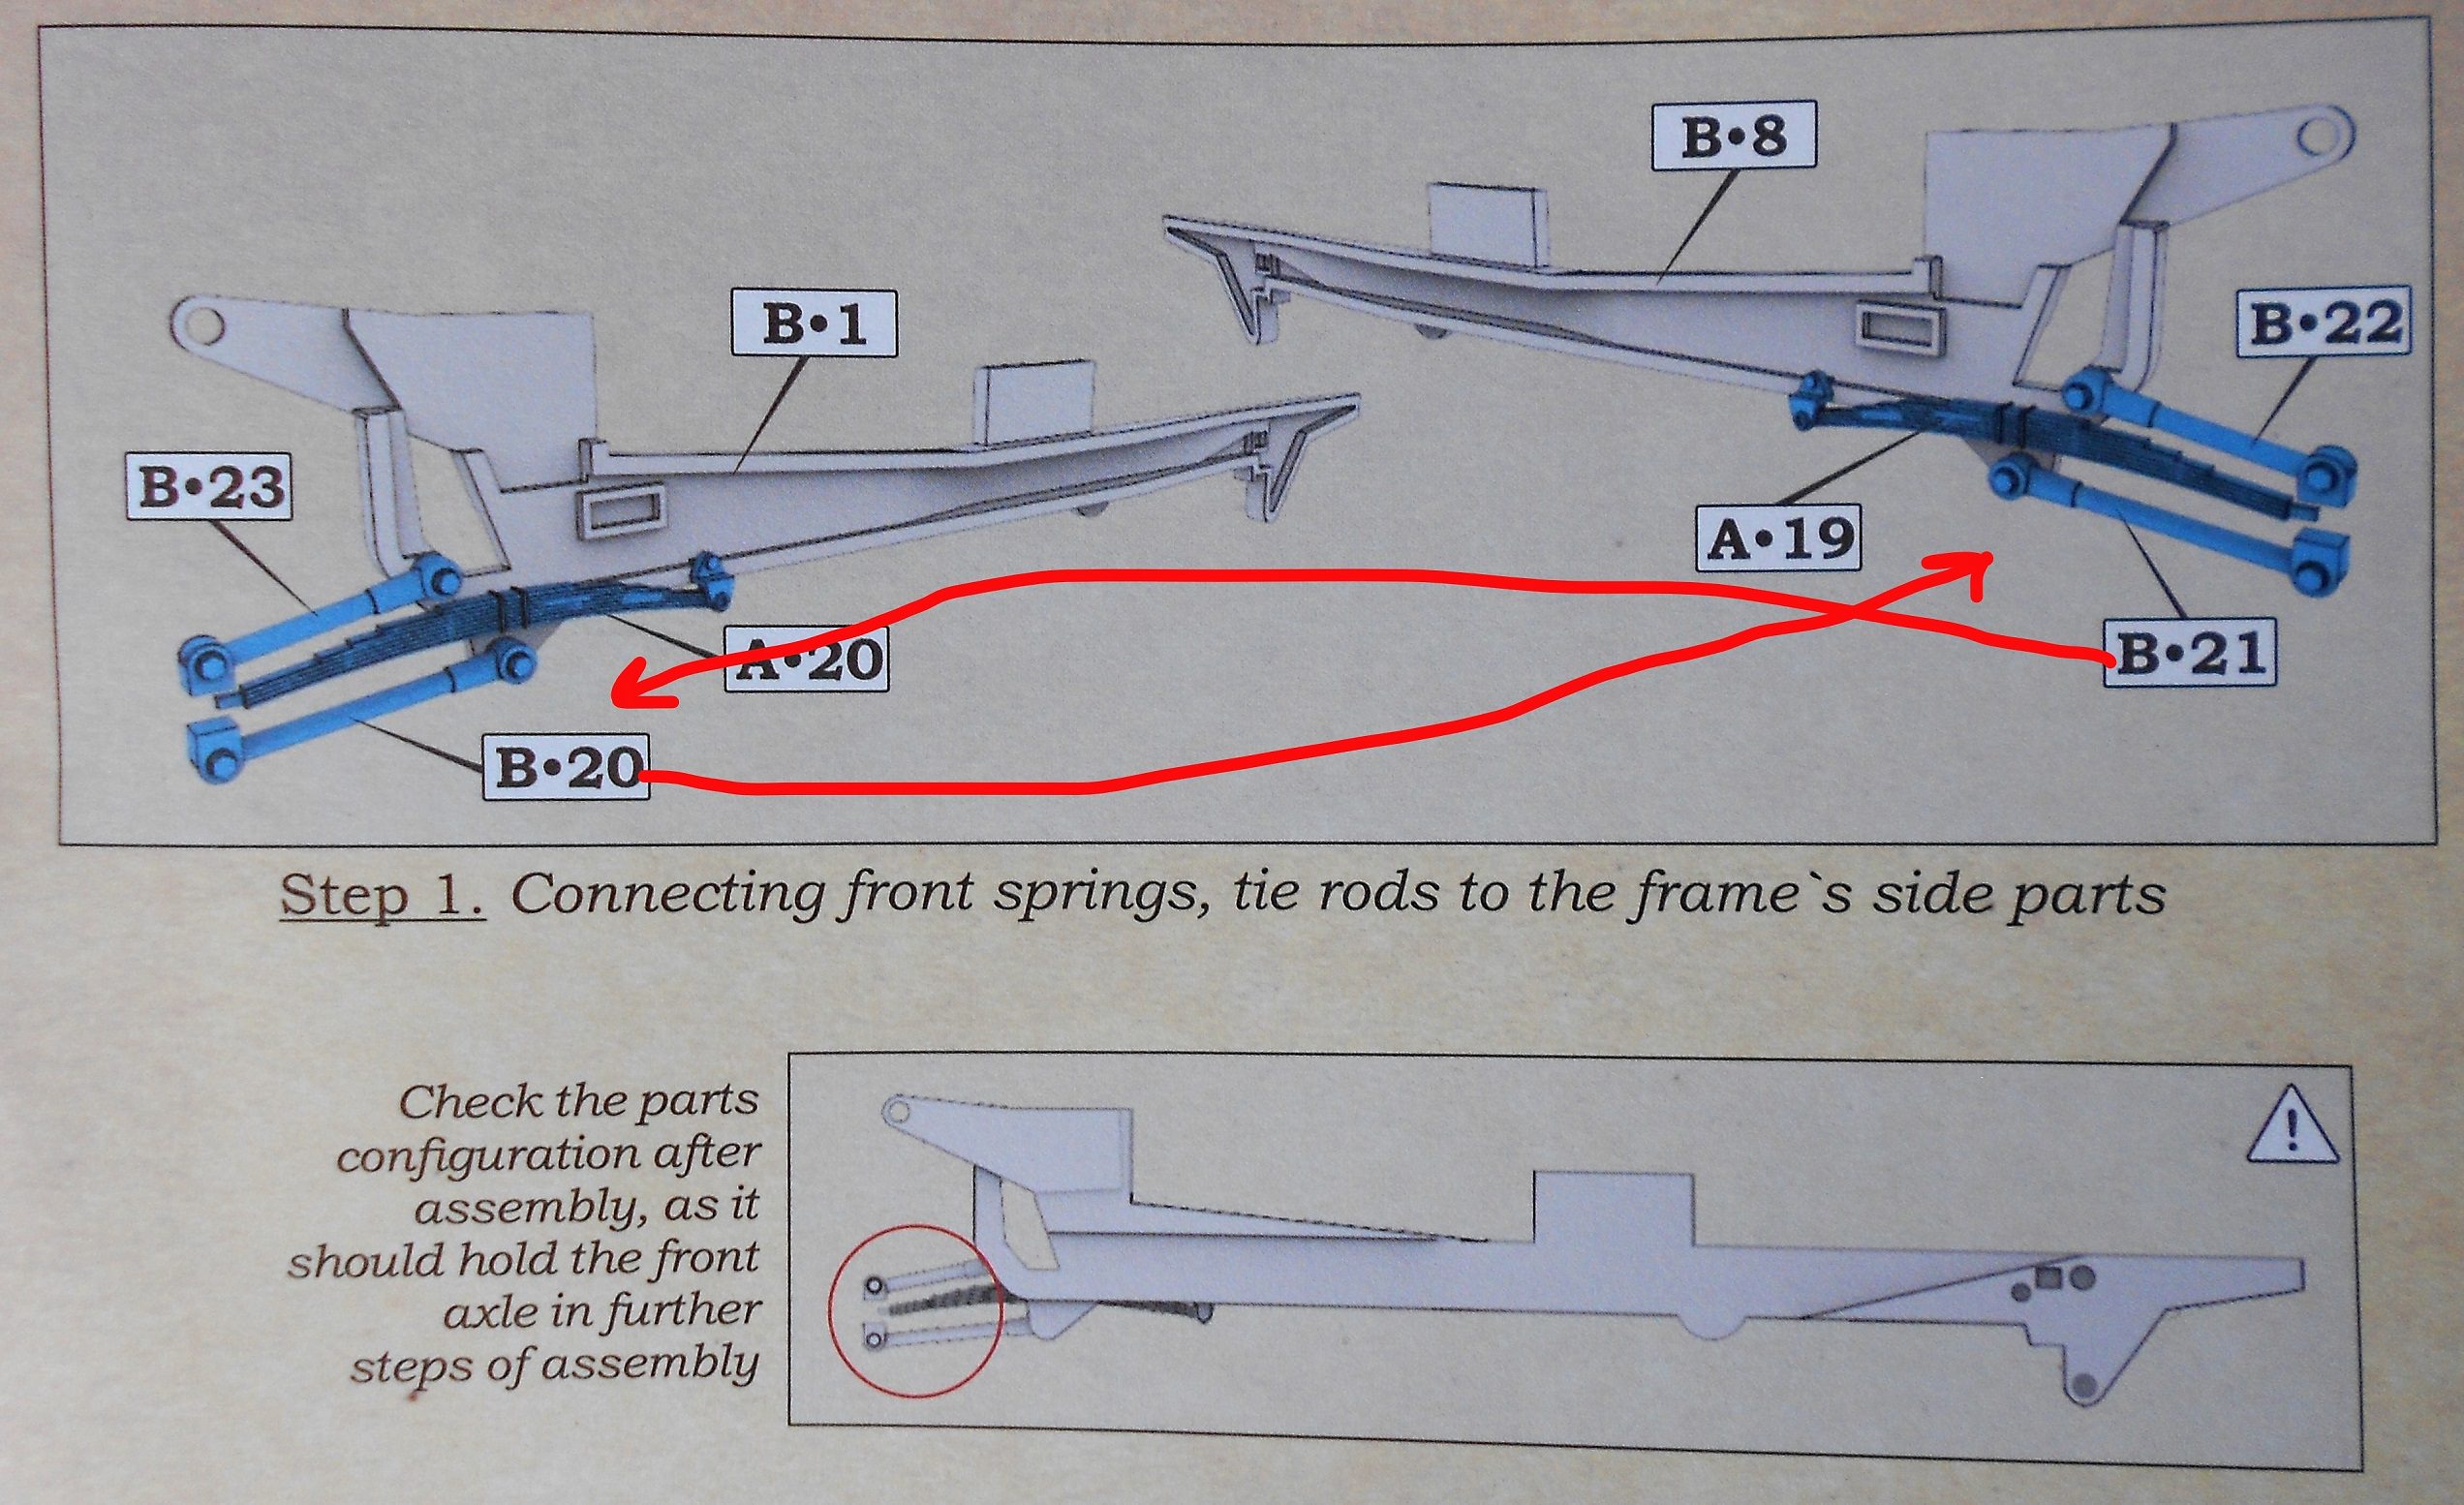
I started my build this morning and found an error in Step 1 of the instruction sheet. Parts B-20 & B-21 are reversed, they should go on the side opposite which they are shown. B-20 should go on B-8, B-21 goes on B-1.  Al
Al
 Al
Al
RobinNilsson

Joined: November 29, 2006
KitMaker: 6,693 posts
Armorama: 5,562 posts

Posted: Thursday, February 15, 2018 - 09:38 PM UTC
Thanks!
Checked & Conformed, studied the parts and the instructions.
Had to wear my strongest reading glasses to see that one side has a square peg, for the square hole in the chassis frame, and the other side has a hexagonal nut.
/ Robin
Checked & Conformed, studied the parts and the instructions.
Had to wear my strongest reading glasses to see that one side has a square peg, for the square hole in the chassis frame, and the other side has a hexagonal nut.
/ Robin
iowabrit

Joined: November 06, 2007
KitMaker: 585 posts
Armorama: 557 posts

Posted: Thursday, February 15, 2018 - 09:39 PM UTC
Well, of course it has a bucket, they are RN, how else would they be able to swab the decks? Nice looking kit.
TAFFY3

Joined: January 21, 2008
KitMaker: 2,531 posts
Armorama: 859 posts

Posted: Friday, February 16, 2018 - 12:39 AM UTC
Quoted Text
Thanks!
Checked & Conformed, studied the parts and the instructions.
Had to wear my strongest reading glasses to see that one side has a square peg, for the square hole in the chassis frame, and the other side has a hexagonal nut.
/ Robin
At first glance, the front axle assembly looks flimsy. But it goes together well and is fairly sturdy.
 Al
AlTAFFY3

Joined: January 21, 2008
KitMaker: 2,531 posts
Armorama: 859 posts

Posted: Friday, February 16, 2018 - 12:43 AM UTC
Quoted Text
Well, of course it has a bucket, they are RN, how else would they be able to swab the decks? Nice looking kit.
The photo of the built-up car is actually a resin kit by ARMO. I just used it to show the bucket.
 Al
AlTAFFY3

Joined: January 21, 2008
KitMaker: 2,531 posts
Armorama: 859 posts

Posted: Monday, February 19, 2018 - 07:55 AM UTC
I found another error in the instructions, in Step 26, assembling the stowage box mounts. Parts B.22 & B.23 are actually A.22 & A.23, no biggie really. Other than that, I'm really enjoying this build. There is a little flash here and there. So little in fact, that you have to look carefully to notice it. But it can interfere with fit in a few places. Speaking of fit, it is excellent for the most part. The only real problem that I see concerns the two Parts C.9, the headlight mounts. They are very delicate and the attachment points to the sprue are rather heavy. It looks to be difficult, if not impossible, to separate them without damage. I may have to resort to replacing them with wire, which shouldn't be too difficult to manage. I'll let you know how I make out.  Al
Al
 Al
Al
RobinNilsson

Joined: November 29, 2006
KitMaker: 6,693 posts
Armorama: 5,562 posts

Posted: Monday, February 19, 2018 - 06:05 PM UTC
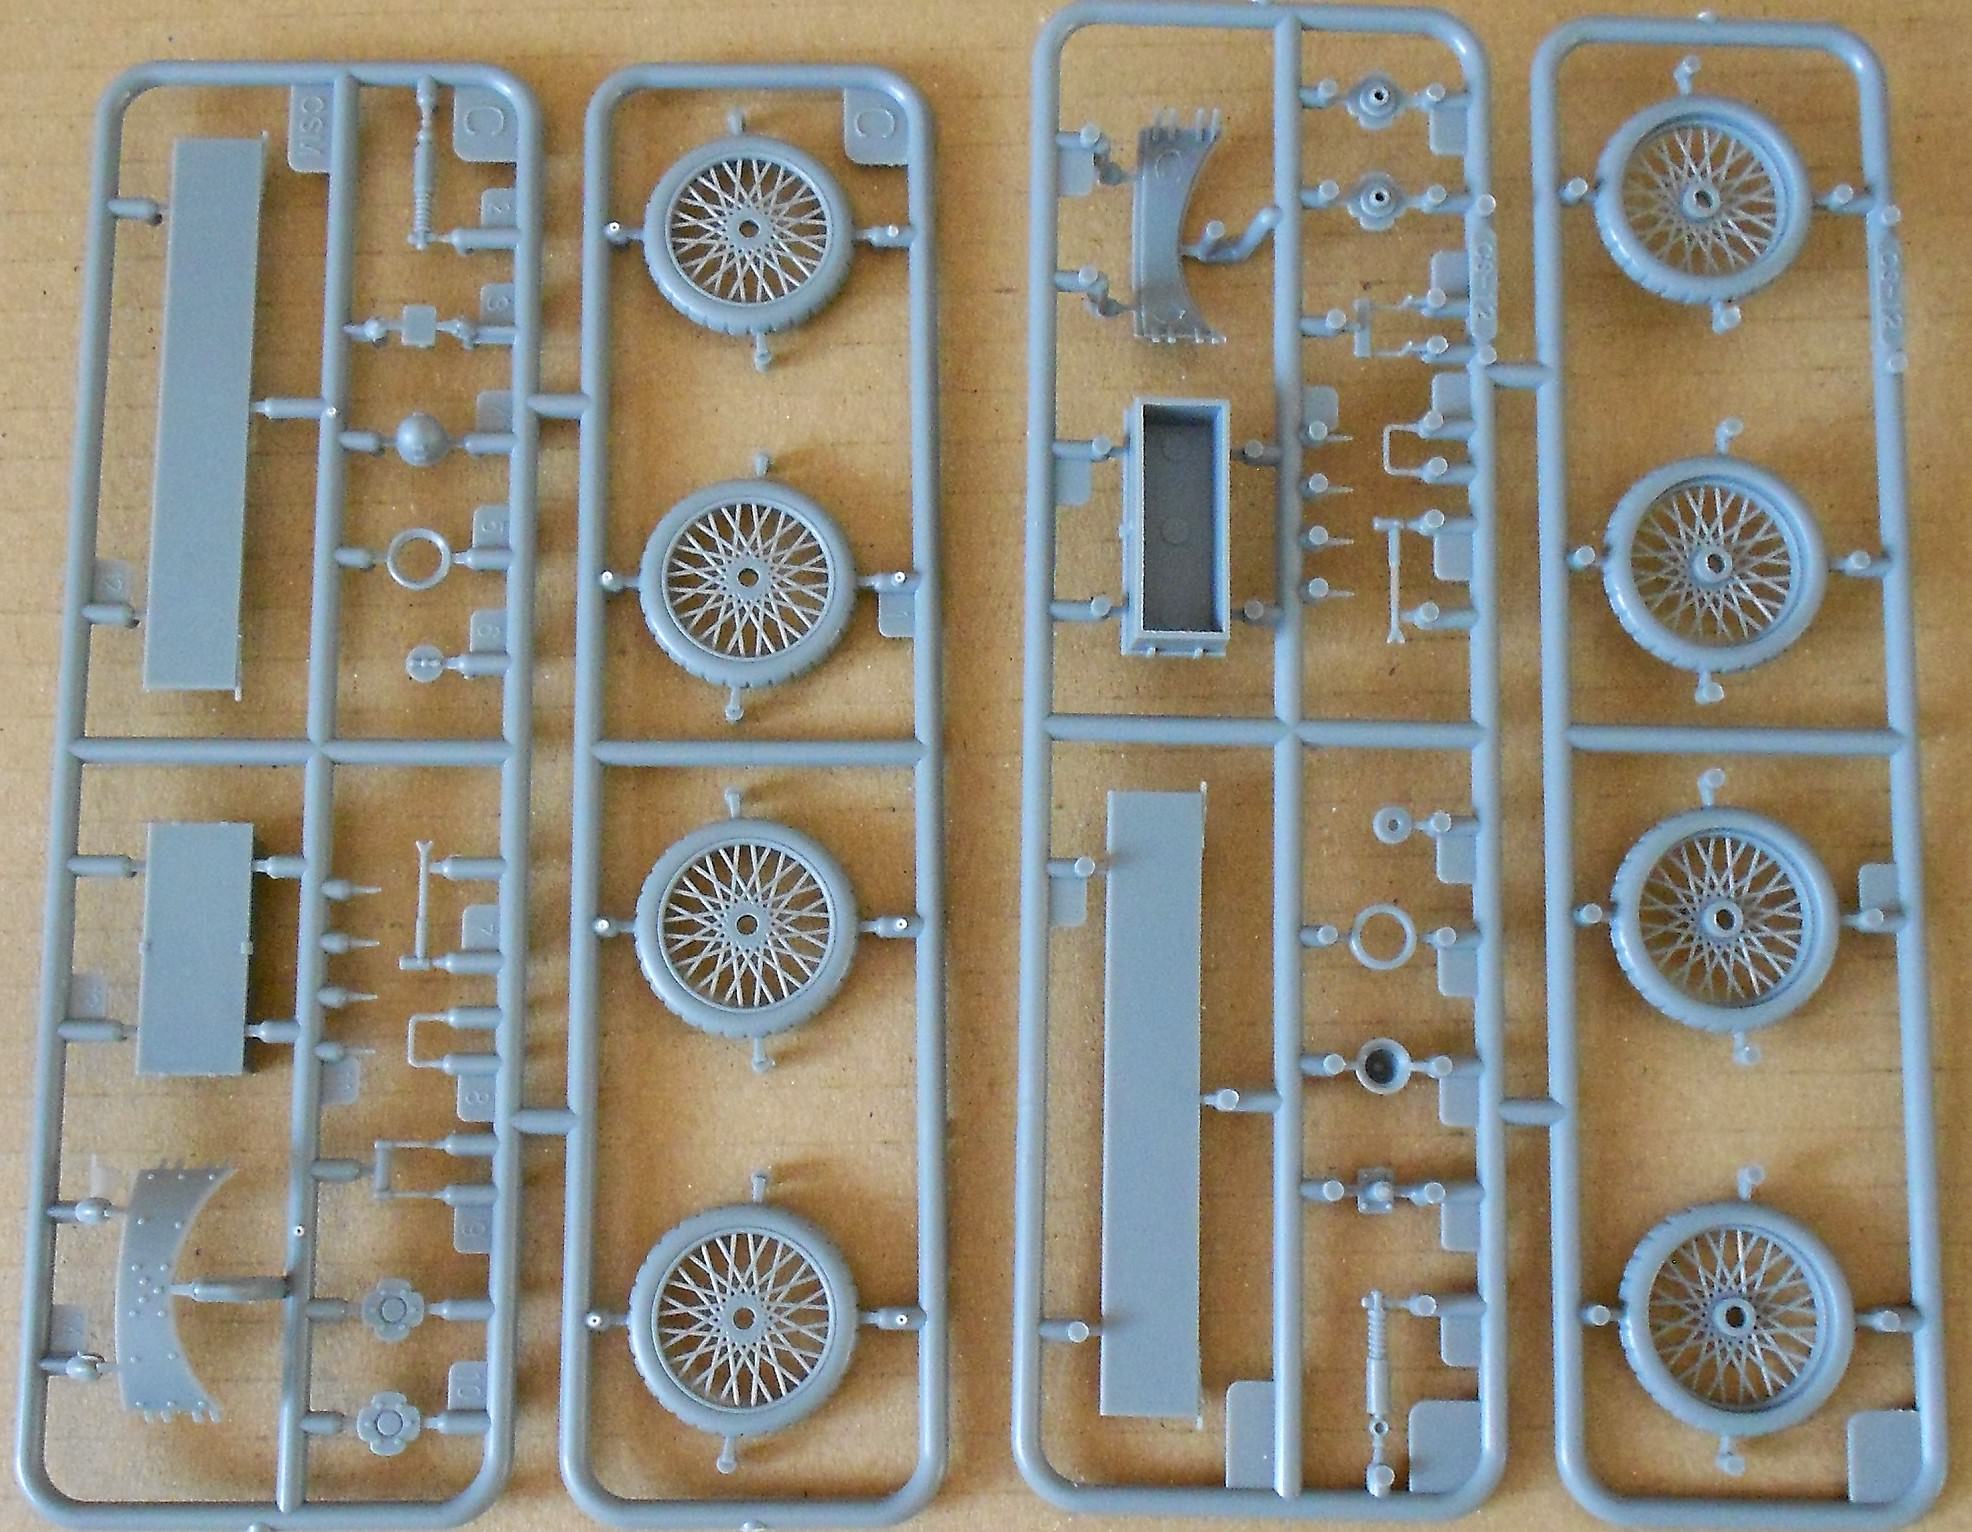
Sprue images, both sides of all sprues
A
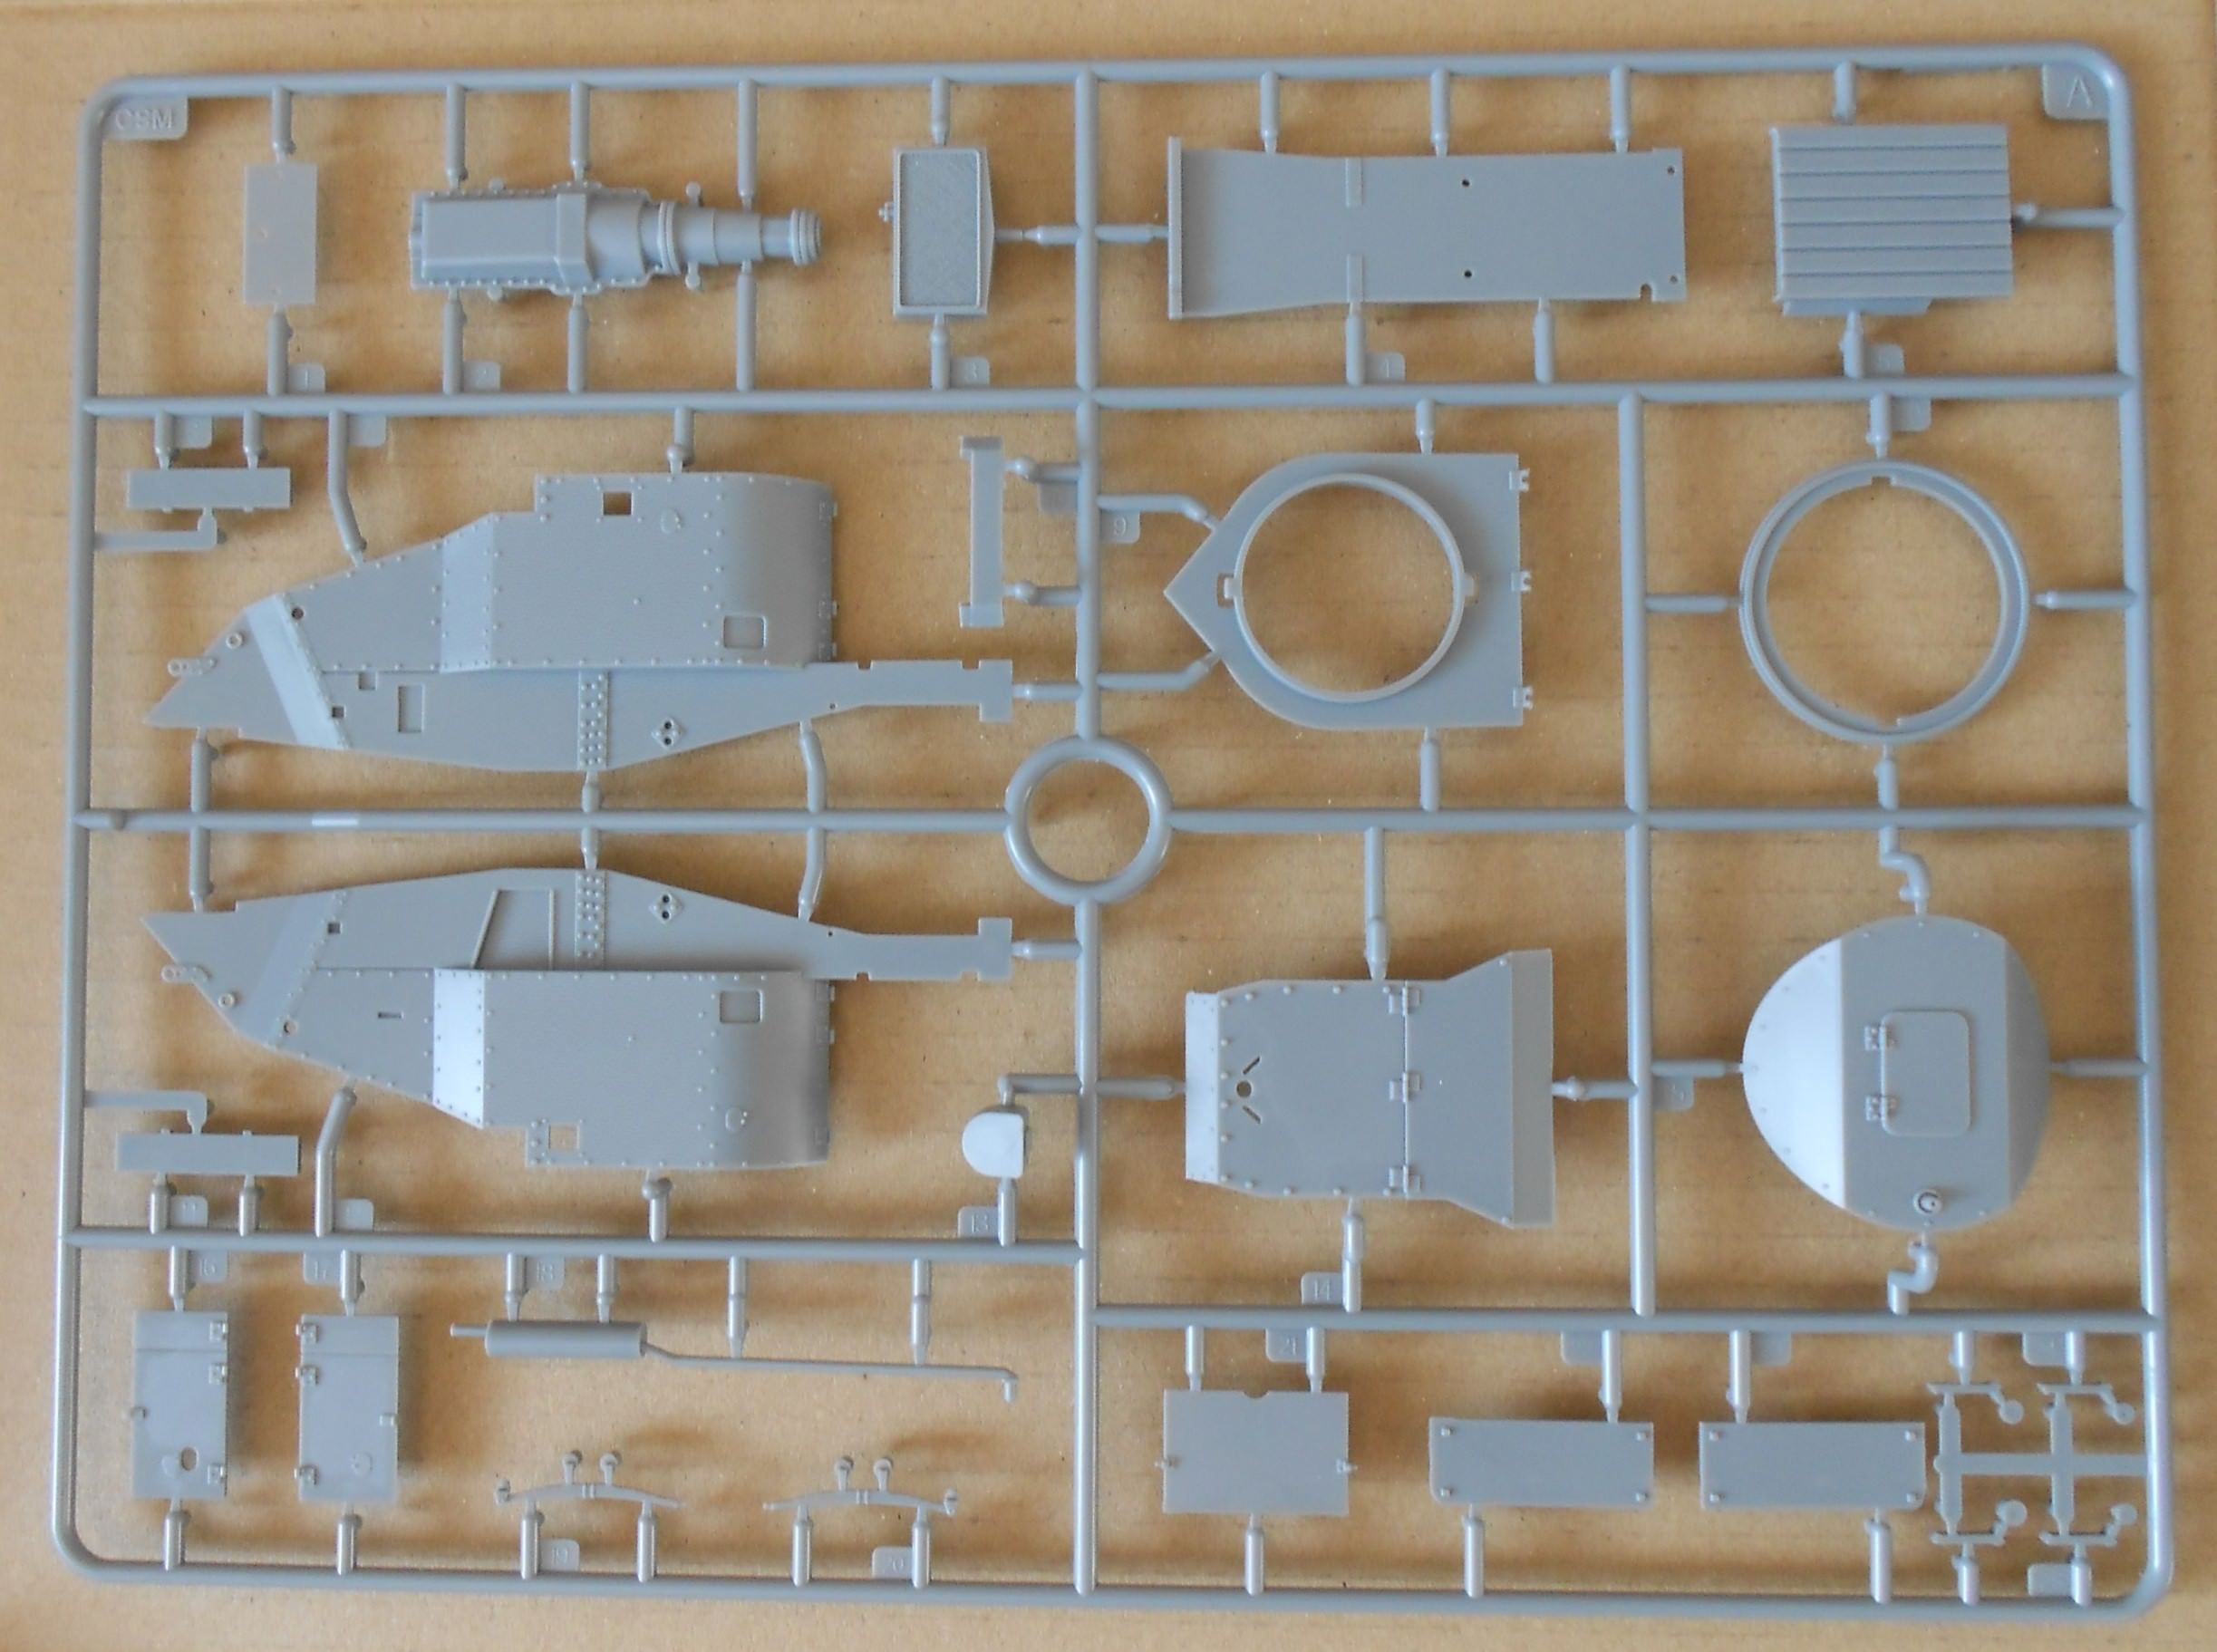
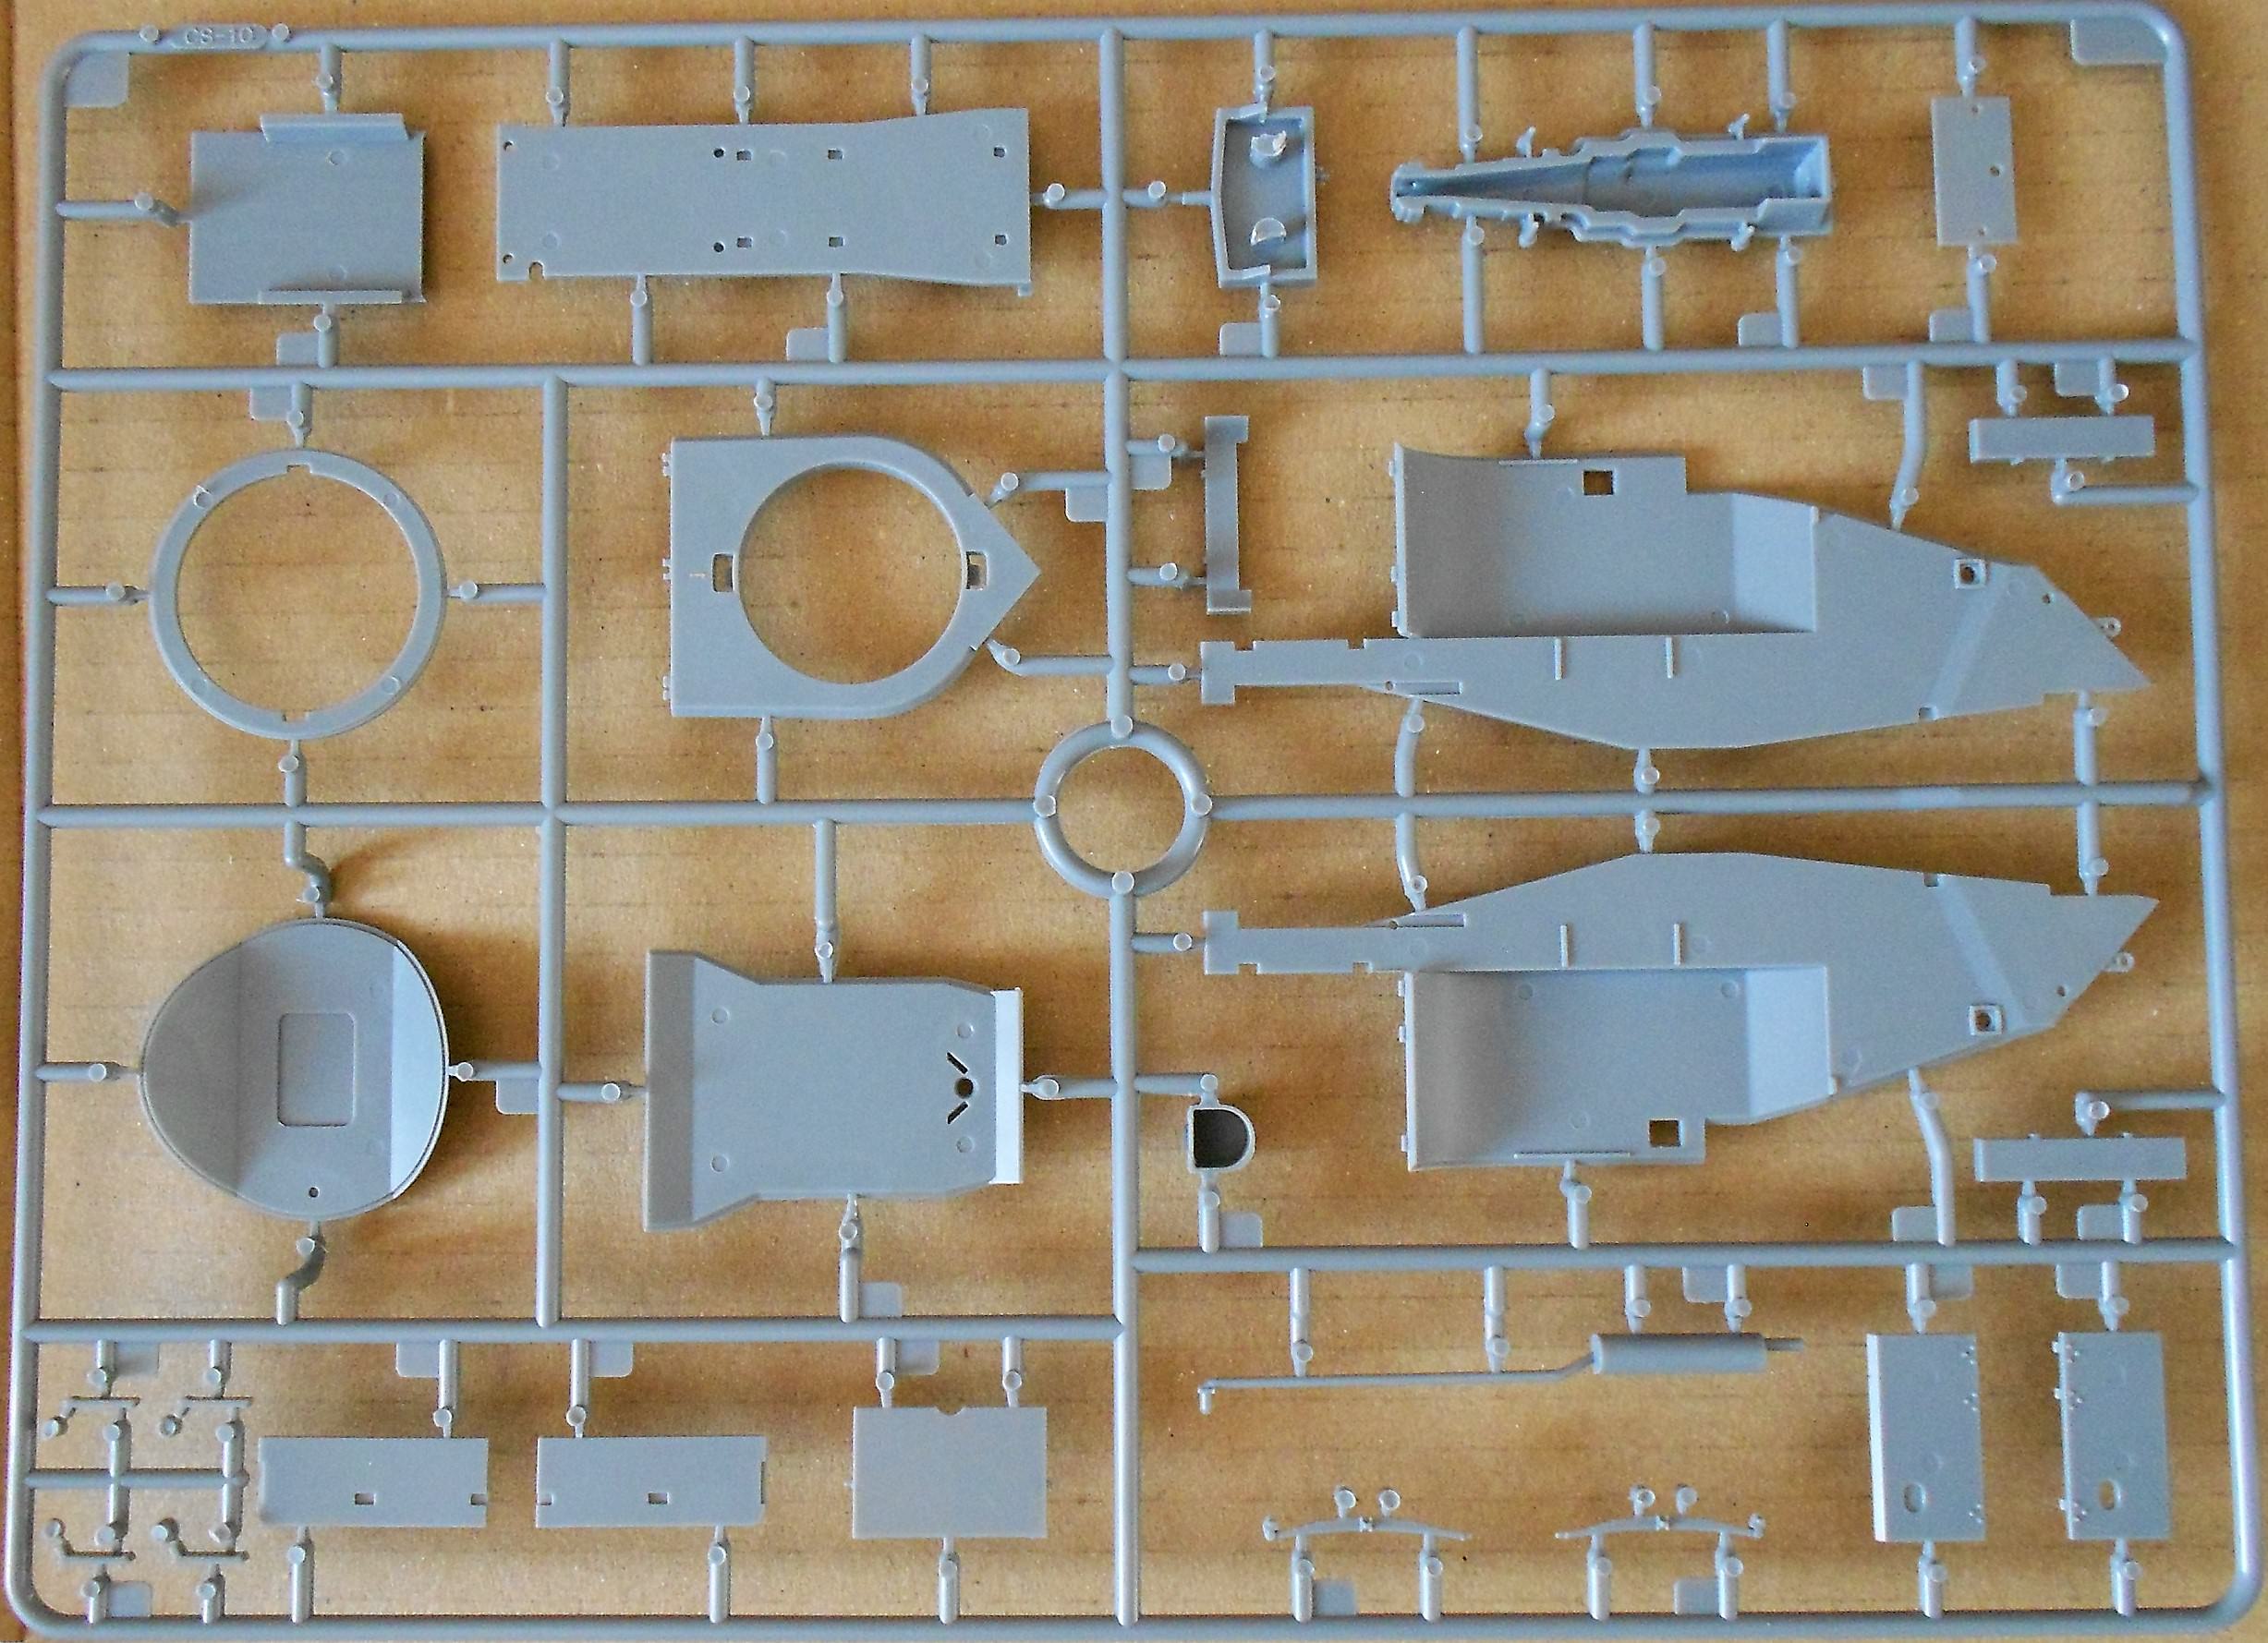
B
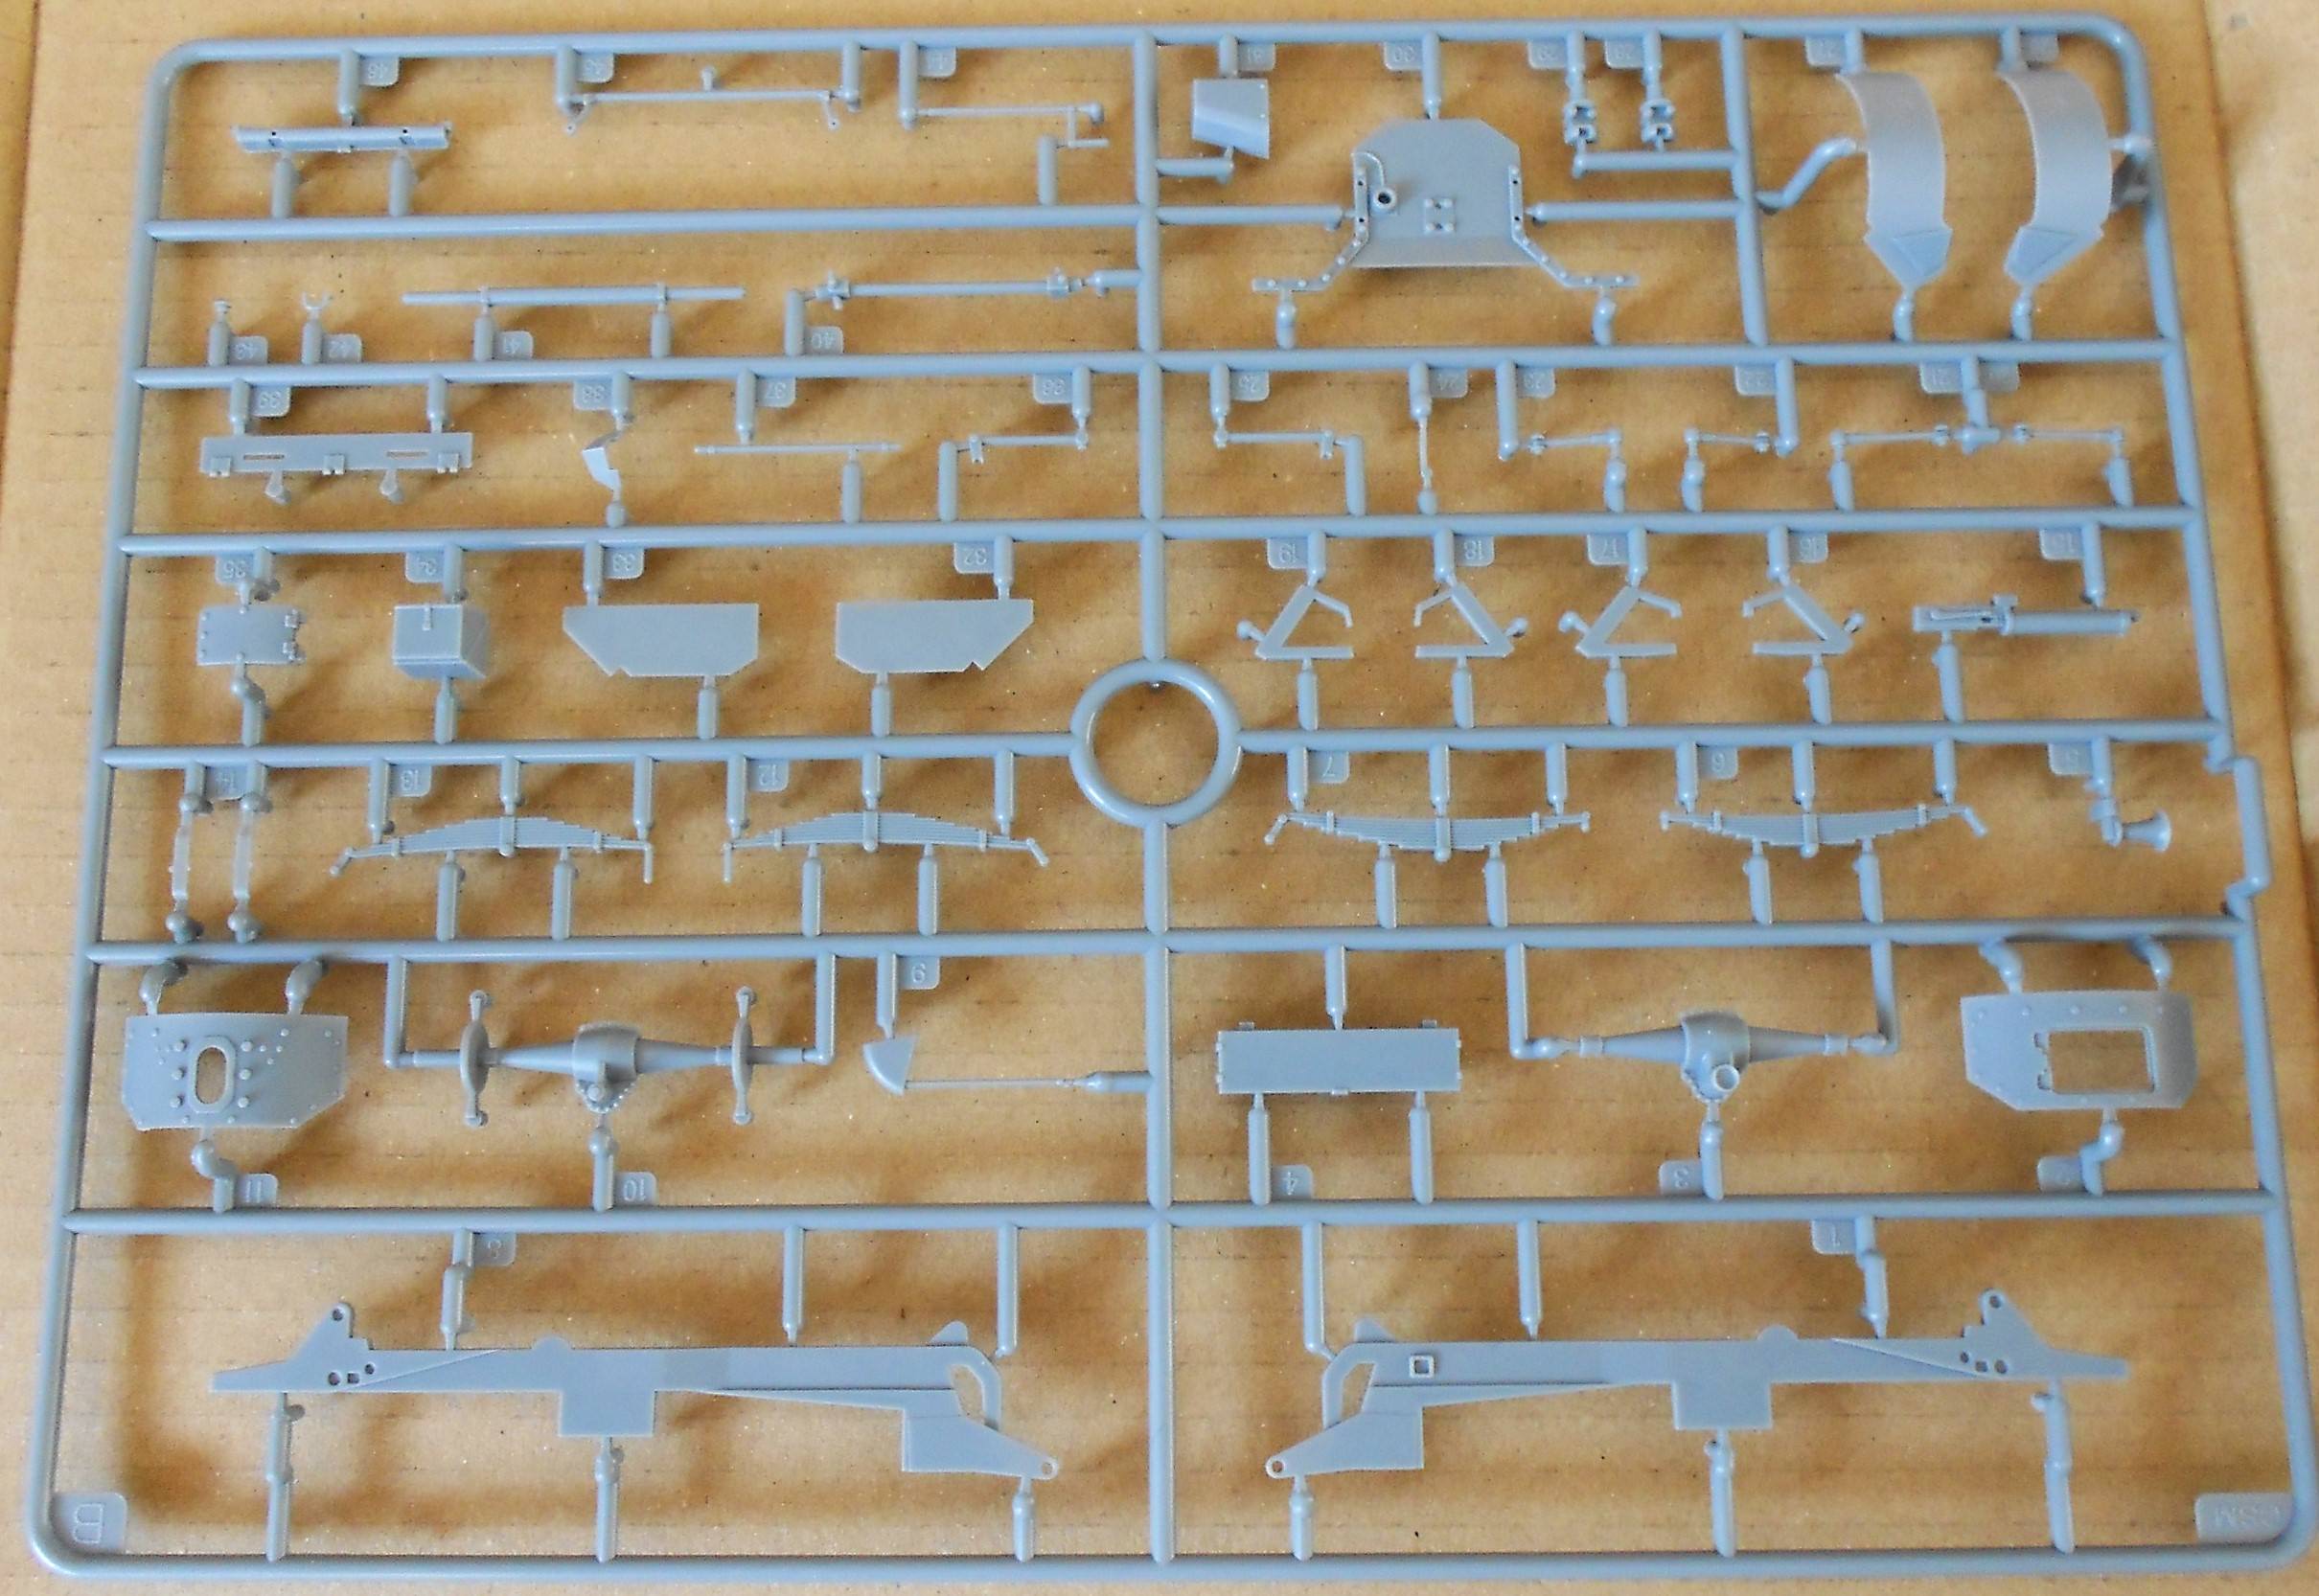
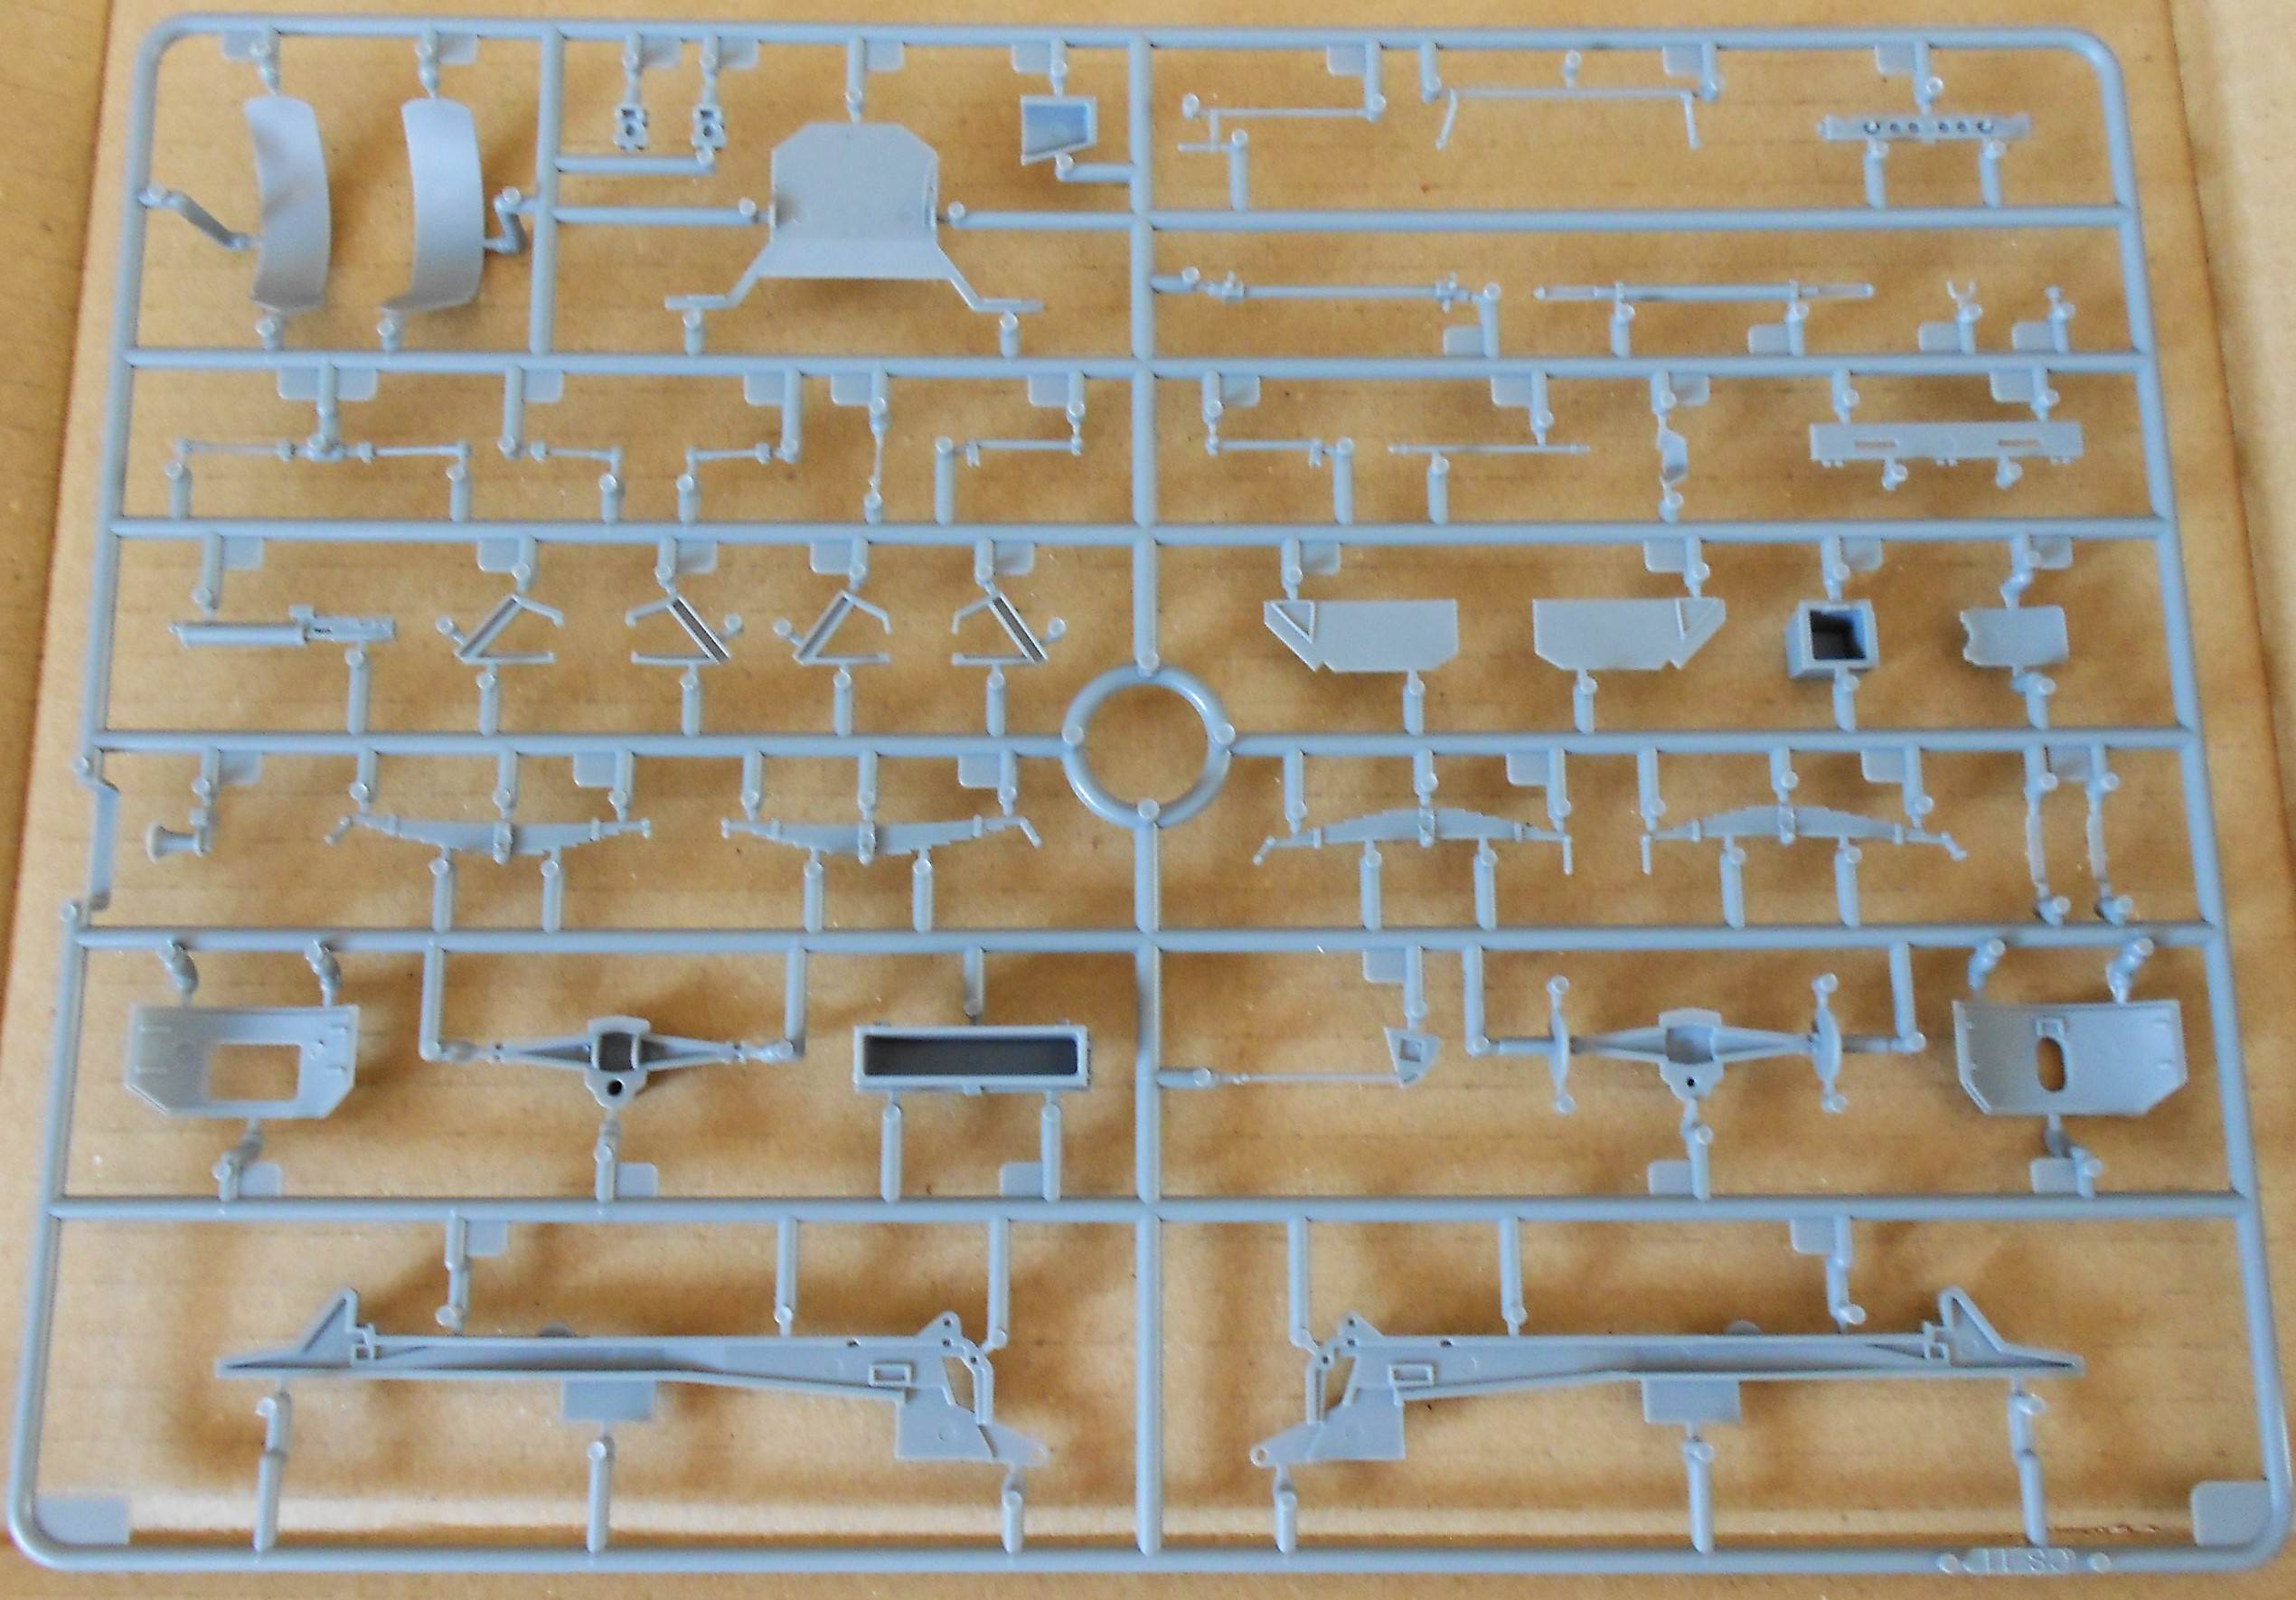
C and extra sections of C to get more wheels
Error in step 1, pointed out by Taffy3 in an earlier post in this thread
Parts glued together:
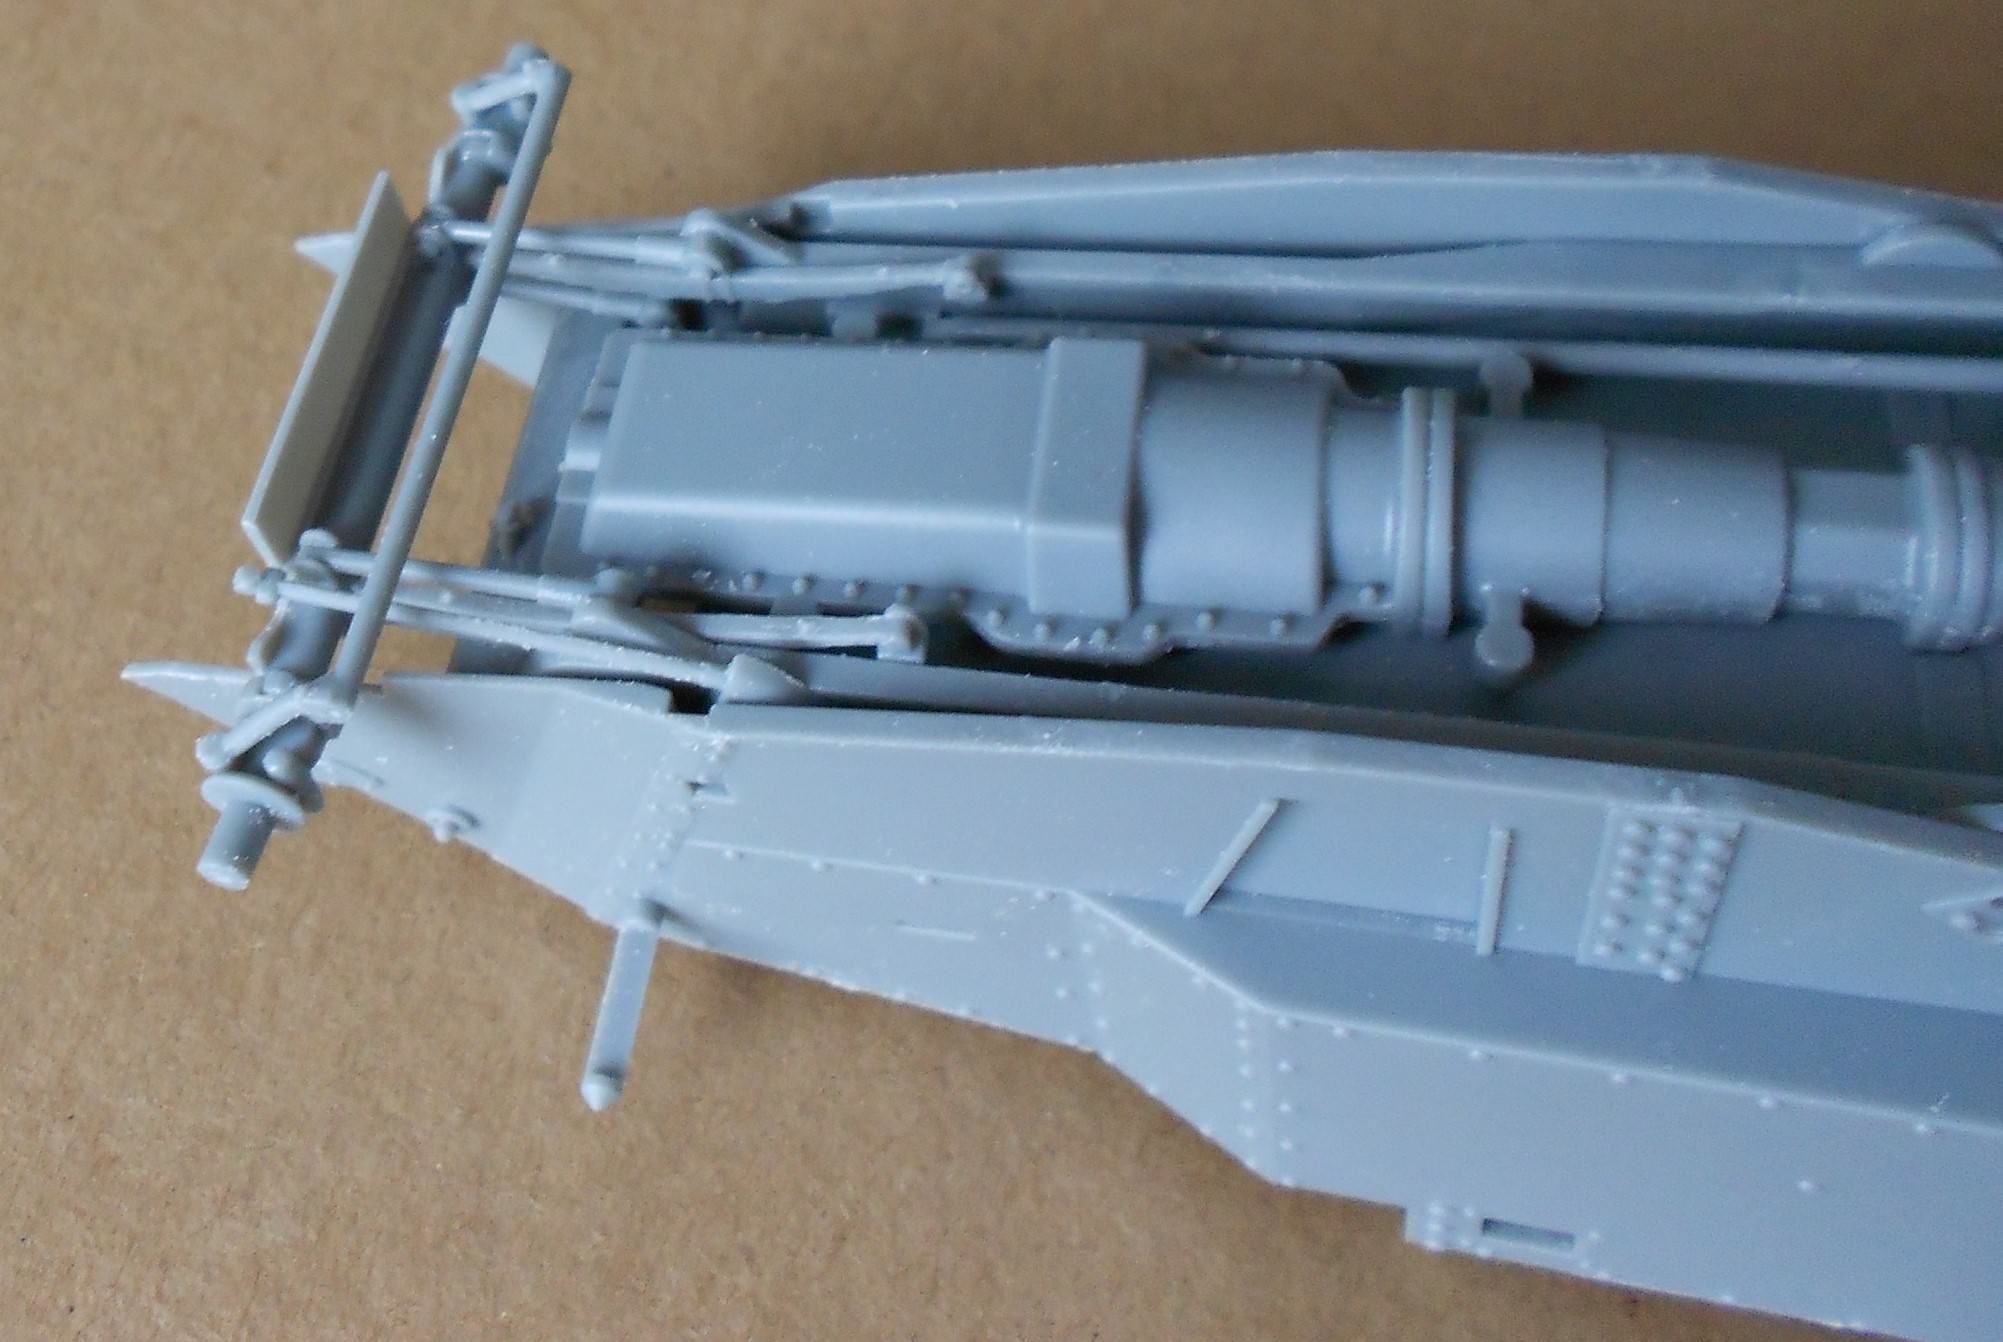
a small part of the steering linkage is missing from this image, I wanted to let the other joints harden/dry first.
Adding the sides of the armour before getting all the front suspension parts in place is not a good idea. It gets unnecessarily fiddly. Follow the steps and be a little careful when adding the sides. The fit is very good so adding large parts to assemblies with small and delicate parts attached is not a problem.
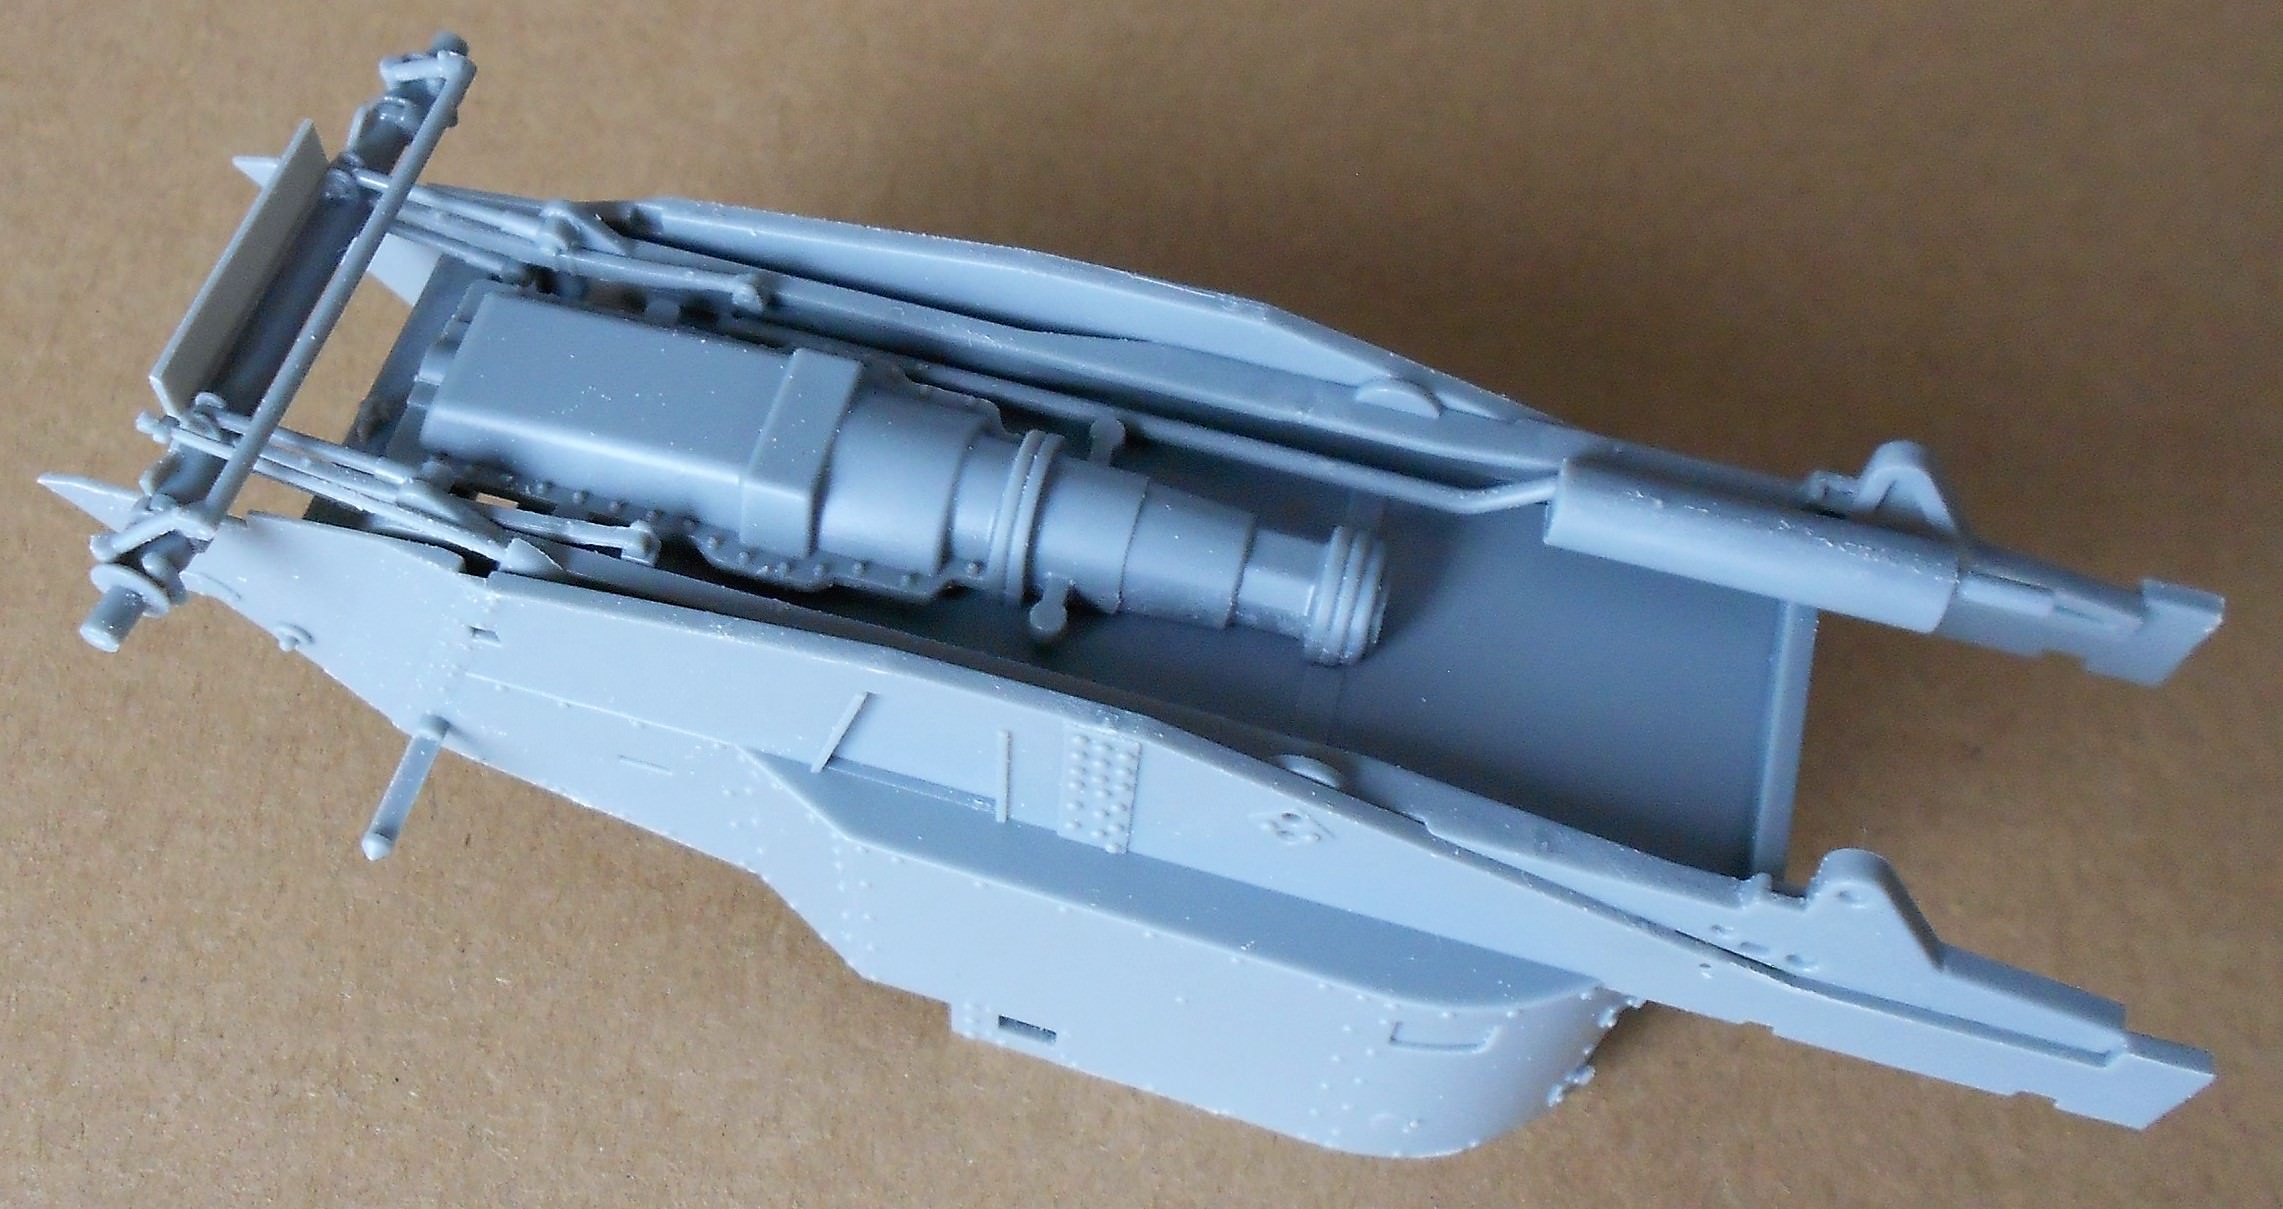
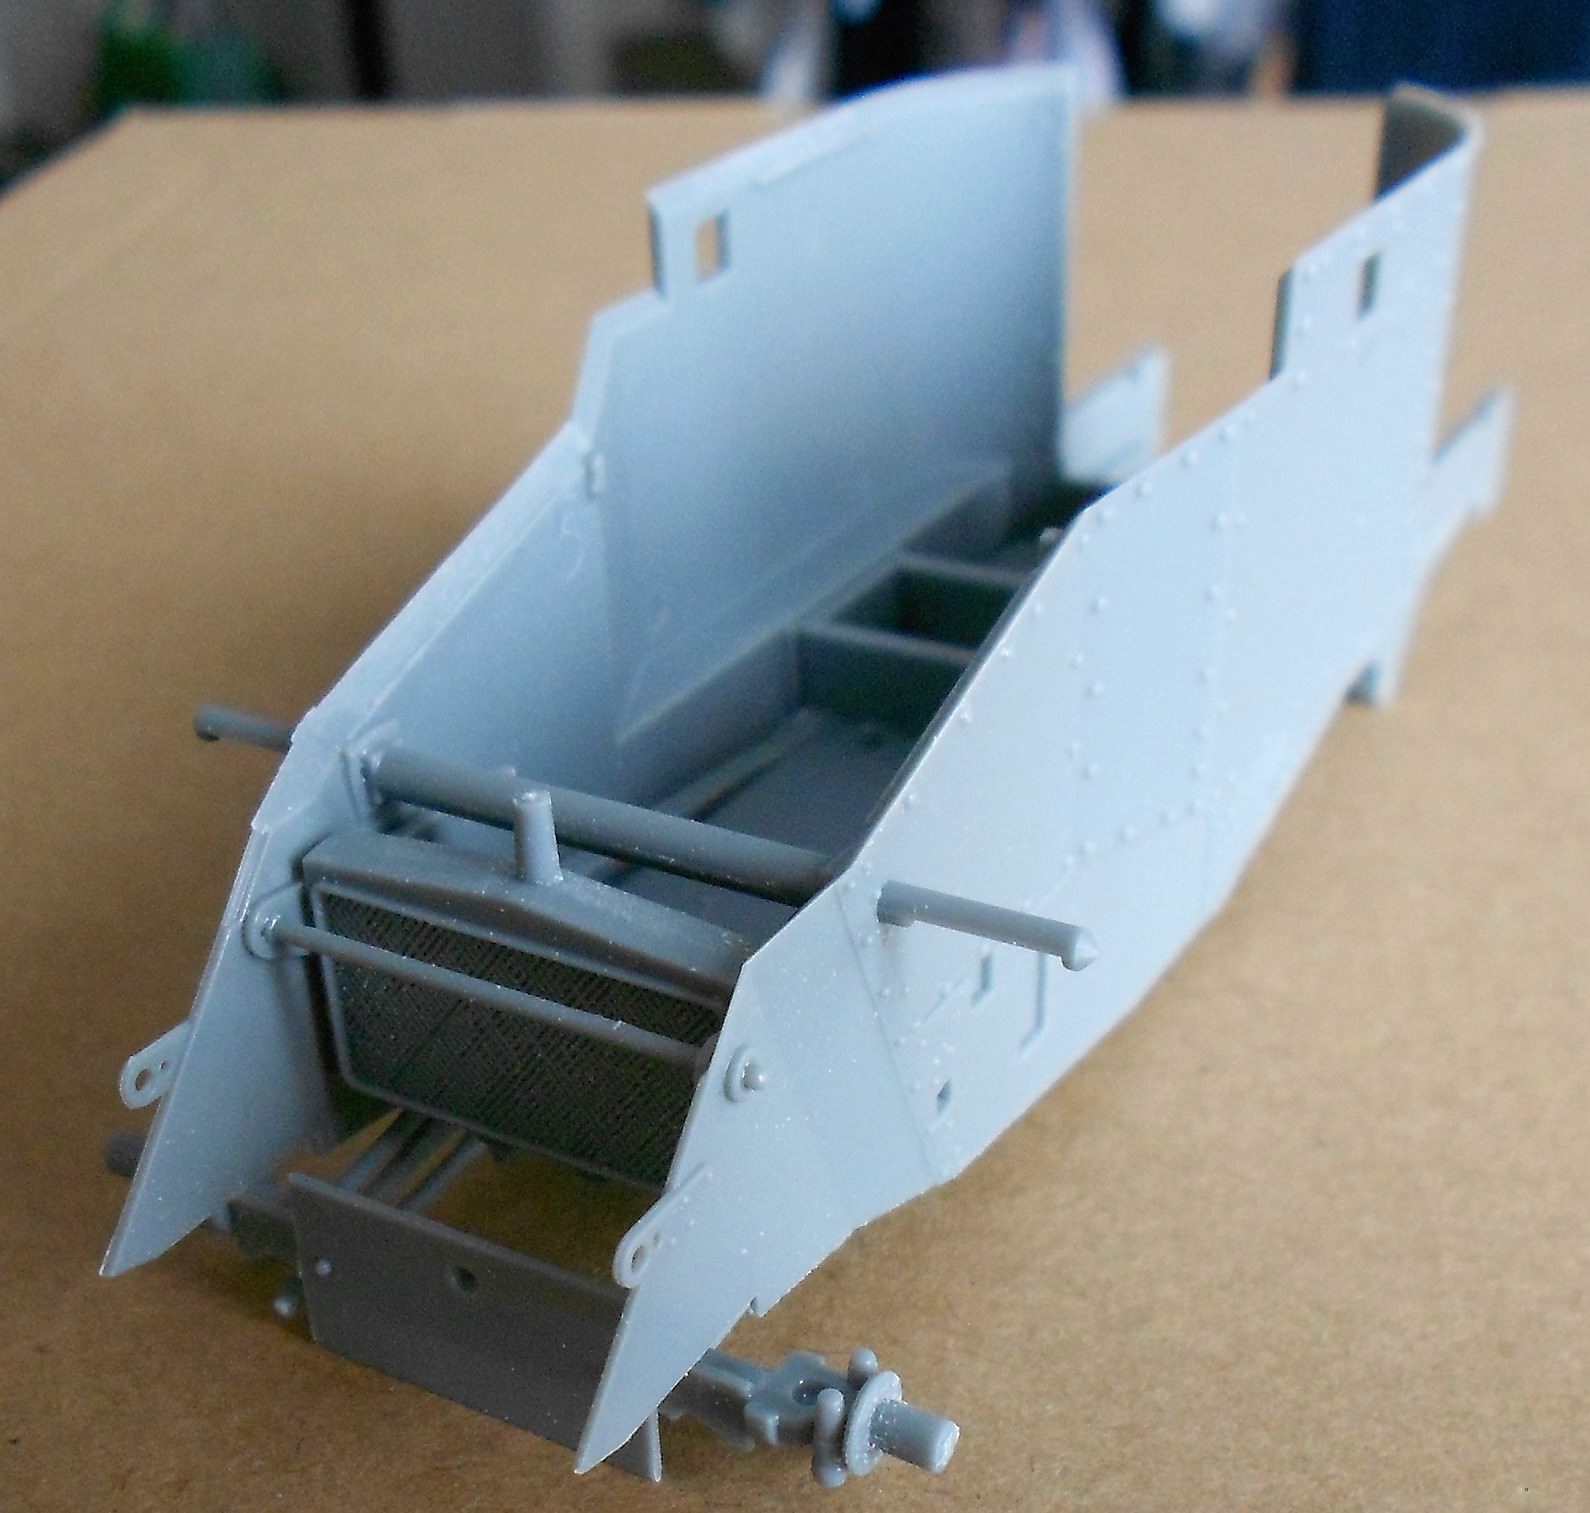
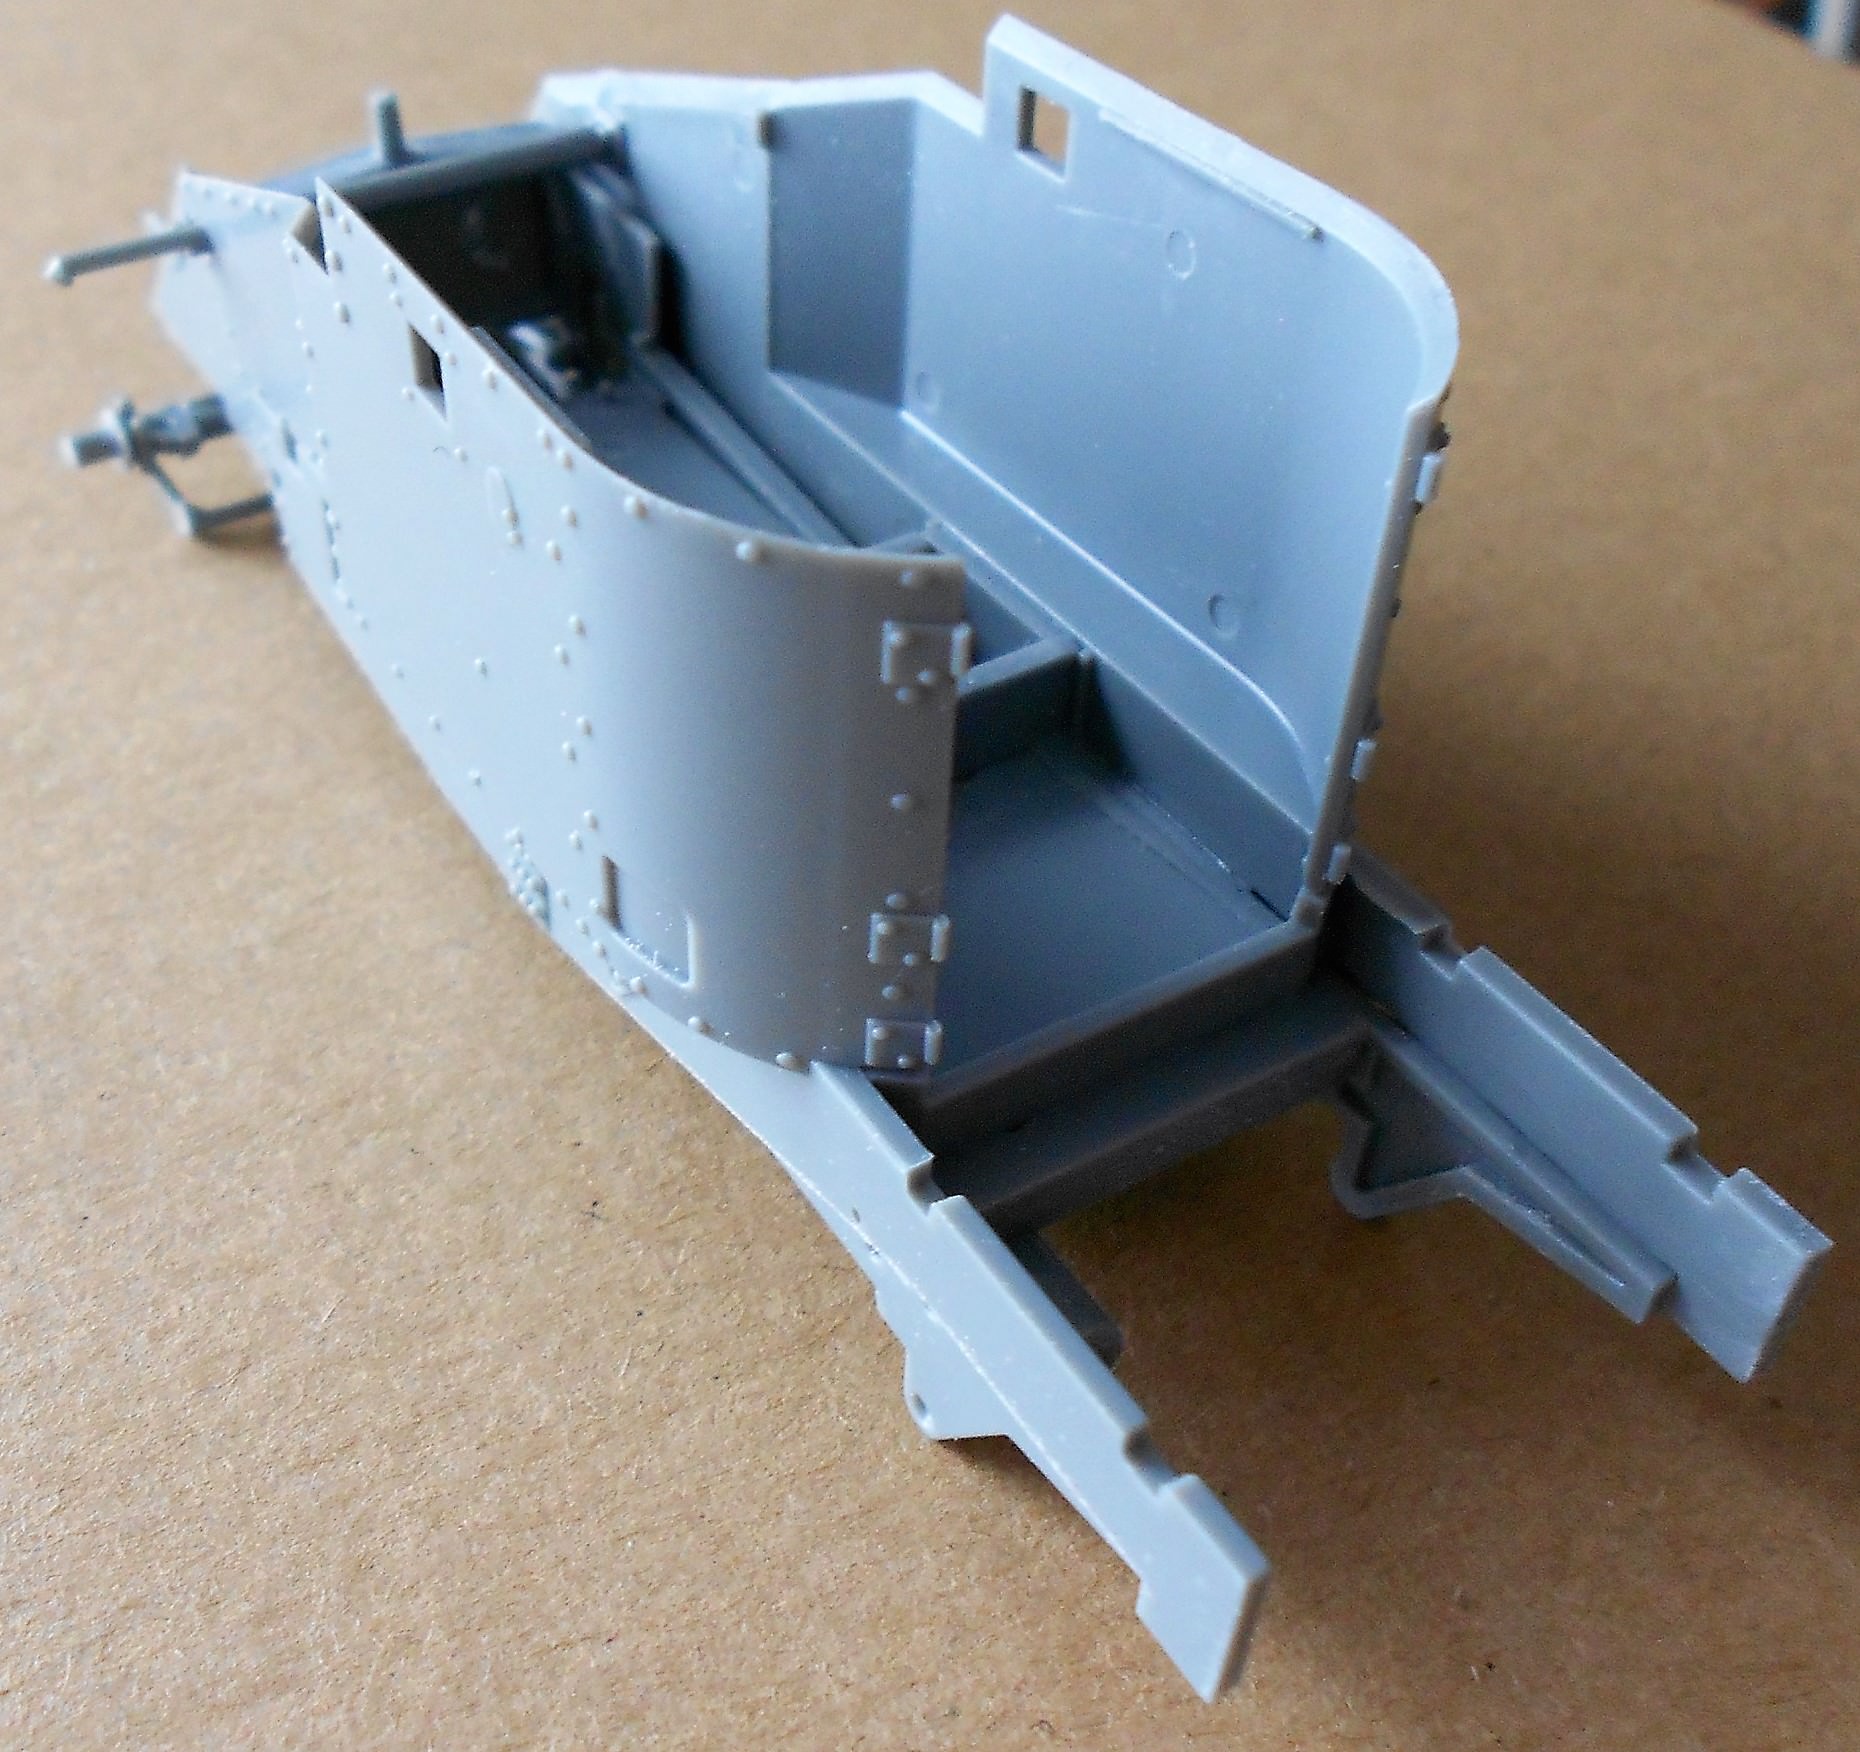
Some dry fitting is needed, a few of the locating tabs are a fraction longer than the depth of the corresponding hole and need to be filed down. On the whole I would refer to a Tom Cromwells signature field:
"Glue, or Glue Not - there is no Dry-Fit" - Yoda
/ Robin
A


B


C and extra sections of C to get more wheels


Error in step 1, pointed out by Taffy3 in an earlier post in this thread

Parts glued together:

a small part of the steering linkage is missing from this image, I wanted to let the other joints harden/dry first.
Adding the sides of the armour before getting all the front suspension parts in place is not a good idea. It gets unnecessarily fiddly. Follow the steps and be a little careful when adding the sides. The fit is very good so adding large parts to assemblies with small and delicate parts attached is not a problem.


Some dry fitting is needed, a few of the locating tabs are a fraction longer than the depth of the corresponding hole and need to be filed down. On the whole I would refer to a Tom Cromwells signature field:
"Glue, or Glue Not - there is no Dry-Fit" - Yoda
/ Robin
TAFFY3

Joined: January 21, 2008
KitMaker: 2,531 posts
Armorama: 859 posts

Posted: Monday, February 19, 2018 - 07:39 PM UTC
You're making good progress, Robin. Be mindful of those two notches on top of both sides of the rear frame. Mine had a little flash that went unnoticed until I tried to mount the stowage box supports. As complicated as the suspension looks, it goes together well, and is quite sturdy. You're right about the need for test fitting before committing to glue. 
 Al
Al

 Al
AlTAFFY3

Joined: January 21, 2008
KitMaker: 2,531 posts
Armorama: 859 posts

Posted: Tuesday, February 20, 2018 - 10:02 PM UTC
Hello again, Step.29 concerns the assembly of the wheels, which includes some very tiny valve stems (Parts C-11). The instructions would have you glue them to a notch inside Parts C-1. I found it easier to attach them to Parts C-11 instead. When I removed the valve stems from the sprue, I left a small bit of the sprue attached. This made the part easier to handle. There is a notch in C-11, I applied a small drop of CA glue and placed the part into the notch leaving the excess sprue protruding from the outside of the rim. After the glue hardened it was only a matter of trimming off said excess and cementing the two wheel halves together. The valve stem is meant to act as an alignment guide. Didn't lose a single one to tweezer launch. Oh Happy Day! 
 Al
Al

 Al
Alvettejack

Joined: November 23, 2012
KitMaker: 1,277 posts
Armorama: 1,254 posts

Posted: Wednesday, February 21, 2018 - 05:25 AM UTC
Well...this is one of those instances where I placed a pre-order for this kit from HLJ when first announced. I have no previous knowledge of this company's capability and/or degree of detail in the molding process, but after these opinions/reviews, I'm convinced I made the right decision to order (even with miss-labeling of parts). 

TAFFY3

Joined: January 21, 2008
KitMaker: 2,531 posts
Armorama: 859 posts

Posted: Wednesday, February 21, 2018 - 07:39 AM UTC
Quoted Text
Well...this is one of those instances where I placed a pre-order for this kit from HLJ when first announced. I have no previous knowledge of this company's capability and/or degree of detail in the molding process, but after these opinions/reviews, I'm convinced I made the right decision to order (even with miss-labeling of parts).
Hello John, While I wouldn't recommend this kit to a beginner, I found it to be a thoroughly enjoyable build. It does have a few minor issues, what kit doesn't? But all in all, it goes together very well. Compared to some other kits that I've built, or attempted to build, this one was a relative walk in the park.
 Al
Al  |


