_GOTOBOTTOM
Яusso-Soviэt Forum: Cold War Soviet Armor
For discussions related to cold war era Russo-Soviet armor.
MiniArt T55 Model 1963 w/interior
HeavyArty
Visit this Community
Florida, United States
Joined: May 16, 2002
KitMaker: 17,694 posts
Armorama: 13,742 posts
Posted: Friday, February 16, 2018 - 08:33 PM UTC
I was recently sent the MiniArt T55 Model 1963 w/Interior kit (#37018) for a build log here on Armorama.


You can see a great in-box review of this kit by Andras (SPONGYA) here. It includes sprue shots and detailed pics of the parts, along with a good description and instruction pictures.

When I received the package and opened it, I was initially surprised by the hefty weight of it. It is really heavy. Then I opened the box and figured out why. There are a bunch of sprues in there; it is crammed full. The kit has 95 sprues! A whopping 1284 parts! Many of them are not used though as there are common sprues from other versions of T-54/55 that MiniArt uses.


Of those, 165 are PE on one fret.


So far, I have started handling the parts and planning on which version to build. It includes markings for 12 different vehicles of various countries throughout the years.


I may do either the Syrian or Iraqi version, but I'm not sure yet.

I will update more as I get going on it.

HeavyArty
Visit this Community
Florida, United States
Joined: May 16, 2002
KitMaker: 17,694 posts
Armorama: 13,742 posts
Posted: Saturday, February 17, 2018 - 08:16 PM UTC
I started the build yesterday. It is very detailed with lots of parts, so it is going a little bit slowly. Steps 1-8 in the instructions build the V-55 engine. It starts with a two-part block and multi-part cylinder heads and valve covers. Then you start adding the accessories. I also plumbed it with glow plug wires coming out of the glow plug controller at the front of the engine and fuel lines up top coming out of the central plenum to each cylinder.


Interestingly, there is no transmission or any other parts for the rear-most compartment. This is the case with all the MiniArt T44/54/55 series tanks with interiors. Don't know why they didn't include that area.
KoSprueOne
Visit this Community
Myanmar
Joined: March 05, 2004
KitMaker: 4,011 posts
Armorama: 1,498 posts
Posted: Saturday, February 17, 2018 - 09:15 PM UTC
Looks like you're already going all the way with this one. Funny with all the super detailing parts, PE and plastic, that nearly the first thing done was to add detail, plumbing, that is not included in the kit.

Following.


sgtreef
Visit this Community
Oklahoma, United States
Joined: March 01, 2002
KitMaker: 6,043 posts
Armorama: 4,347 posts
Posted: Sunday, February 18, 2018 - 02:15 AM UTC
Looking good Gino, I am also doing a build blog on the T-34, though.
Boy still looks like a million parts in that bad boy.

Cheers

Jeff
HeavyArty
Visit this Community
Florida, United States
Joined: May 16, 2002
KitMaker: 17,694 posts
Armorama: 13,742 posts
Posted: Sunday, February 18, 2018 - 06:31 AM UTC
Thanks guys. You know I can't leave an engine unplumbed. The thin wires and fuel lines would be hard to do in plastic and would look horrible in flat PE. It really didn't take that long to do it with thin solder and looks well worth the effort if you ask me.
panamadan
Visit this Community
Minnesota, United States
Joined: July 20, 2004
KitMaker: 1,513 posts
Armorama: 1,449 posts
Posted: Sunday, February 18, 2018 - 06:54 AM UTC
Gino,
I’ll be watching.
Dan
avenue
Visit this Community
Philippines
Joined: May 25, 2013
KitMaker: 544 posts
Armorama: 542 posts
Posted: Sunday, February 18, 2018 - 10:06 AM UTC
I have notice,that tamiya kit tend to contain very few P.E.parts,by contrast trumpheter and miniart usually contain a lot of P>E. is this due mold making technology and the skill of the mold maker?
HeavyArty
Visit this Community
Florida, United States
Joined: May 16, 2002
KitMaker: 17,694 posts
Armorama: 13,742 posts
Posted: Sunday, February 18, 2018 - 07:20 PM UTC

Quoted Text

I have notice,that tamiya kit tend to contain very few P.E.parts,by contrast trumpheter and miniart usually contain a lot of P>E. is this due mold making technology and the skill of the mold maker?


I think it is just not Tamiya's way of doing business. Tamiya kits are designed to fall together easily. To do this, they have to cut corners on some details. Less details usually means less PE as well. I think these newer companies are aiming for a different market than Tamiya. They are geared toward the builder who wants extreme details, so they add PE as well to aid in that. Personally, I don't usually buy Tamiya kits unless there is no other option. I find them simplified and needing a lot of work to bring up to the standards I am looking for.
sgtreef
Visit this Community
Oklahoma, United States
Joined: March 01, 2002
KitMaker: 6,043 posts
Armorama: 4,347 posts
Posted: Sunday, February 18, 2018 - 08:39 PM UTC
So if you choose Iraq which year might I ask Gino?

Cheers
HeavyArty
Visit this Community
Florida, United States
Joined: May 16, 2002
KitMaker: 17,694 posts
Armorama: 13,742 posts
Posted: Monday, February 19, 2018 - 10:48 PM UTC
I might do it as a stacked cut-away type museum piece sort of like the below image. If I go this route, I might do it as a Russian tank.

RKrebs
Visit this Community
Washington, United States
Joined: November 27, 2015
KitMaker: 14 posts
Armorama: 7 posts
Posted: Saturday, February 24, 2018 - 01:25 AM UTC

Quoted Text

I might do it as a stacked cut-away type museum piece sort of like the below image. If I go this route, I might do it as a Russian tank.


Awesome!!! I will be following with rapt attention.
metooshelah
#011
Visit this Community
Jerusalem, Israel
Joined: February 06, 2009
KitMaker: 1,507 posts
Armorama: 1,304 posts
Posted: Saturday, February 24, 2018 - 01:57 AM UTC
started fantastic, keep us posted!
HeavyArty
Visit this Community
Florida, United States
Joined: May 16, 2002
KitMaker: 17,694 posts
Armorama: 13,742 posts
Posted: Sunday, February 25, 2018 - 03:22 AM UTC
Work continues. I have completed a couple more steps; through step 13. These steps work on the running gear and start the lower hull details. I found the holes for the torsion bars were a little tight, so I drilled them out w/a 1/16" bit. They slid right in after that. There are a lot of parts for the running gear and it is fully articulated when done; just go slow and use glue sparingly.

You also start adding the interior parts for the lower hull. The control rods and laterals are really finely detailed. The floor pieces and covers for the torsion bars look great as well. I had no issues with any of the hull detail parts.

Here it is so far.

sgtreef
Visit this Community
Oklahoma, United States
Joined: March 01, 2002
KitMaker: 6,043 posts
Armorama: 4,347 posts
Posted: Sunday, February 25, 2018 - 03:41 AM UTC
That is looking good.
HeavyArty
Visit this Community
Florida, United States
Joined: May 16, 2002
KitMaker: 17,694 posts
Armorama: 13,742 posts
Posted: Sunday, February 25, 2018 - 09:33 PM UTC
Thanks Jeff. I hope to get more done on it this week. I will be a little busy though as my daughter is getting married Sat; so lots to do.
sgtreef
Visit this Community
Oklahoma, United States
Joined: March 01, 2002
KitMaker: 6,043 posts
Armorama: 4,347 posts
Posted: Monday, February 26, 2018 - 05:50 PM UTC

Quoted Text

Thanks Jeff. I hope to get more done on it this week. I will be a little busy though as my daughter is getting married Sat; so lots to do.


Congratulations on that Gino.

Cheers
PliciPlici
Visit this Community
Romania
Joined: February 20, 2018
KitMaker: 11 posts
Armorama: 7 posts
Posted: Monday, February 26, 2018 - 06:01 PM UTC
I will follow with great interest. Great subject and awesome work so far!
cheswickthecat
Visit this Community
Washington, United States
Joined: October 13, 2007
KitMaker: 212 posts
Armorama: 208 posts
Posted: Tuesday, February 27, 2018 - 07:55 AM UTC
Gino, that is a neat idea to do the "stacked" style build. This should be quite interesting.
Terry
HeavyArty
Visit this Community
Florida, United States
Joined: May 16, 2002
KitMaker: 17,694 posts
Armorama: 13,742 posts
Posted: Monday, March 26, 2018 - 03:24 AM UTC
I am back...finally. After recovering from my daughter's wedding, then having my computer crash and having to go through the pain of data recovery and having the hard drive replaced, it was only two months old. I have an update.

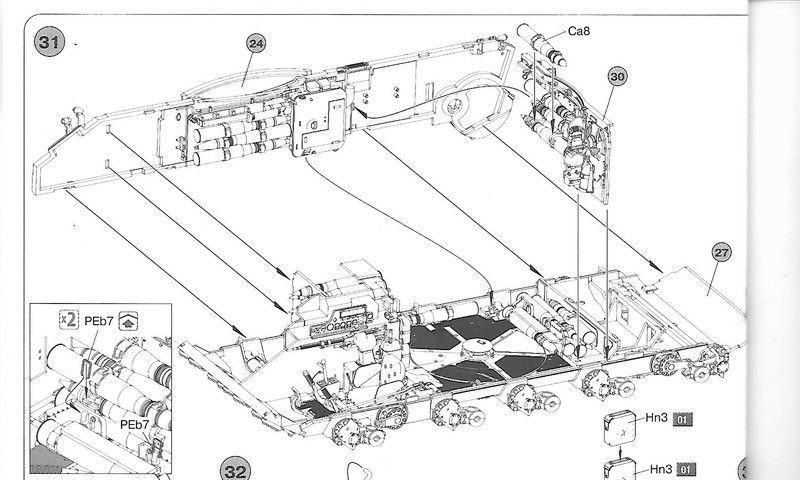
I have continued with the build. So far, I have gotten through about step 30. These steps have you start the interior of the hull. I did deviate a bit here from the instructions.

The instructions would have you build and add details to each inner wall section, then glue them onto the outer side hull sections. Once they are joined, they call for you to paint the lower hull a blue-gray color and the side walls/hull sides white. After painting and detailing, you are then to glue the side hull pieces onto the lower hull part. To me, this would leave very weak joints where the hull sides meet the hull bottom. This is a crucial joint to keep the hull all together and in one piece.


My method is to glue the hull sides to the lower hull first. Then paint and detail the inner hull wall sections and the hull tub separately. Once everything is dry, I will then add the inner side walls to the very secure hull sides and bottom. The side walls just slide into place. I don't know why they have you do it the other way, but this works better for me.

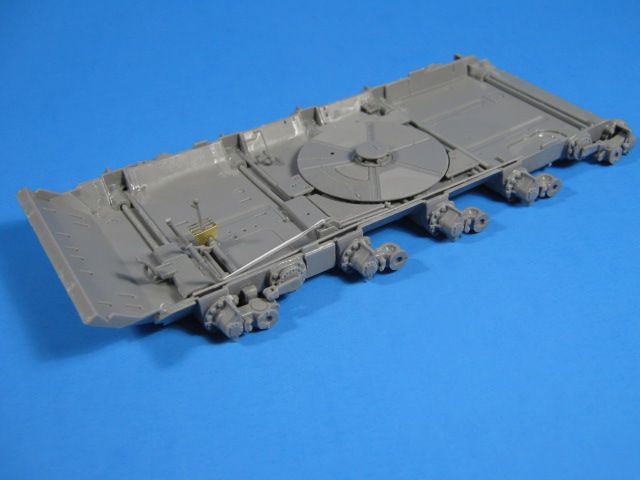
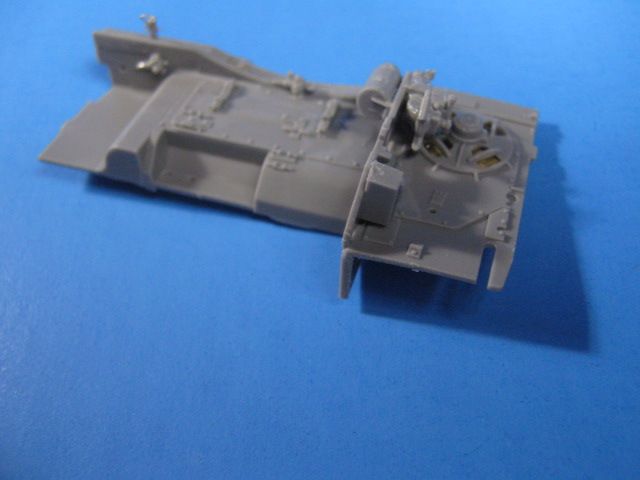
Here is the completed hull. I also jumped ahead a bit and added the rear hull piece to secure everything before painting.


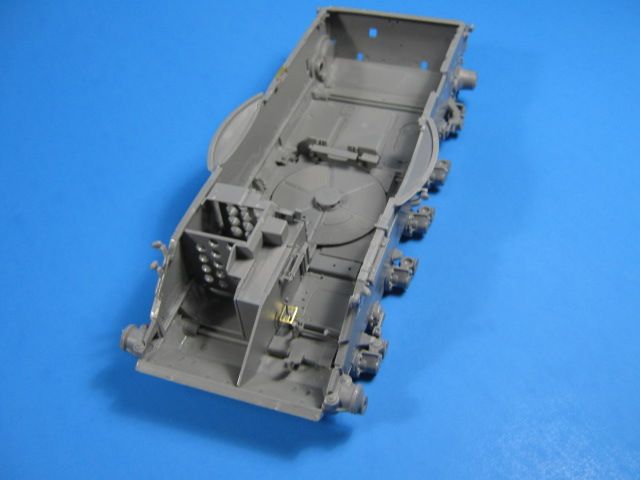
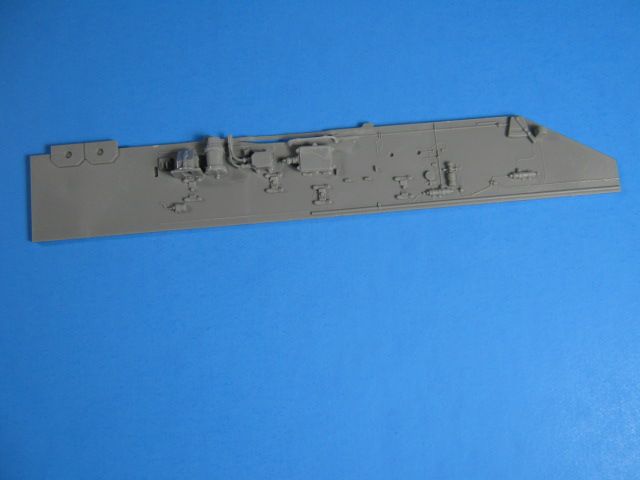
The outer side of the hull. There were a lot of fidly pieces here to add. They include very nice position lights and a small horn. There were also more pieces for the suspension in the form of bump stops for the roadwheel arms and little detail pieces on the final drive housings. The front idler mounts were also added.


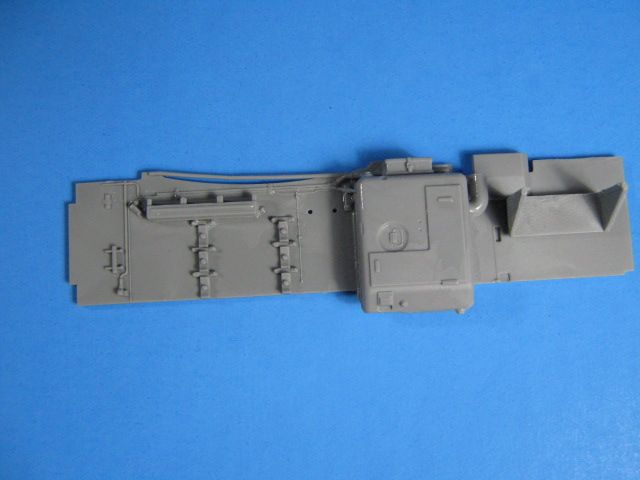
These are the interior detail pieces. They include both side walls, a rear wall, seat, and a very detailed compressor.


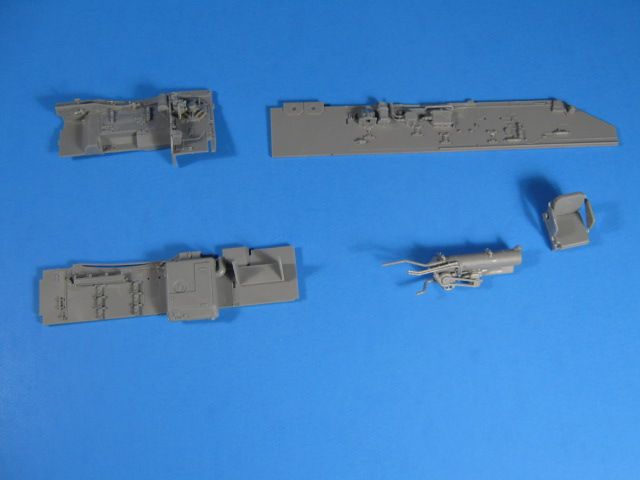
Driver's (left) side wall.


Right side wall.


Rear wall with very nice PE fan and small PE clips.


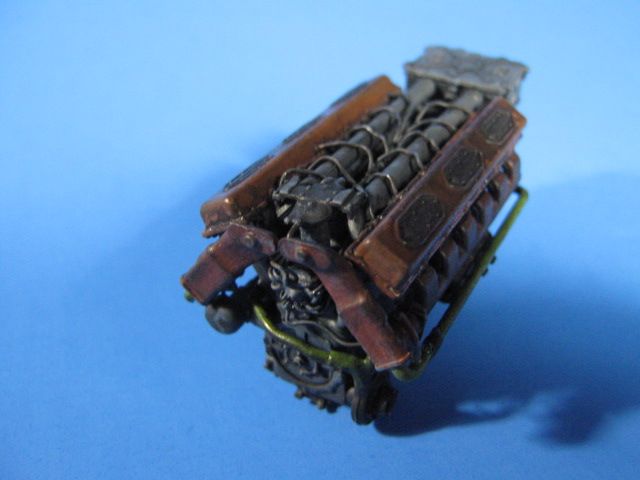
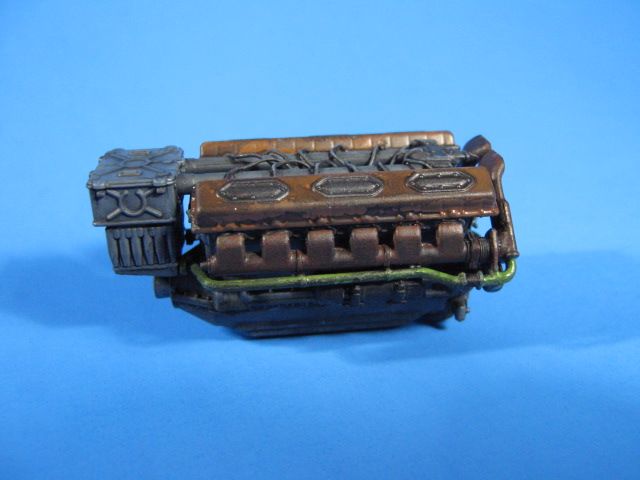
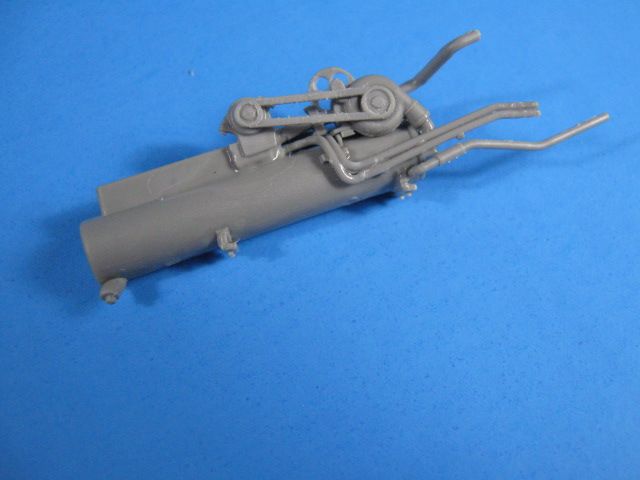
Close up of the compressor. There are 14 pieces just in this assembly. Everything is very detailed and looks great.


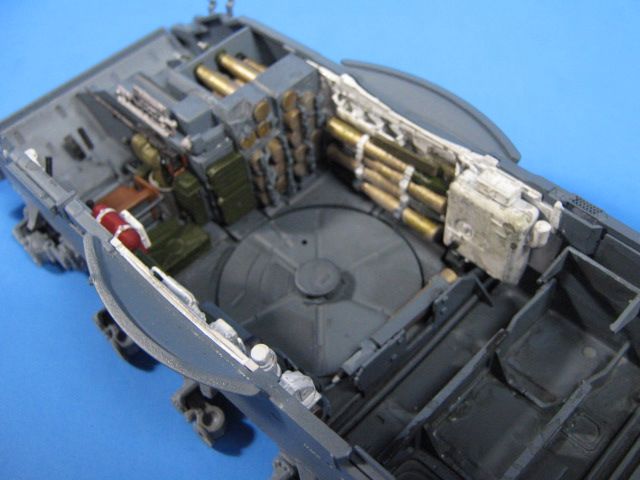
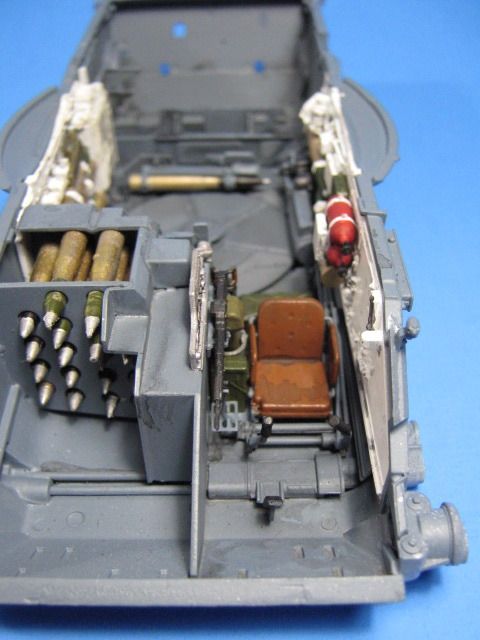
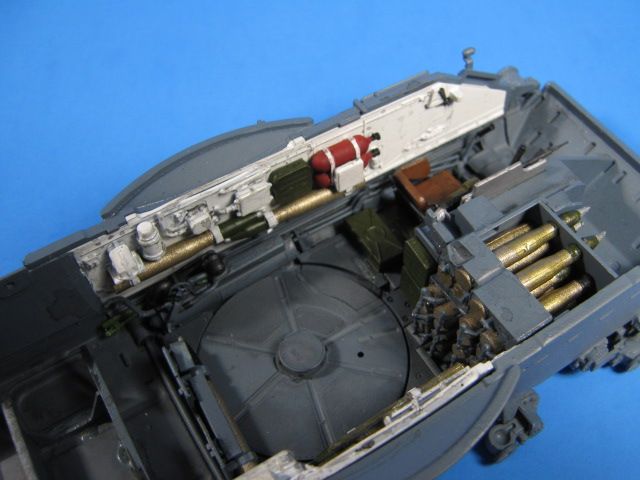
There are still a bunch of detail pieces to add all over the inner wall sections. The most items to still be added are all the ammo. There are 36 rounds to add onto the hull walls. There are also a few fire extinguishers, bags, hull-mounted 12.7mm machine gun, and ammo boxes to add as well.

Next up is painting the hull blue-gray and the walls white. Then on to all the detail painting and adding the detail bits.
sgtreef
Visit this Community
Oklahoma, United States
Joined: March 01, 2002
KitMaker: 6,043 posts
Armorama: 4,347 posts
Posted: Monday, March 26, 2018 - 05:08 AM UTC
Coming out good Gino,a lot of parts.
I am beginning to hate large kits.
But that looks like a lot of kit.
Wonder if they do a T-34 type 85?
Keep after it can't wait to see paint.

Cheers


KoSprueOne
Visit this Community
Myanmar
Joined: March 05, 2004
KitMaker: 4,011 posts
Armorama: 1,498 posts
Posted: Monday, March 26, 2018 - 05:52 AM UTC
That's a lot of detail indeed. I just bought a Tiran-4 with interior so I'll follow this for recommended builder tips on getting these kits done.


HeavyArty
Visit this Community
Florida, United States
Joined: May 16, 2002
KitMaker: 17,694 posts
Armorama: 13,742 posts
Posted: Monday, March 26, 2018 - 06:34 PM UTC
Thanks guys. It has been fun so far...tedious, but fun. I am not looking forward to painting all the rounds though.
koalorka
Visit this Community
Canada
Joined: June 16, 2010
KitMaker: 48 posts
Armorama: 46 posts
Posted: Tuesday, March 27, 2018 - 05:14 AM UTC
Looking amazing so far.

I can't believe how much improvement we've seen in the T-55 since the Tamiya kit.

Looking at my "Prague 1968" Soviet T-55 Tamiya build, the Soviet style commander's hatch seems so much thicker and clunkier than the MiniArt kit. Might need to get the kit strictly for that!

Unless anyone knows of any aftermarket options?
PlasticMac
Visit this Community
United Kingdom
Joined: March 29, 2018
KitMaker: 1 posts
Armorama: 1 posts
Posted: Thursday, March 29, 2018 - 12:10 PM UTC
Try out this database / stash manager site I use www.scalemates.com - you dont need to register to search, and it is easy to use.

It offers several really neat features such as -
- a timeline of kits based on the first issued with instalinks to them.
- marketplace showing several vendors of the kit with up to date pricing.
- links to online reviews of the kit and video reviews of the kit.
- lastly a section of related products which shows almost all known aftermarket goodies for the kit in question.

(I wont say its totally complete, but it does come close enough for me to be indispensible.) 2 thumbs up from me.

The link for the base MiniArt T-54-1 is below, just use the product timeline to find and click on the Tiran 4 kit.

https://www.scalemates.com/kits/1012275-miniart-37003-t-54-1
HeavyArty
Visit this Community
Florida, United States
Joined: May 16, 2002
KitMaker: 17,694 posts
Armorama: 13,742 posts
Posted: Sunday, May 13, 2018 - 04:34 AM UTC
Contrary to the evidence posted here, I have been working on this. Life has been crazy and progress slow, but it is progressing. I have been painting and assembling the lower hull interior. There are a bunch of tank rounds in there. I have been painting and adding them where required. I still have the rear wall and about 10 more rounds to go on it.

Here it is so far.


I also completed and painted the engine. It will be installed after the lower hull is complete with the back wall in place.


 _GOTOTOP