Dioramas: Warships
Naval dioramas and related subjects
Hosted by Darren Baker
German Uboat TypeVIIB Conning Tower Gun Deck
sgtreef
Visit this Community
Oklahoma, United States
Joined: March 01, 2002
KitMaker: 6,043 posts
Armorama: 4,347 posts
Posted: Sunday, April 22, 2018 - 05:13 PM UTC

Quoted Text

You had me at "Uboat"

Jeff-
Are you out of the way of the fires?


Yes sir , panhandle area mostly.

Place is wild though, as can rain here for days, but none seems to make it out west. I live close to Tulsa.

You have quite a bit of patience here.

I would be cursing like a long shore man by now.

Going to killer indeed.

And your painting skills look to be top notch.
PolishBrigade12
Visit this Community
Washington, United States
Joined: January 31, 2009
KitMaker: 380 posts
Armorama: 366 posts
Posted: Tuesday, April 24, 2018 - 10:16 PM UTC
Take A Seat, Relax. Wood Planks

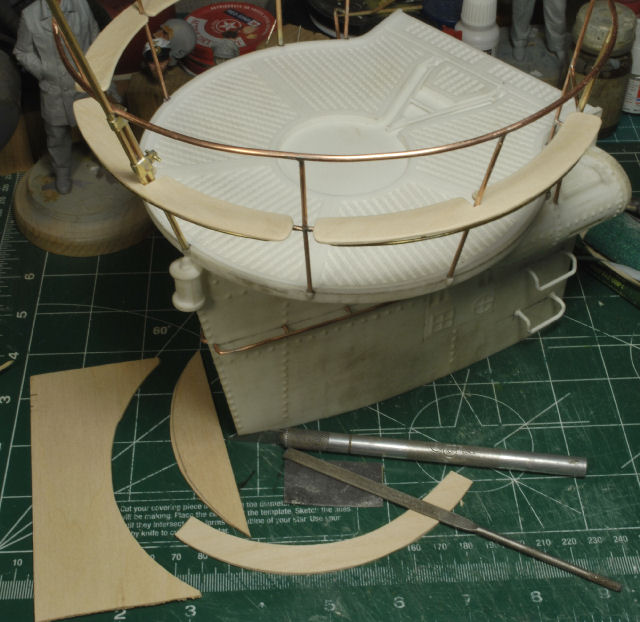
One feature on the U-Boats was seating for the crew to take a break on the "smoking deck". From what I've read the planks were wood and some boats didn't have any, but more than likely they were removed due to damage, etc.

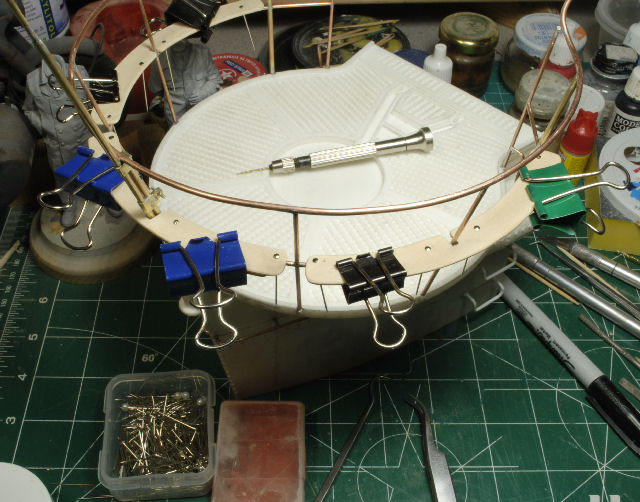
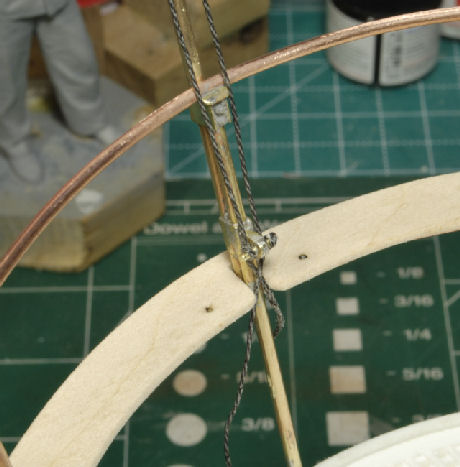
In the photos below you can see how I clamped the planks in place for pinning and securing them. After the bass wood was cut to fit I used sewing pins to secure them to the railing supports. I drilled a slight recess into the wood to get a flush fit on the sewing pins. I then flipped the tower over and soldered the pins in place and trimmed the excess. Then I went back and lightly sanded the plank with 600 grit sand paper. This process was fast and easy.


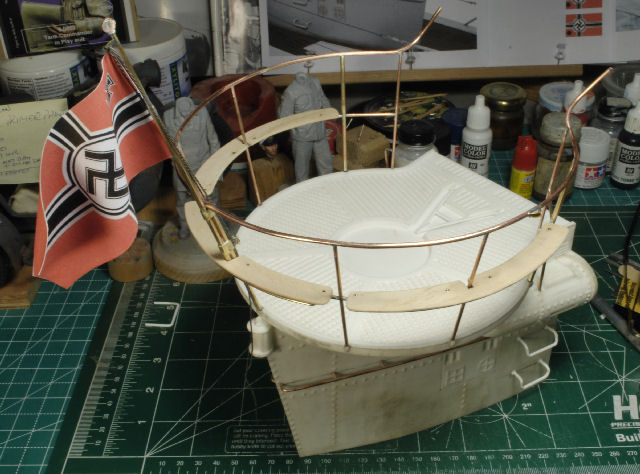
Here's the flag mounted for perspective. The size may change depending on the figures once mounted on deck.


Next up, sanding the gun and mount.

Cheers, Ski.


P.S. Russ, I attempted to use your flag method, still need more practice, wasn't working too well for me. But, I see how it works, thx Bro.
Kevlar06
Visit this Community
Washington, United States
Joined: March 15, 2009
KitMaker: 3,670 posts
Armorama: 2,052 posts
Posted: Wednesday, April 25, 2018 - 07:13 AM UTC
Ski,
I may not have been too clear in flag making process-- but the flag in your photo looks pretty good. Can you adjust the color in your print program any to deepen the shade? I use PowerPoint, and am able to change the background shade somewhat, going with a darker red. You can always try and run the print through your printer a second or even third time to deepen the color.
VR, Russ
PolishBrigade12
Visit this Community
Washington, United States
Joined: January 31, 2009
KitMaker: 380 posts
Armorama: 366 posts
Posted: Wednesday, April 25, 2018 - 10:42 AM UTC
Thx Russ, haven't tried those ideas. I may leave it as is, recon they fade anyway. No worries, thx for the tips, greatly appreciated.

Cheers, Ski.
jrutman
Visit this Community
Pennsylvania, United States
Joined: April 10, 2011
KitMaker: 7,941 posts
Armorama: 7,934 posts
Posted: Wednesday, April 25, 2018 - 06:25 PM UTC
Great ideas for everything so far. The cigarette deck looks brilliant as does the flag.
J
PolishBrigade12
Visit this Community
Washington, United States
Joined: January 31, 2009
KitMaker: 380 posts
Armorama: 366 posts
Posted: Wednesday, April 25, 2018 - 10:01 PM UTC
Thx Jerry. I almost got too excited to paint this bugger and forgot, I still have cables to install, HA! I mean, there ain't a whole lot of detail to be had on the gun deck, so I'm going to do it up right, right?

Whoooaaaa horsey, whoa! Ok, I'm chillin now, lol.

Cheers, Ski.
strongarden
Visit this Community
Florida, United States
Joined: May 14, 2012
KitMaker: 730 posts
Armorama: 624 posts
Posted: Friday, April 27, 2018 - 09:40 PM UTC
I'm following along Ski, this is awesome!
Great tips and techniques we can all learn from and use.

Cheers Dude
Dave
PolishBrigade12
Visit this Community
Washington, United States
Joined: January 31, 2009
KitMaker: 380 posts
Armorama: 366 posts
Posted: Friday, April 27, 2018 - 10:02 PM UTC
Thx Dave, welcome aboard, lol.

Cheers, Ski.
PolishBrigade12
Visit this Community
Washington, United States
Joined: January 31, 2009
KitMaker: 380 posts
Armorama: 366 posts
Posted: Wednesday, May 02, 2018 - 12:12 AM UTC
Sanding The Deck Gun And Mount

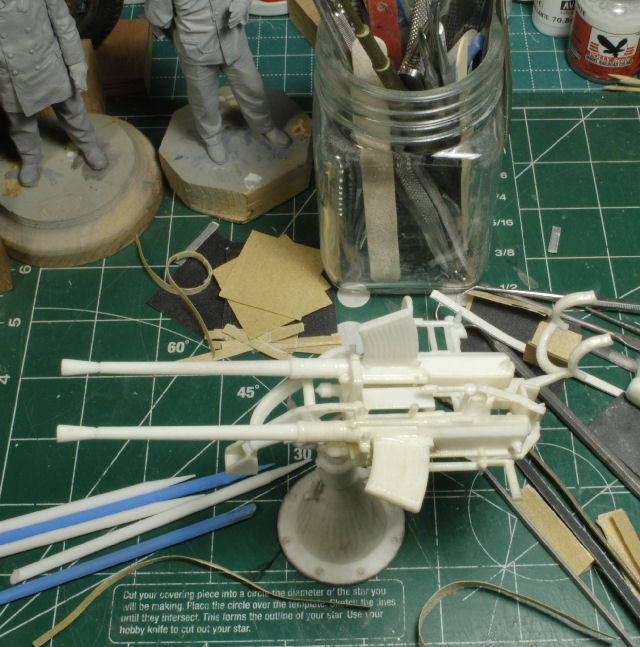
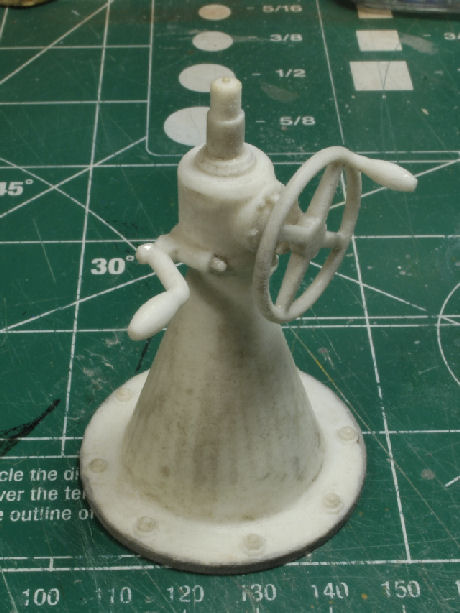
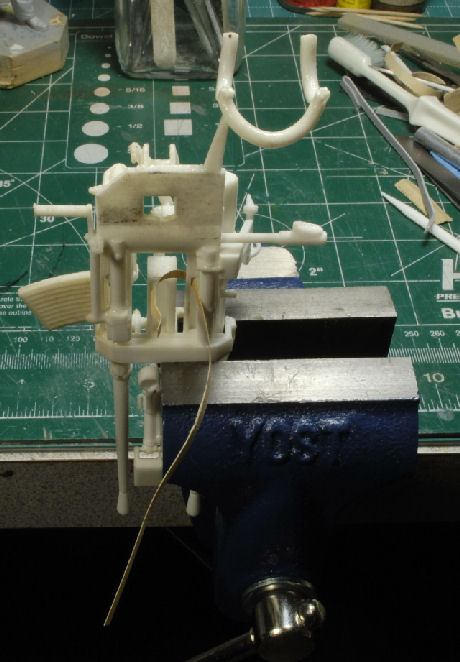
Ok, now that the deck has been completed and is ready for priming and painting it's time to fight the good fight and sand the deck gun and mount. The mount was not such a big deal, but this gun is one piece and it has some very delicate parts within the structure that are not easy to get to. As you can see, cutting up sand paper into long strips was a necessity and saved my sanity.


I ran into a fore mentioned issue with improperly mixed resin on this gun, so it's been a long process to bring it in to line. I am paying for my lack of attention to detail weeks ago, go figure. Ah, t'sall good!

I will say this, without my Yost miniature vise I would have gone battys by now. This vise was one of the best investments I've made for the model bunker in a long time. I was able to get a decent grip on this gun so I could get to those tight spots.

I recon any miniature vise will work, but I did do my research on vises and found that the Yost vise has the best design for my needs. It has already been upgraded to avoid the retaining washers from crimping and failing. Meaning, a common issue with these smaller vises is the retaining/tension ring/washer has a tendency to fail and you won't get your vise open. Now, that would not be any fun if I had this gun stuck in that vise, nuff said!


More to follow soon, if I ever get this gun sanded, HA!
cheyenne
Visit this Community
New Jersey, United States
Joined: January 05, 2005
KitMaker: 2,185 posts
Armorama: 1,813 posts
Posted: Friday, May 04, 2018 - 08:17 PM UTC
Ski , this is friggin awesome , you've got one hellava set of coconuts brother , and the patience of a saint !!!
I've been checking out different casters on Shapeways and have always wanted to get a ships gun tub with the two twin 40mm aa guns .
Always wanted to know what the "grainy finish", meant well now I know it means a lot of work , to much work for the extremely large price tag on said quad 40mm .
Maybe Walmart sells a extra large set of coconuts I could try on ................. I really want that gun tub !!!
PolishBrigade12
Visit this Community
Washington, United States
Joined: January 31, 2009
KitMaker: 380 posts
Armorama: 366 posts
Posted: Friday, May 04, 2018 - 09:16 PM UTC

Quoted Text

Ski , this is friggin awesome , you've got one hellava set of coconuts brother , and the patience of a saint !!!
I've been checking out different casters on Shapeways and have always wanted to get a ships gun tub with the two twin 40mm aa guns .
Always wanted to know what the "grainy finish", meant well now I know it means a lot of work , to much work for the extremely large price tag on said quad 40mm .
Maybe Walmart sells a extra large set of coconuts I could try on ................. I really want that gun tub !!!


?Por Que tu no tiene los grande juevos hombre? Bashahahhaaaaaaaaaaaa.

Ah, it ain't so bad Bro, just another challenge that won't go away lookin at it, HA! Thx Brotha, it's a bit more work than I expected, that's for sure.

There is a lot of cool stuff on that site, but depending on what you are wanting they may be able to make it out of plastic, but not in this scale. You can always check with Sasa and see what he can get done, might be worth a try, cost would be lower.

cheers, SKi.

JGphins
Visit this Community
Florida, United States
Joined: July 19, 2014
KitMaker: 249 posts
Armorama: 249 posts
Posted: Friday, May 04, 2018 - 09:54 PM UTC
Amazing and wonderful results with extremely well made details. Excellent sir thanks for sharing!!!

JGphins
PolishBrigade12
Visit this Community
Washington, United States
Joined: January 31, 2009
KitMaker: 380 posts
Armorama: 366 posts
Posted: Tuesday, May 08, 2018 - 10:47 PM UTC
Thank you Joaguin, greatly appreciated.
PolishBrigade12
Visit this Community
Washington, United States
Joined: January 31, 2009
KitMaker: 380 posts
Armorama: 366 posts
Posted: Friday, May 11, 2018 - 05:53 AM UTC
Still More Sanding


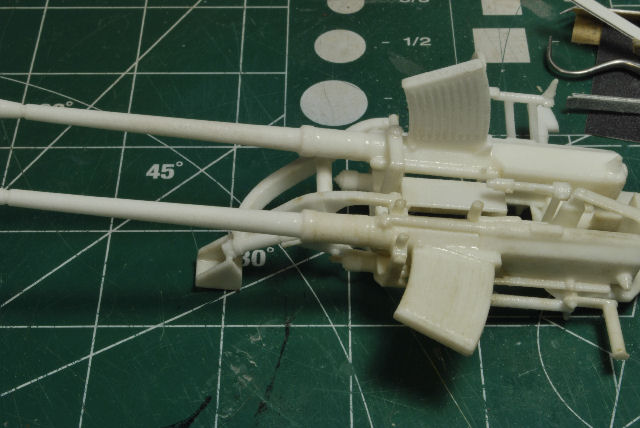
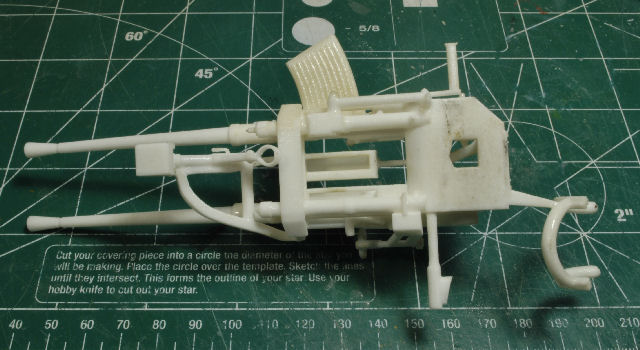
I gave the gun and deck and gun a primer coat and then went back and started sanding the imperfections found in all the nooks and crannies. The primer coat really brought out areas that were hard to see otherwise.

The gun is proving to be the most time consuming, but that is the nature of the nylon 3D printing material. Even after using the XTC-3D and sanding the snot out of it I still had a lot of work to do to get rid of the "fuzzy hairs" and bumps. This will take several coats of primer in specific problem areas to remedy, all while ensuring I don't cover up any details.

Some of the areas were gently scraped with a sharp flat dental tool while other tight areas were accessed by using various types of files, such as sanding sticks, finger nails filers, standard models files and strips of sanding paper as shown before.

The gun may not look so good right now, i.e., the fuzz, but slowly I am making progress. I just keep the DVD player running with "Das Boot", "Gray Lady Down" or some other submariner movie and I barely notice the clock, HA!
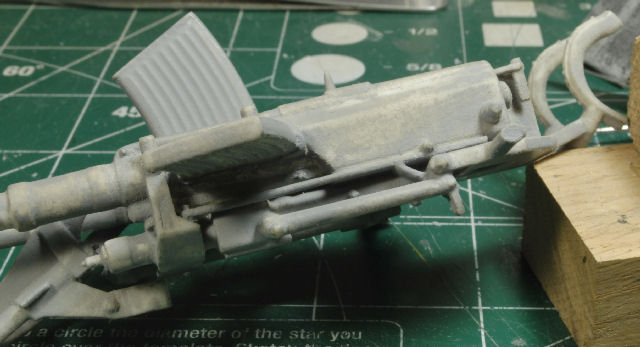
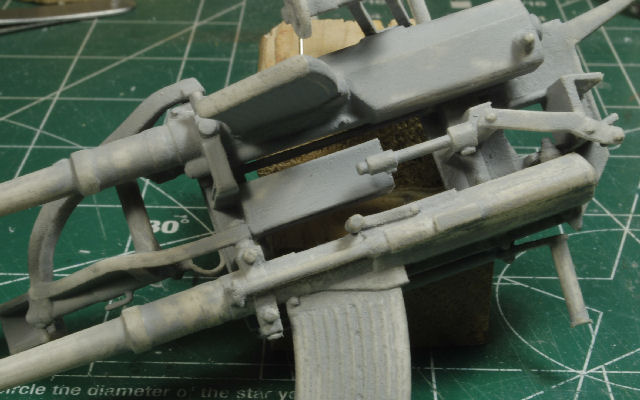
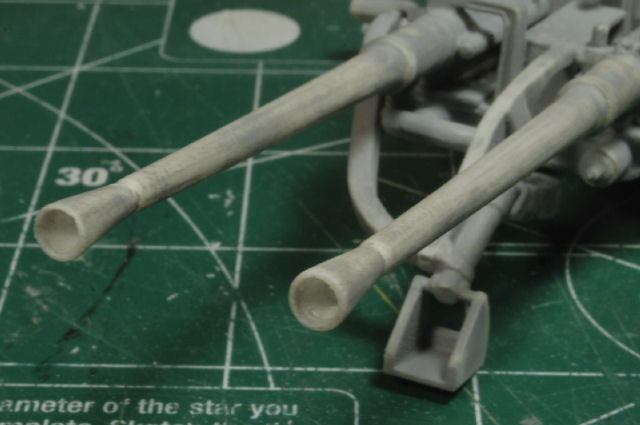


The deck portion of this beast was not so bad. The XTC-3D worked really well on this section, but it still had the typical nylon print issues. Given it's a much flatter surface it was easier to clean up, but there is still a "boat load" of fuzz on the actual grid deck. Trust me, you won't see it when I'm done and I ain't gonna sweat the piddly stuff, not gonna do it, lol.

Also, there is some clean up around the tower bolts/rivets that were created when sanding and filing before the primer coat. I'll go back and add some putty to smooth out those surface areas. All these little details will scream at you in this scale, so don't neglect them, you'll pay for it in end if you do.

The minor blemishes on the starboard ladder section will be filled and filed. If you look closely you can see the geometry of the print still visible on the ventilation tube. I've sanded that till I'm blue in the face and it still wants to be part of the picture. I'm not sure how much further I can go down without distorting the details, but I may have to Dremel it a bit to square it up before I call it good.
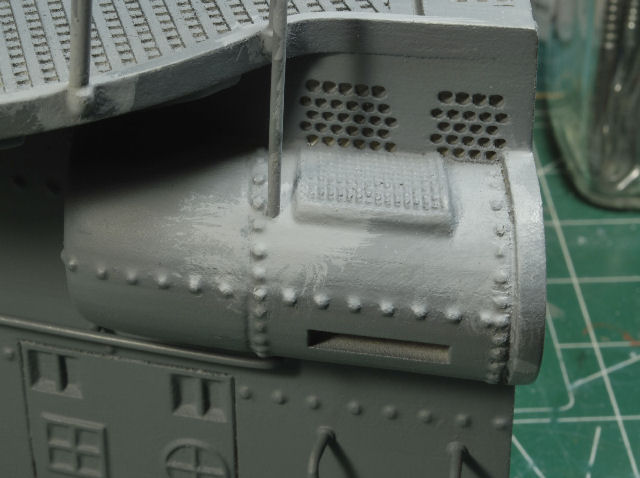
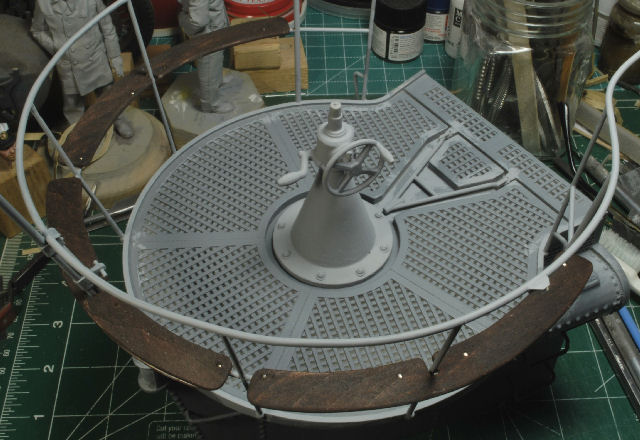


One item that is not pictured here is the sights on the gun itself. The nylon print is super bulky and looks way out of proportion, so I'll scratch build another one out of thin wire and mount it. This would be a great place for some PE, but I'm not going to learn that process today, lol.

Ok, time permitting, I'll get the sanding closed out and get ready for cables, ship's bell, minor details and painting, yehaaaaaaa!


Thx for watchin. Cheers, Ski.
jrutman
Visit this Community
Pennsylvania, United States
Joined: April 10, 2011
KitMaker: 7,941 posts
Armorama: 7,934 posts
Posted: Friday, May 11, 2018 - 06:39 PM UTC
More nice progress Ski,
This will be an epic build.
J
PolishBrigade12
Visit this Community
Washington, United States
Joined: January 31, 2009
KitMaker: 380 posts
Armorama: 366 posts
Posted: Friday, May 11, 2018 - 08:12 PM UTC
Thx for the encouragement Jerry!

Cheers, Ski.
Dioramartin
Visit this Community
New South Wales, Australia
Joined: May 04, 2016
KitMaker: 1,476 posts
Armorama: 1,463 posts
Posted: Saturday, May 12, 2018 - 06:39 PM UTC
That’s a scary amount of sanding Ski (got any fingers left?) - & you’re rapidly scaring me off 3D printing for what I need. It’s looking great though, this must be the 99% perspiration bit
PolishBrigade12
Visit this Community
Washington, United States
Joined: January 31, 2009
KitMaker: 380 posts
Armorama: 366 posts
Posted: Saturday, May 12, 2018 - 07:54 PM UTC
It is a pain Tim, but I'm elbows and hind quarters in alligators now. Too late to turn back now, HA!

Ah, this 3D stuff will be worked out over the coming years, so I see improvements coming down the line. Don't call it quits yet, you haven't even started.

Cheers, Ski.
cheyenne
Visit this Community
New Jersey, United States
Joined: January 05, 2005
KitMaker: 2,185 posts
Armorama: 1,813 posts
Posted: Saturday, May 12, 2018 - 11:50 PM UTC
Sanding be darned this is still an incredible piece of work .
Ski your heritage got you through this ya know , if I had a nickel for every time my Dad called me a stubborn P.....
Looking beautiful man , all your hard work s paying off big time !!!
PolishBrigade12
Visit this Community
Washington, United States
Joined: January 31, 2009
KitMaker: 380 posts
Armorama: 366 posts
Posted: Thursday, May 17, 2018 - 10:38 AM UTC
Thx Cheyenne. Like I tell my kids, "It ain't gonna get done lookin at it!"

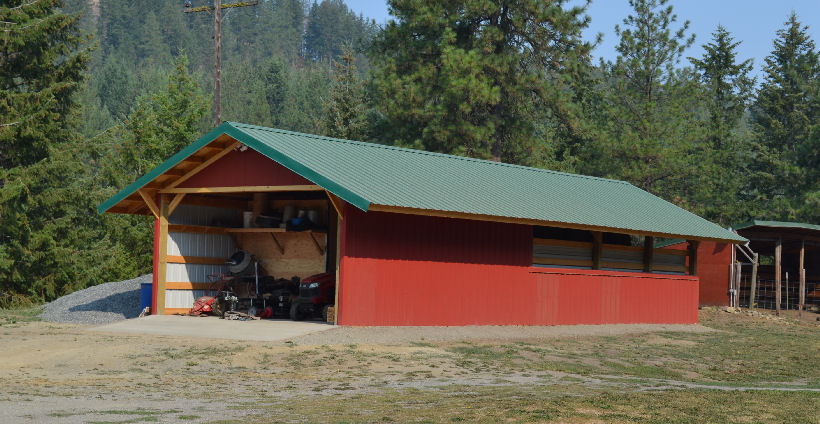
Unfortunatley Bro, the bunker has been powered down for the summer, period. I've got a hay barn going up, needs to be done before the hay comes in. Then of course all the rest of the summer stuff. Aaa, when I retire I'll have no closure season on the bunker, but for now, work sure get's in the way of bunker time, lol.

Thx for the kind words Ma Brotha! Cheers, Ski.
callmehobbes
Visit this Community
England - North West, United Kingdom
Joined: April 17, 2005
KitMaker: 751 posts
Armorama: 740 posts
Posted: Thursday, May 17, 2018 - 01:18 PM UTC
Staggeringly good. Im just in awe.
PolishBrigade12
Visit this Community
Washington, United States
Joined: January 31, 2009
KitMaker: 380 posts
Armorama: 366 posts
Posted: Friday, May 18, 2018 - 06:54 AM UTC
Thx Mr. Hobbes. I'll update as I can, but for now, it's barn raisin time, lol.


Cheers, Ski.
PolishBrigade12
Visit this Community
Washington, United States
Joined: January 31, 2009
KitMaker: 380 posts
Armorama: 366 posts
Posted: Saturday, October 20, 2018 - 05:56 AM UTC
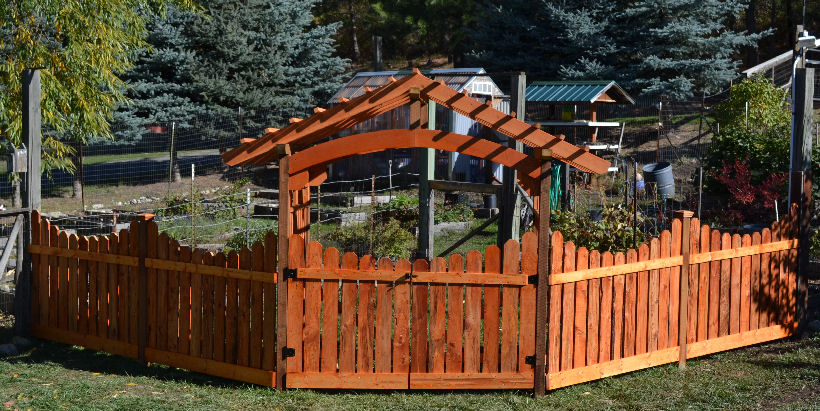
Howdy Gents, it's been one heck of a busy summer, but I'll be getting back to this gun deck in a few weeks. Some serious 1:1 scale builds had taken most of my time, but summer is usually never good for model bunker time anyway, lol.

The Mrs. had her list ready in April, so they got top priority, just how it goes, right?


Cheers, Ski.

P.S. I tell yaz, I've been long itchin to get back to "sniffin some paint and gluin my fingers together" in a real bad way. I'm ready to burry myself in my bunker and only come up for air, HA!
jrutman
Visit this Community
Pennsylvania, United States
Joined: April 10, 2011
KitMaker: 7,941 posts
Armorama: 7,934 posts
Posted: Saturday, October 20, 2018 - 08:40 AM UTC
All I can say is WOW!! Serious honey-do list.
J
pnance26
Visit this Community
California, United States
Joined: January 22, 2016
KitMaker: 766 posts
Armorama: 518 posts
Posted: Saturday, October 20, 2018 - 09:26 AM UTC
And a carpenter on top expert model maker!

I know that honey do stuff too well... I have two more major chores prior to the onset of winter. I need to drain my lawn tractor, remount the tire that was flat, and get it tarped for the winter.

Then the gutters need cleaned. I already did the four cords of wood necessary to get through the winter. I didn't split it but it was delivered so I had to stack and tarp all that.

I am trying to decide what project to jump into... have so many options but there is something looming... I can feel it, Dave. I can feel it... my mind is going.

Great work, Ski! Can't wait to see more!