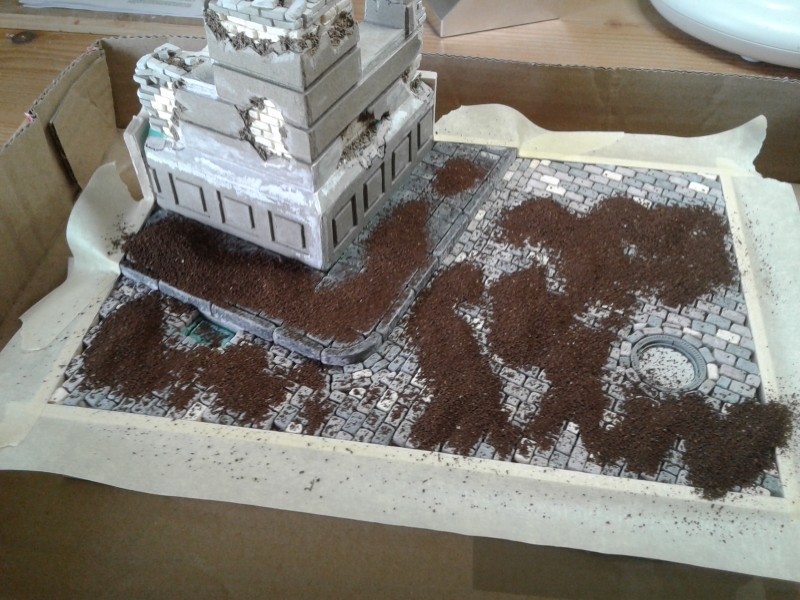
Corner ruin and sorundings 1/35 schratchbuild
Slovenia
Joined: January 13, 2017
KitMaker: 69 posts
Armorama: 66 posts
Posted: Sunday, April 22, 2018 - 11:57 PM UTC
Hallo!
I decided that i Will make my first ever diorama (verrdamt banditen) again with new skills...
The first one looks like this:
http://makete.si/viewtopic.php?t=9219The layout Will remain the same and i Will try my new tecnick for bulding ruins using styrodure, cartboard and plaster casted bricks and other features (molds by Diorama debries)
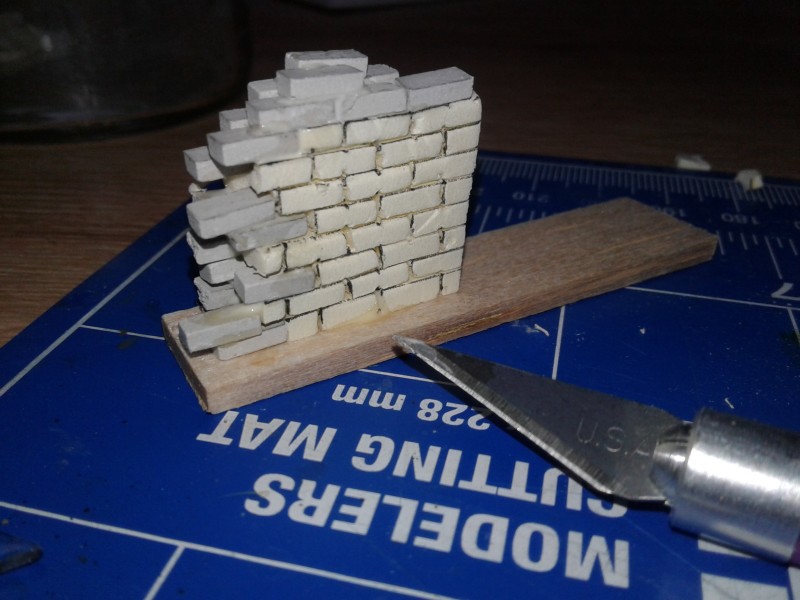
I started with a test section of wall! Sribing bricks in styrodure is a well known tecnicque. We must take care that we match the size of casted bricks...
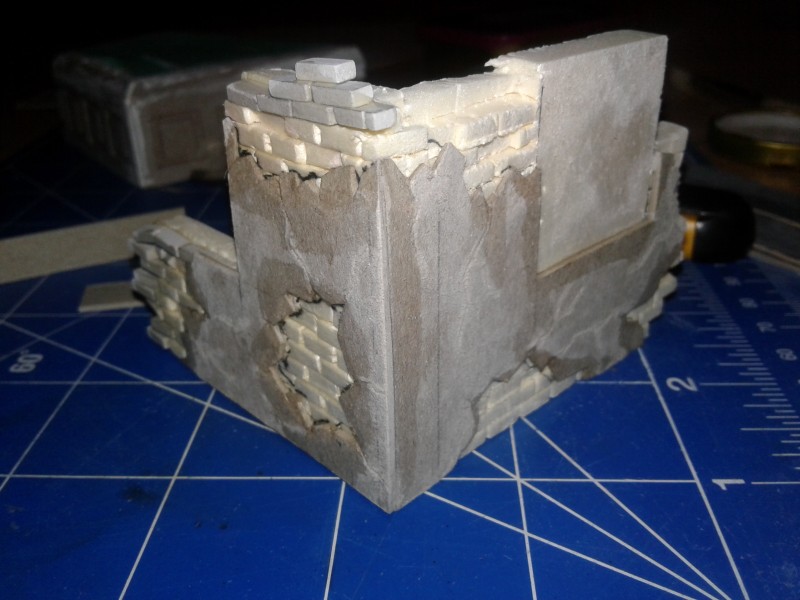
For traning i scribbed the bricks on the whole surface (even where they Will not be seen... I aded 1mm cartbord to simulate concrete...
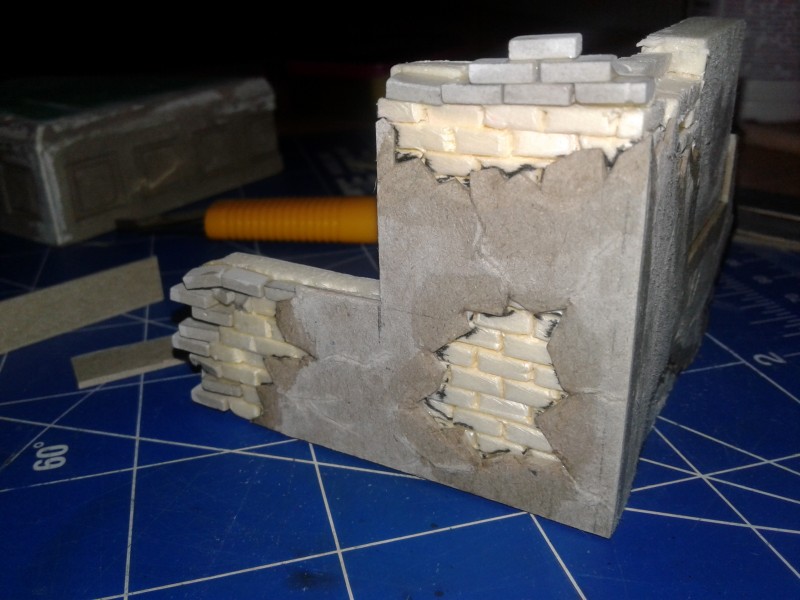
I made holes in the cartboard and smoothed the edges..
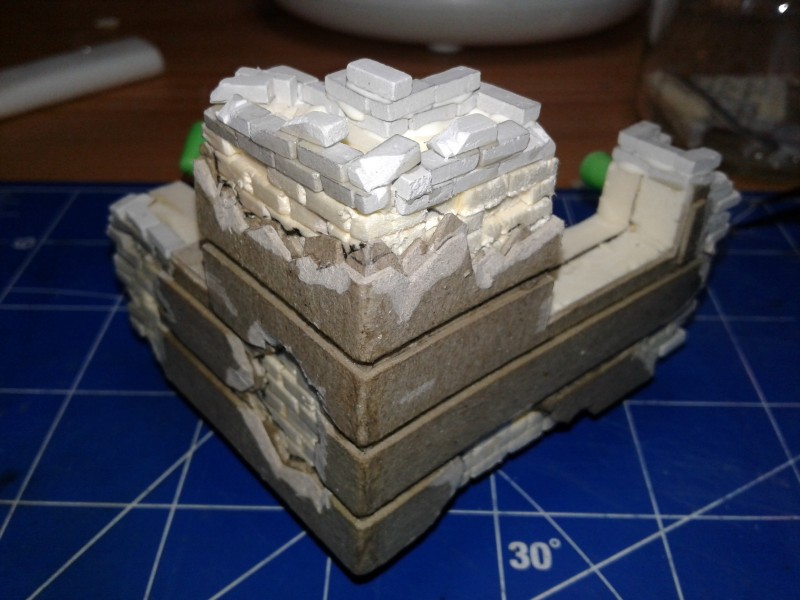
I added upper sections of concrete, and i cutted them according to lower holes... on the top I stardted adding casted bricks...
Slovenia
Joined: January 13, 2017
KitMaker: 69 posts
Armorama: 66 posts
Posted: Monday, April 23, 2018 - 12:02 AM UTC
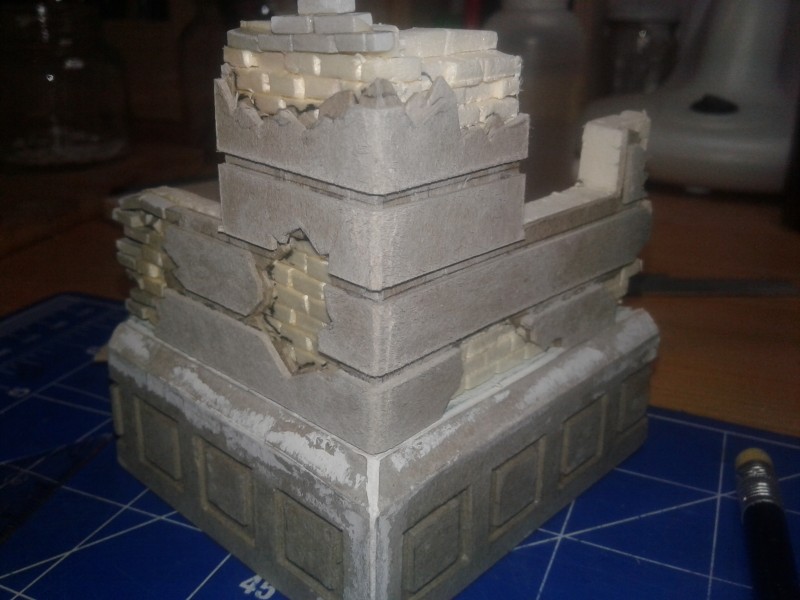
The lower part is also styrodure dressed with cartboard...
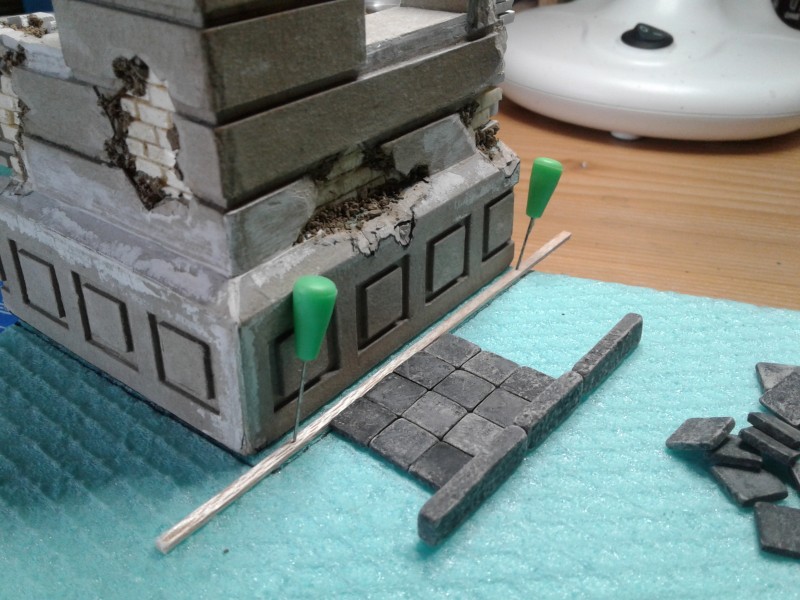
In the holes i putted some white glue and added some dirt to simulate mortar... now you can see the testfitting of the sidewalk...
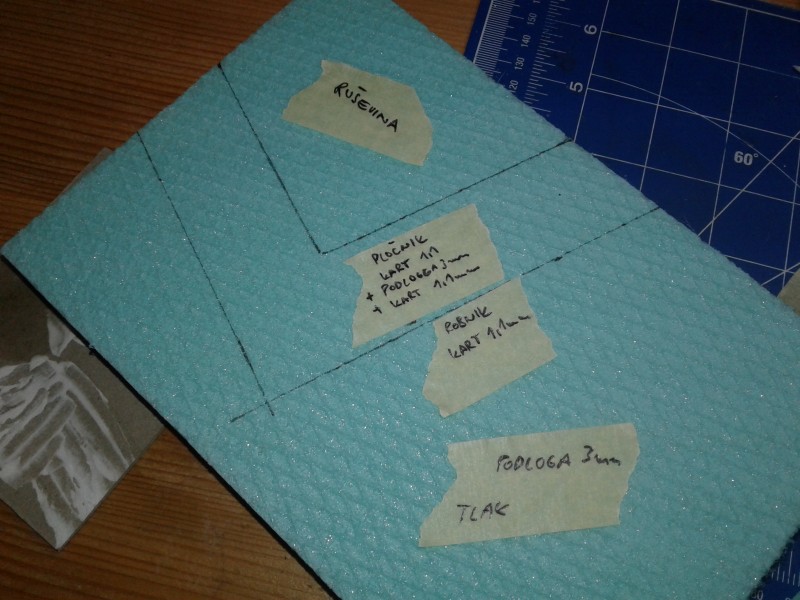
I cutted the base from styrodure and marked the hights of all the fatures...
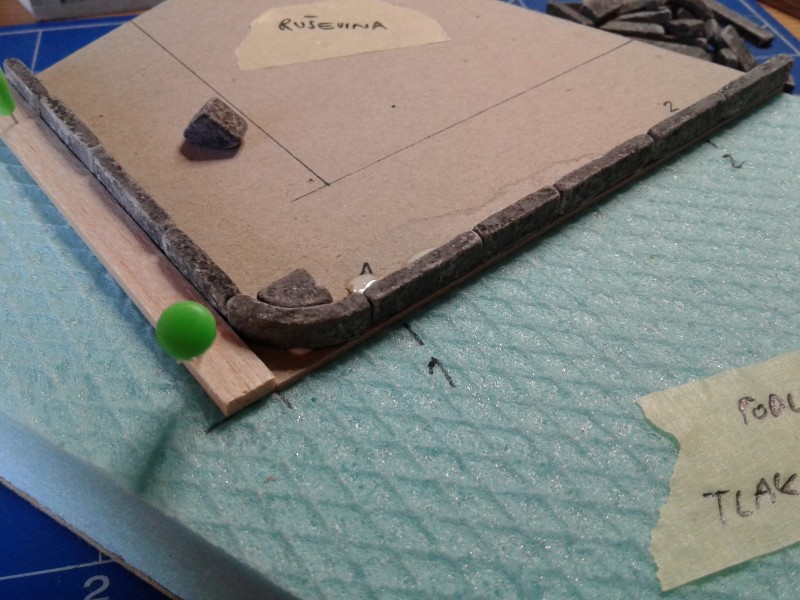
the sidewalk edge is in place... the tiles Will follow...
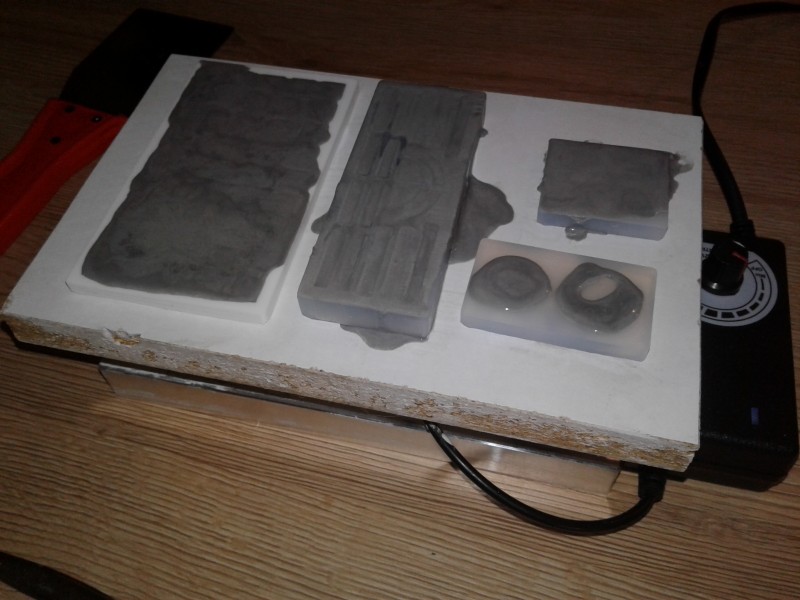
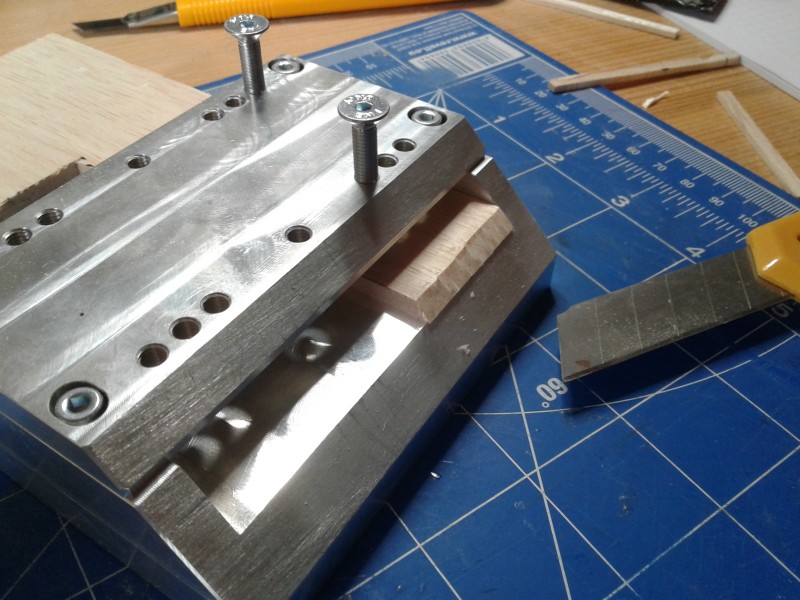
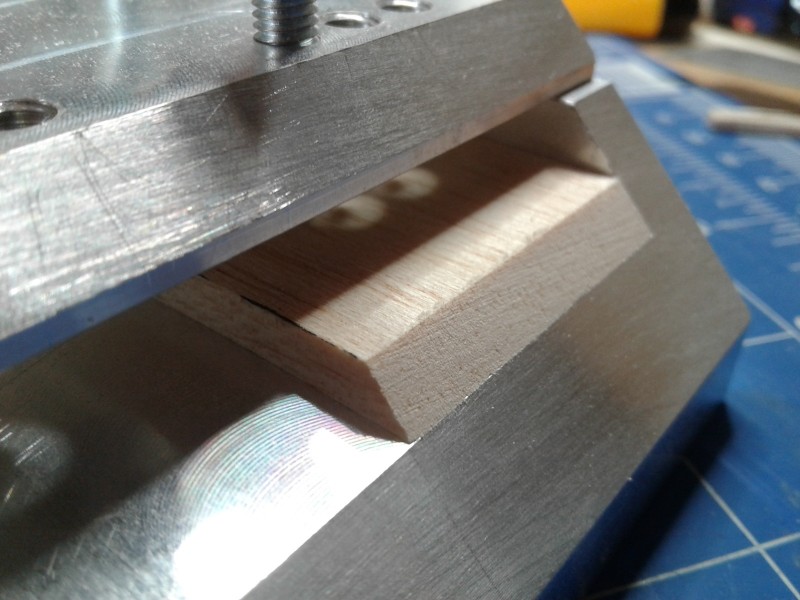
Those are the molds on the vibrating table...
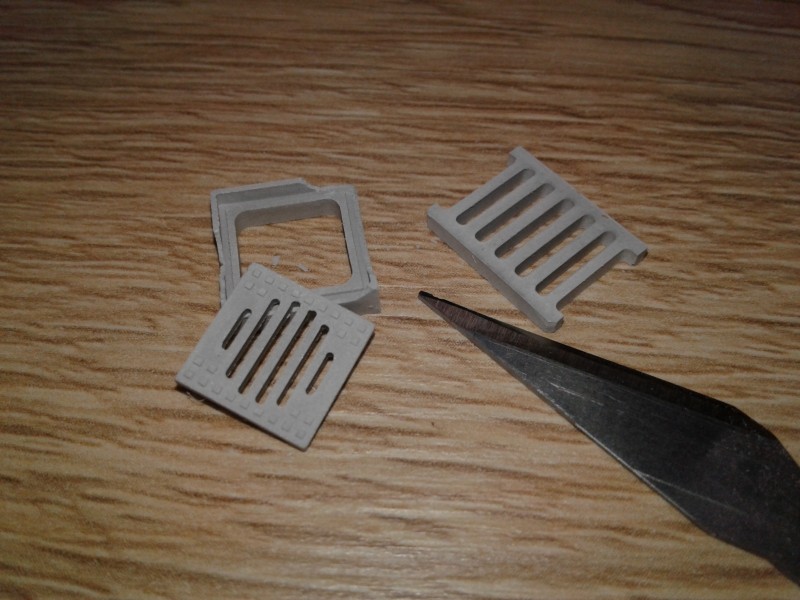
The gutter frame didnt make it out of the mold, but the coversa are superbe... not bad for first time and for plaster...

All questions welcome...
Boštjan
Noord-Holland, Netherlands
Joined: October 10, 2010
KitMaker: 764 posts
Armorama: 742 posts
Posted: Monday, April 23, 2018 - 03:54 AM UTC
Good start

Florida, United States
Joined: May 14, 2012
KitMaker: 730 posts
Armorama: 624 posts
Posted: Monday, April 23, 2018 - 06:45 AM UTC
Yes Bostjan, I agree great start! Nice attention to detail.
Dave

"No beast so fierce but knows some touch of pity.
But I know none, and therefore am no beast."
New Jersey, United States
Joined: January 05, 2005
KitMaker: 2,185 posts
Armorama: 1,813 posts
Posted: Monday, April 23, 2018 - 03:32 PM UTC
Bostjan , very , very cool decorative cement work over the buildings main structure of brick . It turned out excellent , I know how hard it is to convincingly achieve that visual .
I also know you're a very wise man by using dioramadebris molds , they are invaluable when it comes to creating architectural structures . Their uses are unlimited .
Keep at it this is going to be great !!!
New South Wales, Australia
Joined: May 04, 2016
KitMaker: 1,476 posts
Armorama: 1,463 posts
Posted: Monday, April 23, 2018 - 07:13 PM UTC
Slovenia
Joined: January 13, 2017
KitMaker: 69 posts
Armorama: 66 posts
Posted: Friday, April 27, 2018 - 01:10 PM UTC
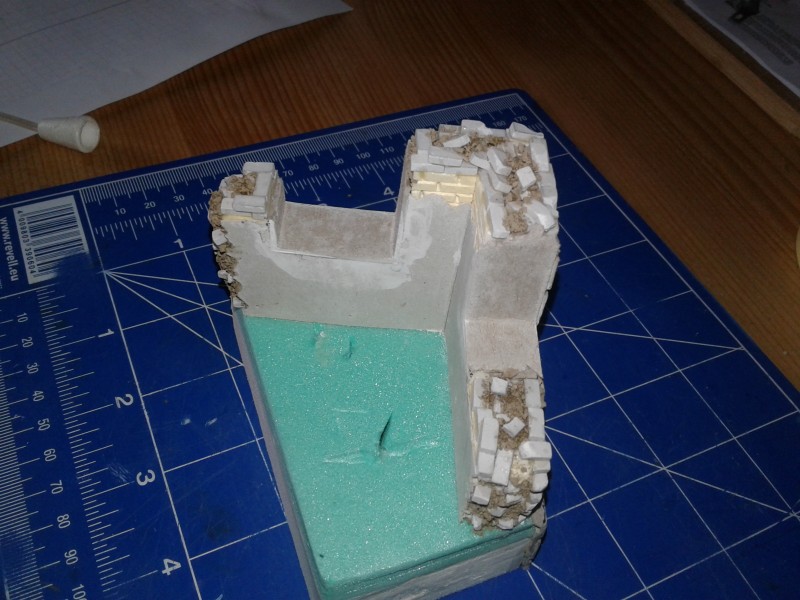
The interiror is starting to get shape...
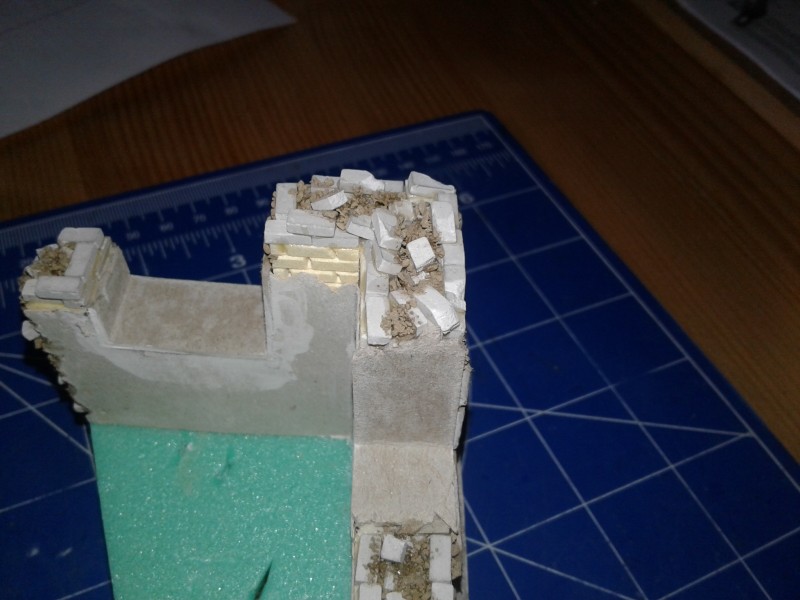
I builded a hollow top of the wall with casted briks... then i glued some briks inside, and in the end i added earth... take care not to cover the bricks with earth... if we want we can add some later...
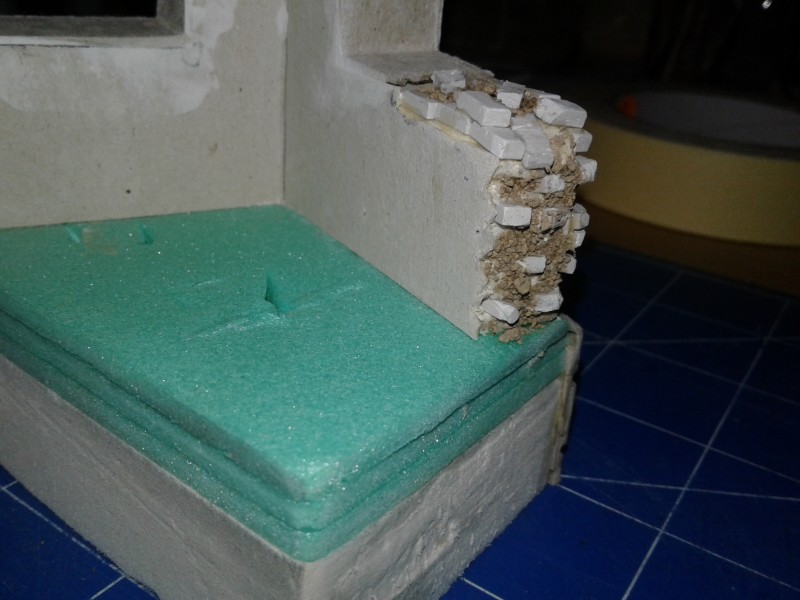
For the ends of the walls i putted some briks in small holes in styrodure... then when i was happy with the position i added some glue... in the end i added some earth same way as in previous picture...
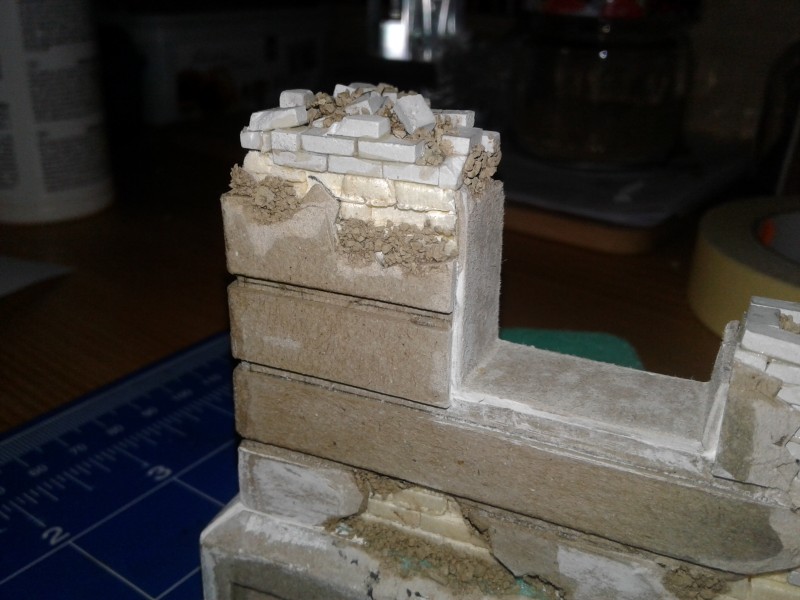
Here you can see the transition of the carved briks to casted ones... when it will be colored i think that it will not be to see...
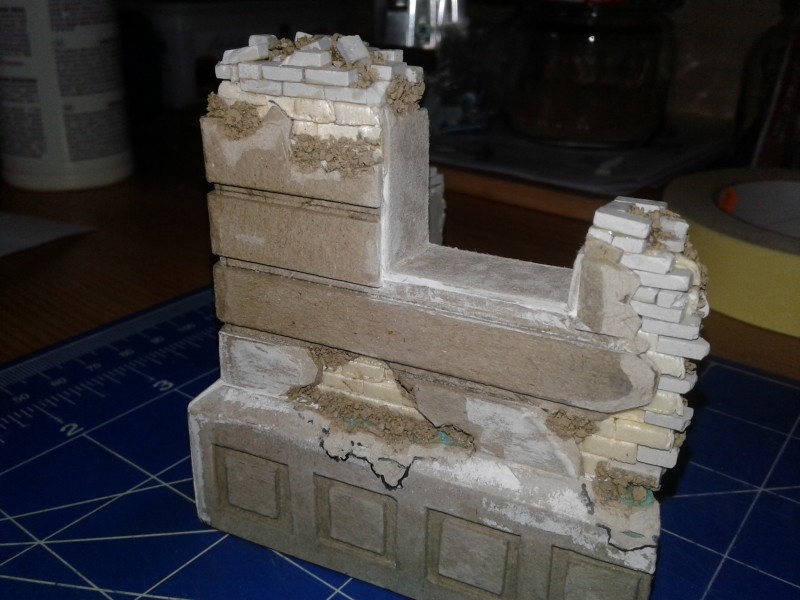
The building part is going to end... now the windows (or what remained of theme) will follow...
Stay tuned...
Bruc

Slovenia
Joined: January 13, 2017
KitMaker: 69 posts
Armorama: 66 posts
Posted: Sunday, April 29, 2018 - 01:33 PM UTC
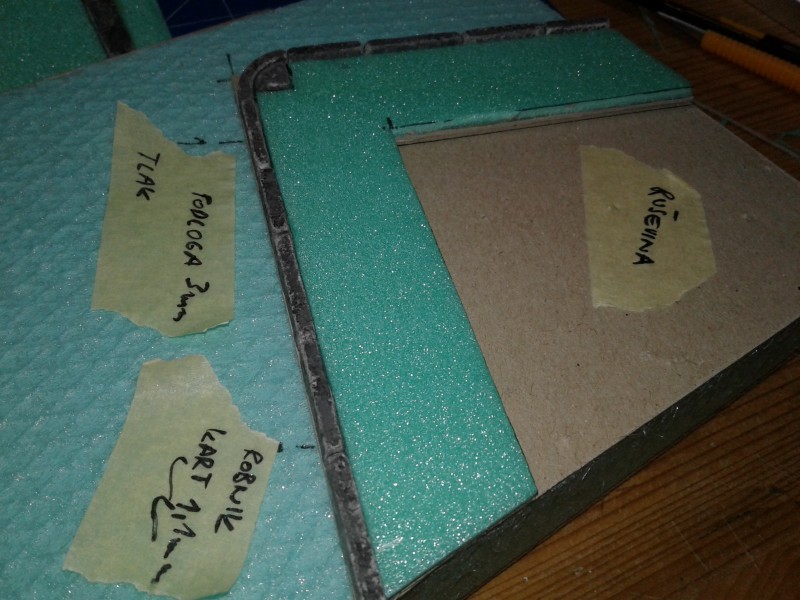
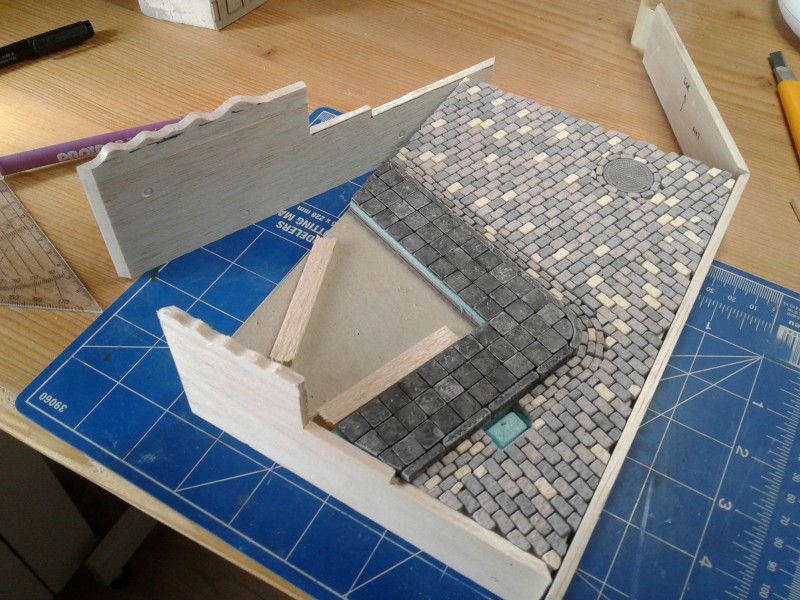
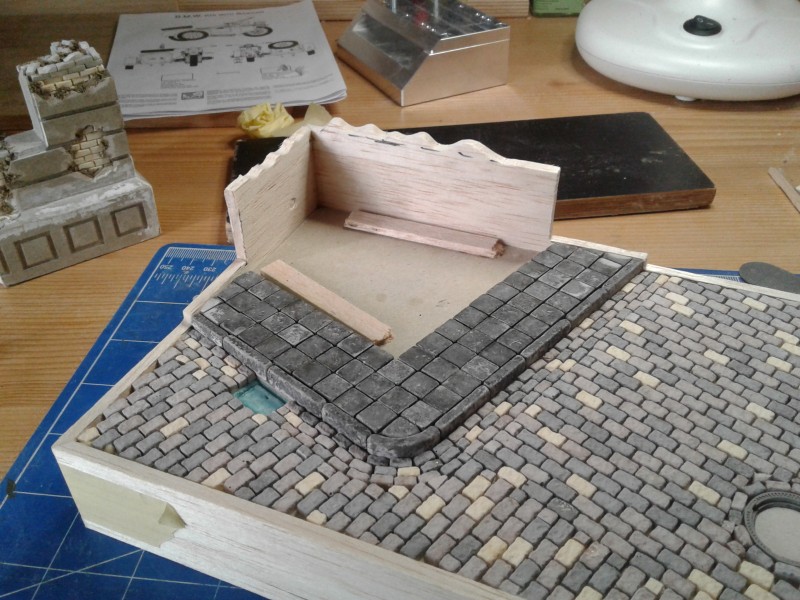
The wor continued with the sidewalk... first the hight... (4mm-cartboard+styrofoam)
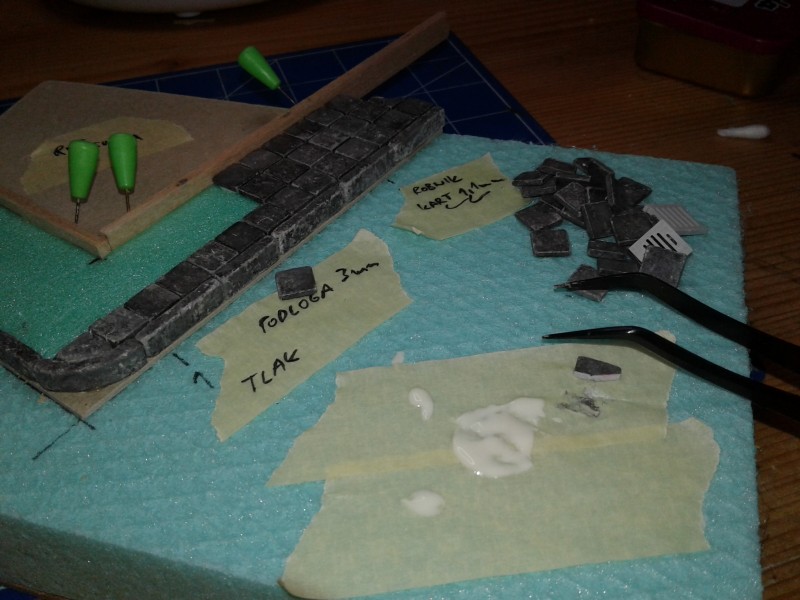
I started laying down the tiles, and made a huge mistake, by not starting by the corner stone... I started in the middle... luckyly all ended good in the end with some cutting and stilling some space here and there...

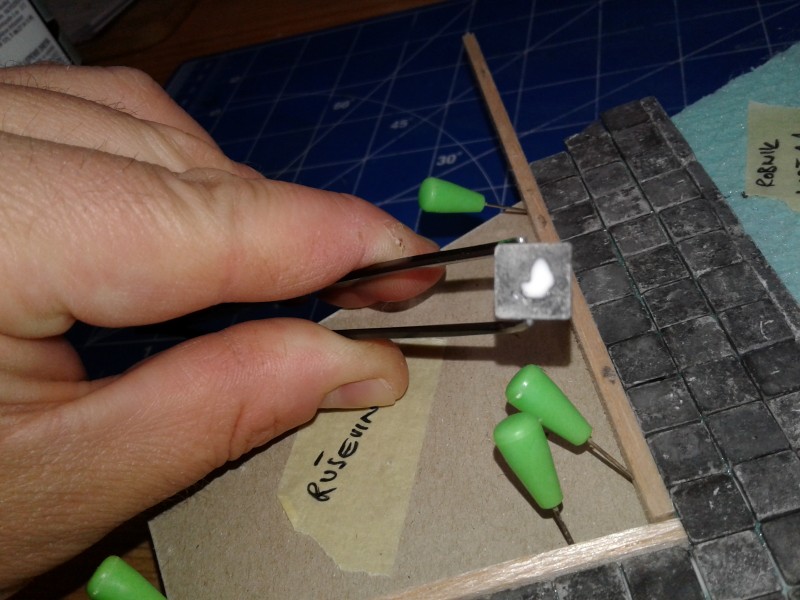
we must put a little amount of glue on the tile (on the surface taht is so smooth, because the glue must not fill the gaps betwen tiles...
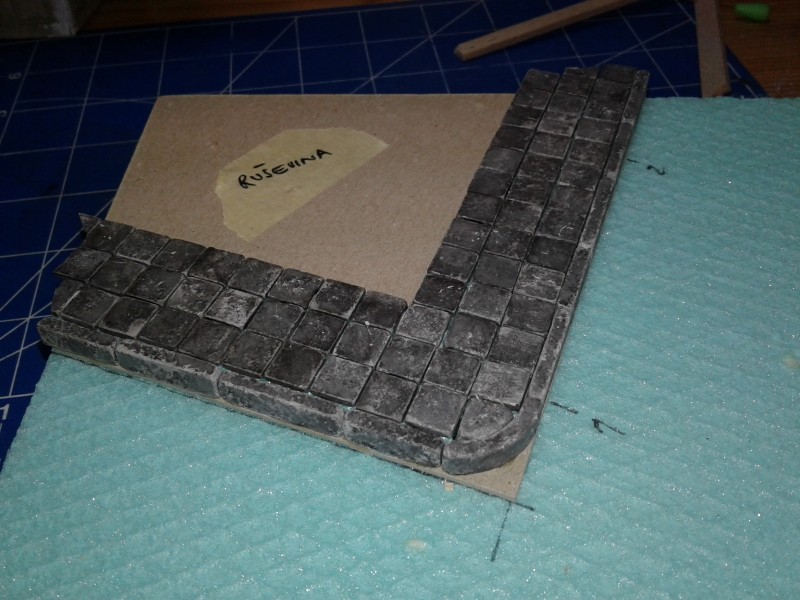
The sidewalk was done... it took me about 20min... the work si fast and fun...
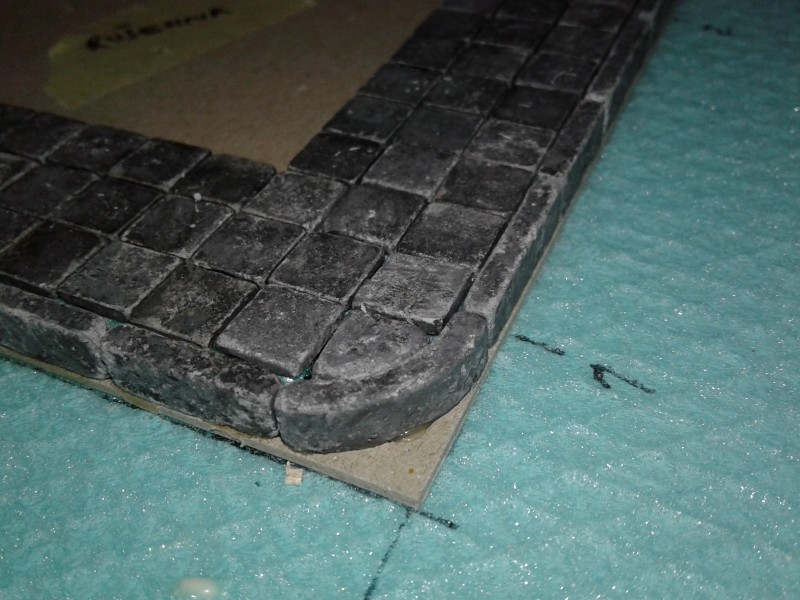
I am verry happy with the result...
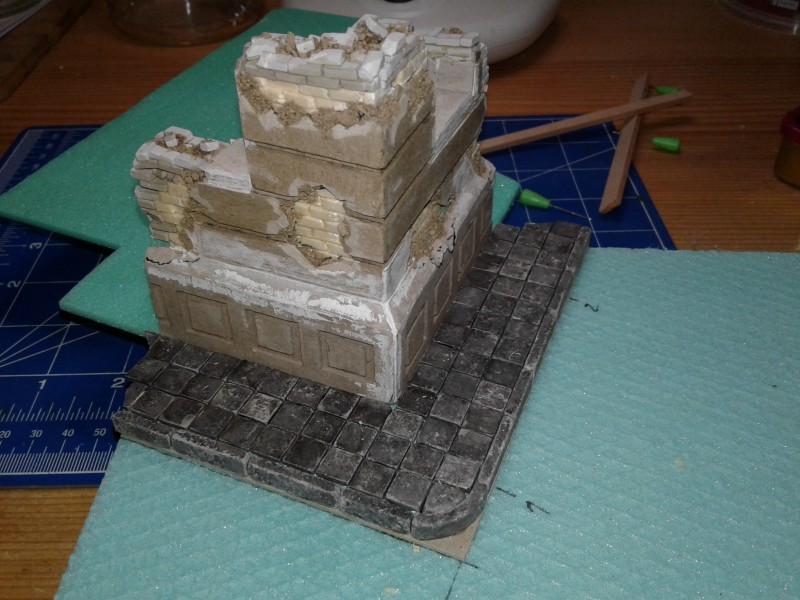
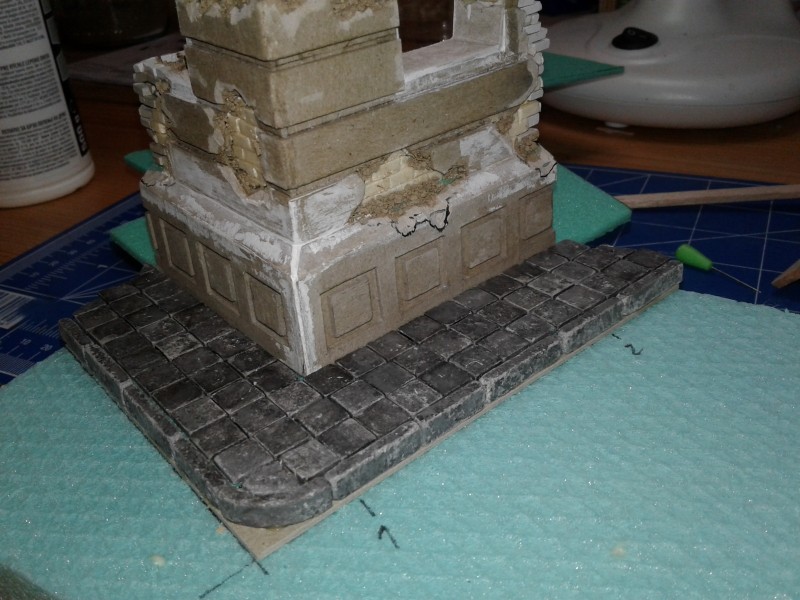
Other 2 fotos with the ruin in place....
Hi to evrybody and happy 1.st of May...
Bruc

England - North West, United Kingdom
Joined: September 19, 2006
KitMaker: 262 posts
Armorama: 251 posts
Posted: Sunday, April 29, 2018 - 01:49 PM UTC
Slovenia
Joined: January 13, 2017
KitMaker: 69 posts
Armorama: 66 posts
Posted: Sunday, April 29, 2018 - 03:50 PM UTC
Slovenia
Joined: January 13, 2017
KitMaker: 69 posts
Armorama: 66 posts
Posted: Friday, May 04, 2018 - 03:30 PM UTC
Ok... 6days to competition... the devil took the joke away (a slovenian say...

) and i started the casting factory...
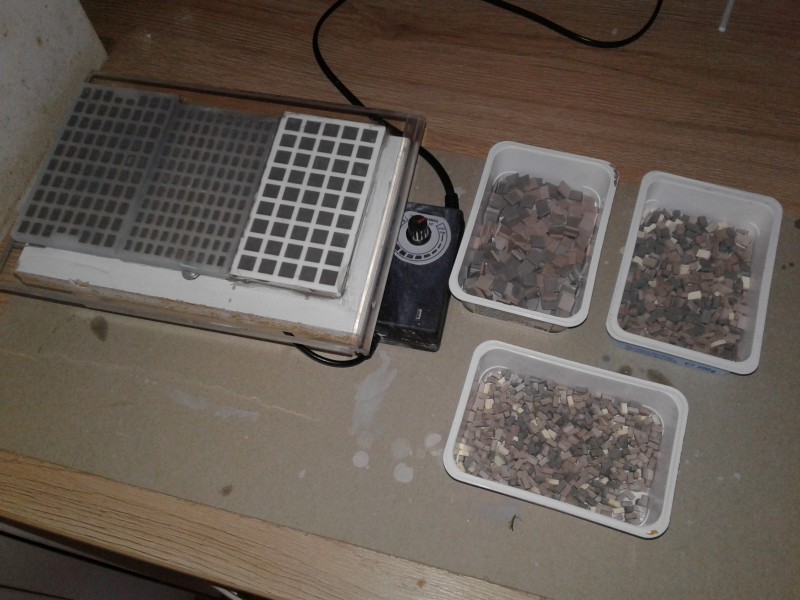
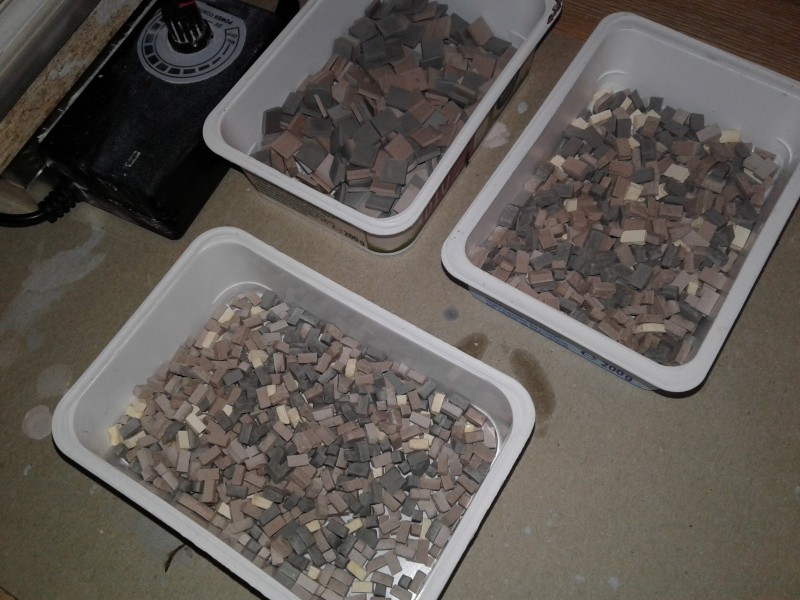
I made the cobble stone in 3 colors... brown gray and some yellow to be more interesting...
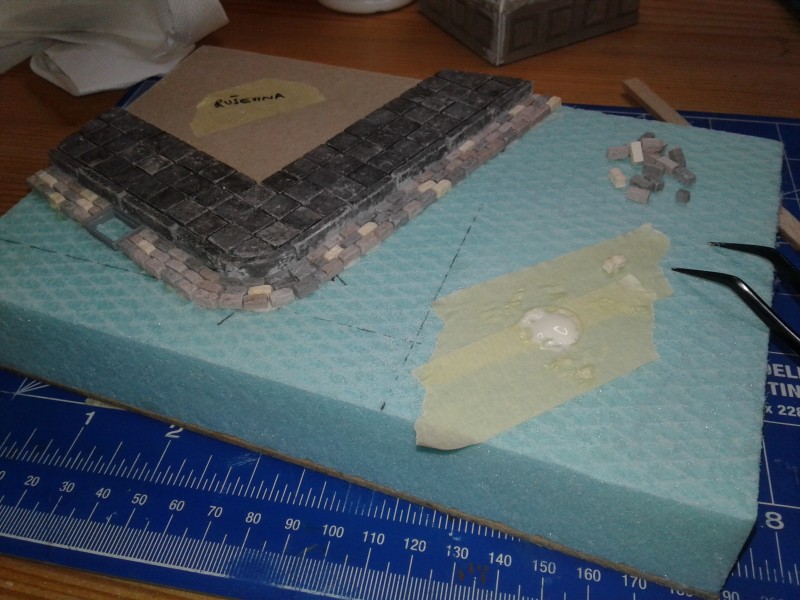
I first lyed down the gutter...
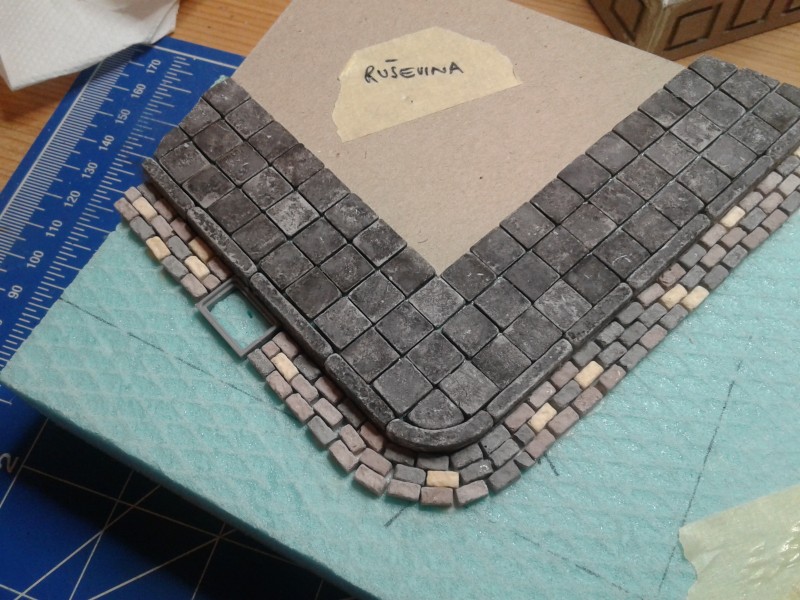
The results after 2h of work...
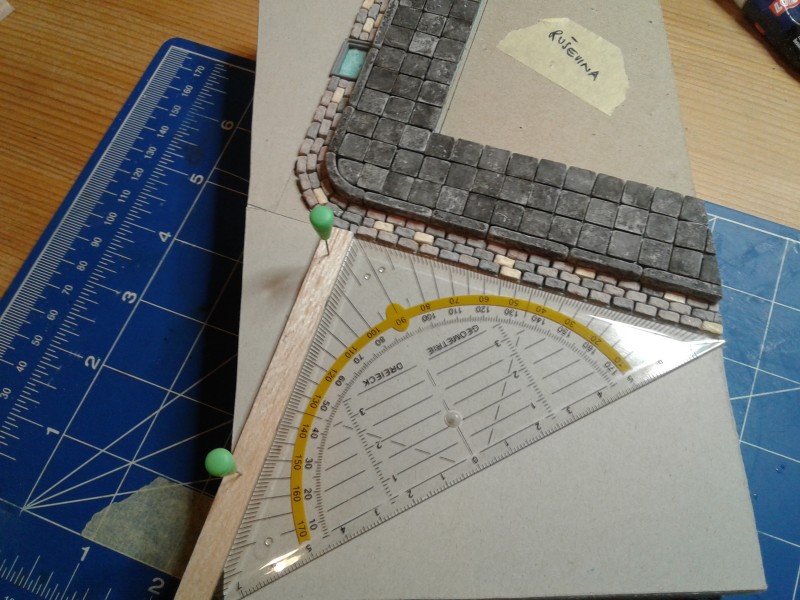
A little help so the first row Will be "perpendicular"
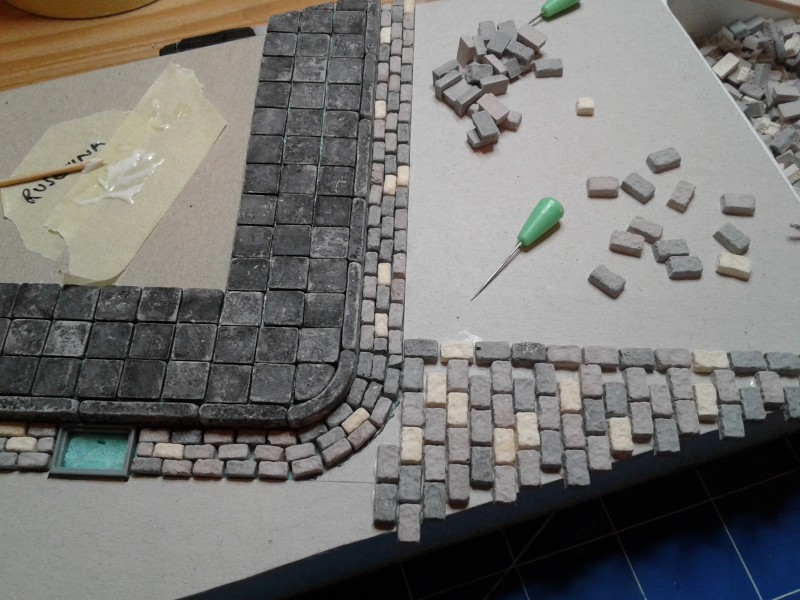
To add interest i made 2 diferent ways of cobblestone...

First way is done...
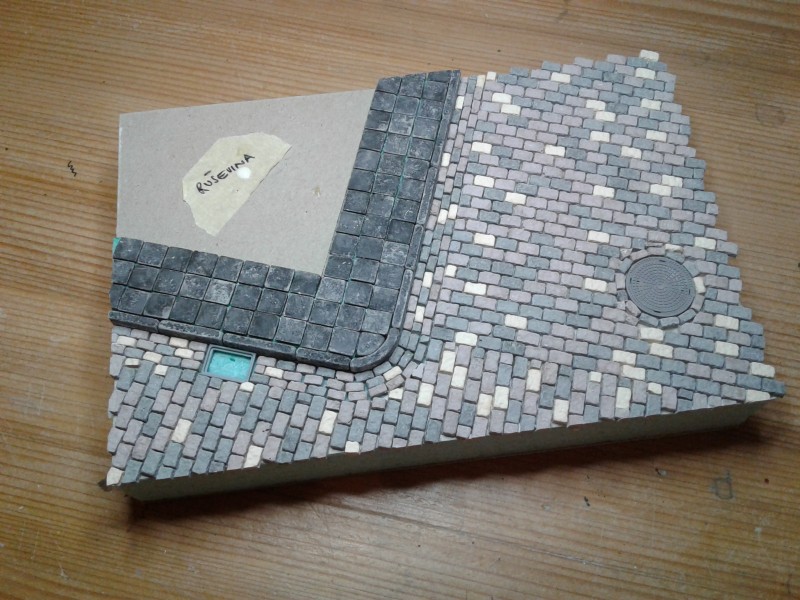
And the other way (THANKS GOD) is done to...

Hope you like it...
New Jersey, United States
Joined: January 05, 2005
KitMaker: 2,185 posts
Armorama: 1,813 posts
Posted: Friday, May 04, 2018 - 07:31 PM UTC
Nice work man , very clean build in a destruction kind of way .
Iowa, United States
Joined: May 12, 2014
KitMaker: 542 posts
Armorama: 539 posts
Posted: Friday, May 04, 2018 - 08:21 PM UTC
amazing work!! lots to learn; might have to try some of these techniques
Slovenia
Joined: January 13, 2017
KitMaker: 69 posts
Armorama: 66 posts
Posted: Sunday, May 13, 2018 - 01:57 PM UTC
Slovenia
Joined: January 13, 2017
KitMaker: 69 posts
Armorama: 66 posts
Posted: Sunday, May 13, 2018 - 02:08 PM UTC
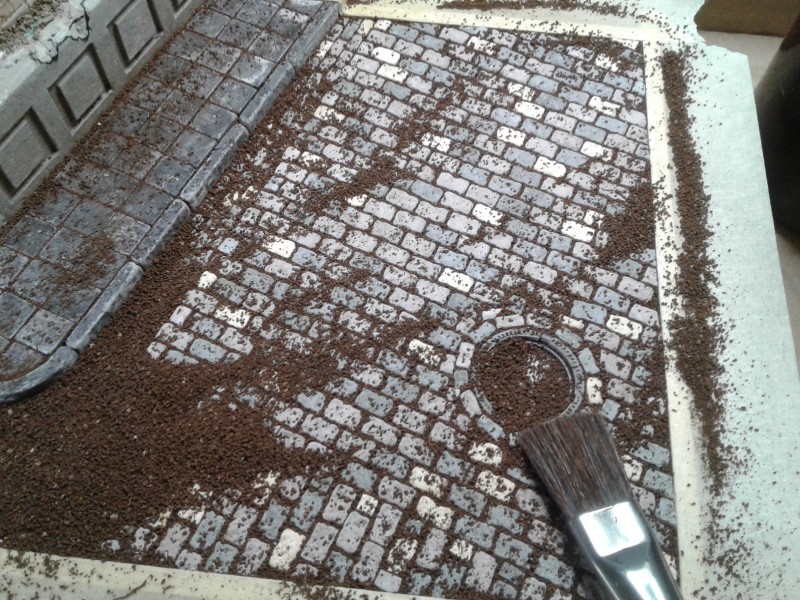
With a soft brush we sweep the dirt into the gaps...
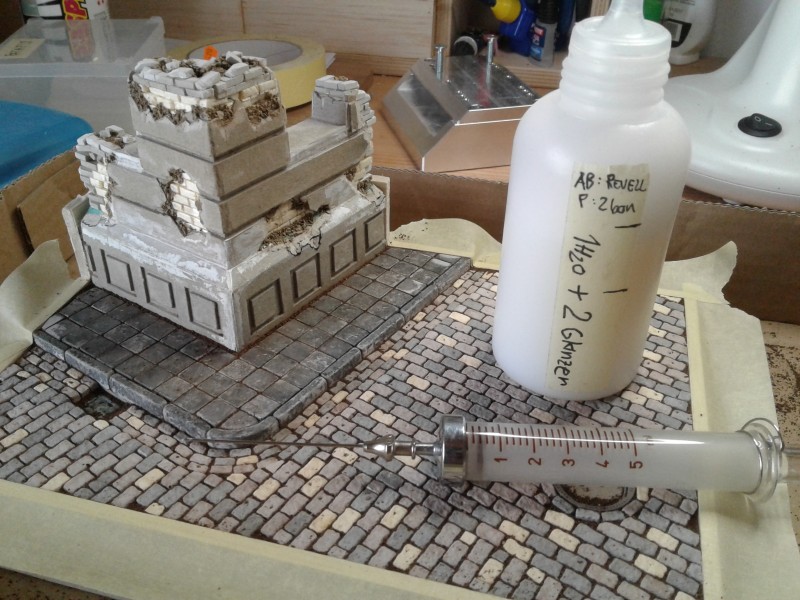

I tried to fix the dirt with Glanzer (an equivalent for your future floor polish) but it didnt work well... so I added a little white glue to the mix... It worked perfectly...
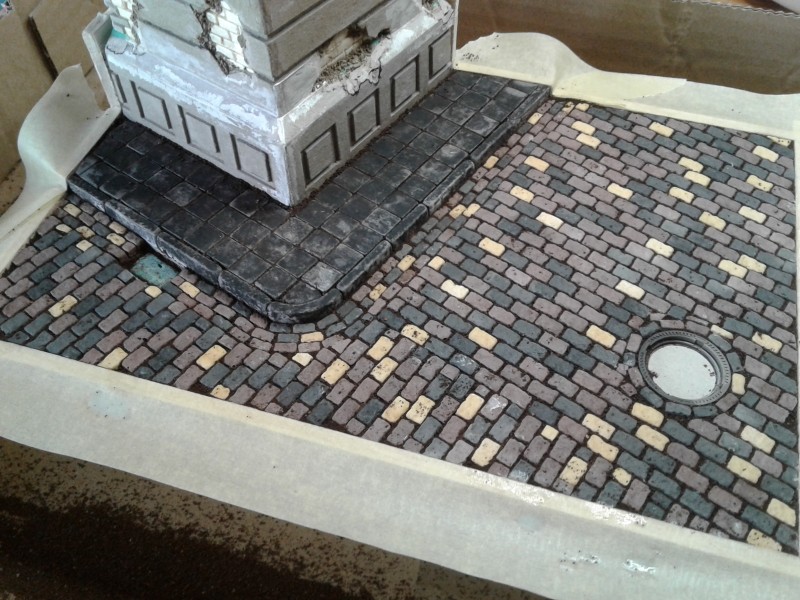
This mix also toned down the cobblestone alittle, and covered the plaster with protective film, so i can apply wash with oils now...
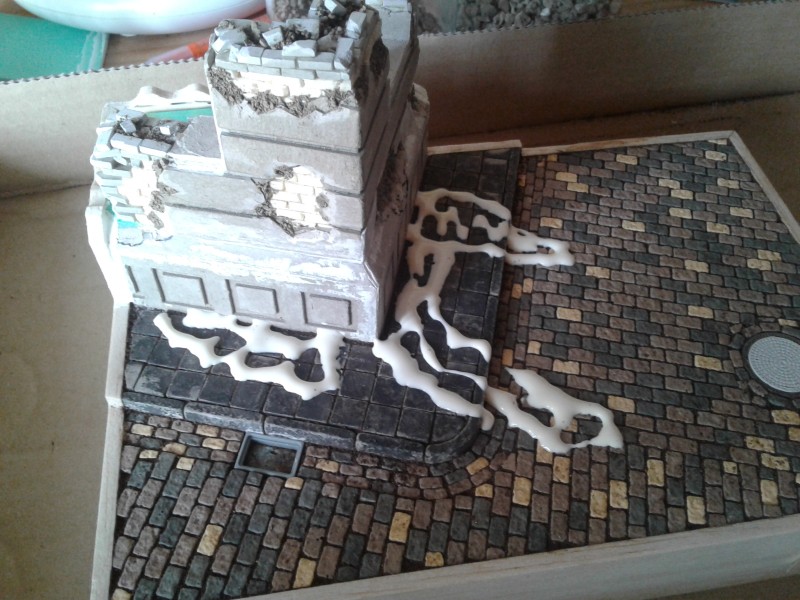
It is time to add some rubble... This is my recipie:
First i add unthined white glue
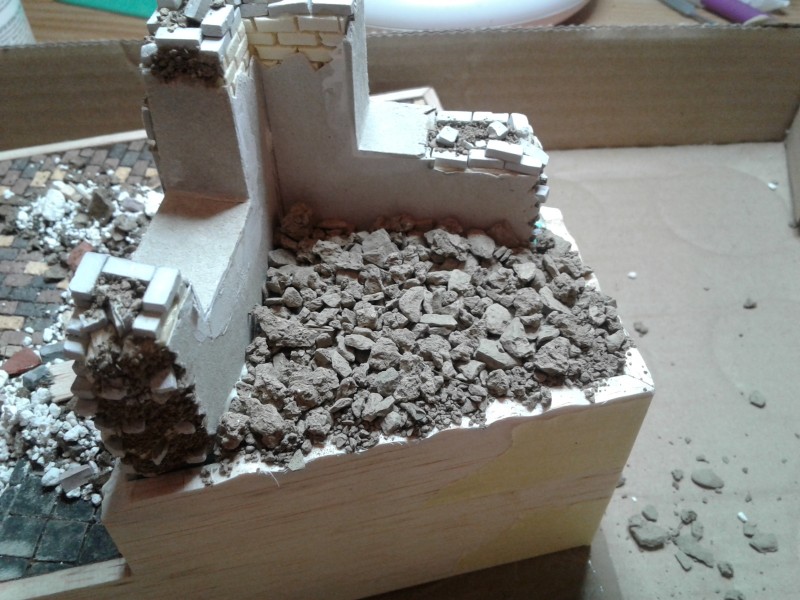
Than i add big dirt pieces and emidiatly throw away the excess of dirt...
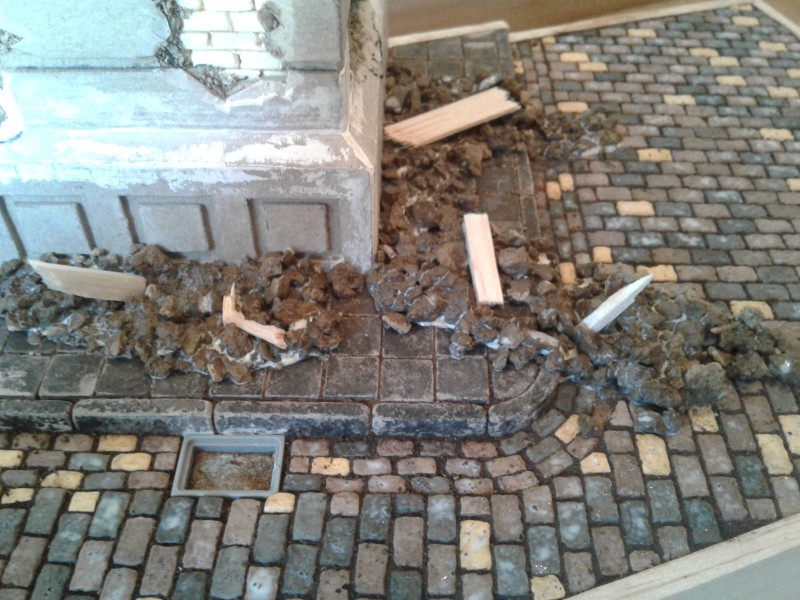
I add more untined glue (smaller surface than the first step) and again big dirt pieces... I repeat this step several times to form a pile... I also add some balsa pieces ti simulate pieces of wood... I fix evrything with diluited white glue... (2part water 1 part glue). Brush full of this stuff, tuch the pile and the capilary effect will do the rest...
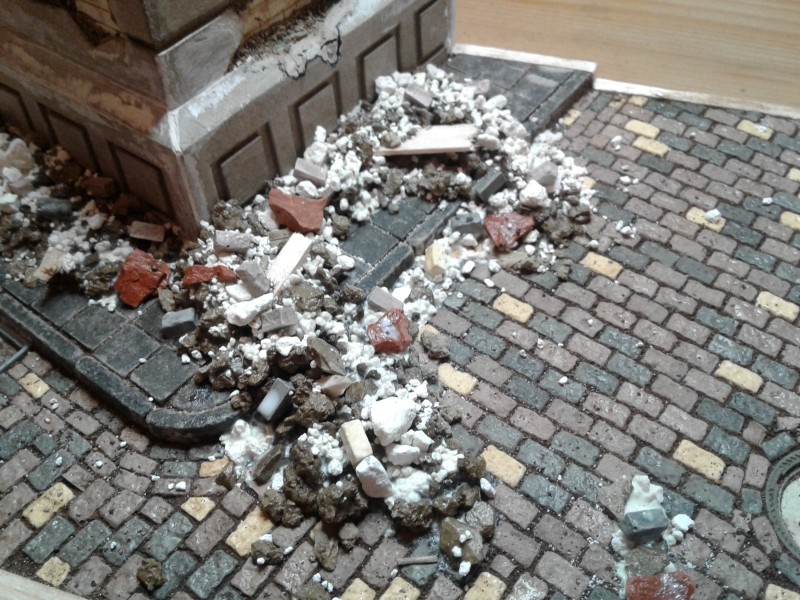
When its still wet we add some white glue and we add small rocks (cat toilet) and small brick debries... alsso some casted bricks an cobblestone...
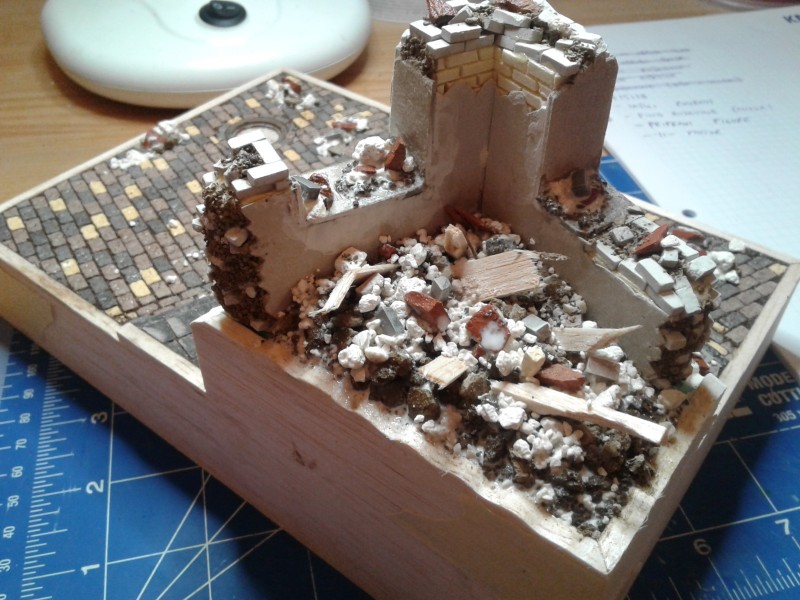
Stay tuned...
Klaus-Adler
 Campaigns Administrator
Scotland, United Kingdom
Joined: June 08, 2015
KitMaker: 1,505 posts
Armorama: 840 posts
Posted: Sunday, May 13, 2018 - 02:37 PM UTC
This looks amazing, you're doing a great job and I look forward to seeing more soon
Slovenia
Joined: January 13, 2017
KitMaker: 69 posts
Armorama: 66 posts
Posted: Sunday, May 13, 2018 - 08:22 PM UTC
Thanks mate... I hope to continue the work soon...
Slovenia
Joined: January 13, 2017
KitMaker: 69 posts
Armorama: 66 posts
Posted: Wednesday, July 11, 2018 - 11:37 PM UTC
Halo to evrybody…
Some updates...
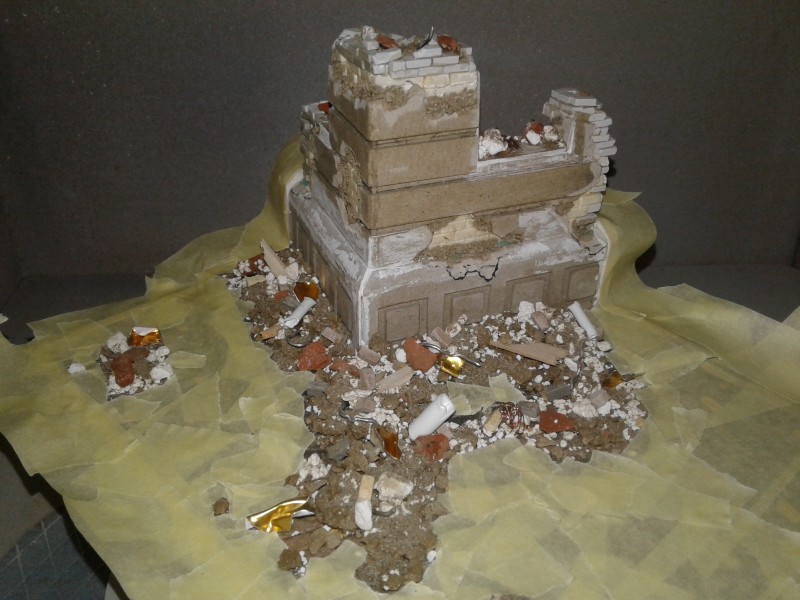
The ruins are done... I added some pieces of pipes, some copper wire and some pieces of twisted brass sheets...
I masked the cobblestone with masking paper...
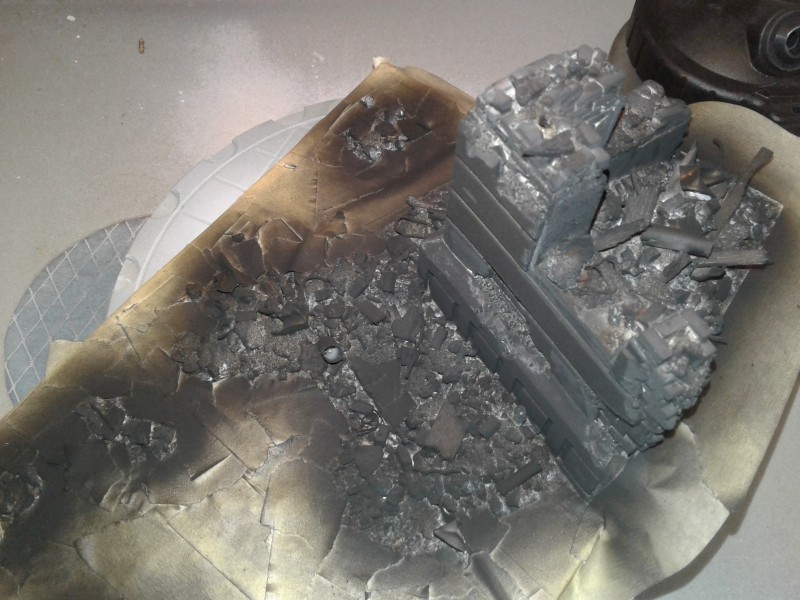
I sprayed the ruins and building in black… I added some diluited paint to go int the cravicies… than i sprayed 3 gray shades to bring things to life...
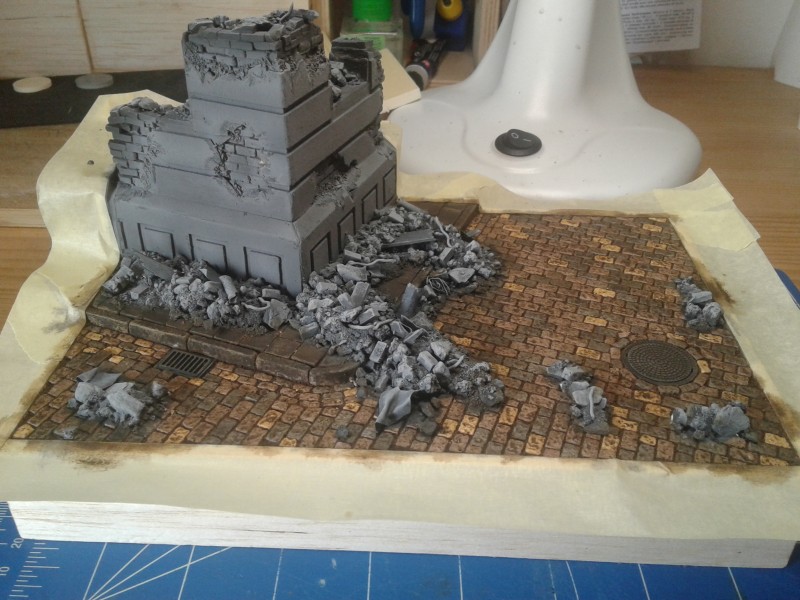
I peeled the masking paper of and masked only the border… Then i continued drybrushing light gray shades on the top... I Row umber oil wash was applied to cobblesotone and to the begining of the ruins to blend them together...
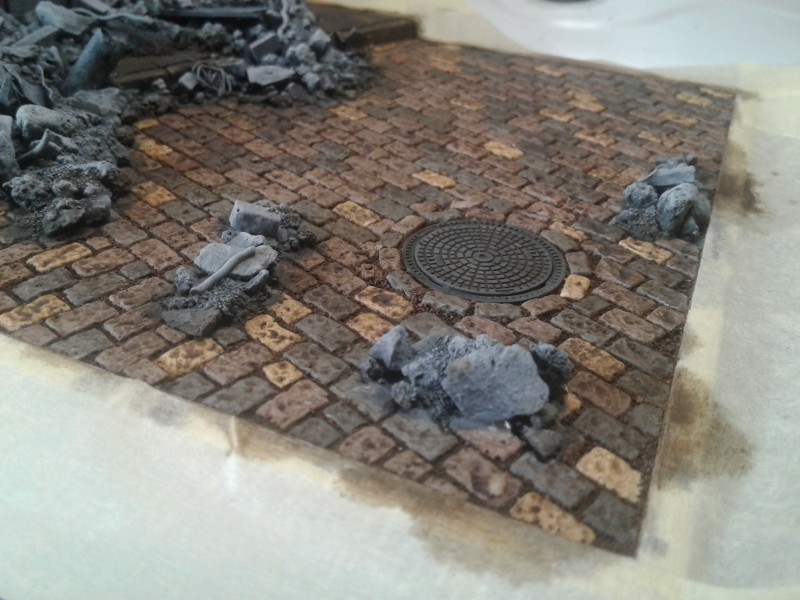
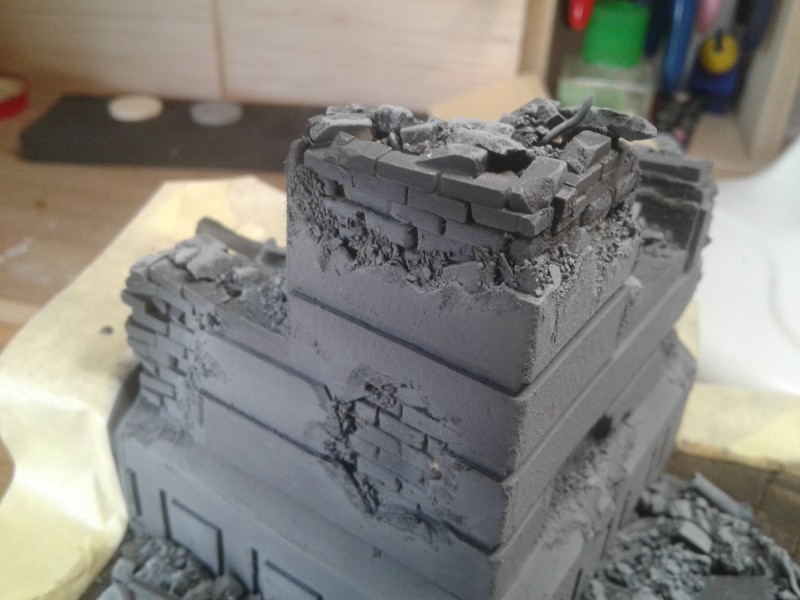
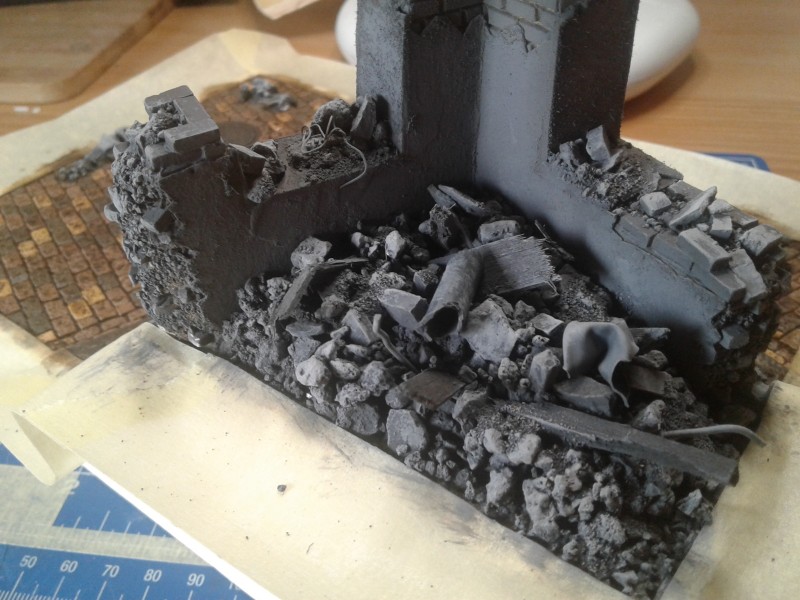
The results ar on top 3 pictures...
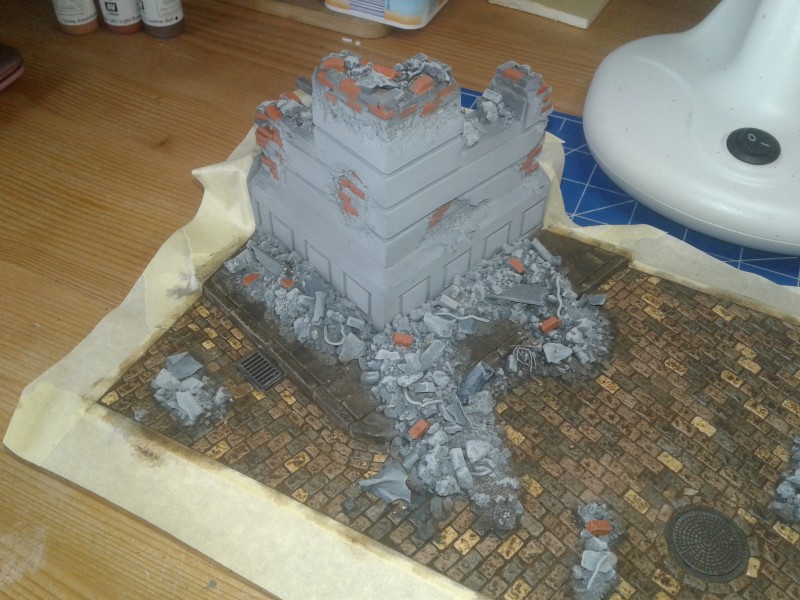
I started painting details with acrylics… the paint is diluited so the base show tru (a little)
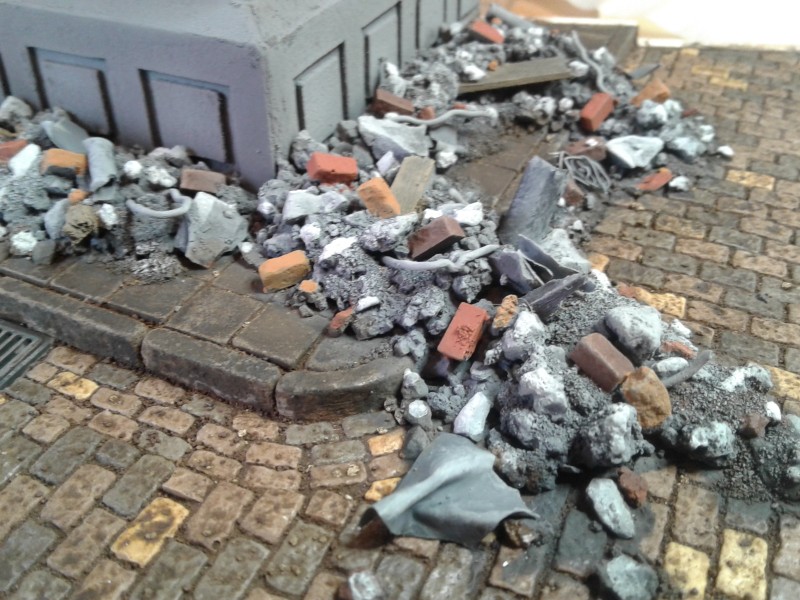
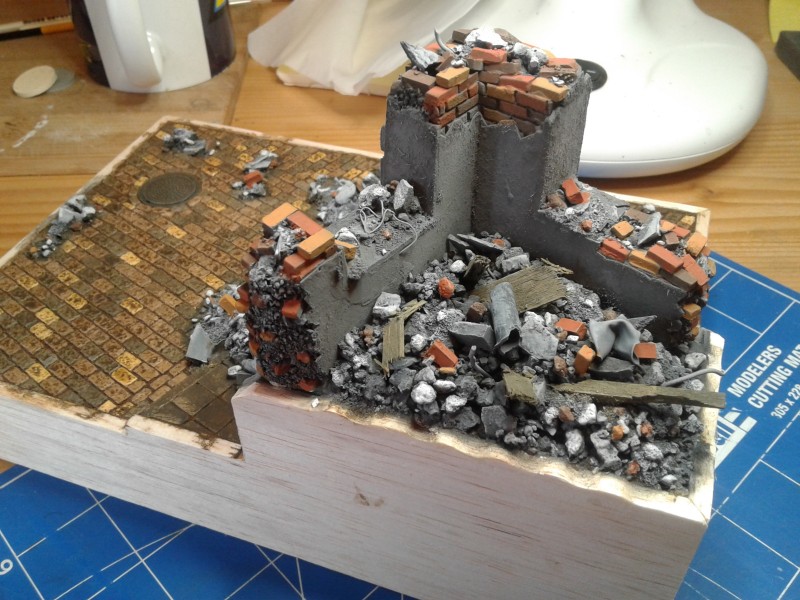
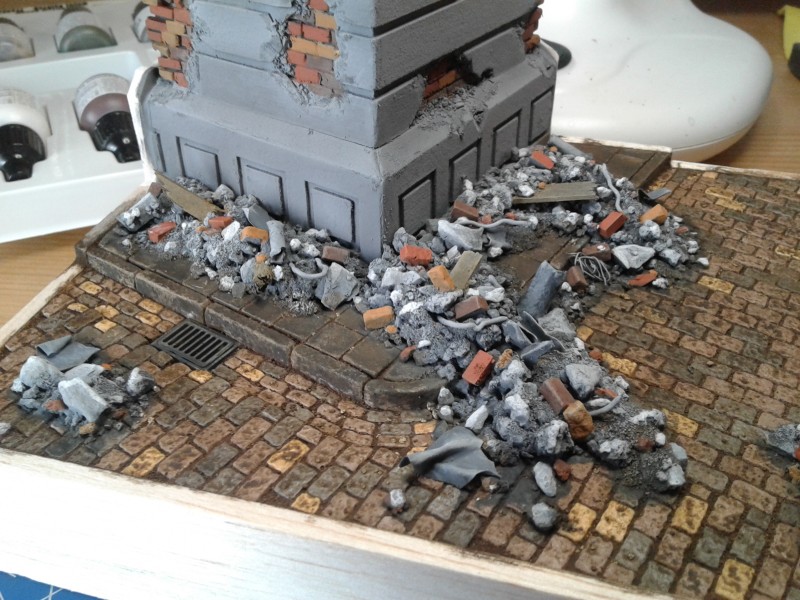
Results on top 3 pictures
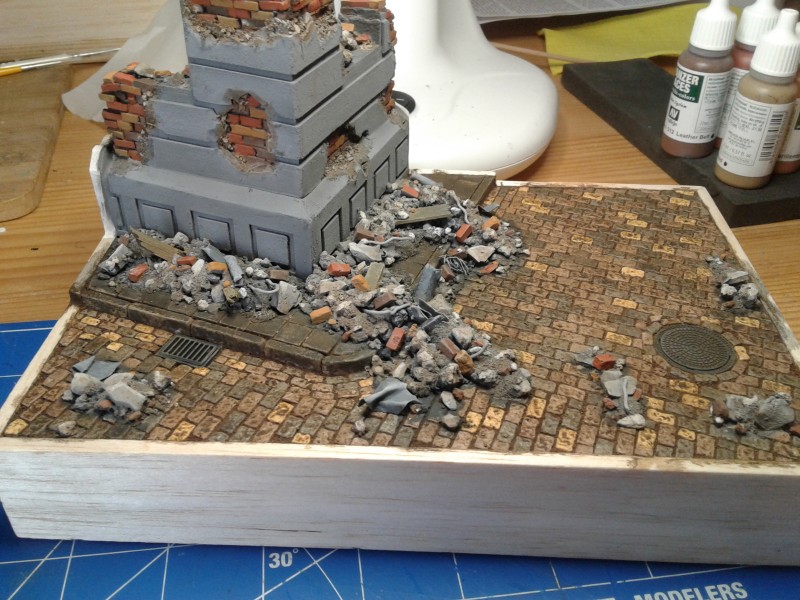
If you look carfully, the building have the same color of the ruins, and i didnt want that, so i aplied a light broun acrilic filter on the ruins. The result (so far) is this:
South Africa
Joined: July 22, 2015
KitMaker: 72 posts
Armorama: 67 posts
Posted: Thursday, July 12, 2018 - 12:57 AM UTC
Hi there Bostjan
This is some amazing work - keep it coming.
United States
Joined: May 12, 2010
KitMaker: 139 posts
Armorama: 135 posts
Posted: Thursday, July 12, 2018 - 01:03 AM UTC
This is turning out very well. Thank you for the step by step- very informative.
vr,
Tim
On The Bench: Poland 1939 Diorama
Scotland, United Kingdom
Joined: September 11, 2005
KitMaker: 109 posts
Armorama: 98 posts
Posted: Saturday, July 14, 2018 - 11:20 AM UTC
Hello Bostjan,
This is a great tutorial and looks fantastic. May I ask where did you get the vibrating table ?
Paul
RobinNilsson
 TOS Moderator
Stockholm, Sweden
Joined: November 29, 2006
KitMaker: 6,693 posts
Armorama: 5,562 posts
Posted: Saturday, July 14, 2018 - 07:42 PM UTC
An alternative answer:
http://www.hirstarts.com/casting/advanced.html Maybe a justifiable reason to buy a vibrator ......
/ Robin
In memory of Al Superczynski:
"Build what YOU want, the way YOU want to....
and the critics will flame you every time"
Slovenia
Joined: January 13, 2017
KitMaker: 69 posts
Armorama: 66 posts
Posted: Saturday, July 14, 2018 - 08:28 PM UTC
Paul... i buildit my self. If you want i can give you the plans... cost: 15dollars if you have a friend with a cnc shop...
Robin... some greate tips on that link... i followed pritty mutch all of theme...
Slovenia
Joined: January 13, 2017
KitMaker: 69 posts
Armorama: 66 posts
Posted: Sunday, July 15, 2018 - 07:52 PM UTC
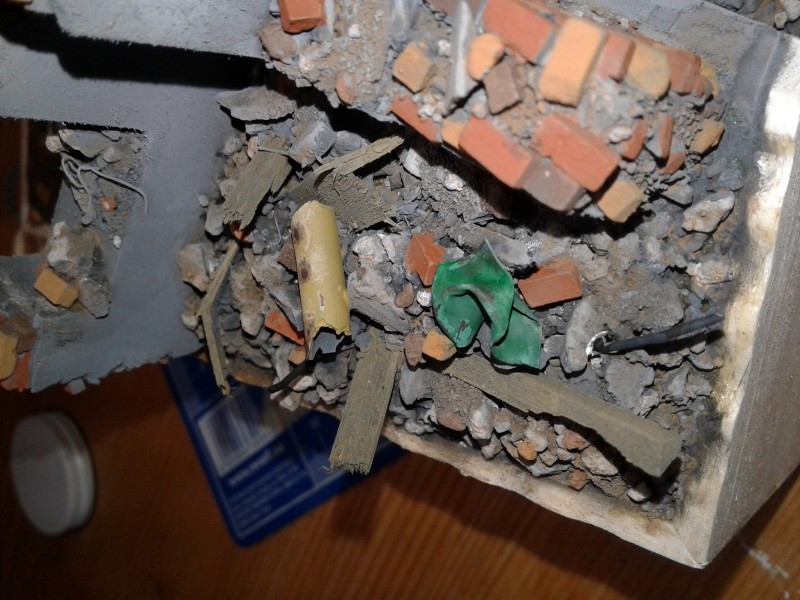
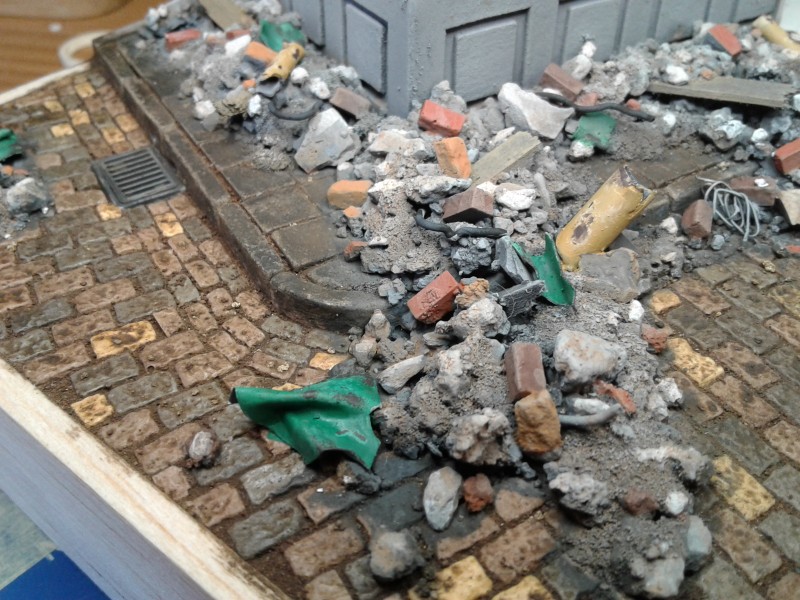
I painted the metal parts and done my first ever rust efect… for the first time i am Quite happy...

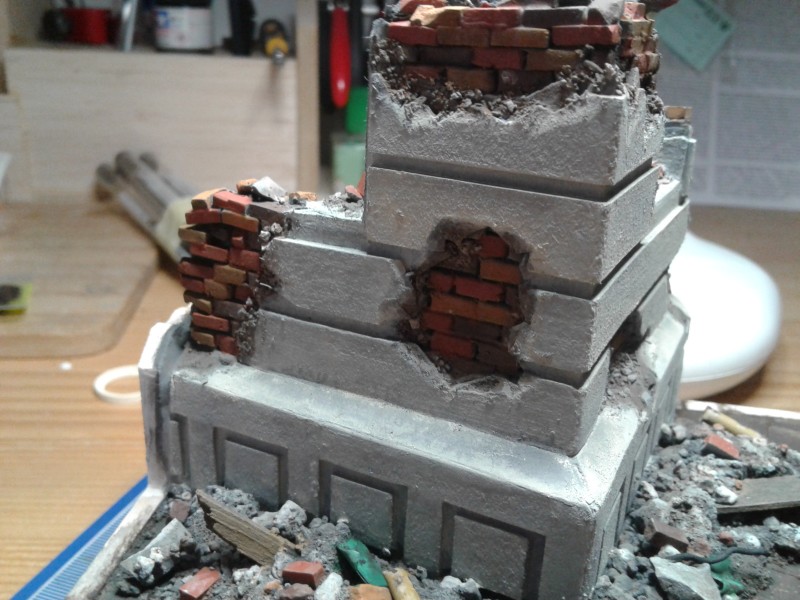
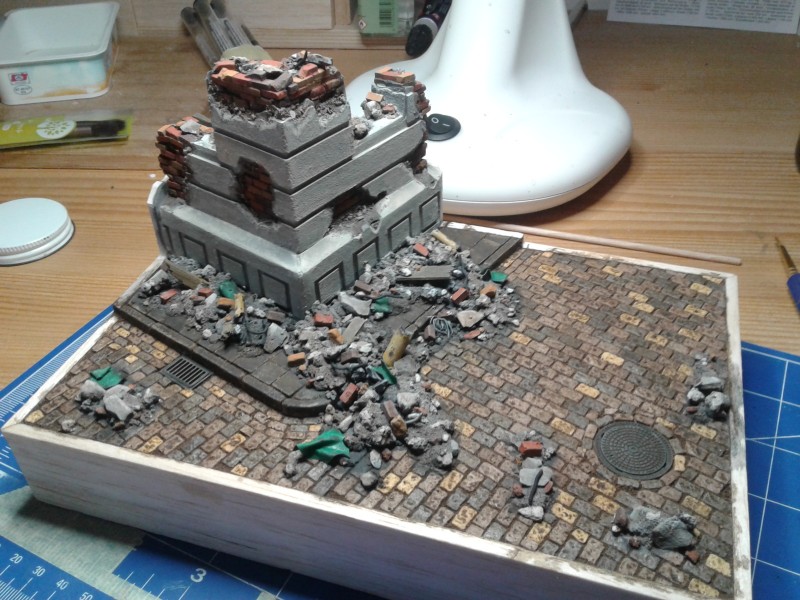
I added a lot of very diluited pale sand shades on the building, but i am non Quite sottisvied with the result… I dont know where to find references for the color and how to aproach painting of big surfaces…
All advices more then welcome…
At this time the facade of the building shines to mutch, and i Will tone it down with oil colors, oil colors Will also produce shadows in the gaps between concrete platres, but this is still not it...
If you have a tutorila of painting big building surfaces lease let me know...
Stay tuned…
Bostjan
RobinNilsson
 TOS Moderator
Stockholm, Sweden
Joined: November 29, 2006
KitMaker: 6,693 posts
Armorama: 5,562 posts
Posted: Sunday, July 15, 2018 - 09:25 PM UTC
I don't have any tips about painting/weathering buildings but a general advice is to go out and check the real thing.
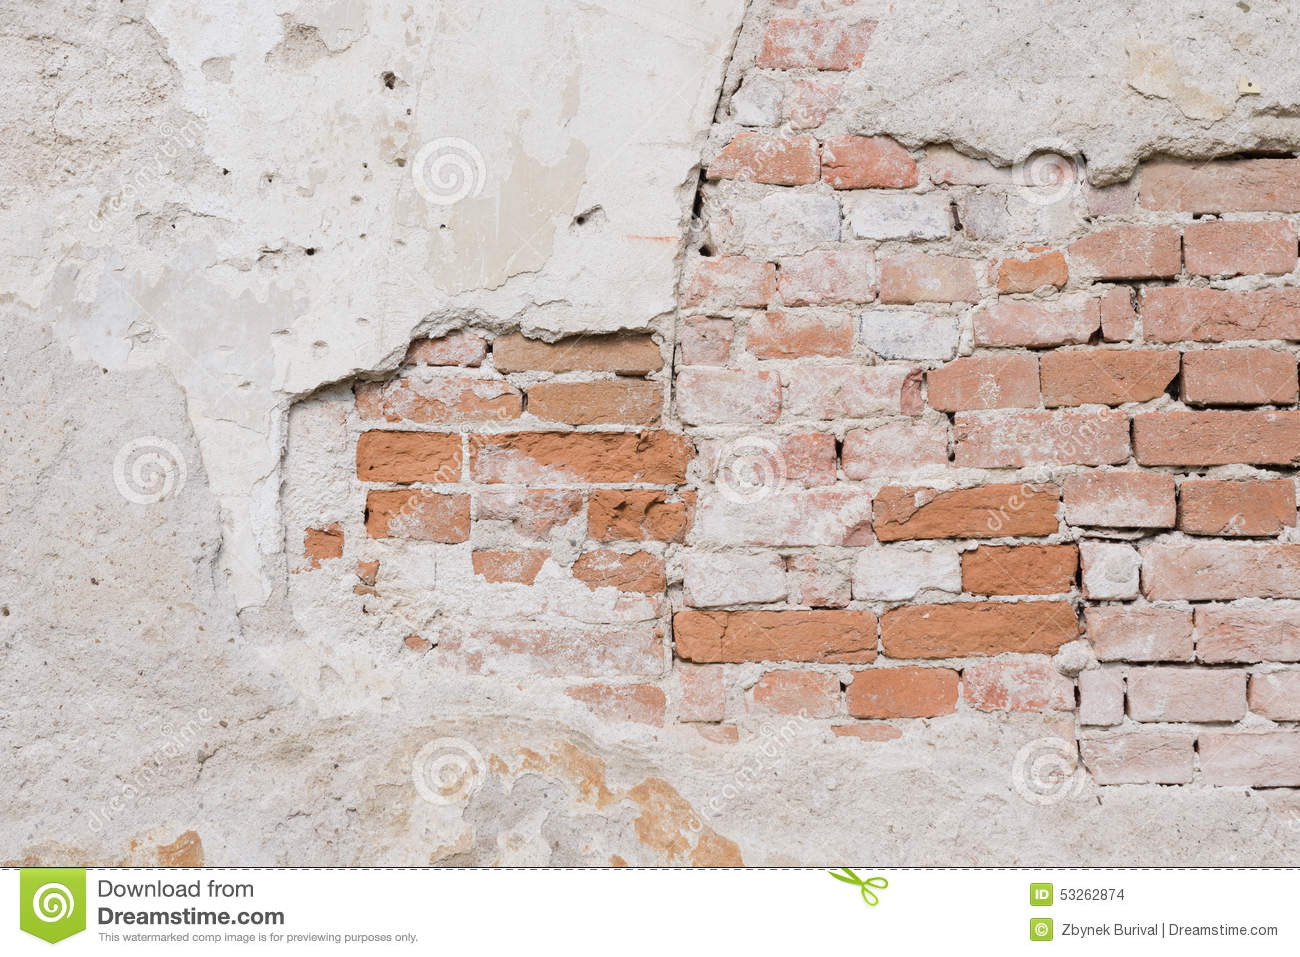
It looks as if the joints between the bricks are not flush with the front of the bricks. If the wall has been covered with plaster/grout then the joints would be flush. There could/should also be some of the plaster/grout left on some places of the bricks.
The plaster/grout is more or less the same material as in the joints between the bricks and if the bricks are "clean" it means that the plaster/grout has never had a "grip" on the bricks (the builder did a bad job).
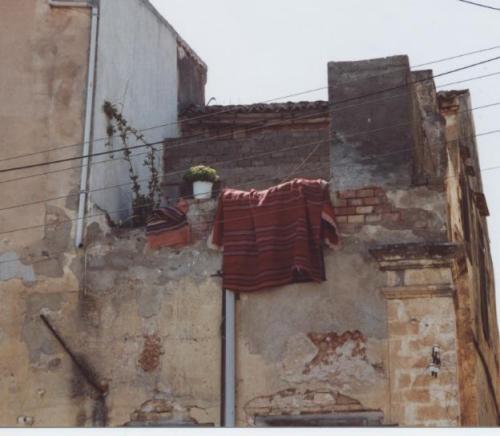
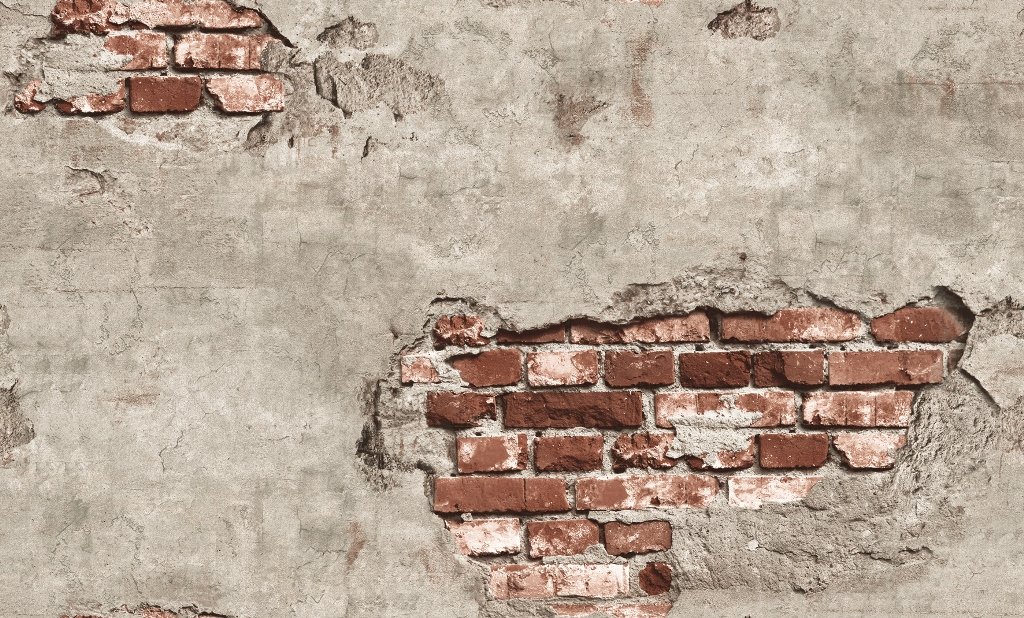
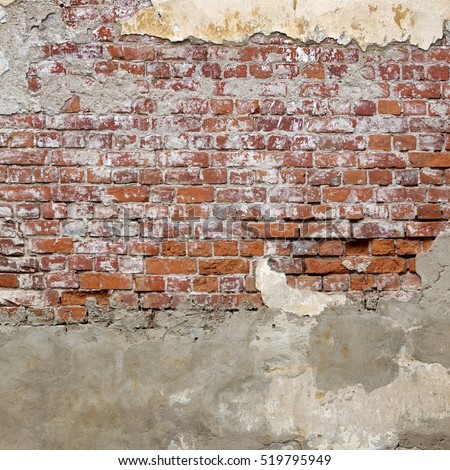


If the damages to the plaster has been caused by impacts, physical violence, then maybe the bricks inside the damaged plaster should also be damaged?
About the bricks: When using bricks to build a wall it is very important to get some bonds/strength through the wall, at a 90 degree angle to the face of the wall.
If you look at this image you see that some bricks show their ends and not their sides:
Some diagrams over different bond types:
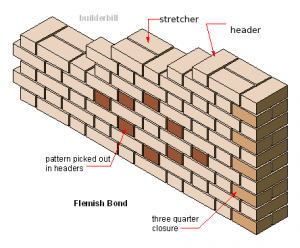
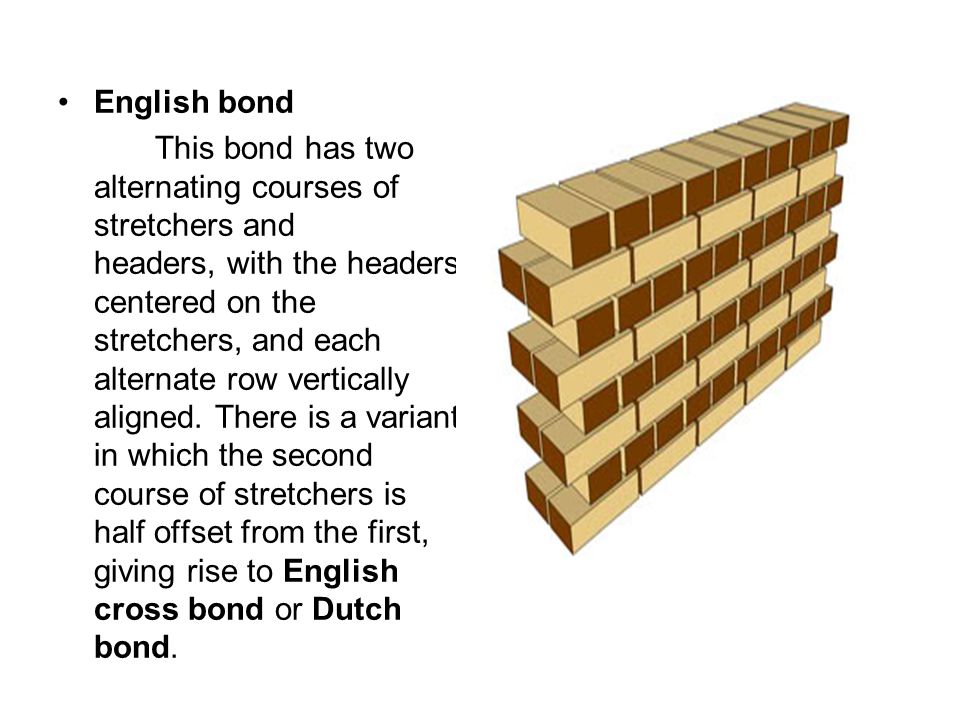 https://theconstructor.org/building/types-bonds-brick-masonry-flemish-english-wall/11616/
 / Robin
In memory of Al Superczynski:
"Build what YOU want, the way YOU want to....
and the critics will flame you every time"


 The gutter frame didnt make it out of the mold, but the coversa are superbe... not bad for first time and for plaster...


