_GOTOBOTTOM
Armor/AFV: Softskins
Softskins group discussions.
Hosted by Darren Baker
SEAL FAV scratchbuild
Stickframe
#362
Visit this Community
California, United States
Joined: December 01, 2013
KitMaker: 1,661 posts
Armorama: 1,202 posts
Posted: Tuesday, May 01, 2018 - 12:33 AM UTC
Hello model builders - -

I've been up to scratch building recently, specifically off-road vehicles in 1/25 scale. Over the last few years, Heavy Arty and Trisaw have commented on a few of my projects to check the FAV out. It's an interesting high speed, light weight vehicle based on off-road racing technology:


I'm sure many of you have seen the image above. As an off-road racing enthusiast, I've long been interested in this vehicle. As I did some research I found that vehicle users noted these were under powered which limited their value. They were equipped with an air cooled VW engine - which is fine for off road racing purposes which include one or two drivers, and little else in terms of storage, but not great when you add a passenger, weapons, and gear.

Nonetheless, I was going to build this with a VW engine. I didn't though, as the 1/25 versions of VW engines I found simply looked anemic - and I couldn't figure out how to faithfully build one up to reflect at least some power modifications.

So, instead, I looked into the SCORE International rule book for specs on variations of the buggy class and discovered Class 10 which allows the use of among other things, higher powered engines - like the GM EcoTec, and Ford 2.4l engine (used in some Ford Rangers). While I couldn't find either of those, I did find a Nissan engine that includes a trans axle - which is perfect for a rear engine, rear wheel drive unit - as an example, see below:


and while I was at making changes - new rear suspension, as below:
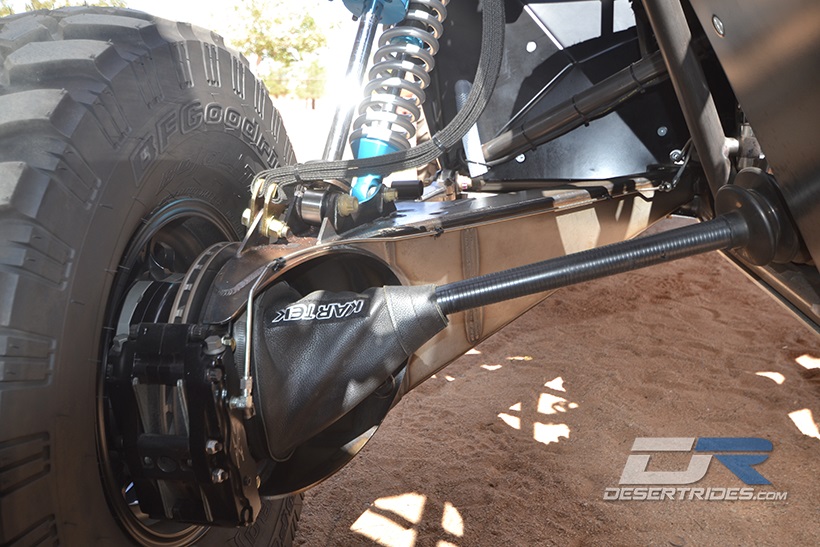


and modified front suspension, as below:


Below, you'll see first WIP, then built:


As you can see above, the fit is tight, but believable - and not that far removed from the original - and below, a bit more done:


and with some paint:


And there you have it - a fun build -

thanks for checking it out!

Cheers
Nick


retiredyank
Visit this Community
Arkansas, United States
Joined: June 29, 2009
KitMaker: 11,610 posts
Armorama: 7,843 posts
Posted: Tuesday, May 01, 2018 - 01:29 AM UTC
This is astounding work! Now, if some manufacturer would produce it, in plastic.
WarWheels
Visit this Community
Illinois, United States
Joined: March 24, 2006
KitMaker: 1,816 posts
Armorama: 1,402 posts
Posted: Tuesday, May 01, 2018 - 01:55 AM UTC
Awesome model Nick! Great job. Thanks for sharing with us.
white4doc
#429
Visit this Community
Massachusetts, United States
Joined: October 14, 2003
KitMaker: 1,086 posts
Armorama: 964 posts
Posted: Tuesday, May 01, 2018 - 02:53 AM UTC
Okay, that's it. I quit. First Joaquin is knocking 'em dead with his dio, now Nick hits the board with this. I'm putting the stash out on the curb and becoming a hermit...LOL. Man, Nick that is some beautiful work. How many hours do your have invested in this project? Tell me you're gonna add the dart board in the stowage rack like in the ODS pictures, you got to (well you don't, but it would look way cool) Duplicata has one in one of their US Vietnam sets.
HeavyArty
Visit this Community
Florida, United States
Joined: May 16, 2002
KitMaker: 17,694 posts
Armorama: 13,742 posts
Posted: Tuesday, May 01, 2018 - 05:15 AM UTC
Very nice. Great job on it.
KoSprueOne
Visit this Community
Myanmar
Joined: March 05, 2004
KitMaker: 4,011 posts
Armorama: 1,498 posts
Posted: Tuesday, May 01, 2018 - 08:03 AM UTC
Impressive SB.


cheyenne
Visit this Community
New Jersey, United States
Joined: January 05, 2005
KitMaker: 2,185 posts
Armorama: 1,813 posts
Posted: Tuesday, May 01, 2018 - 02:22 PM UTC
Outstanding work Nick , beautiful !!!
Bricksy1969
Visit this Community
England - North West, United Kingdom
Joined: September 19, 2006
KitMaker: 262 posts
Armorama: 251 posts
Posted: Tuesday, May 01, 2018 - 04:42 PM UTC
Brilliant stuff!!!!
WXerock
#450
Visit this Community
California, United States
Joined: July 19, 2015
KitMaker: 672 posts
Armorama: 668 posts
Posted: Tuesday, May 01, 2018 - 05:14 PM UTC
Nick, you call it a fun build, I call it a work of art! How long did this fun build take?

Regards,

Eric
Stickframe
#362
Visit this Community
California, United States
Joined: December 01, 2013
KitMaker: 1,661 posts
Armorama: 1,202 posts
Posted: Tuesday, May 01, 2018 - 10:11 PM UTC
Hi gents -

Thanks for taking the time to drop by!

Hi RetiredYank - thanks! As for the kit, I think we've all seen rumors of this coming out in plastic - I understand there's a resin version already available - maybe a great kit? I don't know. This has long been on my "to attempt" list! Finally just did it!

Hi WarWheels, thanks, and glad to hear you like it!

Hi John - ha!! You can't quit now! Lol - we're doing this for fun - not work! I appreciate the good words! This took about a month - it's a fairly small model - the good news is it's small - the less good is that means some tight fits. I built it like you might make a real car - chassis, install engine and transmission, fab up rear then front suspension - then all the rest. Just like any other kit, keeping all four wheels on the ground is the hardest part!

Hi Gino, thanks - I think you pointed this vehicle out to me a few years ago - it caught my eye as an interesting project - thanks

KoSprueOne - thanks - I was in the mood for a complete SB - this was/is a good candidate!

Hi Cheyenne - thanks! No scenes of rubble and landscape with this - just a good and complicated build! Lol

Hi Bricksy - thanks!

Hi Eric - I've seen you build some pretty complex projects - and nail them! Maybe fun isn't the exact word for a build like this, but I do like the challenge. As for time - this took about a month - doing some research, finding a few parts, and then getting into it. The first step of laying out the chassis - is tedious - if it isn't square, it can be really hard to fix once you're into the build - and not having any plans doesn't help! - I've learned this the hard way! A bit out of square or proportion here or there and ugh! What a mess - and the pics don't lie! Thanks for the positive words, I appreciate them!

Cheers
Nick
bat-213
Visit this Community
Canada
Joined: December 30, 2011
KitMaker: 902 posts
Armorama: 788 posts
Posted: Thursday, May 03, 2018 - 07:21 AM UTC
great build .
gaborka
Visit this Community
Borsod-Abauj-Zemblen, Hungary
Joined: October 09, 2005
KitMaker: 626 posts
Armorama: 250 posts
Posted: Thursday, May 03, 2018 - 02:07 PM UTC
Hello Nick,
may I ask how you bend plastic rod this neatly?

Stickframe
#362
Visit this Community
California, United States
Joined: December 01, 2013
KitMaker: 1,661 posts
Armorama: 1,202 posts
Posted: Thursday, May 03, 2018 - 09:55 PM UTC
Hi guys - thanks for having a look

Thanks, Roy!

Hi Gabor -

It takes a bit of practice to get the plastic rod to bend correctly - if you're not careful it will snap. First, if you're going to bend it, do so over a curved surface - not a hard edge or flat plane like a ruler - It can snap.

For sweeping or larger radius curves I bend the plastic over a knife holder or pin vice shaft - gradually going from a very broad curve to the curve I want.

For sharper, smaller radius, I first mark the beginning and end of the desired curve on the rod - say about 1/4 inch or about 1cm in length. Next, I begin curving the rod in increments over a rat tail file or other strong, small diameter rod. As before, gradually working the general curve into whatever radius you want. Unlike the larger curve radius, at some point you need to "comit" to bending the rod into the sharper curve.

Once you've tried a few times, I'll bet you'll understand - there's just the right touch between bending and snapping.

Finally for really sharp curves, you can work the plastic rod with needle nose pliers - this is a bit harder to do as you don't to deform the rod or leave tool marks - or, snap the material. Just take your time and you'll be fine.

Thanks for leaving your question!


Cheers
Nick
gaborka
Visit this Community
Borsod-Abauj-Zemblen, Hungary
Joined: October 09, 2005
KitMaker: 626 posts
Armorama: 250 posts
Posted: Sunday, May 06, 2018 - 04:11 PM UTC
Thank you for your detailed explanation. I would have sworn the process involves some heat treatment like a hairdryer or so, therefore I am a bit suprised too.

jrutman
Visit this Community
Pennsylvania, United States
Joined: April 10, 2011
KitMaker: 7,941 posts
Armorama: 7,934 posts
Posted: Sunday, May 06, 2018 - 06:40 PM UTC
Holy crap man that is IMPRESSIVE !!
J
ReconTL3-1
Visit this Community
Texas, United States
Joined: June 07, 2006
KitMaker: 726 posts
Armorama: 687 posts
Posted: Monday, May 07, 2018 - 02:16 AM UTC
That looks so awesome, Nick!

Outstanding scratch-building work for sure. Way beyond my current skill level. Heck, I have problems keeping the small parts from the AFV Club M113 that I am working on from shooting through the air and then when I find them getting them in the right place. I couldn't imagine the amount of time and effort that goes into something like this.

I think I will stick mainly with figures.

Again, outstanding work!

Cheers,
James
Stickframe
#362
Visit this Community
California, United States
Joined: December 01, 2013
KitMaker: 1,661 posts
Armorama: 1,202 posts
Posted: Monday, May 07, 2018 - 05:43 AM UTC
Hi guys

thanks for having a look - it was sunny this weekend, so I took some more pictures! plus a bonus shot or two:


OK - on to a few of each:


and...another group of the big Chevy:


OK - hope you like them!

Gabor - - I don't use any heat - just some patience and time!

Hi Jerry - thanks!

Hi James - ha! I'd gladly trade you (and Jerry!) some of my evergreen tricks if I could learn to do figures like you guys do!

Happy model building -

Nick


 _GOTOTOP