Viana do Castelo, Portugal
Joined: January 12, 2012
KitMaker: 216 posts
Armorama: 194 posts
Posted: Monday, July 02, 2018 - 12:45 AM UTC
Hi all Guys,
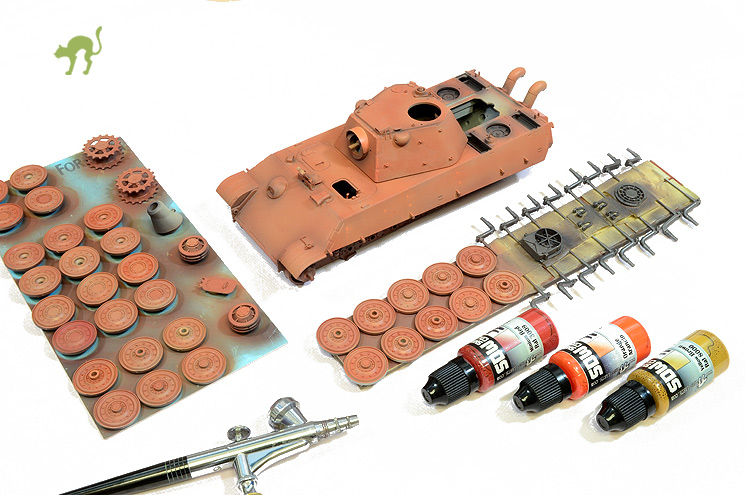
here my latest cat in progress. An old Dragon reference built from the box, so let's go straight to painting.

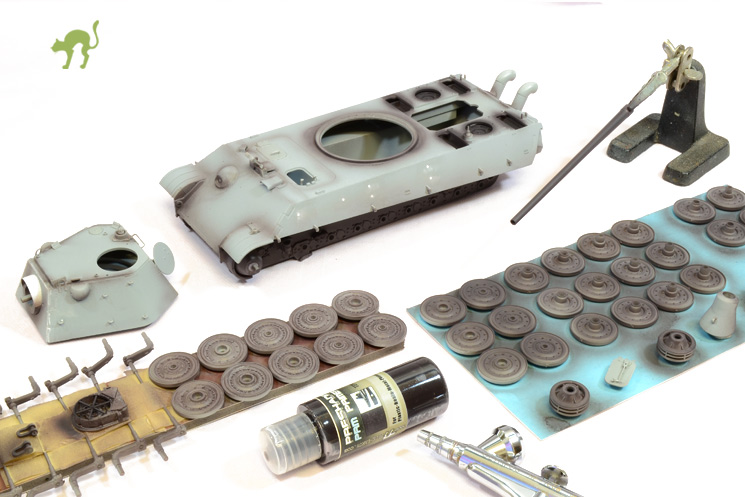
At first, a dark priming to all inner wheels side and hull spots
Giuseppe Vitali
www.TRUE-EARTH.com
Washington, United States
Joined: August 09, 2002
KitMaker: 1,742 posts
Armorama: 1,658 posts
Posted: Monday, July 02, 2018 - 02:01 PM UTC
I am at the paint stage on the same kit. I am looking forward to your painting process.
Msgt Retired USMC
M48/ M60A1/ M1A1
Semper Fi!
Viana do Castelo, Portugal
Joined: January 12, 2012
KitMaker: 216 posts
Armorama: 194 posts
Posted: Tuesday, July 03, 2018 - 01:59 AM UTC
Hi Greg, hope to be helpful

Wheel hidden sides are now painted with a thin layer of minium
Now the whole wheel assembly is turned turtle, and the outer sides are primed with Chromatic Primer, together with hull.
Giuseppe Vitali
www.TRUE-EARTH.com
Viana do Castelo, Portugal
Joined: January 12, 2012
KitMaker: 216 posts
Armorama: 194 posts
Posted: Wednesday, July 04, 2018 - 08:24 PM UTC
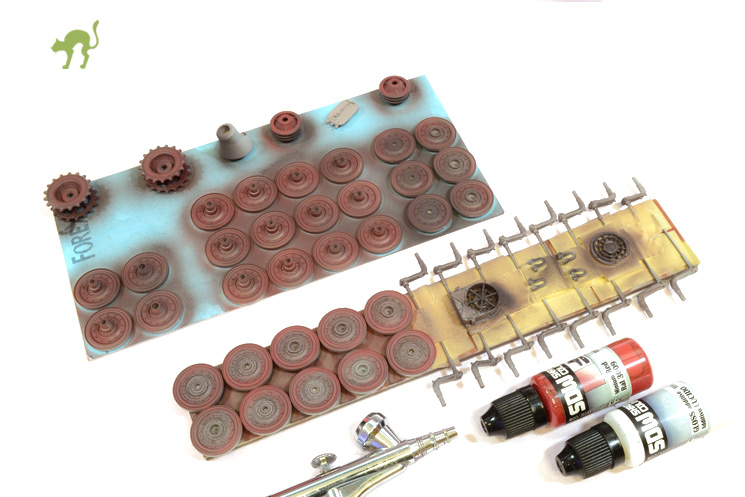
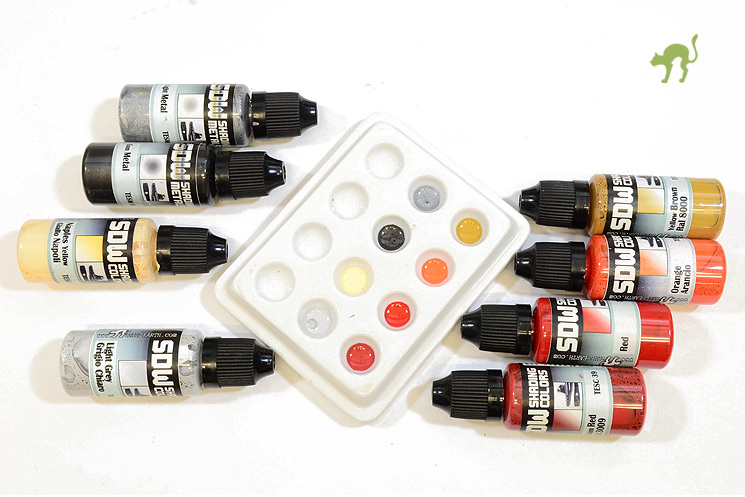
Now a very light coat of some different mixes of minium
And metal on some smaller parts.
This model should represent a what if panther, hurried up to the battlefield directly from the building plant.

Giuseppe Vitali
www.TRUE-EARTH.com
Wien, Austria
Joined: June 28, 2006
KitMaker: 4 posts
Armorama: 4 posts
Posted: Thursday, July 05, 2018 - 01:46 AM UTC
Hi Guiseppe,
I have always admired the very special look of models you achieve with your true earth products. Thanks for sharing! But so far I have only experimented a little with your colours/shadings/etc.
One question: Do you come to the Milano Show by the end of September to make demonstrations? I will come from Vienna for a day to see the Italian scene.
Best regards,
Georg
Viana do Castelo, Portugal
Joined: January 12, 2012
KitMaker: 216 posts
Armorama: 194 posts
Posted: Tuesday, July 10, 2018 - 12:22 AM UTC
Hi Georg,
the company will have a sales stand in Milano at september, but no demos.
Anyway we are empowering the video-tutorial section, and you probably know that many pdf tutorials are available subscribing the TEAM.
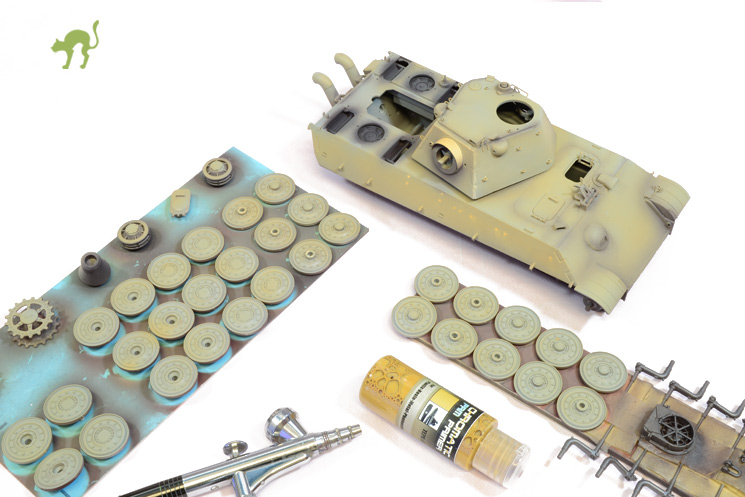
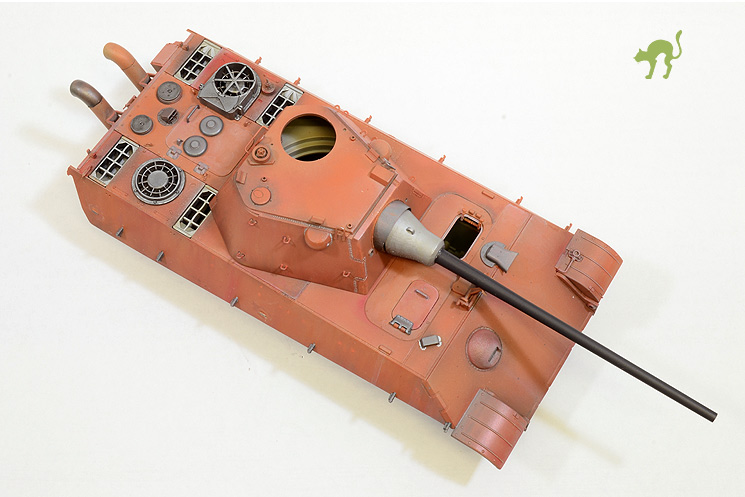
Now it's time to differentiate some areas, applying different methods :
- directly covering the base paint of engine plate, mufflers
with thin coats of altered tones.
- altering some spots thorugh a wet on dry blending of other tones over the base paint
- blending wet on wet different tones
Therefore, the same paint used for painting, takes place of oils into the weathering process.

Giuseppe Vitali
www.TRUE-EARTH.com
Viana do Castelo, Portugal
Joined: January 12, 2012
KitMaker: 216 posts
Armorama: 194 posts
Posted: Wednesday, July 11, 2018 - 12:06 AM UTC
The same paints are used for subtle drybrushing, further altering the whole
Giuseppe Vitali
www.TRUE-EARTH.com
Viana do Castelo, Portugal
Joined: January 12, 2012
KitMaker: 216 posts
Armorama: 194 posts
Posted: Wednesday, July 11, 2018 - 09:53 PM UTC
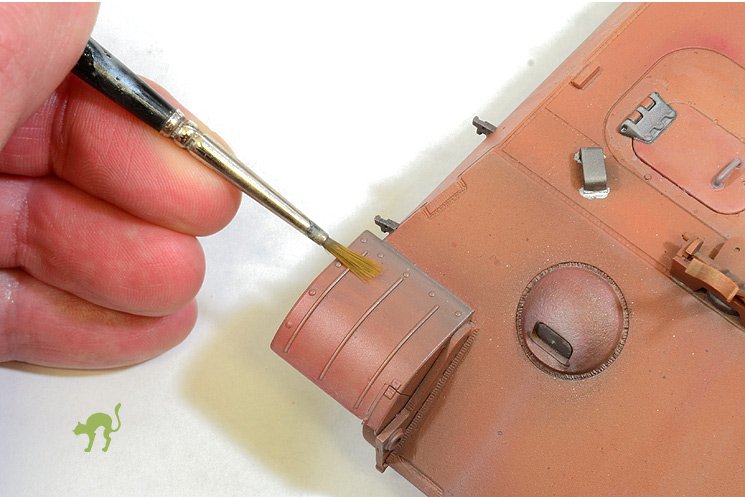
Subtle streaks added on sloped sides. Somewhat like the oil-dot technique, but on smaller areas, because even if these paints dry slower than acrylics, they are faster than oils.

For the blending, I used a water-wet brush, this way the gradations have a sharper streaked effect.

Giuseppe Vitali
www.TRUE-EARTH.com
Viana do Castelo, Portugal
Joined: January 12, 2012
KitMaker: 216 posts
Armorama: 194 posts
Posted: Thursday, July 12, 2018 - 07:26 PM UTC
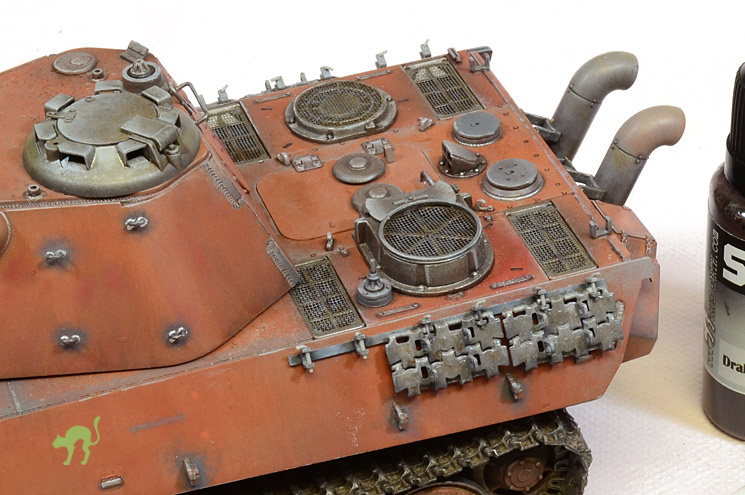
More blending for a graded effect is also added to the large soldered areas of hull and turret.
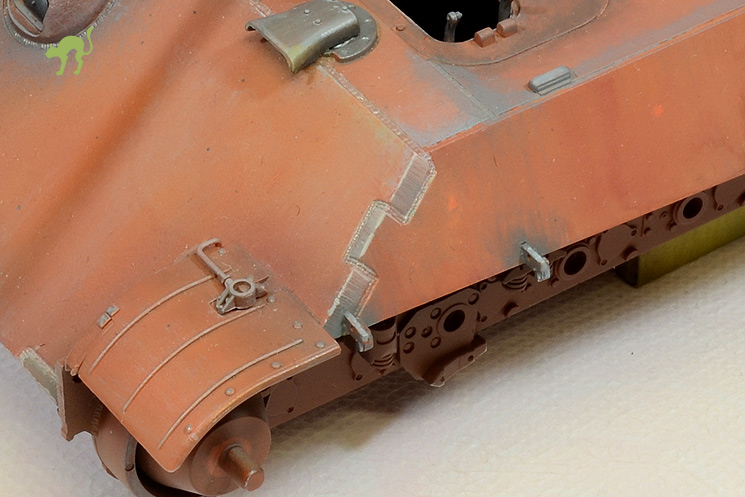
And here we are now
Giuseppe Vitali
www.TRUE-EARTH.com
Queensland, Australia
Joined: September 04, 2015
KitMaker: 1,517 posts
Armorama: 1,109 posts
Posted: Saturday, July 14, 2018 - 11:07 AM UTC
WoW...che lavorone,veramente Bellissimo con la B maiuscola!....I saw that finally we can find your products in various stores around the world, I absolutely want to have a go with your SDW,since they came out i want to try them.
Viana do Castelo, Portugal
Joined: January 12, 2012
KitMaker: 216 posts
Armorama: 194 posts
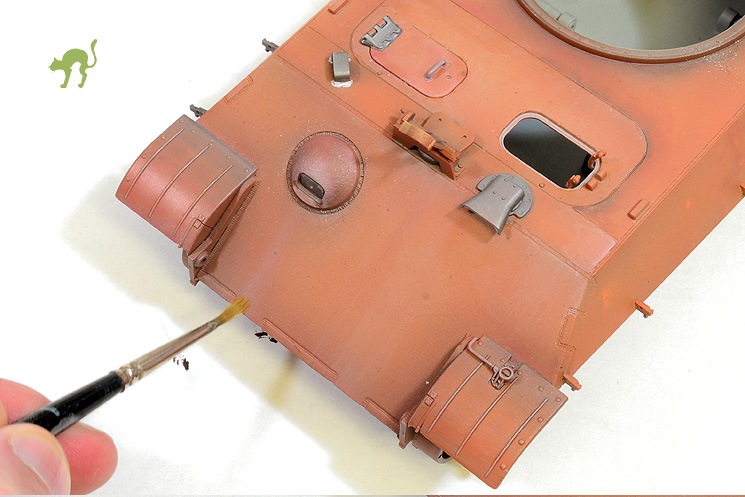
Posted: Thursday, July 19, 2018 - 01:12 AM UTC
Thanks Vicious
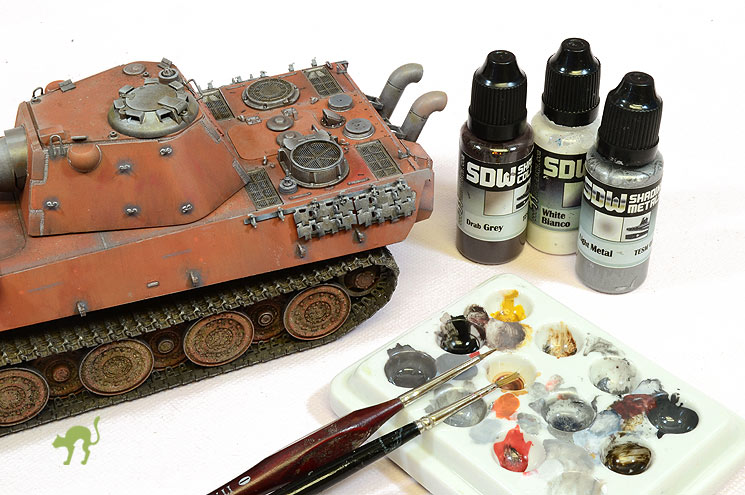
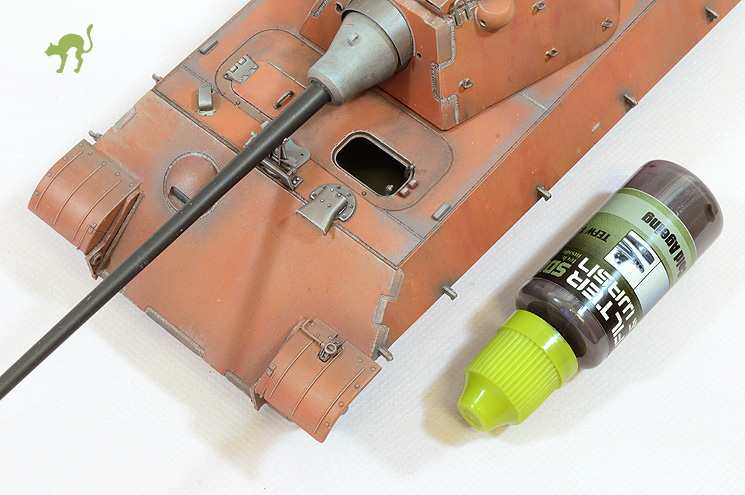
To counterbalance somewhat the overall warm tone of the model, cold pinwashes to enchance details.
Giuseppe Vitali
www.TRUE-EARTH.com
United Kingdom
Joined: May 03, 2017
KitMaker: 148 posts
Armorama: 122 posts
Posted: Thursday, July 19, 2018 - 06:43 AM UTC
WOW! This panther is going to look incredible when it's finished!
Florida, United States
Joined: October 21, 2013
KitMaker: 751 posts
Armorama: 751 posts
Posted: Thursday, July 19, 2018 - 06:51 AM UTC
Your build here is amazing.Love the painting and weathering the way it blends in just right on this Panther.
Viana do Castelo, Portugal
Joined: January 12, 2012
KitMaker: 216 posts
Armorama: 194 posts
Posted: Monday, July 30, 2018 - 08:25 PM UTC
Giuseppe Vitali
www.TRUE-EARTH.com
Arkansas, United States
Joined: June 29, 2009
KitMaker: 11,610 posts
Armorama: 7,843 posts
Posted: Monday, July 30, 2018 - 08:39 PM UTC
Outstanding work. I may have to invest, in some of your structured pigments.
Ideals are peaceful. History is violent.
Skåne, Sweden
Joined: January 05, 2009
KitMaker: 83 posts
Armorama: 69 posts
Posted: Tuesday, July 31, 2018 - 07:55 AM UTC
Splendid work!
Is that an Olympus HP-100B airbrush?
Viana do Castelo, Portugal
Joined: January 12, 2012
KitMaker: 216 posts
Armorama: 194 posts
Posted: Tuesday, July 31, 2018 - 09:52 PM UTC
Thanks
@Magnus : it is, it's a real mule
I use it for almost everything since
too many years to remember
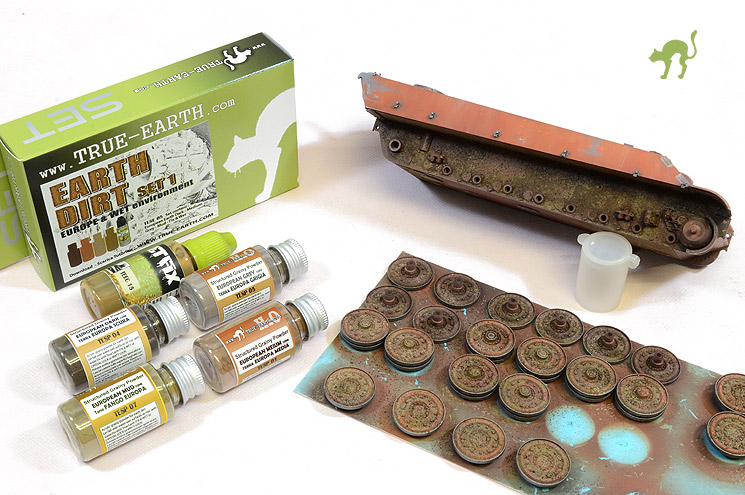
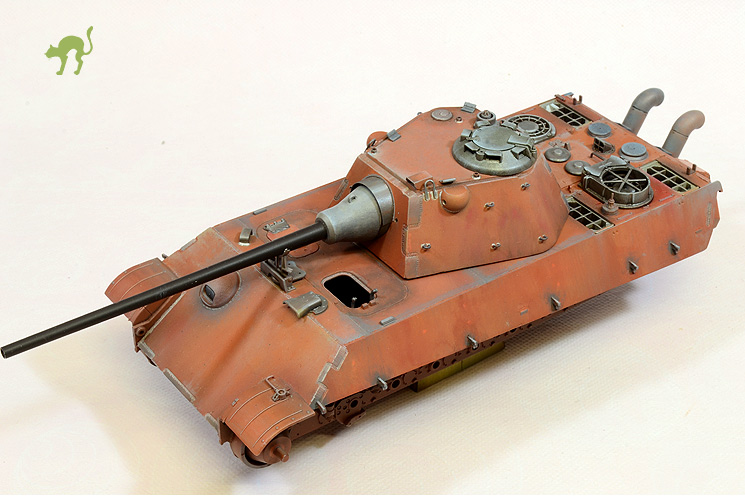
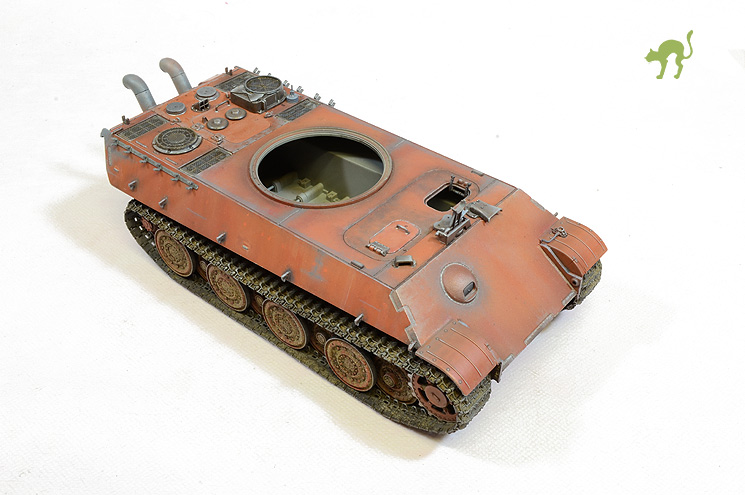
The whole is fixed with Fix & Wet, contained into the Set, spreading more in some spots for a wet effect.

Giuseppe Vitali
www.TRUE-EARTH.com
Viana do Castelo, Portugal
Joined: January 12, 2012
KitMaker: 216 posts
Armorama: 194 posts
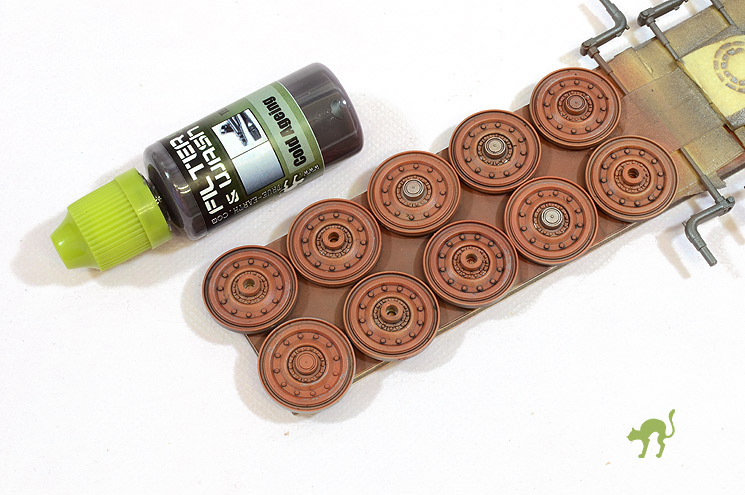
Posted: Wednesday, August 01, 2018 - 09:33 PM UTC
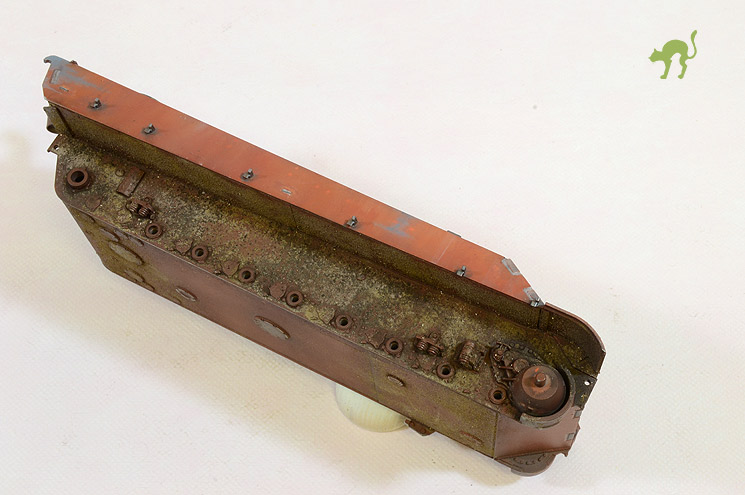
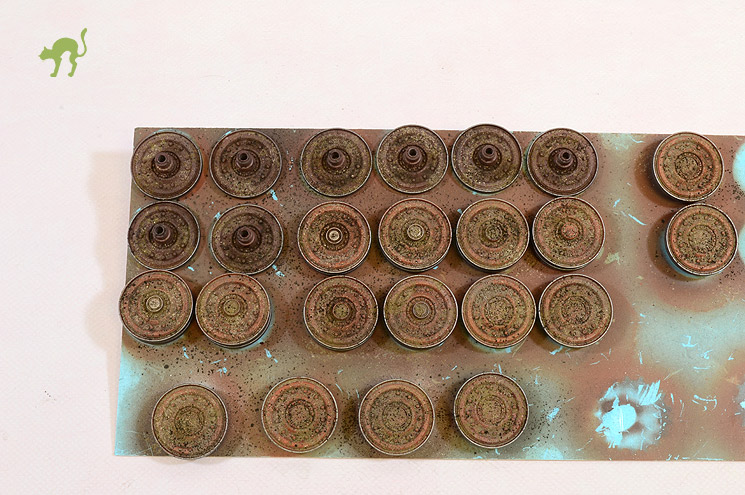
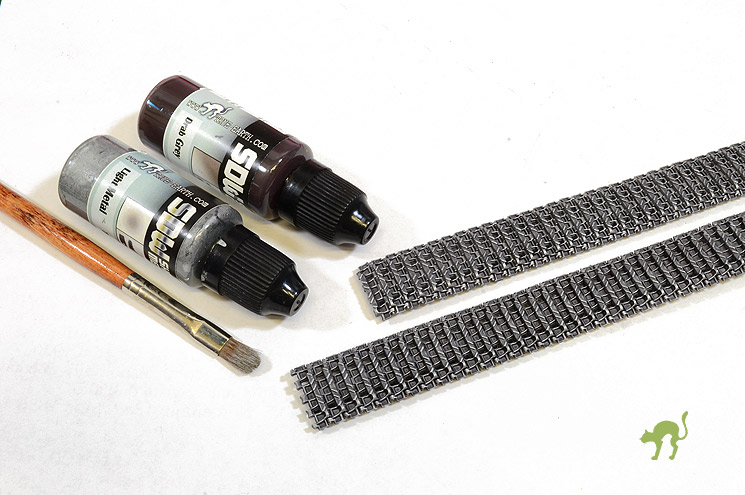
Tracks are simply painted with SDW Metal - Gun Metal, then drybrushed with SDW Light Metal.
It's an almost new vehicle
Giuseppe Vitali
www.TRUE-EARTH.com
Viana do Castelo, Portugal
Joined: January 12, 2012
KitMaker: 216 posts
Armorama: 194 posts
Posted: Friday, August 03, 2018 - 01:42 AM UTC
Tracks now fitted and dirted as shown in previous steps
Giuseppe Vitali
www.TRUE-EARTH.com
Florida, United States
Joined: May 14, 2012
KitMaker: 730 posts
Armorama: 624 posts
Posted: Friday, August 03, 2018 - 03:38 AM UTC
Giuseppe great presenation! I will be following along.
Cheers

Dave
"No beast so fierce but knows some touch of pity.
But I know none, and therefore am no beast."
Pennsylvania, United States
Joined: October 16, 2006
KitMaker: 3,374 posts
Armorama: 3,126 posts
Posted: Friday, August 03, 2018 - 06:23 AM UTC
Incredible work! Do you have a tutorial somewhere for how you did the dust and mud on the lower hull? it looks spectacular!
Viana do Castelo, Portugal
Joined: January 12, 2012
KitMaker: 216 posts
Armorama: 194 posts
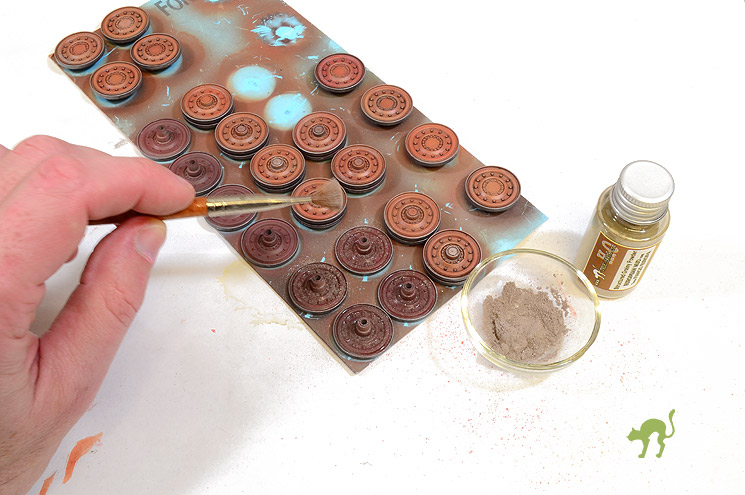
Posted: Friday, August 03, 2018 - 06:56 AM UTC
Thanks Guys !
#@Jason, there's actually nothing more than what shown and explained : surface moistened with water, then various colors of that product falling like snow on to
Anyway all products have
an info/tutorials page linked from the product's page Giuseppe Vitali
www.TRUE-EARTH.com
Pennsylvania, United States
Joined: October 16, 2006
KitMaker: 3,374 posts
Armorama: 3,126 posts
Posted: Friday, August 03, 2018 - 12:37 PM UTC
Thank you! I'm going to have to pick some of your products come payday
Viana do Castelo, Portugal
Joined: January 12, 2012
KitMaker: 216 posts
Armorama: 194 posts
Posted: Wednesday, August 22, 2018 - 08:56 PM UTC
Giuseppe Vitali
www.TRUE-EARTH.com
Florida, United States
Joined: March 18, 2008
KitMaker: 173 posts
Armorama: 168 posts
Posted: Thursday, August 23, 2018 - 08:31 AM UTC