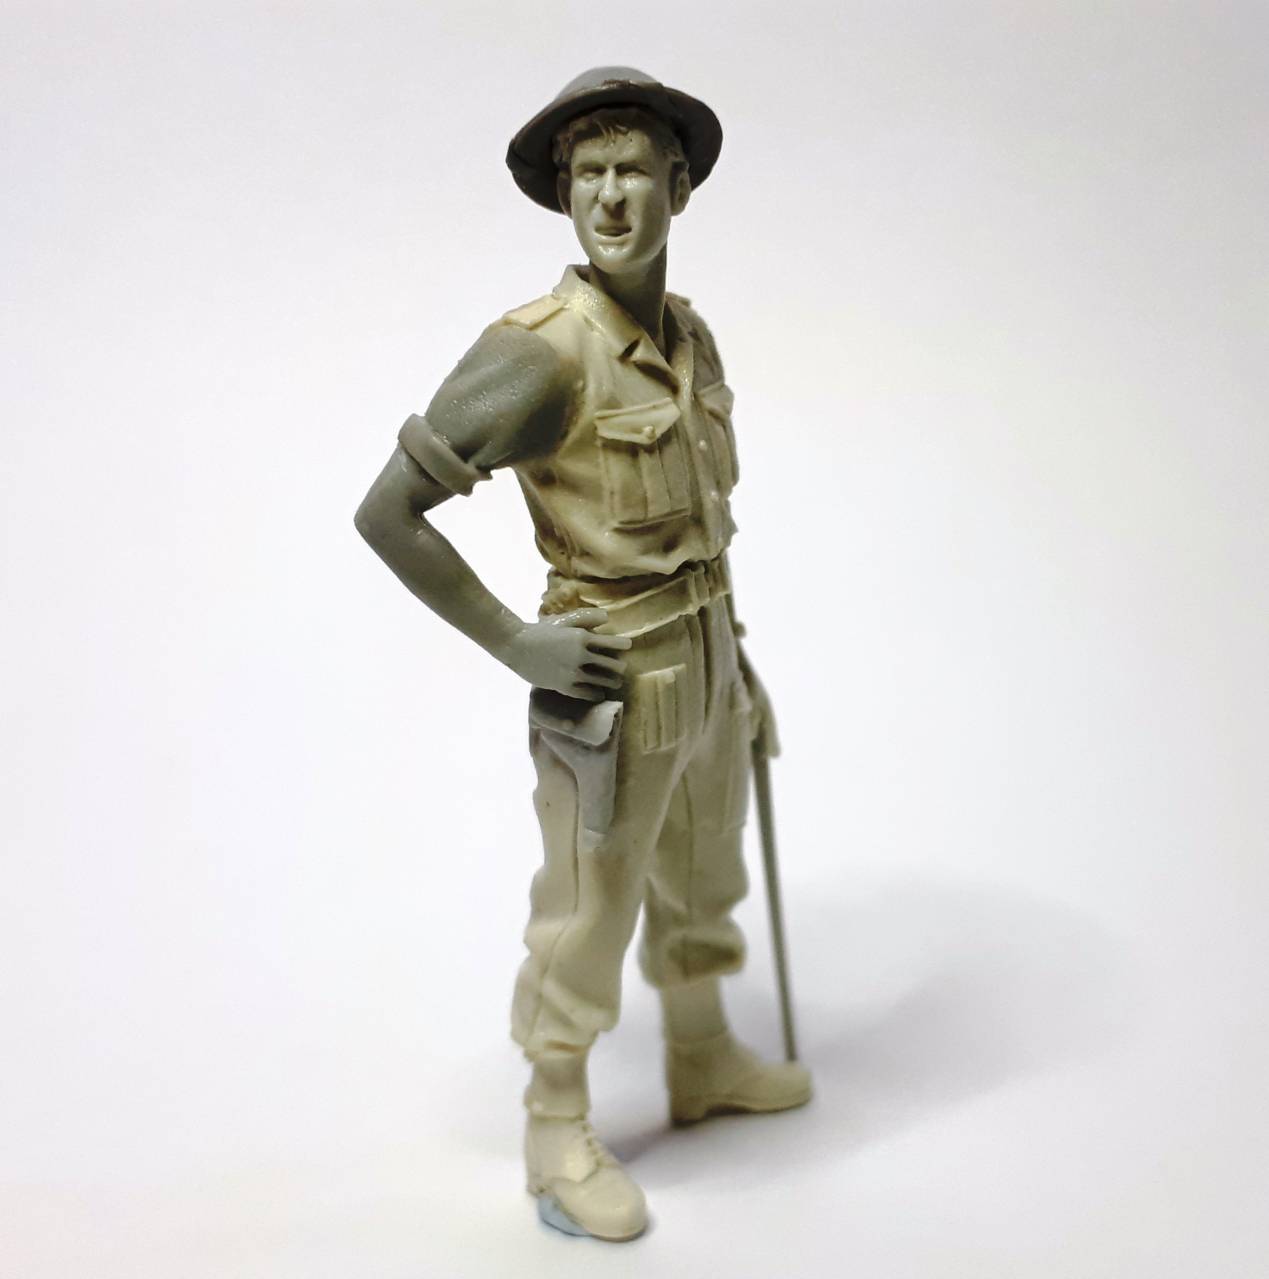
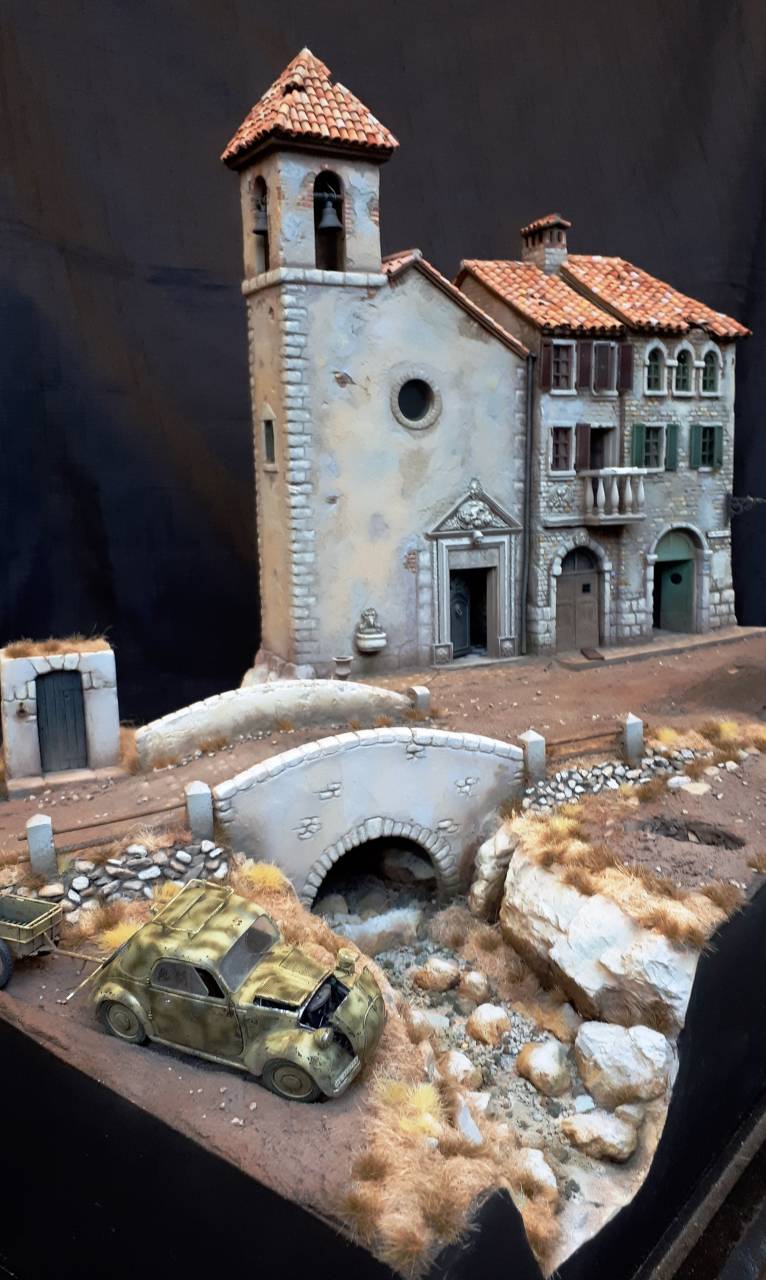
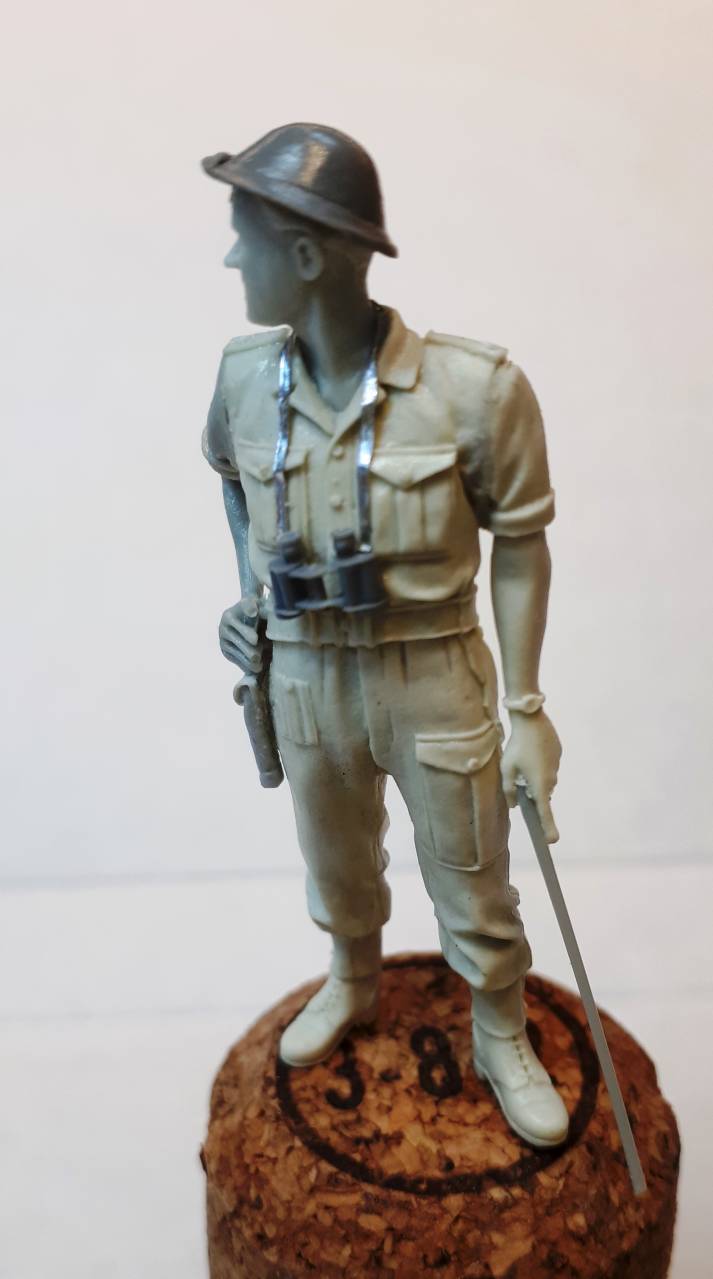
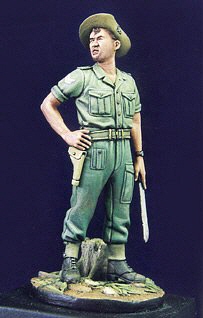
When I went looking for a British / Allied officer in battle dress I was surprised at how little choice there seems to be. However, as always when looking for something on the internet, it helps to think outside the box. Looking for 'British' or 'Allied' wouldn't have helped me find this lovely figure:
Called Commonwealth Soldier, Burma 1943 he's by Dog Tag (WZ3501). I found him on the Historex website:
http://www.historexagents.com/images/dt/wz3501.jpg
Obviously, the bush hat and machete wouldn't work for my setting, but all I had to do was replace the headgear with a Mk.2 helmet and the machete with a cane and - hey presto - I had a rather dashing Infantry officer in Italy!
Dioramas
Do you love dioramas & vignettes? We sure do.
Hosted by Darren Baker, Mario Matijasic
Liberation, Italy 1944
TanksForTheMemory
England - South East, United Kingdom
Joined: August 31, 2016
KitMaker: 154 posts
Armorama: 152 posts
Joined: August 31, 2016
KitMaker: 154 posts
Armorama: 152 posts
Posted: Friday, August 31, 2018 - 09:38 AM UTC
TanksForTheMemory
England - South East, United Kingdom
Joined: August 31, 2016
KitMaker: 154 posts
Armorama: 152 posts
Joined: August 31, 2016
KitMaker: 154 posts
Armorama: 152 posts
Posted: Friday, August 31, 2018 - 09:44 AM UTC
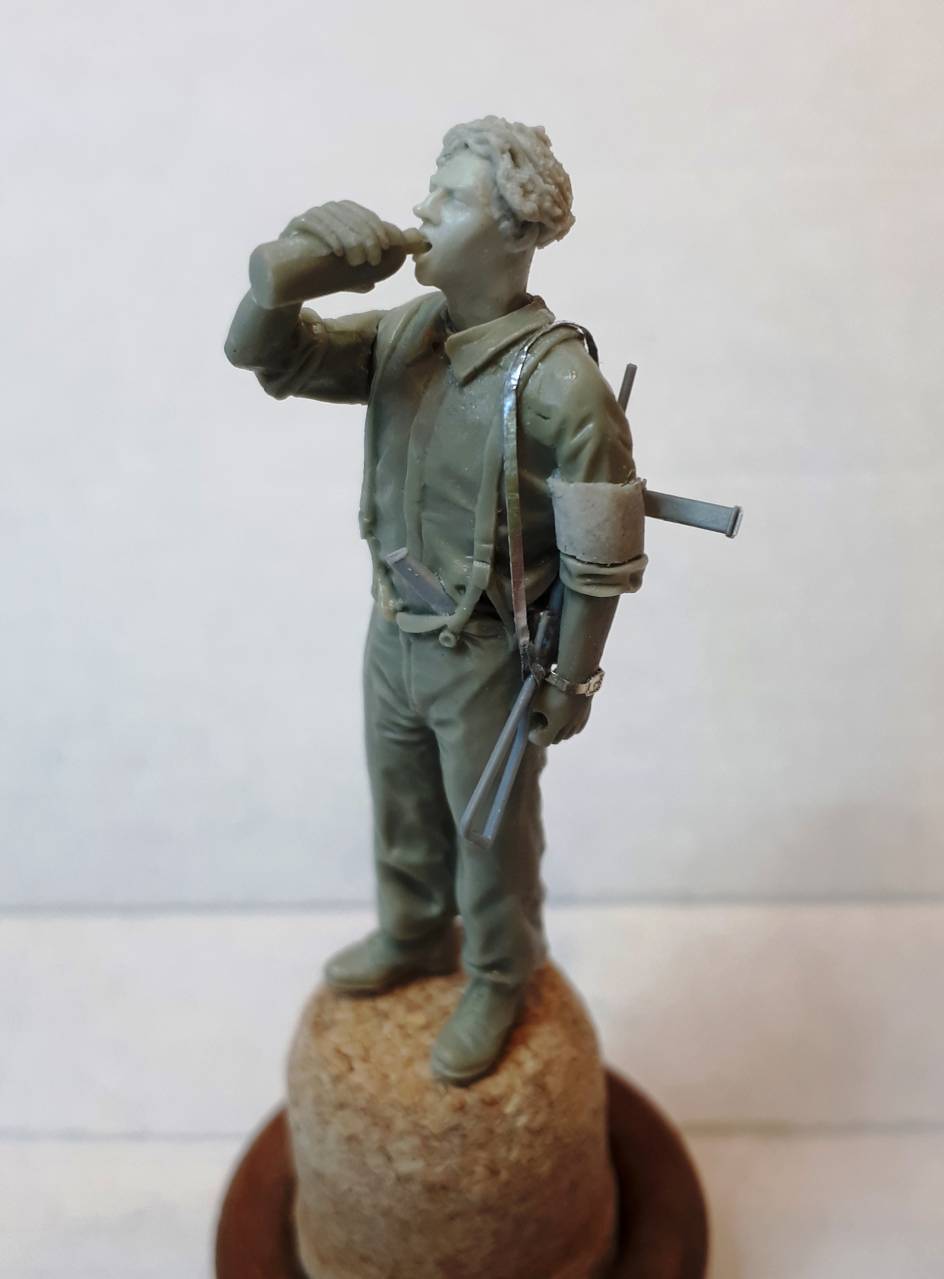
Another character invited to the liberation party will be this guy: part civilian, part soldier.
By the time Rome had been liberated the Italian armistice was approaching its first anniversary - and the Allies were getting increasing assistance from Italian irregulars harassing the Germans from the rear. By the end of '44 there would even be Italian troops fighting alongside the Allies wearing Commonwealth battledress!
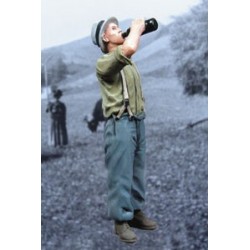
A really good source of figures which I haven't seen on many dioramas comes from the French manufacturer Mk35 (they also made the lovely little building by my bridge).
This guy is called MK35-F181 Man Drinking. As you can see, he has a lovely 'liberated' pose.
Because the face was a little narrow and the hat didn't seem quite right for a rural setting, I replaced the head with one from the Hornet range. I started out sculpting a cap or beret from Magicsculp, but in the end I thought it looked better as a haircut. This chap obviously hasn't had one for a while! It's quite easily done with fingers and a scalpel blade.
As you can see, the moulding of the clothes is exquisite - full of character. Obviously the head is temporarily held in place with some blutac...
I added an armband - although I have no idea what sort of colour or design this should be. I suppose they might have chosen any local colour to indicate to the approaching Allies troops that they were part of the local resistance. I may also add a Sten slung over his shoulder.
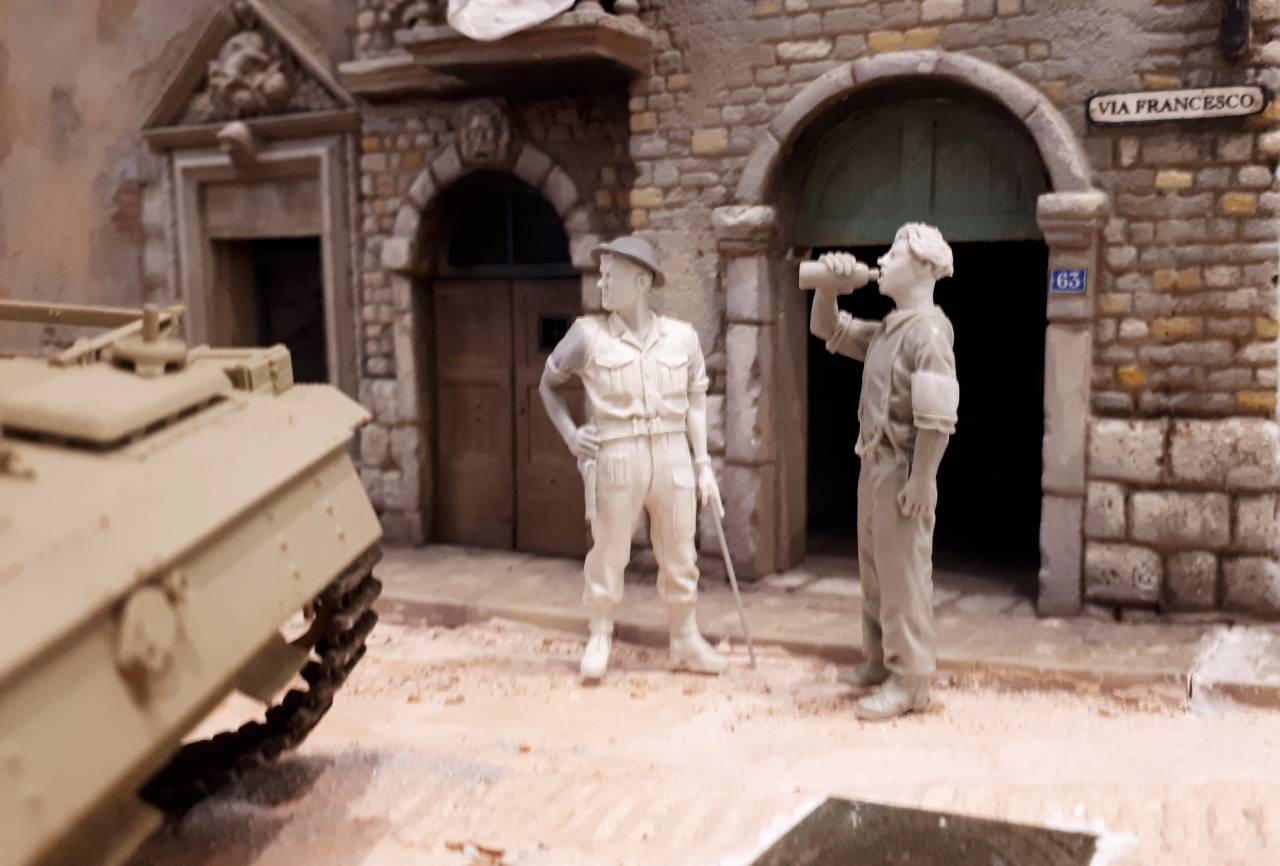
This is how he looks next to my officer on the diorama. I'm going to have a table and a couple of chairs with some more bottles of vino or beer in evidence.
TanksForTheMemory
England - South East, United Kingdom
Joined: August 31, 2016
KitMaker: 154 posts
Armorama: 152 posts
Joined: August 31, 2016
KitMaker: 154 posts
Armorama: 152 posts
Posted: Friday, August 31, 2018 - 09:50 AM UTC
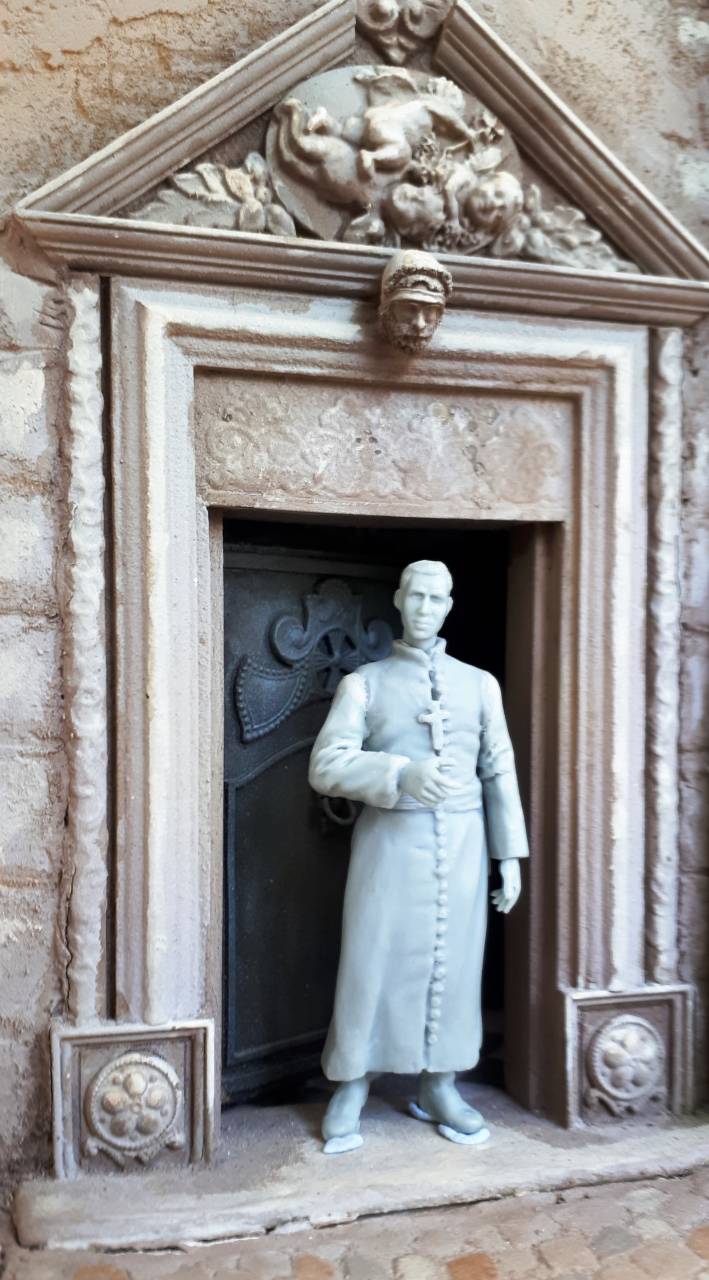
Another pivotal figure in the scene is the Priest.
This is one of my favourite figures from the Mk.35 range. I found this one long ago after I started to build my church. He comes with a bible in his hand and an umbrella over his arm (what was I saying about unpredictable Italian weather?)
I haven't quite decided, but I will probably have him looking skyward as if to give thanks...
strongarden
Florida, United States
Joined: May 14, 2012
KitMaker: 730 posts
Armorama: 624 posts
Joined: May 14, 2012
KitMaker: 730 posts
Armorama: 624 posts
Posted: Saturday, September 01, 2018 - 03:06 AM UTC
Tim this is awesome work my friend!
Everything is spot on: rare subject matter, research and back story, layout, figures, vehicles, and especially the buildings.
...and you have some nicely shot images as well.
Not an expert by any stretch, but I've been thru Italia and the close-up tallish foto, about halfway down Pg.1, looks like a REAL CHURCH FACADE. Bravisio!
I'll be following this, thanks for posting.
Cheers
Dave
TanksForTheMemory
England - South East, United Kingdom
Joined: August 31, 2016
KitMaker: 154 posts
Armorama: 152 posts
Joined: August 31, 2016
KitMaker: 154 posts
Armorama: 152 posts
Posted: Saturday, September 08, 2018 - 10:40 AM UTC
Vegetation
At last I have made a start on the greenery. Well I say 'greenery' - but because this is going to be Tuscany in the summer of 1944 its more of a collection of reds, yellows and browns.
The first step was to add rough grass to the areas around the ravine and road. This was done with a method I only read about recently. The hanging basket liner method is pretty well known, but what I hadn't understood was that it works best of you stick it 'grass' side down using PVA. It's dry within 24 hours. The trick then is to peel away the backing (it usually comes away quite easily with tweezers).
What you're left with needs to be tamed with scissors, tweezers and fingers to make it look something like rough grass.
Now, as I say, this gives you a basic covering of what is basically rough grass or undergrowth. It's very cheap, quick and easy way of covering quite large areas.
However, it needs something more to make it look like real vegetation.
This is where I turned to the excellent MiniNatur range of grass tufts. These come as little tufts of varying size and different shades, which you pull of the backing strip using tweezers. They can then be easily glued in place with PVA.
I used a mixture of 'Golden grass prairie tufts, tall' (727-35 S) and 'Two colour grass tufts late fall' (737-34).
I effectively used them to 'surround' the basket liner areas to give a more natural look.
The contrasts may look a little strong in these shots, but here's still more to be added and, ultimately, pigments (and perhaps a little airbrush work) should help to bring everything together.
Onward and upward!
cheyenne
New Jersey, United States
Joined: January 05, 2005
KitMaker: 2,185 posts
Armorama: 1,813 posts
Joined: January 05, 2005
KitMaker: 2,185 posts
Armorama: 1,813 posts
Posted: Saturday, September 08, 2018 - 10:30 PM UTC
Great work Tim your flora looks the part !!!
j76lr
New Jersey, United States
Joined: September 22, 2006
KitMaker: 1,081 posts
Armorama: 1,066 posts
Joined: September 22, 2006
KitMaker: 1,081 posts
Armorama: 1,066 posts
Posted: Sunday, September 09, 2018 - 03:30 AM UTC
good job !!!
Ronaldo
Noord-Holland, Netherlands
Joined: October 14, 2004
KitMaker: 116 posts
Armorama: 103 posts
Joined: October 14, 2004
KitMaker: 116 posts
Armorama: 103 posts
Posted: Friday, September 14, 2018 - 07:12 PM UTC
Magnificent,more please.
Come on lurkers,don't you have anything to say about this beautiful diorama.
Northern_Lad
United Kingdom
Joined: September 17, 2012
KitMaker: 462 posts
Armorama: 417 posts
Joined: September 17, 2012
KitMaker: 462 posts
Armorama: 417 posts
Posted: Friday, September 14, 2018 - 11:44 PM UTC
Yes! What a lovely diorama! The church is magnificent, and the figures and their positioning are spot on! Let’s see some more.
Cheers
Matthew
Cheers
Matthew
TanksForTheMemory
England - South East, United Kingdom
Joined: August 31, 2016
KitMaker: 154 posts
Armorama: 152 posts
Joined: August 31, 2016
KitMaker: 154 posts
Armorama: 152 posts
Posted: Sunday, September 16, 2018 - 08:46 AM UTC
Thanks guys. I really appreciate the feedback...
I have been doing a little more work on my figures. I freely admit that I have taken inspiration from Jerry Rutman's wonderful work here... So, using some lead sheet and couple of Aber photoetch sets - buckles and watches & glasses - I added some more details.
First up is the Partisan. I gave him a Sten Mk.II (from my Riich Carrier) slung over his shoulder, a spare magazine shoved in his trouser waistband and a watch. Yes, I know the strap needs to be settled a little...
For the Brit officer I added a pair of binoculars from the spares box (these are probably German, but if so that merely adds to my 'liberation' theme) and a strap.
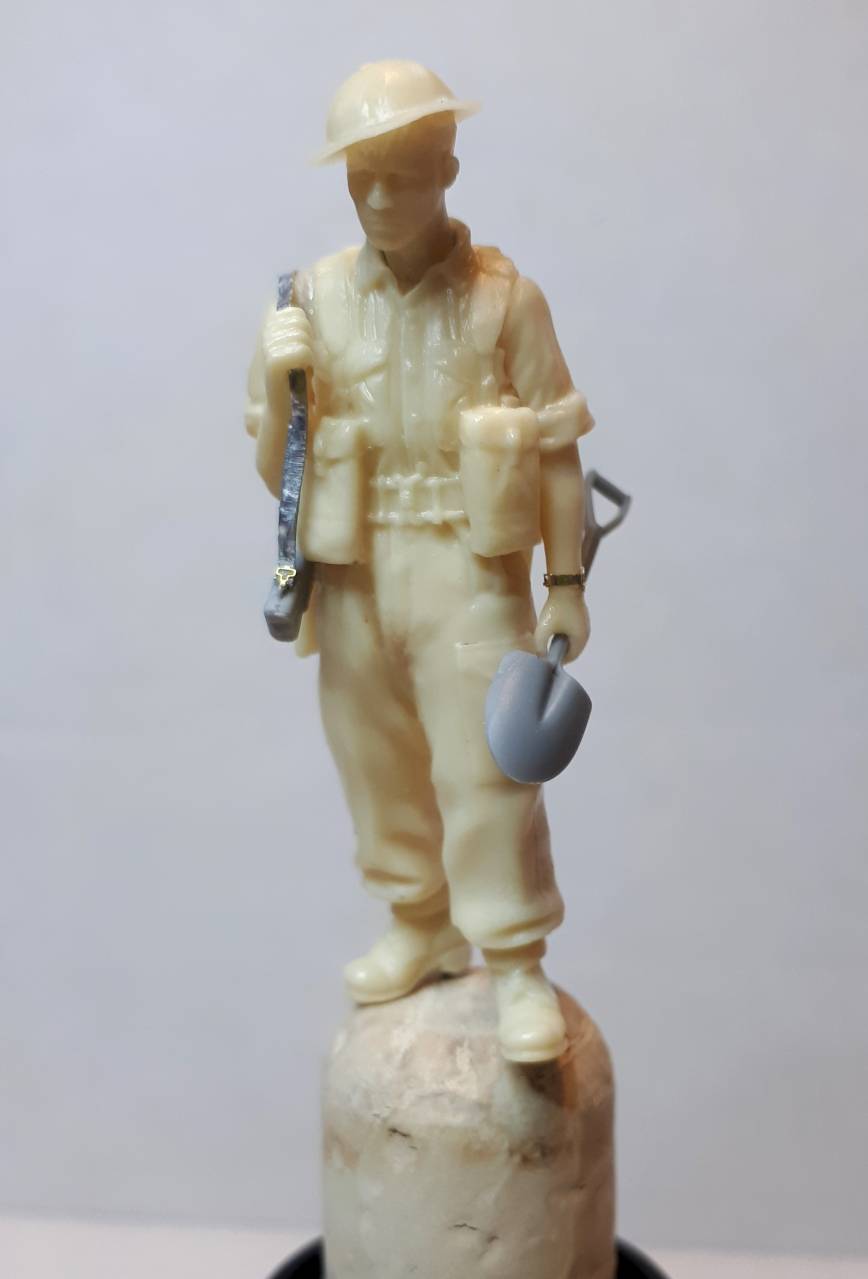
Another figure I have been working on is this beautifully posed (and rather sombre looking) fellow.
As with my officer, I would never have found him if I had been looking for an infantryman from the European theatre because he is described as WWII British Infantryman, Far East (Wee Friends WF35010)
However, he looks just right for Italy. To add a little variety, I gave him a Lee Enfield Mk.III with sniper sight from the Riich Commonwealth Weapons Set.
Putting the rifle sling on him was not easy. I had to drill a hole through the hand and then feed the lead sheet through. Buckles were added from the Aber set - and also a watch.
More to come soon...
TanksForTheMemory
England - South East, United Kingdom
Joined: August 31, 2016
KitMaker: 154 posts
Armorama: 152 posts
Joined: August 31, 2016
KitMaker: 154 posts
Armorama: 152 posts
Posted: Sunday, September 16, 2018 - 09:45 AM UTC
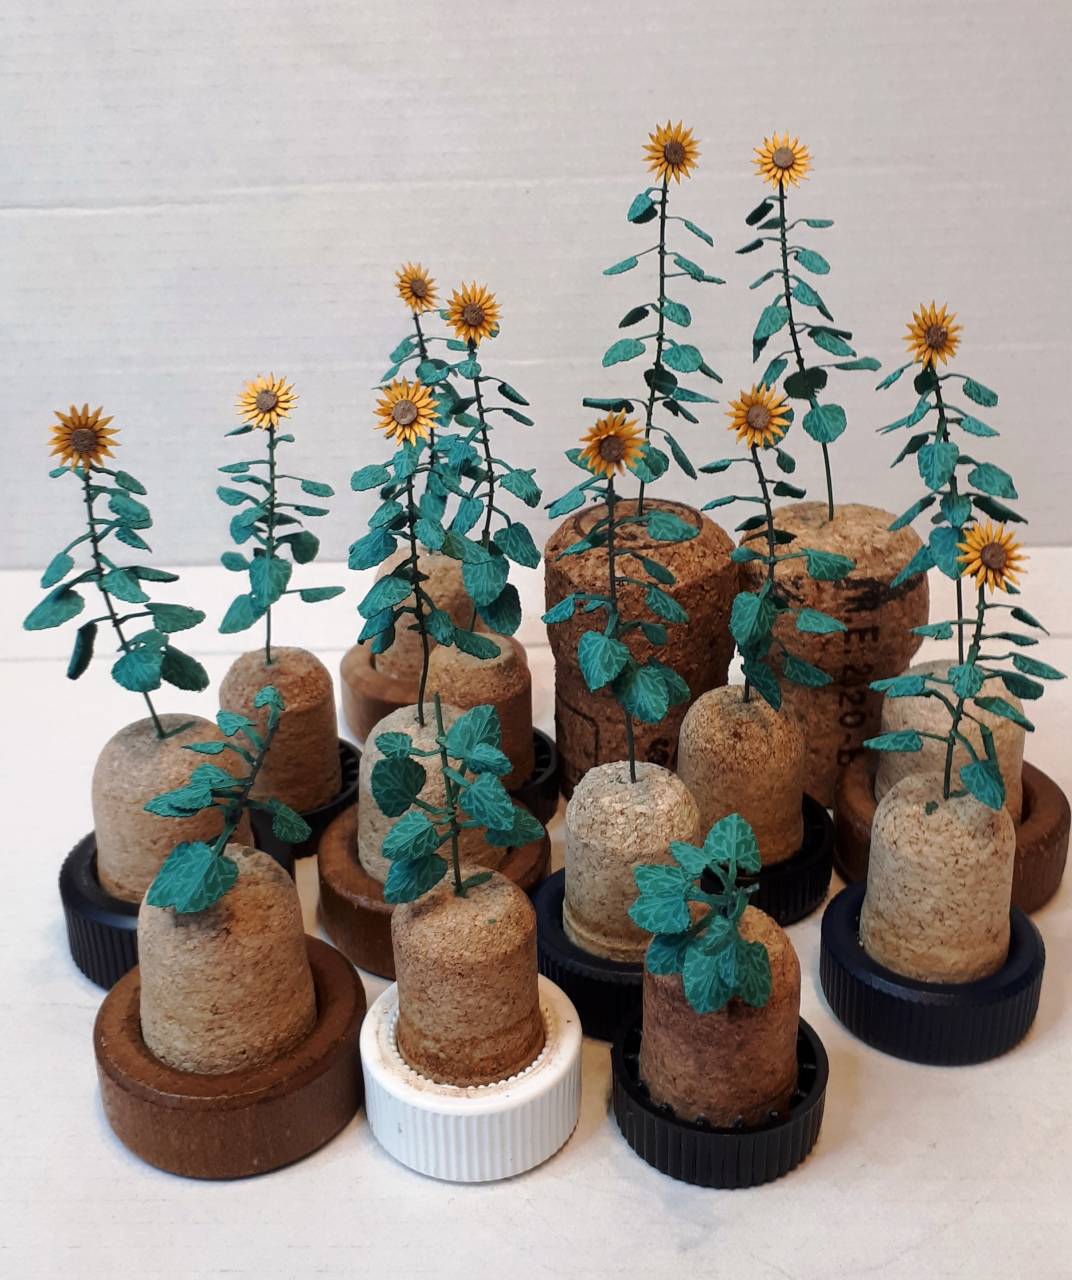
Sunflower Madness
Now I will be the first to confess that I thought I had taken leave of my senses at this point... it all started when I was on holiday in Italy a couple of years ago and we were staying in a villa surrounded by sunflowers. I got it into my head that I wanted a field of them to feature in my diorama.
After a bit of research I discovered these wonderful 1/35 sunflowers in kit form: GreenLine GL085 laser cut sunflower plants.
Now I haven't worked with many paper kits before, but these are absolutely stunning. They are also quite ingenious. And quite time-consuming... Having said that, I believe they are absolutely worth the effort.
The set comes with sheets of flowers and leaves pre-coloured in yellow and green. The leaves are even embossed with the leaf veins in a slightly lighter shade. There's a piece of thicker cardboard for the circular stamen and 14 lengths of flexible brass rod. Everything can be pushed out from the surrounding sheets with a minimum of fuss.
Then the fun begins. The flowers are easy enough to make with five layers + the stamen. The leaves then almost 'clip' onto the brass rod, although they need to be glued in place. I used my new favourite glue: Gorilla Super Glue Gel. This is the first glue I have found that actually doesn't clog just as it promises...
It's important not only to arrange the leaves in a three-dimensional way, but also to give them some shape by bending them over a cocktail stick / end of a paintbrush. This is best done before gluing them in place.
Also, although the kit promises to make you 14 plants, I would advise buying two sets if you want to add more leaves (as I did).
Lastly, I brush painted the brass stems using a mix of Vallejo Uniform Green 70922 and USMC Tank Crew 319 + a little black.
Et voila!
Well, as I say, despite the effort I felt that it was worth it. They look great! Now I just have to work out where to put them all...
Now I will be the first to confess that I thought I had taken leave of my senses at this point... it all started when I was on holiday in Italy a couple of years ago and we were staying in a villa surrounded by sunflowers. I got it into my head that I wanted a field of them to feature in my diorama.
After a bit of research I discovered these wonderful 1/35 sunflowers in kit form: GreenLine GL085 laser cut sunflower plants.
Now I haven't worked with many paper kits before, but these are absolutely stunning. They are also quite ingenious. And quite time-consuming... Having said that, I believe they are absolutely worth the effort.
The set comes with sheets of flowers and leaves pre-coloured in yellow and green. The leaves are even embossed with the leaf veins in a slightly lighter shade. There's a piece of thicker cardboard for the circular stamen and 14 lengths of flexible brass rod. Everything can be pushed out from the surrounding sheets with a minimum of fuss.
Then the fun begins. The flowers are easy enough to make with five layers + the stamen. The leaves then almost 'clip' onto the brass rod, although they need to be glued in place. I used my new favourite glue: Gorilla Super Glue Gel. This is the first glue I have found that actually doesn't clog just as it promises...
It's important not only to arrange the leaves in a three-dimensional way, but also to give them some shape by bending them over a cocktail stick / end of a paintbrush. This is best done before gluing them in place.
Also, although the kit promises to make you 14 plants, I would advise buying two sets if you want to add more leaves (as I did).
Lastly, I brush painted the brass stems using a mix of Vallejo Uniform Green 70922 and USMC Tank Crew 319 + a little black.
Et voila!
Well, as I say, despite the effort I felt that it was worth it. They look great! Now I just have to work out where to put them all...
TanksForTheMemory
England - South East, United Kingdom
Joined: August 31, 2016
KitMaker: 154 posts
Armorama: 152 posts
Joined: August 31, 2016
KitMaker: 154 posts
Armorama: 152 posts
Posted: Sunday, September 16, 2018 - 09:55 AM UTC
Oh yes, I forgot the 'team' shot...
Ronaldo
Noord-Holland, Netherlands
Joined: October 14, 2004
KitMaker: 116 posts
Armorama: 103 posts
Joined: October 14, 2004
KitMaker: 116 posts
Armorama: 103 posts
Posted: Friday, September 21, 2018 - 02:19 AM UTC
ReluctantRenegade
Wien, Austria
Joined: March 09, 2016
KitMaker: 2,408 posts
Armorama: 2,300 posts
Joined: March 09, 2016
KitMaker: 2,408 posts
Armorama: 2,300 posts
Posted: Friday, September 21, 2018 - 05:12 AM UTC
Beautiful work, Sir! Love the the atmosphere the composition generates!
Ronaldo
Noord-Holland, Netherlands
Joined: October 14, 2004
KitMaker: 116 posts
Armorama: 103 posts
Joined: October 14, 2004
KitMaker: 116 posts
Armorama: 103 posts
Posted: Tuesday, October 23, 2018 - 03:06 AM UTC
Unfortunately nothing to see for a month,no progress with this diorama???
edoardo
Milano, Italy
Joined: November 30, 2007
KitMaker: 642 posts
Armorama: 234 posts
Joined: November 30, 2007
KitMaker: 642 posts
Armorama: 234 posts
Posted: Tuesday, October 23, 2018 - 05:05 PM UTC
hey Tim!
good work indeed! I too miss the udates...
in the meanwhile, may I suggest you a minor improvement you could do on your oustanding dio?
The street name plate should be modified in my opinion. Usually in Italy streets are named by surname of the person the road is entitled tp. So if the road is dedicated to, say, Francesco Sforza (duke of Milan in 1300) it is “via F.Sforza”. . so the only way to have a “via Francesco” is when the road is dedicated to Saint Francesco of Assisi, but in this case it should read “via S.Francesco” where the capital S is for “santo” and the “d’Assisi” could be omitted.
Maybe you could add a capital “S” to the road sign withot too much work....
keep us posted!
ciao
edo
Kuba_Bartosik
Wroclaw, Poland
Joined: October 20, 2018
KitMaker: 41 posts
Armorama: 41 posts
Joined: October 20, 2018
KitMaker: 41 posts
Armorama: 41 posts
Posted: Tuesday, October 23, 2018 - 08:38 PM UTC
I watch with pleasure.
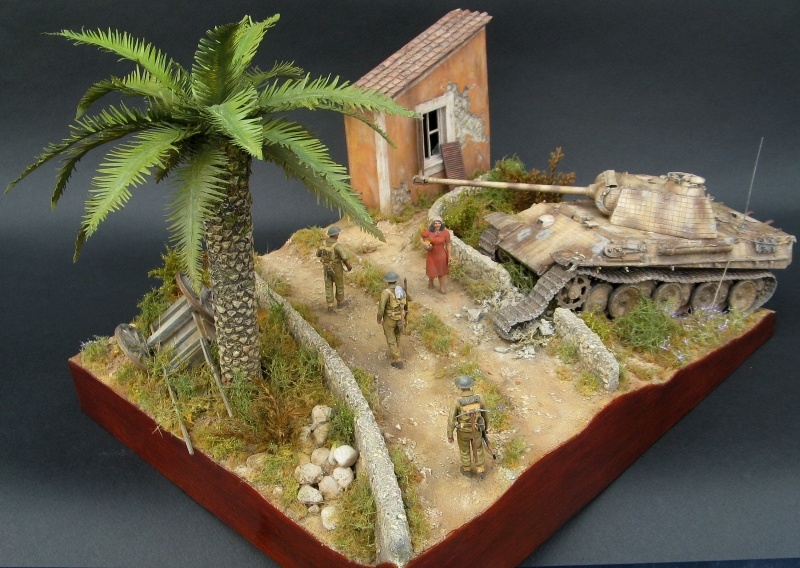
The Italian campaign was once my favorite topic. 7-10 years ago I made a few dioramas related to this campaign. Here are some pictures. Of course, these dioramas are primitive compared to your diorama
TanksForTheMemory
England - South East, United Kingdom
Joined: August 31, 2016
KitMaker: 154 posts
Armorama: 152 posts
Joined: August 31, 2016
KitMaker: 154 posts
Armorama: 152 posts
Posted: Tuesday, October 23, 2018 - 09:02 PM UTC
Dear all,
First of all apologies for the lack of updates. Unfortunately, I have had endless trouble trying to upload images to this sight. However, despite my originals being well within the nominal size limit, I believe I have finally solved the problem by reducing them a little... or maybe I am just having a good day!
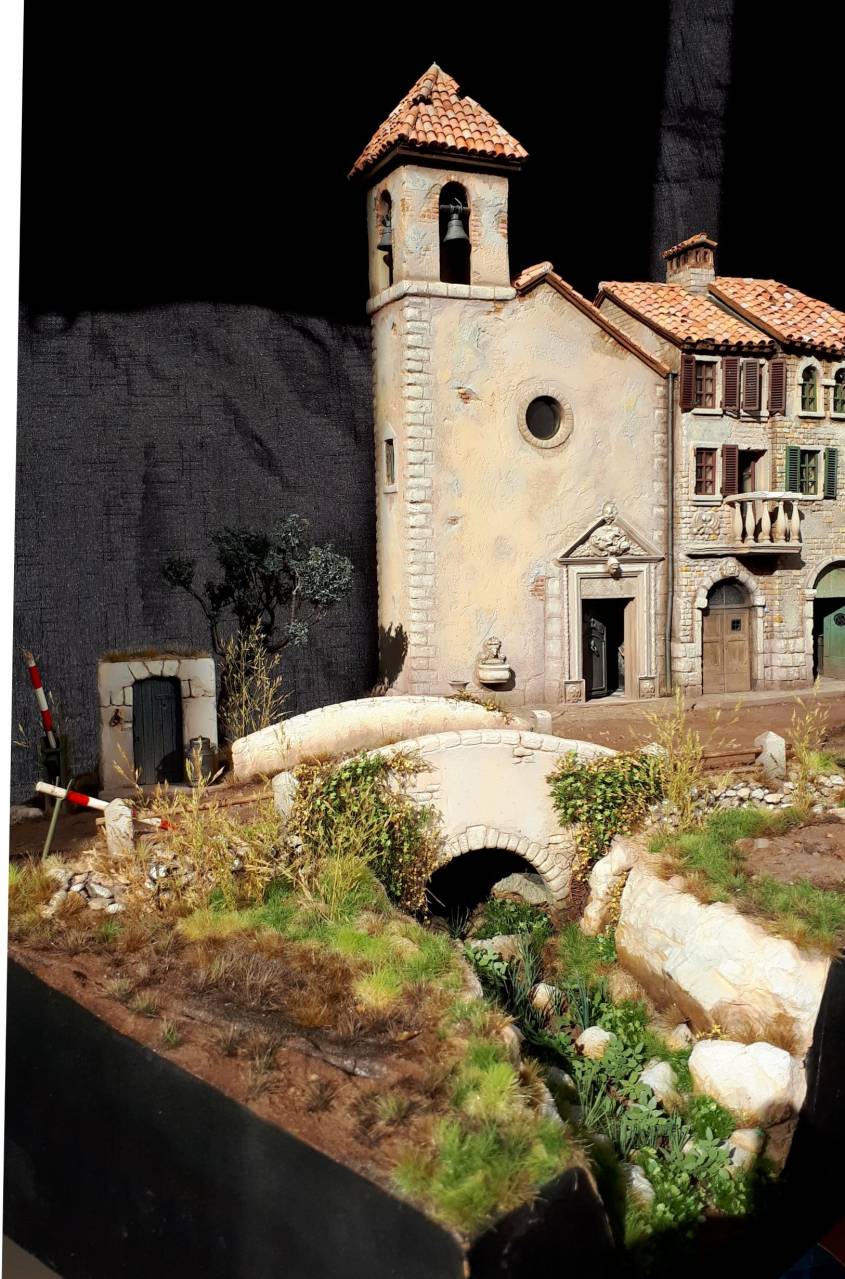
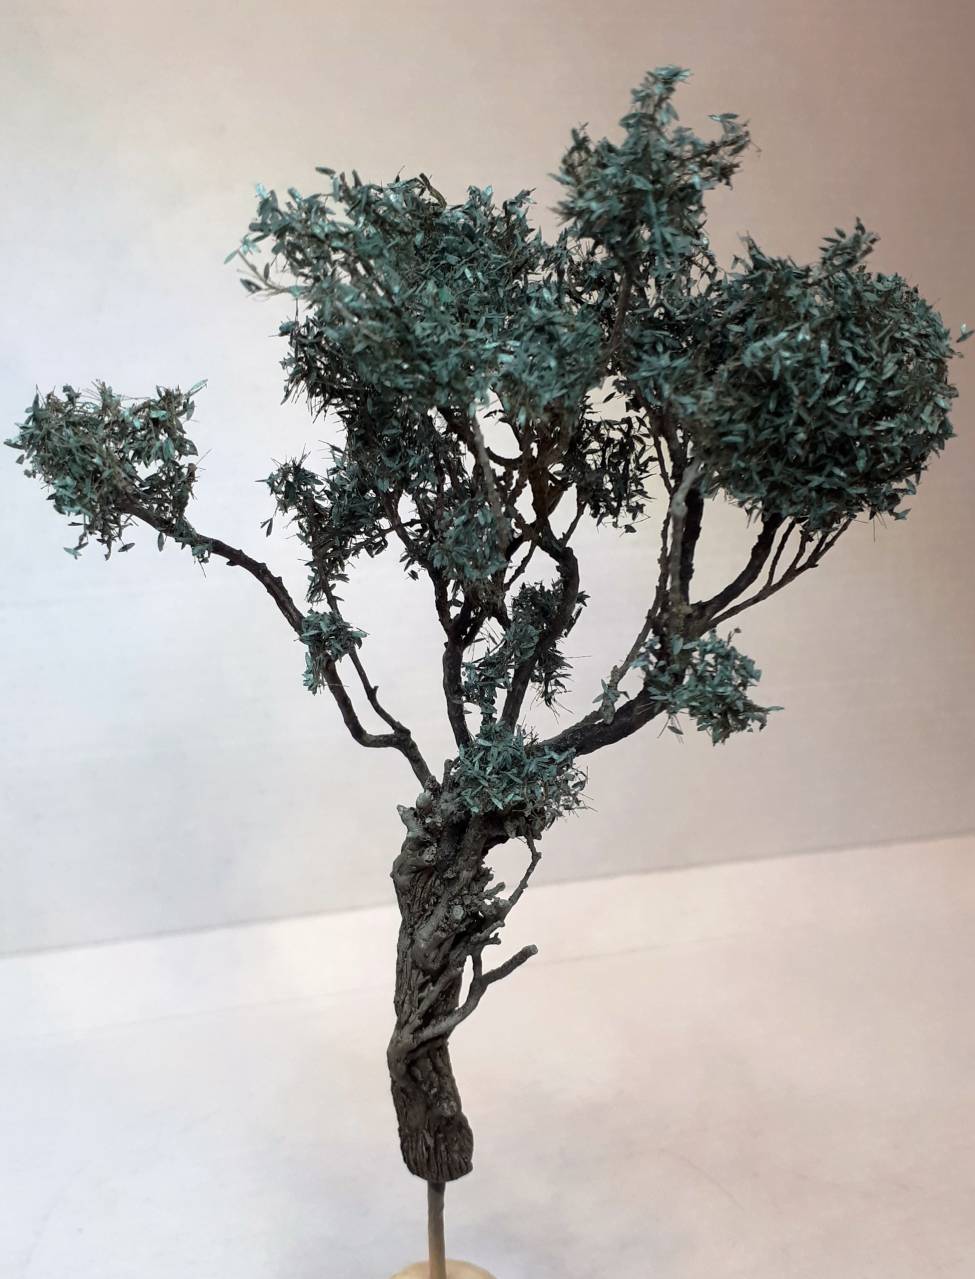
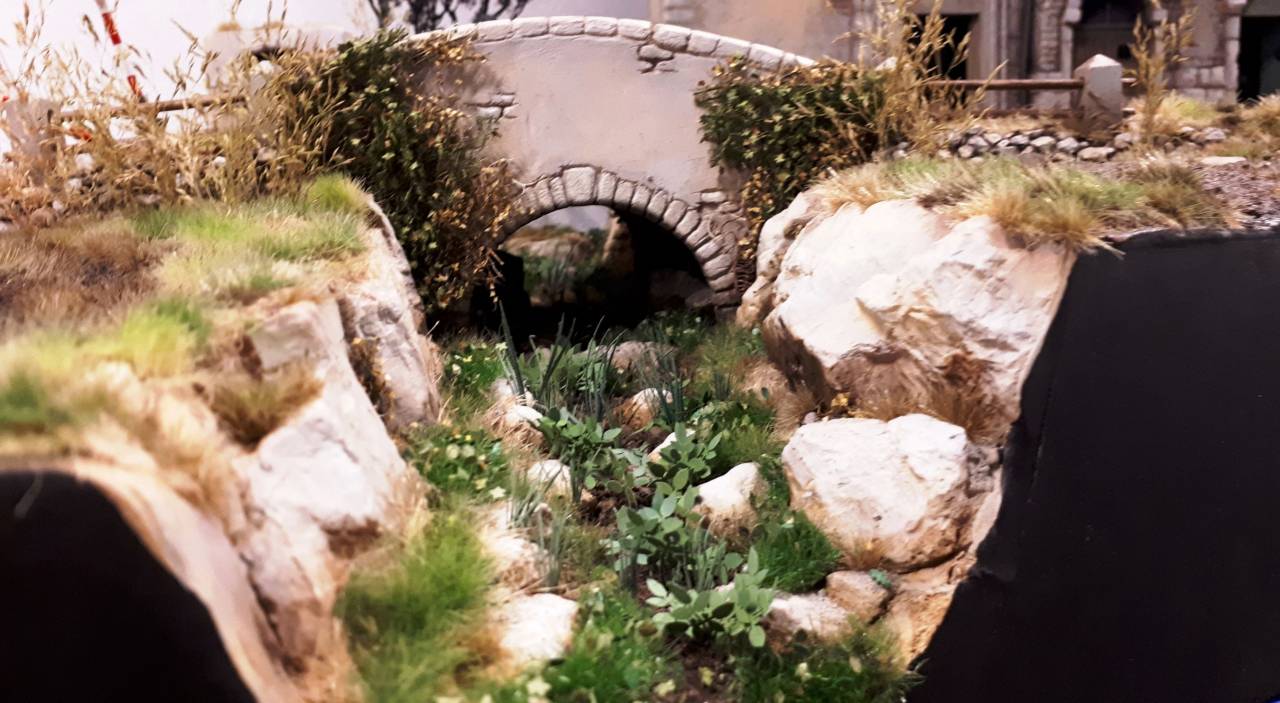
So here are a couple more shots showing the progress with the vegetation around the ravine and the olive tree. I will post more over the next few days.
Meanwhile, thank you all for your comments and by all means keep them coming.
Edoardo, I will take on board what you say about the street sign. To be honest I did not much like it anyway!
And Kuba, your dioramas may be less complicated than mine - but they are no less wonderful. I think you have the terrain and the colour pallet just right.
Speaking of which, I realise that, even for Tuscany, mine is looking a little too 'lush'. But I still have to hit everything with pigments which I expect will tone everything down!
Back soon...
jrutman
Pennsylvania, United States
Joined: April 10, 2011
KitMaker: 7,941 posts
Armorama: 7,934 posts
Joined: April 10, 2011
KitMaker: 7,941 posts
Armorama: 7,934 posts
Posted: Wednesday, October 24, 2018 - 01:24 AM UTC
I am a big fan of the paper veggie products so I am happy to see them used here for sure. The sun flowers look great! Thanks for the mention in your figure post,BTW. You can make it easier on yourself with the metal rifle slings by just cutting the sling and gluing the ends to either side of the clasped hand. That is what I learned to do after a lot of needless frustration ! LoL
As far as "lush" veggies go,it would depend on the amount of rainfall. I lived in Italy for almost a year and it could get nice and green. To be fair though,that was up by Vicenza within the Venetian Crescent.
Marvelous work so far here!
J
As far as "lush" veggies go,it would depend on the amount of rainfall. I lived in Italy for almost a year and it could get nice and green. To be fair though,that was up by Vicenza within the Venetian Crescent.
Marvelous work so far here!
J
TanksForTheMemory
England - South East, United Kingdom
Joined: August 31, 2016
KitMaker: 154 posts
Armorama: 152 posts
Joined: August 31, 2016
KitMaker: 154 posts
Armorama: 152 posts
Posted: Wednesday, October 24, 2018 - 04:28 AM UTC
Thanks Jerry.
As I may already have said above, Italy is certainly a country of contrasts.
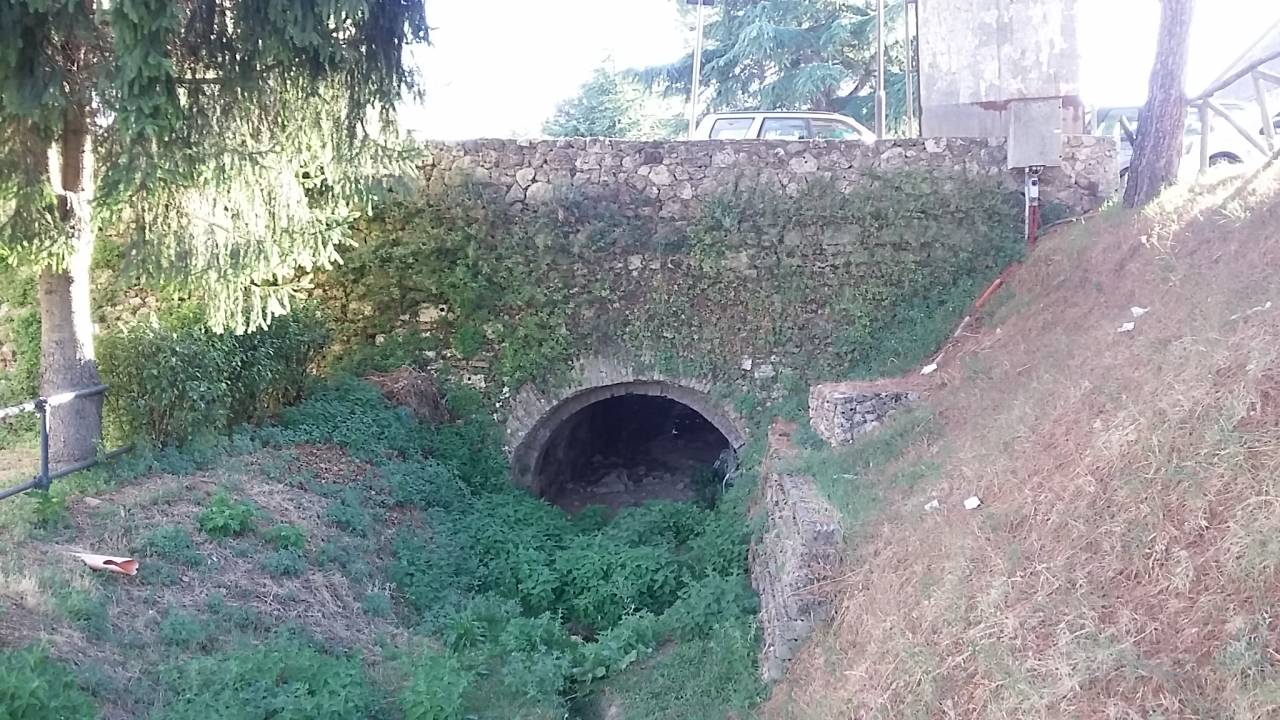
Before I went there a couple of years ago I had an idea that, in Summer at least, it would be sun-bleached and quite barren. However, here is a photo I took in Tuscany in the middle of August. As you can see, it was quite an inspiration for my own bridge and culvert...
TanksForTheMemory
England - South East, United Kingdom
Joined: August 31, 2016
KitMaker: 154 posts
Armorama: 152 posts
Joined: August 31, 2016
KitMaker: 154 posts
Armorama: 152 posts
Posted: Wednesday, October 24, 2018 - 04:37 AM UTC
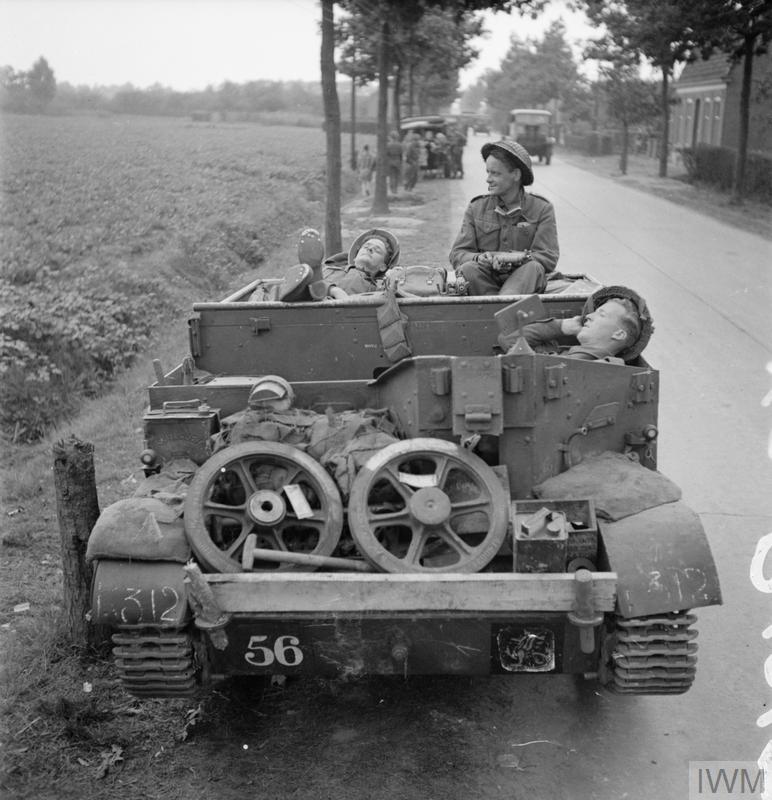
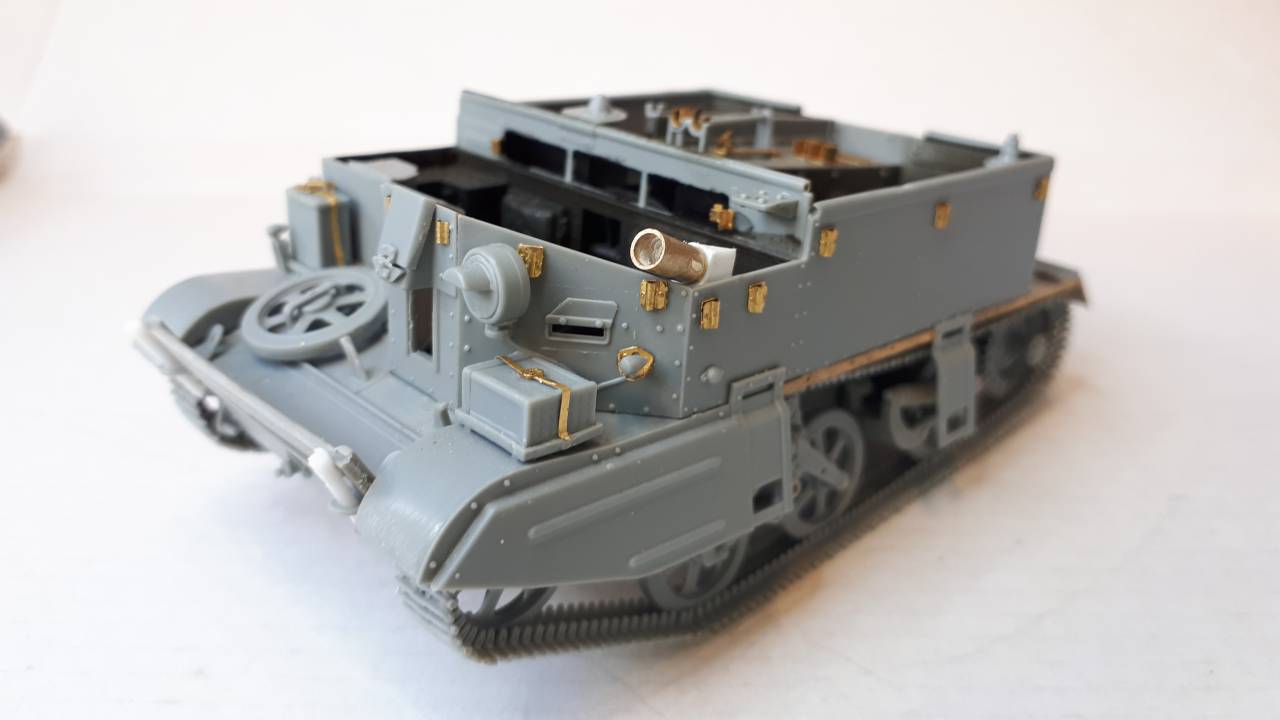
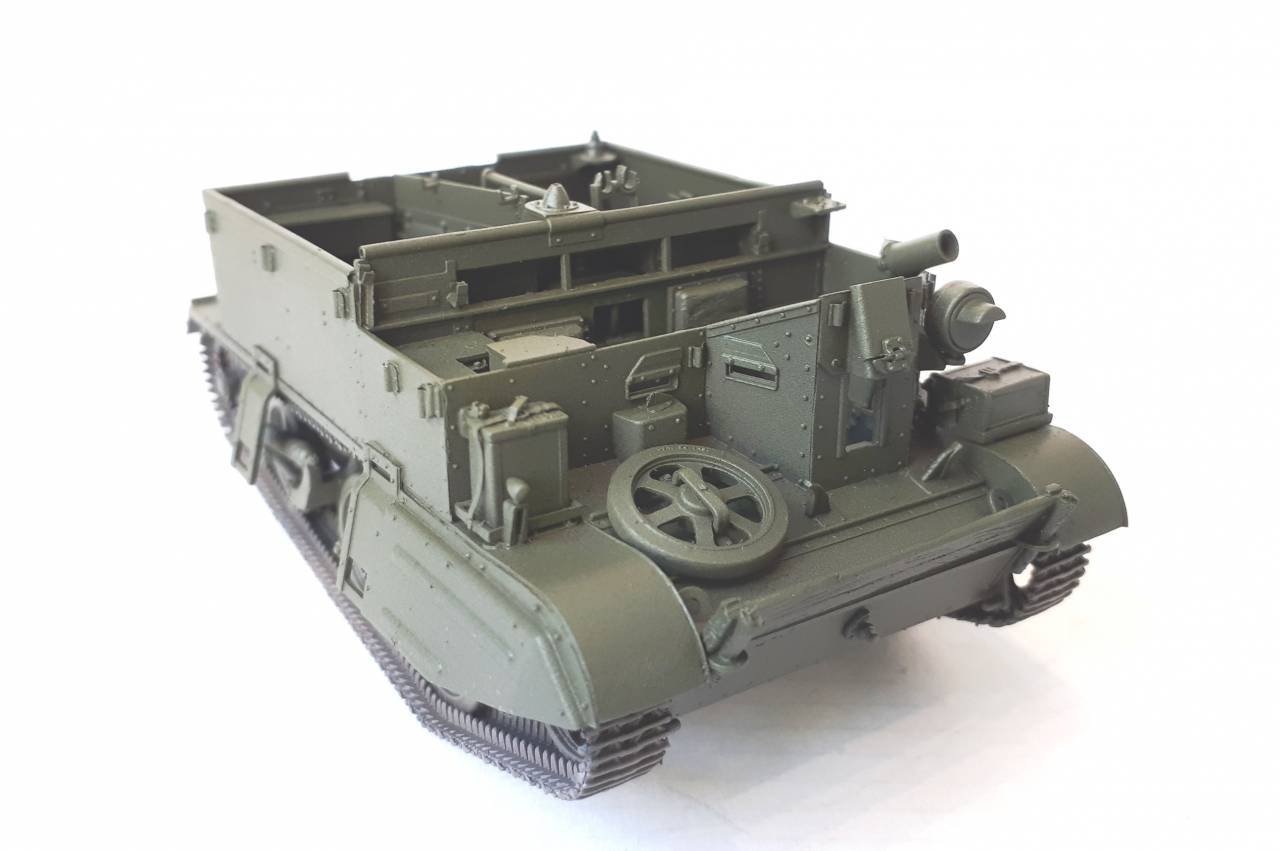
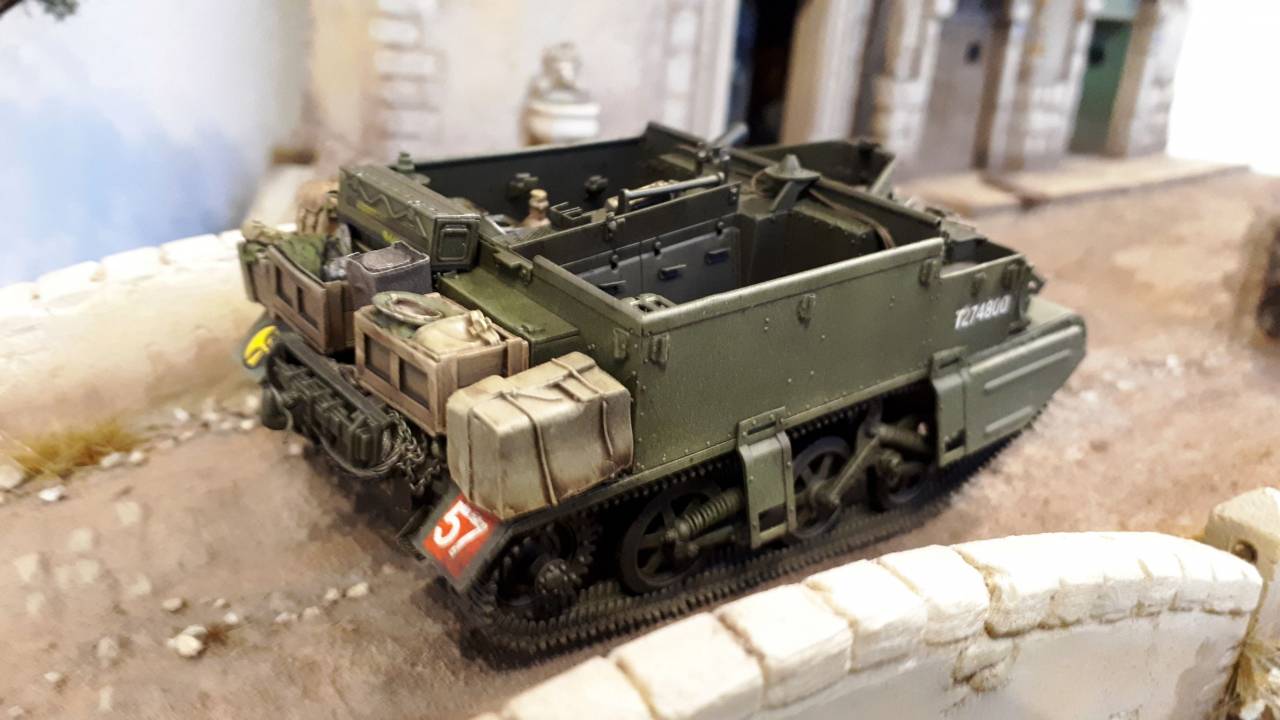
I realise that I haven't posted any images of the third vehicle for my diorama. This is the Riich Carrier, built pretty much out of the box with a couple of modifications. I added a grenade launcher and also a plank to retain stowage at the front.
Here's the original shot I used as inspiration for the latter:
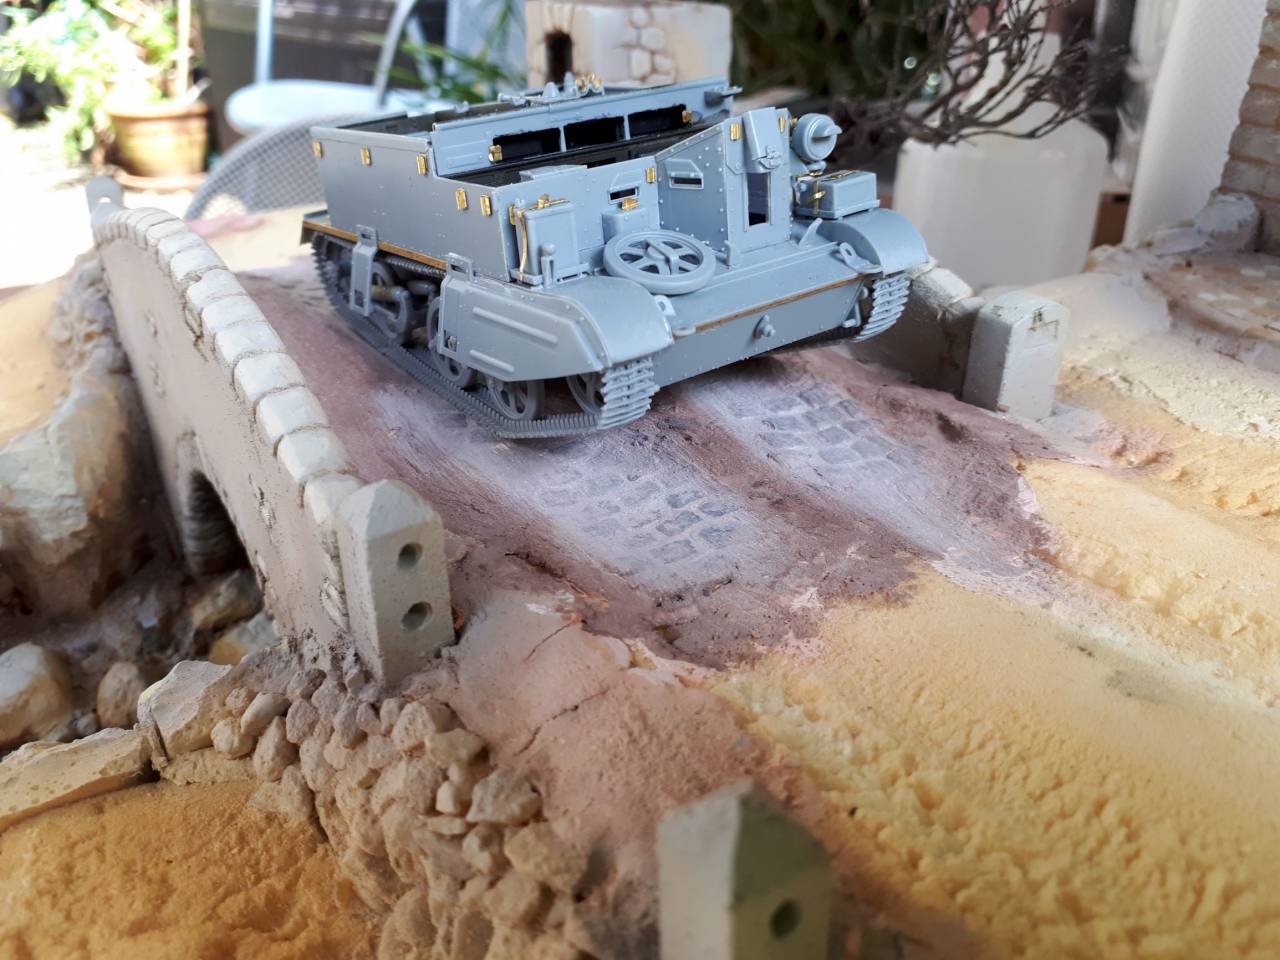
And here a few shots of the model:
In the last pic, the stowage is only temporarily in place and, like everything else, awaits a heavy application of dust...
Here's the original shot I used as inspiration for the latter:
And here a few shots of the model:
In the last pic, the stowage is only temporarily in place and, like everything else, awaits a heavy application of dust...
obg153
Texas, United States
Joined: April 07, 2009
KitMaker: 1,063 posts
Armorama: 1,049 posts
Joined: April 07, 2009
KitMaker: 1,063 posts
Armorama: 1,049 posts
Posted: Wednesday, October 24, 2018 - 04:51 AM UTC
Still following along & still impressed with how your scene in progressing, especially the groundwork. Also learned a few tips as well. Look forward to your updates!
ivanhoe6
Wisconsin, United States
Joined: April 05, 2007
KitMaker: 2,023 posts
Armorama: 1,234 posts
Joined: April 05, 2007
KitMaker: 2,023 posts
Armorama: 1,234 posts
Posted: Wednesday, October 24, 2018 - 08:36 AM UTC
Hi Tim, I am one of Ronaldo's "lurkers". This is truly a great diorama ! The composition, interaction between figures, the itty bitty details that pop out at you when I revisit your work that I didn't see the first time.
I wouldn't worry too much about the lushness of the drainage ditch/creek. The splash of green helps offset the tan & yellow shades, IMHO. Hitting it with some pigments will harmonize it for sure. Restraint will be your friend here I think.
Keep up the good work and please keep posting new images!
Thanks Tim !
americanpanzer
Iowa, United States
Joined: May 12, 2014
KitMaker: 542 posts
Armorama: 539 posts
Joined: May 12, 2014
KitMaker: 542 posts
Armorama: 539 posts
Posted: Wednesday, October 24, 2018 - 08:49 AM UTC
Awesome work!! Mind. Blown.
cheyenne
New Jersey, United States
Joined: January 05, 2005
KitMaker: 2,185 posts
Armorama: 1,813 posts
Joined: January 05, 2005
KitMaker: 2,185 posts
Armorama: 1,813 posts
Posted: Wednesday, October 24, 2018 - 11:35 PM UTC
Nice work Tim , everything's starting to fall in line , great veg, figs and carrier !!!