

Initially it was exciting to learn of the Dragon's release of a Panzer IV D as well as F1 and G models. Unfortunately Dragon has greatly simplified the running gear making it extremely difficult to create a realistic looking model.
I plan to use the running gear from an older kit (Panzerfahre Type 1 ( #7489) and apply it to a a Panzer IV G (#7549). I have never kit bashed a model and aside from adding some stowage, a crew figure(s) or stretched styrene antennae I pretty much build out of the box.
I am more concerned with an overall realistic appearance than minor accuracy issues which I am sure to arise. Any tips, criticisms or suggestions will be very welcome on this project.
Following this will be some background and hopefully I can get some pics up of my progress so far.
Hosted by Darren Baker
Kitbashing Dragon PZ IV Running Gear

anastasius

Joined: March 23, 2015
KitMaker: 19 posts
Armorama: 19 posts
Posted: Saturday, September 22, 2018 - 08:04 AM UTC
anastasius
Joined: March 23, 2015
KitMaker: 19 posts
Armorama: 19 posts
Posted: Saturday, September 22, 2018 - 08:11 AM UTC
Concerning the recent Dragon Panzer IV releases ....two of the three kits, F1 and F2/G (#7549 #7560) contain identical sprues . The only differences are the boxes, instructions and decals. The D model (#7530) has unique parts for only that version . 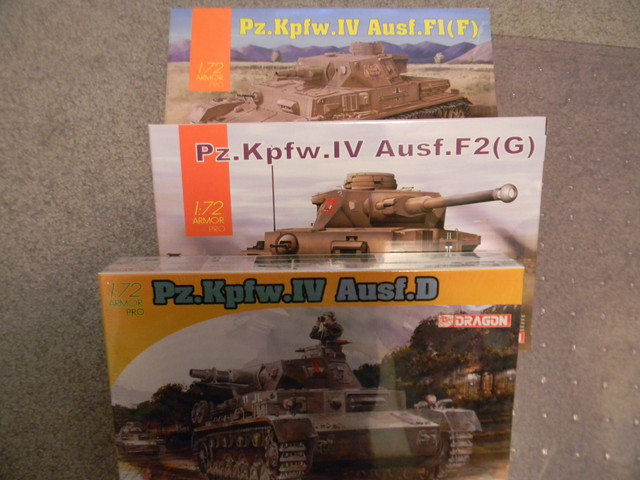
This is the kit I am taking the running gear from. I bought several of these for less than $10 each from Dragon USA during one of their sales which pop up from time to time
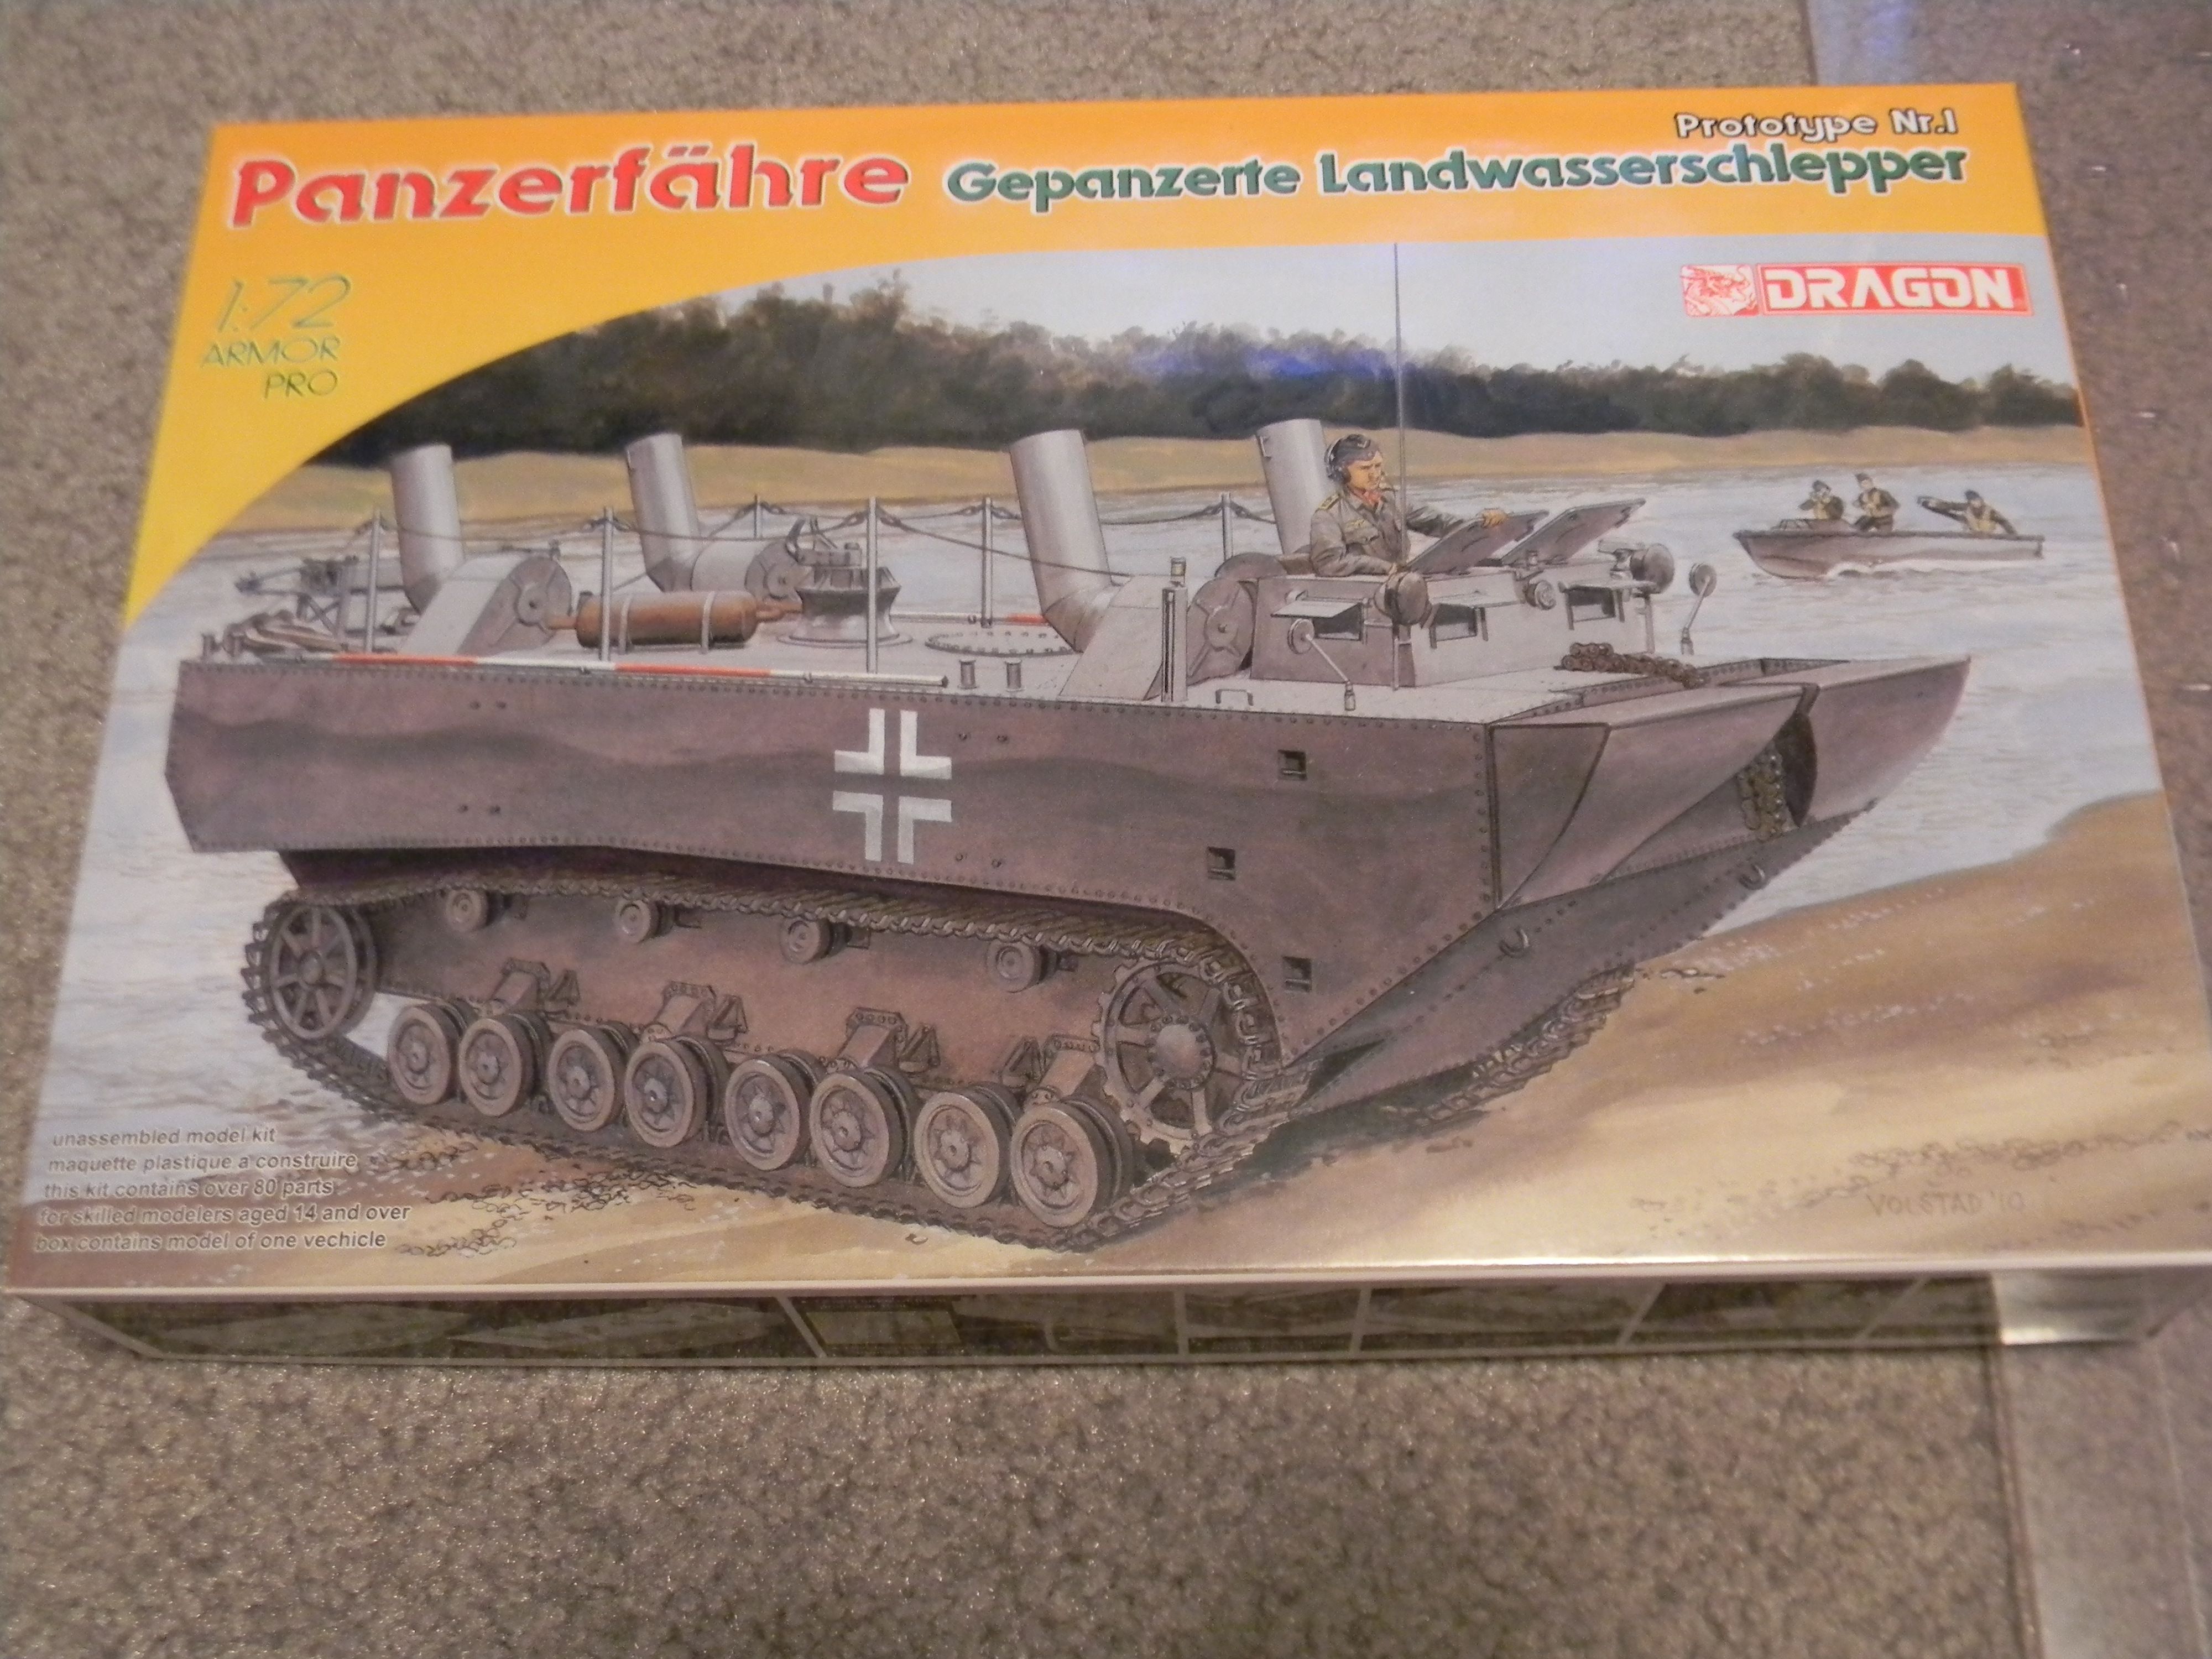
This is the kit I am taking the running gear from. I bought several of these for less than $10 each from Dragon USA during one of their sales which pop up from time to time

RobinNilsson

Joined: November 29, 2006
KitMaker: 6,693 posts
Armorama: 5,562 posts
Posted: Saturday, September 22, 2018 - 08:29 AM UTC
The image looks fine to me. I guess you figured out the ] and [ brackets around the img and /img tags 
/ Robin
/ Robin
Removed by original poster on 09/22/18 - 20:34:52 (GMT).
anastasius
Joined: March 23, 2015
KitMaker: 19 posts
Armorama: 19 posts
Posted: Saturday, September 22, 2018 - 09:11 AM UTC
Thanks Robin ....Who would have thunk a little / could make such a difference...? 
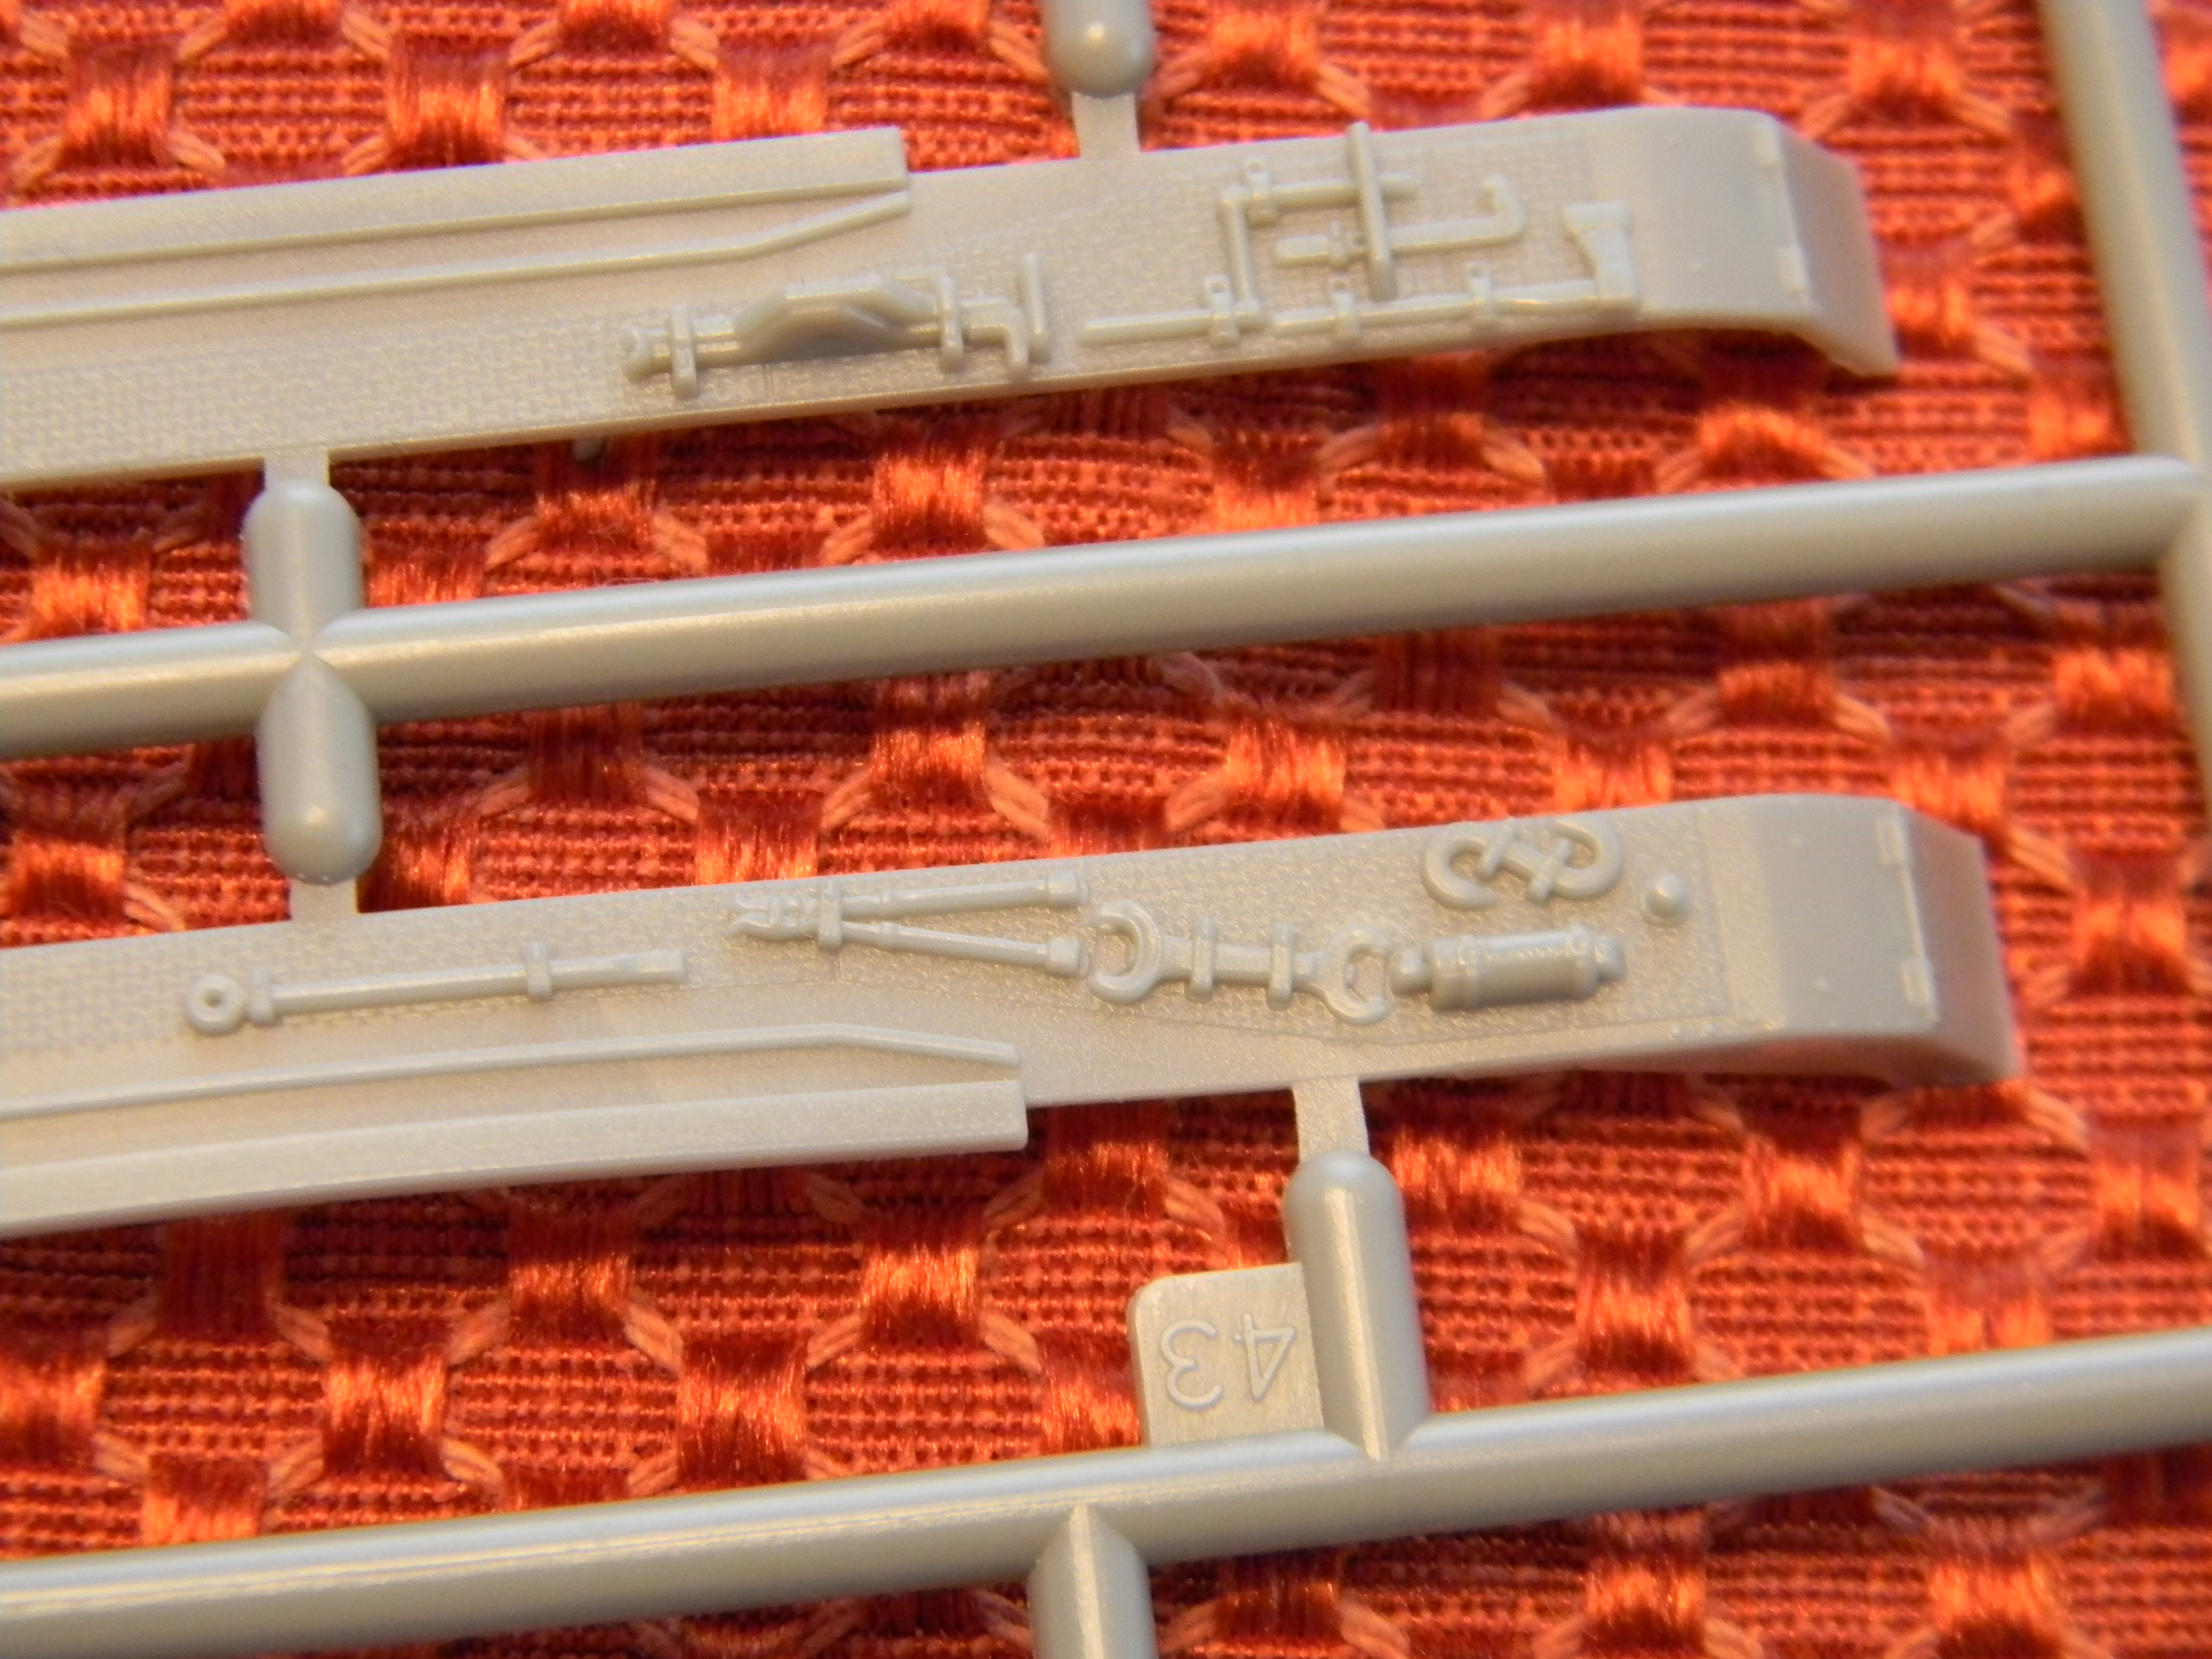
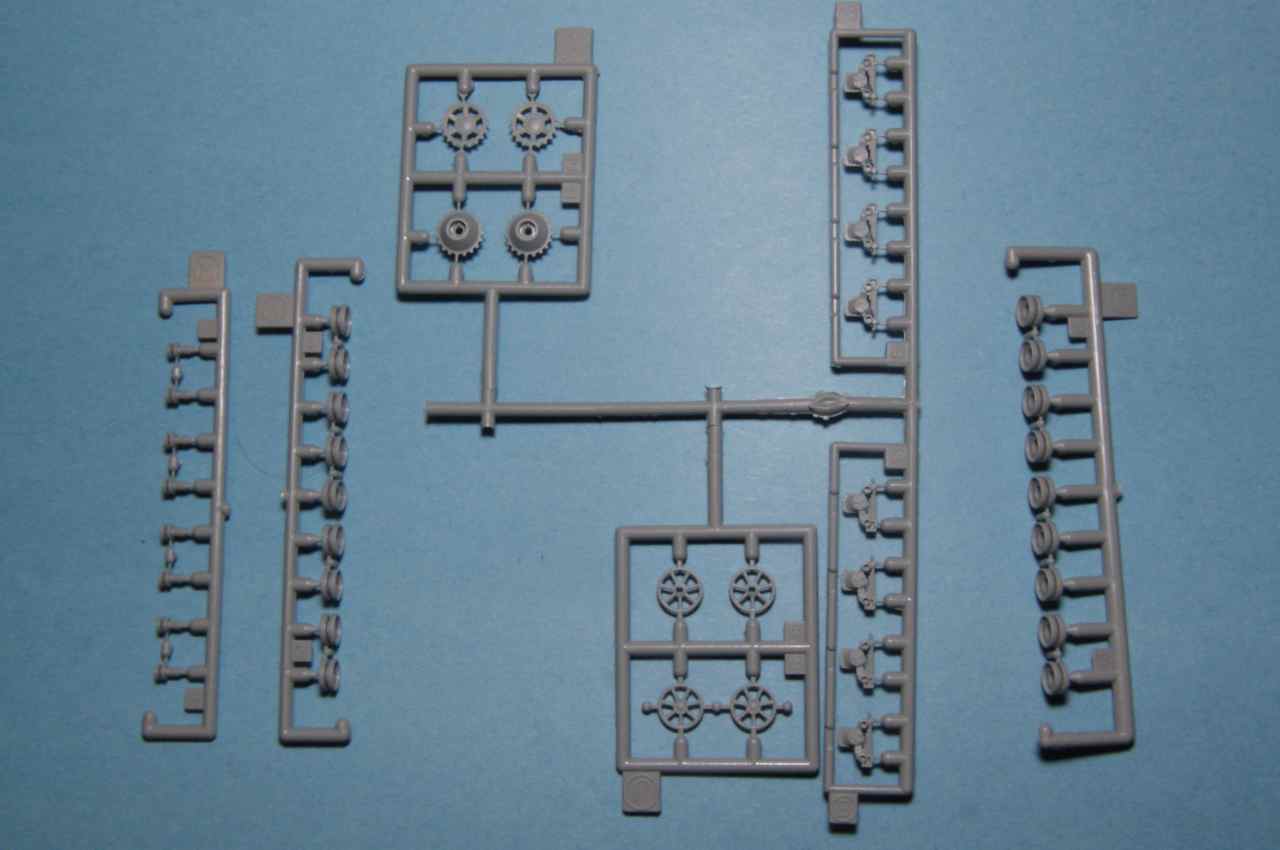
This is a pic of the running gear from the Panzer IV kit...
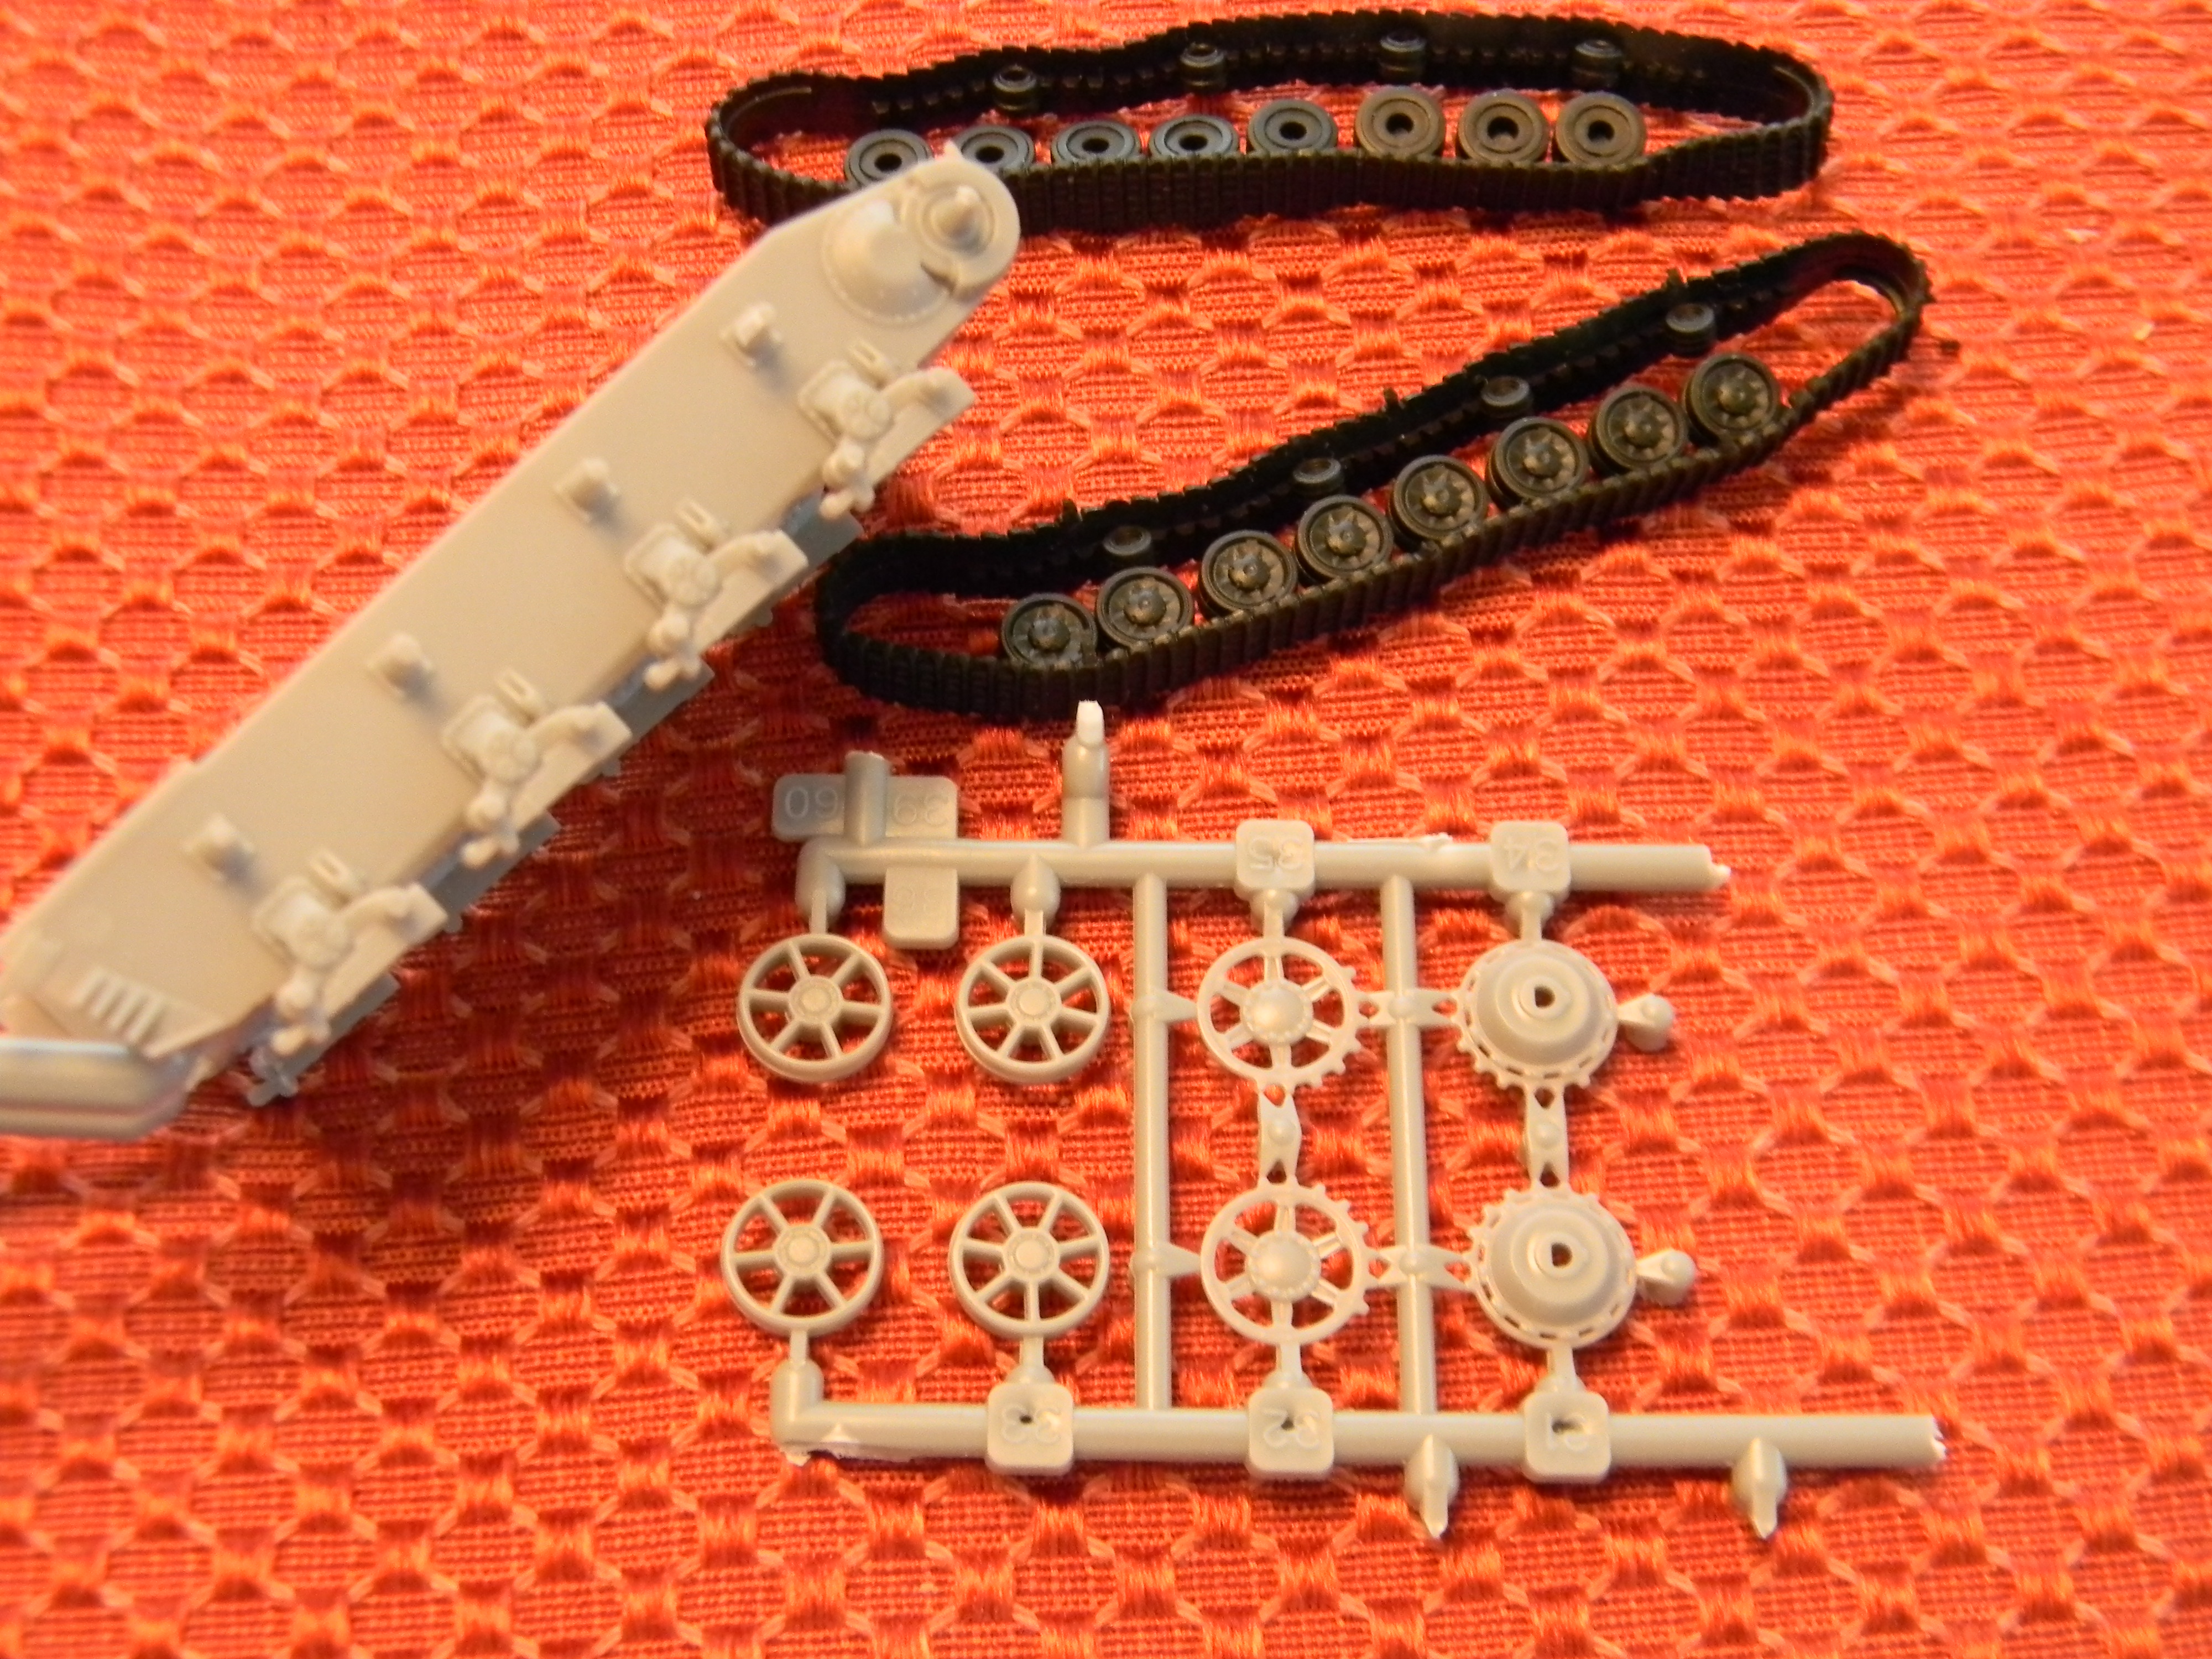
and for comparison the parts from the Panzerfahre
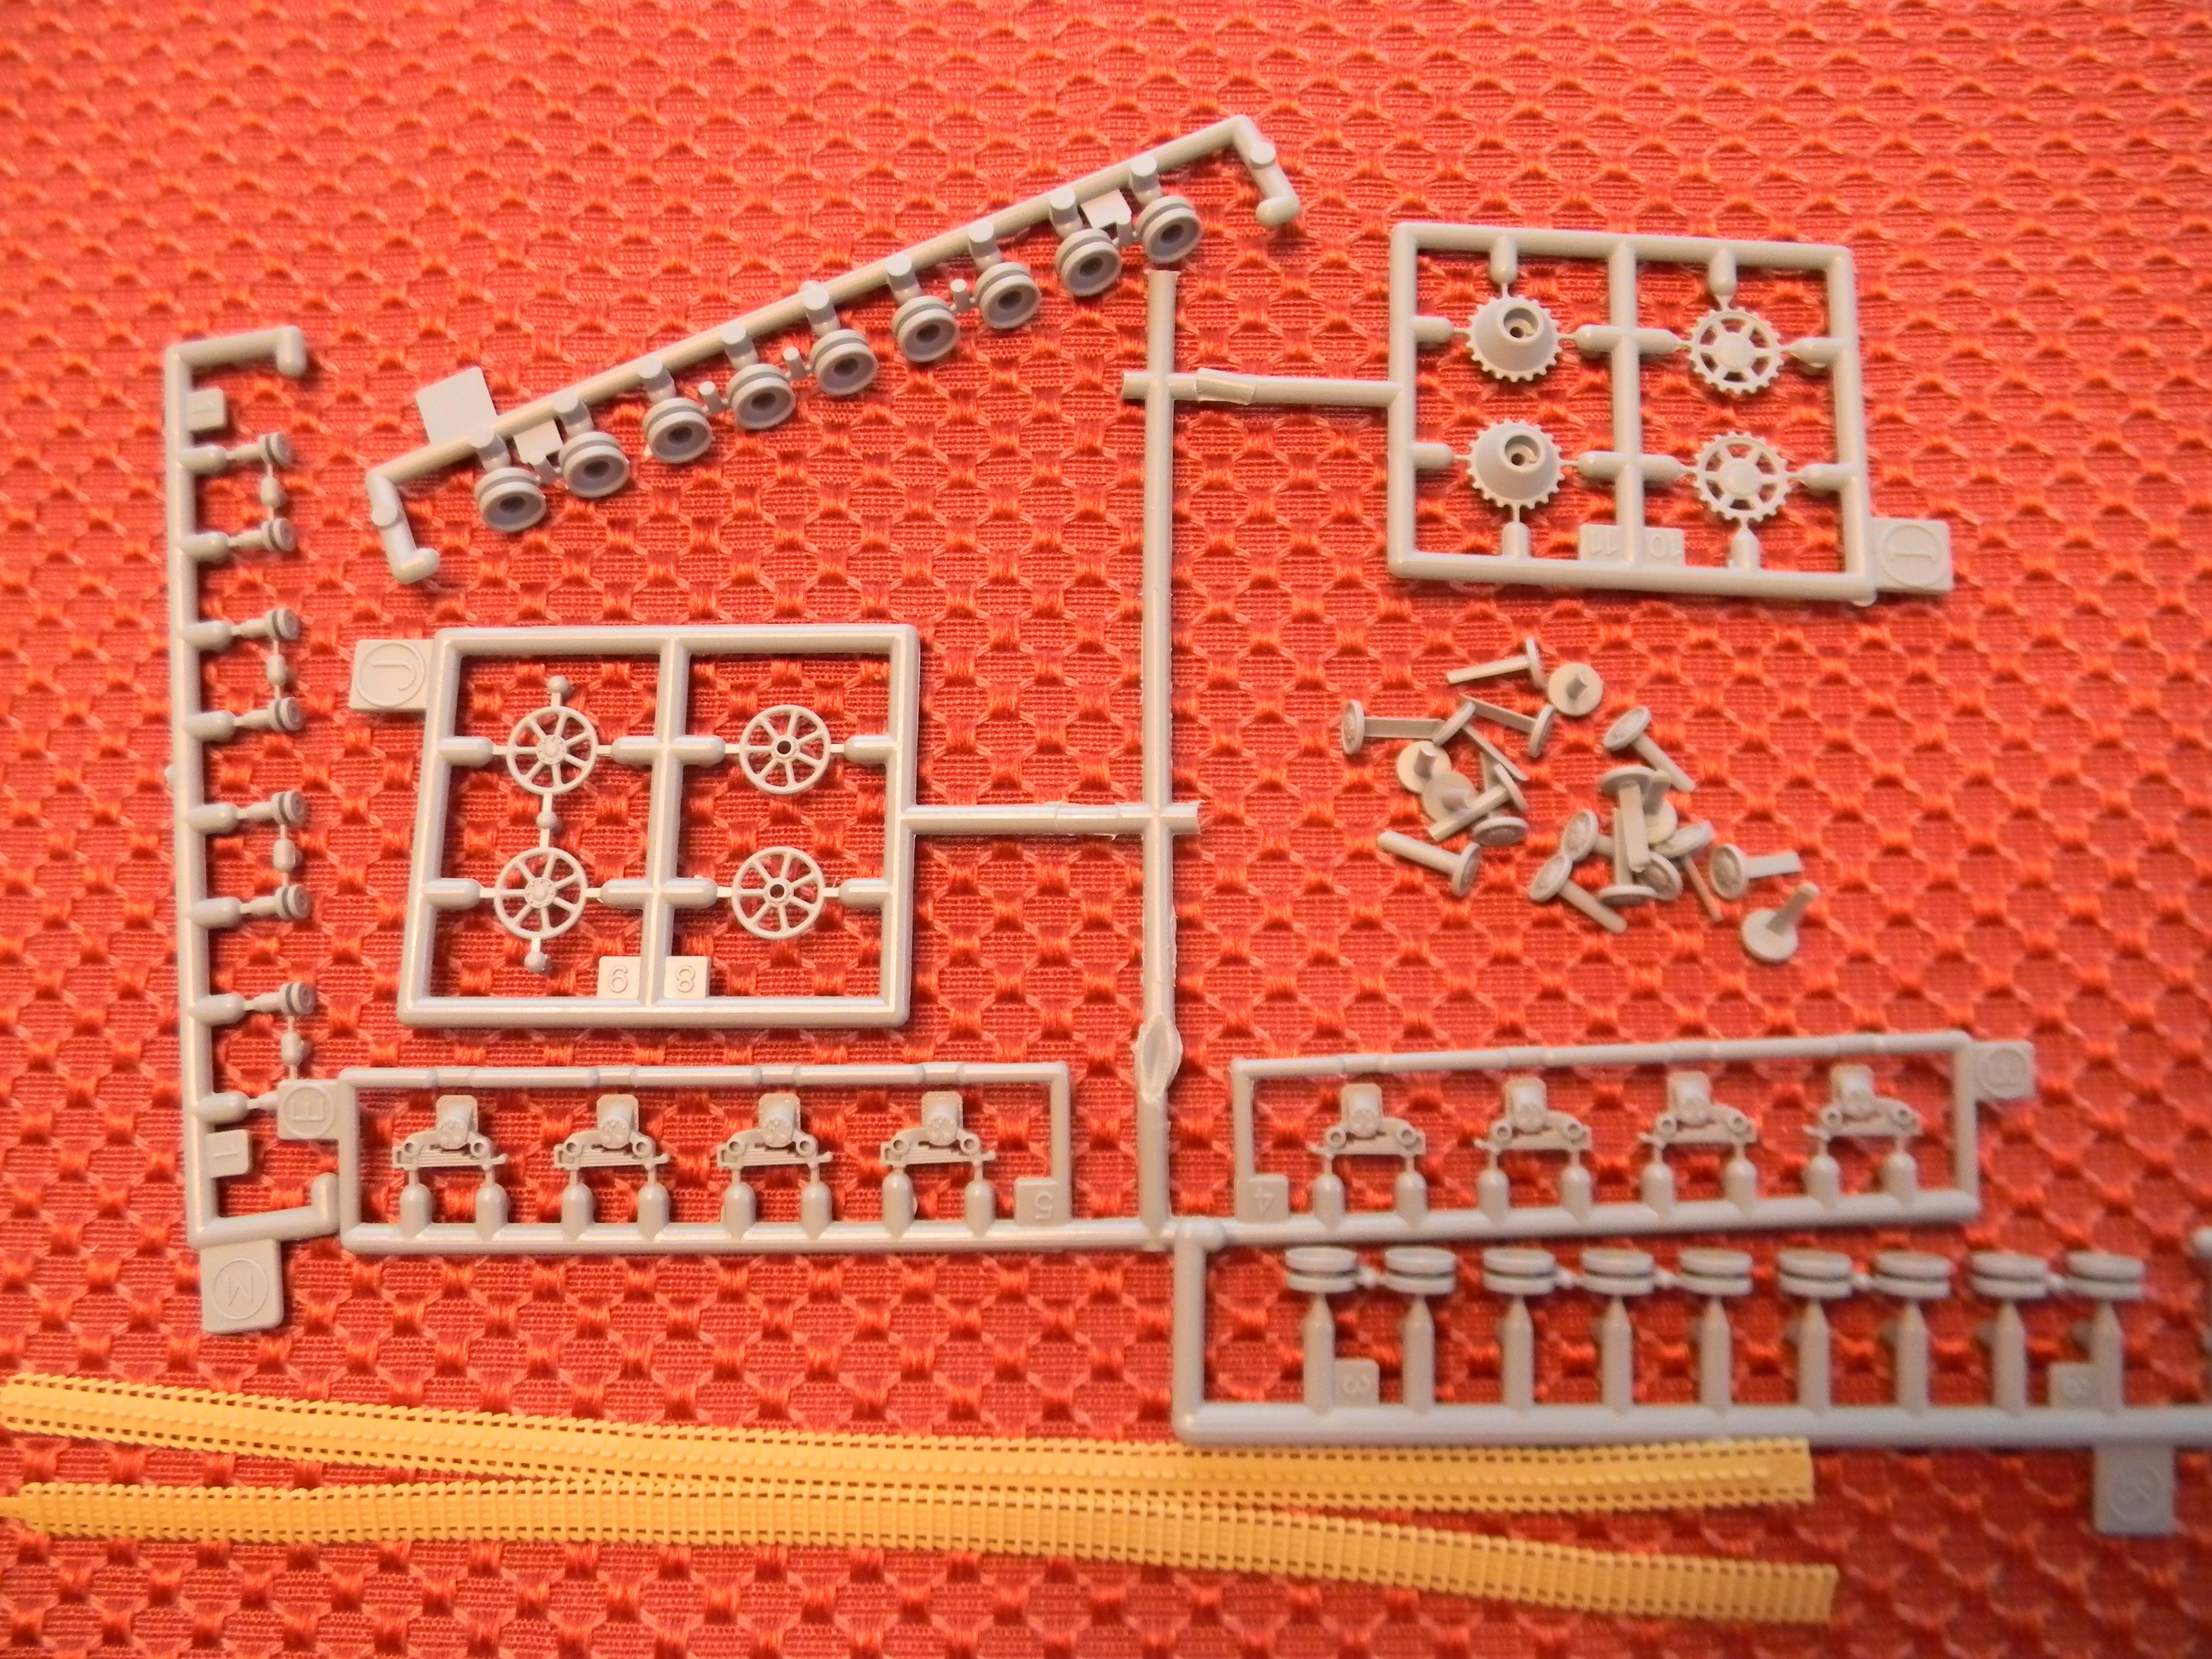
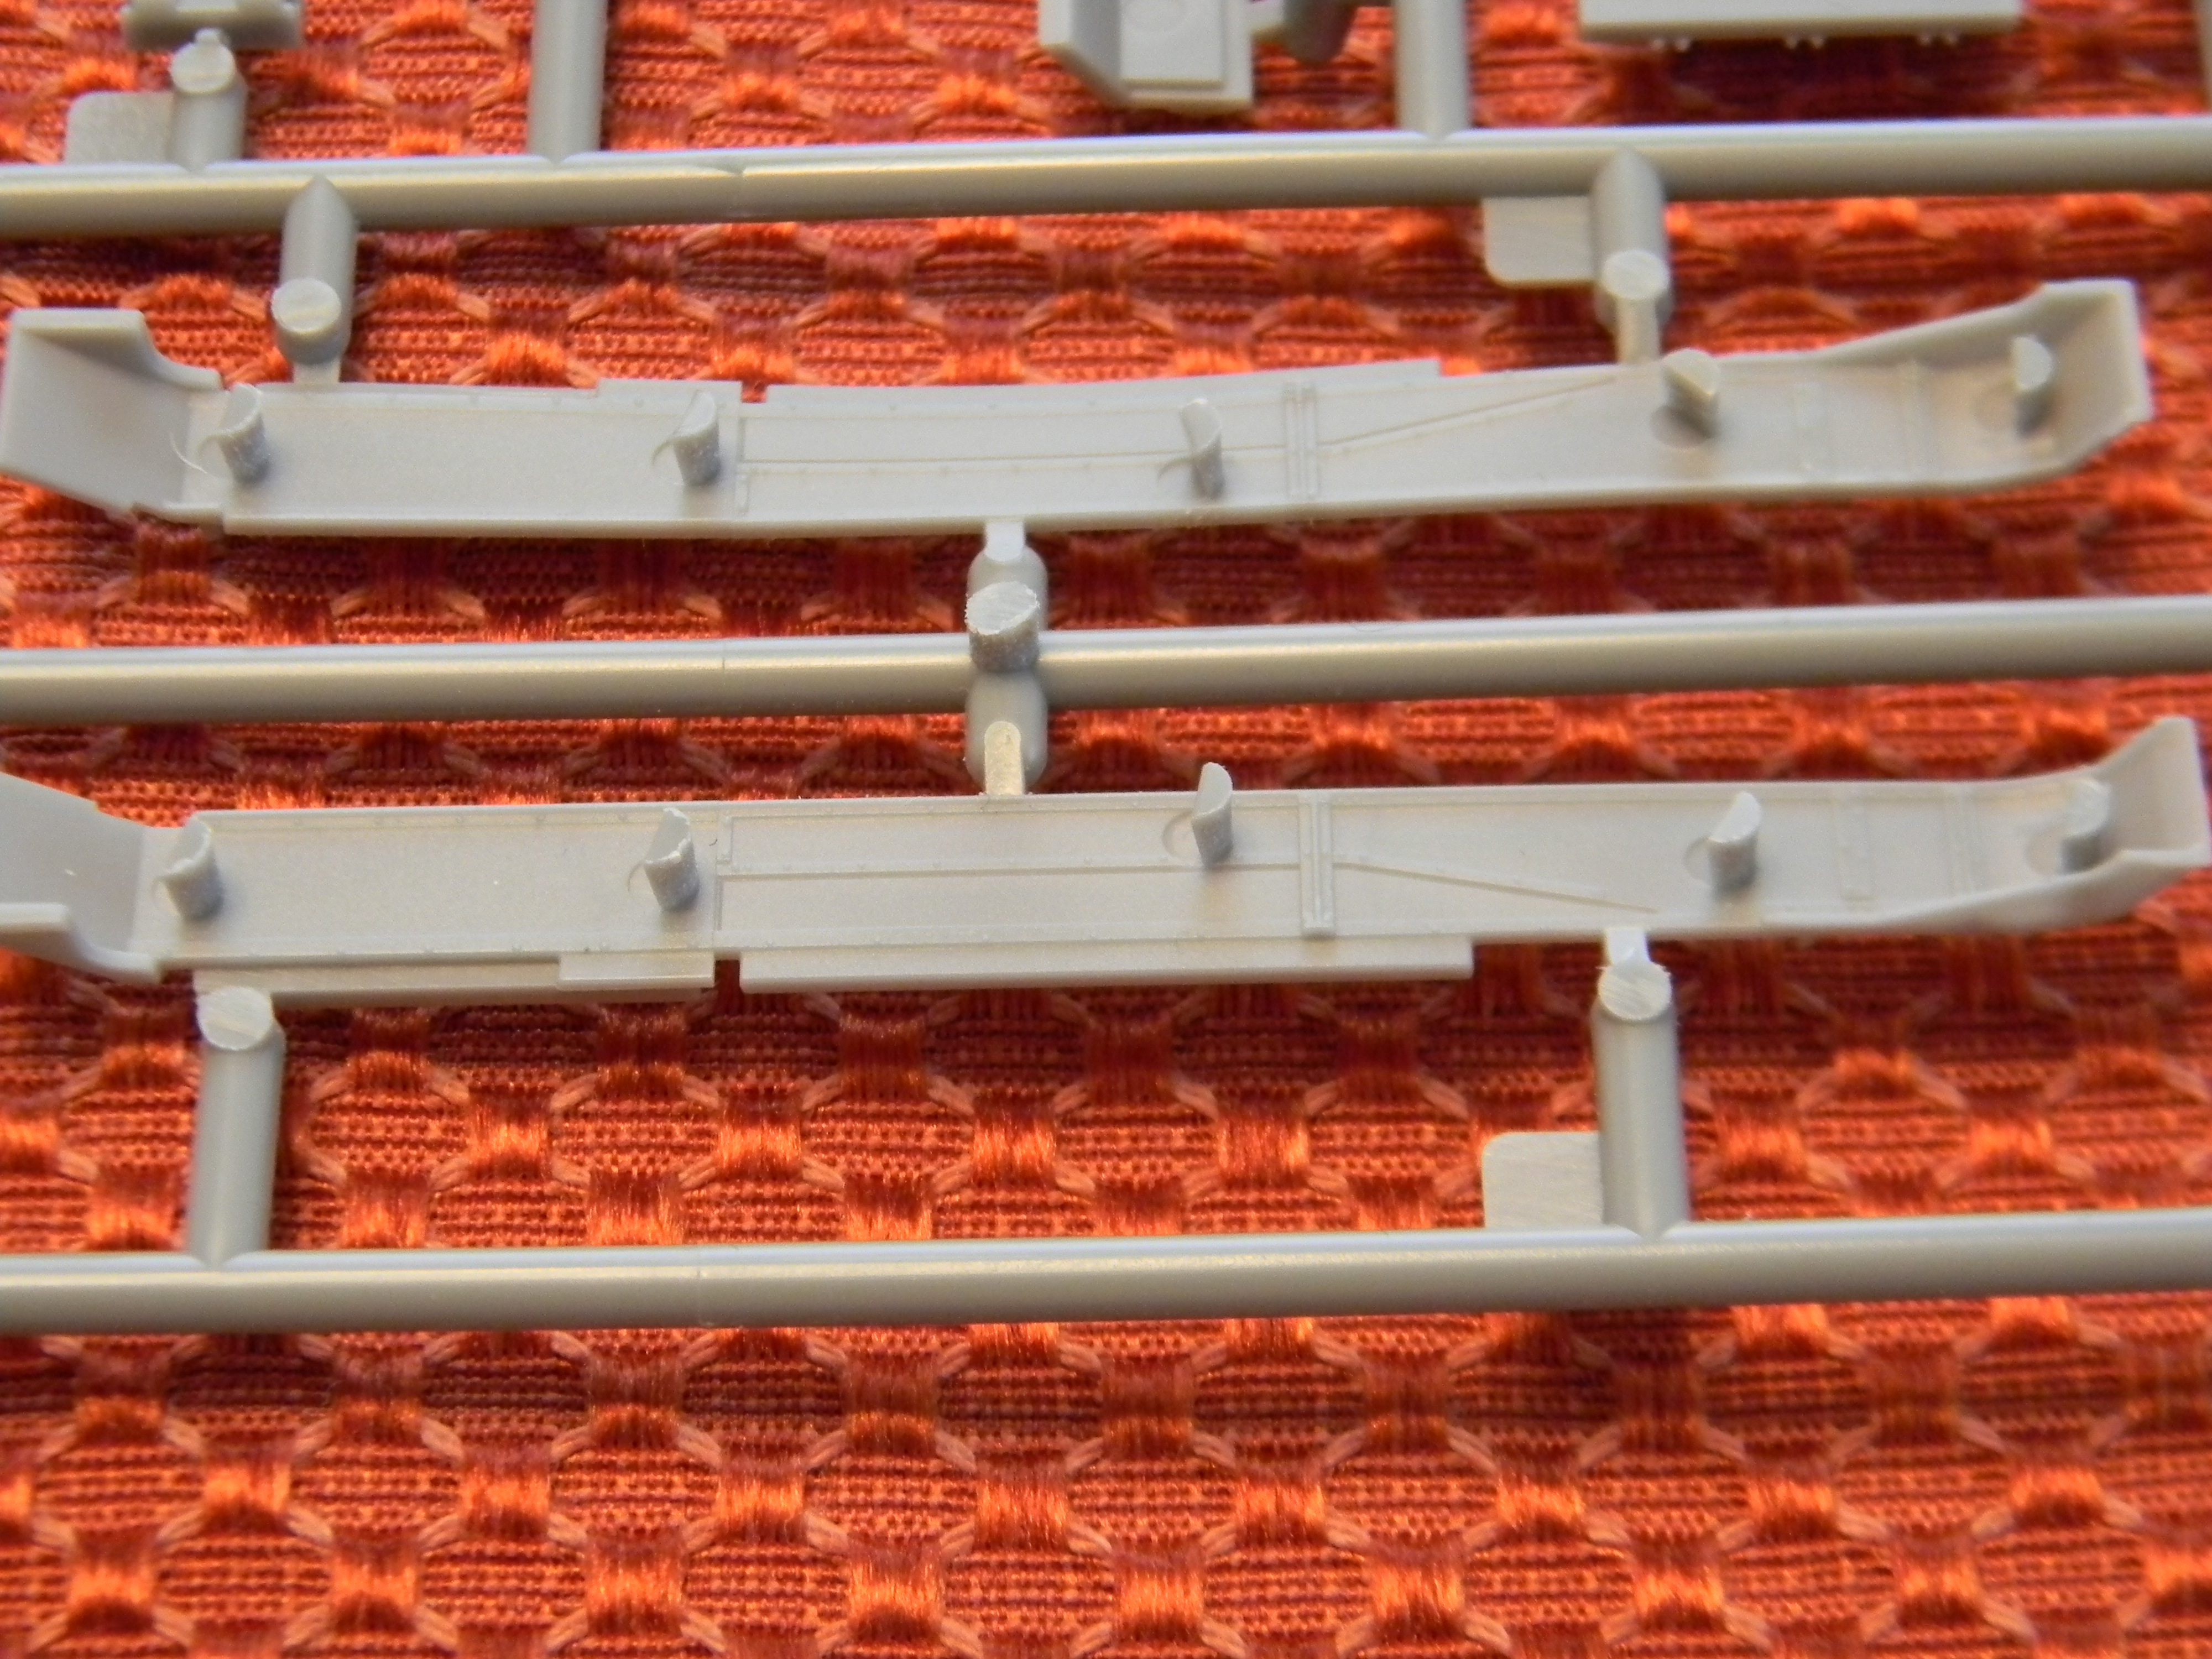
Many of the details such as tools are molded on. They seem sharply done and should look fairly realistic after an overall or pinwash. The underside of the fenders are detailed but have huge projections. I am not sure if they were part of the molding process or meant to create track sag as the older Hasegawa Panzer IV kits had. No matter, they will be cut out for my project.
This is a pic of the running gear from the Panzer IV kit...
and for comparison the parts from the Panzerfahre
Many of the details such as tools are molded on. They seem sharply done and should look fairly realistic after an overall or pinwash. The underside of the fenders are detailed but have huge projections. I am not sure if they were part of the molding process or meant to create track sag as the older Hasegawa Panzer IV kits had. No matter, they will be cut out for my project.
RobinNilsson
Joined: November 29, 2006
KitMaker: 6,693 posts
Armorama: 5,562 posts
Posted: Saturday, September 22, 2018 - 10:04 AM UTC
Those projections are left-overs from the molding process.
Remove. Fill and/or sand smooth if you think that it might possibly be visible later.
/ Robin
Remove. Fill and/or sand smooth if you think that it might possibly be visible later.
/ Robin
anastasius
Joined: March 23, 2015
KitMaker: 19 posts
Armorama: 19 posts
Posted: Saturday, September 22, 2018 - 10:32 AM UTC
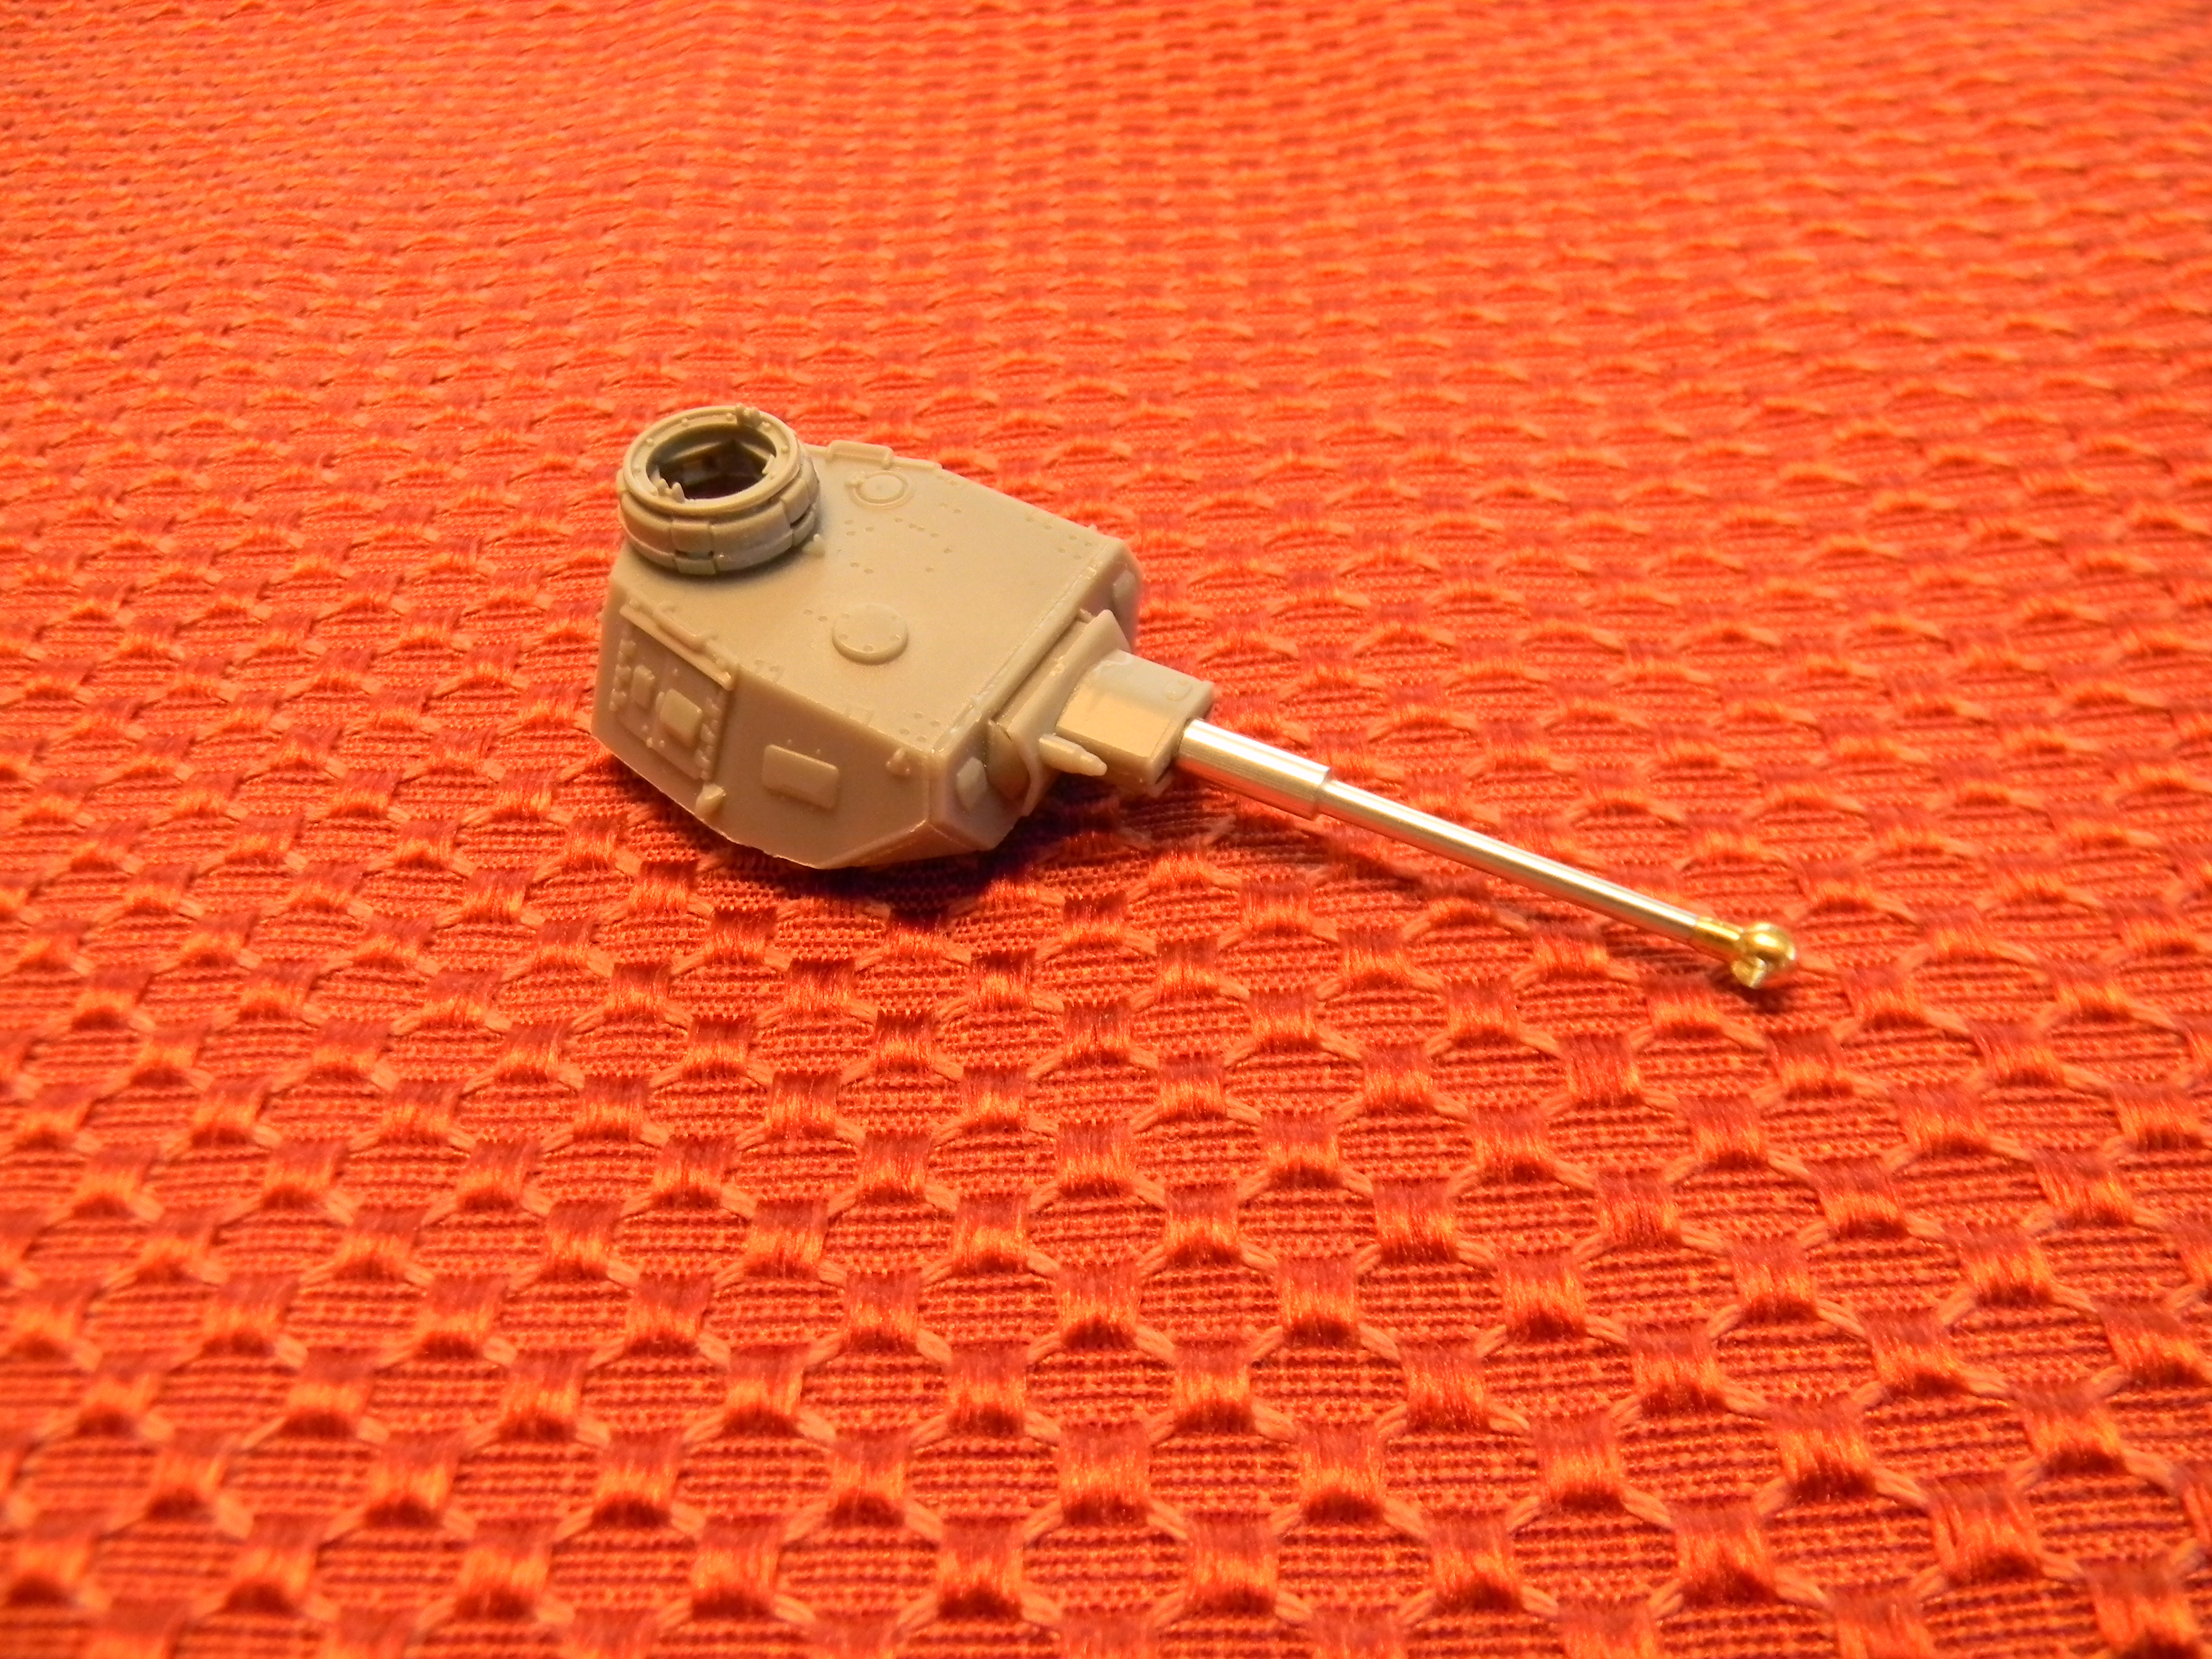
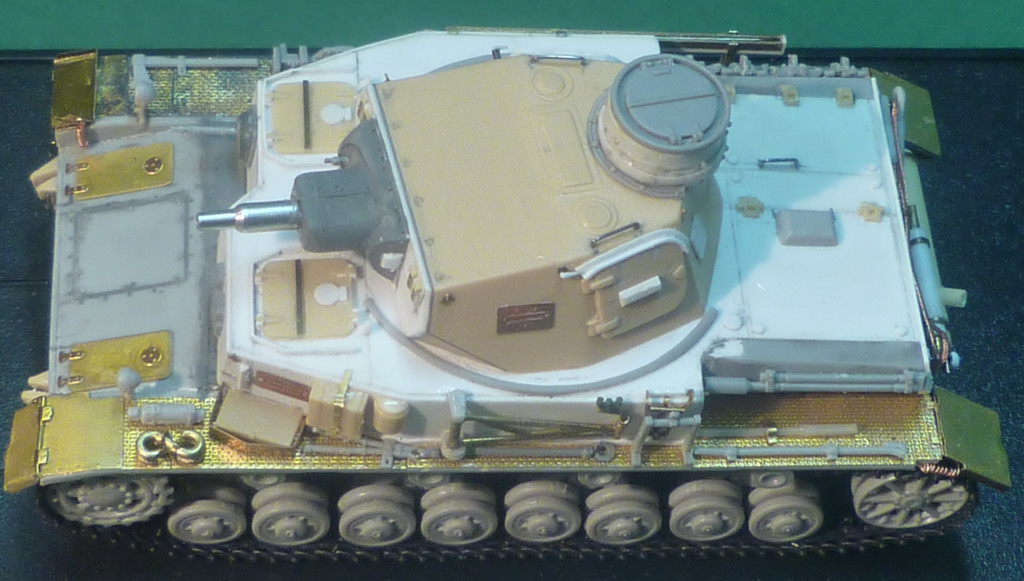
Where I am at so far. The metal barrel is an RB item. The cupola is from the excellent T34/76 Mod.1942 German Army (#7268) kit.
I have cut off all the pins for the upper track support wheels as well as the road wheel mounts from the hull and installed the parts from the Panzerfahre. The issue I face now is ensuring the road wheels, drive and return sprockets all line up so the track horns rest in the slots evenly. This will be critical to getting a realistic appearance. Suggestions very welcome here.
The cupola looks similar to the one provided in the kit but is far more detailed. I can't tell from photos if it is accurate to use. The other question I have is I have seen the hatches on PZ IVs open and either at 45 degrees or parallel to the turret roof top. Does that apply to this model(F2/G)or was it only on later versions that the commander had the option of hatch positions? Most I see of the early models, the open hatches are parallel to the turret top.

Thanks for looking and please don't be shy about offering tips or criticisms. If it improves my skills I will be happy to hear them. looking forward to posting more of this project as I do it.
I have cut off all the pins for the upper track support wheels as well as the road wheel mounts from the hull and installed the parts from the Panzerfahre. The issue I face now is ensuring the road wheels, drive and return sprockets all line up so the track horns rest in the slots evenly. This will be critical to getting a realistic appearance. Suggestions very welcome here.
The cupola looks similar to the one provided in the kit but is far more detailed. I can't tell from photos if it is accurate to use. The other question I have is I have seen the hatches on PZ IVs open and either at 45 degrees or parallel to the turret roof top. Does that apply to this model(F2/G)or was it only on later versions that the commander had the option of hatch positions? Most I see of the early models, the open hatches are parallel to the turret top.
Thanks for looking and please don't be shy about offering tips or criticisms. If it improves my skills I will be happy to hear them. looking forward to posting more of this project as I do it.
anastasius
Joined: March 23, 2015
KitMaker: 19 posts
Armorama: 19 posts
Posted: Saturday, September 22, 2018 - 10:35 AM UTC
The fit of the parts I have so far assembled is excellent so at least Dragon got that right. I suppose there is a market for these kits so I don't want to dump a bunch of crap on my favorite 1/72 kit manufacturer. Hopefully they will reintroduce the older Panzer IV kits with the open hatches and detailed running gear. If this turns out half decently I will do a D model next.
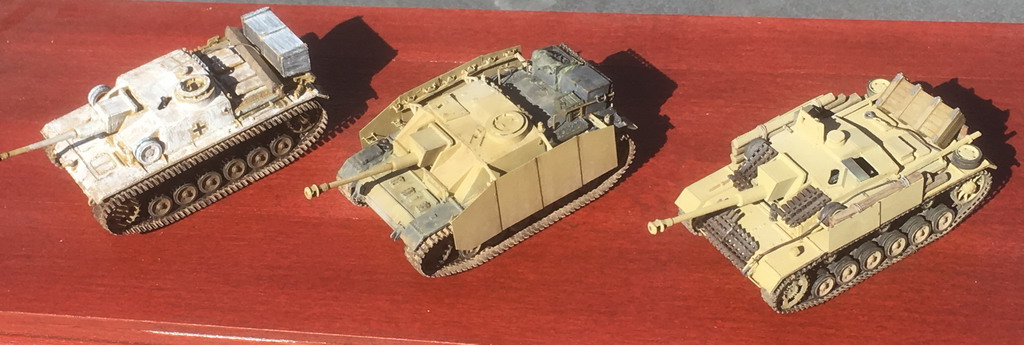
Below is a pic of an S Model Panzer IIIG and a Dragon Panzer IIIJ I built last year. Just to give anyone offering help an example of my abilities. Perhaps mediocre but I will be ecstatic if this project turns out as well as either of these kits did.
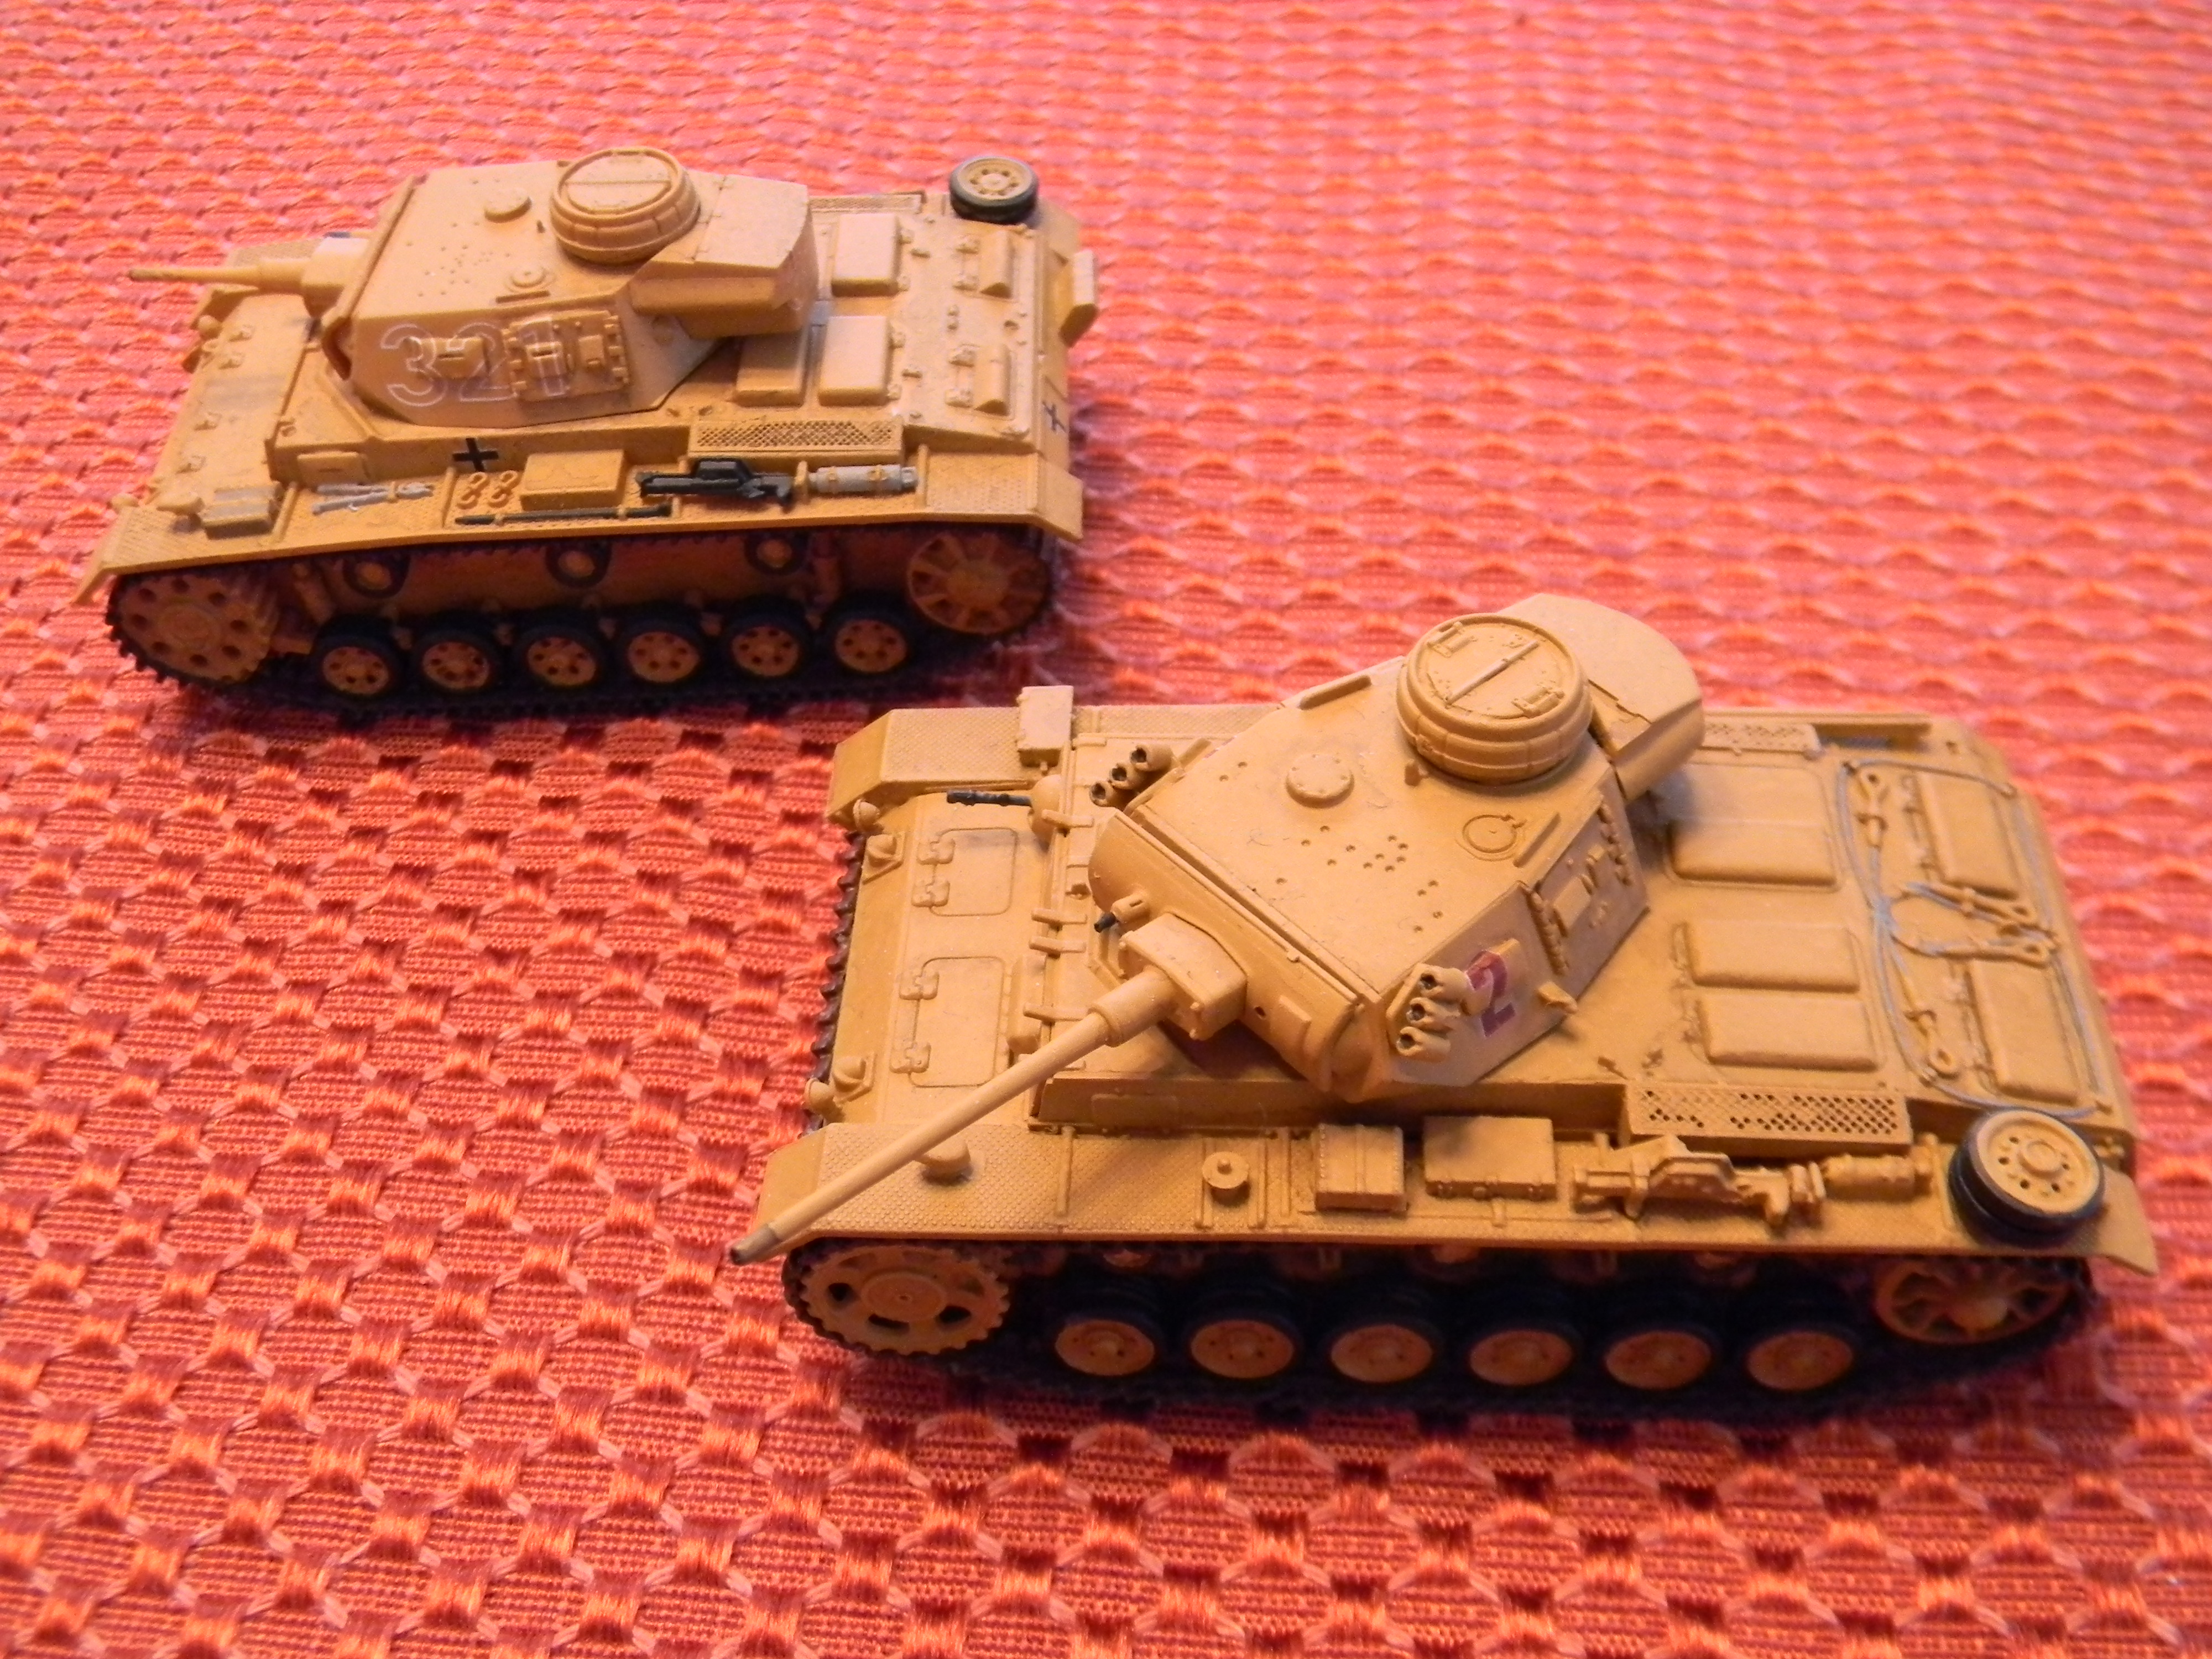
Below is a pic of an S Model Panzer IIIG and a Dragon Panzer IIIJ I built last year. Just to give anyone offering help an example of my abilities. Perhaps mediocre but I will be ecstatic if this project turns out as well as either of these kits did.
tread_geek
Joined: March 23, 2008
KitMaker: 2,847 posts
Armorama: 2,667 posts
Posted: Sunday, September 23, 2018 - 03:37 AM UTC
@ (anastasius) Jack,
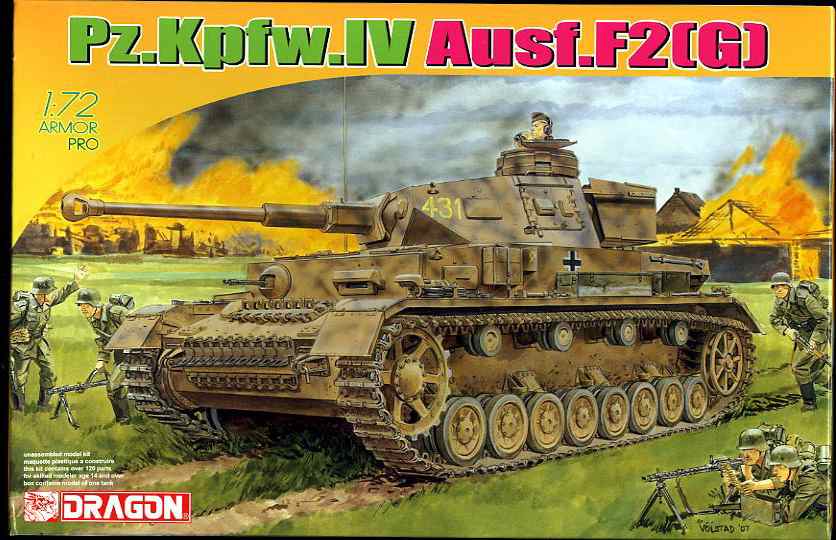
What a sad issue or topic that you bring up. Dragon has really lowered their standards compared to their "glory days". The Panzerfahre suspension is pleasantly complex and is/was based on their Pz.Kpfw. IV Ausf. F2(G) kit #7359 of yore.
  There is a review of that kit on Armorama and you can find it HERE.
 Pz.Kpfw.IV Ausf.F2(G)-1 by Jan Etal, on Flickr
 Pz.Kpfw.IV Ausf.F2(G)-4 by Jan Etal, on Flickr
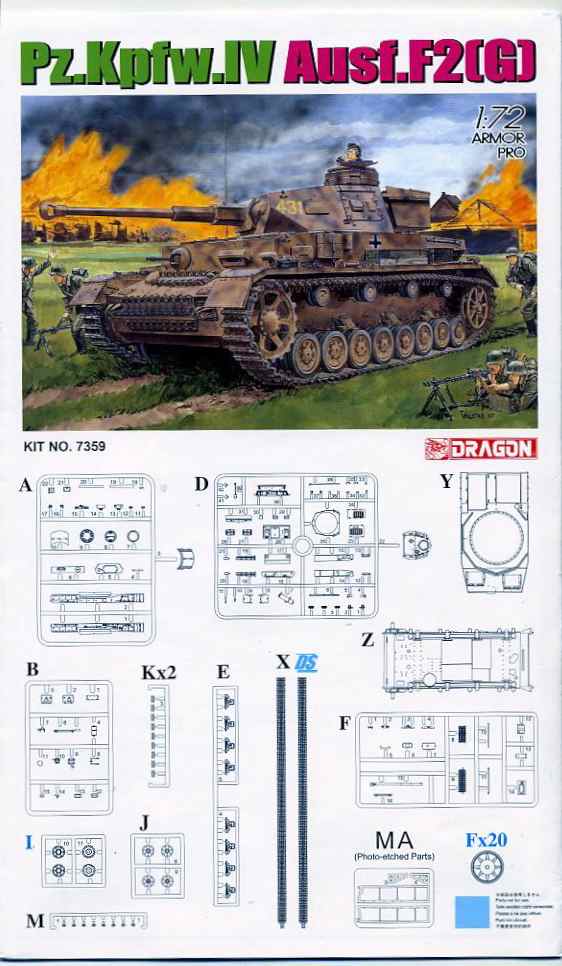
As you can see, the suspension buildup is virtually the same as the Panzerfahre but you also get the body and turret and these kits still can be found from time to time even on DragonUSA.
 Pz.Kpfw.IV Ausf.F2(G)-13 by Jan Etal, on Flickr
IMHO, for Dragon to call their new simplified kits "Armor Pro" is a travesty when compared to their earlier offerings. Hope this helps.
Cheers,
--Jan
What a sad issue or topic that you bring up.
Dragon has really lowered their standards compared to their "glory days". The Panzerfahre suspension is pleasantly complex and is/was based on their Pz.Kpfw. IV Ausf. F2(G) kit #7359 of yore. There is a review of that kit on Armorama and you can find it HERE. Pz.Kpfw.IV Ausf.F2(G)-1 by Jan Etal, on FlickrPz.Kpfw.IV Ausf.F2(G)-4 by Jan Etal, on FlickrAs you can see, the suspension buildup is virtually the same as the Panzerfahre but you also get the body and turret and these kits still can be found from time to time even on DragonUSA.
Pz.Kpfw.IV Ausf.F2(G)-13 by Jan Etal, on FlickrIMHO, for Dragon to call their new simplified kits "Armor Pro" is a travesty when compared to their earlier offerings. Hope this helps.
Cheers,
--Jan

Biggles2
Joined: January 01, 2004
KitMaker: 7,600 posts
Armorama: 6,110 posts

Posted: Sunday, September 23, 2018 - 03:45 AM UTC
That S-Model Pz lll G certainly looks good! Is that an OOB build?
anastasius
Joined: March 23, 2015
KitMaker: 19 posts
Armorama: 19 posts
Posted: Wednesday, October 10, 2018 - 08:55 AM UTC
Thank you Biggles. It is pretty much OOB except I drilled out the lightening holes in the drive sprocket. The kits come two to a box and on the other I built it with an open commander hatch and added a figure. The kits are excellent but the simplified suspension just calls out for enhancement. If I can find (or get the ambition to scratch) proper drive sprockets and idler wheels I may try adding a more authentic suspension to one of those kits.
Jan thank you for posting your review. After reading it I realized the importance of properly aligning the drive sprocket with the idler so the tracks go on straight. On my project I used a length of brass rod with about twenty five percent bent at a 30 degree angle.
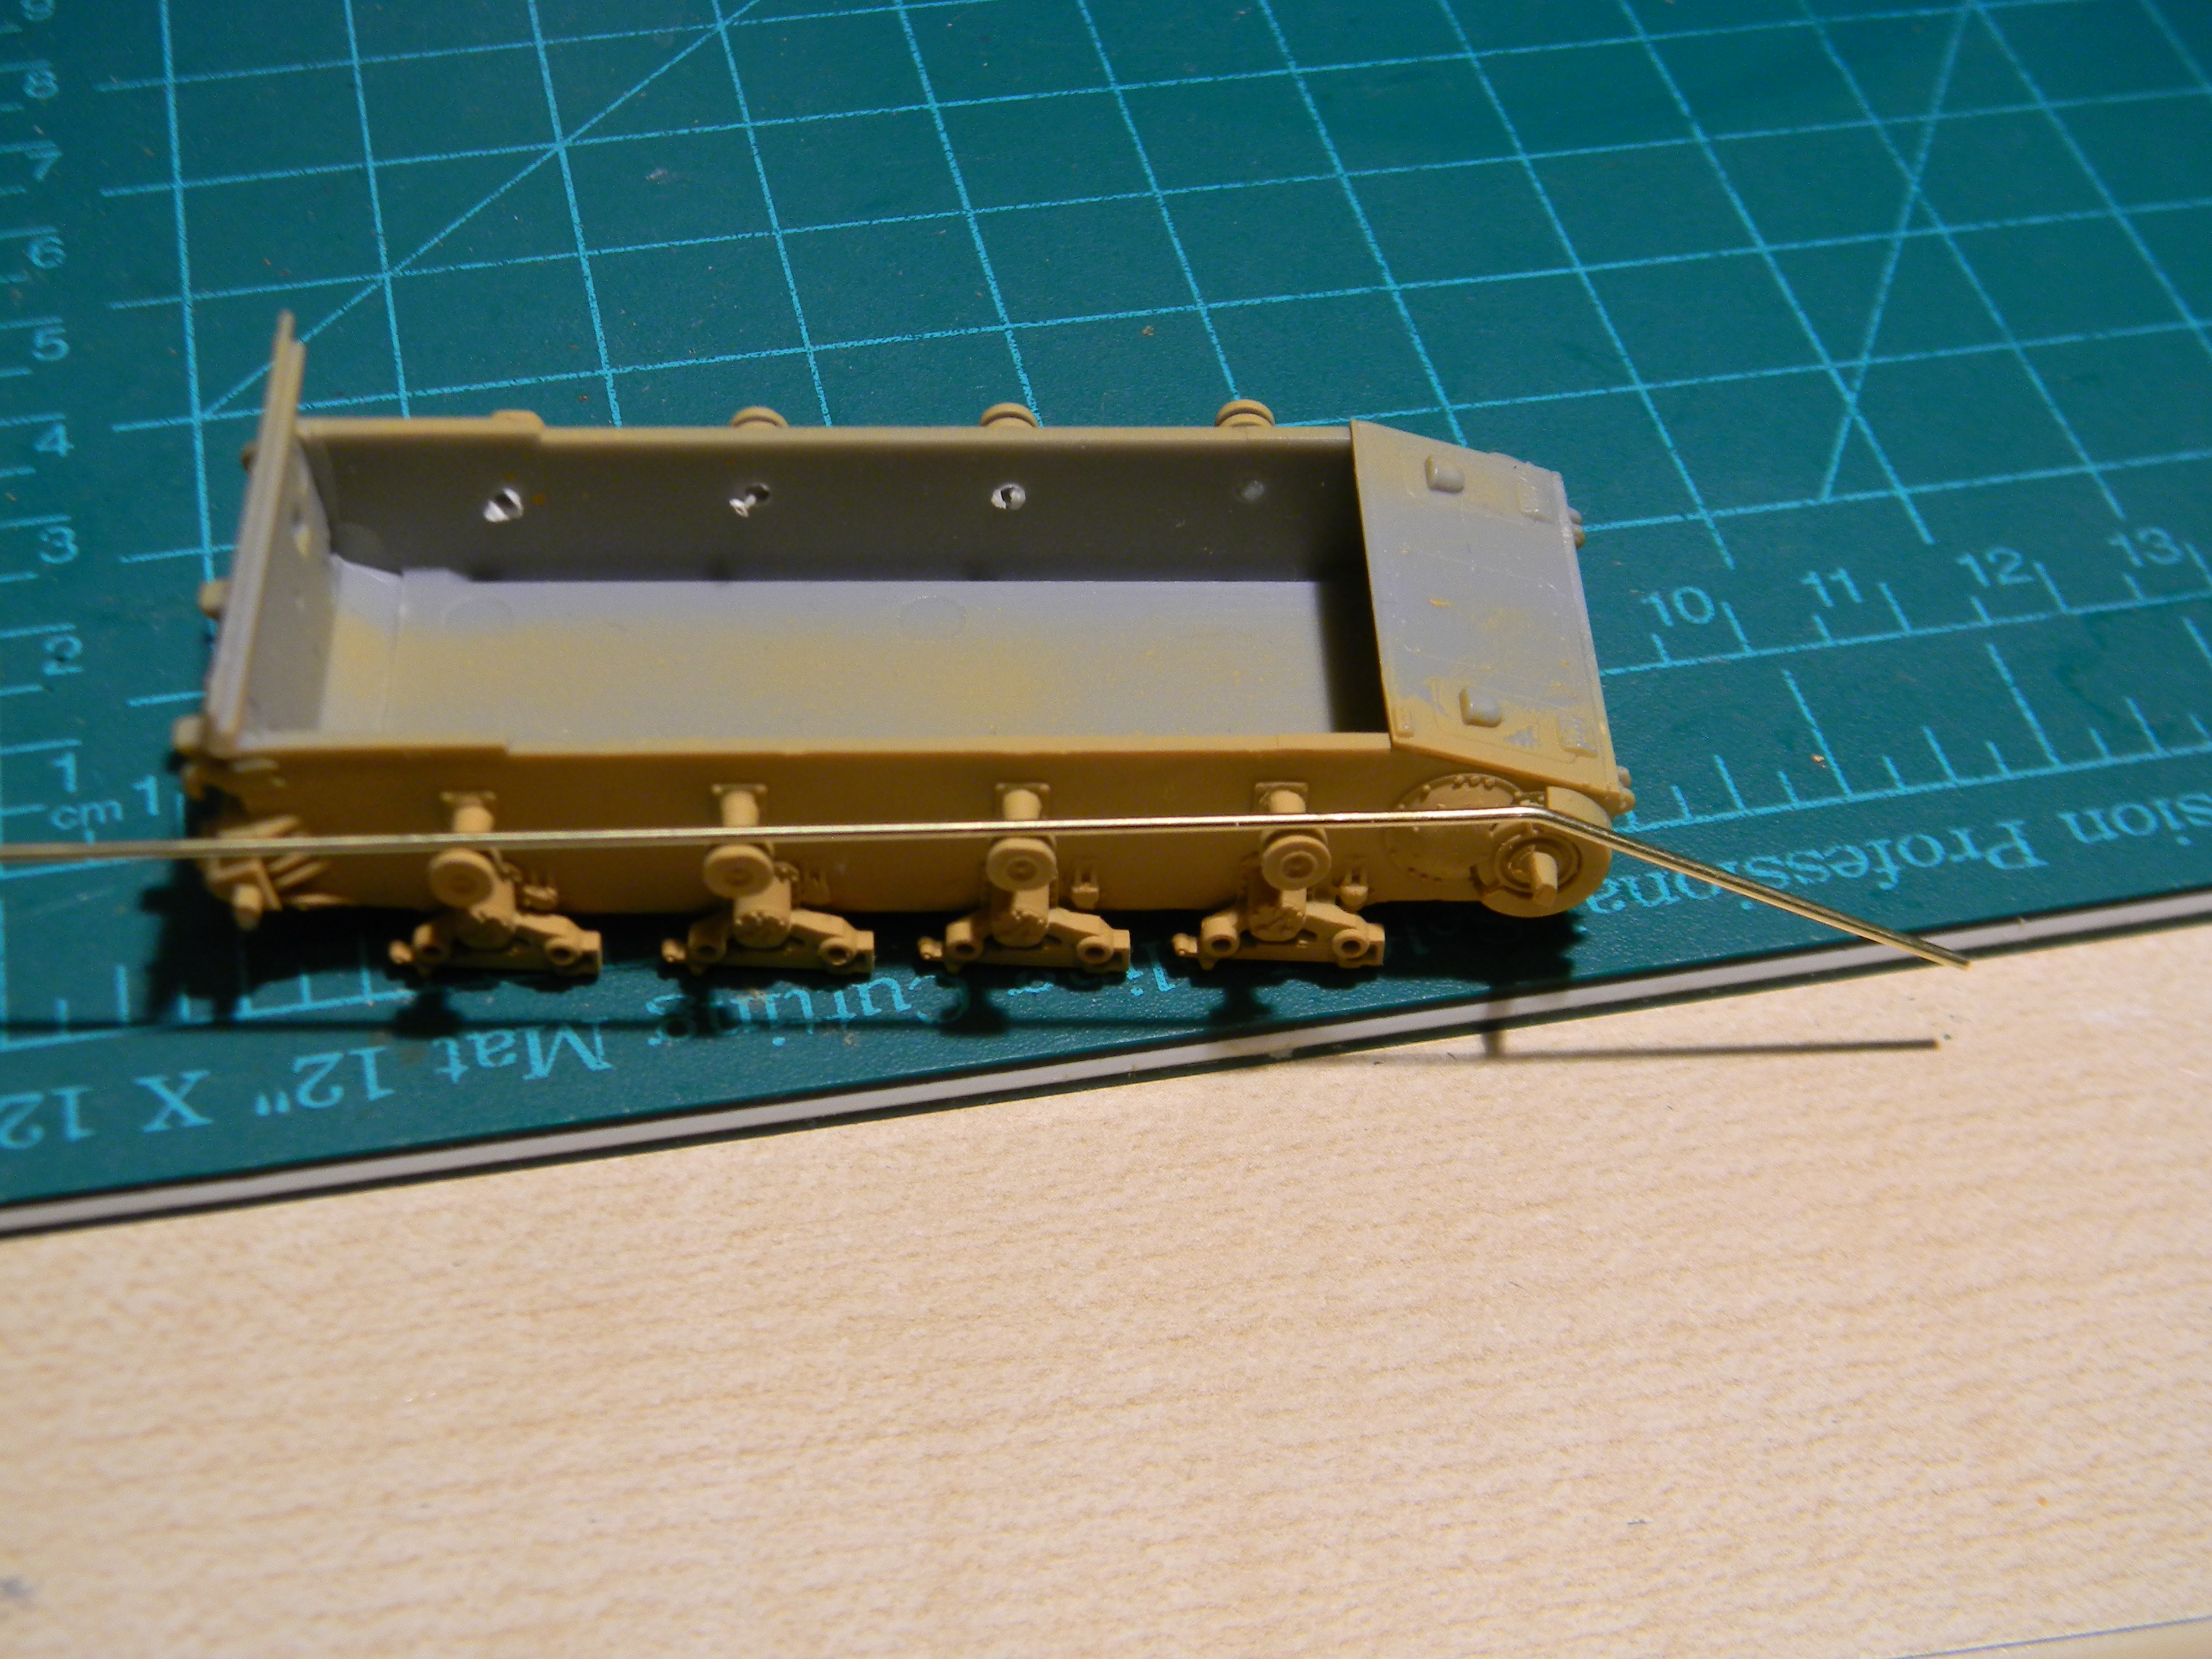
This allowed me to centre and attach them knowing everything was aligned. The bent portion along with a little help from gravity was a huge aid in ensuring vertical alignment.
Jan thank you for posting your review. After reading it I realized the importance of properly aligning the drive sprocket with the idler so the tracks go on straight. On my project I used a length of brass rod with about twenty five percent bent at a 30 degree angle.
This allowed me to centre and attach them knowing everything was aligned. The bent portion along with a little help from gravity was a huge aid in ensuring vertical alignment.
anastasius
Joined: March 23, 2015
KitMaker: 19 posts
Armorama: 19 posts
Posted: Wednesday, October 10, 2018 - 09:11 AM UTC
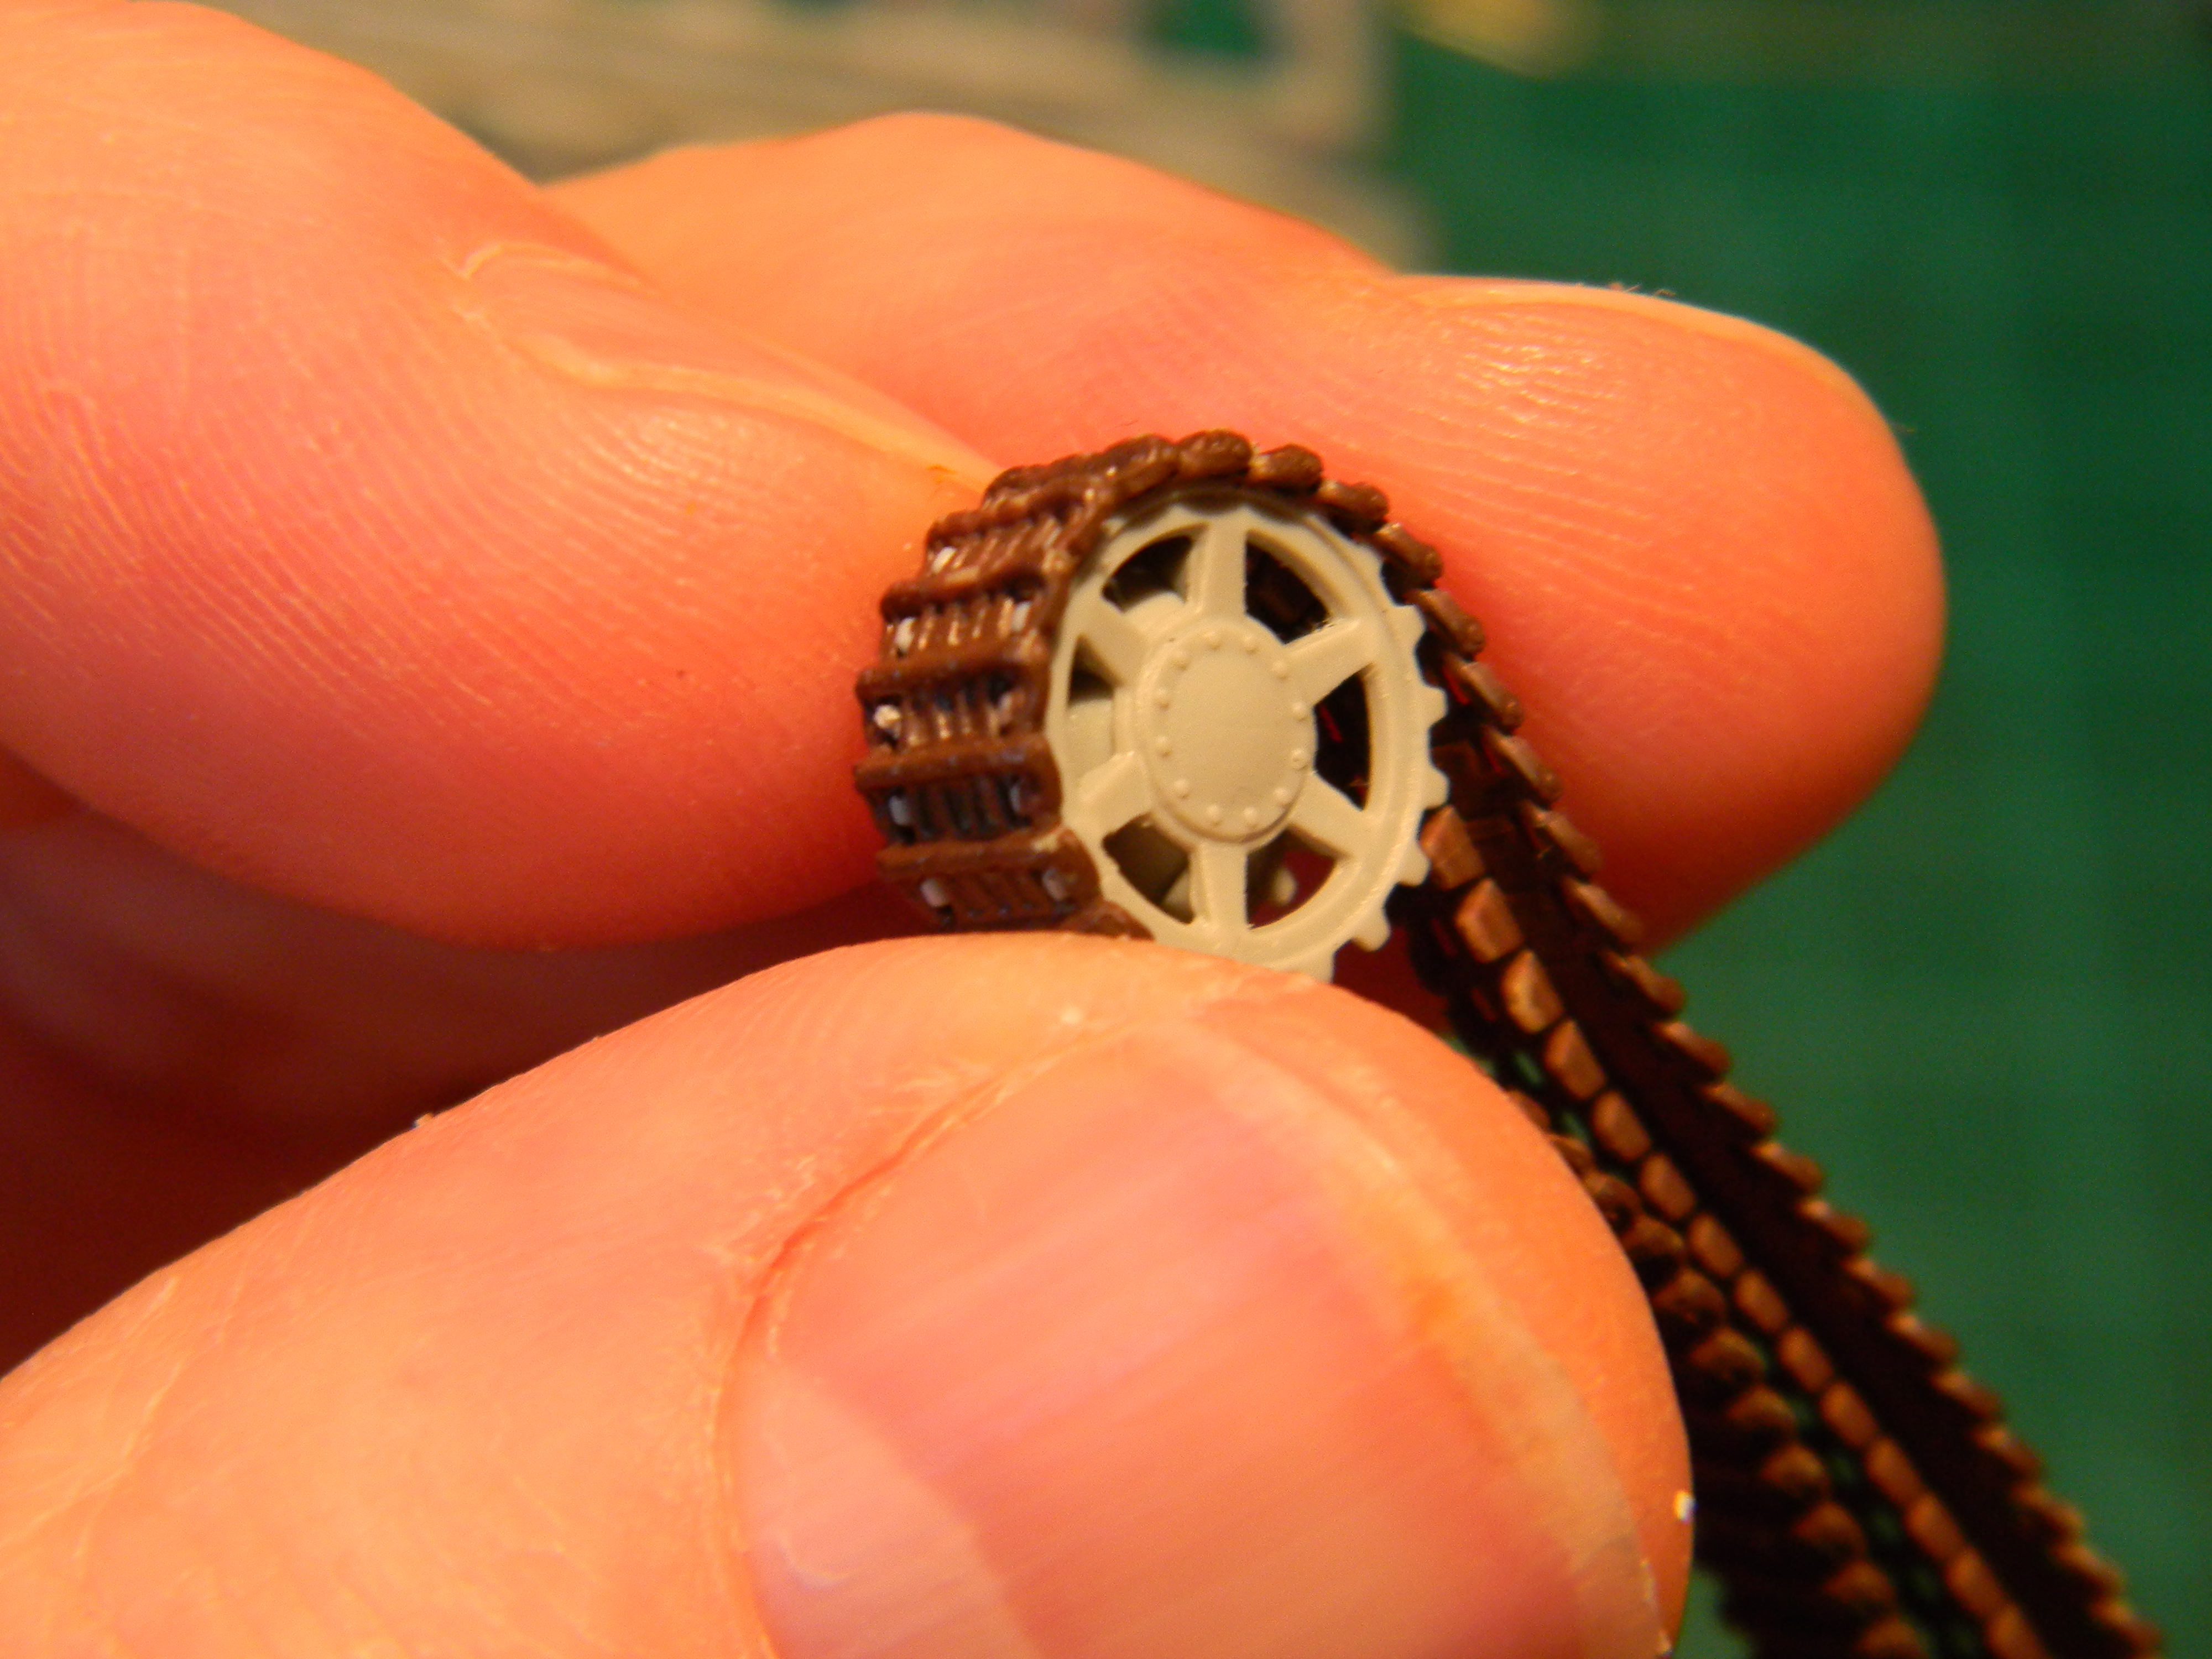
Opps .... Look carefully at the sprocket teeth. They are not symmetrical. The sprockets are two halves and they have a locating pin to ensure proper fit. Unfortunately the locating pin does not ensure teeth alignment.
This is a very important issue and the modeller must address it in order for the tracks to fully engage the sprocket teeth and run parallel to the chassis to the idler wheel without twisting.
After assembling the first sprocket I checked the teeth alignment and it was fine. I assumed that the second one would be the same and did not check it. Even though it was not glued to the hull when I took these pics I never caught until days later when checking the track alignment. By then I had glued the sprocket into place and carefully aligned it.
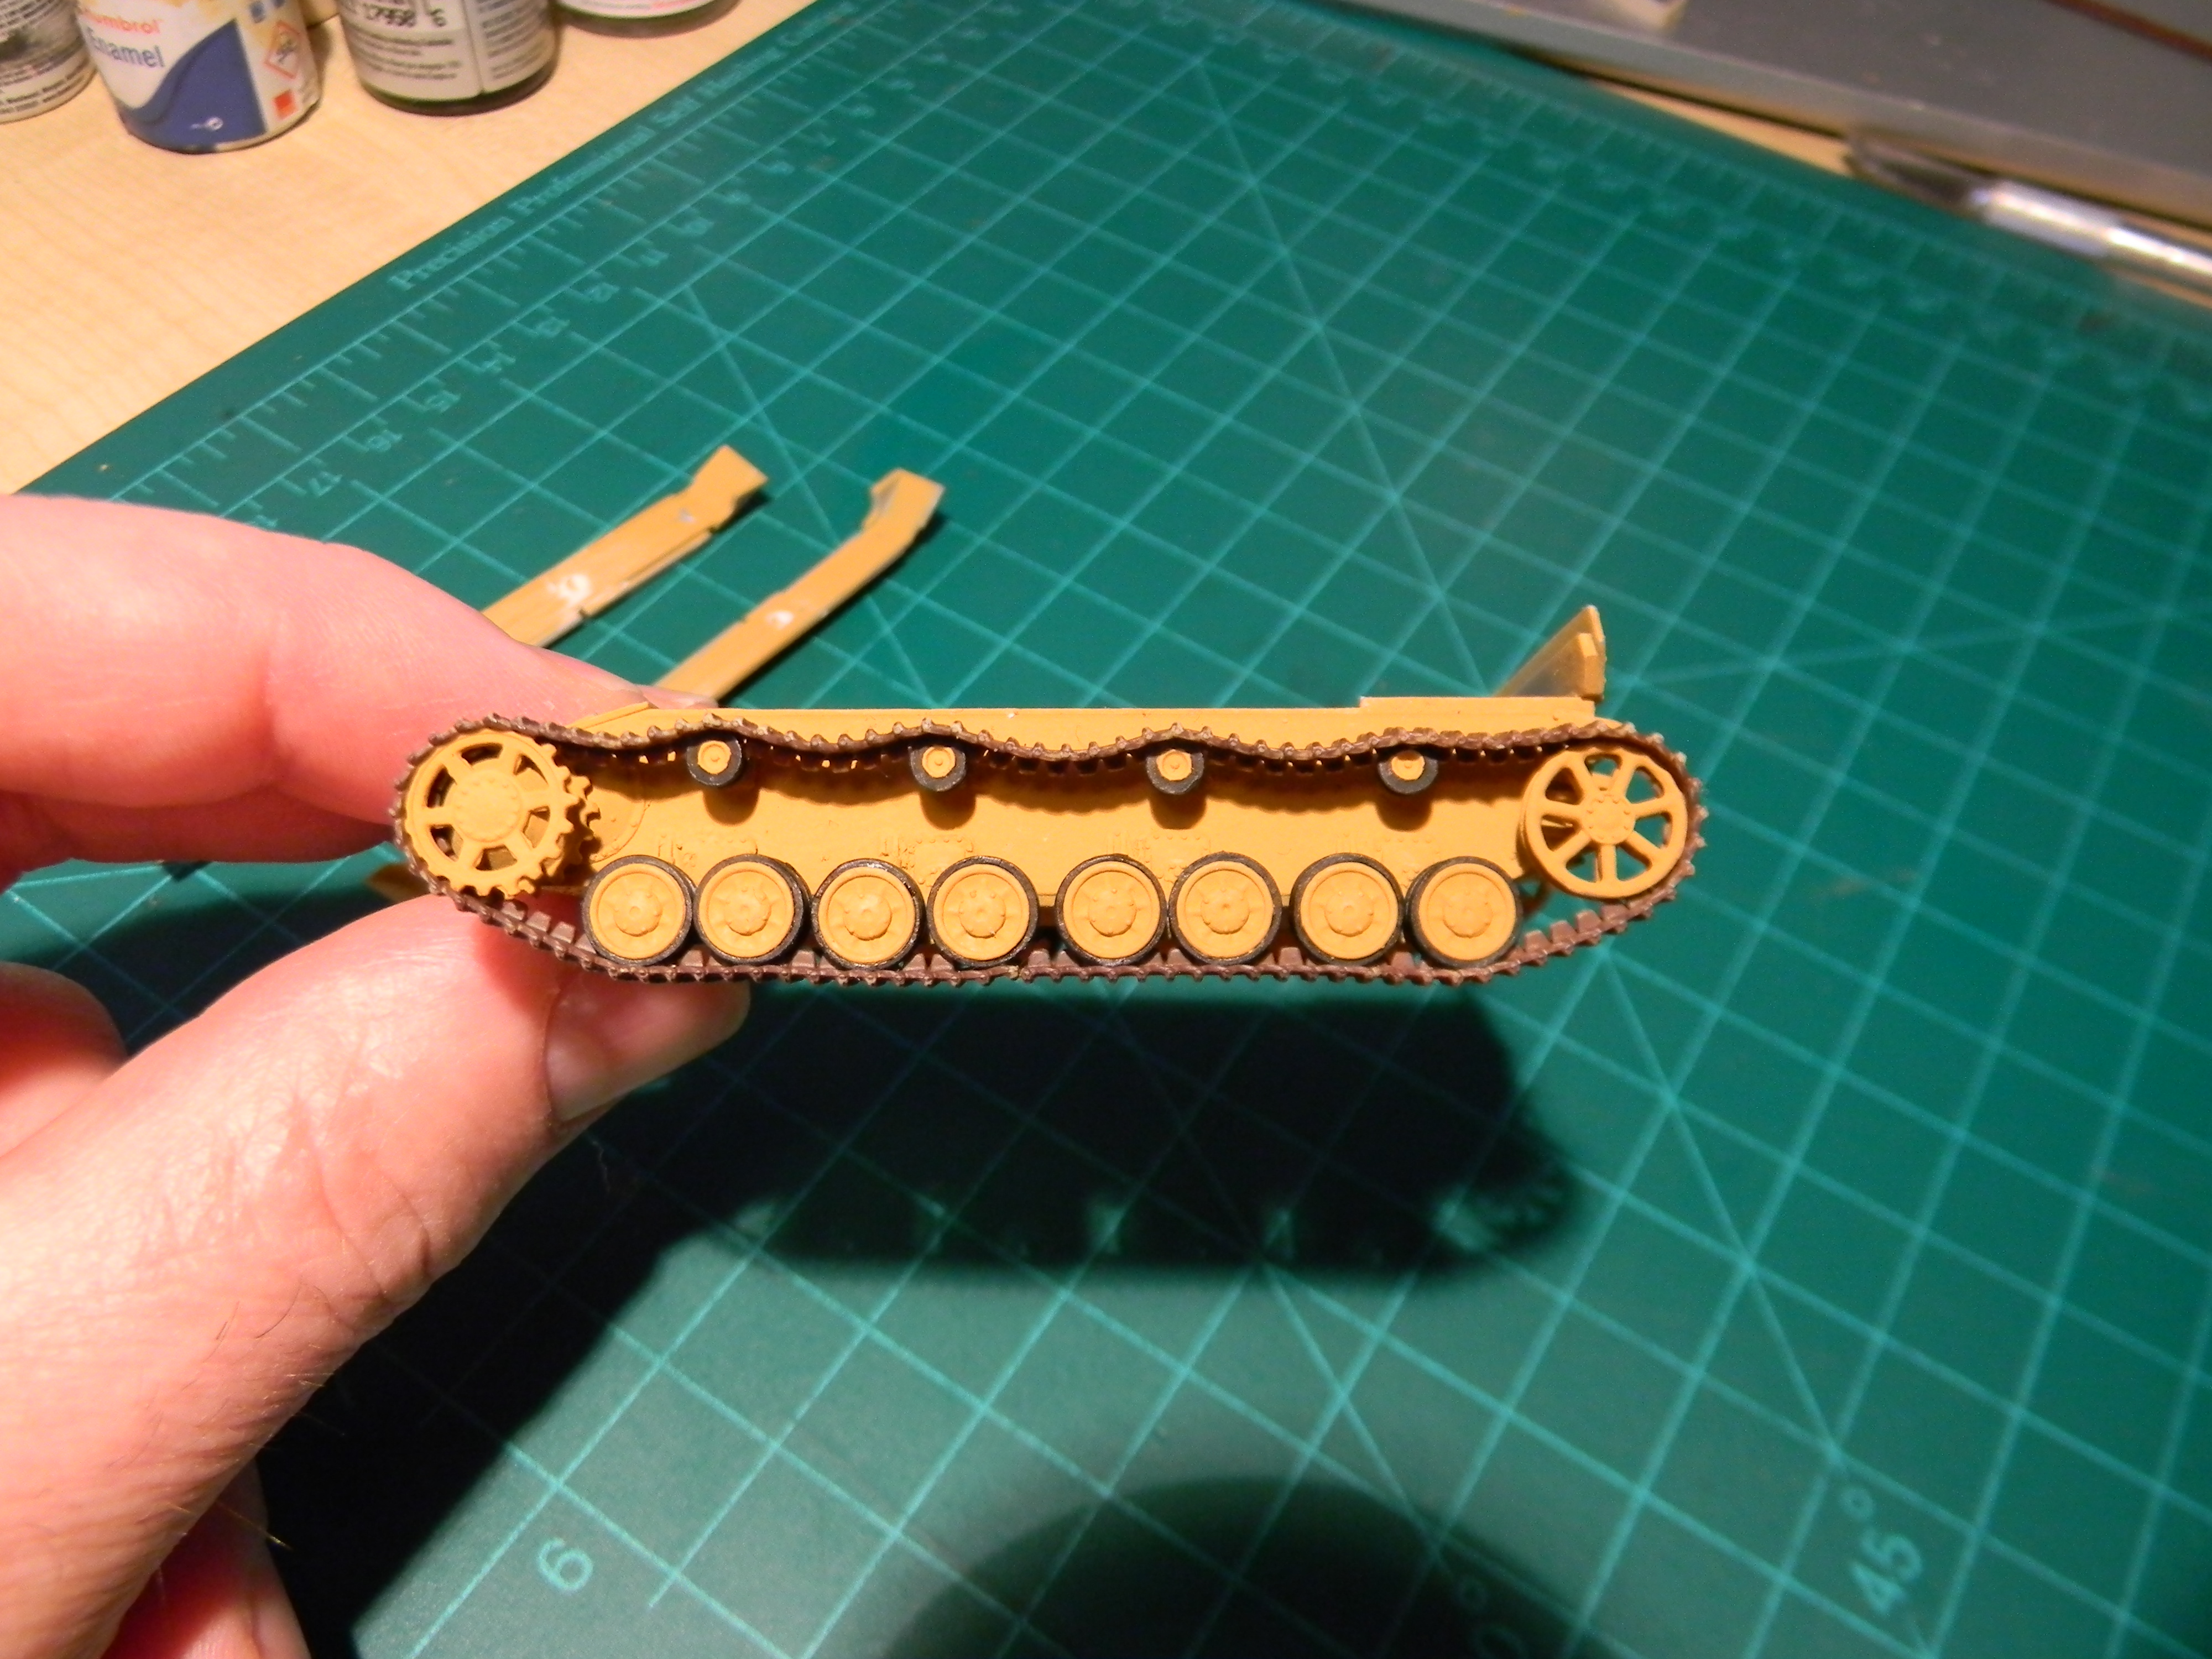
Here you can see the tracks are properly aligned with the rest of the suspension and the chassis.
...and the importance of proper sprocket teeth alignment when using DS tracks.
This is a very important issue and the modeller must address it in order for the tracks to fully engage the sprocket teeth and run parallel to the chassis to the idler wheel without twisting.
After assembling the first sprocket I checked the teeth alignment and it was fine. I assumed that the second one would be the same and did not check it. Even though it was not glued to the hull when I took these pics I never caught until days later when checking the track alignment. By then I had glued the sprocket into place and carefully aligned it.
Here you can see the tracks are properly aligned with the rest of the suspension and the chassis.
...and the importance of proper sprocket teeth alignment when using DS tracks.
anastasius
Joined: March 23, 2015
KitMaker: 19 posts
Armorama: 19 posts
Posted: Wednesday, October 10, 2018 - 09:25 AM UTC
Something else I have been doing in conjunction with this build is research. I have looked at several images and technical information for the vehicle I am building. I have learned a great deal about the actual tank and aside from the cupola and metal barrel I plan to add some other details to enhance realism.
One thing I have noticed is that track sag on this tank varies from extremely taut to being so loose one wonders how the tank could run without throwing them. Fortunately DS tracks can be stretched. I am hoping to have sag so that it is noticeable but not too crazy.
I have found the best way of stretching them is to roll the drive sprocket over them so that the teeth fully engage. Take your time and do multiple passes rather than trying to get all your length in one shot.
For now I am in the process of painting and assembling the road wheels. The brass rod will help in aligning them or so I hope. I plan to have the entire suspension complete and painted before adding the upper hull.
robertkru

Joined: August 31, 2010
KitMaker: 28 posts
Armorama: 26 posts
Posted: Thursday, January 03, 2019 - 09:11 AM UTC
Hi Jack
interesting kitbash and nice tip for lengthen the tracks. If you want to build a Pz4D then Munitionspanzer 4D from Hobbyboss offers useful and correct parts for suspension.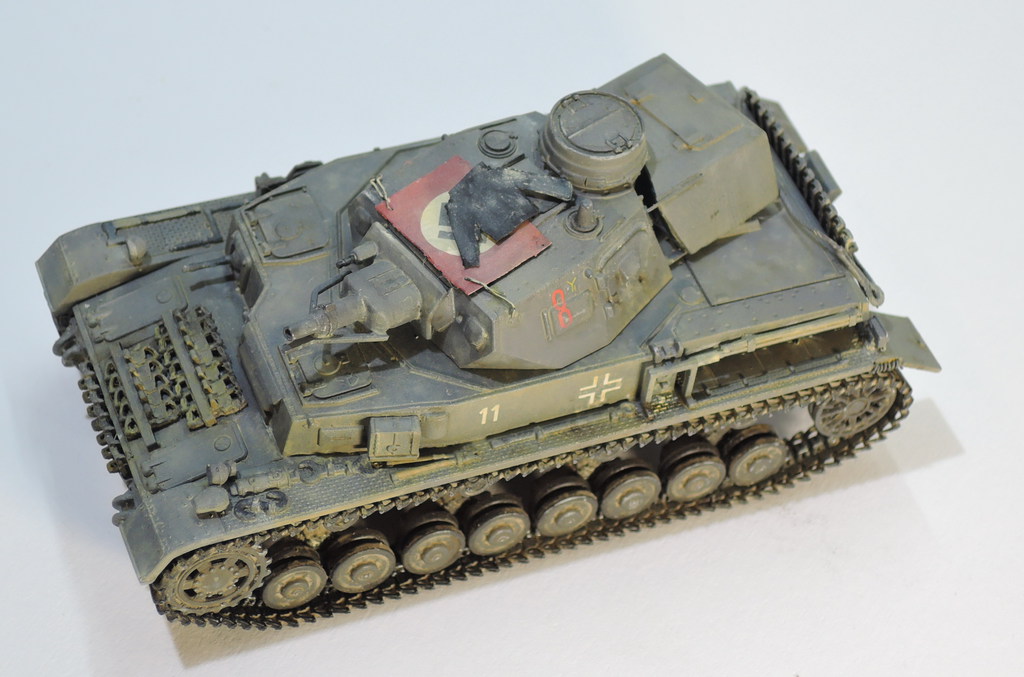
Regards from Vienna
Robert
interesting kitbash and nice tip for lengthen the tracks. If you want to build a Pz4D then Munitionspanzer 4D from Hobbyboss offers useful and correct parts for suspension.
Regards from Vienna
Robert
anastasius
Joined: March 23, 2015
KitMaker: 19 posts
Armorama: 19 posts
Posted: Monday, January 07, 2019 - 07:27 PM UTC
Thank you Robert. Your Panzer IVD looks great. Did you use the Dragon kit upper works on a Hobby Boss hull?
Those tracks are excellent. Are they etched or did you open up the guide horns?
Those tracks are excellent. Are they etched or did you open up the guide horns?
anastasius
Joined: March 23, 2015
KitMaker: 19 posts
Armorama: 19 posts
Posted: Monday, January 07, 2019 - 08:38 PM UTC
Good Grief ....! Almost three months since my last post to this thread. All I can say is thank goodness for Christmas. It's always joyful when I can get some time in on my modelling.
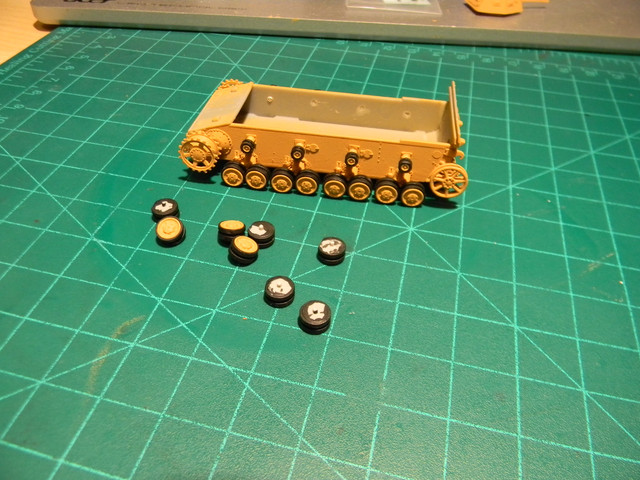
It was only a little over a week ago that the road wheels were attached. My primary goal was to keep all the slots between wheels aligned so the track guide horns would run straight. I also wanted to keep all the wheels on a level plane so the model would look OK in my display cabinet without a diorama base.
Aligning the road wheels was the most challenging aspect of this build. Minor misplacement of the spring housings was amplified on the wheel support arms. I had to drill a few new locating holes to correct height issues. More careful placement of the spring housings/wheel support arms would have made this step much easier.
That leads me to point out that this project is proving a humbling experience. Viewing the posted photos (and those too embarrassing to post) I see many things I could have done better on that are as basic as properly trimming parts. At any rate it is all inspiring me to do better.
Those sink holes would be clearly visible and hence were filled. Thanks Robin.
anastasius
Joined: March 23, 2015
KitMaker: 19 posts
Armorama: 19 posts
Posted: Monday, January 07, 2019 - 08:46 PM UTC
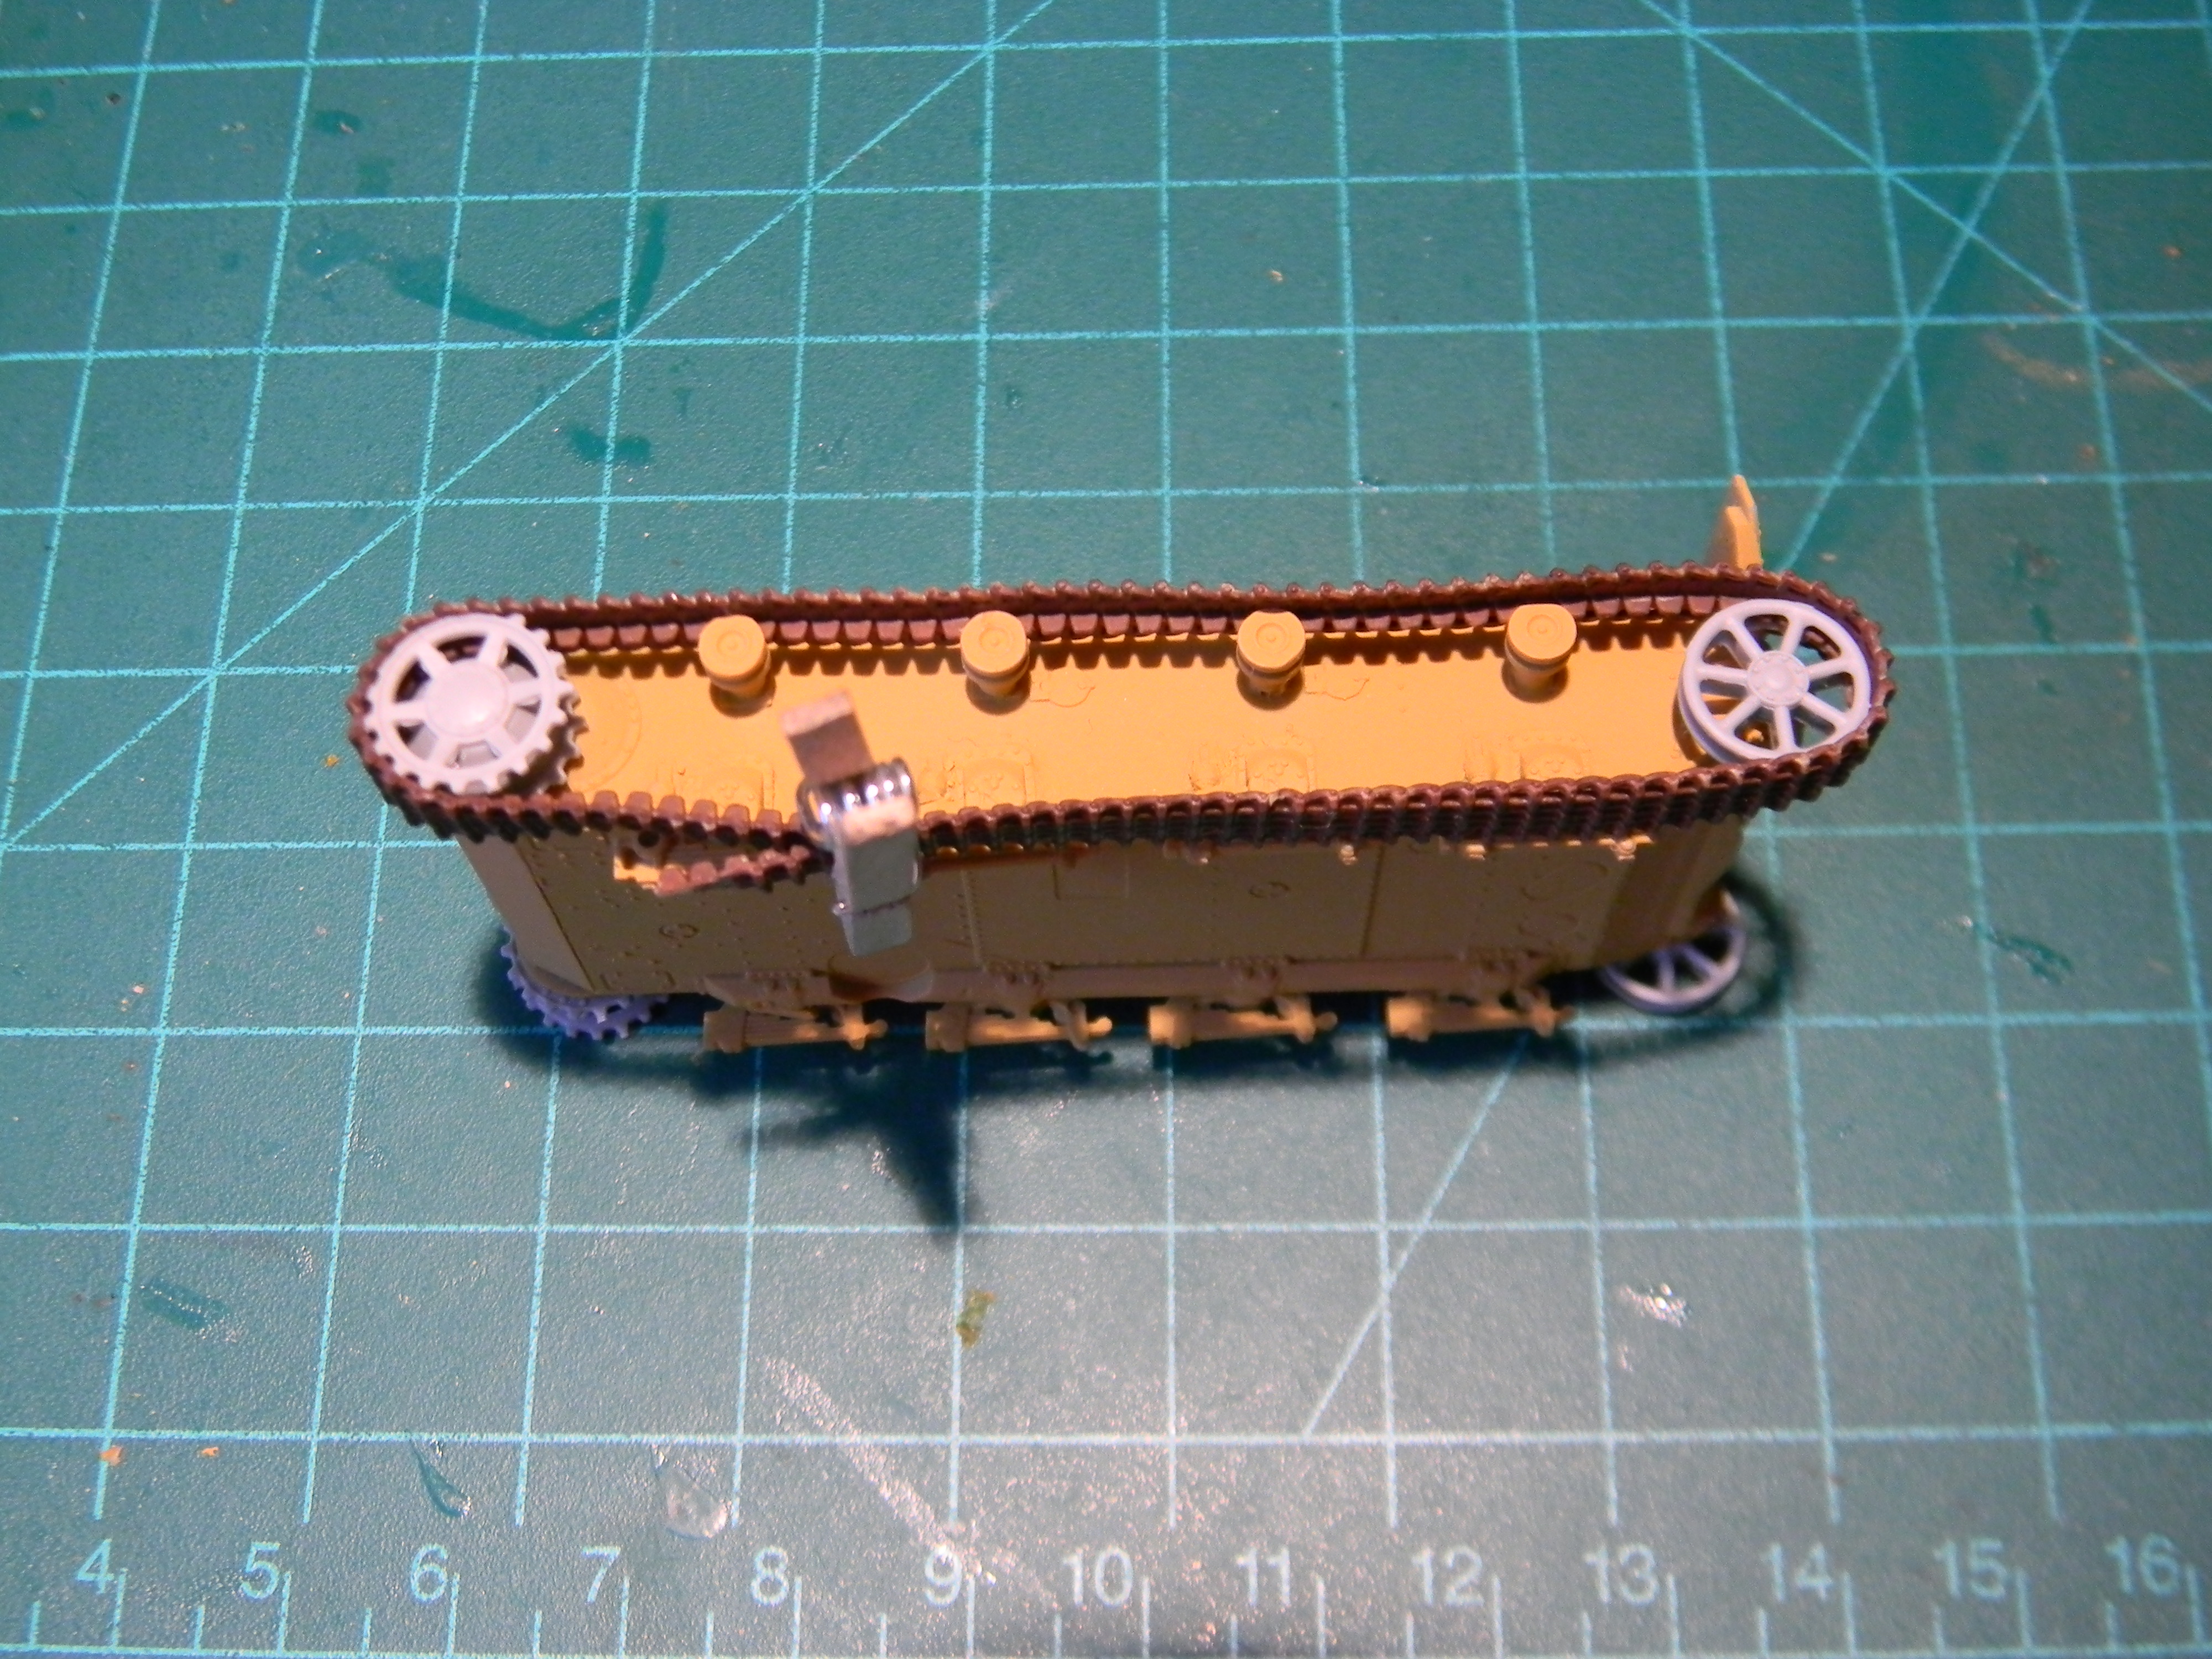
Hopefully this isn't too overdone. I will take more pics when I do the other side. It took three sessions to complete the track as I worked it around the sprockets and wheels
robertkru
Joined: August 31, 2010
KitMaker: 28 posts
Armorama: 26 posts
Posted: Tuesday, January 08, 2019 - 08:58 AM UTC
Hi Jack
Yes it is modified Hobbyboss hull with upper Dragon parts and a lot of parts from my biig sparebox. The tracks are resin from OKB Grigorov and highly recommended. I used already more then 10 sets. Especially I like the wider Winterketten. They have also wheels, cupolas and other stuff. As a Stugoholic and Pz 3/4maniac I am following such projects with interest. Allways something to learn ;-)
Robert
robertkru
Joined: August 31, 2010
KitMaker: 28 posts
Armorama: 26 posts
Posted: Tuesday, January 08, 2019 - 09:06 AM UTC
Other projects:
regards Robert
regards Robert
anastasius
Joined: March 23, 2015
KitMaker: 19 posts
Armorama: 19 posts
Posted: Saturday, October 19, 2019 - 04:24 PM UTC
My apologies for leaving this thread for so long. The fact is I am not sure where to go with my Panzer IV G. Most of my armor and vehicle kits are finished as factory fresh with only a light wash to bring out detail. It has been several years since I have done a diorama as they tend to take up considerably more space in my home. This kit will be an exception and until I decide how I will finish and present it, it will remain in a sealed project box.
The main reason for this thread was to explore the feasibility of applying a detailed older Dragon running gear to one of their newer quick build kits. It turns out that it is a relatively easy project for anyone with basic modelling skills. I find the Dragon Styrene tracks easier to use and more realistic than any vinyl track and some link and length tracks. That is the main reason I choose to do this project.
So I will offer a conclusion and a few pics where I left off with this kit.....
anastasius
Joined: March 23, 2015
KitMaker: 19 posts
Armorama: 19 posts
Posted: Saturday, October 19, 2019 - 05:29 PM UTC
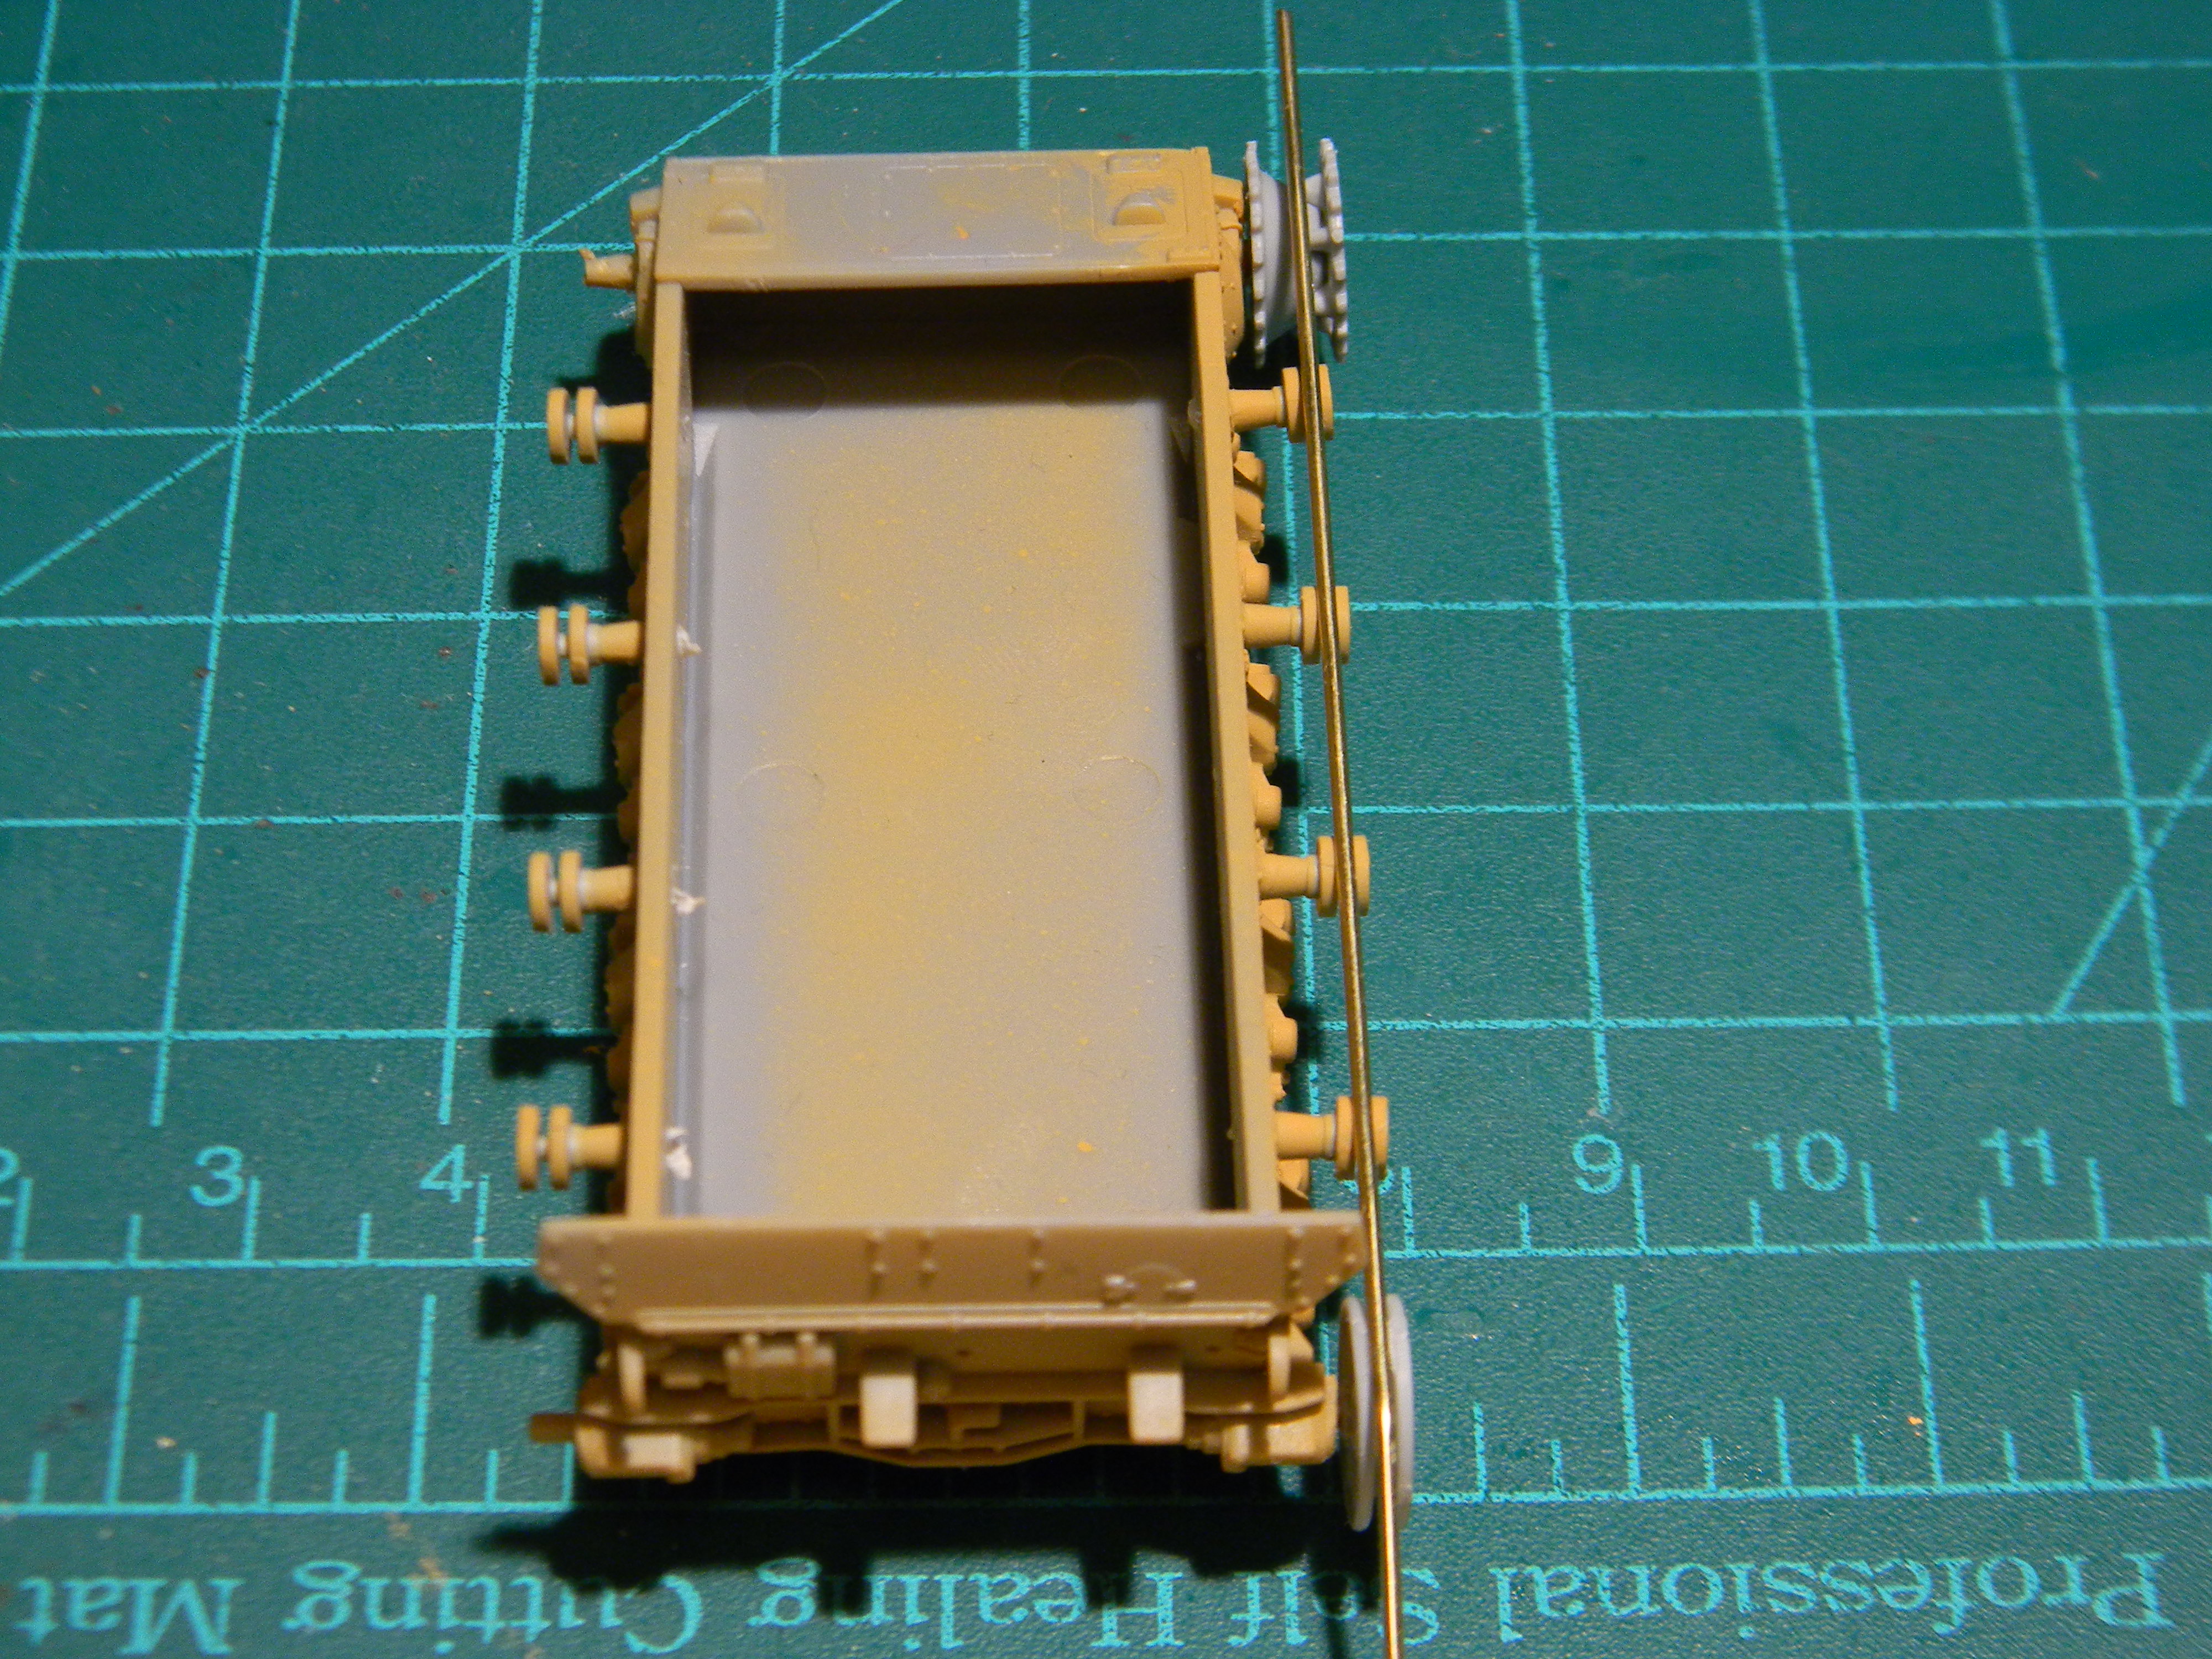
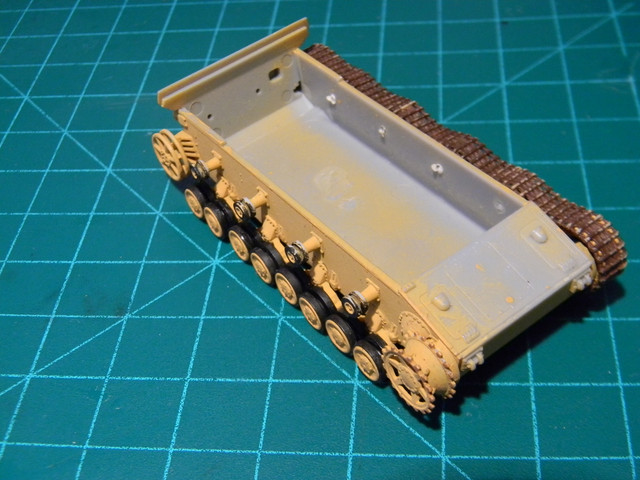
This is a relatively easy conversion to do. The most difficult part was the proper alignment of the return rollers and idler wheel as well as the road wheels and drive sprocket. I would suggest that one carefully trims away the return roller supports from the hull of the quick build kit. Try to get the cut as flush as possible with the surface of the small square panel from which the support protrudes. Also cut away the road wheel supports as flush as possible. Try to avoid damaging the small spring adjustment boxes near the area where the arms attach to the hull.
The return rollers from the more detailed kits come with their supports attached. Drill holes in the centre of the square panels that will allow the locating pins from the return rollers to fit. You will find that the new rollers will protrude the correct distance from the chassis and should be aligned with one another. Use them to align the drive sprocket and idler wheel.
The tricky part will be attaching the road wheel support arms. I attached the arms with the goal of keeping the mounting holes for the road wheels on an even plane. I figured I could adjust the road wheels to the centre of the track by adding to or cutting away their locating pins. The problem was that the height of the road wheels varied somewhat and it took a bit of effort to get them on a horizontal plane. At the time it was important as I did not plan on a diorama base which can account for irregular height of the road wheels. In hindsight it might make more sense to attach the road wheels to the arms of the supports before fixing them to the hull.
That is about all there is to it but I must add one very important point. Do not rely on the locating pins when assembling the drive sprockets. Probably best to cut the locating pin away and ensure that the teeth of the sprocket are aligned. I have read that this is an issue with other Dragon 1/72 tanks. One of the best things with the DS tracks is how they mesh with the drive sprockets. Poorly aligned drive sprocket halves will mess that up.
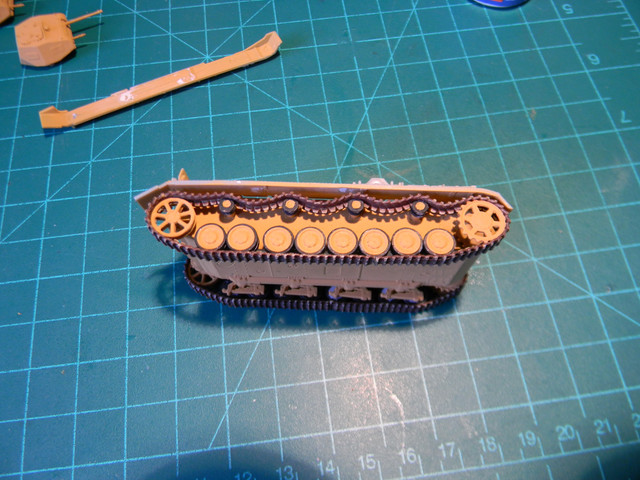
The tracks are ready to be fitted to the other side. DS tracks attack securely with regular plastic model cement but require clean, paint free surfaces.
The return rollers from the more detailed kits come with their supports attached. Drill holes in the centre of the square panels that will allow the locating pins from the return rollers to fit. You will find that the new rollers will protrude the correct distance from the chassis and should be aligned with one another. Use them to align the drive sprocket and idler wheel.
The tricky part will be attaching the road wheel support arms. I attached the arms with the goal of keeping the mounting holes for the road wheels on an even plane. I figured I could adjust the road wheels to the centre of the track by adding to or cutting away their locating pins. The problem was that the height of the road wheels varied somewhat and it took a bit of effort to get them on a horizontal plane. At the time it was important as I did not plan on a diorama base which can account for irregular height of the road wheels. In hindsight it might make more sense to attach the road wheels to the arms of the supports before fixing them to the hull.
That is about all there is to it but I must add one very important point. Do not rely on the locating pins when assembling the drive sprockets. Probably best to cut the locating pin away and ensure that the teeth of the sprocket are aligned. I have read that this is an issue with other Dragon 1/72 tanks. One of the best things with the DS tracks is how they mesh with the drive sprockets. Poorly aligned drive sprocket halves will mess that up.
The tracks are ready to be fitted to the other side. DS tracks attack securely with regular plastic model cement but require clean, paint free surfaces.
anastasius
Joined: March 23, 2015
KitMaker: 19 posts
Armorama: 19 posts
Posted: Saturday, October 19, 2019 - 05:37 PM UTC
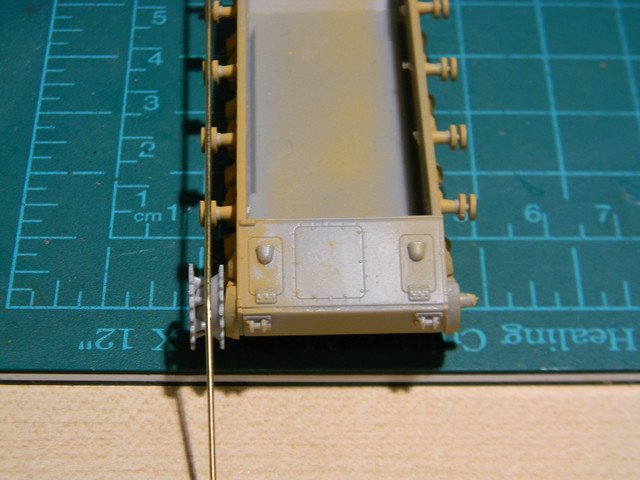
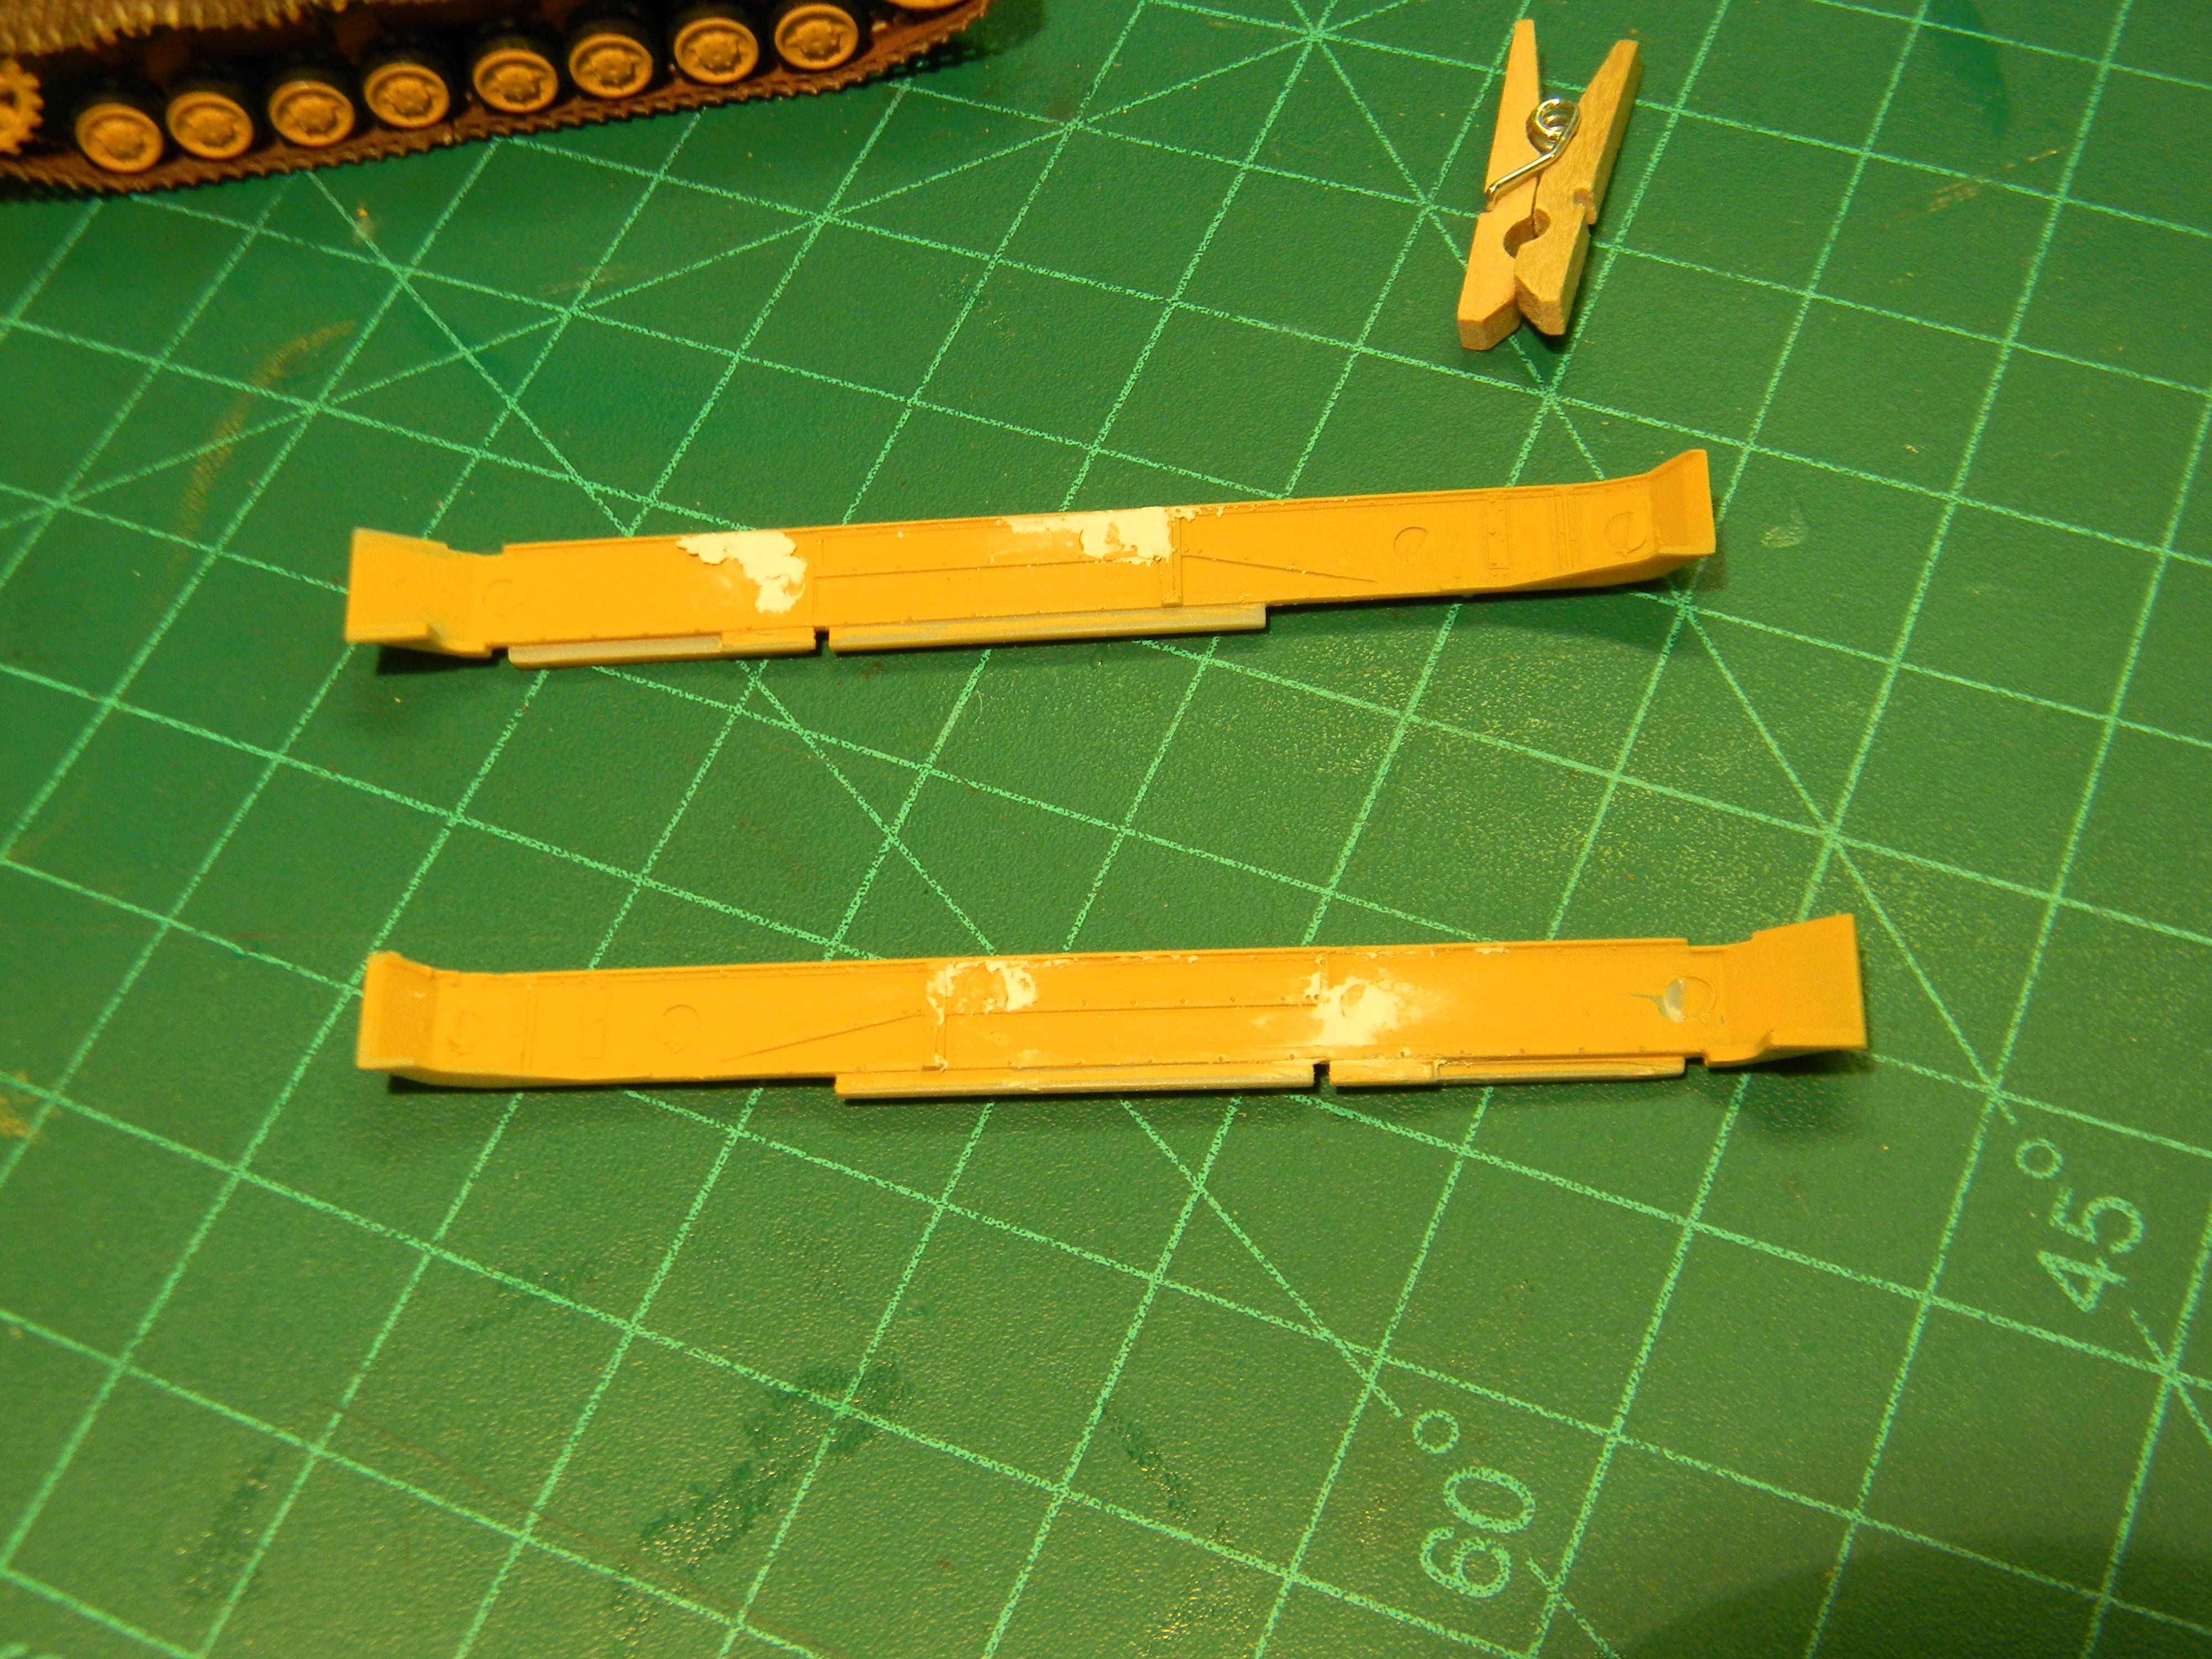
A test fit of the fenders to ensure proper clearance.
anastasius
Joined: March 23, 2015
KitMaker: 19 posts
Armorama: 19 posts
Posted: Saturday, October 19, 2019 - 06:20 PM UTC
This is as far as I have gotten on this kit but it is clear that it isn't a Herculean task to retrofit an earlier Dragon Panzer 4 running gear to one of the more recent quick build kits. Although the newer kits are simplified with many details molded on rather than separate parts, they provide an accurate base to work with.
This conversion only really makes sense as long as you can obtain an earlier Dragon kit for a reasonable price. At this time Dragon USA is still offering the Panzerfahres and they are frequently marked down as sale items. I bought a few and now I am even toying with using much of the older running gear on a Mirage Panzer 4D Tropical kit.
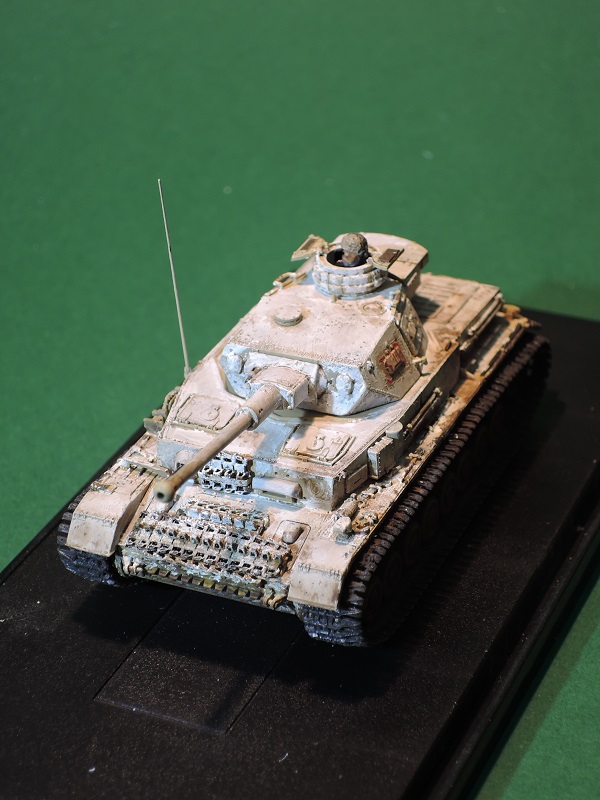
This is what I currently have in mind to model my kit after...
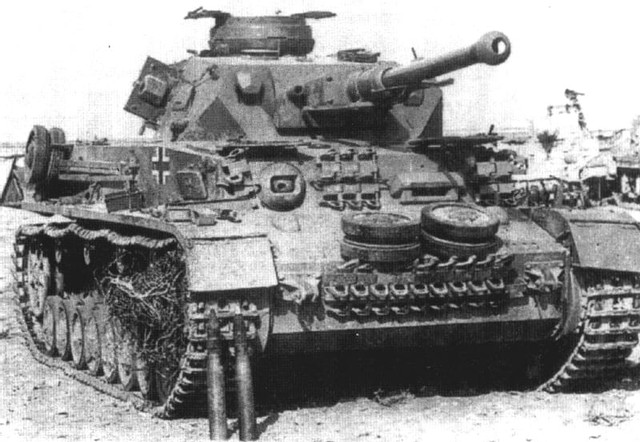
There are several images of this tank as it was captured relatively intact by the Eight Army. I would post more images but I did not save the original location addresses where I found them and I fear I may be stepping on someones toes. (If this is your image please post here and I will remove it or link it back to the original address, whichever you prefer)
Thanks again for your patience and if you have any questions about this please reply and I will do my best to address them in a timely manner. Eventually there will be a finished kit on this thread. Eventually....
This conversion only really makes sense as long as you can obtain an earlier Dragon kit for a reasonable price. At this time Dragon USA is still offering the Panzerfahres and they are frequently marked down as sale items. I bought a few and now I am even toying with using much of the older running gear on a Mirage Panzer 4D Tropical kit.
This is what I currently have in mind to model my kit after...
There are several images of this tank as it was captured relatively intact by the Eight Army. I would post more images but I did not save the original location addresses where I found them and I fear I may be stepping on someones toes. (If this is your image please post here and I will remove it or link it back to the original address, whichever you prefer)
Thanks again for your patience and if you have any questions about this please reply and I will do my best to address them in a timely manner. Eventually there will be a finished kit on this thread. Eventually....
 |

WEB HOSTING BY


Copyright ©2021 Armorama and Kitmaker Network, a subsidiary of Silver Star Enterprises
All Rights Reserved. Please read our Conditions of Use and Privacy Policy.
All Rights Reserved. Please read our Conditions of Use and Privacy Policy.