_GOTOBOTTOM
Armor/AFV: Braille Scale
1/72 and 1/76 Scale Armor and AFVs.
Hosted by Darren Baker
IBG 1/72 Turan II Review Blog
firstcircle
Visit this Community
England - South East, United Kingdom
Joined: November 19, 2008
KitMaker: 2,249 posts
Armorama: 2,007 posts
Posted: Thursday, December 20, 2018 - 07:36 AM UTC

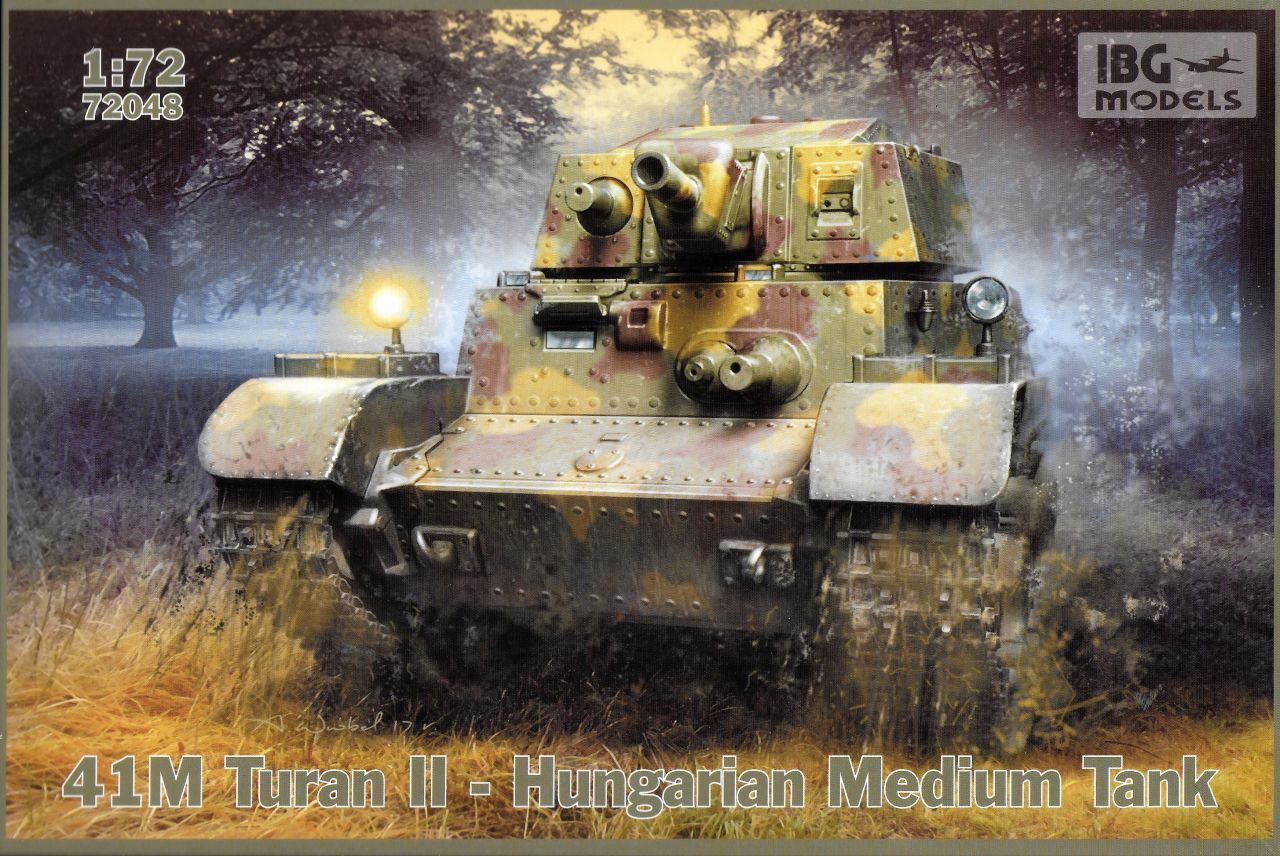
This is a review blog of IBG's 1/72 scale Hungarian Medium Tank 41.M Turan II, kit no. 72048, which was supplied to Armorama as a review sample. This tank is notable for having a quite complex suspension which I've built up twice already in small scale - IBG's 1/72 Turan I (reviewed here) and Zrinyi (reviewed here) - as well being most of the way through Bronco's 1/35 version (blogged here), so in for a penny, in for a pound (or should that be in for a filler, in for a forint??)...

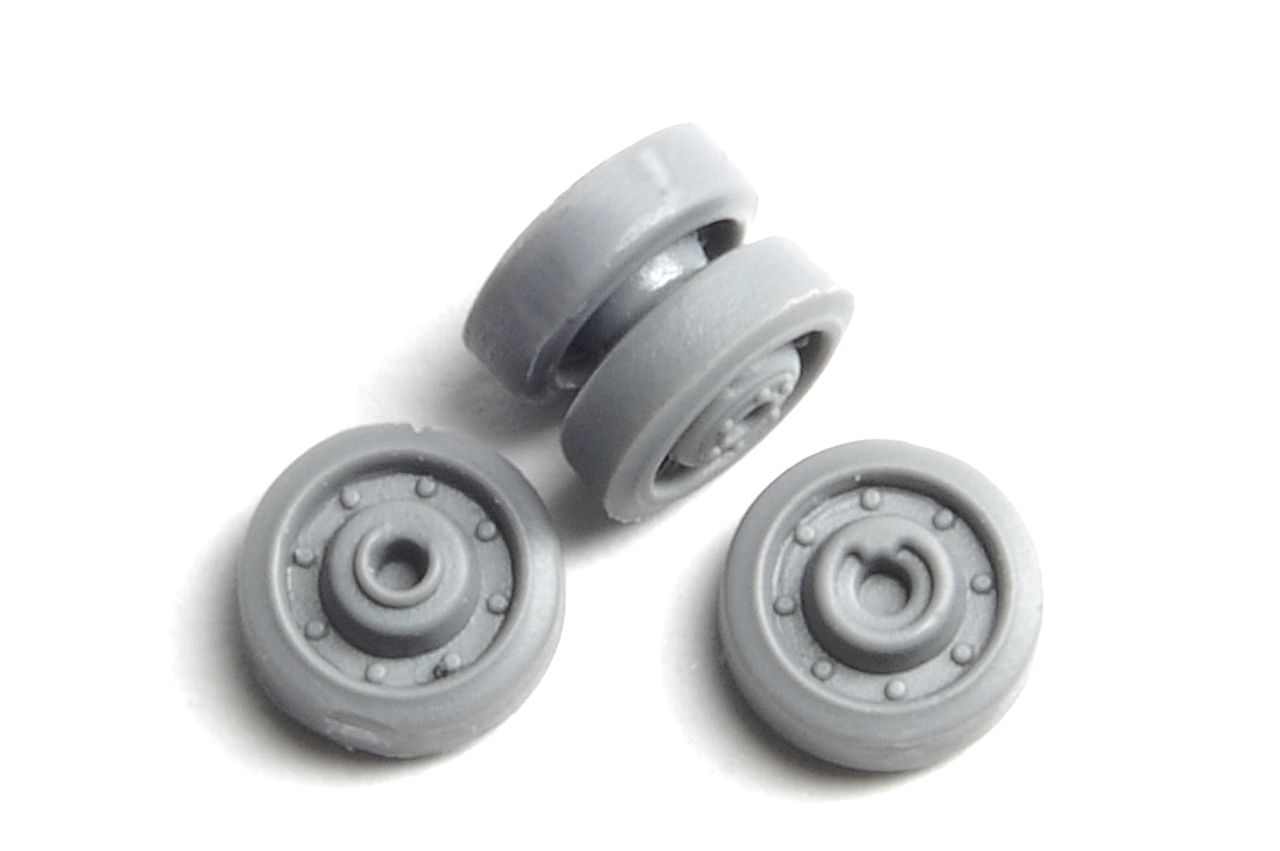
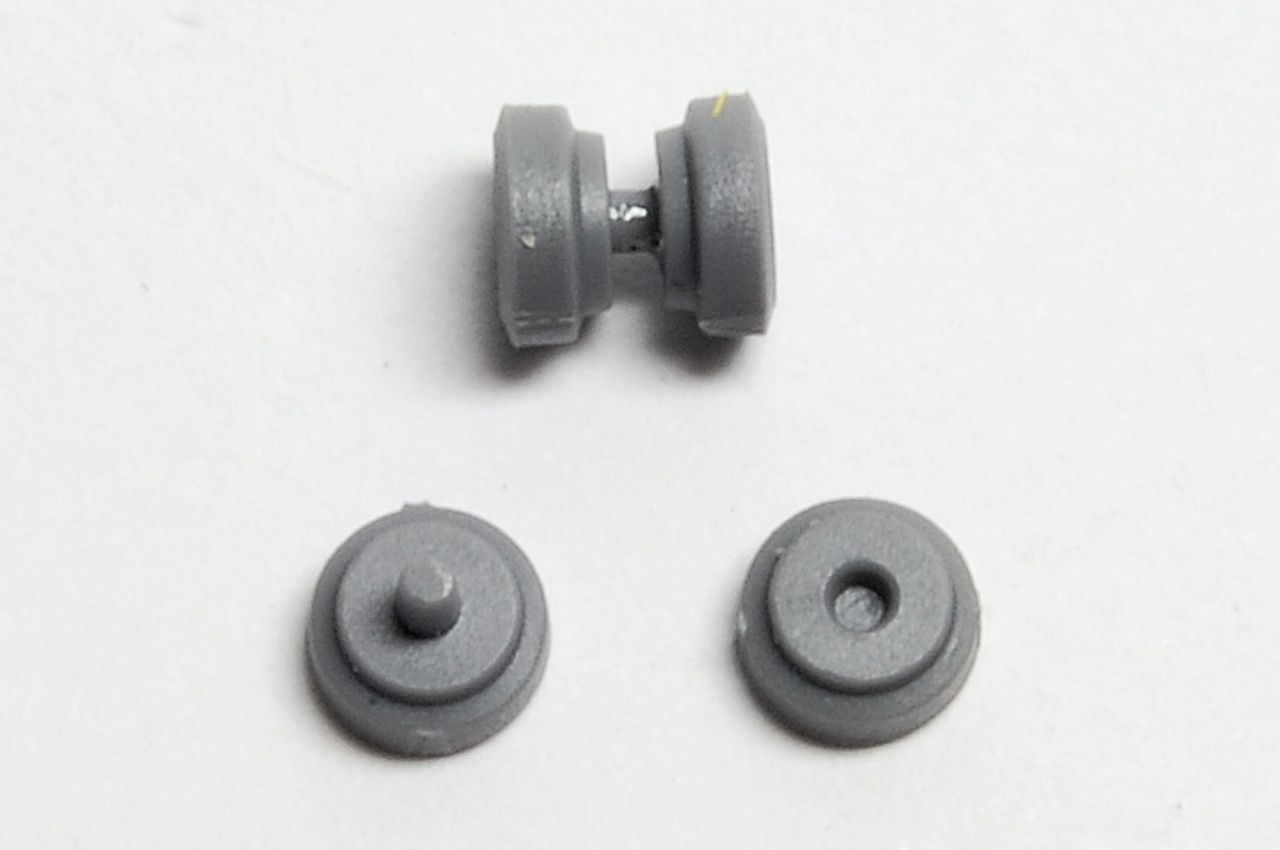
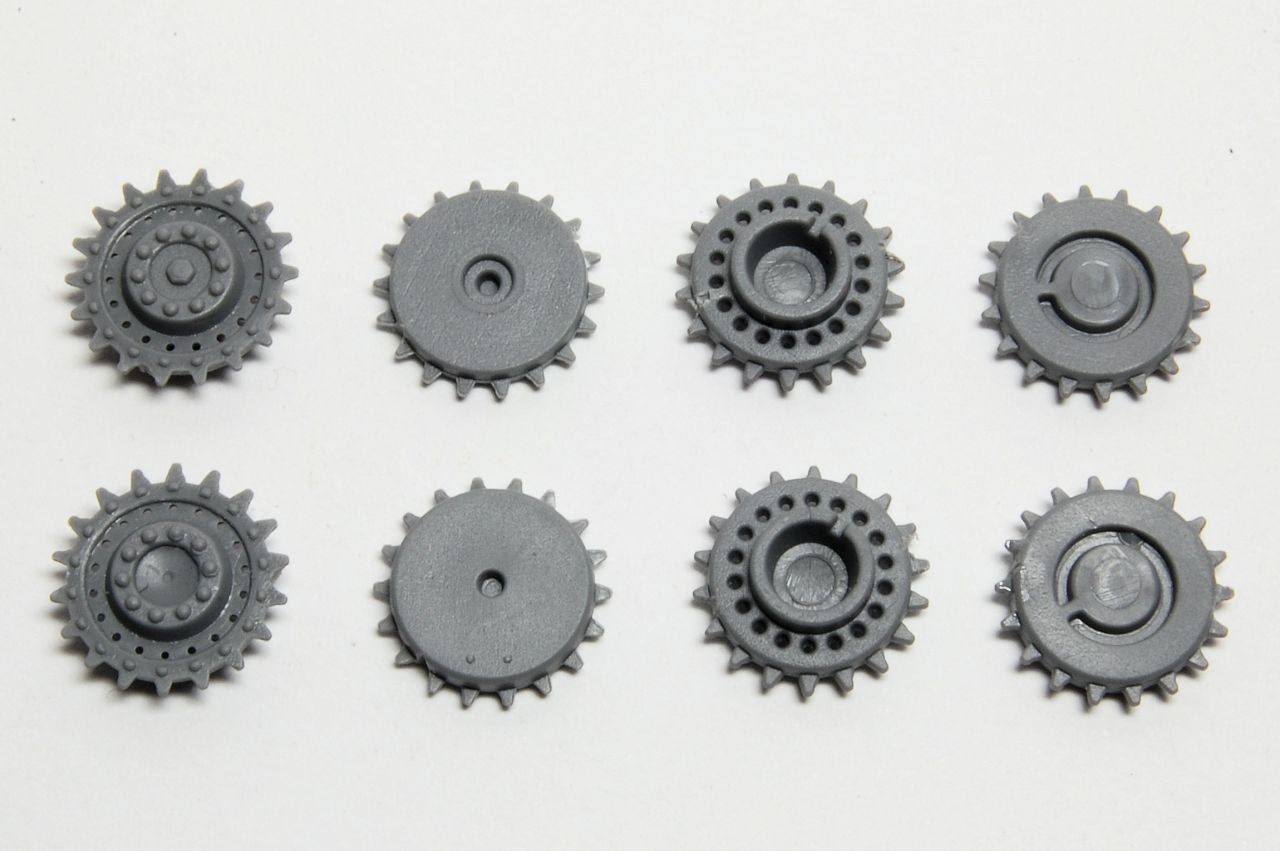
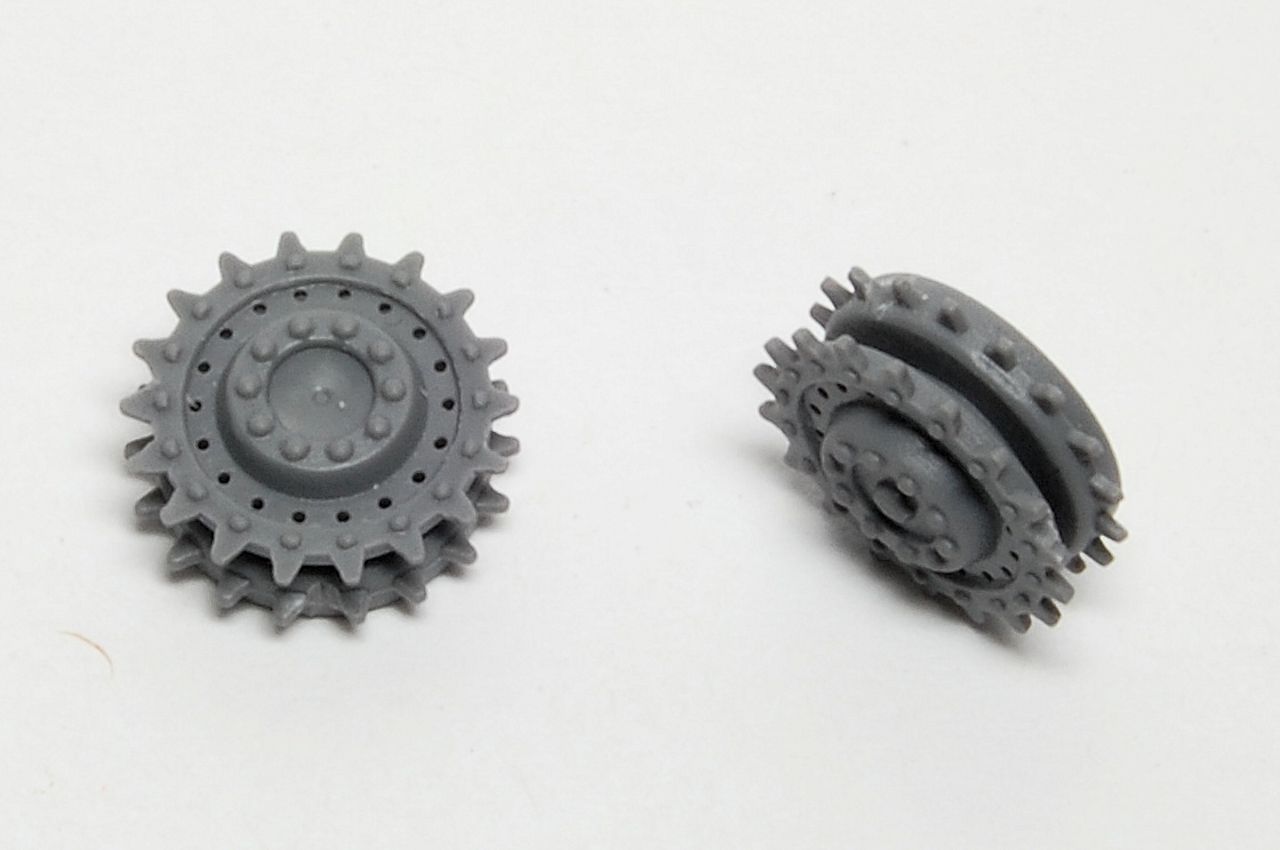
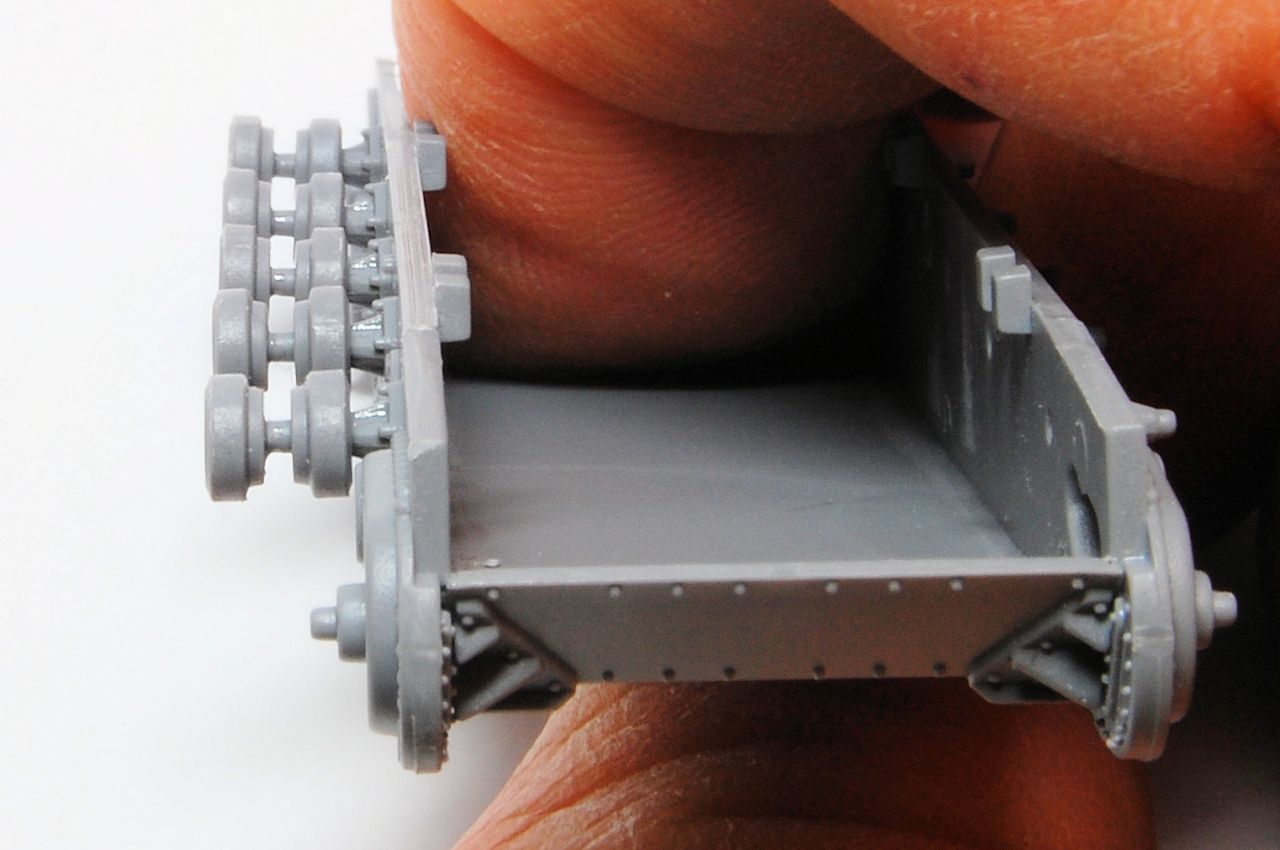
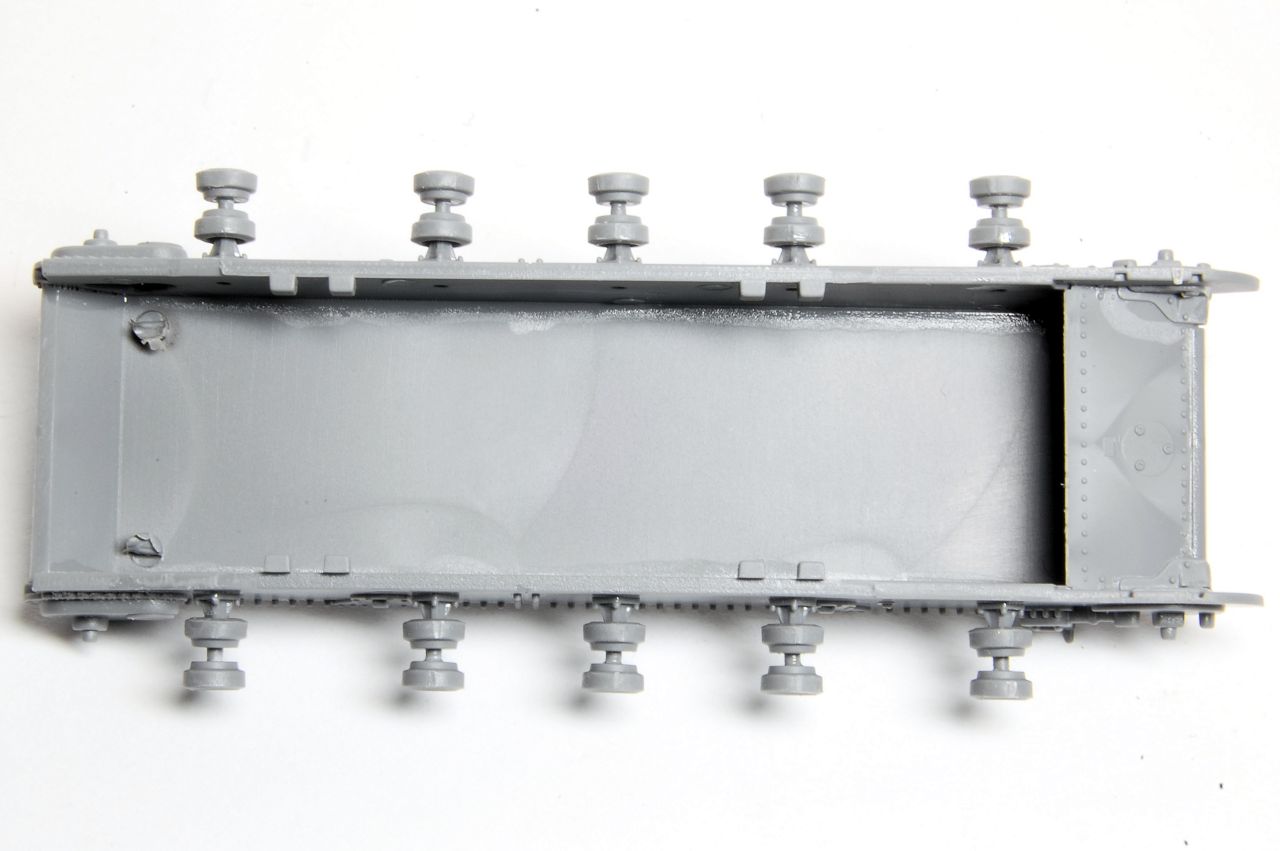
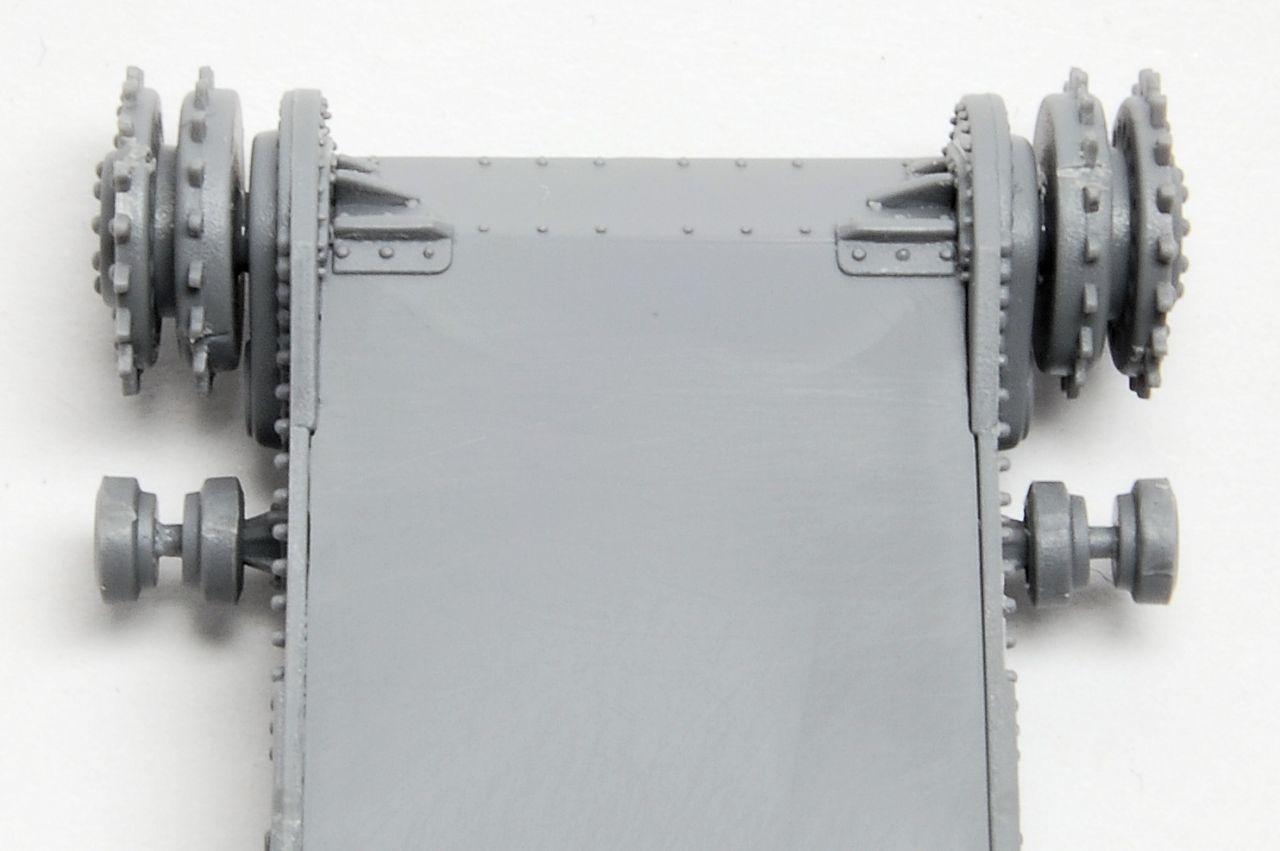
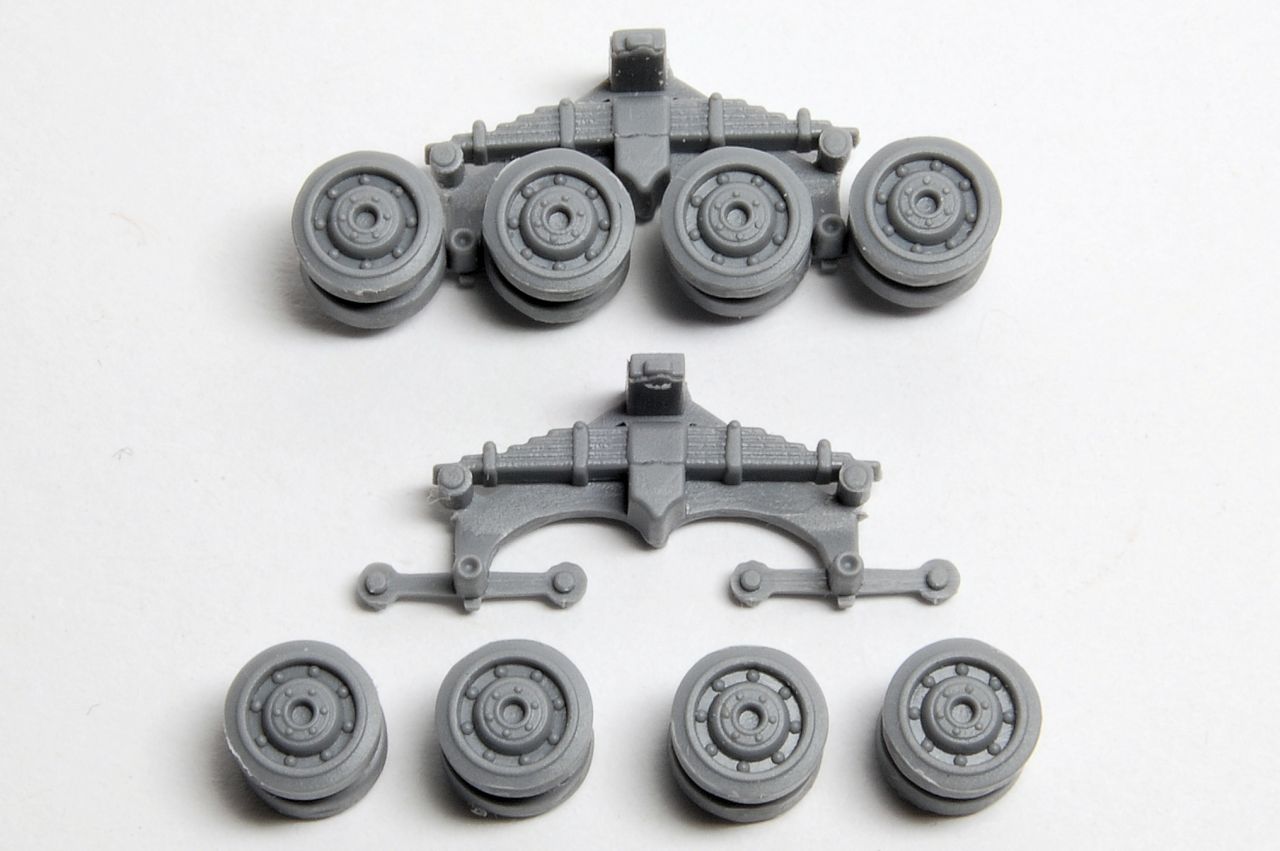
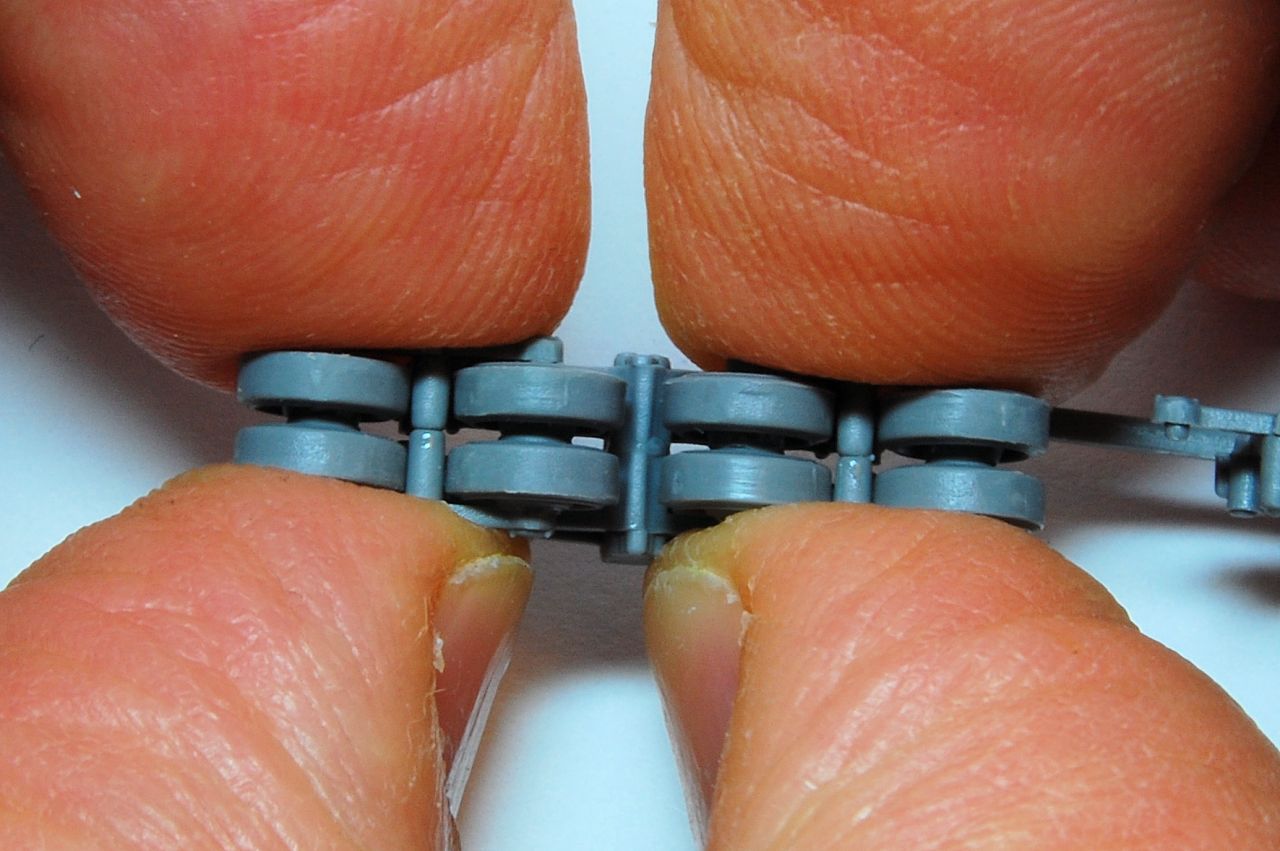
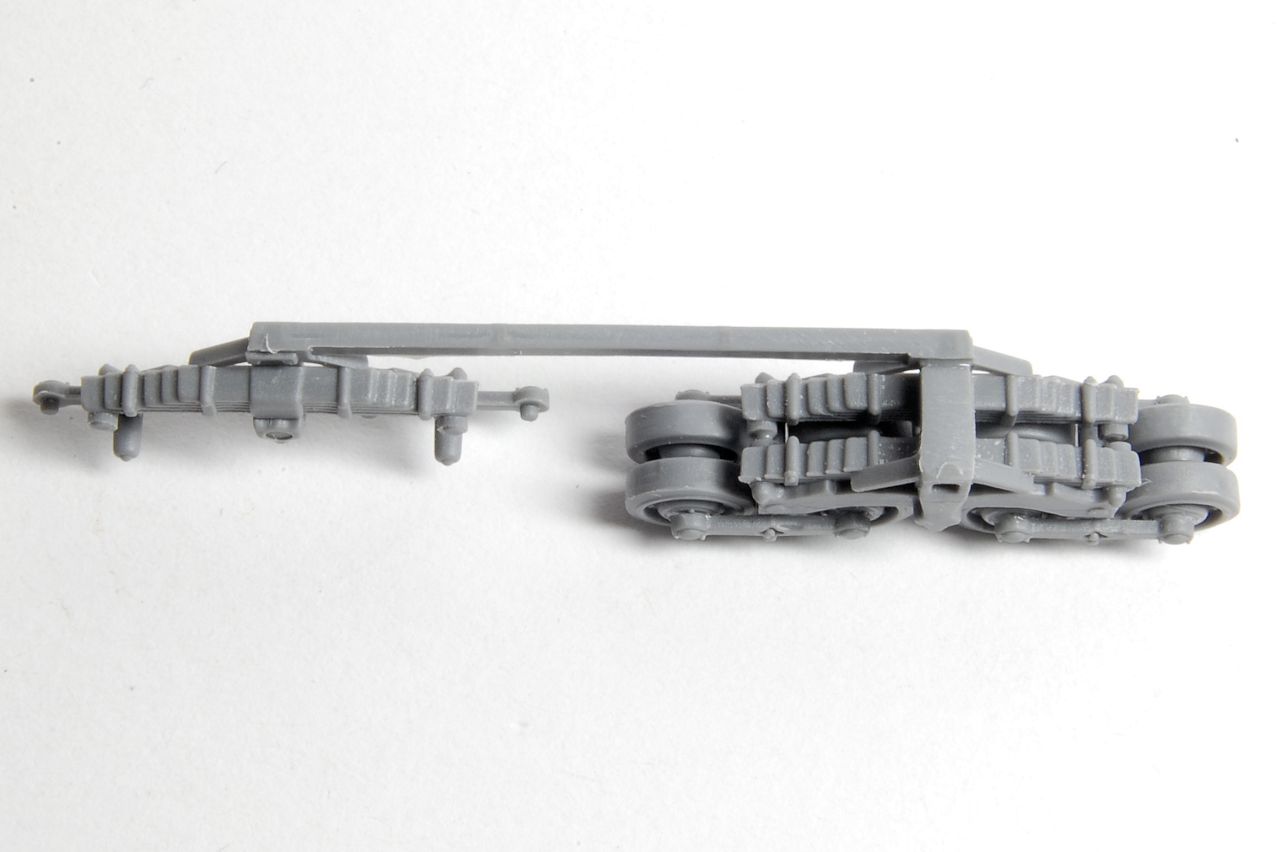
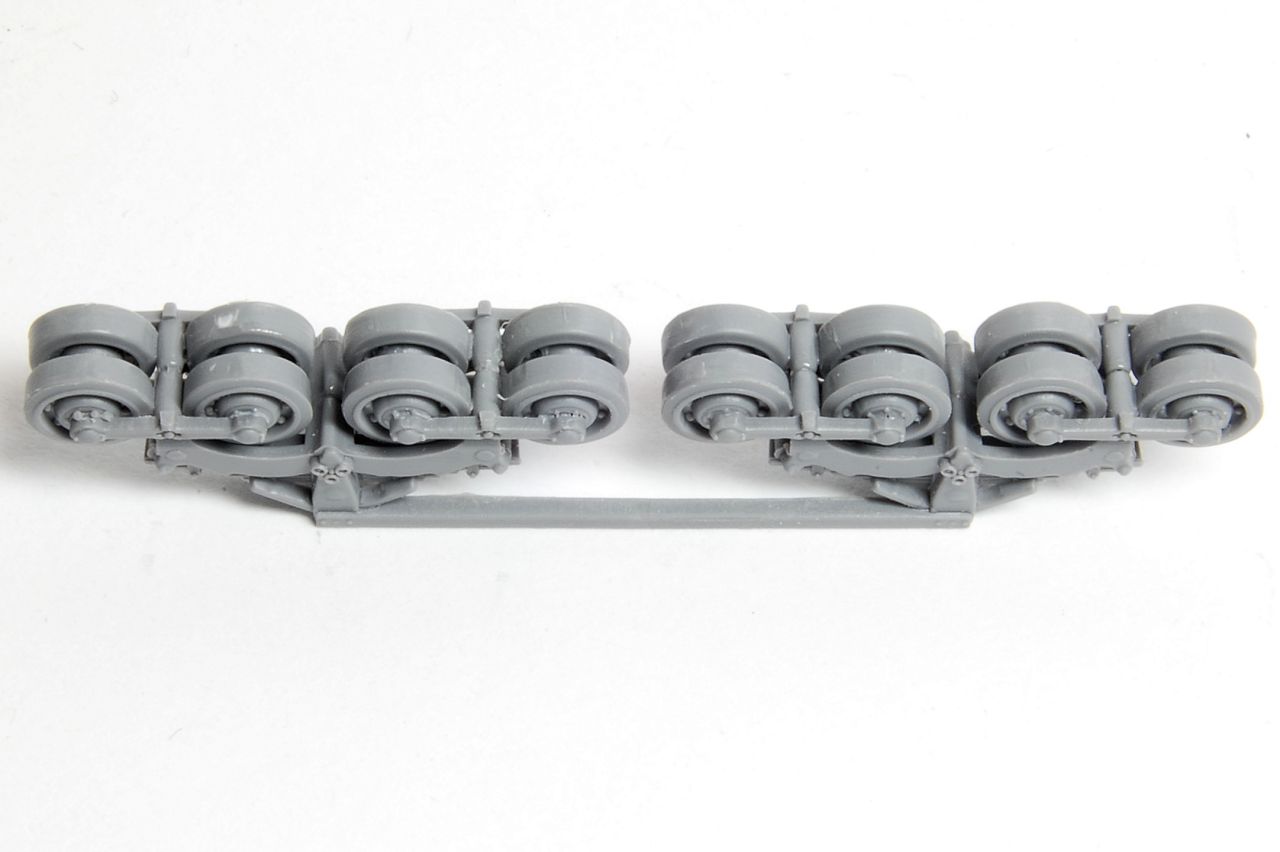
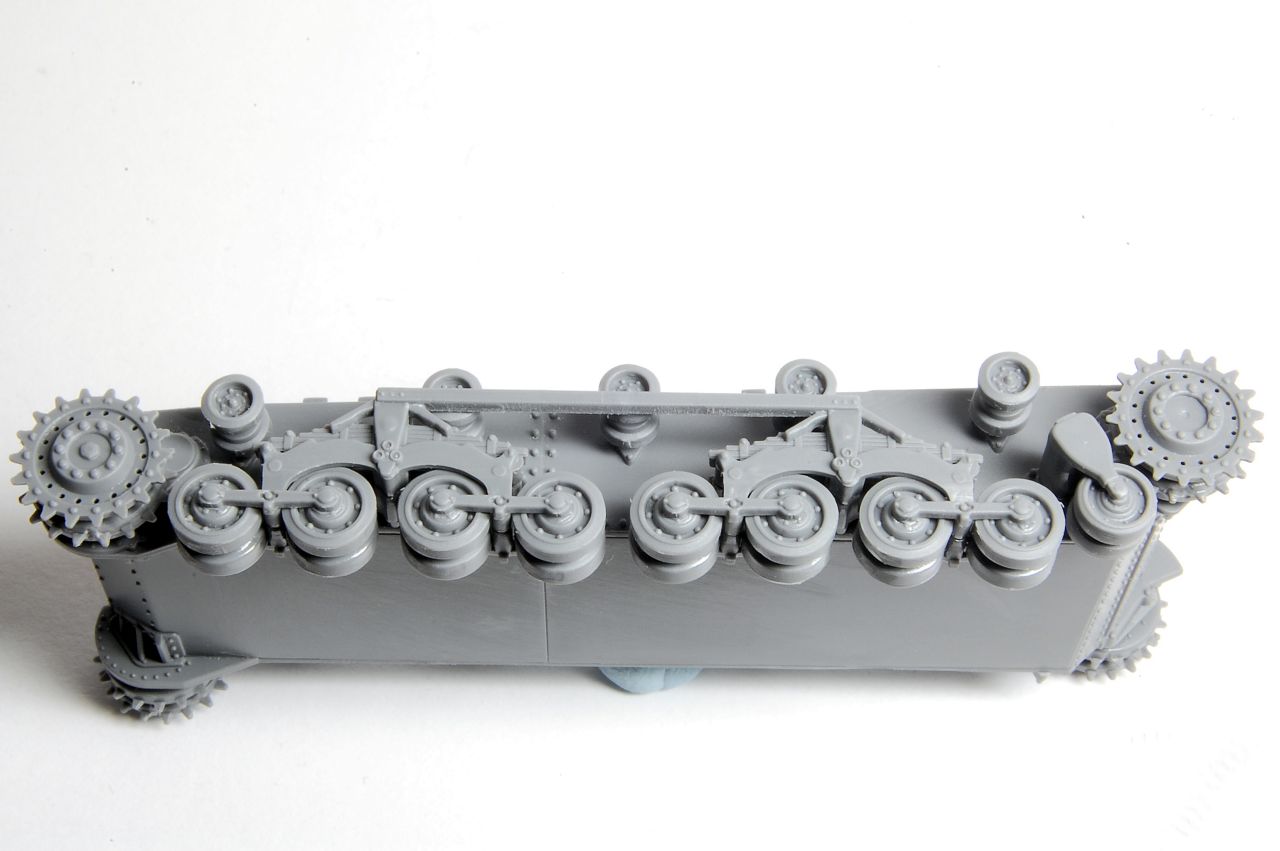
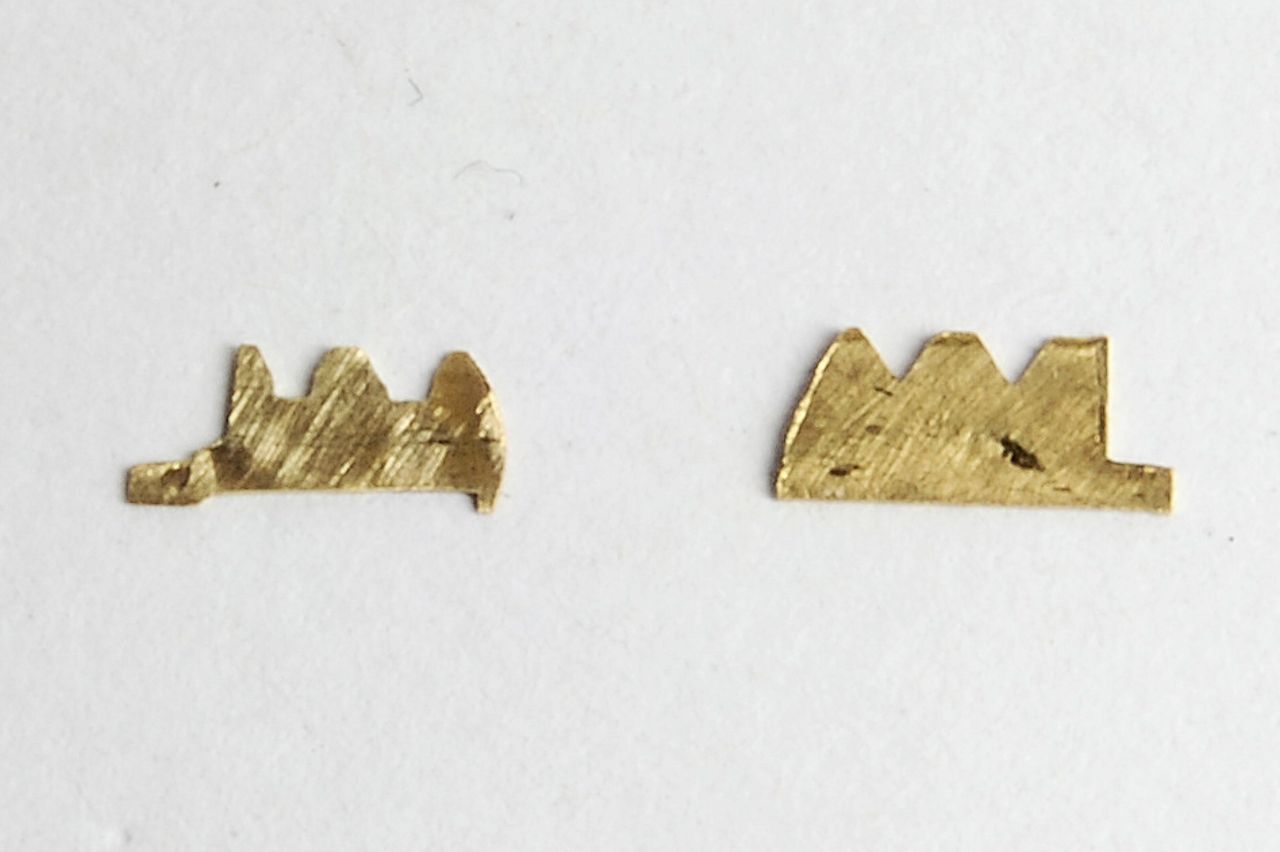
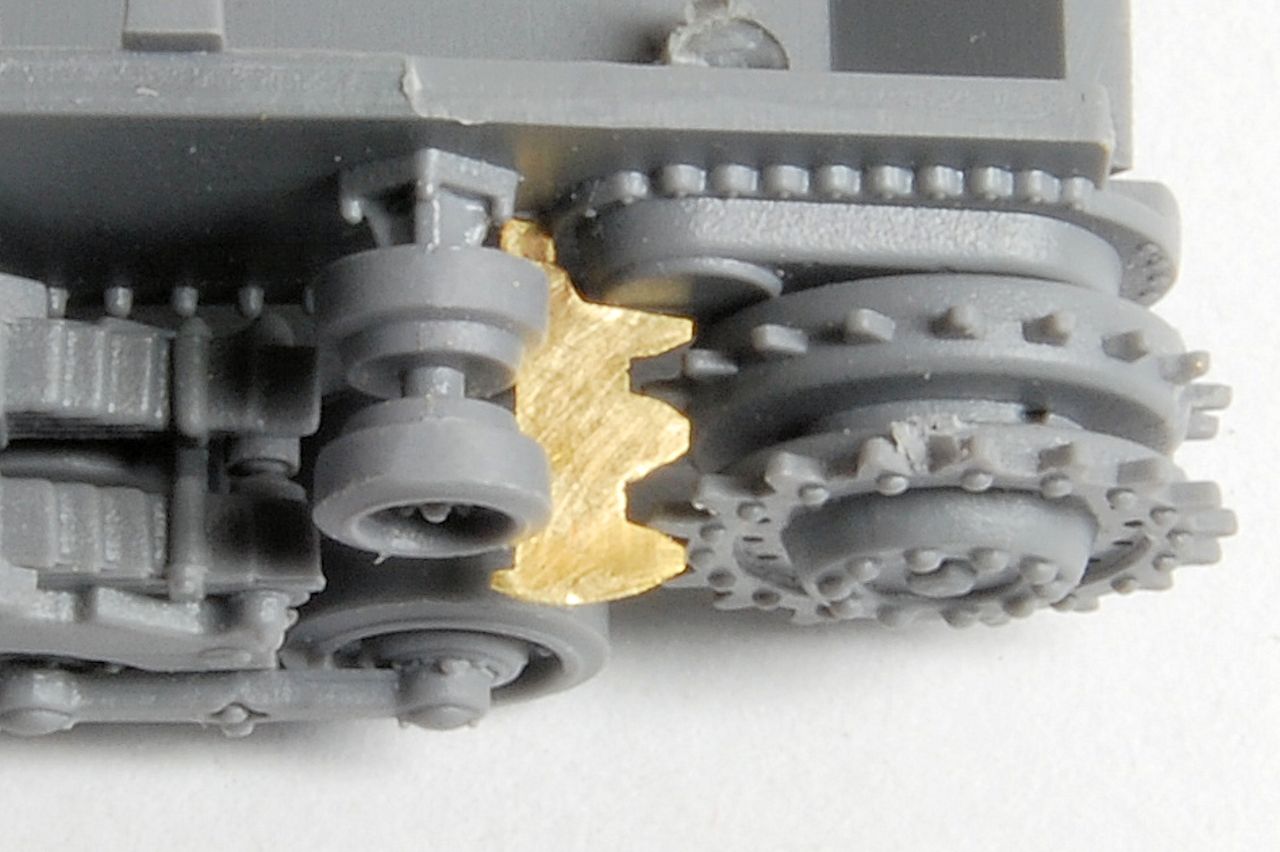
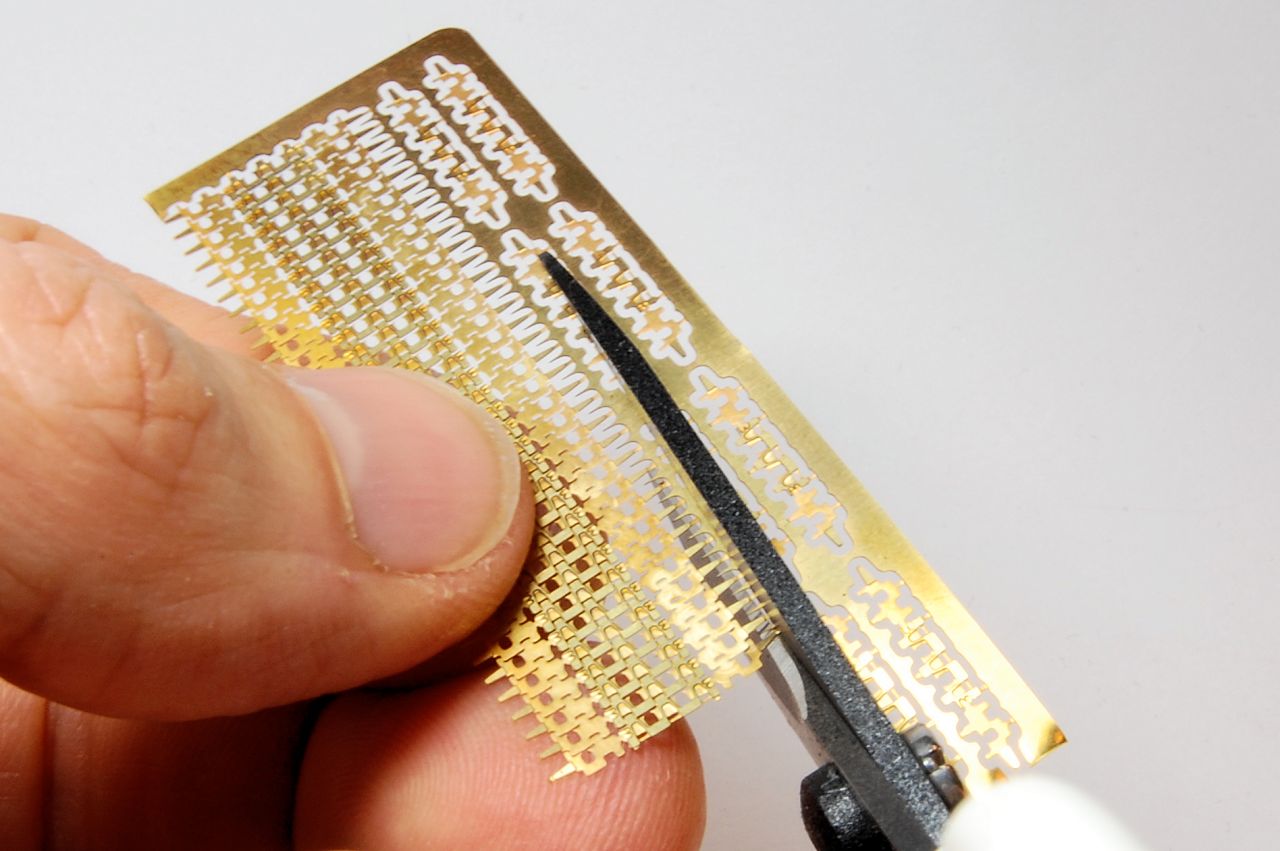
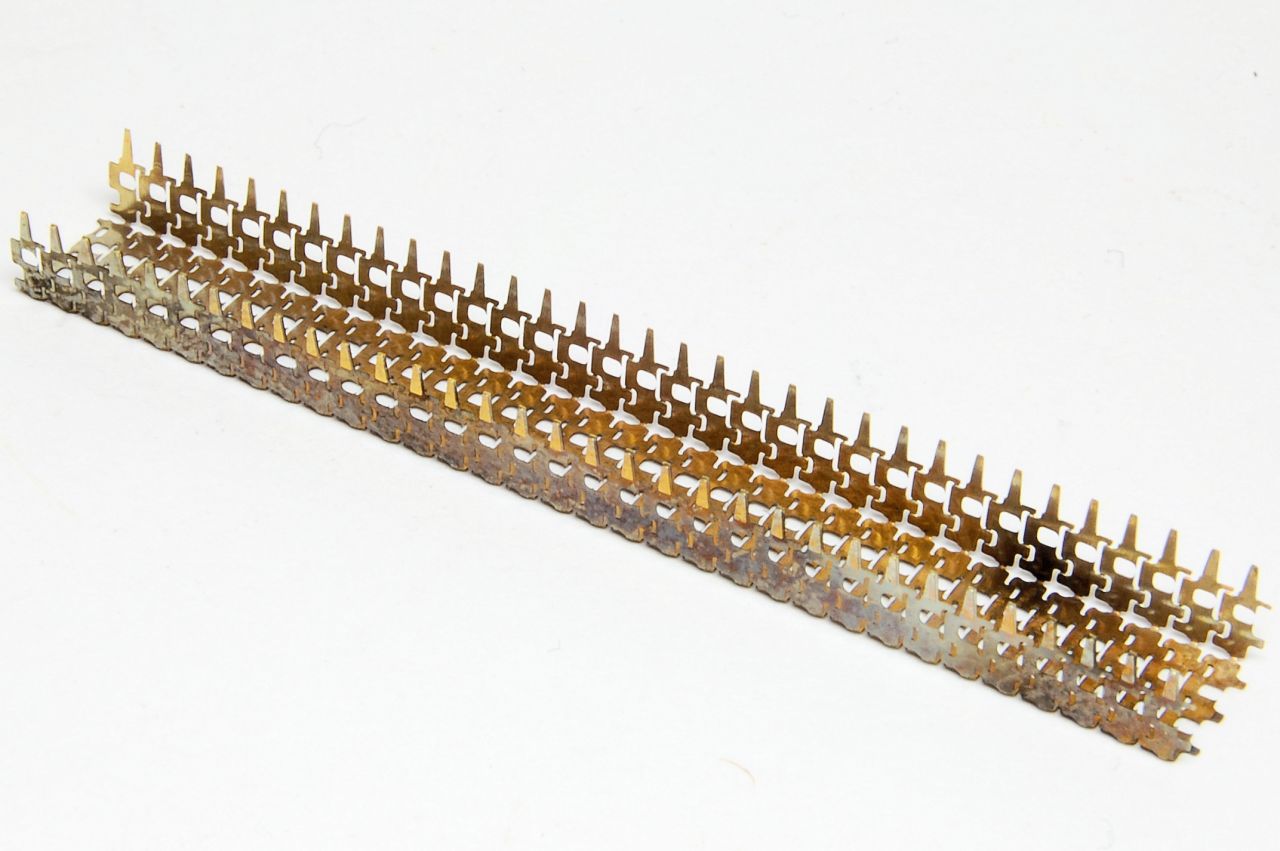
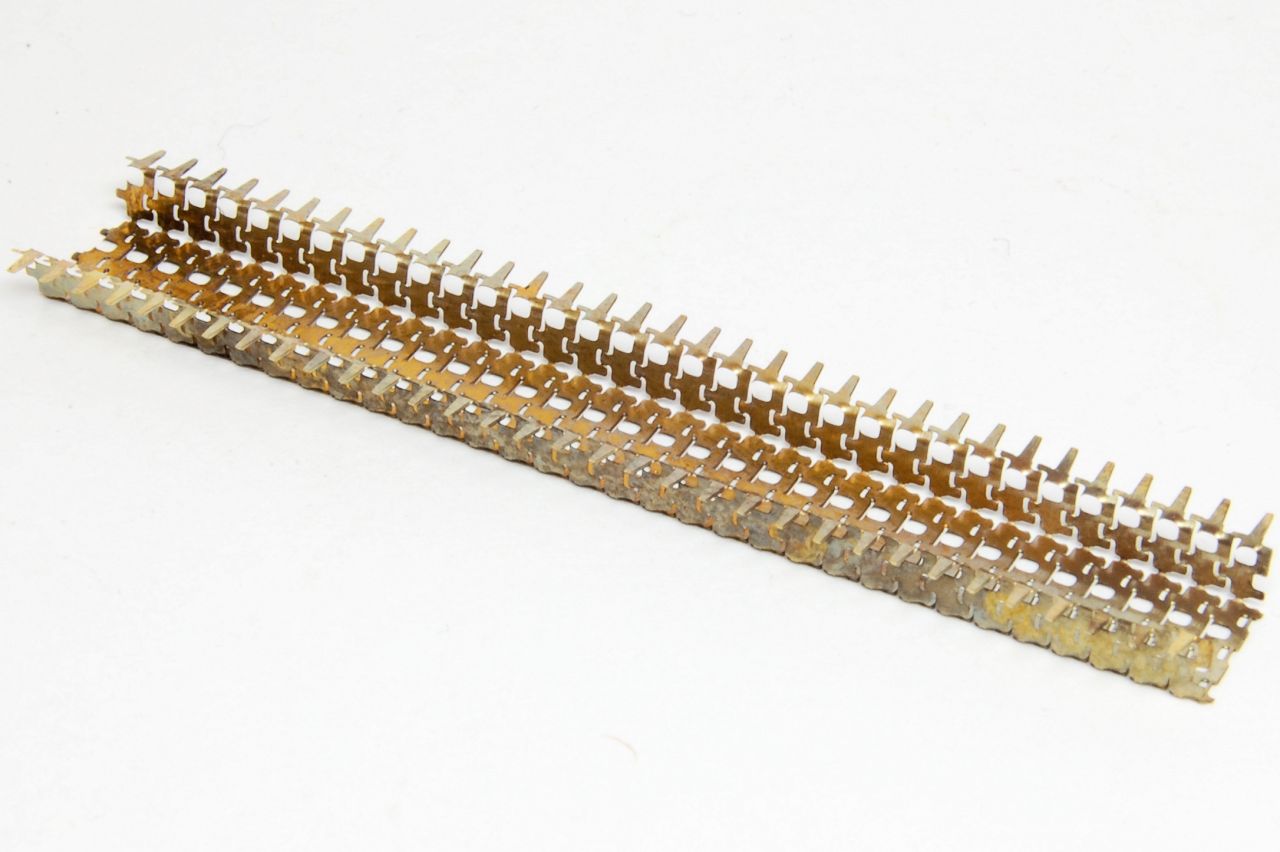
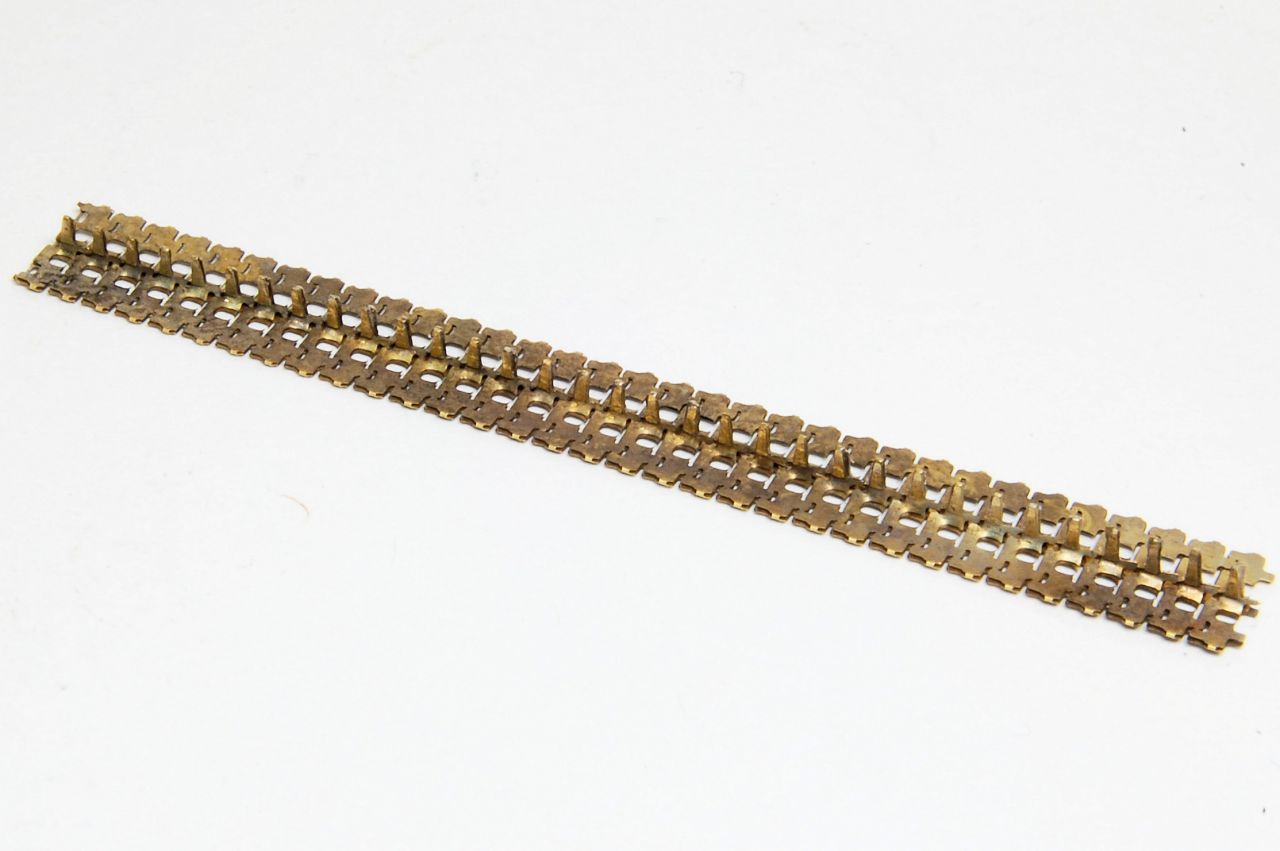
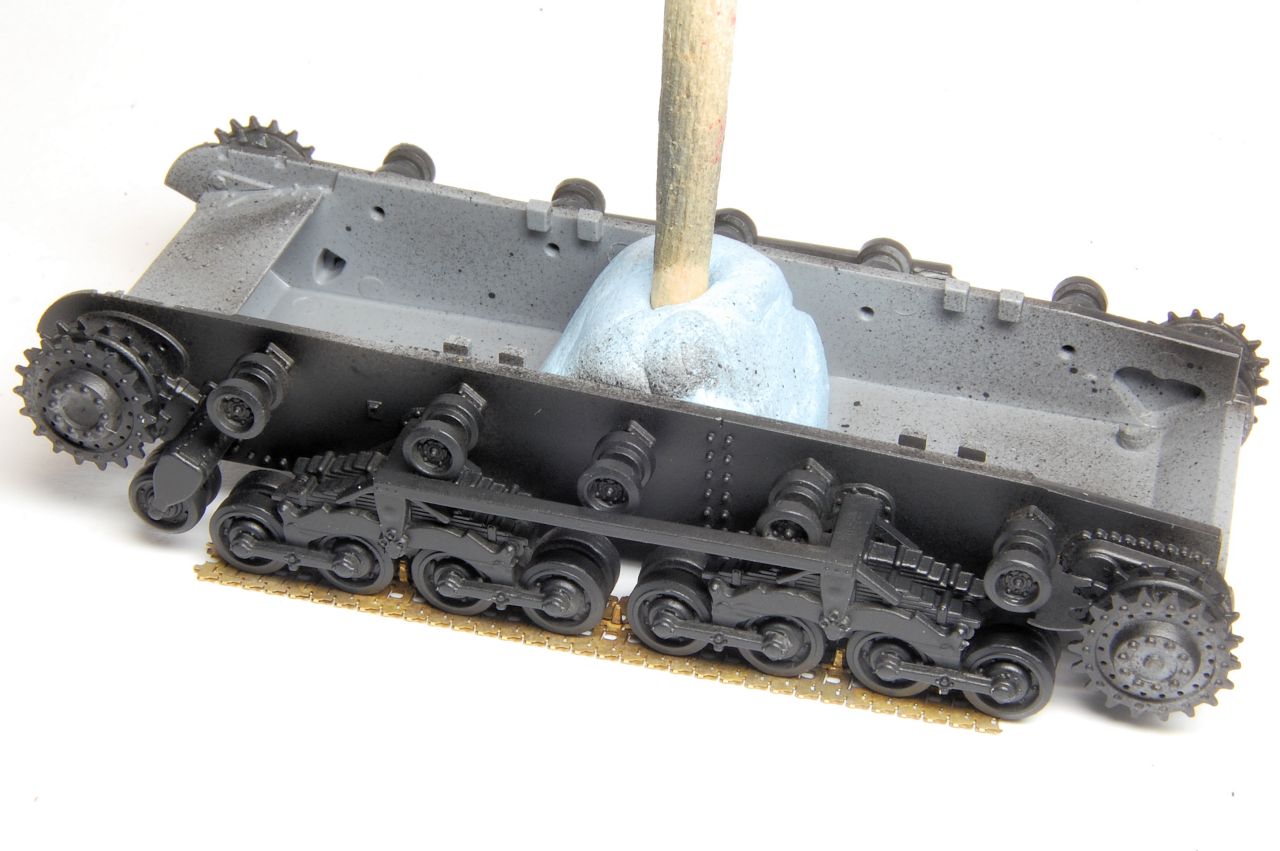
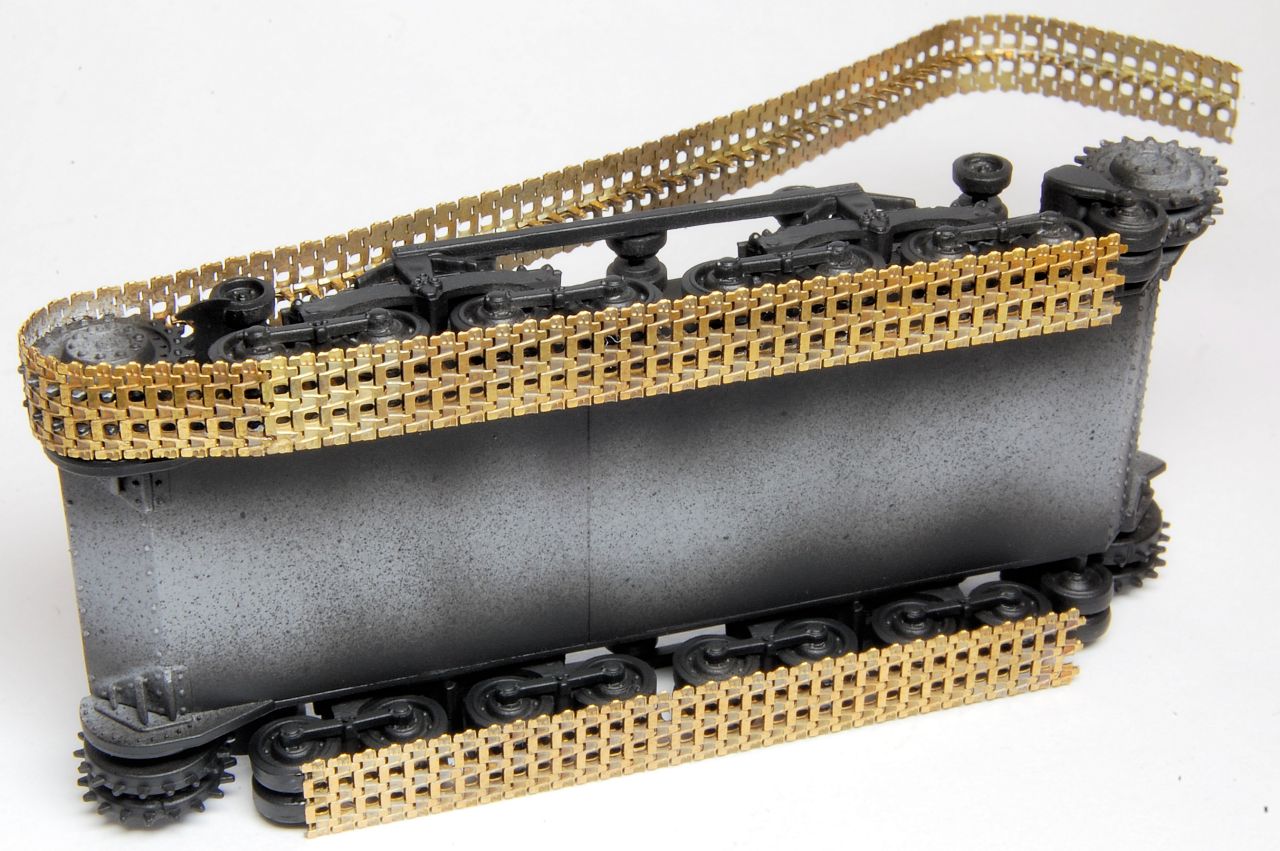
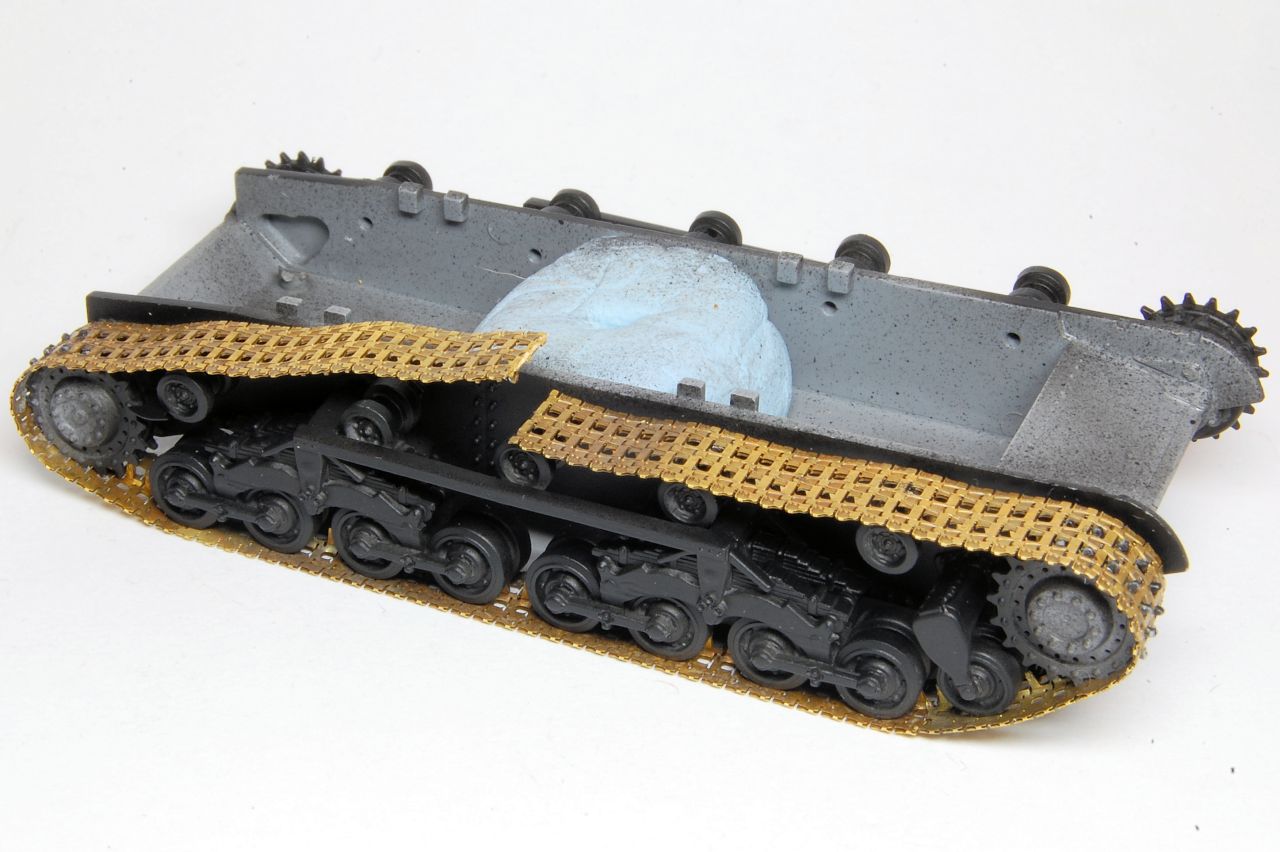
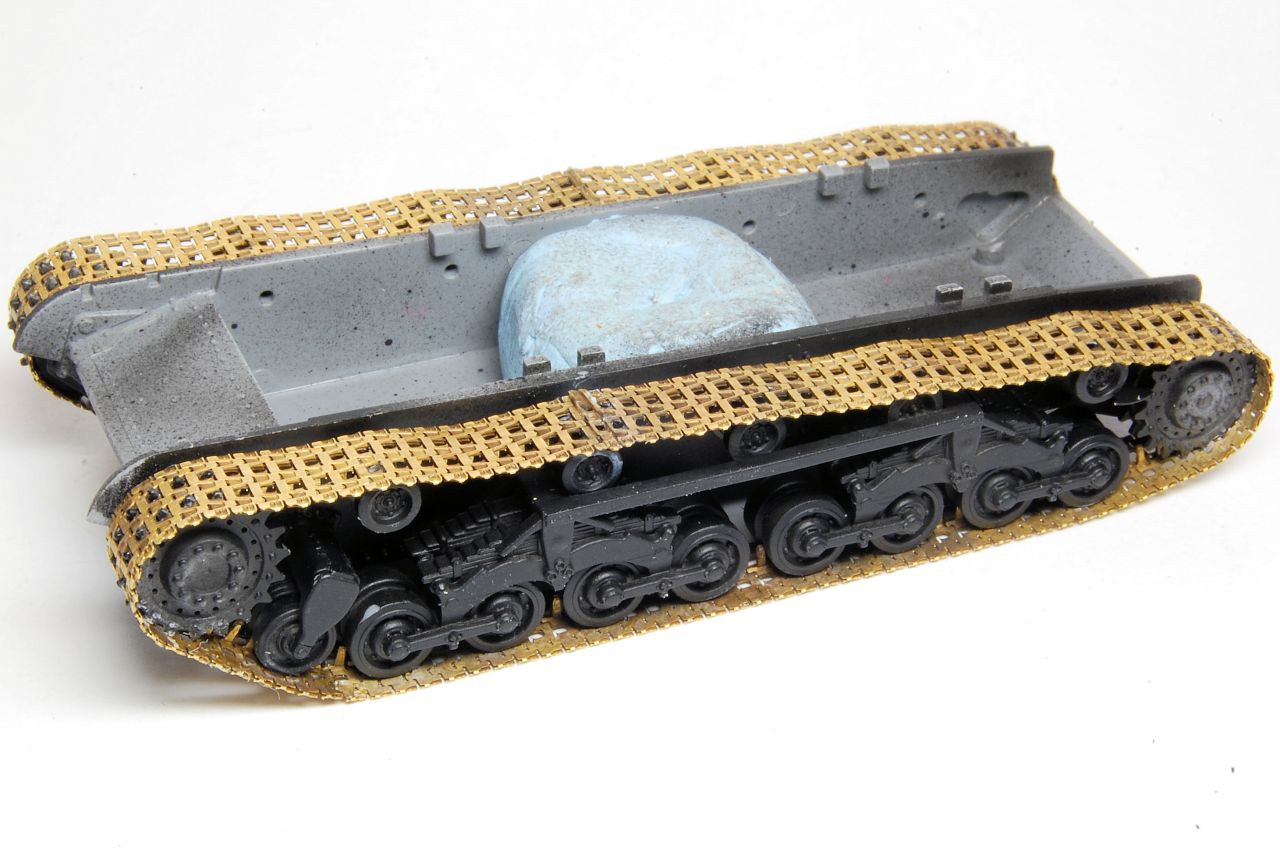
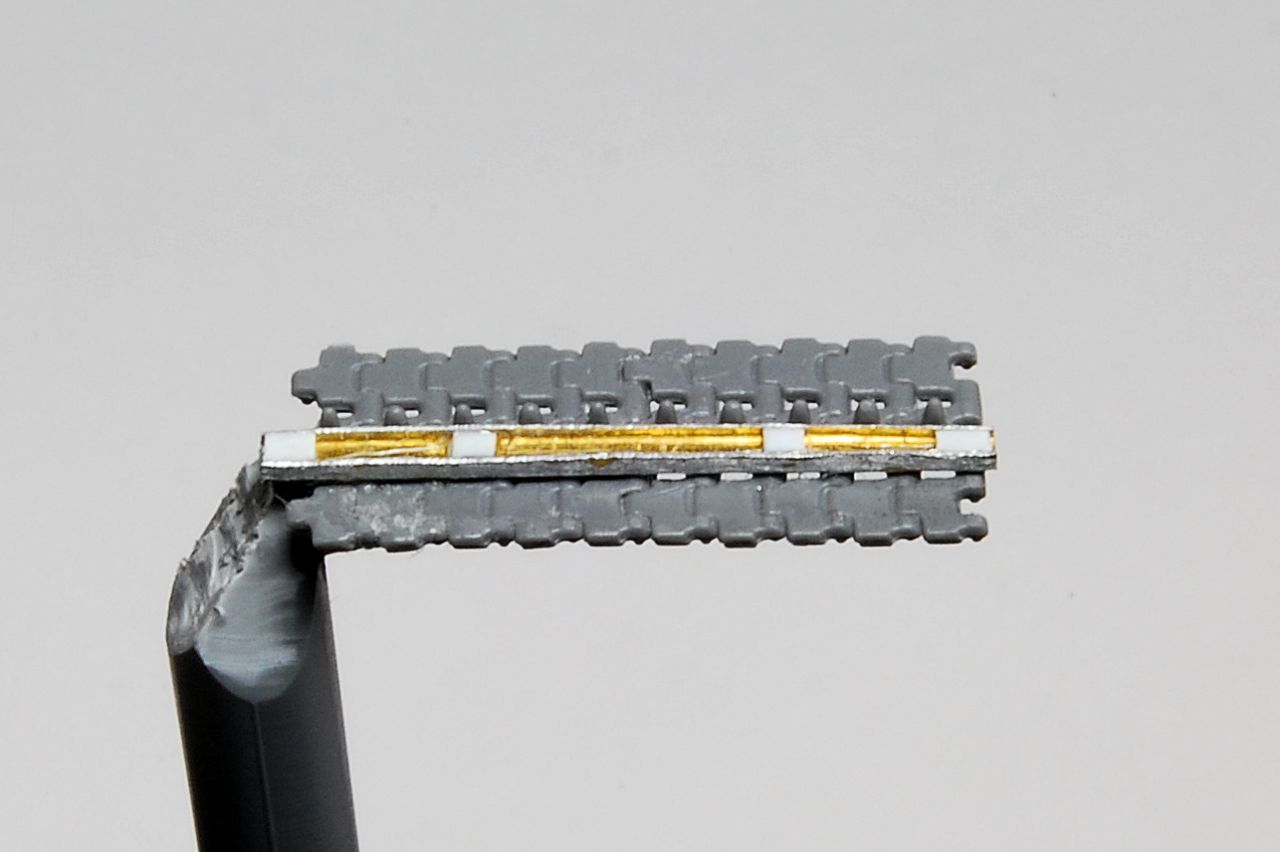
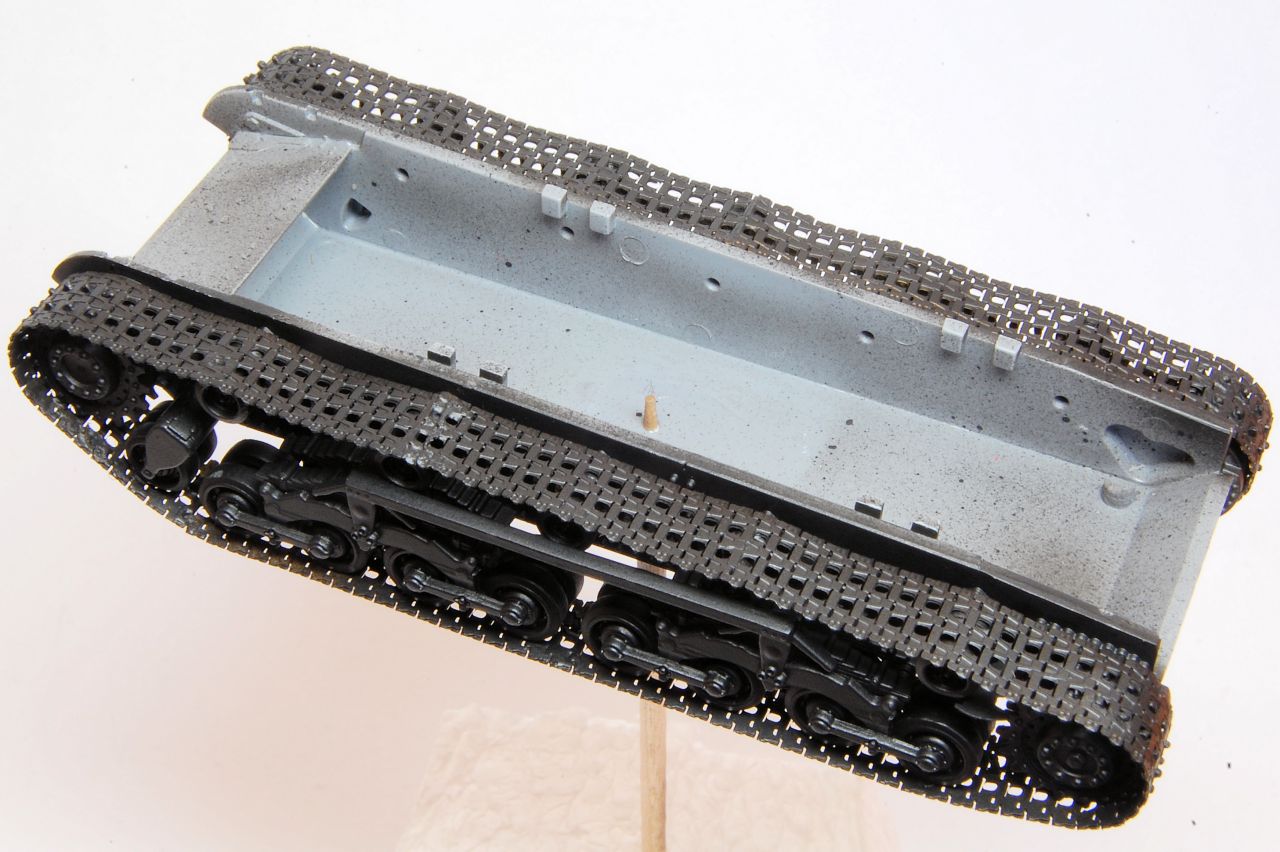
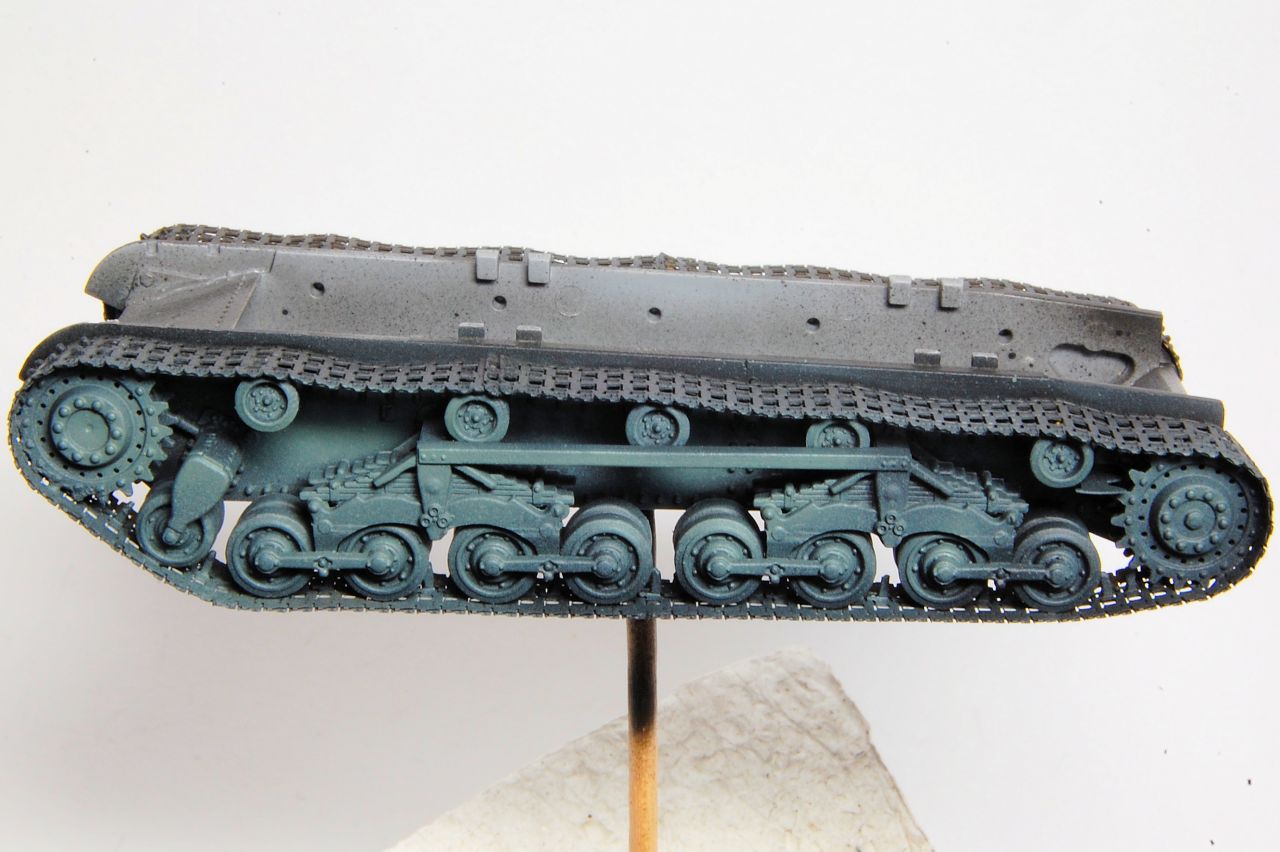
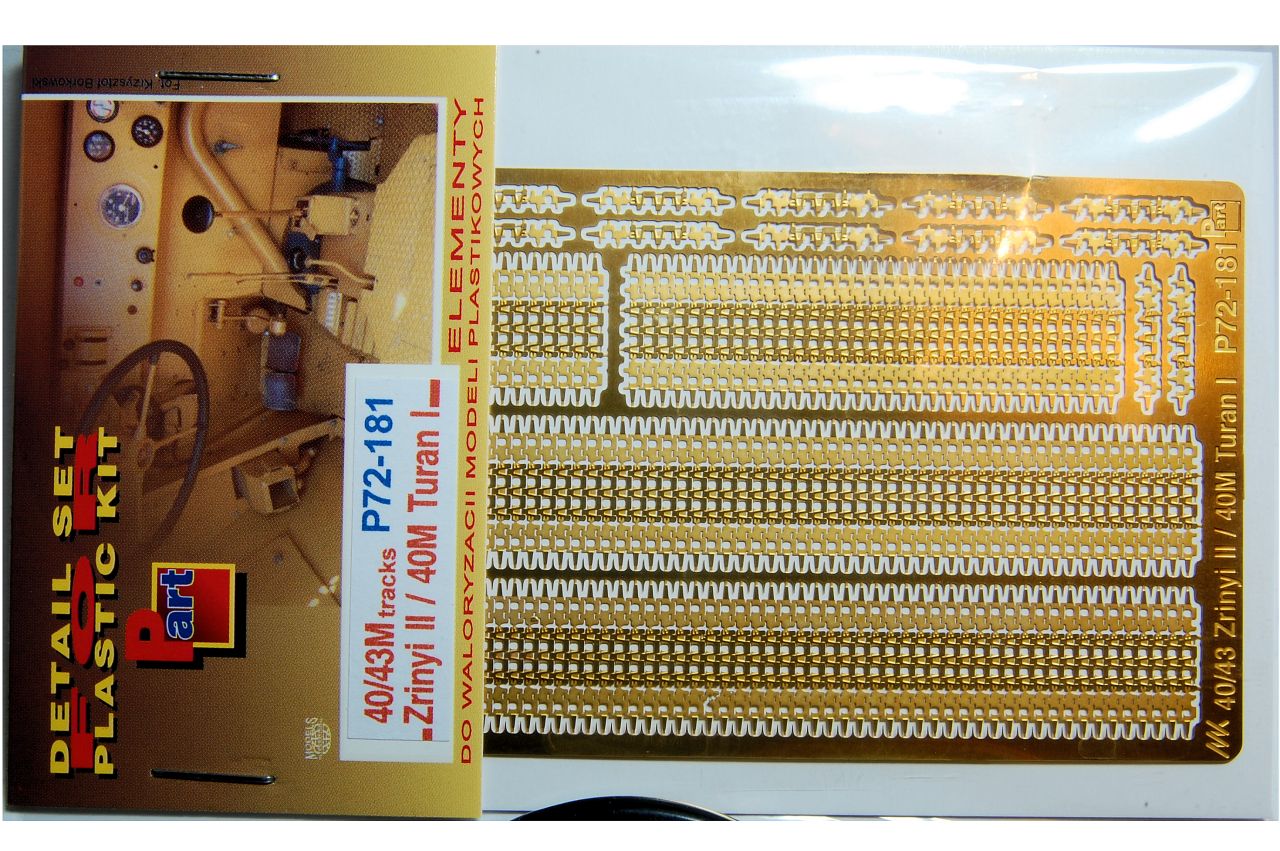
Having enjoyed assembling the IBG tracks twice already, I thought I'd give these a go as part of this build:


As you'd expect, the IBG Turan II shares some of the same sprues with the Turan I, A and Dx2, below:


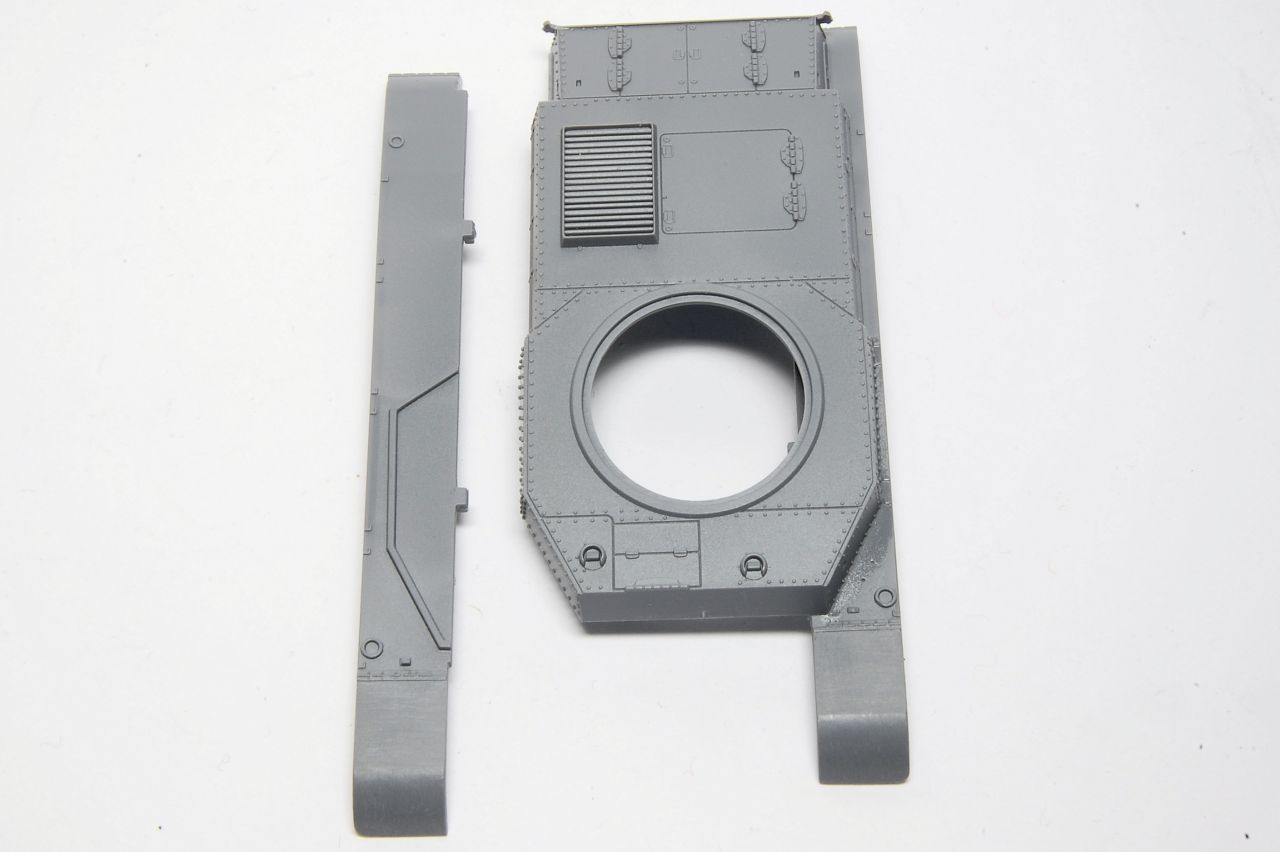
The main difference is sprue J which replaces sprue H:


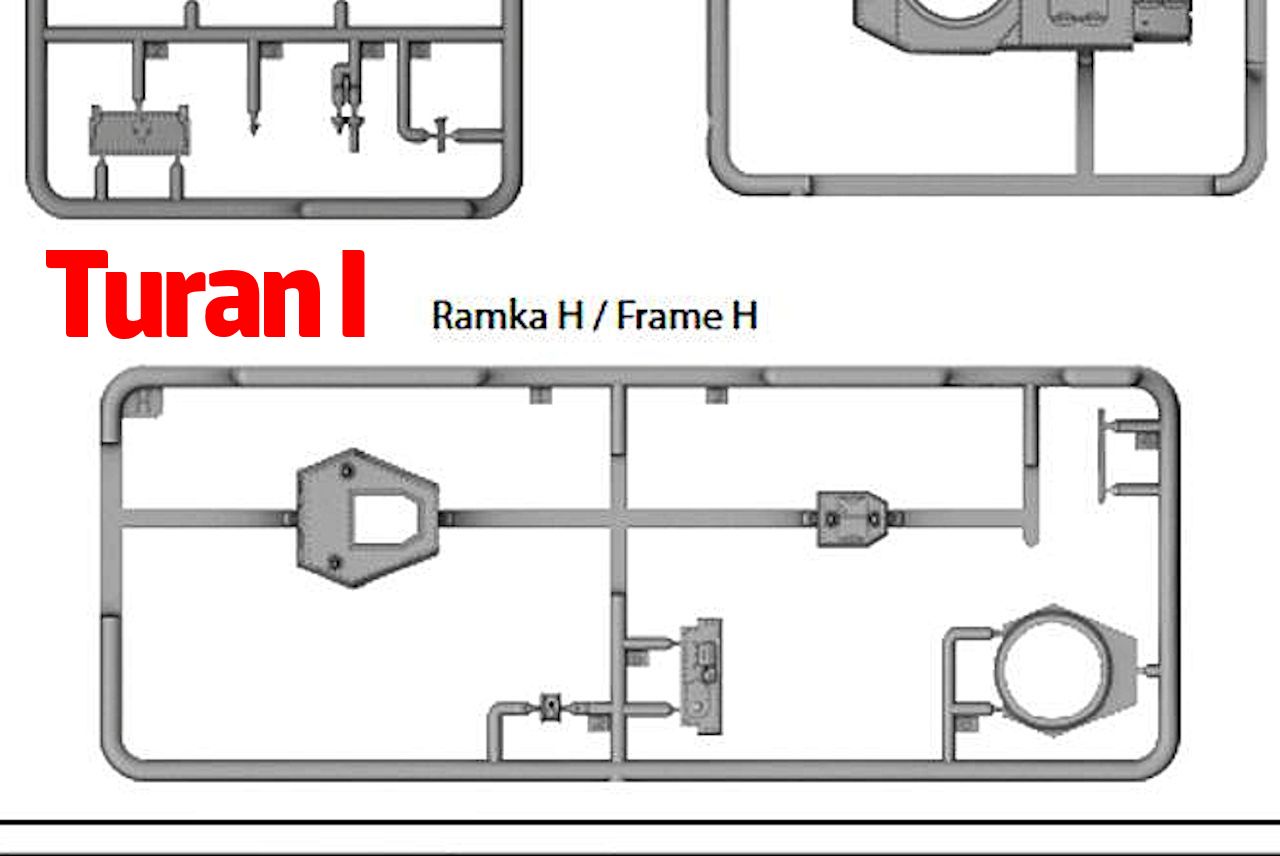
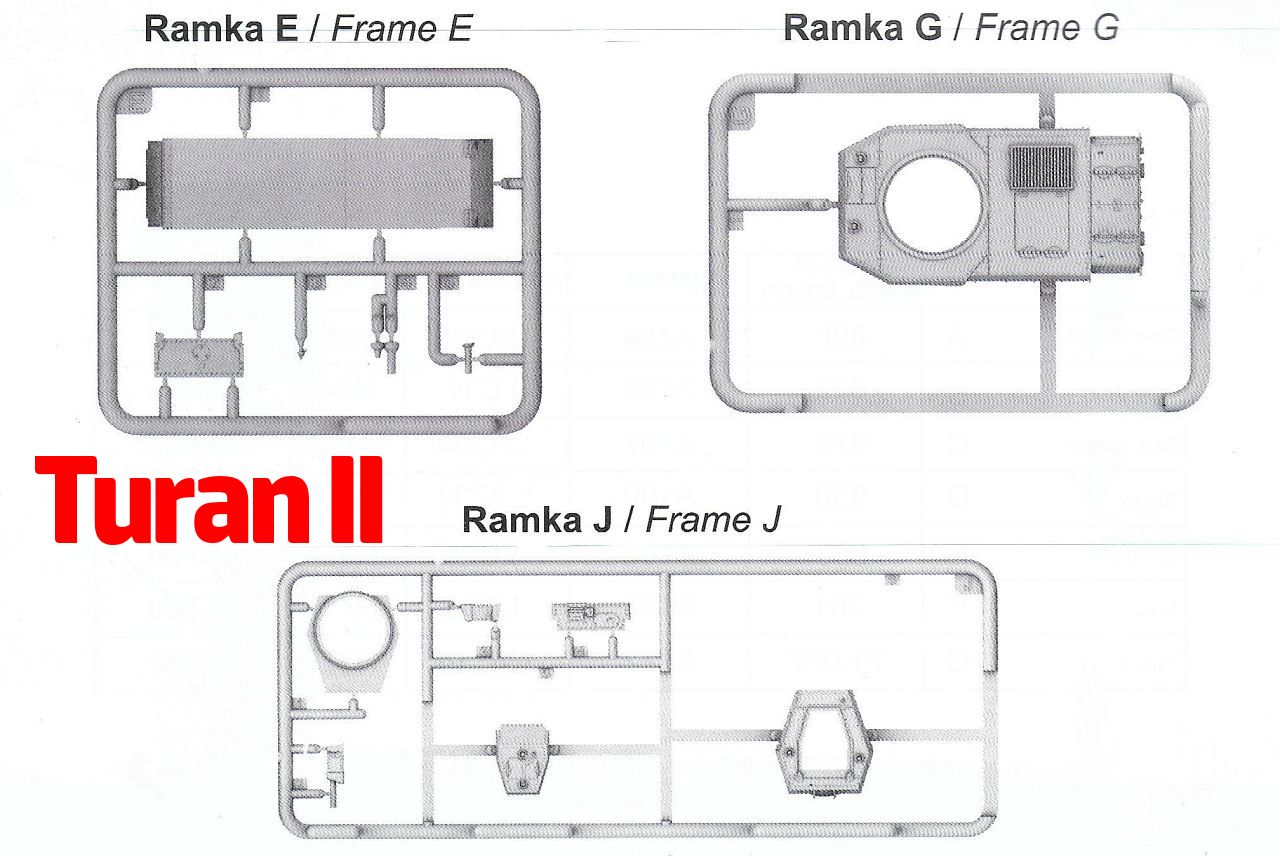
Although there is a sprue G for the upper hull in both kits, it's not the same sprue G in that the driver hatch now folds open forward, instead of opening in two halves sideways. No point in showing the photo of the parts diagram for it from the Turan I kit as IBG inadvertently used the image of the Turan II hull...

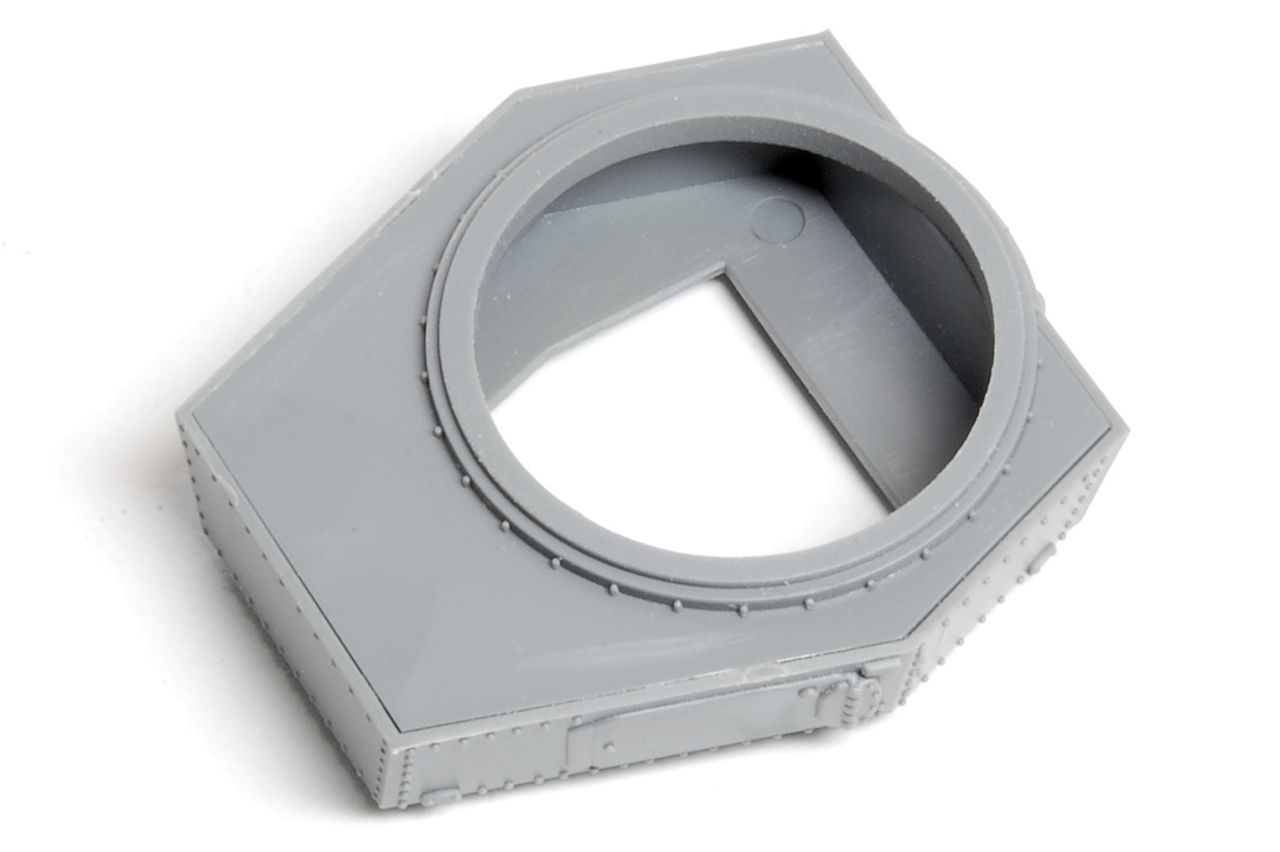
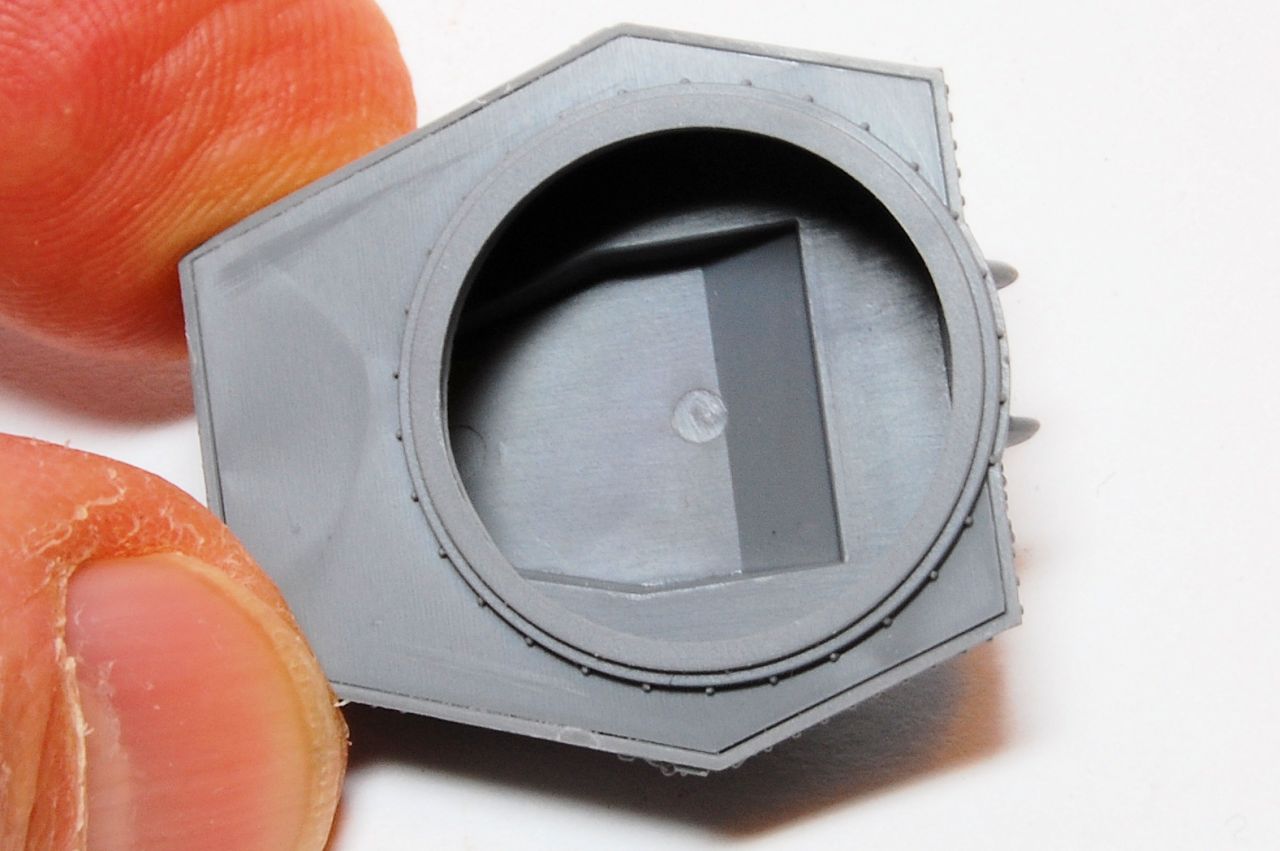
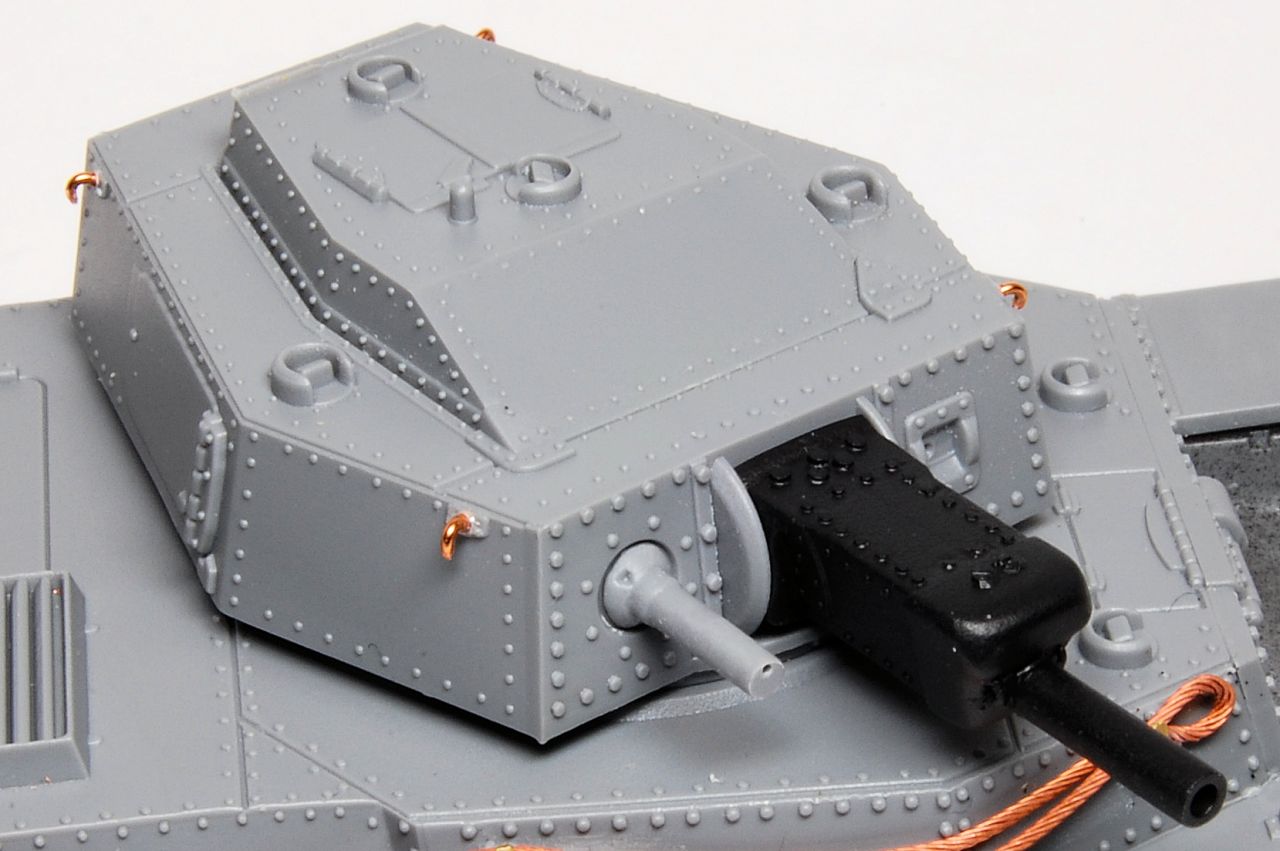
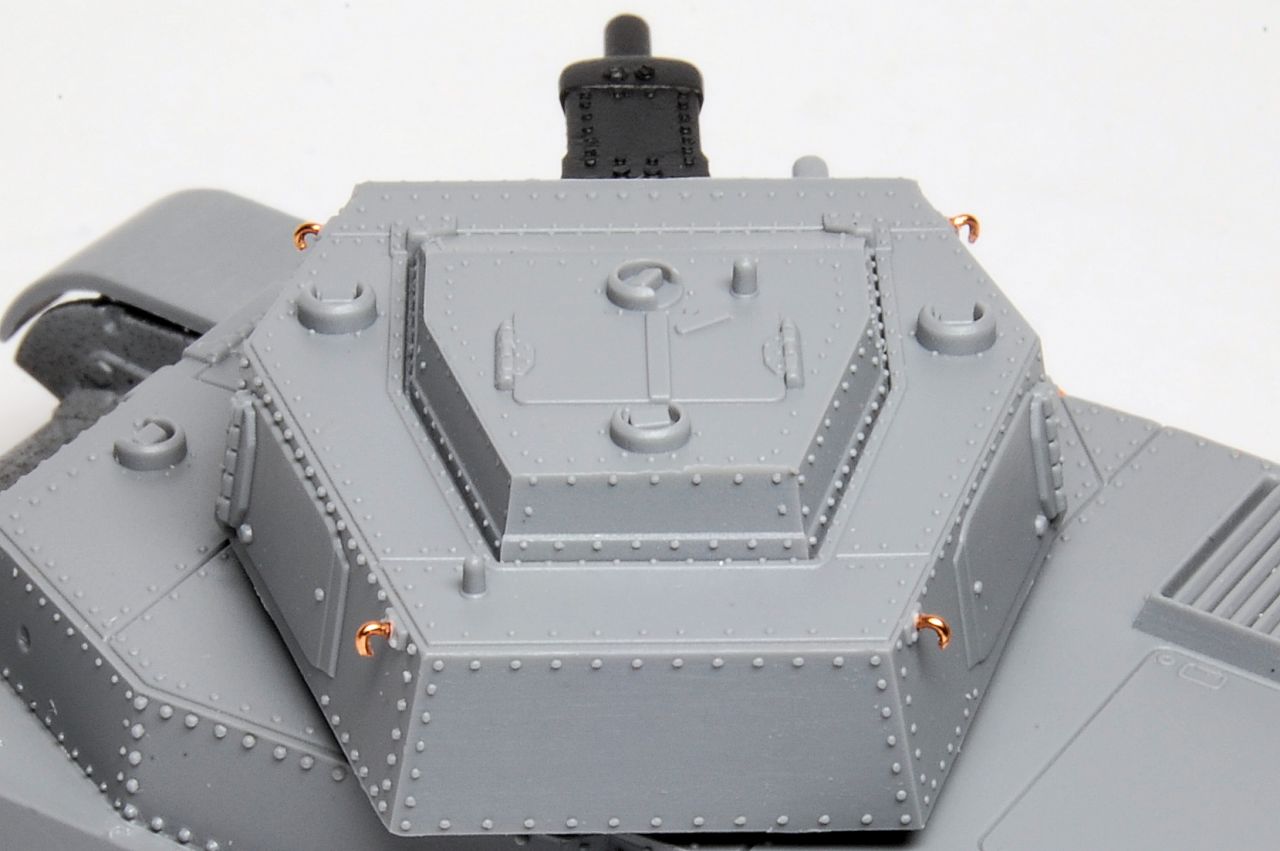
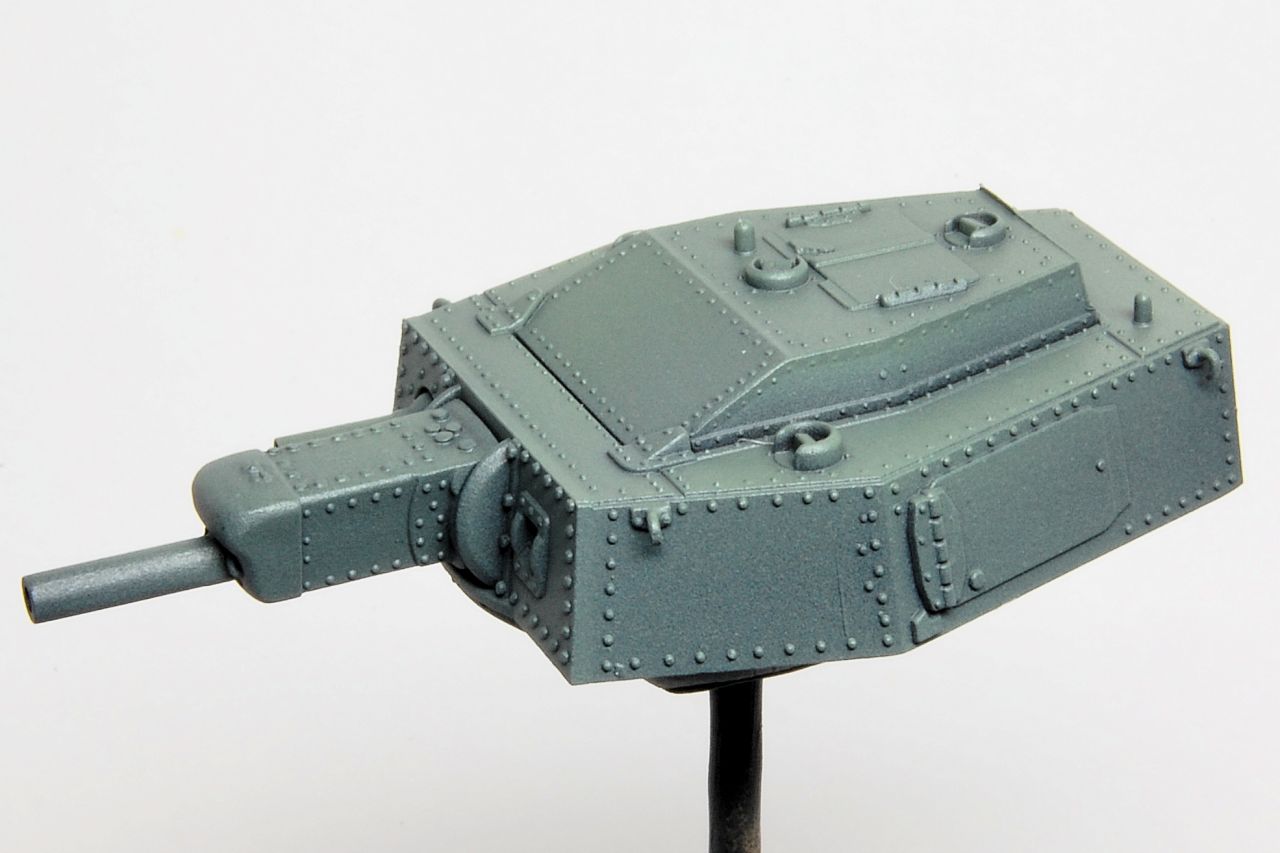
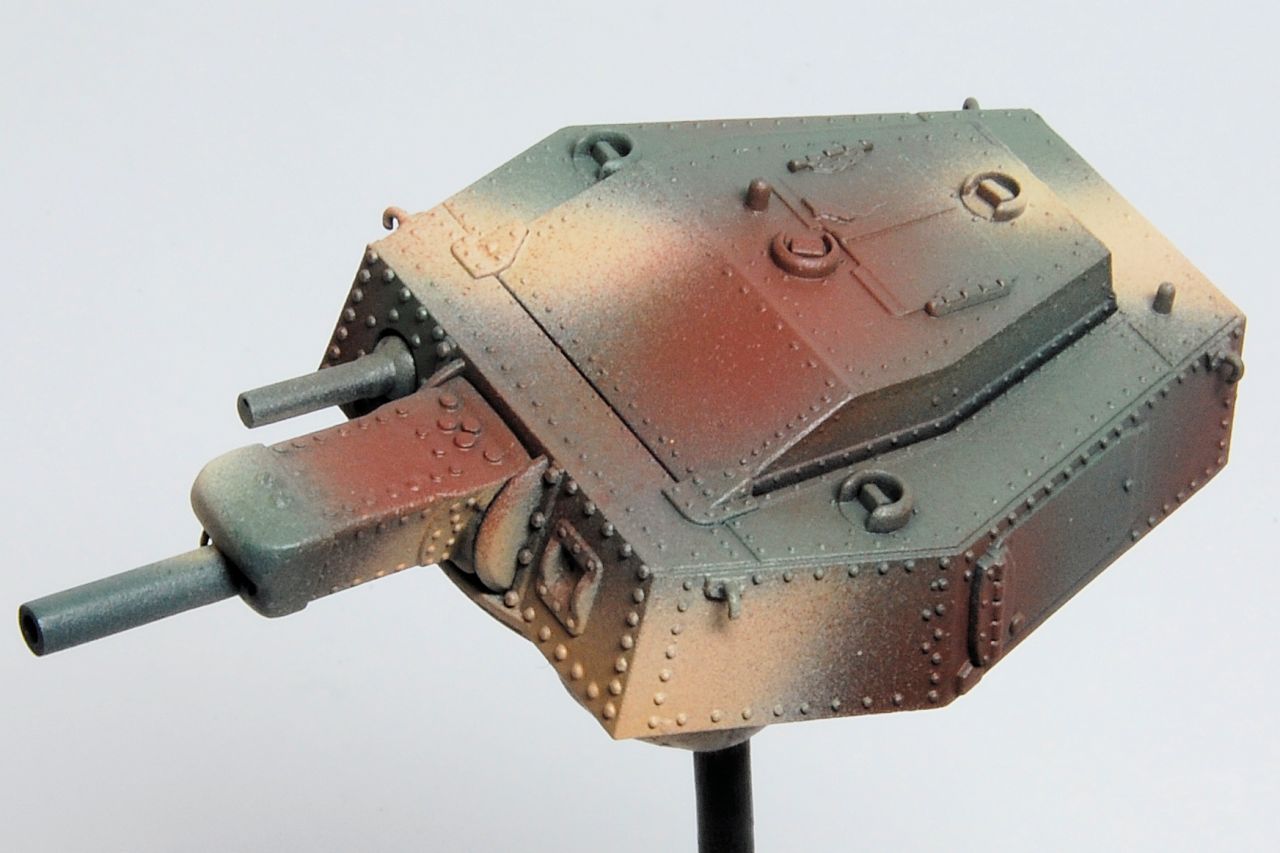
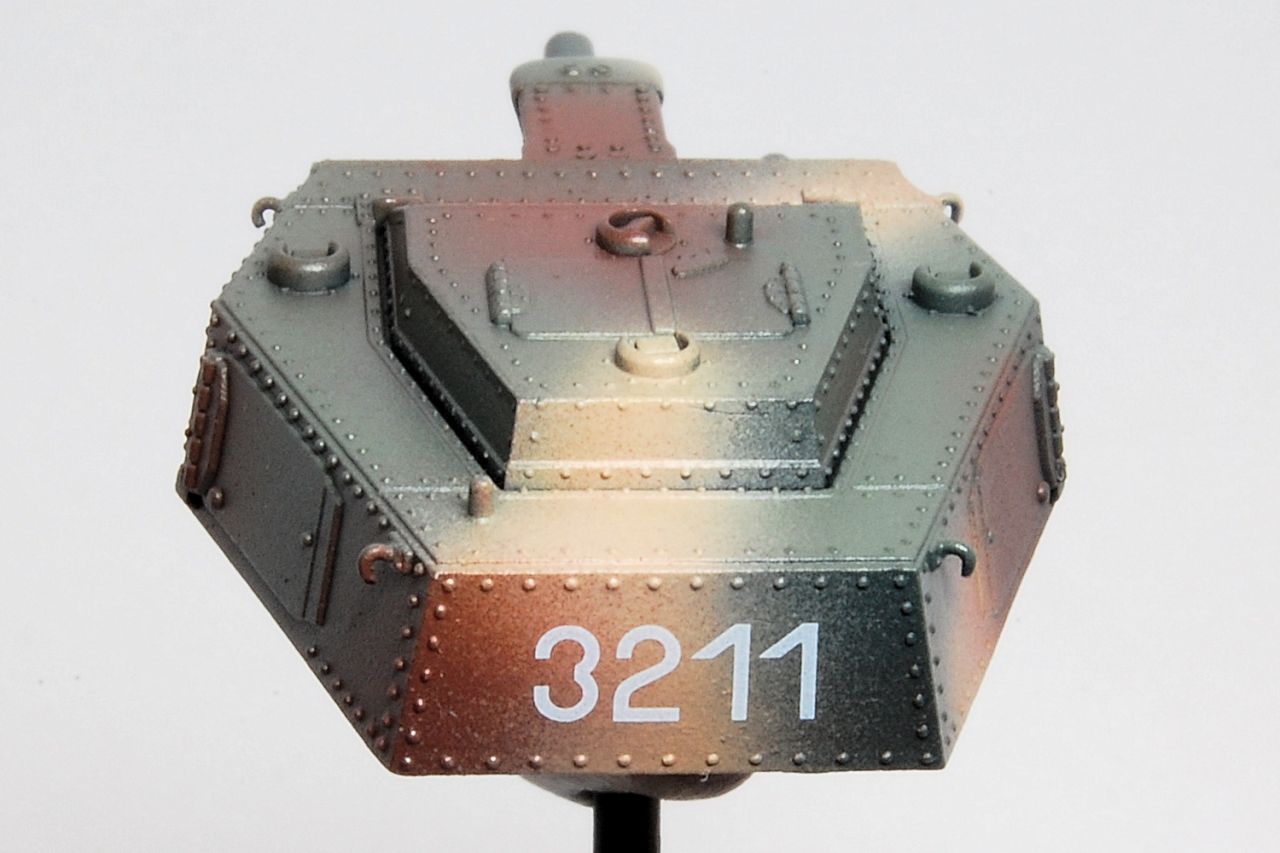
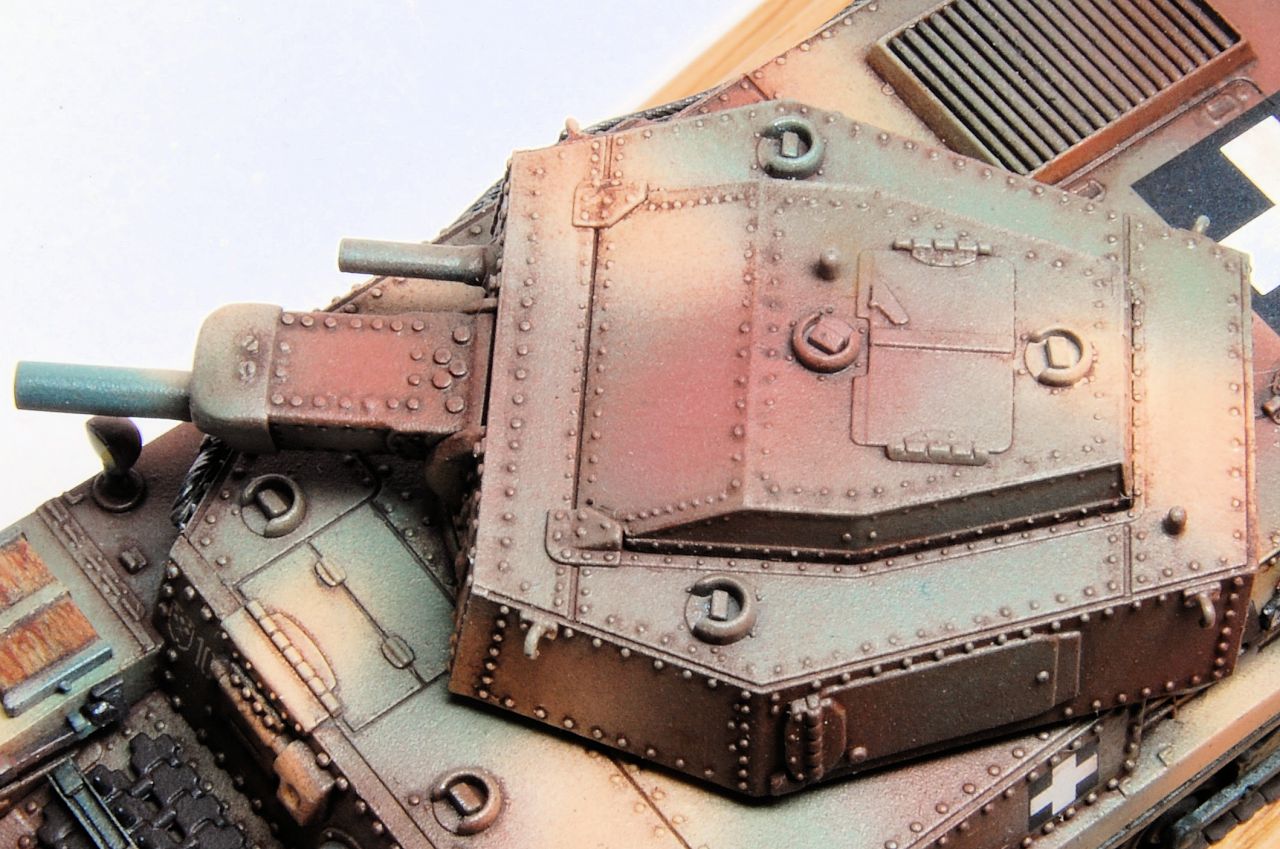
Anyway, here are comparisons of the main turret parts:


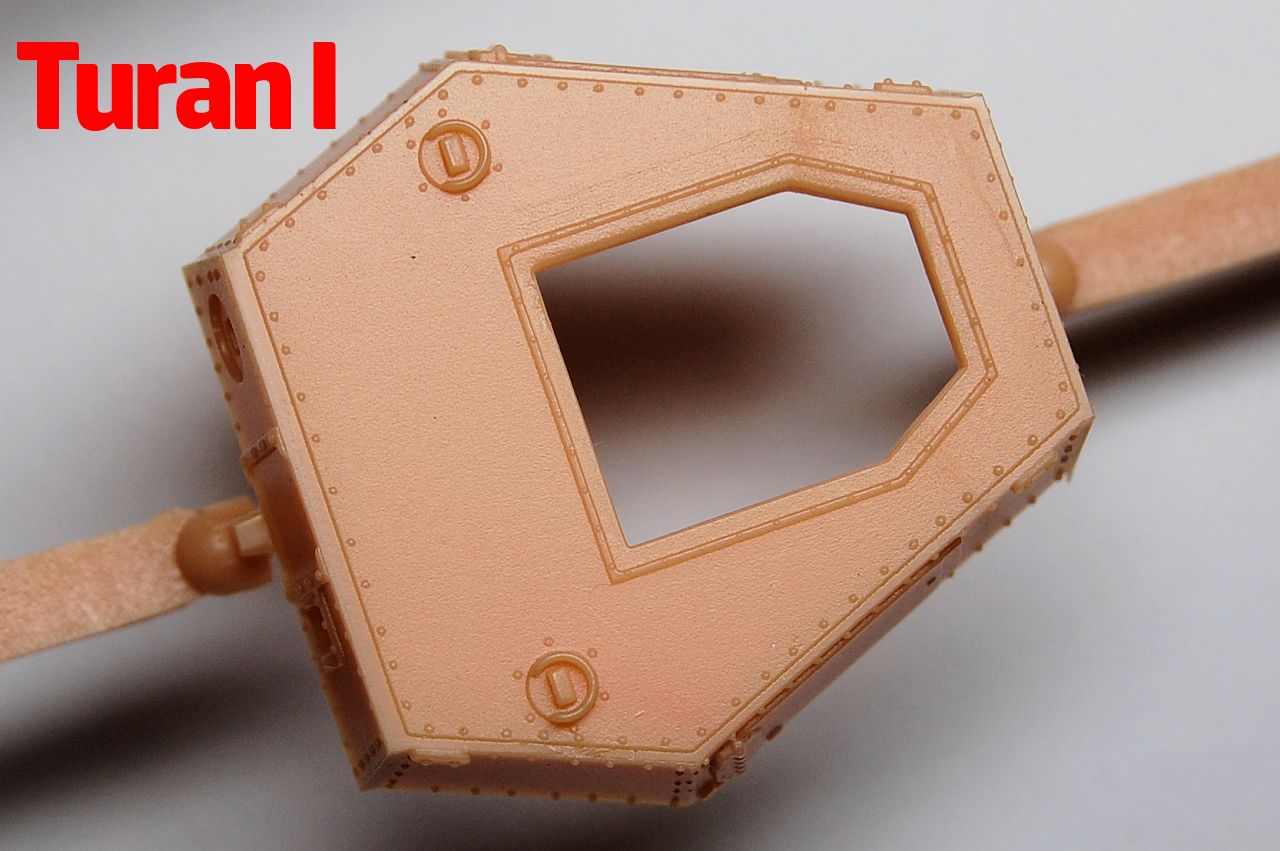
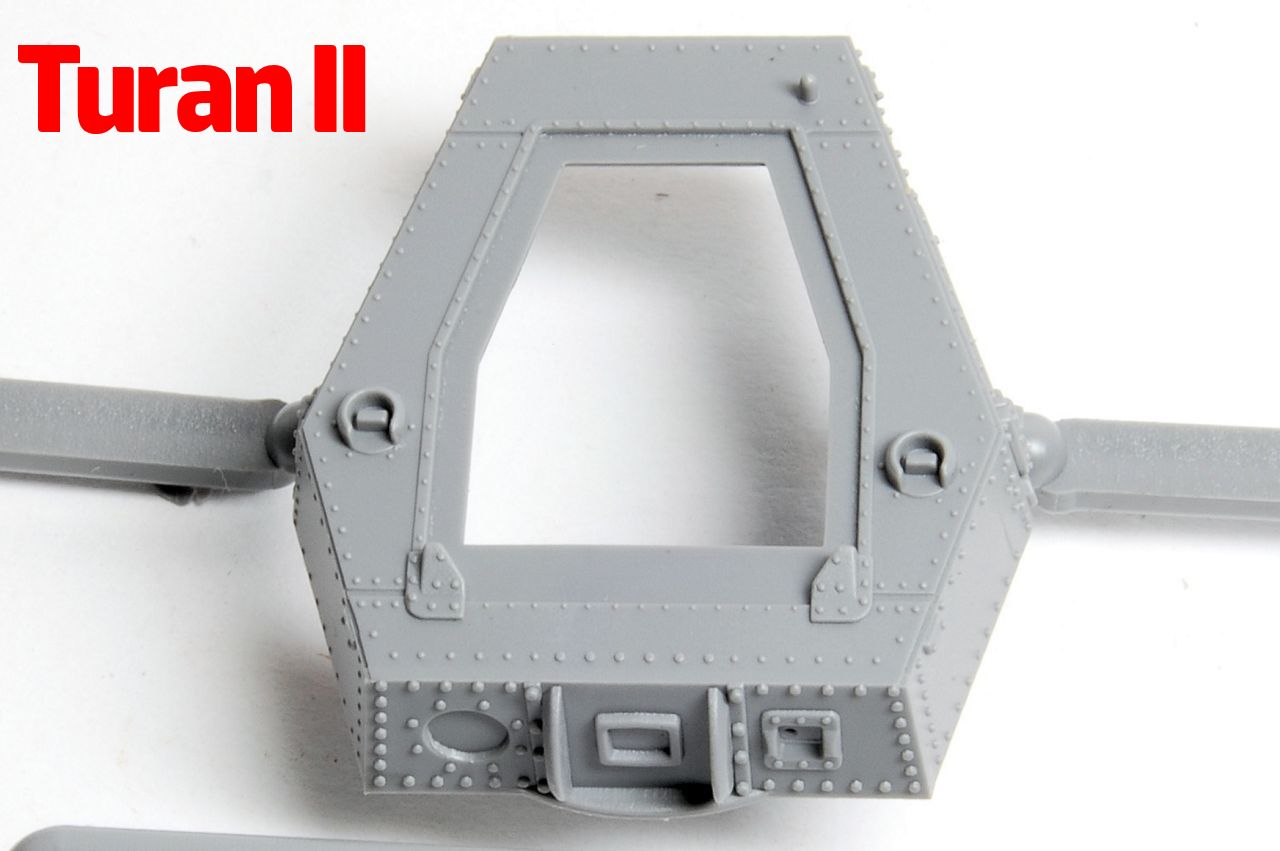
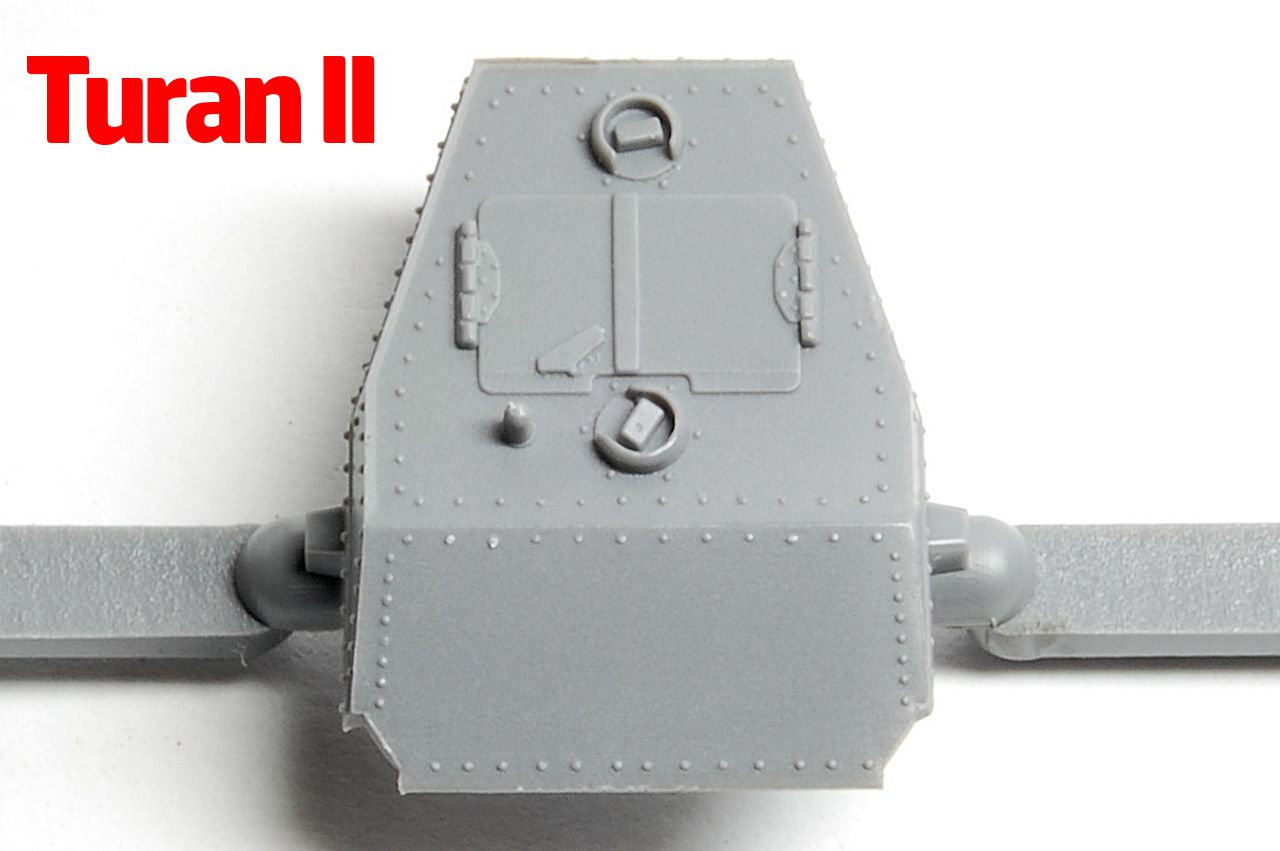
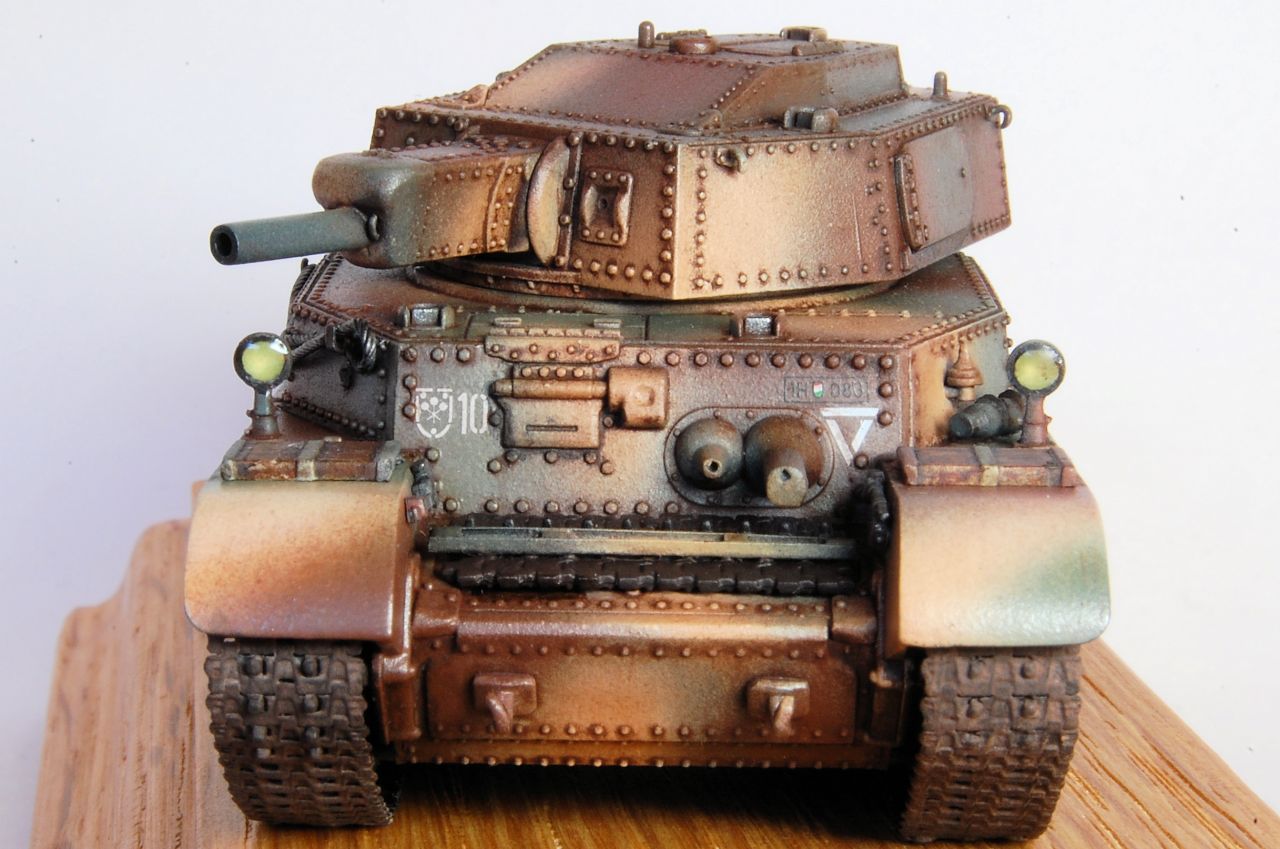
So the Turan II is up-armoured with a thicker turret front, and additional plates on the roof giving a more complex appearance, and the commander's cupola is bigger, wtih a sloping front plate.

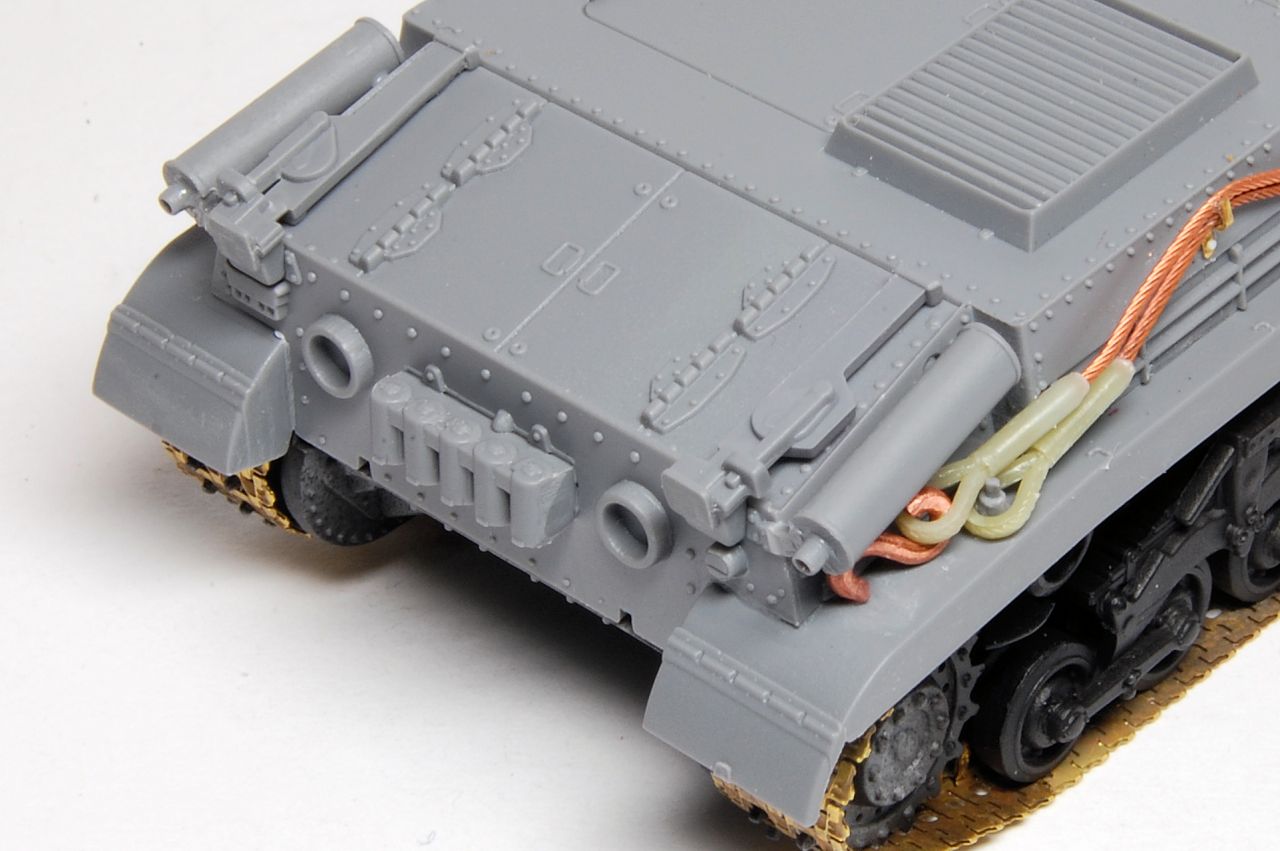
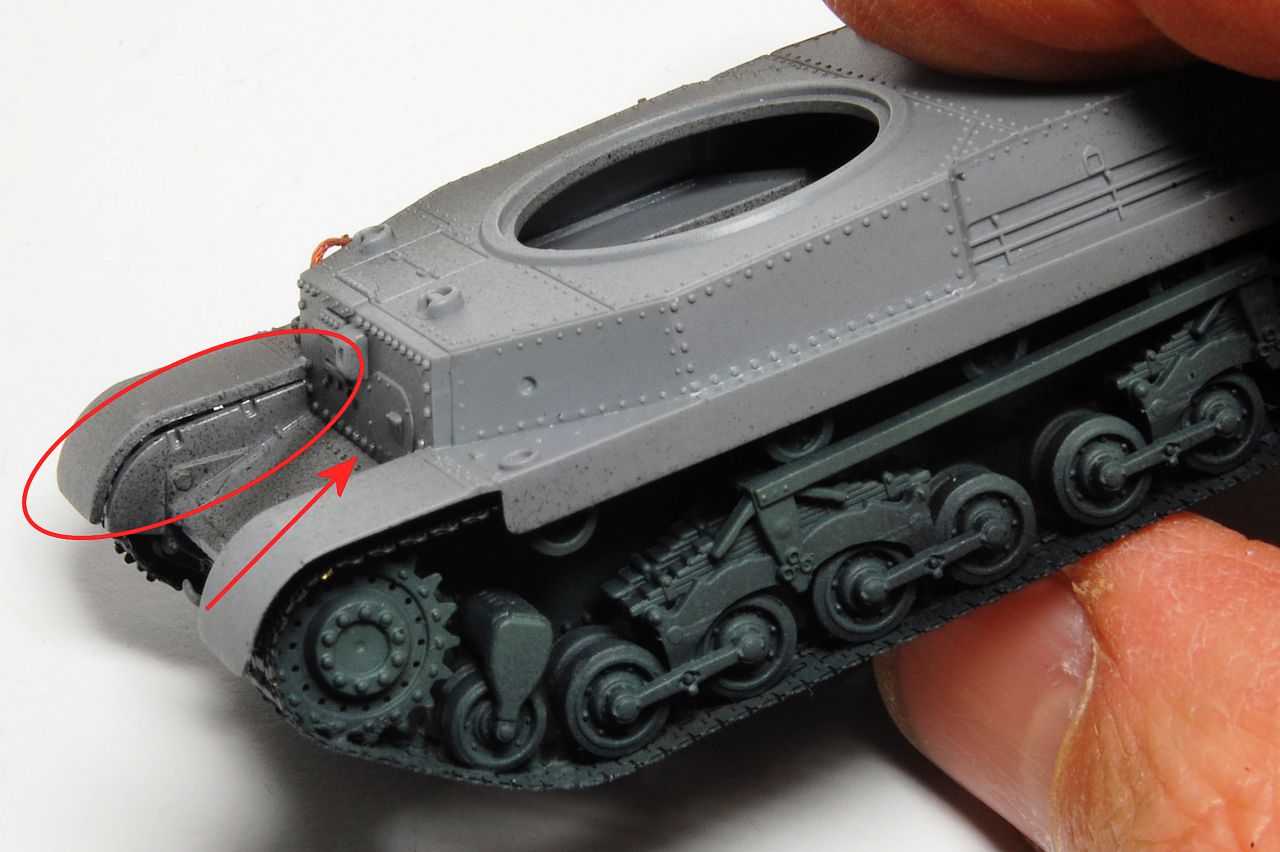
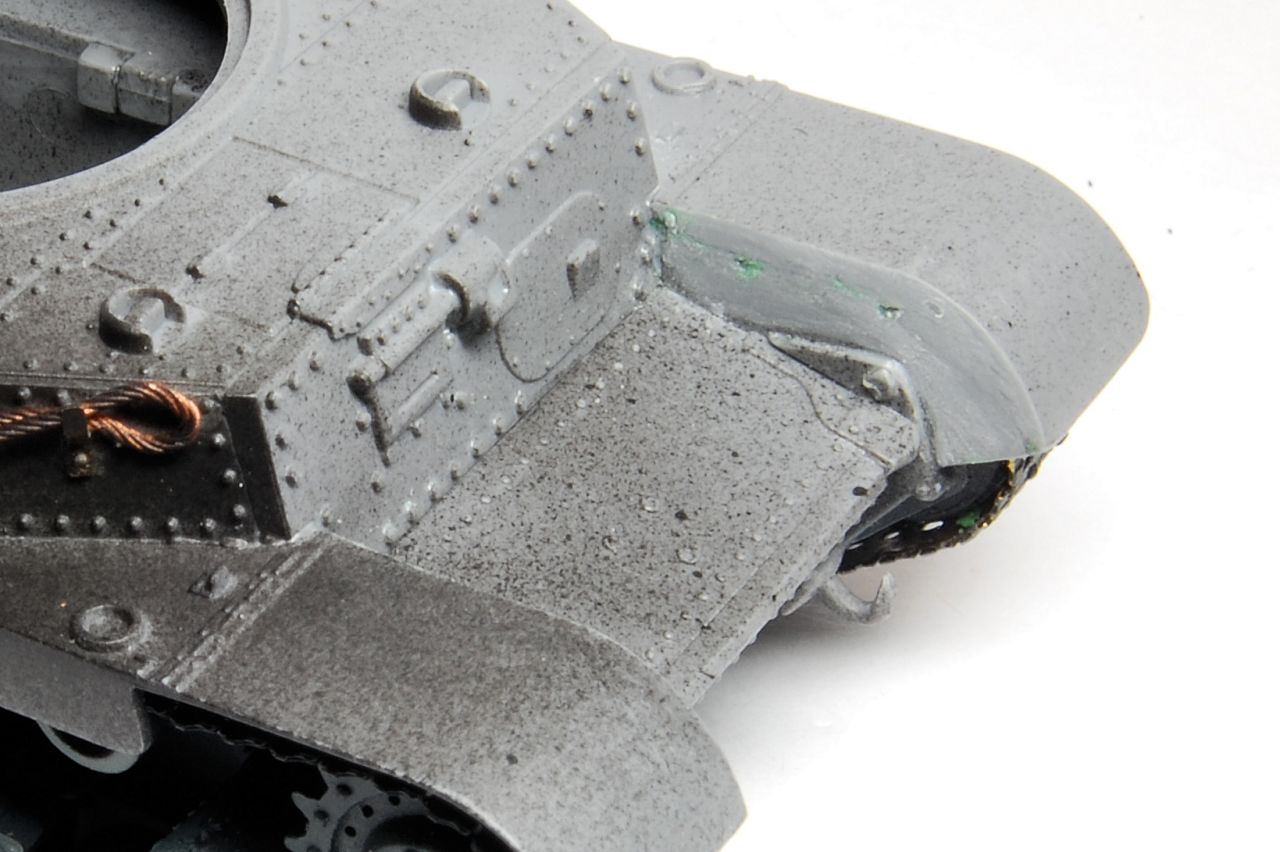
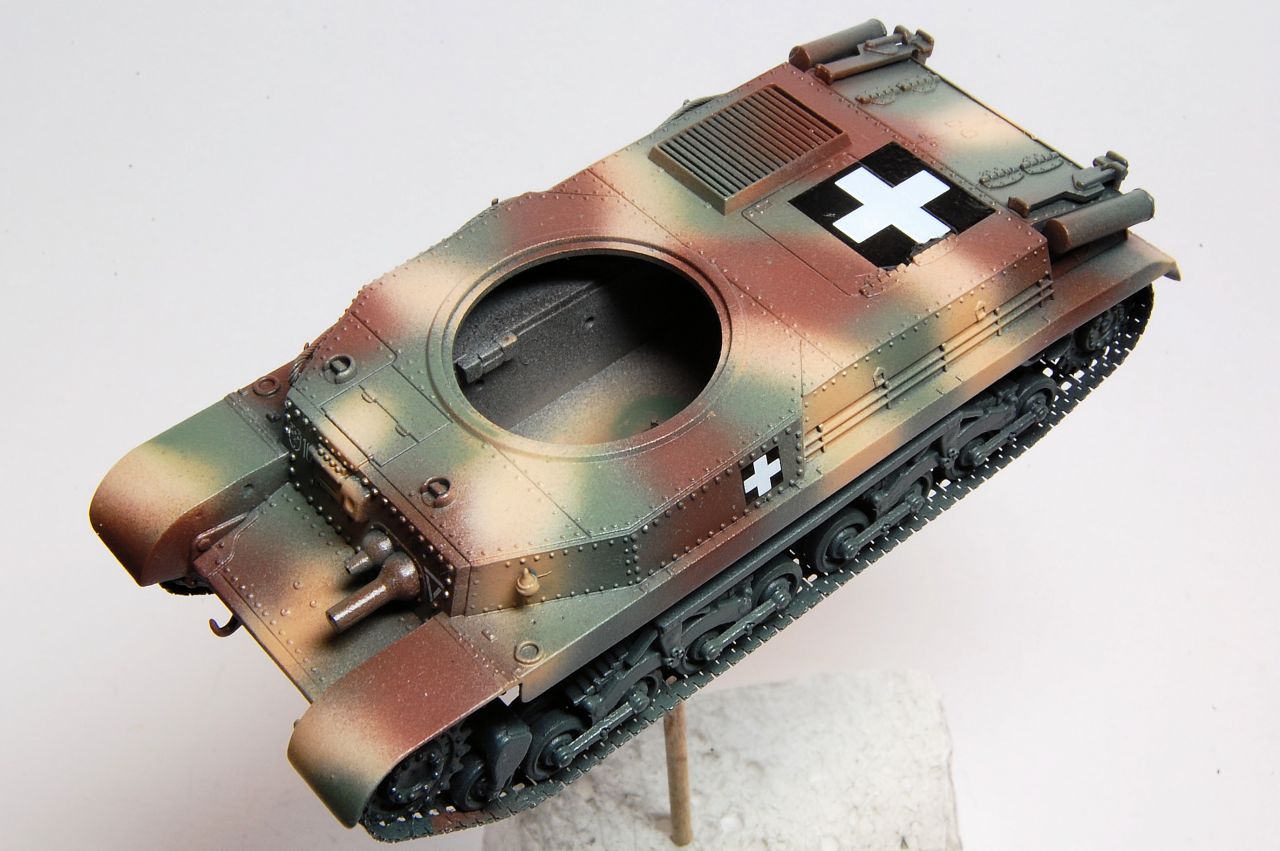
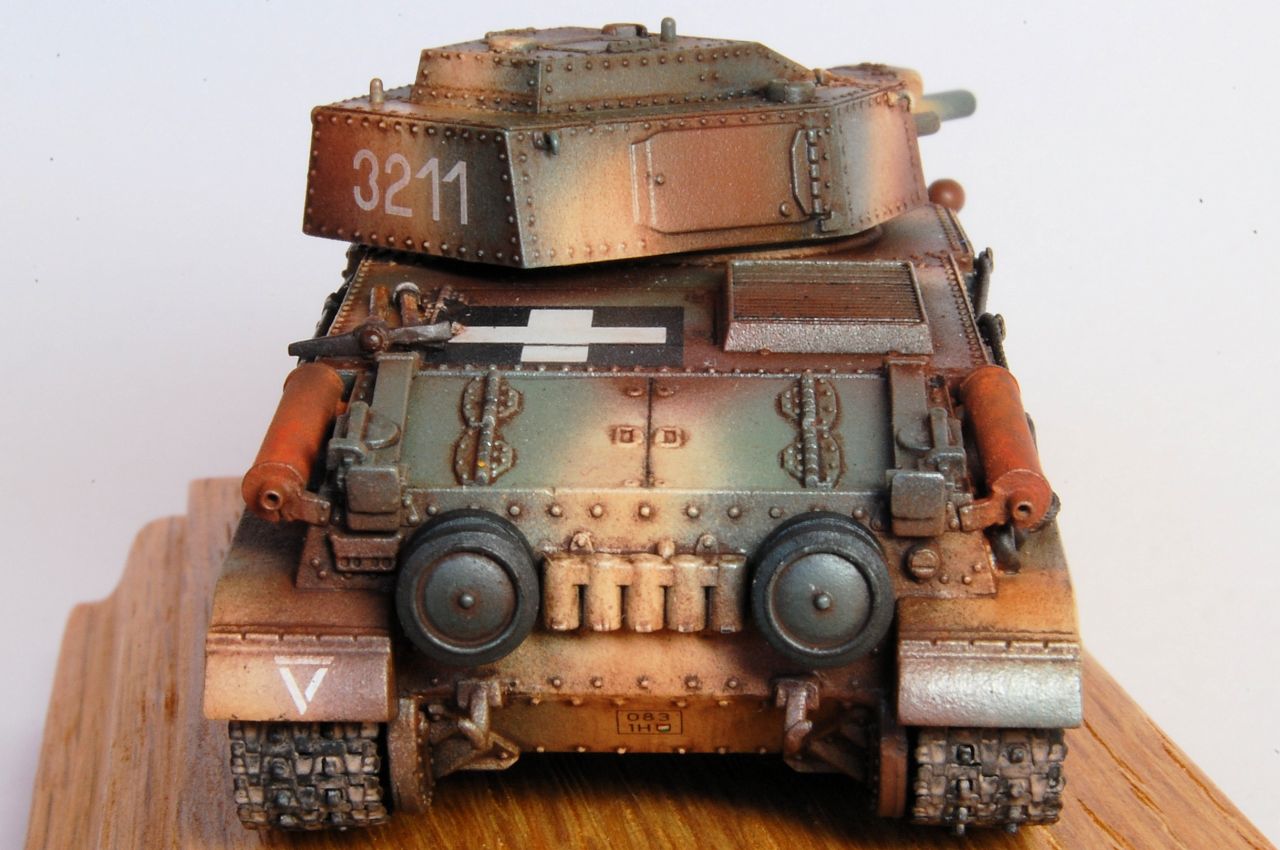
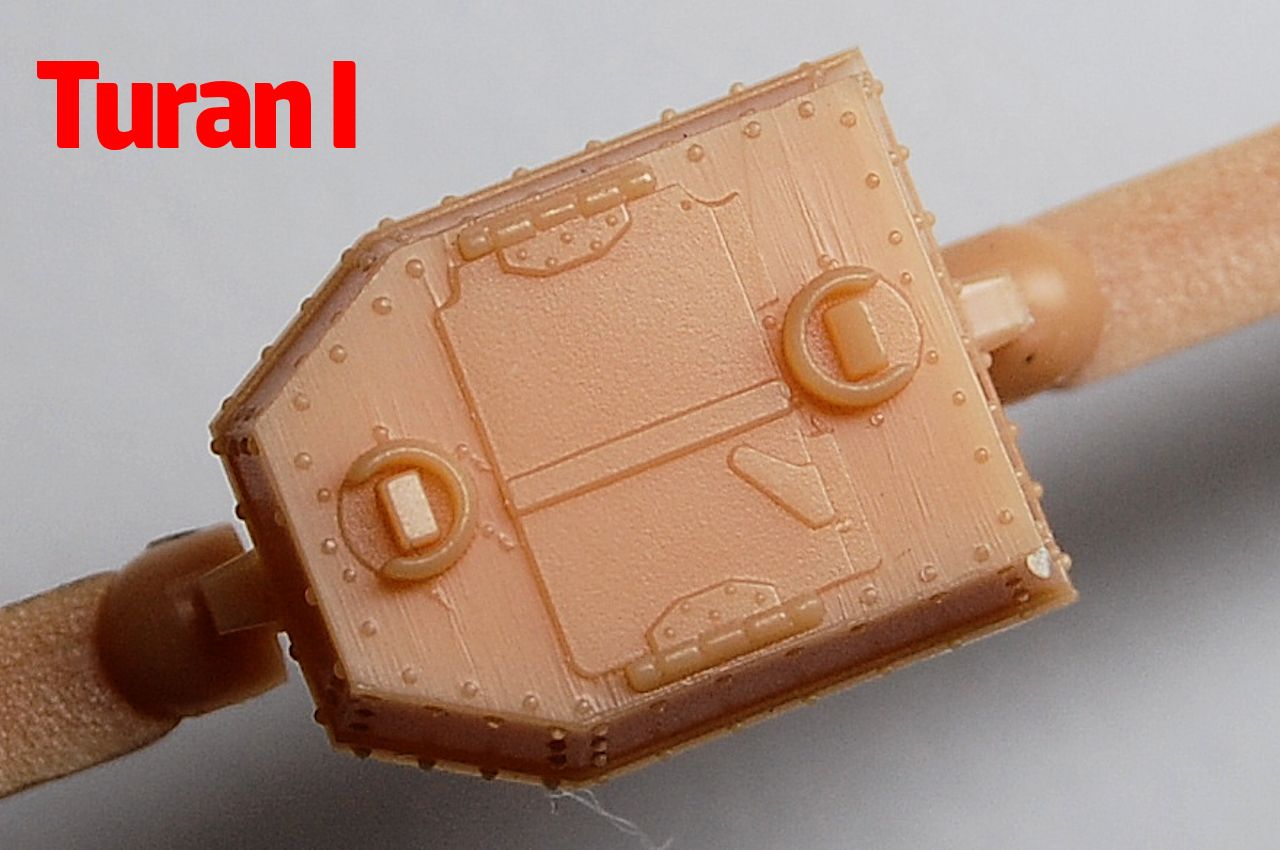
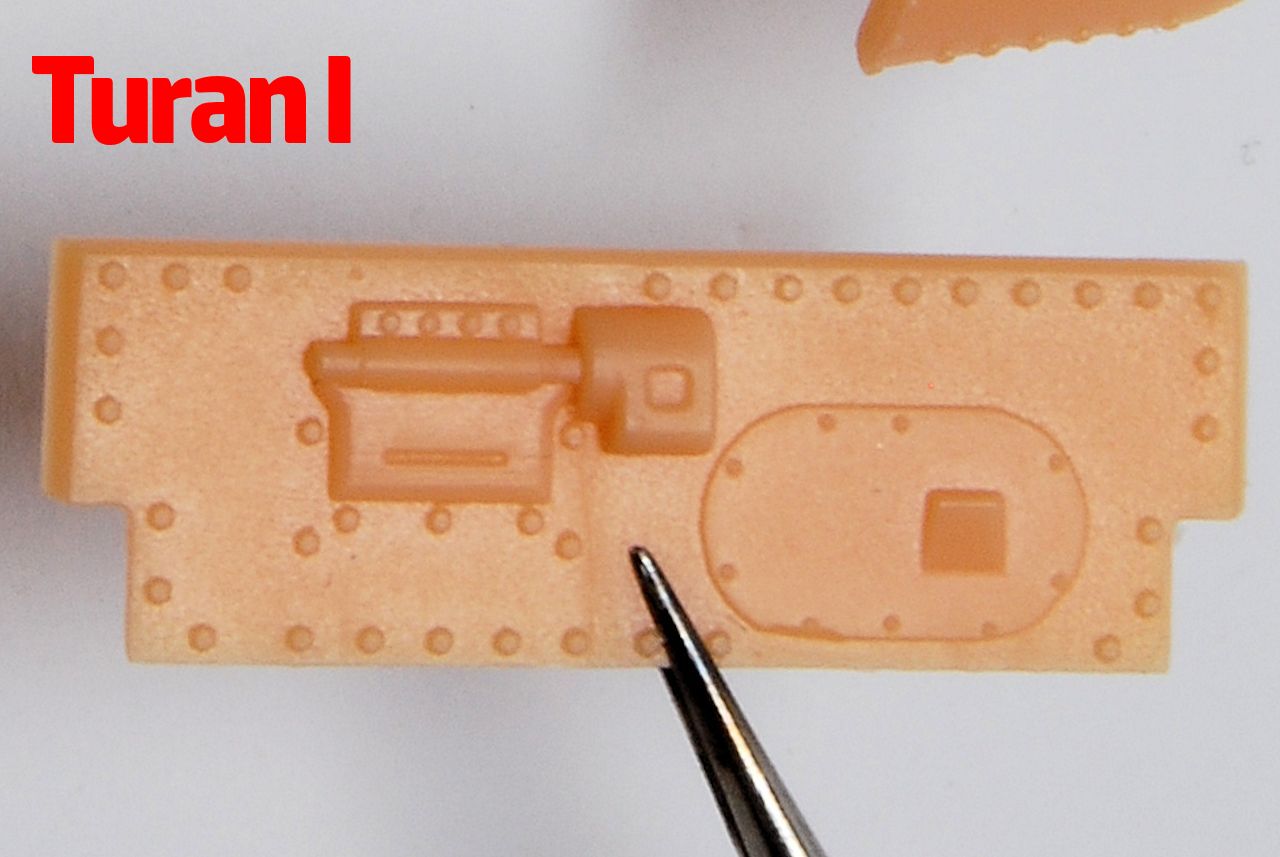
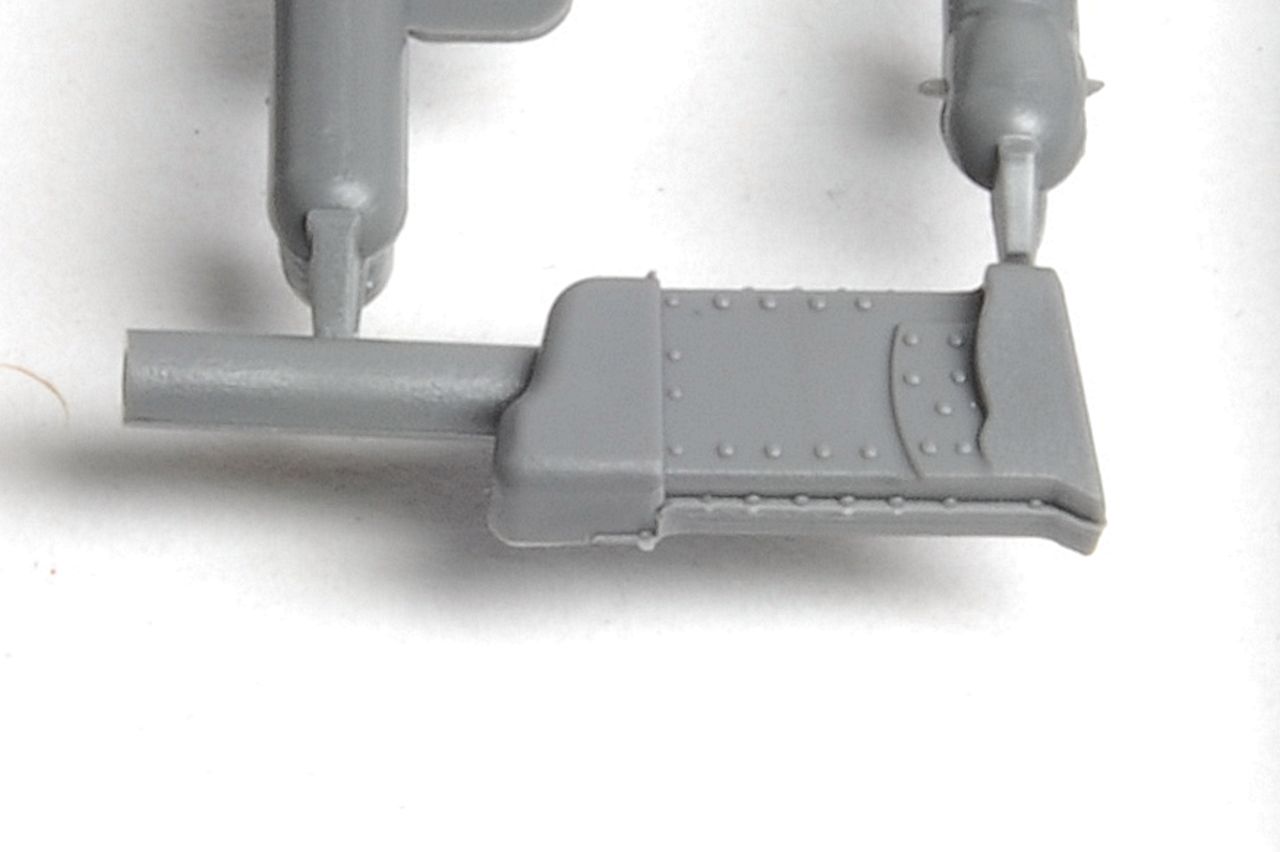
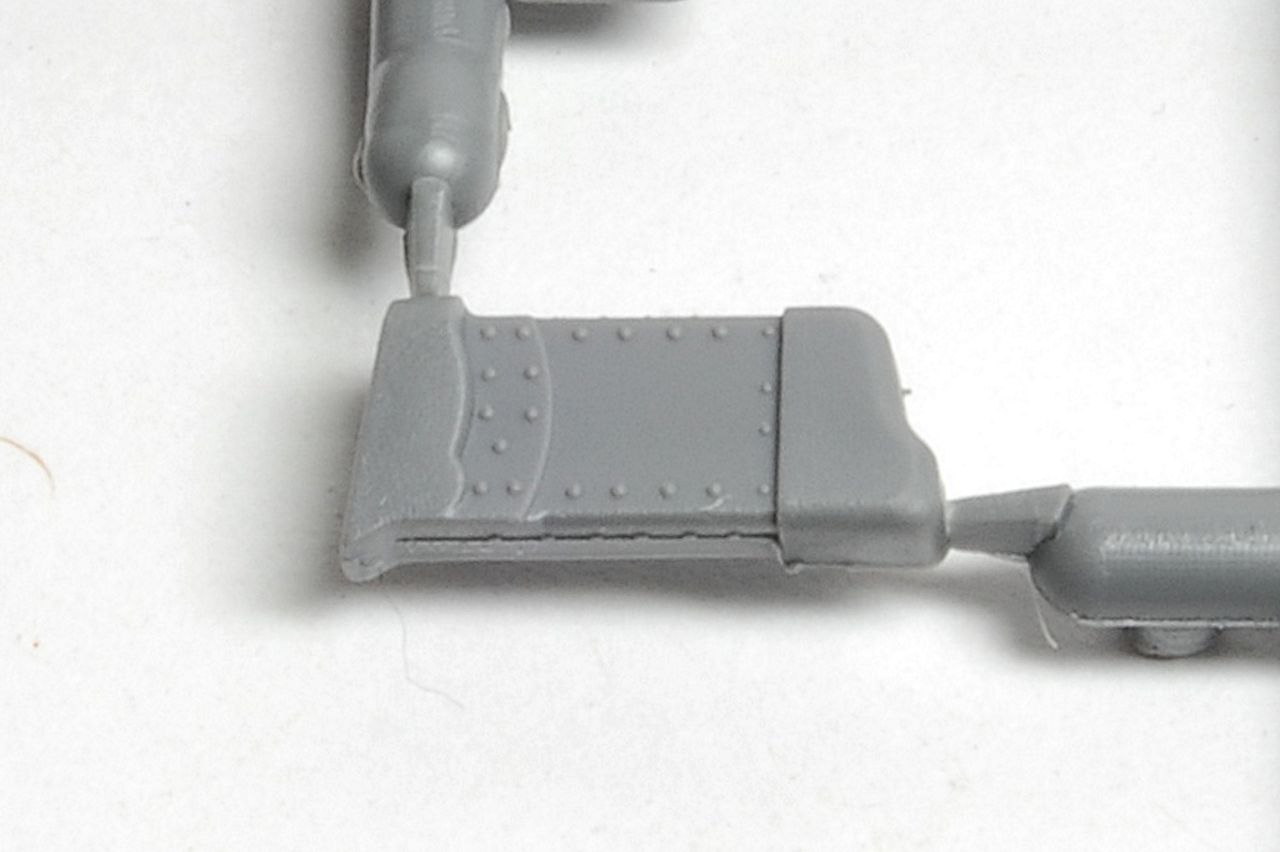
Also new is the front plate of the driver position, which now has the hinge for the forward opening hatch just above the visor:


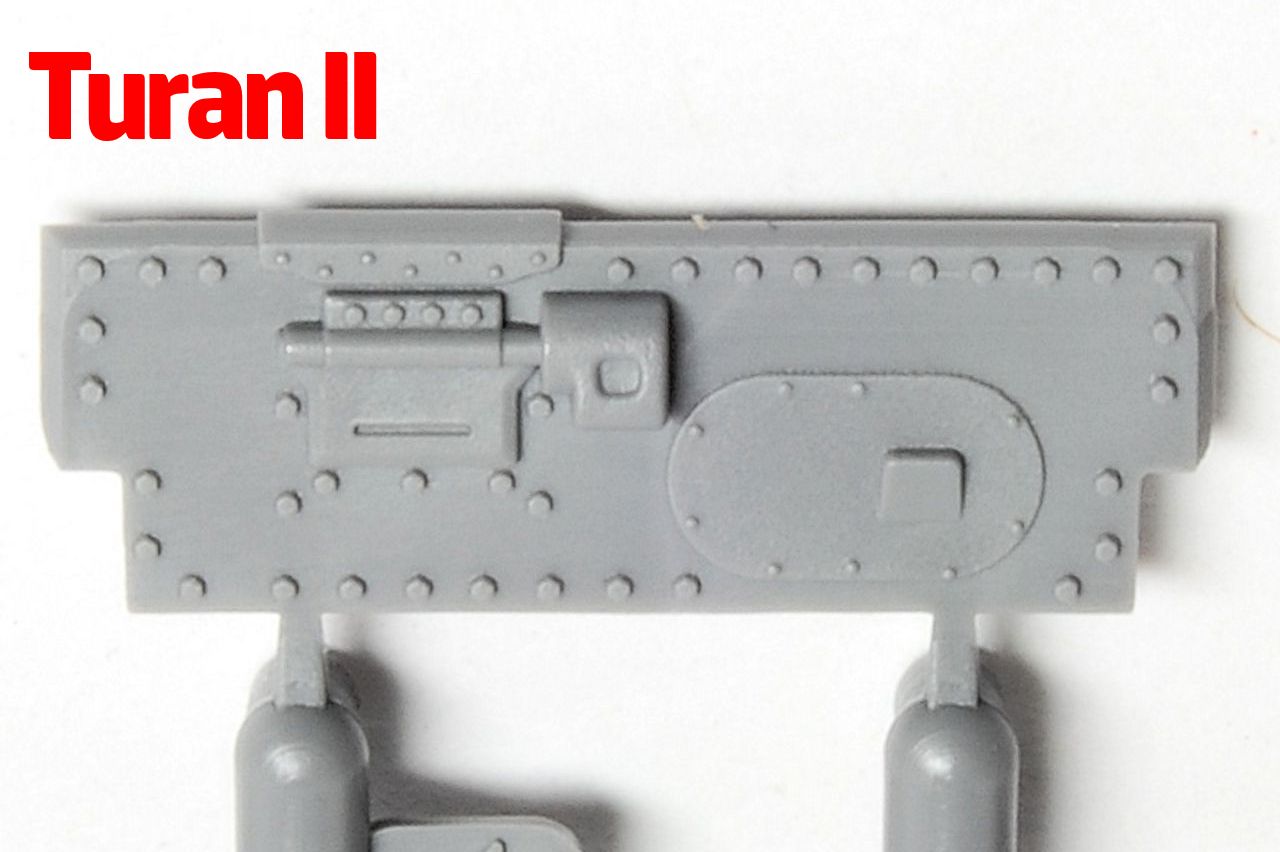
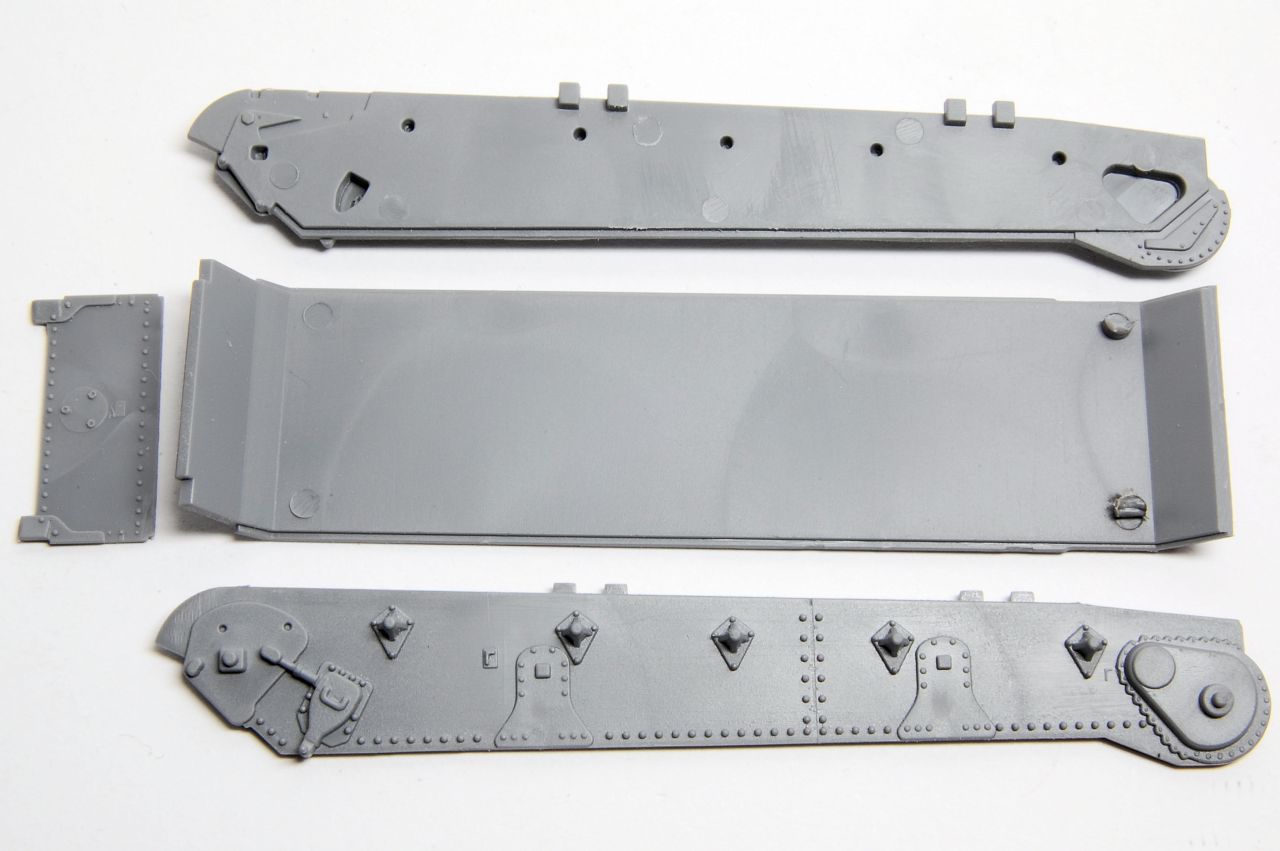
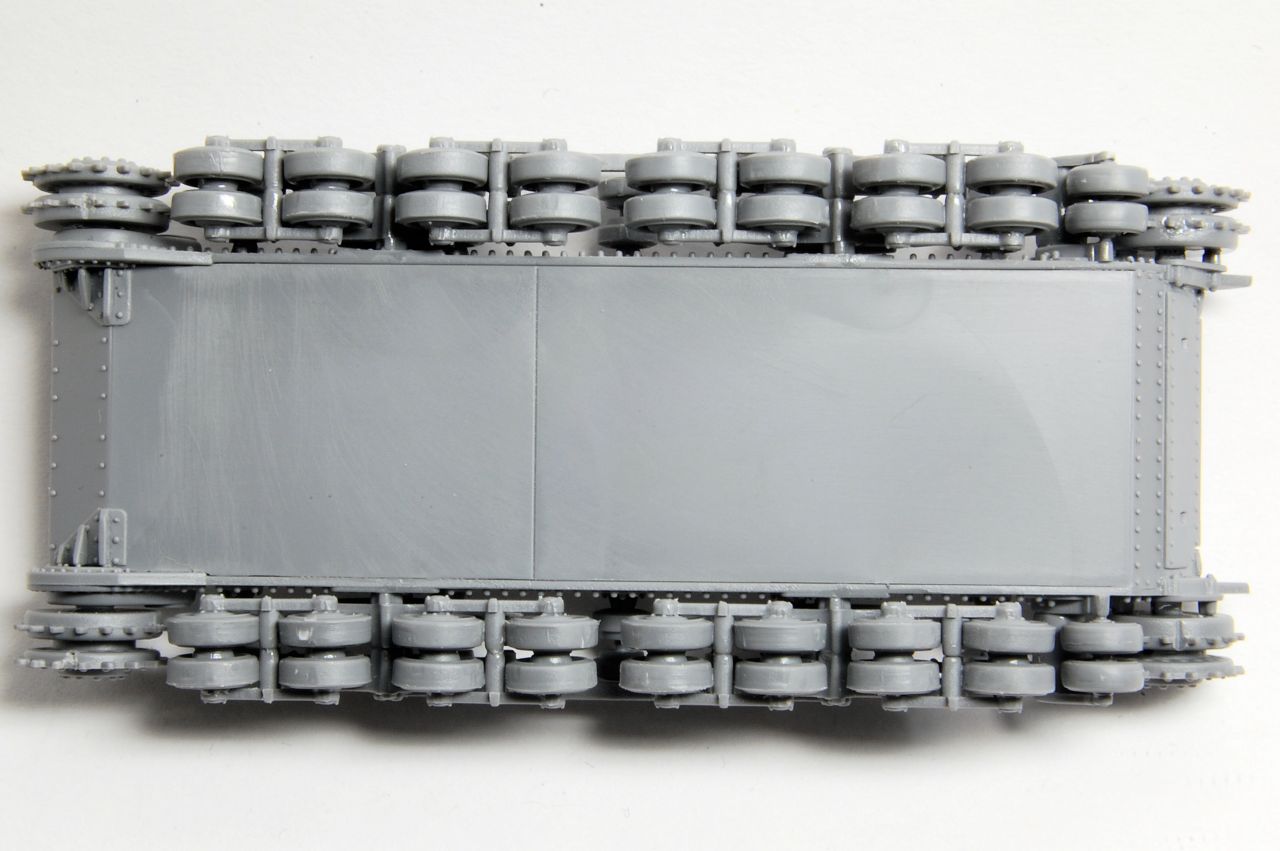
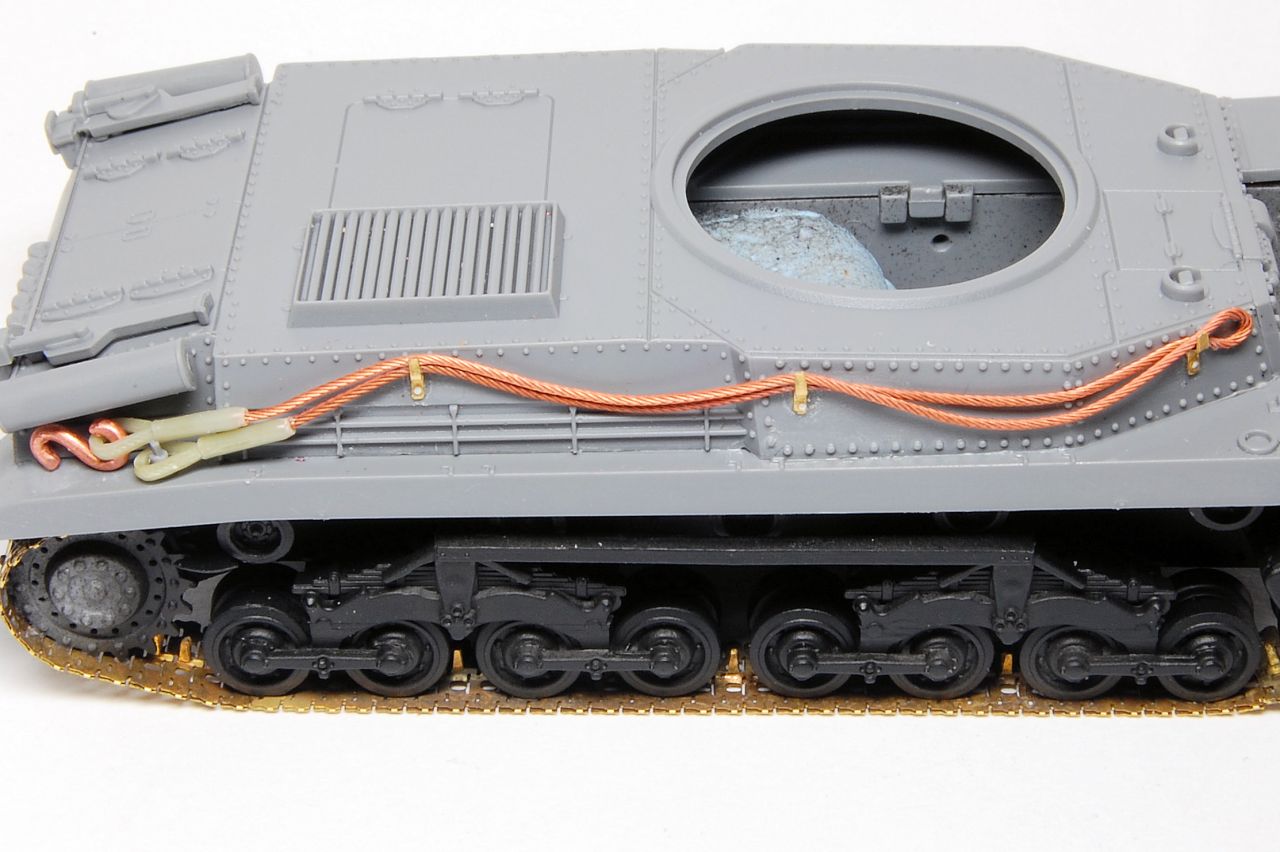
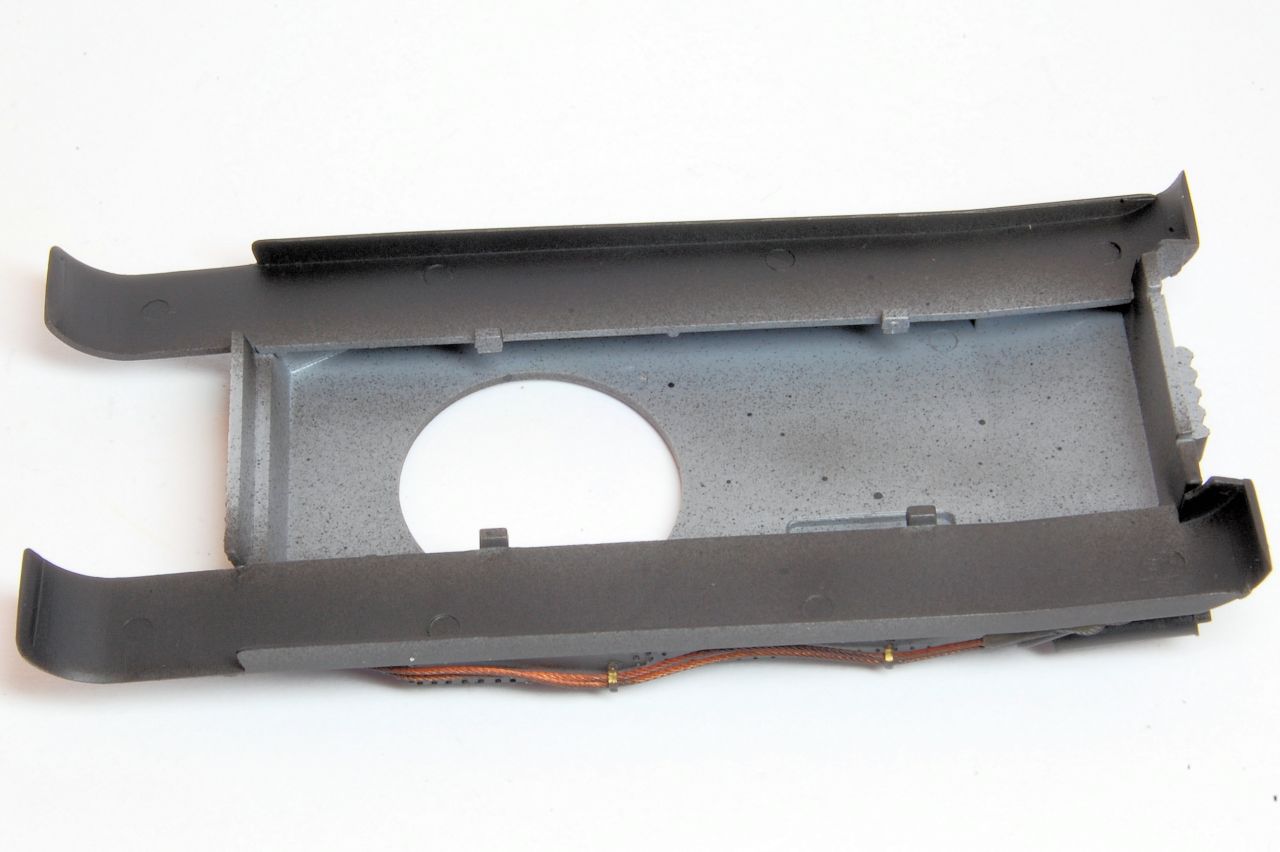
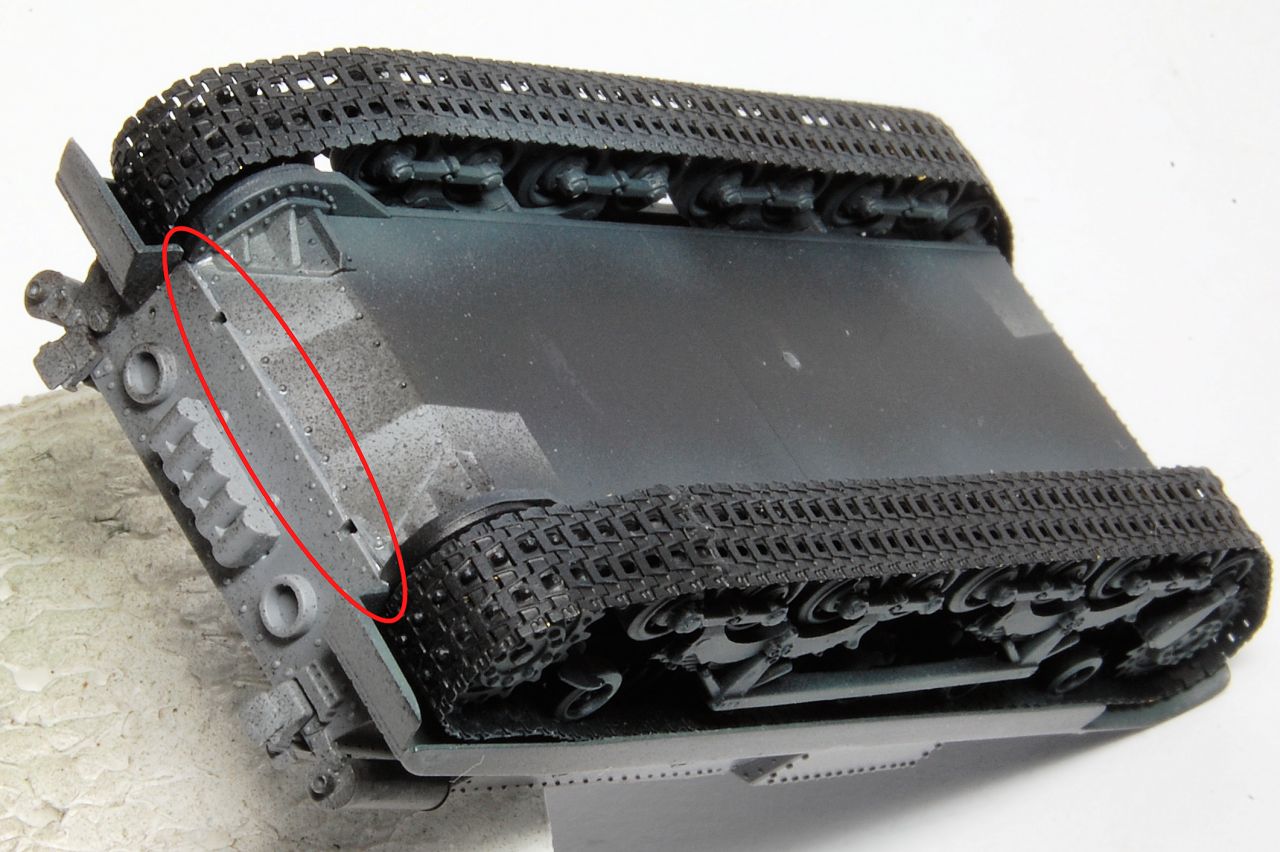
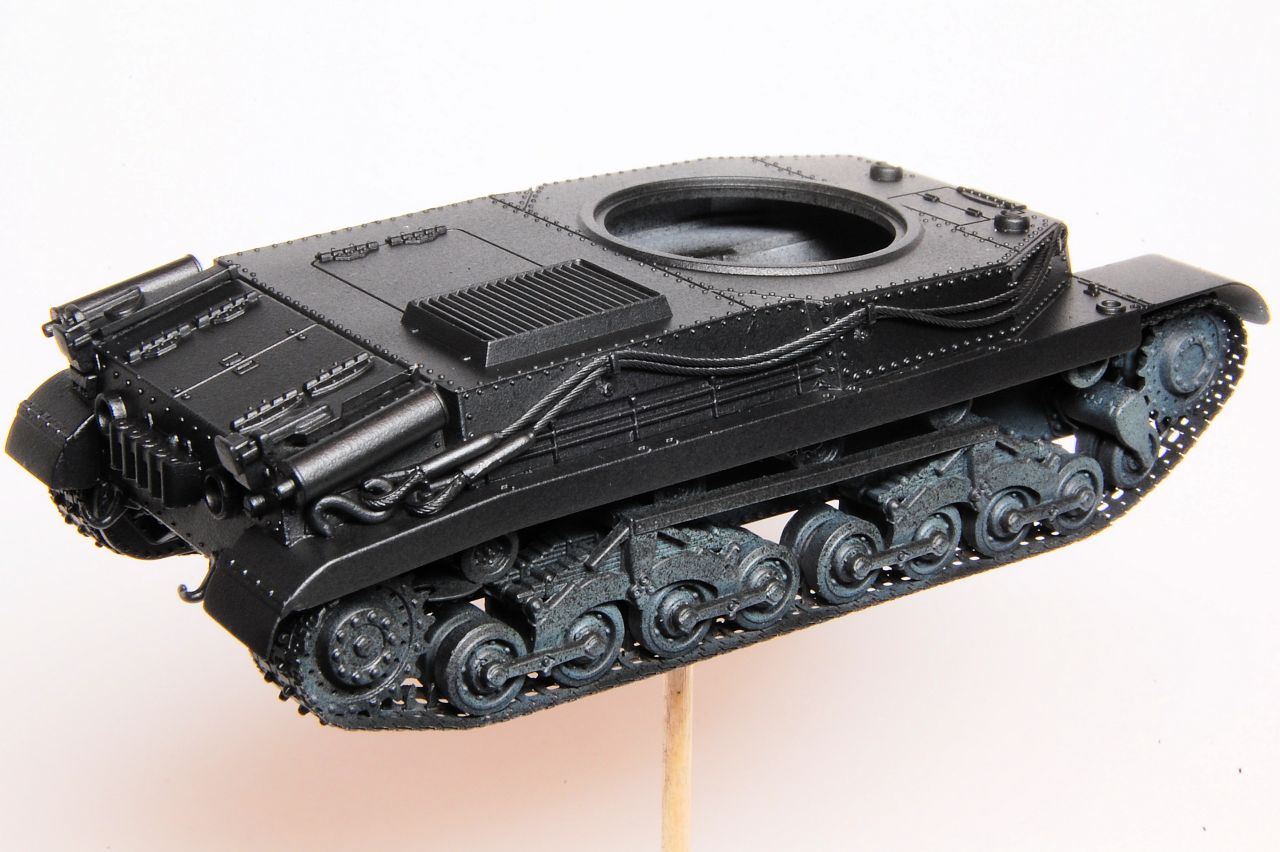
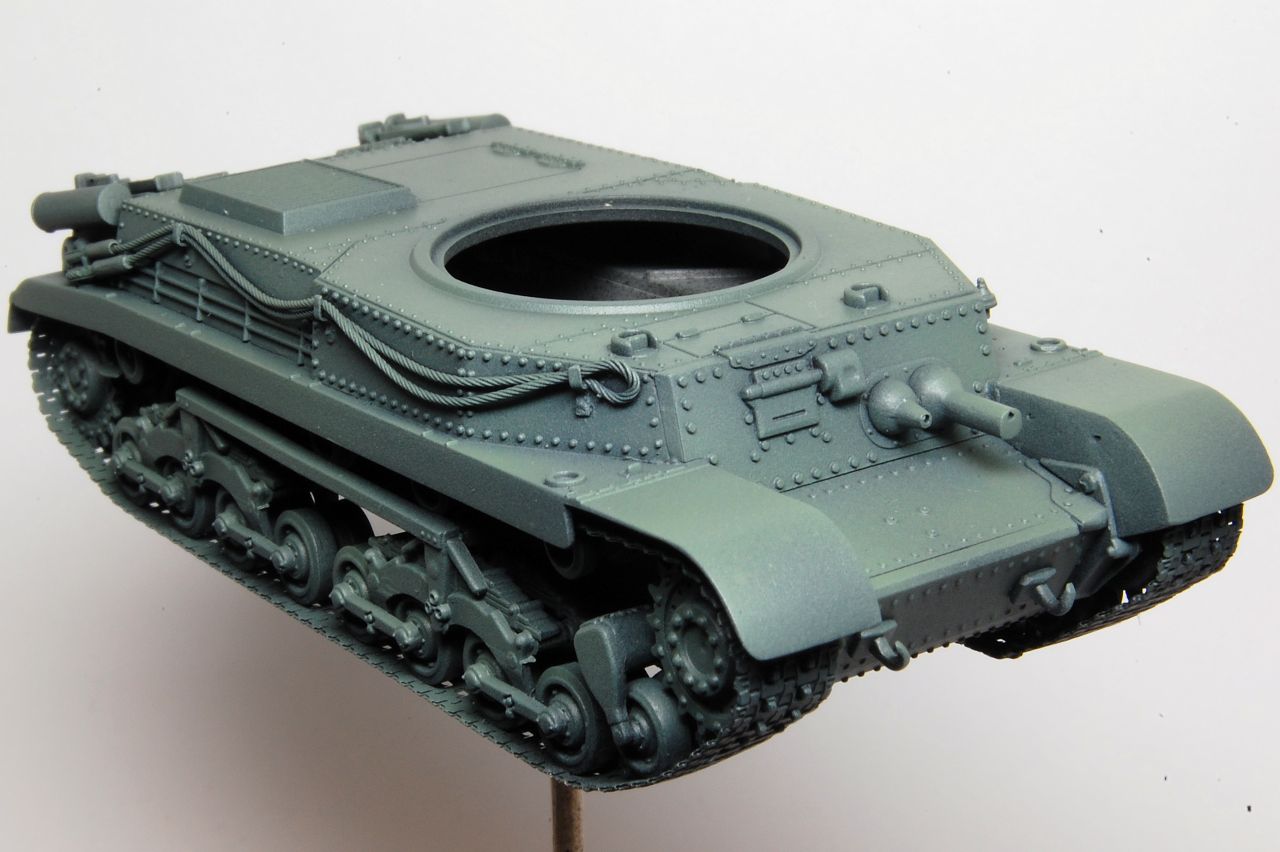
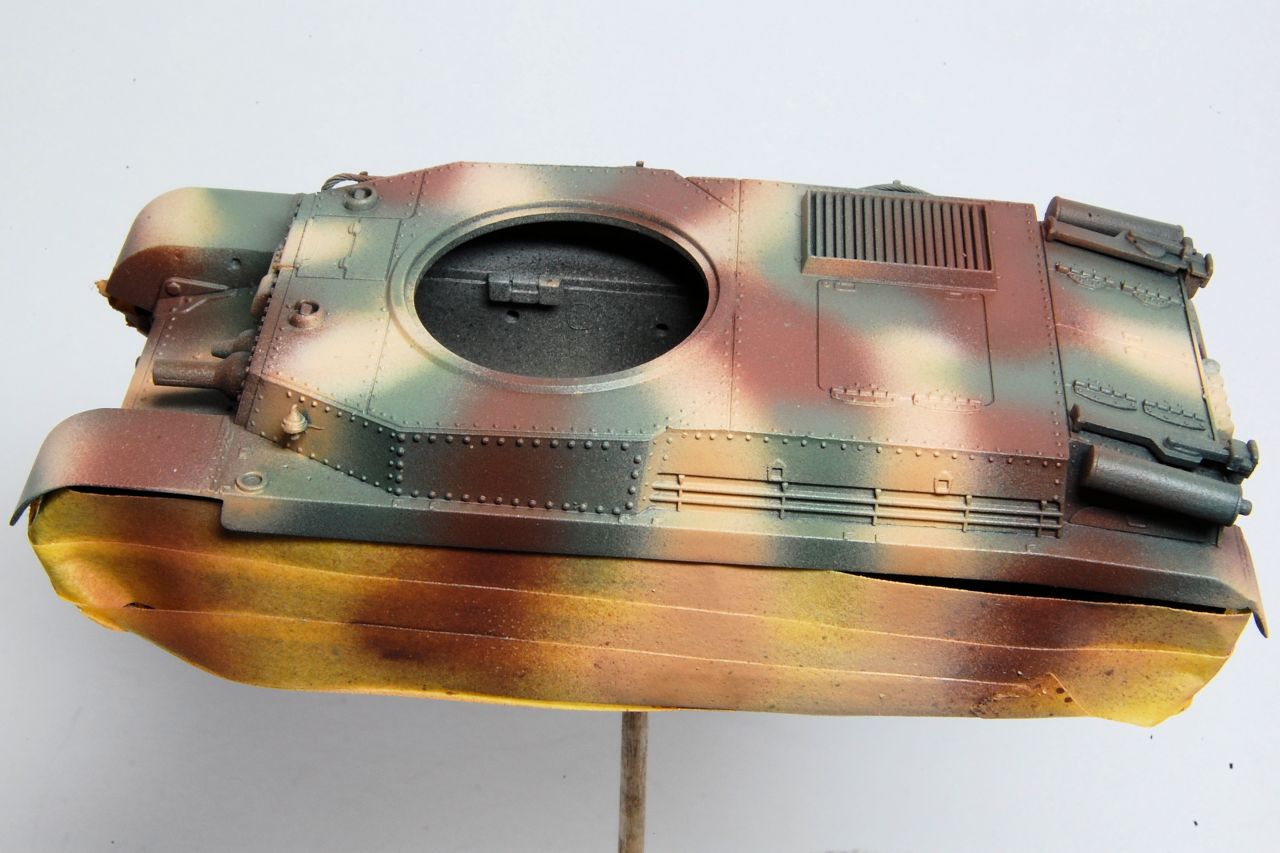
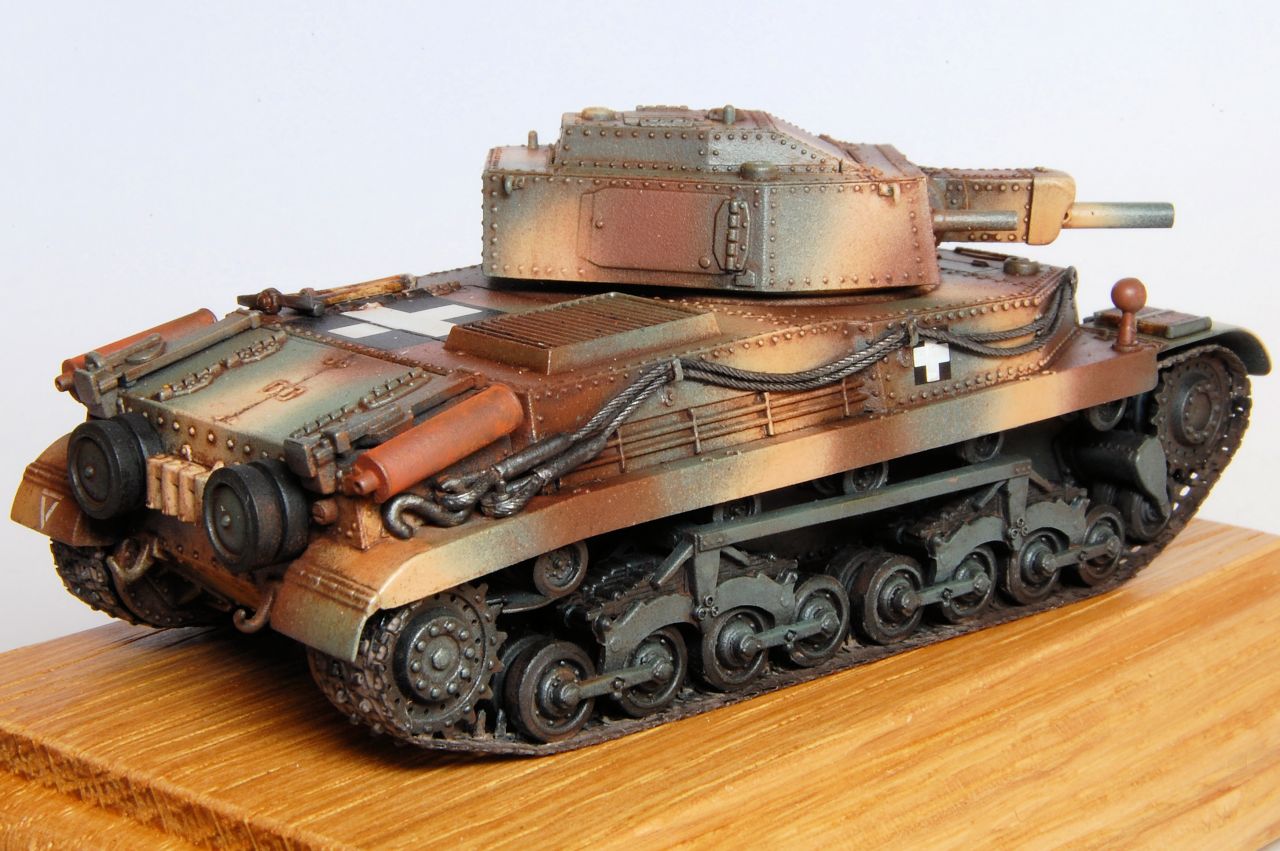
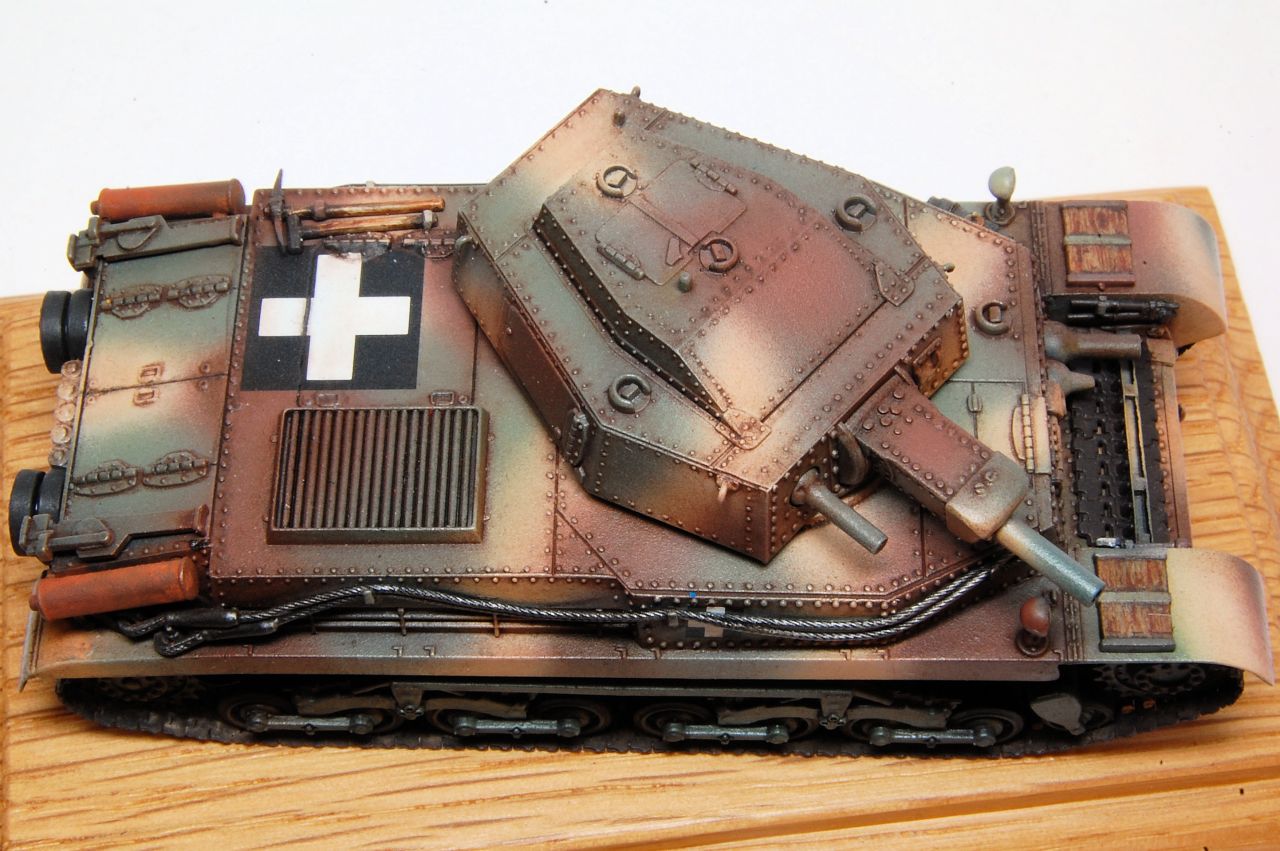
And here's the difference in the hull superstructure:


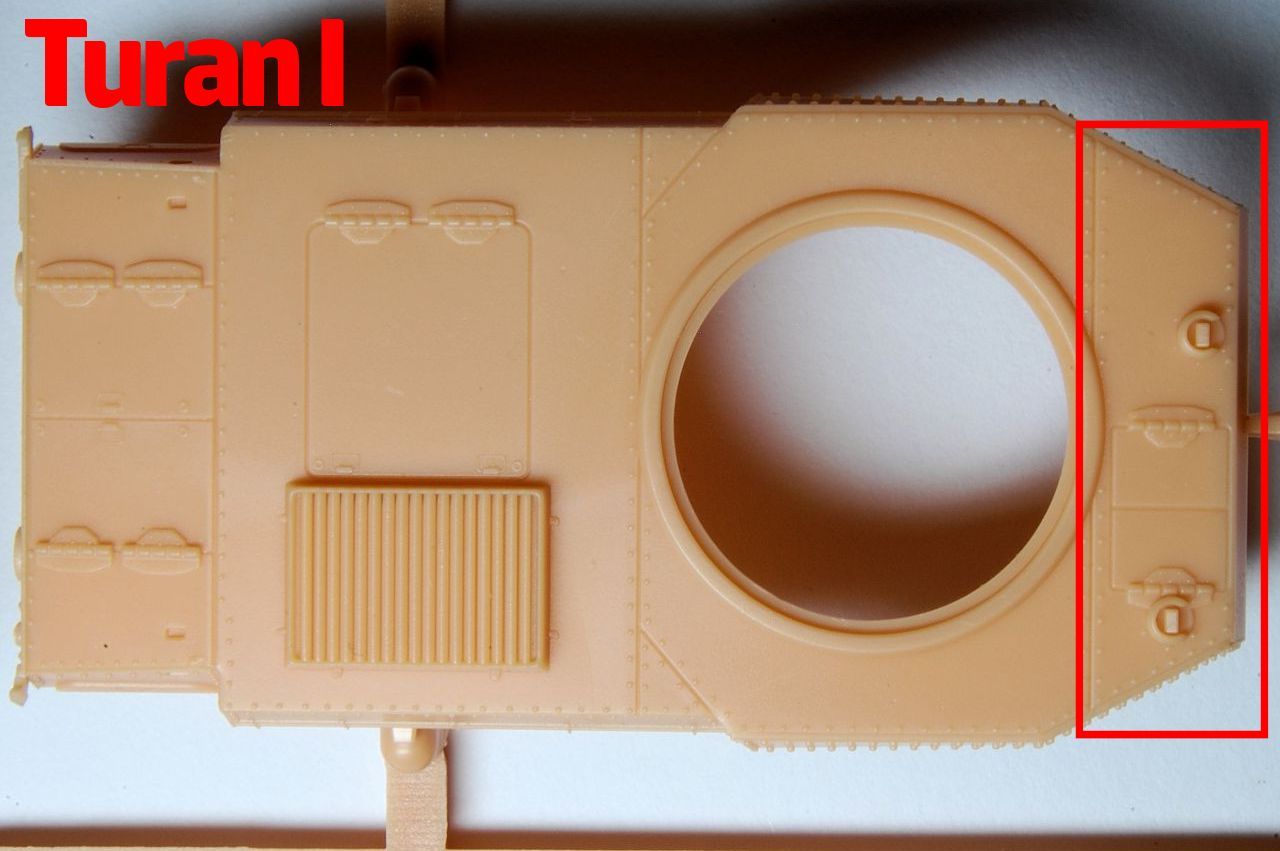
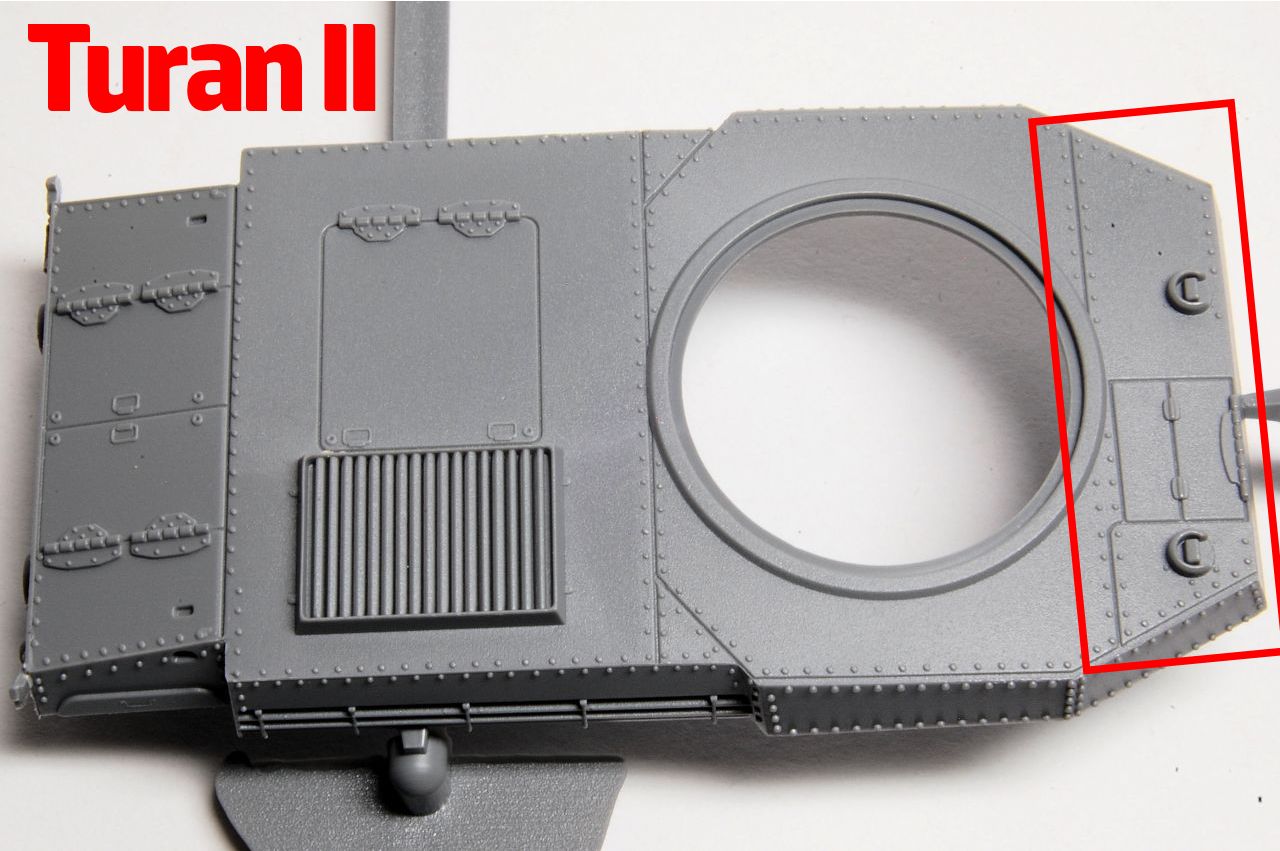
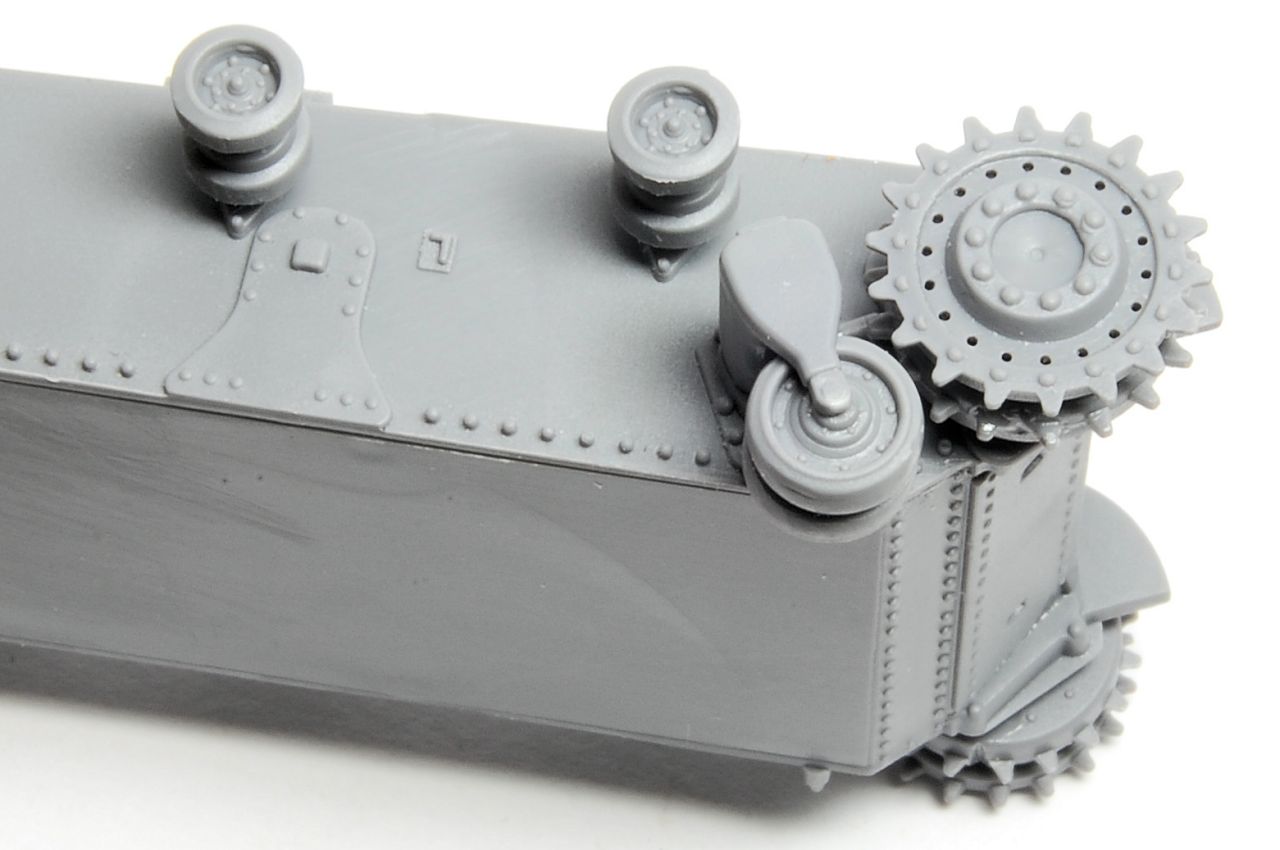
Perhaps a bit hard to tell at this stage, but the new grey Turan II mouldings look a bit cleaner and the rivets a little more defined than the tan sprues of the I.

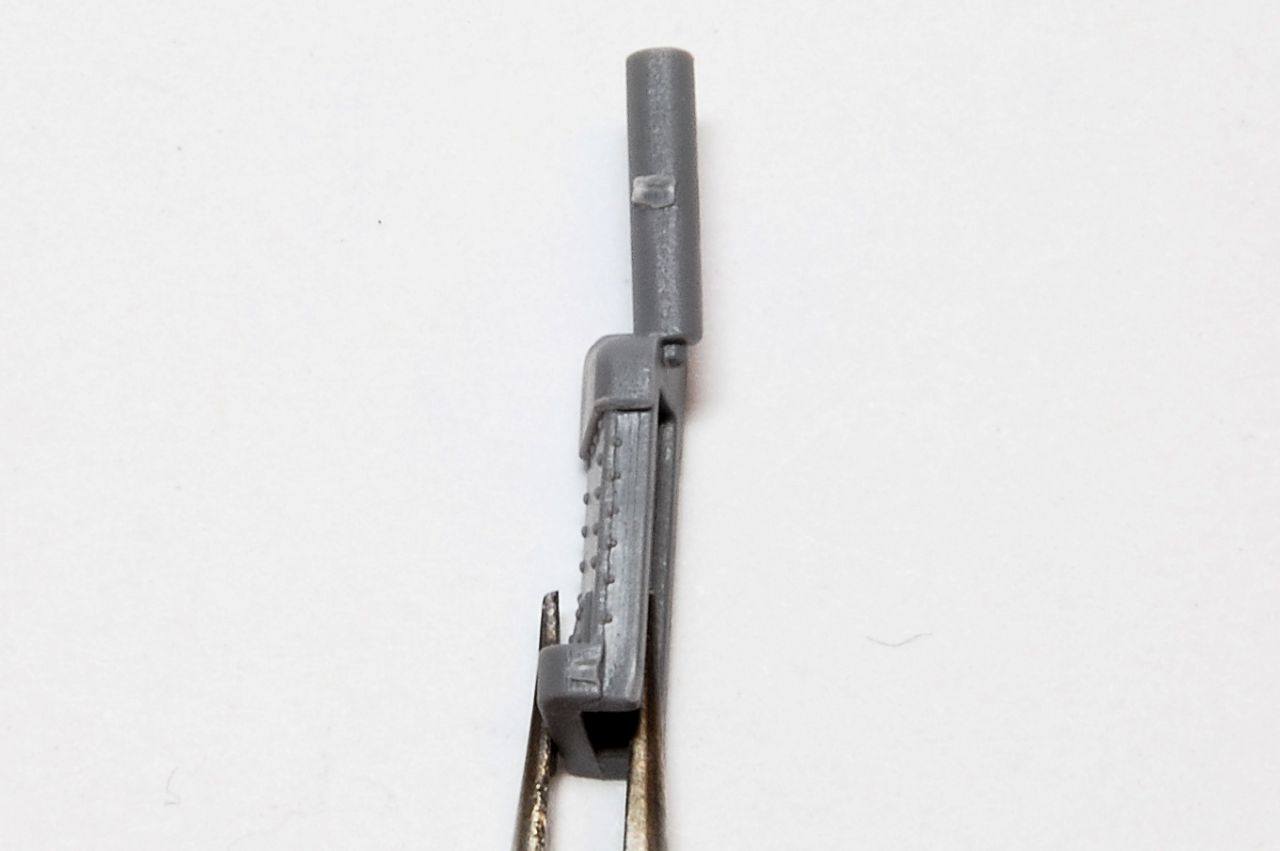
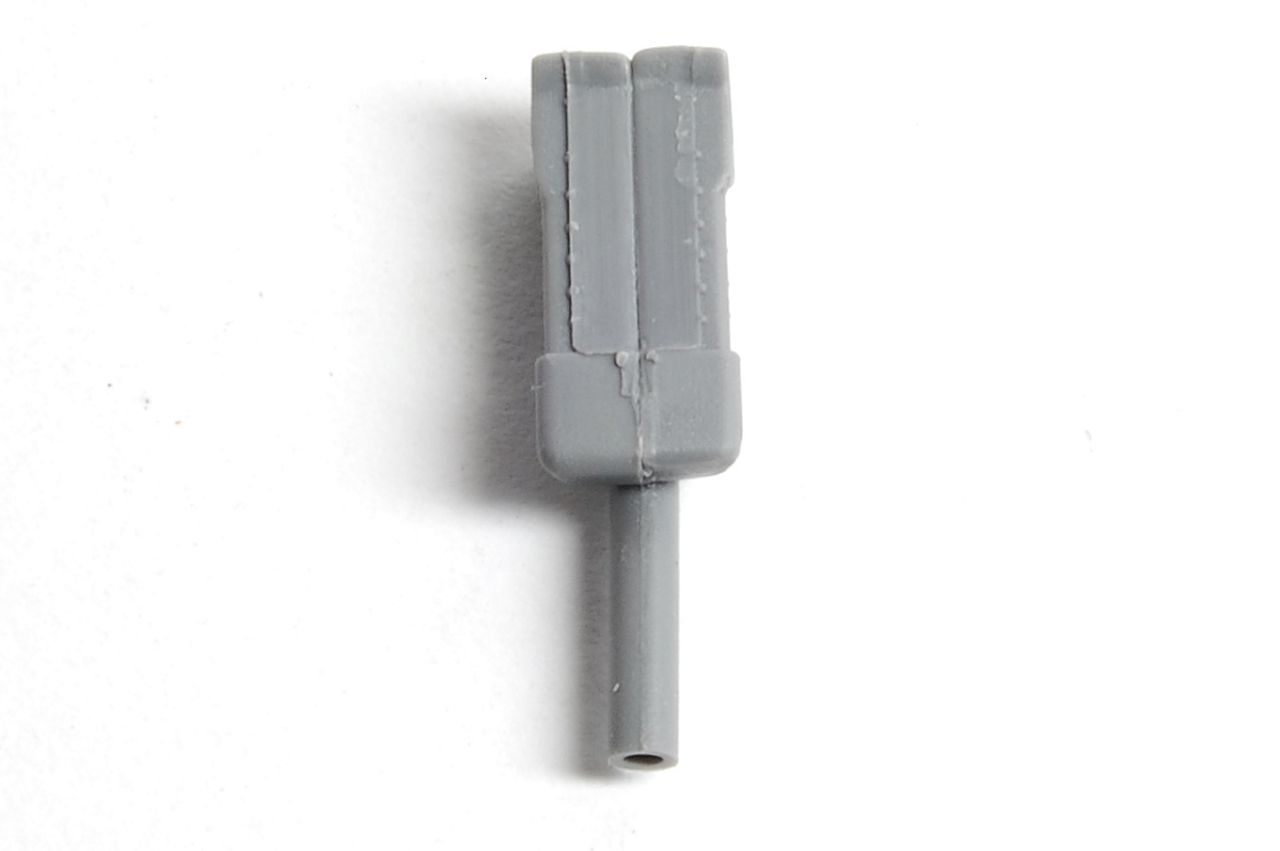
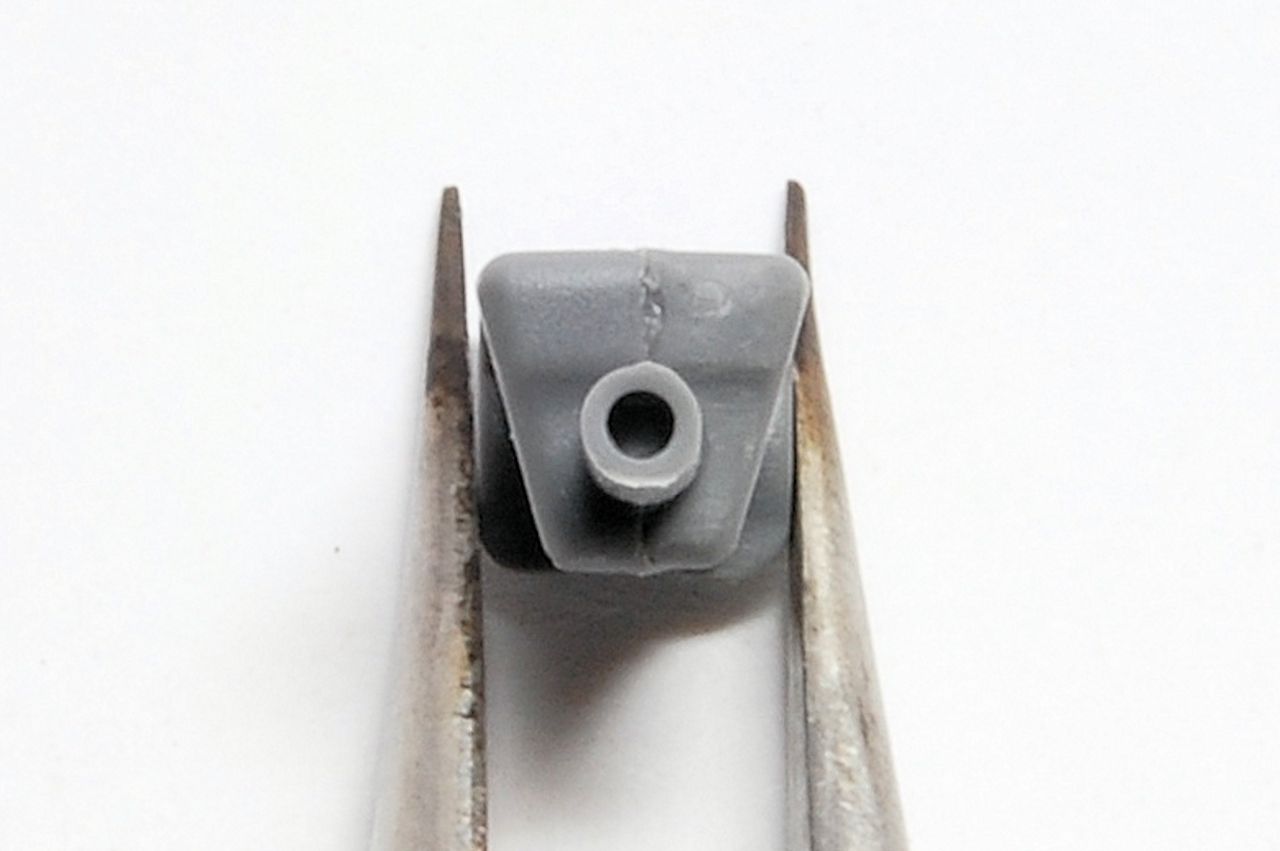
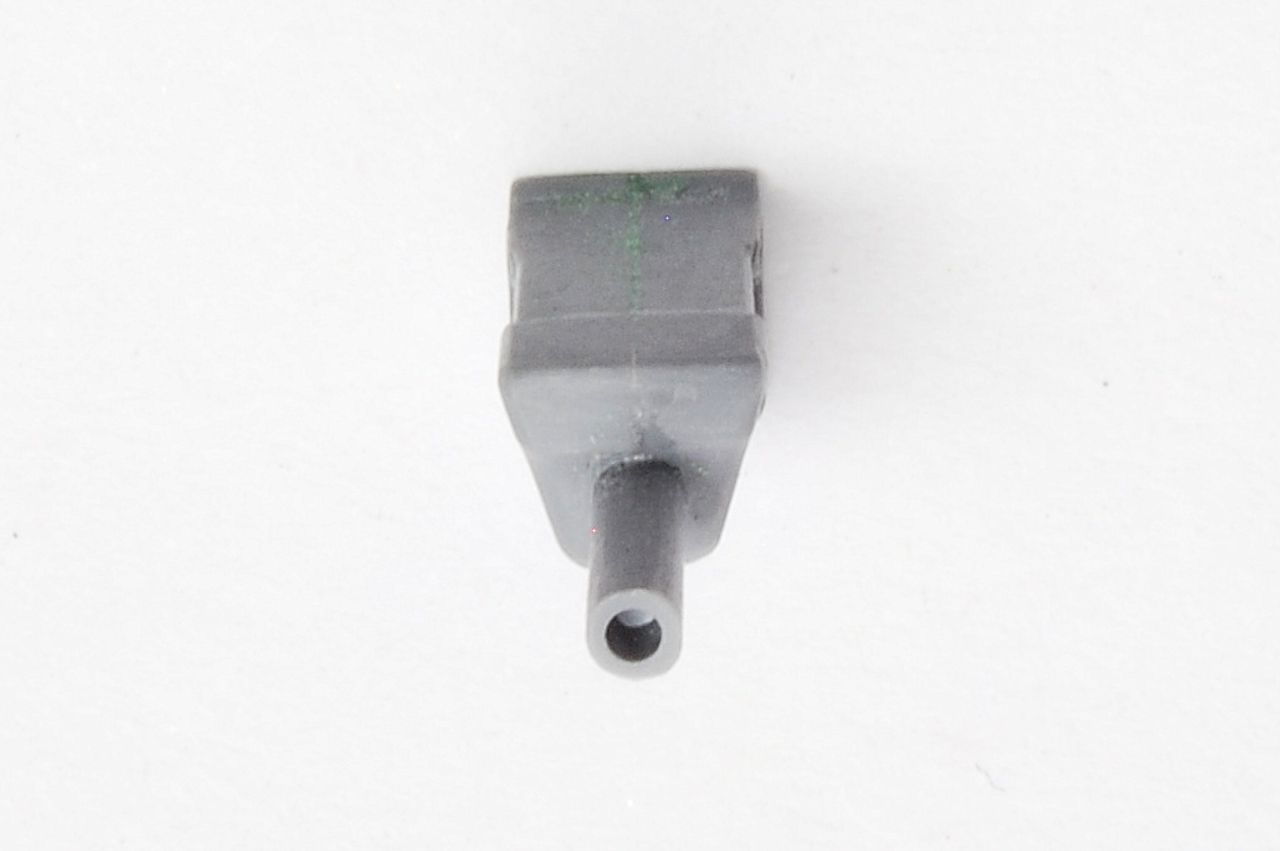
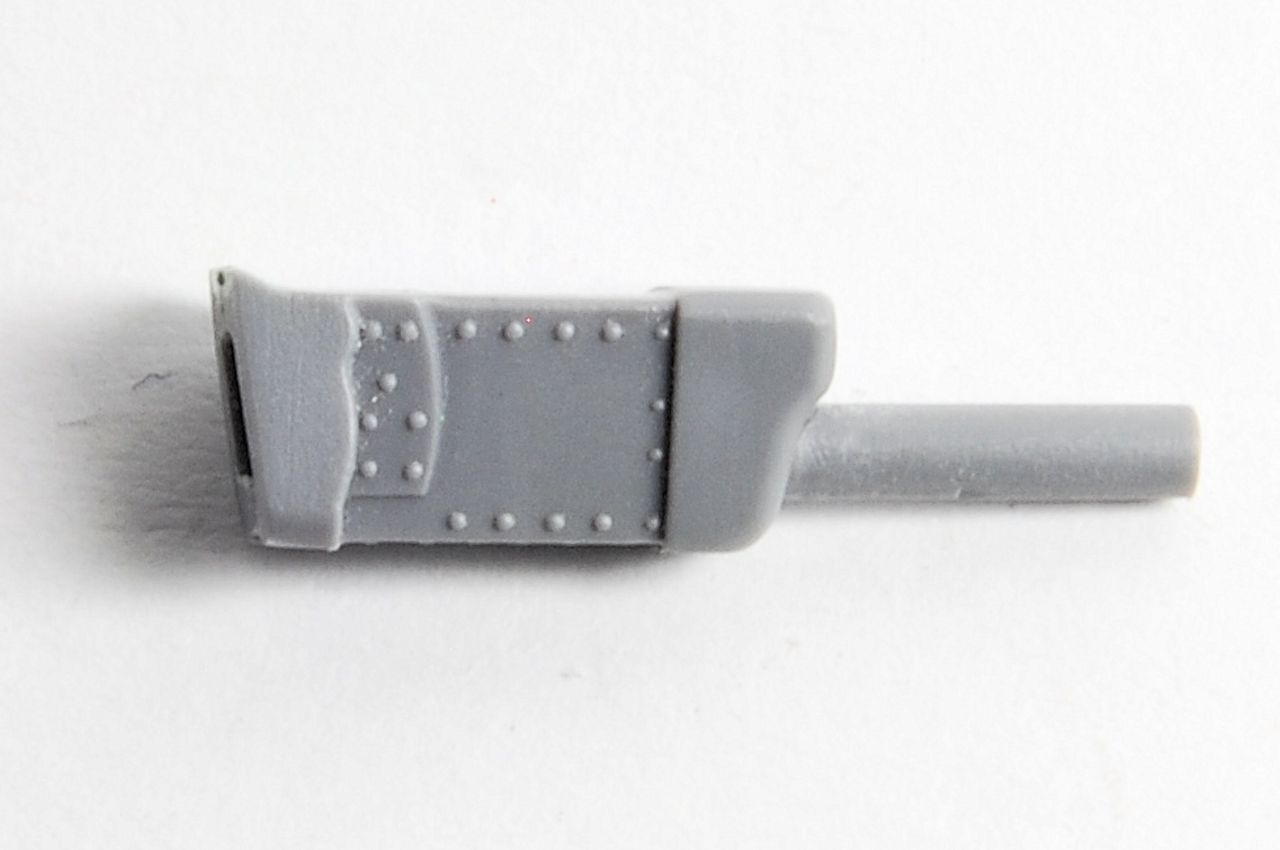
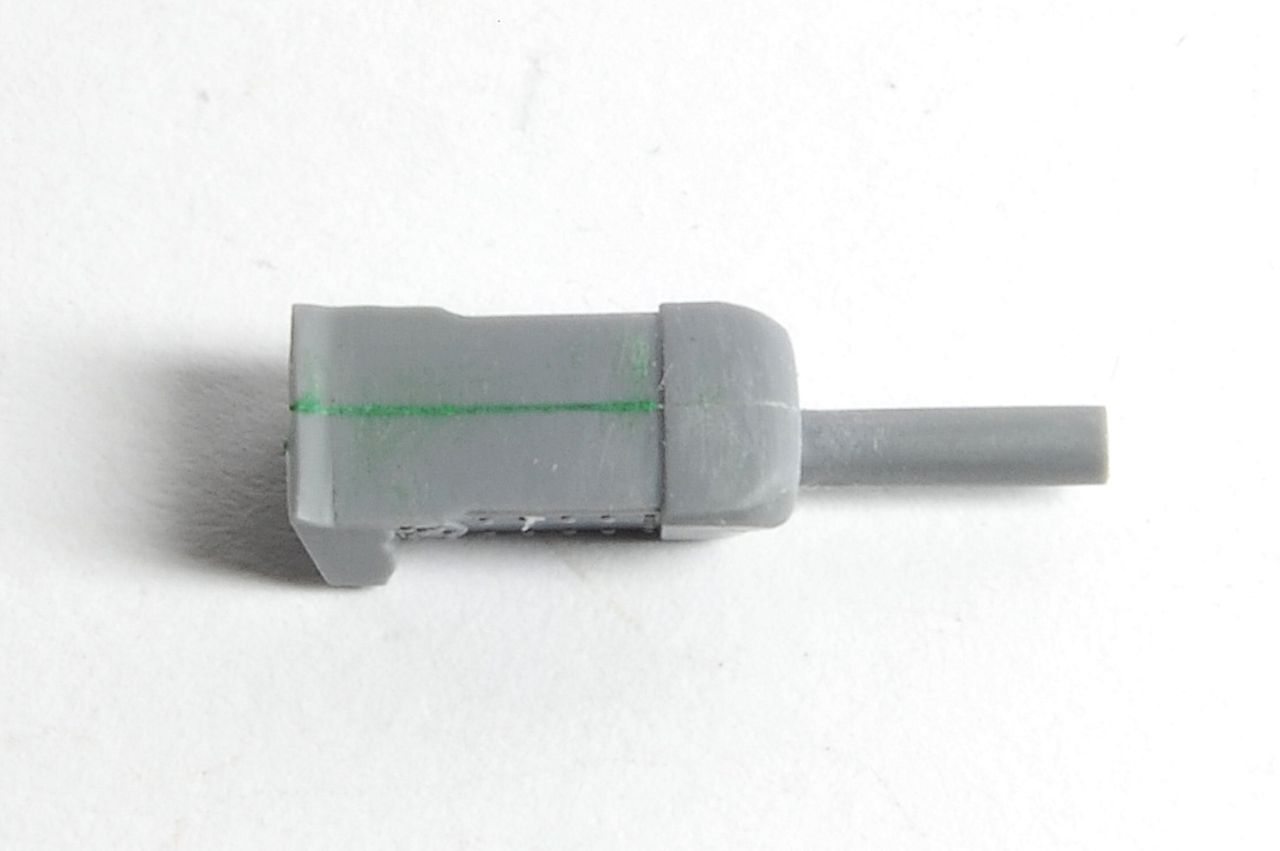
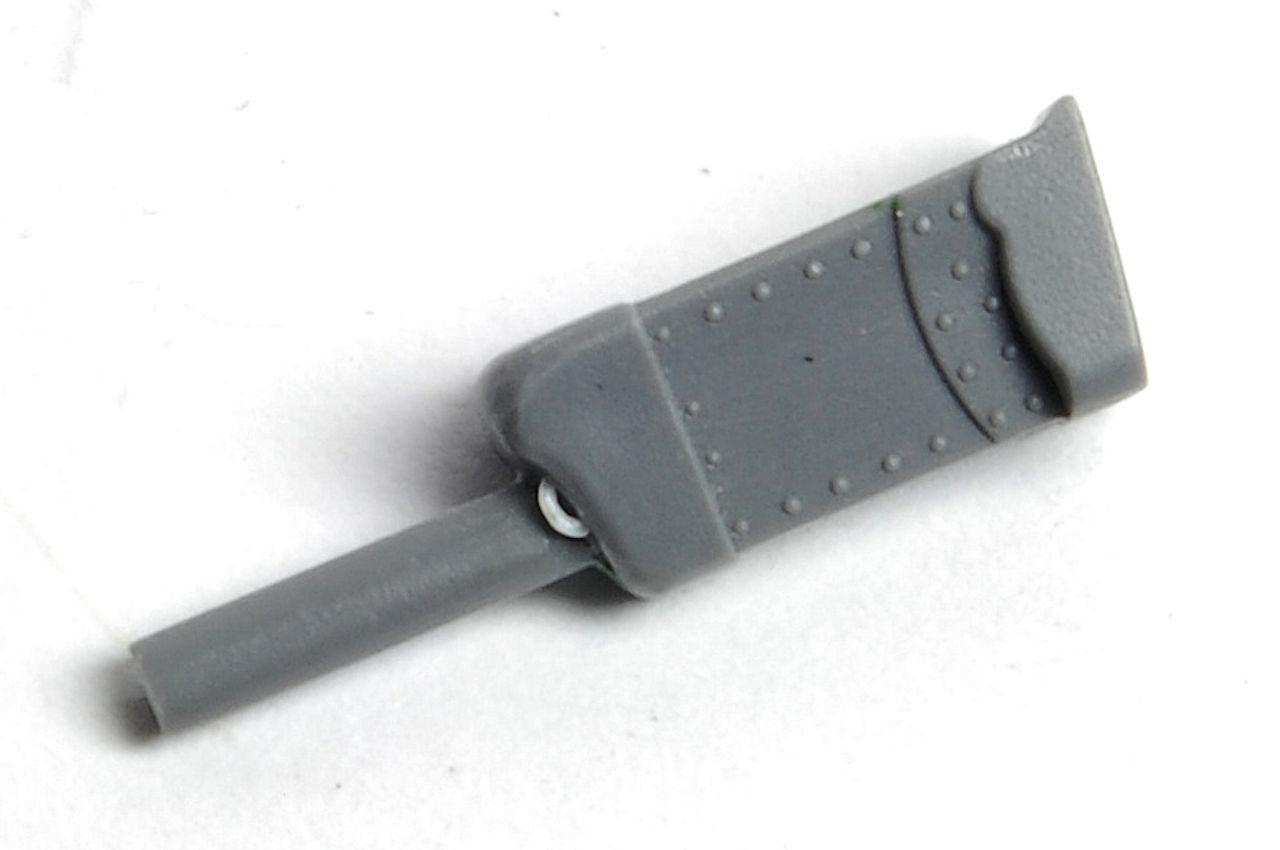
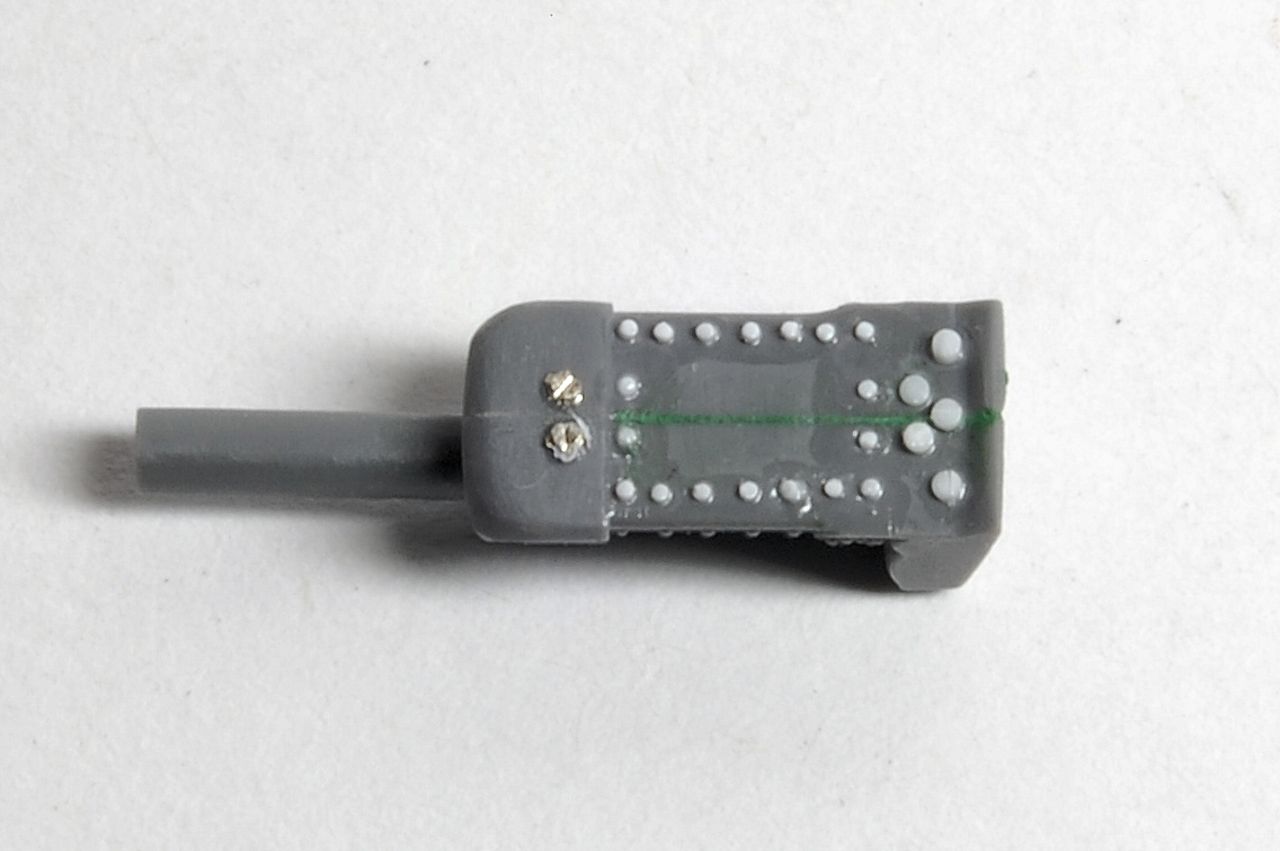
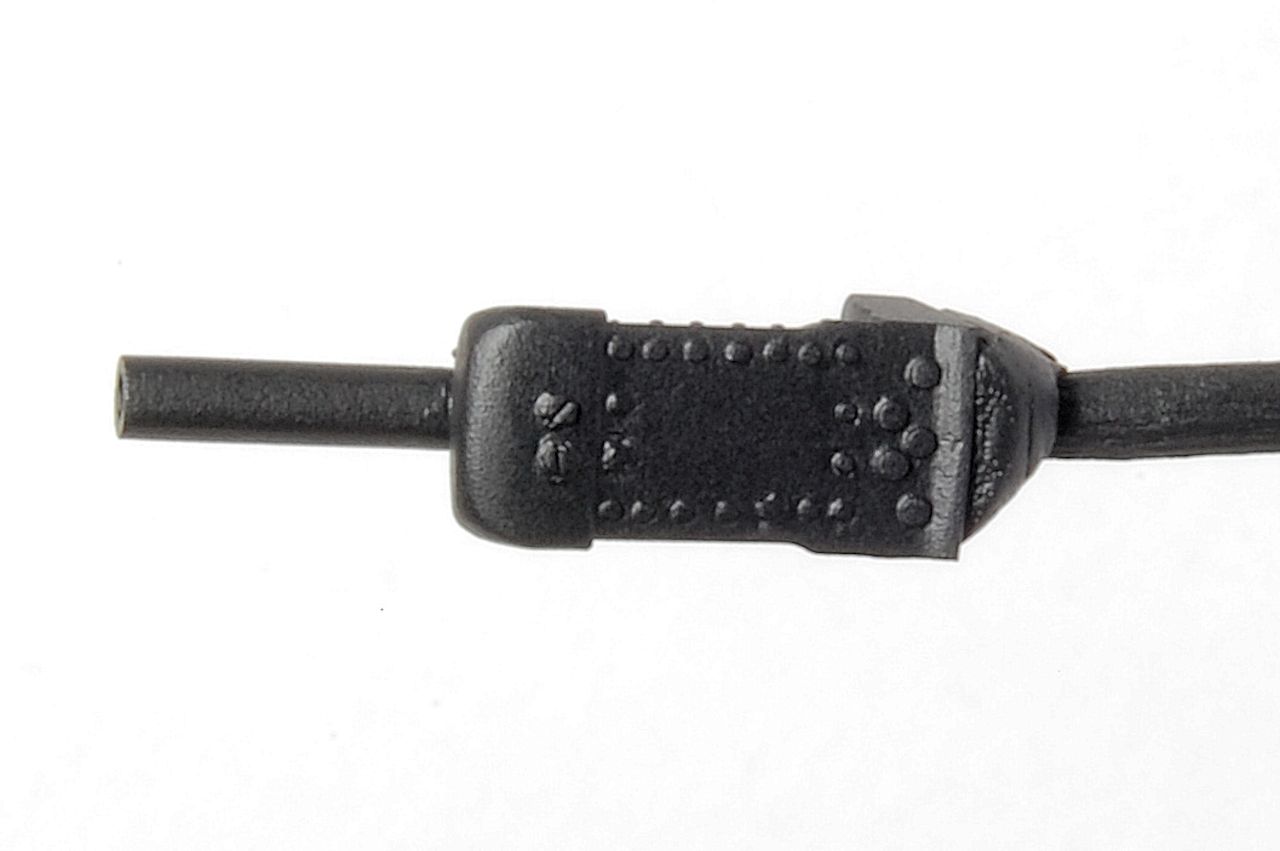
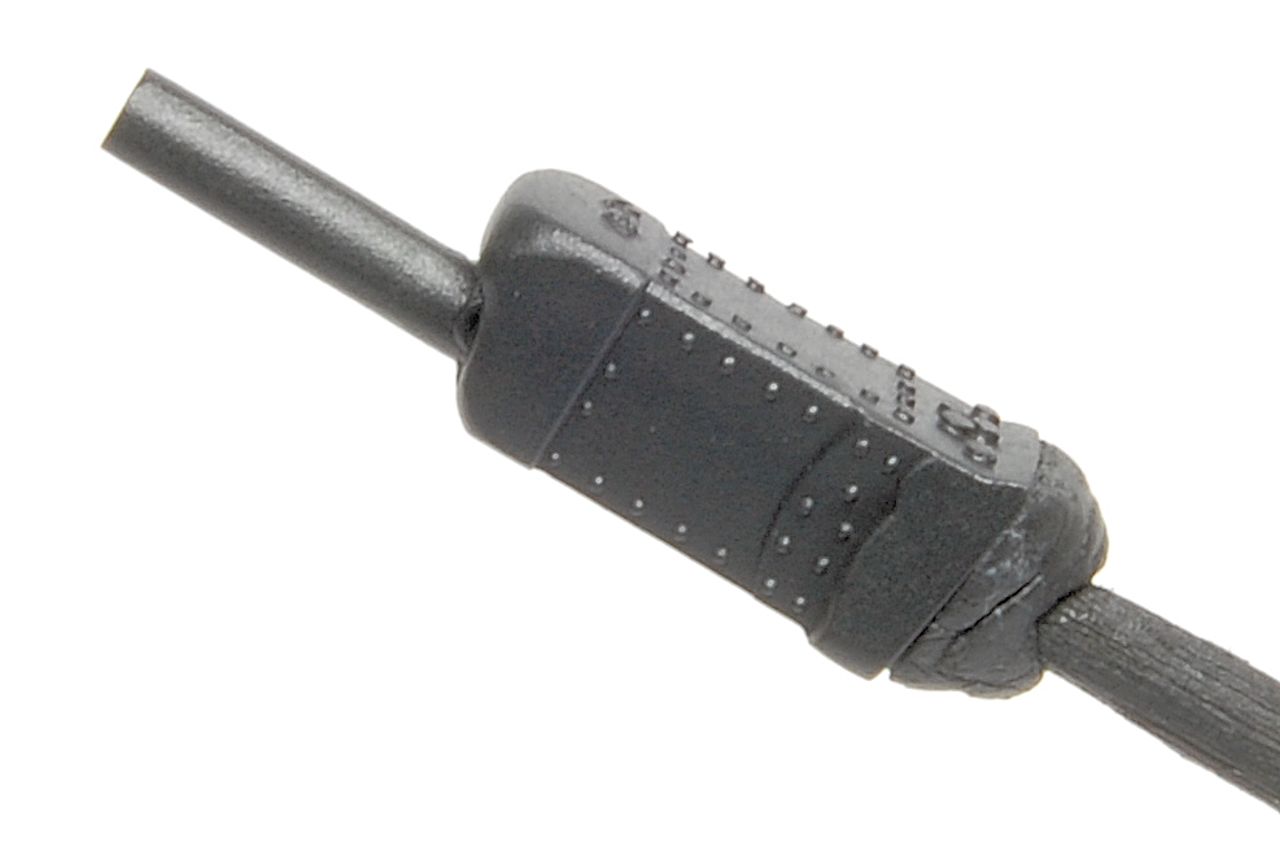
The new gun, changed from 40mm to 75mm, is moulded with the barrel as one slide moulded open ended tube with one half of the recuperator housing:
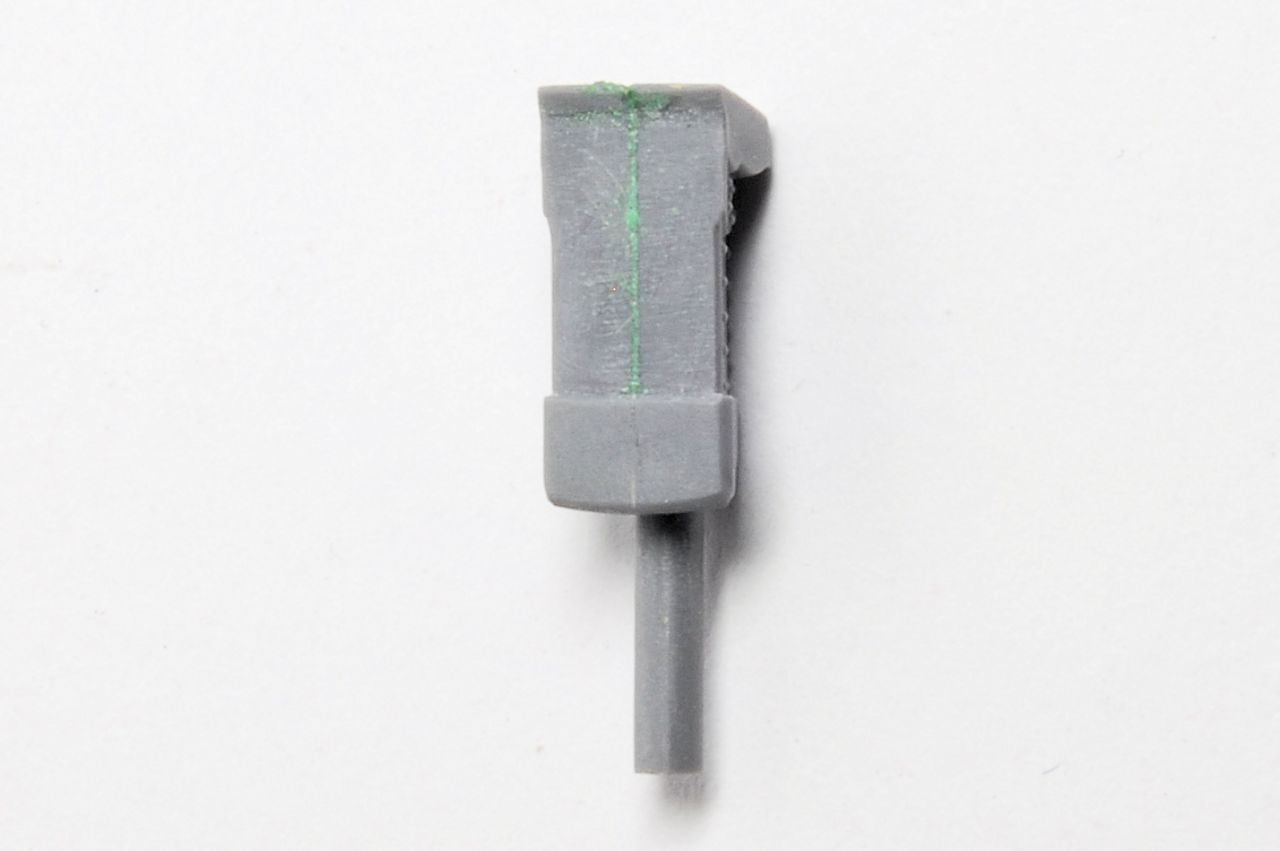
- and the other half:


Top marks for the slide moulded barrel, but not so sure that splitting the recuperator housing in this way was such a good idea...
firstcircle
Visit this Community
England - South East, United Kingdom
Joined: November 19, 2008
KitMaker: 2,249 posts
Armorama: 2,007 posts
Posted: Thursday, December 20, 2018 - 08:32 AM UTC

Quoted Text

...not so sure that splitting the recuperator housing in this way was such a good idea...


Why's that? I hear you say. I'm so glad you asked.

The barrel is a bit out of line with the housing, but that's not much problem:


But when you cement the housing halves together, you get this, viewed from the top:


That should represent the front of the housing being made of a one piece casting with two screws at the front, attached to a single plate on the top with a line of rivets along each edge. It's not a pretty sight, and from the front we see the vertical join that will need to be eliminated:


I think trying to salvage any of those rivets and screws is futile, so I just started filling and smoothing the top off, this is where I am so far:


Needs a bit more attention on the casting:


From the side it looks a bit better, but this is just prep for the re-riveting to come:


While waiting for filler and cement to cure, the turret was started, the base fits in perfectly:


Then the top can be cemented in place from underneath through the turret ring to avoid any risk of damaging the nice rivet detail on the top:


tread_geek
Visit this Community
Ontario, Canada
Joined: March 23, 2008
KitMaker: 2,847 posts
Armorama: 2,667 posts
Posted: Friday, December 21, 2018 - 08:16 AM UTC
Matthew,

While I have read your previous reviews on the Hungarian vehicles by IBG, this will be a fascinating and perhaps educational experience. I can't say that I'm overly impressed with the way they handled the main gun assembly. I've seen the "trauma" caused for a few modellers in a local club who've struggled trying to get PE tracks assembled and positioned so may I wish you good luck. Needless to say I'll be following your exploits in this build.

Cheers,
Jan
nikon1
Visit this Community
Kansas, United States
Joined: April 11, 2005
KitMaker: 622 posts
Armorama: 605 posts
Posted: Sunday, December 23, 2018 - 01:13 PM UTC
First thing I noticed is the detail is sharper on the Turan II compared to the Turan I. Looks like it will build in to a nice kit.
firstcircle
Visit this Community
England - South East, United Kingdom
Joined: November 19, 2008
KitMaker: 2,249 posts
Armorama: 2,007 posts
Posted: Sunday, January 06, 2019 - 11:21 AM UTC

Quoted Text

I can't say that I'm overly impressed with the way they handled the main gun assembly. I've seen the "trauma" caused for a few modellers in a local club who've struggled trying to get PE tracks assembled and positioned so may I wish you good luck.


Jan, agreed, the design of the gun is not at all ideal. I do have some trepidation about the metal tracks, having made a right royal mess of some a few years ago where they didn't join up and half of them fell apart... I'm hoping my increased experience and better quality glue since then will see me through. The good news is that the plastic parts are always there in the box, in case I need a plan B.


Quoted Text

First thing I noticed is the detail is sharper on the Turan II compared to the Turan I. Looks like it will build in to a nice kit.


Charles, it does seem to be sharper in the photos, though I'm not totally convinced that's not just a trick of the plastic colour - the tan coloured plastic may be a little translucent. Hopefully things will be clearer once paint is on.

The instructions call for the single wheel halves to be added to the suspension halves, then for the suspension and wheel halves to be brought together. I think it's easier for getting the wheel pairs well aligned, to start with making up the wheel pairs. The joining surfaces have a horseshoe shape so that they align one way - not that you can view both sides of the wheel at once, but I guess it ensures the bolts align on both sides.


Jumping ahead, while waiting for all the wheel pairs to set, to the lower hull, we have a bottom plate, two side plates with very nice surface detailing, and the top nose plate, which all fit together perfectly..


While that is setting we go even further ahead to the return rollers, and make up ten pairs like this:


Then sprockets and idlers, all toothed. If you go all production line, like I tend to do, and cut it all off the sprue in one go, you can distinguish the parts still: the outer half of the front sprocket has the plain dished centre and the inner half has the narrow locating hole (bottom row), the rear idler has the centre bolt and the larger mounting hole (top row).


The now set return rollers are added to the stalks on the hull sides, and with the cement starting to harden off, a straight edge was used to make sure they were perfectly aligned, as the location points are not that definite and it needs careful checking, like this:


Idlers cemented in place, checked for alignment, with the areas where the sprue gates were removed from between the teeth positioned so that the tracks should cover them:
firstcircle
Visit this Community
England - South East, United Kingdom
Joined: November 19, 2008
KitMaker: 2,249 posts
Armorama: 2,007 posts
Posted: Tuesday, January 15, 2019 - 09:00 AM UTC
Bogie nights...

The frames / springs need careful cutting from the sprue, then as explained before, I'm adding the completed wheel pairs to one half of the bogie frame:


... then sandwiching the other half on top while the cement on the wheels is still flexible, and giving it a good squeeze:


Half of one side done, top view:


One side complete, bottom view:


With both sides setting on one side, that Turan special extra wheel just behind the sprocket:


Before cementing it in place I added some fairly crude bolt detail to the top. It won't be that visible, but just to give some texture to it, instead of the dead flat top of the moulding. Presumably the case contained some kind of spring and I guess the top could be unbolted.


Double bogie set added to one side:


And added to both sides, trying to get them as straight as possible with a steel rule:


Turning to the gun, with the top of the casing now more or less clean:


Added lifting rings from 0.3mm rod:


Added screws and rivets from rod and etched metal - looks really messy


But after cleaning and priming, I think it acceptable:


The kit doesn't include a part for the mud scraper that is mounted just in front of the rear idler. Photos seem to show it bent, but I'm not sure if that was how it was designed or if they just got bent. I just copied the one in the Bronco 1/35 kit, and used a bit of the etched sheet, rough shape on the right, finished on the left:


Attached it into a small slot cut in the side plate:


firstcircle
Visit this Community
England - South East, United Kingdom
Joined: November 19, 2008
KitMaker: 2,249 posts
Armorama: 2,007 posts
Posted: Tuesday, January 15, 2019 - 09:45 AM UTC
Having found out how hard it can be to get all of the nooks painted once the tracks are on, I went for priming the wheels and sides first, especially as I'm using the brass track (aftermarket set by Part, see earlier photo) instead of the plastic kit tracks (I hope).


Starting with the bottom section, the tracks are attached at many tiny points so I just used scissors on it:


Having made sure I annealed it first (I've had this type of track fall apart before) the sides were first bent up to 90°


Then the teeth were bent down 90°


Then the sides were folded right in, and pressed flat, making sure the teeth halves were aligned, then a touch of CA glue added to the teeth and pressed them together with pliers / tweezers:


Seems like an OK start.

firstcircle
Visit this Community
England - South East, United Kingdom
Joined: November 19, 2008
KitMaker: 2,249 posts
Armorama: 2,007 posts
Posted: Tuesday, January 22, 2019 - 09:54 AM UTC
The shorter length of the Part tracks fits under the road wheels:


The longer piece wraps around the rest of it.


But even after introducing some sag, it was a little too long, so a single link was cut out on the top run and it was joined on the centre return roller, which will be totally hidden by the track guards:


It might be easier therefore to put the longer length around the visible part, and use the short length on top, thereby having no joins in the visible section, although the joins that are designed to be there look OK, much better than the one I cut in with scissors.


Some corrections were done to the front section of the track guards (original left, modified right). The thickness was reduced, all the rivets were removed, and the vertical end of the side section (red box) was filed to an angle instead.


Assembling the track guards:


One of the things missing from the kit is a tow cable and brackets on the right side. Brackets were cut from spare PE sheet and some 0.3 rivets added (central one looks a bit adrift). I started trying to use an XXL cable for a Pz.Kpfw.III which was OK in terms of thickness and eye size, but was too short to wrap around in the characteristic Turan style, so I used a Panther cable instead, which is perfect in length, but definitely looks too heavy duty. One eye is stowed over the kit supplied vertical retainer on the track guard below the exhaust, for the other one I made up an equally overly heavy duty tow hook.


Note that the hull top is not yet cemented to the lower hull. At the back, the two jacks were added to the deck, and the smoke canister rack on the rear plate, and the exhausts are in place:


The turret comes with small rivetted plates on the four corners, but they have no lifting hooks, so the plates were drilled and copper wire glued in place, then cut, filed and bent to shape. Both guns have also been cemented in place:

tread_geek
Visit this Community
Ontario, Canada
Joined: March 23, 2008
KitMaker: 2,847 posts
Armorama: 2,667 posts
Posted: Wednesday, January 23, 2019 - 07:33 AM UTC
Oh my goodness to me at least parts of this kit and your work this instalment look frightening, especially those PE tracks. I've seen and heard about some fellows in the local club "trying" PE tracks with mixed results and usually a rather painful experience of the process so I must salute you on your accomplishment with yours. I will admit that they do look remarkably good but wouldn't relish the thought of painting them.

Cheers,
Jan
firstcircle
Visit this Community
England - South East, United Kingdom
Joined: November 19, 2008
KitMaker: 2,249 posts
Armorama: 2,007 posts
Posted: Monday, February 11, 2019 - 10:28 AM UTC

Quoted Text

I've seen and heard about some fellows in the local club "trying" PE tracks with mixed results and usually a rather painful experience of the process so I must salute you on your accomplishment with yours.


Thanks Jan, they went together more easily than I'd anticipated, but I noticed after buying that OKB Grigorov does a resin set, which I suspect look better, being a bit more scale thickness, although I can't comment on whether they are also easier to use or not.

One advantage of using replacement track is the kit tracks can be used as spare links; many Turans carried a length on the front plate in front of the driver hatch, and two of the five link pieces together produces a piece the correct width. The retaining bar was fabricated from very thin metal sheet, two strips bent into L shapes then joined into a U:


That was primed with Mr Surfacer 1500 along with other fittings, the tools in the kit being augmented with a sledgehammer and a pick from the Dan Taylor Modelworks German AFV tools set.


The underside of the trackguards and the tracks were also primed:


Then some green was applied to parts that might be hard to get to once the top goes on. This is the Green Base from the Hataka Hungarian AFV paint set.


The hull top and bottom fit together well, but there's a few challenges. The join under the driver's visor (arrowed below) needs to be closed up fully with not much contact being made, and the track guards need to join firmly to the inner edges (ringed) so that the joins can be eliminated later.


At the rear, a bit of pressure is needed to get this join closed up properly:


Here the left side track guard join has been mostly made good:


With everything tidied to an acceptable point it's all primed:


firstcircle
Visit this Community
England - South East, United Kingdom
Joined: November 19, 2008
KitMaker: 2,249 posts
Armorama: 2,007 posts
Posted: Monday, February 11, 2019 - 10:52 AM UTC
I'm using the Hataka Hungarian AFV Panel Lighting set for this kit:


These are acrylics, from their red line, not lacquers from the orange line, and like (in my experience) most water based acrylics, it can take a bit of practice and messing with the mixes of paint, retarder and thinner to get things right. Using their own thinners, I found it best just to thin a small amount, too thin and the paint is too transparent and prone to splurging. So about 15 drops paint to two drops retarder and two or three of thinner. Spraying in a big wide pattern where the trigger is mostly open is the most forgiving of course, and the finish here looks OK:


Hungarian three colour camouflage seems to commonly be a semi hard edge, so sprayed without the use of templates, but not with a faded look. Really I wanted smaller, tighter patches, but without stencilling. Though wide area spraying is OK with these paints, close up, small areas is more of a challenge. The paint does have a tendency to dry on the needle tip and the nozzle. Normally for close in work you'd dial the pressure down, but that makes the paint more prone to clogging.

I found keeping the pressure up, paint not too thin, and work quickly seemed to work best, keeping the paint flowing as much as possible. Consequently the pattern is much bigger than I originally intended. The edges are not exactly tight, but I can enhance that with oil paint later. I got a bit of subtle shaded effect with the base colours being used on the sides, and the "flash" colours on the upper surfaces.


Then gloss varnish and decals:


The decals are OK in terms of thickness and adhesion, but I should have trimmed the big cross on the rear deck. There's enough black edge that can be trimmed down so that it would fit between the hinges and the handles of the hatch; without trimming it will have to overlap one or the other, this time it went over the hinges, and eventually sat down with enough pressure and Microsol. Whichever way you do it, it also needs to sit into the groove that is the hatch edge (below).
Three more decals go on the front plate, two on the back, and crosses on each side.


firstcircle
Visit this Community
England - South East, United Kingdom
Joined: November 19, 2008
KitMaker: 2,249 posts
Armorama: 2,007 posts
Posted: Sunday, February 24, 2019 - 04:21 AM UTC
When you have a deadline, things happen, or sometimes don't... in this case I hoped to have this ready for February 23rd's On Track show Folkestone. Consequently no photos were taken until the end.

That big decal on the back; it would be better to cut it in two and remove a tiny strip if going over the edge of the hatch, pinwashing the join in just isn't as good:


A number of those small separately painted details go on the front end. The headlamps, having been hollowed out and primed black, were then painted on the interior with Tamiya Aluminium paint, then filled with quick drying epoxy. The jack blocks were given a wood look, and some chips and scratches, the outer edges, which are meant to be the holders the blocks slide into were colour matches to the surface they're mounted on. Also added after painting, the spare track, fire extinguisher, axe and wire cutters.


The tow cable and hook were painted with black enamel, with Ammo metal pigment added (as per Mig's recent video on here) using a rubber tipped clay modelling tool. The exhaust mufflers were airbrushed and pigmented in rust tones.


Not forgetting the spare wheels on the back:


Tools were added, the shovel / pry bar are from the kit, the sledgehammer / pick resin items (Dan Taylor). Should have added a small plate to mount the clasps of the resin additions before anything was painted, too late at this stage.


Final construction step is sticking the turret in place.


Then on to a base (this came from a UK eBay vendor named jaya10612).


firstcircle
Visit this Community
England - South East, United Kingdom
Joined: November 19, 2008
KitMaker: 2,249 posts
Armorama: 2,007 posts
Posted: Sunday, February 24, 2019 - 04:54 AM UTC
Fixing the turret and the base, and a little matt varnish, were done on the morning before driving to the model show. I might have done that on Friday night but I had to go to see Blue Oyster Cult instead.


On returning from lunch on the warm, sunlit beach (this is Folkestone, in February!) I was quite happy to see the Bronze card next to it, and as a bonus a VHC for its IBG / Armorama review kit stablemate, the Chevrolet C15TA.


This Turan II is another decent kit from IBG, although with the significant design fault in the way that the main gun recuperator housing is split, as described above. I think this issue needs to be addressed by the modeller if it is to look anything like the real thing, and unfortunately it couldn't be in a more noticeable position on the finished model.

I'm not sure that the metal tracks by Part are a great improvement in terms of appearance over the kit provided tracks, but they are probably less tedious to assemble (at least if you've already built the IBG tracks twice before). The additional details that I've added in this blog reveal omissions on the part of IBG: the tow cable and brackets, the spare track and rack, the sledgehammer, and the pick were all, I believe, standard equipment for an operational Turan II, so really should have been included. The hooks on the turret could also have been provided as separate parts, but are probably actually easier to add from wire; then there is the mud scrapers which probably can only be made of metal. As is so often the case, it is something of a pity that neither of the hatches can be modelled open. Apart from those points (I think I haven't missed anything) the kit is finely moulded, fits together well, and overall looks reasonably accurate. As usual with IBG, the price is also good.
tread_geek
Visit this Community
Ontario, Canada
Joined: March 23, 2008
KitMaker: 2,847 posts
Armorama: 2,667 posts
Posted: Tuesday, February 26, 2019 - 03:15 AM UTC
You've done an outstanding job on this model considering some of the issues you needed to deal with, Amusingly, I had been looking at a posting on a "competitors" site to Armorama that had pictures from the OnTrack show and I saw both a Turan and a C-15 and recall mentioning to my SWMBO that they looked like Matthews' from Armorama. A few minutes later I go to Armorama and I see your updates here! CONGRATULATIONS on your two wins as it looked like there was some stiff competition at that show. Well and justly deserved acknowledgement of your skills.

Cheers,
Jan
firstcircle
Visit this Community
England - South East, United Kingdom
Joined: November 19, 2008
KitMaker: 2,249 posts
Armorama: 2,007 posts
Posted: Wednesday, February 27, 2019 - 10:14 PM UTC
Thank you very much Jan. Observant of you to recognise it, and I am glad to have received an explanation for the mysterious burning ears sensation I experienced at some point on Tuesday.

Perhaps you would PM me the link to the other site? I actually managed to miss some of the models on display, partly due to the day being so very unseasonably warm that I ended up walking along the beach for much longer than I might have, had it been the more usual freezing and windswept conditions.
tread_geek
Visit this Community
Ontario, Canada
Joined: March 23, 2008
KitMaker: 2,847 posts
Armorama: 2,667 posts
Posted: Thursday, February 28, 2019 - 09:45 AM UTC

Quoted Text

...Perhaps you would PM me the link to the other site? I actually managed to miss some of the models on display, partly due to the day being so very unseasonably warm ...


PM duly sent!

Cheers,
-- Jan
 _GOTOTOP