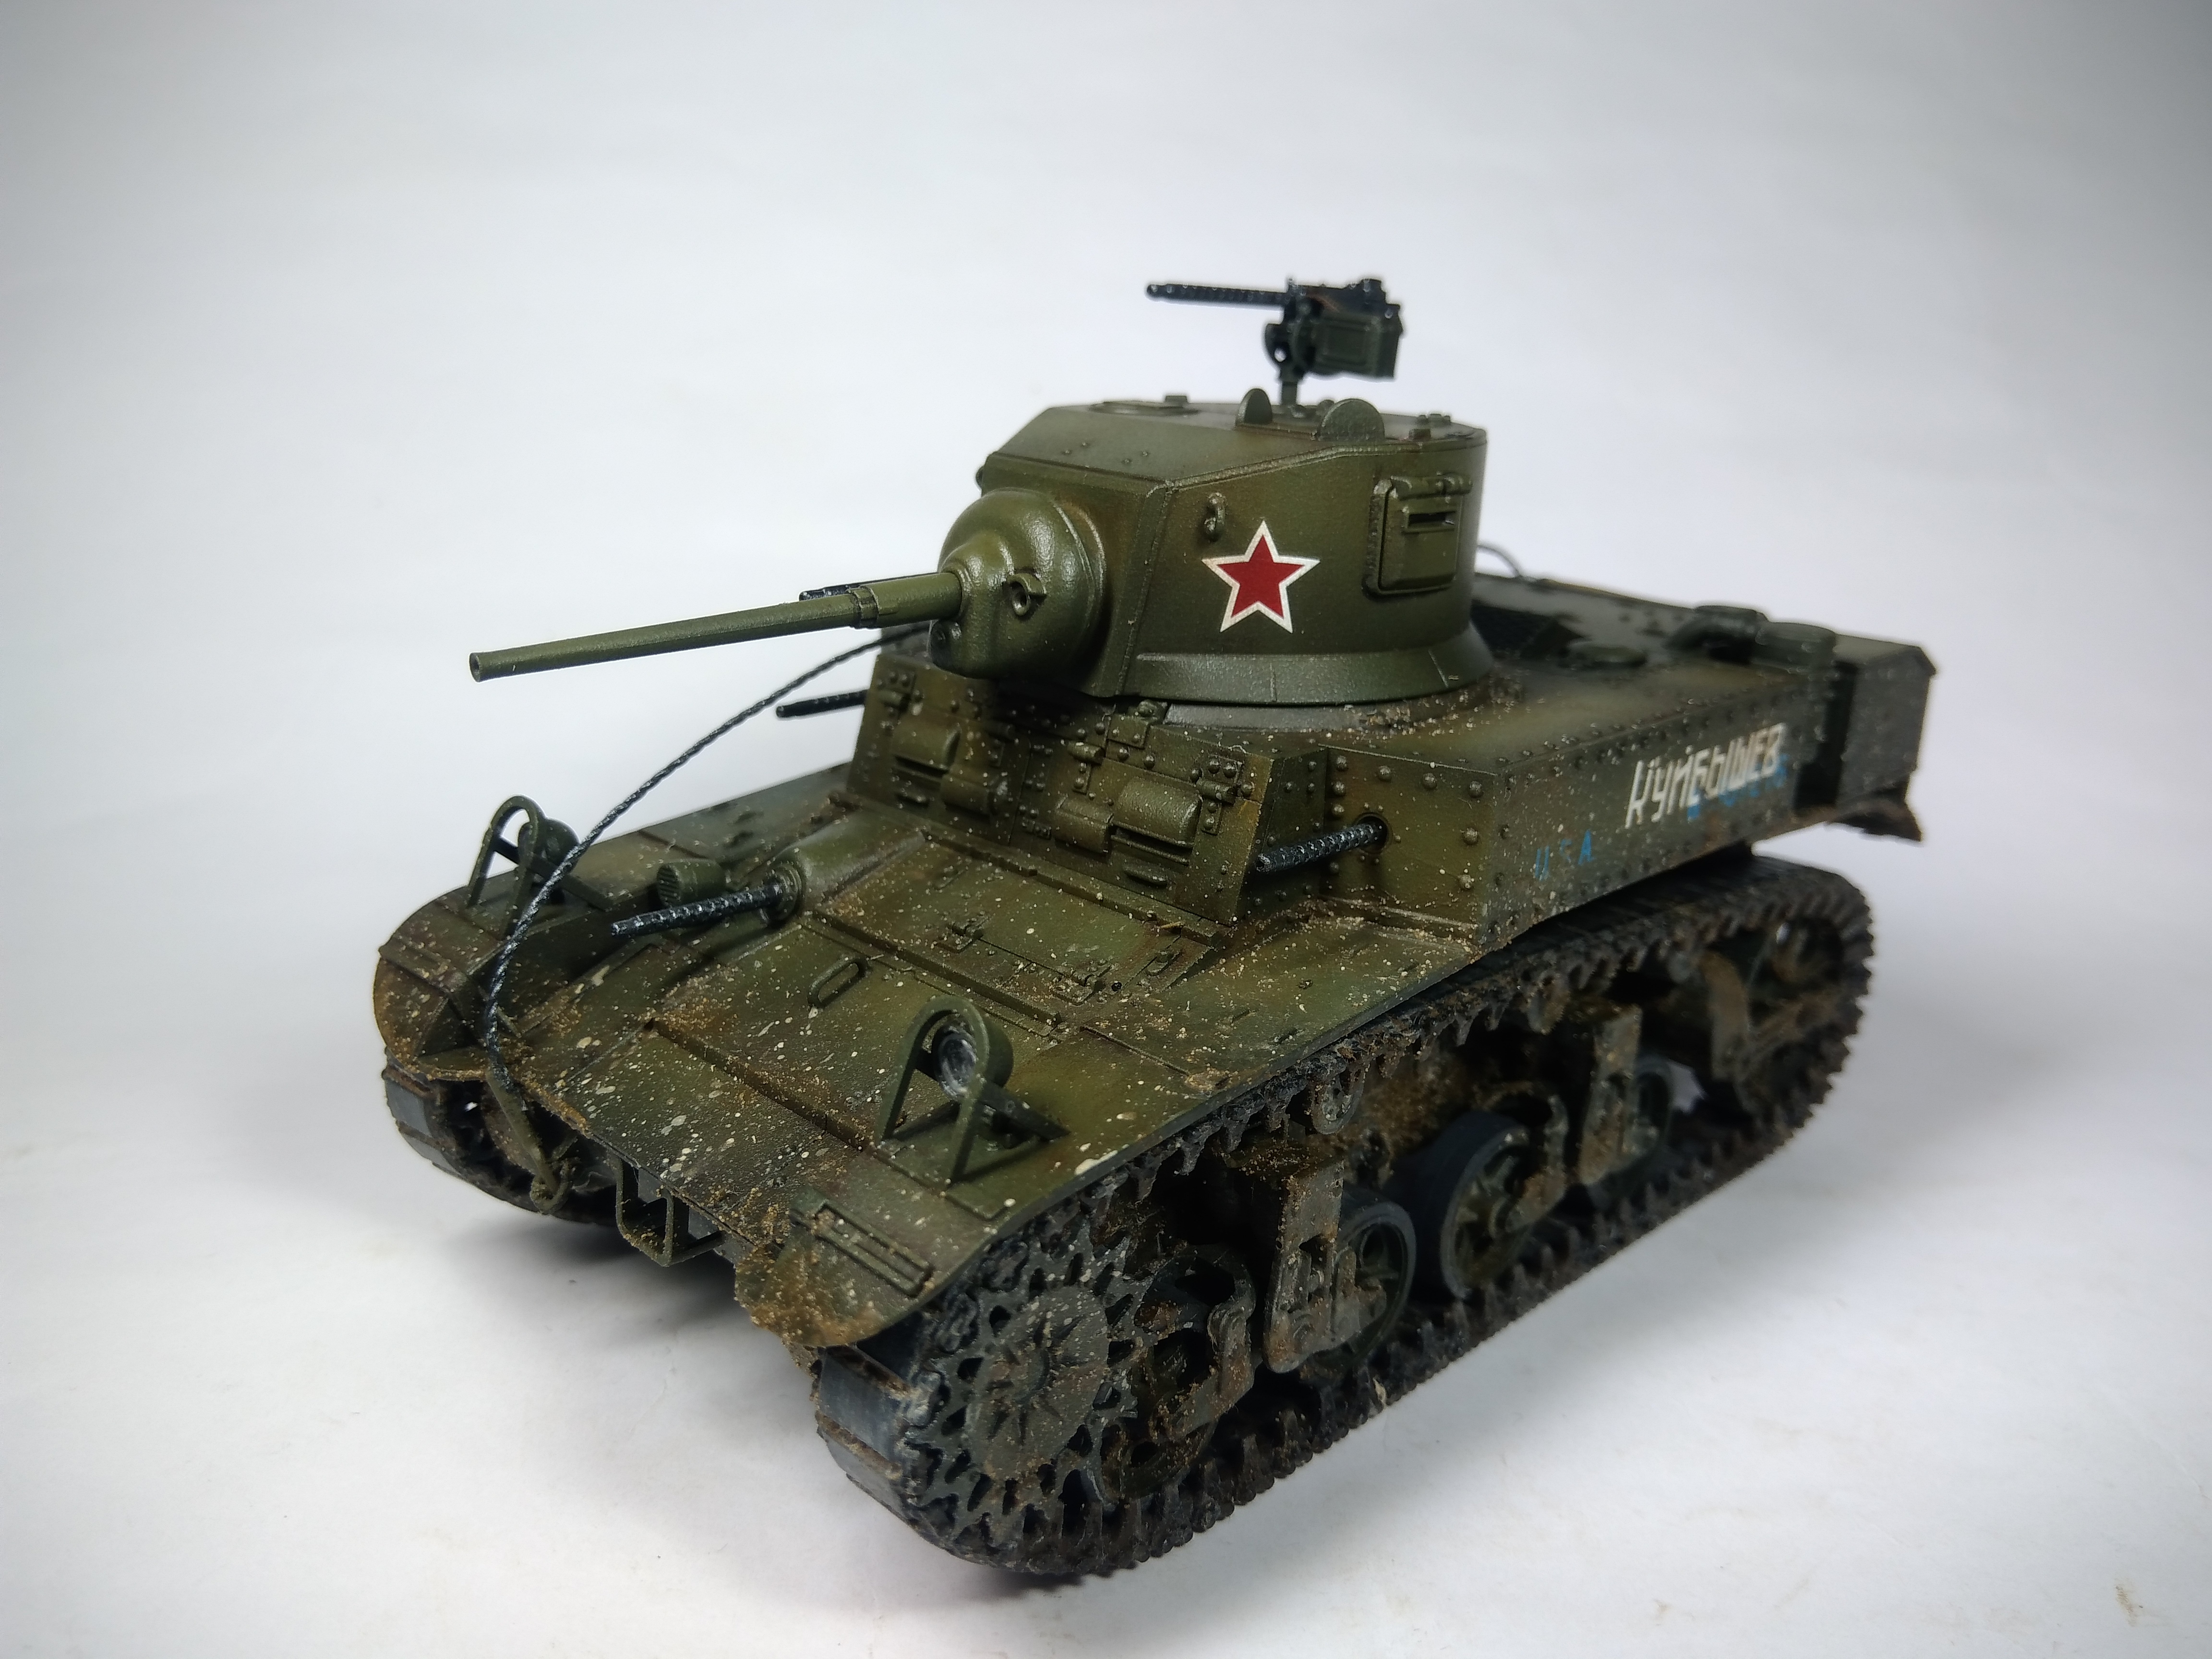
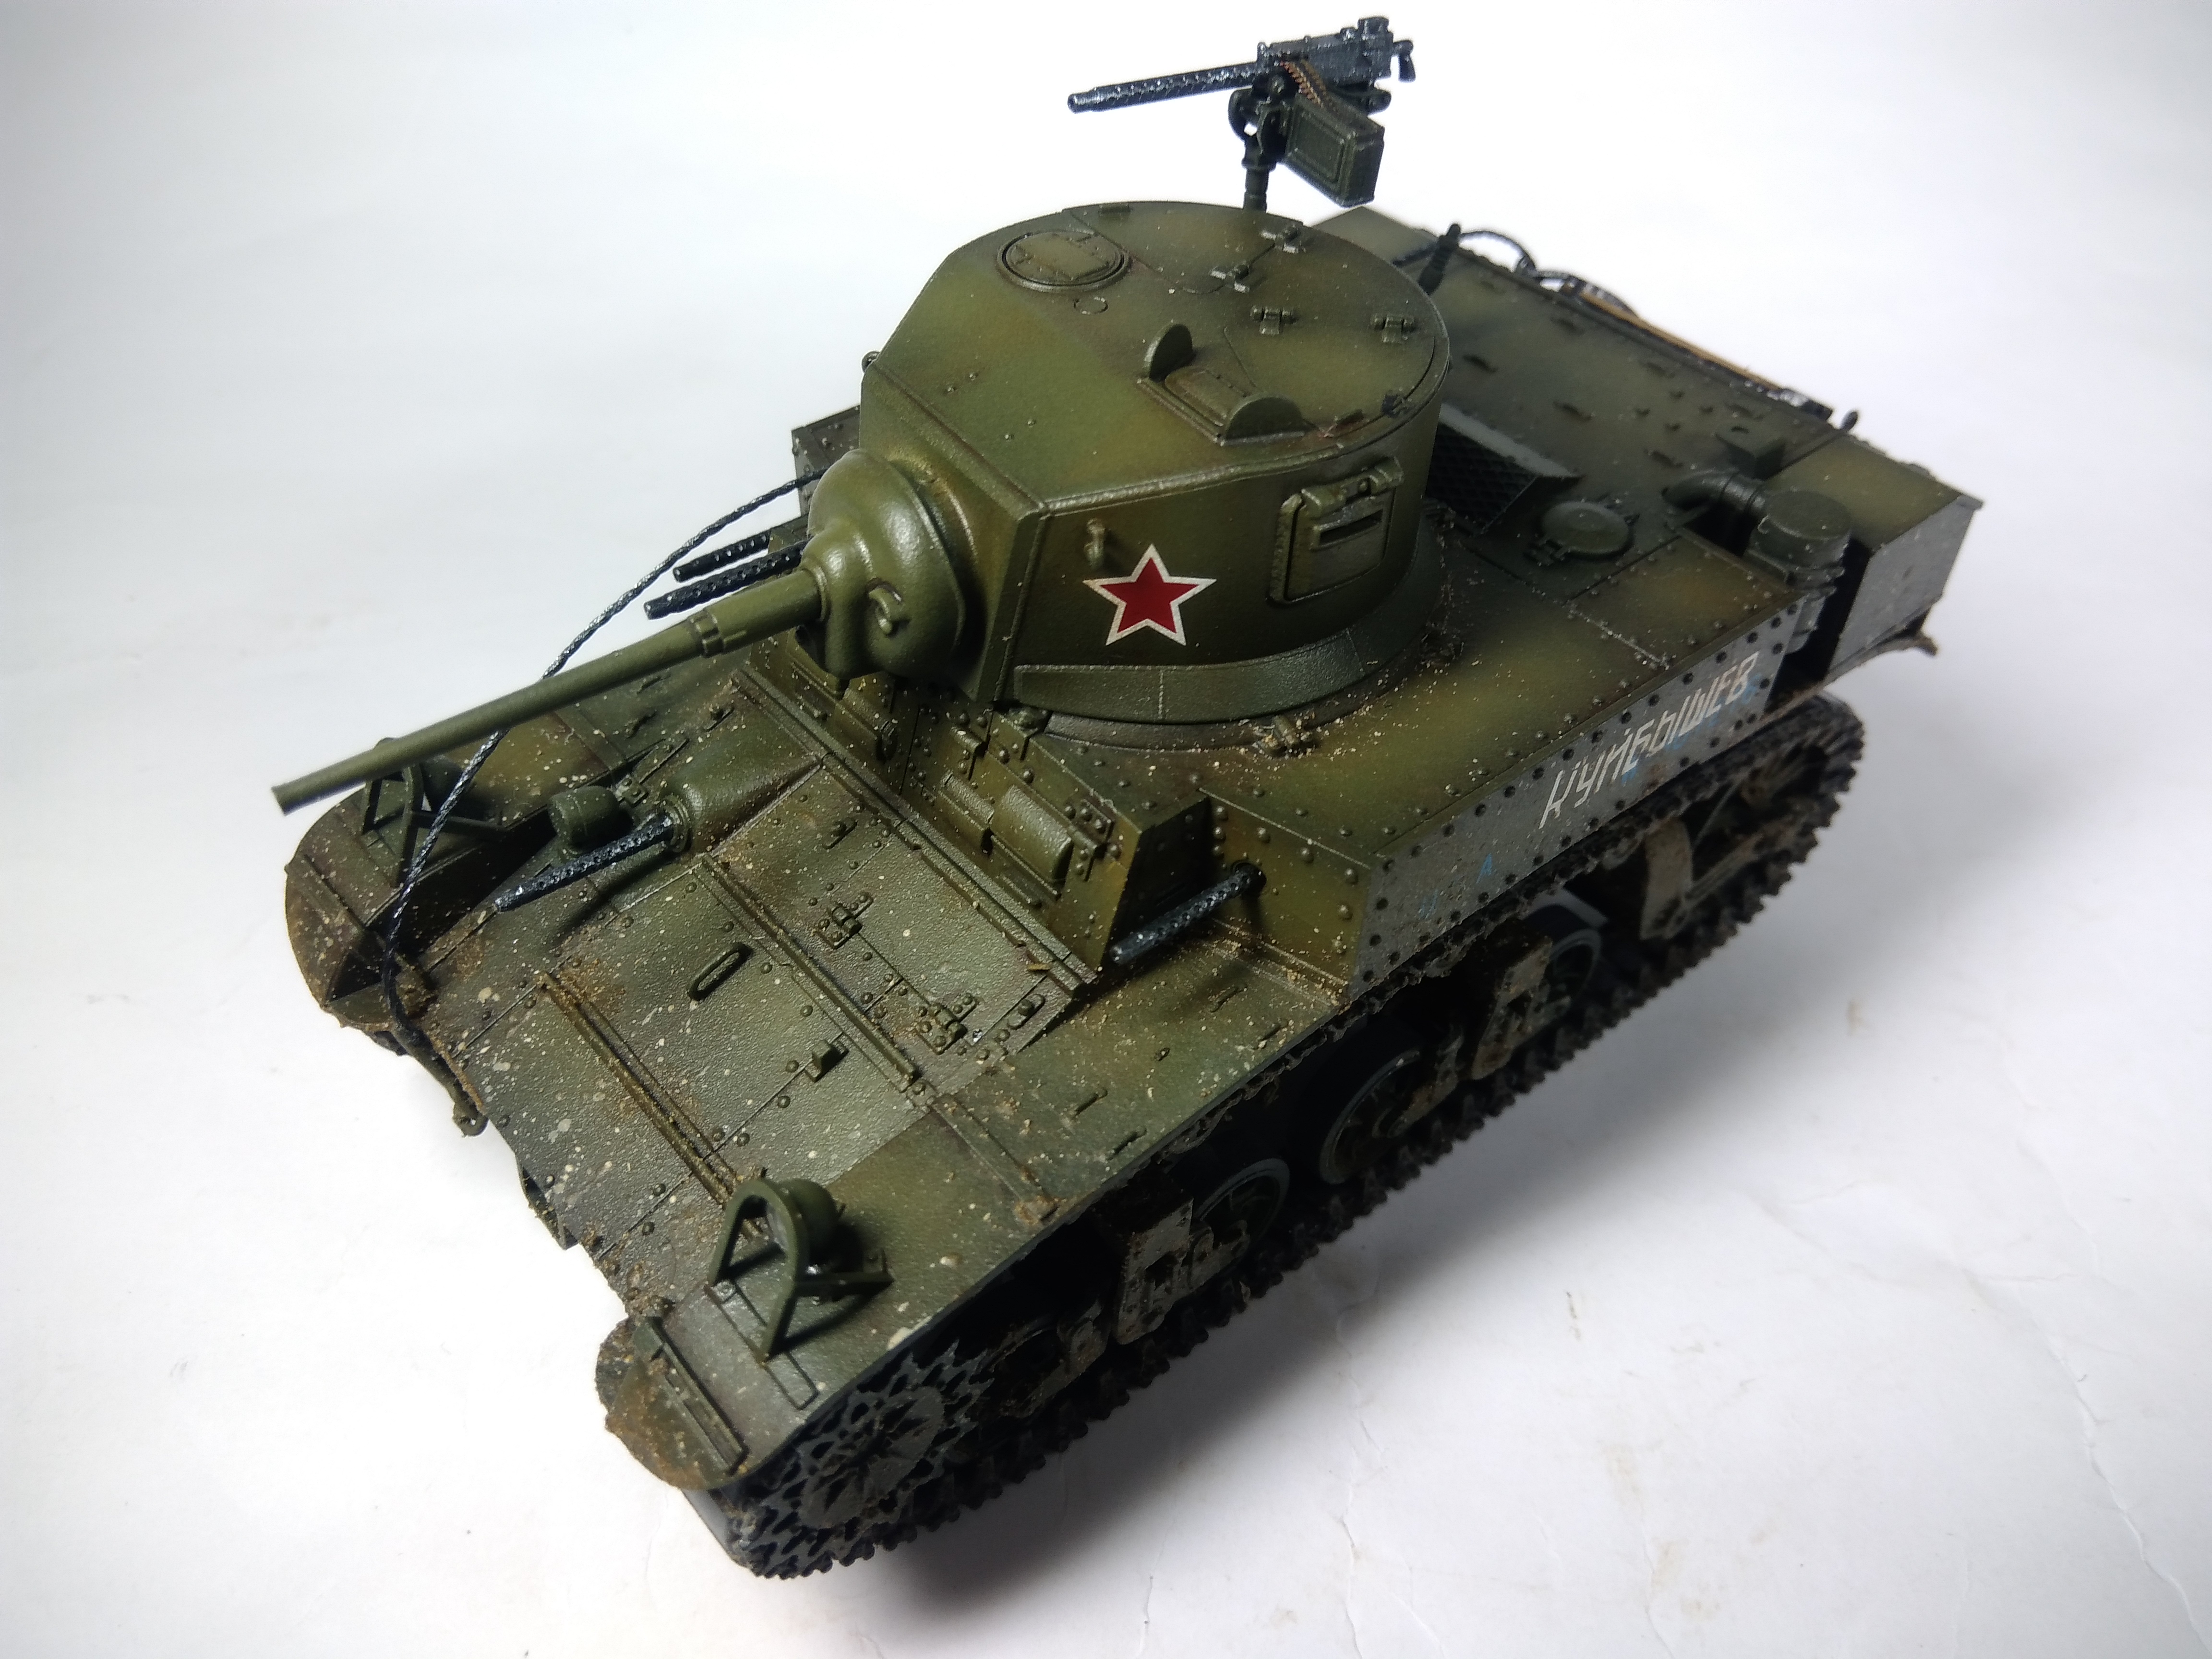
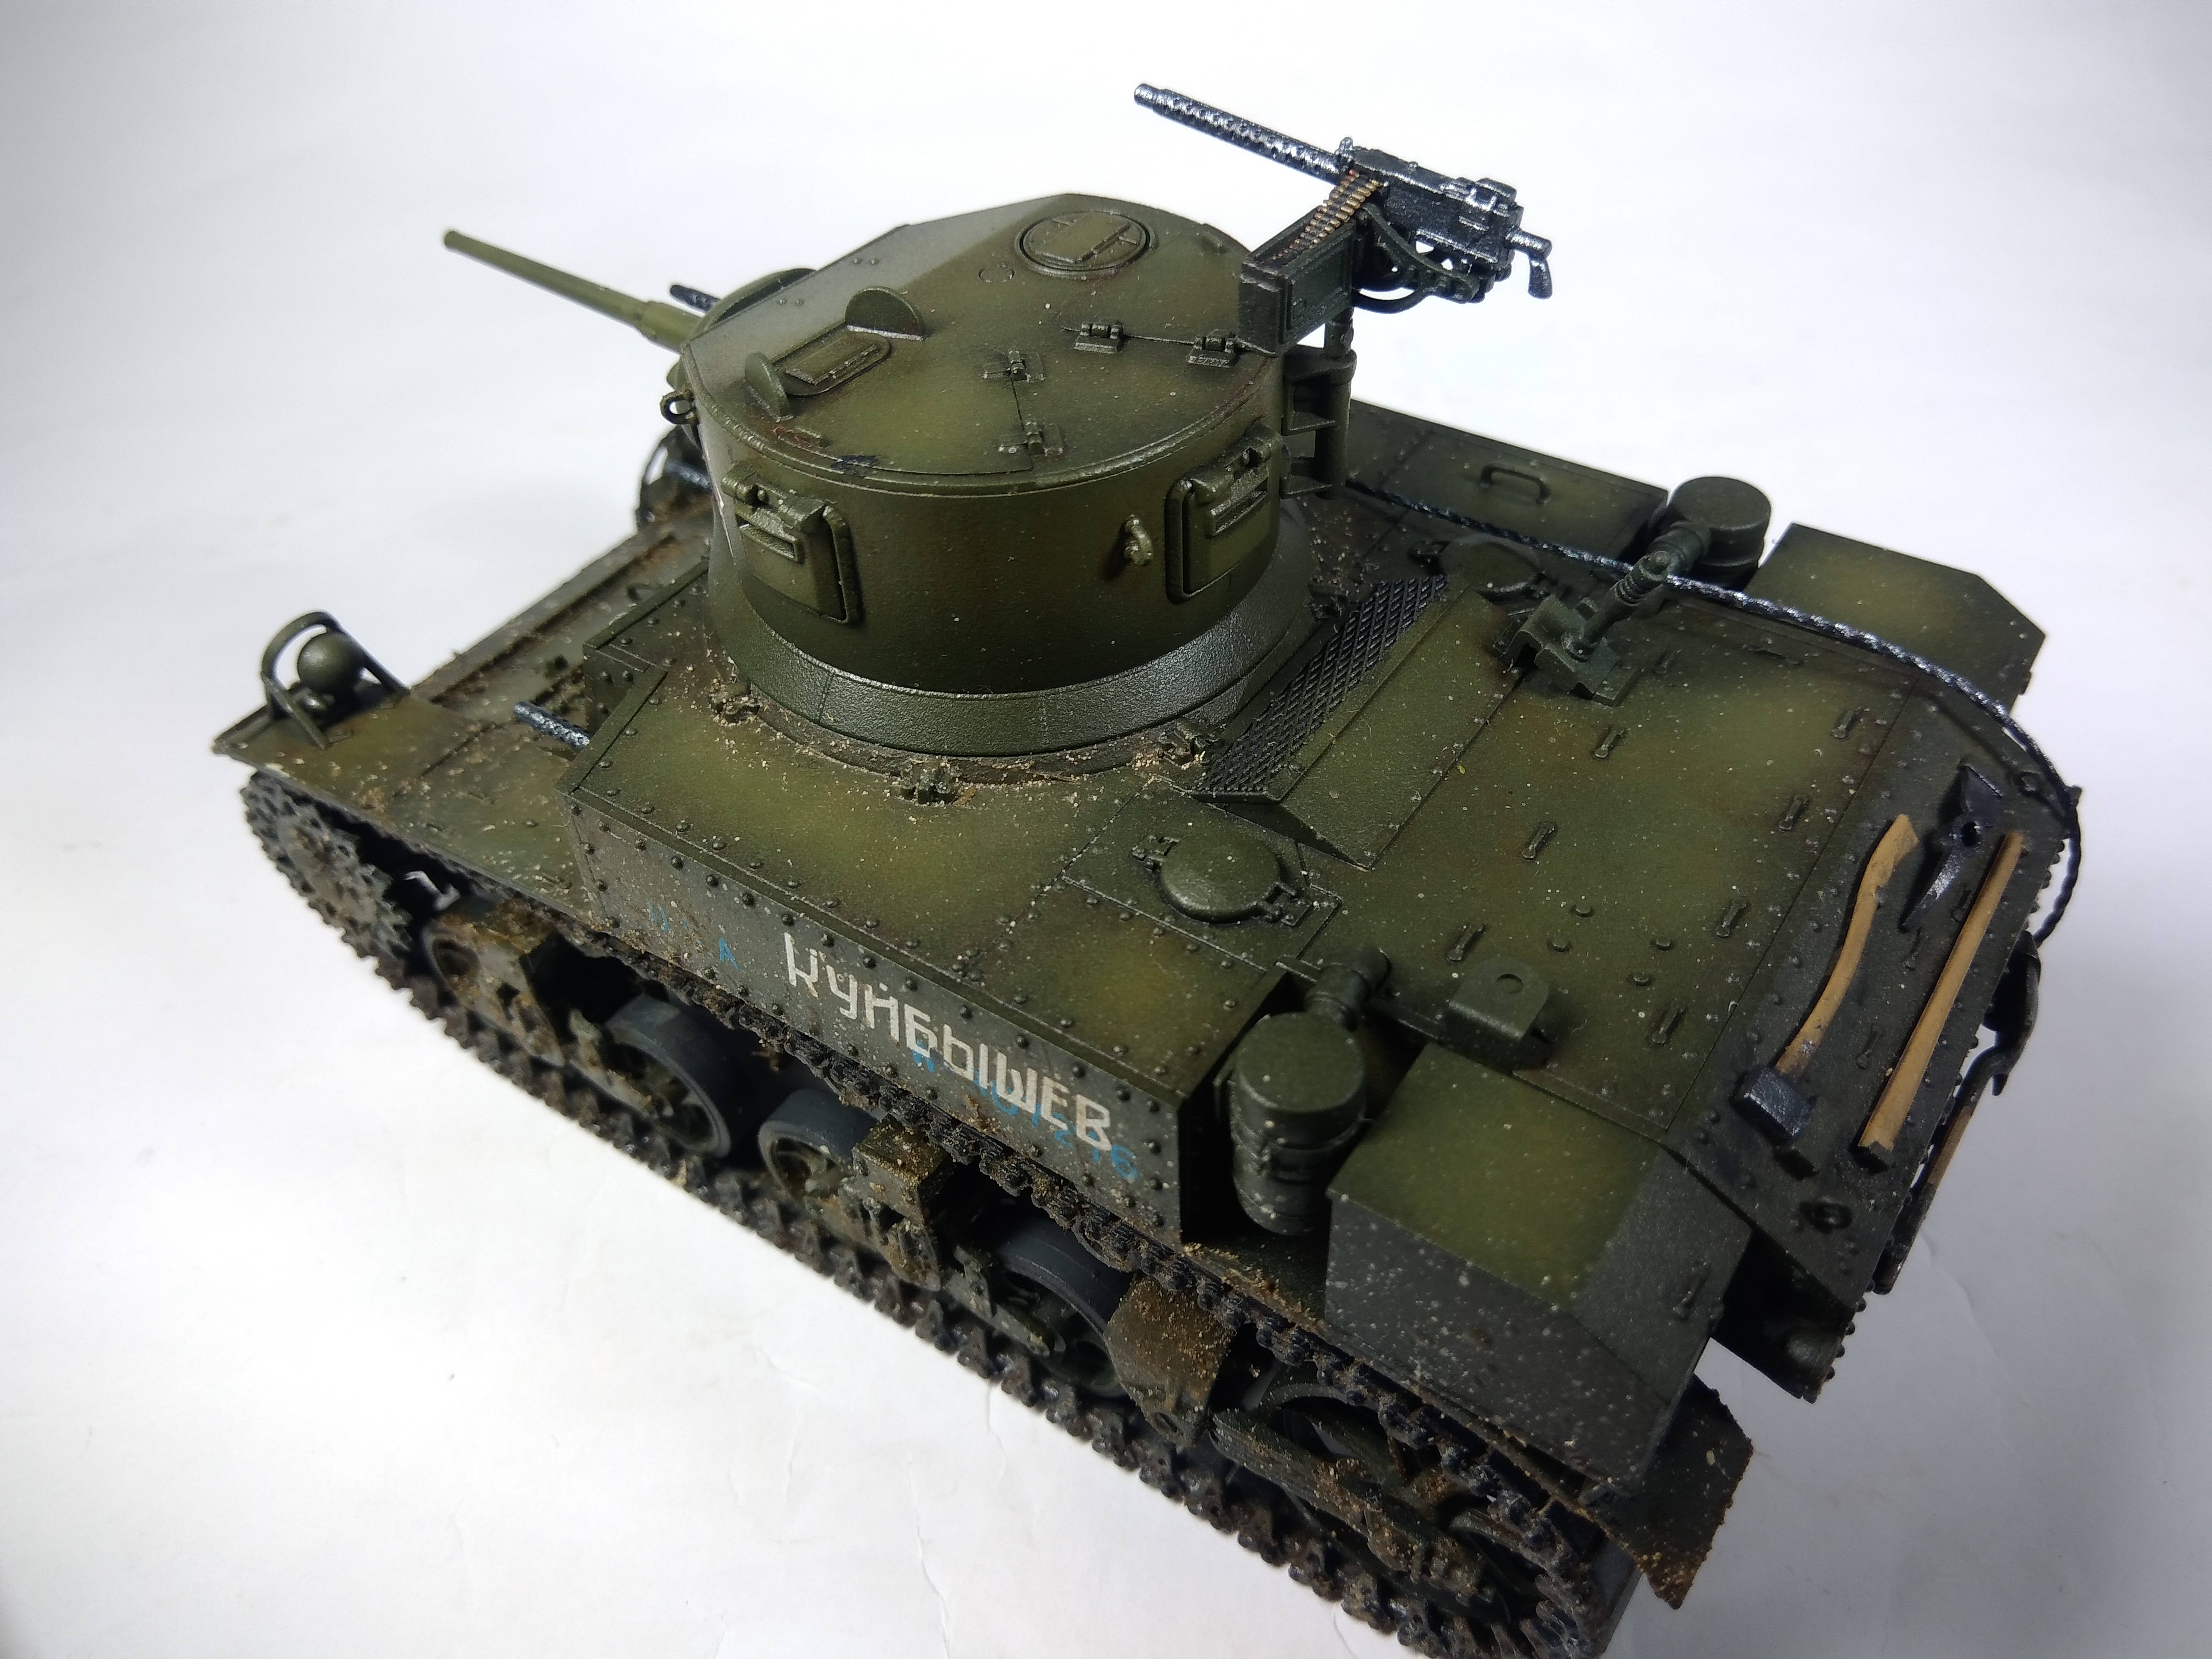
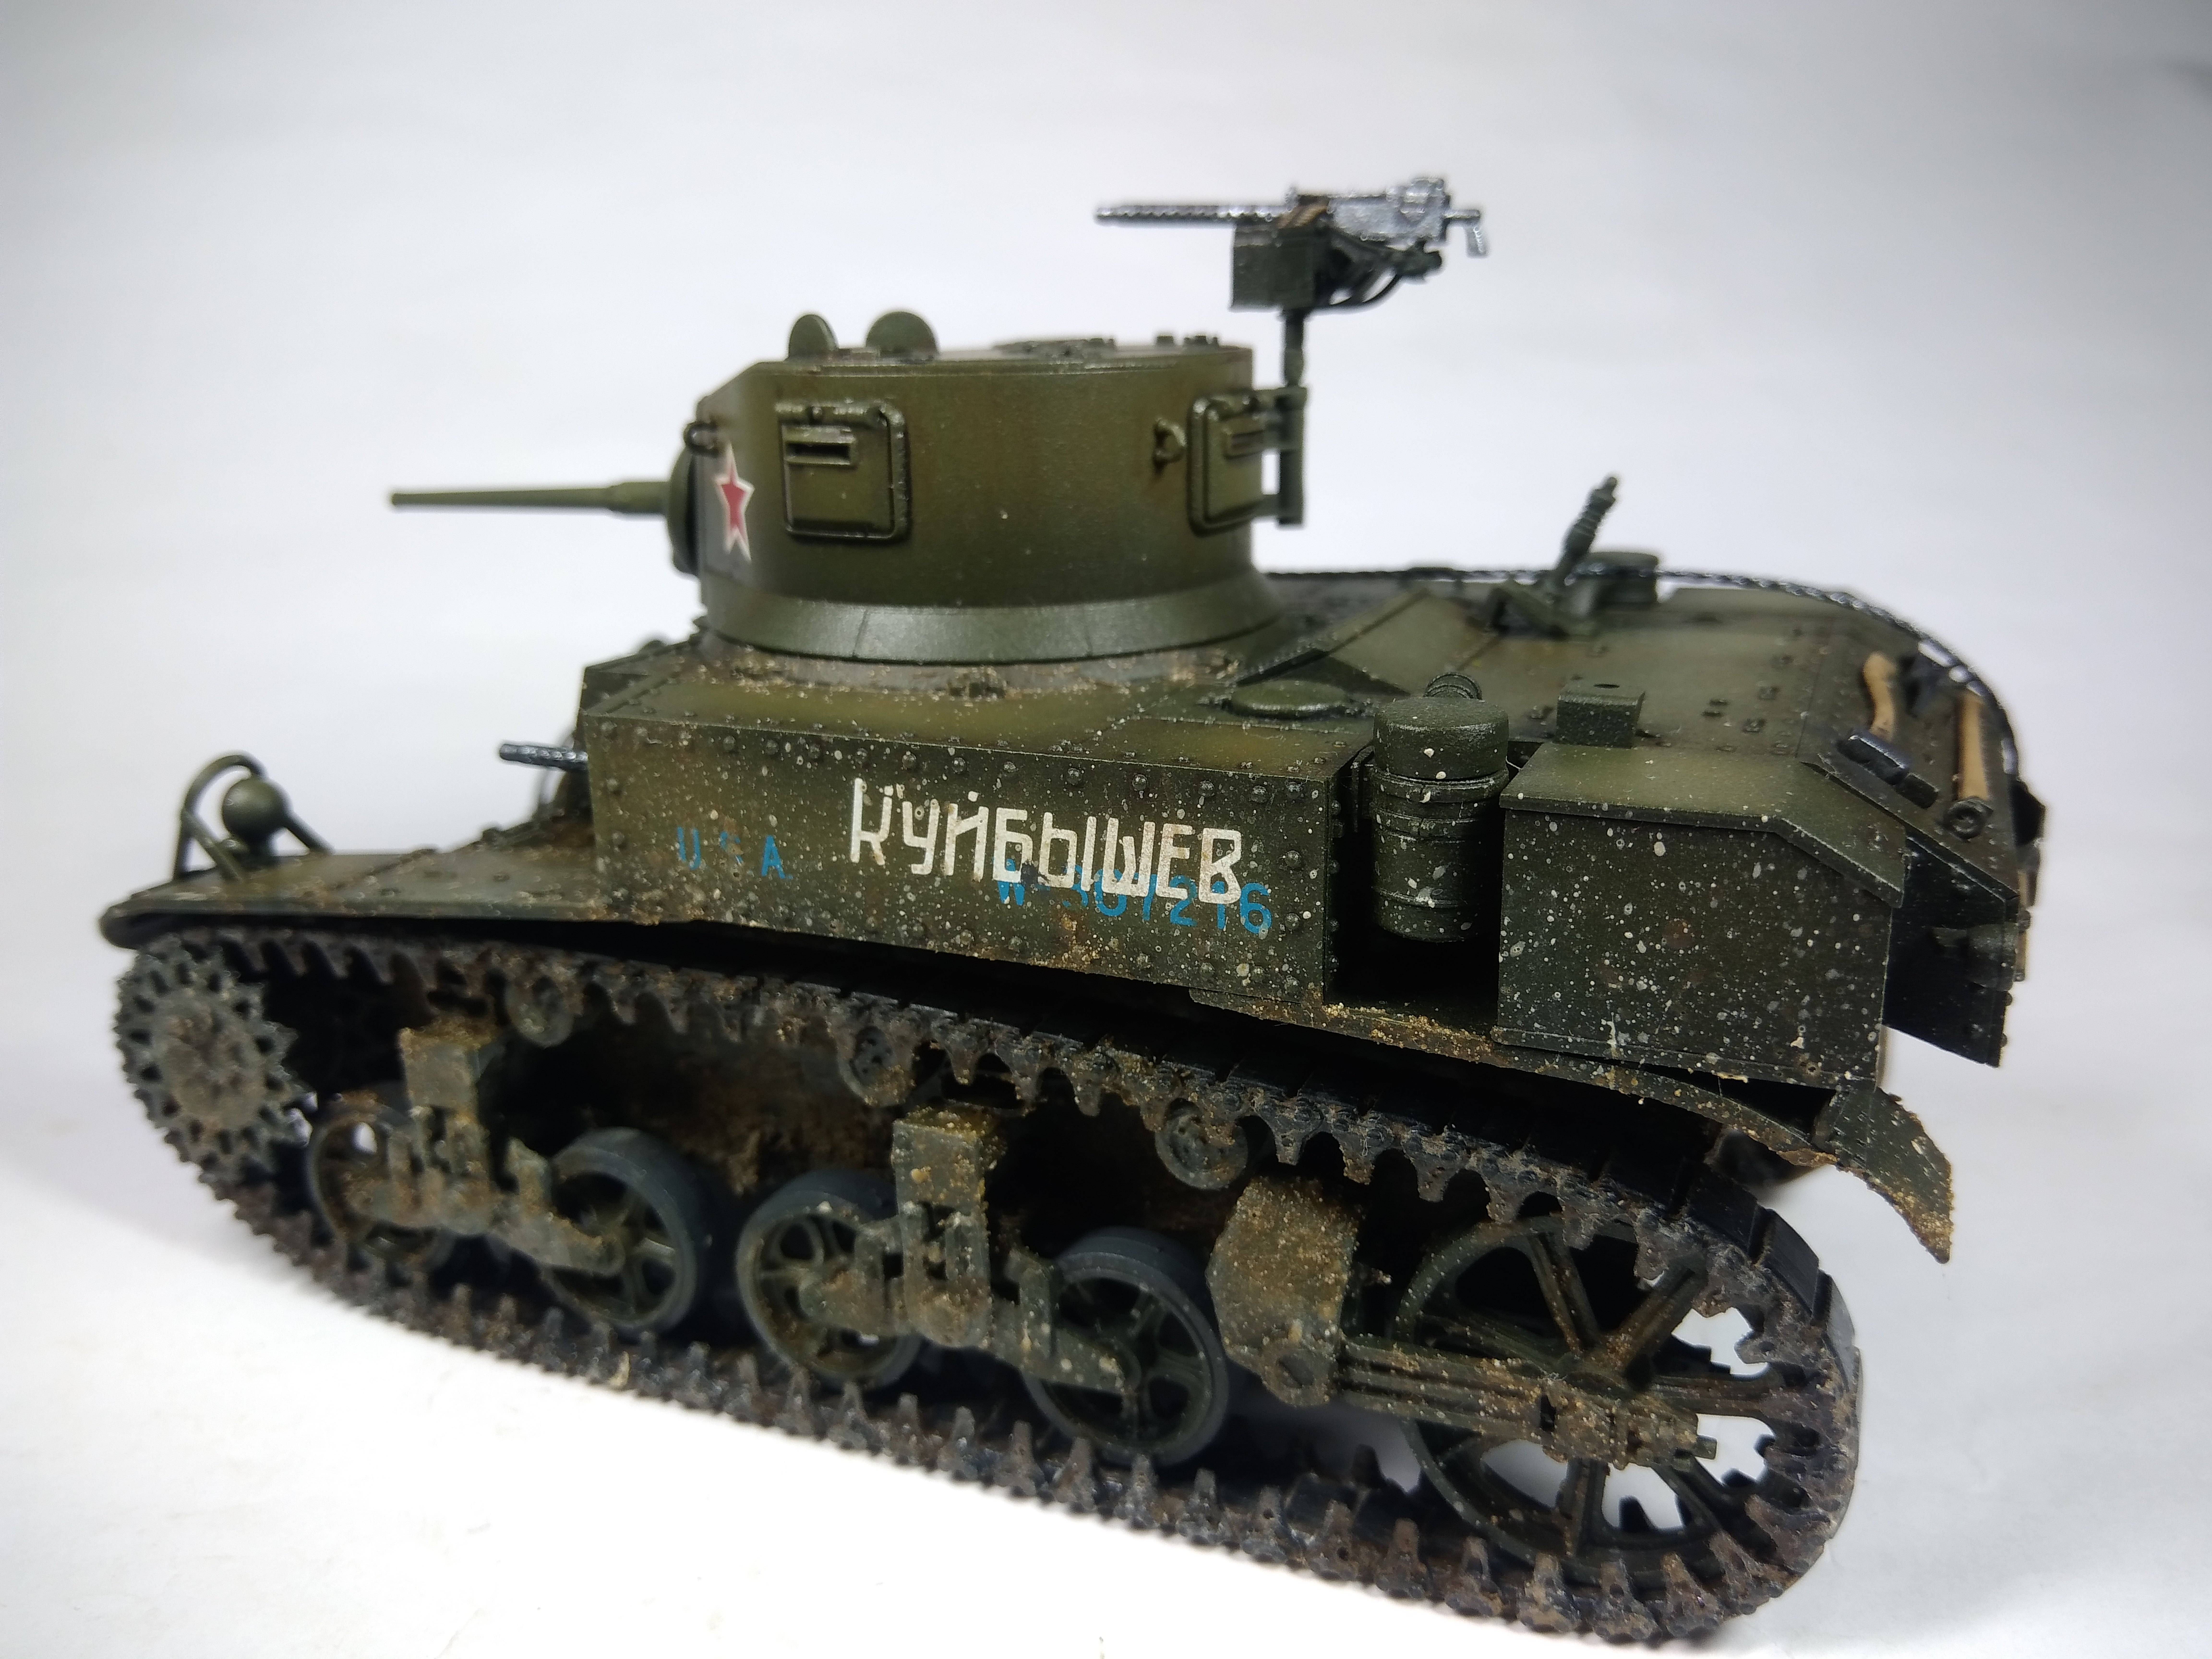
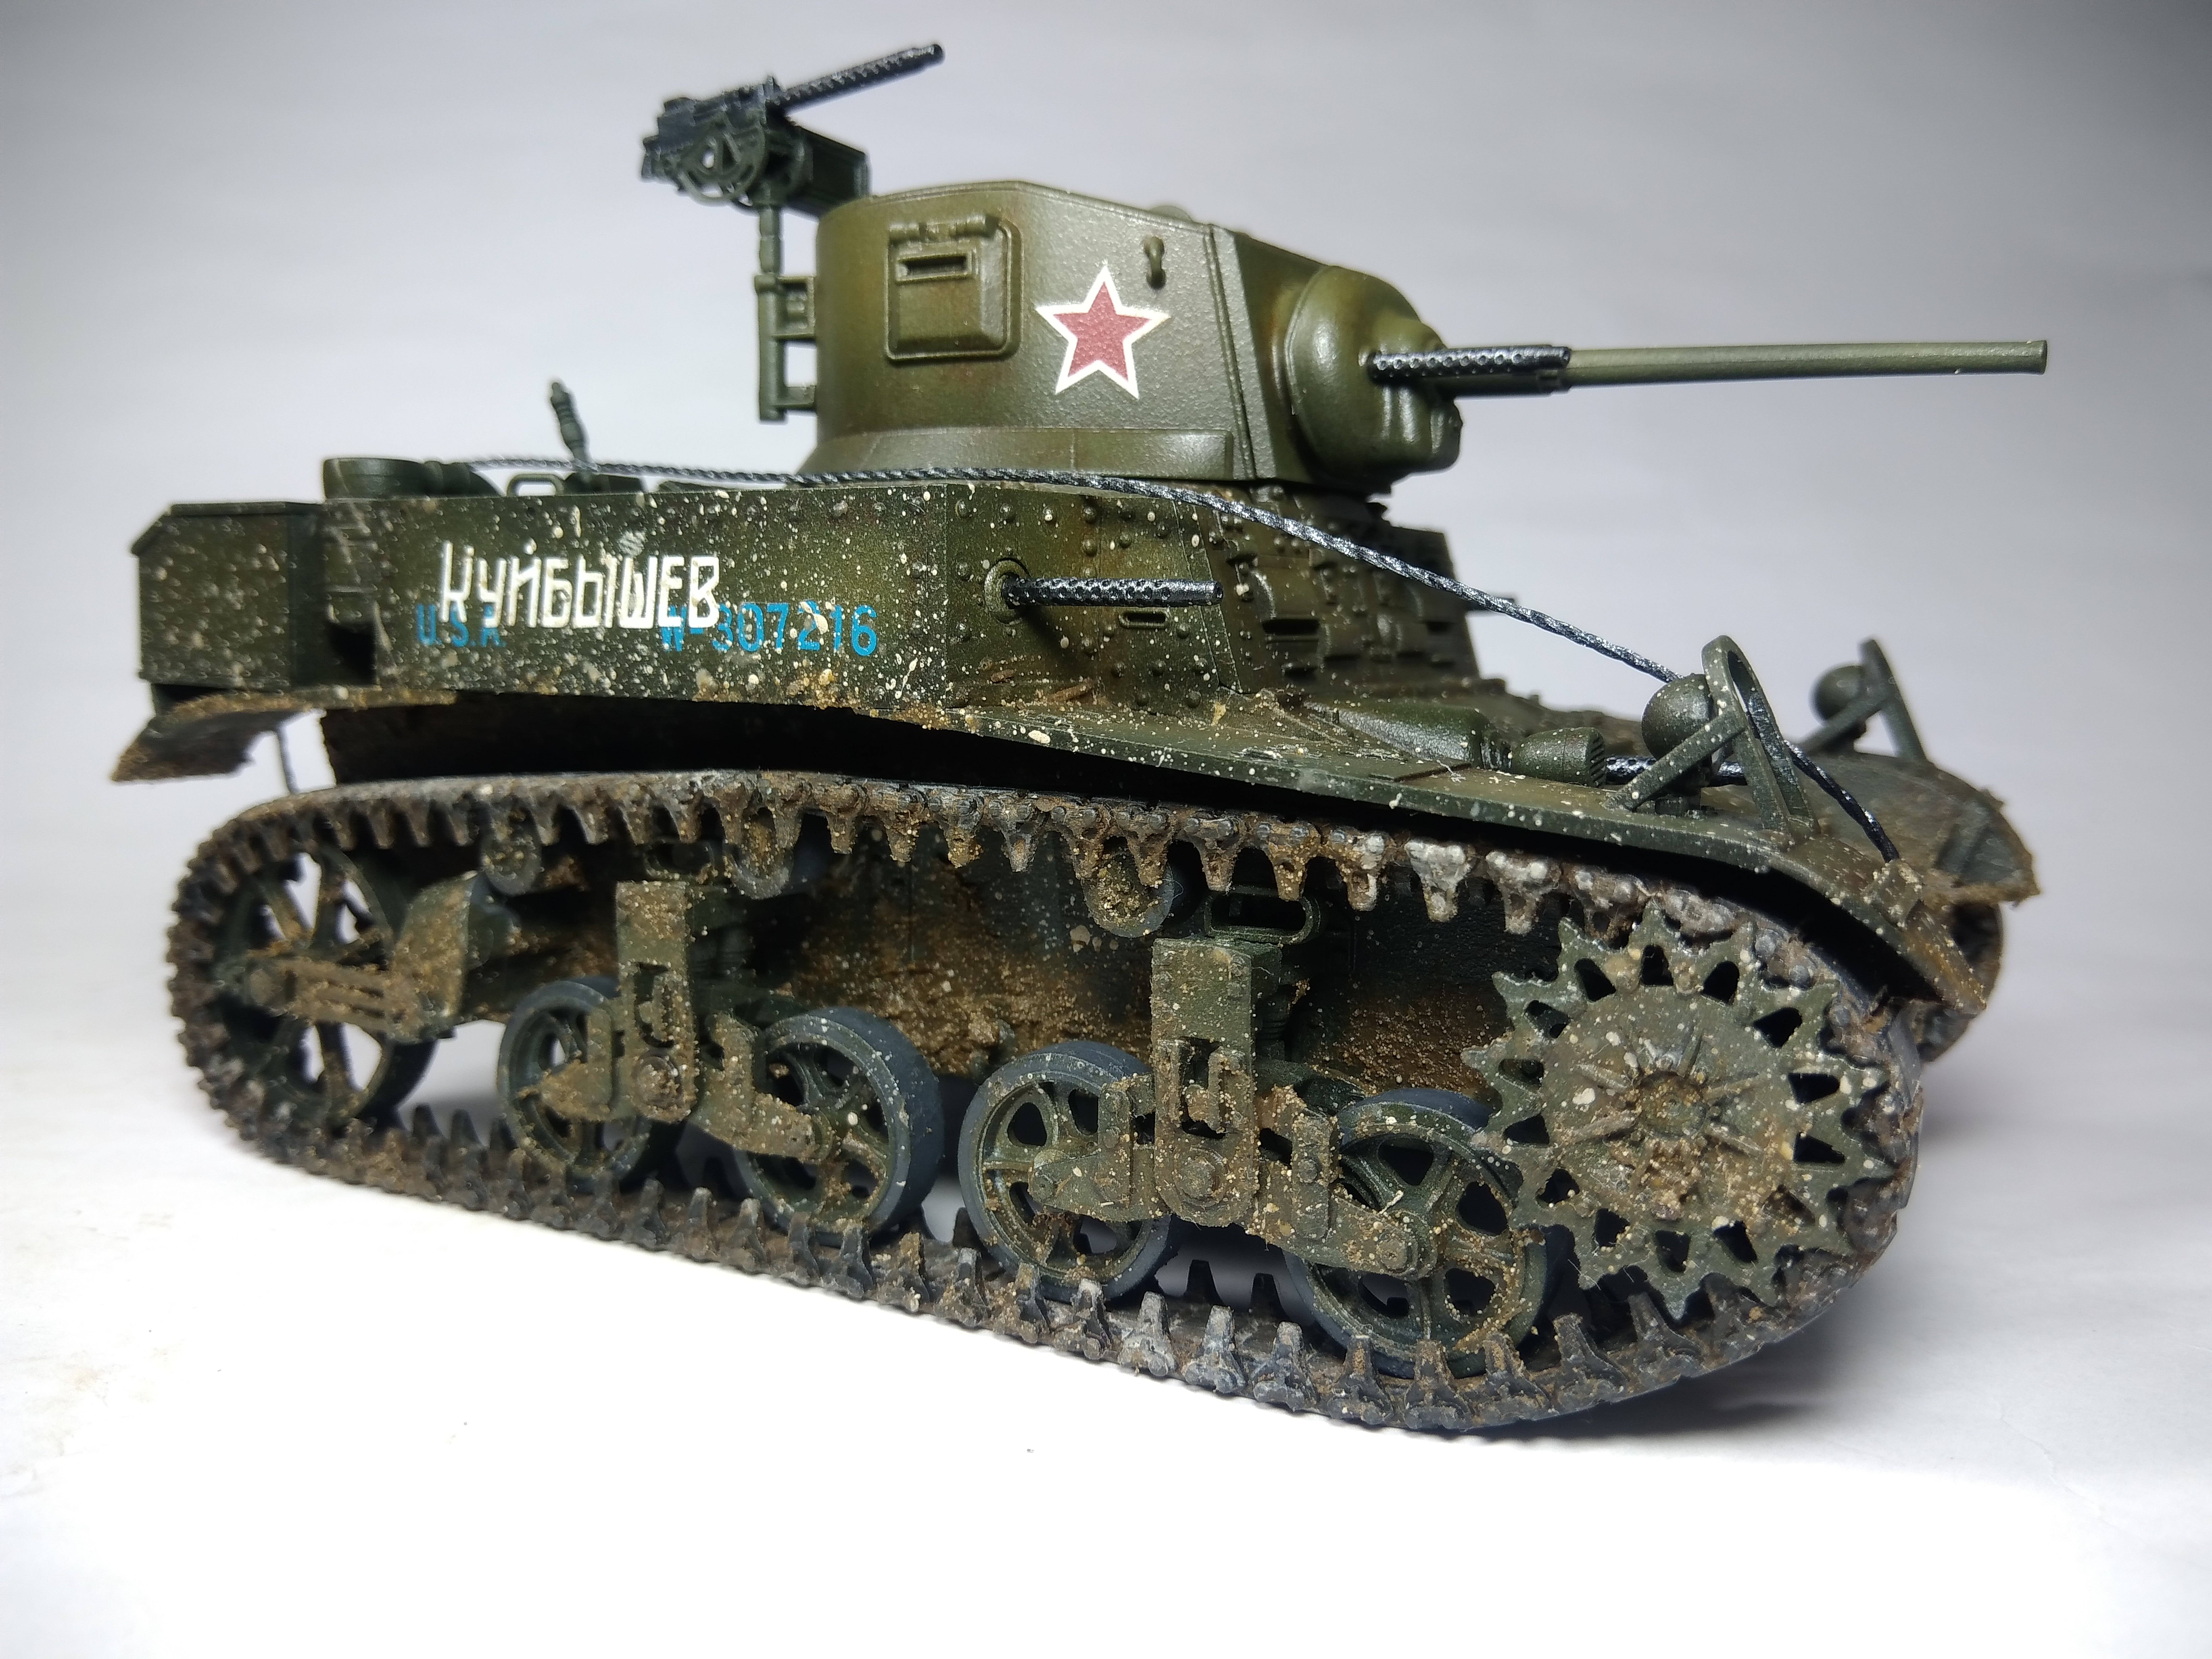
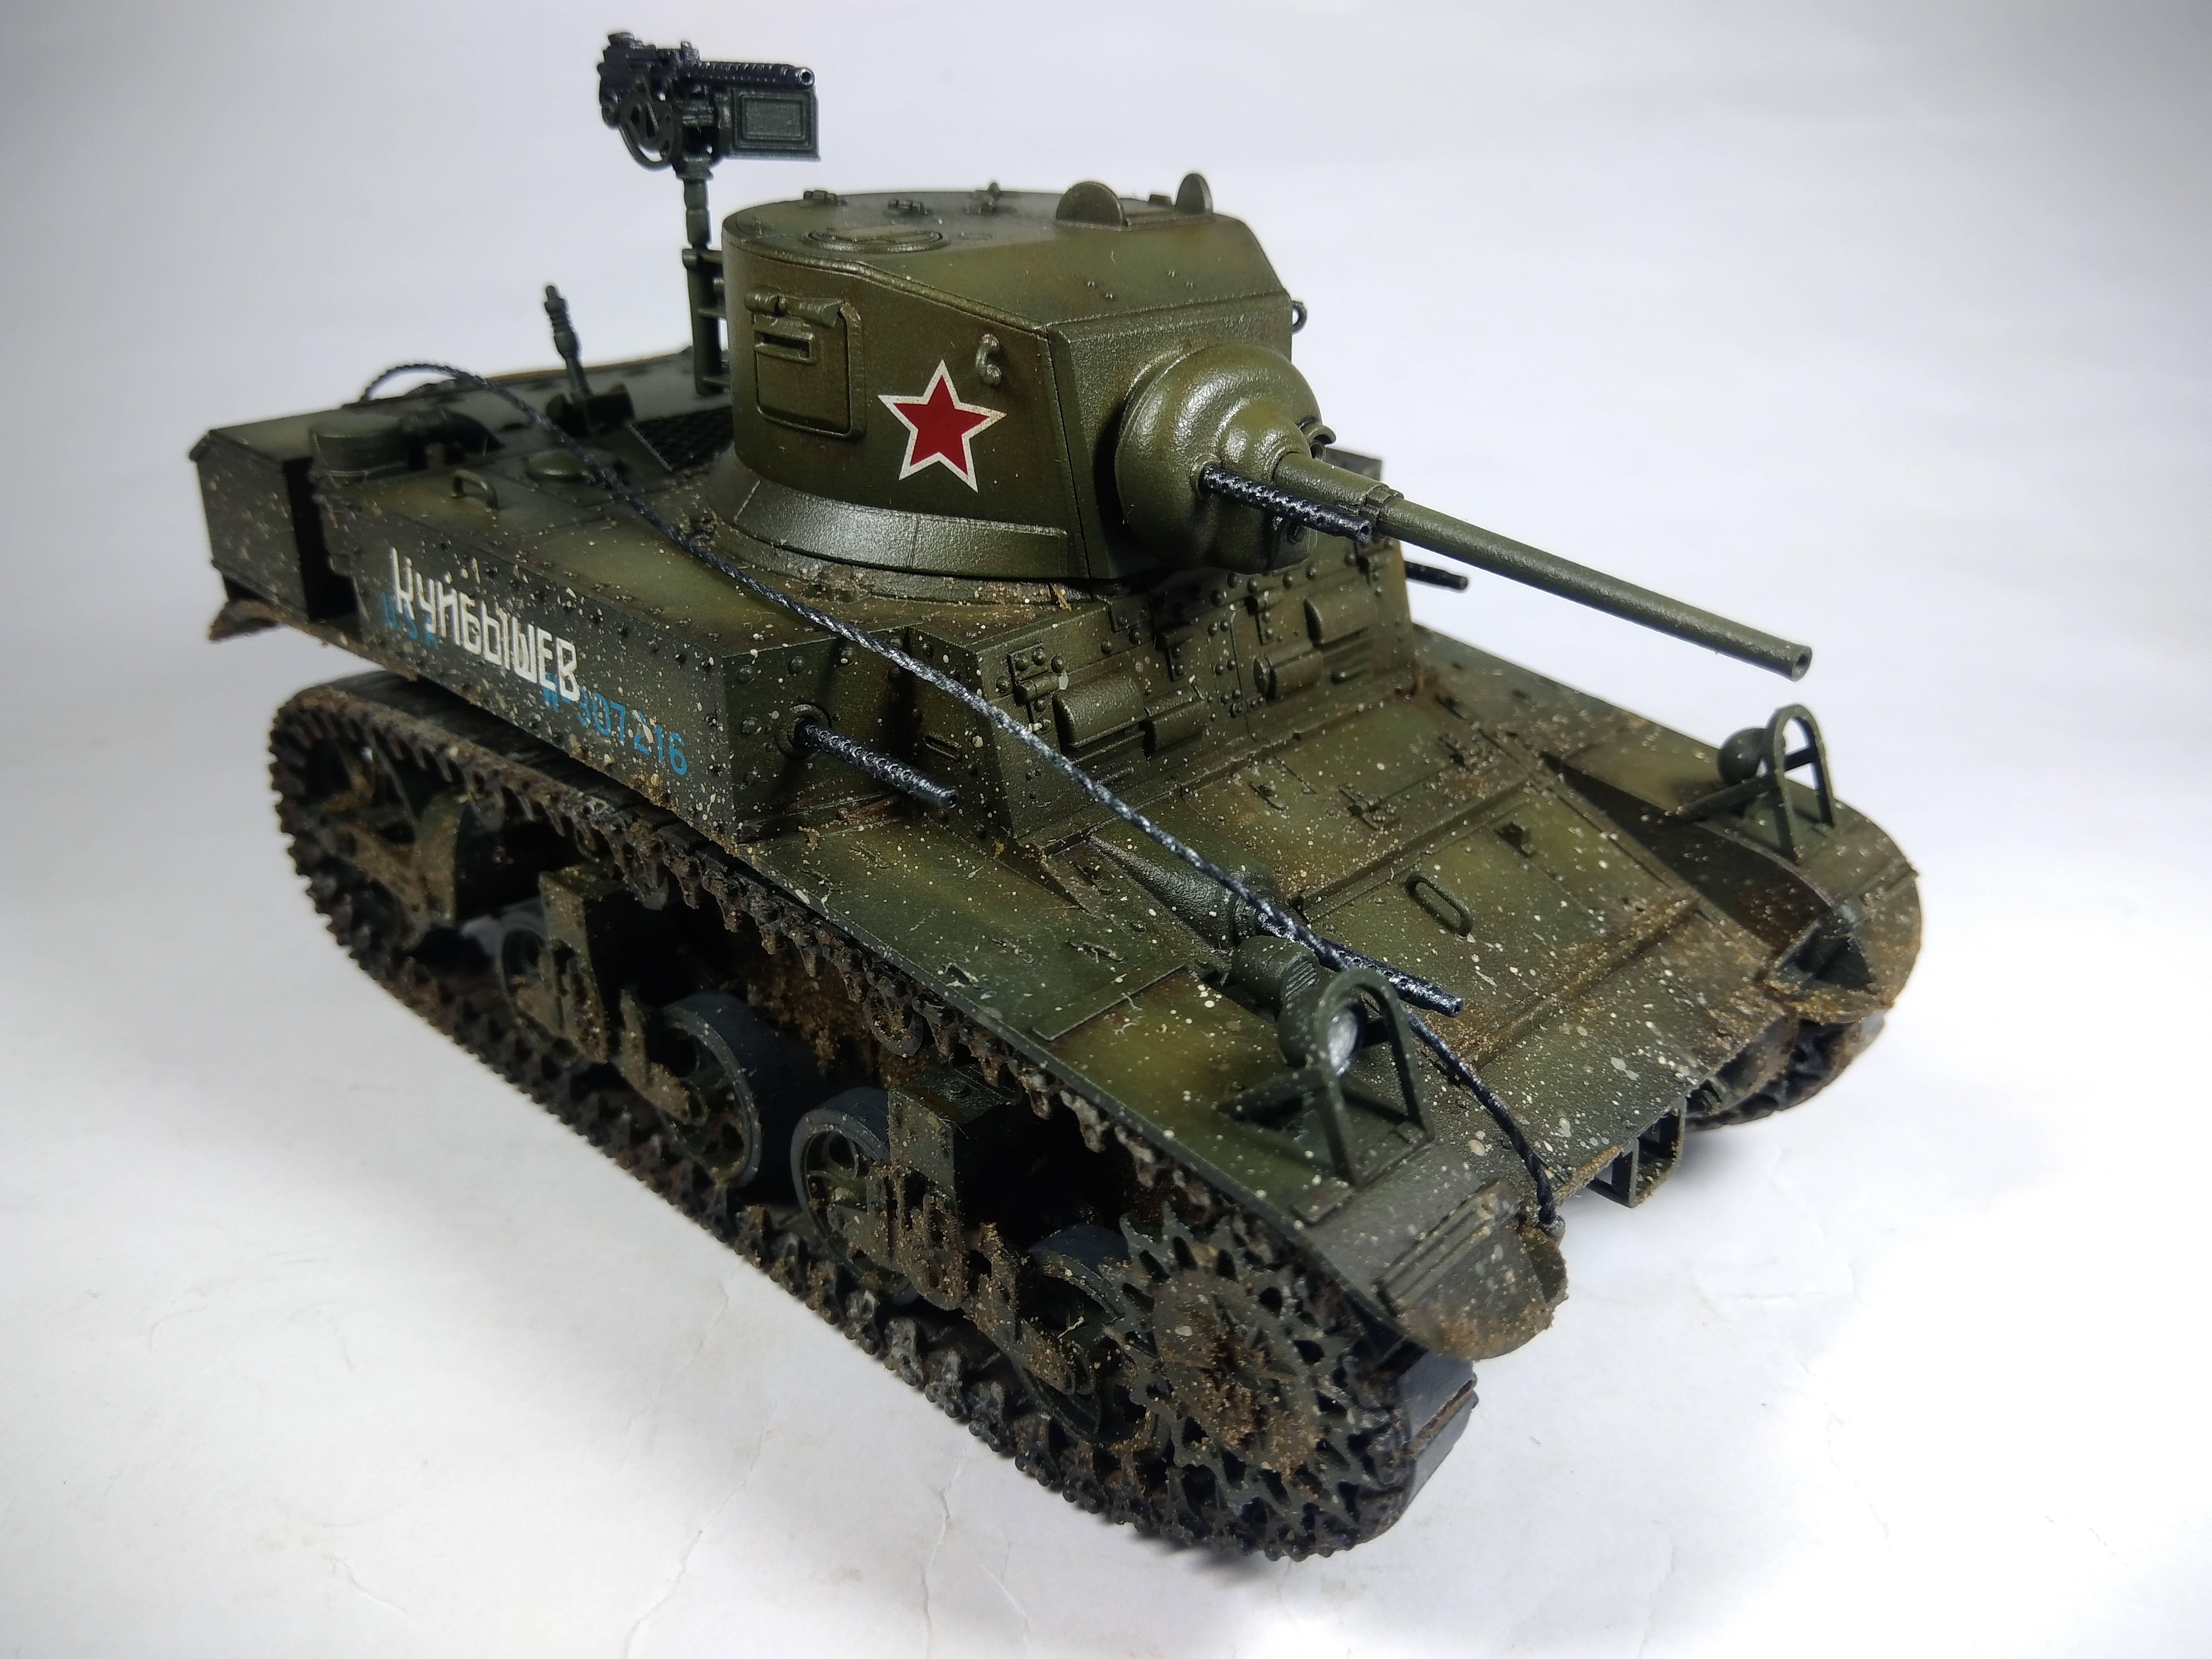
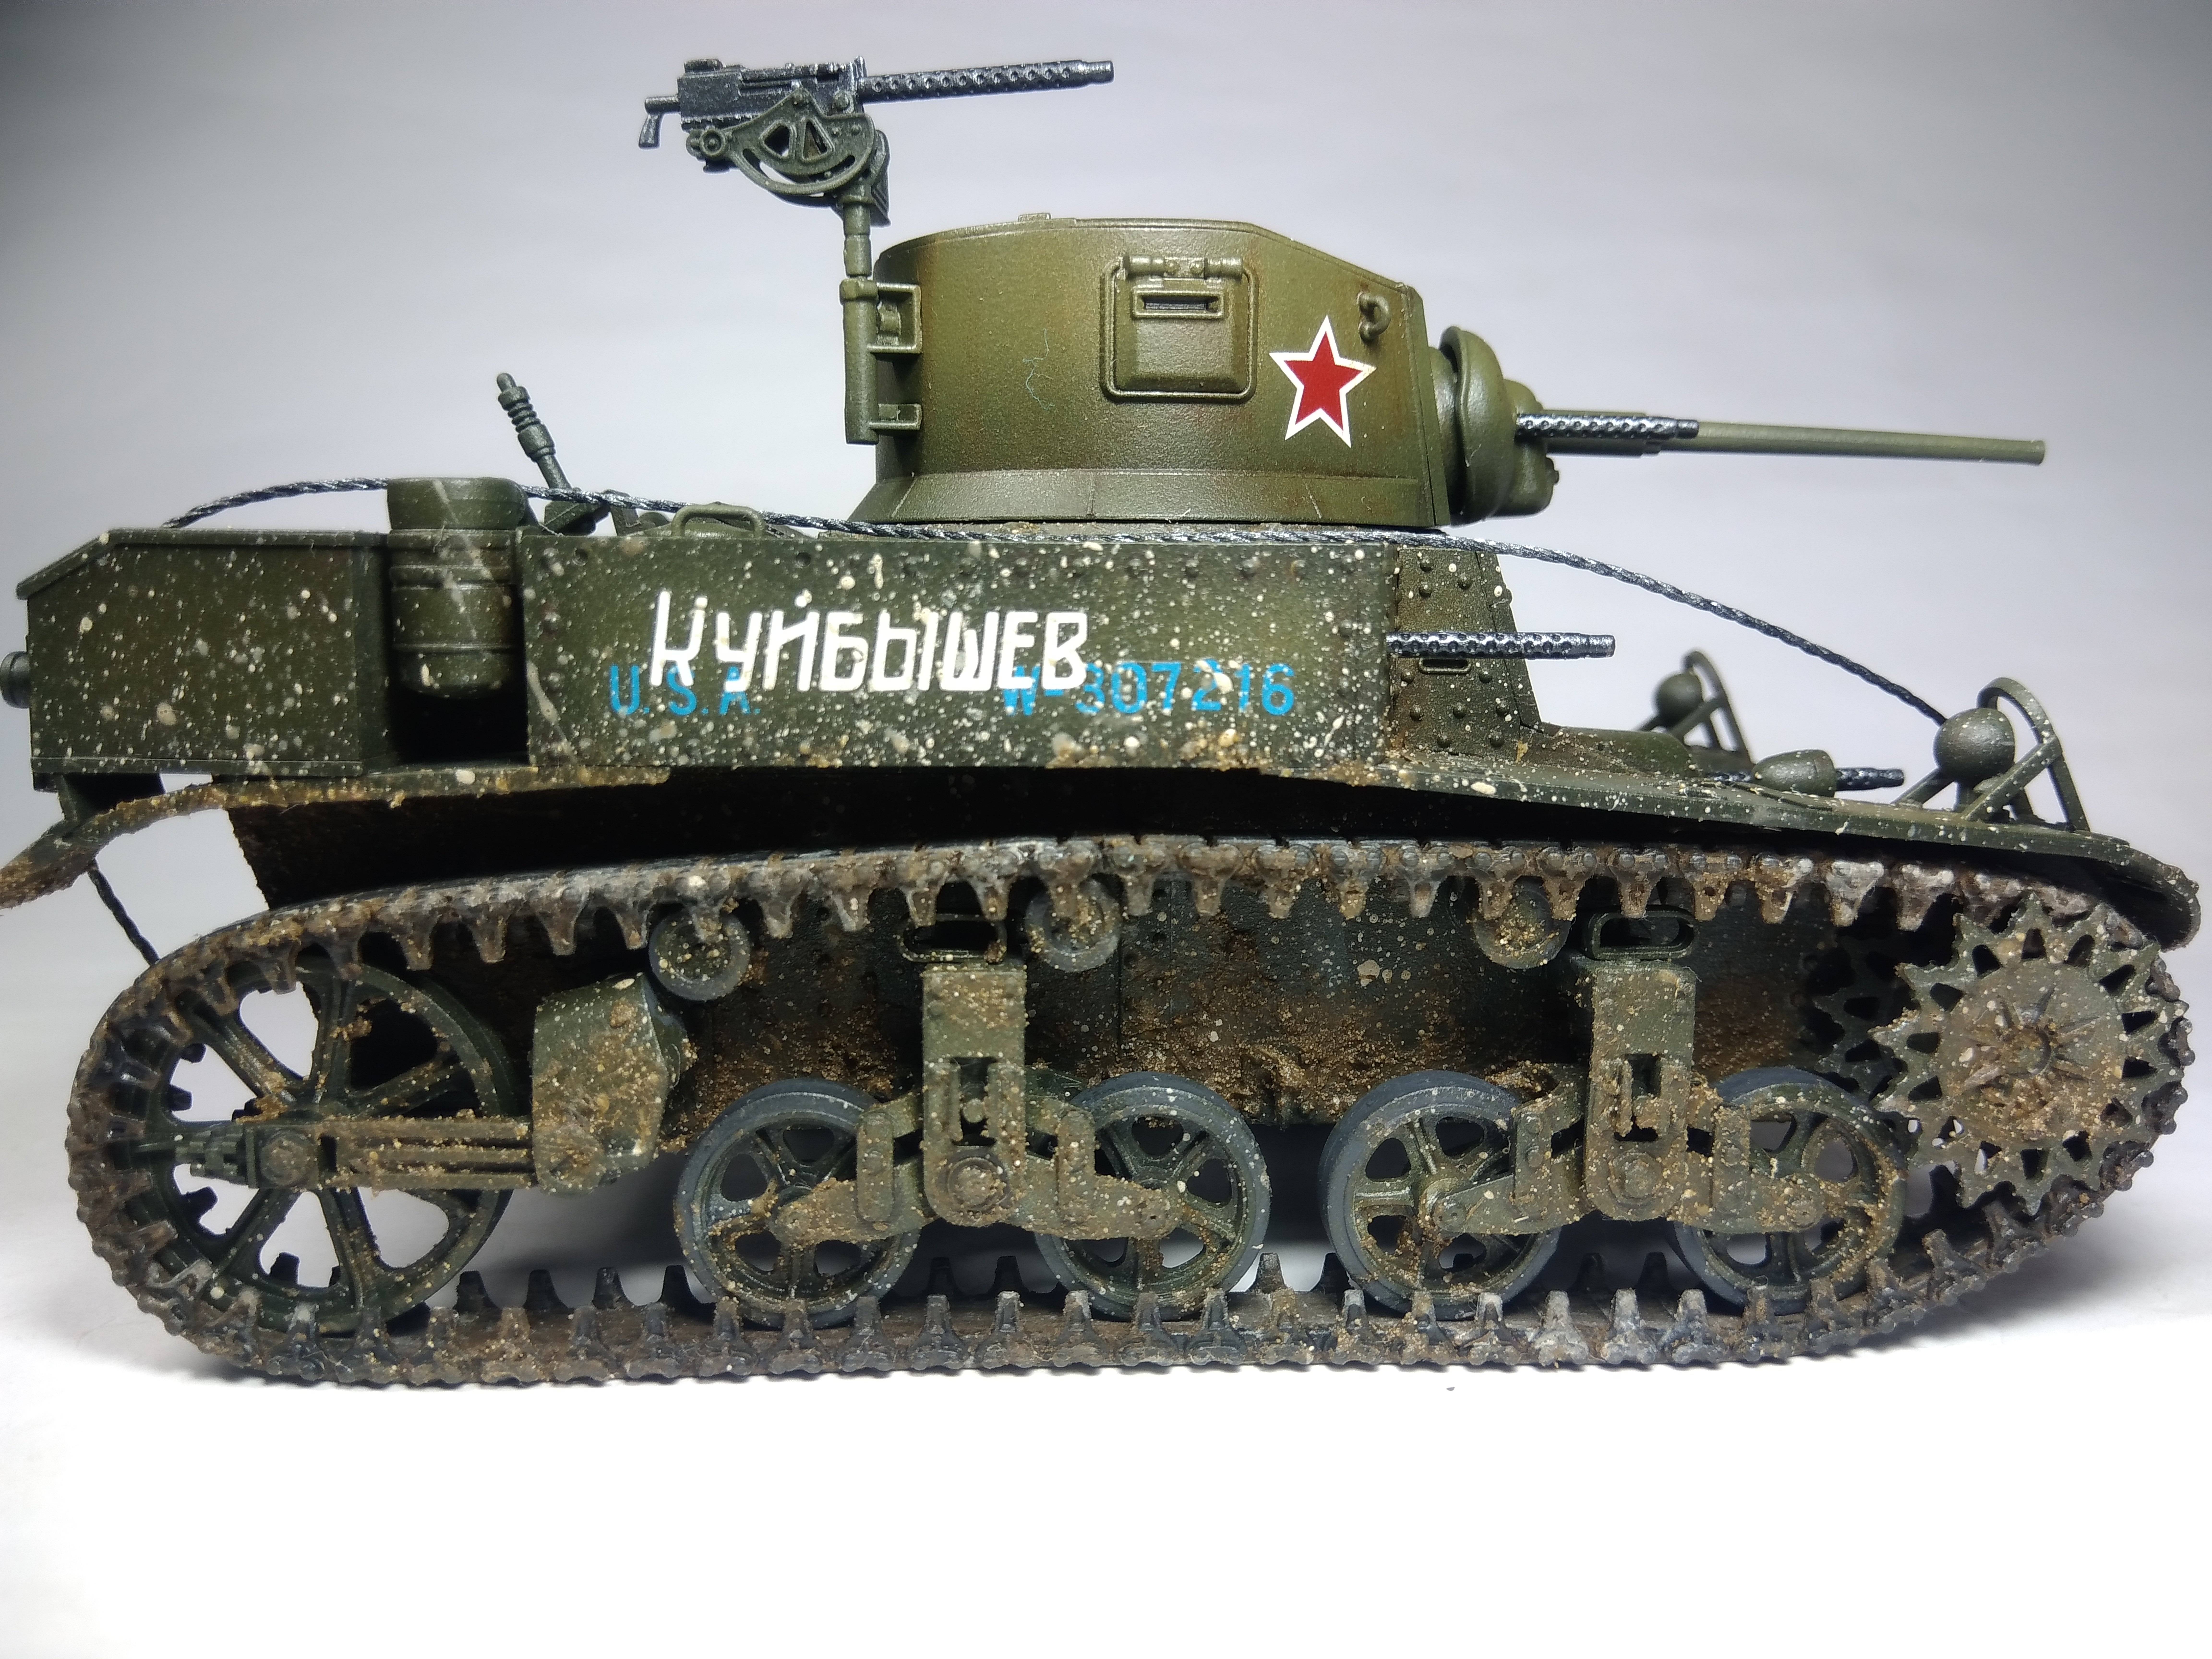
Hi folks! I'd like to share with you my latest work, an M3 Stuart Light tank serving in the Red Army's 241st Tank Brigade.
This tank would take part in the titanic battles fought in and around Stalingrad during the Summer of 1942. The 241st was mostly equipped with Foreign Tanks and made up of relatively newly recruited tankers. The brigade will make the ultimate sacrifice and be mostly annihilated in an attack on German Positions in September 30, 1942
One of the Lend Lease tanks supplied by the Allies, the Stuart would be well received by Soviet Army which was losing tanks at an alarming rate. The crews like the fact that it was mechanically reliable and fast. The 37mm gun compared favorably to the Soviet 45mm and could still fight the smaller panzers the Germans deployed. It also boasted a large amount of machine guns which were quite deadly versus infantry. However, the two side sponsoon mounted MGs only faced forwards and were thus not particularly useful. The tank would continue to see service until the end of the war albeit in much restricted use.
Source:
http://www.o5m6.de/redarmy/m3a1_incombat.php
Would appreciate any of your constructive criticism or comments. Thanks for looking!
Armor/AFV
For discussions on tanks, artillery, jeeps, etc.
Hosted by Darren Baker, Mario Matijasic
Tamiya M3 Stuart Light Tank, Late Production
kunjuro
Philippines
Joined: October 27, 2013
KitMaker: 520 posts
Armorama: 488 posts
Joined: October 27, 2013
KitMaker: 520 posts
Armorama: 488 posts
Posted: Sunday, January 06, 2019 - 03:36 AM UTC
Klaus-Adler
Campaigns Administrator
Scotland, United Kingdom
Joined: June 08, 2015
KitMaker: 1,505 posts
Armorama: 840 posts
Joined: June 08, 2015
KitMaker: 1,505 posts
Armorama: 840 posts
Posted: Sunday, January 06, 2019 - 05:57 AM UTC
that's a very interesting build and i like the lend lease soviet version of the kit. i do have some questions regarding the M3 Stuart but i think i will create a new thread as it's more to do with the British version.
were there any issues in building the kit?
brekinapez
Georgia, United States
Joined: July 26, 2013
KitMaker: 2,272 posts
Armorama: 1,860 posts
Joined: July 26, 2013
KitMaker: 2,272 posts
Armorama: 1,860 posts
Posted: Sunday, January 06, 2019 - 06:30 AM UTC
Quoted Text
that's a very interesting build and i like the lend lease soviet version of the kit. i do have some questions regarding the M3 Stuart but i think i will create a new thread as it's more to do with the British version.
were there any issues in building the kit?
I am building one right now as a Beutepanzer, and the kit goes together quite quickly as per Tamiya's usual ease of assembly.
kunjuro
Philippines
Joined: October 27, 2013
KitMaker: 520 posts
Armorama: 488 posts
Joined: October 27, 2013
KitMaker: 520 posts
Armorama: 488 posts
Posted: Sunday, January 06, 2019 - 11:18 AM UTC
Quoted Text
Quoted Textthat's a very interesting build and i like the lend lease soviet version of the kit. i do have some questions regarding the M3 Stuart but i think i will create a new thread as it's more to do with the British version.
were there any issues in building the kit?
I am building one right now as a Beutepanzer, and the kit goes together quite quickly as per Tamiya's usual ease of assembly.
agreed, this kit was a beauty to build. No issues whatsoever. The tracks also conformed well to the suspension and I didn't have to glue it down on to the wheels to replicate the right amount of sag.
TopSmith
Washington, United States
Joined: August 09, 2002
KitMaker: 1,742 posts
Armorama: 1,658 posts
Joined: August 09, 2002
KitMaker: 1,742 posts
Armorama: 1,658 posts
Posted: Sunday, January 06, 2019 - 05:19 PM UTC
I noticed a bit of a sheen from the clear coat covering the tank. That would be great for a rainy day. If you are looking for a dry day maybe some flat clear or dusting may be the look. Otherwise, it looks great.
Posted: Monday, January 07, 2019 - 09:58 AM UTC
The use of the lighter colour spatters would indicate that it's not actually pissing down rain at the time we're looking at the model, so I would say that it looks too wet for the use of the dry spatters. To indicate that intermediate period, the top of the tank should be indicating it's drying with being wetter towards the bottom of the vertical surfaces. Some of the mud under the superstructure could use a little hint of dryness to it to show this transitional state.
The basic colour is also a bit too even, a bit to monochromatic. There's not enough dirt streaking/oil staining that you see, wet or not, on all heavily used vehicles. I see the modulation, but it does look too even and overall the vehicle looks too clean, notwithstanding the spatters.
Also, the tow rope is too evenly coloured, too new and also too smoothly curved from front to back. Real wire ropes of this size are heavy and in real life this would lay, rather more untidily, down on the surface of the tank. Not following the contours exactly, but not, generally, forming such a smooth arc from front to back.
You might want to thin the headlight guards and the front step with a file. Both are rather thick.
If you are up to adding some small details, then the tools and the two grouser stowage boxes on the rear fenders could use straps to hold them down. An antenna in the flex mount would be nice as well as would wires to the front lights.
I hope it doesn't come across as if I'm dumping on your model. What you've done has been done nicely, I'm just making constructive (I hope) criticisms to help you improve it or your next model.
Paul
kunjuro
Philippines
Joined: October 27, 2013
KitMaker: 520 posts
Armorama: 488 posts
Joined: October 27, 2013
KitMaker: 520 posts
Armorama: 488 posts
Posted: Monday, January 07, 2019 - 04:49 PM UTC
@TopSmith - thanks for pointing that out. I haven't been able to tone down the sheen on the kit very well. I might have to apply another dull coat.
Thank you very much for these pointers! You're not dumping on my work - in fact, this exact criticism is exactly what I'm looking for. I'm not very skilled at my craft yet, so I appreciate in-depth advice left by folks.
For the slightly gloss sheen, would you recommend applying an overall dullcoat to tone everything down, or should I apply a very thin layer of dust with either oils or pigments? I also think that the rear engine deck is a bit too clean. I'm still trying to look for a way to spice things up in that part without making it look out of place or unnatural.
I also tried putting some streaking with oils down on the vehicle, but I guess I didn't do a good enough job making them stand out. I may have removed too much of it. I'll see if I can go over it again with thinned down oils. I avoided scratches as I heard that US Olive Drab was quite a resistant paint that didn't scratch or flake off much. Guess I'll have to resort to the streaking. Question though: are oil or fuel stains on the rear deck common on vehicles or would that be a reflection that the vehicle was not properly maintained by its crew?
Again, thank you for the specific advice and suggestions. I really appreciate it.
Quoted Text
The use of the lighter colour spatters would indicate that it's not actually pissing down rain at the time we're looking at the model, so I would say that it looks too wet for the use of the dry spatters. To indicate that intermediate period, the top of the tank should be indicating it's drying with being wetter towards the bottom of the vertical surfaces. Some of the mud under the superstructure could use a little hint of dryness to it to show this transitional state.
The basic colour is also a bit too even, a bit to monochromatic. There's not enough dirt streaking/oil staining that you see, wet or not, on all heavily used vehicles. I see the modulation, but it does look too even and overall the vehicle looks too clean, notwithstanding the spatters.
Also, the tow rope is too evenly coloured, too new and also too smoothly curved from front to back. Real wire ropes of this size are heavy and in real life this would lay, rather more untidily, down on the surface of the tank. Not following the contours exactly, but not, generally, forming such a smooth arc from front to back.
You might want to thin the headlight guards and the front step with a file. Both are rather thick.
If you are up to adding some small details, then the tools and the two grouser stowage boxes on the rear fenders could use straps to hold them down. An antenna in the flex mount would be nice as well as would wires to the front lights.
I hope it doesn't come across as if I'm dumping on your model. What you've done has been done nicely, I'm just making constructive (I hope) criticisms to help you improve it or your next model.
Paul
Thank you very much for these pointers! You're not dumping on my work - in fact, this exact criticism is exactly what I'm looking for. I'm not very skilled at my craft yet, so I appreciate in-depth advice left by folks.
For the slightly gloss sheen, would you recommend applying an overall dullcoat to tone everything down, or should I apply a very thin layer of dust with either oils or pigments? I also think that the rear engine deck is a bit too clean. I'm still trying to look for a way to spice things up in that part without making it look out of place or unnatural.
I also tried putting some streaking with oils down on the vehicle, but I guess I didn't do a good enough job making them stand out. I may have removed too much of it. I'll see if I can go over it again with thinned down oils. I avoided scratches as I heard that US Olive Drab was quite a resistant paint that didn't scratch or flake off much. Guess I'll have to resort to the streaking. Question though: are oil or fuel stains on the rear deck common on vehicles or would that be a reflection that the vehicle was not properly maintained by its crew?
Again, thank you for the specific advice and suggestions. I really appreciate it.
Posted: Tuesday, January 08, 2019 - 05:27 AM UTC
Quoted Text
@TopSmith - thanks for pointing that out. I haven't been able to tone down the sheen on the kit very well. I might have to apply another dull coat.
You should have been able to get the surface absolutely flat (matte) with a flat overspray. What are you using, if I may ask?
Quoted Text
For the slightly gloss sheen, would you recommend applying an overall dullcoat to tone everything down, or should I apply a very thin layer of dust with either oils or pigments?
Overspray the areas to be dry with a good flat coat. try to modulate that effect to the extend you want areas to be wet or dry. Generally wetter towards the bottom of vertical surfaces and the underside where the suspension is. Make it look a bit dryer than your desired end state as we'll add more wet afterwards.
Once you have the overall level of wet/dry established, you can go in add an overall dark wash to the crevasses and around rivet heads.
Next add some streaking. One of the techniques used for this is to put very small dots of several artists' oil paint colours and then using a brush damp with thinner, streak those dots down the surfaces until most of it is gone, but a continuously varying hint of colour remains, this provides a lot of variation in the finish. You can add or subtract layers of this in several colours all over the vehicle to break up the uniformity of the colour without making major changes. The colours used vary depending on the supposed environment of the model, however, in your case, with it being wet, stick to the darker colours like van dyke brown, brunt sienna, with only a little white, ochre and sienna. You can look up the oil dot technique on YouTube and I'm sure there are a lot of videos there to get you started .
After that dries (and it will take days with oils, so don't rush it) you can now come back and add more wet where you want it to creep back up into the dry areas. Remembering that water accumulates in the corners and such, areas around welds, rivets, indentation etc. will have a bit more gloss/wet look than open flat areas. I like to use pictures of construction equipment to get a feel for where and how water and mud accumulate in real life.
When all that dries you can add some pigments, sparingly as you don't want to get the dry into the wet areas, to provide interest , but remember, it's just been raining, so even this dust can be streaked to show interest.
There are a whole lot more methods to get the effects you want and there are a lot of sites and videos out there to help you along. Study them and practice.
And remember, you're absolutely not going to produce models like you see from the best guys without many years of practice, so if your end result is something that doesn't look amazing, remember not to beat yourself up about it. The good guys do this a LOT and have been doing it for many years. Your basic building techniques are on solid ground and you already have a good start with this model.
Just keep plugging.
As for the rear deck, gasoline residue (that light brown/grey staining that also picks up dirt and oil) around the gas caps are definitely a thing and do not indicate poor maintenance. These guys were busy fighting a war. Cleaning up every dribble of oil or gas simply wasn't a priority. In peacetime, the RSM would make you spit polish your tank twice a day. In wartime, he's trying to make sure his people aren't getting killed. Tanks got and still get incredibly dirty and beat up in combat.
Paul