Small steel bridges for many applications
Rhone, France
Joined: December 02, 2002
KitMaker: 12,719 posts
Armorama: 12,507 posts
Posted: Tuesday, February 05, 2019 - 08:42 PM UTC
Here are a few more period pics (but I don't want to derail your original thread

)


I guess the pictured truck is a Büssing-Nag Type 500 A:

You'll find more German bridging equipment pics (only if you need them
) in this thread :
https://forum.axishistory.com/viewtopic.php?f=20&t=168276&hilit=bruckengerat#p1489677 H.P.
"Find the Bastards, then Pile On"
Col. George W.Patton III 's standing order for the troopers of the 11th Armoured Cavalry Regiment

#521
Kentucky, United States
Joined: April 13, 2011
KitMaker: 9,465 posts
Armorama: 8,695 posts
Posted: Tuesday, February 05, 2019 - 09:33 PM UTC
Frenchy, derail all you want!
(We'll just bring out the "Big Hook" and get things right back on track!)
For the moment you certainly have my attention focused on the question whether (regardless of scale) any available model railroad bridge truss comes close to approximating the individual K-Bridge equipment? Today I purchased some used N scale model railroad bridges to pursue this very question.
So no danger of a derail!
As such I think we are very much "on topic" for this thread.
Mike
Rhone, France
Joined: December 02, 2002
KitMaker: 12,719 posts
Armorama: 12,507 posts
Posted: Wednesday, February 06, 2019 - 12:57 AM UTC
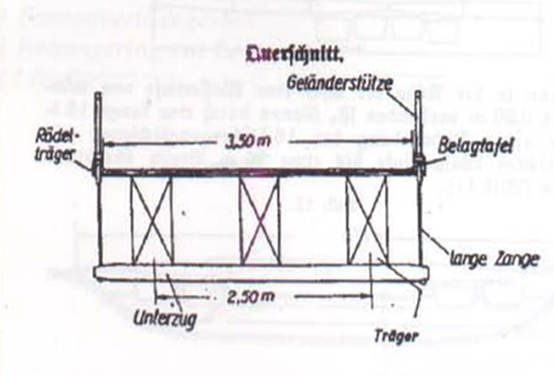
According to the German book, the "end" section (the one with a slope) of the K-Gerät bridge should be 480cm long and 220cm wide. The middle section is 480cm long, 220cm wide and 100cm high.
H.P.
"Find the Bastards, then Pile On"
Col. George W.Patton III 's standing order for the troopers of the 11th Armoured Cavalry Regiment
#521
Kentucky, United States
Joined: April 13, 2011
KitMaker: 9,465 posts
Armorama: 8,695 posts
Posted: Friday, February 08, 2019 - 01:45 PM UTC
Not my first Rodeo! -- I have been repurposing bridges since the late seventies.
As you can probably tell, this HO scale bridge approach is made up from a number of repurposed O gauge 2-track signal bridges which then became the trestles and piers that formed the approach to what was to be a much longer bridge. This structure was intended to cross an aisle and connect to the rest of my logging railroad empire on the opposite side of the room.
Built around 1978, I dug this one out of the warehouse to illustrate this thread. Both tower bents originally sat on carved balsa wood "stone" piers anchored to my benchwork. The track level height was 62" off the floor.
(I like to view my models at almost eye level, I feel that makes them look more real and also forces me to do a better job on detailing.)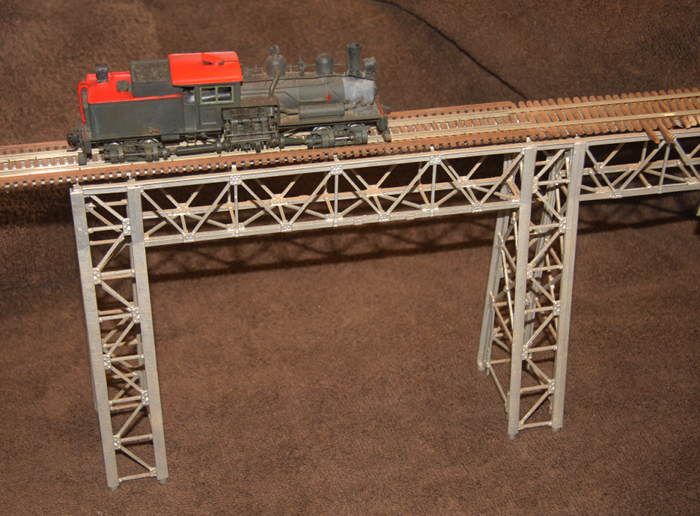 Below are shown the separate parts to the O gauge signal bridge used:
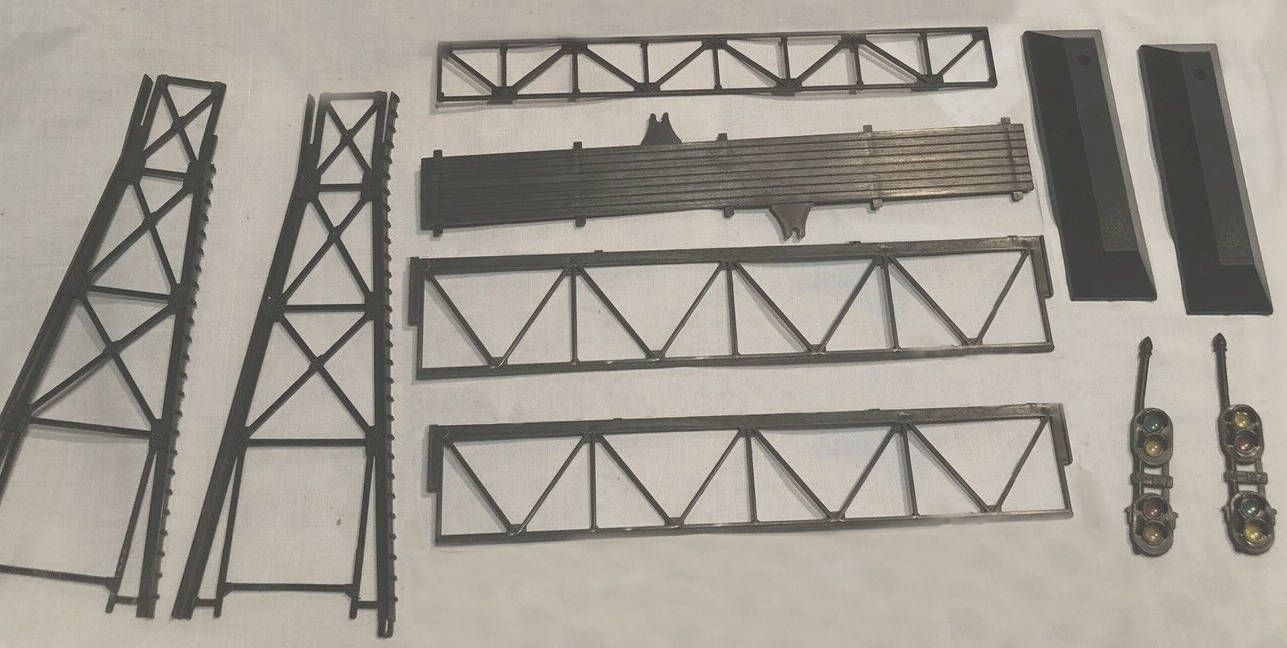
Seen also in the photo is my kit-bashed HO 70 ton 2-truck Shay locomotive built from a former PFM brass 3-truck Shay. (I just never cared for the proportions of that B3 loco anyway, AND besides, I had always wanted a really nice heavy 2-truck Shay.)
As you can also tell I have been running my model "chop-shop" since the seventies as well. #521
Kentucky, United States
Joined: April 13, 2011
KitMaker: 9,465 posts
Armorama: 8,695 posts
Posted: Friday, February 08, 2019 - 02:02 PM UTC
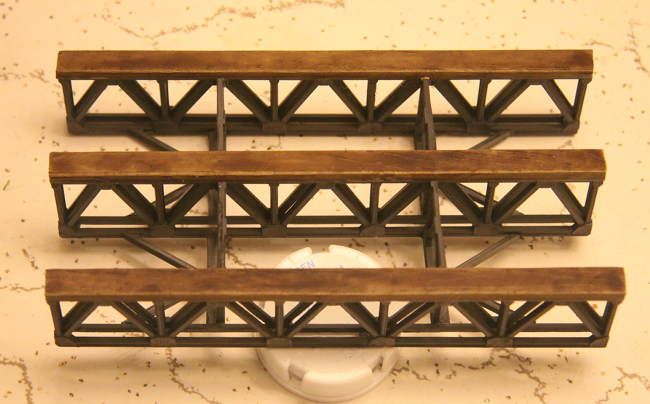
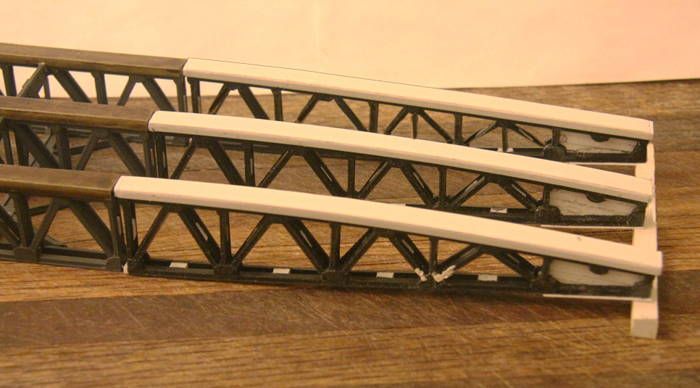
This photo shows the four HO Warren deck truss bridges that I spliced together to form the main span of that future aisle way crossing bridge.
Unfortunately the layout lasted just slightly longer than the marriage so the portion of my empire on the other side of the valley (aisle way) never got built. The silver approach bridge however was installed and was operational throughout most of that time.
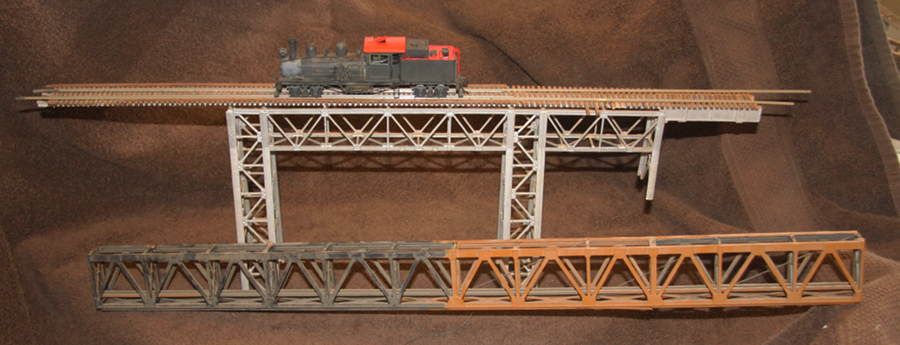 There was originally one more silver trestle section to the left before reaching the primary support pier for the main span. However that appears to have been broken off and lost somewhere in my warehouse.
#521
Kentucky, United States
Joined: April 13, 2011
KitMaker: 9,465 posts
Armorama: 8,695 posts
Posted: Saturday, February 09, 2019 - 10:08 AM UTC
Color test: Status on my 1/35th scale railroad bridge:
The plan is to use a textured buff tan for the abutments (Home Depot textured paint) and sage green for the steel bridge. Both colors will be weathered before completion.
I'm using my favorite Woodland Scenics "cinder" shade of ballast there.
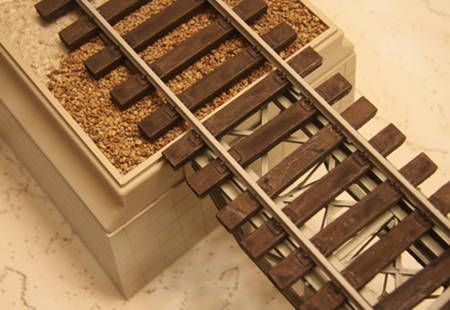
The rails will be painted rust with a silver top.
#521
Kentucky, United States
Joined: April 13, 2011
KitMaker: 9,465 posts
Armorama: 8,695 posts
Posted: Sunday, February 17, 2019 - 12:46 AM UTC
#521
Kentucky, United States
Joined: April 13, 2011
KitMaker: 9,465 posts
Armorama: 8,695 posts
Posted: Sunday, February 17, 2019 - 01:11 AM UTC
#521
Kentucky, United States
Joined: April 13, 2011
KitMaker: 9,465 posts
Armorama: 8,695 posts
Posted: Sunday, February 17, 2019 - 02:57 AM UTC
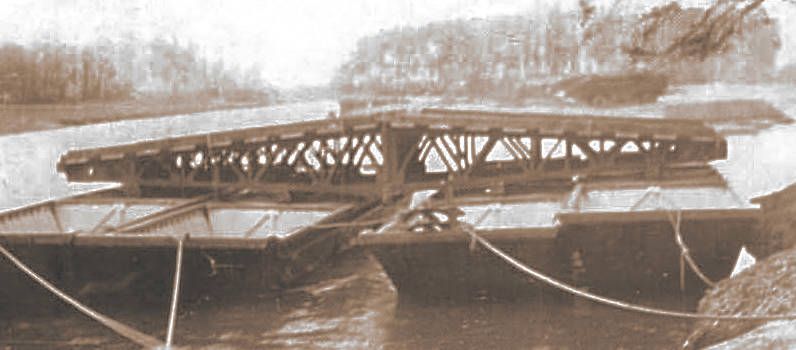
My next challenge:
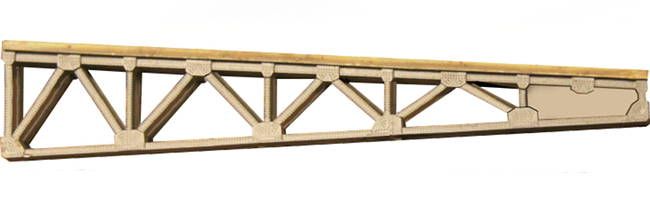
My next challenge, and one that I am not sure if I can tackle, is to alter these same "toy" train bridge trusses to form a respectable rendition of the tapered end sections to the K-Gerät as shown here.
#521
Kentucky, United States
Joined: April 13, 2011
KitMaker: 9,465 posts
Armorama: 8,695 posts
Posted: Sunday, February 17, 2019 - 03:16 AM UTC
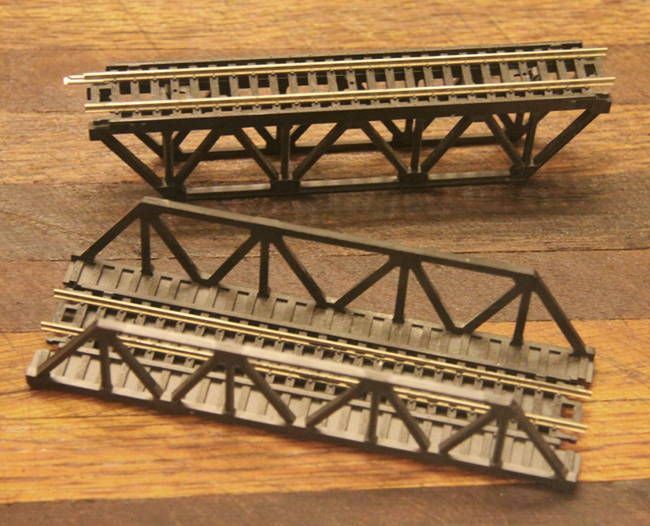
One question - so far without an answer!
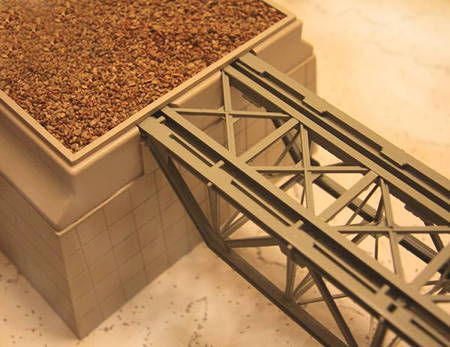
See the difference between these two tapered sections?
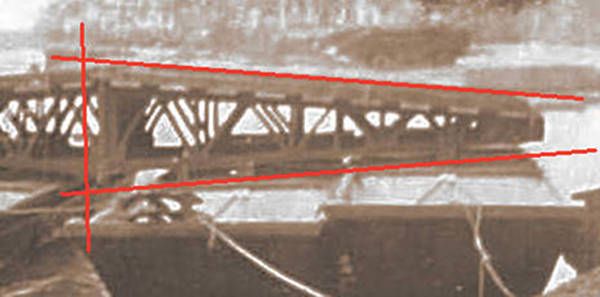
In the upper photo the uprights of the truss are perpendicular to the top deck. Only the bottom tapers. (Please disregard that "holy" beam sitting on top of the taper. I know what that is and it's a separate beam just sitting on the piece below.)
In the second photo both the top and bottom beams taper and the uprights are not perpendicular to either.
(The bottom style appears to have been more common. However the top style would be much easier for me to build with the materials currently at hand.)
#521
Kentucky, United States
Joined: April 13, 2011
KitMaker: 9,465 posts
Armorama: 8,695 posts
Posted: Sunday, February 17, 2019 - 06:57 AM UTC
I can take a photo and cut it up like making paper dolls but the question is; can I do the same with the plastic trusses - and can I do it repeatedly twelve times??? (Some Photoshop work here!)
#521
Kentucky, United States
Joined: April 13, 2011
KitMaker: 9,465 posts
Armorama: 8,695 posts
Posted: Sunday, February 17, 2019 - 09:54 AM UTC
The start of my little drawing that then got carried away.

#521
Kentucky, United States
Joined: April 13, 2011
KitMaker: 9,465 posts
Armorama: 8,695 posts
Posted: Sunday, February 17, 2019 - 10:28 AM UTC
#521
Kentucky, United States
Joined: April 13, 2011
KitMaker: 9,465 posts
Armorama: 8,695 posts
Posted: Sunday, February 17, 2019 - 11:22 PM UTC
#521
Kentucky, United States
Joined: April 13, 2011
KitMaker: 9,465 posts
Armorama: 8,695 posts
Posted: Tuesday, February 19, 2019 - 04:57 PM UTC
If you check the period reference photos shown above on these pioneer bridges it seems every bridge makes use of multiple Sturmbrucke. These small bridging planks were used to transition the vehicles from the dirt roadway up onto the larger K-Gerät bridge. So I thought I had better order a few. I now have these and six more on order and on the way.
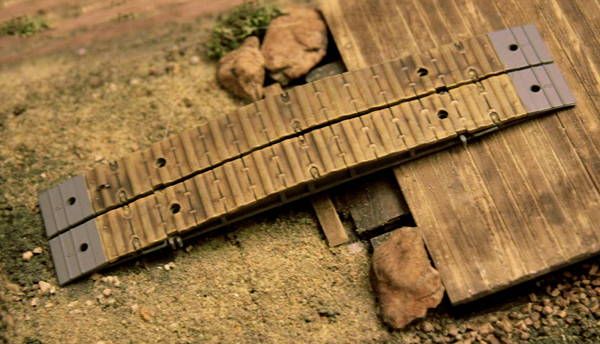
Use of these Sturmbrucke keeps the vehicles from damaging the bridge approach ramps. Also it keeps the vehicles crossing the bridge from inadvertently moving the bridge structure around and possibly pushing it off its' temporary foundations as they "bump up" onto the bridge.
#521
Kentucky, United States
Joined: April 13, 2011
KitMaker: 9,465 posts
Armorama: 8,695 posts
Posted: Friday, March 01, 2019 - 12:27 AM UTC
Sooooo much work yet to do!

The tapered end trusses are still not fully completed and I need to build TWO MORE complete assemblies just like this one!
Bangkok, Thailand / ไทย
Joined: September 17, 2013
KitMaker: 1,617 posts
Armorama: 1,150 posts
Posted: Friday, March 01, 2019 - 01:36 PM UTC
Nice work Michael.
Kind regards,
Robert Jan

#521
Kentucky, United States
Joined: April 13, 2011
KitMaker: 9,465 posts
Armorama: 8,695 posts
Posted: Monday, March 04, 2019 - 07:20 PM UTC
Thank you Robert.
________________________________________
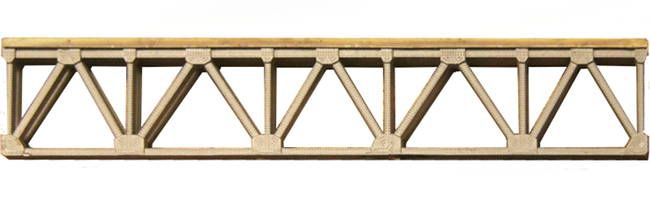
First fully assembled bridge truss section:
REAL - (No Photoshop)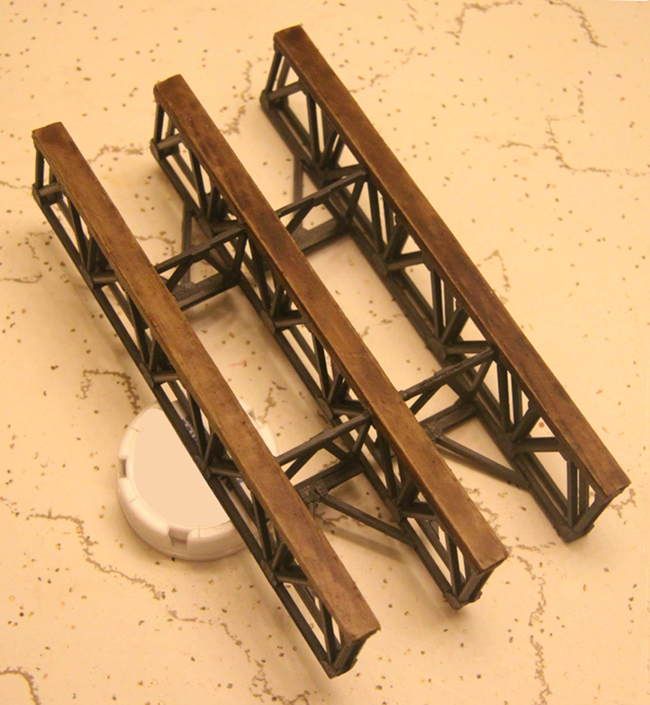
#521
Kentucky, United States
Joined: April 13, 2011
KitMaker: 9,465 posts
Armorama: 8,695 posts
Posted: Monday, March 04, 2019 - 08:23 PM UTC
Center to center spacing of the outside trusses was 2.5 meters. (Approximately the tread width of the Panzer III and IV.) Overall width of the finished roadway was 3.5 meters which also included a heavy wooden curbing running along each side.
#521
Kentucky, United States
Joined: April 13, 2011
KitMaker: 9,465 posts
Armorama: 8,695 posts
Posted: Thursday, March 07, 2019 - 05:27 AM UTC
More progress, this time on the approach trusses - half a bridge is better than none!
North Carolina, United States
Joined: April 29, 2014
KitMaker: 1,112 posts
Armorama: 886 posts
Posted: Saturday, March 09, 2019 - 12:38 AM UTC
I like how that is turning out. Great use of other materials. I sent you a PM.
#521
Kentucky, United States
Joined: April 13, 2011
KitMaker: 9,465 posts
Armorama: 8,695 posts
Posted: Saturday, March 09, 2019 - 08:58 AM UTC
Thanks Ryan
I am succeeding (I think) in doing a more or less clean build here but there are just so many compromises popping up as departures from the original I am starting to have my reservations.
#521
Kentucky, United States
Joined: April 13, 2011
KitMaker: 9,465 posts
Armorama: 8,695 posts
Posted: Saturday, March 09, 2019 - 12:13 PM UTC
I'm no good at molding resin but the real solution here would have been to make one straight truss, one left and one right handed tapered truss as masters and then cast all the needed parts in resin.
And of course 3D printed parts would have been even better and more highly detailed!
JPTRR
 Managing Editor
#051
Tennessee, United States
Joined: December 21, 2002
KitMaker: 7,772 posts
Armorama: 2,447 posts
Posted: Sunday, November 10, 2019 - 04:23 PM UTC
Hi Michael,
How is your bridge progressing? This has been such a great thread, I look forward to more posts.
If they demand your loyalty, give them integrity; if they demand integrity, give them your loyalty.--Col John Boyd, USAF
Any plan where you lose your hat is a bad plan.
#521
Kentucky, United States
Joined: April 13, 2011
KitMaker: 9,465 posts
Armorama: 8,695 posts
Posted: Monday, November 11, 2019 - 12:08 PM UTC
Sorry Fred no progress on either the railroad truss bridge or the German K bridge. However I have a fairly good excuse; been working on a 1/35th scale steam locomotive and also have now just completed painting and relettering three On30 freight cars.
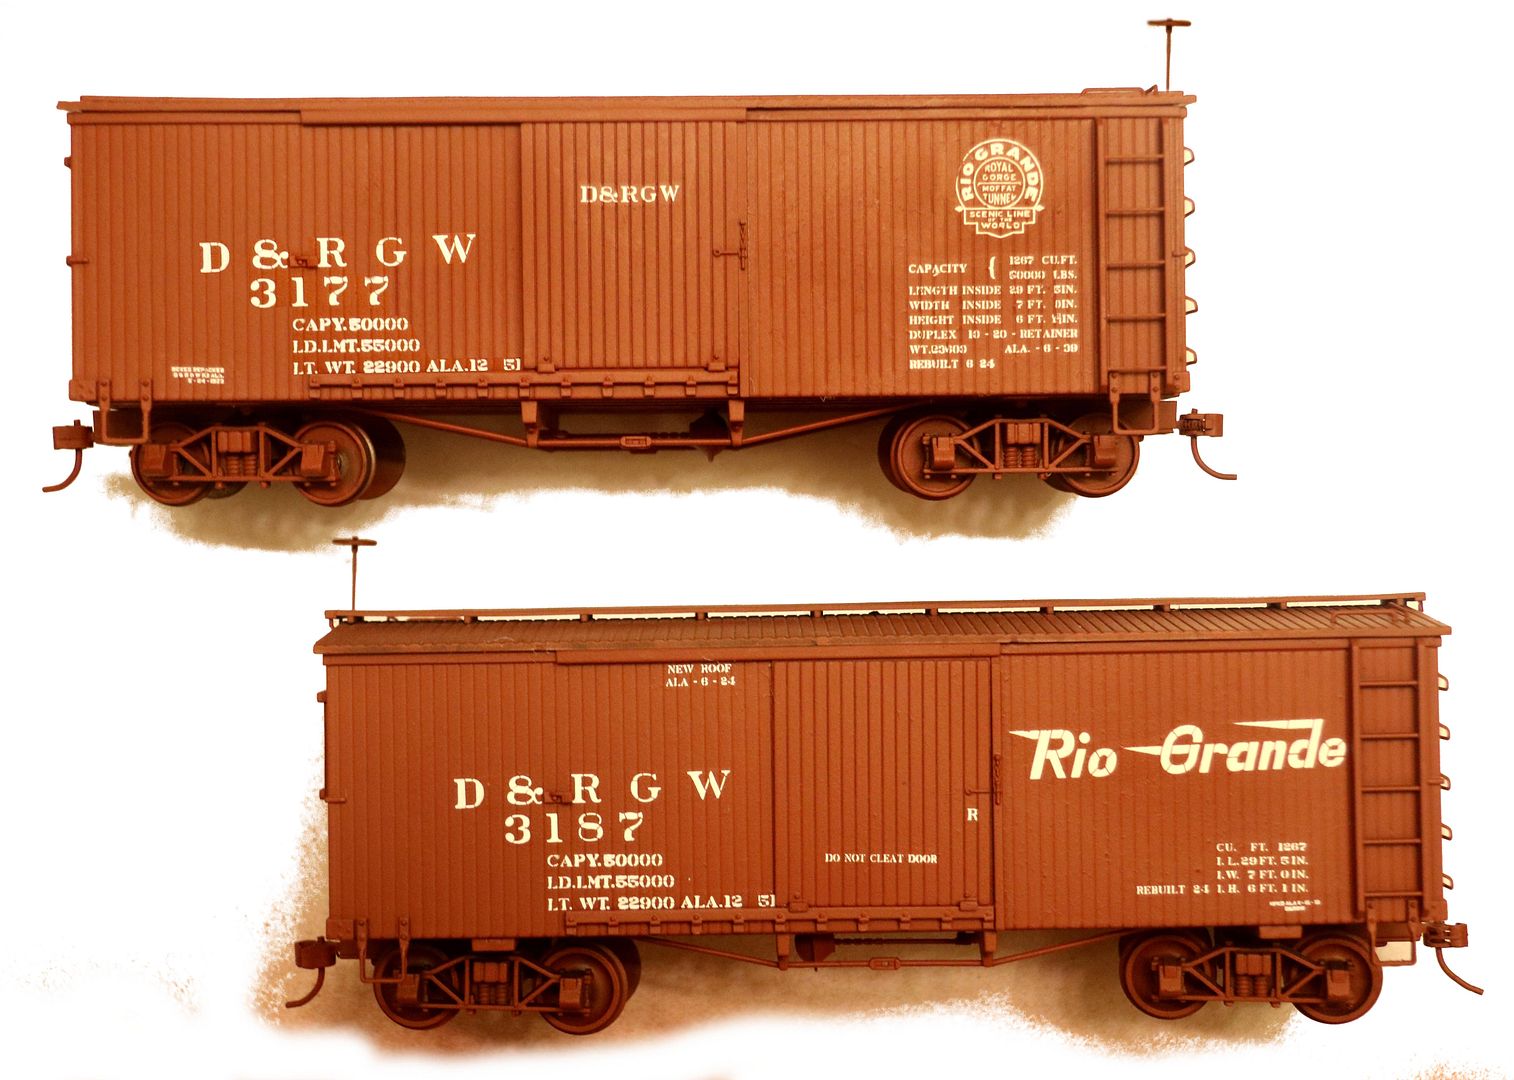
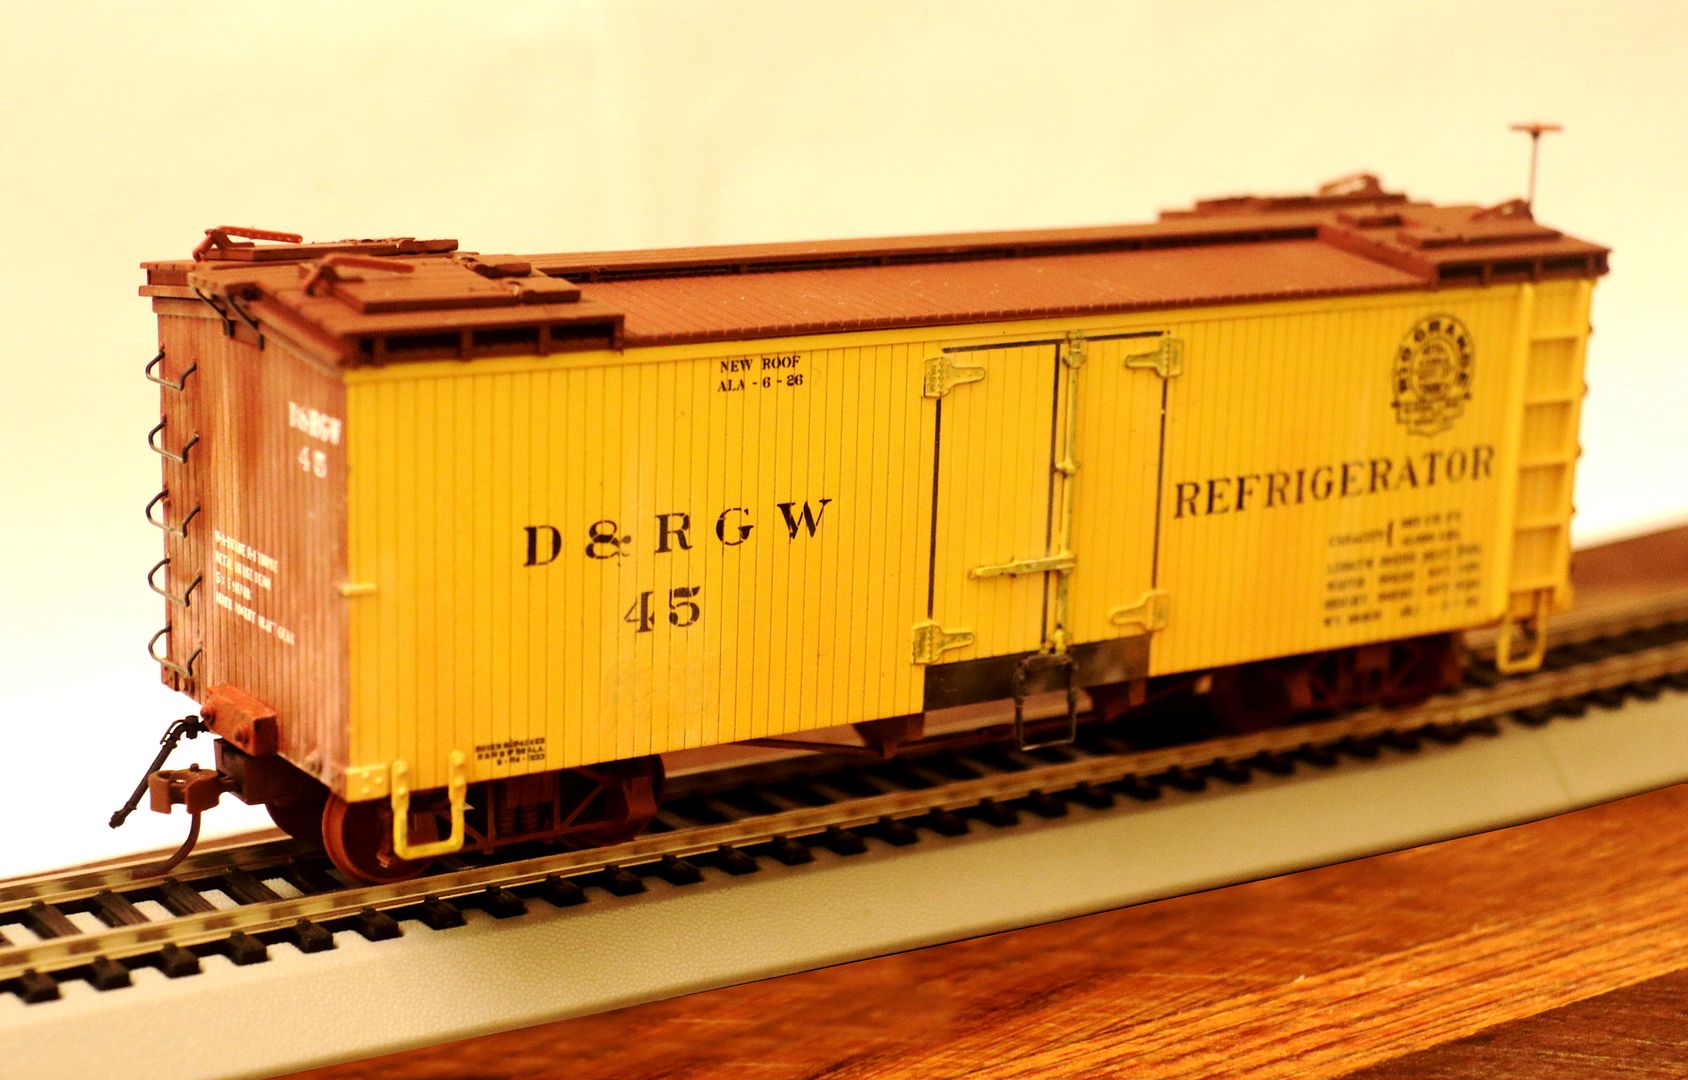
(Too soon for the locomotive.)


 [/URL]


