Hosted by Darren Baker
Putting Together The Chieftain Hull
long_tom

Joined: March 18, 2006
KitMaker: 2,362 posts
Armorama: 2,005 posts

Posted: Monday, April 22, 2019 - 02:22 PM UTC
Problem: I'm trying to dry fit the three main pieces of the Chieftain Mark 2 hull. The instructions don't help, and I cannot for the life of me figure out how they're supposed to go together! Has anyone tried it yet?

RobinNilsson

Joined: November 29, 2006
KitMaker: 6,693 posts
Armorama: 5,562 posts

Posted: Monday, April 22, 2019 - 06:17 PM UTC
The upper hull has small edge or lip at the front end. This lip overlaps the lower hull slightly.
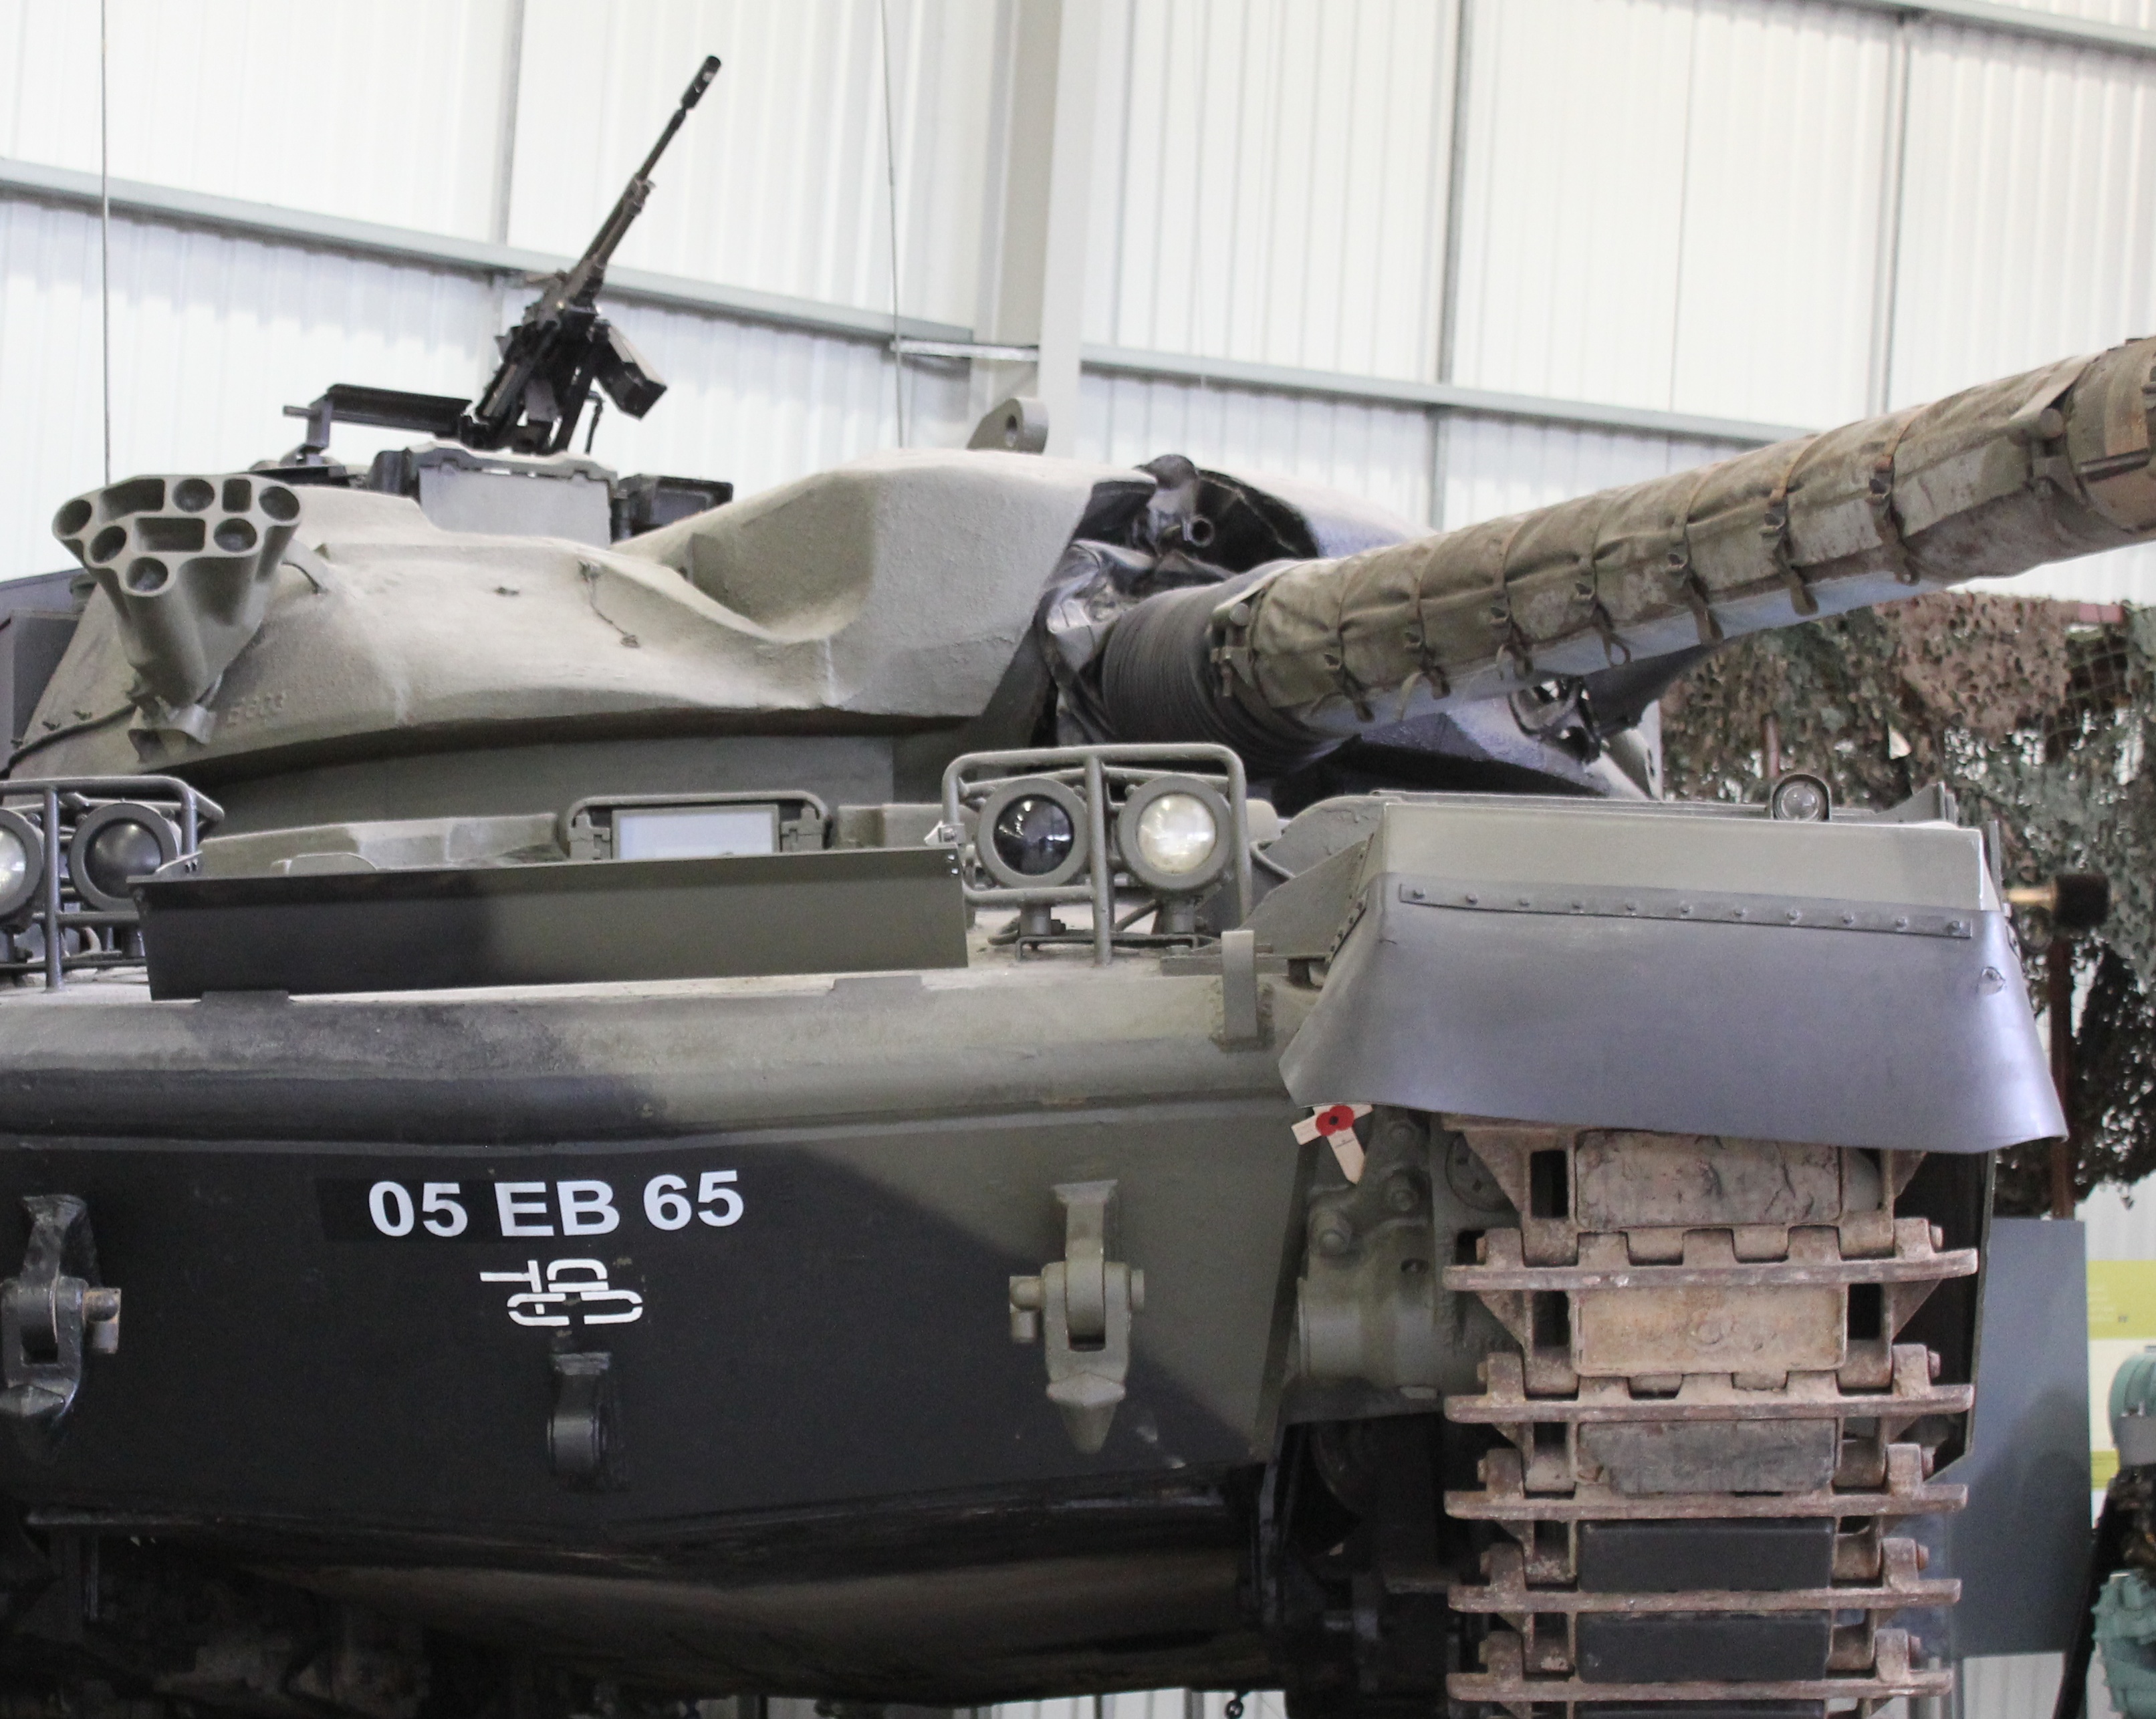
I think this one has extra armour on the lower glacis so the overhang looks like a groove.
The upper hull has two pegs, circled in red.
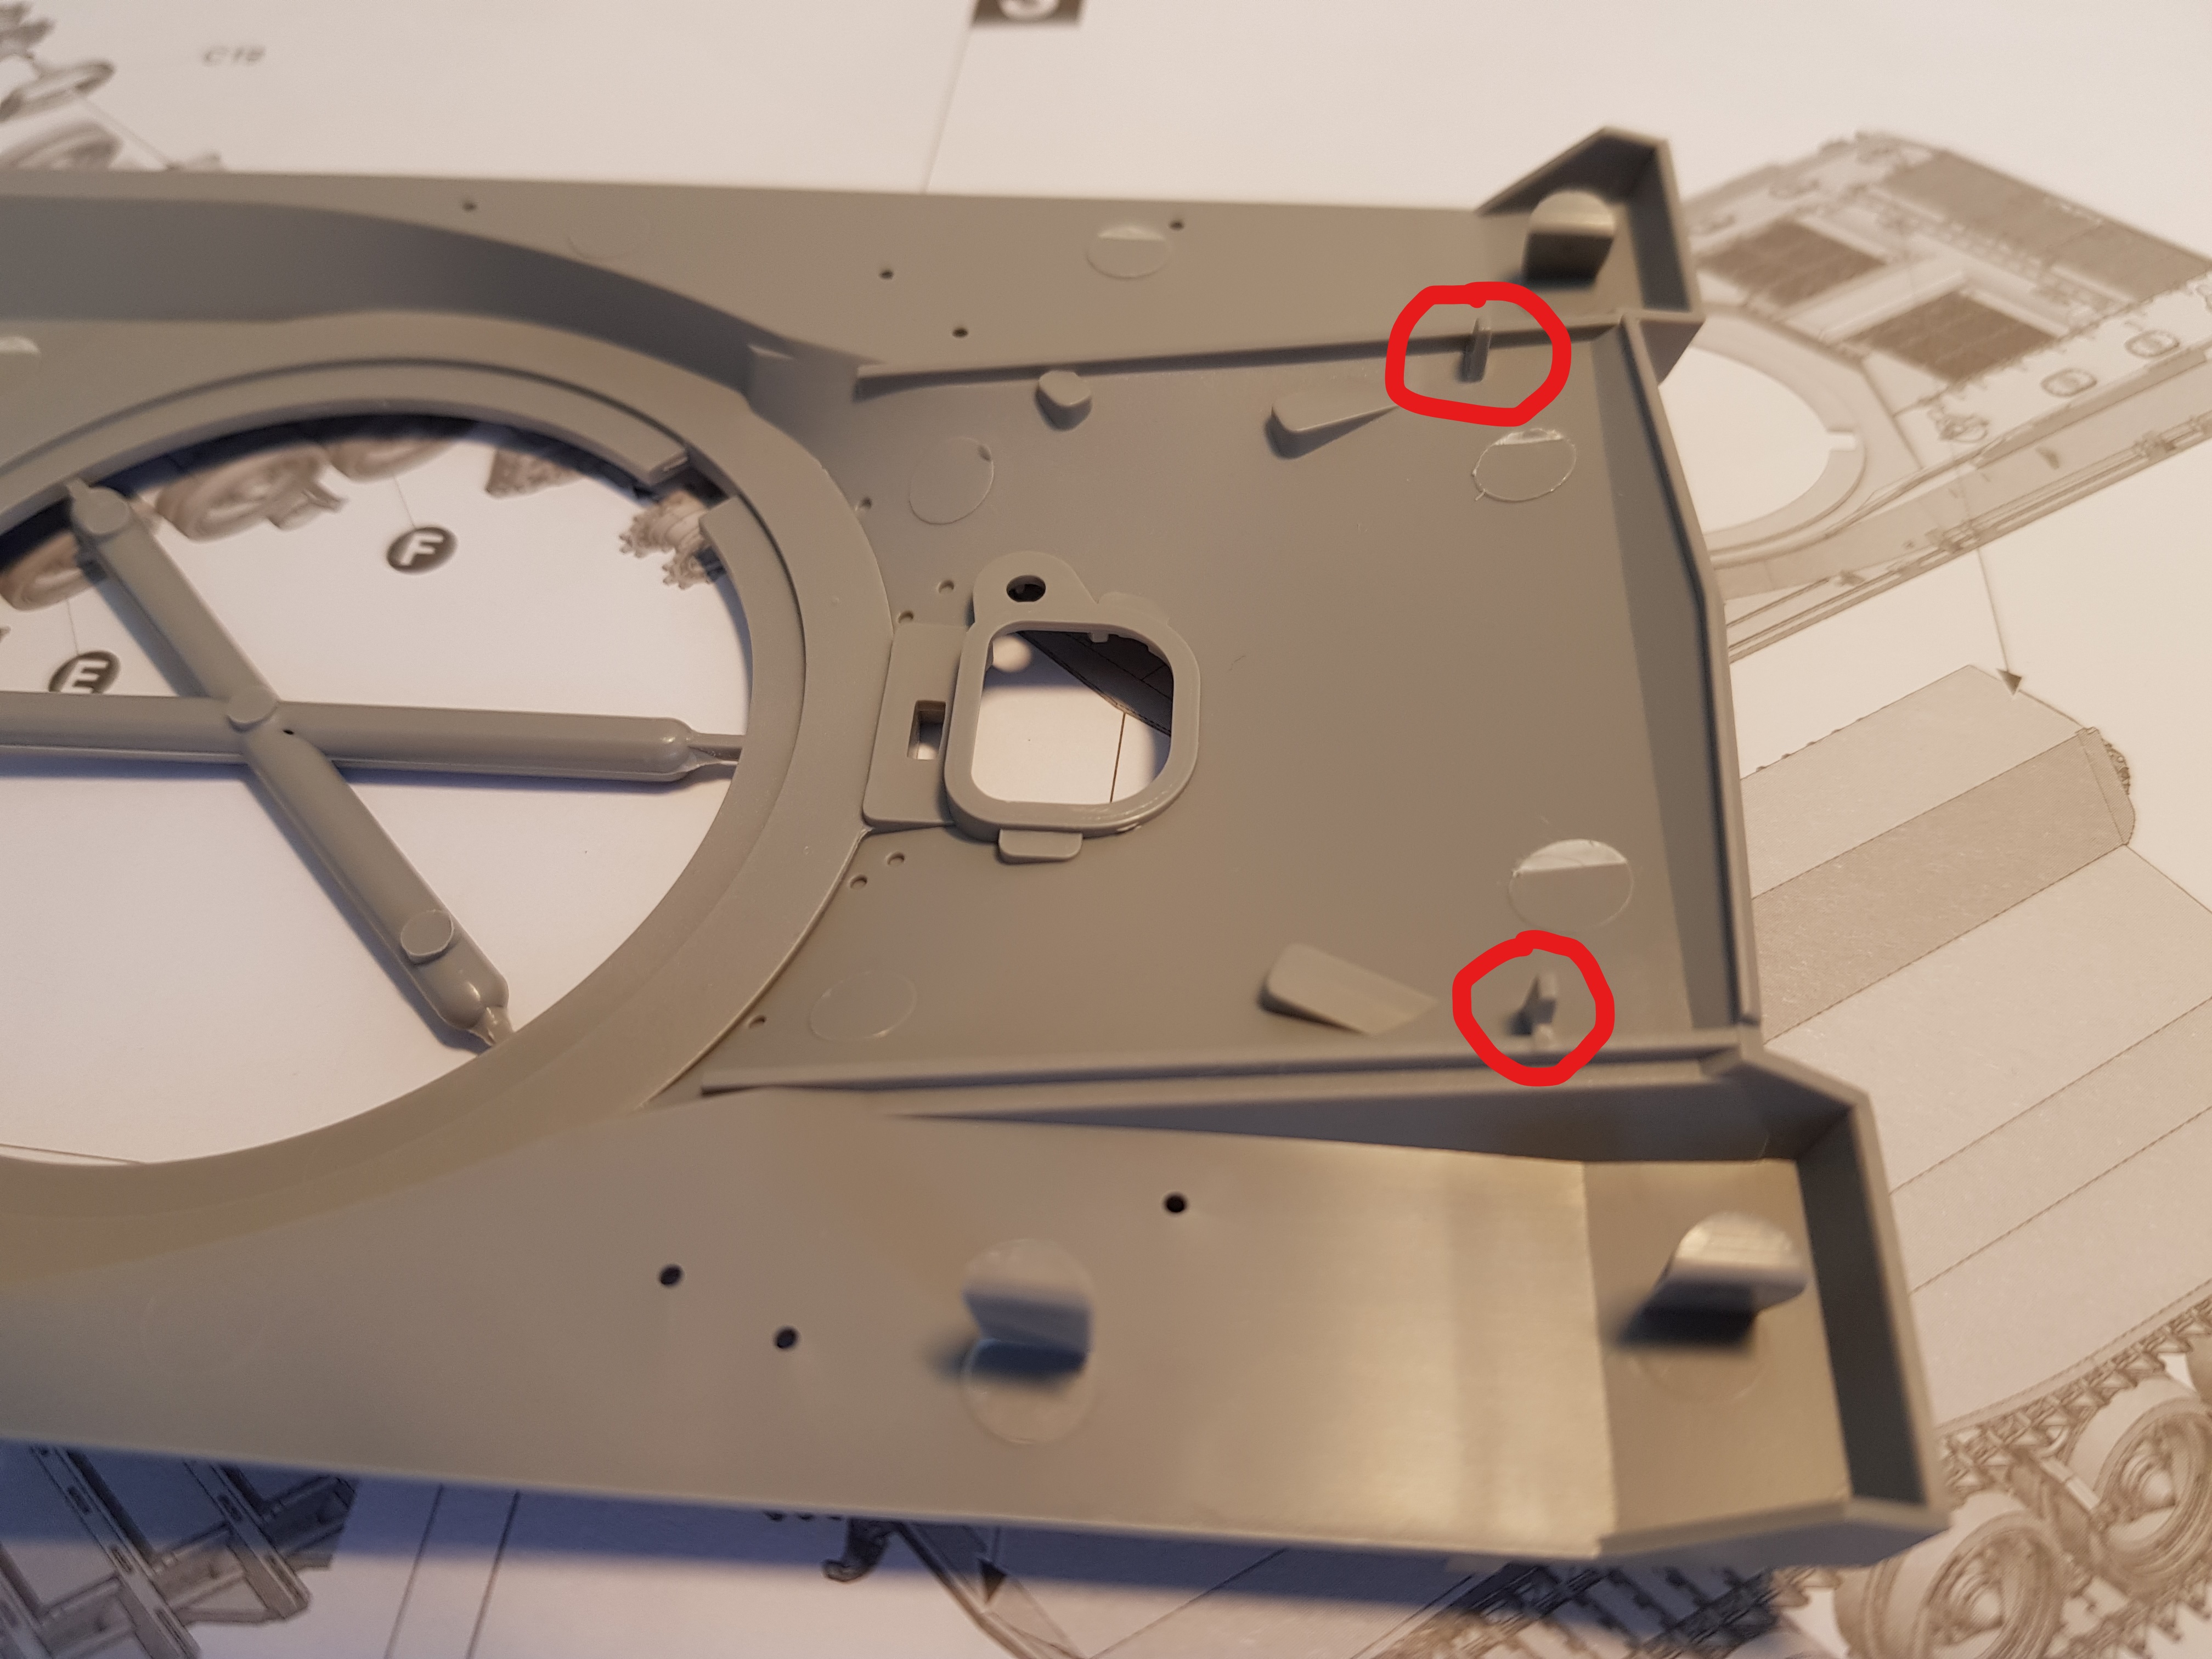
On my kit there is a small amount of excess plastic on the mating surface by the nearest peg. This causes a bad fit.
Check and file/sand this down if needed.
Place the upper hull top down, position the lower hull (bottom up) so that the front (lower glacis) fits over the pegs. Slide forward.
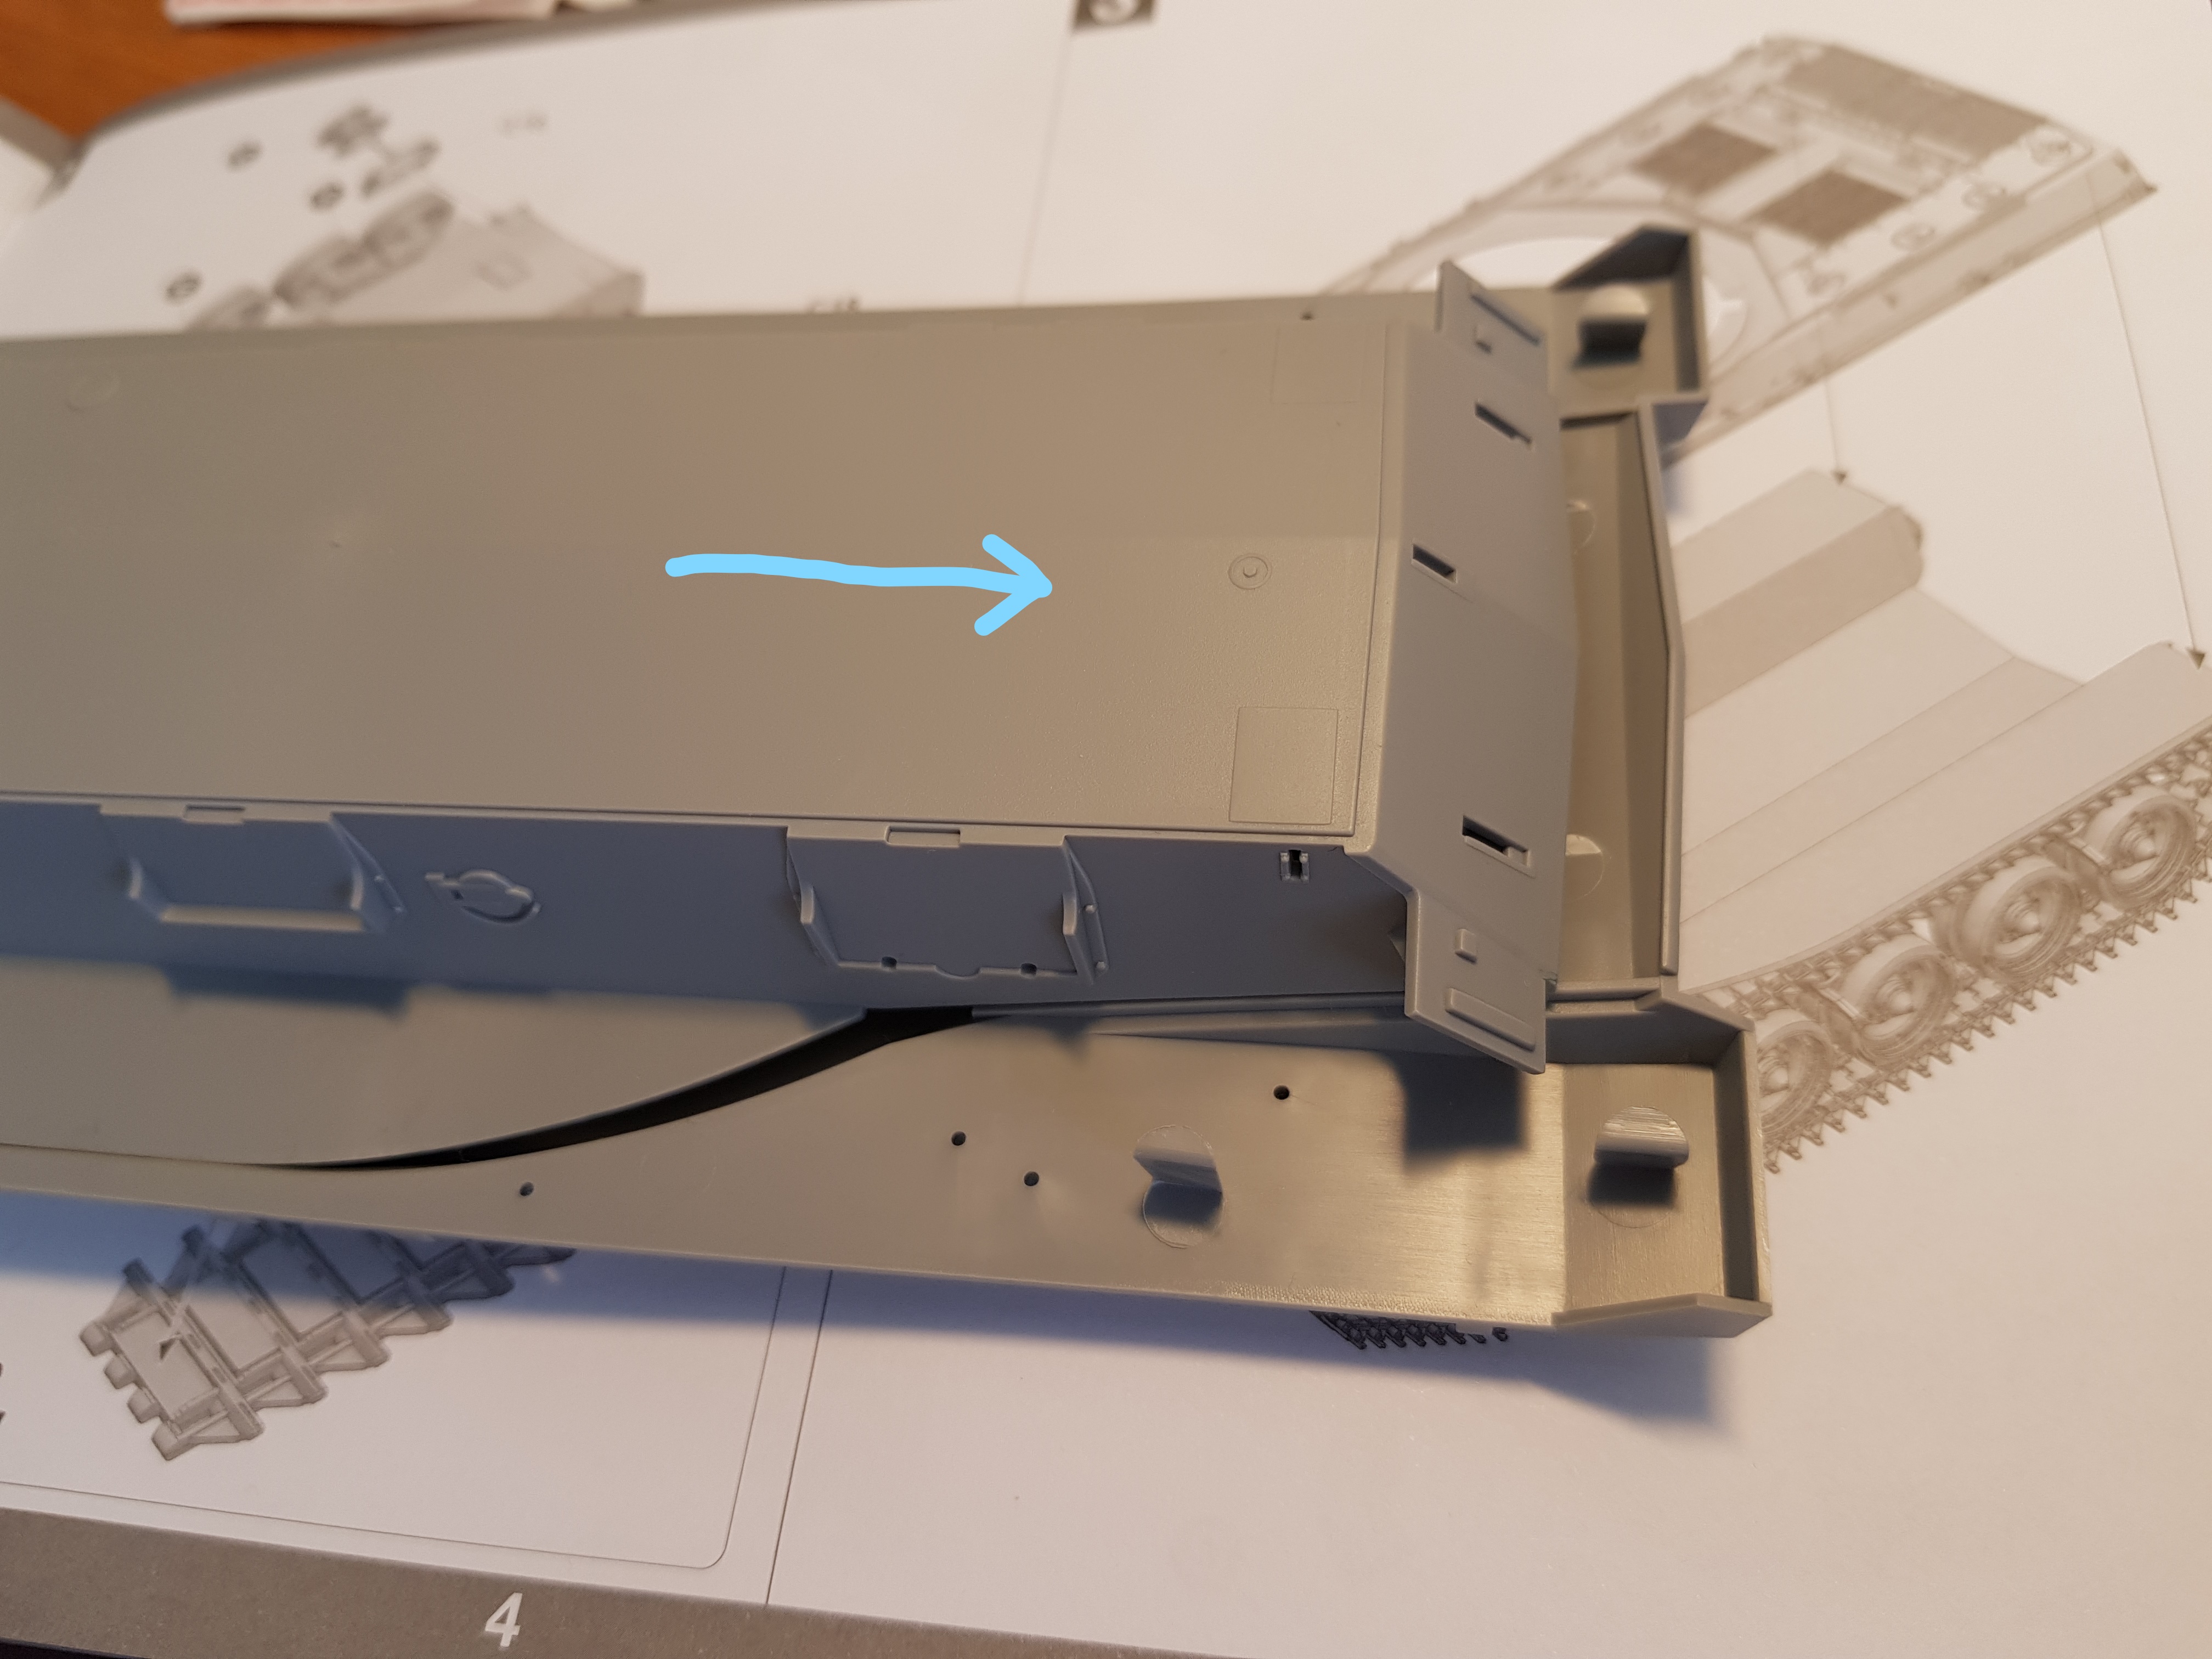
Done. Take apart and add glue. If you use pure solvents to melt the plastic to form a bond you can start "glueing" right away. As you can see in the image the joint between the upper and lower glacis is slightly wider on the left side in the photo. This is caused by that excess plastic by the peg.
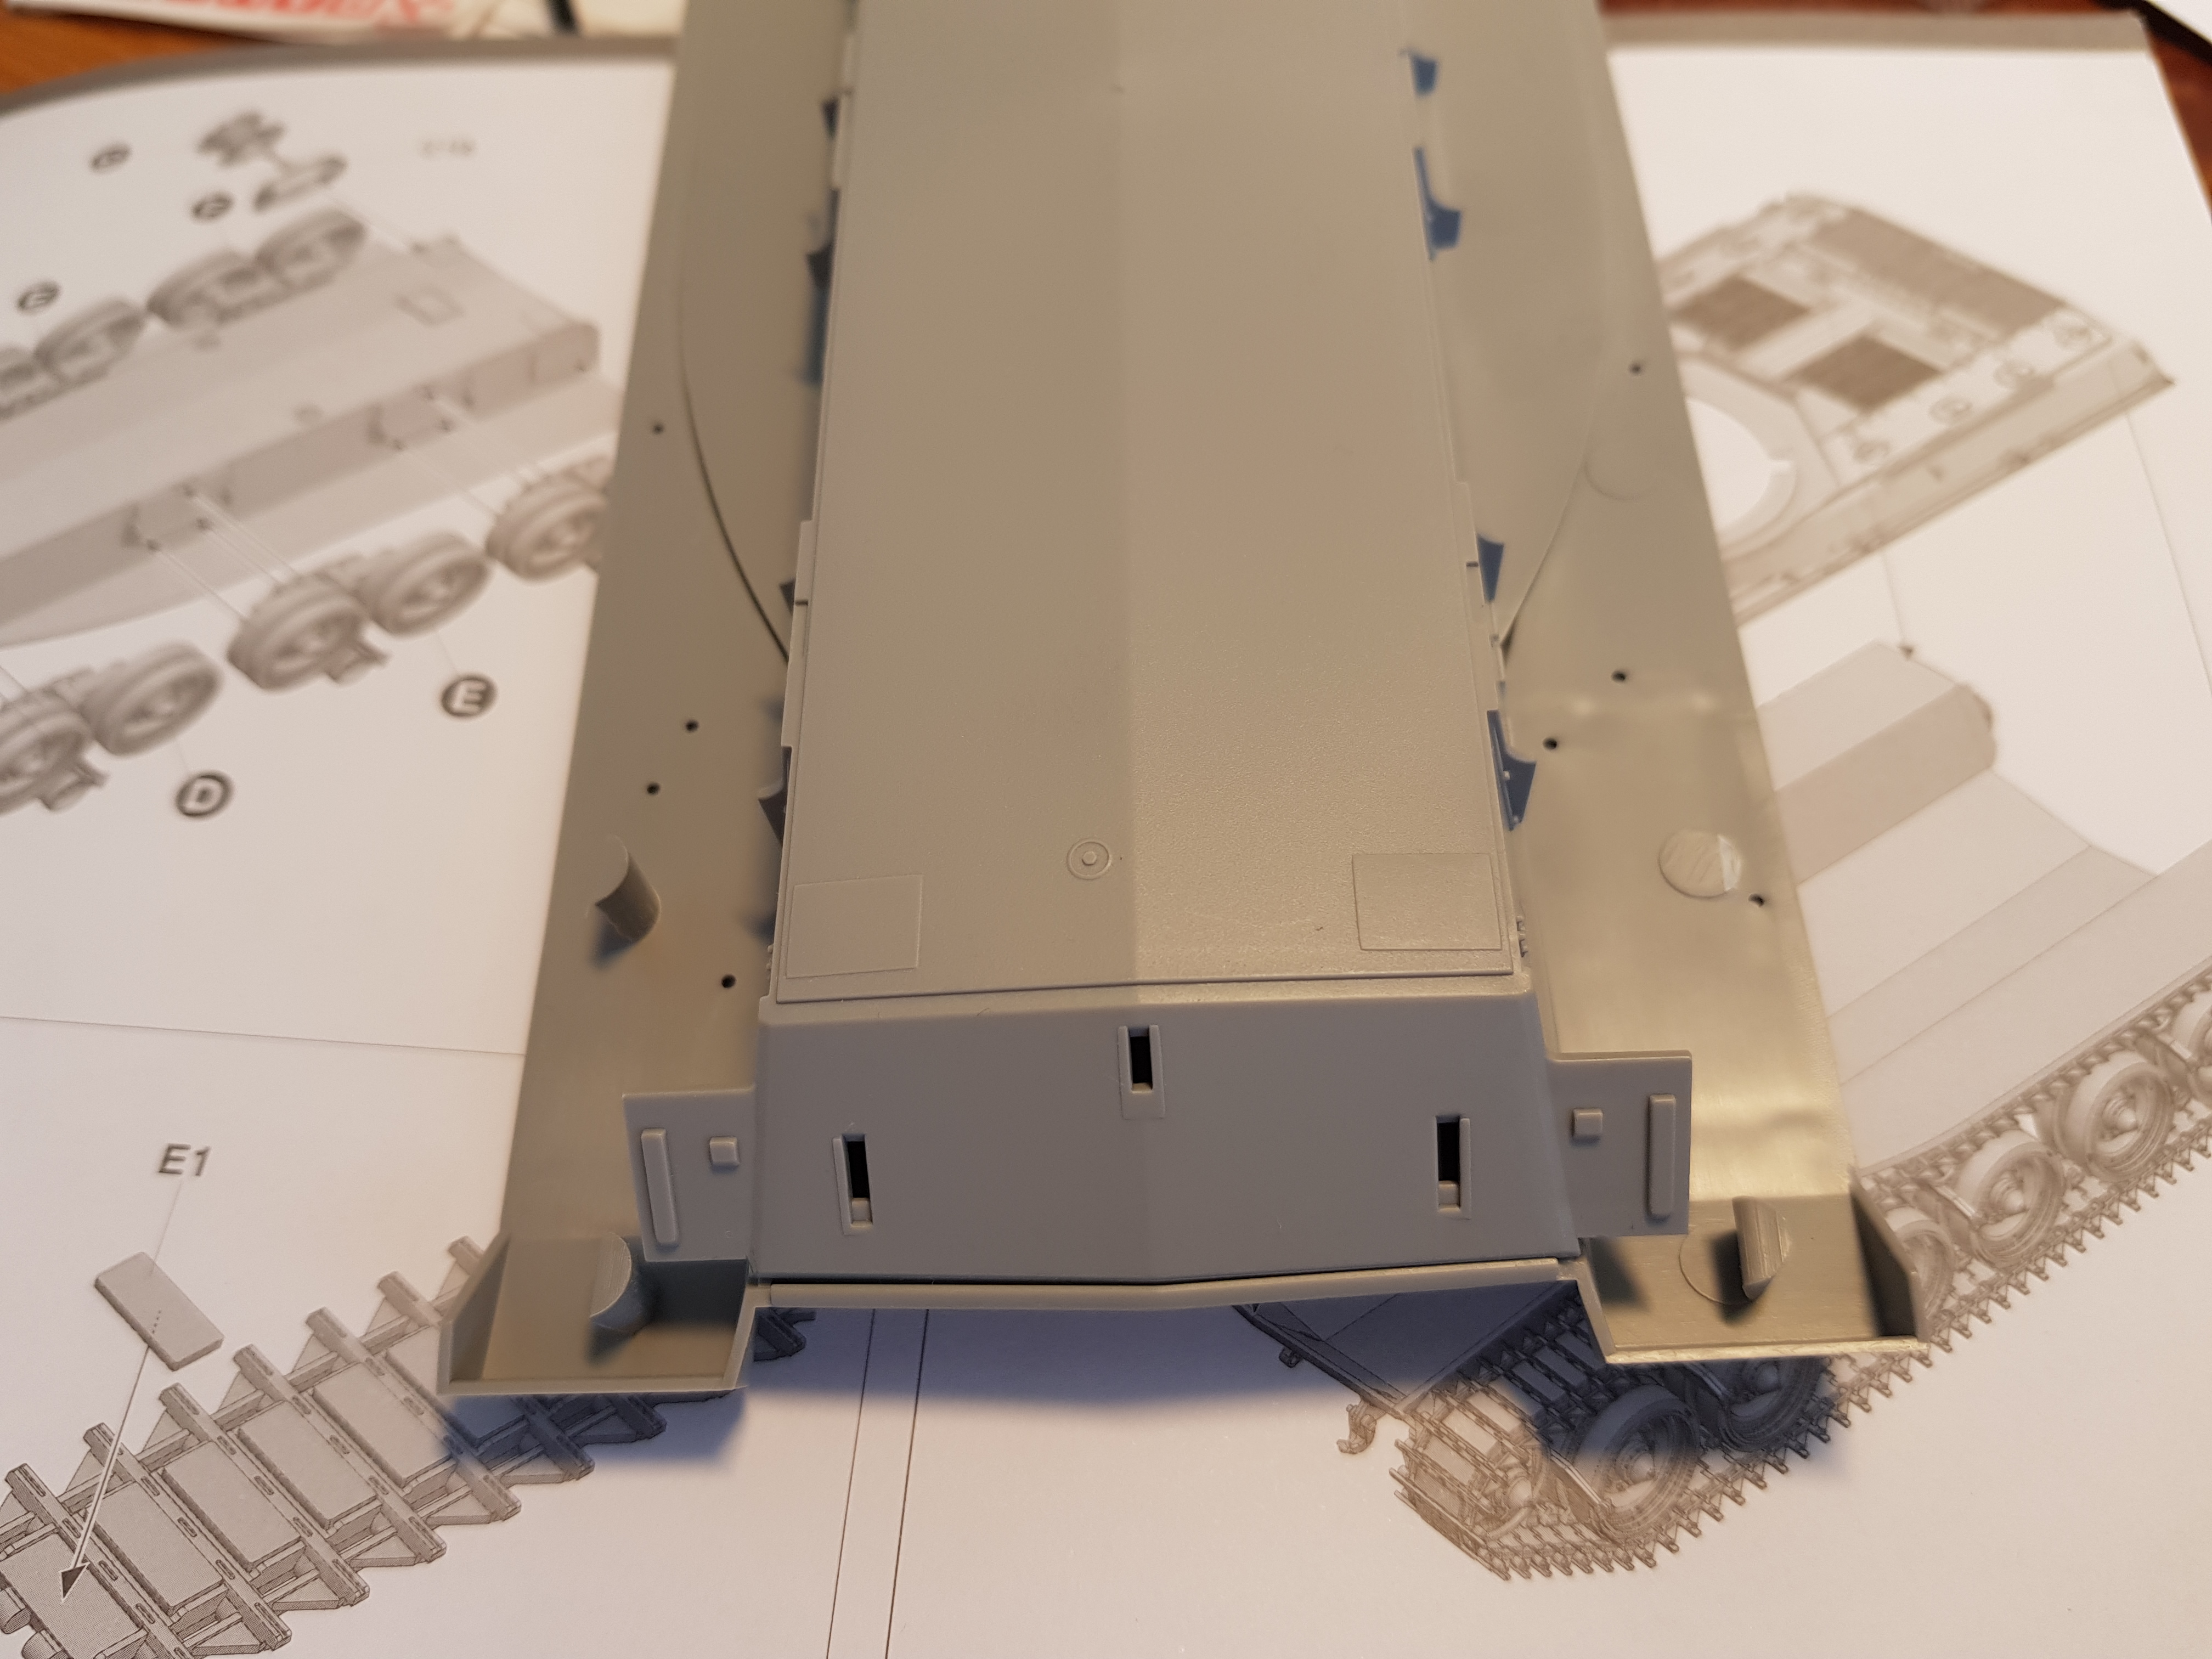
The rear end is slightly trickier.
Part R5 is the rear hull plate and there is no guidance as to how it fits. The lower edge is fine but the upper edge is just flapping around with nothing to control it.
The solution here is to add the big box to the rear plate first, before trying to add the rear plate to the upper & lower hull.
The box consists of parts R13, R8, C11 & C12.
The top of the box comes up behind the rear edge of the upper hull and this controls the position of the rear plate.
There will probably be small gaps at the lower sides of part R5 (rear hull plate). Make sure the edges of R5 are smooth before adding glue. There are also large gaps at the top of R5 by the sponsoons but these will be filled/covered by the boxes added in step 5. The large slots seem to be designed to receive tabs on parts R21 and R22.
It looks tempting to add these boxes to the rear plate before adding the rear plate to the hull.
Rear hull before adding the boxes in step 5.
Shows how the top of the rear plate meets the upper hull
The boxart also shows the joint between the top of the engine deck and the upper edge of the rear plate.
/ Robin

I think this one has extra armour on the lower glacis so the overhang looks like a groove.
The upper hull has two pegs, circled in red.

On my kit there is a small amount of excess plastic on the mating surface by the nearest peg. This causes a bad fit.
Check and file/sand this down if needed.
Place the upper hull top down, position the lower hull (bottom up) so that the front (lower glacis) fits over the pegs. Slide forward.

Done. Take apart and add glue. If you use pure solvents to melt the plastic to form a bond you can start "glueing" right away. As you can see in the image the joint between the upper and lower glacis is slightly wider on the left side in the photo. This is caused by that excess plastic by the peg.

The rear end is slightly trickier.
Part R5 is the rear hull plate and there is no guidance as to how it fits. The lower edge is fine but the upper edge is just flapping around with nothing to control it.
The solution here is to add the big box to the rear plate first, before trying to add the rear plate to the upper & lower hull.
The box consists of parts R13, R8, C11 & C12.
The top of the box comes up behind the rear edge of the upper hull and this controls the position of the rear plate.
There will probably be small gaps at the lower sides of part R5 (rear hull plate). Make sure the edges of R5 are smooth before adding glue. There are also large gaps at the top of R5 by the sponsoons but these will be filled/covered by the boxes added in step 5. The large slots seem to be designed to receive tabs on parts R21 and R22.
It looks tempting to add these boxes to the rear plate before adding the rear plate to the hull.
Rear hull before adding the boxes in step 5.
Shows how the top of the rear plate meets the upper hull

The boxart also shows the joint between the top of the engine deck and the upper edge of the rear plate.
/ Robin
Posted: Monday, April 22, 2019 - 09:46 PM UTC
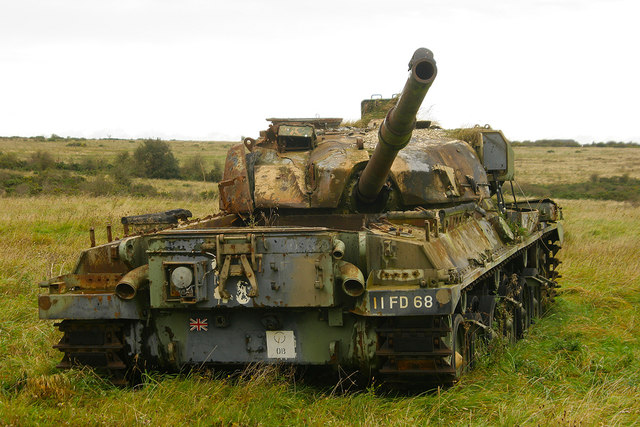
Let me guess Imber Village Chieftain?

RobinNilsson

Joined: November 29, 2006
KitMaker: 6,693 posts
Armorama: 5,562 posts

Posted: Monday, April 22, 2019 - 09:49 PM UTC
Quoted Text
Let me guess Imber Village Chieftain?
Spot on!
And of course I had to get som more info about Imber village

https://en.wikipedia.org/wiki/Imber
/ Robin
Posted: Tuesday, April 23, 2019 - 12:26 AM UTC
I have been there a few times.
 |


