

Hosted by Darren Baker
German 251 D/7 bridges

johnstone

Joined: September 11, 2017
KitMaker: 77 posts
Armorama: 69 posts
Posted: Sunday, May 12, 2019 - 01:22 PM UTC
Hello again everyone. I'm still working on the Dragon kit.My question is: how would you paint/weather the top surfaces of the bridges? The first parts of the bridge are metal;the remainder is wood. Would this all be painted the base coat of the vehicle or would the wooden parts be left unpainted? If painted how would you go about showing wear and chipping? On line I see several models of the 251 D/7 and all on of them the bridges are painted German dark yellow overall. Thanks in advance for your thoughts!!
petbat

Joined: August 06, 2005
KitMaker: 3,353 posts
Armorama: 3,121 posts
Posted: Sunday, May 12, 2019 - 08:12 PM UTC
They look painted the vehicle colour


johnstone
Joined: September 11, 2017
KitMaker: 77 posts
Armorama: 69 posts
Posted: Monday, May 13, 2019 - 12:30 AM UTC
Thank you,Sir!
Bonaparte84

Joined: July 17, 2013
KitMaker: 338 posts
Armorama: 331 posts
Posted: Monday, May 13, 2019 - 12:43 AM UTC
Quoted Text
They look painted the vehicle colour
This won't help, but how would you ever deduce any colour from a b/w picture?
 It is impossible!
Frenchy

Joined: December 02, 2002
KitMaker: 12,719 posts
Armorama: 12,507 posts
Posted: Monday, May 13, 2019 - 01:09 AM UTC
Maybe this would help (providing the restorers at the Deutsches Panzermuseum in Munster have done their homework  ) :
) :
https://nonsolopanzer.com/2016/05/02/sdkfz-2517-pionierpanzerwagen-deutsches-panzermuseum-munster-2013/
H.P.
) :https://nonsolopanzer.com/2016/05/02/sdkfz-2517-pionierpanzerwagen-deutsches-panzermuseum-munster-2013/
H.P.
johnstone
Joined: September 11, 2017
KitMaker: 77 posts
Armorama: 69 posts
Posted: Monday, May 13, 2019 - 03:03 AM UTC
Thank you. Those pictures were a great help. Appears to me that the wood was in it's natural color. Again - big help!!

165thspc

#521
Joined: April 13, 2011
KitMaker: 9,465 posts
Armorama: 8,695 posts
Posted: Monday, May 13, 2019 - 06:29 AM UTC
I have seen them treated both ways in both model form and on restored museum vehicles. If on a vehicle I suspect more likely them to be painted the vehicle color. (The one museum vehicle not withstanding.) But if part of a Pioneer (Engineer) group then they would probably just be thrown piecemeal into the back of a transport trailer, never to be repainted with a lot of wear and scratches to the darkening bare wood.
I will say this if I were the vehicle commander I would not want those two bright, fresh rectangular strips of clean, almost white wood showing to the sky to reveal my vehicle while under cover. Two duplicate, equally squarish shapes like that would attract any pilot's eye!(An aerial "EQUAL SYMBOL" no less!) My first thought would be to stain that fresh wood with old, dirty engine oil if I could get my hands on some. Lacking that I would use whatever camo paste paint I had.
The included photo only shows how I chose to model them as part of an Pioneer/Engineer unit. I do not offer this as any kind of proof one way of the other.
Please Note: If you should go out on the internet to purchase extra of these bridge pieces do know the plastic ones sold separately are of equal quality to the ones that come in the original halftrack model kit. However these are much more expensive.
There is also a much cheaper option: Offered in resin in sets of six or eight. (I suspect these are knock-off resin copies molded using the better plastic ones as patterns.) While these are much cheaper and still very well detailed, my primary complaint would be that as the resin cures, each individual bridge piece adopts a different degree of arch all it's own. If you intend to place say four of these, side by side, at the entry onto a bridge, the pieces will not properly line up as to the height of the arch next to each other.
I will say this if I were the vehicle commander I would not want those two bright, fresh rectangular strips of clean, almost white wood showing to the sky to reveal my vehicle while under cover. Two duplicate, equally squarish shapes like that would attract any pilot's eye!(An aerial "EQUAL SYMBOL" no less!) My first thought would be to stain that fresh wood with old, dirty engine oil if I could get my hands on some. Lacking that I would use whatever camo paste paint I had.
The included photo only shows how I chose to model them as part of an Pioneer/Engineer unit. I do not offer this as any kind of proof one way of the other.

Please Note: If you should go out on the internet to purchase extra of these bridge pieces do know the plastic ones sold separately are of equal quality to the ones that come in the original halftrack model kit. However these are much more expensive.
There is also a much cheaper option: Offered in resin in sets of six or eight. (I suspect these are knock-off resin copies molded using the better plastic ones as patterns.) While these are much cheaper and still very well detailed, my primary complaint would be that as the resin cures, each individual bridge piece adopts a different degree of arch all it's own. If you intend to place say four of these, side by side, at the entry onto a bridge, the pieces will not properly line up as to the height of the arch next to each other.

petbat
Joined: August 06, 2005
KitMaker: 3,353 posts
Armorama: 3,121 posts
Posted: Tuesday, May 14, 2019 - 07:25 AM UTC
Quoted Text
Quoted TextThey look painted the vehicle colour
This won't help, but how would you ever deduce any colour from a b/w picture?
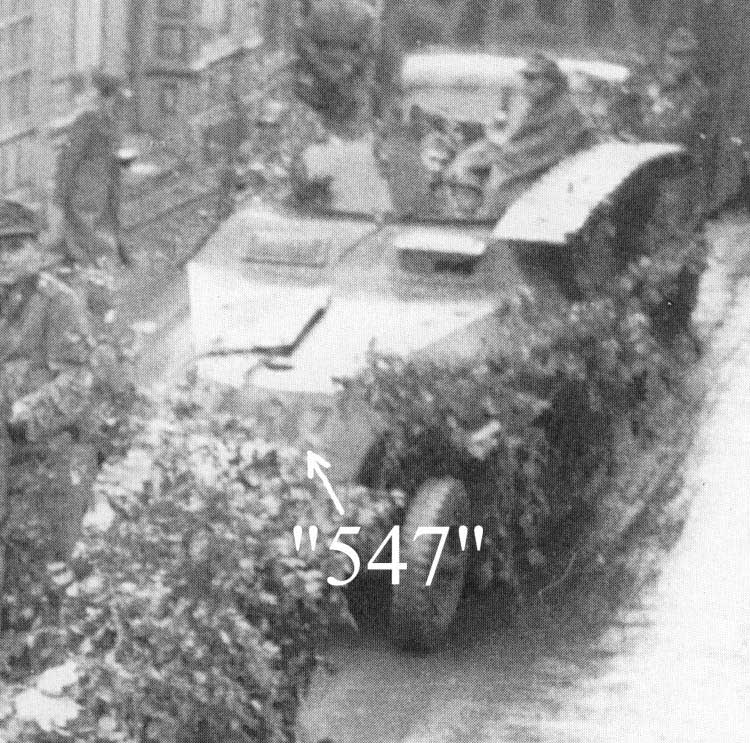
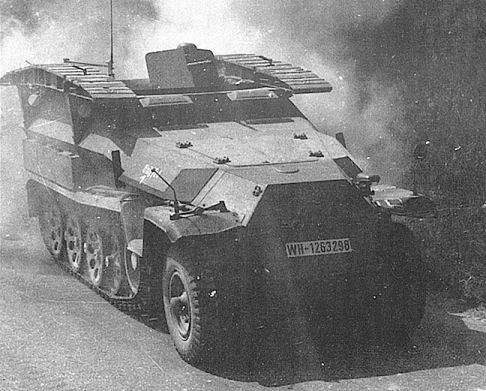
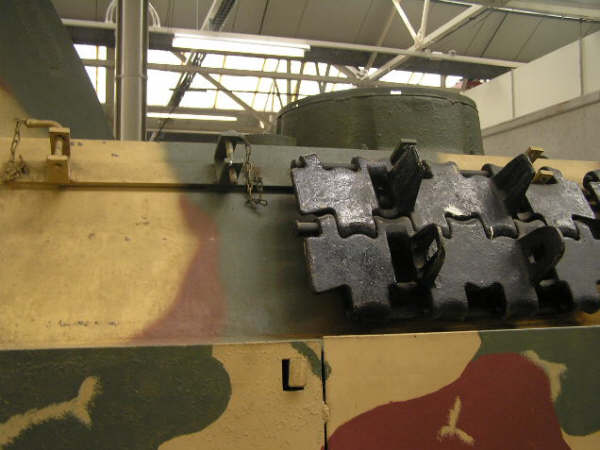
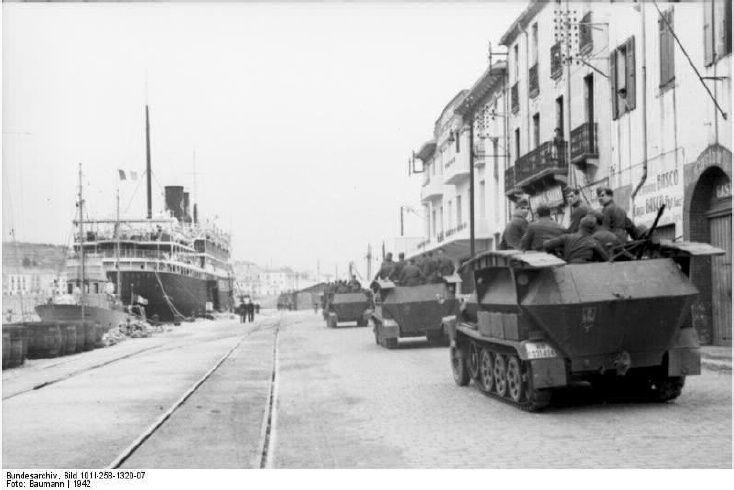
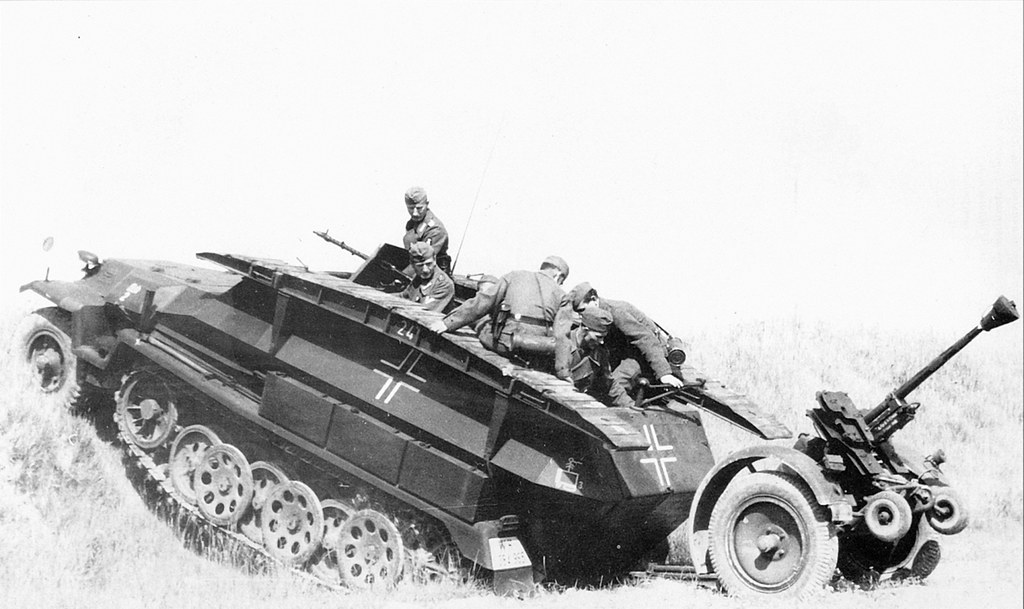
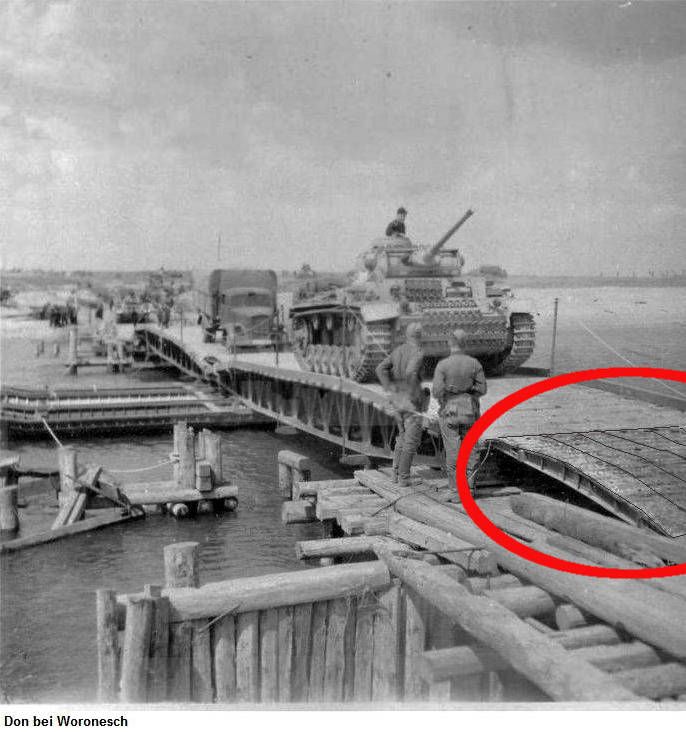
Heavy emphasis on the word 'appear' as I used it. Match the reflective colour of the bridge components to the vehicle itself in the first 2 pics.
The latter two pictures show dark colour that 'seems' to match the vehicle colour and certainly not light unpainted wood.
The smart money is not using any museum vehicles as references as more often than not, fabricated parts are not accurate nor are parts added from replacements obtained.
Tamiya's old SdKfz 251/1 kit has a cylinder water tank between the front seats. The Bovington vehicle had it and Tamiya copied it. However, the Bovington 251 was rebuilt from a 251/11 Krankenpanzer (ambulance) - the only version to have a water tank. I believe it has since been removed by the museum.
Then take the spare track links on Bovington's Panther for example. For a long time people believed the Germans had solid guide horn links for the Panther. In fact, these were made specifically for the museum.
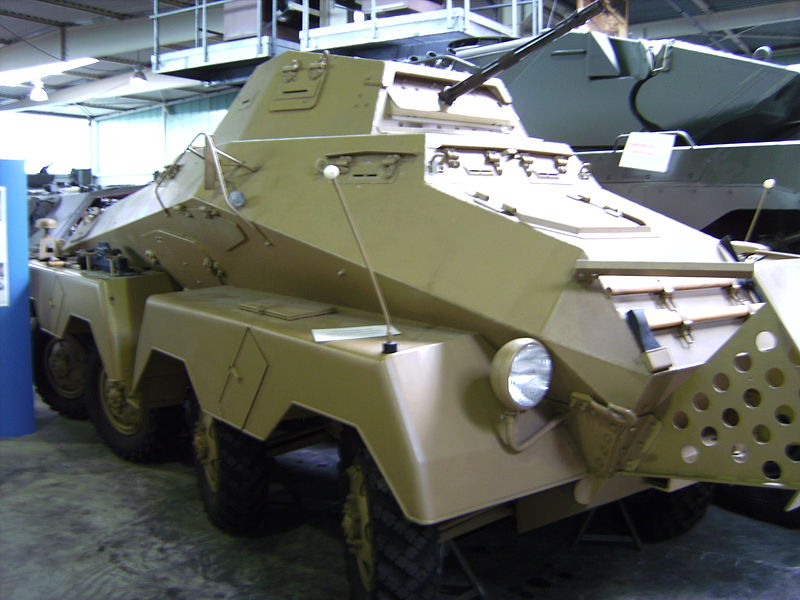
and the specially made fenders on the Koblenz (ex-Aberdeen) SdKfz 232
petbat
Joined: August 06, 2005
KitMaker: 3,353 posts
Armorama: 3,121 posts
Posted: Tuesday, May 14, 2019 - 07:46 AM UTC
John
You can always layer them with mud and then no-one can complain about your approach
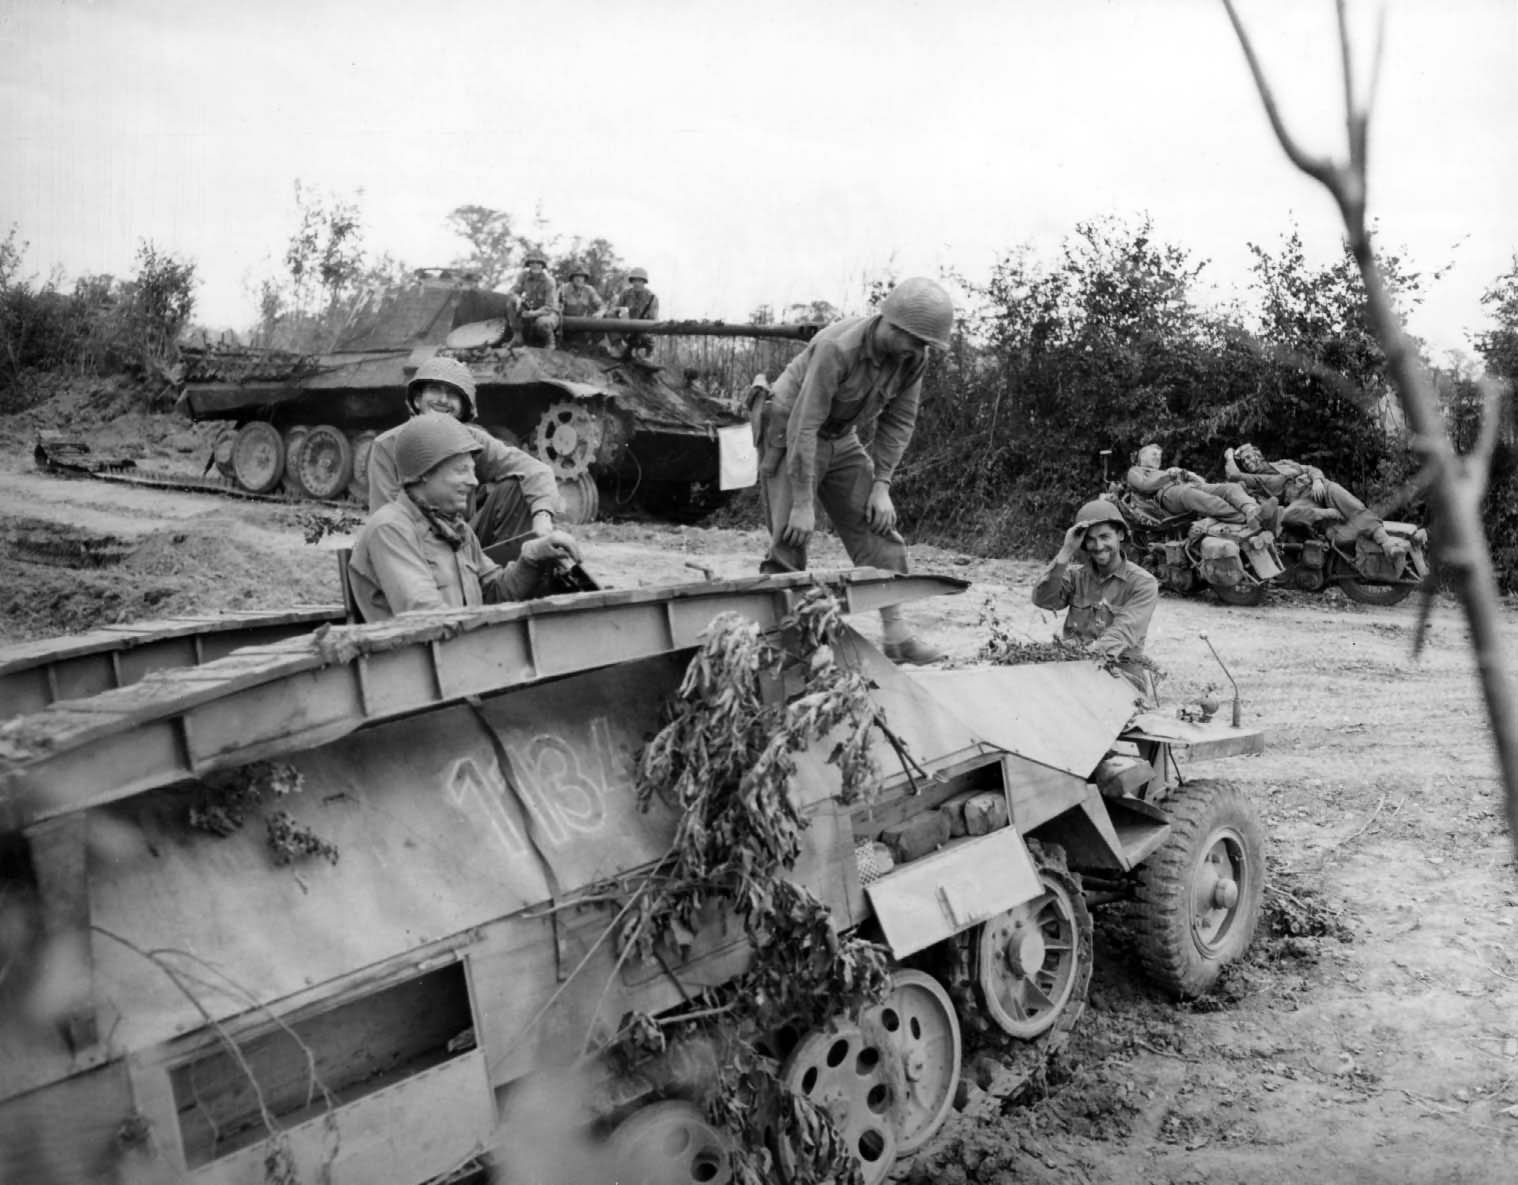
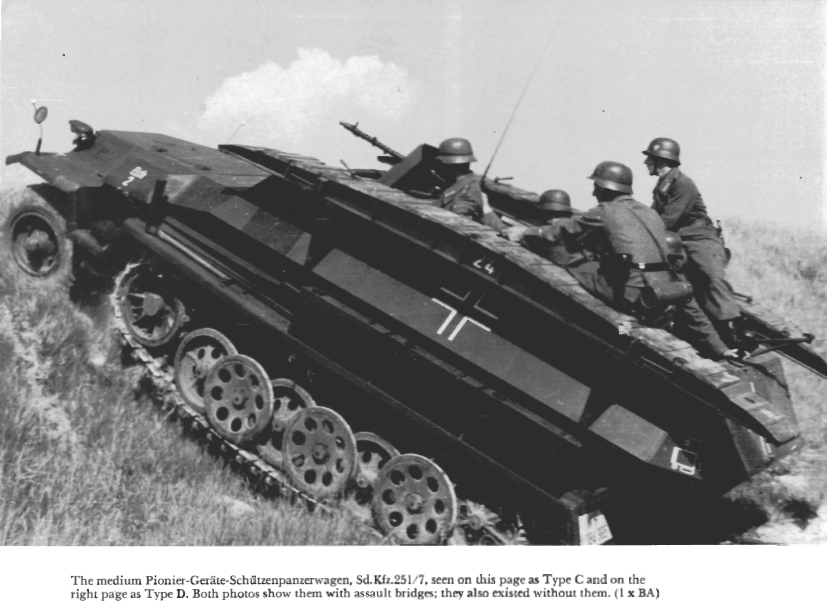
More pics to argue over
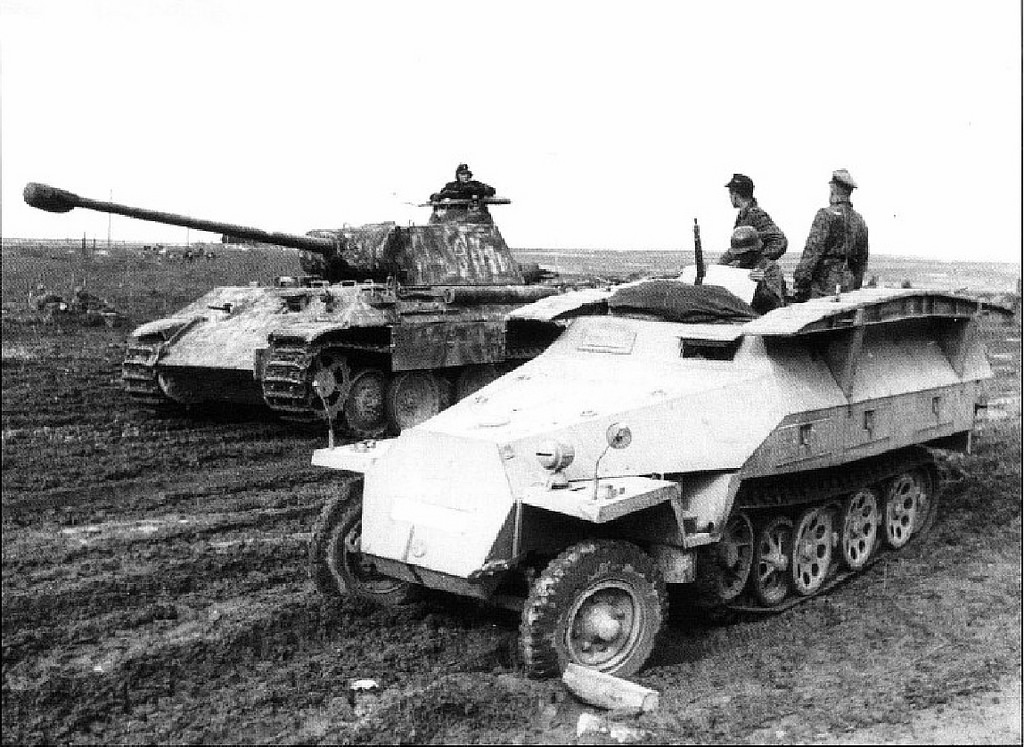
and a clearer one from what I posted previously
You can always layer them with mud and then no-one can complain about your approach
More pics to argue over
and a clearer one from what I posted previously
brekinapez
Joined: July 26, 2013
KitMaker: 2,272 posts
Armorama: 1,860 posts
Posted: Tuesday, May 14, 2019 - 08:40 AM UTC
Not as impossible as you think.
johnstone
Joined: September 11, 2017
KitMaker: 77 posts
Armorama: 69 posts
Posted: Tuesday, May 14, 2019 - 08:47 AM UTC
Michael & Peter - Wow! Great posts! I had never thought about how the bridge segments would appear from the air. Jabo magnets! I am going to paint mine as a somewhat dark wood. This model is going into an Ardennes diorama - so some mud will be very appropriate.
Thanks guys!
Thanks guys!

ayovtshev

#490

Joined: September 22, 2016
KitMaker: 1,432 posts
Armorama: 1,390 posts

Posted: Wednesday, May 22, 2019 - 08:11 PM UTC
Gentlemen,
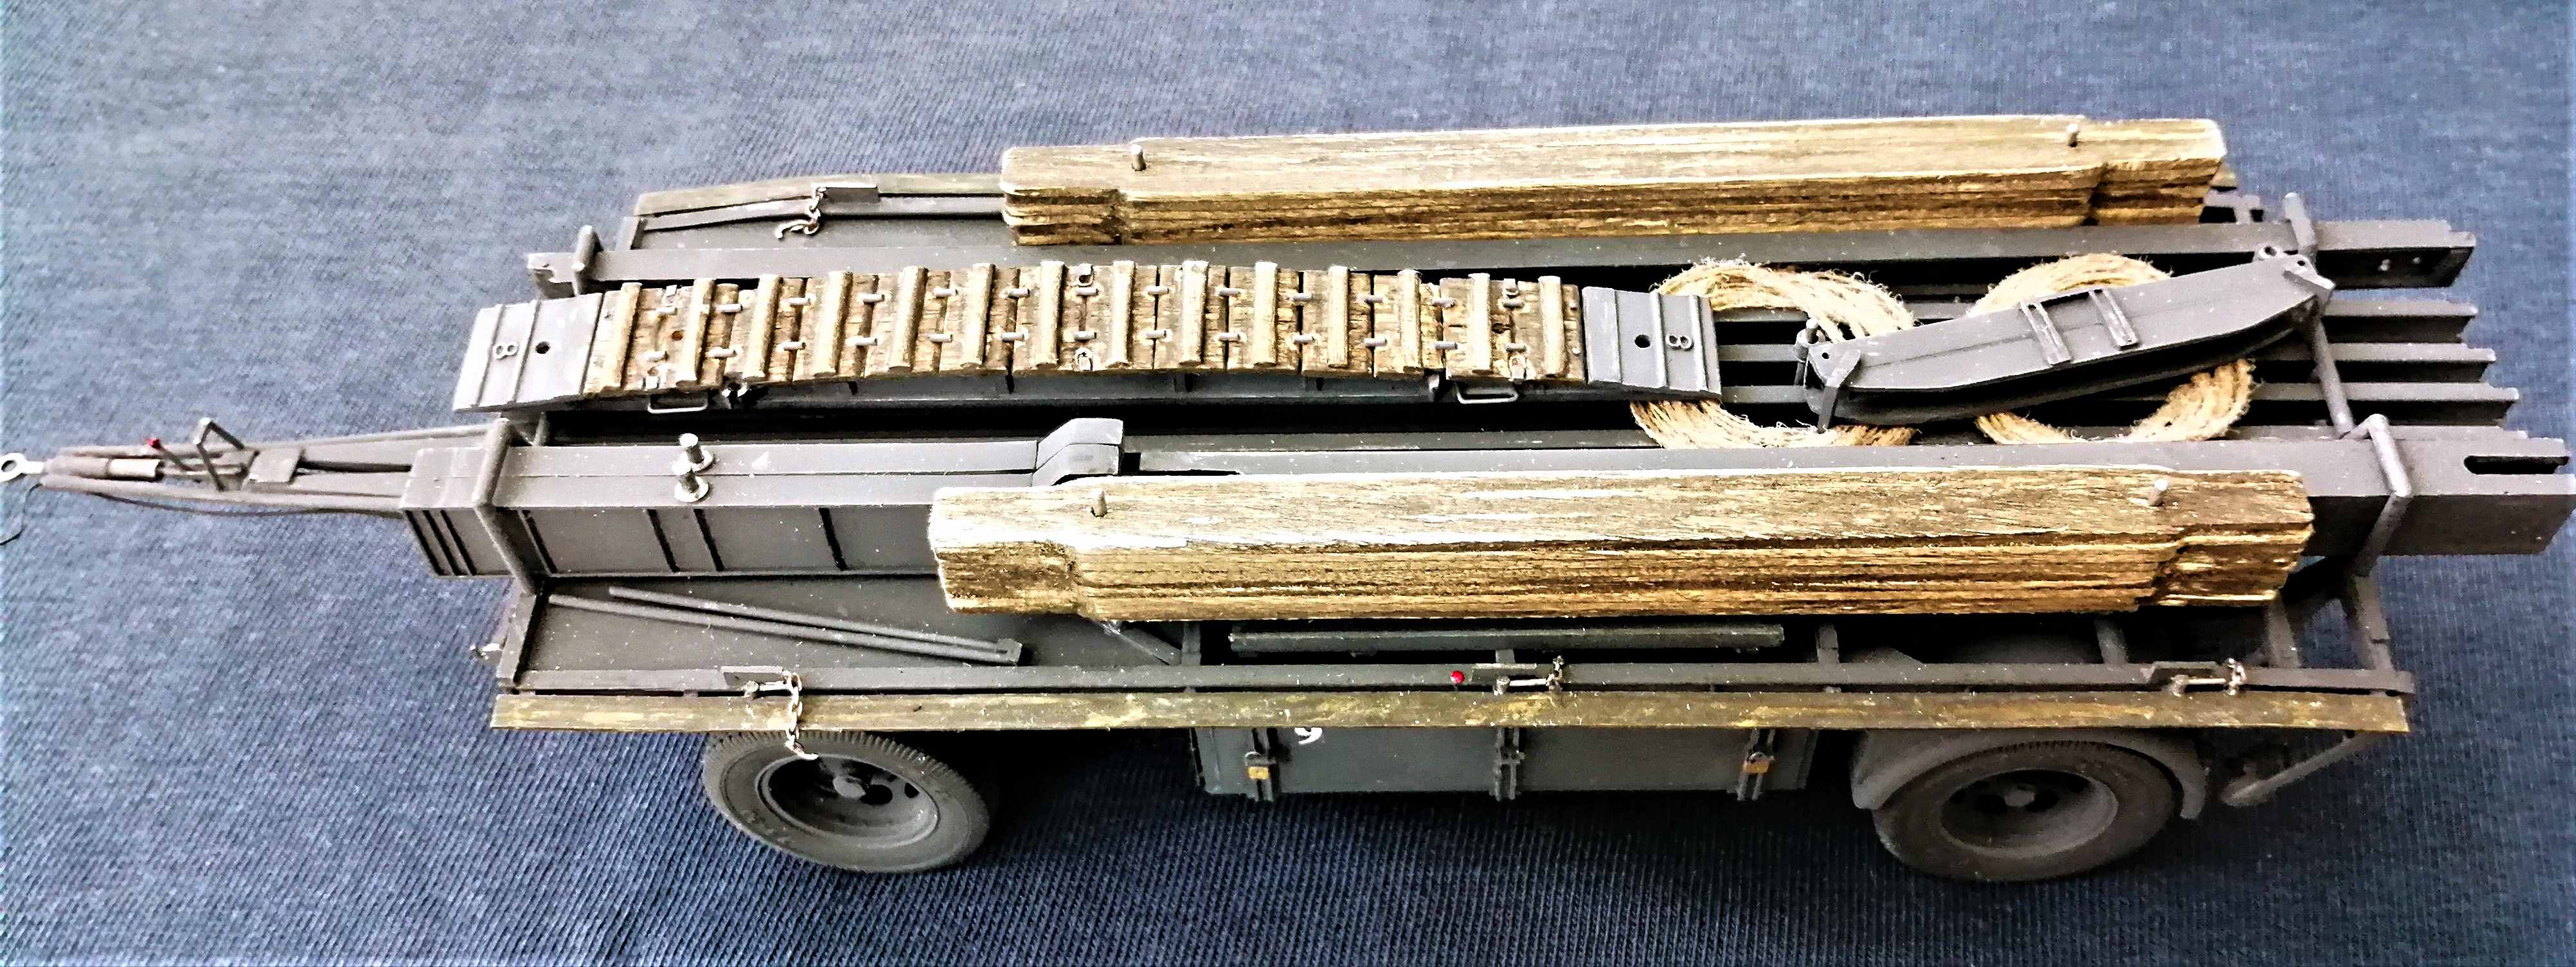
I have recently built a Pf.11 Pontonwagen from German B type pontoon bridge for the "Once More Unto the Breach" Campaign.
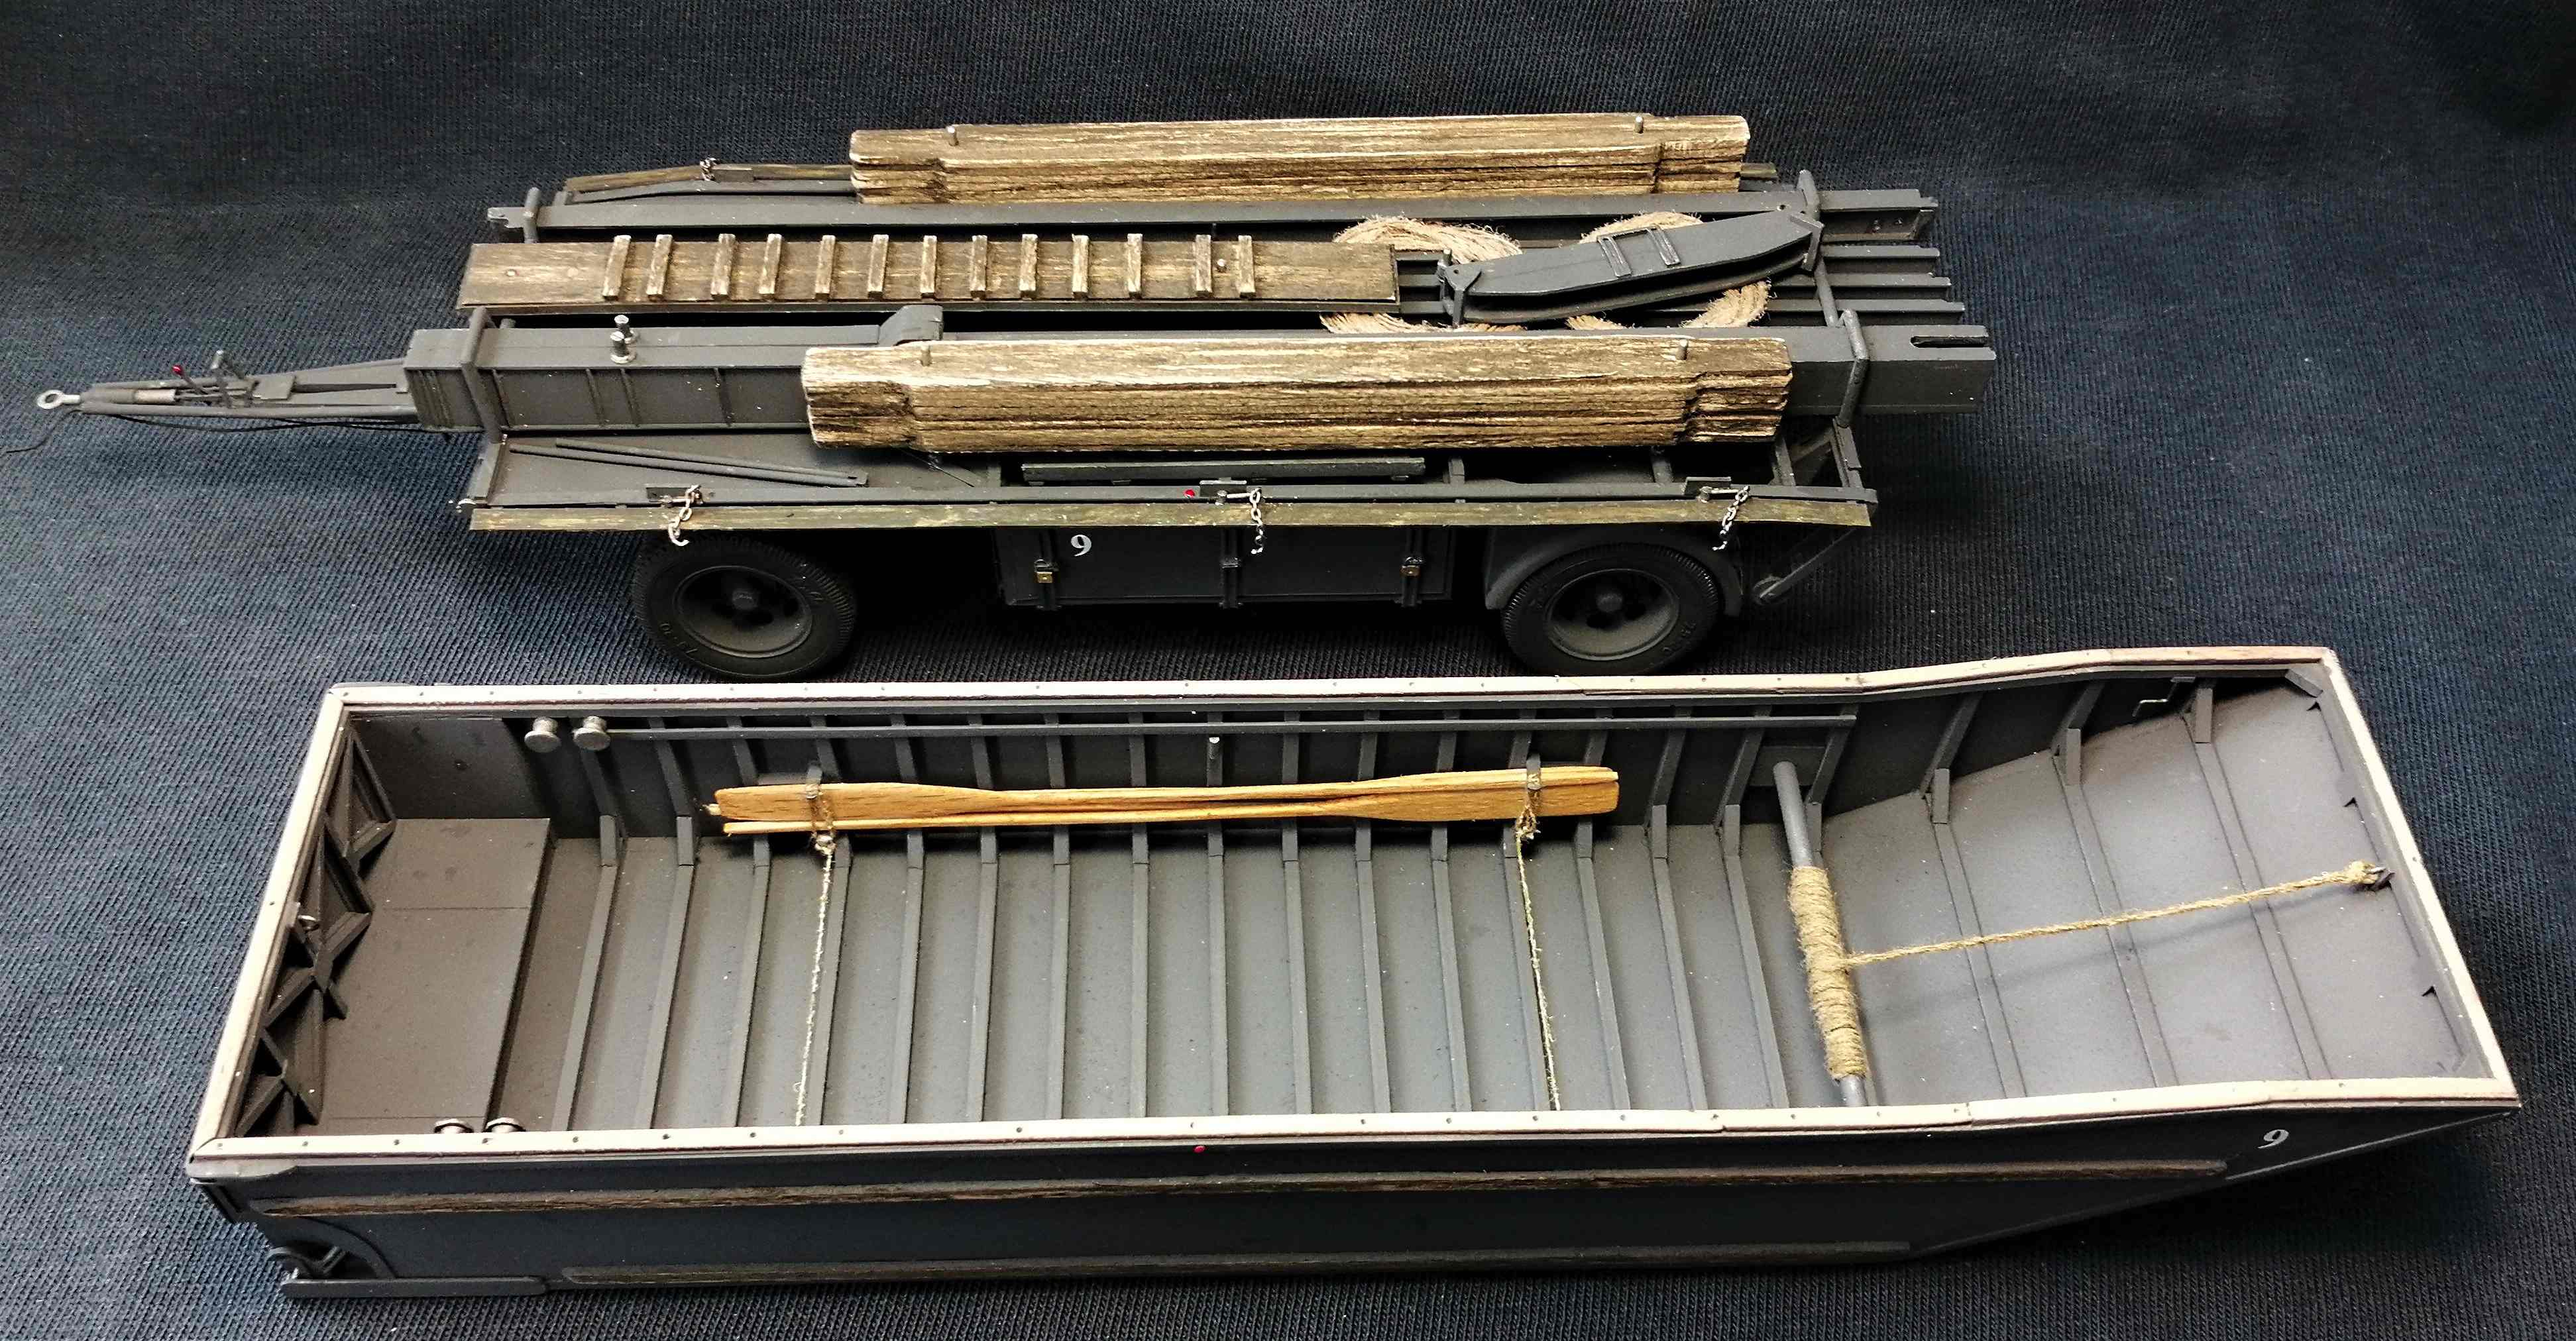
The Pontonwagen has in its load an Uebergangsschiene(8t), which is basically one of the types carried also by the Sd.Kfz.251/7-the other being the all metal Uebergangsschiene(16t).
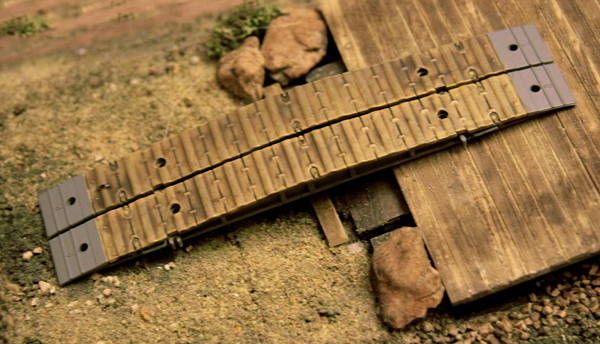
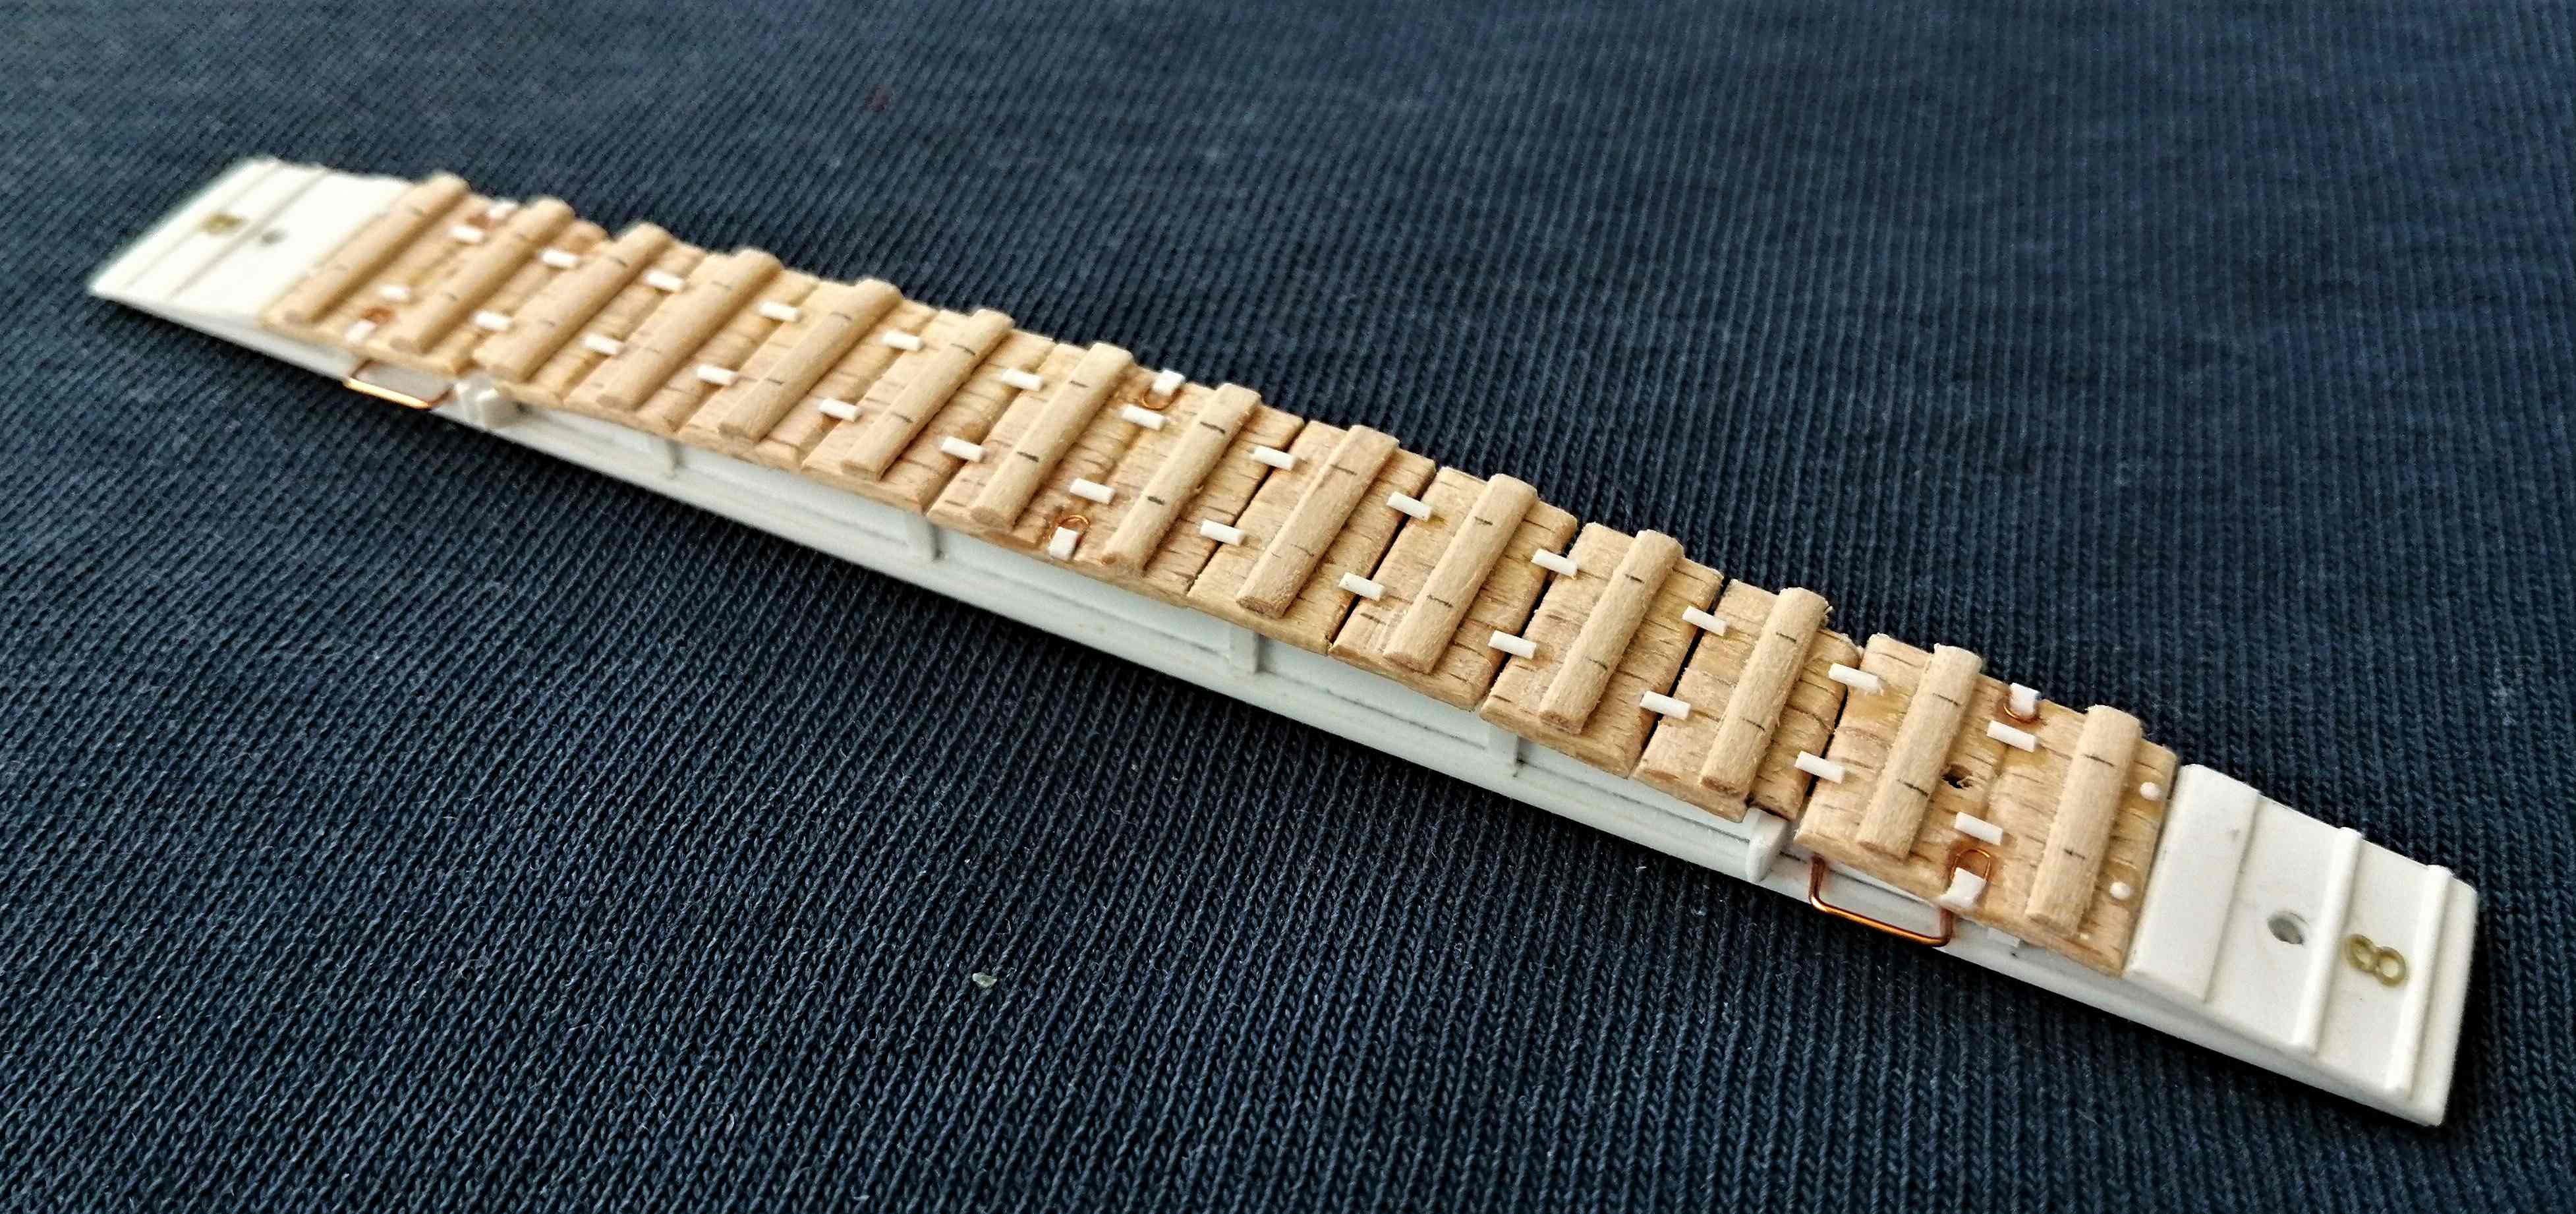
Although using a B Type Bridge Manual I recently bought, I somehow missed the fact, that the ramp is not flat, but arched...
It was this thread-and Mike's post particularly- that made me realize my mistake.
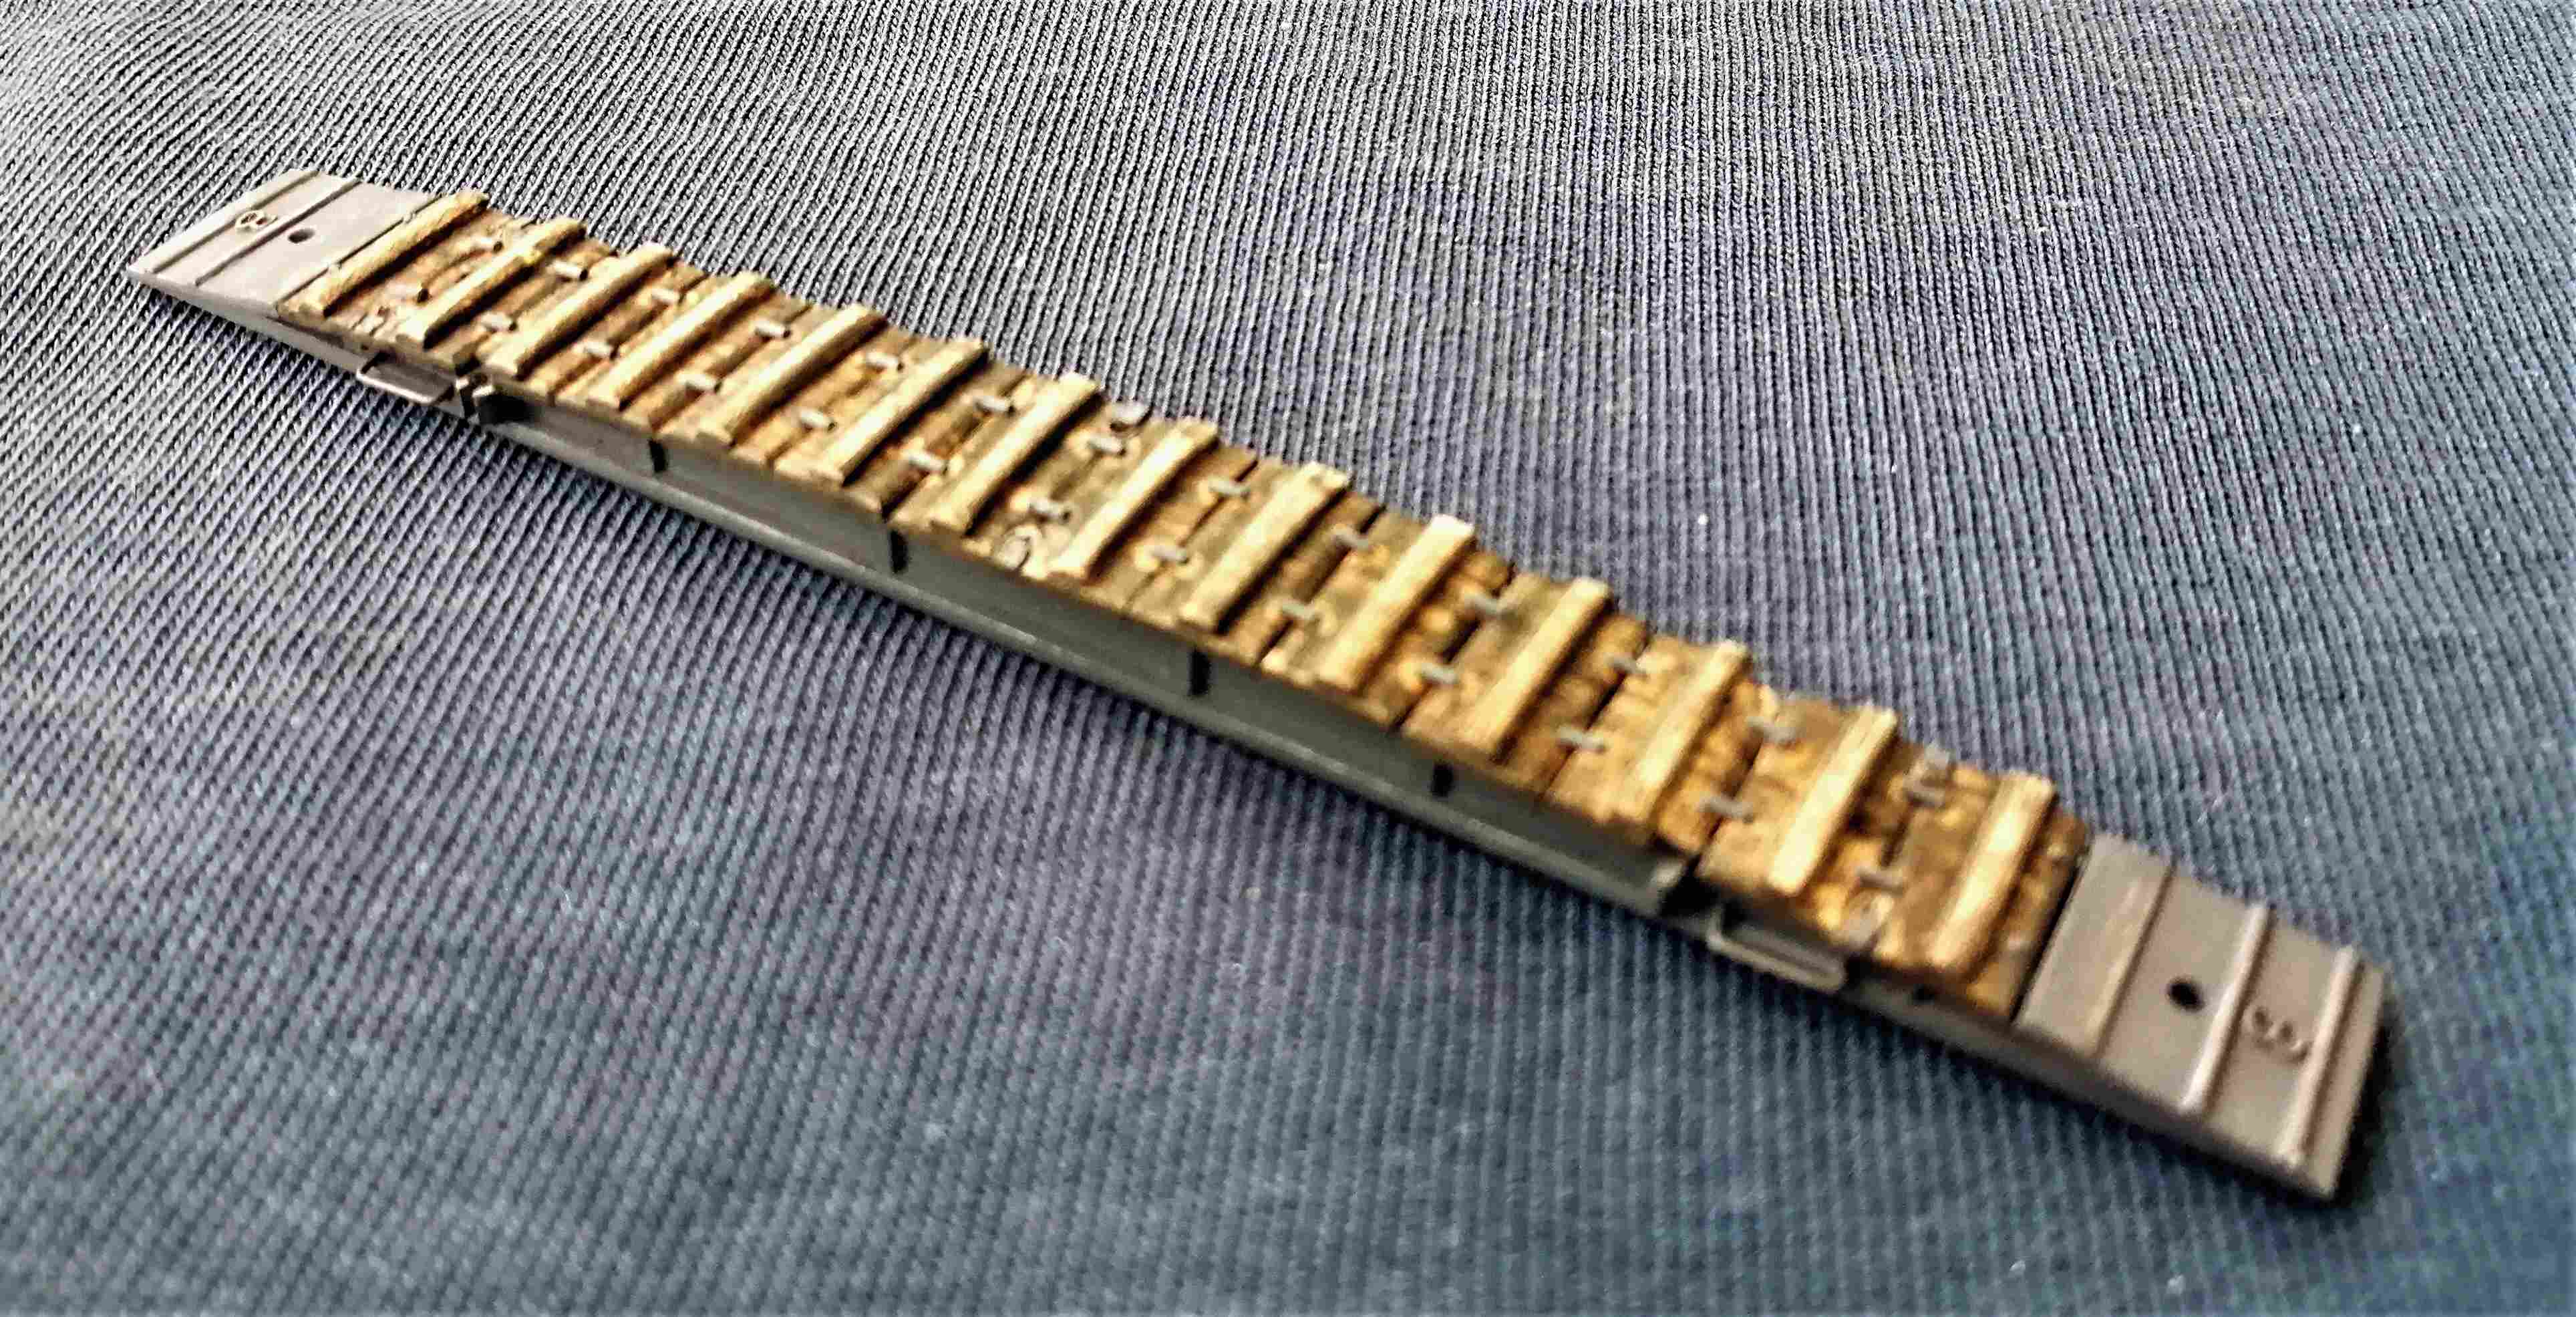
A friend of mine borrowed me an AFV Club's Assault Bridge, I found it matched the sizes given in the Manual perfectly and then used it as a refference to scratchbuild a new Uebergangsschiene(8t):
Here it is painted,partially weathered and loaded on the Pf.11:
So-John, thanks for raising the question and all others-thanks for your answers in this thread!

I have recently built a Pf.11 Pontonwagen from German B type pontoon bridge for the "Once More Unto the Breach" Campaign.
The Pontonwagen has in its load an Uebergangsschiene(8t), which is basically one of the types carried also by the Sd.Kfz.251/7-the other being the all metal Uebergangsschiene(16t).
Although using a B Type Bridge Manual I recently bought, I somehow missed the fact, that the ramp is not flat, but arched...
It was this thread-and Mike's post particularly- that made me realize my mistake.
A friend of mine borrowed me an AFV Club's Assault Bridge, I found it matched the sizes given in the Manual perfectly and then used it as a refference to scratchbuild a new Uebergangsschiene(8t):
Here it is painted,partially weathered and loaded on the Pf.11:
So-John, thanks for raising the question and all others-thanks for your answers in this thread!

SpeedyJ

Joined: September 17, 2013
KitMaker: 1,617 posts
Armorama: 1,150 posts
Posted: Wednesday, May 22, 2019 - 10:59 PM UTC
Hello.
Note that the bridges also can be found on the Panzer Kampfwagen II Ausf. D.
There were some Pioneer versions. I'm finishing one right now. Model comes from Bronco.
First 3 pictures you'll see the almost finished weathering of the bridge parts, including the wooden construction
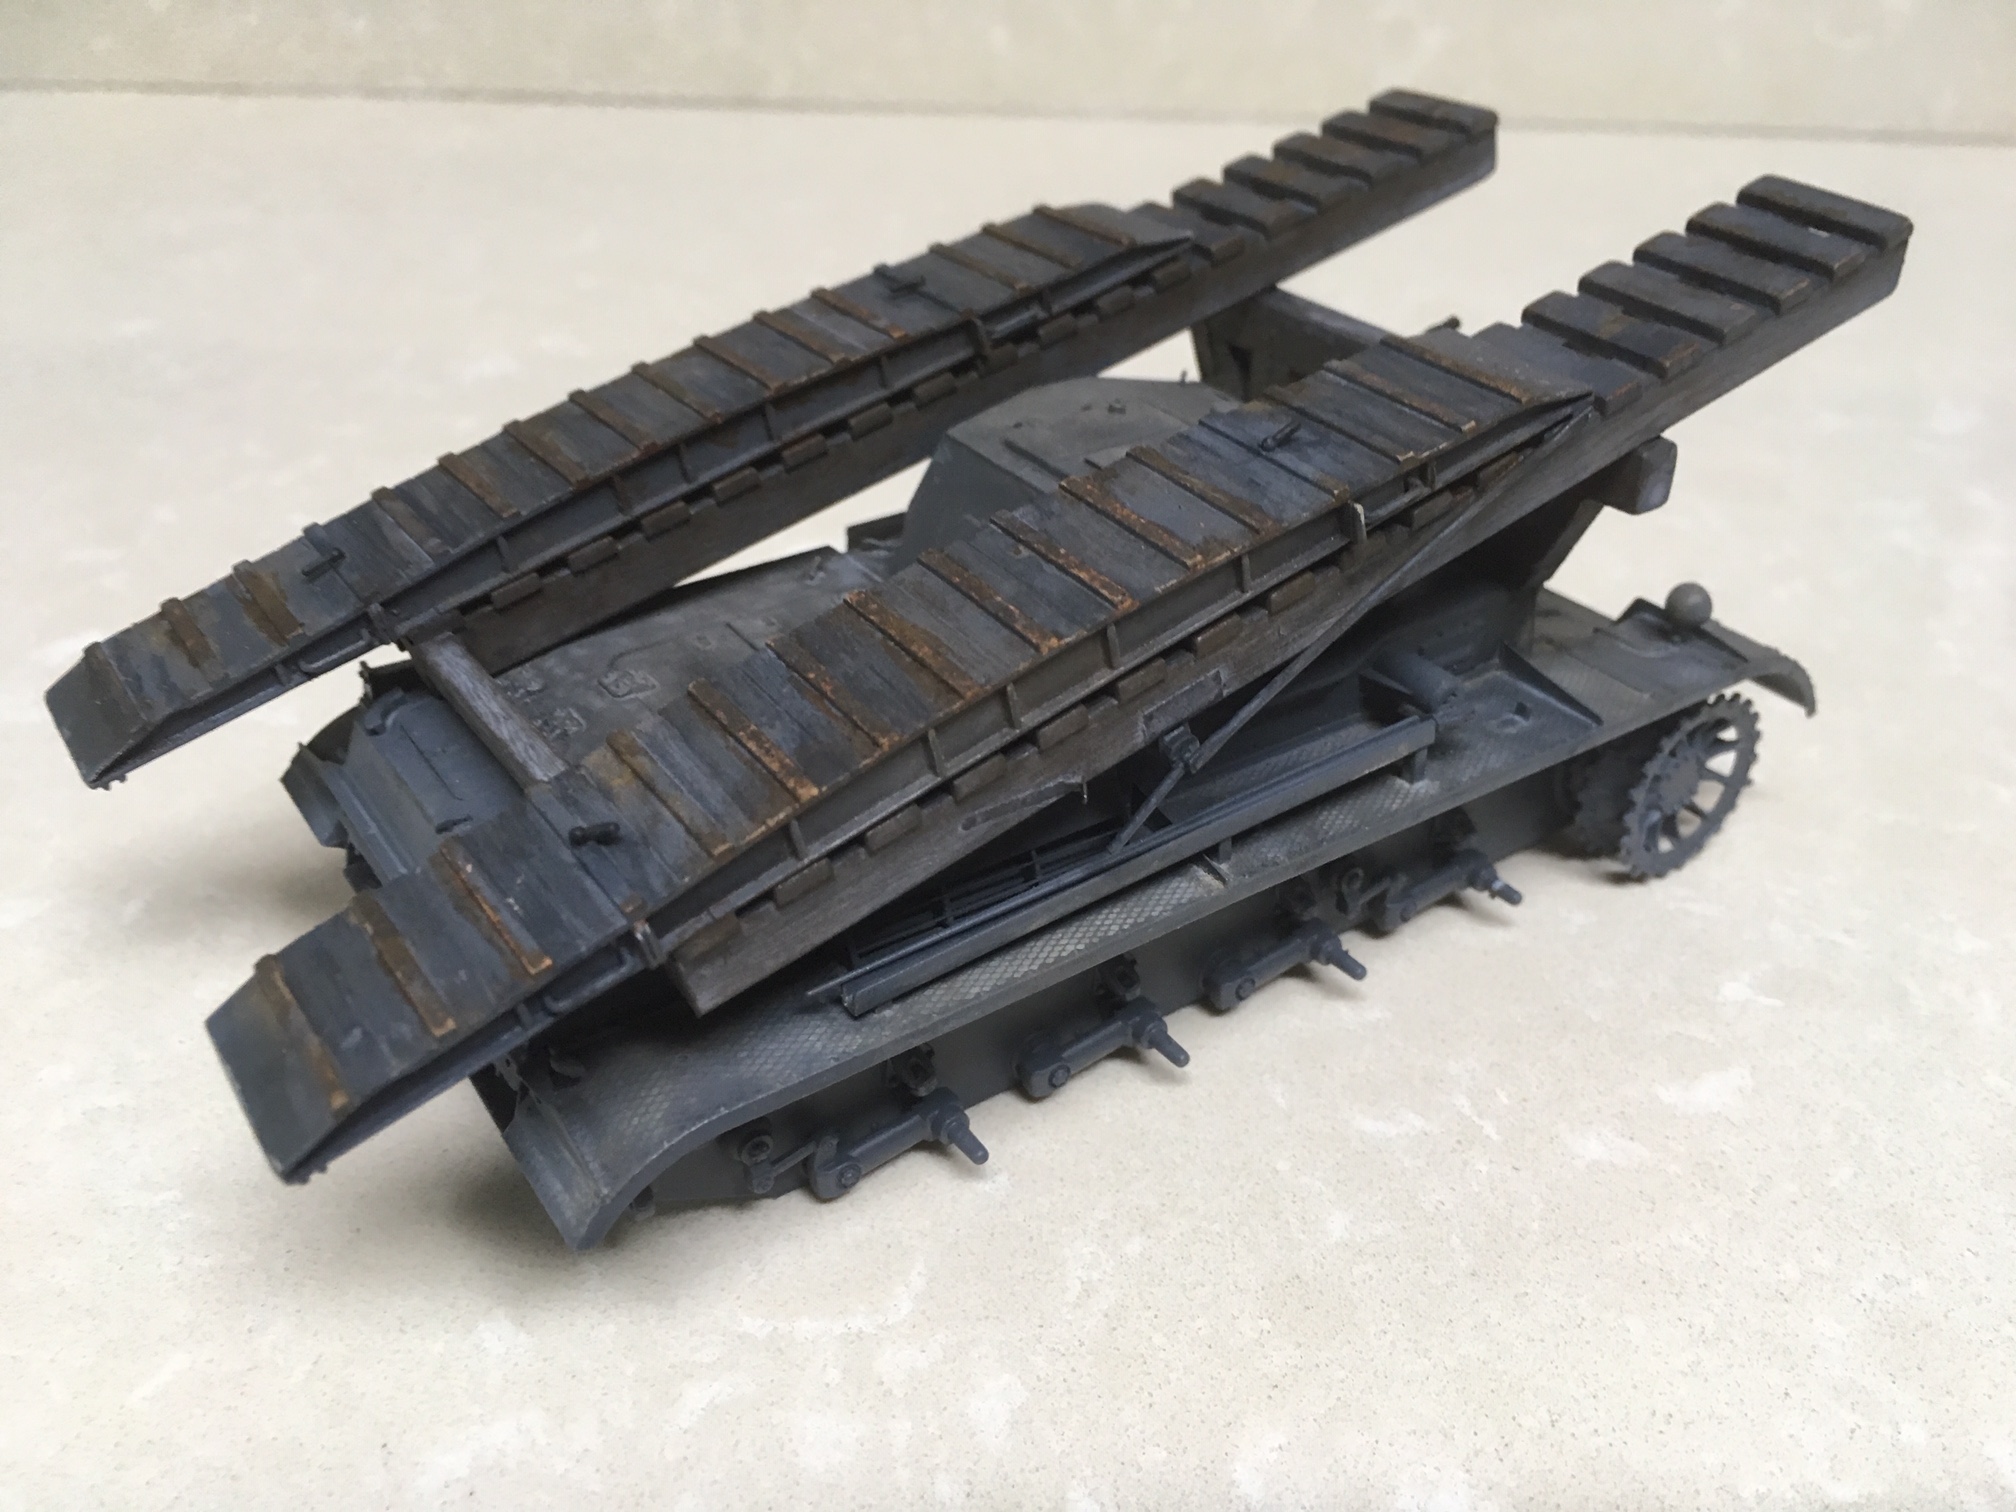
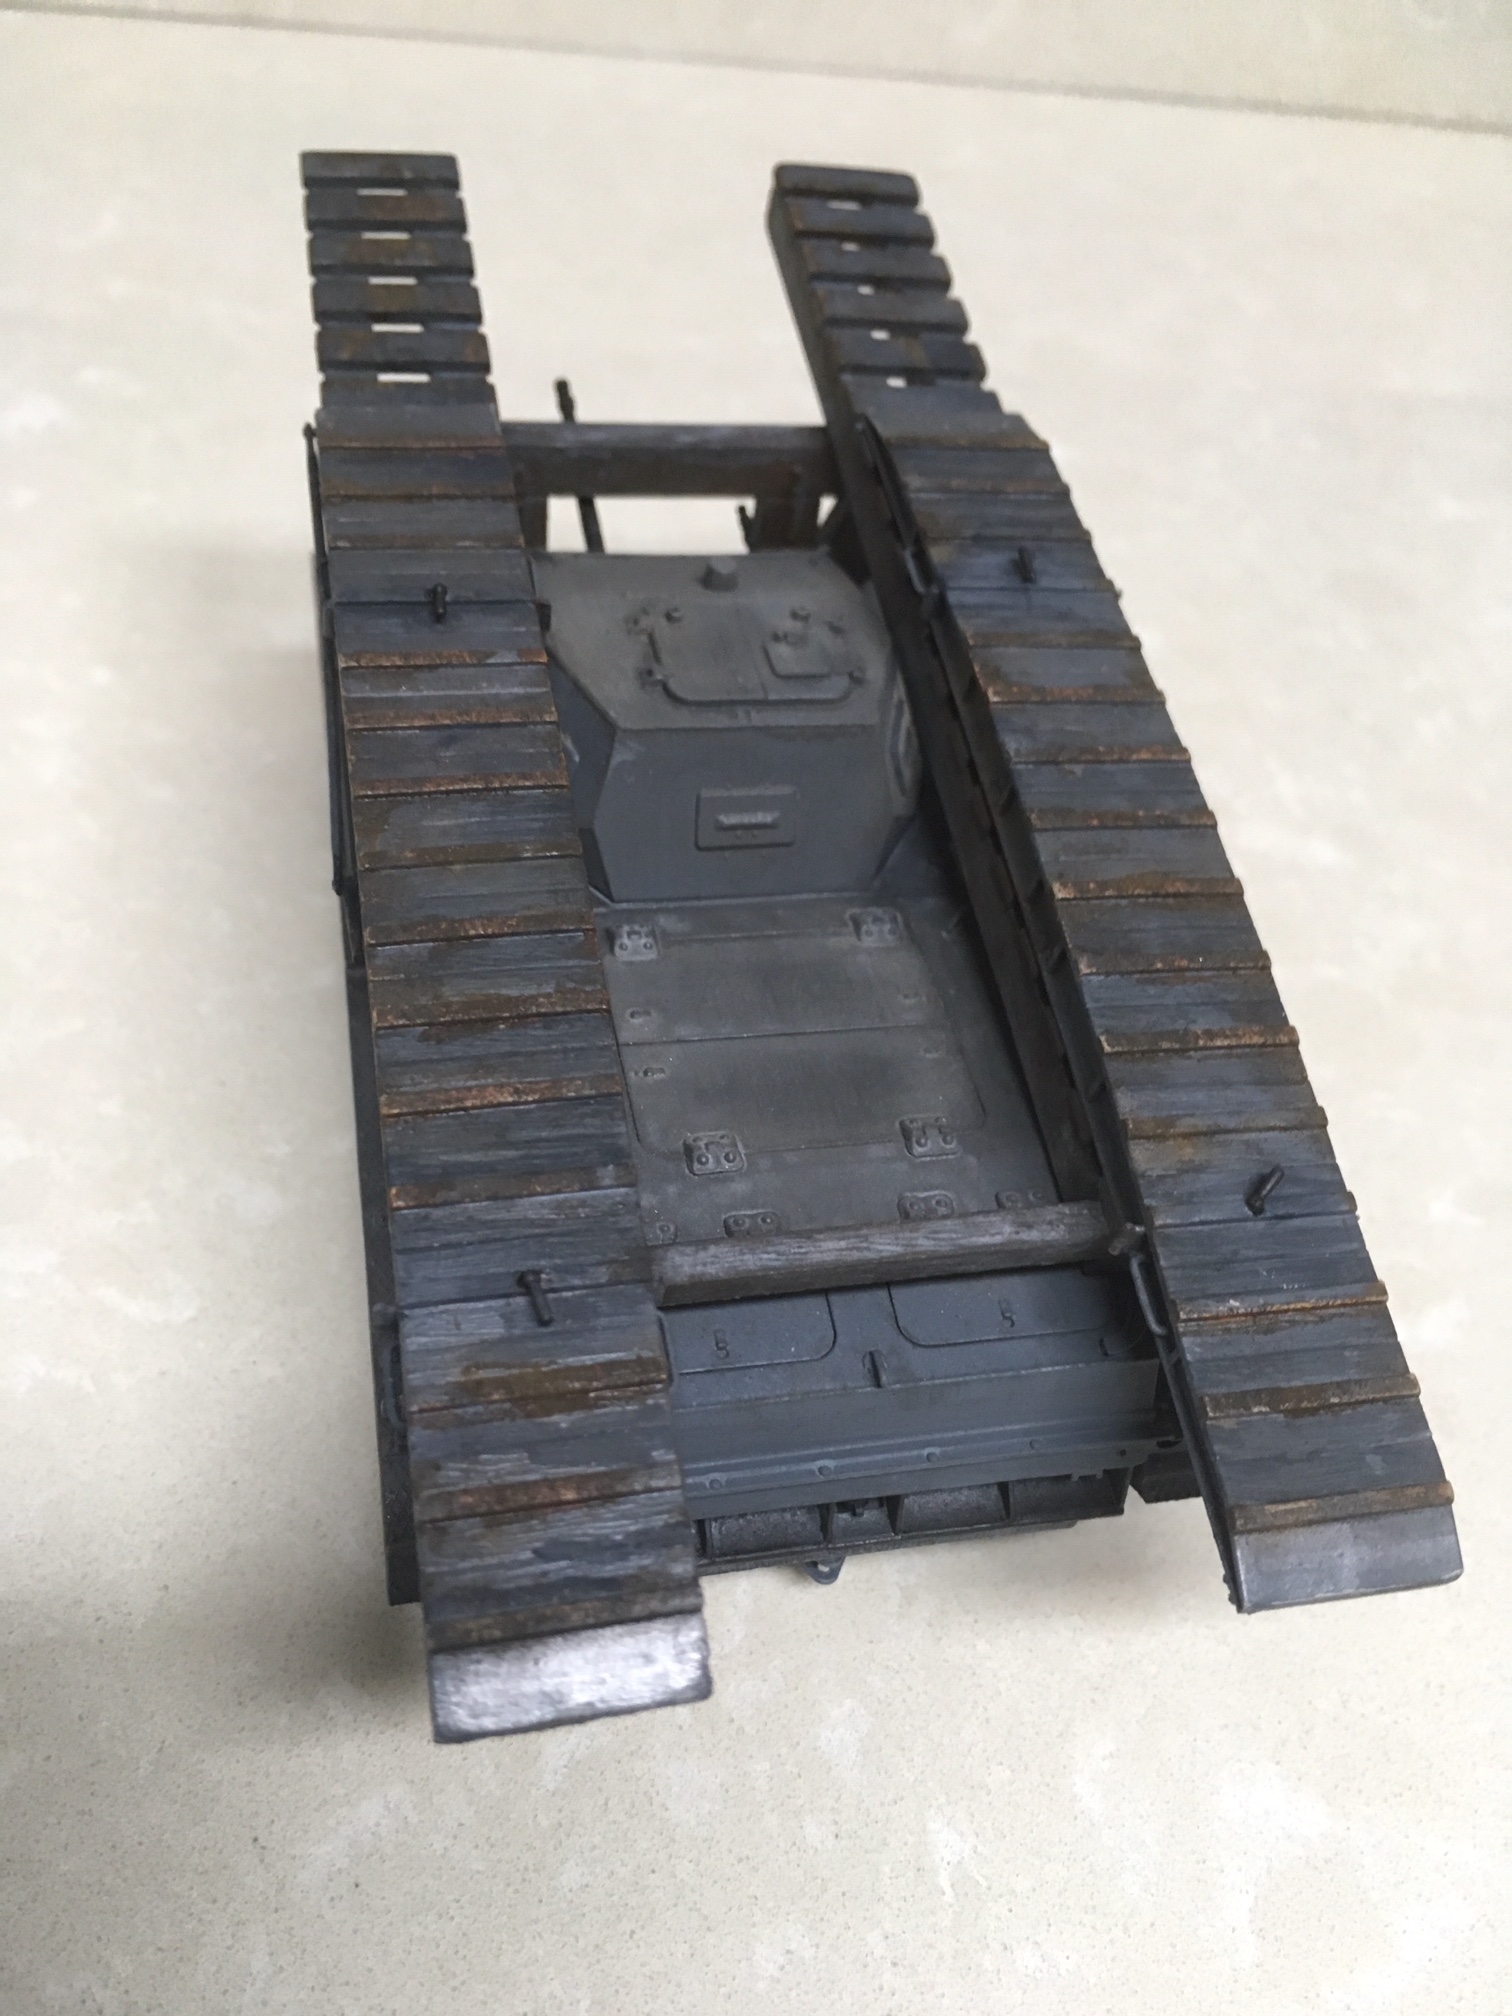
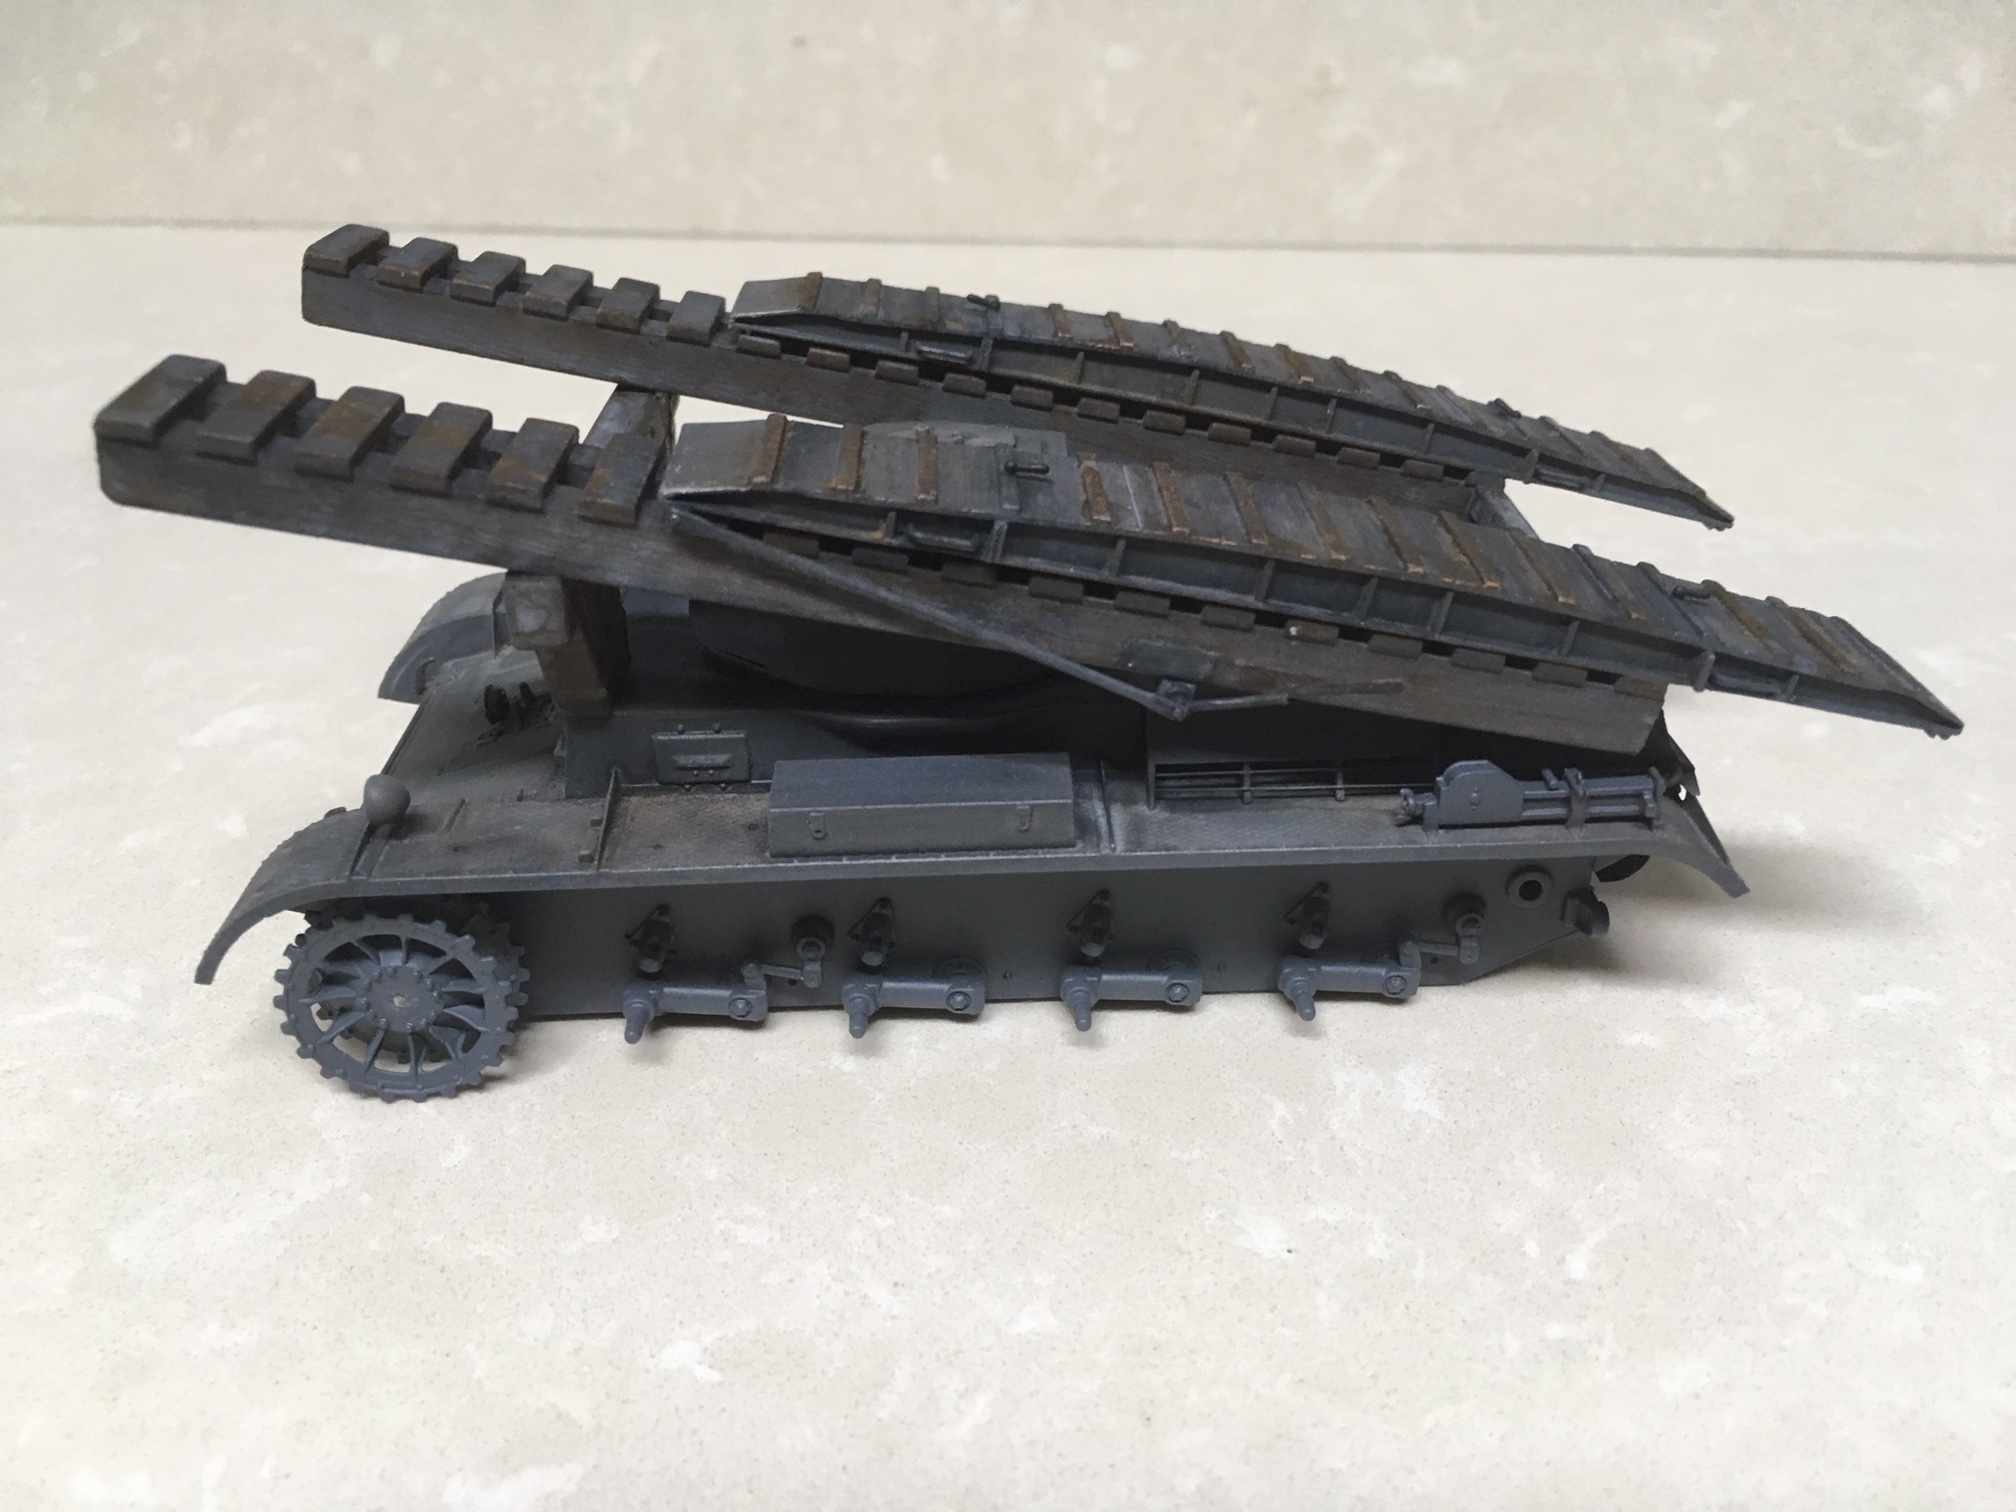
This 1 shows the application of all kind of pigments, diluted in a thinned oil wash. Still very rough and dusty.
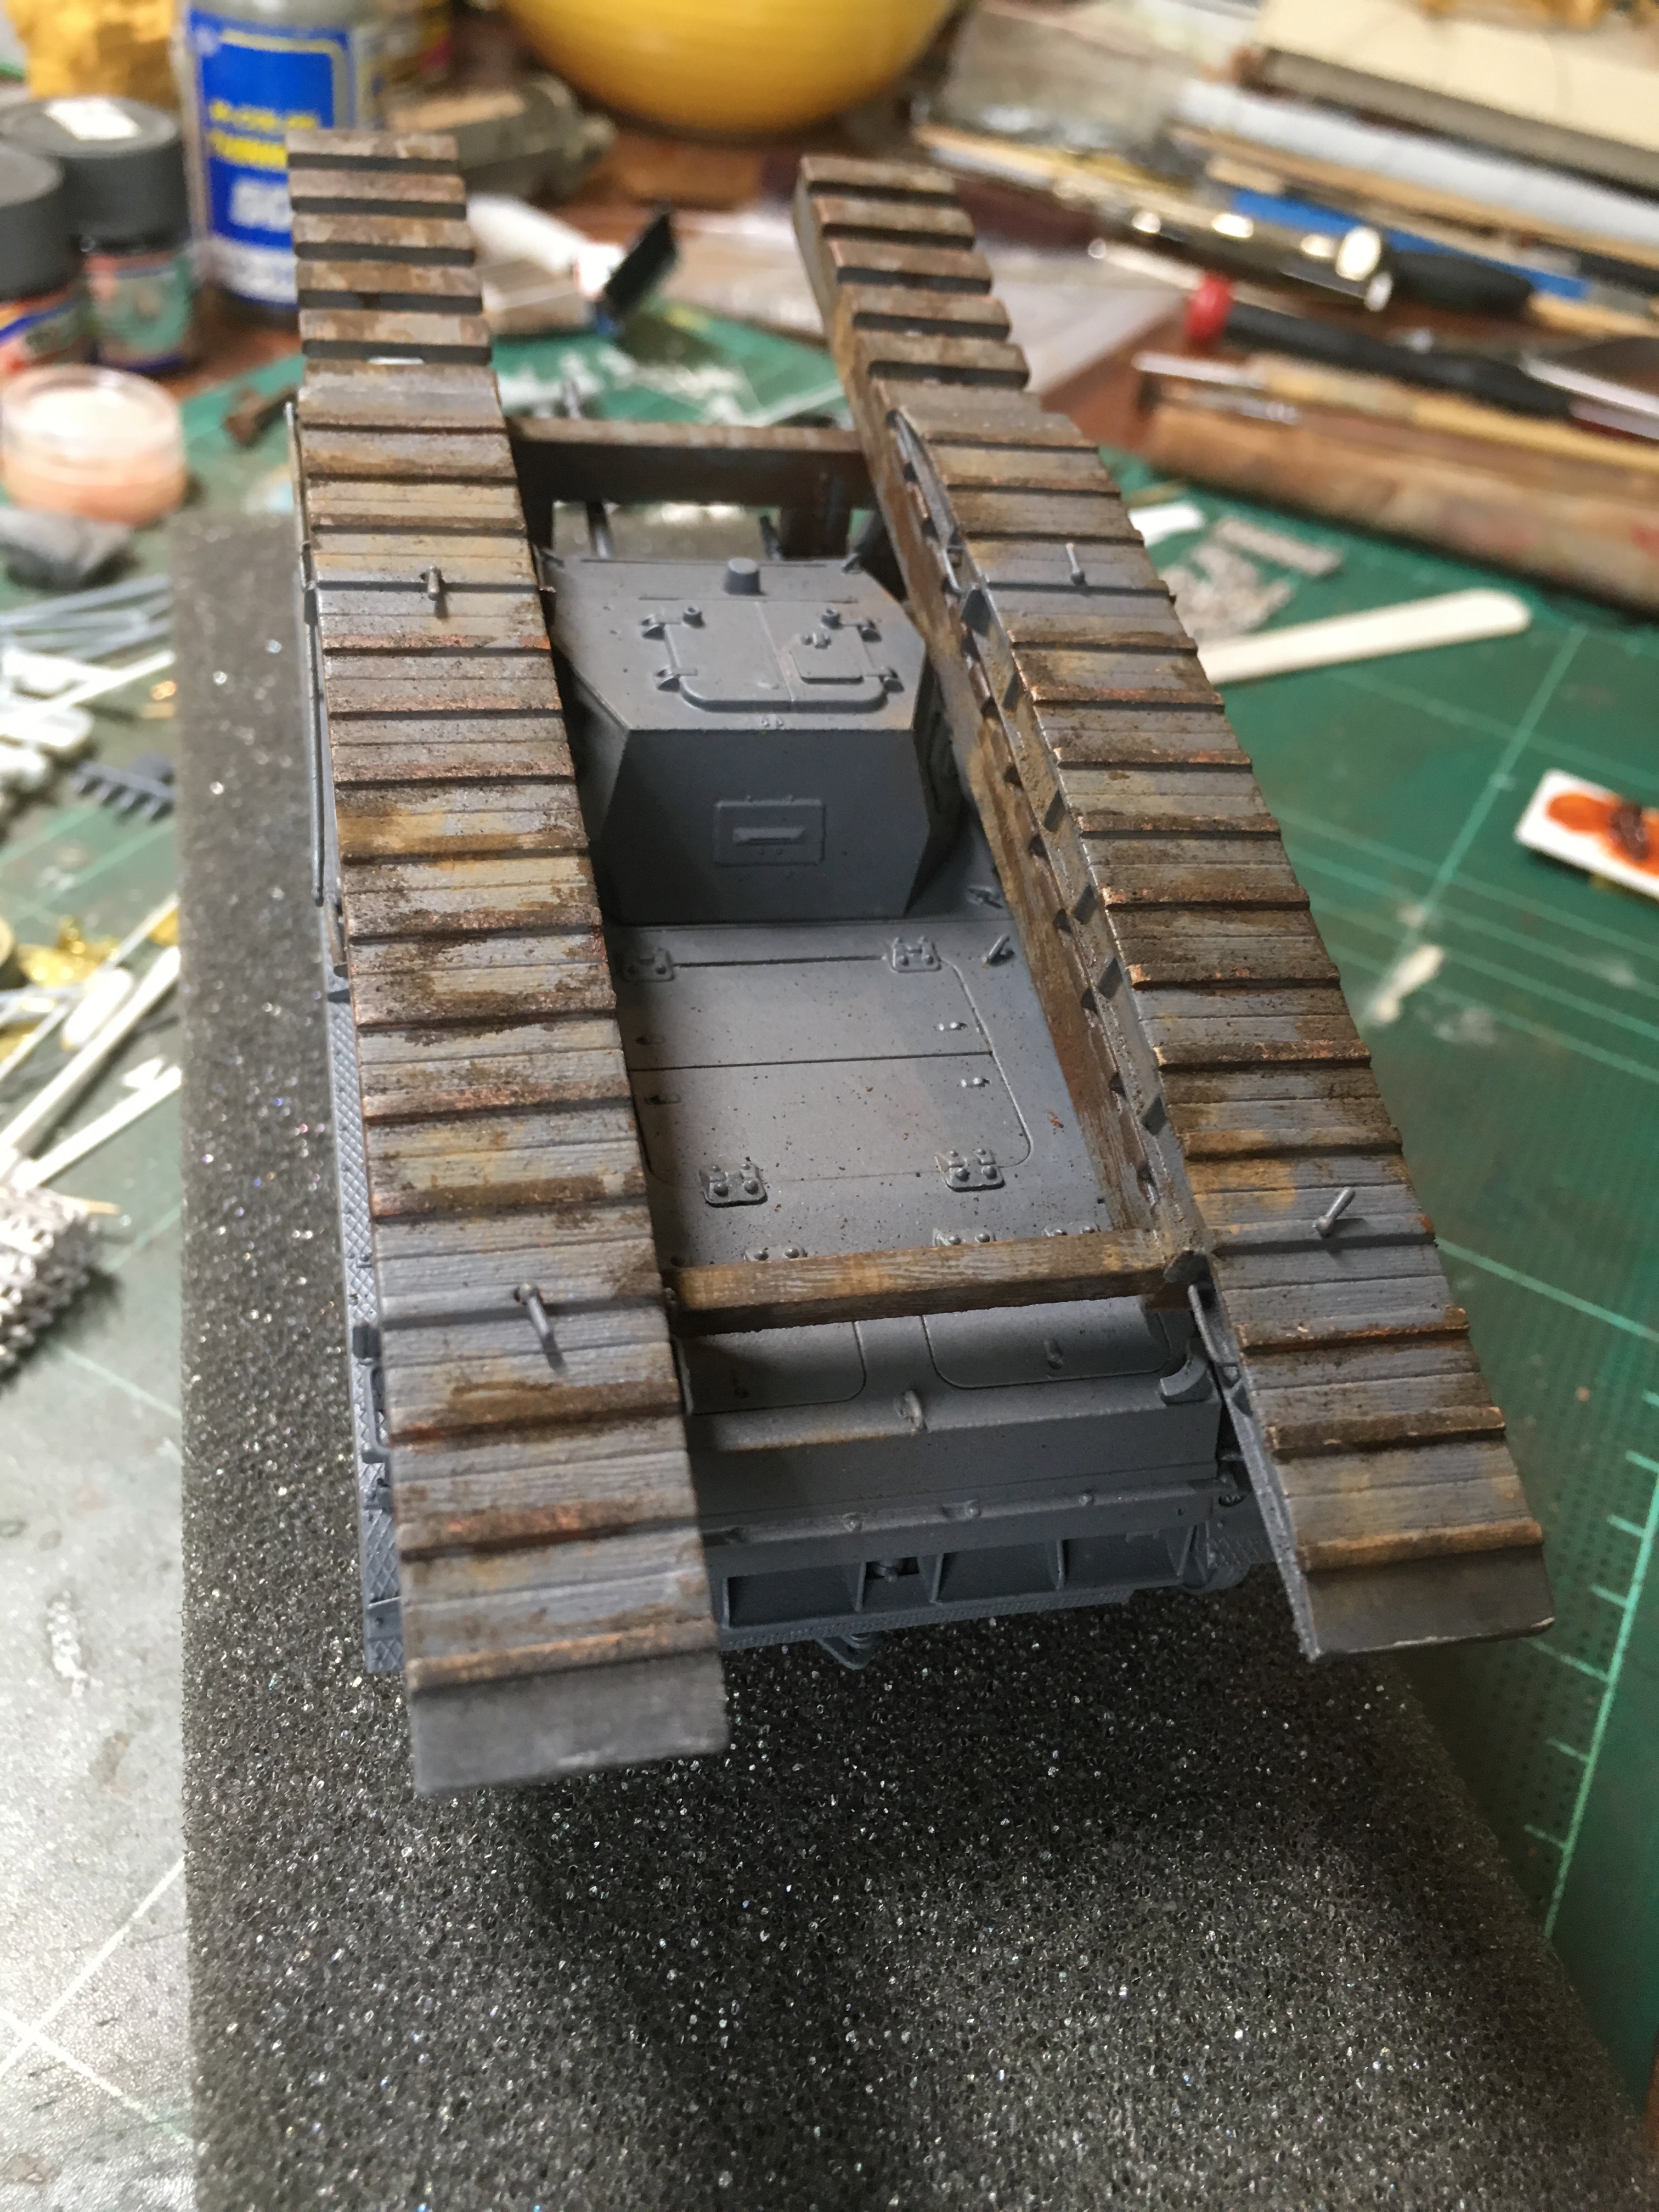
Here you see how the hairspray technique gives back the wood color which was colored with Oil paints.
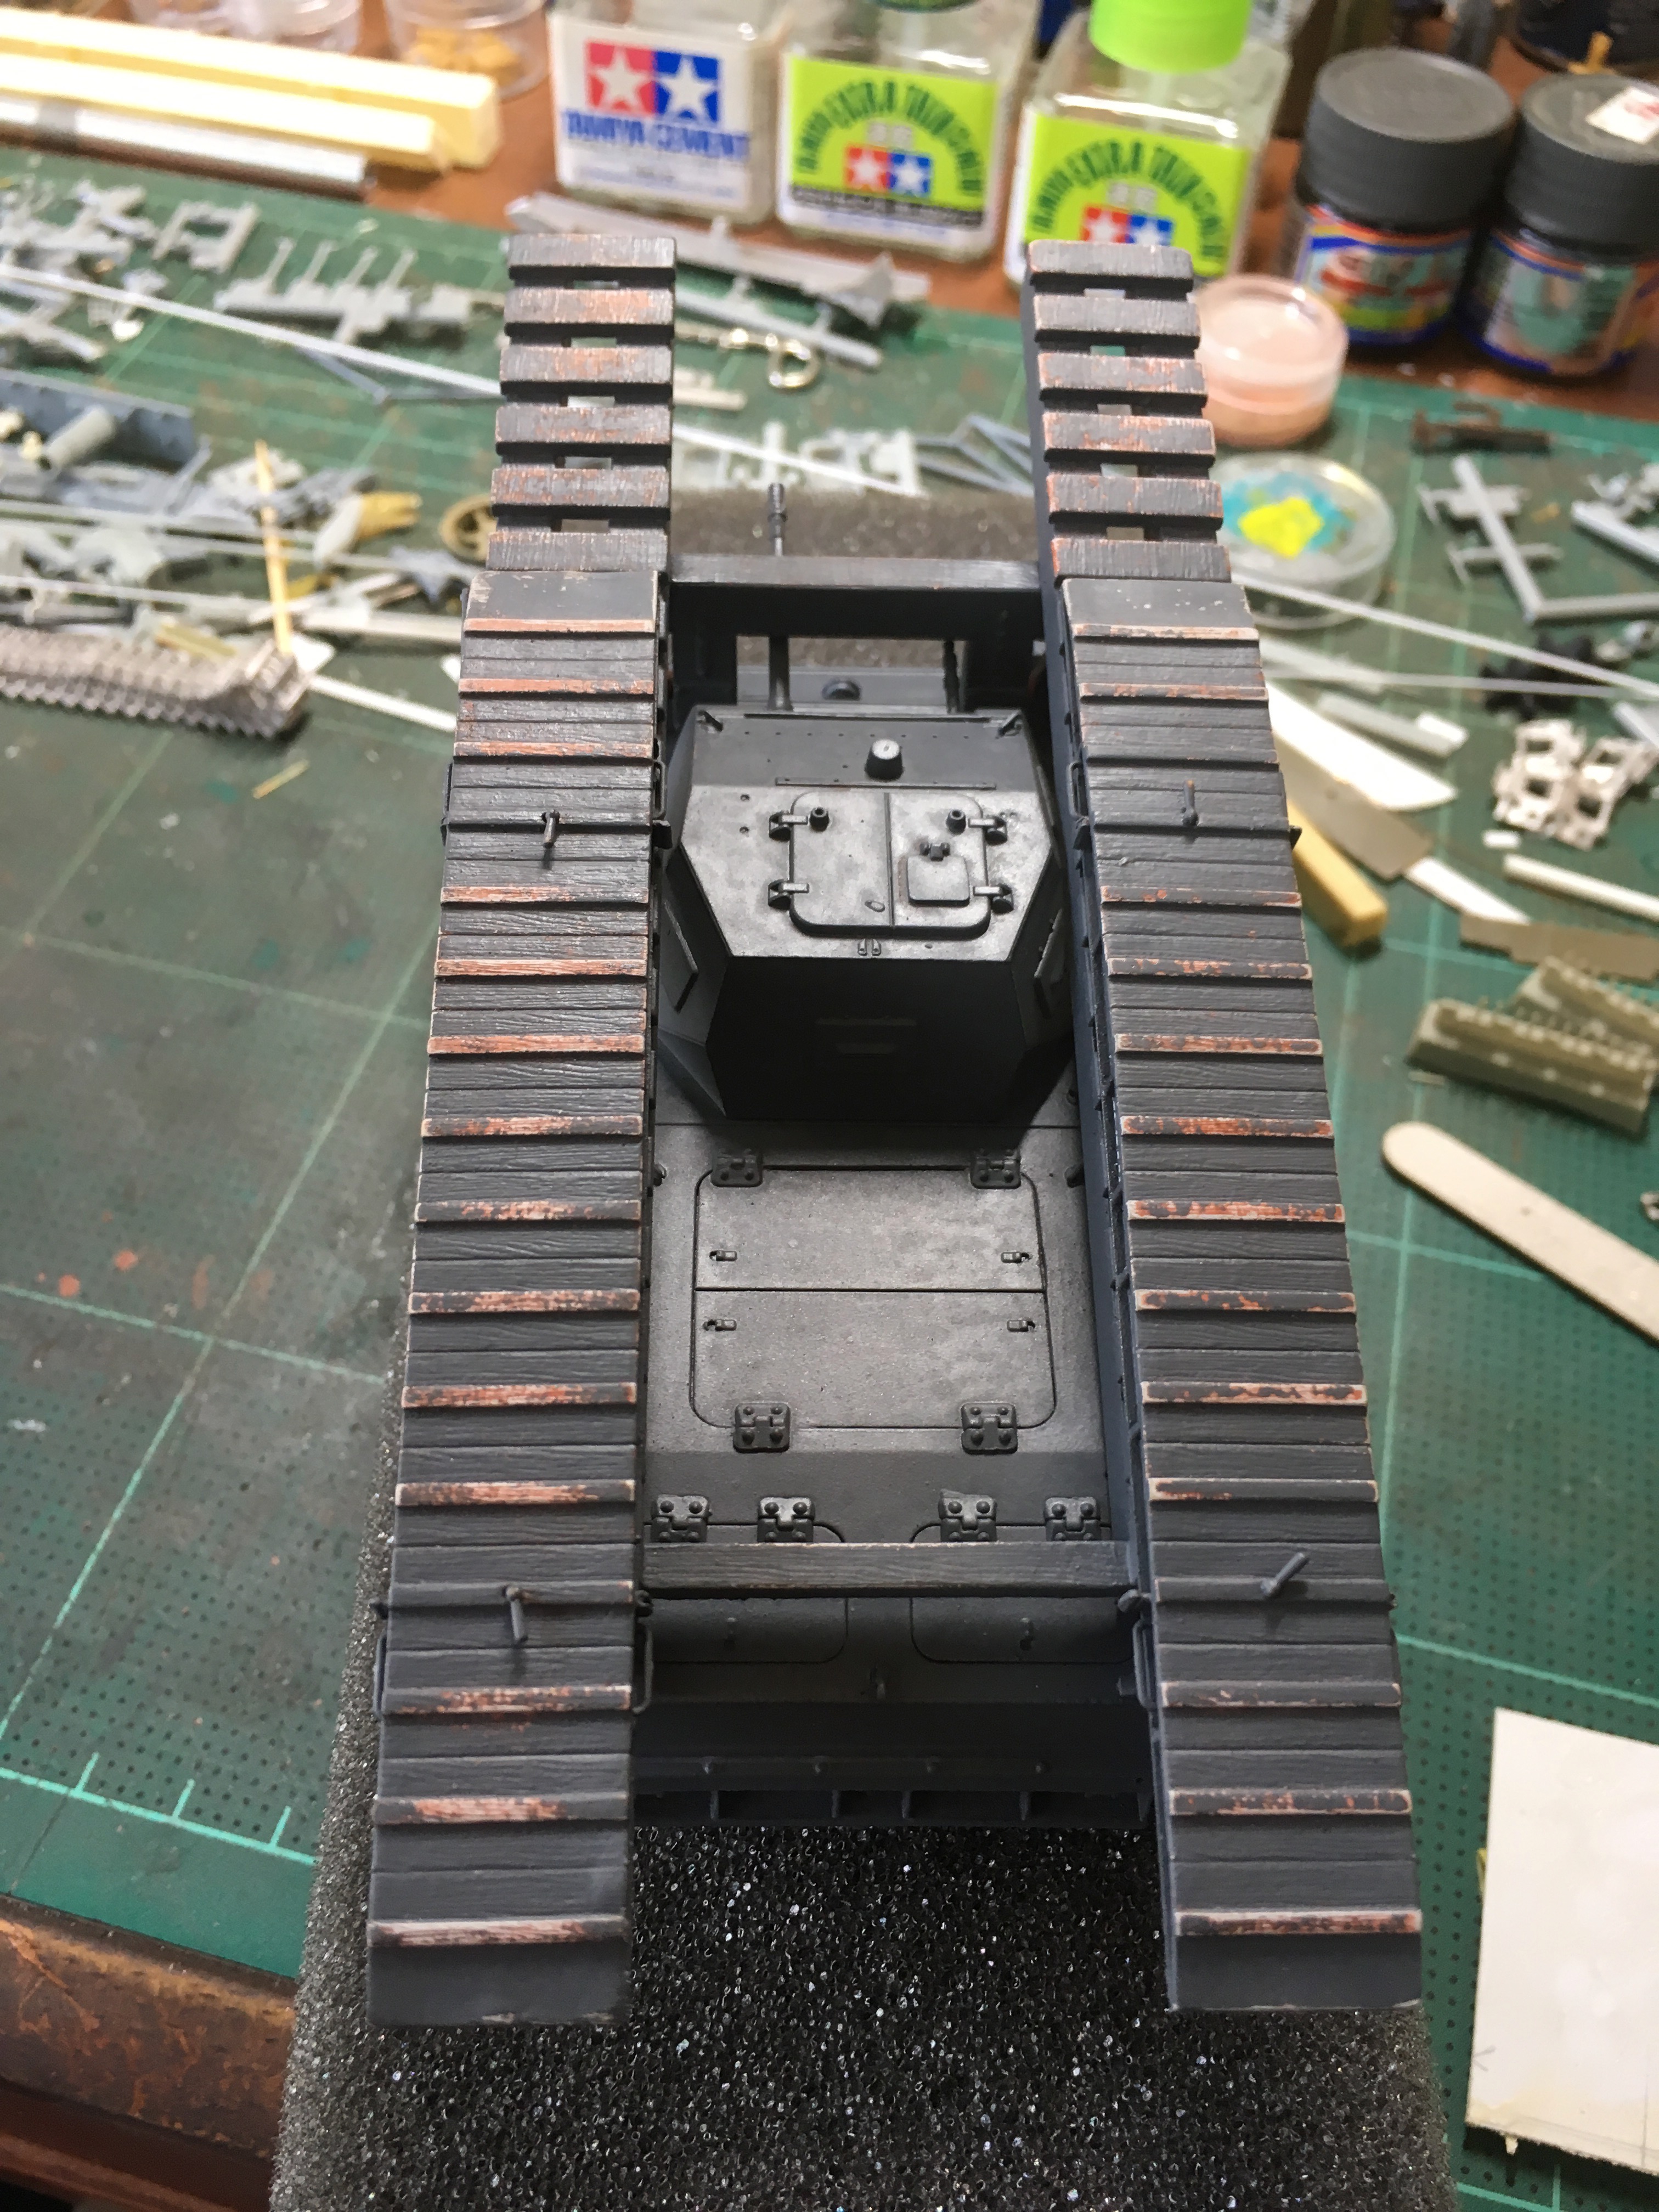
The overall finish is in German Grey with the accents I want to show from the wood.
Hope this helps to work on painting your bridges for the Sd.Kfz. 251/7
Kind regards,
Robert Jan

Note that the bridges also can be found on the Panzer Kampfwagen II Ausf. D.
There were some Pioneer versions. I'm finishing one right now. Model comes from Bronco.
First 3 pictures you'll see the almost finished weathering of the bridge parts, including the wooden construction
This 1 shows the application of all kind of pigments, diluted in a thinned oil wash. Still very rough and dusty.
Here you see how the hairspray technique gives back the wood color which was colored with Oil paints.
The overall finish is in German Grey with the accents I want to show from the wood.
Hope this helps to work on painting your bridges for the Sd.Kfz. 251/7
Kind regards,
Robert Jan
165thspc
#521
Joined: April 13, 2011
KitMaker: 9,465 posts
Armorama: 8,695 posts
Posted: Friday, May 31, 2019 - 11:17 AM UTC
Here is exactly the type of application where those inexpensive resin bridges I spoke of will not line up and therefore will not work.

johnstone
Joined: September 11, 2017
KitMaker: 77 posts
Armorama: 69 posts
Posted: Friday, May 31, 2019 - 01:39 PM UTC
Guys - thanks again to all of you. My model is finally done - waiting to go into a diorama. Couldn't have done it without you!
 |

WEB HOSTING BY


Copyright ©2021 Armorama and Kitmaker Network, a subsidiary of Silver Star Enterprises
All Rights Reserved. Please read our Conditions of Use and Privacy Policy.
All Rights Reserved. Please read our Conditions of Use and Privacy Policy.