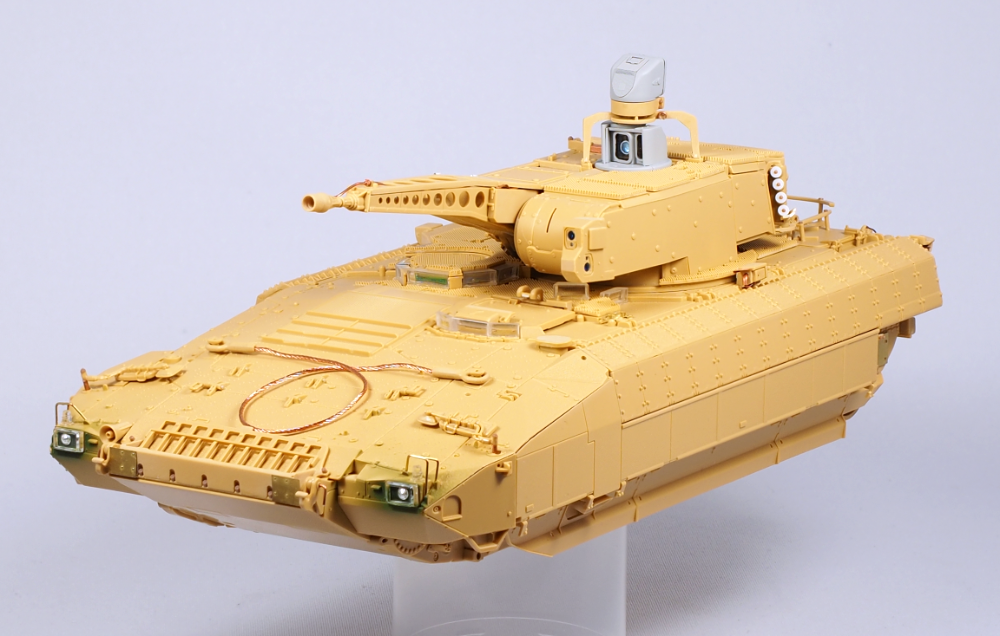
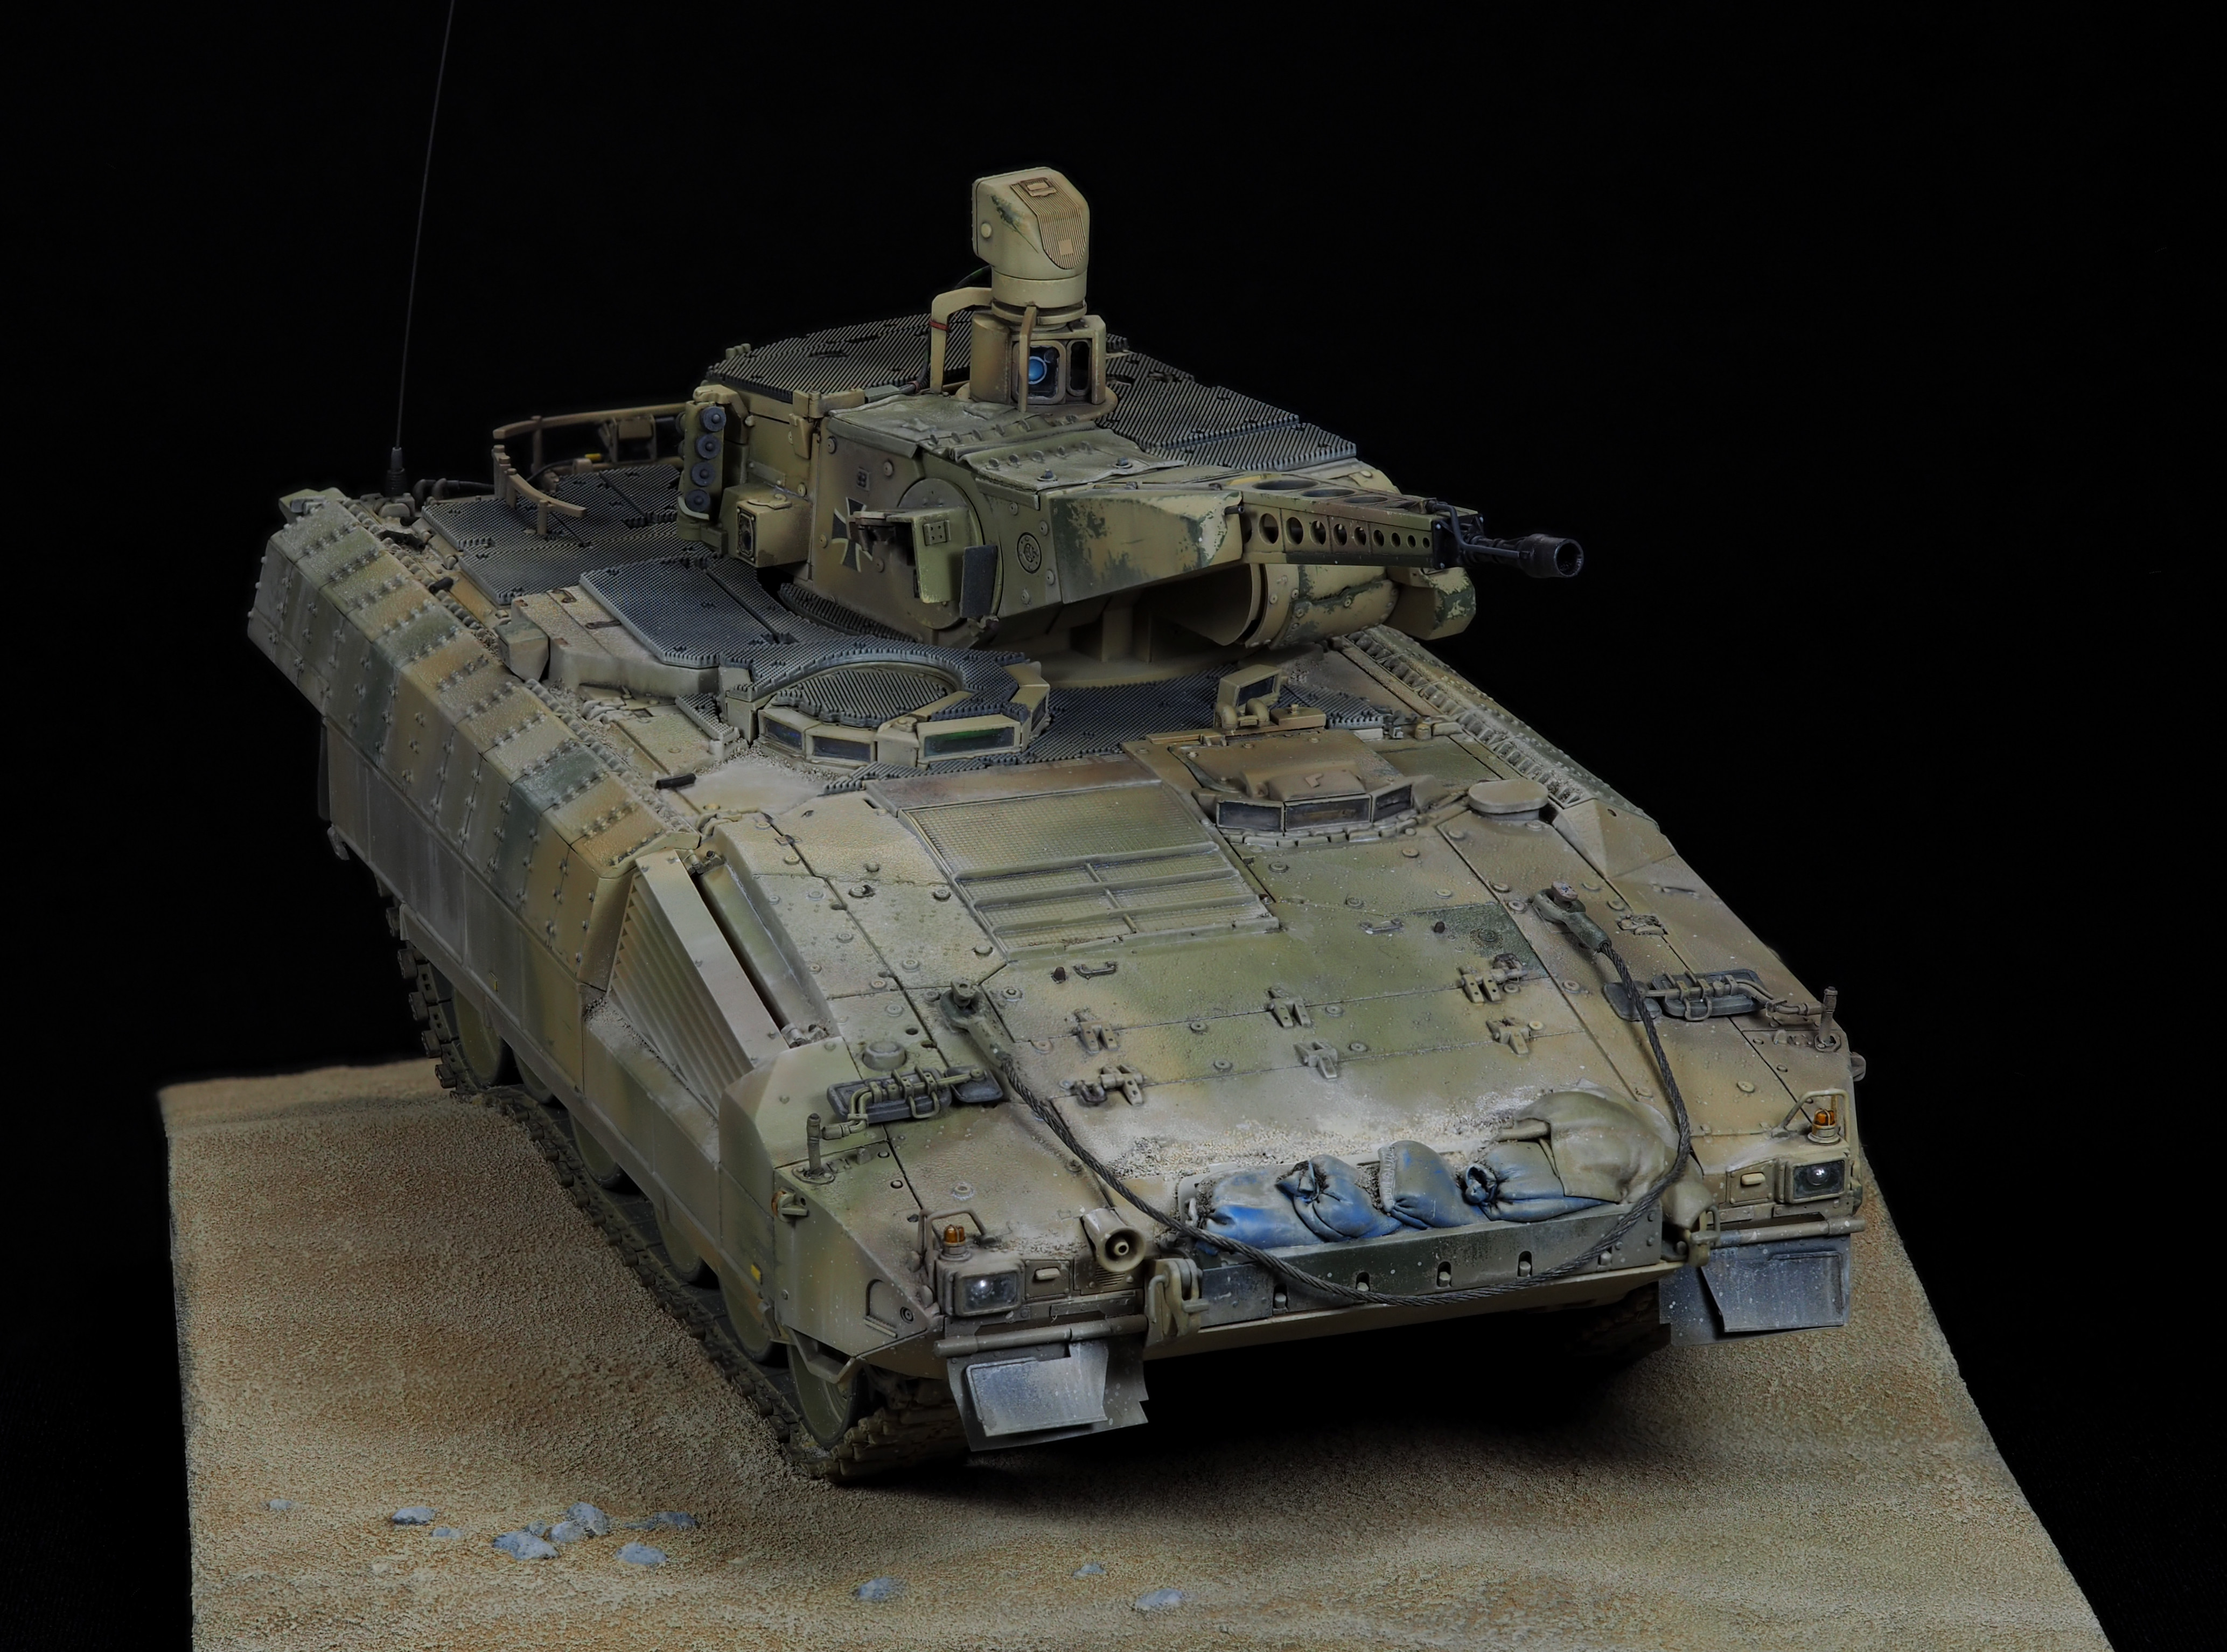
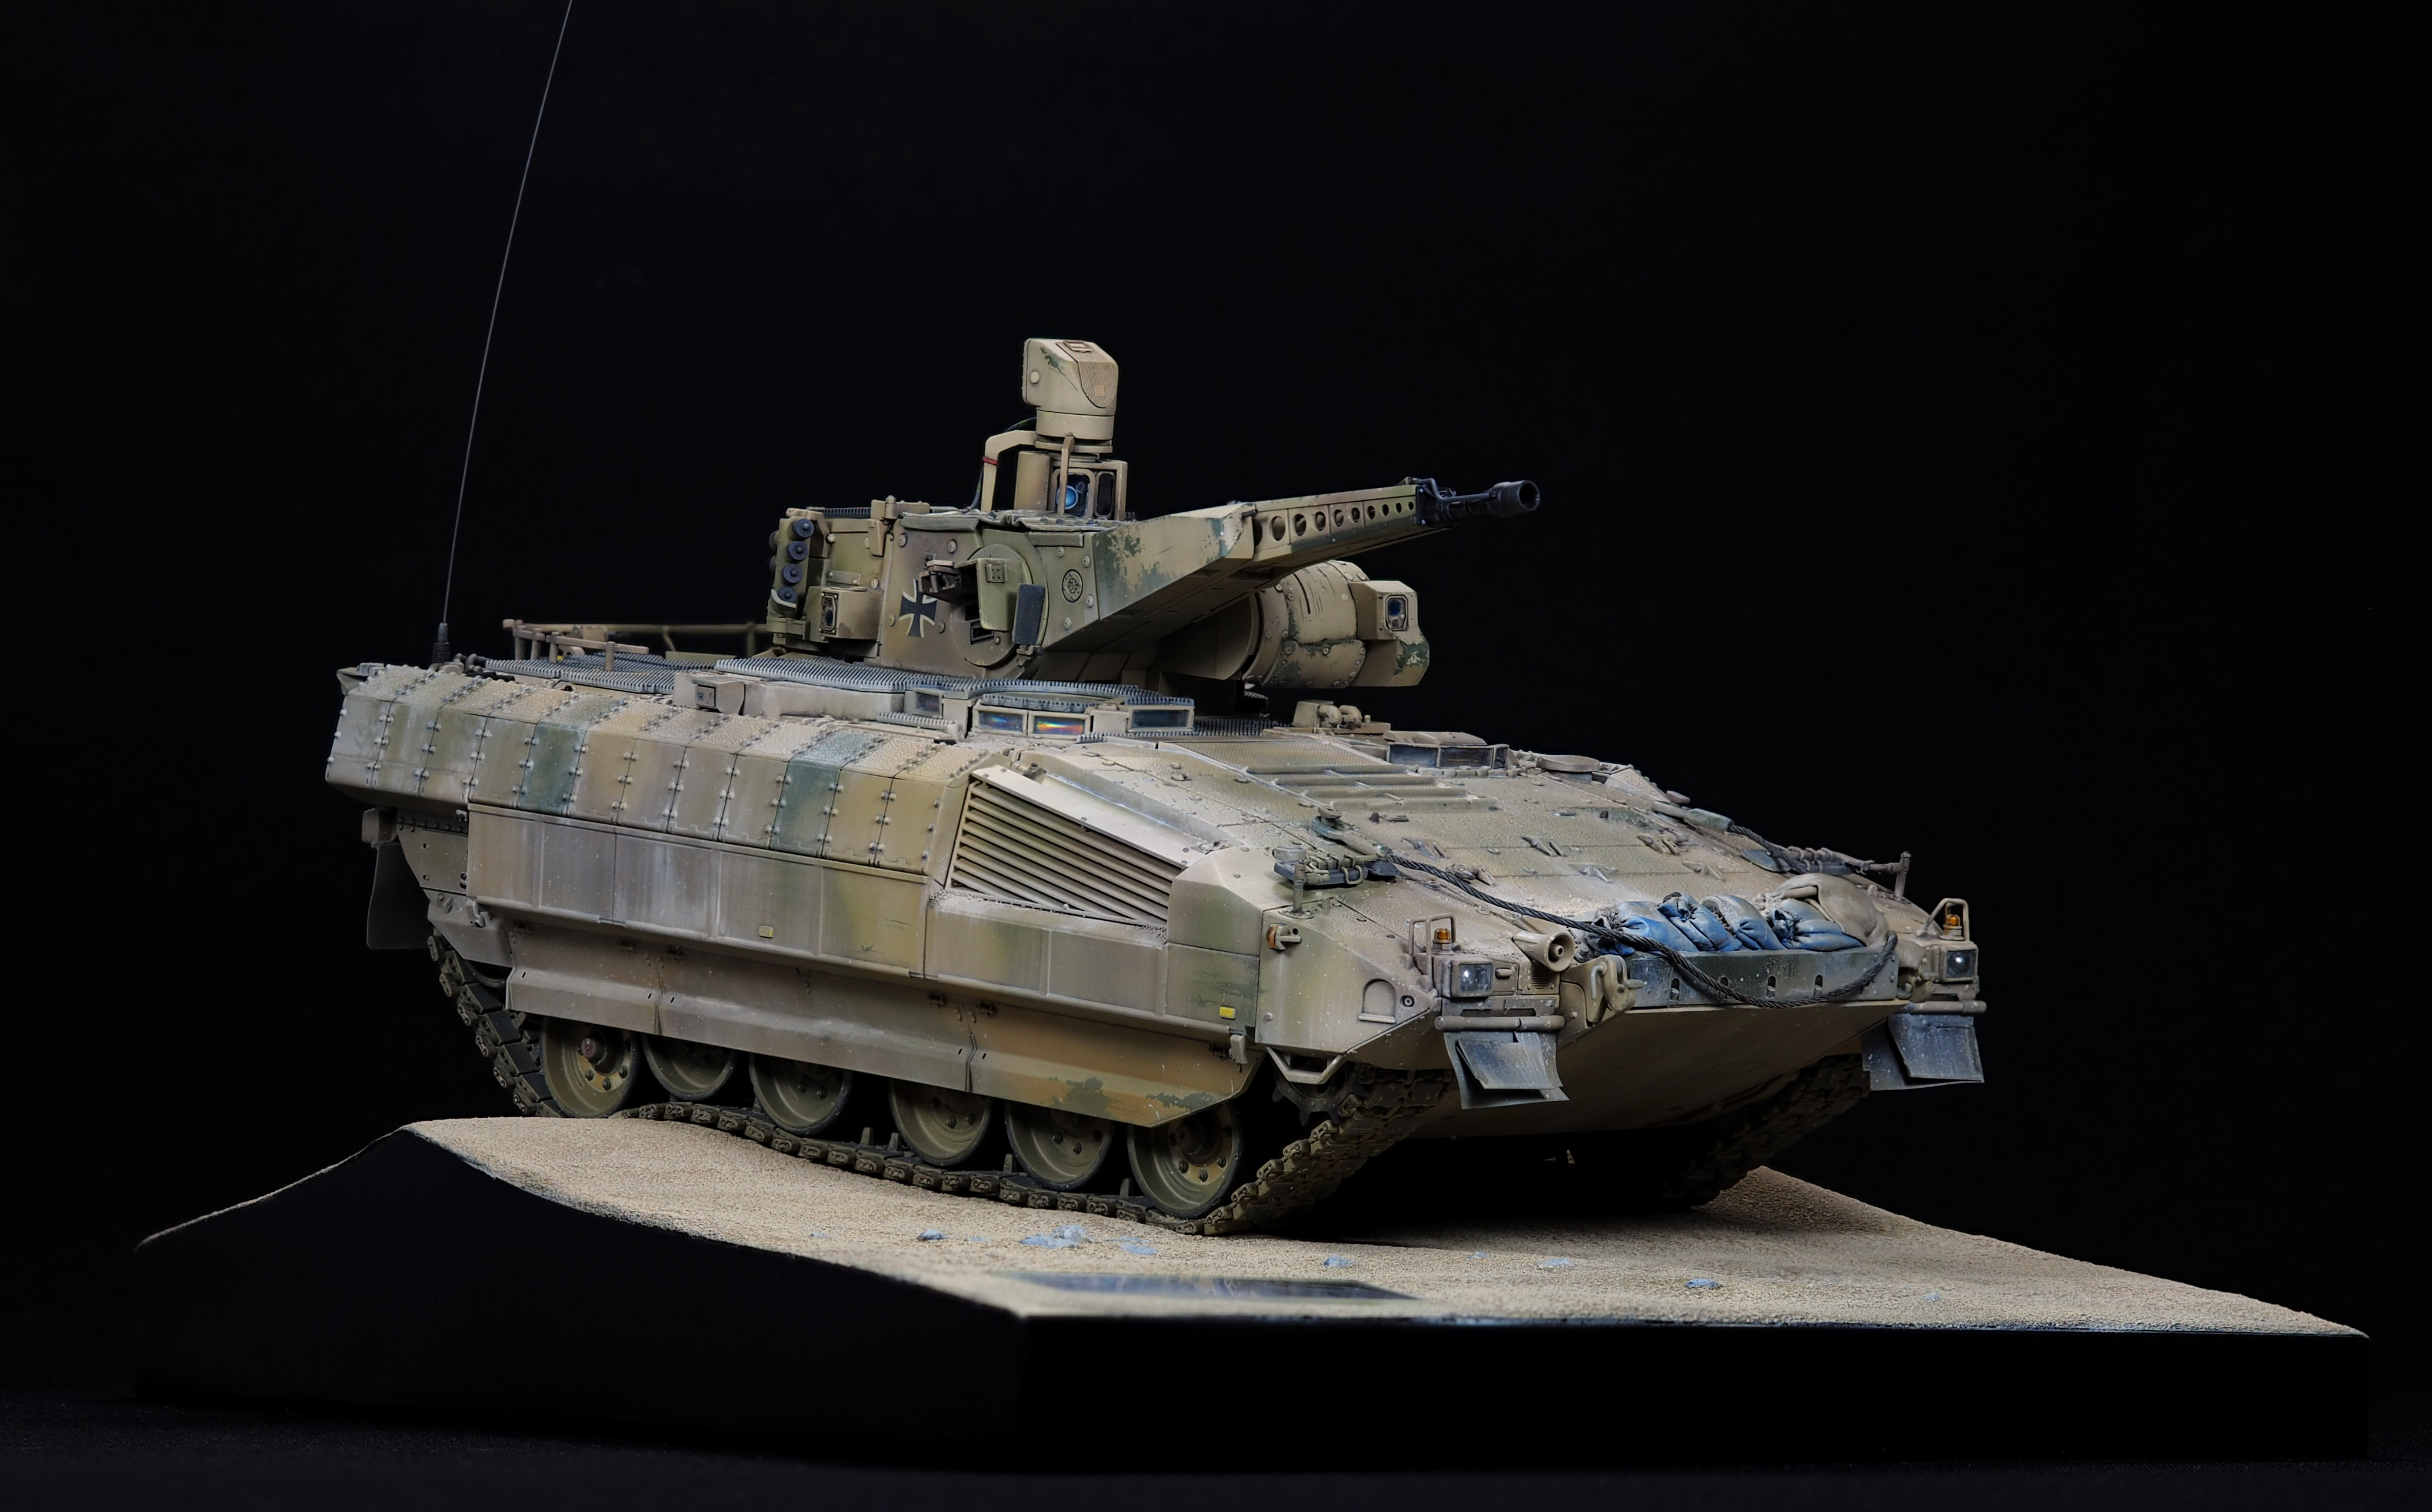
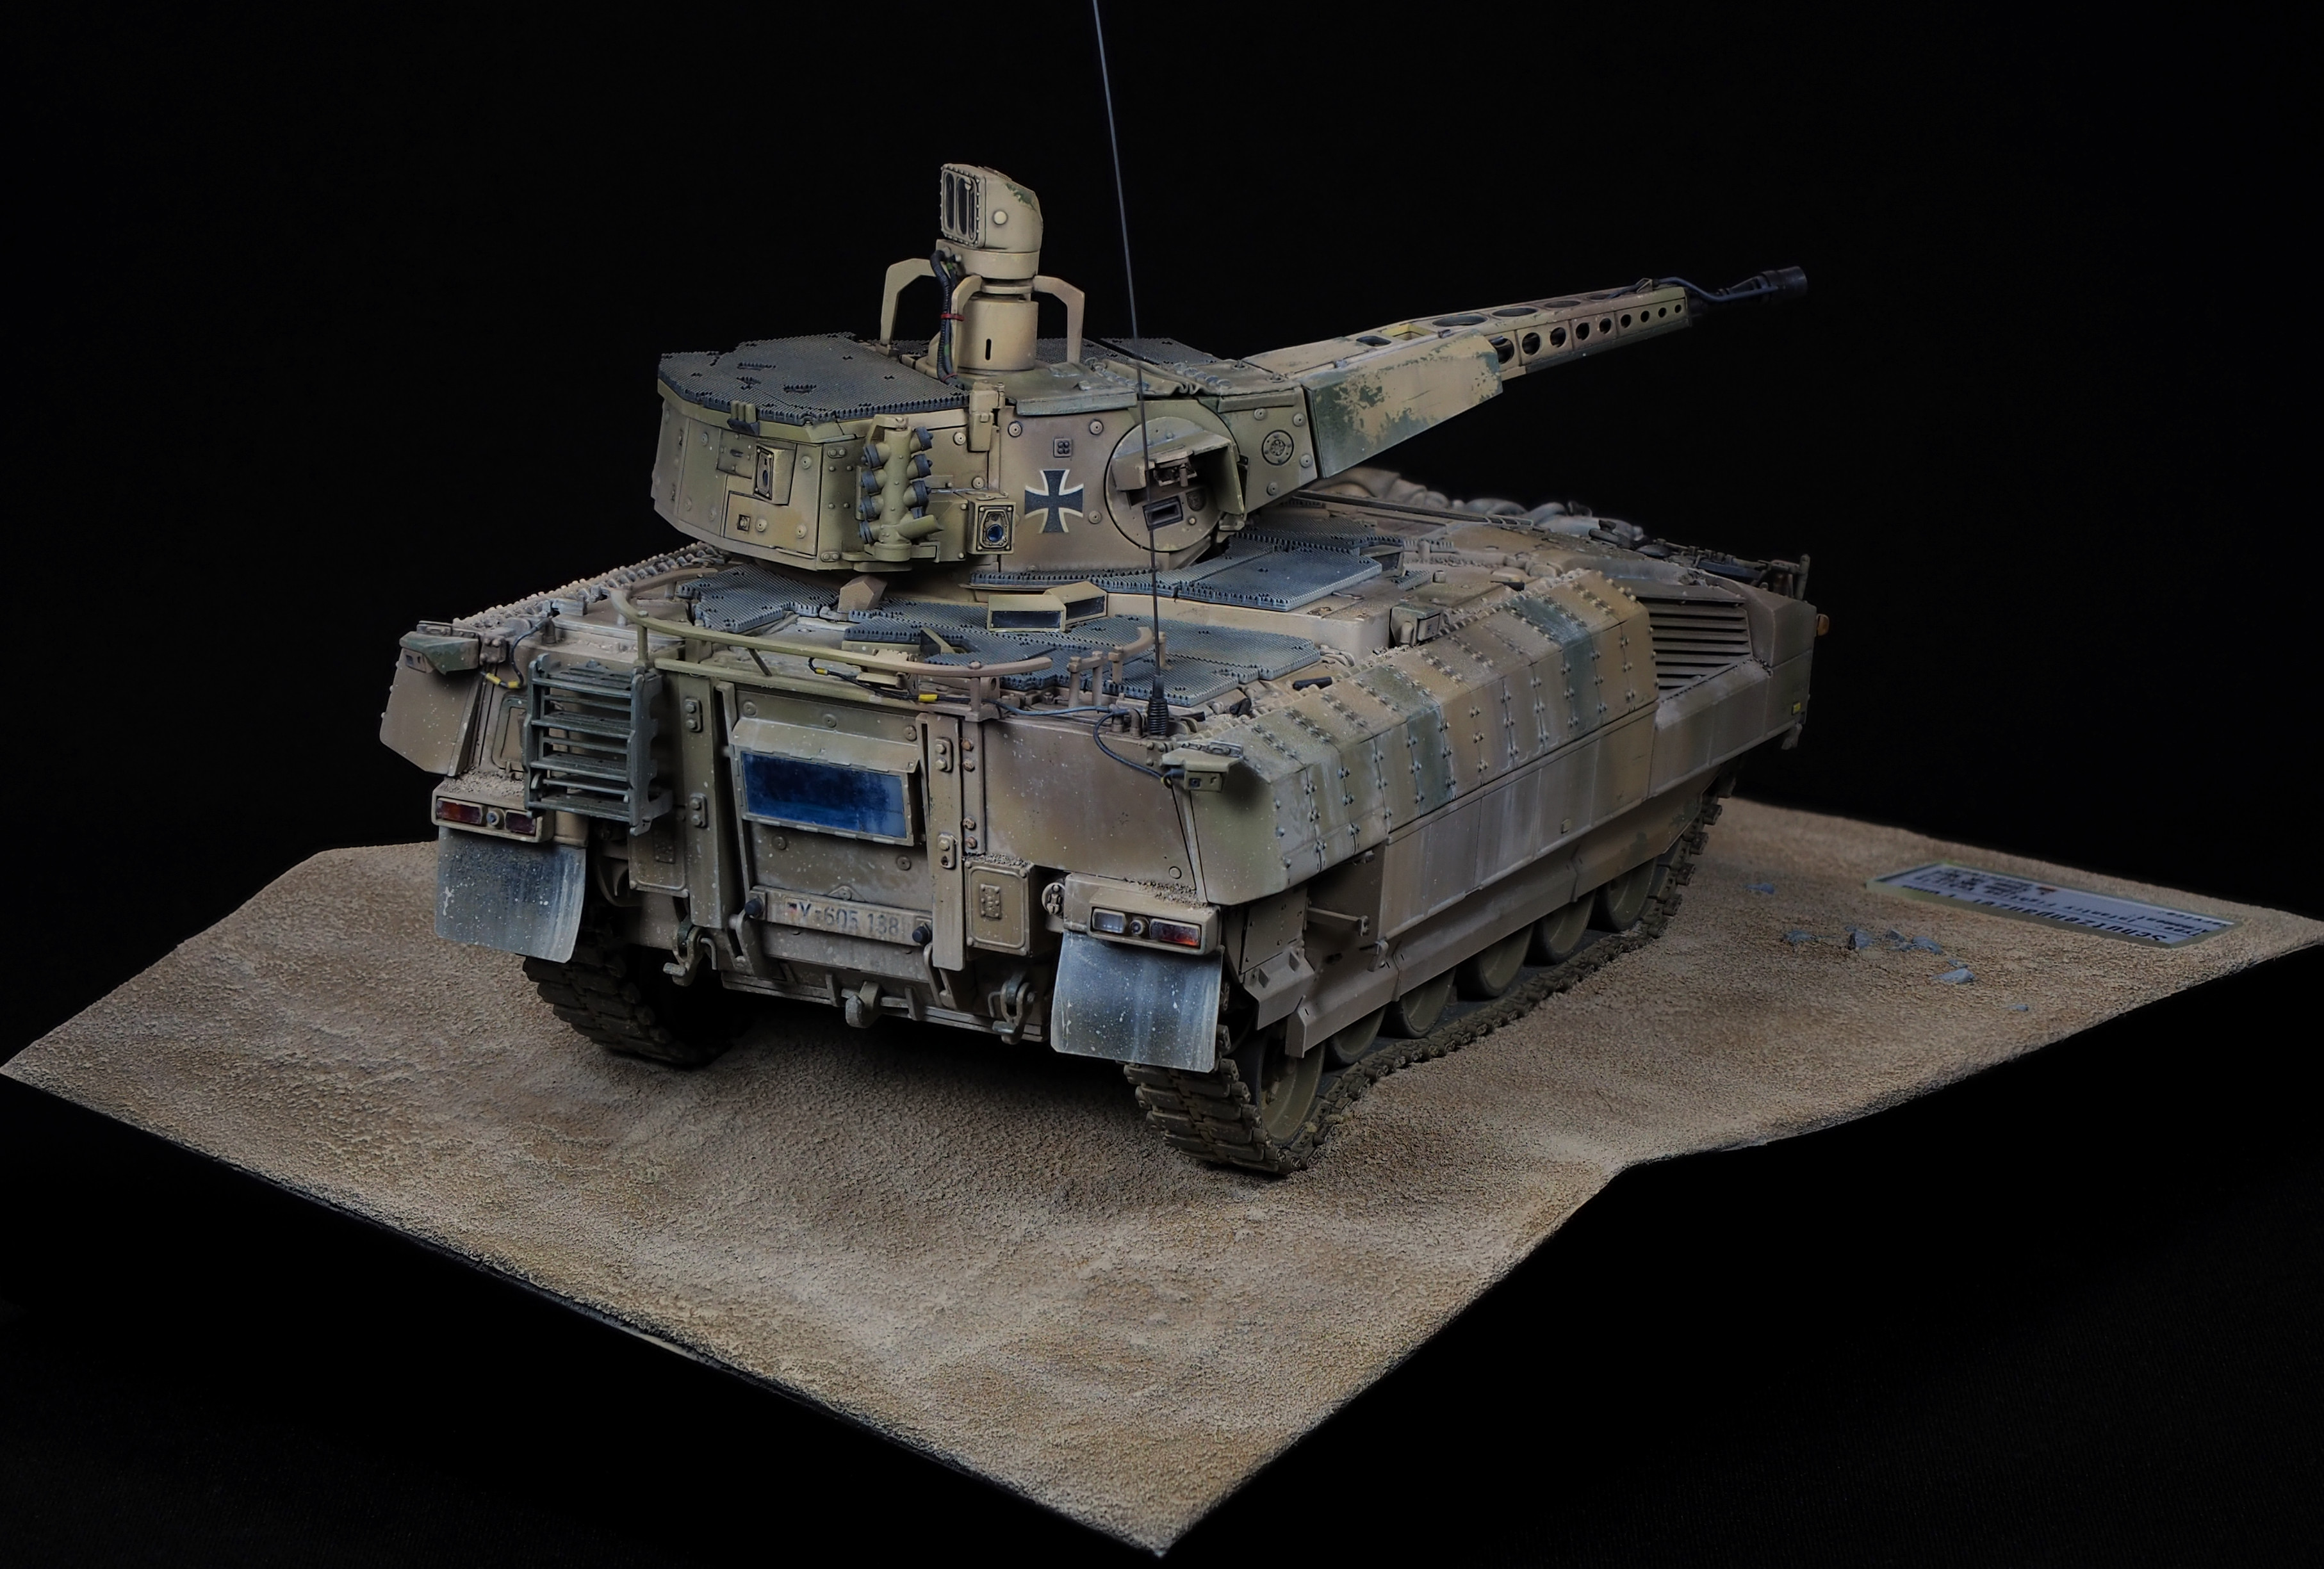
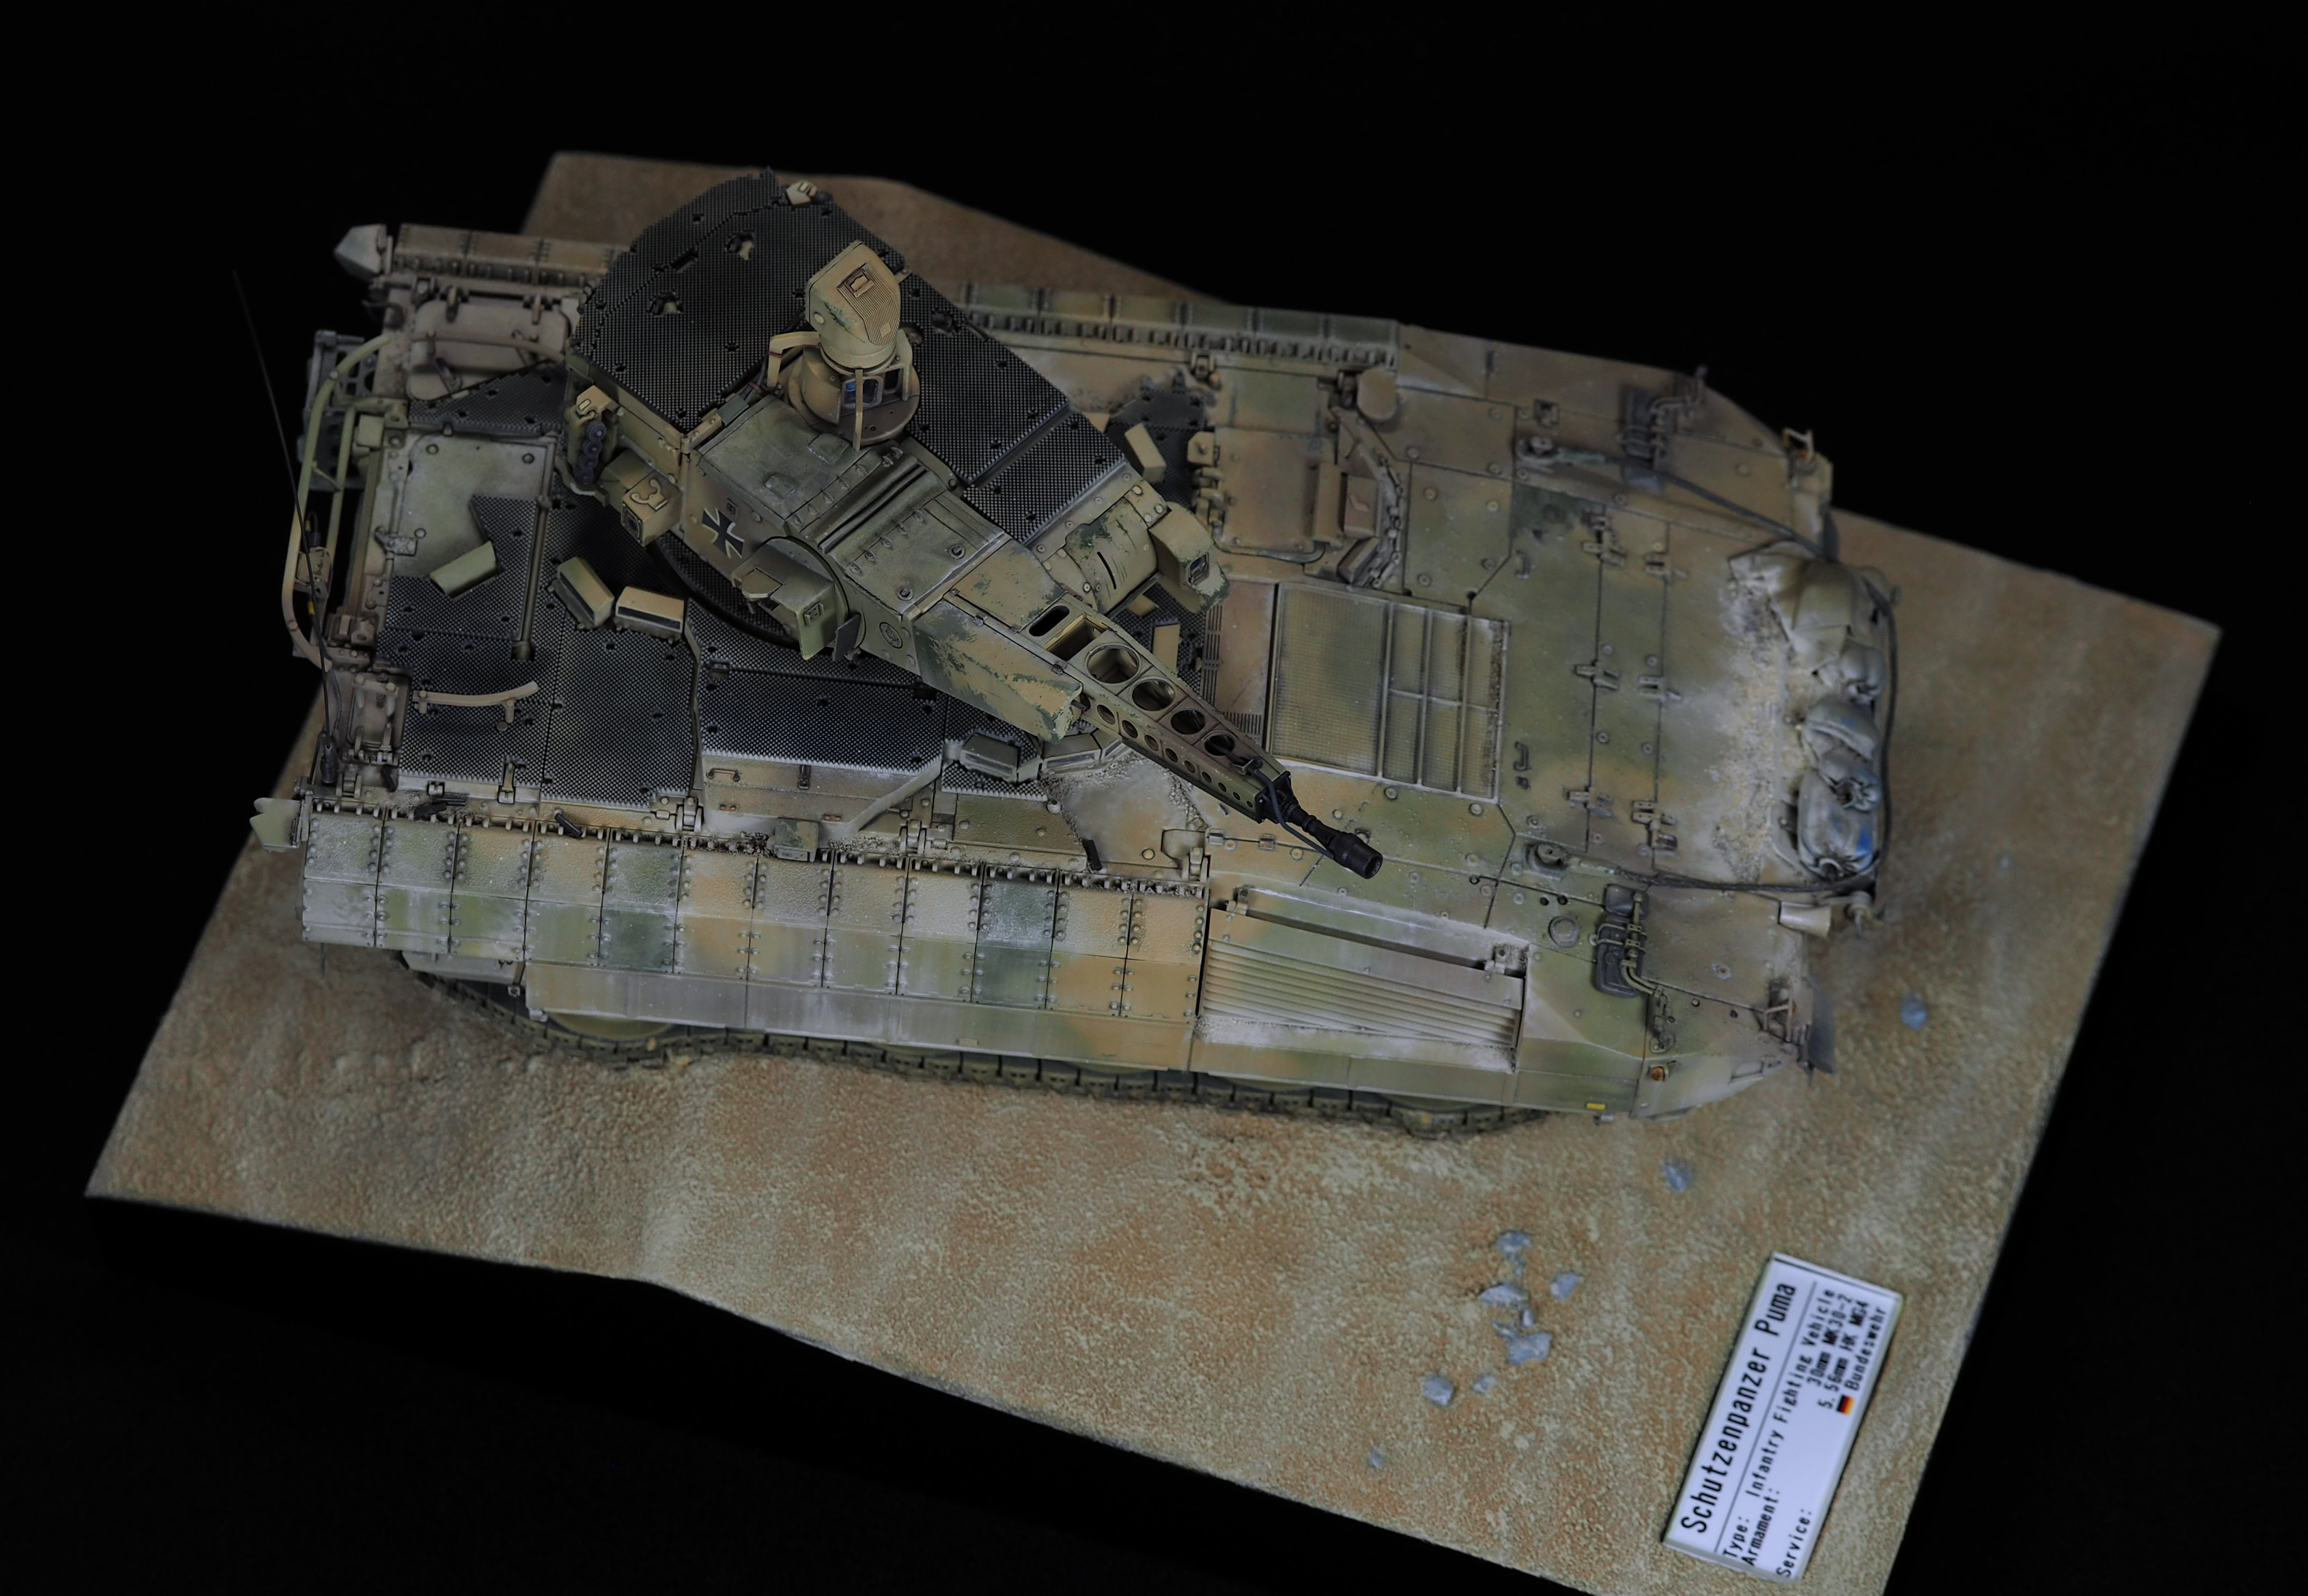
Hello. It has been a while since I last posted a proper build log. So here we go. Ryefield`s Shutzenpanzer Puma. Interesting subject, very futuristic looking vehicle. I wish more kit manufactures focus on missing/outdated subjects rather than tackling Panthers and Abrams over and over again
You can see my preview of this kit here
Everything is written in Japanese, but you get to see detailed shots of whats inside.
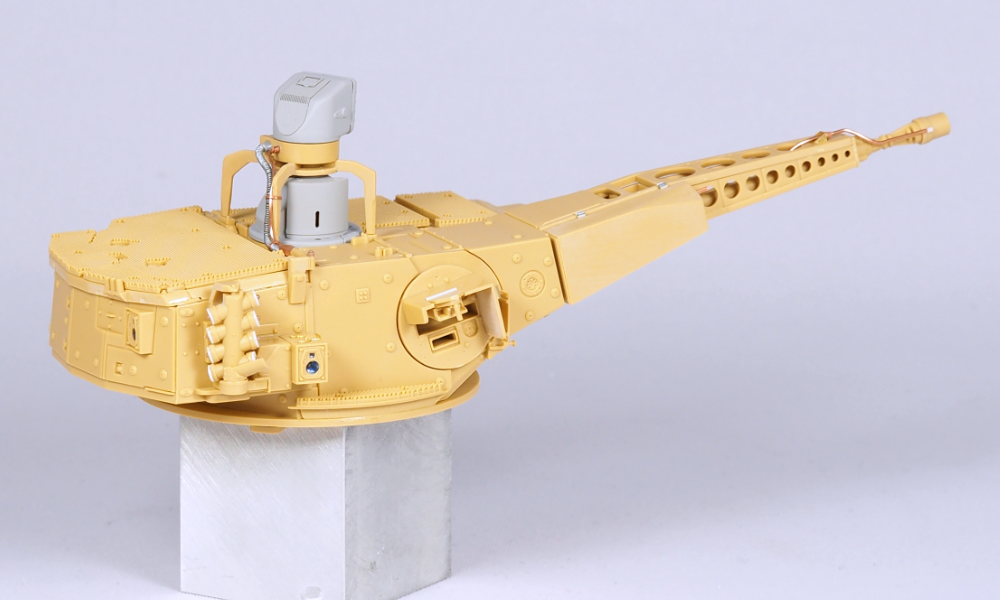
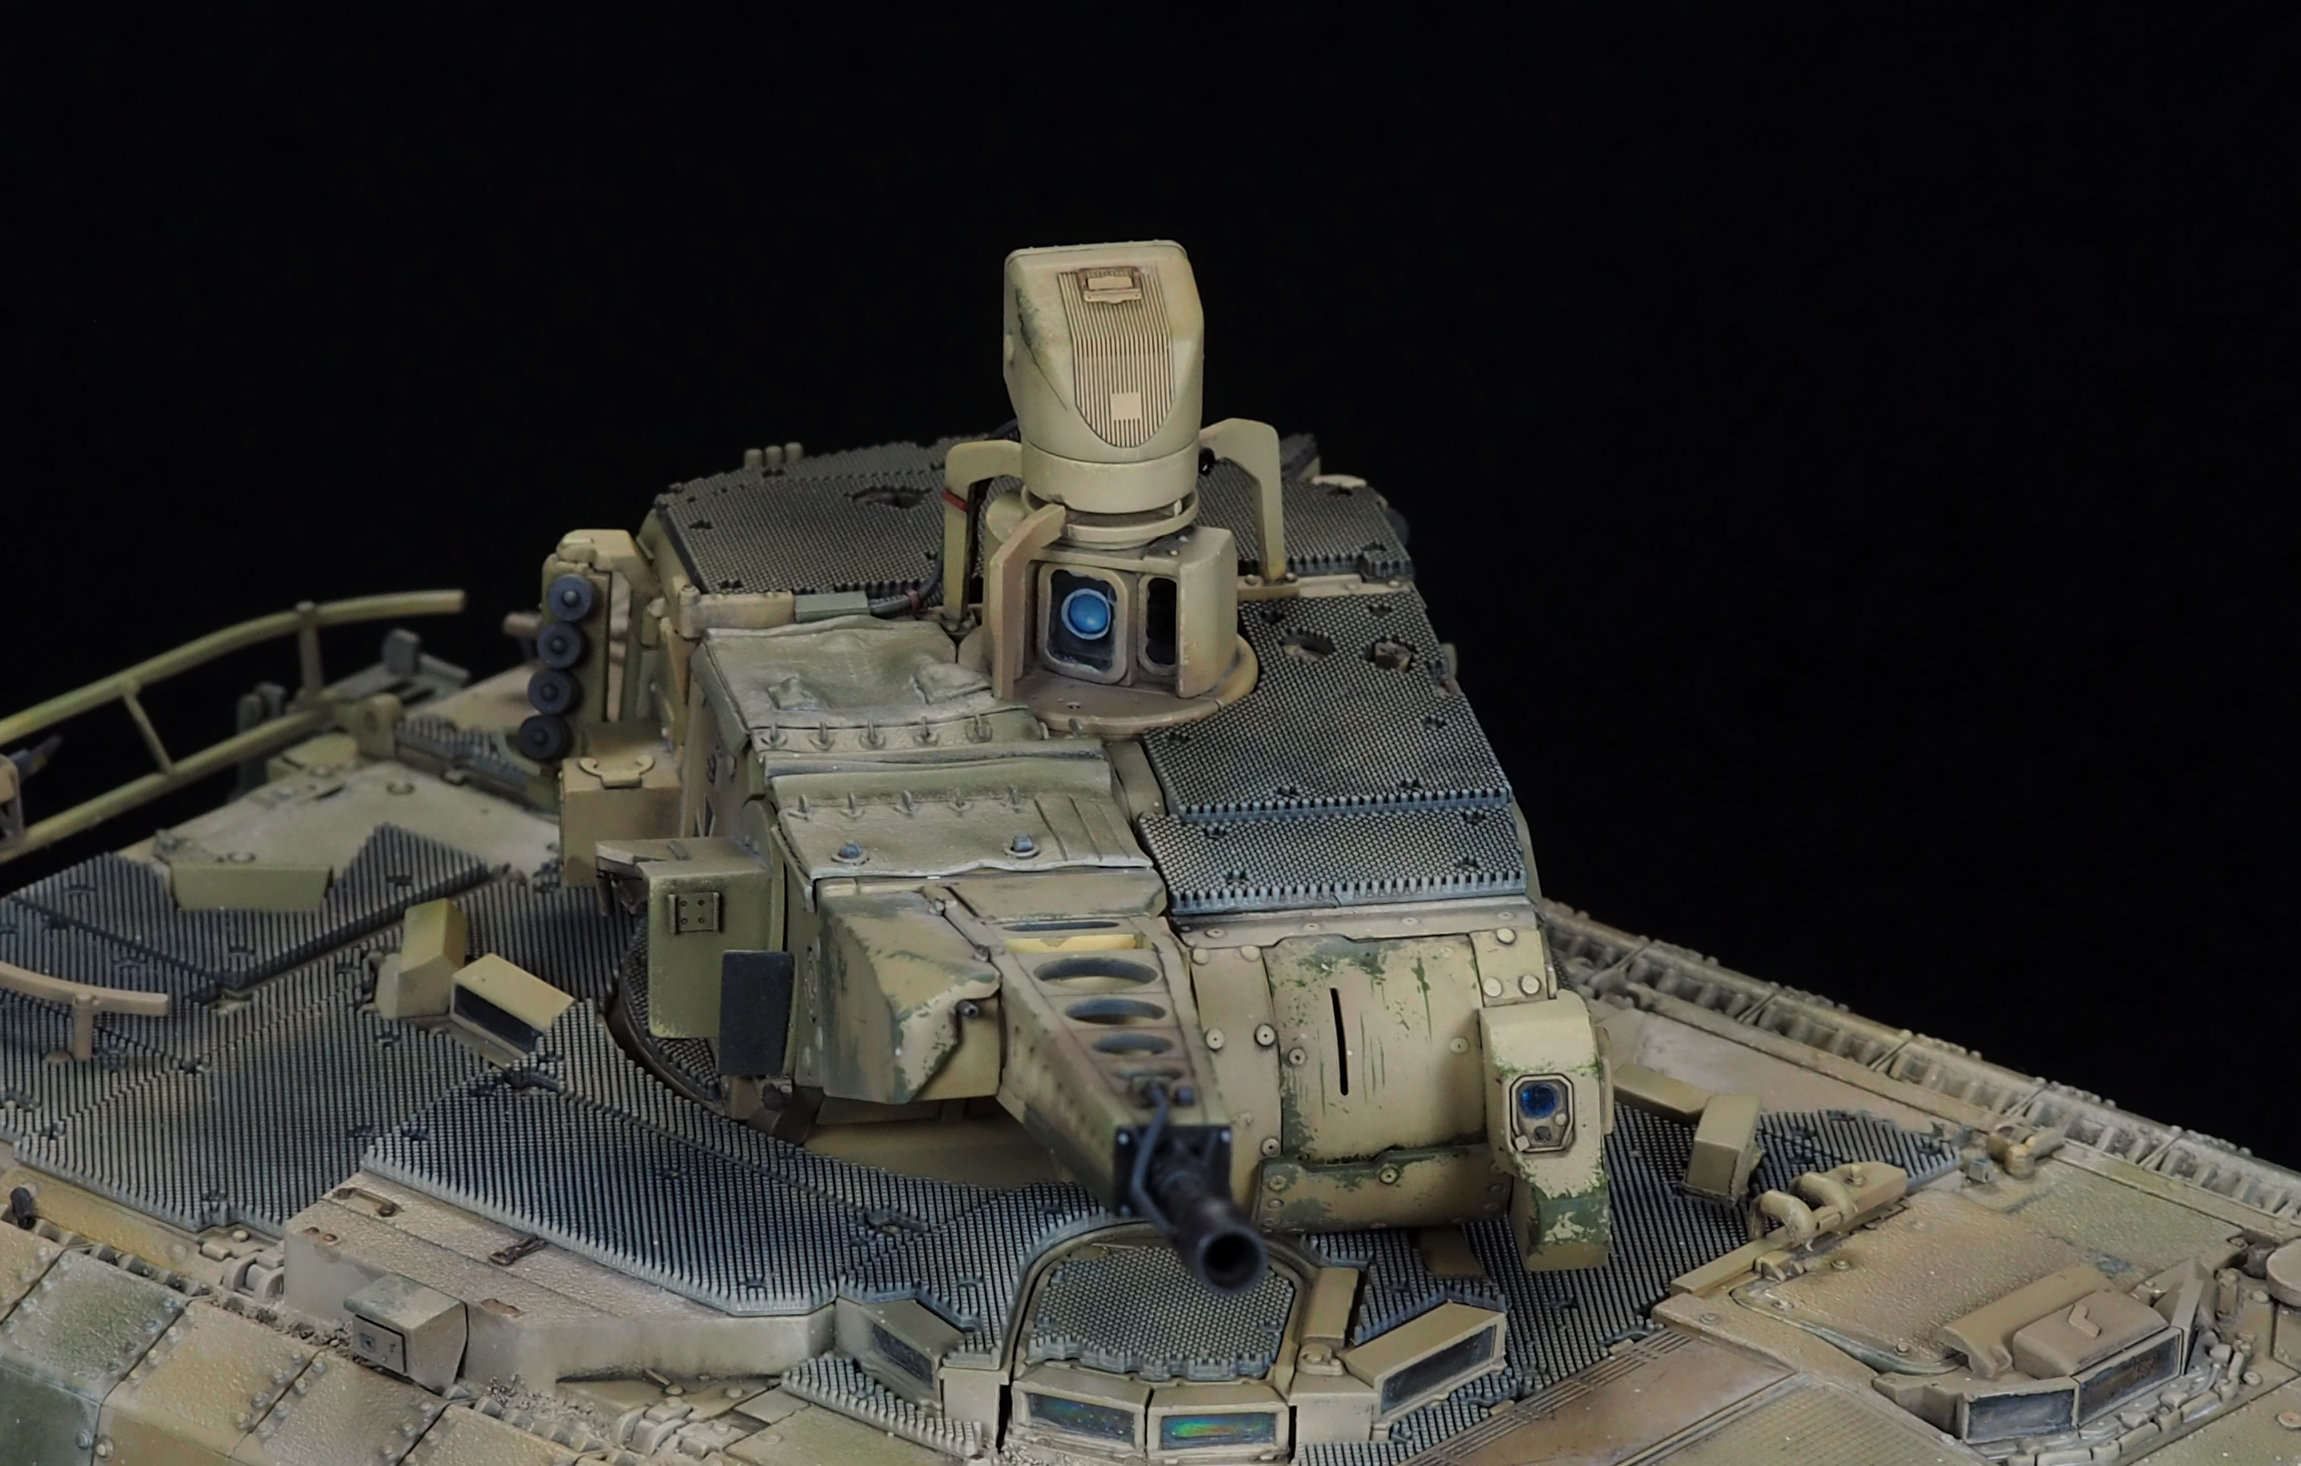
I followed the instructions and started from the iconic turret. It is an unmanned turret with 30mm automatic cannon, co-ax MG and bunch of sensory equipment.
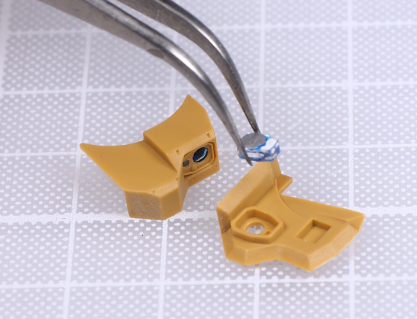
Since the turret is unmanned, the turret has 4 cameras functioning like periscopes. Rye decided to provide clear parts for these cameras, but not for the gunner`s targeting optic. I would have much appreciated if they molded the targeting pod in clear plastic.
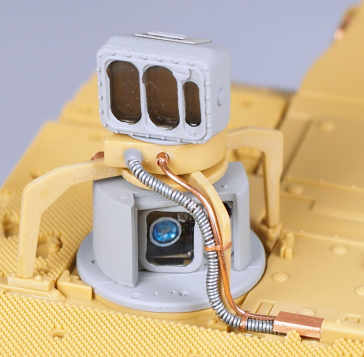
The 360 degrees optical sensors are molded in clear plastic. There is nothing inside the sensor housing, so you might want to put some junk parts to simulate the actual optic elements. Prominent cables were also missing, so I added them using copper and soft steel wires.
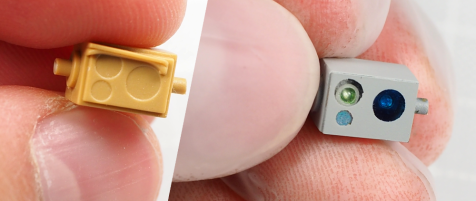
This is the gunner targeting system I was talking about. The right side is my attempt at creating a more believable optic. I didnt like the result, so I ended up closing the protection shield to hide everything in it.
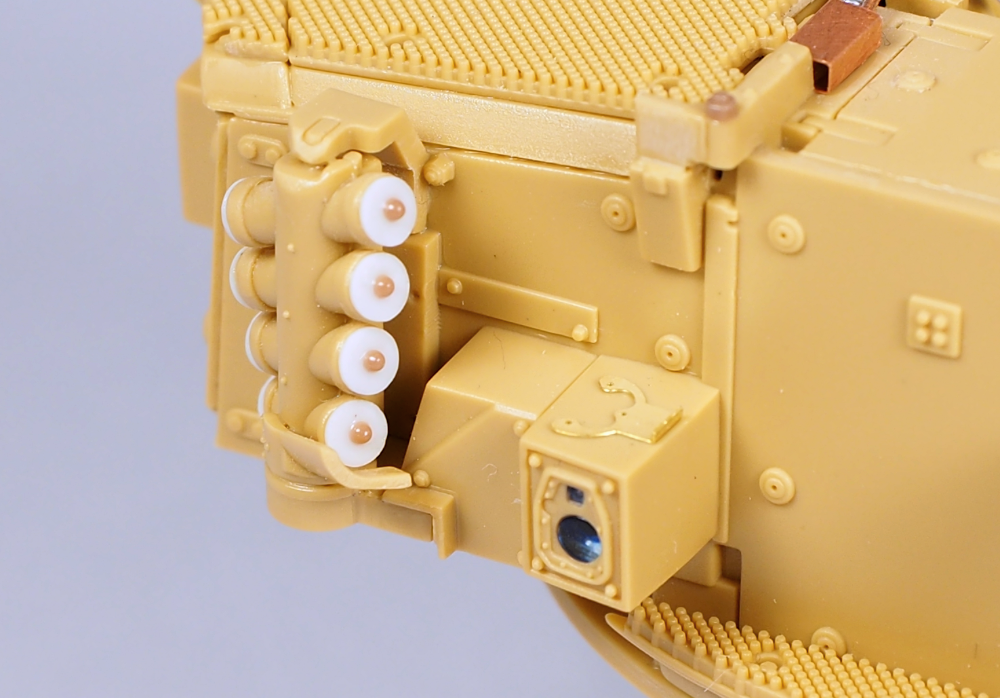
Assembled smoke discharger. You can also spot one of the periscope camera on its right. Rye did a great job eliminating most of the parting lines by cleverly dividing the discharger parts in 2. I simply punched out 2.5mm diameter plastic paper on top of each canister.
And the completed turret.
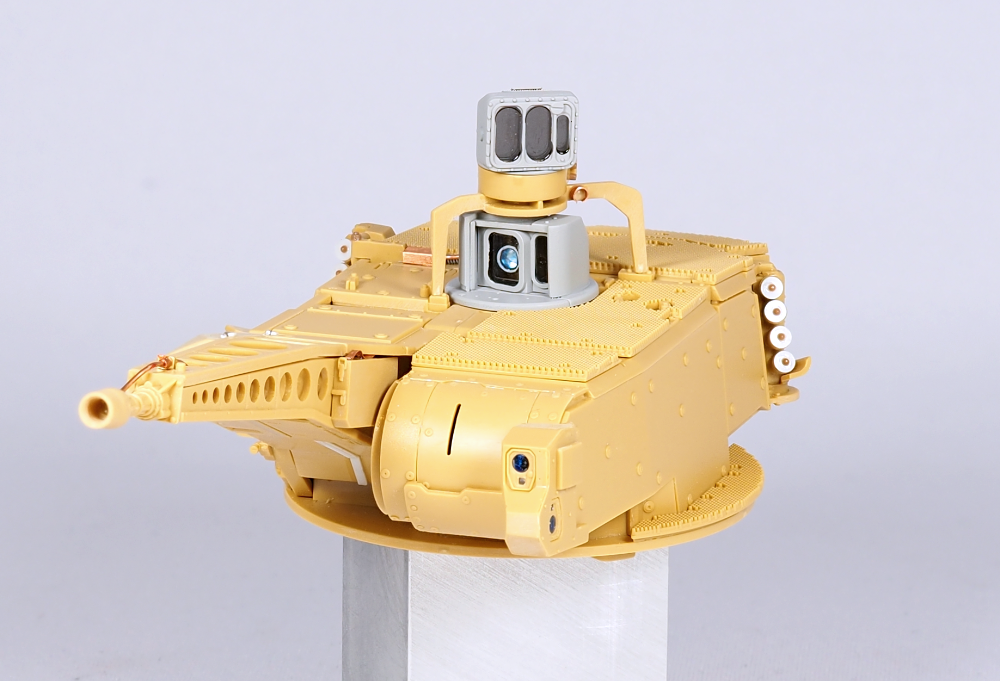
Parts are detailed nicely, but take care eliminating minor flashes.. as they can build up to make a big gap somewhere. Rye did a great job recreating the complicated structure of the turret while maintaining easy build-ability. However, dont mix this kit up with Tamiya. It has good fit, but you need to take care of each assembly steps. Not magical tight fit like Tamiya ^^
Here is hoping someone can answer this question.
I am planning to paint the Puma in desert scheme, while it was on trial in Saudi Arabia. However I cant find any information on this color scheme. Is this the official desert paint scheme of modern Germany? Or one off thing?
Armor/AFV
For discussions on tanks, artillery, jeeps, etc.
Hosted by Darren Baker, Mario Matijasic
Rye`s Shutzenpanzer Puma Build Log
Luftan
Aichi-ken, Japan / 日本
Joined: June 04, 2016
KitMaker: 87 posts
Armorama: 76 posts
Joined: June 04, 2016
KitMaker: 87 posts
Armorama: 76 posts
Posted: Wednesday, June 19, 2019 - 02:53 AM UTC
HermannB
Bayern, Germany
Joined: October 14, 2008
KitMaker: 4,099 posts
Armorama: 4,067 posts
Joined: October 14, 2008
KitMaker: 4,099 posts
Armorama: 4,067 posts
Posted: Wednesday, June 19, 2019 - 03:52 AM UTC
Hi Luftan,
trial vehicles were painted in Umtarnfarben desert colors. Operational vehicles are painted in NATOflage only. the device on top of the turret, above the commanders periscope, is the MUSS missile jammer. it`s normally not maounted on vehicles in service since it cost 1.000.000 Euros, a little to much too be damaged during training. take note that there is no slat armor on the side, this means that the rear of the vehicle an prototype version and could not be build OOTB. The "cameras" around the turret are in fact the detection sensors for the MUSS jammer.
HermannB
Bayern, Germany
Joined: October 14, 2008
KitMaker: 4,099 posts
Armorama: 4,067 posts
Joined: October 14, 2008
KitMaker: 4,099 posts
Armorama: 4,067 posts
Posted: Wednesday, June 19, 2019 - 04:12 AM UTC
According to Tankograd Puma books, the vehicles tested in UAE were #004 and #006 pre-series vehicles.They had a different layout of the rear, with massive armor blocks similar to the RoG kit. Desert paint consisted of RAL 8031 F9 Sandbraun, RAL 1039 F9 Sandbeige and RAL 1040 F9 Graubeige.
Luftan
Aichi-ken, Japan / 日本
Joined: June 04, 2016
KitMaker: 87 posts
Armorama: 76 posts
Joined: June 04, 2016
KitMaker: 87 posts
Armorama: 76 posts
Posted: Wednesday, June 19, 2019 - 11:17 PM UTC
Thank you for the information! I assumed the cameras for viewing the surroundings, but I guess they serve more important role!
The puma is going to be a relaxed build for me while I build more serious one (currently ZSU-23-4), so I won’t be trying to replicate the exact vehicle. Maybe a small vignette of it on a desert terrain ^^
Looks like AK has all those 3 colors in stock. Never used AK colors, but I’ll try! Thank you very much my friend ^^
Luftan
Aichi-ken, Japan / 日本
Joined: June 04, 2016
KitMaker: 87 posts
Armorama: 76 posts
Joined: June 04, 2016
KitMaker: 87 posts
Armorama: 76 posts
Posted: Saturday, June 29, 2019 - 03:53 PM UTC
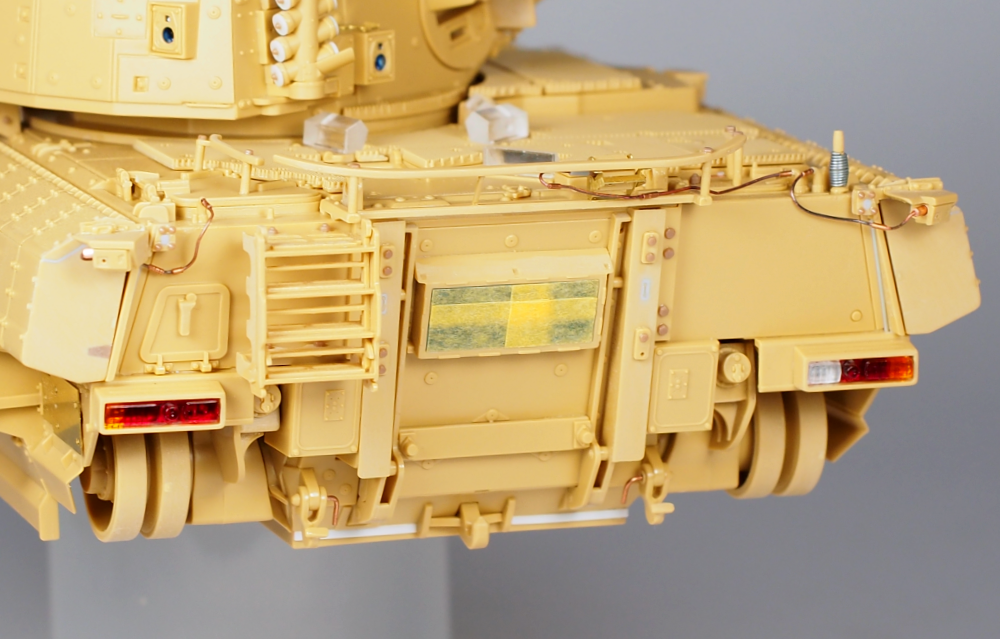
The hull body is 90% complete. Lots of parts are unglued, to make things easier during the painting process. I also decided to omit slat-armor entirely.. partly due to the fact that desert trail vehicles had few of them removed, and also because the kit supplied parts are a bit too thick.
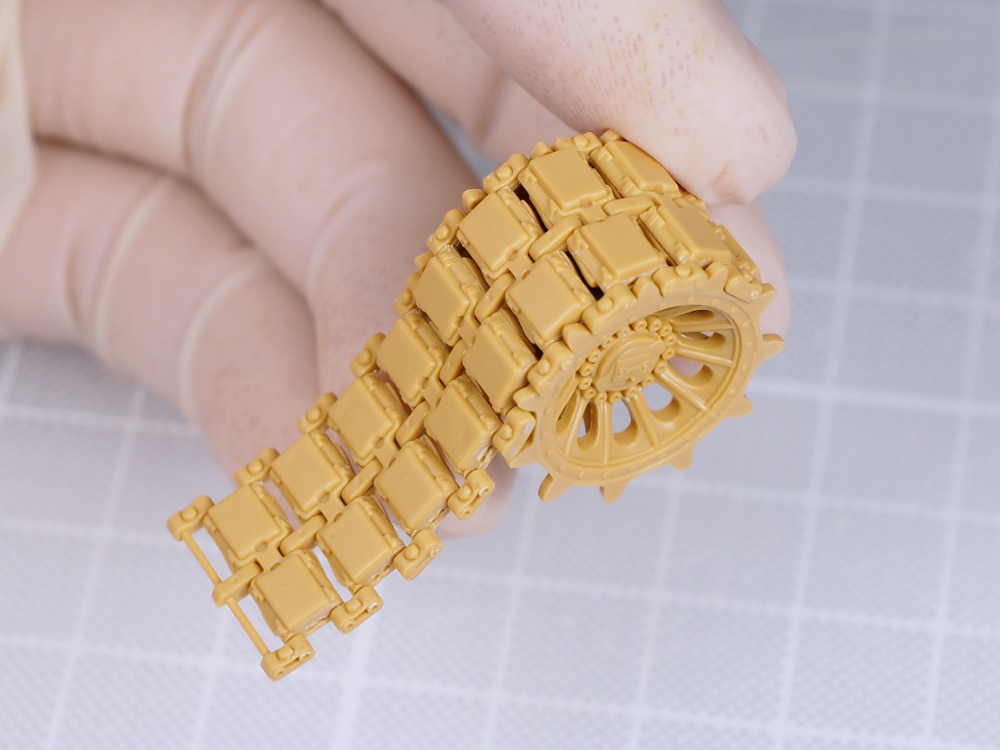
I was surprised to find out that RFM has completely forgotten about indi-link instructions.
why
I was surprised to find out that RFM has completely forgotten about indi-link instructions.
why
Luftan
Aichi-ken, Japan / 日本
Joined: June 04, 2016
KitMaker: 87 posts
Armorama: 76 posts
Joined: June 04, 2016
KitMaker: 87 posts
Armorama: 76 posts
Posted: Saturday, July 13, 2019 - 03:47 AM UTC
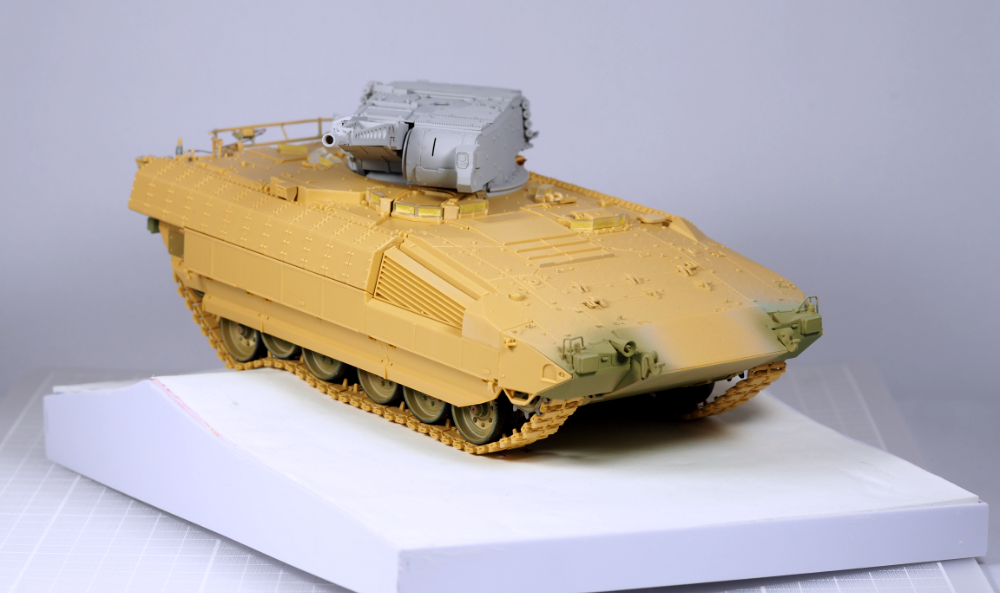
Although slow, here is some progress on Rye`s Puma IFV.
I am the type of modeler who likes to glue everything first and proceed painting, however with prominent large sideskirts of Puma, I had to paint the road-wheels/under chassee first.
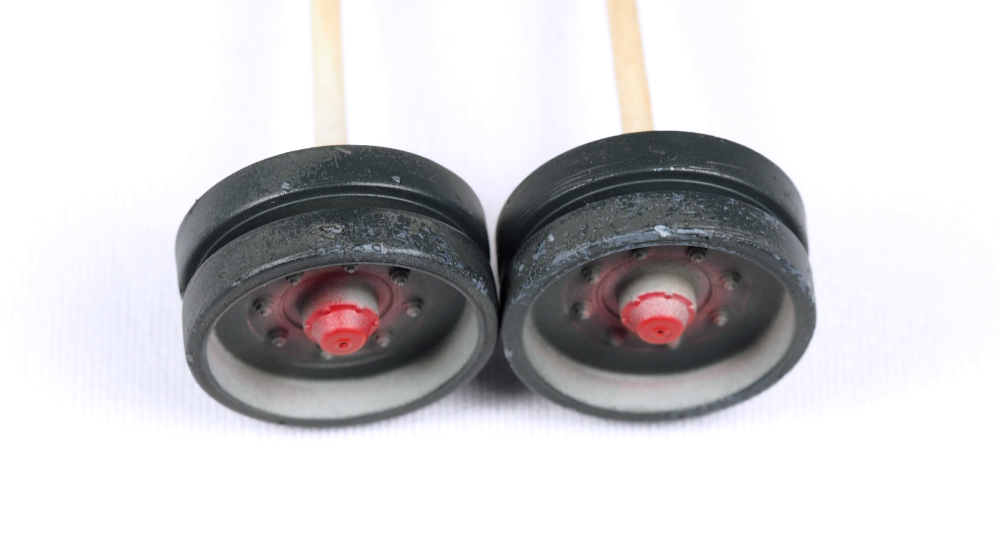
The smooth rubber tire surface didnt really make sense, so I added some wear and tear using a blunt blade and #120 sandpaper. Then, the tires received two tones of rubber black. The 2nd layer was partially removed using the hairspray technique. The upper image is the result.
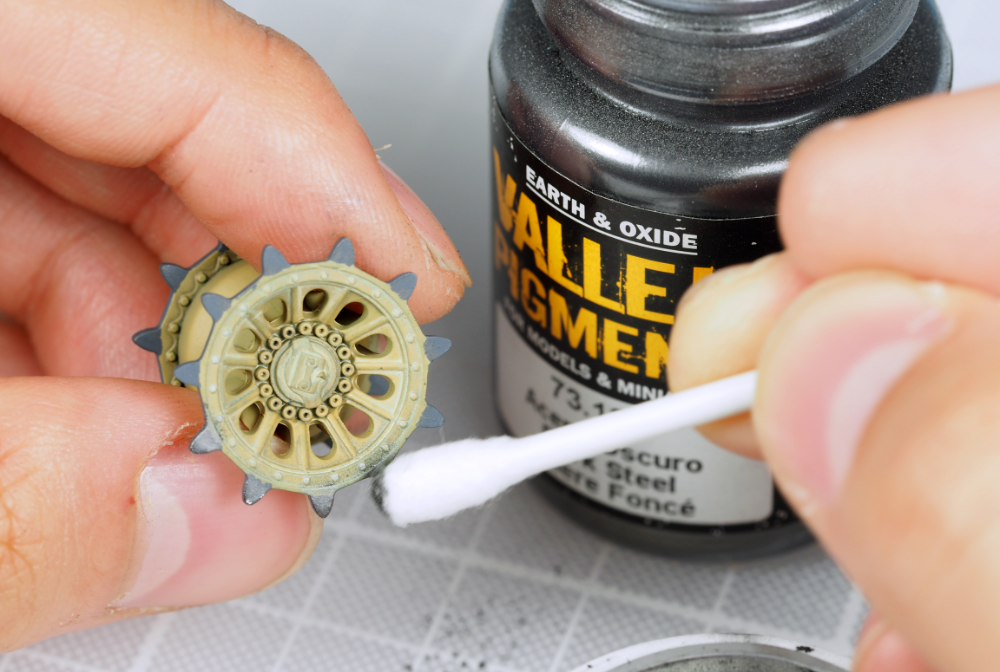
Using Vallejo metal pigment, I added glare to the sprocket wheels.
You can use the old pencil trick and achieve the same result, but spending $5 and getting life time worth of fine metal pigment didnt sound like a bad deal at all
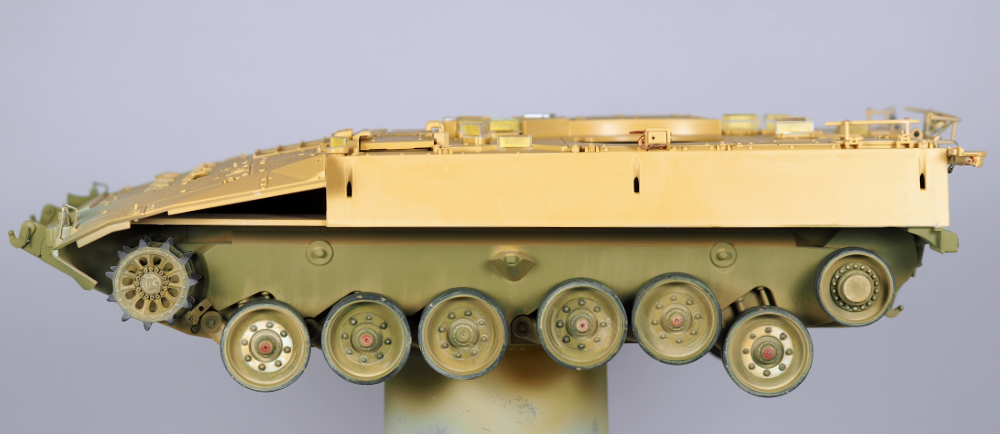
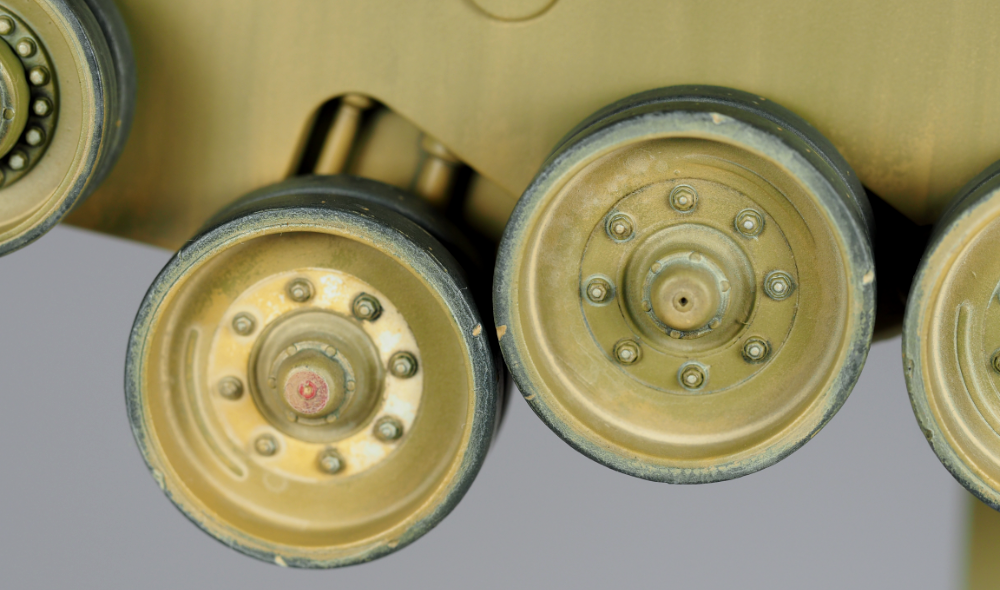
The end result looks like this.
I ignored most part of lower chassee, since they will be obscured by the sideskirt. I always have trouble simulating dust accumulation of desert terrain. Its much easier to apply thick mud and wet dirt.. but desert, if done wrong the whole model will just look dirty. Im not too happy with this result, but I will move on.
Made a simple base too ^^
AKirchhoff
Germany
Joined: September 12, 2008
KitMaker: 307 posts
Armorama: 304 posts
Joined: September 12, 2008
KitMaker: 307 posts
Armorama: 304 posts
Posted: Sunday, July 14, 2019 - 10:12 PM UTC
Hi!
A really nice built so far. You might consider to repaint the teeth of the sprocket on the outer side. There is no wear at the outside of the teeth because these are not in contact with the track components.
Andreas
A really nice built so far. You might consider to repaint the teeth of the sprocket on the outer side. There is no wear at the outside of the teeth because these are not in contact with the track components.
Andreas
Luftan
Aichi-ken, Japan / 日本
Joined: June 04, 2016
KitMaker: 87 posts
Armorama: 76 posts
Joined: June 04, 2016
KitMaker: 87 posts
Armorama: 76 posts
Posted: Tuesday, July 30, 2019 - 05:04 PM UTC
Thanks Andreas!
Unfortunately I only noticed the mistake in sprocket teeth when I finished gluing the tracks to the body. I will tone down the shine during the weathering process.
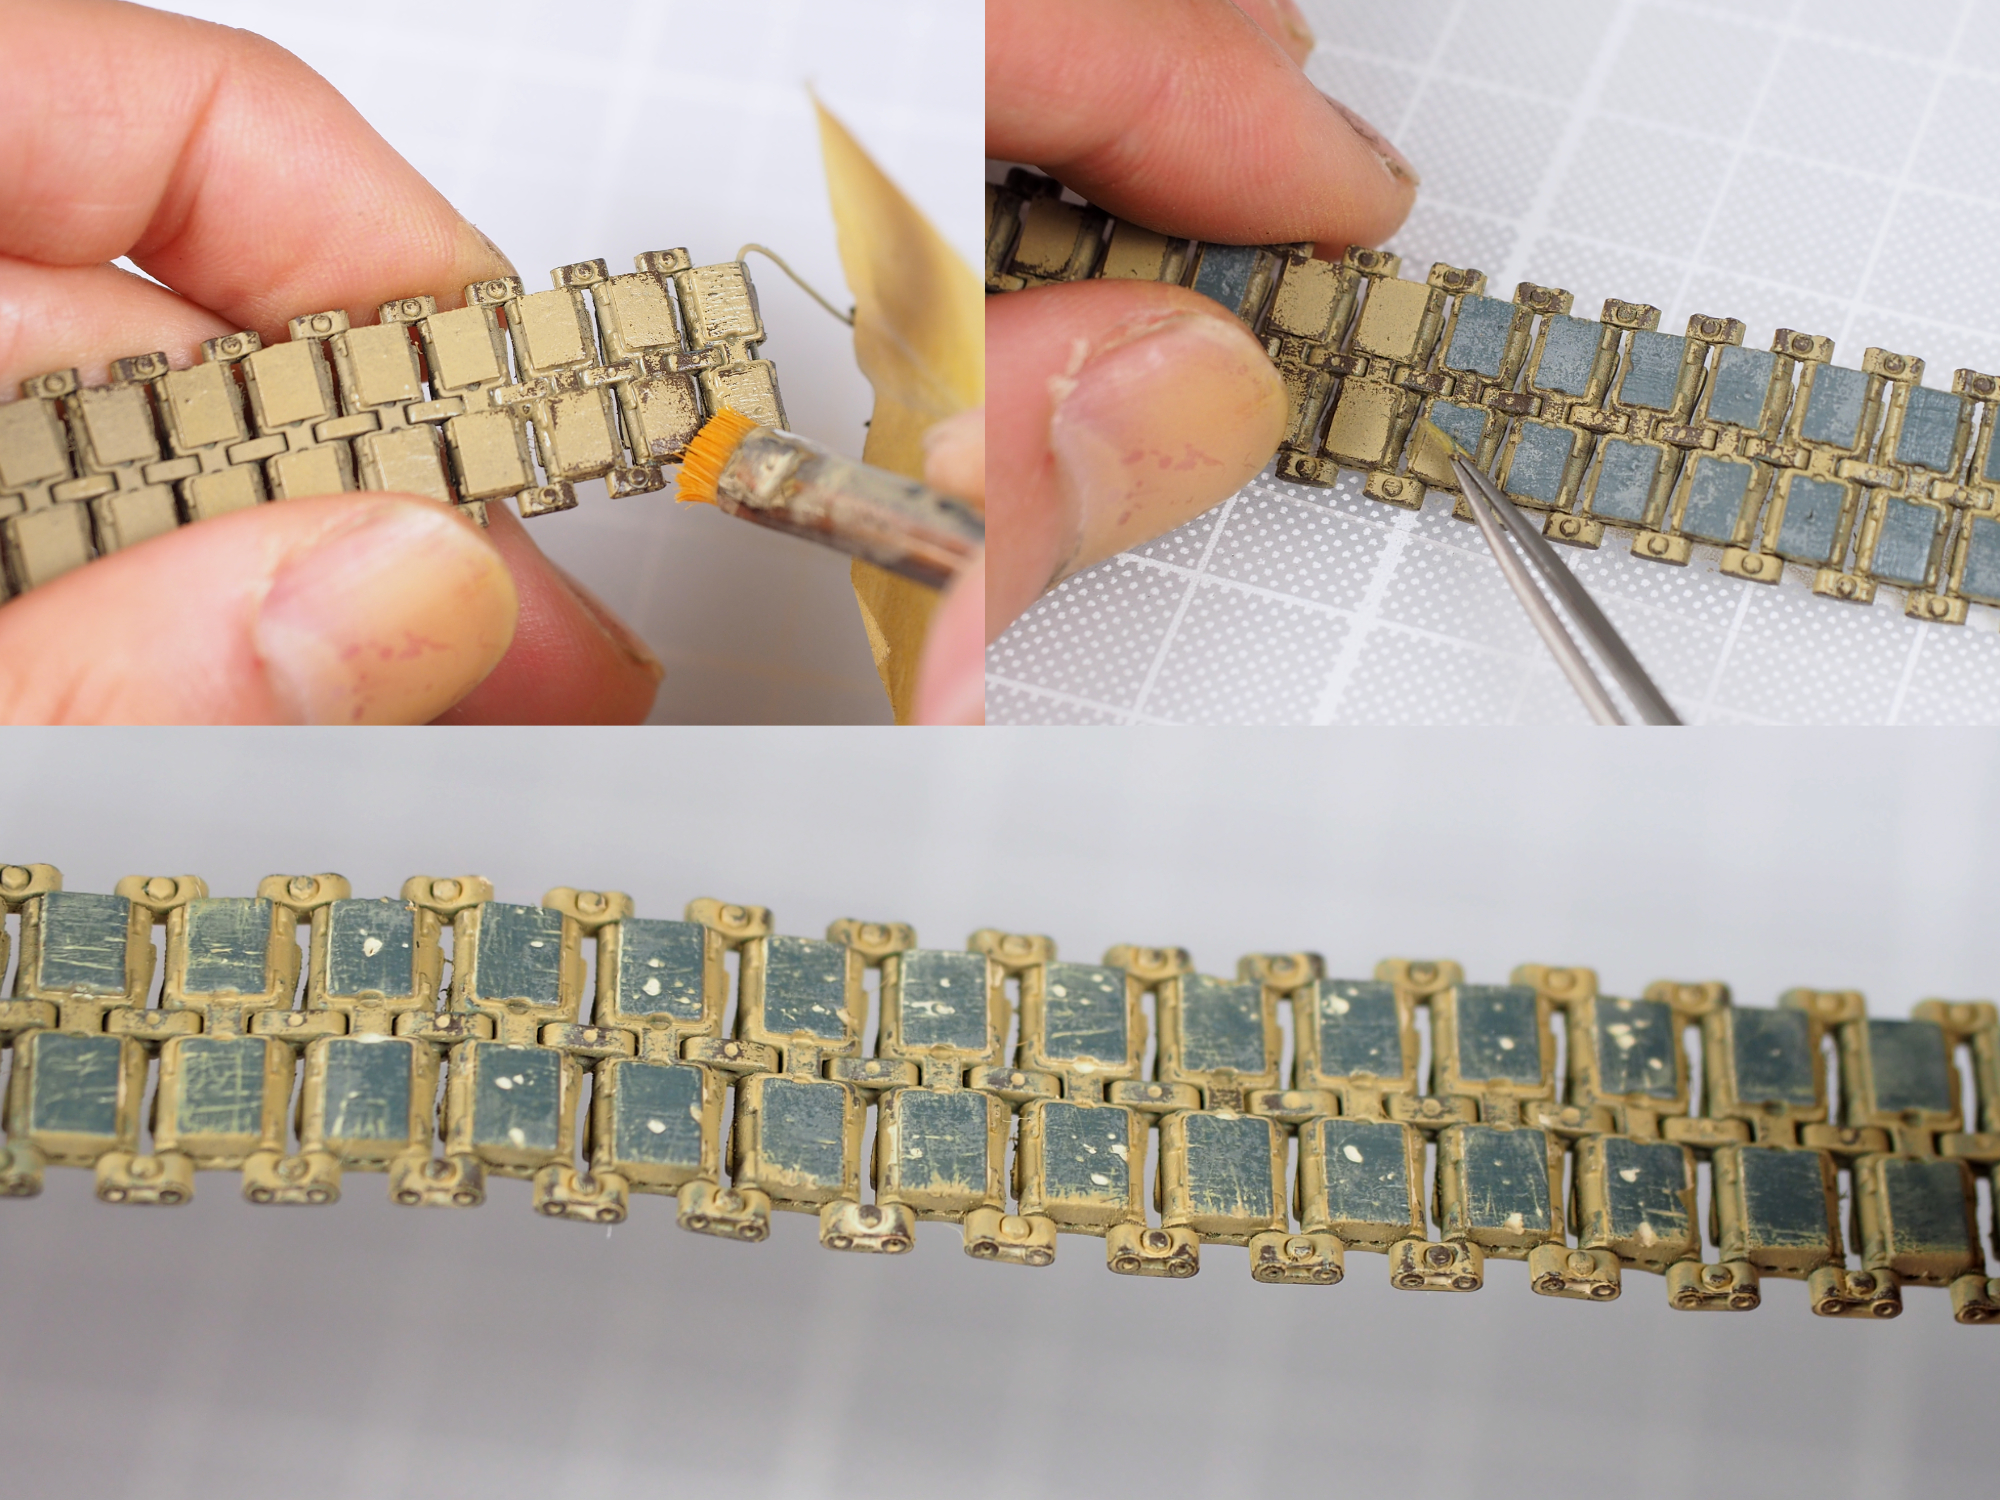
In the meantime, I build, painted and weathered the tracks.
Unfortunately I only noticed the mistake in sprocket teeth when I finished gluing the tracks to the body. I will tone down the shine during the weathering process.
In the meantime, I build, painted and weathered the tracks.
Luftan
Aichi-ken, Japan / 日本
Joined: June 04, 2016
KitMaker: 87 posts
Armorama: 76 posts
Joined: June 04, 2016
KitMaker: 87 posts
Armorama: 76 posts
Posted: Monday, August 05, 2019 - 03:28 PM UTC
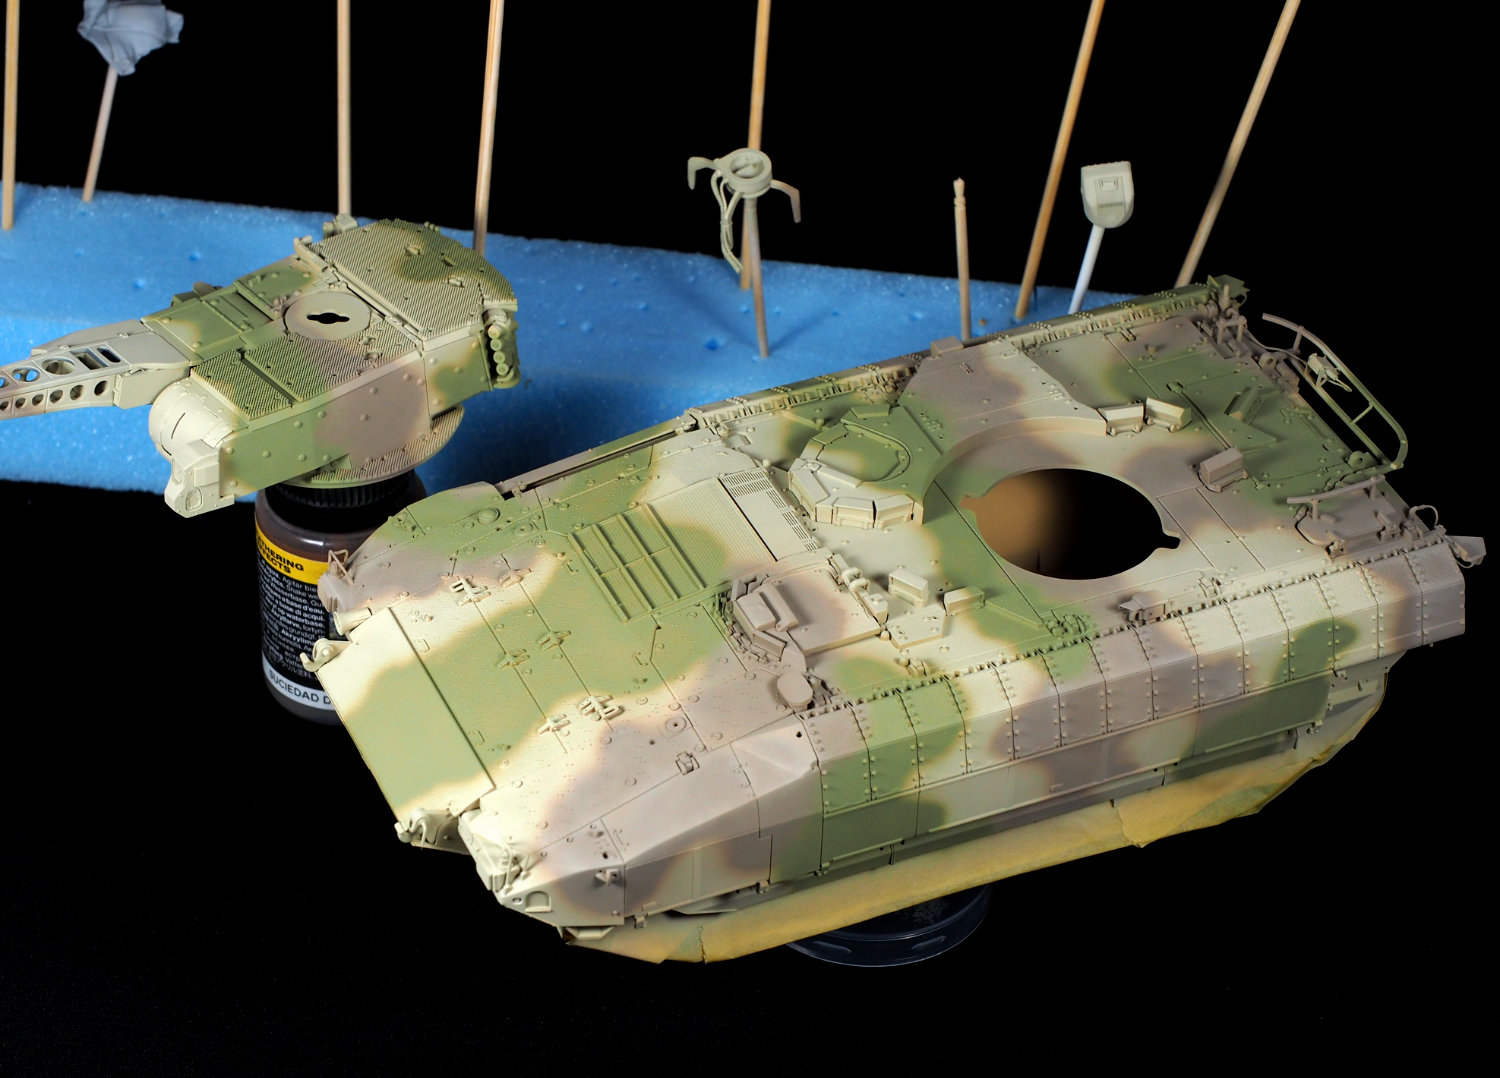
Hello folks. I have layed down the base color paint for my Puma. I used AK color RC088, RC092, RC089, with RC227 to simulate faded color tones. Ive also added few drops of Mr.Color Brown/Green to corresponding colors.
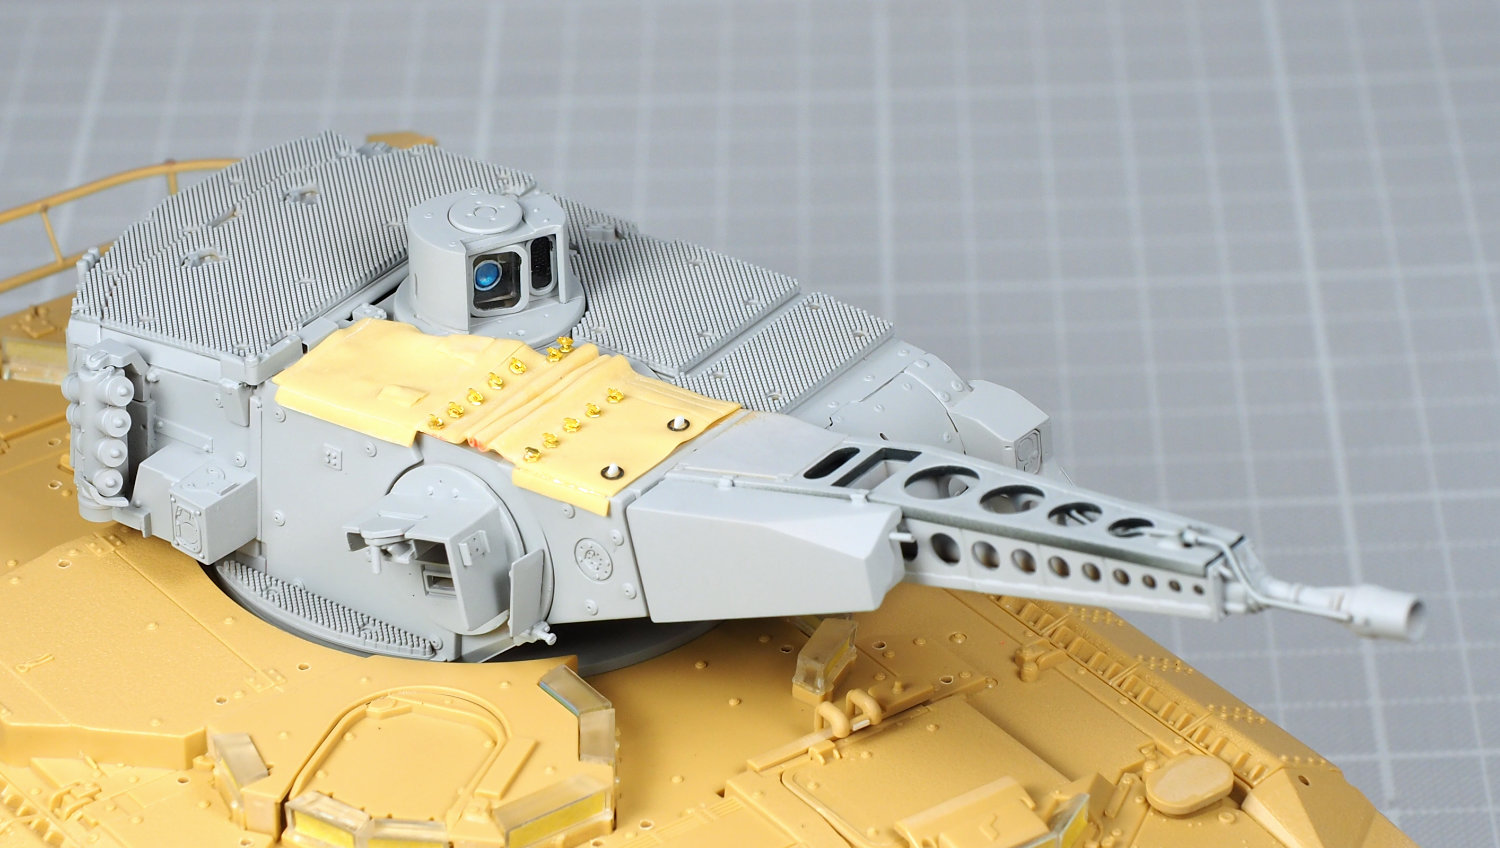
also made the turret cover from Tamiya 2 part putty. Its not exactly like the real thing, but this was the closest I could make.
Luftan
Aichi-ken, Japan / 日本
Joined: June 04, 2016
KitMaker: 87 posts
Armorama: 76 posts
Joined: June 04, 2016
KitMaker: 87 posts
Armorama: 76 posts
Posted: Thursday, September 19, 2019 - 12:01 AM UTC
Hello, I finally finished my Puma last week. I just lost all motivation, and it was a difficult project to force through. Not happy with how the paintjob turned out. Desert weathering is very difficult. Real vehicle looks like they are covered in white dust/sand. If you replicate that, your model ends up looking like white blurry mess.
Thanks to all who followed the build log. It wasnt very popular
Luftan
Aichi-ken, Japan / 日本
Joined: June 04, 2016
KitMaker: 87 posts
Armorama: 76 posts
Joined: June 04, 2016
KitMaker: 87 posts
Armorama: 76 posts
Posted: Thursday, September 19, 2019 - 12:02 AM UTC
More photos, and WIP images on my website.
https://tankobo.com/1-35/
Johnnych01
England - South West, United Kingdom
Joined: June 29, 2019
KitMaker: 604 posts
Armorama: 506 posts
Joined: June 29, 2019
KitMaker: 604 posts
Armorama: 506 posts
Posted: Thursday, September 19, 2019 - 02:23 AM UTC
Dont be so hard on yourself about the finish Luftan ....... I didnt see the build blog, but the end result looks pretty good to me, so well done on the finished result.
griffontech
Canada
Joined: November 21, 2007
KitMaker: 237 posts
Armorama: 231 posts
Joined: November 21, 2007
KitMaker: 237 posts
Armorama: 231 posts
Posted: Thursday, September 19, 2019 - 06:41 AM UTC
If you consider that model a bad finish, I'm giving up on this hobby!
It looks fantastic.
Remember, there are various climatic changes in the desert, including rain and snow. I was in Kuwait a couple years back and experienced rain, hail, thunderstorms, snow, freezing temps. Vehicles get dusty, but then the dust washes off. Come up with a story in your mind about this vehicle just leaving the compound right after a rain storm where most of the dust washed away and you are golden.
Keep up the great work.
Posted: Thursday, September 19, 2019 - 06:02 PM UTC
I like it!
BootsDMS
England - South West, United Kingdom
Joined: February 08, 2012
KitMaker: 978 posts
Armorama: 965 posts
Joined: February 08, 2012
KitMaker: 978 posts
Armorama: 965 posts
Posted: Thursday, September 19, 2019 - 10:22 PM UTC
I concur with the last 3 commentators - it's fine!
When I was in the desert (Oman mid 80s) vehicles do indeed turn into a white blurry mess!
Seriously, a most useful article so thanks for your efforts.
Brian
When I was in the desert (Oman mid 80s) vehicles do indeed turn into a white blurry mess!
Seriously, a most useful article so thanks for your efforts.
Brian
ptruhe
Texas, United States
Joined: March 05, 2003
KitMaker: 2,092 posts
Armorama: 1,607 posts
Joined: March 05, 2003
KitMaker: 2,092 posts
Armorama: 1,607 posts
Posted: Friday, September 20, 2019 - 01:04 AM UTC
That looks fantastic!
Luftan
Aichi-ken, Japan / 日本
Joined: June 04, 2016
KitMaker: 87 posts
Armorama: 76 posts
Joined: June 04, 2016
KitMaker: 87 posts
Armorama: 76 posts
Posted: Saturday, September 21, 2019 - 04:07 AM UTC
Thank you all for your kind response
Its not that I hate the finish, I think its the best desert weathering ive done. But, its just that there are so many more things to learn!
I will move on to the next project ^^
Its not that I hate the finish, I think its the best desert weathering ive done. But, its just that there are so many more things to learn!
I will move on to the next project ^^