Sachsen, Germany
Joined: April 13, 2014
KitMaker: 279 posts
Armorama: 279 posts
Posted: Saturday, October 12, 2019 - 08:30 AM UTC

#521
Kentucky, United States
Joined: April 13, 2011
KitMaker: 9,465 posts
Armorama: 8,695 posts
Posted: Saturday, October 12, 2019 - 01:28 PM UTC
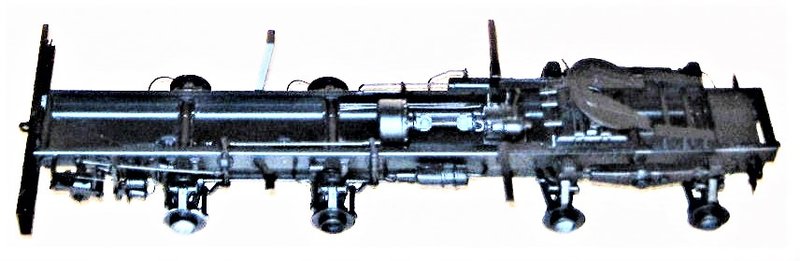
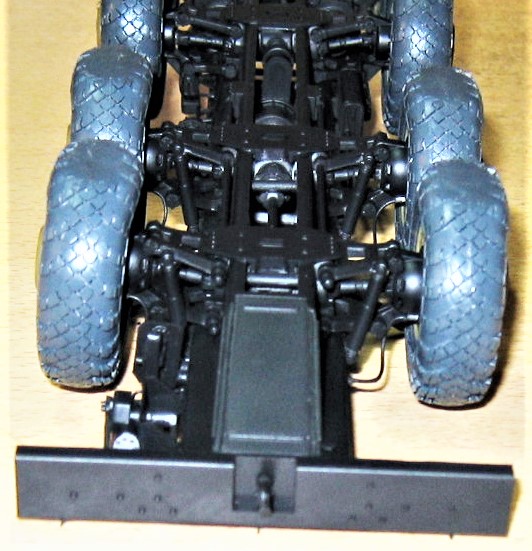
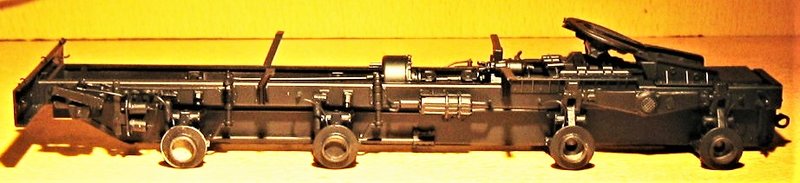
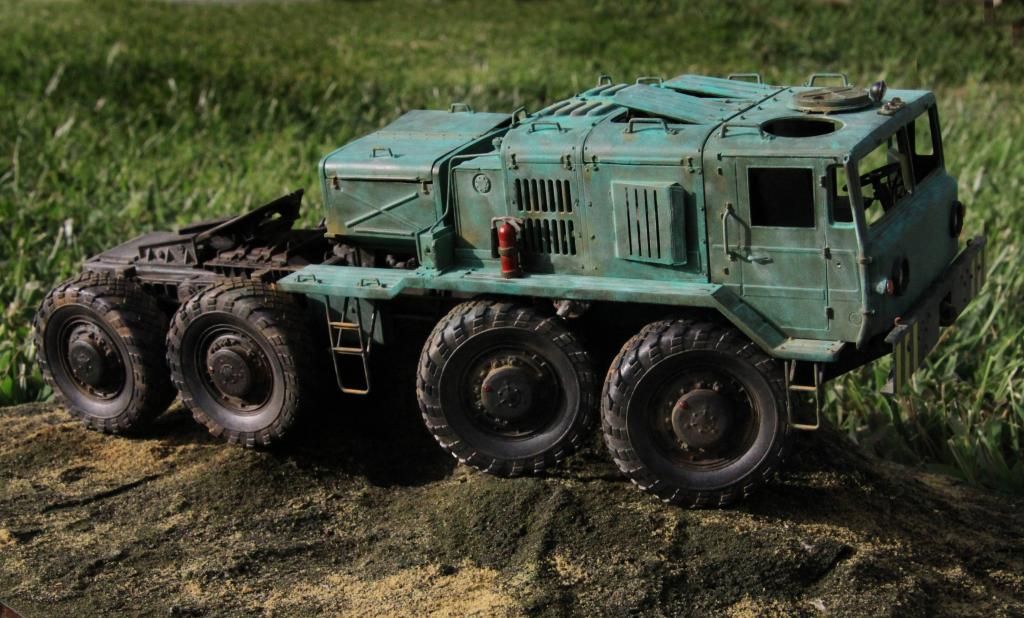
Correct driveline arrangement:
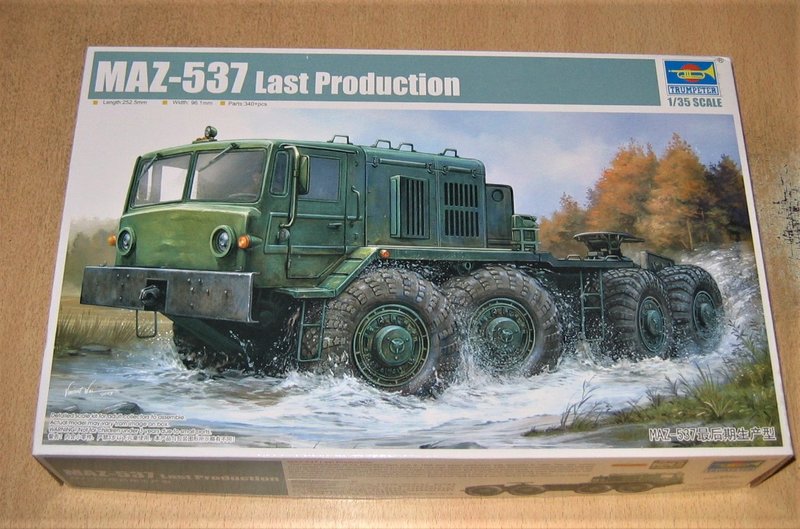
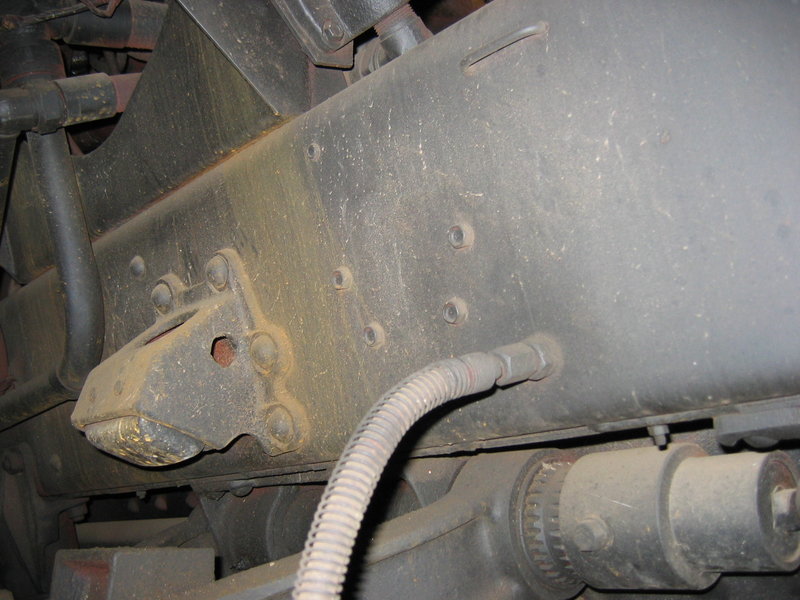
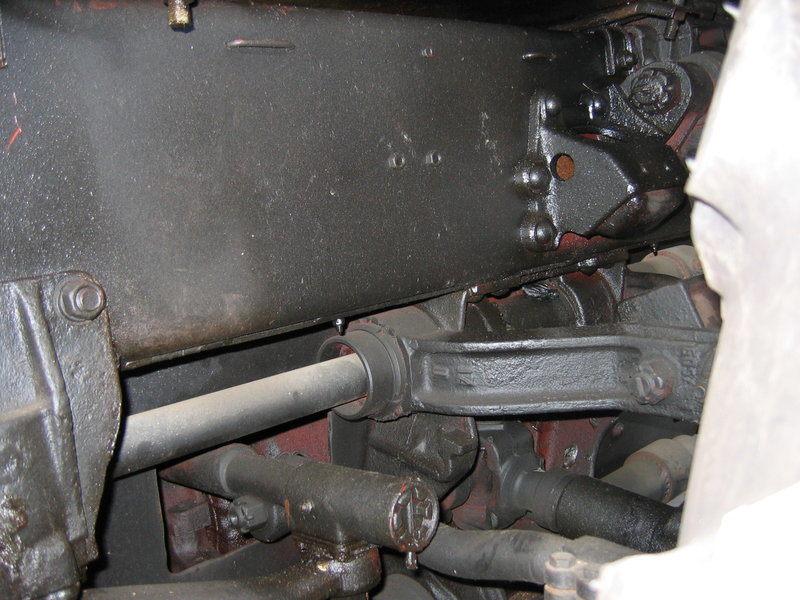
The MAZ-537 kit has some driveline included in the kit but what is there has faults. Please see below:
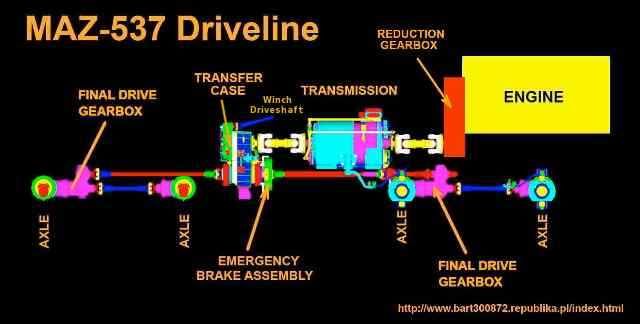
This driveline layout is correct for both the MAZ-537 and the MAZ-543.
Please note power take-off driveshaft going to winch. (Missing entirely from this kit.)
#521
Kentucky, United States
Joined: April 13, 2011
KitMaker: 9,465 posts
Armorama: 8,695 posts
Posted: Saturday, October 12, 2019 - 01:40 PM UTC
You might wish to check here for possible helpful information:
https://armorama.kitmaker.net/forums/218845&ord=&page=1Sachsen, Germany
Joined: April 13, 2014
KitMaker: 279 posts
Armorama: 279 posts
Posted: Sunday, October 13, 2019 - 01:42 AM UTC
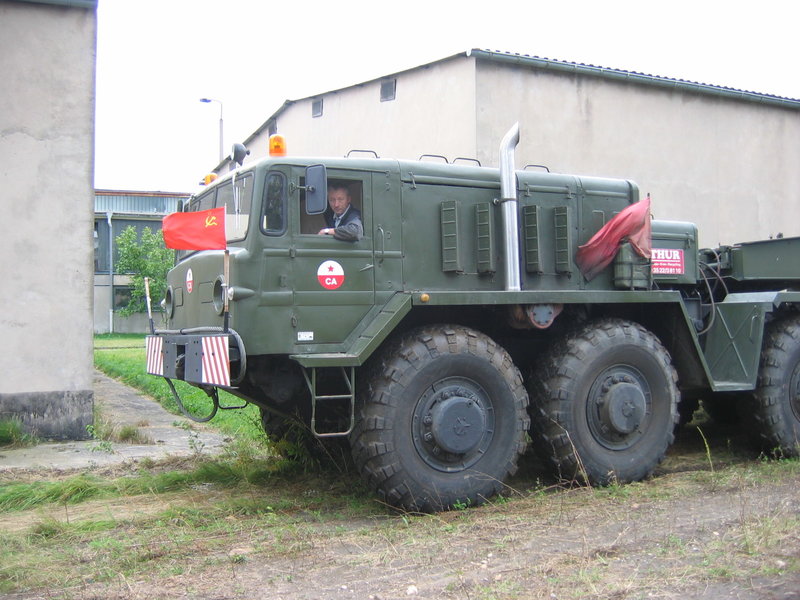
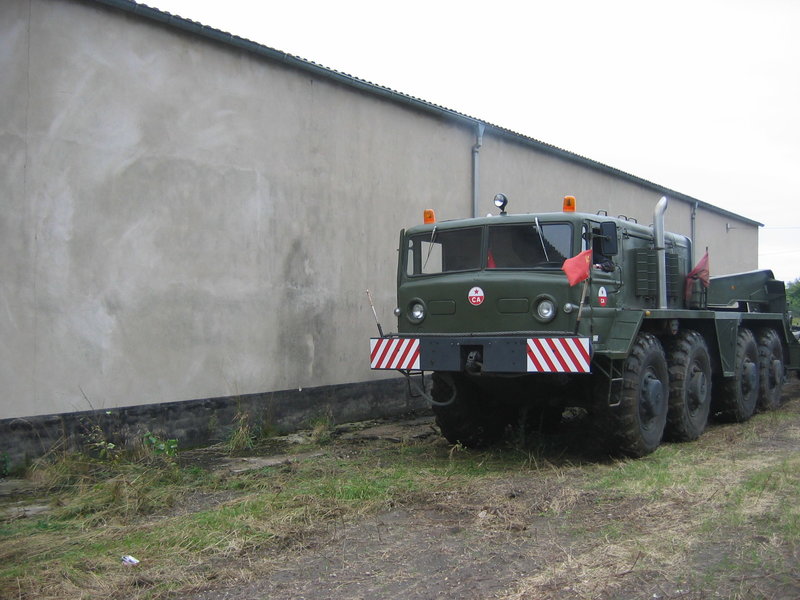
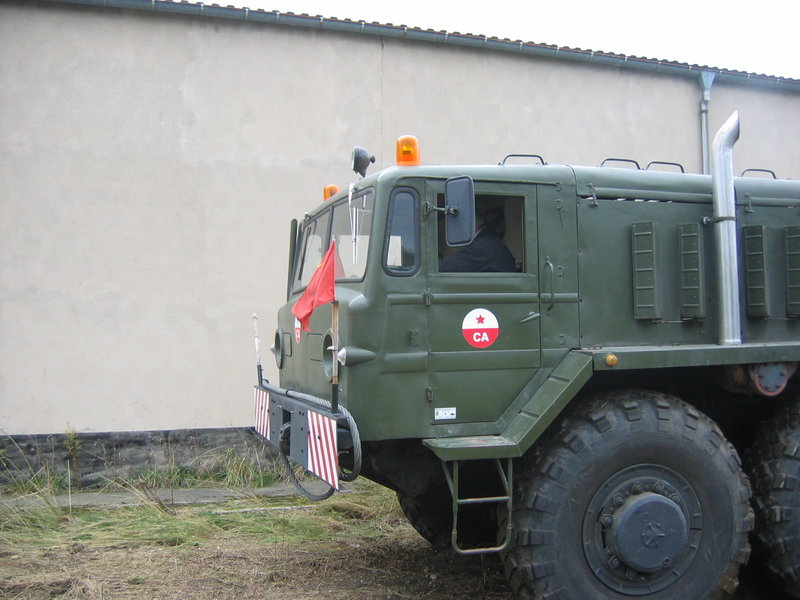
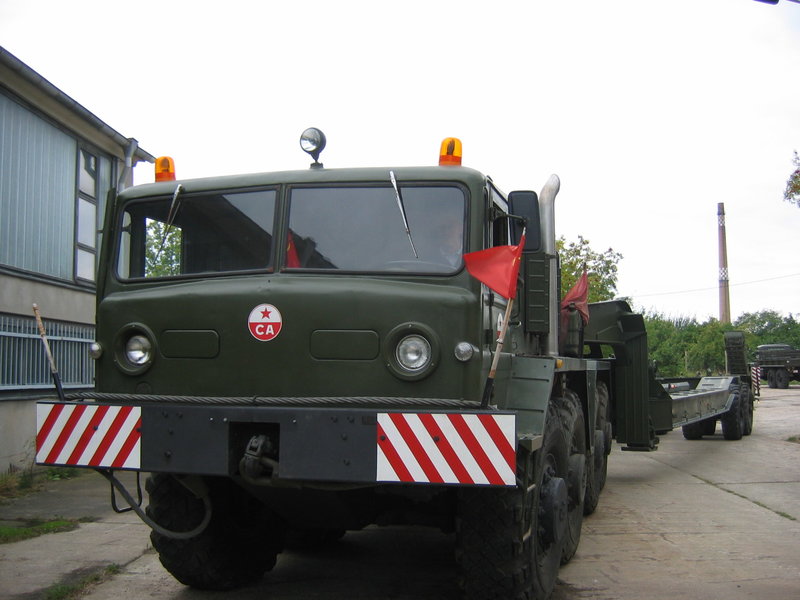
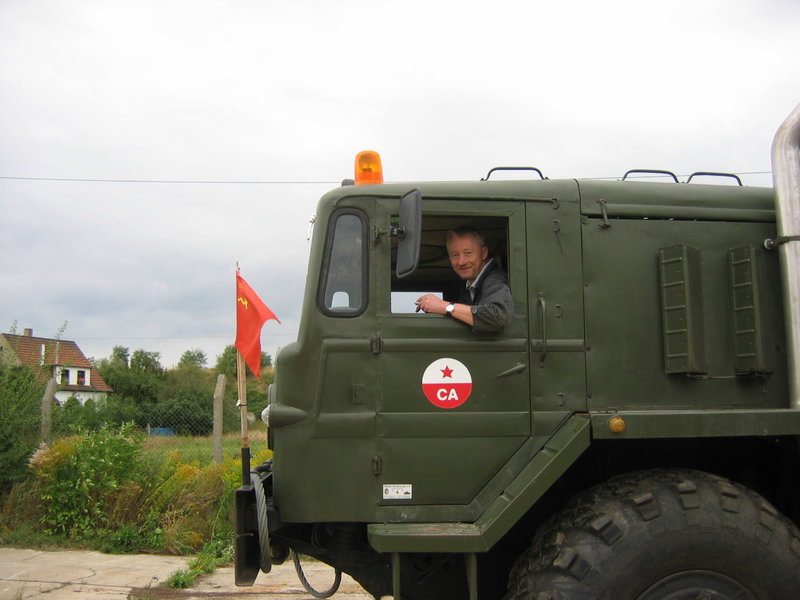
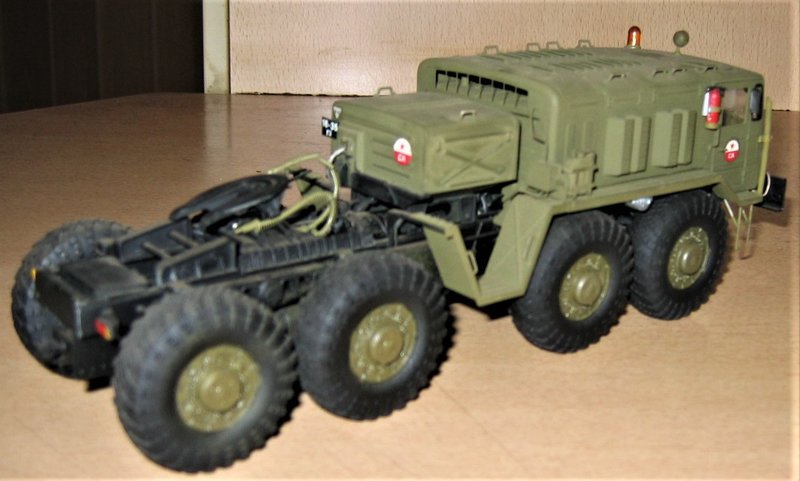
Thank you Michael for your hints. To say straight away, there is a lot wrong with this model. Not only the tractor but also the trailer has its faults. At the first tractor I made the gearbox and many other details myself. The trailer was even more complicated, where I rebuilt the entire suspension with brake cylinders. I'm looking forward to the new trailer, what is coming up to me. you have to know this vehicle from the original to be able to build it correctly, pictures do not say everything there. Have such a vehicle driven in the original, it is already an interesting vehicle and you have to say that the Russians at the time of development were already far ahead. the gearbox is pneumatically switched by a small lever on the steering column of the right side and a clutch pedal does not exist. The brake pedal sits on the left side, a very large change for the driver. Here are two pictures of the old version.
#521
Kentucky, United States
Joined: April 13, 2011
KitMaker: 9,465 posts
Armorama: 8,695 posts
Posted: Sunday, October 13, 2019 - 02:15 AM UTC
Joch, seeing your vehicle under construction I was just trying to offer research information from someone who has traveled the same path ahead of you. (And someone who has published the results here on Armorama.)
Best of luck in your build!
#521
Kentucky, United States
Joined: April 13, 2011
KitMaker: 9,465 posts
Armorama: 8,695 posts
Posted: Sunday, October 13, 2019 - 02:32 AM UTC
Another great reference document, this time on the three axle trailer:
Thanks again to our friends at E63 Paper Models you can now print out the plans for FREE! Then either build it directly from the paper cutouts or use them as templates to manufacture the plastic parts yourself!
Perhaps a plastic model will soon be in our future!
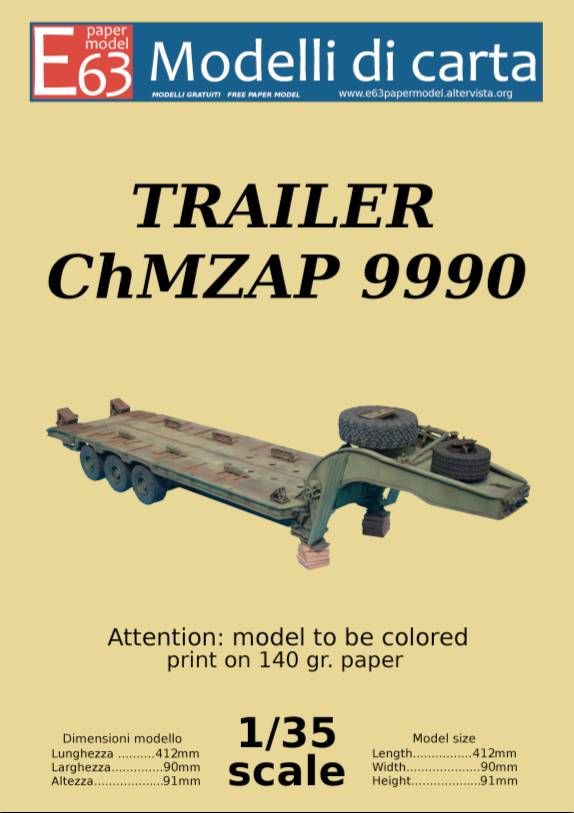 https://mega.nz/#!BRQBABxY!jZCJ-8OP9Nlk1BJEiDUGBHPjseXHmANfqZgjEvz3qmQ
Sachsen, Germany
Joined: April 13, 2014
KitMaker: 279 posts
Armorama: 279 posts
Posted: Sunday, October 13, 2019 - 05:30 AM UTC
Michael, thank you very much, more photos coming soon from the construction of the model.
#521
Kentucky, United States
Joined: April 13, 2011
KitMaker: 9,465 posts
Armorama: 8,695 posts
Posted: Monday, October 14, 2019 - 02:44 AM UTC
Sachsen, Germany
Joined: April 13, 2014
KitMaker: 279 posts
Armorama: 279 posts
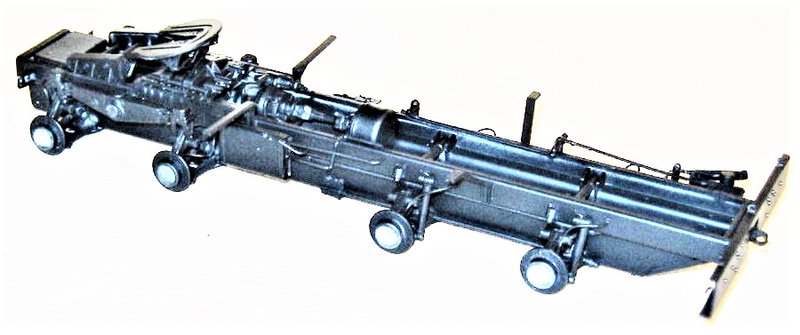
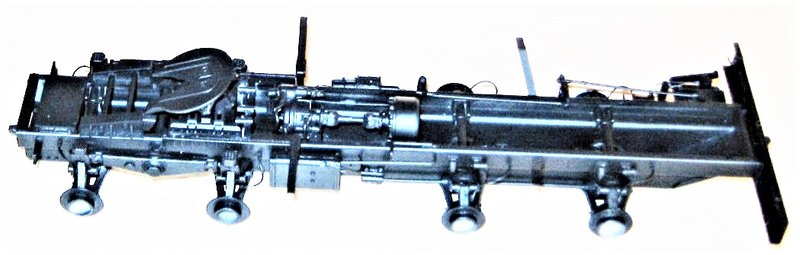
Posted: Monday, October 14, 2019 - 08:24 AM UTC
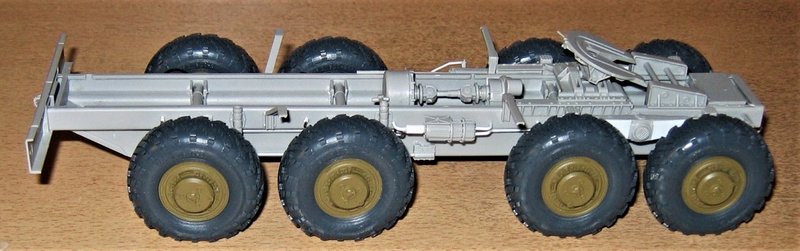
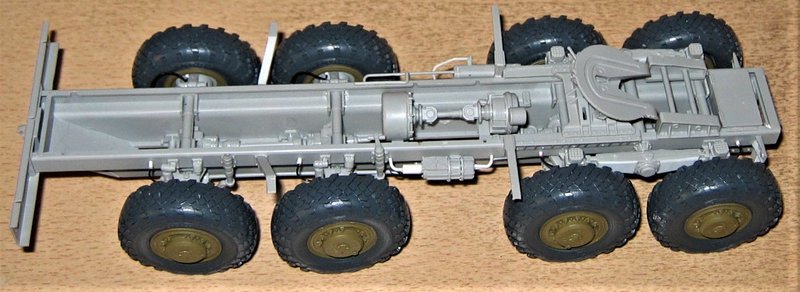
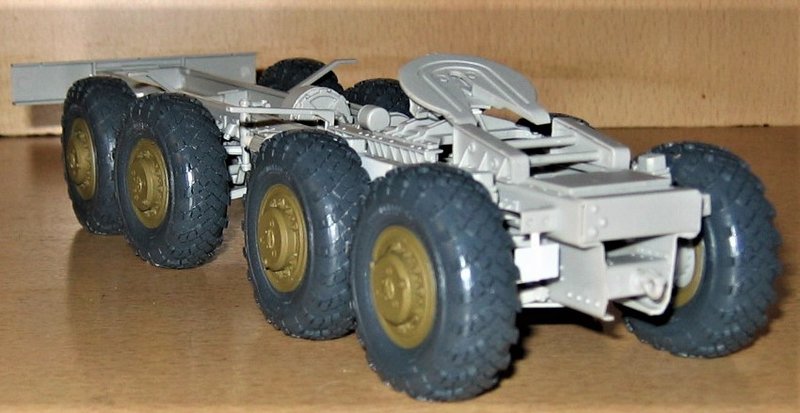
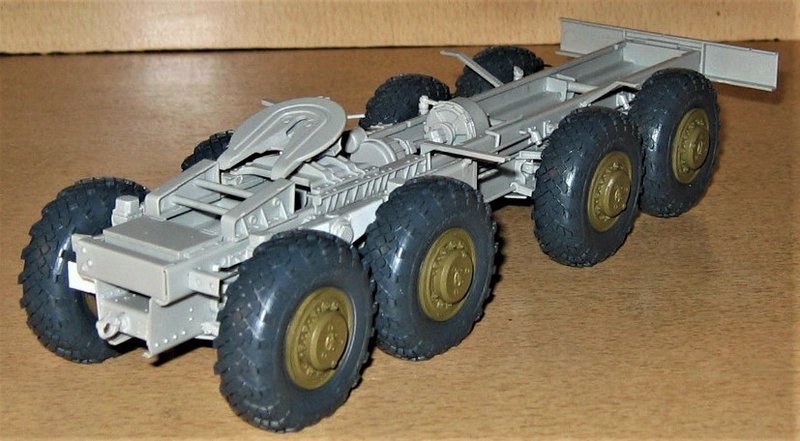
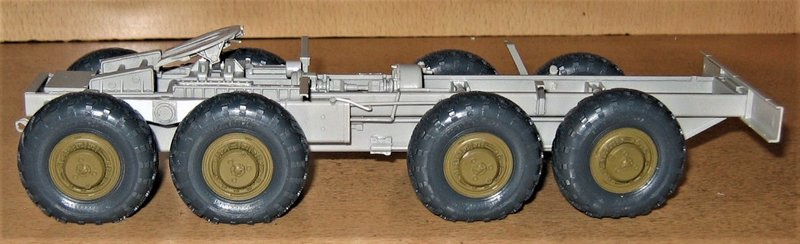
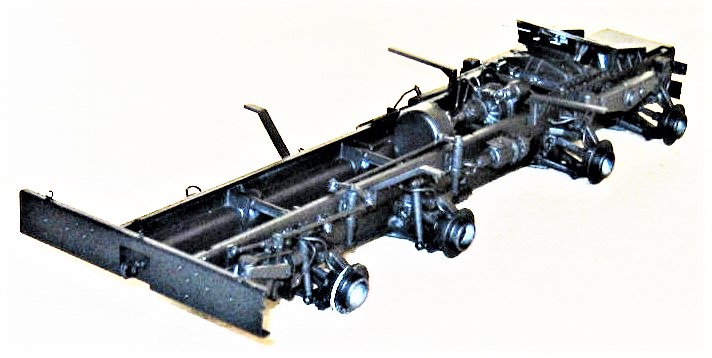
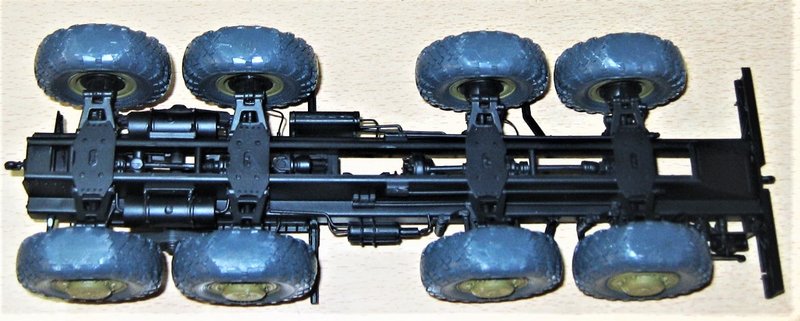
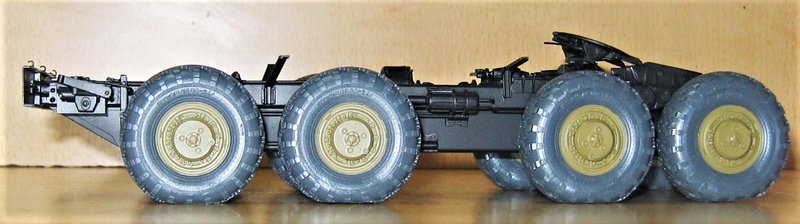
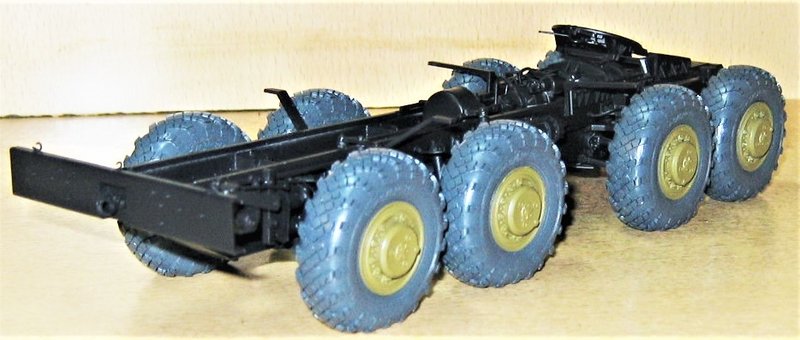
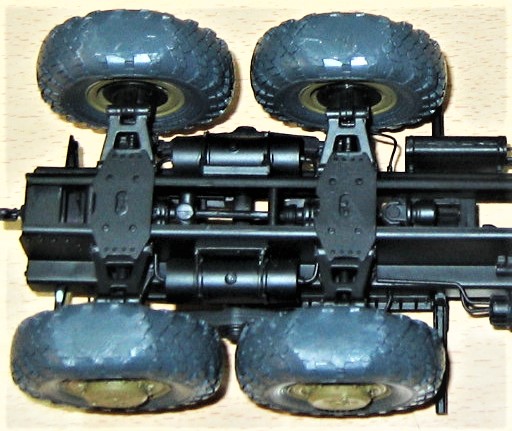
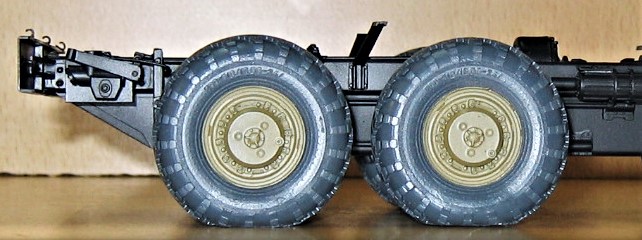
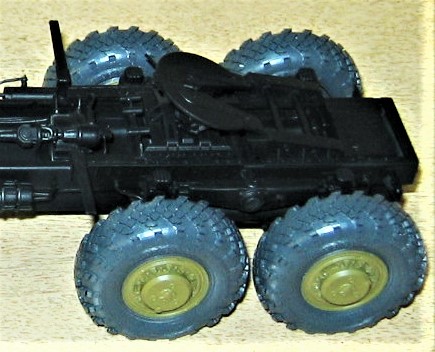
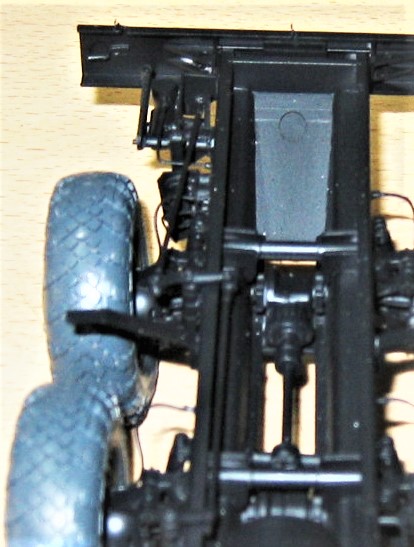
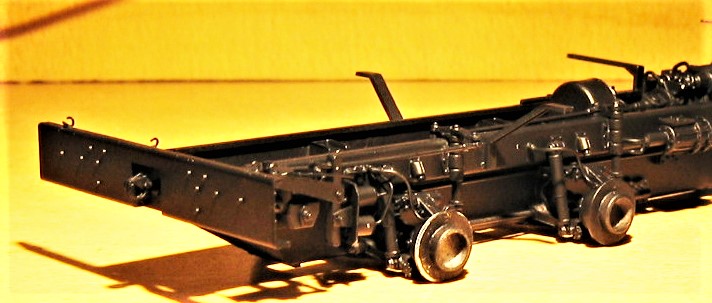
Today two pictures of the Chassi
Sachsen, Germany
Joined: April 13, 2014
KitMaker: 279 posts
Armorama: 279 posts
Posted: Monday, October 14, 2019 - 06:57 PM UTC
Sachsen, Germany
Joined: April 13, 2014
KitMaker: 279 posts
Armorama: 279 posts
Posted: Wednesday, October 16, 2019 - 09:21 AM UTC
Sachsen, Germany
Joined: April 13, 2014
KitMaker: 279 posts
Armorama: 279 posts
Posted: Wednesday, October 16, 2019 - 09:41 AM UTC
#521
Kentucky, United States
Joined: April 13, 2011
KitMaker: 9,465 posts
Armorama: 8,695 posts
Posted: Thursday, October 17, 2019 - 04:19 AM UTC
Joch - it certainly appears you have access to good reference on this vehicle!
Did you build the air tanks for the brake system yourself? Or is this an update that has been added recently to the Trumpeter kit? This particular detail was missing from the Trumpeter model of the late production MA3 kit that I bought?
If you built these air tanks yourself then perhaps you might want to focus your photography more on your changes to the original kit.
I am sure I speak for everyone when I say we would love to see more up close photos of your own creative handiwork. Perhaps also photos taken before painting????
Sachsen, Germany
Joined: April 13, 2014
KitMaker: 279 posts
Armorama: 279 posts
Posted: Thursday, October 17, 2019 - 08:13 AM UTC
Hallo Michael, ich schreibe jetzt in deutsch, um Verwechslungen aus dem Weg zu gehen. Klar habe ich ich die gesten Referenzen, wenn ich dieses Fahrzeug fahre,was besseres kann es nicht geben. Dadurch weiss ich auch, das Trumpeter bei seinem Bausatz sehrviel falsch gemacht hat. Aber man sollte sich an vielen Fehlern nicht hochziehen. Wenn das optische stimmt ist der Krieg gewonnen. Ich denke, das haben viele Modellbauer vergessen. Nun was zu deiner frage mit den druckkesseln der Luftanlage, die waren auch im meinem Bausatz nicht vorhanden und wurden nachgerüstet. Das war die allerkleinste Aufgabe und das beherscht jeder Modellbauer, da braucht man nicht tagelang drüber zu diskutieren wie das gemacht wird. Die Dinger habe ich schon bei meinem ersten Modell nachgerüstet. Klar kann ich noch paar Bilder davon zeigen, habe auch früher bei anderen Modellen den gesamten Bau gezeigt, aber Reaktionen kamen keine und darum wollte ich mir diesen Stress in Zukunft ersparen. Auch das Einstellen der Bilder macht Arbeit, das sollte nicht vergessen werden.
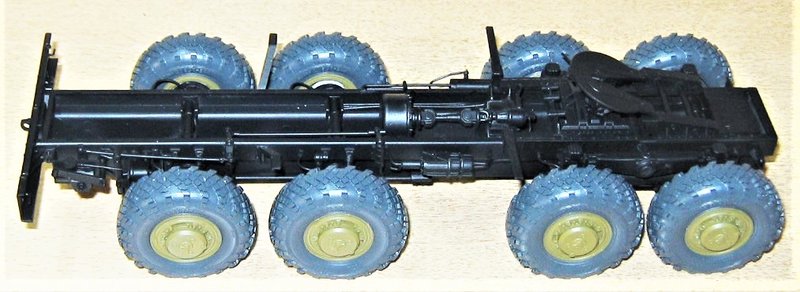
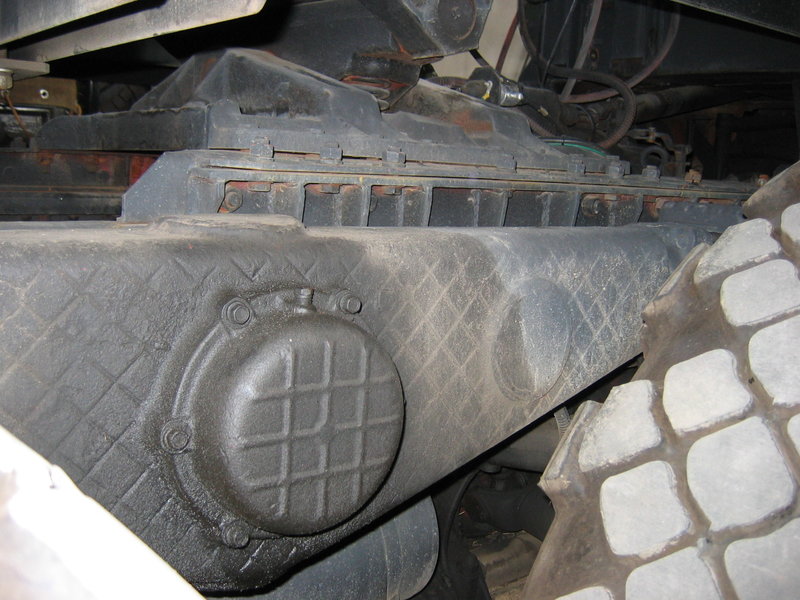
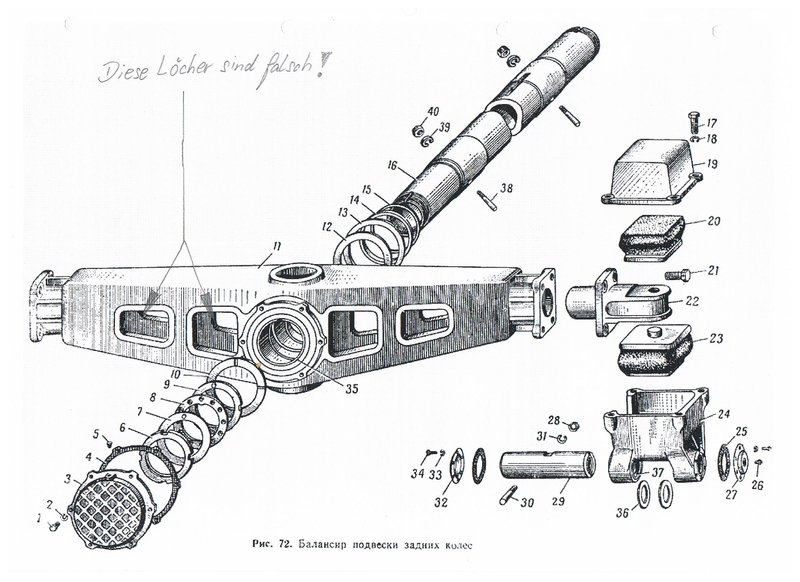
Und nun mal was zu meiner Meinung nach größten Fehler, aud den du bis jetzt noch nicht hingewiesen hast, sind die beiden Traversen der linken und rechten Seite zwischen den beiden Hinterachsen. Diese waren in der Realität nicht unterbrochen, sondern zugeschweißt. Habe das, wie im Modell, nie gesehen. Ich weiß, das es in der Rep. Anleitung auch durchbrochen dargestellt ist. Soviel dazu, wenn du Fragen hast, kannst du sie stellen und ich werde versuchen sie zu beantworten.
Stelle heute noch paar Detailbilder vom Orginal ein.
Sachsen, Germany
Joined: April 13, 2014
KitMaker: 279 posts
Armorama: 279 posts
Posted: Thursday, October 17, 2019 - 08:24 AM UTC
#521
Kentucky, United States
Joined: April 13, 2011
KitMaker: 9,465 posts
Armorama: 8,695 posts
Posted: Thursday, October 17, 2019 - 10:50 AM UTC
Sorry but still having much trouble translating your statements.
What was it that was not welded together between the last two axles???
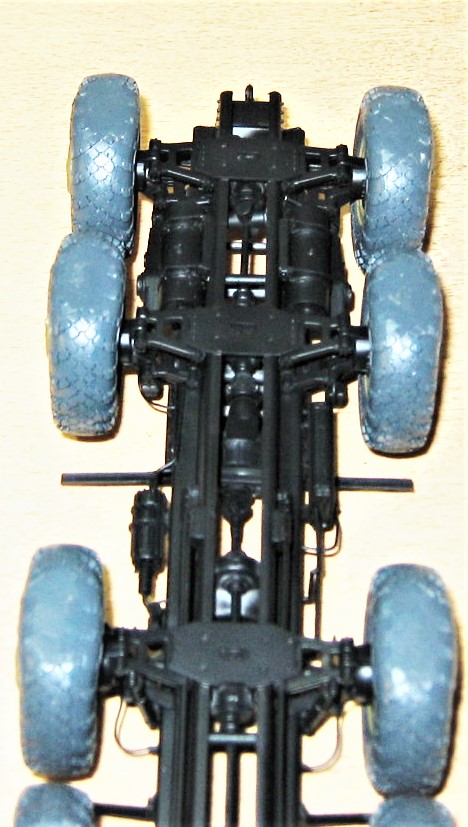
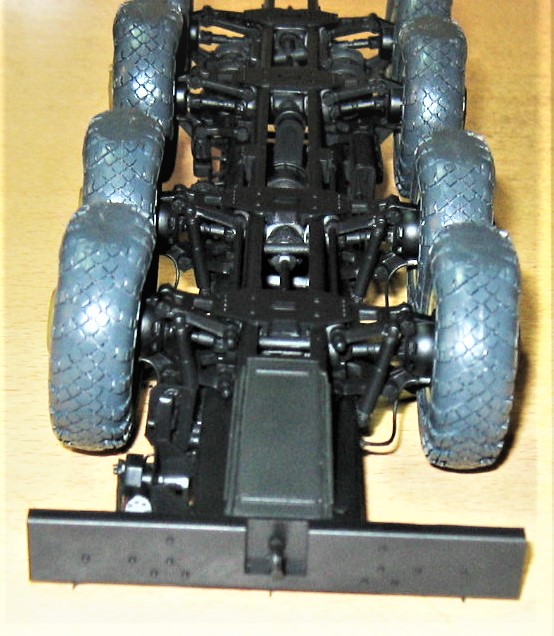
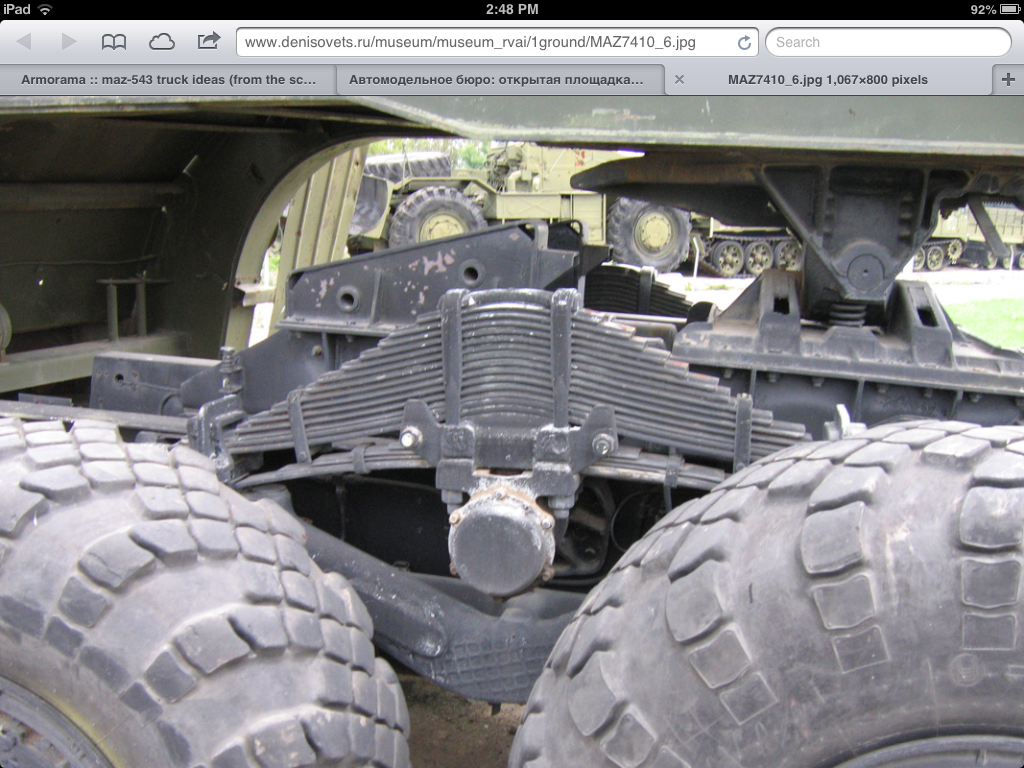
The two "walking beams" in the rear suspension could move independently of each other. They were not welded together between the left and right sides of the chassis.
Again I am sure I am not understanding what you are trying to say here.
#521
Kentucky, United States
Joined: April 13, 2011
KitMaker: 9,465 posts
Armorama: 8,695 posts
Posted: Thursday, October 17, 2019 - 11:00 AM UTC
I am most interested in all the many extra details you may have chosen to add to your build.
I wish to find those improvements which you discovered and added as compared to the details (improvements) that I added when I built the same kit.
I had many photos and the service manuals as reference for my build but you have access to the actual truck!
p.s. Do you own the MA3 truck yourself?
#521
Kentucky, United States
Joined: April 13, 2011
KitMaker: 9,465 posts
Armorama: 8,695 posts
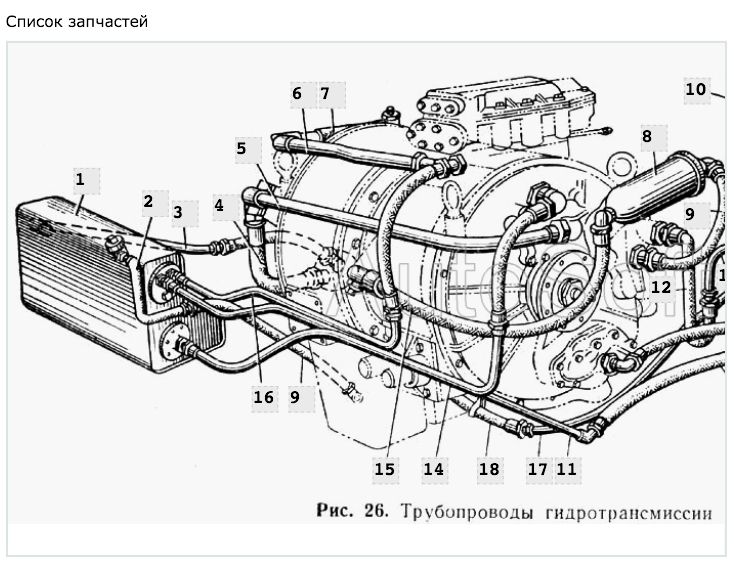
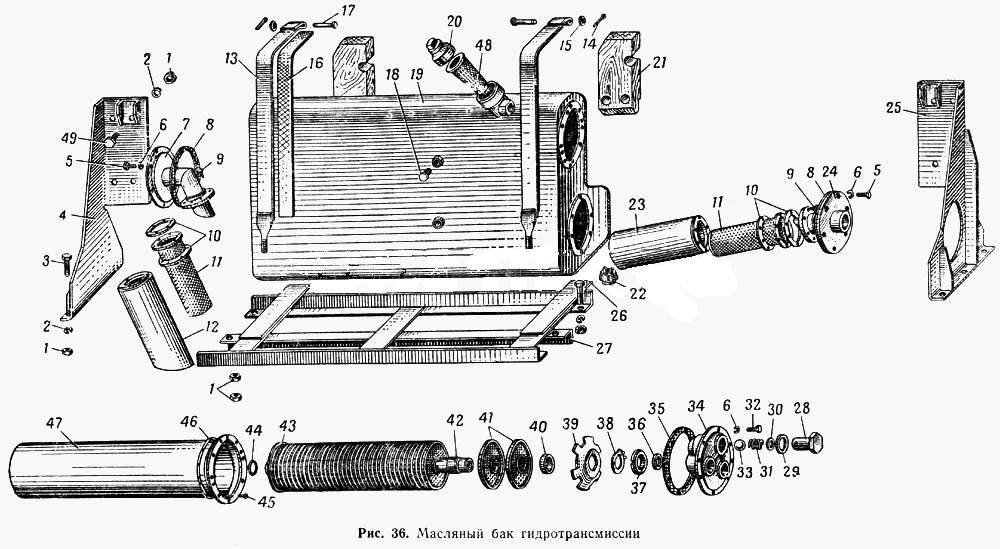
Posted: Thursday, October 17, 2019 - 11:32 AM UTC
Some reference from the service manual for detailing that hydraulic oil reservoir for the transmission:
Sachsen, Germany
Joined: April 13, 2014
KitMaker: 279 posts
Armorama: 279 posts
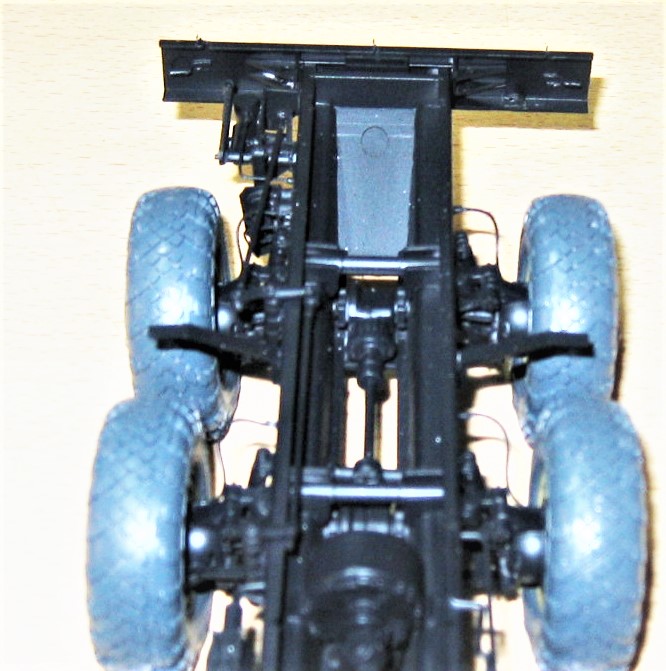
Posted: Thursday, October 17, 2019 - 06:01 PM UTC
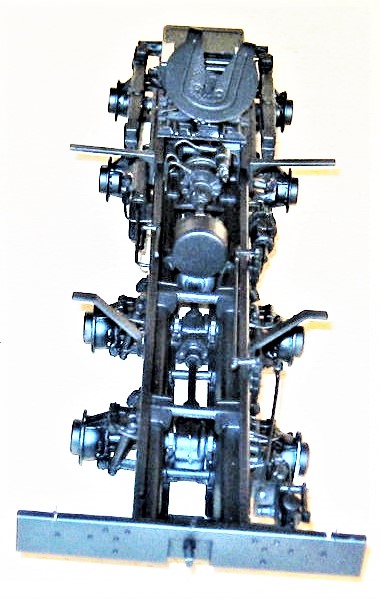
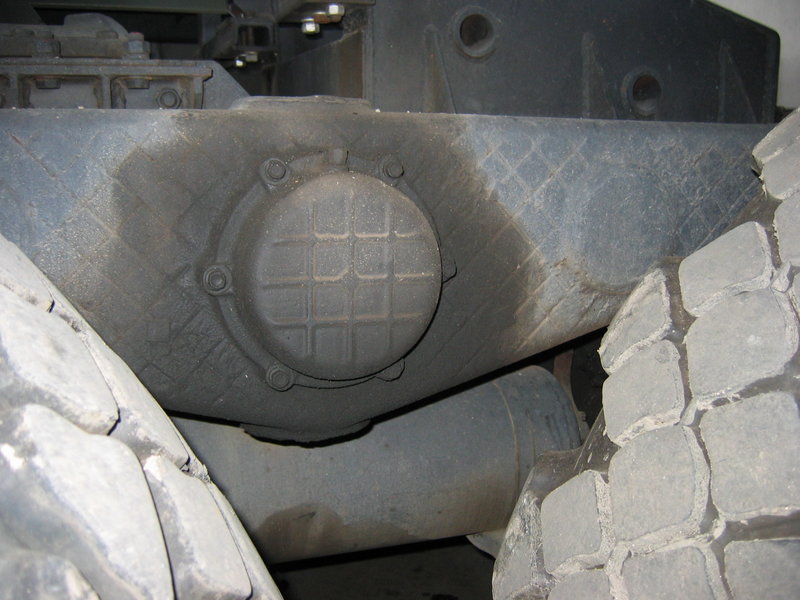
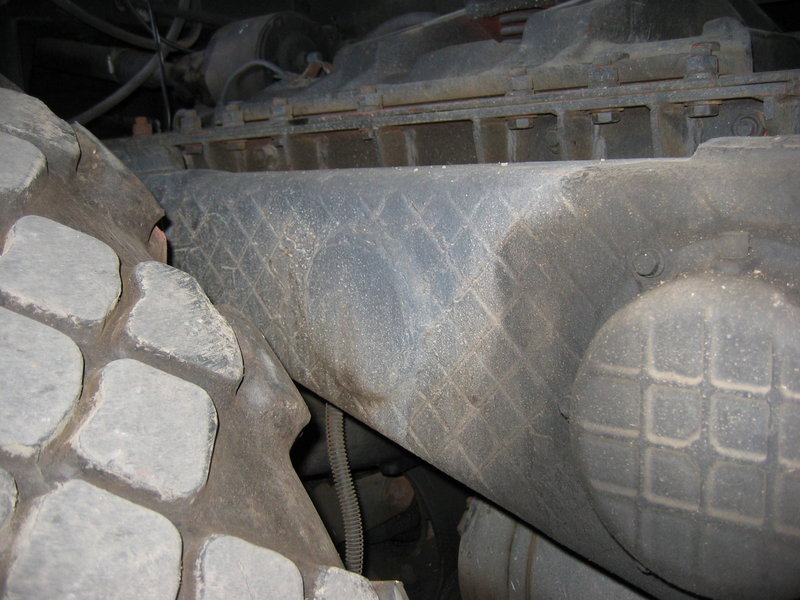
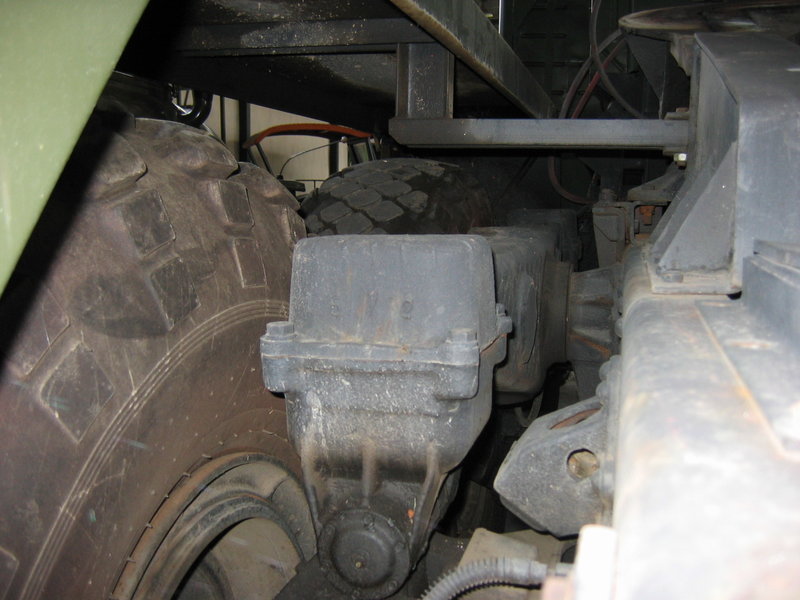
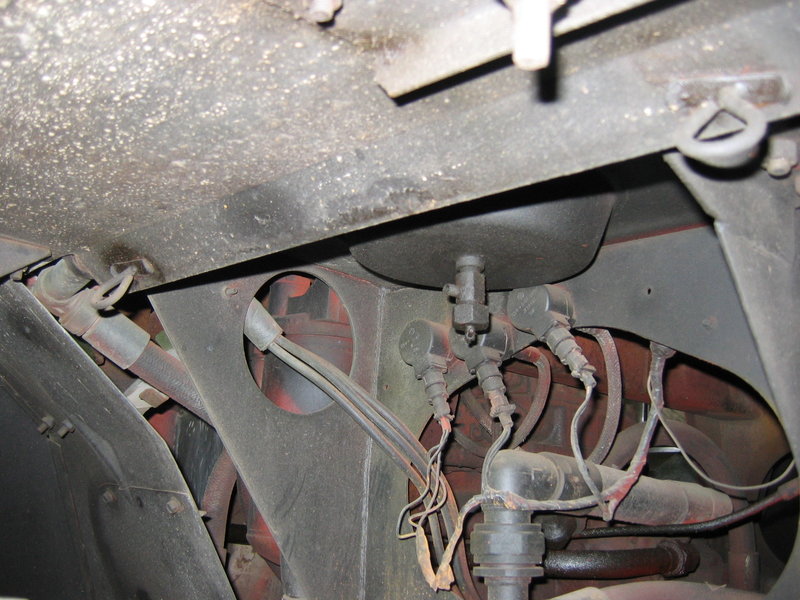
In this picture I have marked the problem.
Sachsen, Germany
Joined: April 13, 2014
KitMaker: 279 posts
Armorama: 279 posts
Posted: Thursday, October 17, 2019 - 06:23 PM UTC
#521
Kentucky, United States
Joined: April 13, 2011
KitMaker: 9,465 posts
Armorama: 8,695 posts
Posted: Friday, October 18, 2019 - 05:46 AM UTC
I now understand.
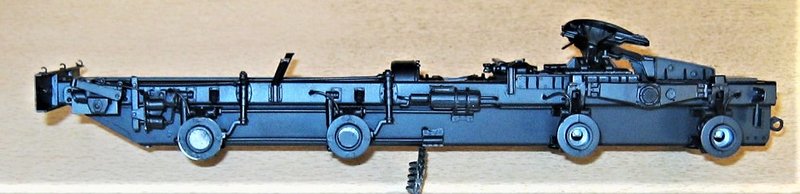
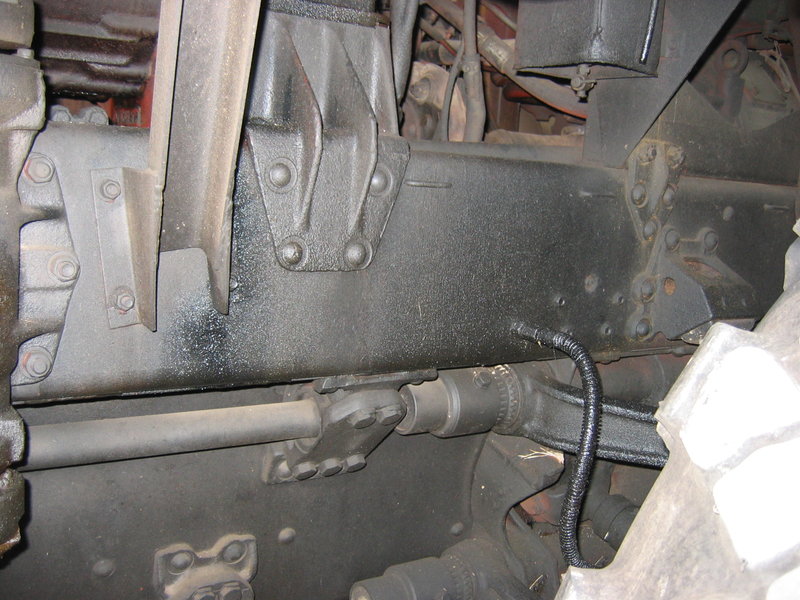
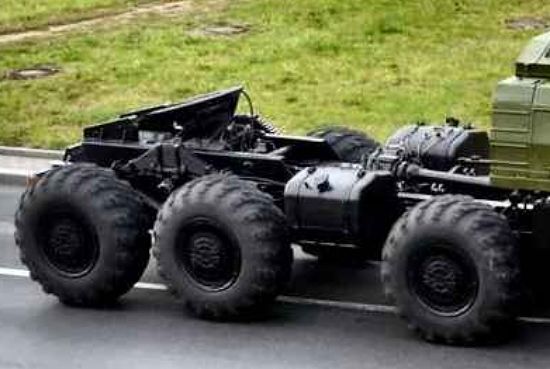
Clearly those unsprung (no springs) walking beam axle support arms take a lot of abuse. It appears in the original design they were to have weight reduction holes but in later production vehicles the holes were eliminated either to add strength or to make the arms easier to manufacture. (On other variants of this truck these where replaced with massive leaf springs.)
If I do another of these heavy trucks I will consider adding these holes back into the model.
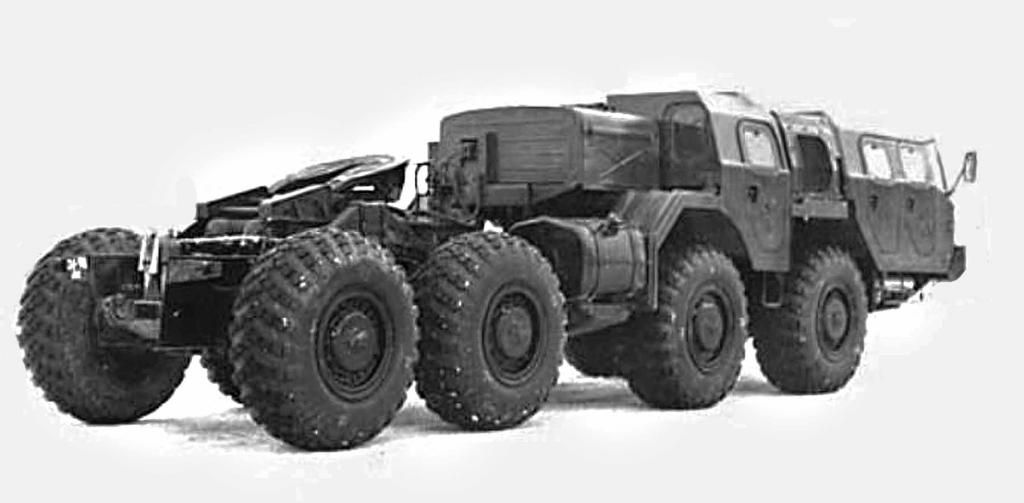
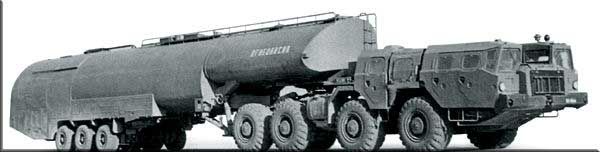
Joch do you have any information on the interesting five passenger cab on this one? If I every do build another of these massive trucks I think it will be this one in the above photo. (Do not know however if I would ever try the huge tanker trailer to go with it!)
#521
Kentucky, United States
Joined: April 13, 2011
KitMaker: 9,465 posts
Armorama: 8,695 posts
Posted: Friday, October 18, 2019 - 06:02 AM UTC
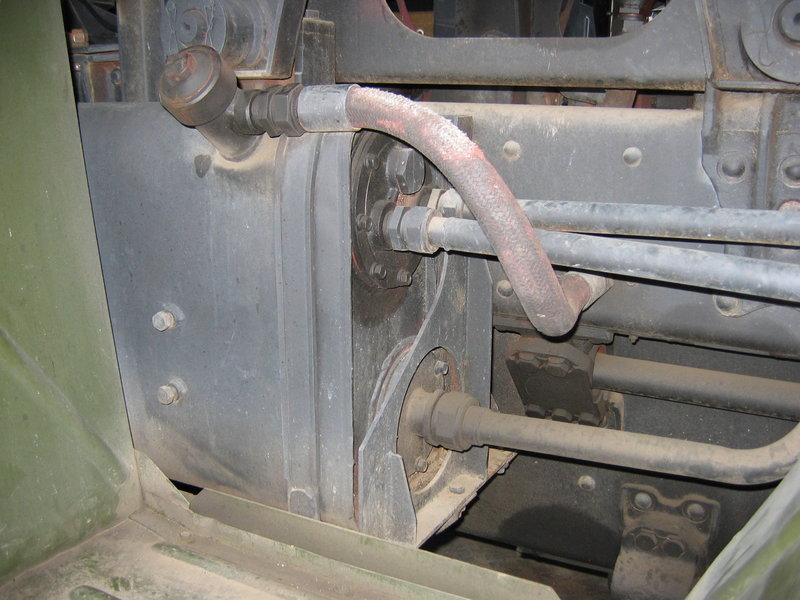
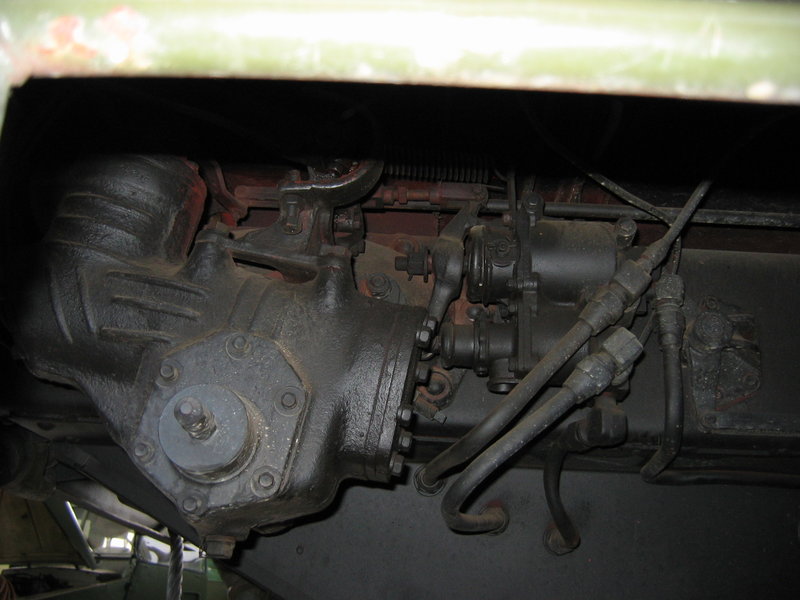
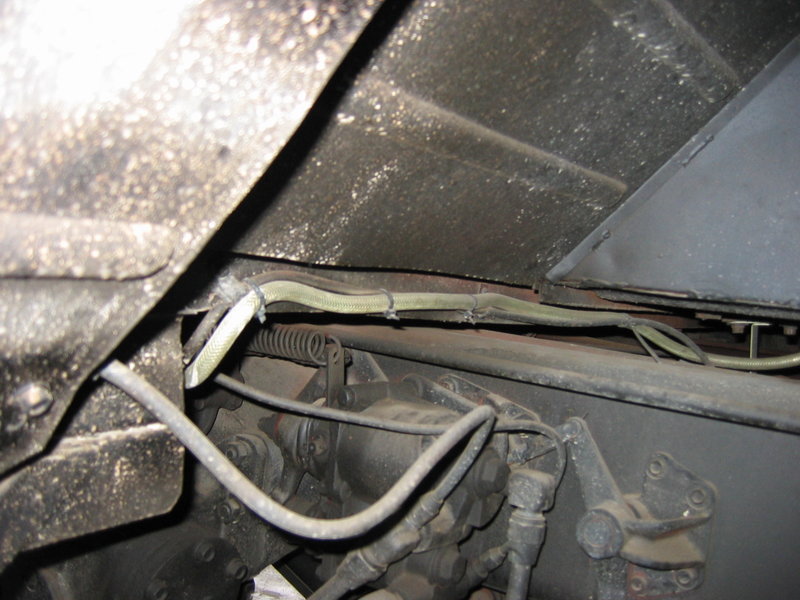
Joch, it appears you have added much detail under the floor of the driver's compartment. I would love to see close ups of your work in this area.
Sachsen, Germany
Joined: April 13, 2014
KitMaker: 279 posts
Armorama: 279 posts
Posted: Friday, October 18, 2019 - 08:47 AM UTC
#521
Kentucky, United States
Joined: April 13, 2011
KitMaker: 9,465 posts
Armorama: 8,695 posts
Posted: Friday, October 18, 2019 - 09:48 AM UTC
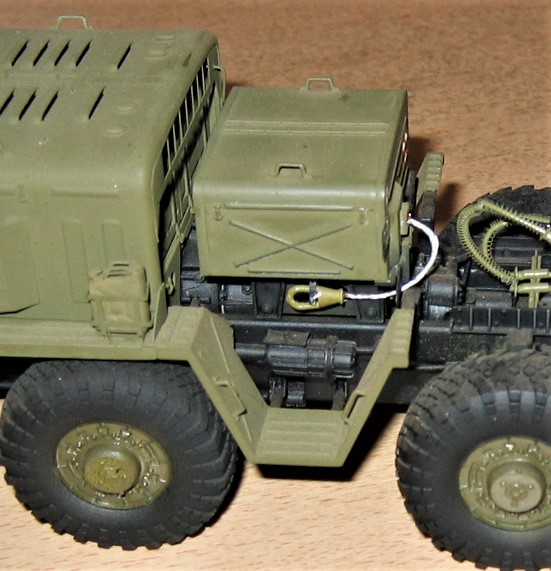
At the risk of being wrong (and I might be) the MAZ-537 appears to share a lot of major components with the MAZ-543 and a model of one would seem to be a real good starting point for building a semi-scratch model of the other.
That's my plan anyway. Is there some good reason why this would be a bad idea?
#521
Kentucky, United States
Joined: April 13, 2011
KitMaker: 9,465 posts
Armorama: 8,695 posts
Posted: Friday, October 18, 2019 - 09:49 AM UTC
I like that you added brake lines to your model. For some reason that never occurred to me though I have added then to other trucks. I just might have to go back to my model and follow your lead.