Hello all,
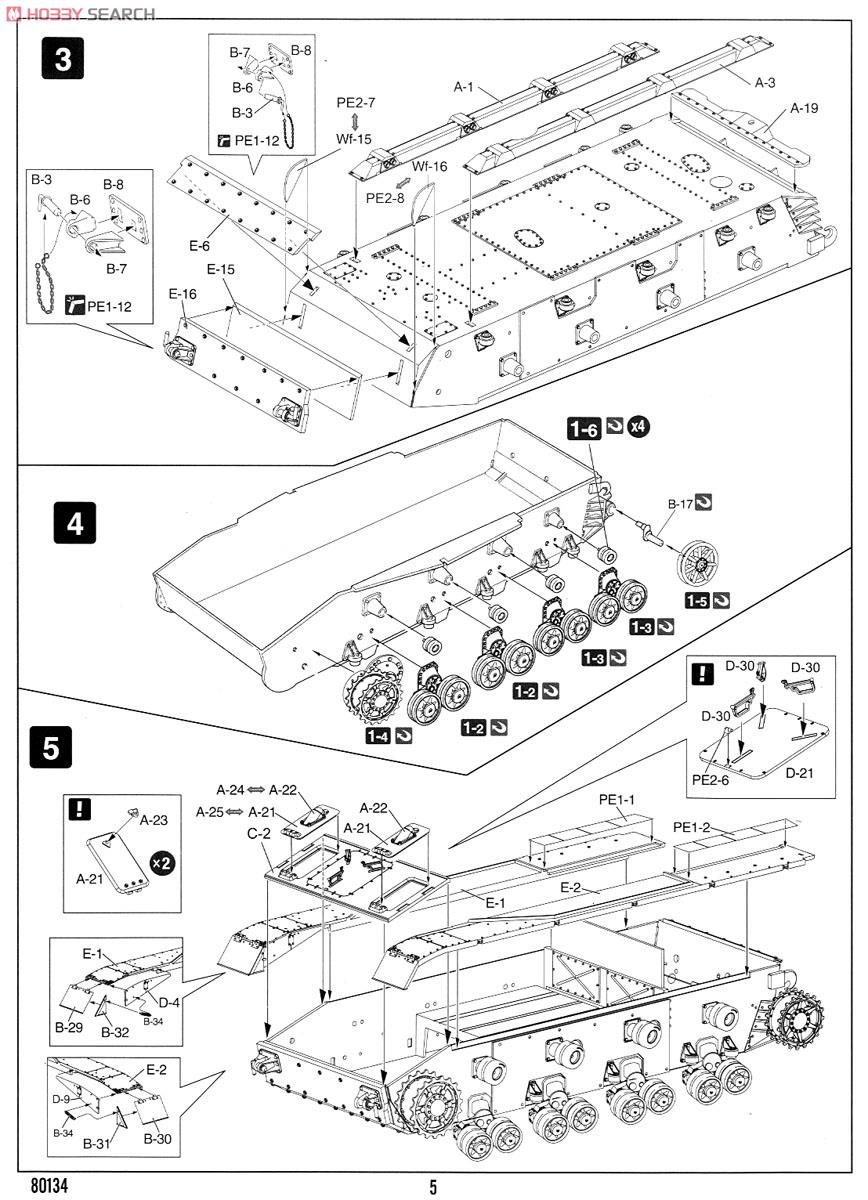
I'm building Hobbyboss' Brummbar, which I understand is a reboxing of the tristar kit. I don't know if the instructions are a direct copy as well, but they're somewhat vague in spots.
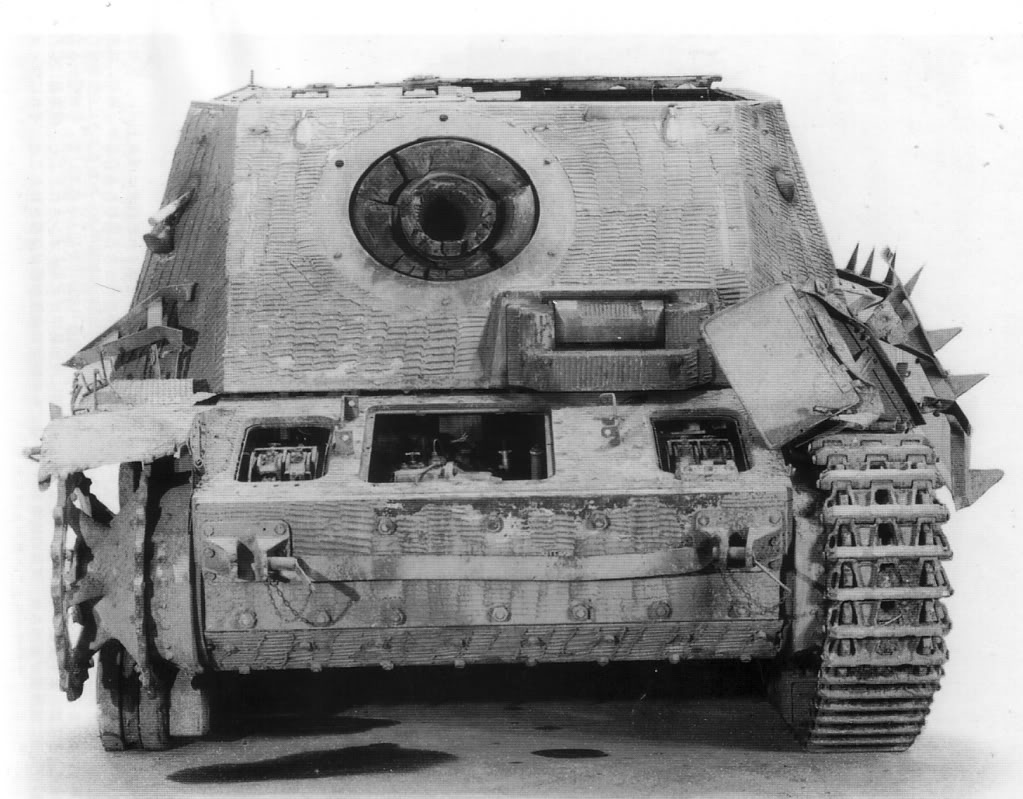
I'm confused about how the applique plates on the front lower hull should look. There are five pieces here. The 20 mm armor plate and the applique plate which goes over it, and then a smaller applique plate that goes beneath the 20 mm armor. Then there are two small inserts (plastic or PE) which go on either side. The applique plates have cutouts and dont reach the sides of the hull. I have a few brummbar pics and do not see these cutouts on any of them.
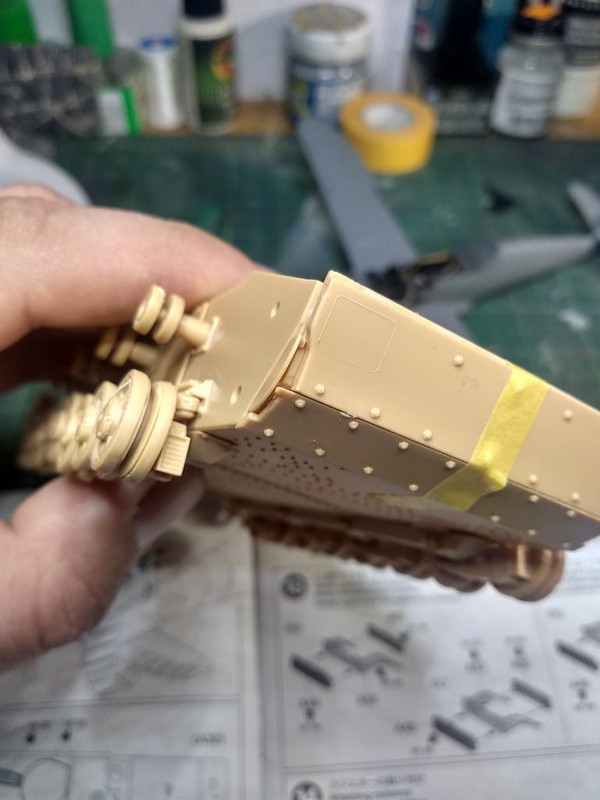
Also the small inserts that go along the sides are shaped differently on the instructions, and their location is vaguely indicated. They don't fit into the wedges on the hull tub.
If anybody has this kit built, can you please post a photo of what the finished lower hull front is supposed to look like ?
Hosted by Darren Baker
HB Brummbar Early Lower Hull Front shapes?
BornToDig
Maryland, United States
Joined: December 25, 2002
KitMaker: 345 posts
Armorama: 311 posts
Joined: December 25, 2002
KitMaker: 345 posts
Armorama: 311 posts
Posted: Thursday, January 02, 2020 - 04:43 AM UTC
marcb
Overijssel, Netherlands
Joined: March 25, 2006
KitMaker: 1,244 posts
Armorama: 1,226 posts
Joined: March 25, 2006
KitMaker: 1,244 posts
Armorama: 1,226 posts
Posted: Thursday, January 02, 2020 - 09:41 AM UTC
What kit number do you have?
80134,without zimmerit
https://www.1999.co.jp/eng/image/10346410
80135, with zimmerit
https://www.1999.co.jp/eng/image/10353002
I haven't built the kit, but it might help if you first install the drive sprockets.
80134,without zimmerit
https://www.1999.co.jp/eng/image/10346410
80135, with zimmerit
https://www.1999.co.jp/eng/image/10353002
I haven't built the kit, but it might help if you first install the drive sprockets.
alanmac
United Kingdom
Joined: February 25, 2007
KitMaker: 3,033 posts
Armorama: 2,953 posts
Joined: February 25, 2007
KitMaker: 3,033 posts
Armorama: 2,953 posts
Posted: Thursday, January 02, 2020 - 09:54 AM UTC
Hi.
Is it section 3 that you are having difficulty with? Looks straightfoward to me with a choice of PE or plastic for the two crescent shaped sections that back onto the drive sprocket housing filling those notched gaps in the applique armour.
marcb
Overijssel, Netherlands
Joined: March 25, 2006
KitMaker: 1,244 posts
Armorama: 1,226 posts
Joined: March 25, 2006
KitMaker: 1,244 posts
Armorama: 1,226 posts
Posted: Thursday, January 02, 2020 - 10:05 AM UTC
BornToDig
Maryland, United States
Joined: December 25, 2002
KitMaker: 345 posts
Armorama: 311 posts
Joined: December 25, 2002
KitMaker: 345 posts
Armorama: 311 posts
Posted: Thursday, January 02, 2020 - 10:46 AM UTC
Quoted Text
Hi.
Is it section 3 that you are having difficulty with? Looks straightfoward to me with a choice of PE or plastic for the two crescent shaped sections that back onto the drive sprocket housing filling those notched gaps in the applique armour.
The problem is that the plastic parts do not resemble the drawings in the instructions.parts wf 15 and 16 are shaped differently and don't extend into the notches on the applique.
I'll try adding the sprocket housings first, as per Marc's suggestion.
BornToDig
Maryland, United States
Joined: December 25, 2002
KitMaker: 345 posts
Armorama: 311 posts
Joined: December 25, 2002
KitMaker: 345 posts
Armorama: 311 posts
Posted: Thursday, January 02, 2020 - 10:55 AM UTC
Quoted Text
Interesting. Here are the kit parts in comparison. Maybe the drive housings will enclose this business on the sides?