

Hi All,
First build on this site.
Ive had this idea to build an Australian M113A1 Fire Support Vehicle from Vietnam for a long time. With the new AFV Club M113A1 and Dragon Saladin Mk 2 both out. I had no excuse to throw them together. Ok, these kits have been out for a while, Im just a slow to act on it and a very slow builder.
I also do a fly in/fly out type job. So this is getting built on my time off. As a bit of scratch building is involved. I am constructing kits while Im away, but only main/major parts. So for the first time I have over one kit on the run. About four them atm. This kit was start about four to five months ago. Yes a very slow builder.
Well to the build.
I had reference measurements taken by me from an actual FSV. Also access to two other FSV . So walk around photos is not an issue.
I also had a number good pictures from the web of FSV in Vietnam. Not many but enough to hopefully do the job.
Two books. Military Briefs No 1 FSV and Mud and Dust.
Also Jason and Greg with the answer along the way.
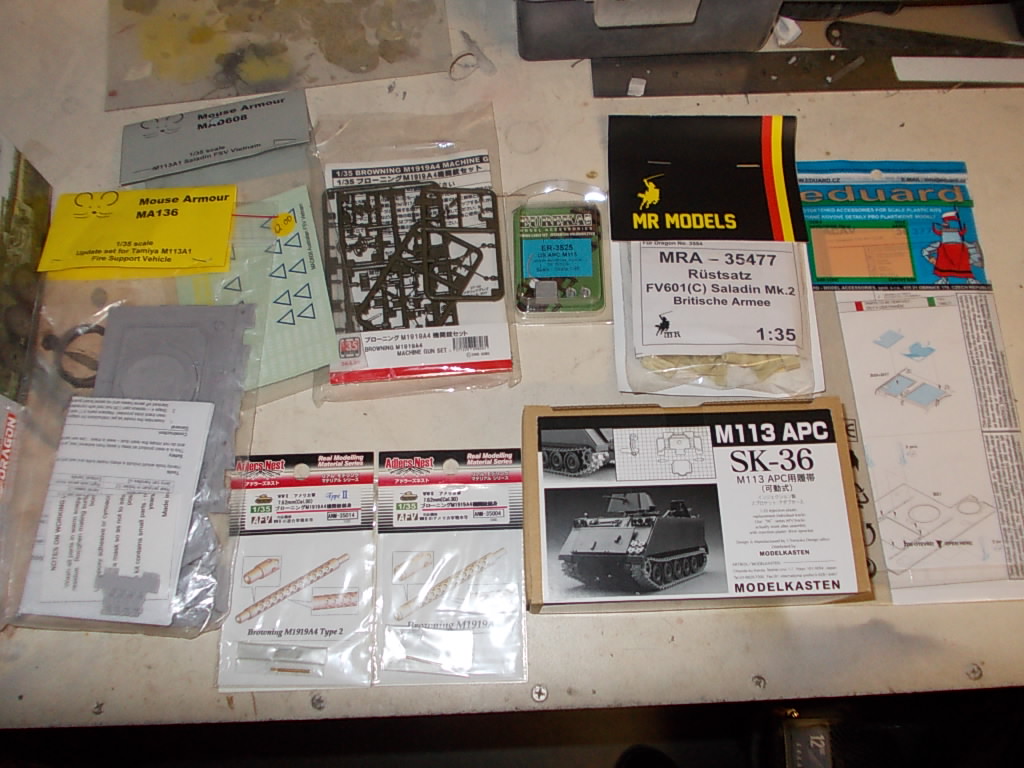
Kits and aftermarket
AFV Club M113A1
Dragon Saladin Mk 2
Modelkasten M113 Tracks
Masterclub M113 Tracks
Mouse House Decals MAD 608 FSV Veitnam
Mouse House MA136 Update for FSV Tamiya
Fire Storm M113A1 Belly Armour
Arms Corp Models AMU M113A1
Alder nest .30 barrels
Asuka Model .30 cal
Eduard PE 36377 for AFV Club M113
Arms Corp
Arms Corp Models spot weld tiedowns
I think thats it
BTW how the hell do you upload pics on this site?
Hosted by Darren Baker
Australian M113A1 FSV kit bash

gibbo

Joined: June 21, 2004
KitMaker: 30 posts
Armorama: 30 posts
Posted: Monday, April 06, 2020 - 10:36 PM UTC
Removed by original poster on 04/07/20 - 10:45:19 (GMT).

RobinNilsson

Joined: November 29, 2006
KitMaker: 6,693 posts
Armorama: 5,562 posts
Posted: Monday, April 06, 2020 - 11:07 PM UTC
There is a small photo gallery attached to your user id but that wil become full very quickly.
The other option is to use some photo hosting site out there on the world wide web.
Stay away from photobucket, they had some strange ideas about trying to take photos as hostages so the 'free' service you started with suddenly became a pay-up-or-get-screwed deal. My only remaining picture there is a F-U message, I digress ...
A photo host I can recommend is imgur.
Uploading images is by drag-and-drop and then they provide very easy access to links to publish the photos on various platforms.
I posted the image above by hitting the Copy-button for the BB-code link above and then simply pasting it above this text.
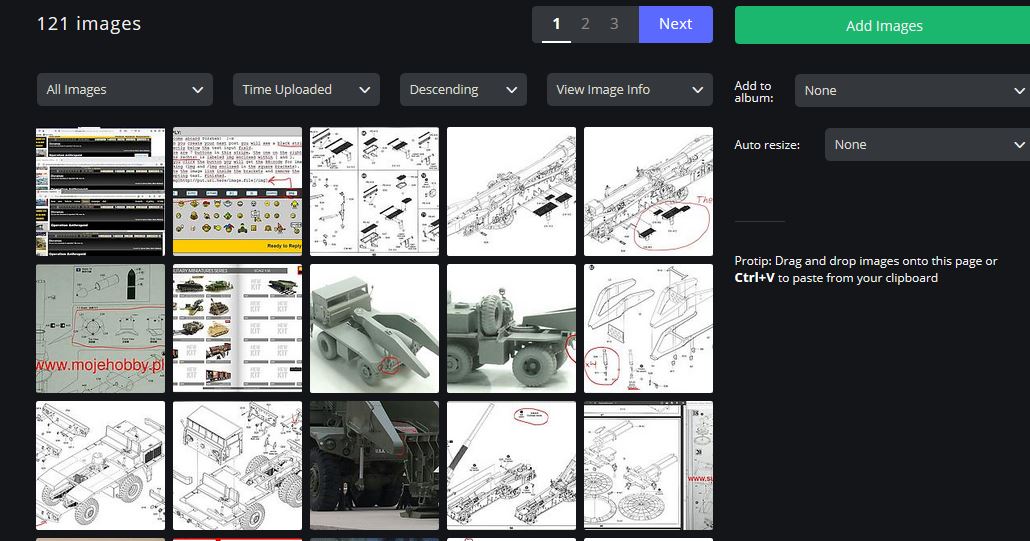
This is my "front page" on imgur, the interesting part is the "Protip: Drag and drop ...."-text
Imgur front page: https://imgur.com/
Two links in the top right, 'sign in' and 'sign up'
/ Robin
The other option is to use some photo hosting site out there on the world wide web.
Stay away from photobucket, they had some strange ideas about trying to take photos as hostages so the 'free' service you started with suddenly became a pay-up-or-get-screwed deal. My only remaining picture there is a F-U message, I digress ...
A photo host I can recommend is imgur.
Uploading images is by drag-and-drop and then they provide very easy access to links to publish the photos on various platforms.
I posted the image above by hitting the Copy-button for the BB-code link above and then simply pasting it above this text.
This is my "front page" on imgur, the interesting part is the "Protip: Drag and drop ...."-text
Imgur front page: https://imgur.com/
Two links in the top right, 'sign in' and 'sign up'
/ Robin
gibbo
Joined: June 21, 2004
KitMaker: 30 posts
Armorama: 30 posts
Posted: Monday, April 06, 2020 - 11:08 PM UTC

gibbo
Joined: June 21, 2004
KitMaker: 30 posts
Armorama: 30 posts
Posted: Monday, April 06, 2020 - 11:09 PM UTC
Thanks Robin.
Think it will be a steep learning curve for me.
GG
Think it will be a steep learning curve for me.
GG
gibbo
Joined: June 21, 2004
KitMaker: 30 posts
Armorama: 30 posts
Posted: Monday, April 06, 2020 - 11:15 PM UTC
Ok, Lets see how this goes!
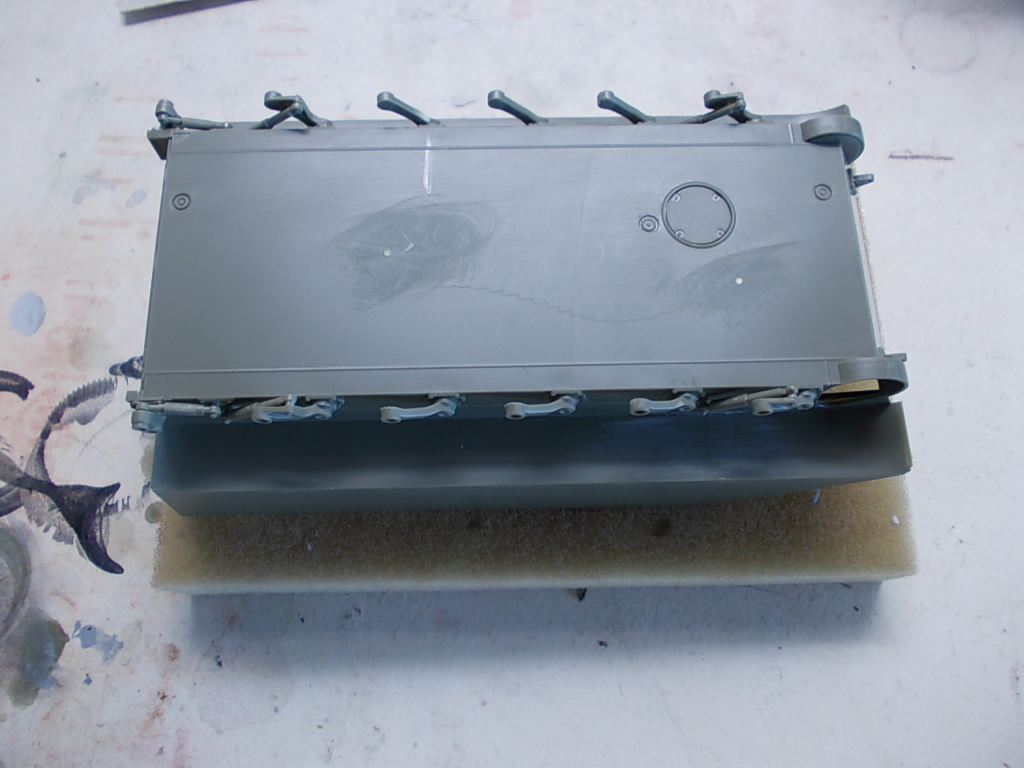
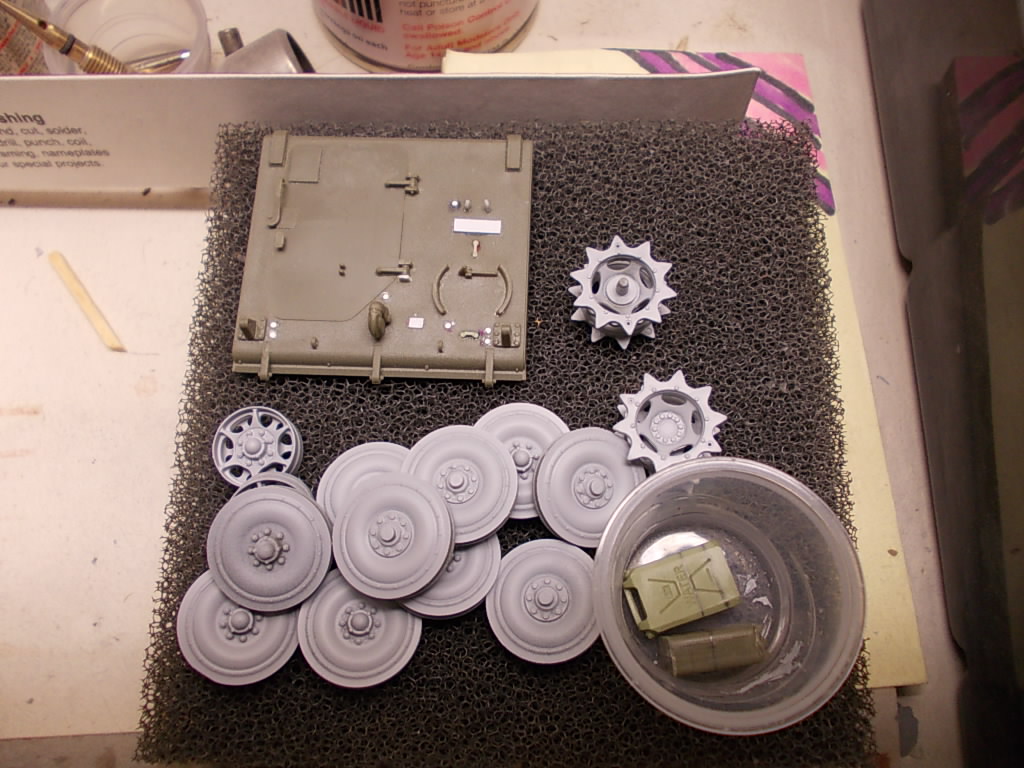
All running gear was done on the boat while I was away
Rear hull, red indicates bits for removal
More off the hull
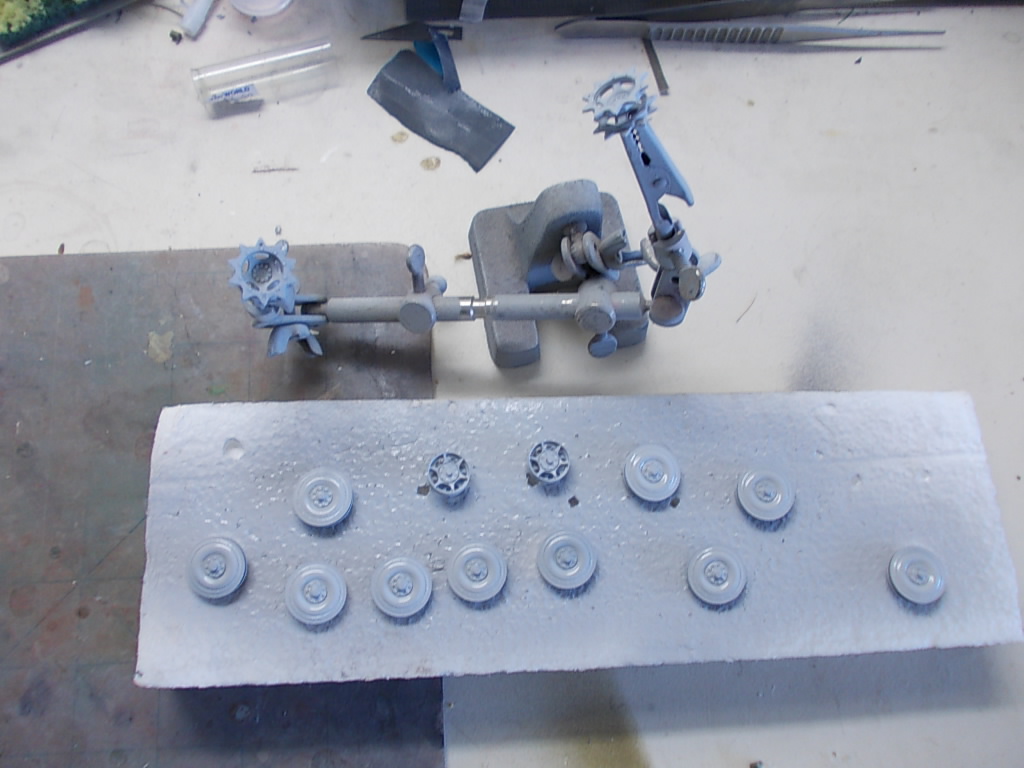
All drive sprockets, road wheels idlers were done on the boat. Prime at home.
all cleaned up.
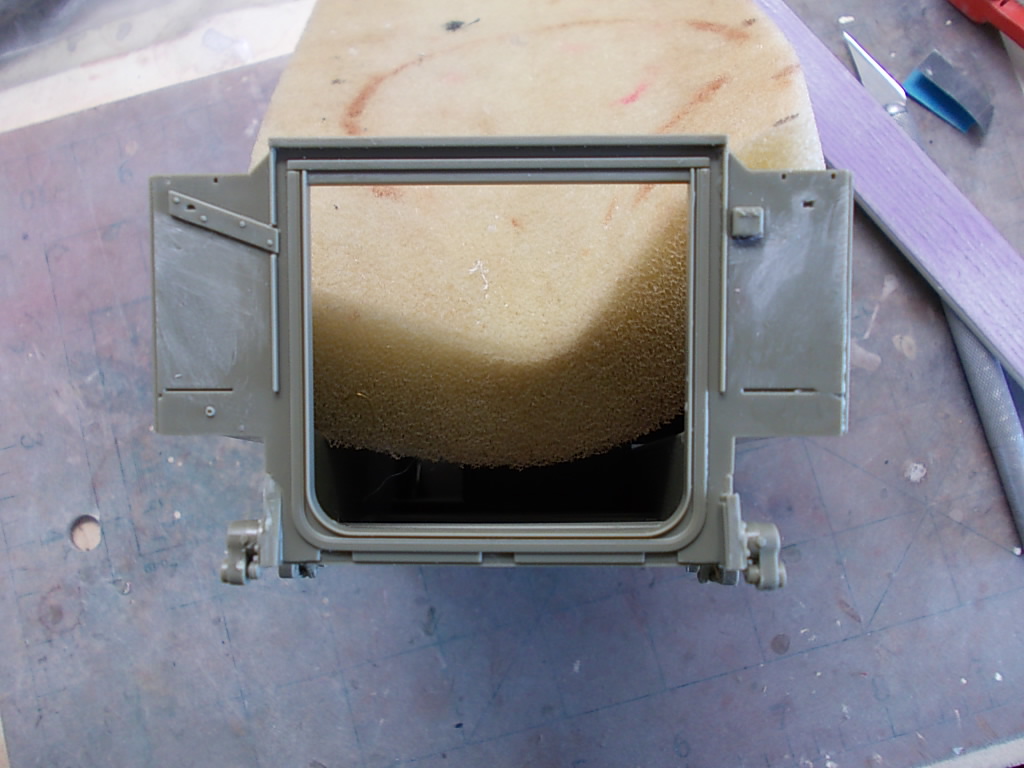
Ok, all M113 kits have the rear mod guards open. I believe most/all were covered. I will be fixing this issue
All running gear was done on the boat while I was away
Rear hull, red indicates bits for removal
More off the hull
All drive sprockets, road wheels idlers were done on the boat. Prime at home.
all cleaned up.
Ok, all M113 kits have the rear mod guards open. I believe most/all were covered. I will be fixing this issue

ptruhe


Joined: March 05, 2003
KitMaker: 2,092 posts
Armorama: 1,607 posts

Posted: Monday, April 06, 2020 - 11:46 PM UTC
Nice M113 base kit. It's got all the drain plugs and the belly plate.
Have fun with making the hull top. You don't have the Tamiya kit as a guide?
Have fun with making the hull top. You don't have the Tamiya kit as a guide?
gibbo
Joined: June 21, 2004
KitMaker: 30 posts
Armorama: 30 posts
Posted: Tuesday, April 07, 2020 - 12:02 AM UTC
Going to use the Mouse House conversion and measurements I have taken from a 1/1 scale one. Most likely scratch build it.See how I go.
I'm impressed with the AFV club kit. excellent detail and fits real good. Light years ahead of the old M113 kits
I'm impressed with the AFV club kit. excellent detail and fits real good. Light years ahead of the old M113 kits
gibbo
Joined: June 21, 2004
KitMaker: 30 posts
Armorama: 30 posts
Posted: Tuesday, April 07, 2020 - 11:24 PM UTC
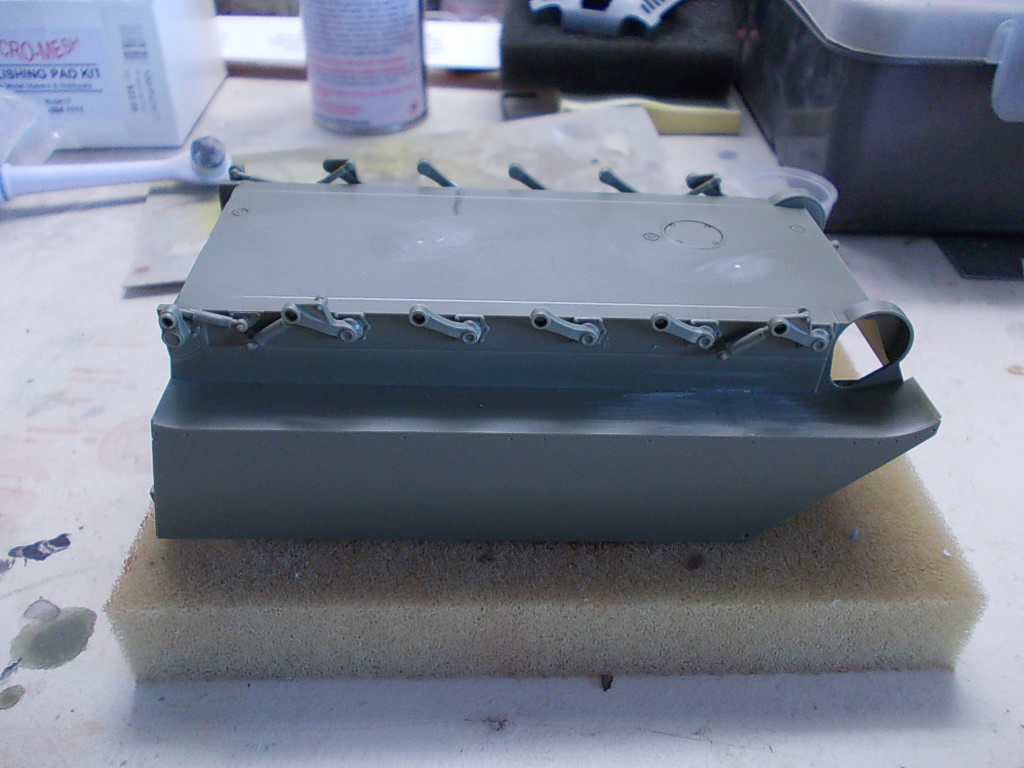
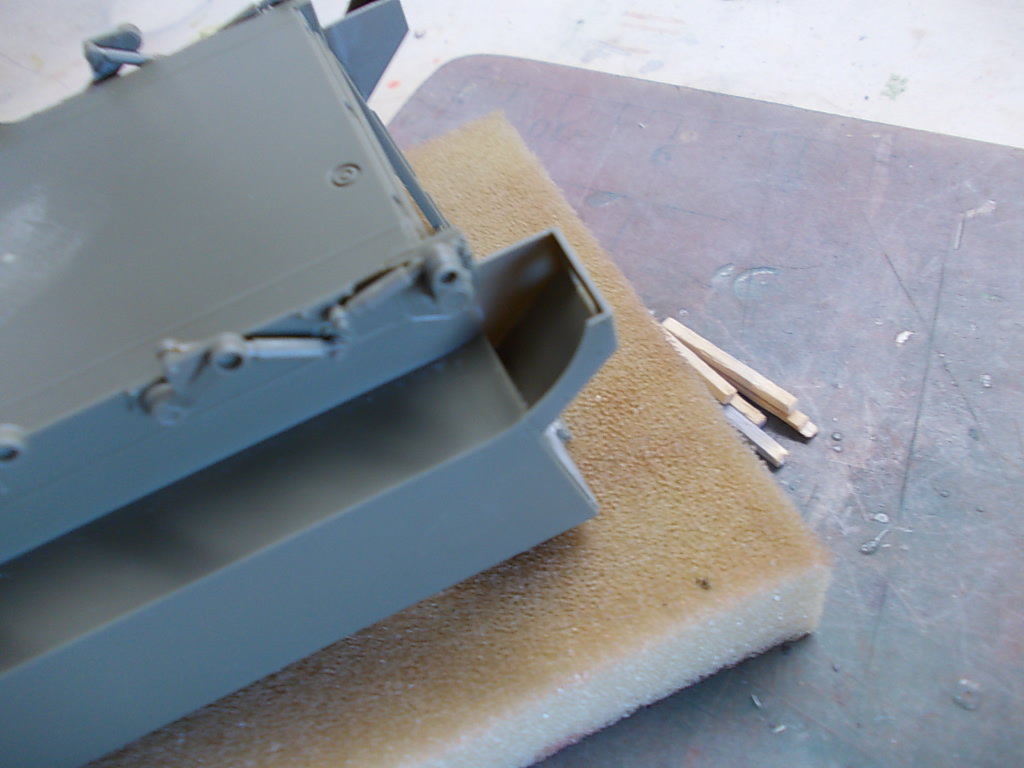
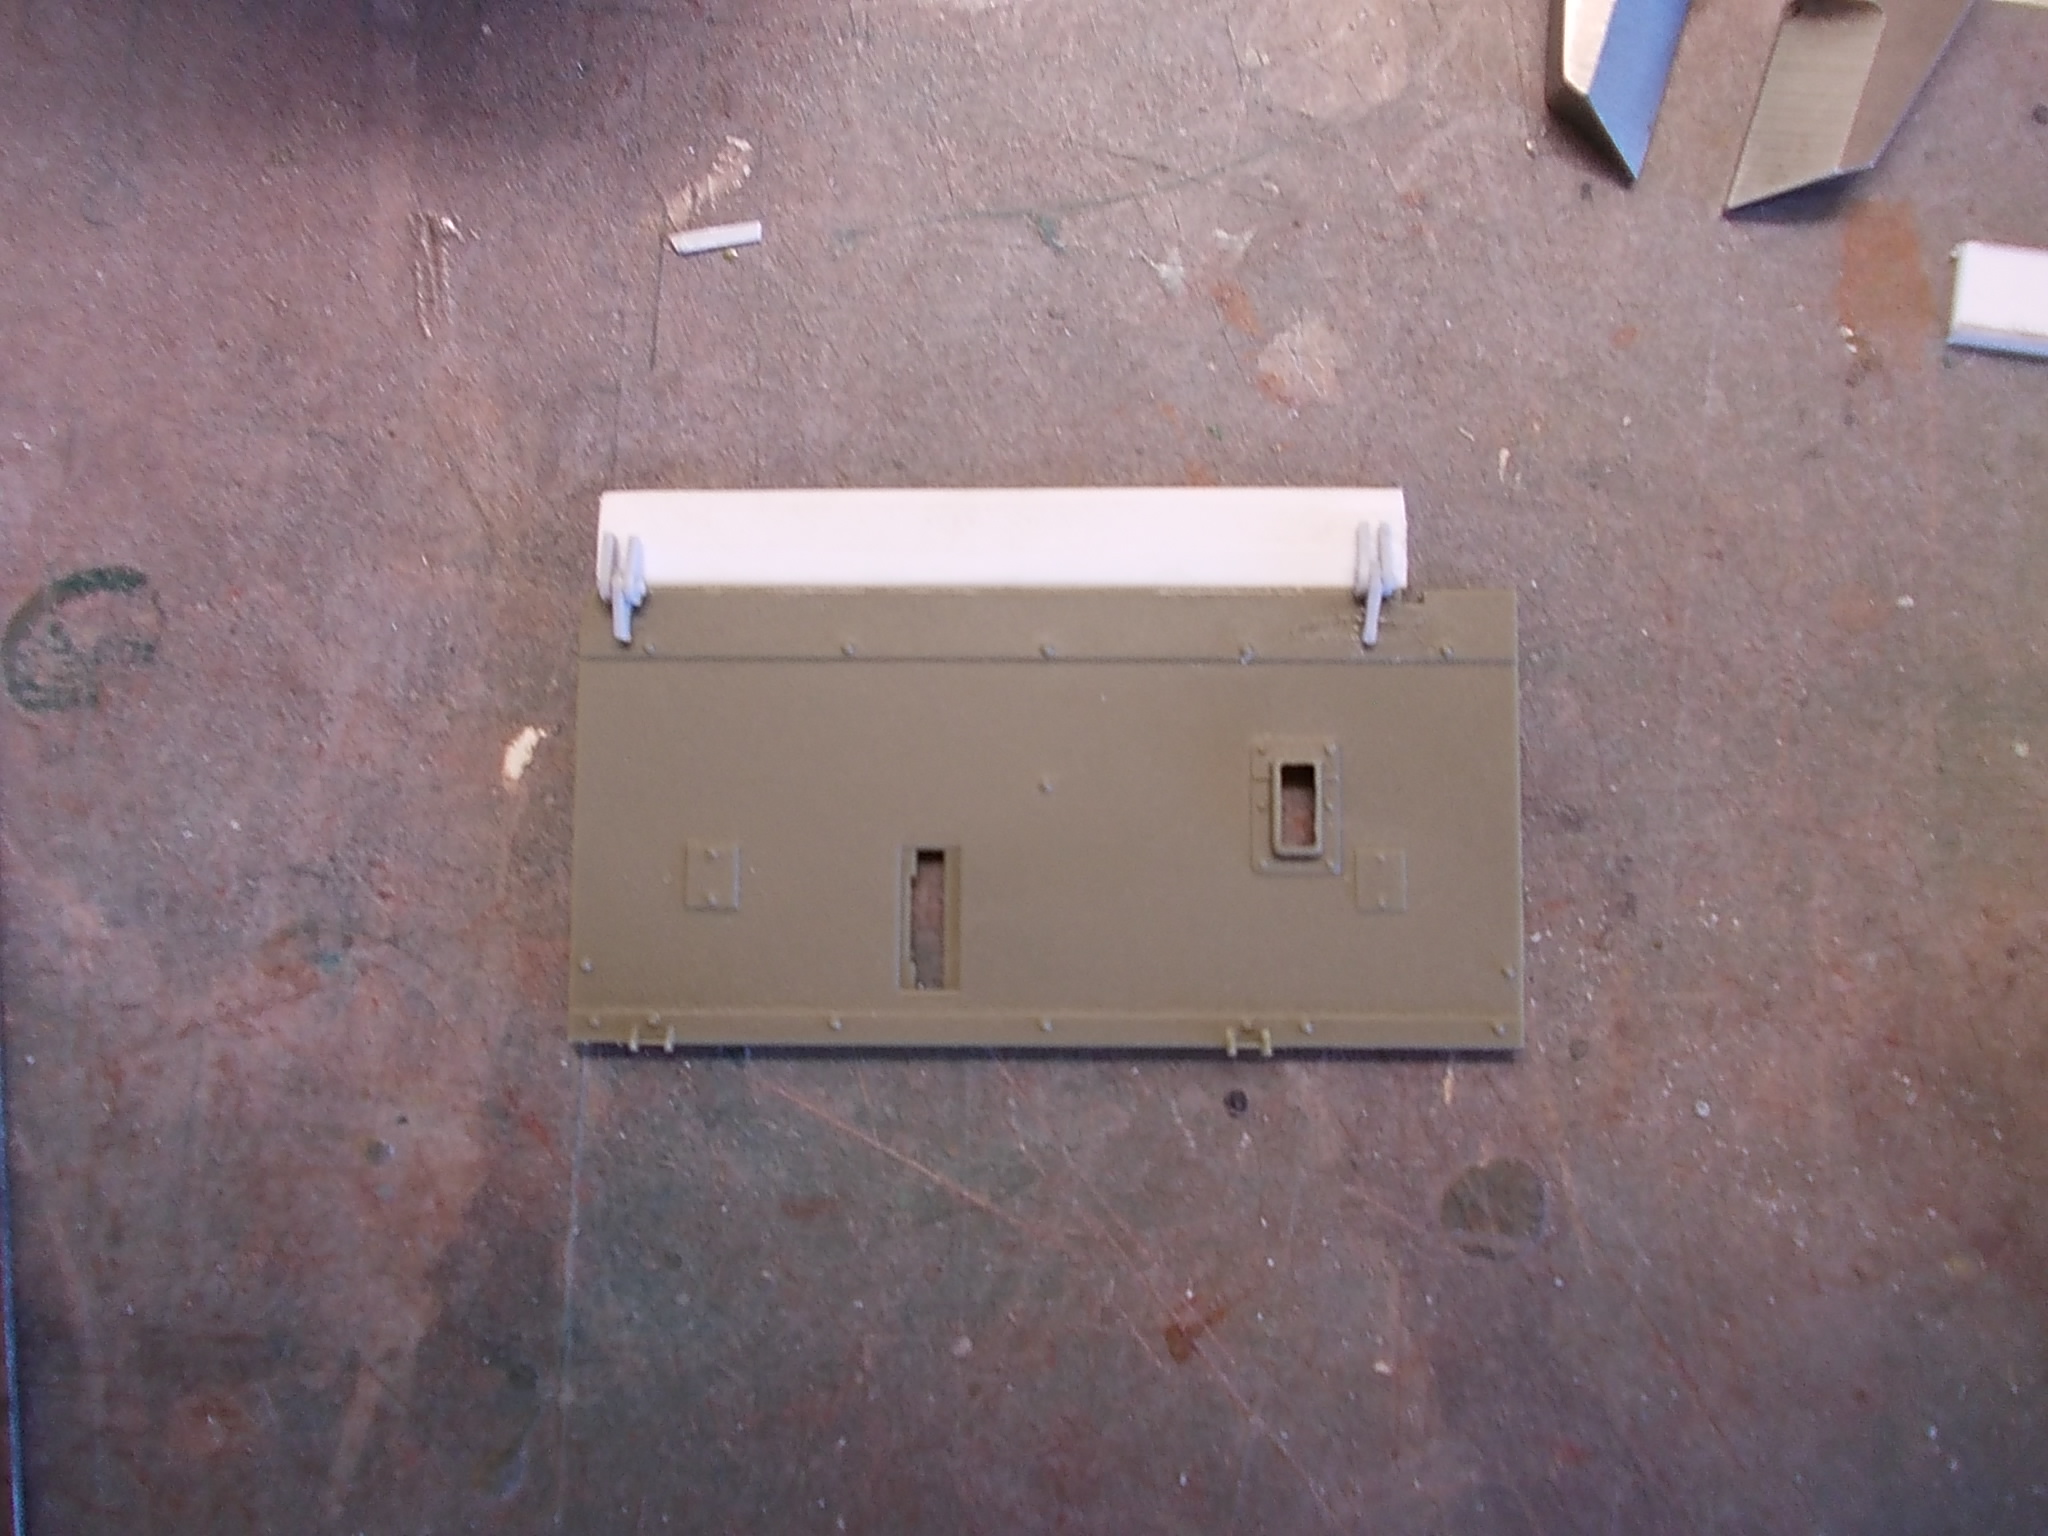
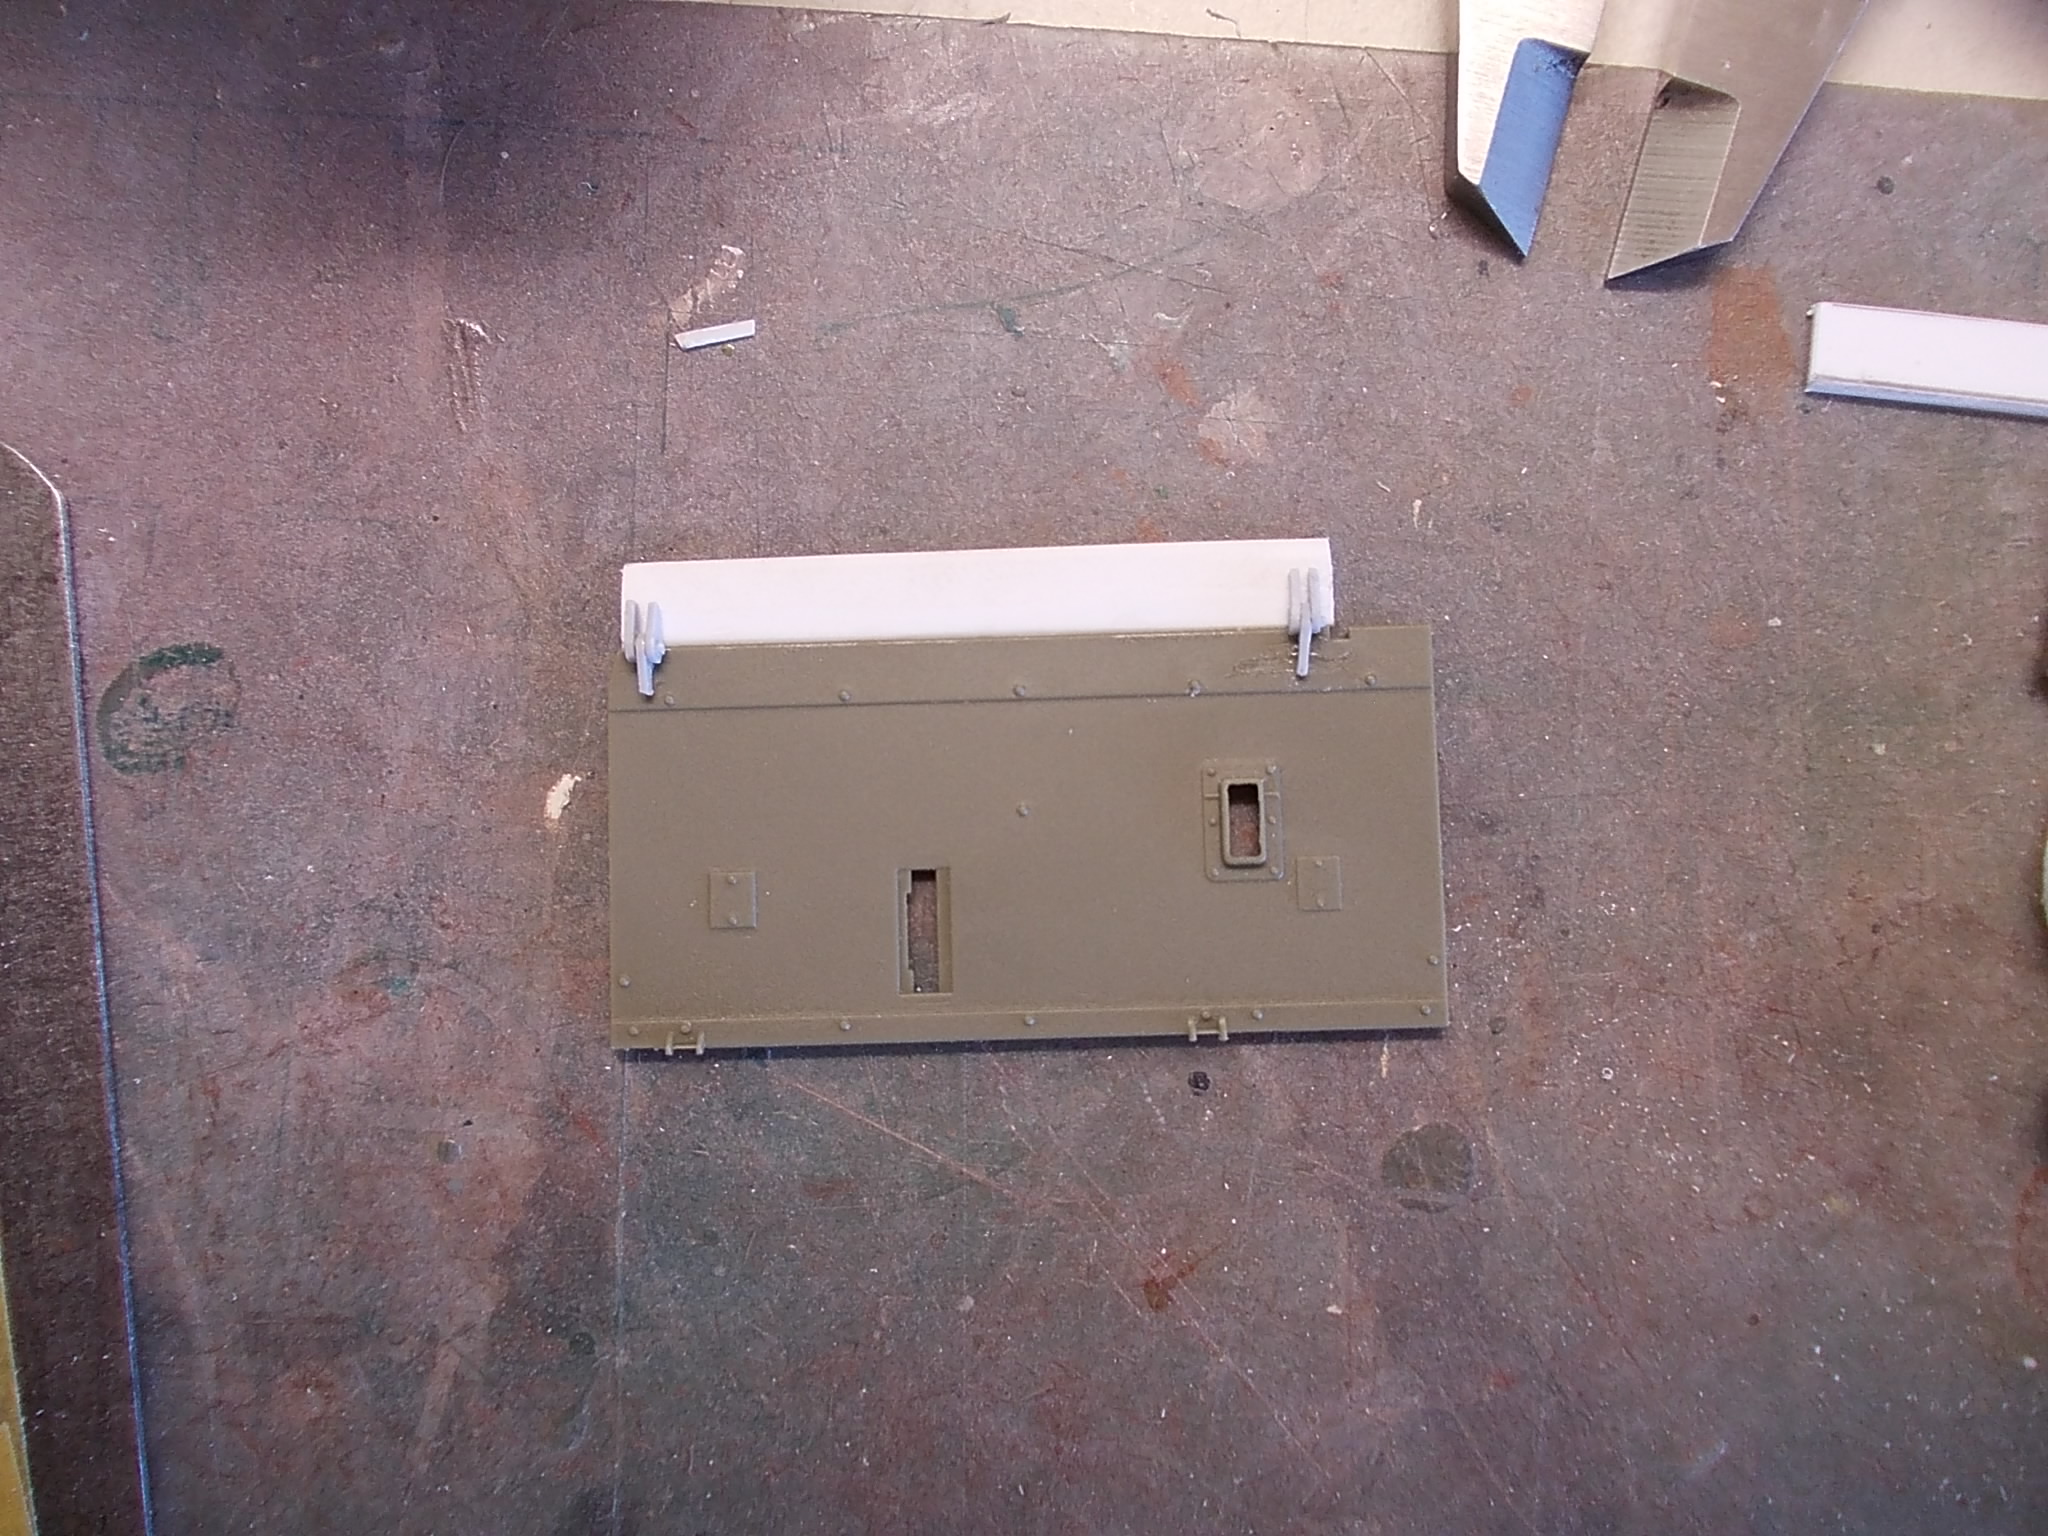
While onto the rear guards. Bit of plastic card about .25mm and some 500 Mr Surfacer. Not that happy with it. I have done better with my SASR M113A2. I will recoat it bit of sanding and it should be good.
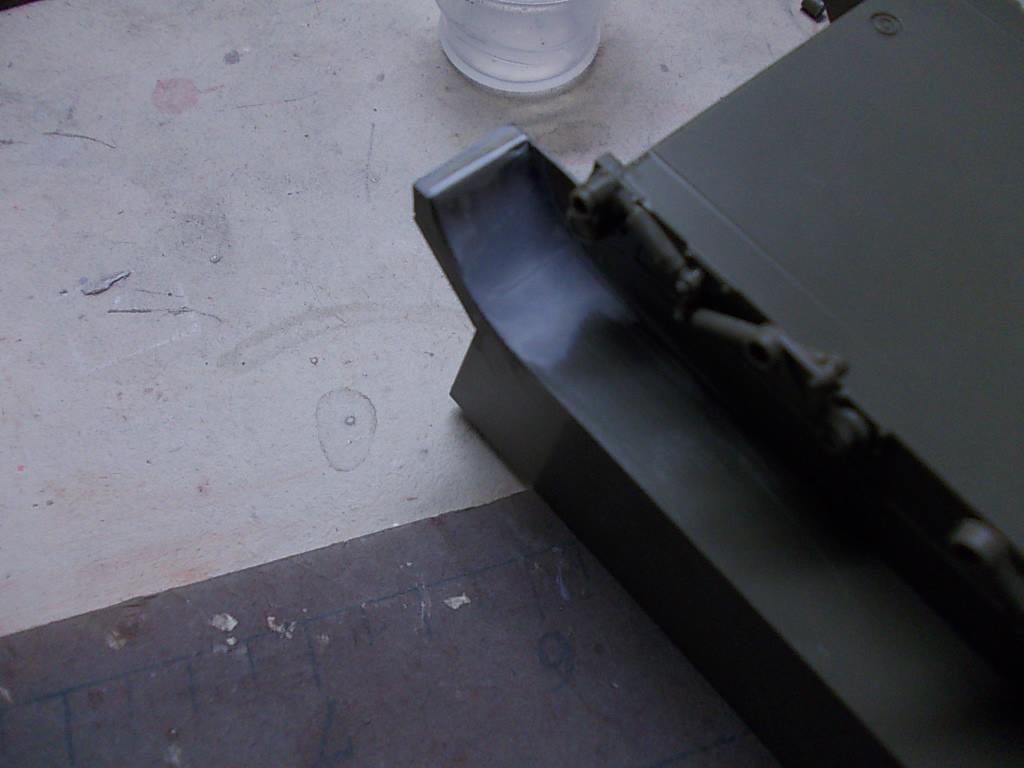
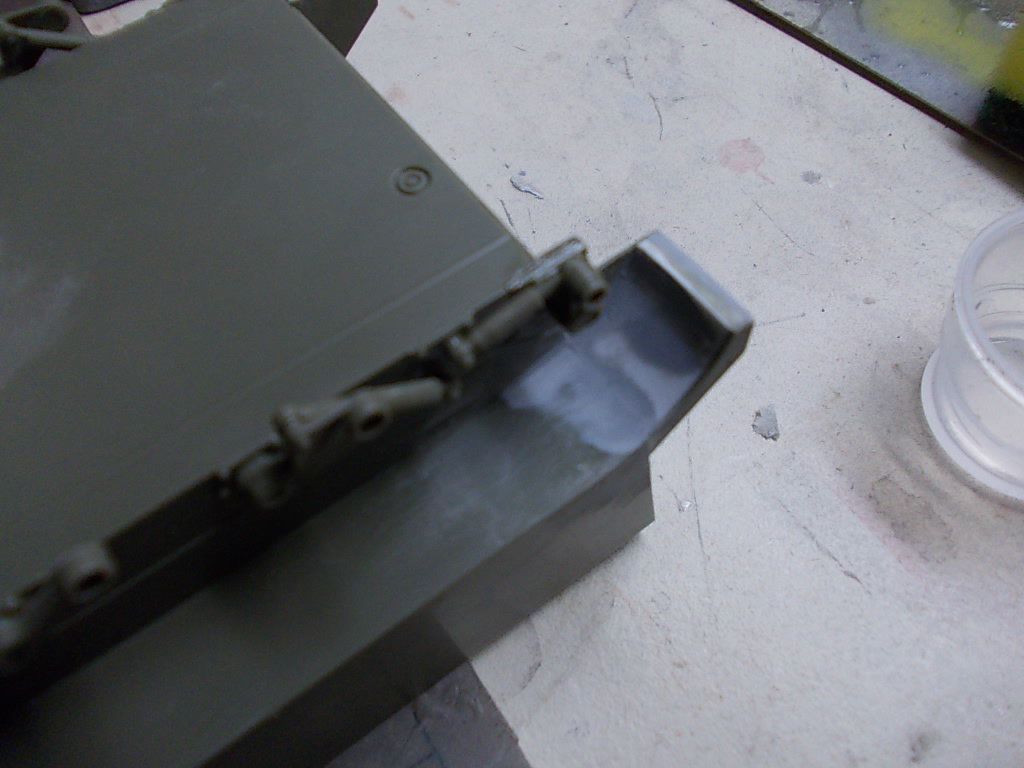
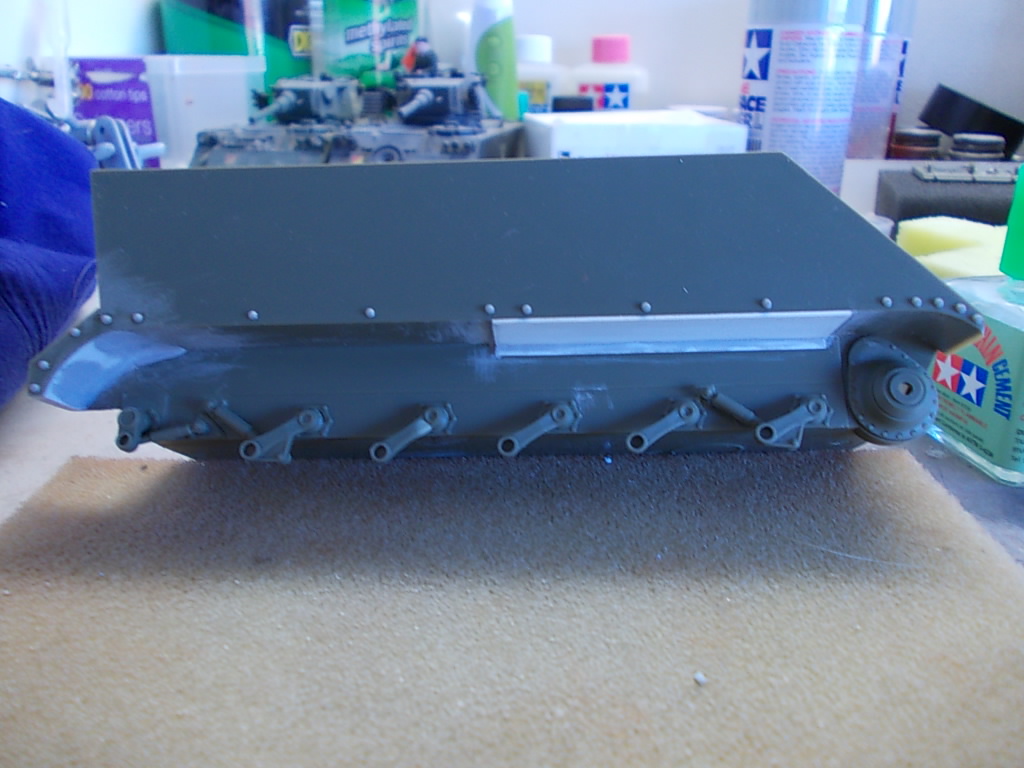
I also added the sponse armour. Got the measurements from the AWM vehicle so Im happy with the dimensions. One issue is I used two pieces. The Nam vehicle were first like this. The late ones were one piece. Going to shape it and add a bit of putty to give it the one piece look.
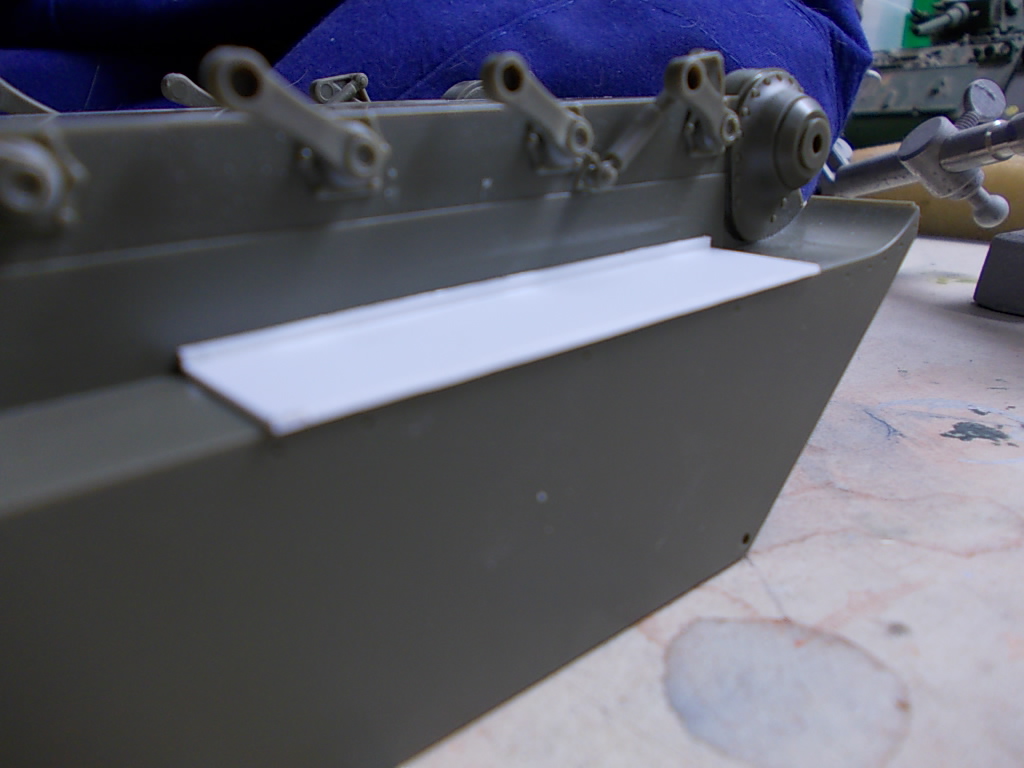

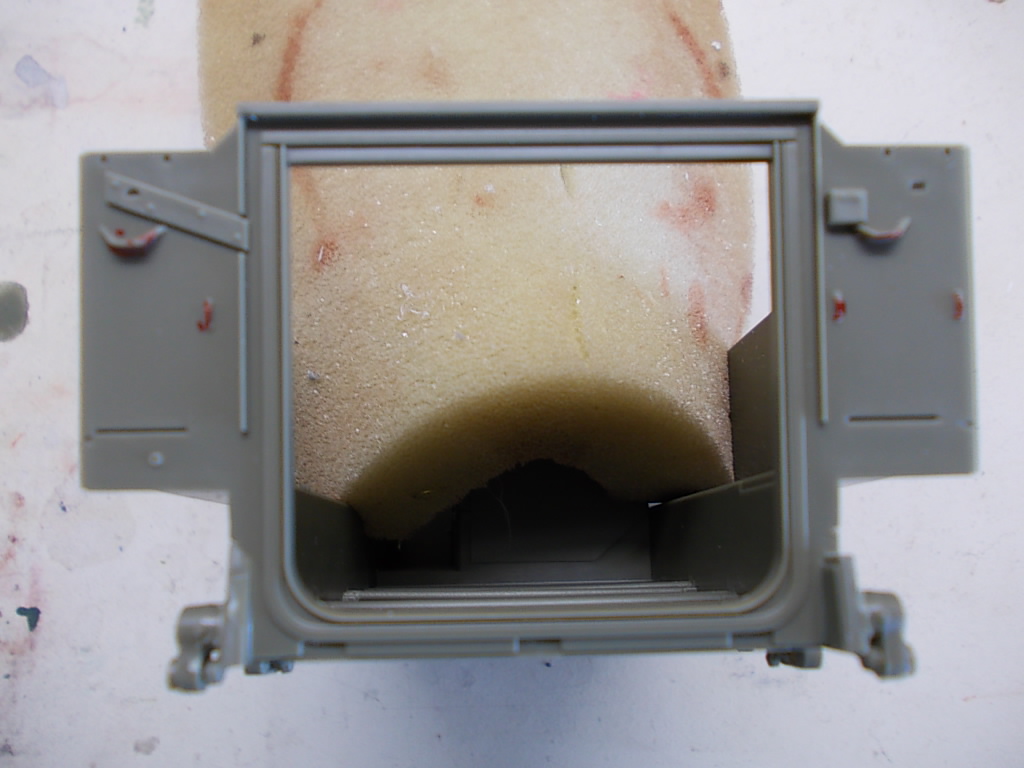
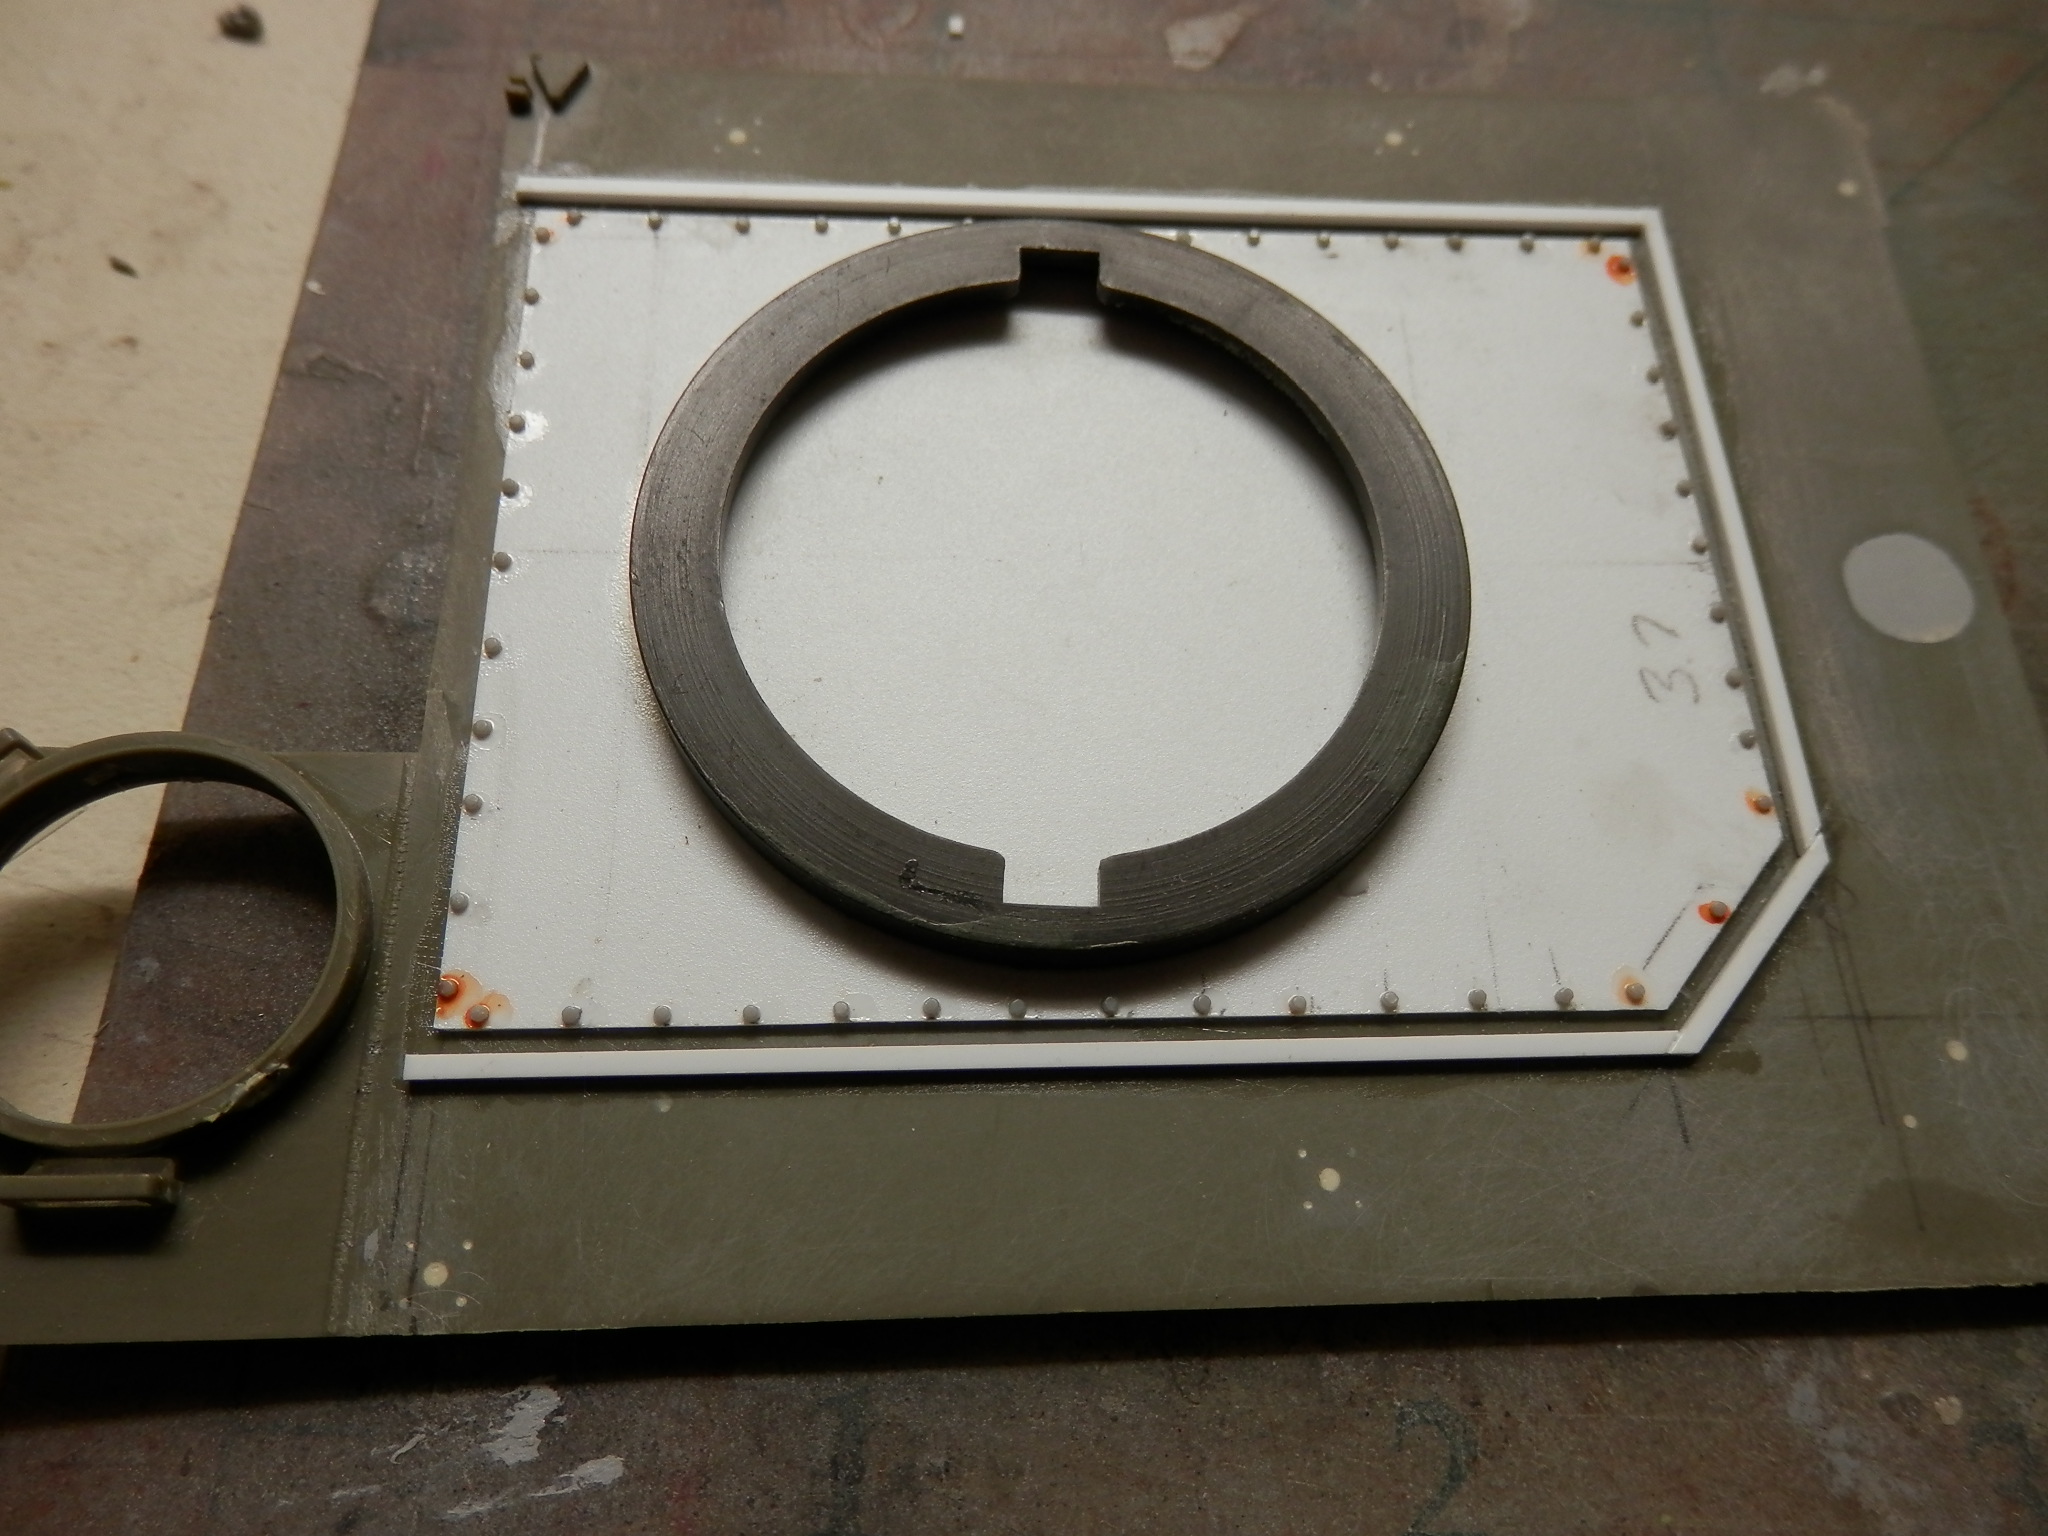
Work started on the back ramp. Removing all bits marked red and replacing with PE, aftermarket and scratch items.
I also added the sponse armour. Got the measurements from the AWM vehicle so Im happy with the dimensions. One issue is I used two pieces. The Nam vehicle were first like this. The late ones were one piece. Going to shape it and add a bit of putty to give it the one piece look.
Work started on the back ramp. Removing all bits marked red and replacing with PE, aftermarket and scratch items.
seanmcandrews
Joined: May 09, 2009
KitMaker: 561 posts
Armorama: 553 posts
Posted: Wednesday, April 08, 2020 - 01:14 AM UTC
Looks like the outside of the ramp has some pretty significant sink marks, that's unfortunate.
Sean
Sean
petbat
Joined: August 06, 2005
KitMaker: 3,353 posts
Armorama: 3,121 posts
Posted: Wednesday, April 08, 2020 - 08:50 AM UTC
Looking good so far Gibbo.
You may want to check the measurements and fit of the MH hull top to the AFV Club kit and the Saladin turret to the MH hull before you go too far, just to make sure it is workable - I see the MH hull top was designed for the old Tamiya kit.
I would also suggest that you see if you can join the Facebook group:
M113's in ANZAC Service.
They have had some good pics posted over the time and there are guys that actually crewed these in the group. Also a great inspiration for other M113 based builds.
Paul, the old Tamiya kit is not accurate in a lot of respects and using that as a guide is not recommended.

ptruhe
Joined: March 05, 2003
KitMaker: 2,092 posts
Armorama: 1,607 posts
Posted: Wednesday, April 08, 2020 - 11:44 AM UTC
Quoted Text
the old Tamiya kit is not accurate in a lot of respects and using that as a guide is not recommended.
I was hoping the turret ring is at least in the right spot.
gibbo
Joined: June 21, 2004
KitMaker: 30 posts
Armorama: 30 posts
Posted: Wednesday, April 08, 2020 - 03:07 PM UTC
You are right, the MH conversion is for the Tamiya kit. Which is different in size from the AFV kit. So Im using the measurements from the real thing to aid in making the adapter plate for the hull to turret.
The turret adapter rings is an issue.
I do have a couple old Tamiya FSVs, so I looked a the turret rings from the Tamiya kit. They are the correct size.
The adapter plate on the MH deck is also the correct size.
Both off on these surprised me!
So Im going to look at ripping off the rings of the Tamiya kit, instead of making the rings.
Im going to scratch the adapter plates using photo, measurements and the MH as an aid.
Hopefully this Frankenstein will work out.
Im going to worry about it once the front, rear of the hull is finished.
ptruhe
Joined: March 05, 2003
KitMaker: 2,092 posts
Armorama: 1,607 posts
Posted: Thursday, April 09, 2020 - 04:08 AM UTC
Quoted Text
So Im going to look at ripping off the rings of the Tamiya kit, instead of making the rings.
Can you slice it off with a chisel blade by going around the ring?
I have the same book. I see the issues around the edges of the adapter plate and the protective ring but my plan was to just clean those up and leave the adapter plate.
gibbo
Joined: June 21, 2004
KitMaker: 30 posts
Armorama: 30 posts
Posted: Friday, April 10, 2020 - 01:04 AM UTC
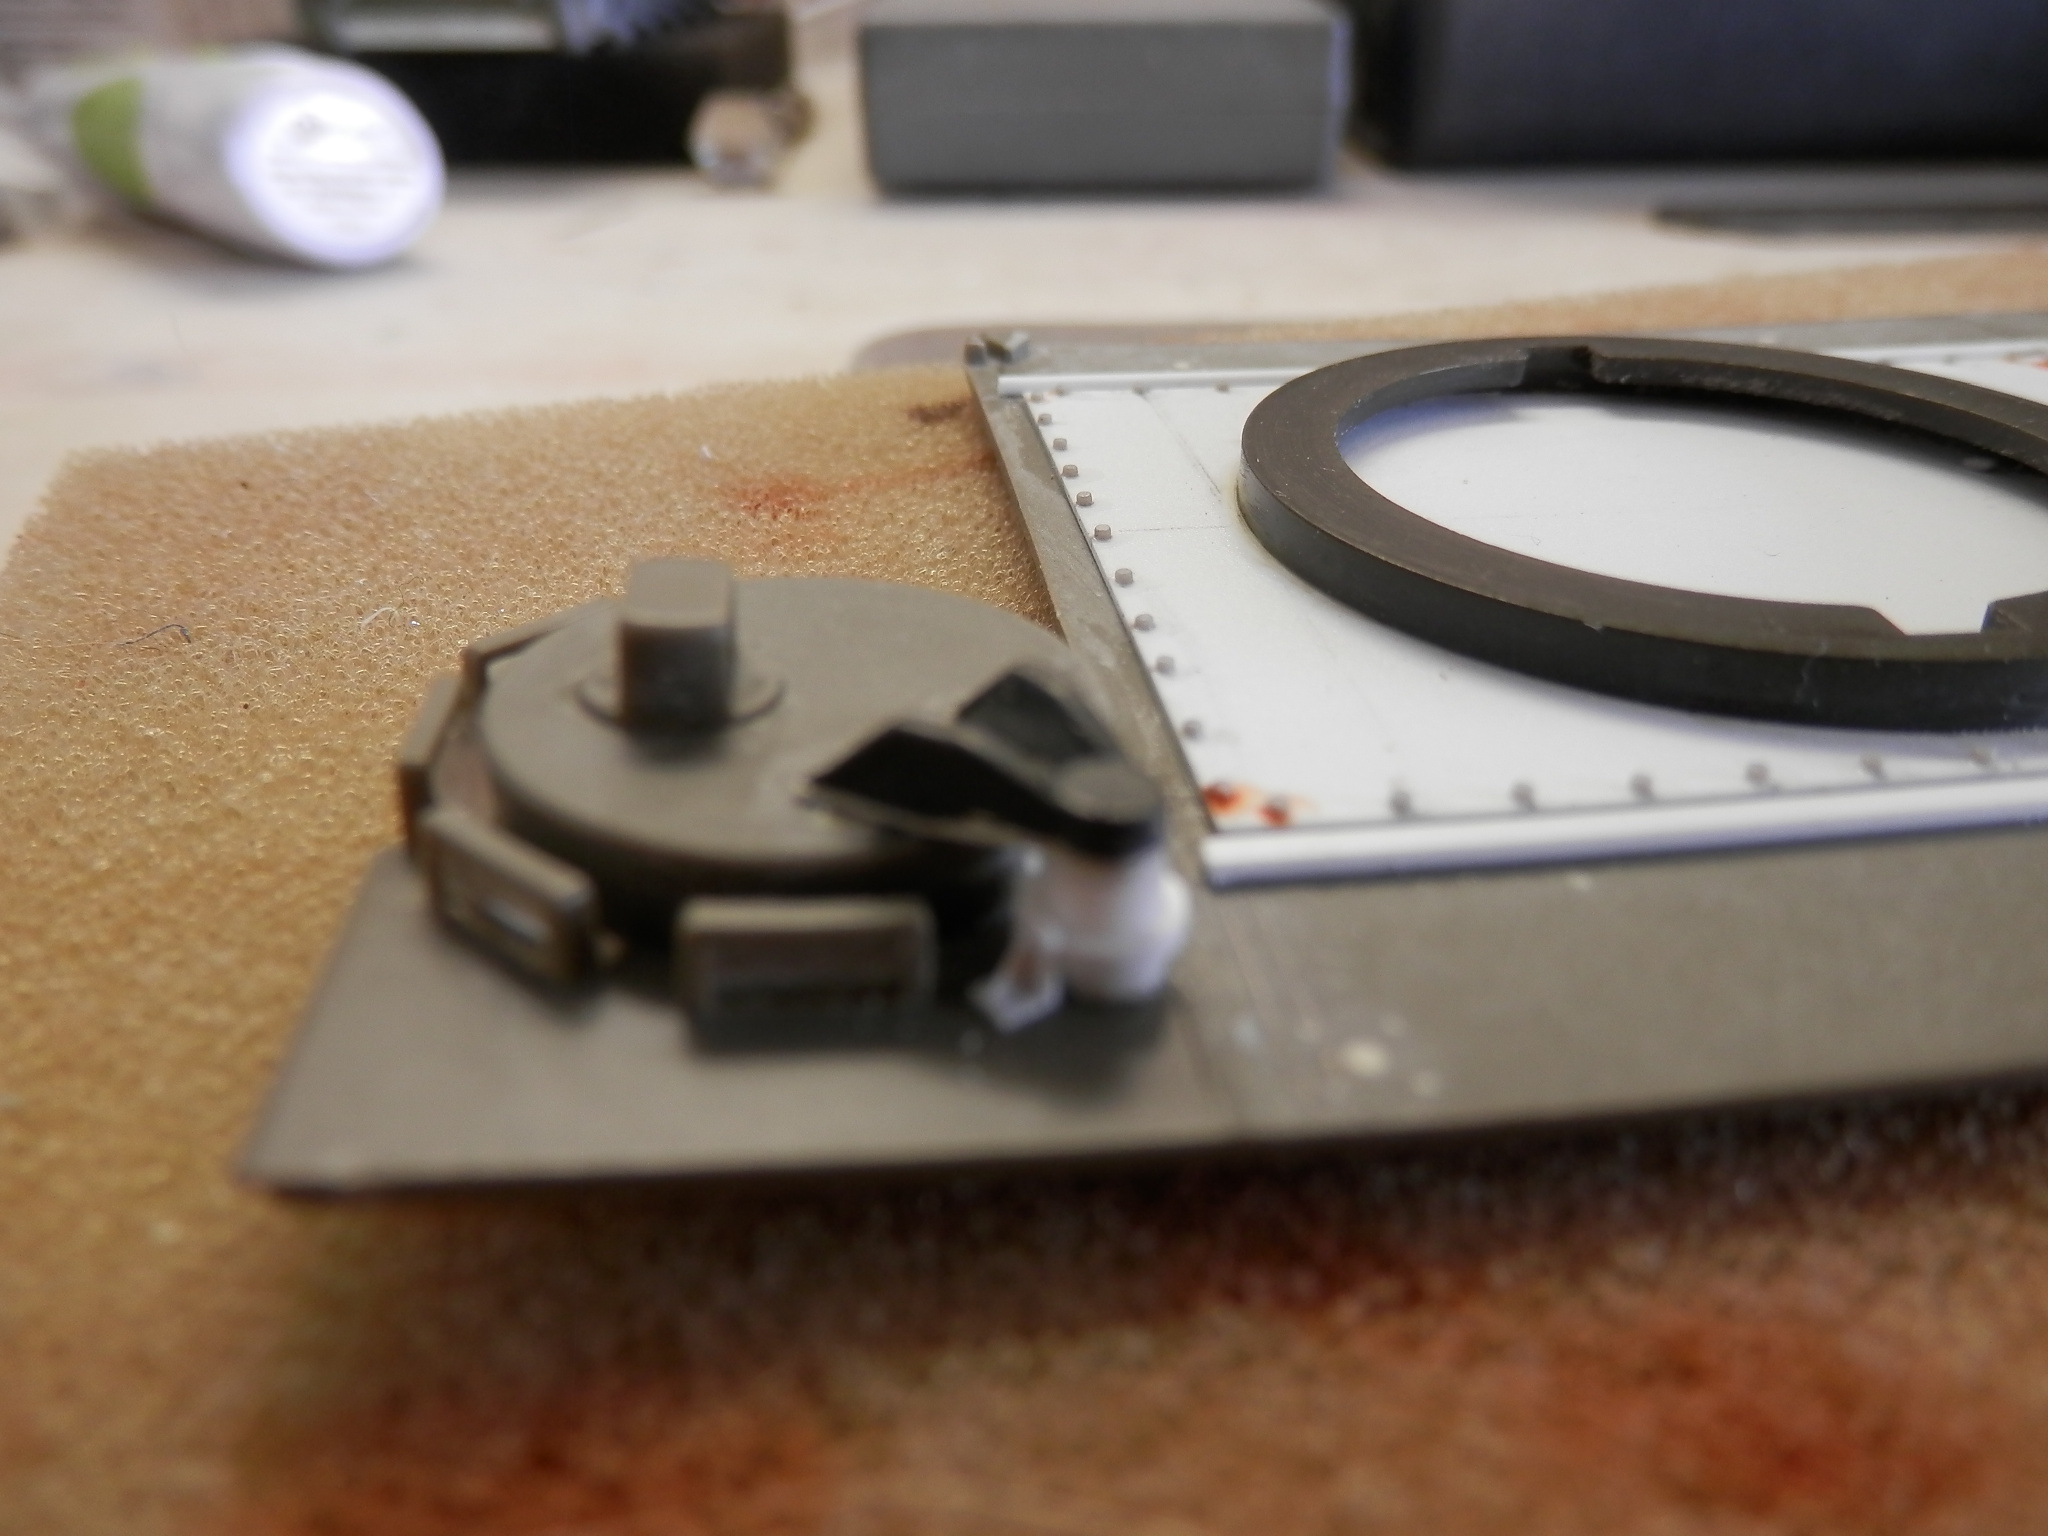
Plan is cut around the old Tamiya, place it on an A4 sheet of wet and dry and carefully sand the turret ring to the right height.
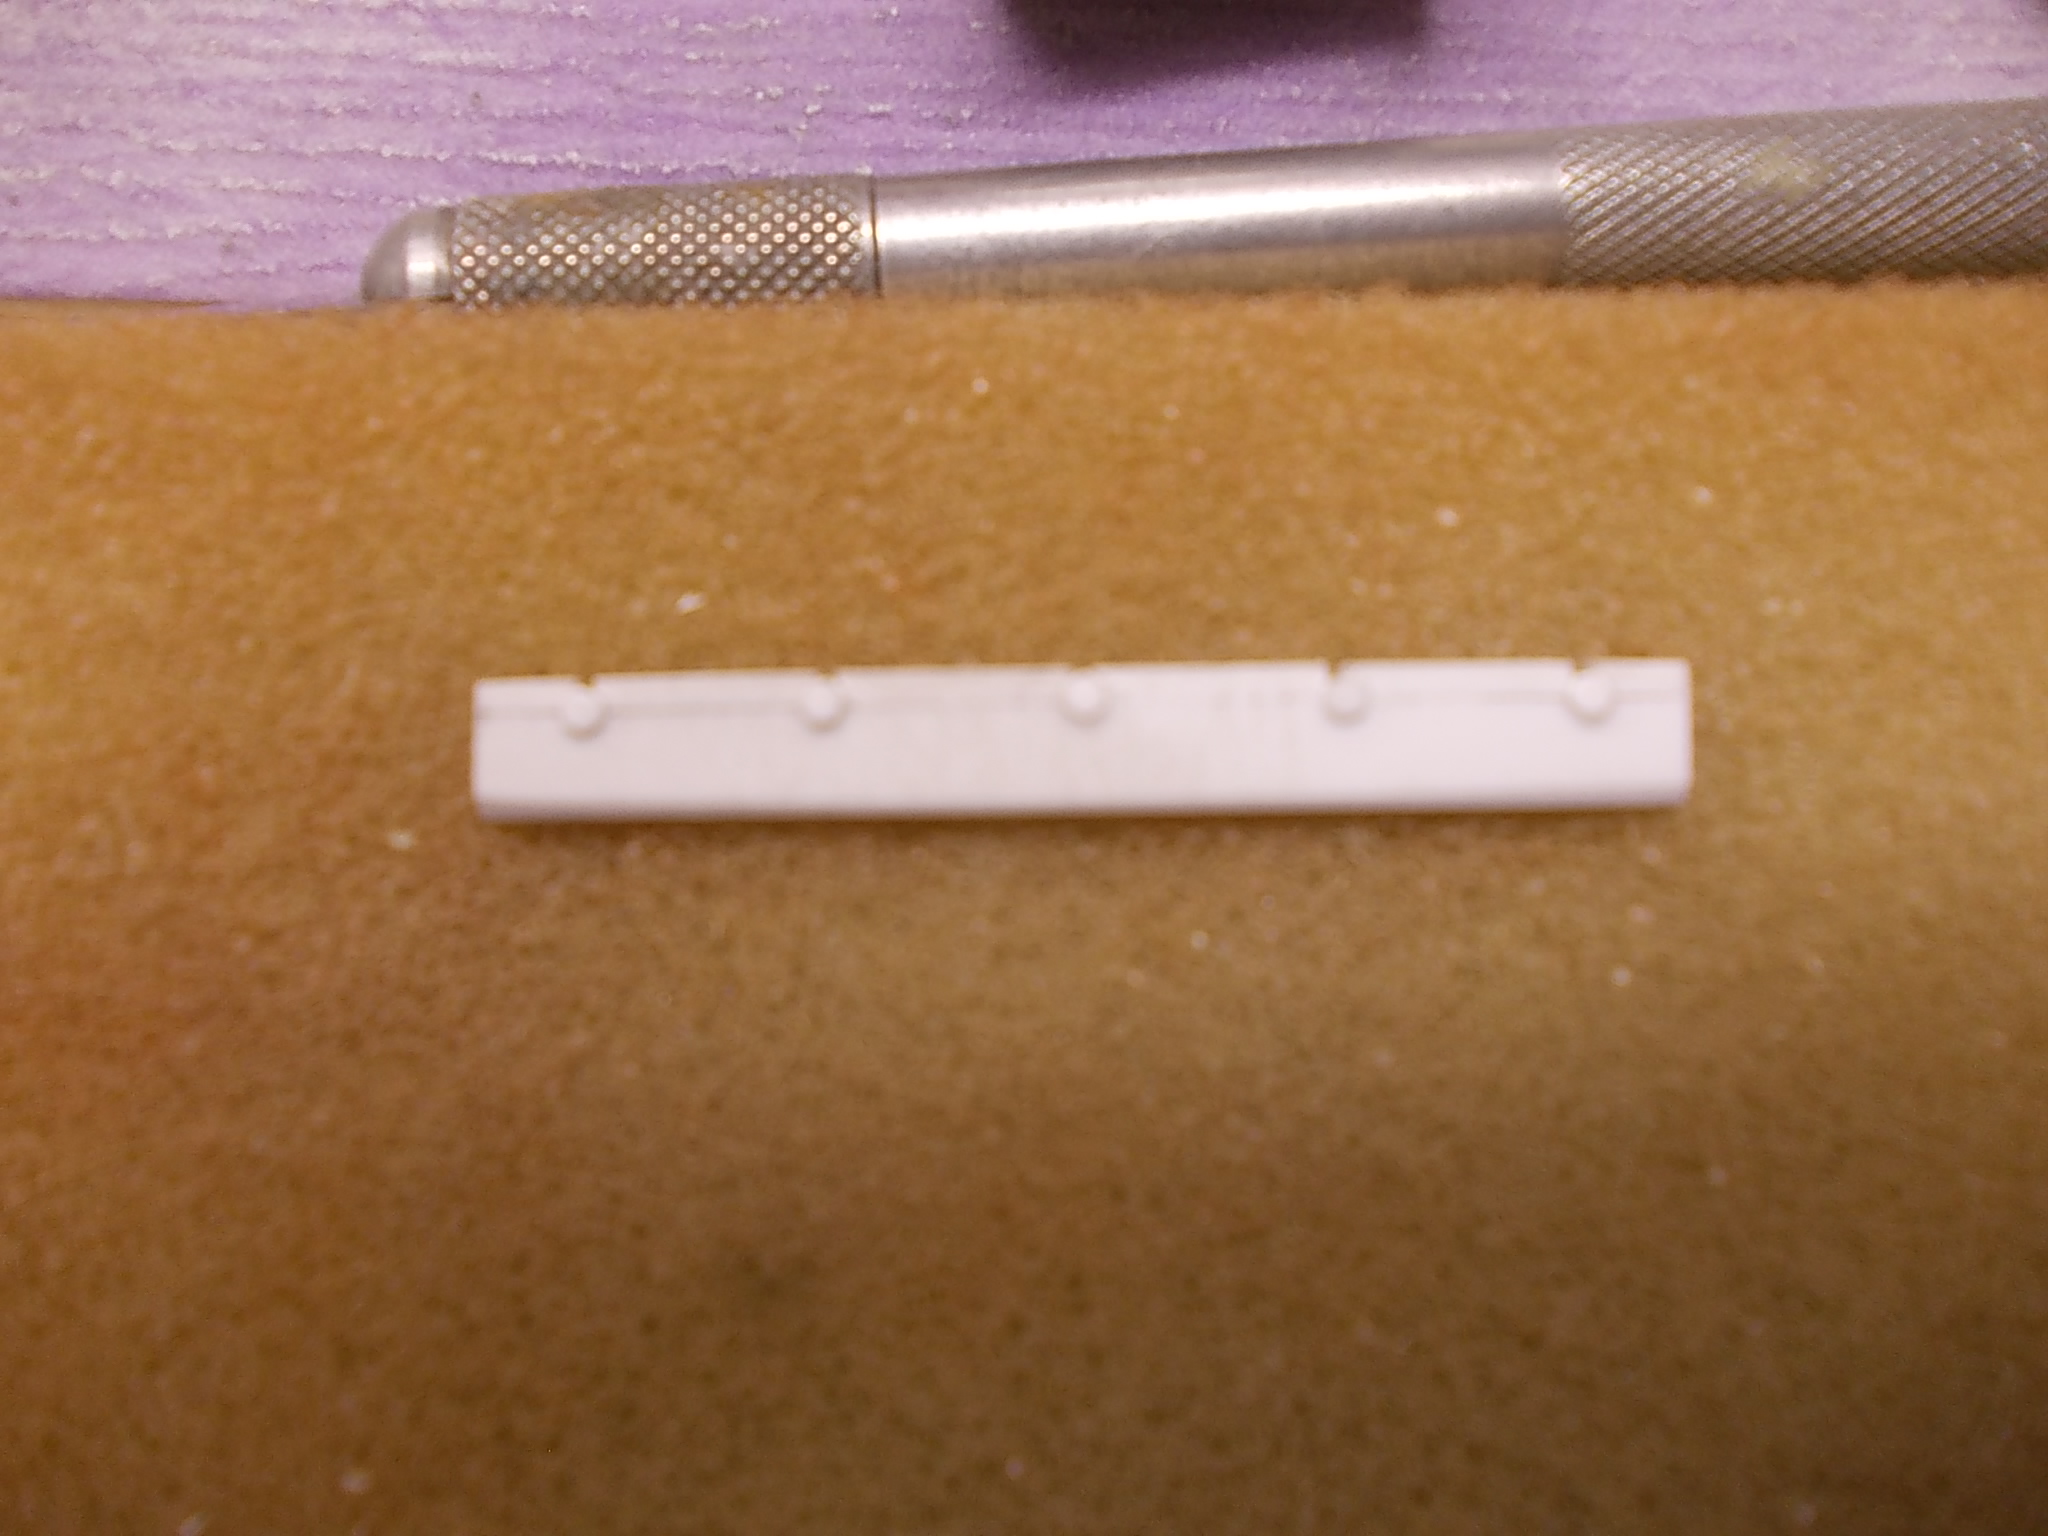
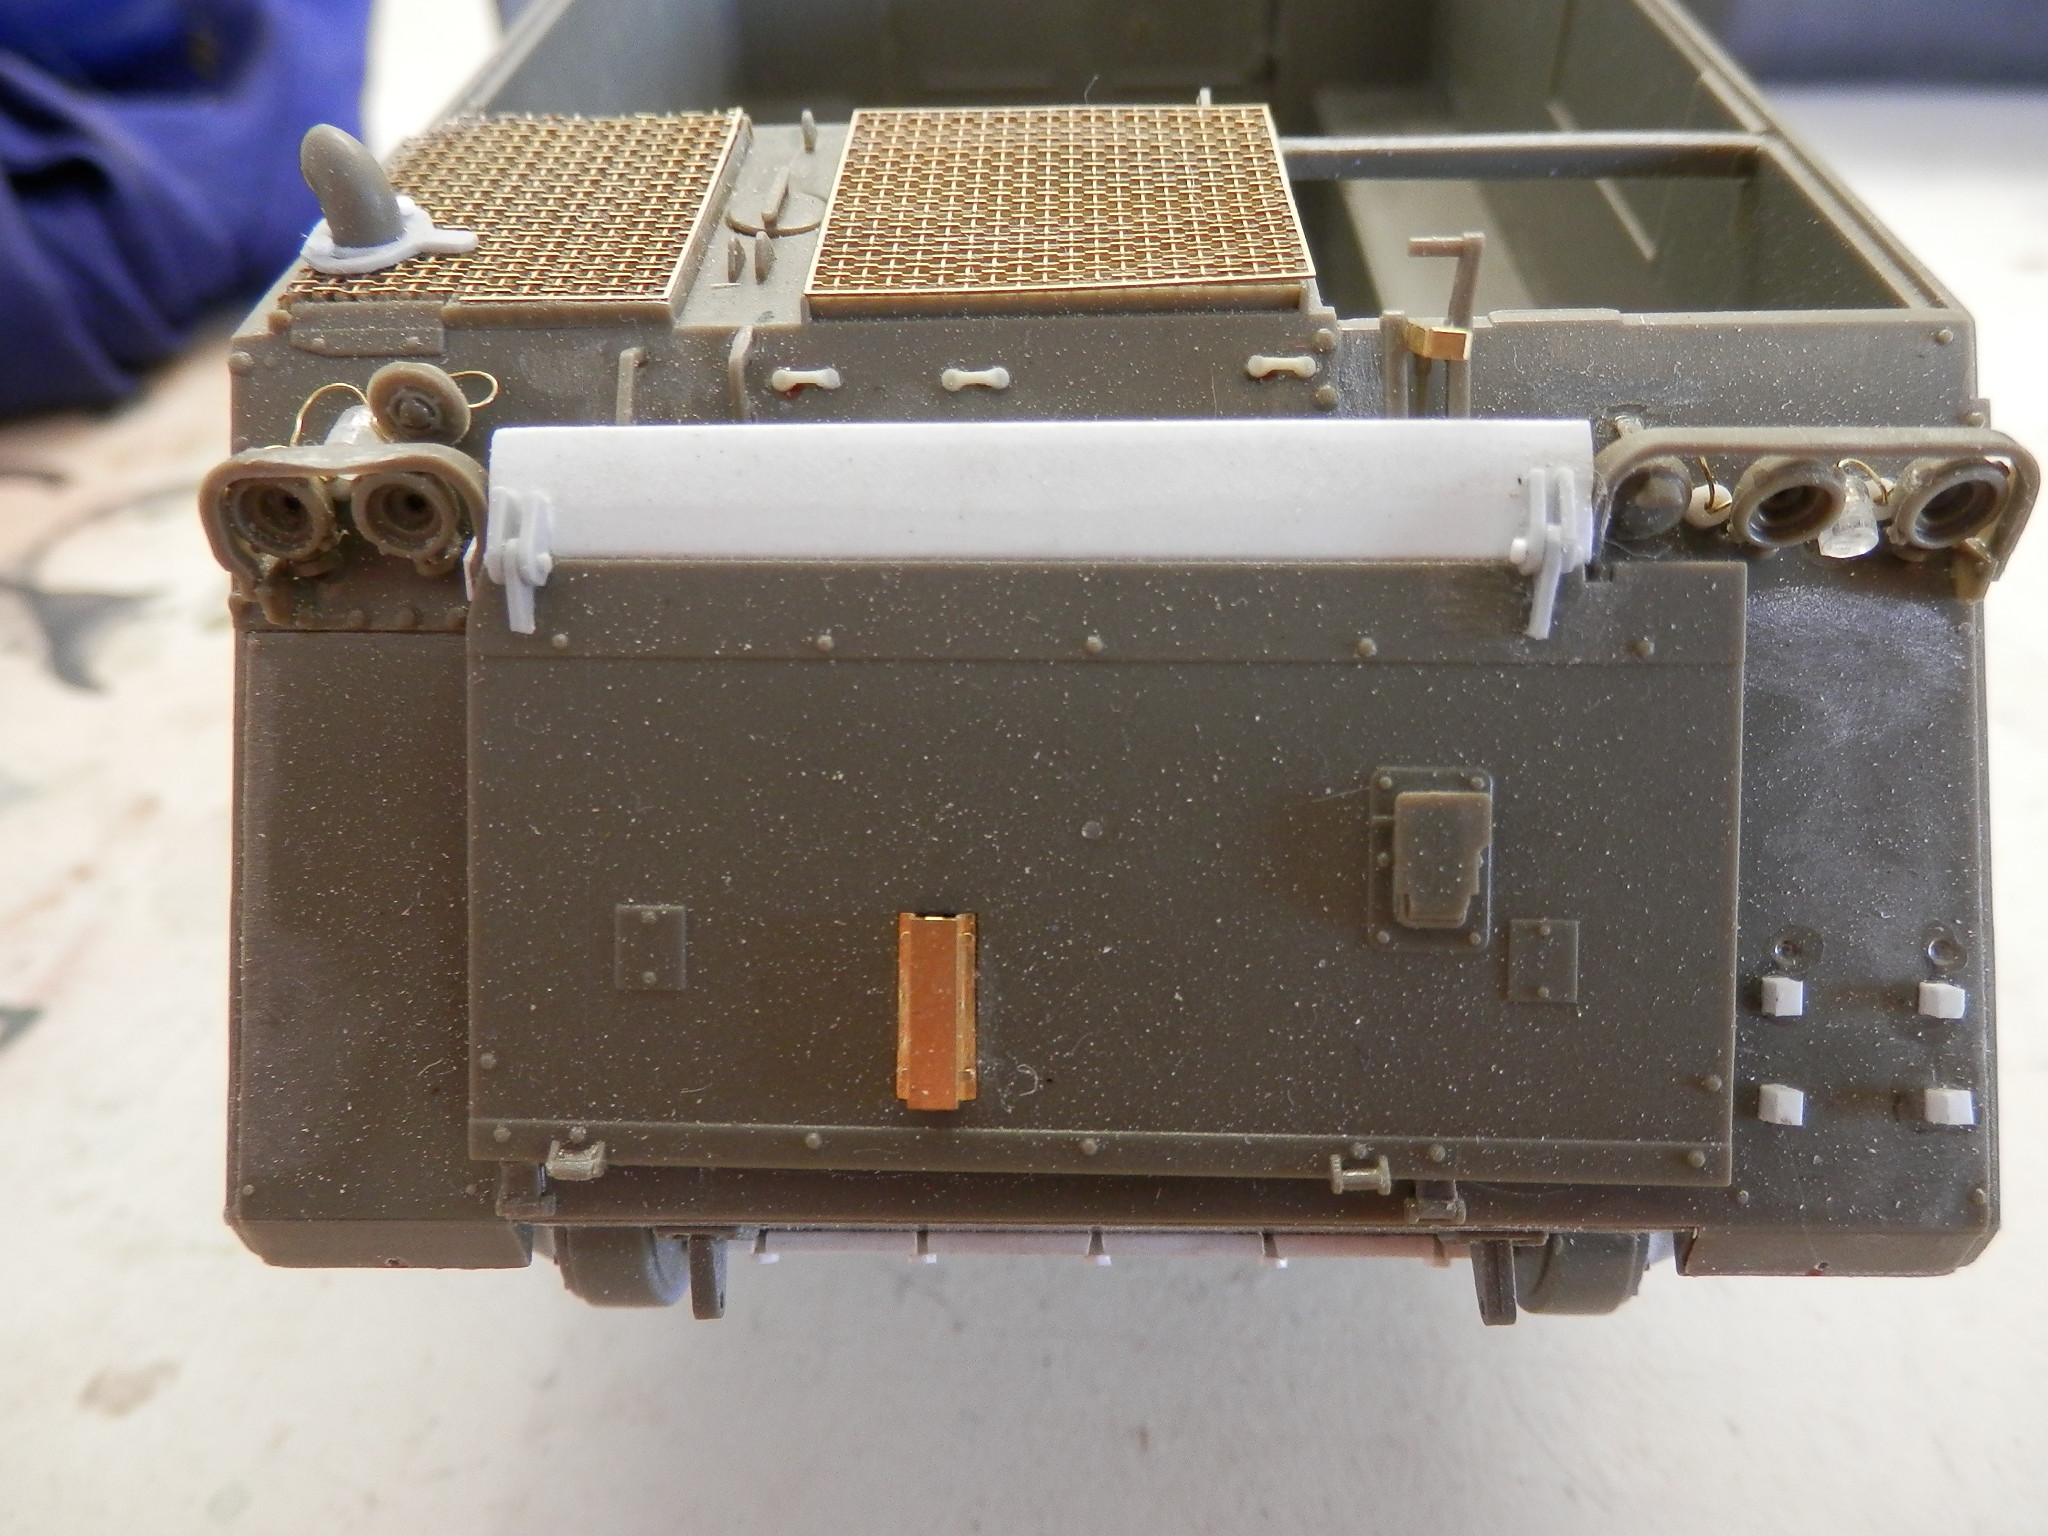
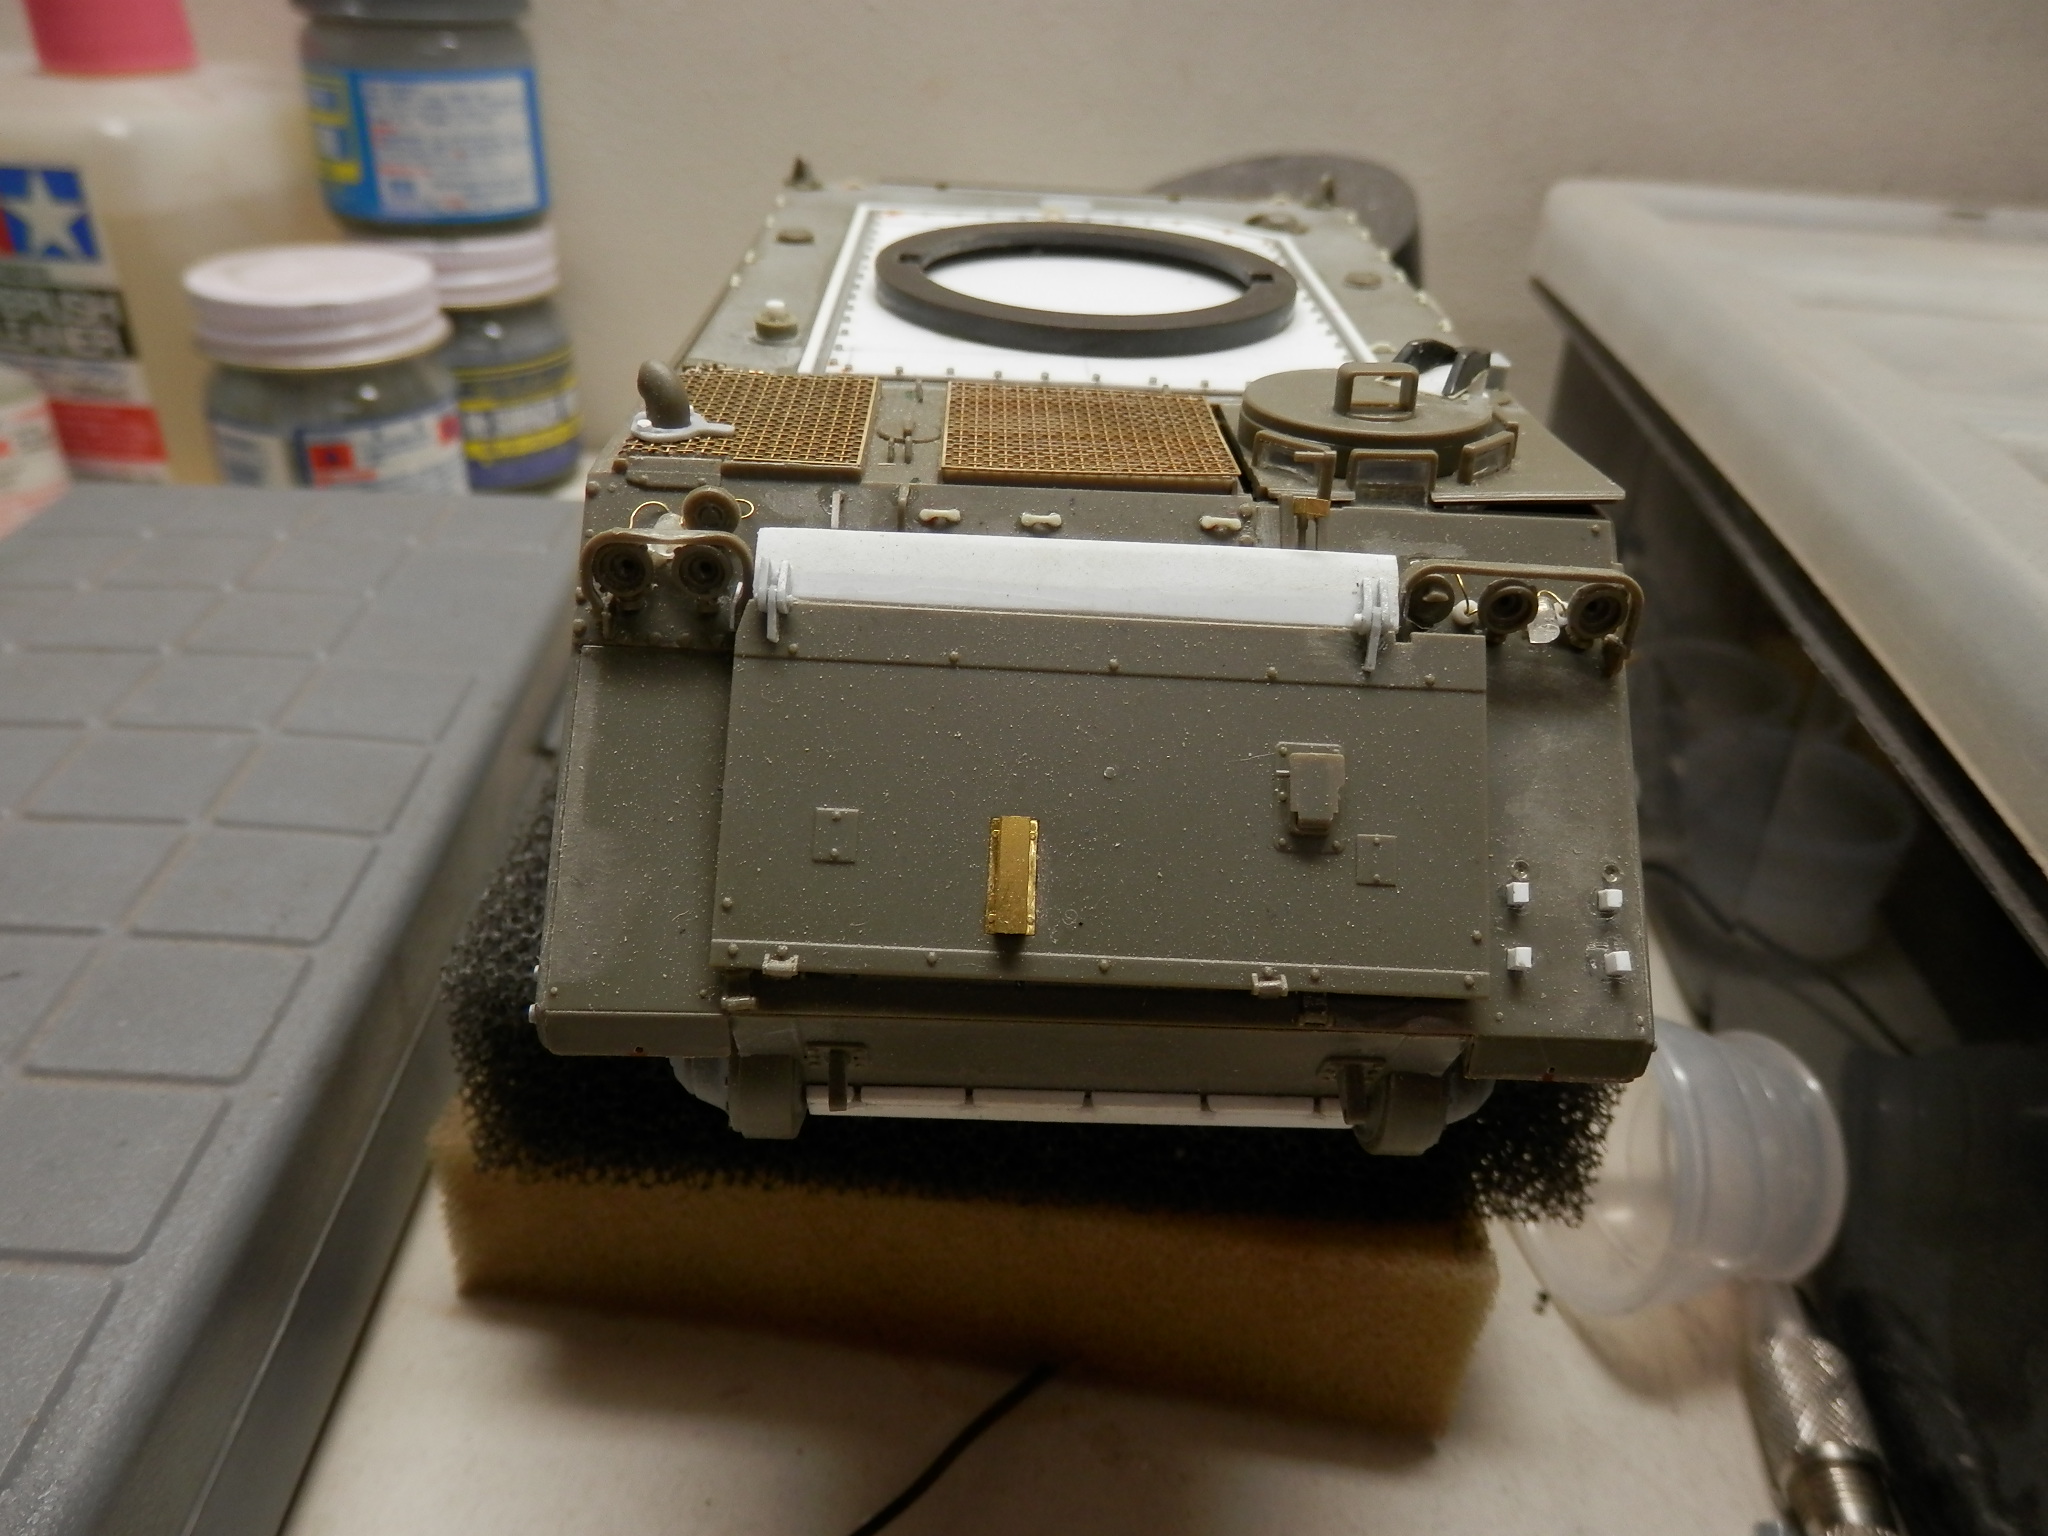
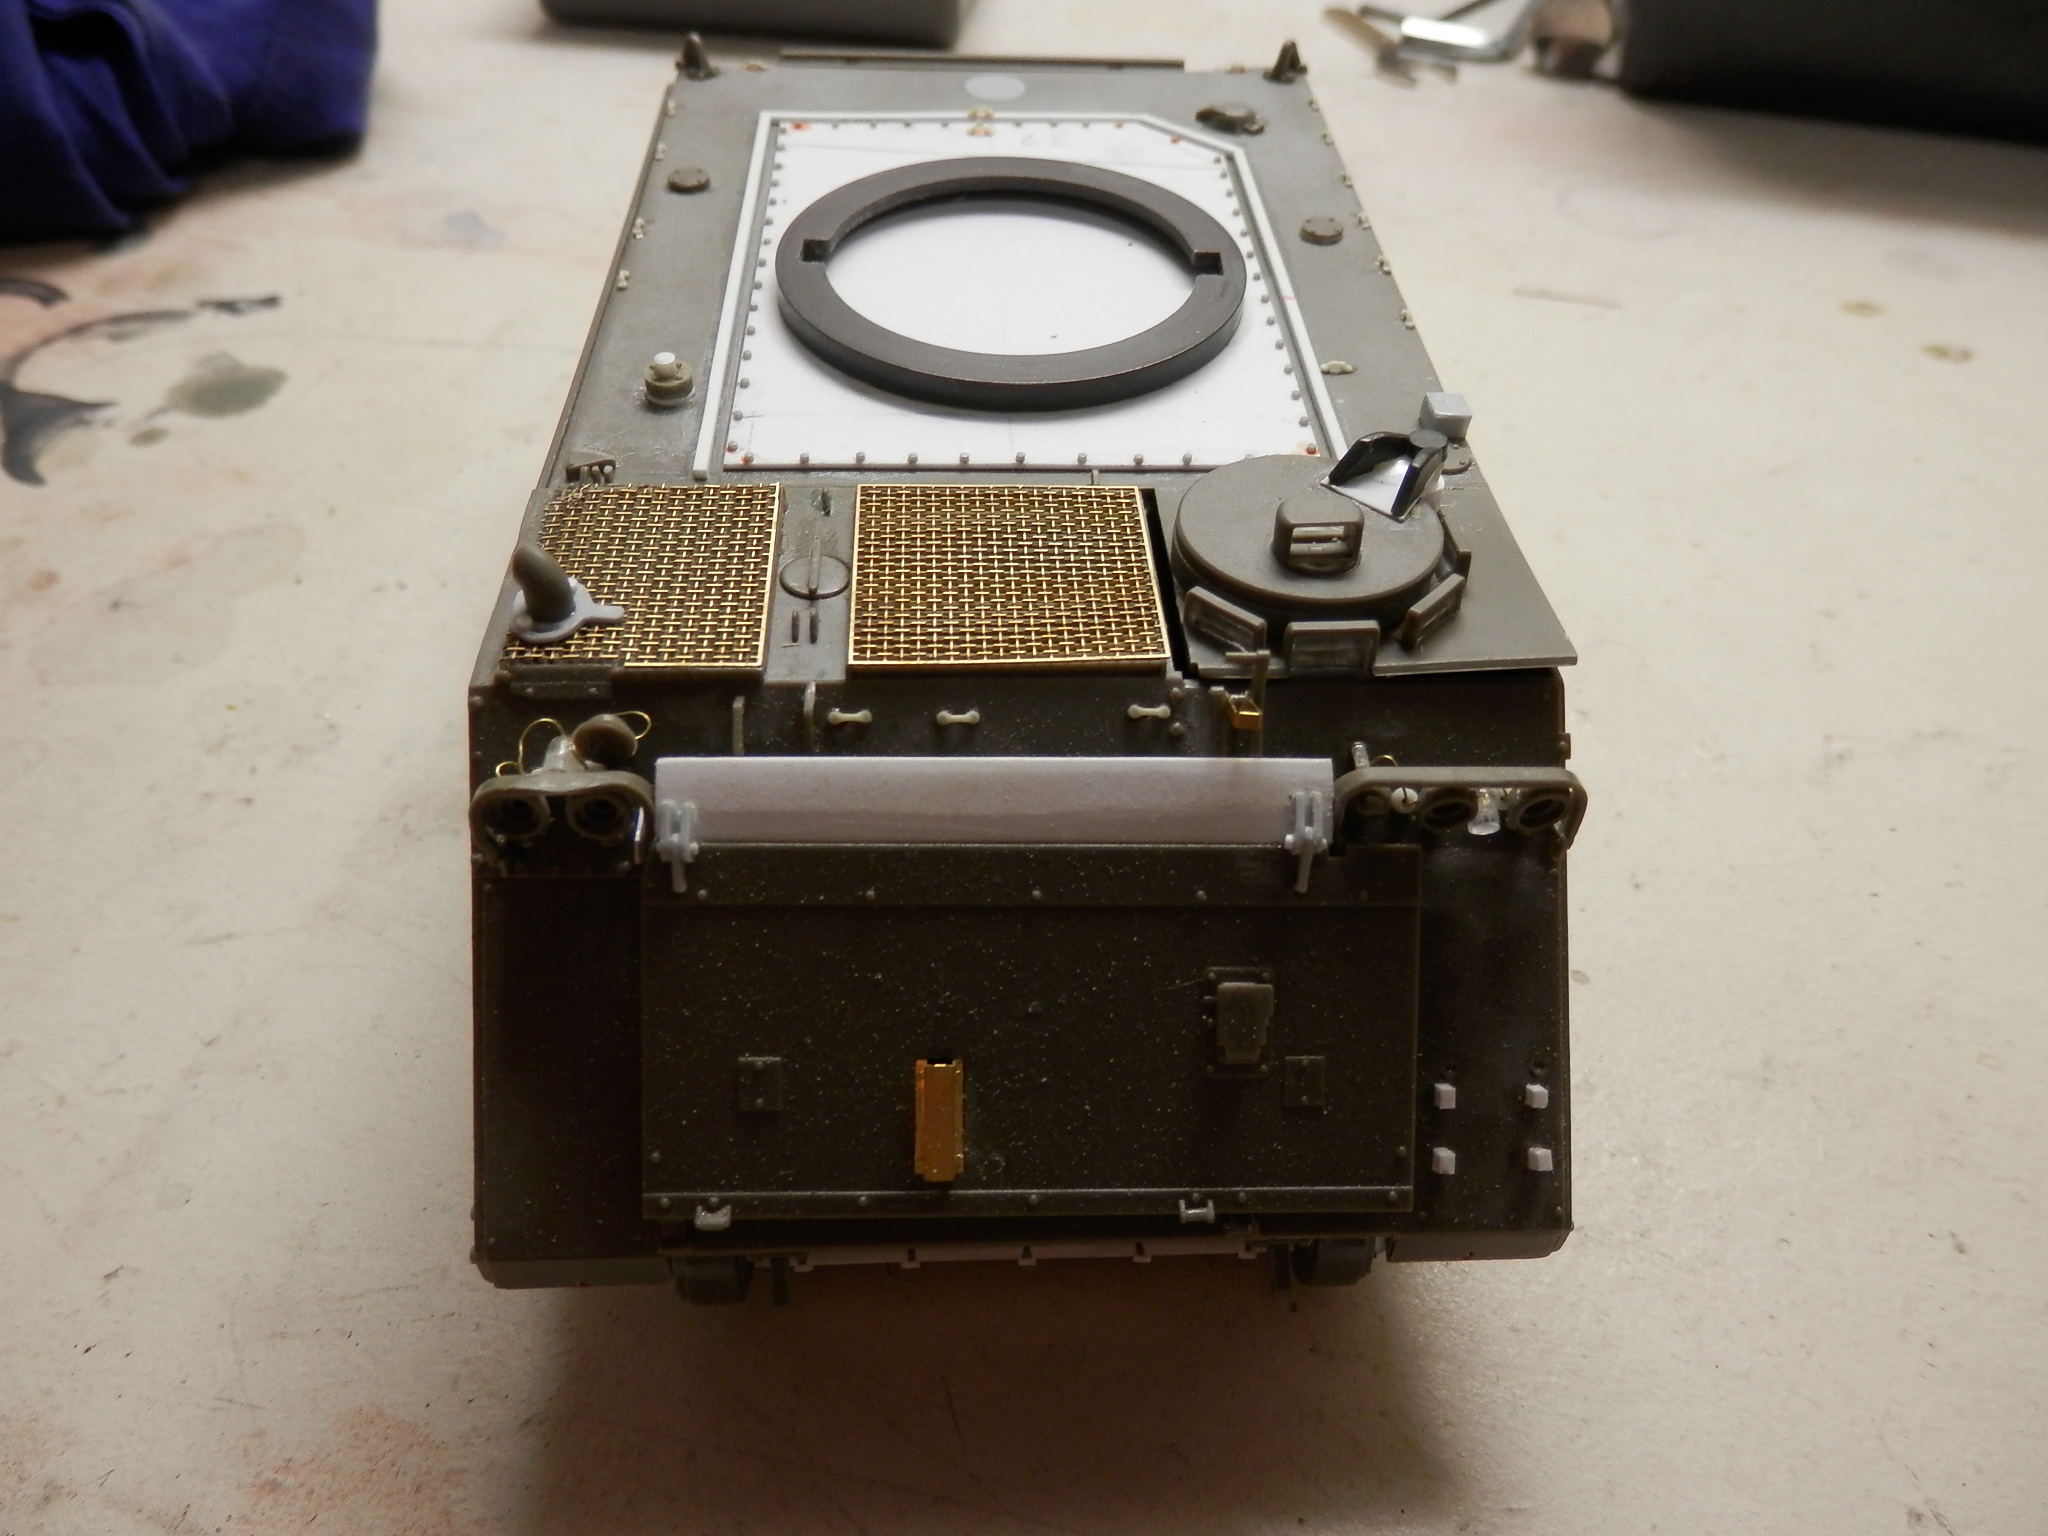
Added Meng bolts and washers for were the track guards did mount. Finished the work on the rear guard. Prime it to see how it turn out. Very happy camper! Finished the rear jerry holders, which were different on most Aust M113. Ok, almost finished, need to add tighteners on the straps. Got some old ACM ones laying around. Basically the rear of the hull is finished.
I almost forgot the belly armour on this one. Tomorrow will post pics.
Cheers all.
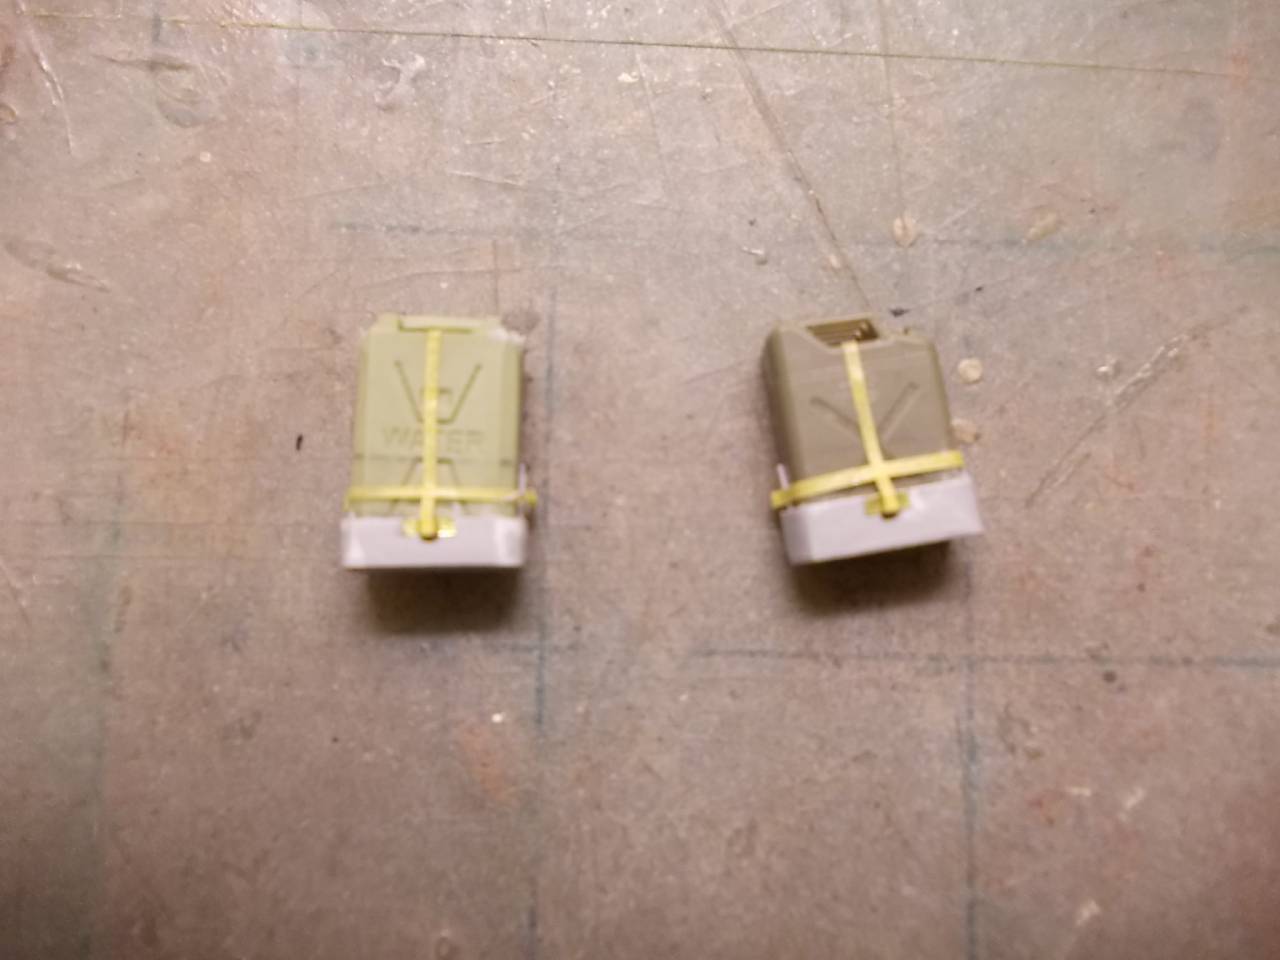
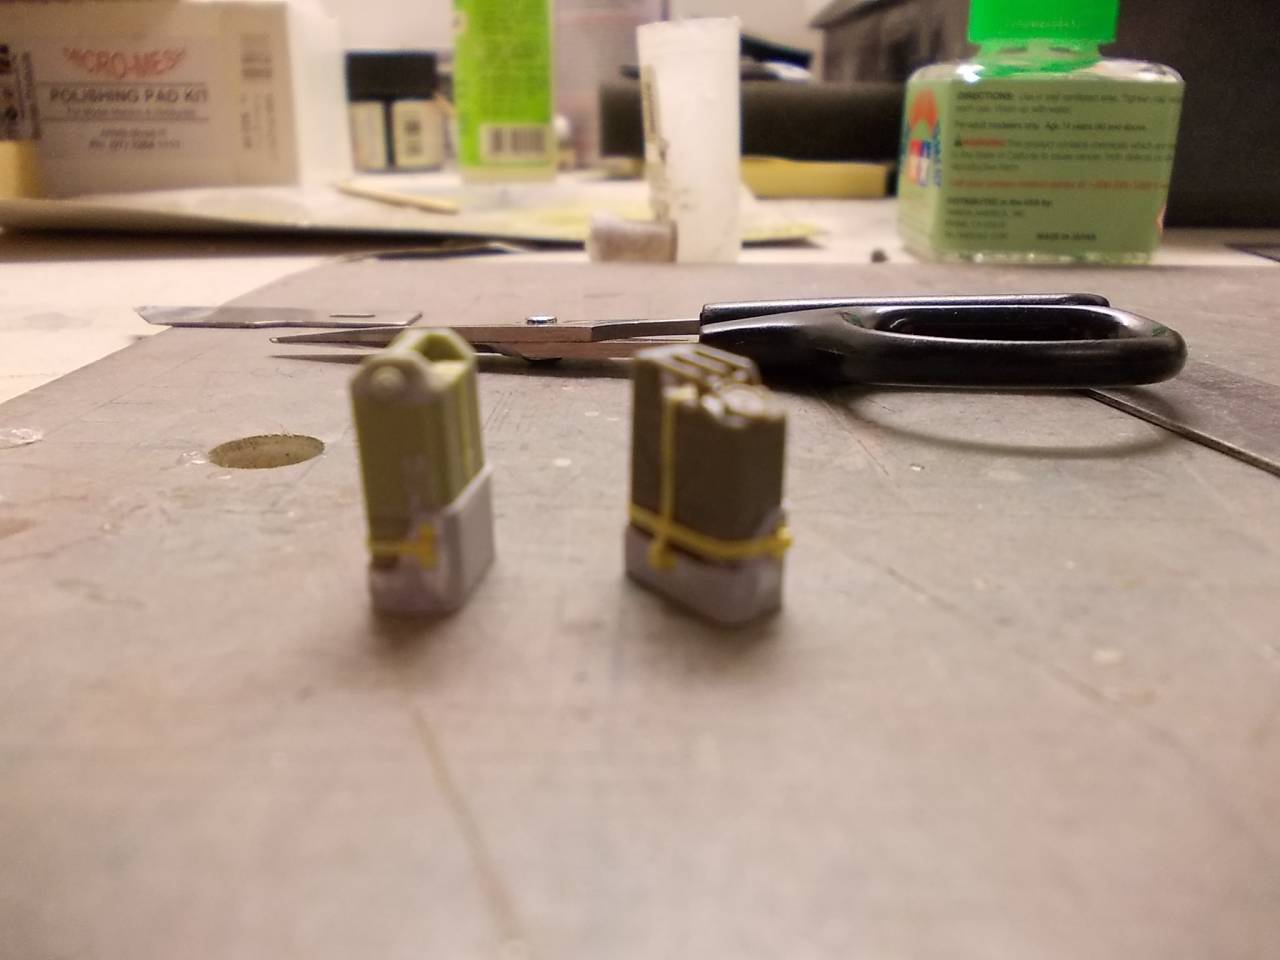
gibbo
Joined: June 21, 2004
KitMaker: 30 posts
Armorama: 30 posts
Posted: Saturday, April 11, 2020 - 04:25 PM UTC
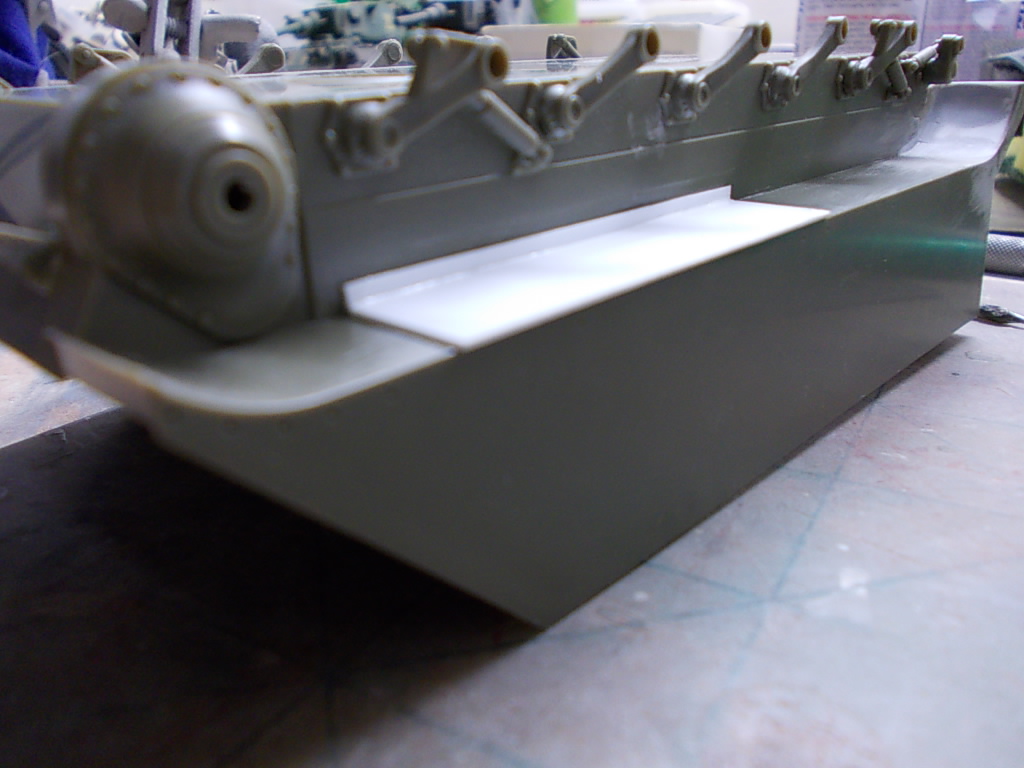
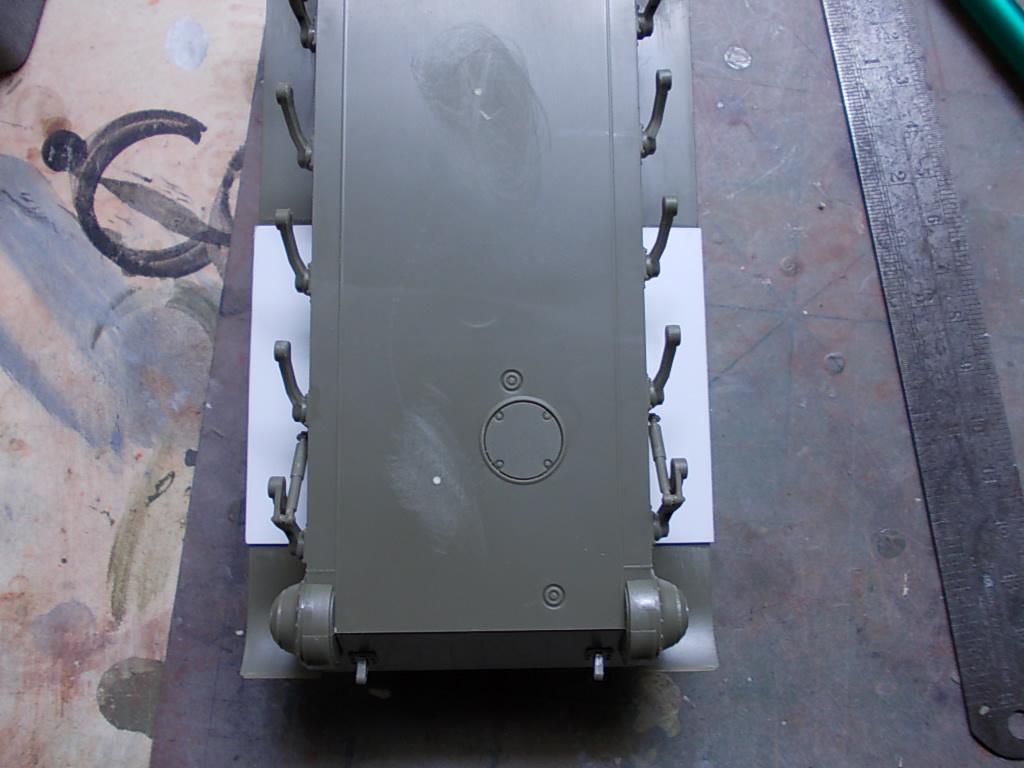
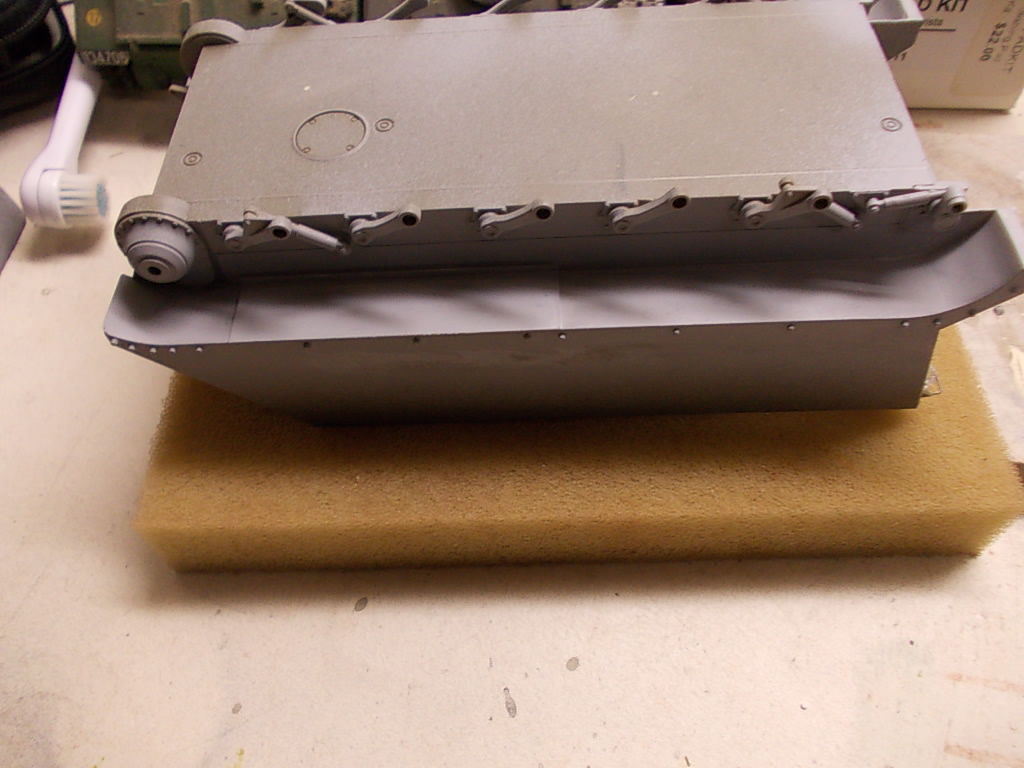
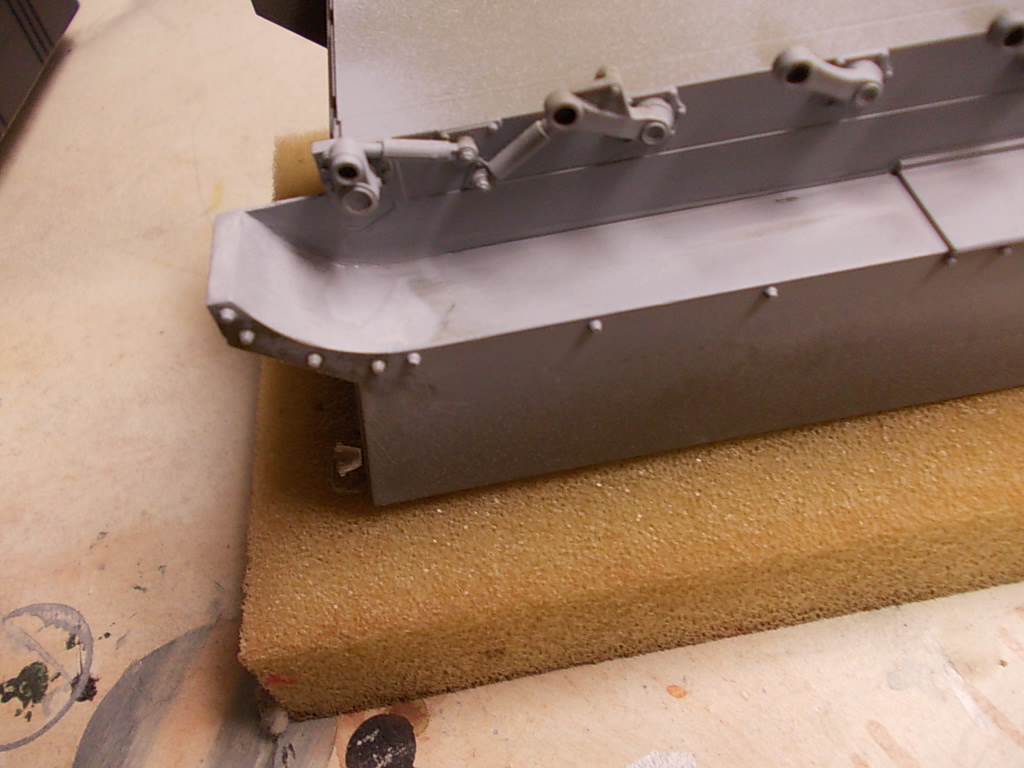
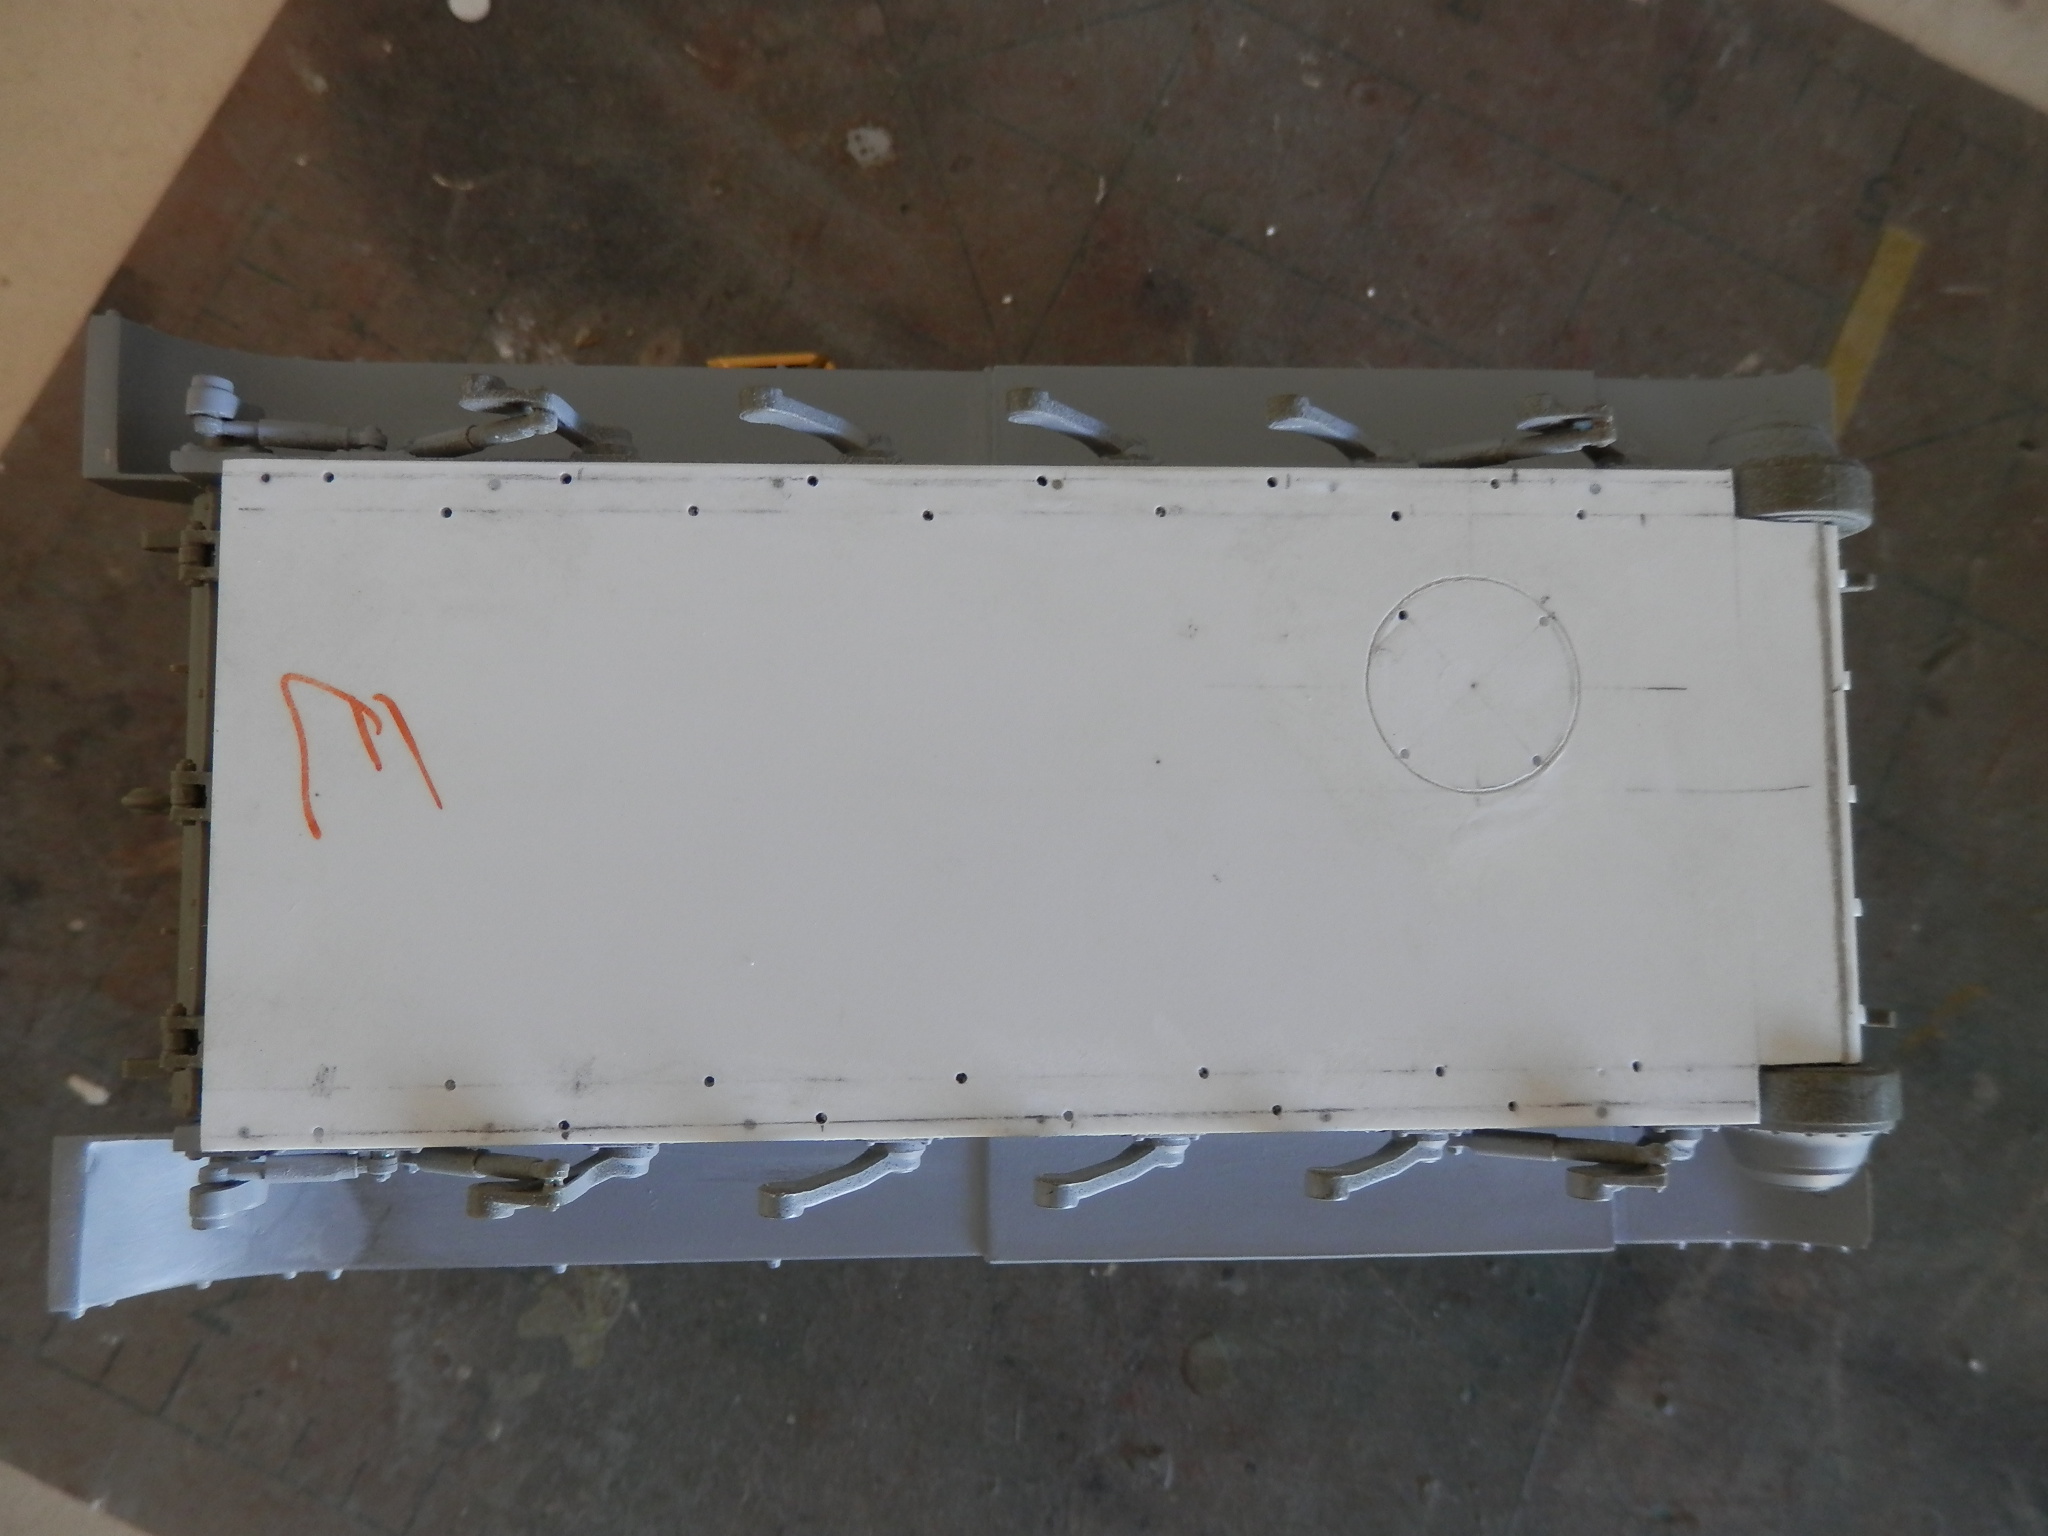
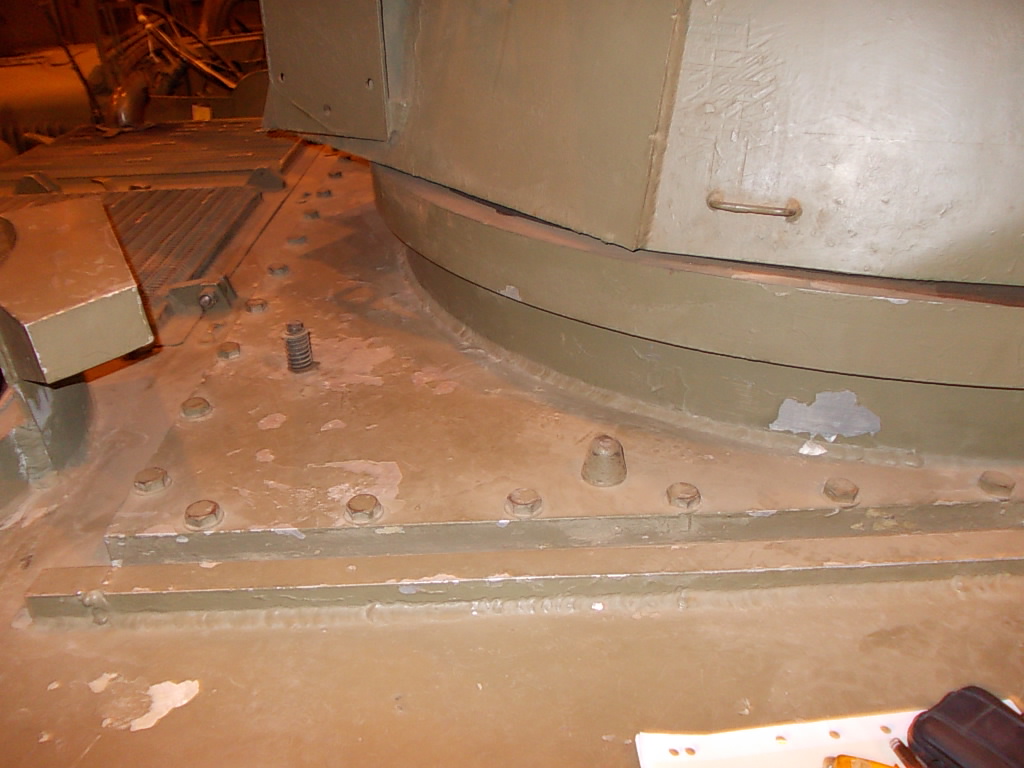
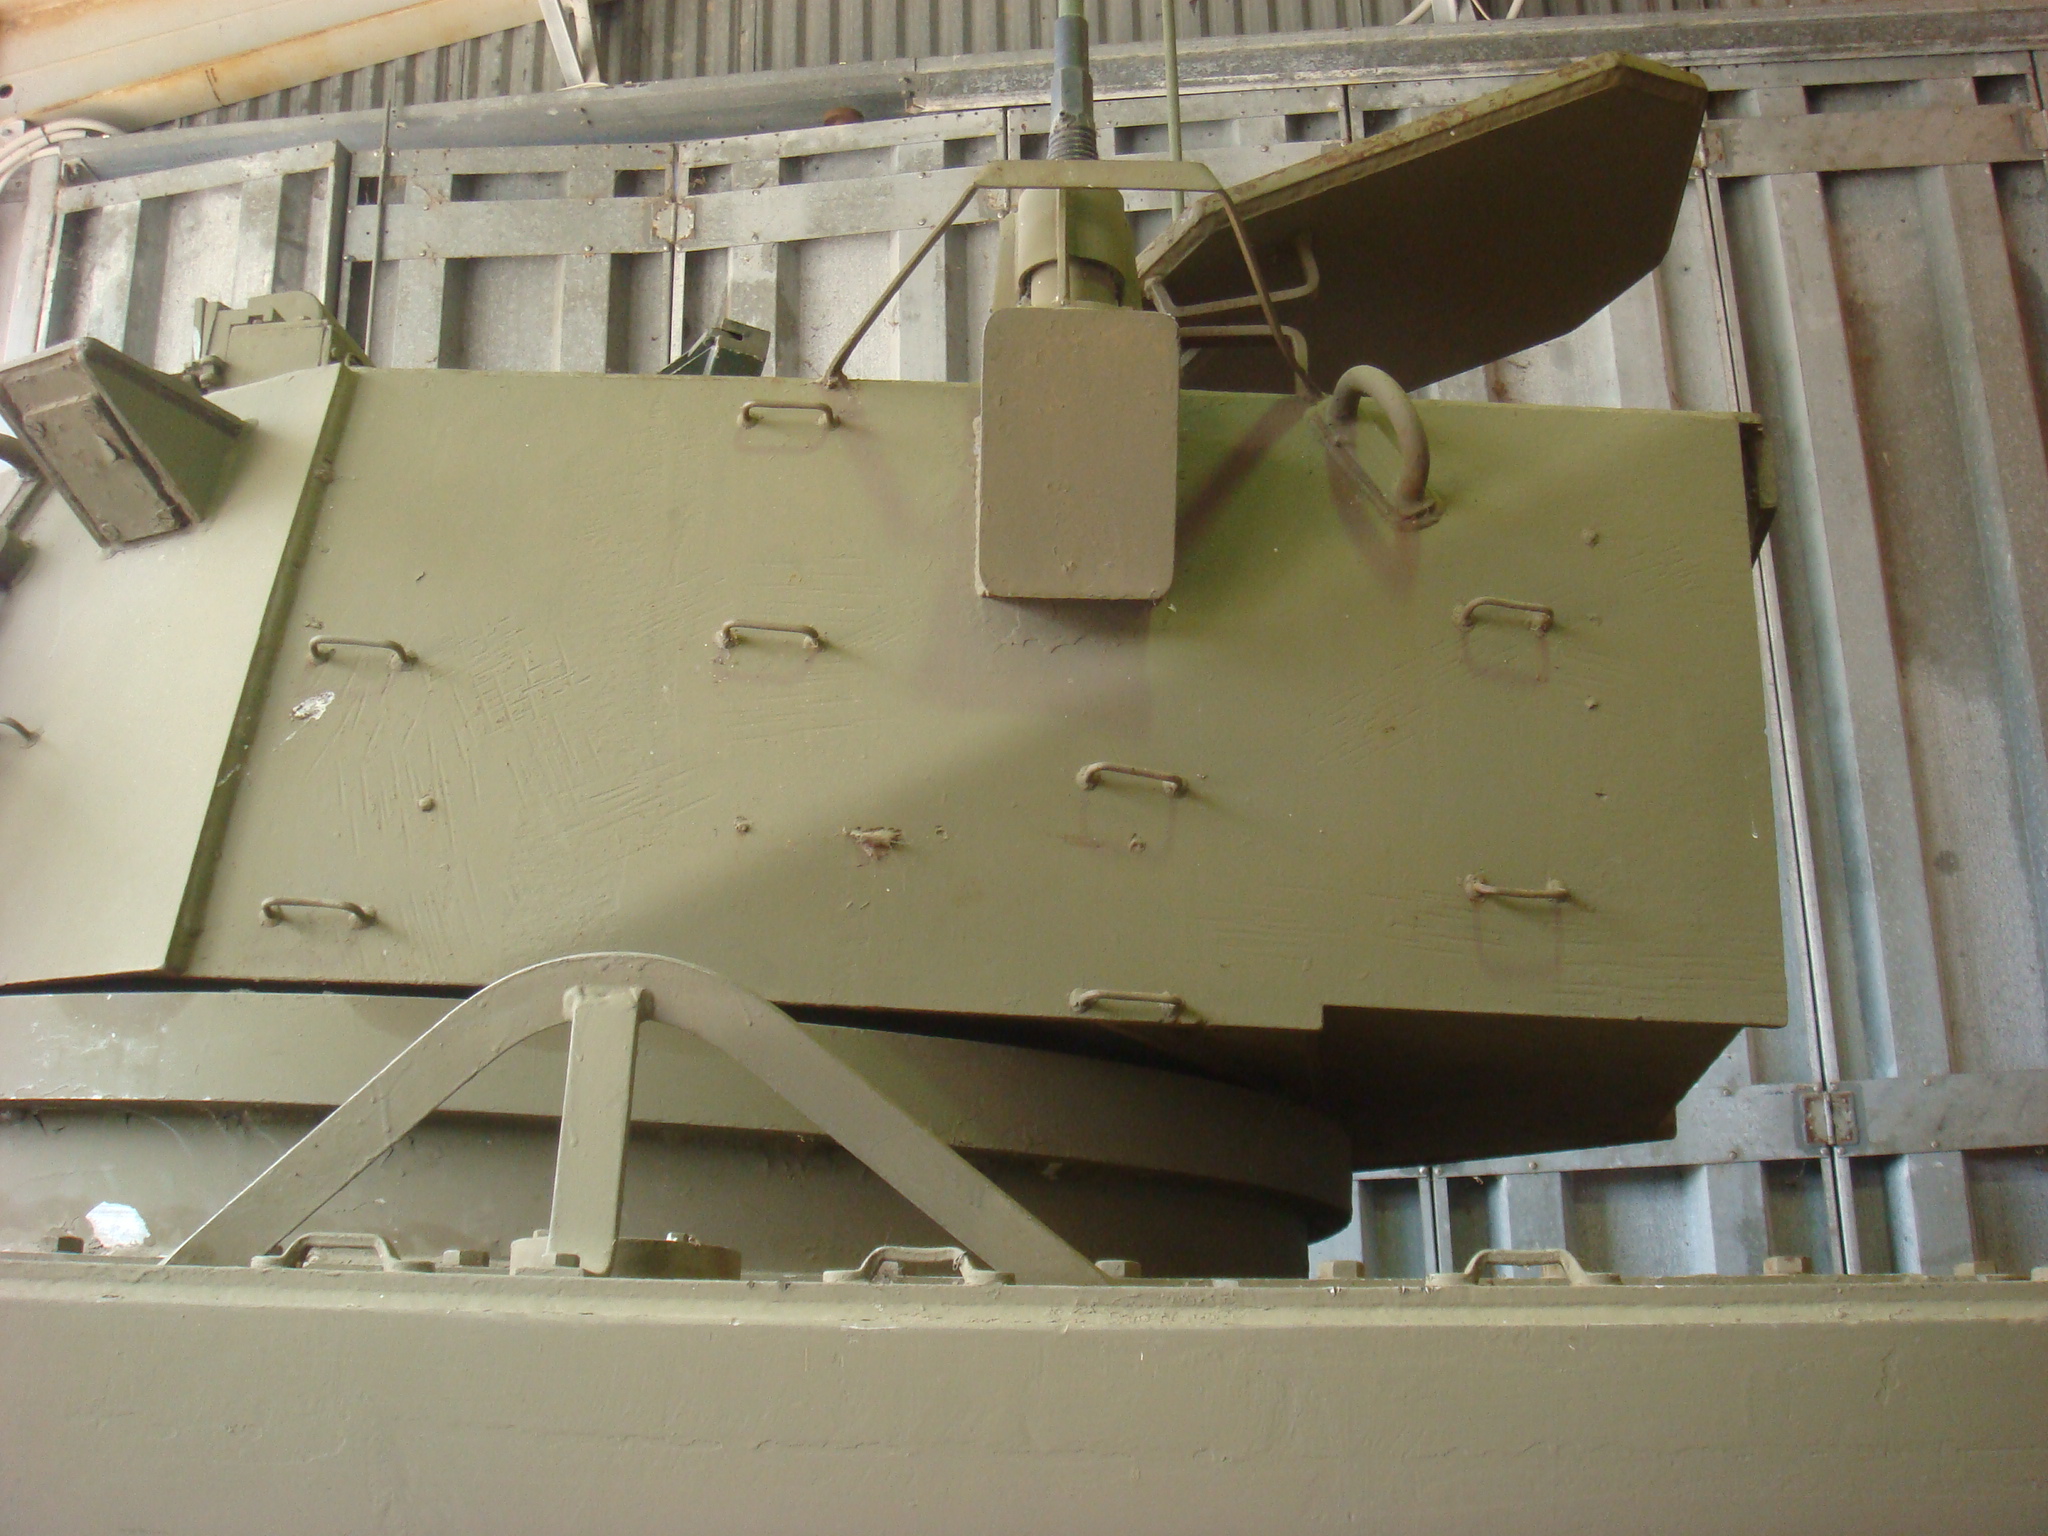
As above, I almost forgot to add the belly armour on. I was sent a couple excellent pics of the installation of the bully armour in Vietnam.
I did have the fire storm belly armour. Bit strange as it only has the front and back. Issue is you can see the belly armour from the sides. I wanted to do the whole armour as it was when these vehicles were deployed.

I cut a large piece of plastic card, then cut out the front edges to fit around the final drives. After a final fit, I then cut the end to the correct length.
I then using the fire storm front armour and reference pictures made the front part.
It wasnt that difficult to join the belly and front armour. Bit of filler and sanding and a happy outcome.
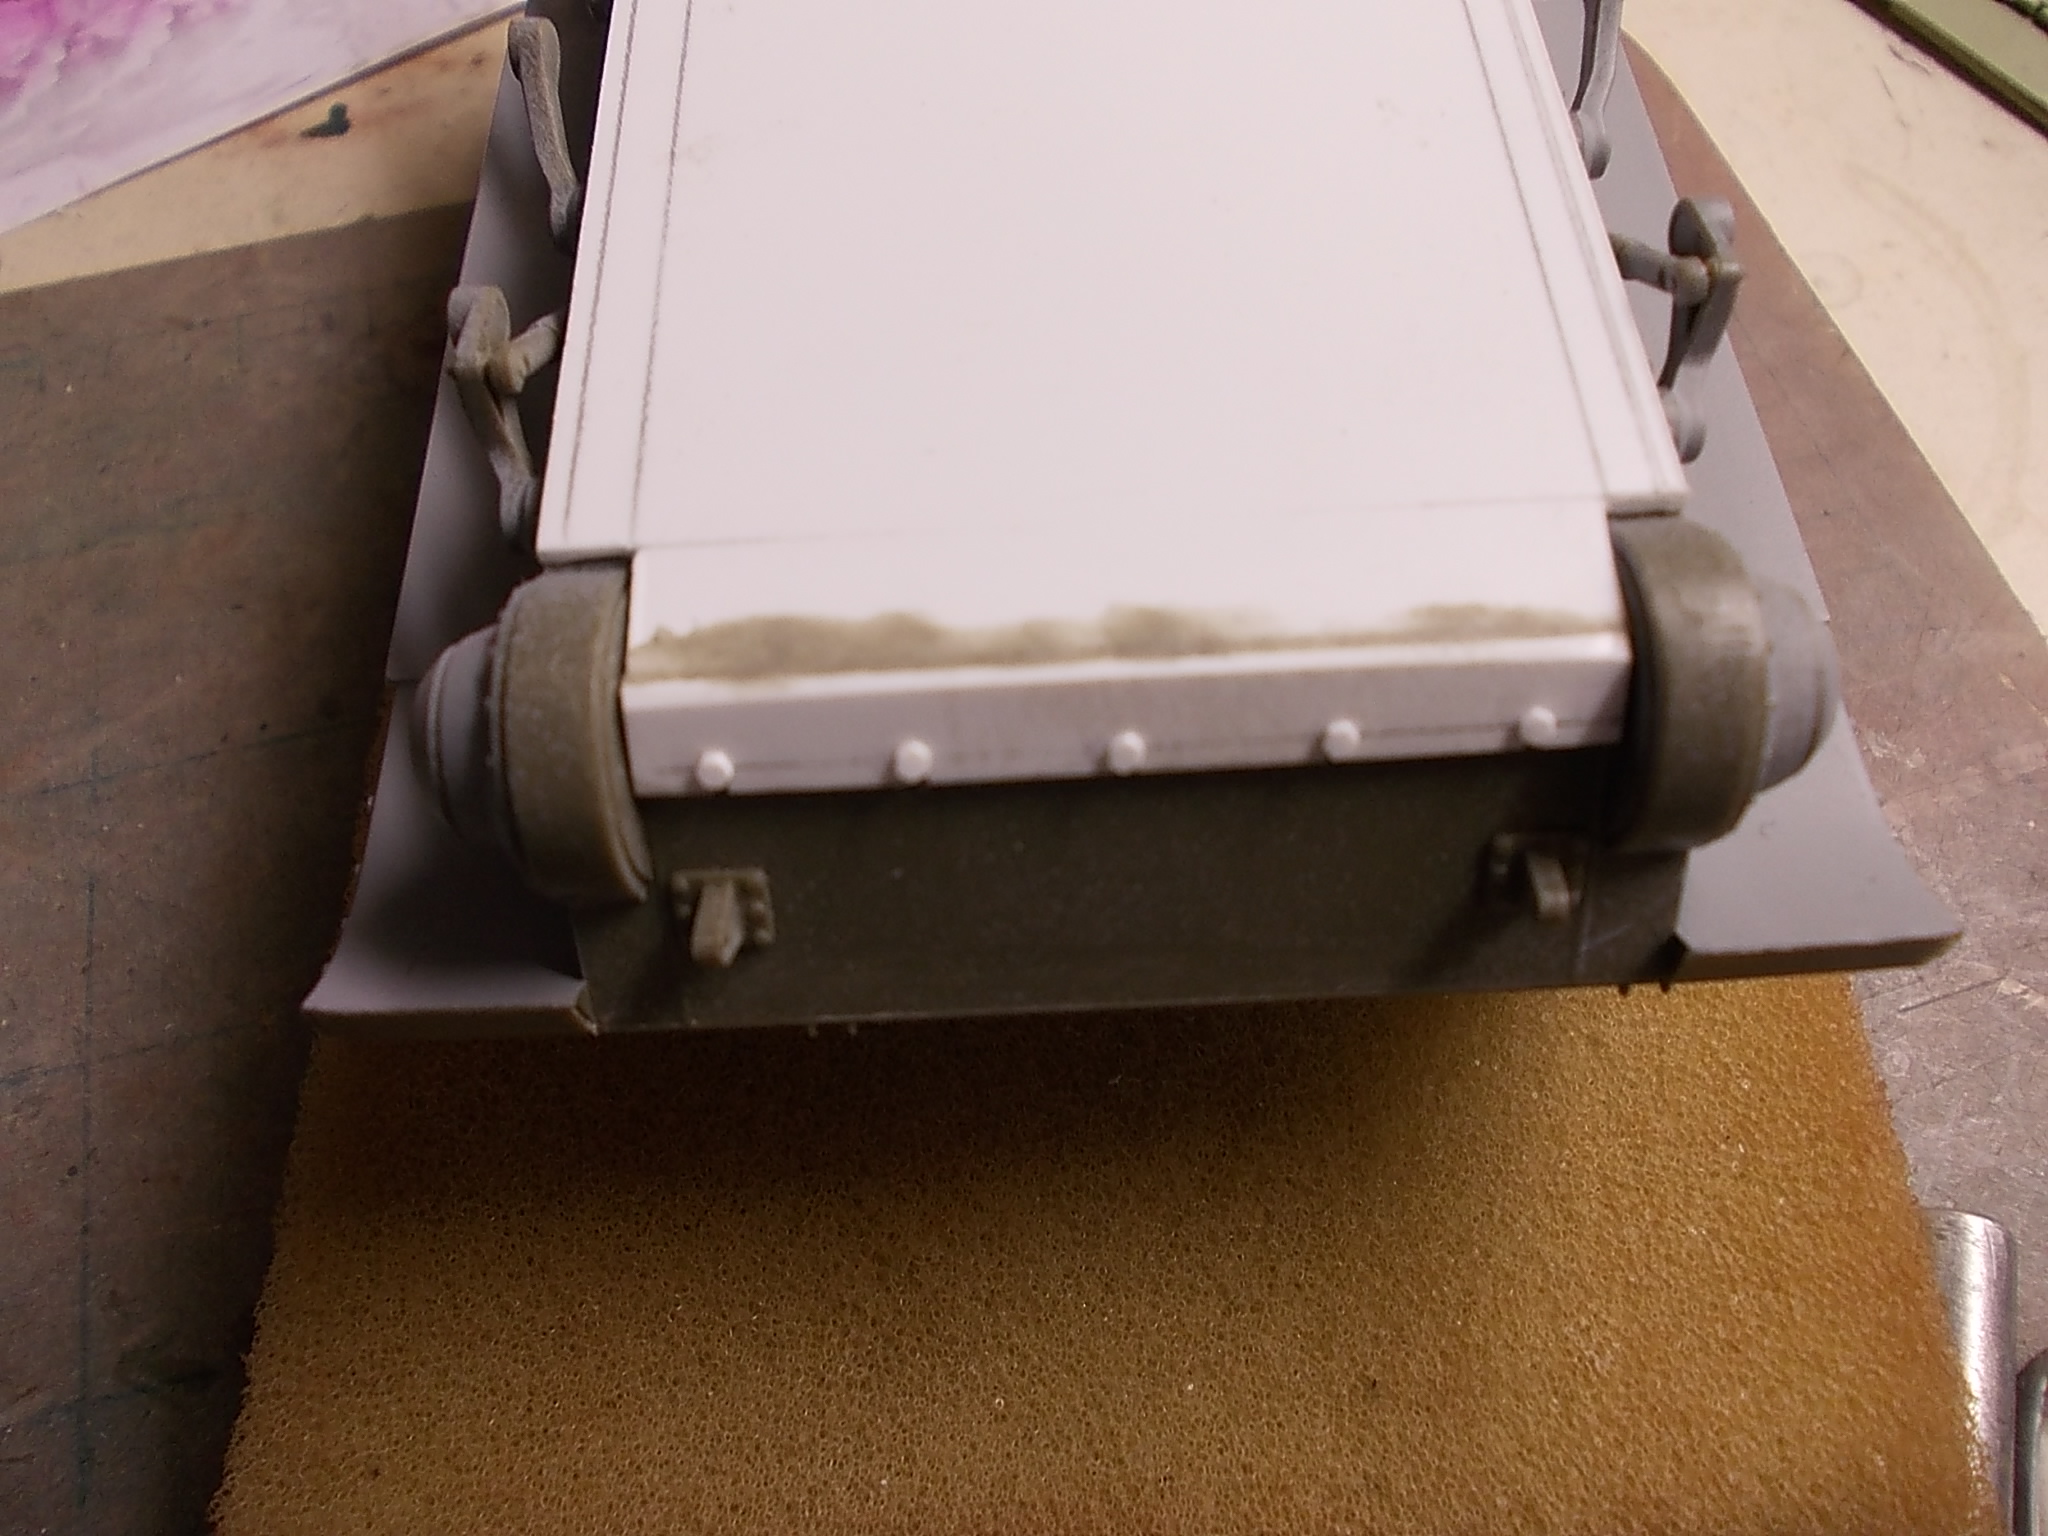

Bit of issue to accurately place the mounting bolts. As these were done in country, they were not done by modern factory standard. I also rescribed the access panel to the engine bay. I suff it up the first time. Went back to the pics and redid the mount holes.
I also dry fitted the front and engine deck. Both fit perfectly.
Next up, is the upper hull, making the adapter plate to join the AFV club hull to Dragon Saladin.
I did have the fire storm belly armour. Bit strange as it only has the front and back. Issue is you can see the belly armour from the sides. I wanted to do the whole armour as it was when these vehicles were deployed.
I cut a large piece of plastic card, then cut out the front edges to fit around the final drives. After a final fit, I then cut the end to the correct length.
I then using the fire storm front armour and reference pictures made the front part.
It wasnt that difficult to join the belly and front armour. Bit of filler and sanding and a happy outcome.
Bit of issue to accurately place the mounting bolts. As these were done in country, they were not done by modern factory standard. I also rescribed the access panel to the engine bay. I suff it up the first time. Went back to the pics and redid the mount holes.
I also dry fitted the front and engine deck. Both fit perfectly.
Next up, is the upper hull, making the adapter plate to join the AFV club hull to Dragon Saladin.
gibbo
Joined: June 21, 2004
KitMaker: 30 posts
Armorama: 30 posts
Posted: Tuesday, April 14, 2020 - 11:48 PM UTC
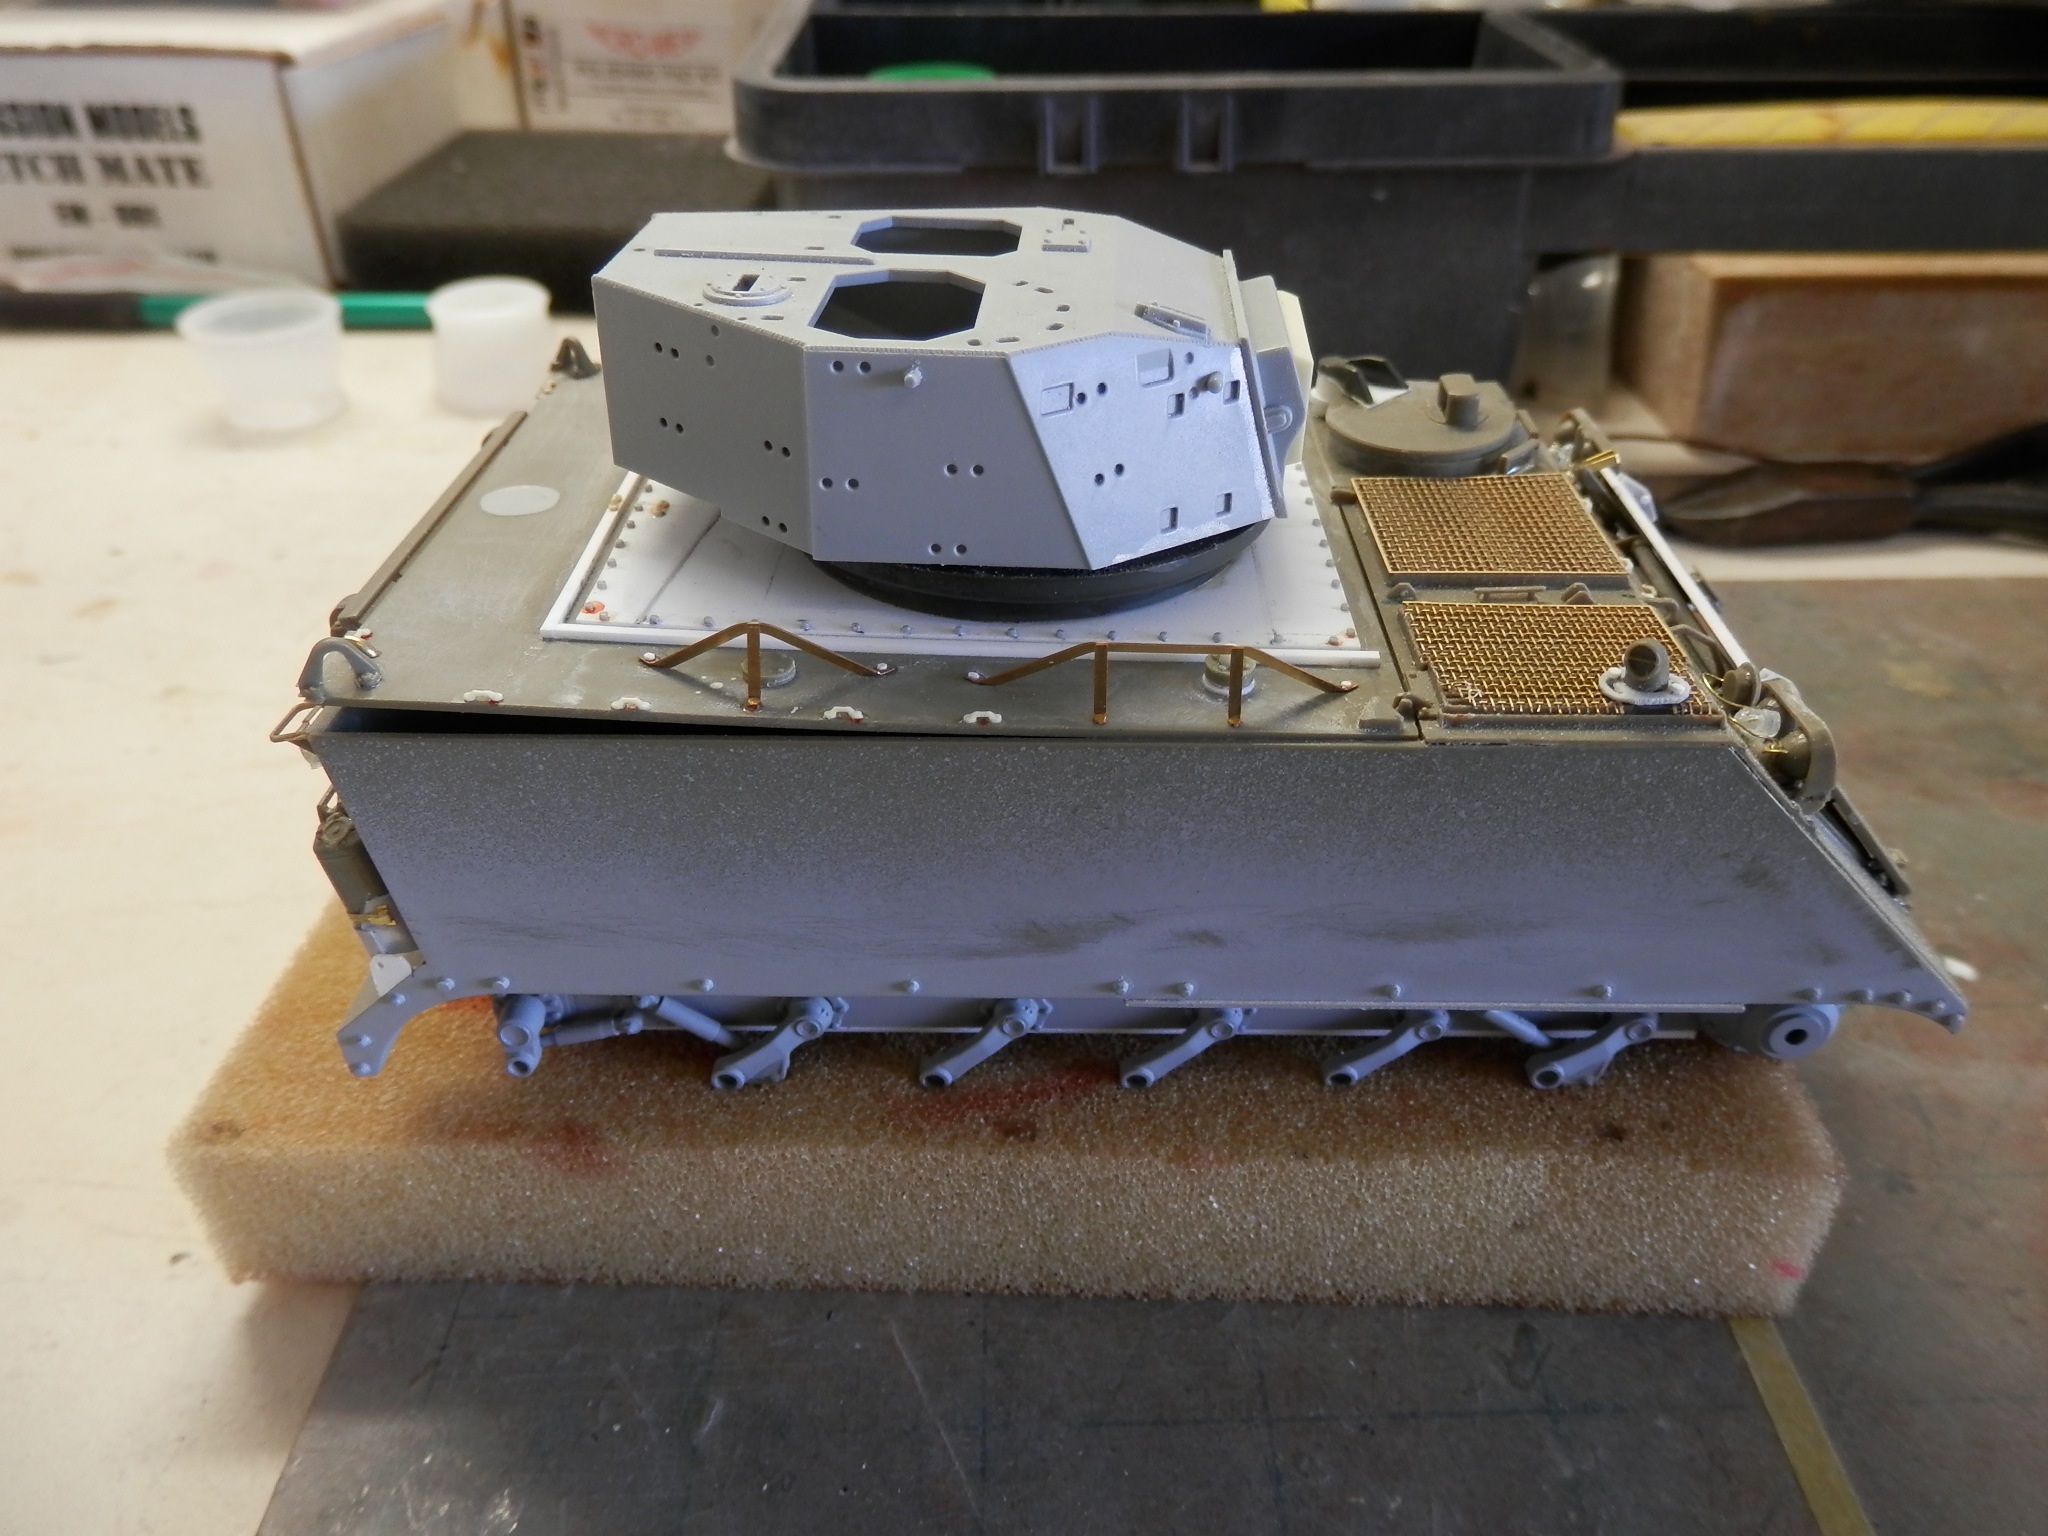
Ok the matching the hull to the turret from two different manufactures.
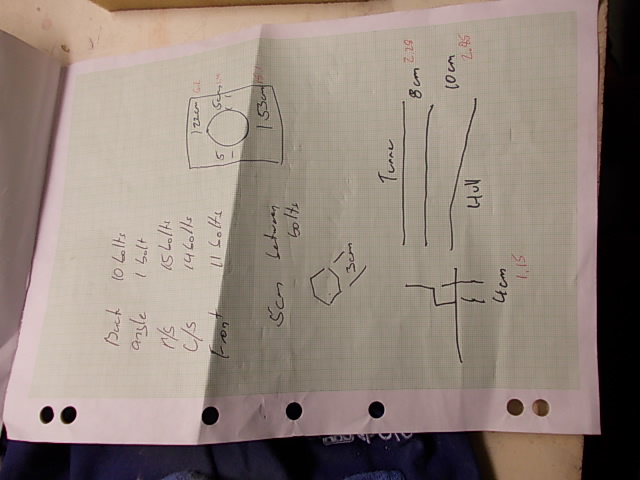
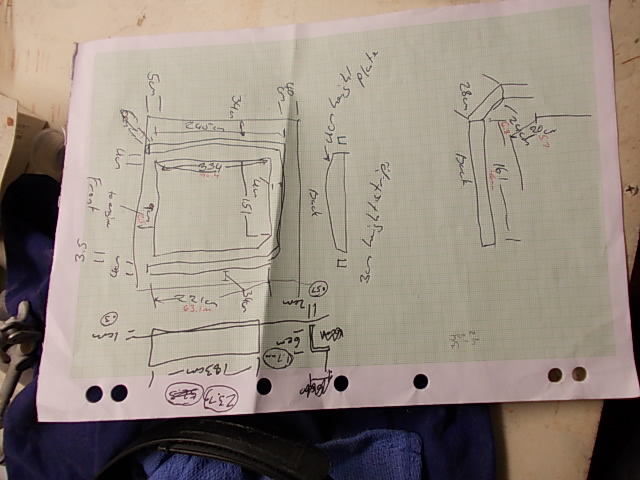
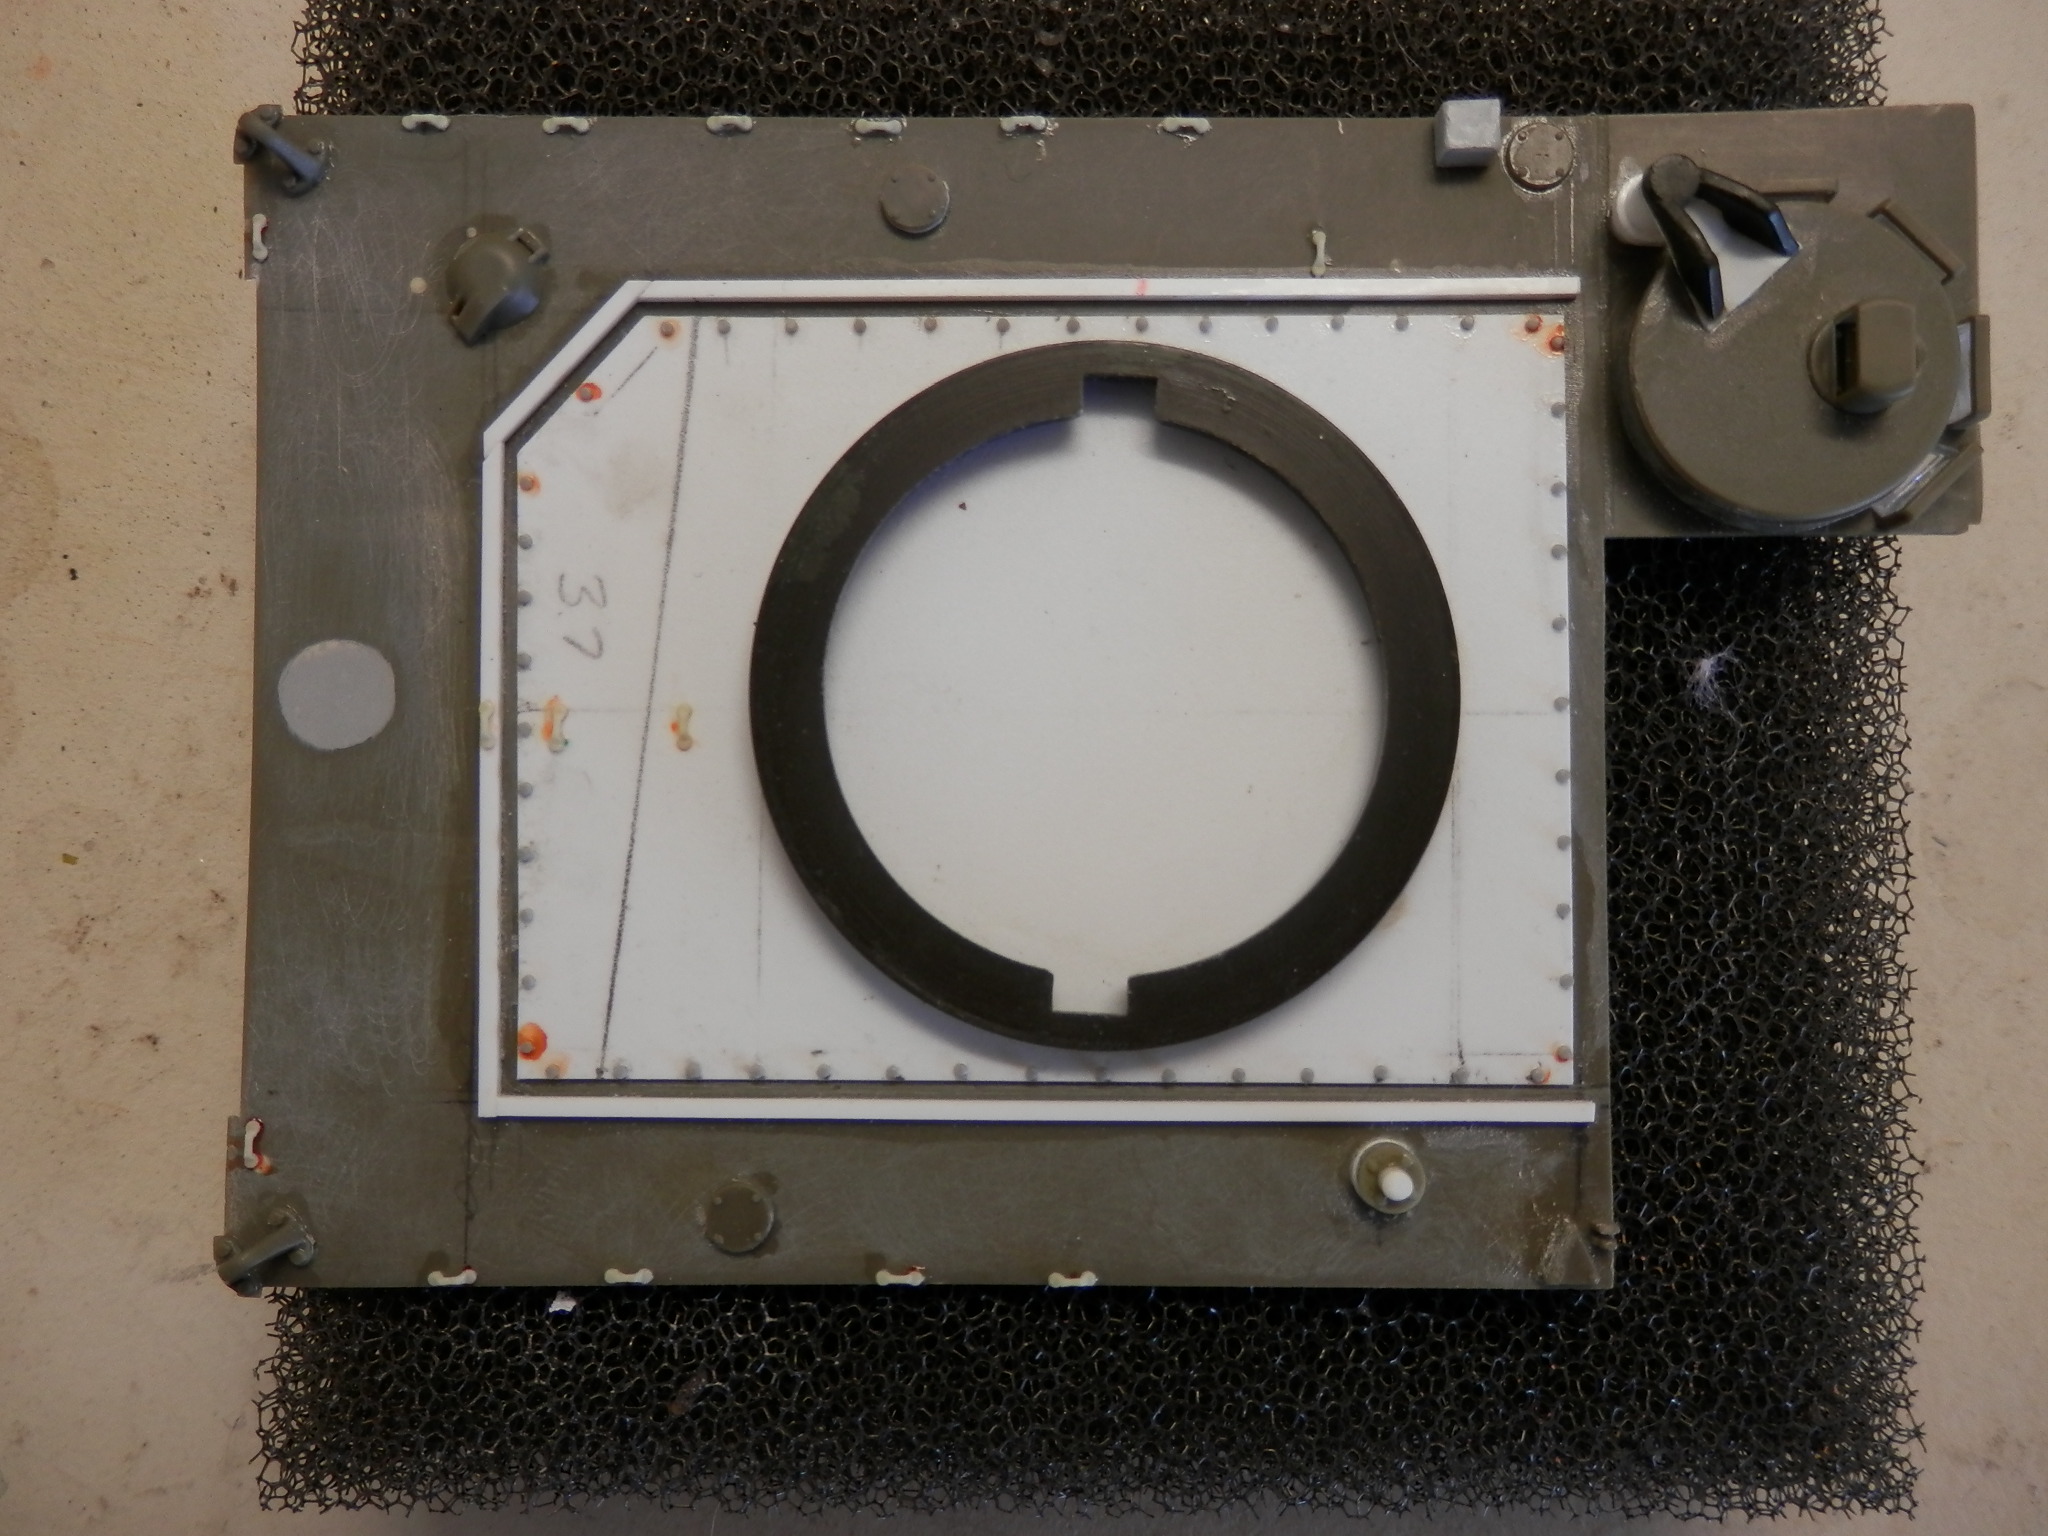
I measure an real FSV not that long ago. Images are my notes taken. No Im not a doctor, just a mad writing. I also had a lot of pictures of the turret rings and adapter plate. So I could see if it looked right was to scale.
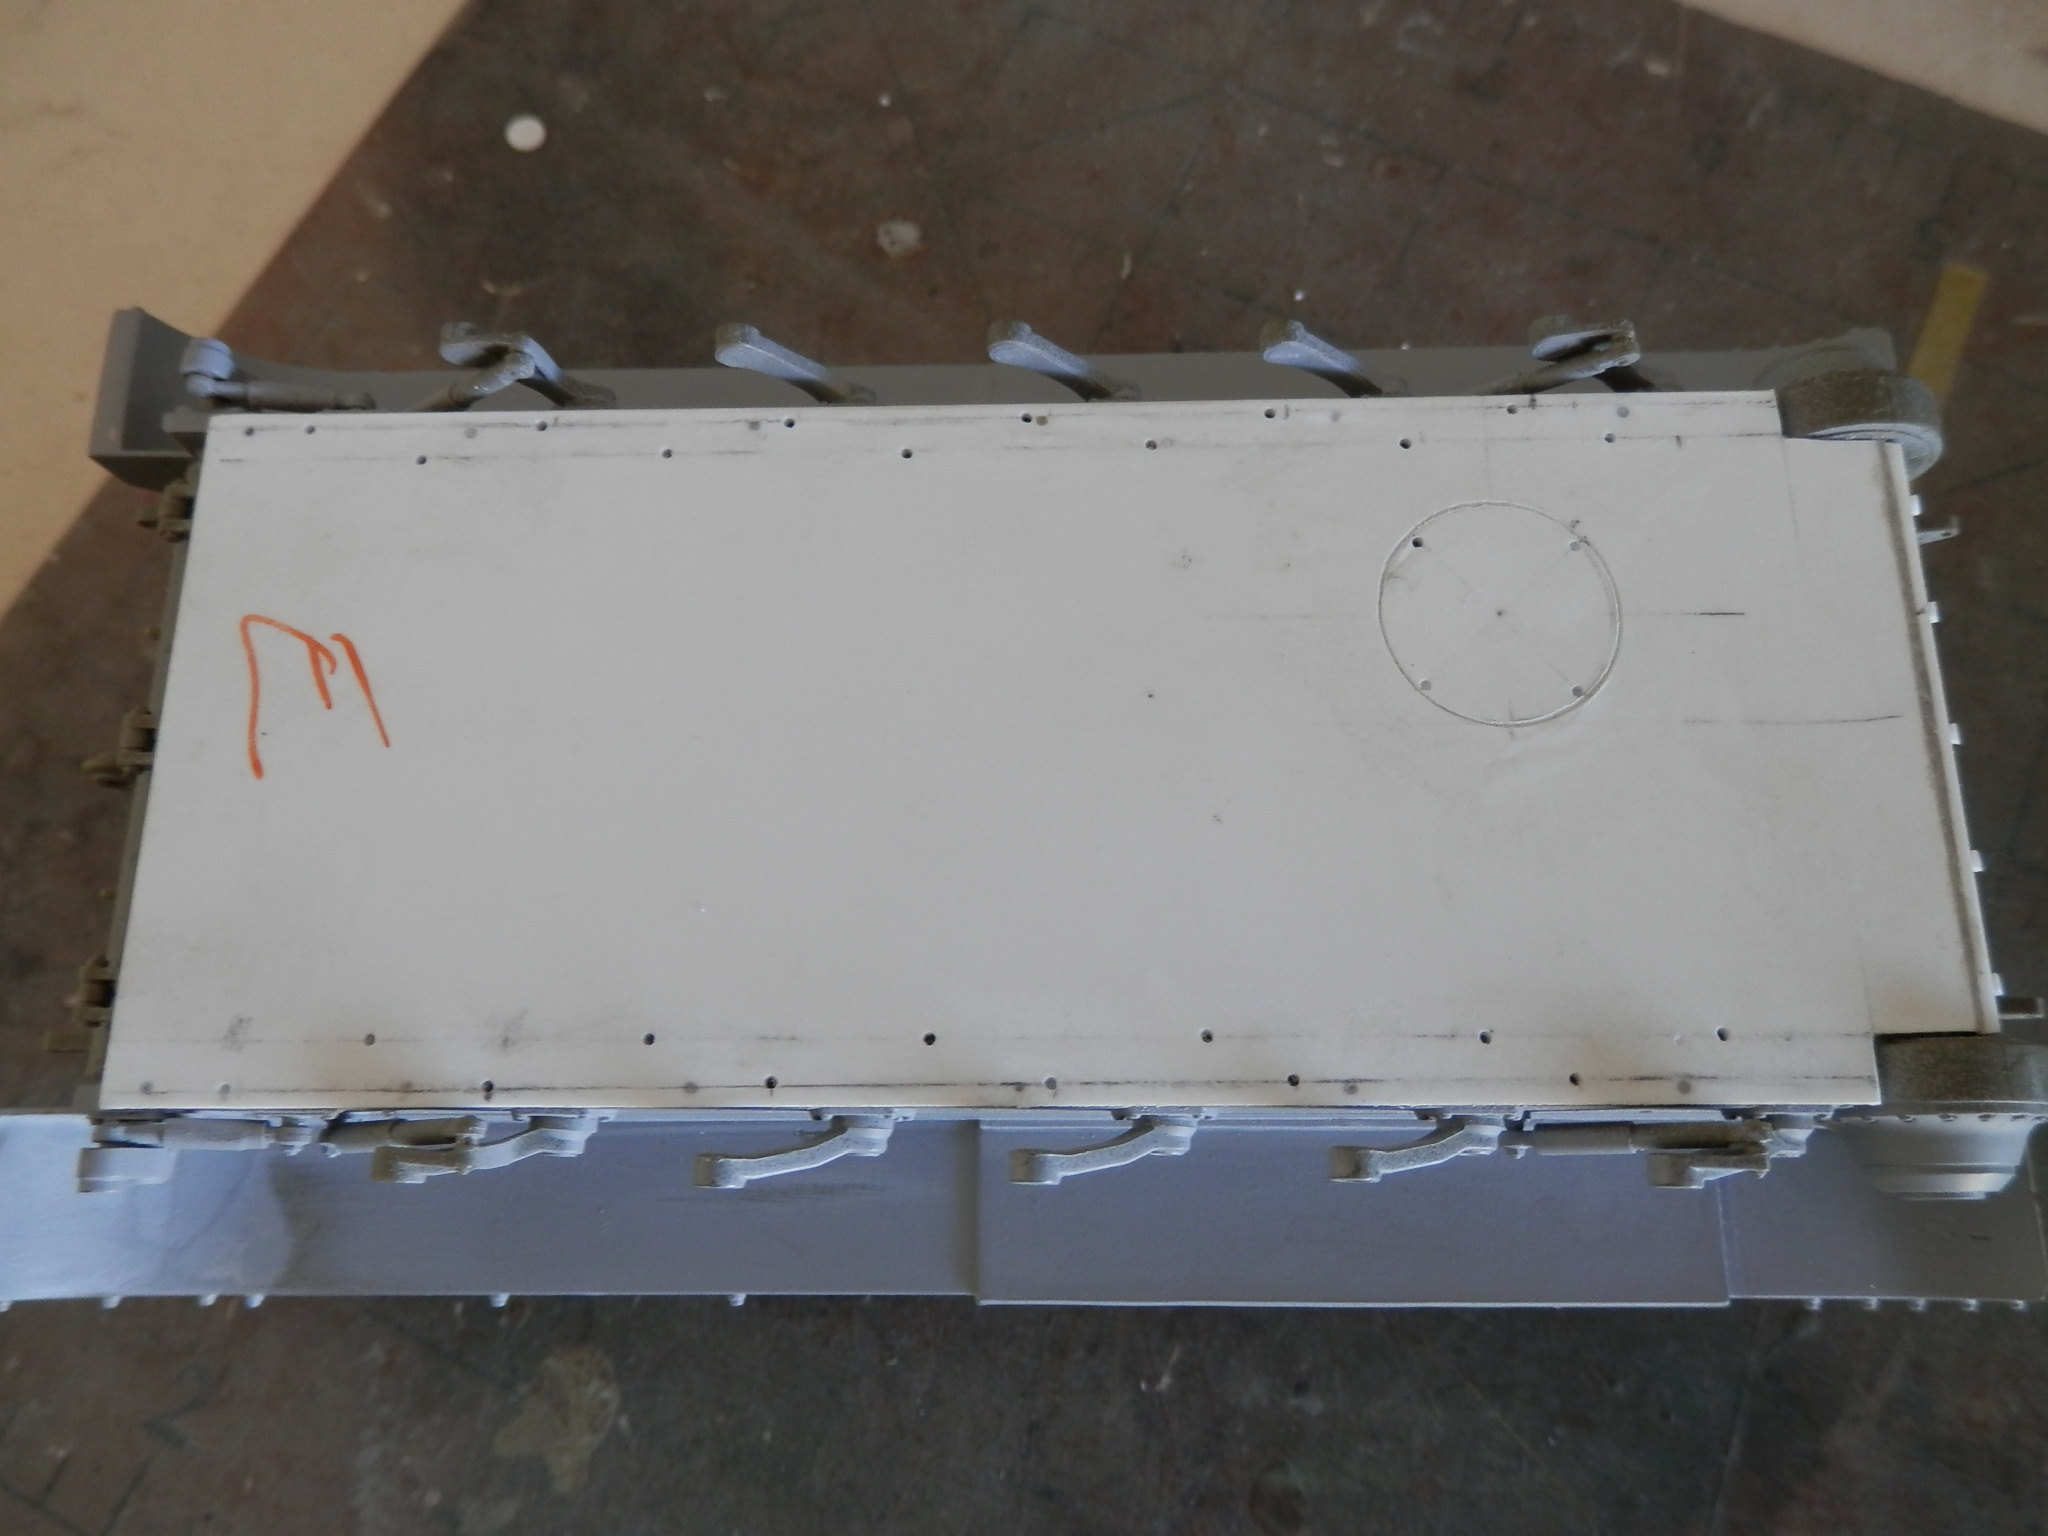
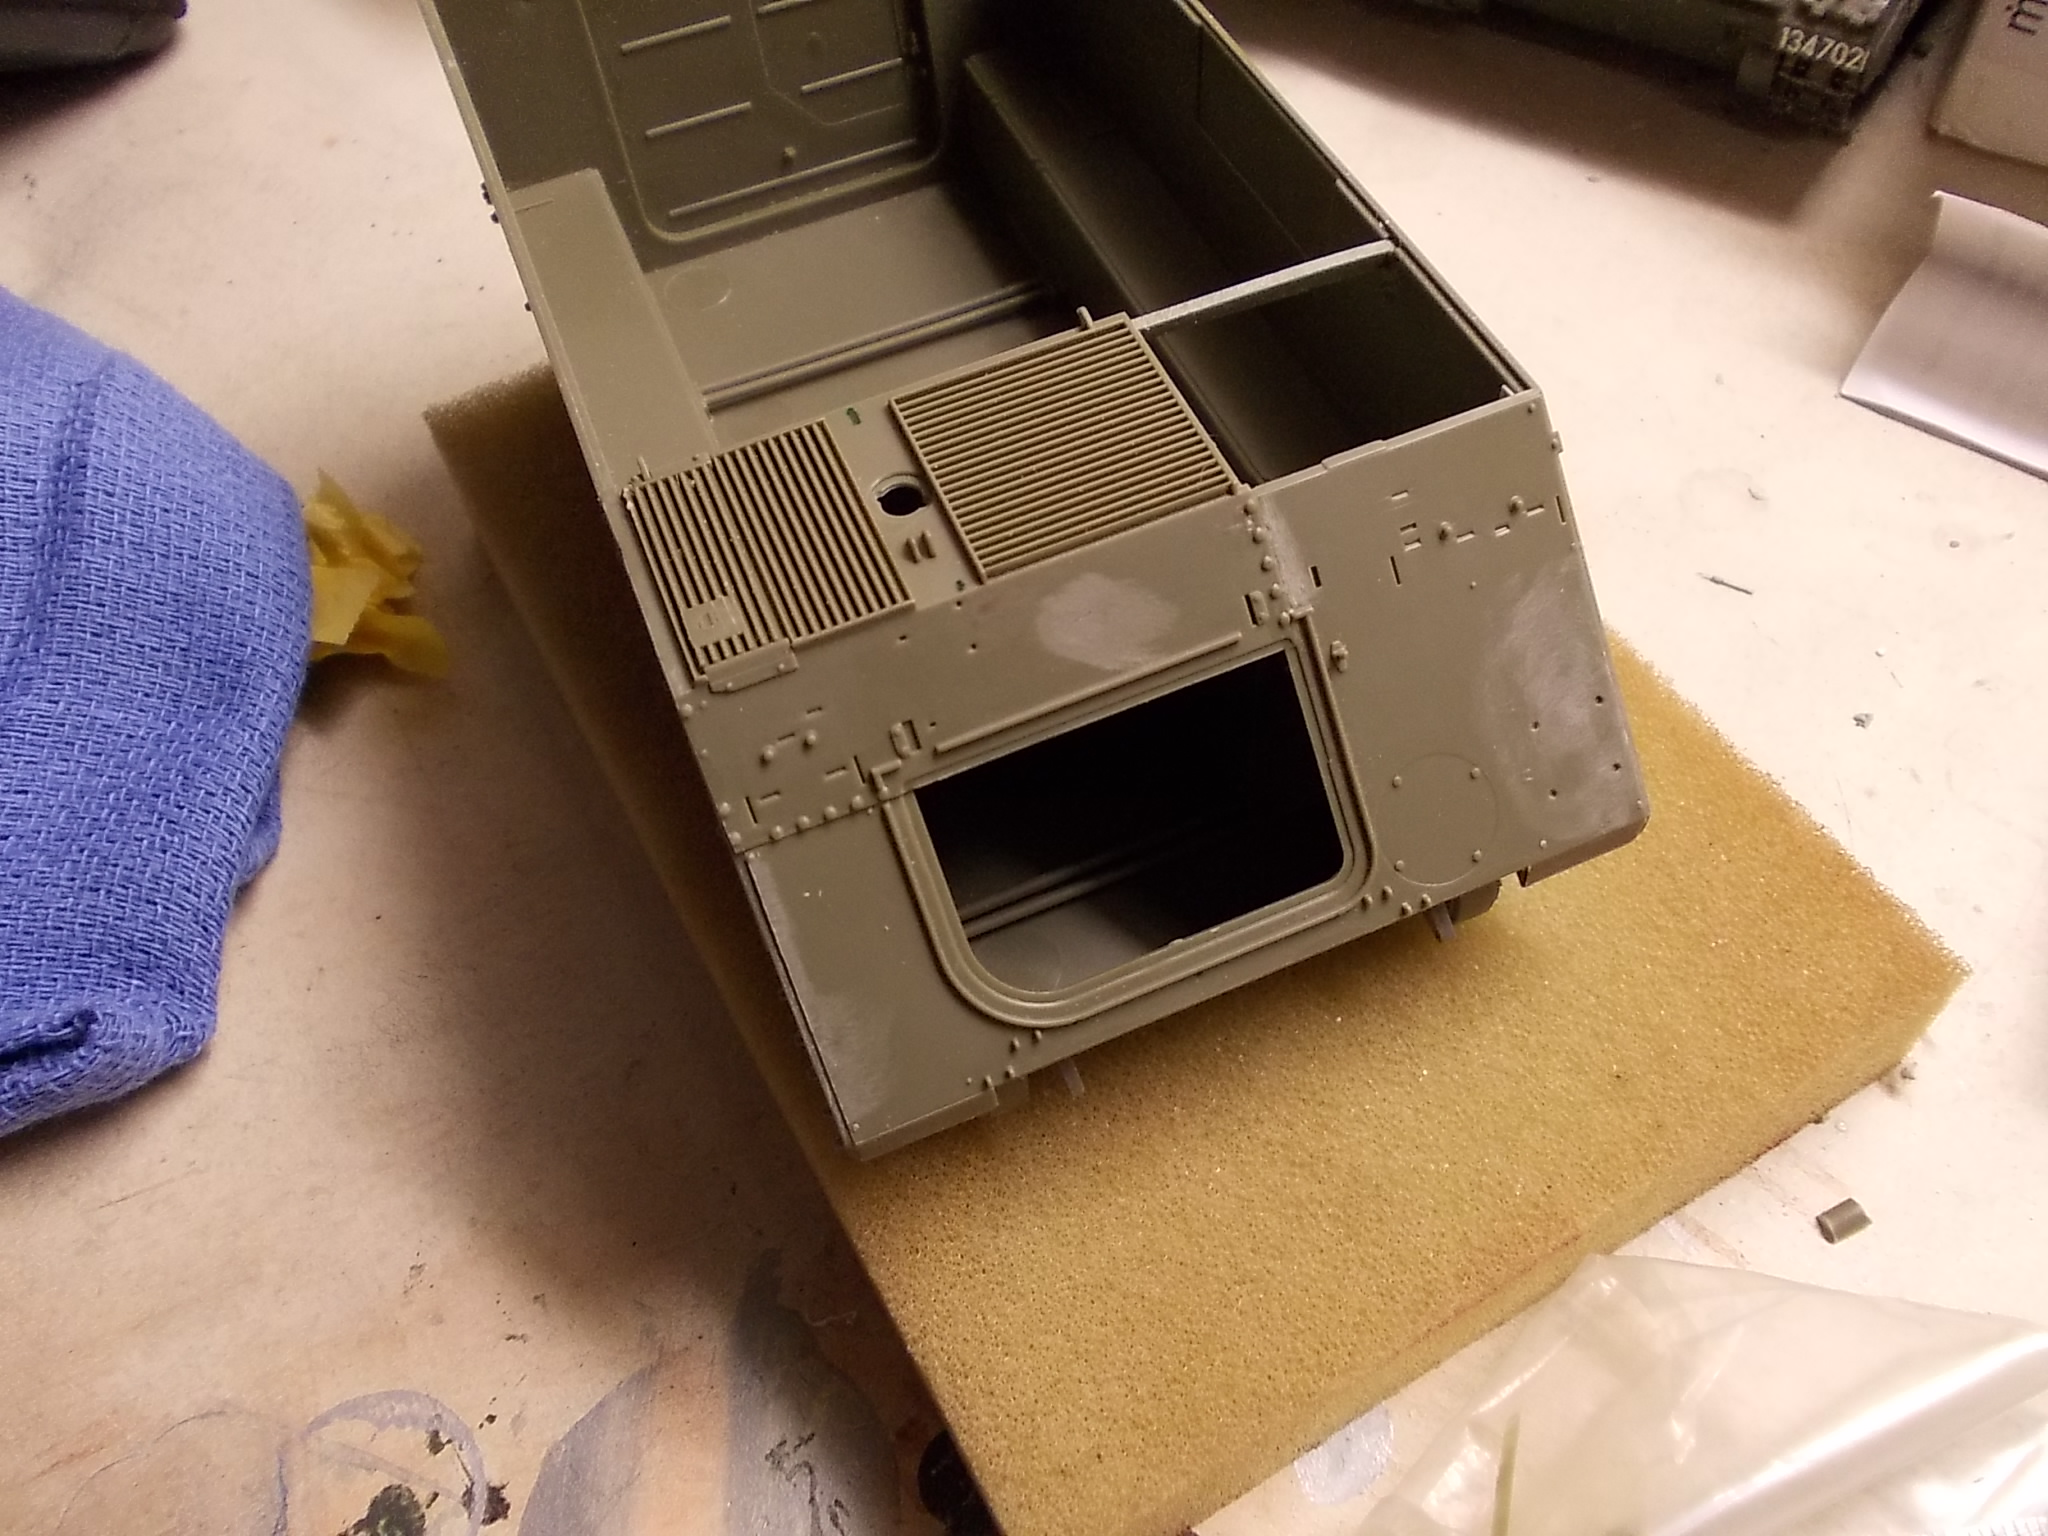
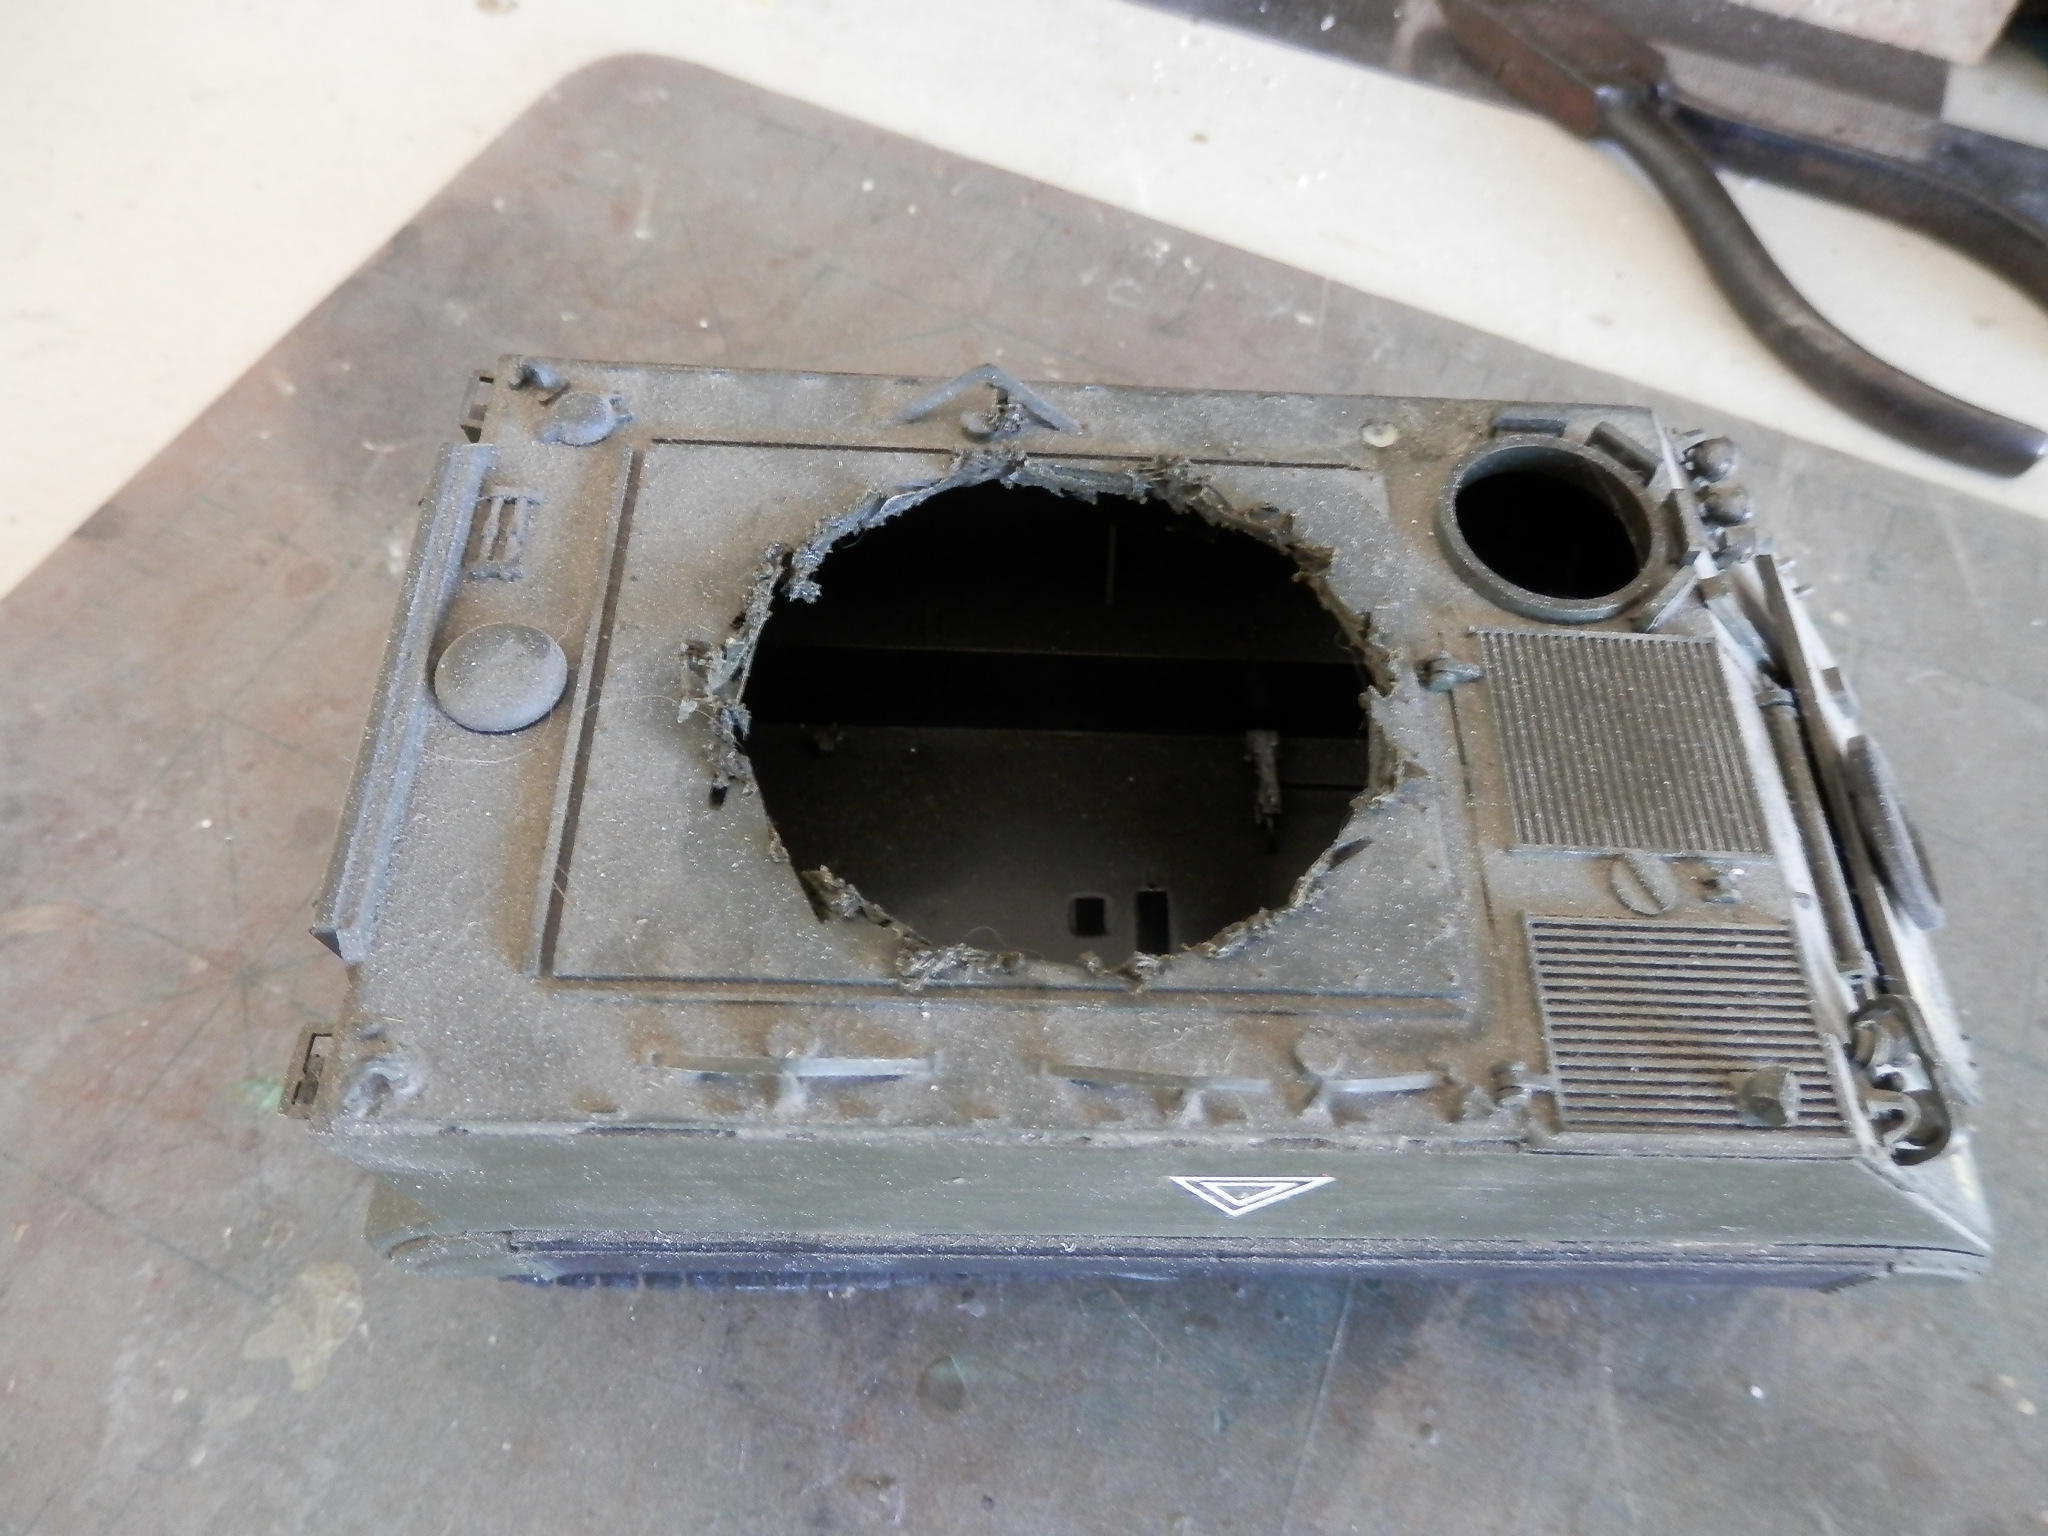
First up was removing all, well most of the upper deck to add all the updates and enhancements over the kits.
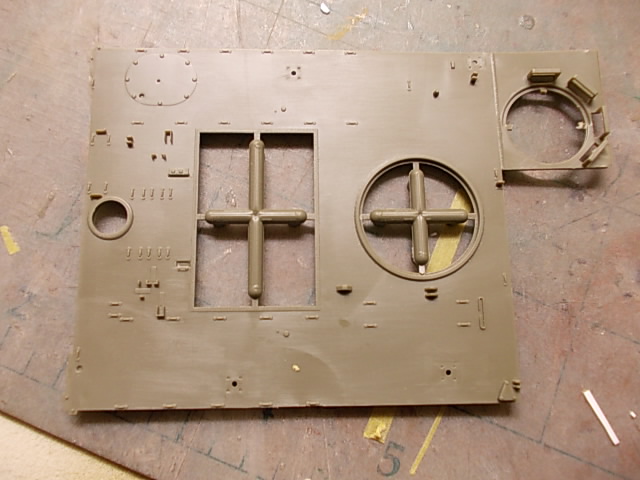
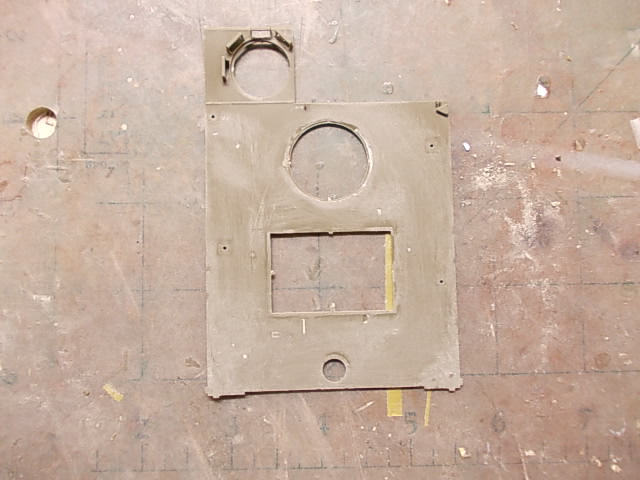
Then to fill in the old copula hole and rear vent fan. I did stuff up by almost gluing the plastic card on the wrong side, before adding the putty.
I compared the two upper decks. MH measurements were spot on. The deck will not fit as its for the Tamiya kit. I will use the MH part as an reference in the construction of the upper hull.
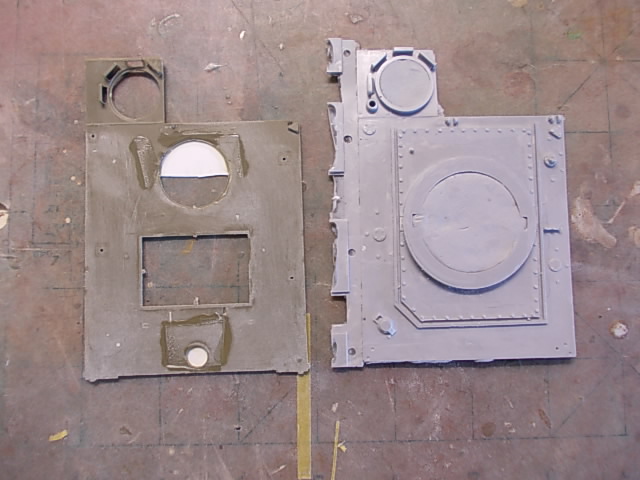
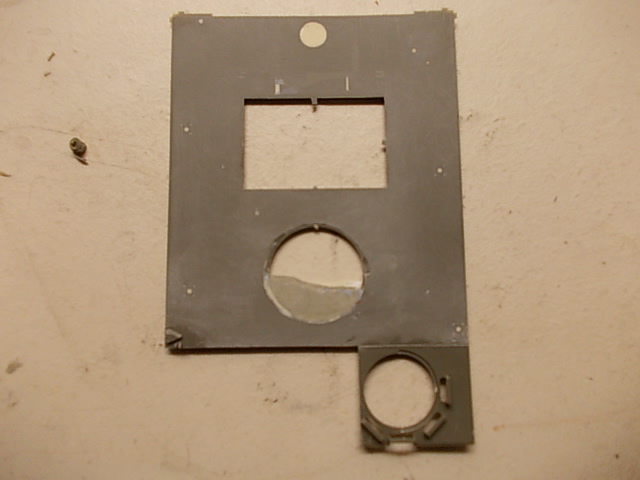
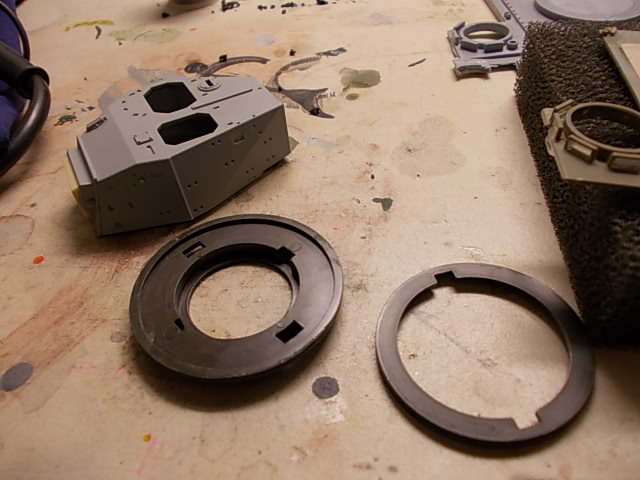
I decided to cut out the turret rings from an old Tamiya FSV. Hoping it was to scale. I was lucky as it was spot on. I sanded down the lower ring till all the plastic from the Tamiya upper deck was gone and it was the right size/scale.
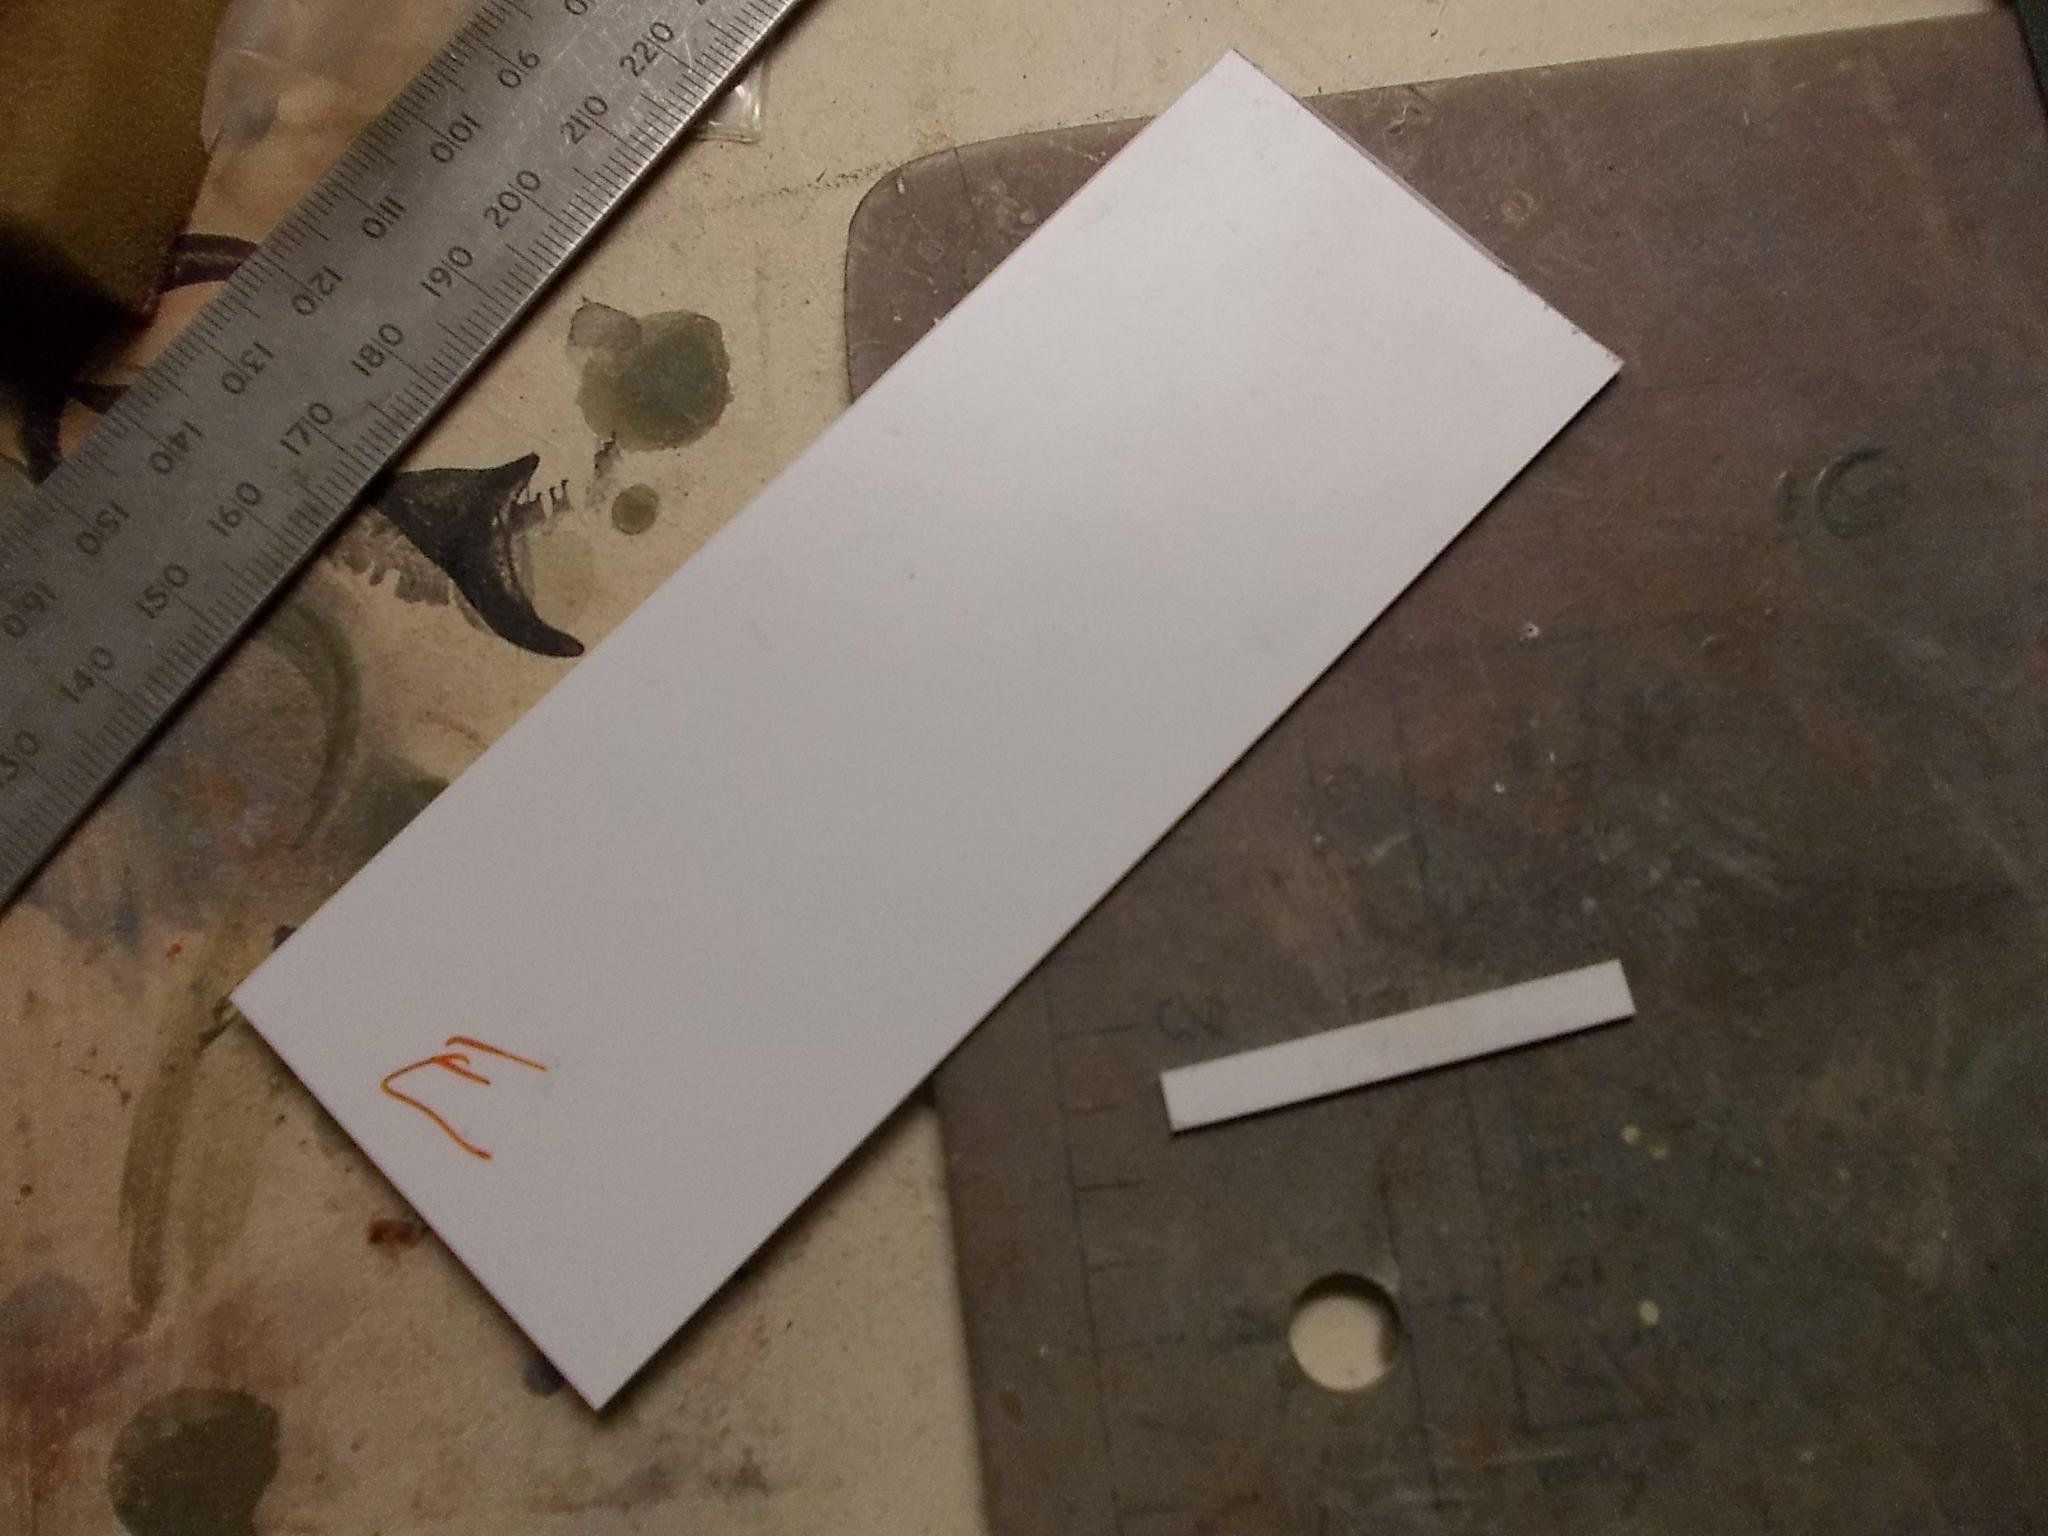
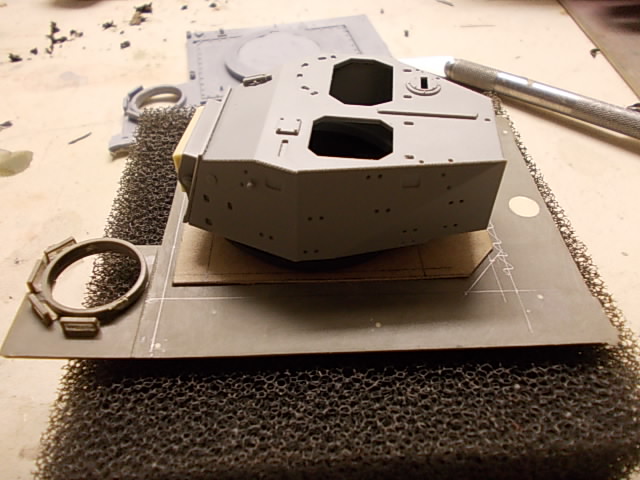
I came up with the idea to use very thin cardboard to make a template before cutting any plastic. Also to confirm dimensions and look.
I also glued the Dragon turret together to help with the process.
I then used the template to help fit the turret rings.
Everything was going well.
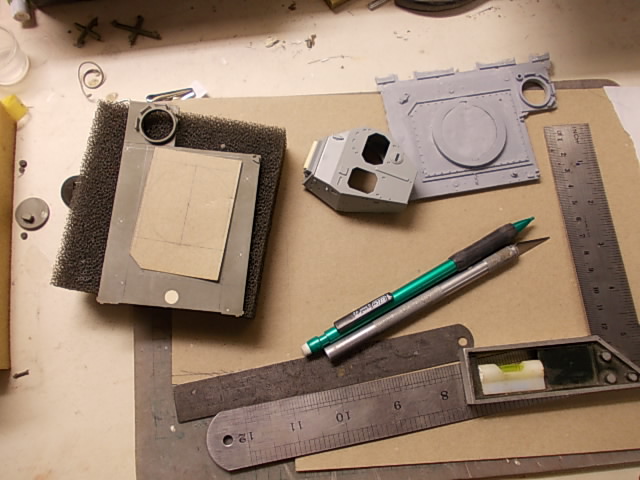
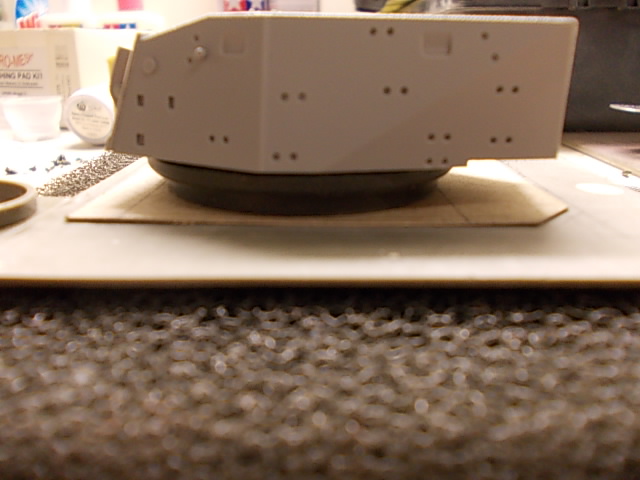


And still is. Everything is to scale, adapter plate, Tamiya turret rings and Dragon turret. To good to believe.
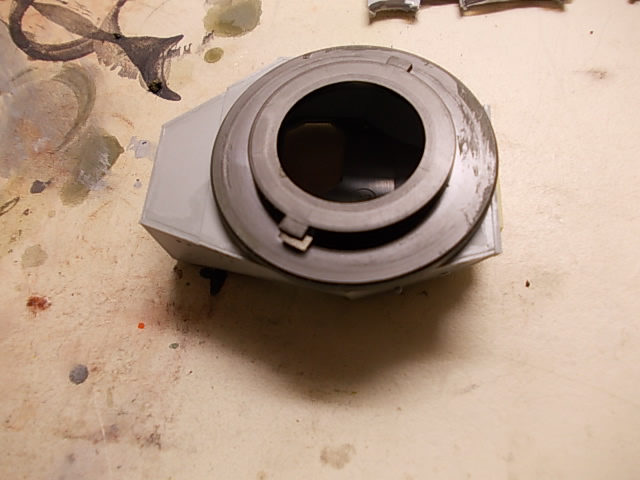
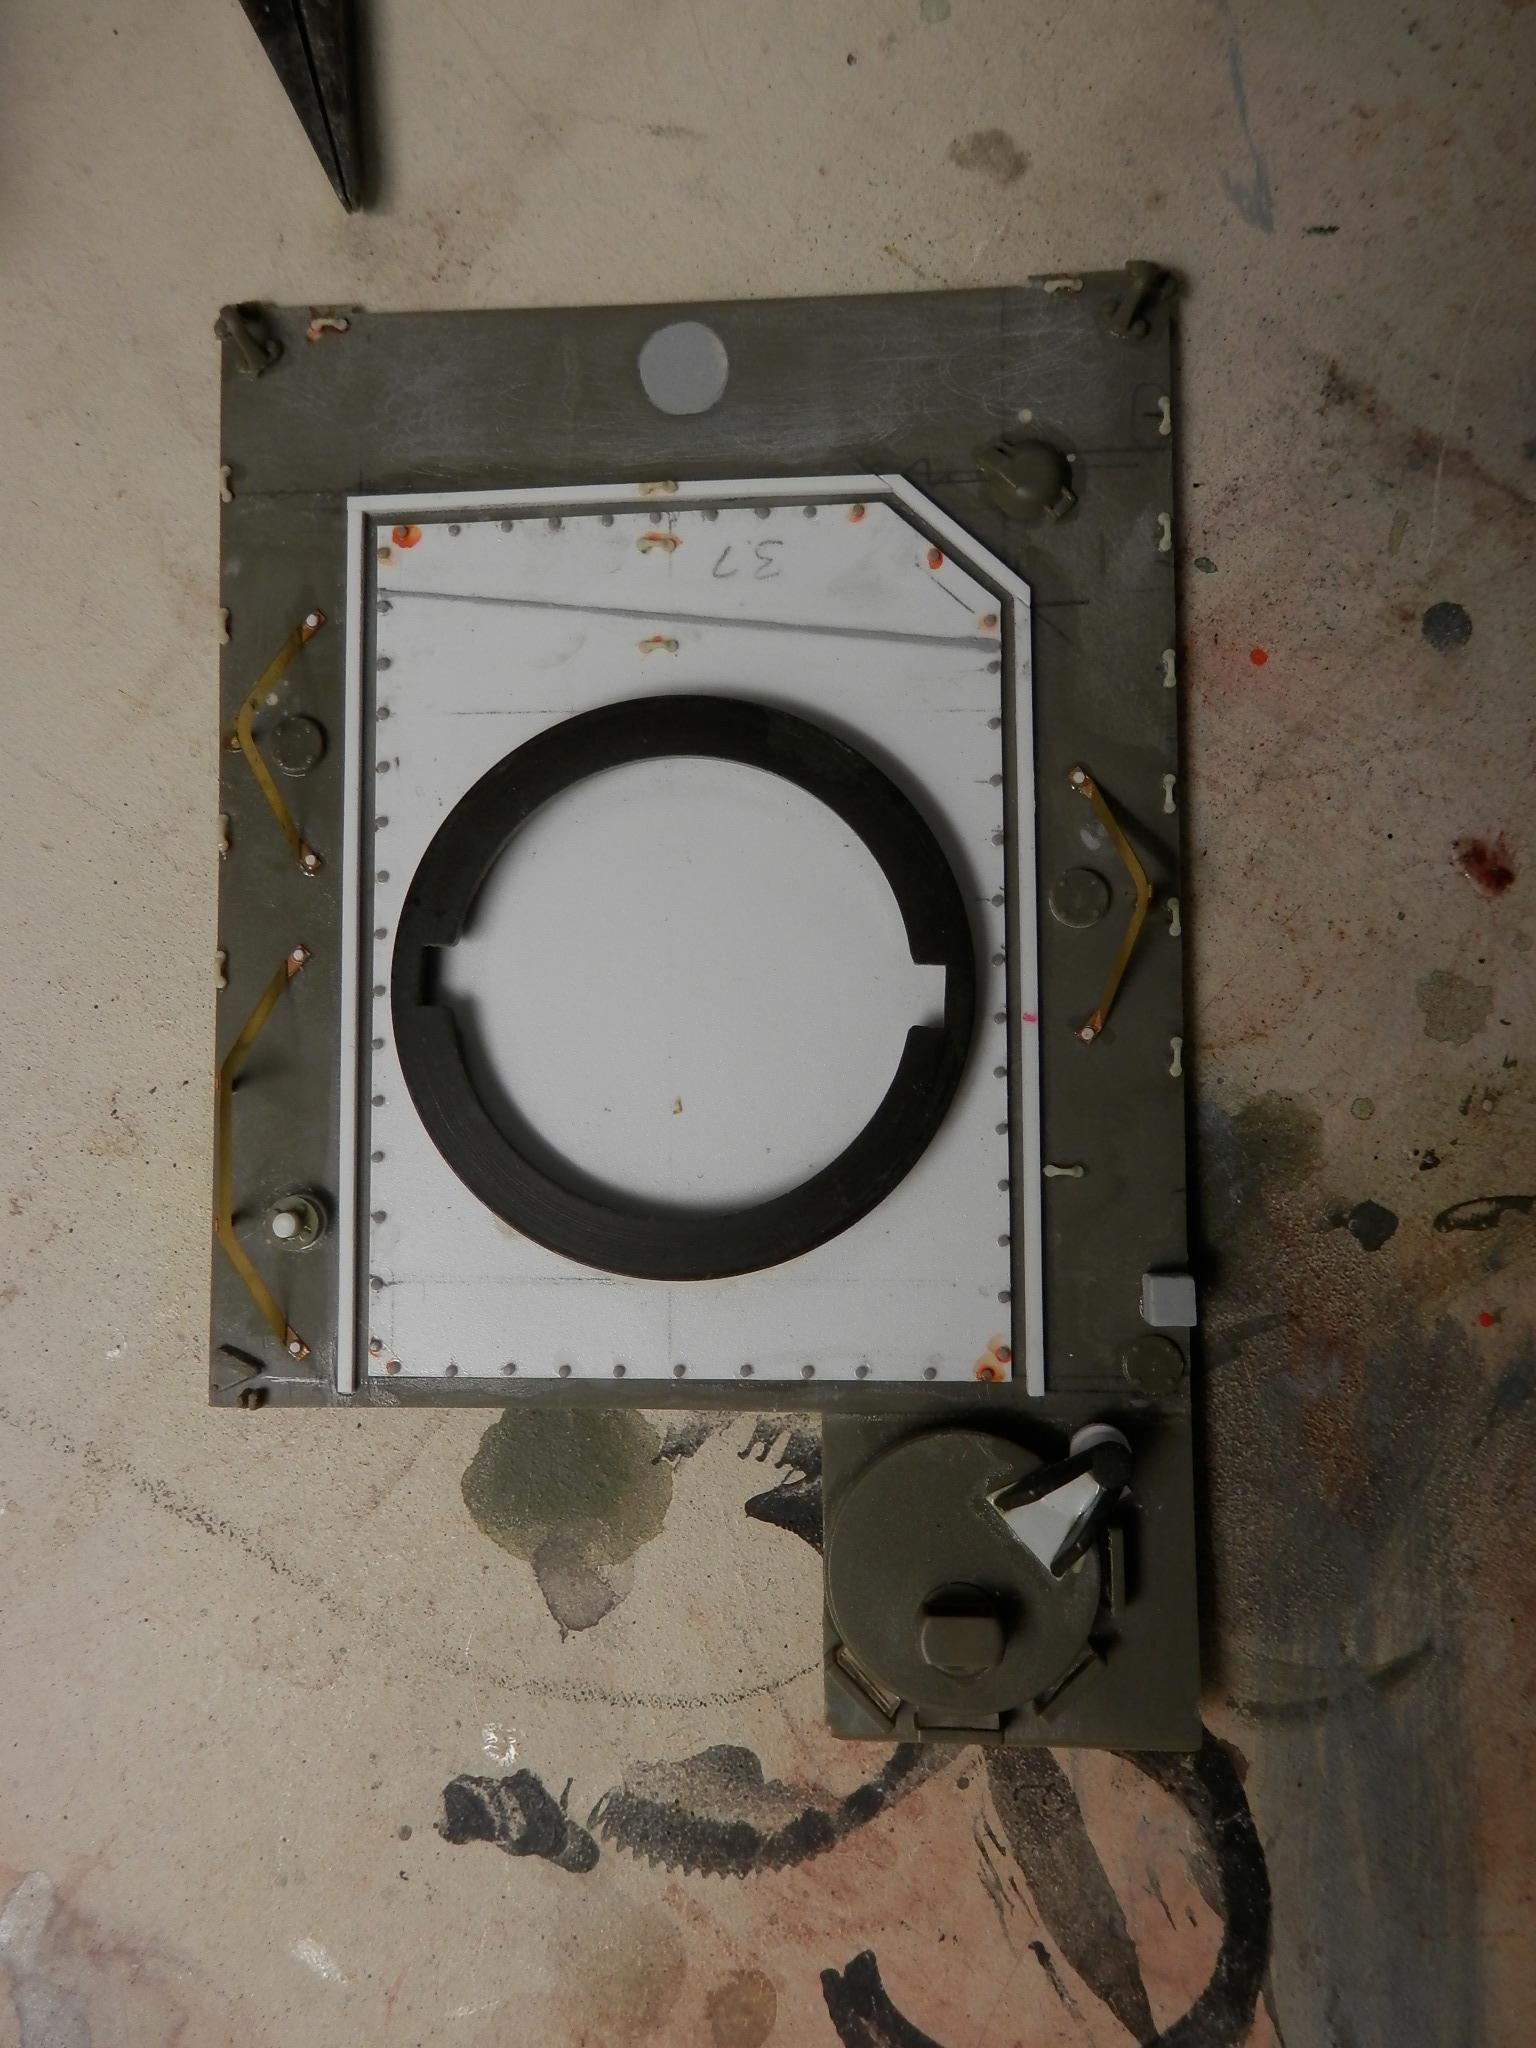
Next was to cut plastic. Once everything was cut, I dry fitted. Also at this time cut the long square rails next too the plate on the sides and back. I joined these as per the reference pics. Then added the bolts and washes along the adapter plate. I used Meng bolts for these.
Thats it atm. Everything is going to plan, which is very unusually strange.
I measure an real FSV not that long ago. Images are my notes taken. No Im not a doctor, just a mad writing. I also had a lot of pictures of the turret rings and adapter plate. So I could see if it looked right was to scale.
First up was removing all, well most of the upper deck to add all the updates and enhancements over the kits.
Then to fill in the old copula hole and rear vent fan. I did stuff up by almost gluing the plastic card on the wrong side, before adding the putty.
I compared the two upper decks. MH measurements were spot on. The deck will not fit as its for the Tamiya kit. I will use the MH part as an reference in the construction of the upper hull.
I decided to cut out the turret rings from an old Tamiya FSV. Hoping it was to scale. I was lucky as it was spot on. I sanded down the lower ring till all the plastic from the Tamiya upper deck was gone and it was the right size/scale.
I came up with the idea to use very thin cardboard to make a template before cutting any plastic. Also to confirm dimensions and look.
I also glued the Dragon turret together to help with the process.
I then used the template to help fit the turret rings.
Everything was going well.
And still is. Everything is to scale, adapter plate, Tamiya turret rings and Dragon turret. To good to believe.
Next was to cut plastic. Once everything was cut, I dry fitted. Also at this time cut the long square rails next too the plate on the sides and back. I joined these as per the reference pics. Then added the bolts and washes along the adapter plate. I used Meng bolts for these.
Thats it atm. Everything is going to plan, which is very unusually strange.
bat_213

Joined: January 07, 2019
KitMaker: 110 posts
Armorama: 95 posts
Posted: Friday, April 17, 2020 - 11:06 AM UTC
 your build is looking very good .

gibbo
Joined: June 21, 2004
KitMaker: 30 posts
Armorama: 30 posts
Posted: Friday, April 17, 2020 - 10:57 PM UTC
Thanks Mate, much appreciated. 
Top of the hull is going pretty good. So instead of rushing in and stuffing it up. Im going to complete the front of the hull, before mating the top to the rest of the hull.
Ok first up was the trim vane. The last M113A2 I did I made it out of balsa wood and the extension out of some folded foil. It look and turned out really well. The AFV Club kit trim vain has some very good detail on it, compared to the older kits. So Ieft the the main part as is. The extension on the FSV was larger than the stock Aust M113A1. So did some measuring up and made one out of plastic, not as good as my previous vehicle, but ok. Added the kit PE and hinges.
I had removed all the details not up to standard and started gluing on the kit head lights, trim vane extension handle, light guards and horn.
I then added the wire for the headlights and horn.
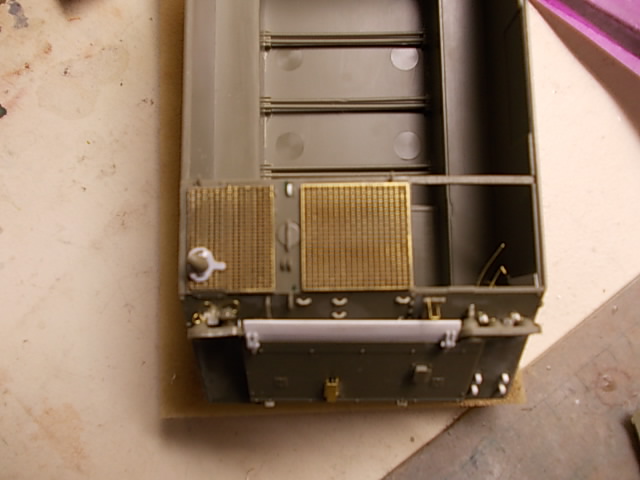
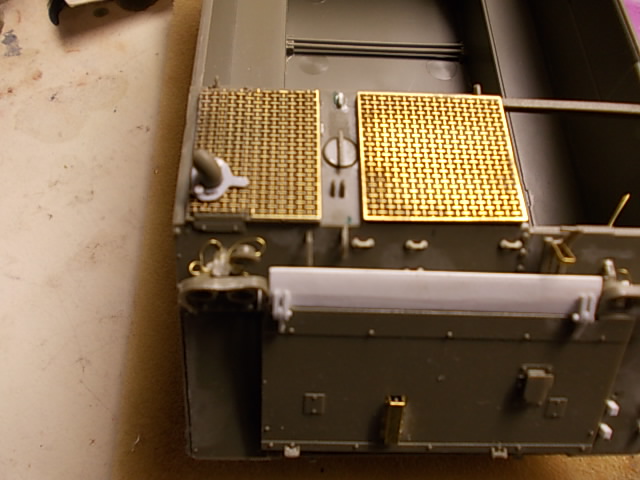
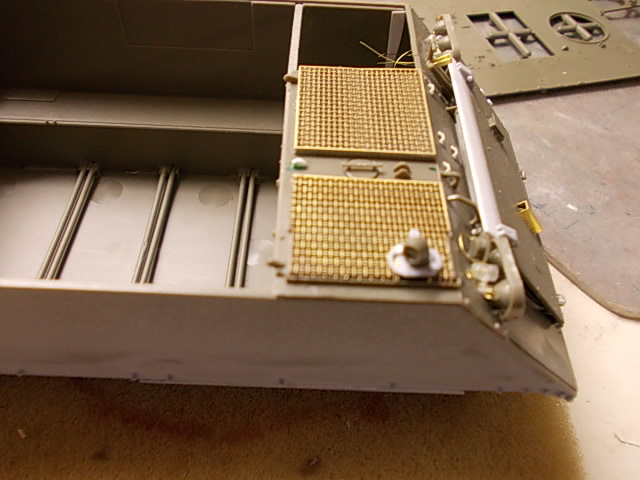
The engine grills were eduard PE set for the kit and an old PE grill I had in the spares box, that looked the closest match to the real thing. I also added the MH exhaust handle. The Arms Corp footman loops were added for the shovel. I also dry fitted the spare MK track links and added the mounts for them.
Once again happy with the progress.
Top of the hull is going pretty good. So instead of rushing in and stuffing it up. Im going to complete the front of the hull, before mating the top to the rest of the hull.
Ok first up was the trim vane. The last M113A2 I did I made it out of balsa wood and the extension out of some folded foil. It look and turned out really well. The AFV Club kit trim vain has some very good detail on it, compared to the older kits. So Ieft the the main part as is. The extension on the FSV was larger than the stock Aust M113A1. So did some measuring up and made one out of plastic, not as good as my previous vehicle, but ok. Added the kit PE and hinges.
I had removed all the details not up to standard and started gluing on the kit head lights, trim vane extension handle, light guards and horn.
I then added the wire for the headlights and horn.
The engine grills were eduard PE set for the kit and an old PE grill I had in the spares box, that looked the closest match to the real thing. I also added the MH exhaust handle. The Arms Corp footman loops were added for the shovel. I also dry fitted the spare MK track links and added the mounts for them.
Once again happy with the progress.
gibbo
Joined: June 21, 2004
KitMaker: 30 posts
Armorama: 30 posts
Posted: Friday, April 24, 2020 - 12:41 AM UTC
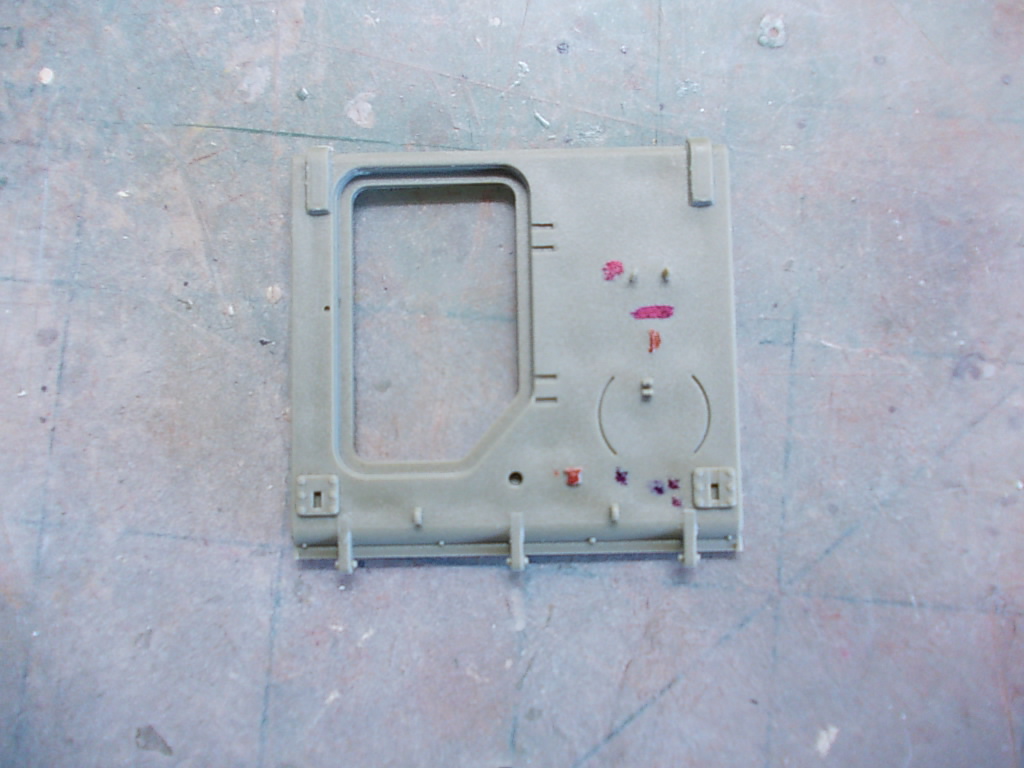
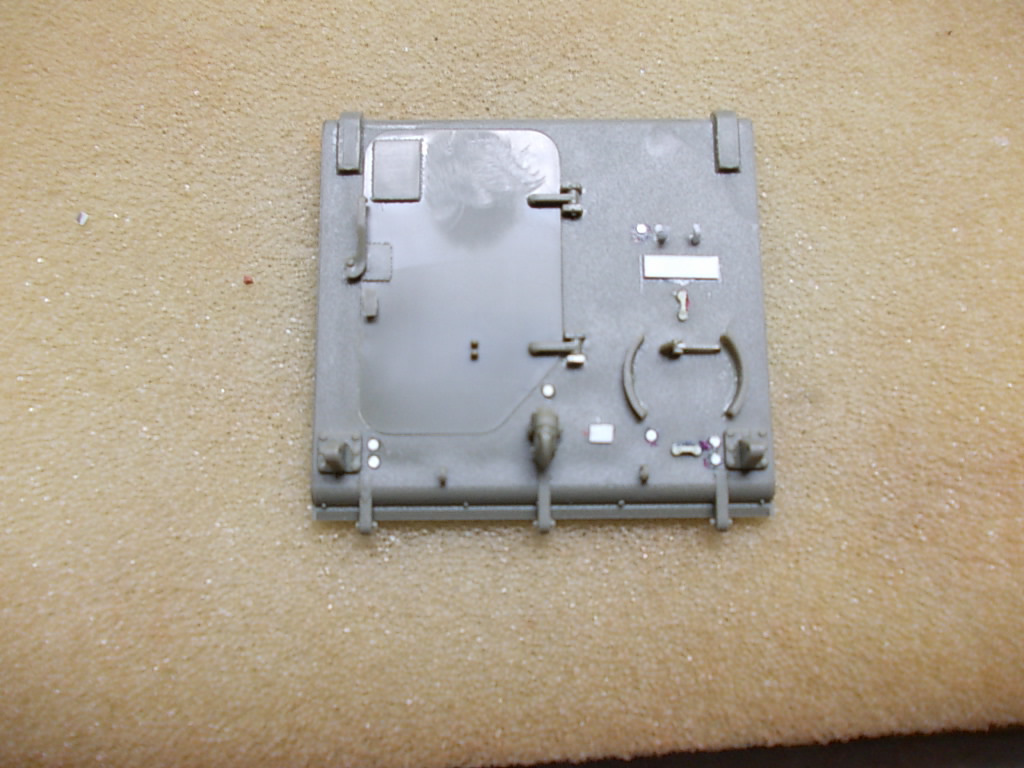
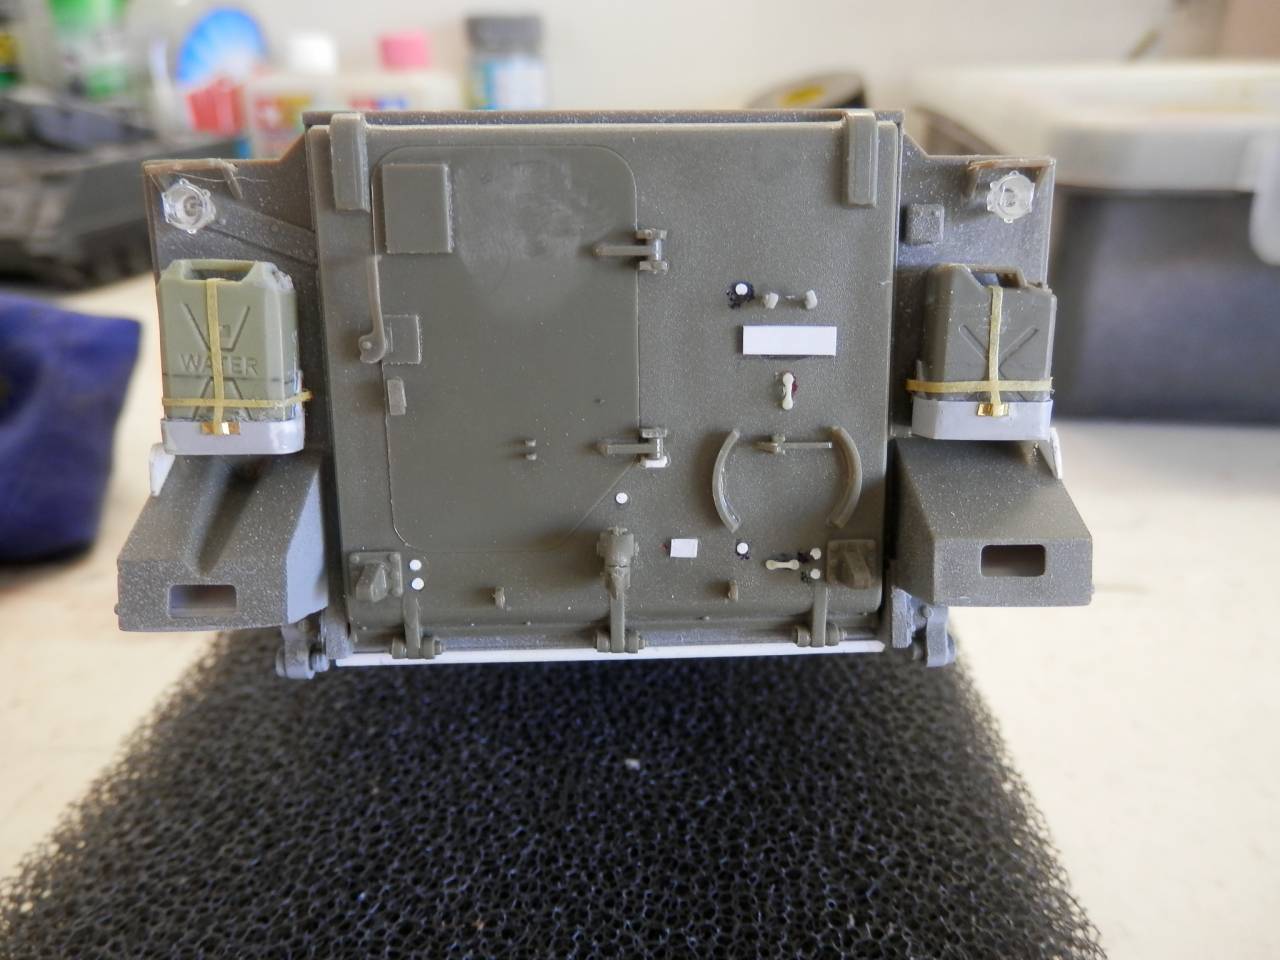
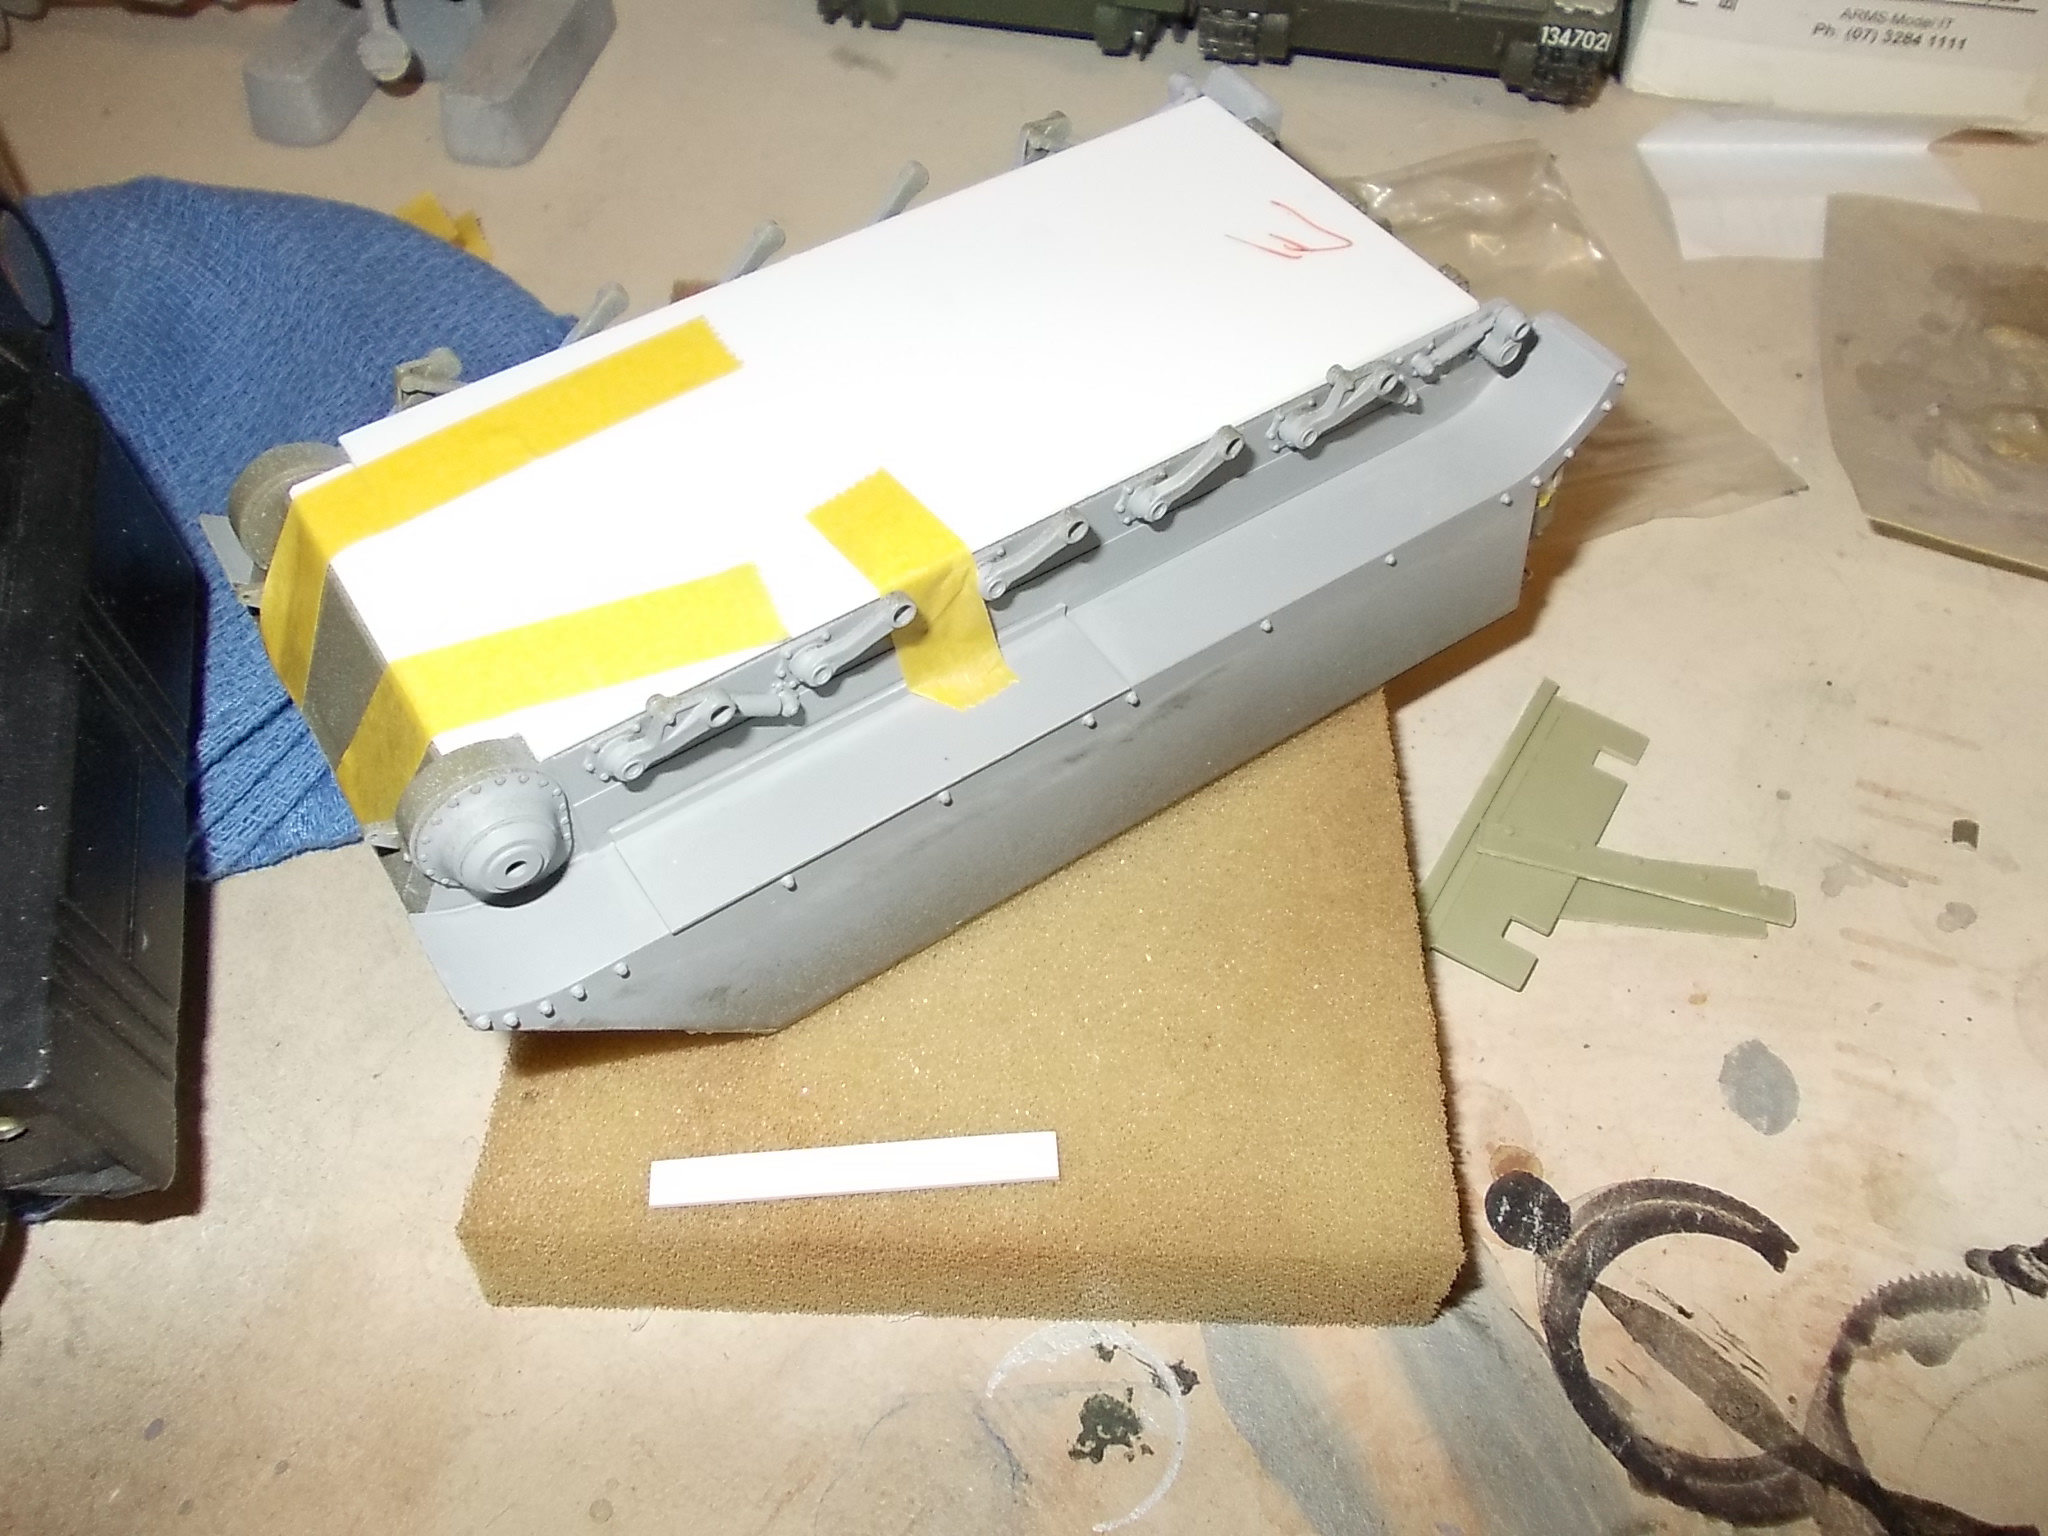
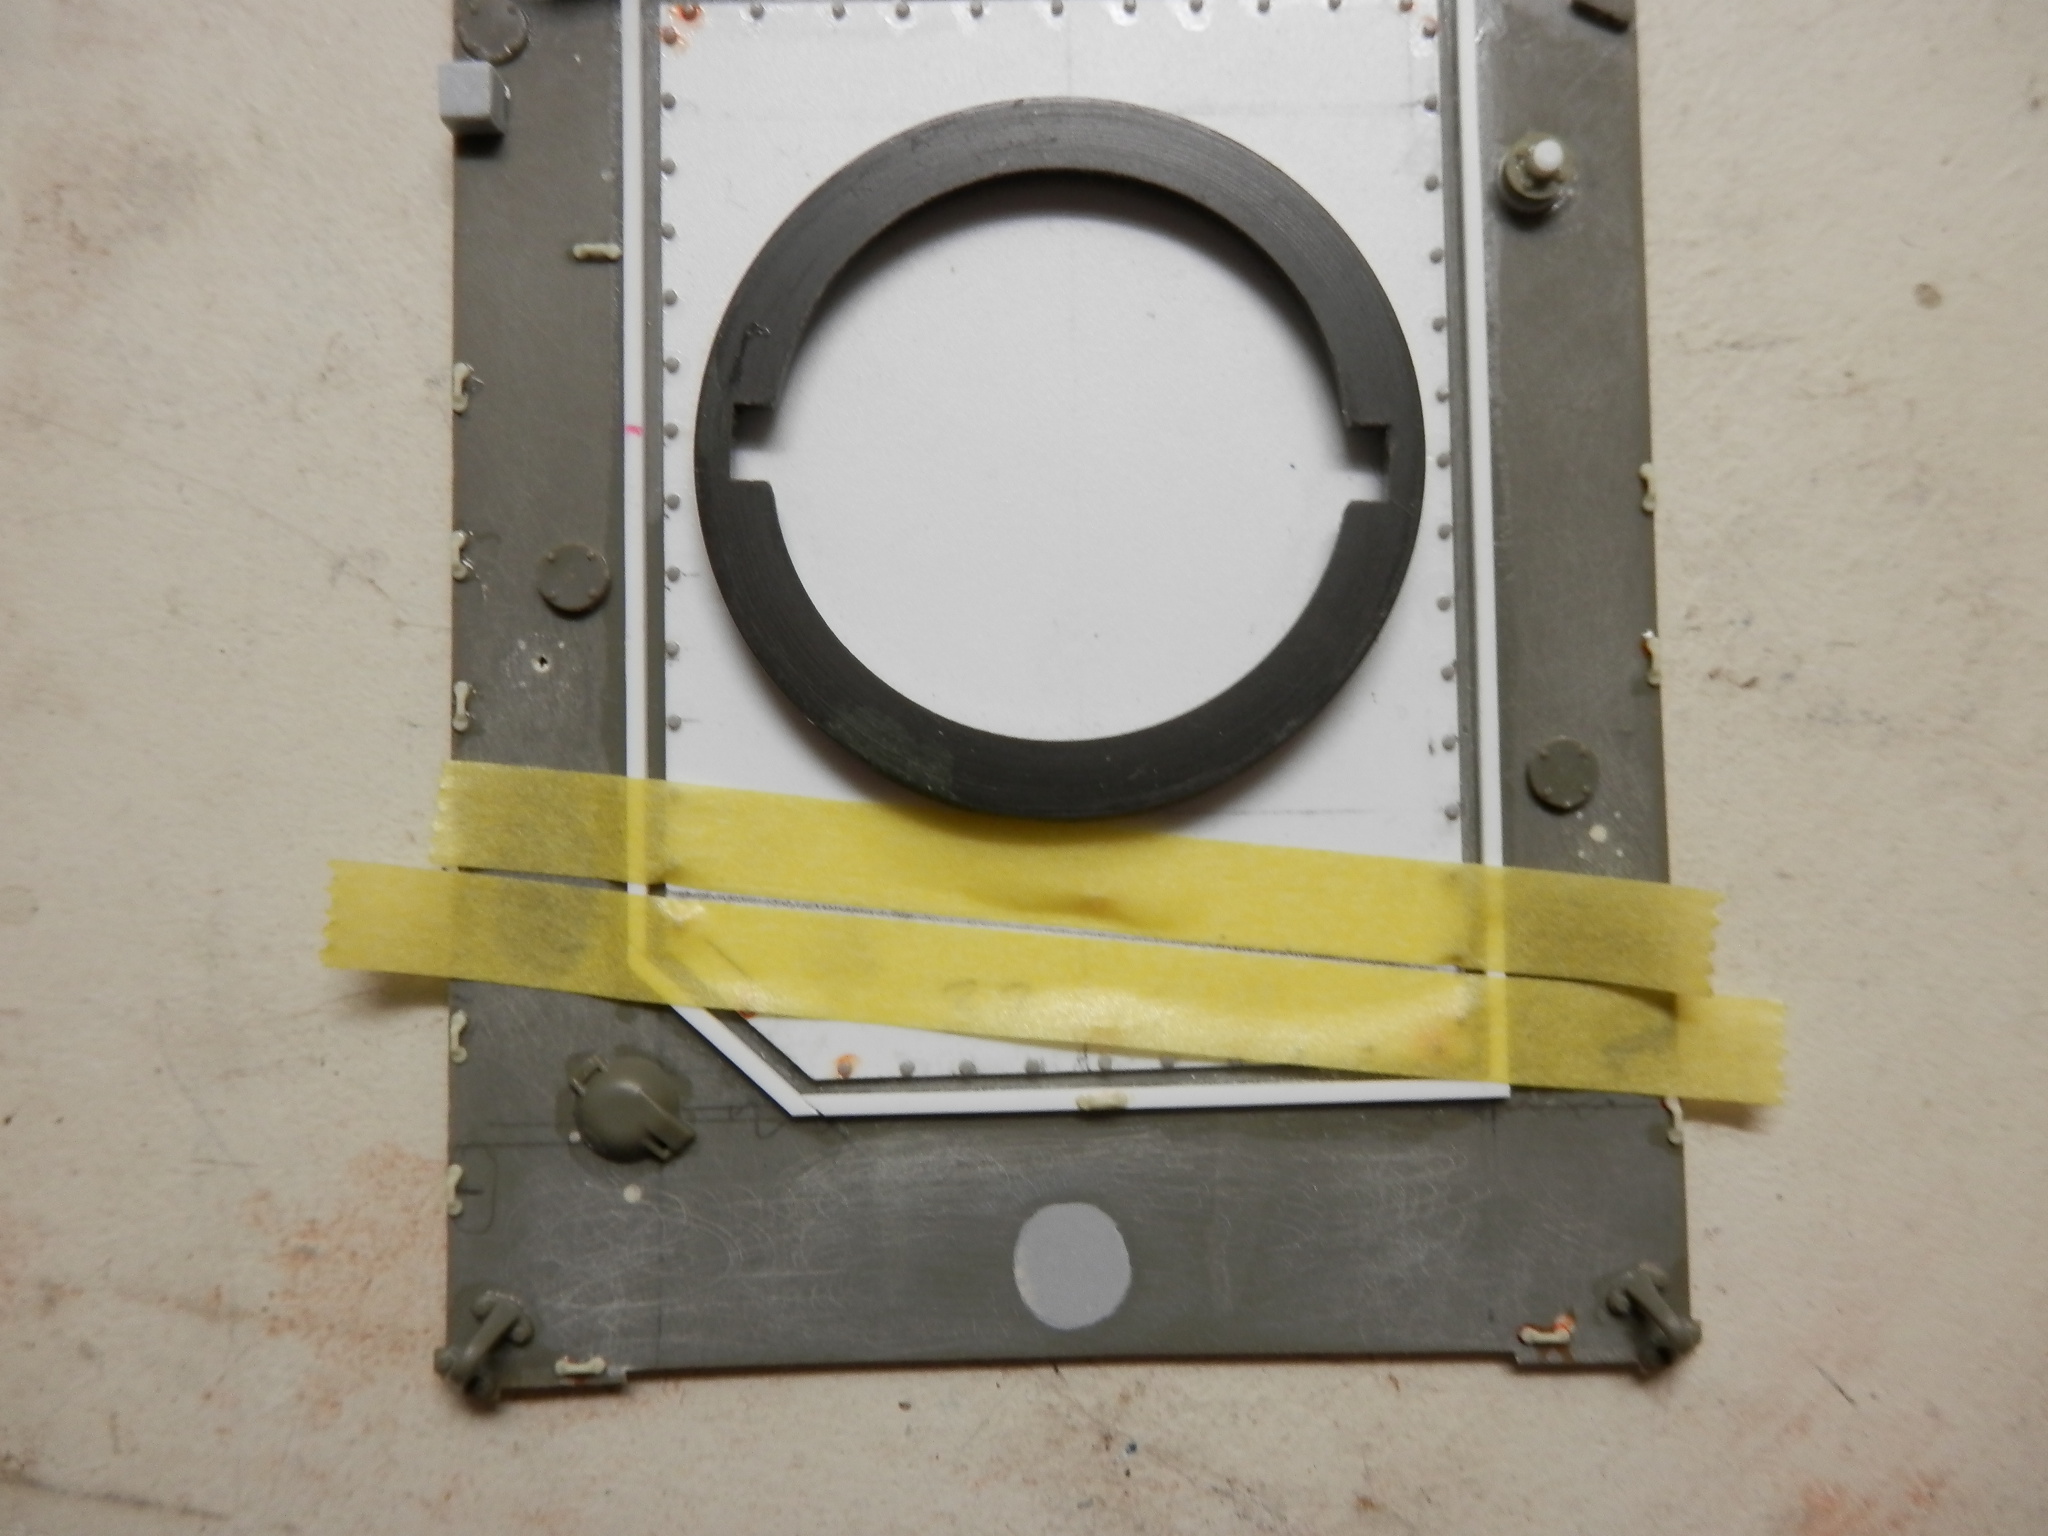
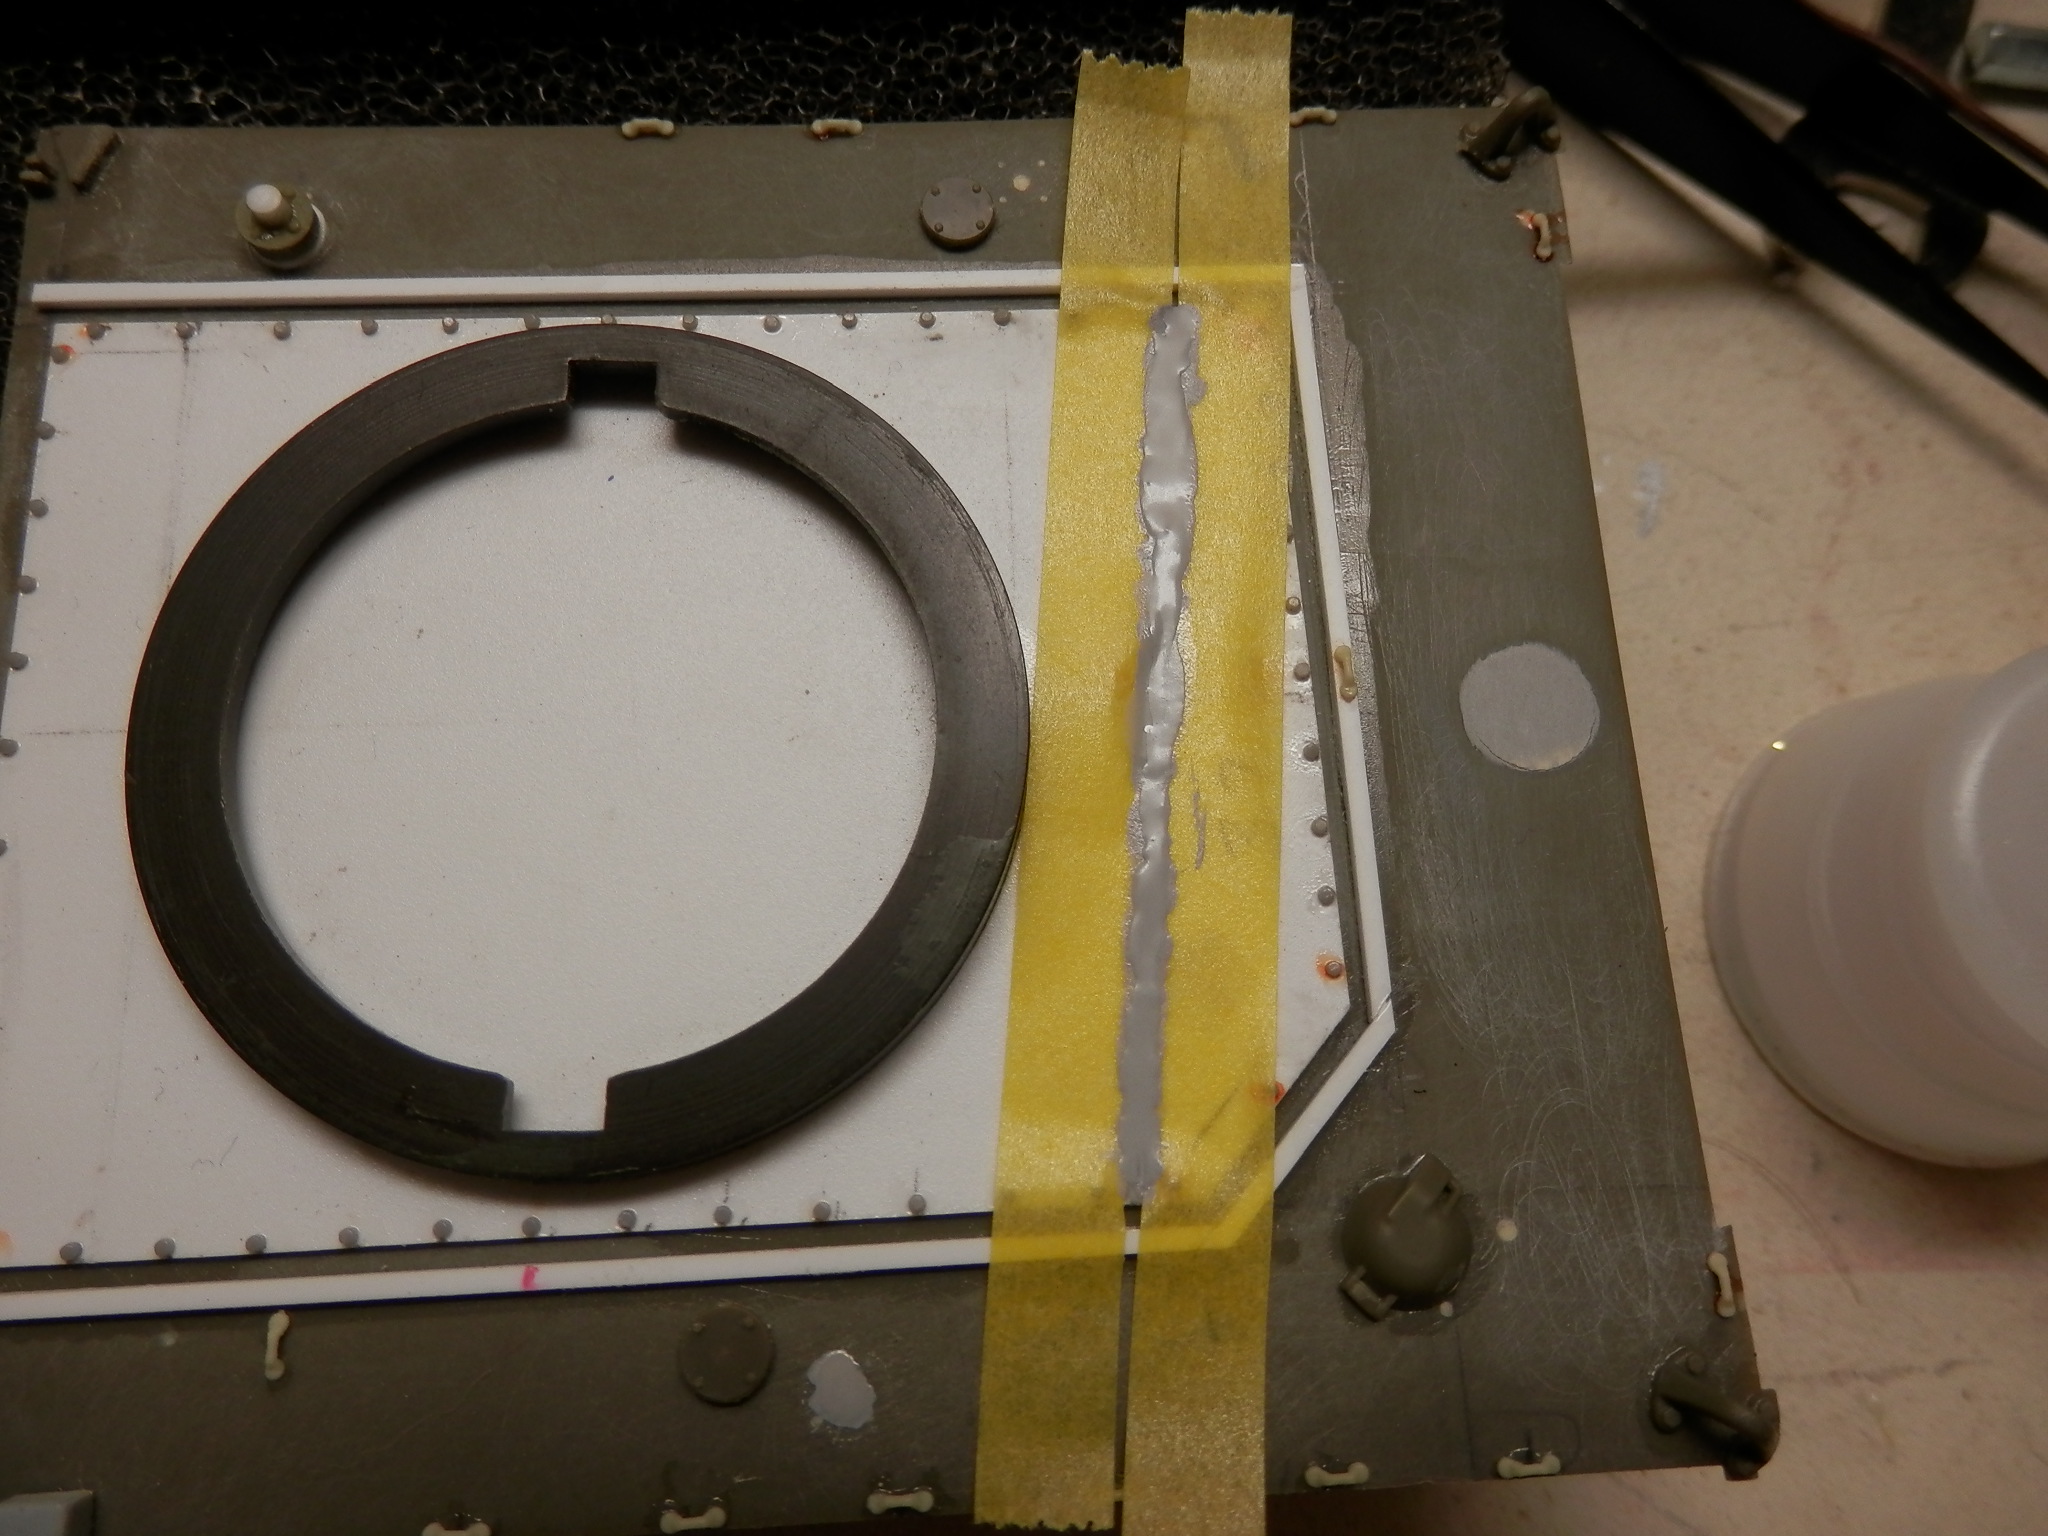
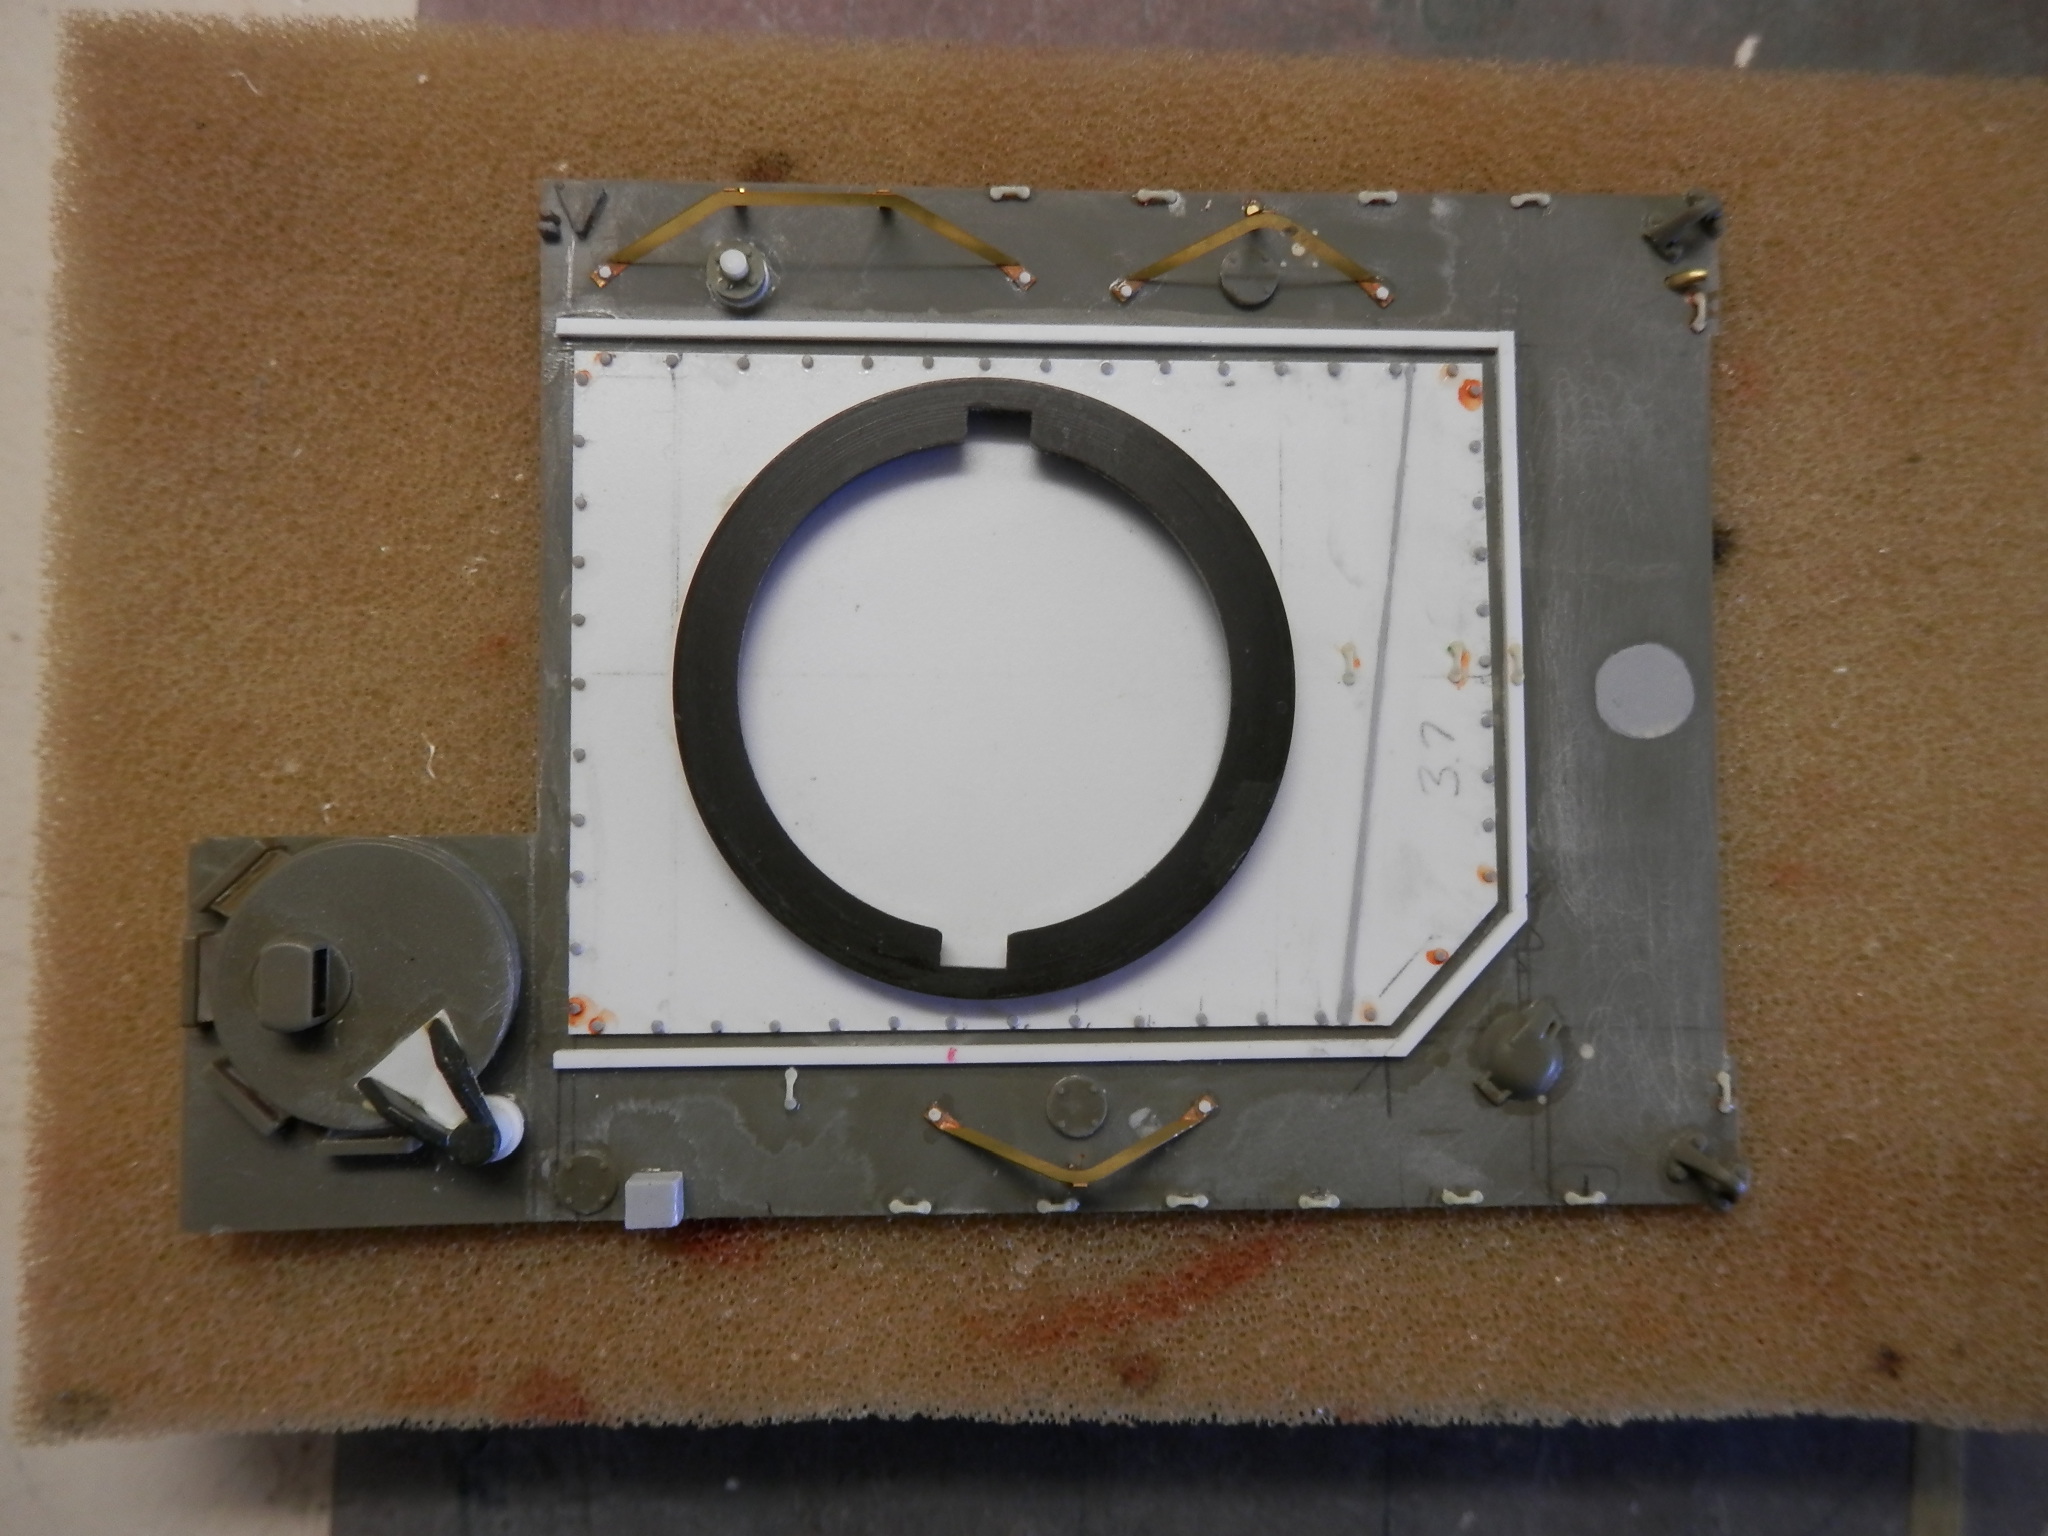
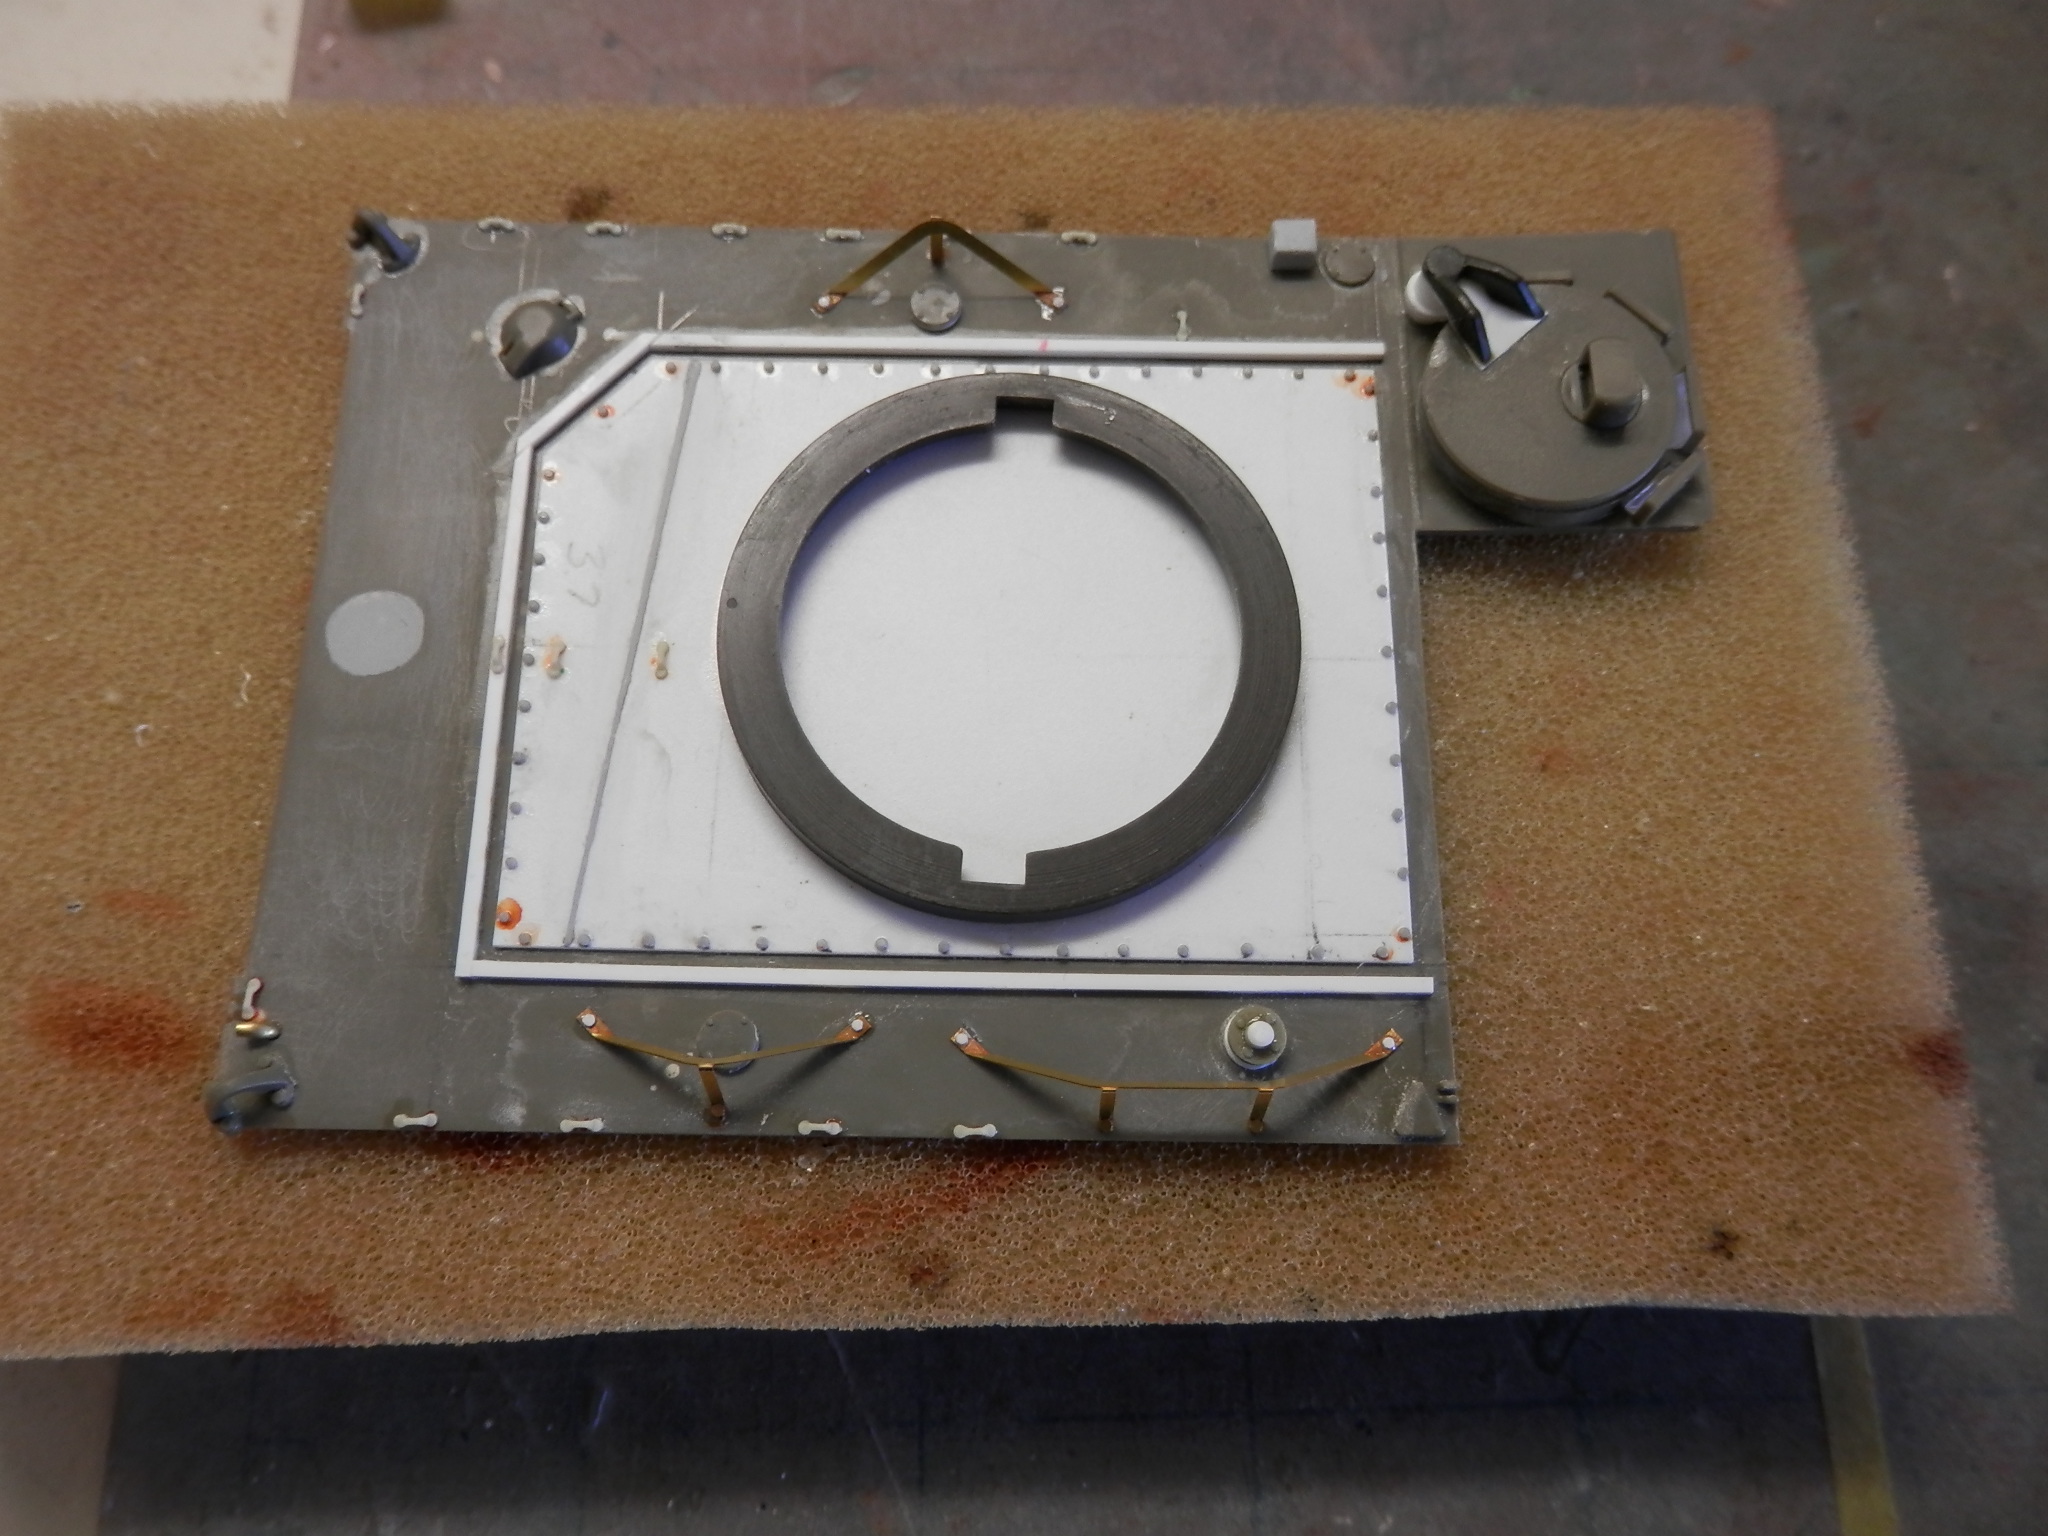
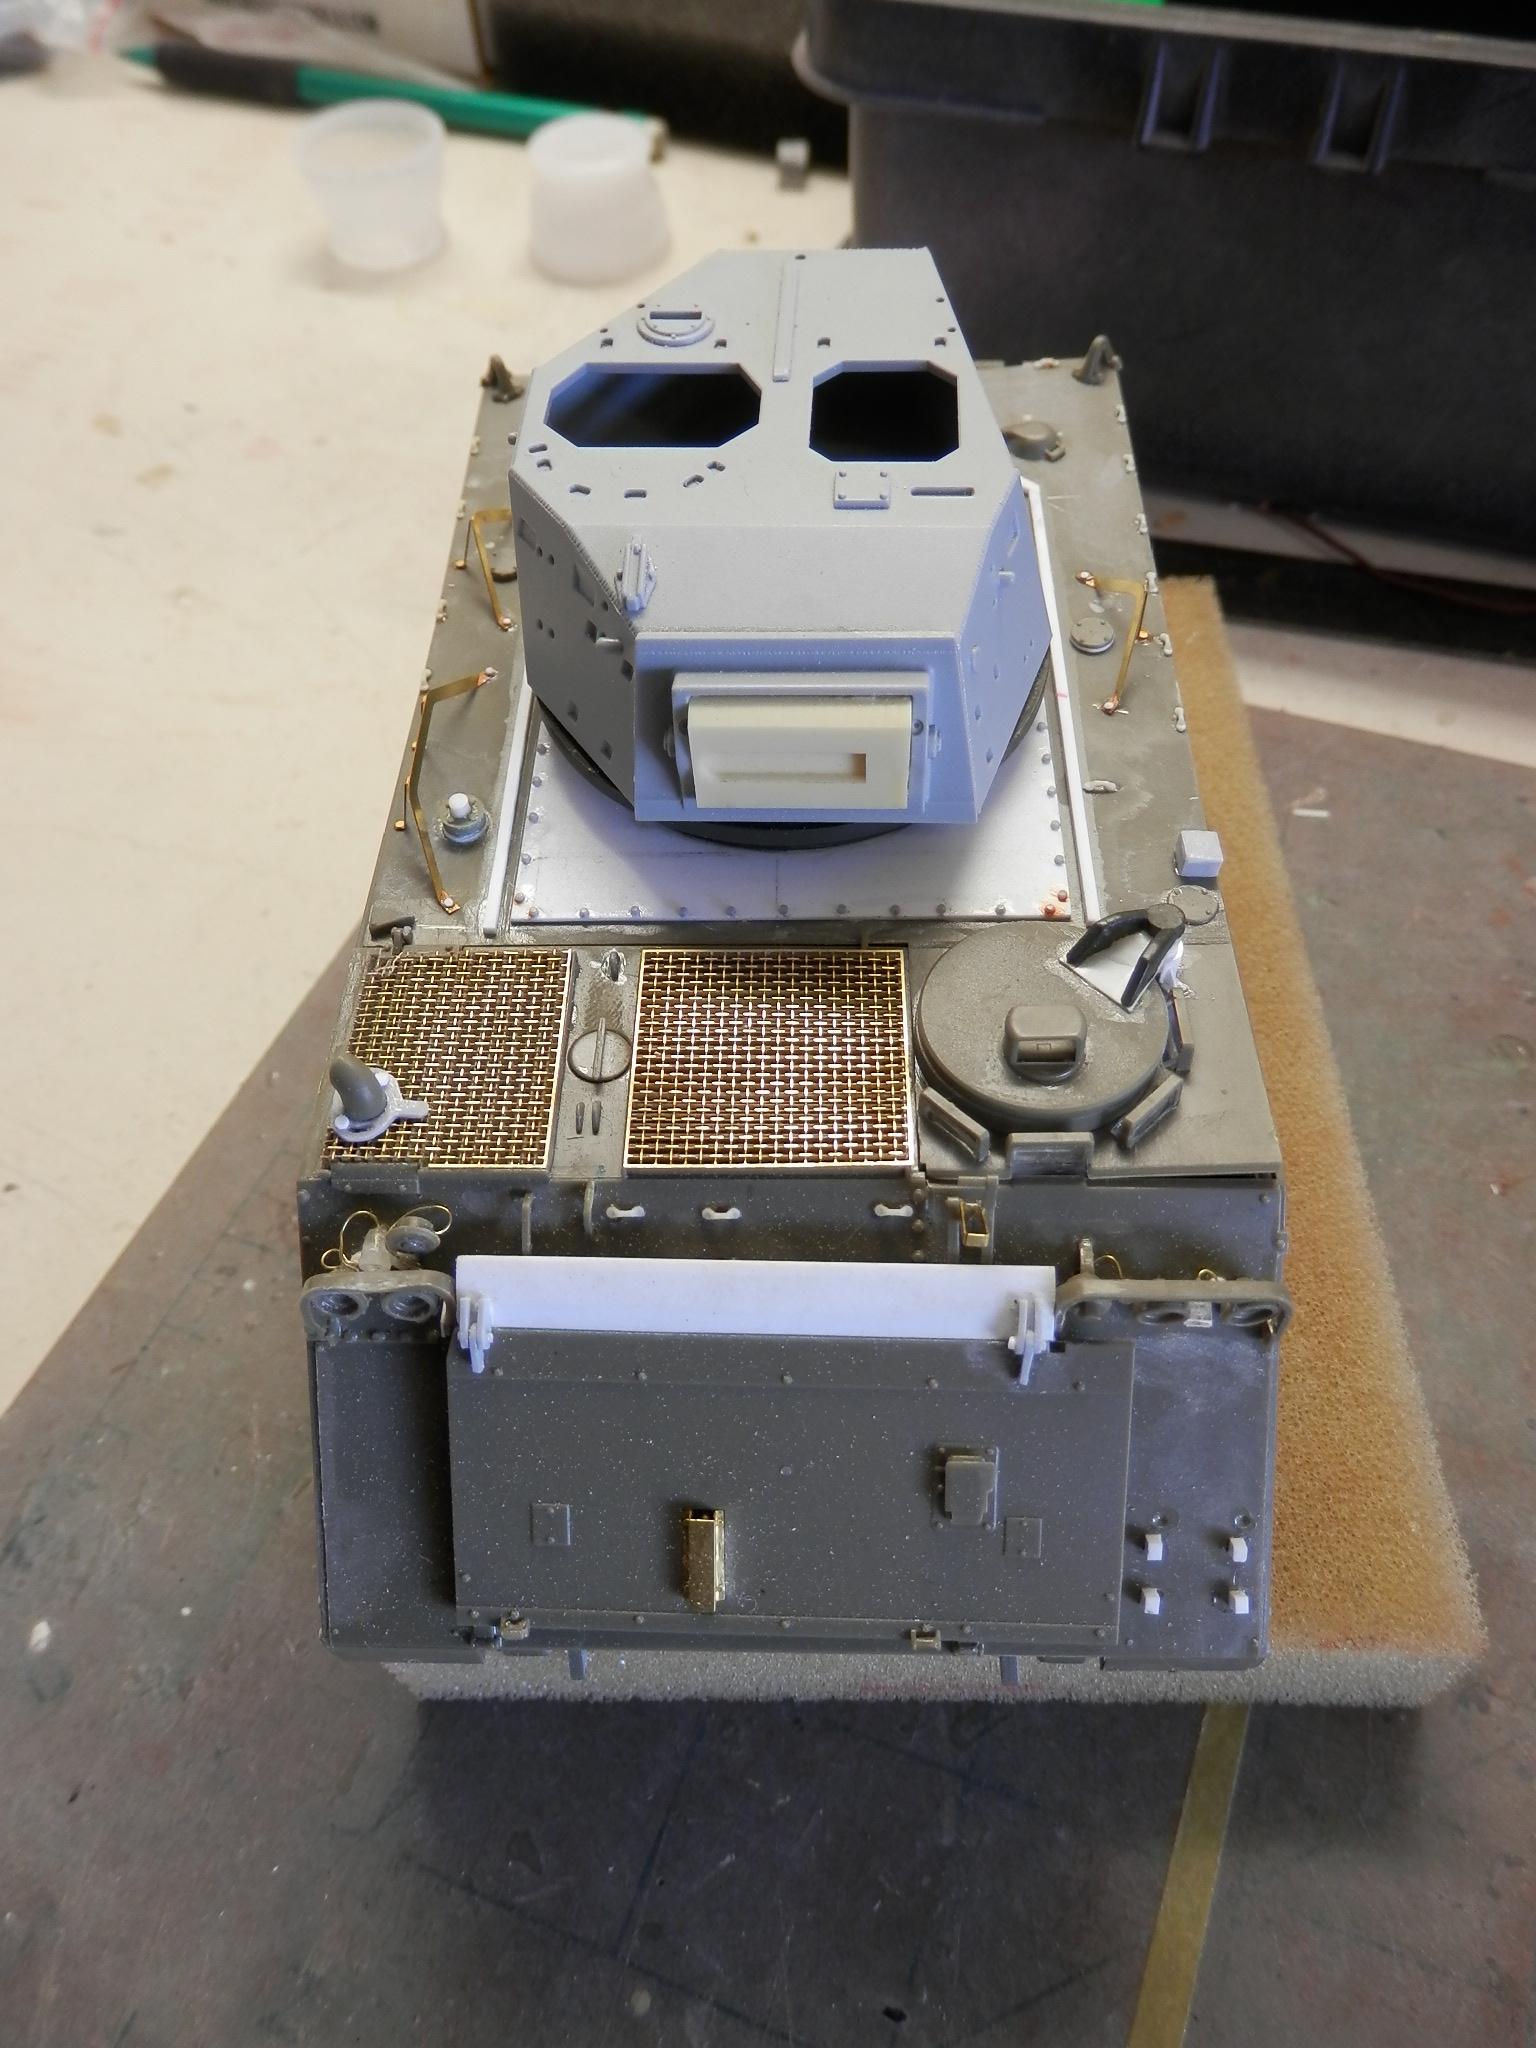
Next is the drivers hatch and weld the runs across the back of the adapter plate. I have no idea why there is a weld there. Its on all FSV I have seen.

The drivers hatch on the Tamiya is way off. I grab one of a donor kit and tried the best to make it a bit accurate. Not the best effort. I dont know if I will try and improve on this one.
The weld line was drawn first.
Then mask off on both sides and Surfacer 500 painted on. Removed the tape and gave it a light sand.
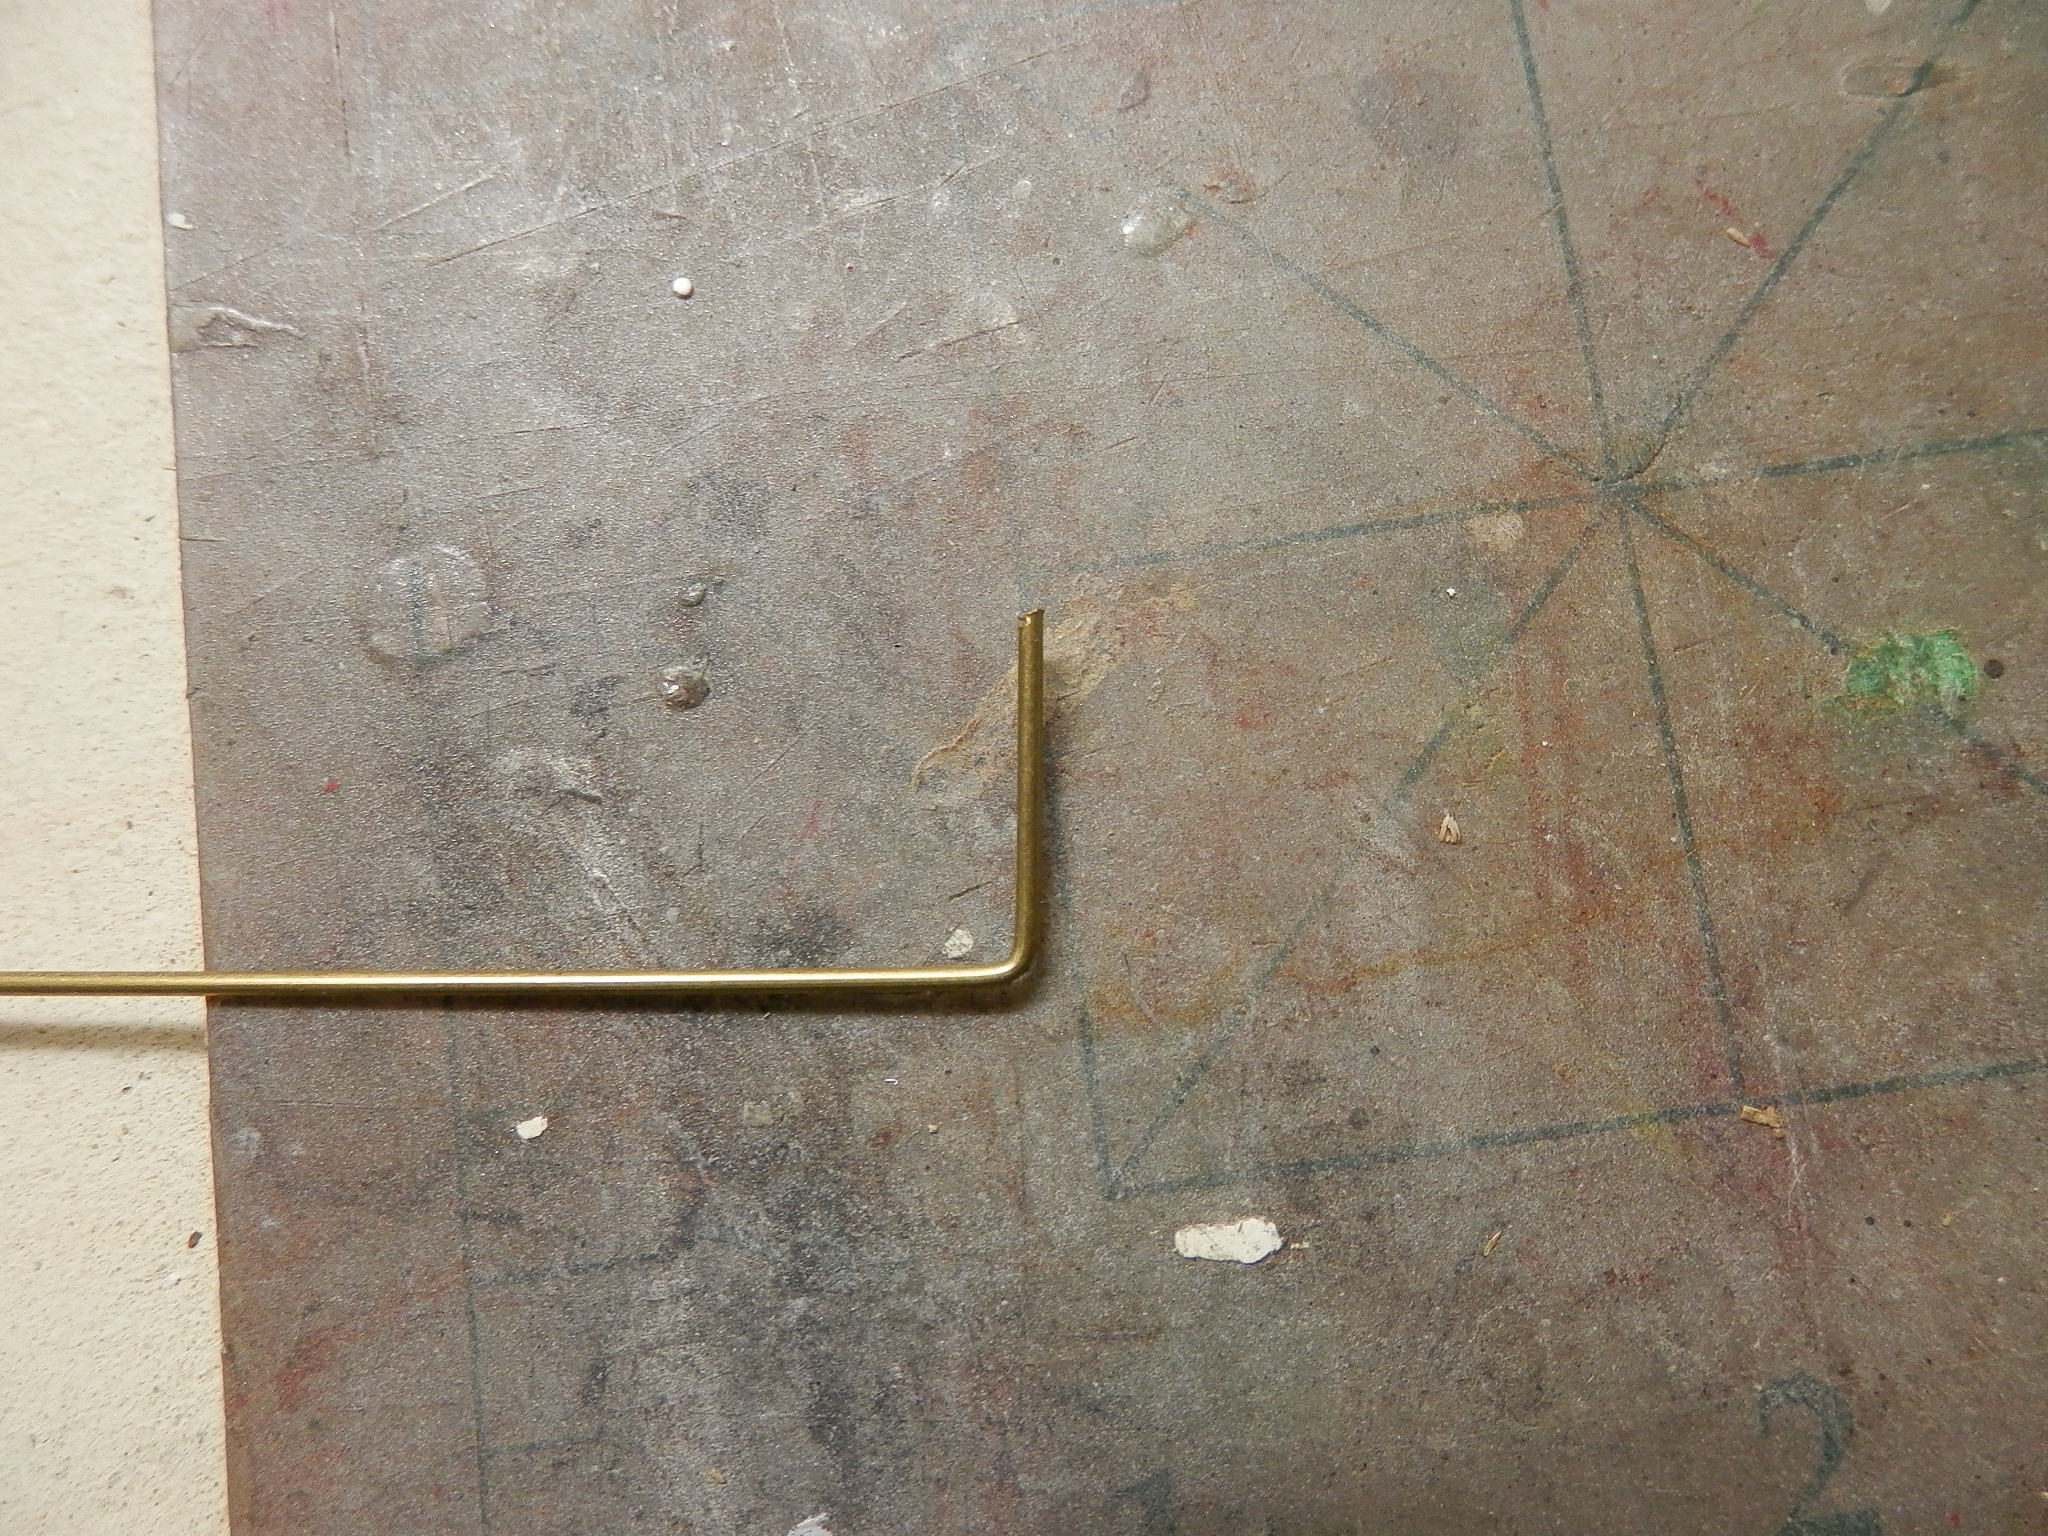
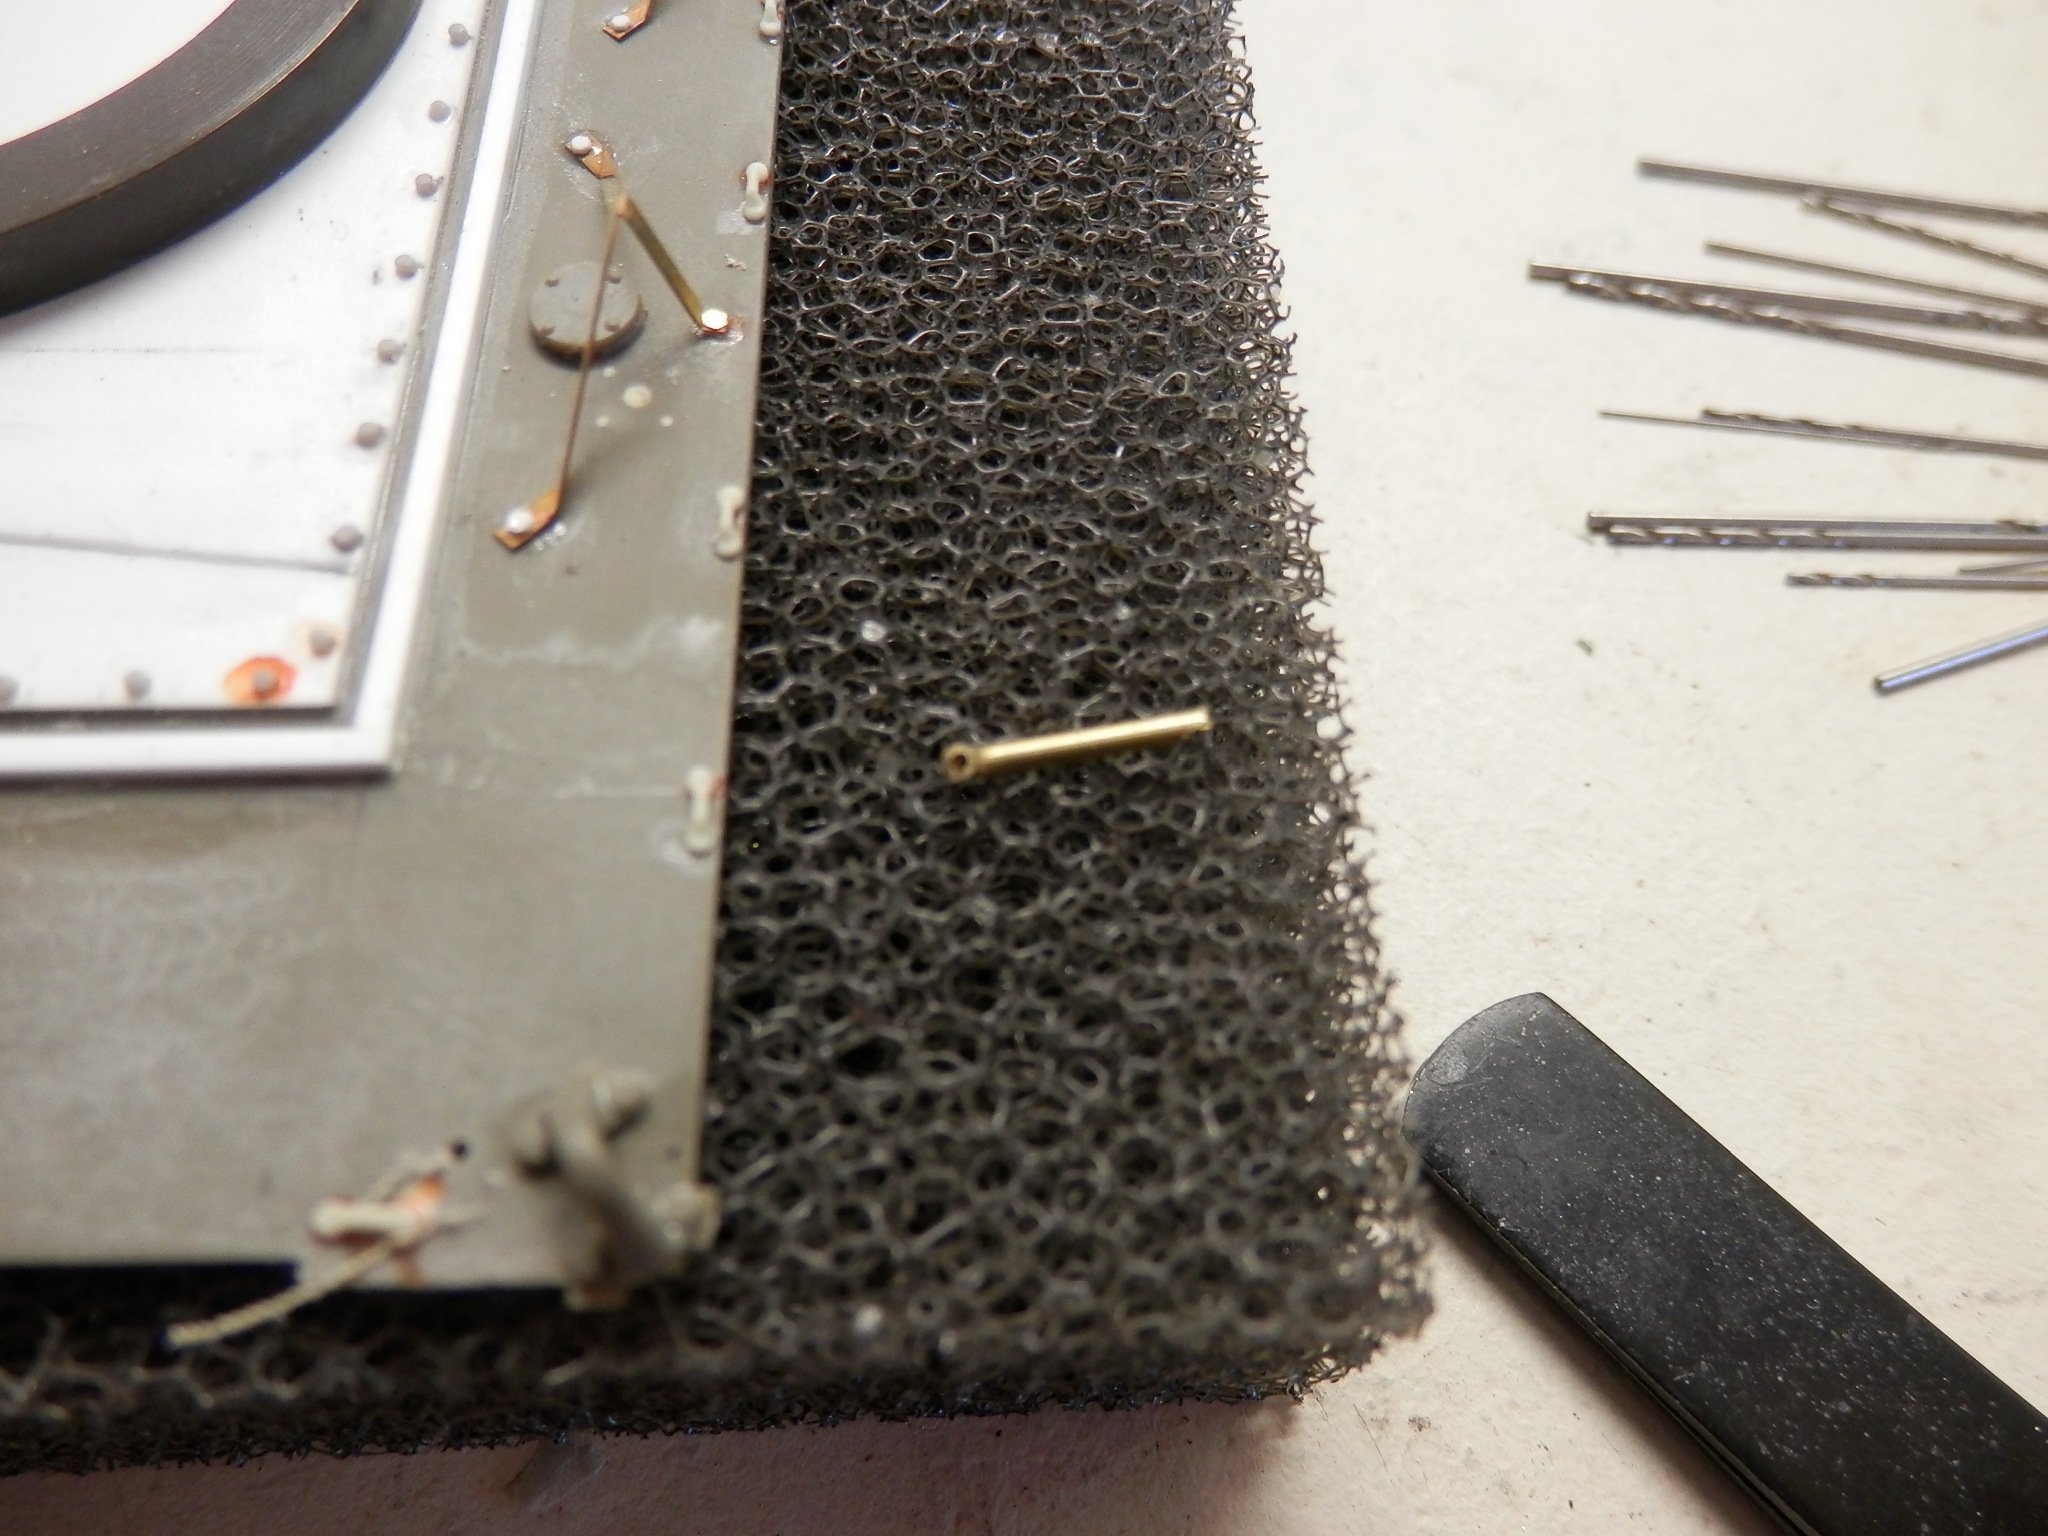
Next up was the bingle pipe on the right rear. Well I lost the kit one. So made one up from some brass pipe.
I also did the left and right side footman loops. Left over Arms Corp Models ones I had. The Ant guards were replaced by Eduard PE and added plates for the AMUs. The MH fire extinguisher handle and housing was taken off the FSV conversion. All the kit parts that were GTG were added.

As Im about to go away for work for a month. Hes some pictures off the top of the hull dry fitted to the hull as well as the turret placed on. I have one last thing to do the hull. Thats the rear footman loops for the pioneer tools. When Im back.
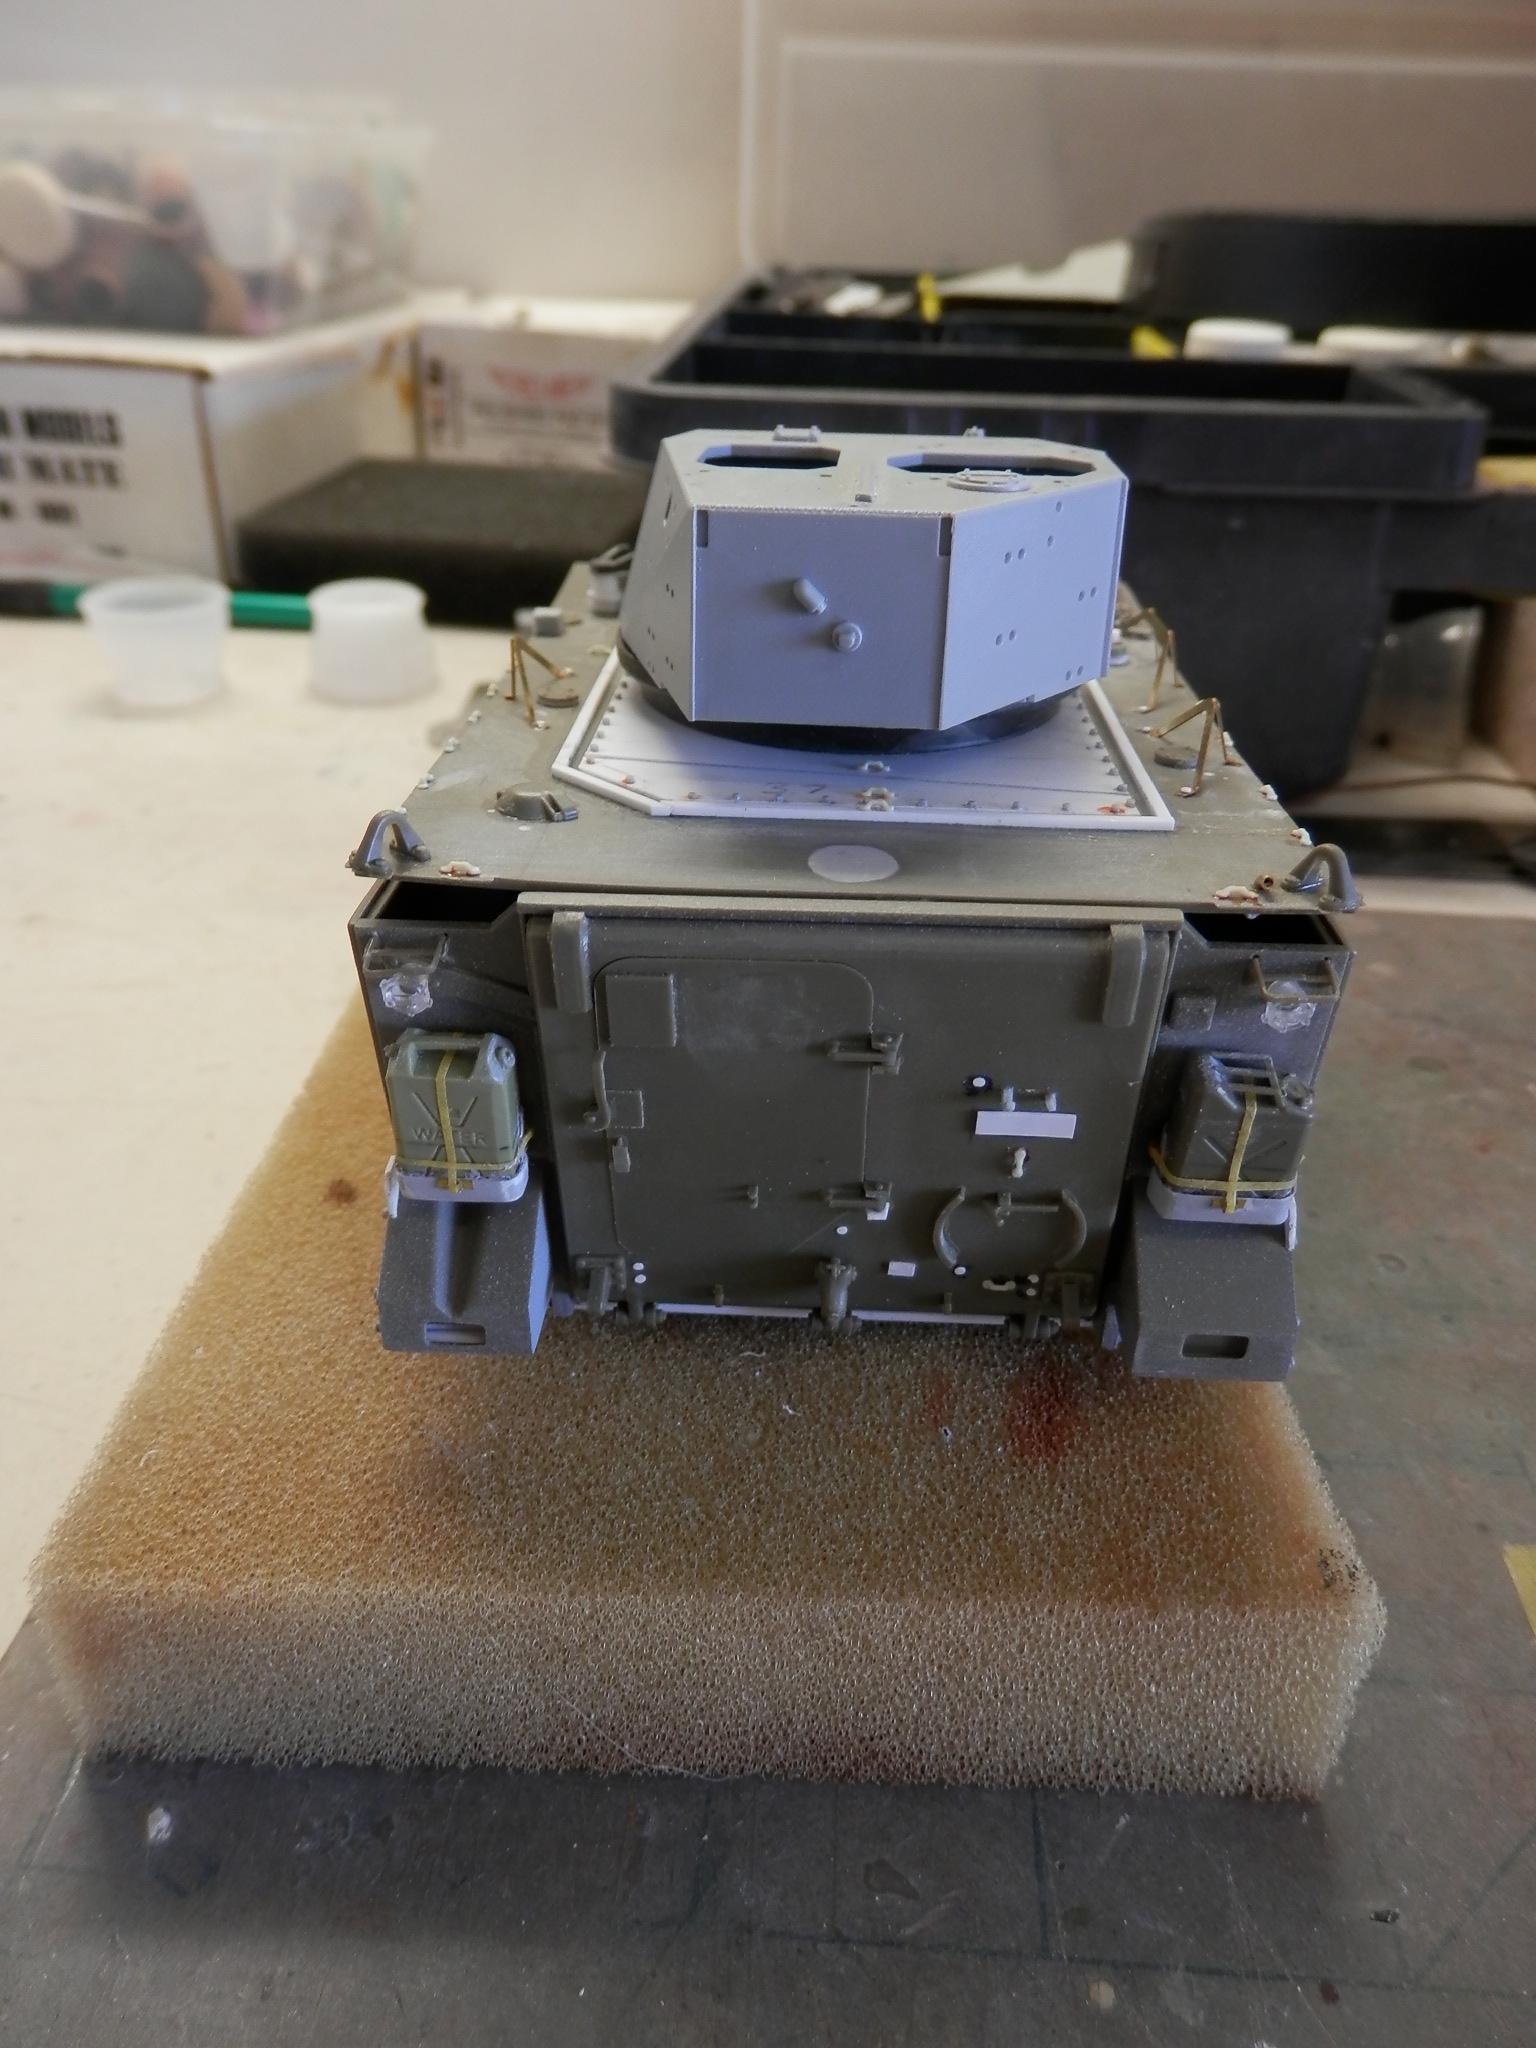
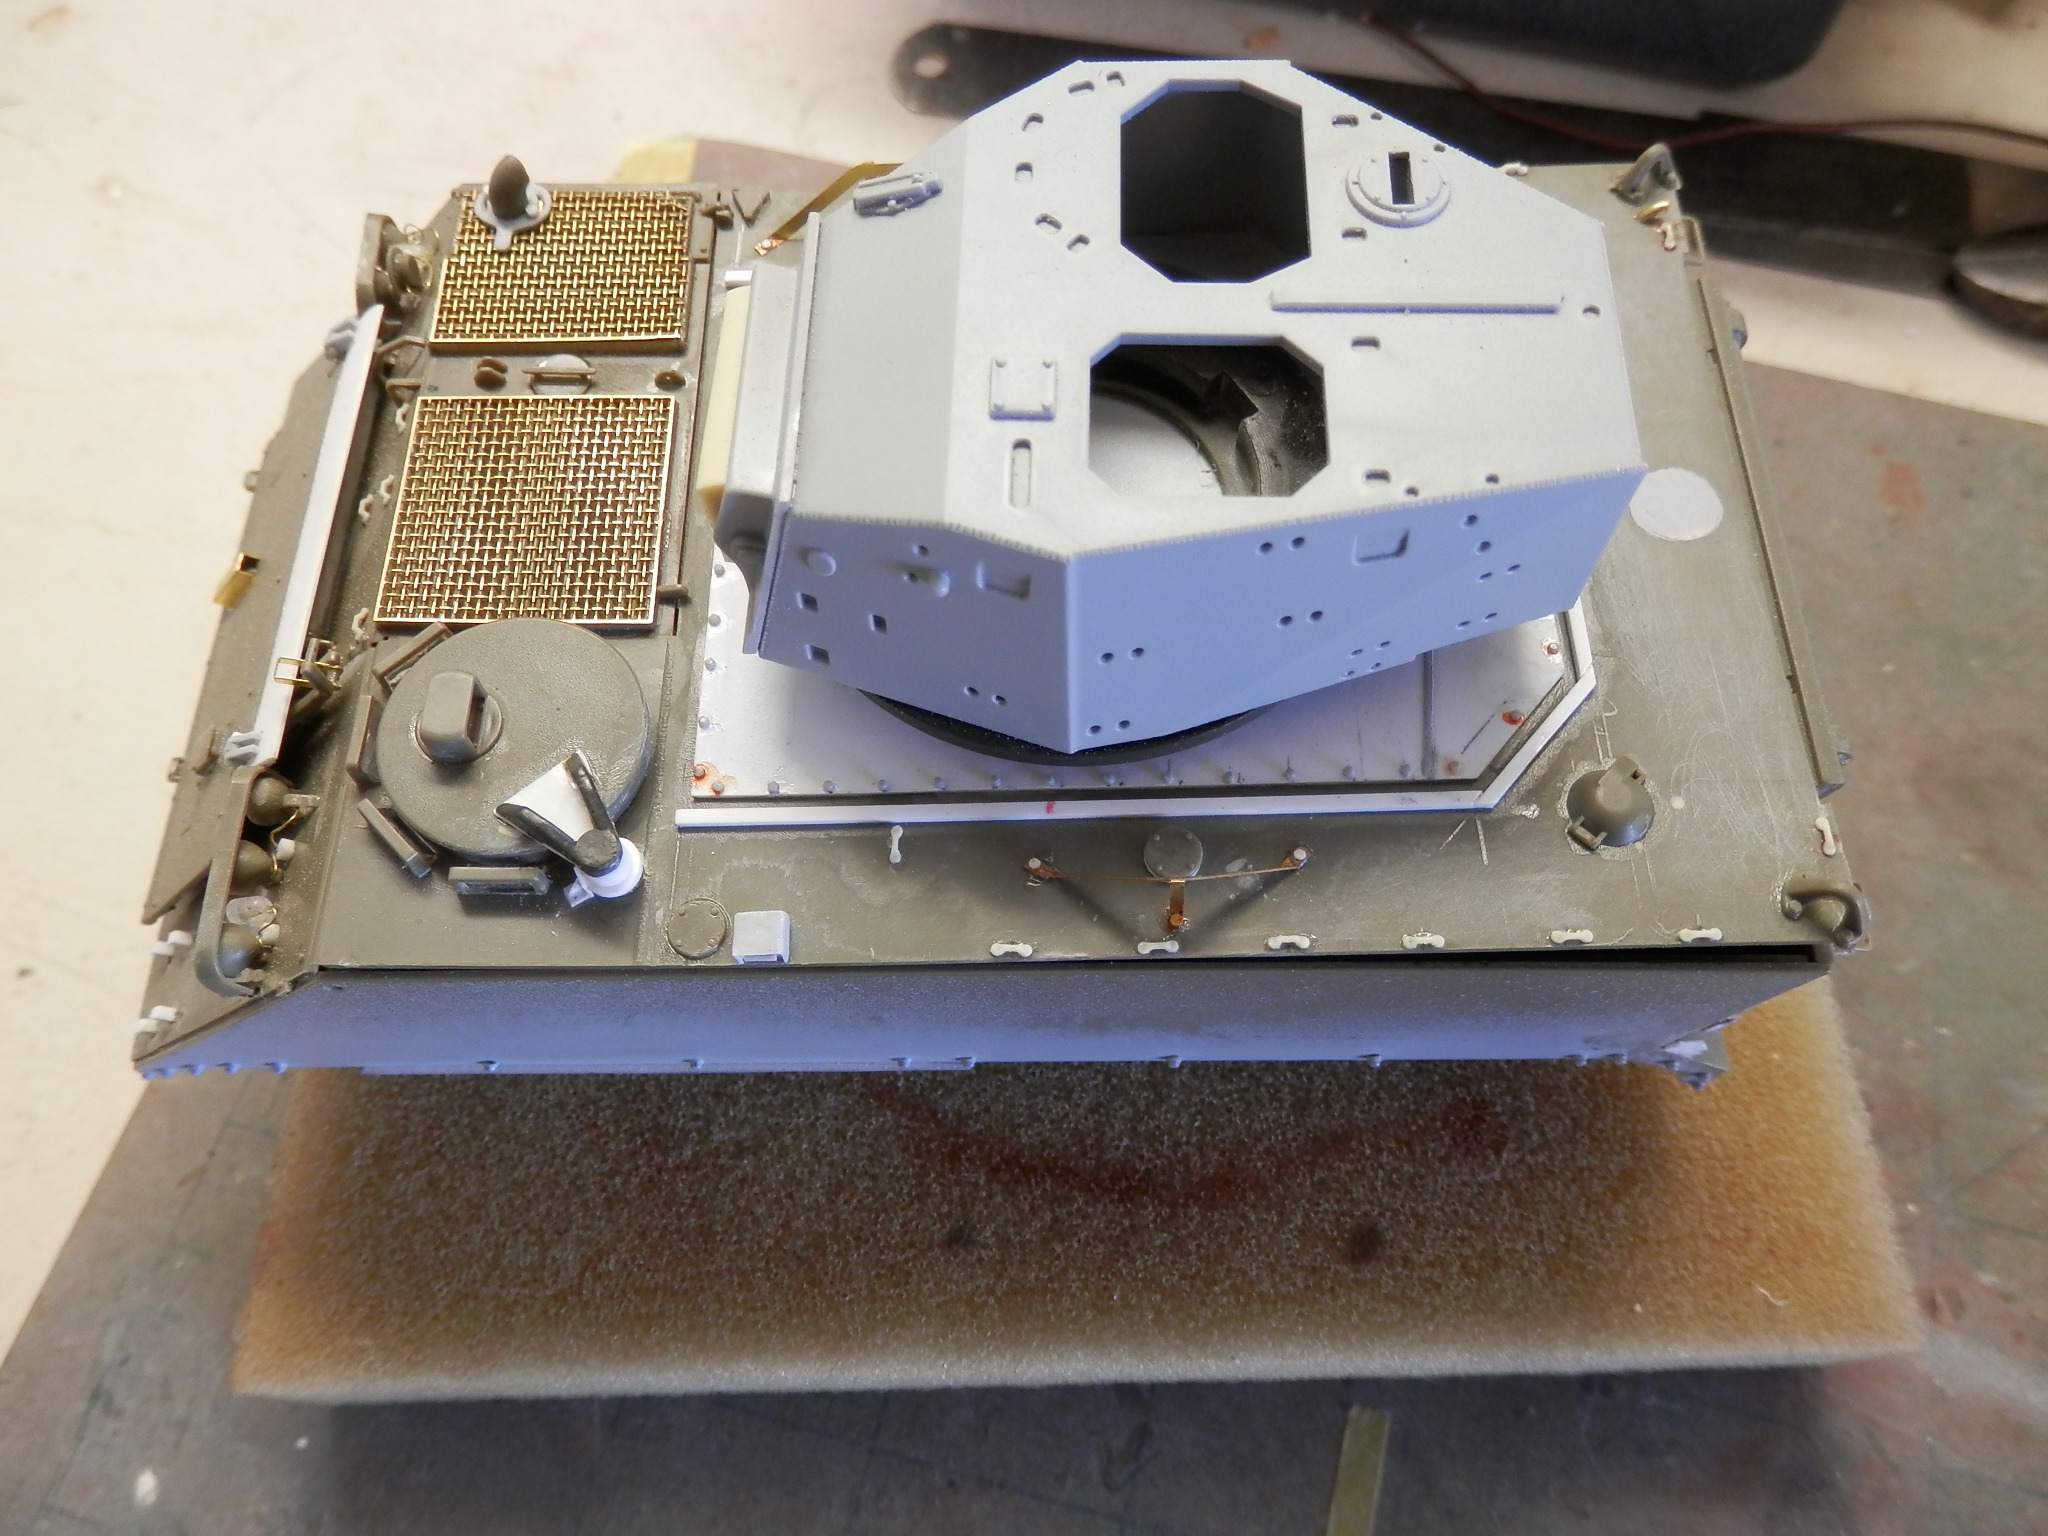
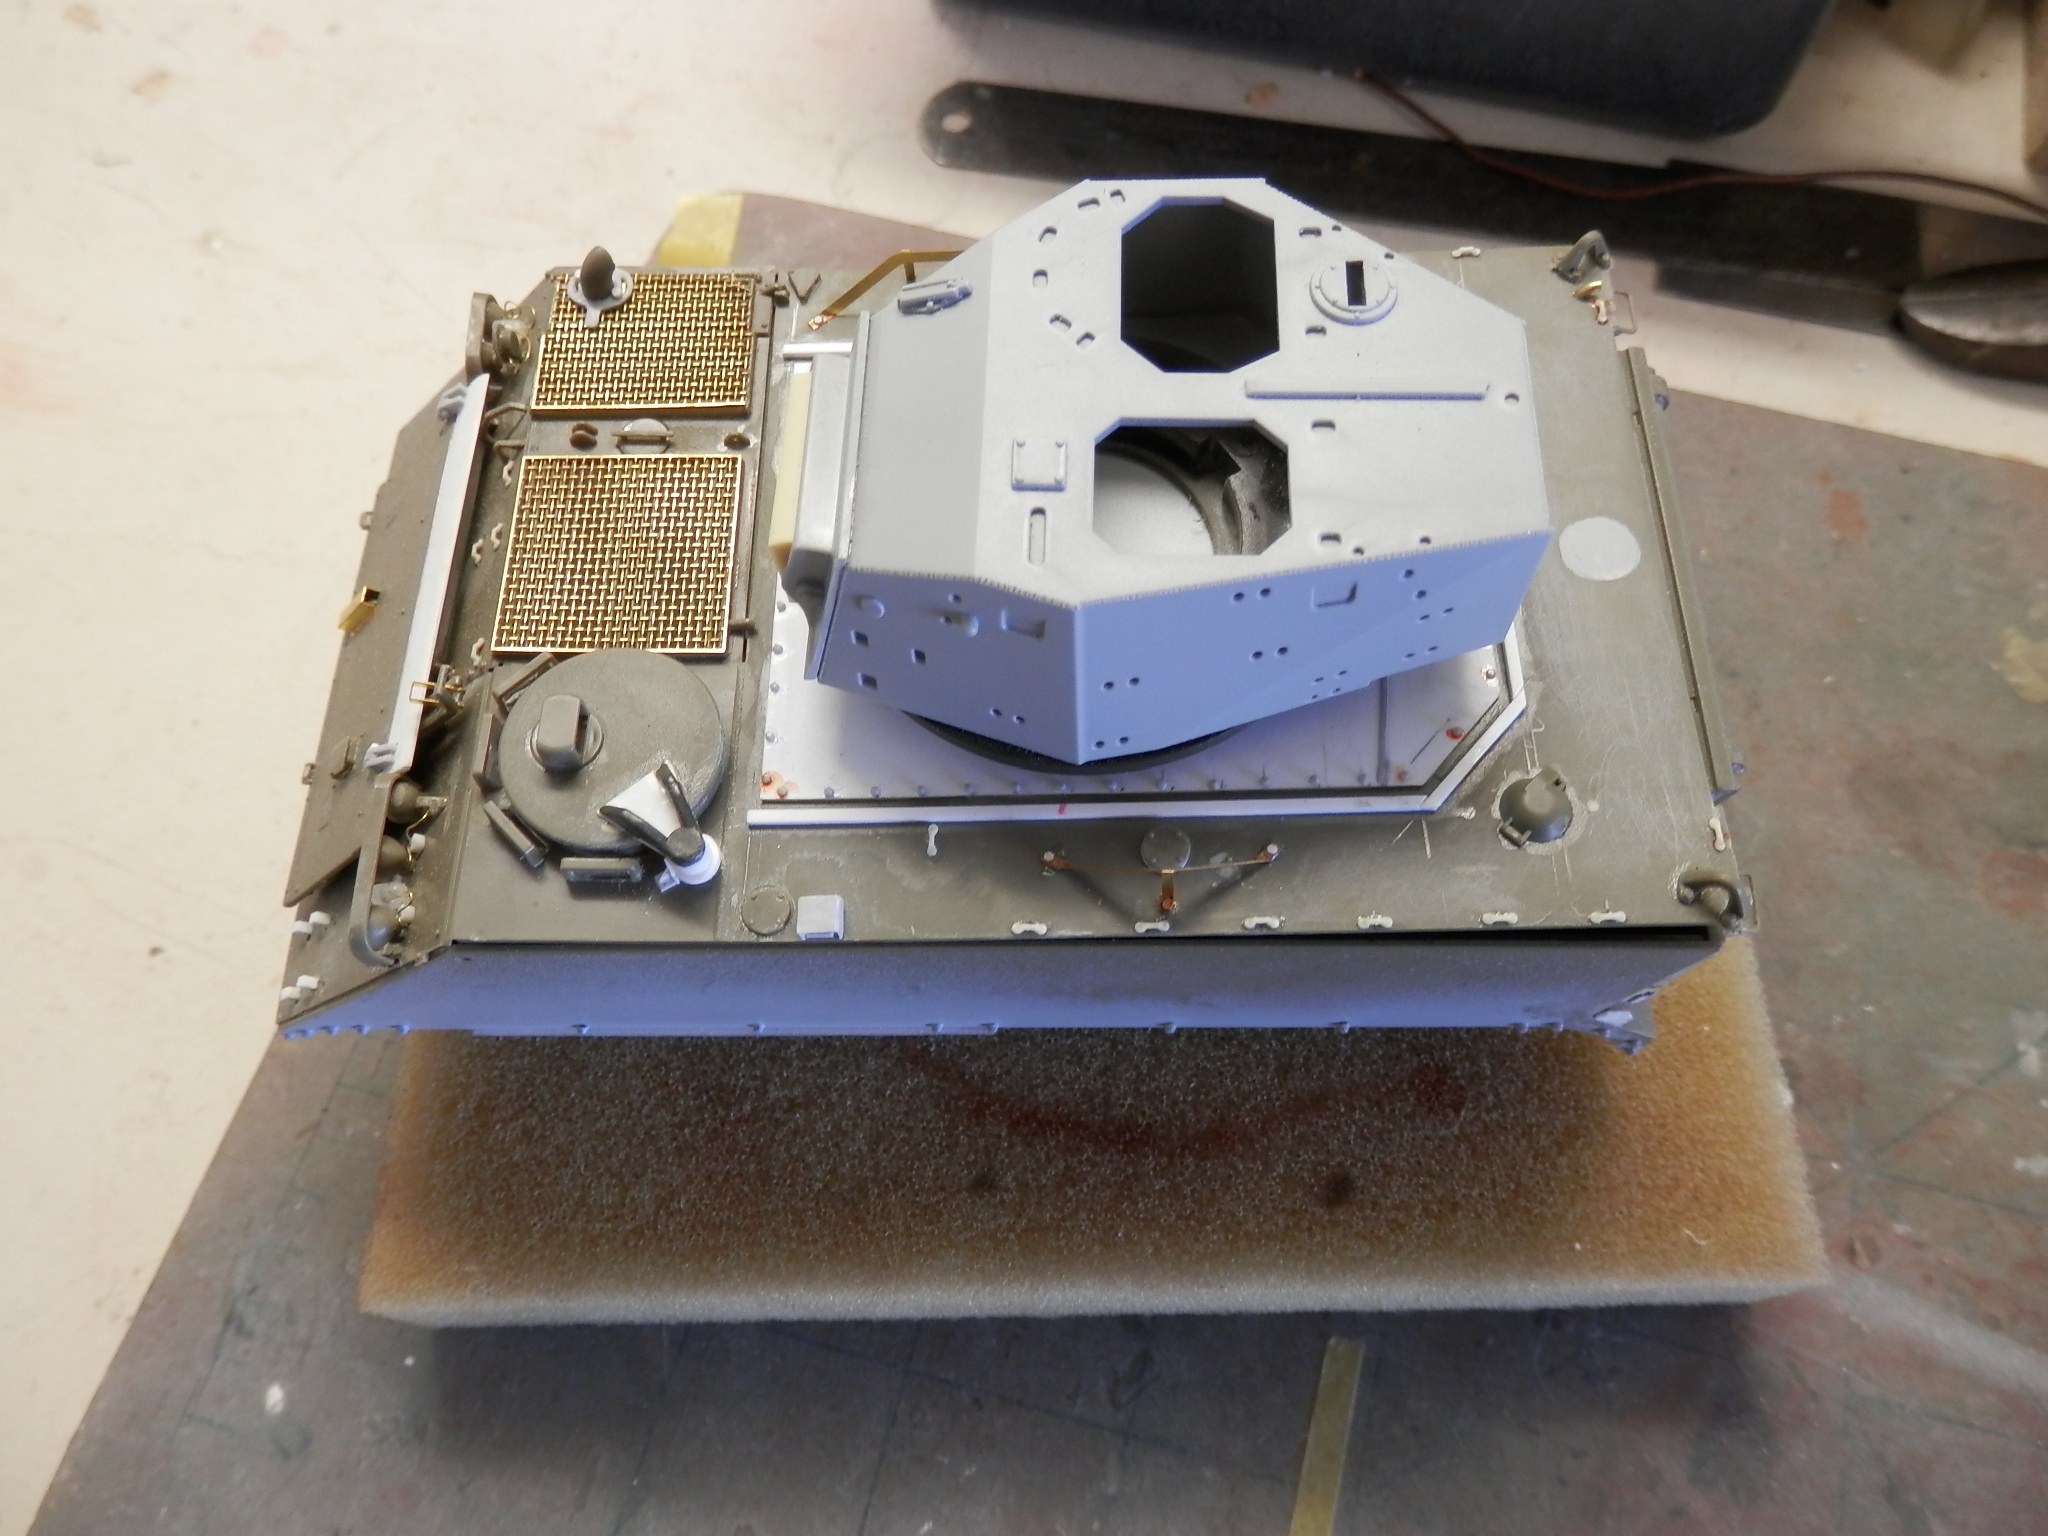
Enjoy.
The drivers hatch on the Tamiya is way off. I grab one of a donor kit and tried the best to make it a bit accurate. Not the best effort. I dont know if I will try and improve on this one.
The weld line was drawn first.
Then mask off on both sides and Surfacer 500 painted on. Removed the tape and gave it a light sand.
Next up was the bingle pipe on the right rear. Well I lost the kit one. So made one up from some brass pipe.
I also did the left and right side footman loops. Left over Arms Corp Models ones I had. The Ant guards were replaced by Eduard PE and added plates for the AMUs. The MH fire extinguisher handle and housing was taken off the FSV conversion. All the kit parts that were GTG were added.
As Im about to go away for work for a month. Hes some pictures off the top of the hull dry fitted to the hull as well as the turret placed on. I have one last thing to do the hull. Thats the rear footman loops for the pioneer tools. When Im back.
Enjoy.
 |

WEB HOSTING BY


Copyright ©2021 Armorama and Kitmaker Network, a subsidiary of Silver Star Enterprises
All Rights Reserved. Please read our Conditions of Use and Privacy Policy.
All Rights Reserved. Please read our Conditions of Use and Privacy Policy.