Hosted by Darren Baker
Looking for HEMTT engine...
Chris83

Joined: October 15, 2012
KitMaker: 138 posts
Armorama: 125 posts

Posted: Wednesday, April 22, 2020 - 03:12 AM UTC
hi guys got the dragon M-983 W PAC-1 on the way and I saw on reviews that it's the old Italeri HEMTT sprues which means no engine...I was hoping someone out there has a trumpy engine block sitting around so i can at least put something in there. I can't afford the $40 + dollars for the real model engine set (the kit itself was a gift) any help would be appreciated, happy modelling everyone and stay safe!
Chris83

Joined: October 15, 2012
KitMaker: 138 posts
Armorama: 125 posts

Posted: Thursday, April 23, 2020 - 06:58 AM UTC
*bump*
I'd be willing to pay if anyone can help out, like I said though I cant afford the real model set...
I'd be willing to pay if anyone can help out, like I said though I cant afford the real model set...
HermannB

Joined: October 14, 2008
KitMaker: 4,099 posts
Armorama: 4,067 posts

Posted: Friday, June 19, 2020 - 08:30 AM UTC
You can`t build the Trumpeter HEMTT without the engine.... 


HeavyArty


Joined: May 16, 2002
KitMaker: 17,694 posts
Armorama: 13,742 posts

Posted: Friday, June 19, 2020 - 10:13 AM UTC
Unless you plan on opening the engine compartment, you can't tell it is just a very basic rear-half of the engine on a solid plate. What Dragon/Italeri provides is adequate if it is left closed up.


Reforger-Victim

Joined: March 26, 2017
KitMaker: 95 posts
Armorama: 79 posts

Posted: Friday, June 19, 2020 - 06:17 PM UTC

HeavyArty


Joined: May 16, 2002
KitMaker: 17,694 posts
Armorama: 13,742 posts

Posted: Saturday, June 20, 2020 - 02:42 AM UTC
Quoted Text
https://www.scalemates.com/kits/real-model-35288-m983-hemtt-update-and-engine-set--978577
Right, if you read his original post:
Quoted Text
I can't afford the $40 + dollars for the real model engine set...
trickymissfit
Joined: October 03, 2007
KitMaker: 1,388 posts
Armorama: 1,357 posts
KitMaker: 1,388 posts
Armorama: 1,357 posts

Posted: Sunday, June 21, 2020 - 08:44 AM UTC
Meng sells a power pac that's very close to what you want. Problem is that it will be for an early variant. That same power pac was used in three or four different platforms (even fire trucks).
gary
gary
Posted: Monday, June 22, 2020 - 03:39 AM UTC
As a possible alternative -
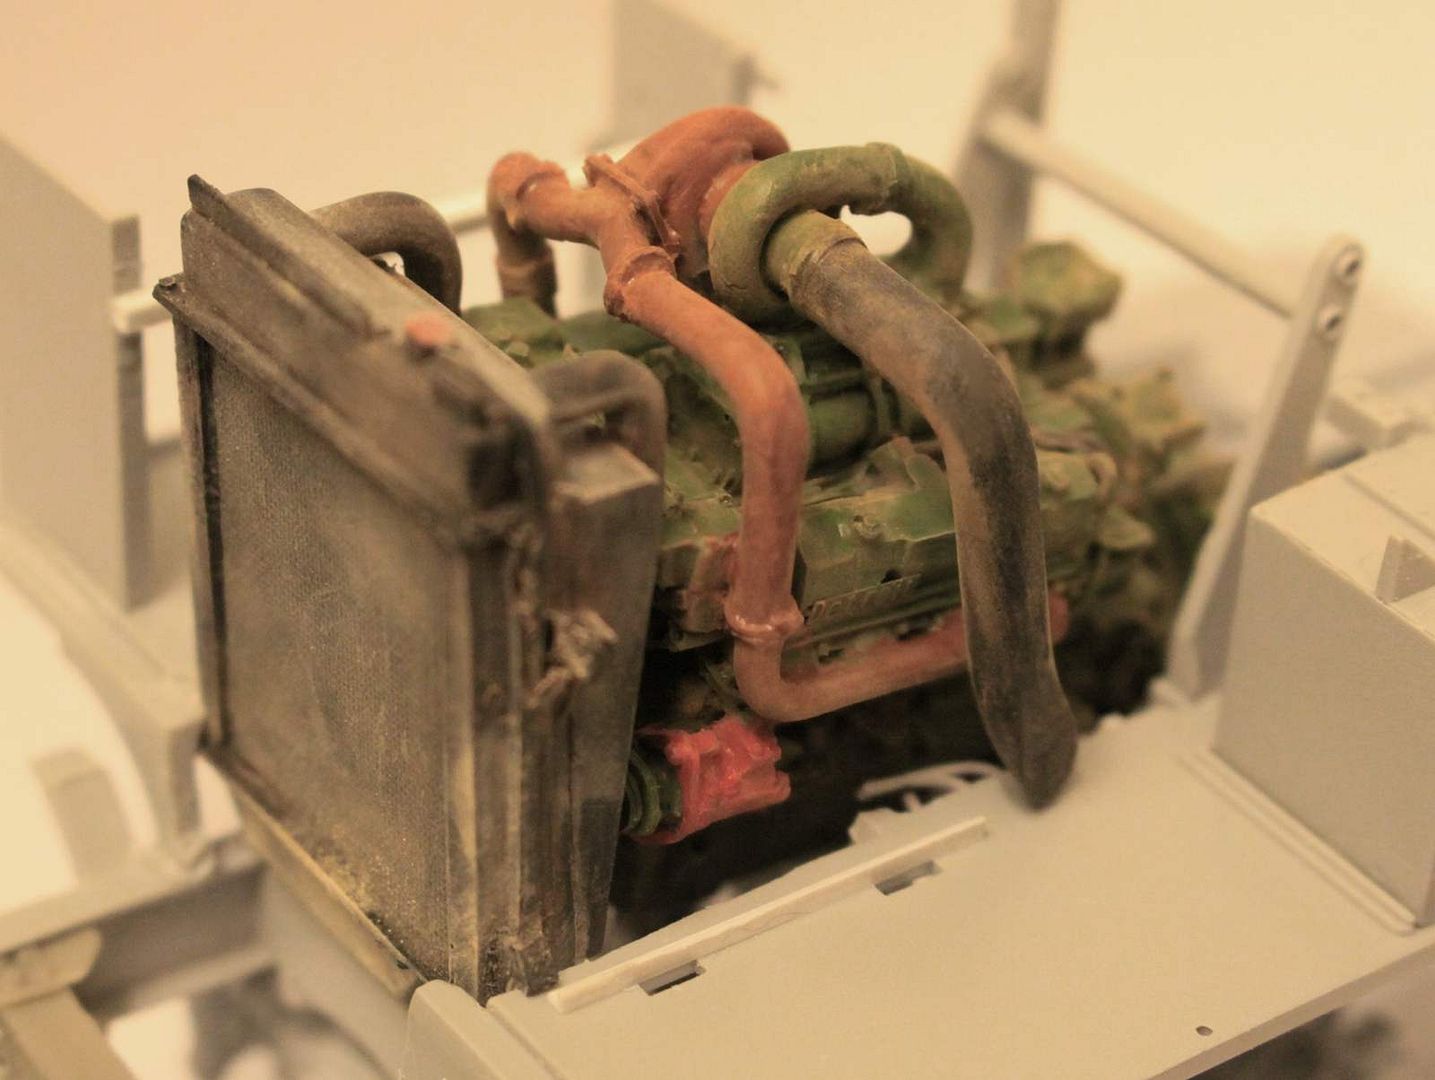
I one time simply cut away the "false walls" of that engine silhouette piece and installed that. Then I also scratch built a somewhat crude radiator to fill up that huge open space in the engine area. At that point the components were so far up into that huge hood enclosure that the viewer really couldn't see what was going on, especially with that huge muffler in the way.
Add some plastic rod to simulate some hydraulic lines and people might end up thinking you had a super detailed engine in there!
{quote} from earlier post
For this new vehicle I decided not to invest in the Real Models resin engine but I still wanted to improve the look and detail of the finished engine area. This is not going to be a build log but maybe just the sharing of a few HEMTT detailing ideas.
The wheels started spinning . . . .
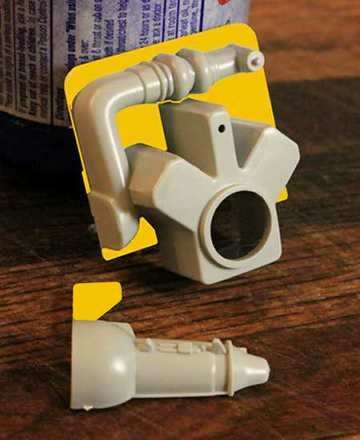
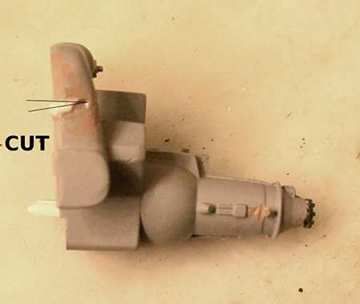
I concluded that no matter what you do to that fake wall at the front of the partial engine it still shows. Paint it matte black and it is still visible. I asked myself what could I do to make it disappear as it is not supposed to be there? Then it struck me, make it disappear - remove it! (As Elon says the best part is no part at all!) So I decided to remove the areas shown in yellow. I also made a cut in the air intake pipe in order to angle it back a bit to slope downward. This would allow me to tilt the rear of the engine downward as it is in the real vehicle.
{end quote}
I one time simply cut away the "false walls" of that engine silhouette piece and installed that. Then I also scratch built a somewhat crude radiator to fill up that huge open space in the engine area. At that point the components were so far up into that huge hood enclosure that the viewer really couldn't see what was going on, especially with that huge muffler in the way.
Add some plastic rod to simulate some hydraulic lines and people might end up thinking you had a super detailed engine in there!
{quote} from earlier post
For this new vehicle I decided not to invest in the Real Models resin engine but I still wanted to improve the look and detail of the finished engine area. This is not going to be a build log but maybe just the sharing of a few HEMTT detailing ideas.
The wheels started spinning . . . .


I concluded that no matter what you do to that fake wall at the front of the partial engine it still shows. Paint it matte black and it is still visible. I asked myself what could I do to make it disappear as it is not supposed to be there? Then it struck me, make it disappear - remove it! (As Elon says the best part is no part at all!) So I decided to remove the areas shown in yellow. I also made a cut in the air intake pipe in order to angle it back a bit to slope downward. This would allow me to tilt the rear of the engine downward as it is in the real vehicle.

{end quote}
Posted: Monday, June 22, 2020 - 03:40 AM UTC
Posted: Monday, June 22, 2020 - 03:44 AM UTC
Posted: Monday, June 22, 2020 - 03:56 AM UTC
Posted: Monday, June 22, 2020 - 04:14 AM UTC
Posted: Tuesday, June 23, 2020 - 03:13 AM UTC
 |


.JPG)


.JPG)
.JPG)
