Hi, Guys. This AFV Club kit 35078- Sd.Kfz.251/1 Ausf.C is driving me nuts.
Step 6 - parts B3, B4, and U30 (double tubing). Can't get them to fit as per instructions. Have they maybe printed this step as flipped? Or upside down??
Thanks for any help!!!!
Hosted by Darren Baker
Help with AFV Club 251/1 C
johnstone

Joined: September 11, 2017
KitMaker: 77 posts
Armorama: 69 posts

Posted: Thursday, May 07, 2020 - 03:30 AM UTC

RobinNilsson

Joined: November 29, 2006
KitMaker: 6,693 posts
Armorama: 5,562 posts

Posted: Thursday, May 07, 2020 - 03:49 AM UTC


U30: The tube faces forward and the arms face backwards
B3/B4: The axle-stub where the idler, one of assembly E, goes in step 7 faces rear and bottom with the "handle" facing rear and on top
johnstone

Joined: September 11, 2017
KitMaker: 77 posts
Armorama: 69 posts

Posted: Thursday, May 07, 2020 - 05:47 AM UTC
Yes, thanks for responding. I can see what the kit directions say - but here's the point. If you follow those directions nothing fits. Nothing.
Take part B3. It has a large end and a small end. On the hull there is a large hole and a small. B3 will not fit as they show it. The large end of B3 should fit into the large hole.
Done the way the kit says B3 will not fit into the space in the hull (large end has to fit the larger hull hole.
Guess I will get out the knives and razor saw and do some surgery!
Thanks again
Removed by original poster on 05/08/20 - 04:28:45 (GMT).
Brigandine

Joined: July 12, 2006
KitMaker: 553 posts
Armorama: 312 posts

Posted: Thursday, May 07, 2020 - 08:44 PM UTC
I'm test fitting the components on my AFV Club SdKfz 251C Stuka Zu Fuss, and having no problems whatsoever.
The problem is,the AFV Club instructions are misleading you:
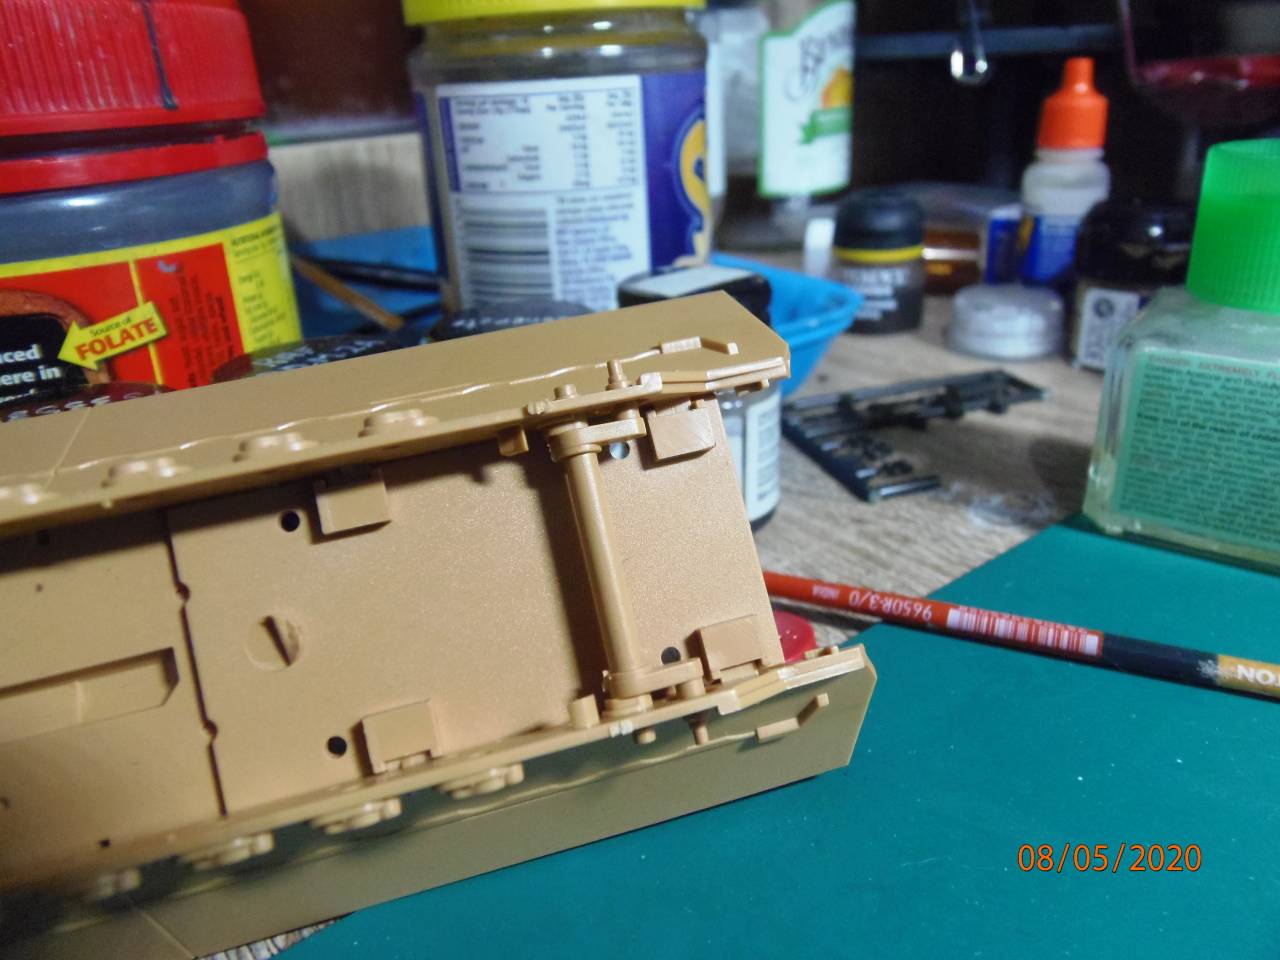
Step 1: The ends of part U3 go through the big and small holes in the sidewalls C1 & C3. I had to carefully open out the slots on the bottom of the floorpan U27, using the tip of a knife, plus, of course, you've got to clean up the beveled edges of U27 slightly, to remove the sprue tree attachment points.
Having done so, both sidewalls fitted snugly to the floorpan and the ends of the suspension arms on U3 fitted neatly through those holes you were trying to use for B3 & B4...
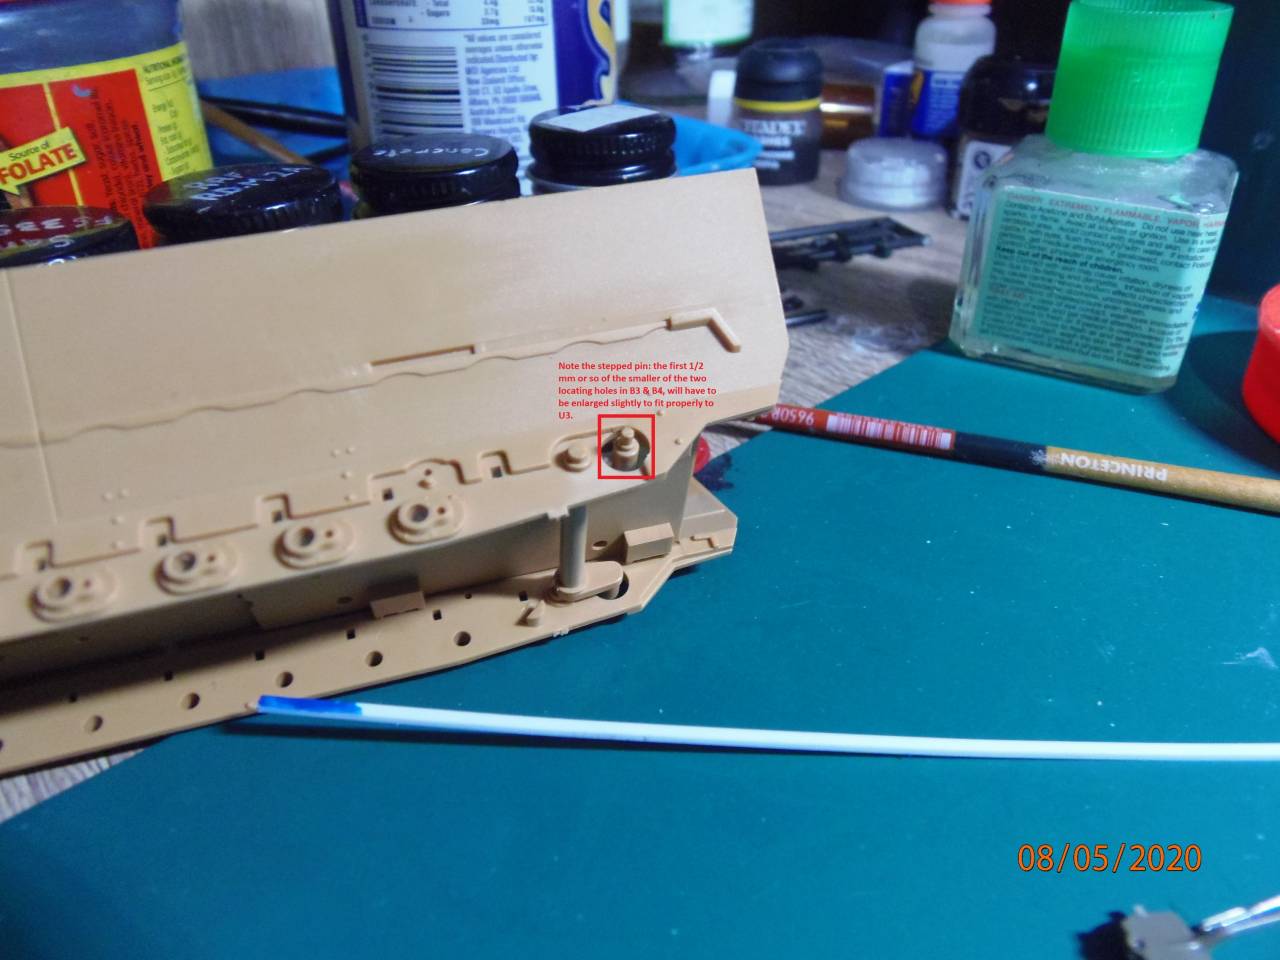
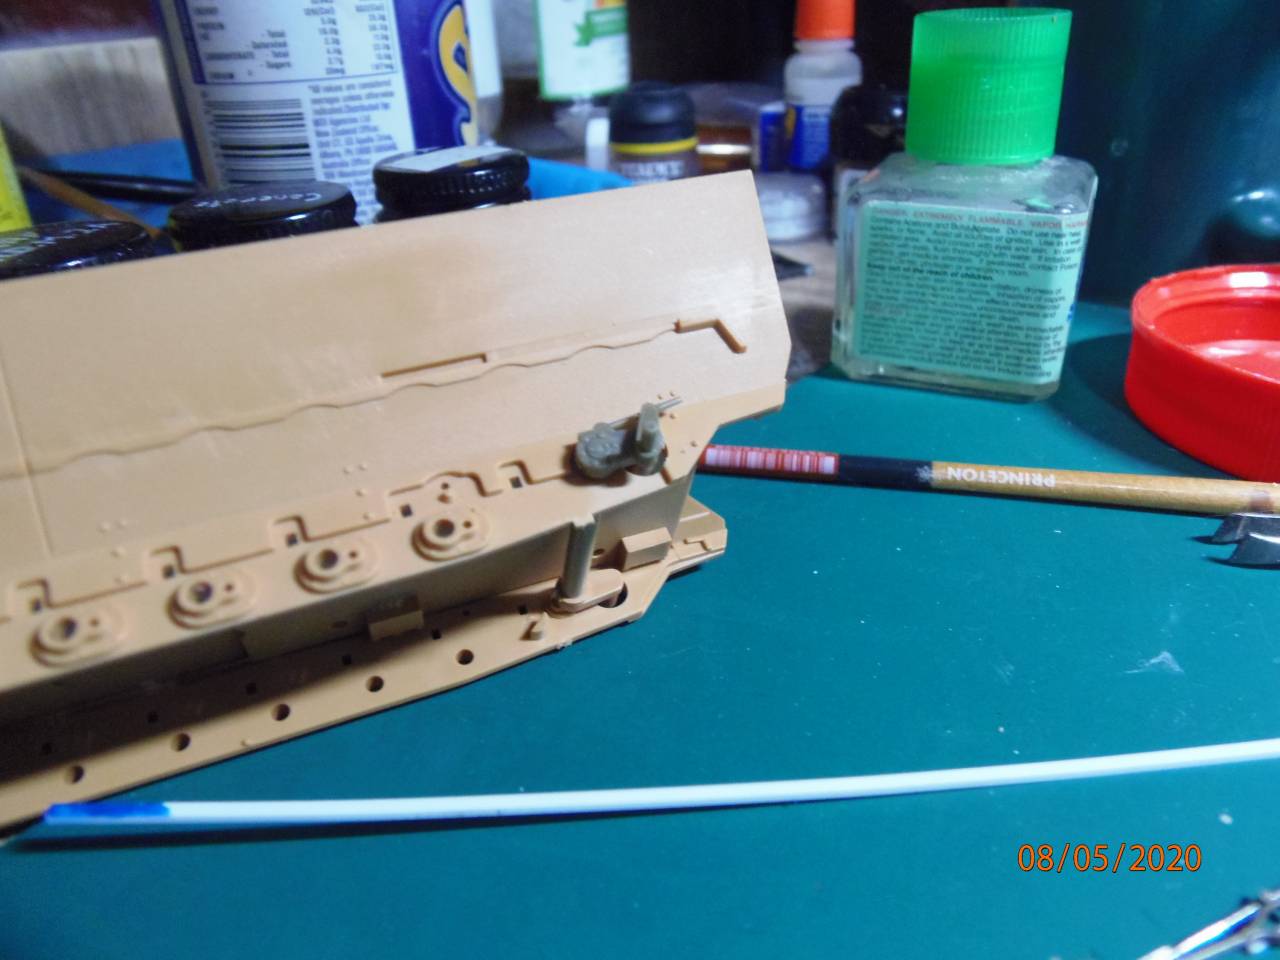
Step 6:(Here, AFV Club's instructions don't show the protruding end of U3)...thus,once the main hull components are assembled, as per Step 1, parts B3 and B4 will then be fitted onto the locating pins on each end of U3.
Be warned that the smaller of the two holes on B3 & B4 will probably have to be enlarged a little to ensure they fit properly onto U3.
General Warning: AFV Club kitsets aren't quite as easy to build as the like of Tamiya's, because often some of the locating pins and holes aren't quite big enough - it's worthwhile to dry fit and test components at every stage of construction. And, as noted, their instructions can add to the confusion.
Here's what it will look like (components all dry fitted):


So, put away that razor saw and bring out those drill bits.
The problem is,the AFV Club instructions are misleading you:
Step 1: The ends of part U3 go through the big and small holes in the sidewalls C1 & C3. I had to carefully open out the slots on the bottom of the floorpan U27, using the tip of a knife, plus, of course, you've got to clean up the beveled edges of U27 slightly, to remove the sprue tree attachment points.
Having done so, both sidewalls fitted snugly to the floorpan and the ends of the suspension arms on U3 fitted neatly through those holes you were trying to use for B3 & B4...
Step 6:(Here, AFV Club's instructions don't show the protruding end of U3)...thus,once the main hull components are assembled, as per Step 1, parts B3 and B4 will then be fitted onto the locating pins on each end of U3.
Be warned that the smaller of the two holes on B3 & B4 will probably have to be enlarged a little to ensure they fit properly onto U3.
General Warning: AFV Club kitsets aren't quite as easy to build as the like of Tamiya's, because often some of the locating pins and holes aren't quite big enough - it's worthwhile to dry fit and test components at every stage of construction. And, as noted, their instructions can add to the confusion.
Here's what it will look like (components all dry fitted):
So, put away that razor saw and bring out those drill bits.

varanusk


Joined: July 04, 2013
KitMaker: 1,288 posts
Armorama: 942 posts

Posted: Thursday, May 07, 2020 - 11:28 PM UTC
That must be the reason, I built one a couple of years ago and do not remember any issue there...
johnstone

Joined: September 11, 2017
KitMaker: 77 posts
Armorama: 69 posts

Posted: Friday, May 08, 2020 - 06:19 AM UTC
Brigandine,
Absolutely over the top!! Thank you so much! Don't know why I couldn't figure it out - other than I'm old (LOL).
Let me ask you about tracks. Read one review where the guy soaked the tracks overnight in degreaser. Overkill??
Thanks again !!
Absolutely over the top!! Thank you so much! Don't know why I couldn't figure it out - other than I'm old (LOL).
Let me ask you about tracks. Read one review where the guy soaked the tracks overnight in degreaser. Overkill??
Thanks again !!
Brigandine

Joined: July 12, 2006
KitMaker: 553 posts
Armorama: 312 posts

Posted: Sunday, May 10, 2020 - 01:49 PM UTC
Quoted Text
Brigandine,
Absolutely over the top!! Thank you so much! Don't know why I couldn't figure it out - other than I'm old (LOL).
Let me ask you about tracks. Read one review where the guy soaked the tracks overnight in degreaser. Overkill??
Thanks again !!
No problem; now that I've brought it out to have a look at, I'm looking at getting stuck into my Stuka Zu Fuss over the next few weeks.
I don't know about soaking the tracks in degreaser overnight, but if they didn't disintegrate, it's possibly not doing any harm. As it is, I don't like the synthetic rubber AFV Club tracks, so I've invested in a set of their polystyrene workable track links: while they will need more work to build, they will look better than the rubber units and be less likely to stress the suspension components.
https://www.perthmilitarymodelling.com/reviews/vehicles/251c/251c.htm
 |


