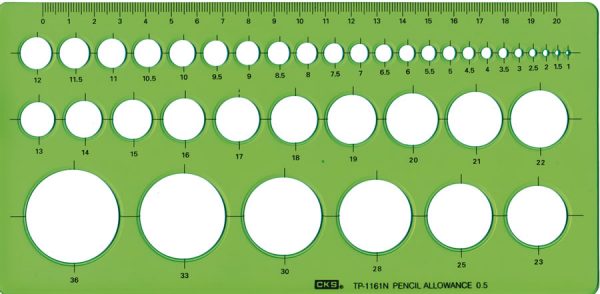
After painting Trumpeter's K1A1 road wheels, I gravitated to Wheeled vehicles and artillery!
Armor/AFV
For discussions on tanks, artillery, jeeps, etc.
For discussions on tanks, artillery, jeeps, etc.
Hosted by Darren Baker, Mario Matijasic
Painting All Those Wheels....
GaryKato

Joined: December 06, 2004
KitMaker: 3,694 posts
Armorama: 2,693 posts

Posted: Wednesday, July 29, 2020 - 07:29 AM UTC

18Bravo

Joined: January 20, 2005
KitMaker: 7,219 posts
Armorama: 6,097 posts

Posted: Wednesday, July 29, 2020 - 08:03 AM UTC
Some road wheels have rubber that's flush with the wheel as in the M109 series, shown earlier. On some there's a pronounces edge of the wheel. When using regular stencils as shown in the beginning of the thread (used to do a lot of M60 series)_ the stencil would cover that edge, leaving it the same black as the rubber, which of course doesn't look right. My solution was to make a stencil from thin brass, and chamfer it so it had a very thin edge. If you don't happen to have an old school hand held chamfer bit, you can try to cut a circle from shim stock, but I find the bit catches more often than not and does not leave a clean edge.
This might help to visualize why you might want to make your own:
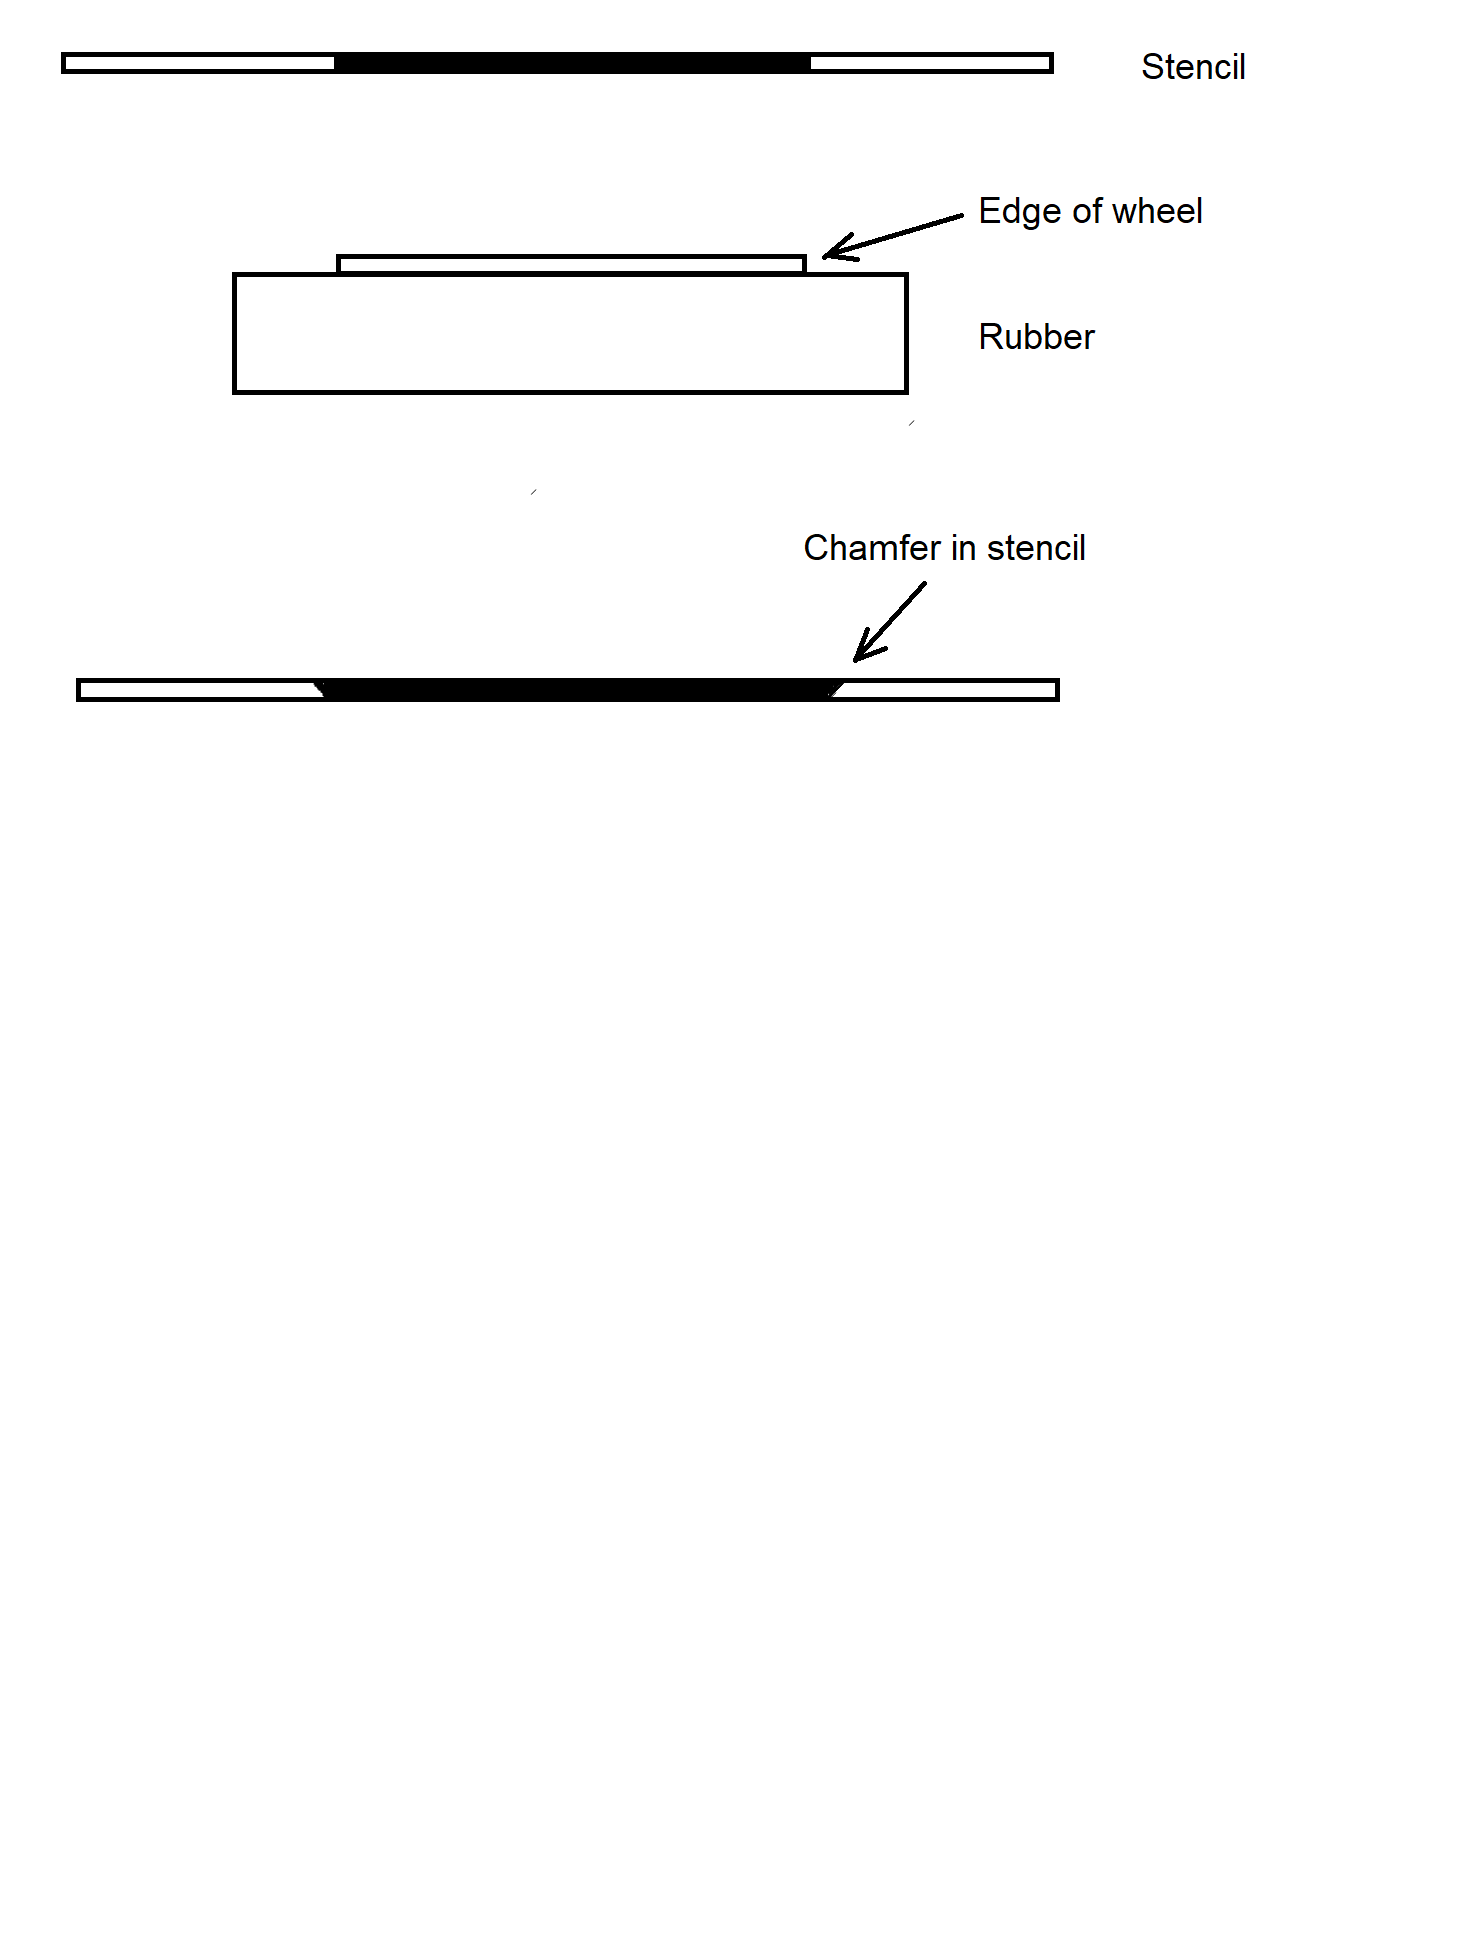
This might help to visualize why you might want to make your own:

brekinapez

Joined: July 26, 2013
KitMaker: 2,272 posts
Armorama: 1,860 posts

Posted: Wednesday, July 29, 2020 - 08:23 AM UTC
I use Quickwheel for Pz IIIs, Pz IVs, and SdKfz 251s as I have a bunch of each type and they are almost all Dragon kits so they are of similar size. Being able to do every wheel in one go is a big time saver. The circle template generally is a one-at-a-time affair.
panzerbob01

Joined: March 06, 2010
KitMaker: 3,128 posts
Armorama: 2,959 posts

Posted: Wednesday, July 29, 2020 - 09:36 AM UTC
That's certainly a valid argument for "QuickWheel" templates, Shell!
For those who have several kits by one mfgr all of one general subject (Shell identified some classics - add on Dragon T-34 kits and Takom or MiniArt T-54/55 series kits, pick-a-mfgr Panthers, etc. as other good cases) and are actually building that series, a "quickwheel" template could be a good investment.
For those of us who skip around among many different subjects... quickwheel things would become expensive. And given that wheels usually come in pairs and different surfaces may get different treatment and pairs need assembling, the amount of time one can save by mounting 6 or whatever number of wheels a qw serves and spraying all the hubs / rims at one pass is a pretty small slice in the overall wheel process. But... That option is out there - one of many successful approaches to do up those pesky roadies! For subject-jumpers, one template covering oodles of different wheels is, while slower than a qw, much less costly.
Cheers! Bob
PS: Hmmmmm. Having said the above... IF I could just beebop down to some nearby (versus 120 miles "by") well-stocked LHS and buy a qw to fit Hobby Boss Soviet T-26 small-tire roadies (there are 2 common styles of T-26 wheels - which differ greatly in "rubber tire profile") , I would be on my way this instant - faced as I am with 48 pairs (3 kits w/ 16 pairs each!) to do in my current mad modeling moment!
 And PPS: You would actually need TWO qw to do all of HB's T-26 kits, as there are two different roadie sets involved in the kit series...
For those who have several kits by one mfgr all of one general subject (Shell identified some classics - add on Dragon T-34 kits and Takom or MiniArt T-54/55 series kits, pick-a-mfgr Panthers, etc. as other good cases) and are actually building that series, a "quickwheel" template could be a good investment.
For those of us who skip around among many different subjects... quickwheel things would become expensive. And given that wheels usually come in pairs and different surfaces may get different treatment and pairs need assembling, the amount of time one can save by mounting 6 or whatever number of wheels a qw serves and spraying all the hubs / rims at one pass is a pretty small slice in the overall wheel process. But... That option is out there - one of many successful approaches to do up those pesky roadies! For subject-jumpers, one template covering oodles of different wheels is, while slower than a qw, much less costly.
Cheers! Bob

PS: Hmmmmm. Having said the above... IF I could just beebop down to some nearby (versus 120 miles "by") well-stocked LHS and buy a qw to fit Hobby Boss Soviet T-26 small-tire roadies (there are 2 common styles of T-26 wheels - which differ greatly in "rubber tire profile") , I would be on my way this instant - faced as I am with 48 pairs (3 kits w/ 16 pairs each!) to do in my current mad modeling moment!

 And PPS: You would actually need TWO qw to do all of HB's T-26 kits, as there are two different roadie sets involved in the kit series...
 accelr8

Joined: March 17, 2005
KitMaker: 159 posts
Armorama: 156 posts

Posted: Wednesday, July 29, 2020 - 09:56 AM UTC
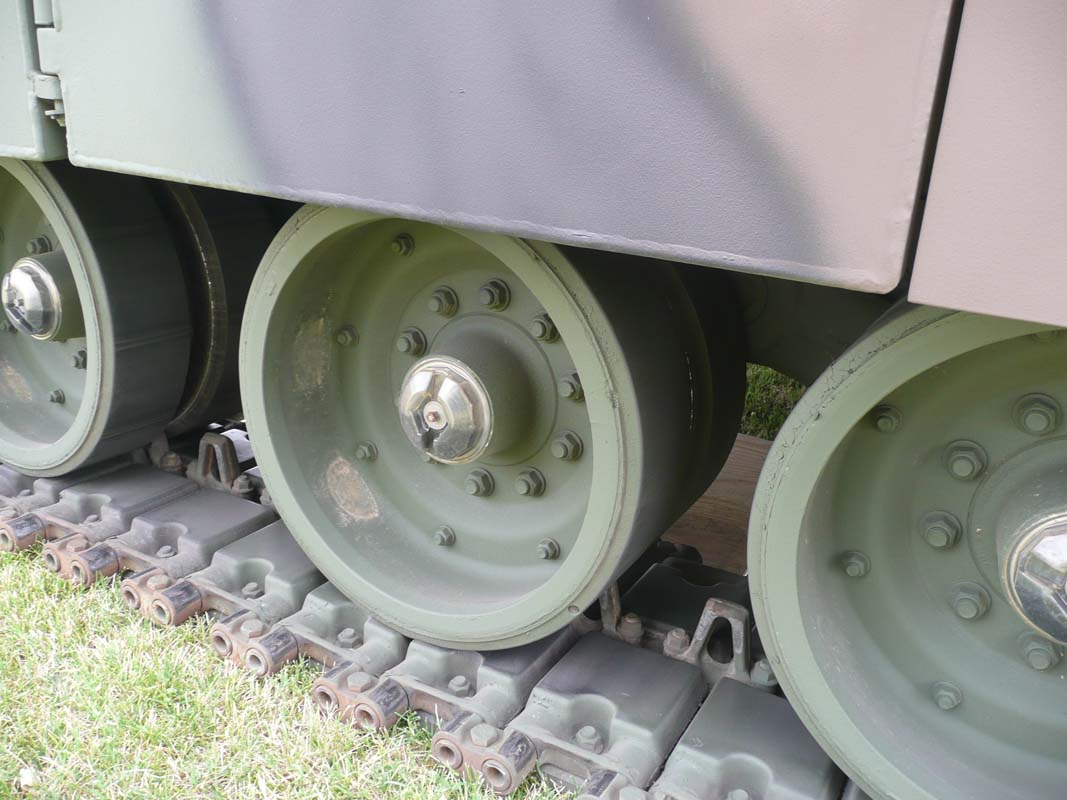
the standing order has always been "when in doubt, rattle can it". Contest judges would just call you lazy though. Here's a M1A2 SEP, circa 2007.


UpperCanadian

Joined: June 28, 2020
KitMaker: 152 posts
Armorama: 133 posts

Posted: Wednesday, July 29, 2020 - 10:01 AM UTC
Quoted Text
I airbrush the hubs/centers first and when dry I paint the rubber while spinning the wheel slowly in a low powered minidrill (low power = I can use my thumb as friction brake against the side of the chuck).
A small conical dowel made from filed down sprue acts as axle for the wheels. I get the rubber on all roadwheels for a Pz IV painted in 15 minutes (32 wheel discs), 30 minutes if I have to make a new dowel.
I think it would take me the same time to get all the quick wheel masks positioned correctly ...
This method results in rubber with no overspray from painting the wheel discs. In reality there is often overspray and in that case Israels method works better.
So you spin the wheel with the drill and hold your hand steady on the wheel?
(I also hate painting road wheels. My least favourite part of building tanks.)

UpperCanadian

Joined: June 28, 2020
KitMaker: 152 posts
Armorama: 133 posts

Posted: Wednesday, July 29, 2020 - 10:04 AM UTC
Where do you get one of those circle templates?

18Bravo

Joined: January 20, 2005
KitMaker: 7,219 posts
Armorama: 6,097 posts

Posted: Wednesday, July 29, 2020 - 10:15 AM UTC
They can be found in many places, but there's a Hobby Lobby in Vancouver...

RobinNilsson

Joined: November 29, 2006
KitMaker: 6,693 posts
Armorama: 5,562 posts

Posted: Wednesday, July 29, 2020 - 10:22 AM UTC
Quoted Text
Quoted TextI airbrush the hubs/centers first and when dry I paint the rubber while spinning the wheel slowly in a low powered minidrill (low power = I can use my thumb as friction brake against the side of the chuck).
A small conical dowel made from filed down sprue acts as axle for the wheels. I get the rubber on all roadwheels for a Pz IV painted in 15 minutes (32 wheel discs), 30 minutes if I have to make a new dowel.
I think it would take me the same time to get all the quick wheel masks positioned correctly ...
This method results in rubber with no overspray from painting the wheel discs. In reality there is often overspray and in that case Israels method works better.
So you spin the wheel with the drill and hold your hand steady on the wheel?
(I also hate painting road wheels. My least favourite part of building tanks.)
First: It has to be a small low powered mini drill (a Dremel is WAY overpowered), the type which looks like a really thick pen. If it runs on DC it is just a matter of reducing the voltage, some of the better ones run on chopped DC (pulsed, so the voltage is 12 volt for a percentage of the time and zero in between which makes the tool "twitch" at low RPM).
Anyhow, it needs to be weak so that you can reduce the RPM using the Mk I TFB (Thumb Friction Brake)
I hold the mini drill in my left hand and the paint brush in my right (I'm right handed), chuck close to my thumb. Low RPM setting and apply TFB to get steady rotation. Let the edge between palm and wrist of the painting hand rest against the hand holding the mini drill, usually against the inner joint of the thumb and slowly apply the paintbrush to the rubber part of the wheel, working from the "tread" in towards the edge of the "rim".
Small paintbrush so that it doesn't hold too much paint. The tedious part is actually to make the conical stubs that go into the chuck. Small angle so that the cone is almost a cylinder to get a good press fit of the wheel. Adjust the wheel so that it doesn't have an obvious wobble.
Some wheels are poorly made so that the axle hole isn't in the center, my method works for some of these but they need to spin REALLY slowly. In these cases I would recommend a mask of some type.
210cav

Joined: February 05, 2002
KitMaker: 6,149 posts
Armorama: 4,573 posts

Posted: Wednesday, July 29, 2020 - 10:24 AM UTC
Quoted Text
Quoted TextThey've been around for quiet some time. I think it's a rip-off. I use one of these instead:
I use a similar one as well and it's great, careless airbrush black on the rubber part and then use the appropriated size (always one of them matches) to mask it and paint the rim.
Amigo-- the only way to paint road wheels, use masking tape to cover the holes not to be used, place template on wheel and airbrush away


Removed by original poster on 07/29/20 - 22:28:00 (GMT).

UpperCanadian

Joined: June 28, 2020
KitMaker: 152 posts
Armorama: 133 posts

Posted: Wednesday, July 29, 2020 - 10:29 AM UTC
Quoted Text
Quoted TextQuoted TextI airbrush the hubs/centers first and when dry I paint the rubber while spinning the wheel slowly in a low powered minidrill (low power = I can use my thumb as friction brake against the side of the chuck).
A small conical dowel made from filed down sprue acts as axle for the wheels. I get the rubber on all roadwheels for a Pz IV painted in 15 minutes (32 wheel discs), 30 minutes if I have to make a new dowel.
I think it would take me the same time to get all the quick wheel masks positioned correctly ...
This method results in rubber with no overspray from painting the wheel discs. In reality there is often overspray and in that case Israels method works better.
So you spin the wheel with the drill and hold your hand steady on the wheel?
(I also hate painting road wheels. My least favourite part of building tanks.)
First: It has to be a small low powered mini drill (a Dremel is WAY overpowered), the type which looks like a really thick pen. If it runs on DC it is just a matter of reducing the voltage, some of the better ones run on chopped DC (pulsed, so the voltage is 12 volt for a percentage of the time and zero in between which makes the tool "twitch" at low RPM).
Anyhow, it needs to be weak so that you can reduce the RPM using the Mk I TFB (Thumb Friction Brake)
I hold the mini drill in my left hand and the paint brush in my right (I'm right handed), chuck close to my thumb. Low RPM setting and apply TFB to get steady rotation. Let the edge between palm and wrist of the painting hand rest against the hand holding the mini drill, usually against the inner joint of the thumb and slowly apply the paintbrush to the rubber part of the wheel, working from the "tread" in towards the edge of the "rim".
Small paintbrush so that it doesn't hold too much paint. The tedious part is actually to make the conical stubs that go into the chuck. Small angle so that the cone is almost a cylinder to get a good press fit of the wheel. Adjust the wheel so that it doesn't have an obvious wobble.
Some wheels are poorly made so that the axle hole isn't in the center, my method works for some of these but they need to spin REALLY slowly. In these cases I would recommend a mask of some type.
Robin, thanks for the detailed reply.

UpperCanadian

Joined: June 28, 2020
KitMaker: 152 posts
Armorama: 133 posts

Posted: Wednesday, July 29, 2020 - 10:31 AM UTC
Quoted Text
They can be found in many places, but there's a Hobby Lobby in Vancouver...
I think they closed all shops in Canada. There's one in Bellingham Washington. In normal times, that's not a big deal for me to get to from Vancouver.
Petro

Joined: November 02, 2003
KitMaker: 984 posts
Armorama: 846 posts

Posted: Wednesday, July 29, 2020 - 11:57 AM UTC
Quoted Text
Where do you get one of those circle templates?
I got mine at Staples.
Posted: Wednesday, July 29, 2020 - 01:52 PM UTC
Here is part of my post from the Build-A-Tool 3 campaign back in 2014 with idea I had for painting roadwheels. The video isn't very clear but it gives you the basic idea behind my idea. 
_____________________________________
My other project is a very simple one to make. All I did was take an old rechargeable can opener and removed the cutting arm. Then all I did was add some double sided tape to the wheel. Now all I have to do is place my road wheel, or any other type of wheel, to the double sided tape, hold the paint brush in place and active the button. The can opener does all of the work for you.
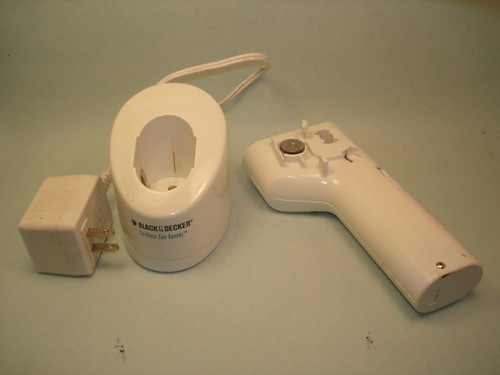
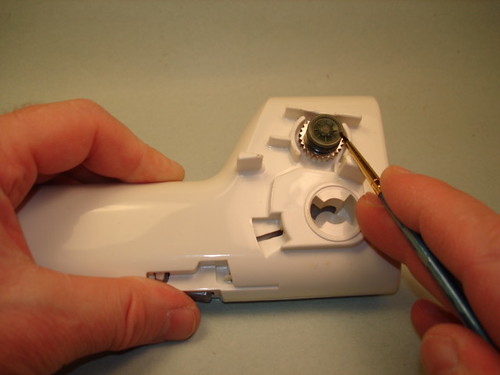
Going to try adding a short video. Never tried this before.
_____________________________________________
Anyway, that is something I came up with.
Thanks,
Randy

_____________________________________
My other project is a very simple one to make. All I did was take an old rechargeable can opener and removed the cutting arm. Then all I did was add some double sided tape to the wheel. Now all I have to do is place my road wheel, or any other type of wheel, to the double sided tape, hold the paint brush in place and active the button. The can opener does all of the work for you.


Going to try adding a short video. Never tried this before.

_____________________________________________
Anyway, that is something I came up with.
Thanks,
Randy

Khouli

Joined: March 13, 2020
KitMaker: 68 posts
Armorama: 68 posts

Posted: Thursday, July 30, 2020 - 01:54 AM UTC
Question then.
We've established that several AFVs used metal wheels.
So, if they are cheaper and easier to produce than rubber tyred wheels, what was the advantage of using a rubber tyred running gear?
We've established that several AFVs used metal wheels.
So, if they are cheaper and easier to produce than rubber tyred wheels, what was the advantage of using a rubber tyred running gear?

ReluctantRenegade

Joined: March 09, 2016
KitMaker: 2,408 posts
Armorama: 2,300 posts

Posted: Thursday, July 30, 2020 - 02:06 AM UTC
Quoted Text
So, if they are cheaper and easier to produce than rubber tyred wheels, what was the advantage of using a rubber tyred running gear?
Reducing tear and wear, more quiet.

RobinNilsson

Joined: November 29, 2006
KitMaker: 6,693 posts
Armorama: 5,562 posts

Posted: Thursday, July 30, 2020 - 02:06 AM UTC
Comfort.
Less wear and tear on the inside of the tracks, some tracks had rubber pads on the inside as well.
Steel wheels on Panthers had rubber inserts in the hubs.
T-34's had steel wheels on the centre positions to save on rubber but the first and last were usually rubber even then.
Less wear and tear on the inside of the tracks, some tracks had rubber pads on the inside as well.
Steel wheels on Panthers had rubber inserts in the hubs.
T-34's had steel wheels on the centre positions to save on rubber but the first and last were usually rubber even then.
panzerbob01

Joined: March 06, 2010
KitMaker: 3,128 posts
Armorama: 2,959 posts

Posted: Thursday, July 30, 2020 - 07:24 AM UTC
You need vibration-damping somewhere between the ground (bottom side of the track) and the axle-mount on the tank or other tracked vehicle. Springs provide part of this, shocks dampen major spring movement due to hull bobbing, and the rubber tires, or rubber hub inserts, or rubber pads on the inner sides of tracks all serve to dampen "finer" vibration (not effectively caught by suspension springs and shocks) from track contact with the ground.
A great way to experience the rubber damper effect is to ride your bicycle on its metal rims!
Why do this, given it's a tank and not your comfy family sedan? Probably the most important reason lies with trying to reduce vibration wear and tear on all the stuff mounted inside the tank - vibration will work bolts loose EVERYWHERE, fracture metal welds and mounts, destroy all lens mounts in sights, etc., destroy electrical equipment such as radios and computer stuff, and potentially damage ammunition, among other things. And then there is the crew... Vibration fatigues people, too.
So when you see all-metal roadies without rubber dampers in their hubs, that vehicle MUST incorporate damper devices elsewhere - whether visible or not. Or it's going to shake itself apart.
And regards the mentioned Soviet T-34 with (all)steel wheels (no rubber damper in hubs, etc.)... Due to critical shortage of rubber, the Sov's developed the all-steel roadie for the T-34 starting in late 1941. They soon discovered that T-34 with steel wheels on all stations quickly developed all sorts of problems - accelerated track wear, all sorts of internal mechanical problems from loosening bolts and such, fracturing of hull armor welds, and dramatic fatigue issues with crew subjected to increased noise and vibration. The working solution was to use steelies only on "inner stations", so that rubber tires dampened the more critical end-stations. And using fewer steelies worked better than using more. Which is why we rarely find pics showing T-34 with steelies on all stations (done only in-extremis), and most commonly with steelies on only one or 2 inner stations each side...
Cheers! Bob

Scottosaurus

Joined: February 15, 2006
KitMaker: 83 posts
Armorama: 59 posts

Posted: Thursday, July 30, 2020 - 07:54 AM UTC
I've used these for a couple of projects (DML Panzer III and Panzer IV series), and really like them. Unlike the standard circle templates (which I have also used), I can pain the entire set of wheels and return rollers at the same time, and the foam means that the wheels will stay in place without me having to hold them tight up against the template. They may not be worth the money for some, but for me the convenience and time saved, plus reusability, make it a worthwhile investment. In my opinion, these are good products.
Cheers,
Scott
Cheers,
Scott
 |


