

Hi all! welcome to my build. I actually picked this kit up on a whim, I was browsing a hobby shop a couple of hours from my place, and it popped into my line of sight. It was December 2019 I purchased it, but it has been sitting for some time as there has been some difficulty in sourcing upgrades! Particularly the Voyager etch sets. I have them now though, so the build is a go!
I will update this list as I go, currently the items I have for this build are:
- Takom Jagdtiger Blitz Kit 8001 (obviously!)
- Voyager Metal Barrel VBS0106
- Voyager Etch Set PE351019
- Voyager Schurzen Set PEA444
- T-Rex Brackets and Clamps TR35011
- T-Rex Clamps TR35010
The intent is to build a reasonably clean and factory fresh kit, as lets face it these vehicles didnt see much action time. The kit will feature mostly (all) closed hatches, as I am imagining one day I might place it onto a rail wagon (perhaps the Sabre 35A05 kit?). Therefore the barrel will be clamped in its travel lock, the schurzen will be off, and it may even feature transport tracks.
Photos to come! I have just created an imgur account for photo hosting, so bear with as I learn the ropes on that.
I have been doing a reasonable amount of research, so am attempting hopefully a pretty accurate "early" variant, so please shout out with any tips or if you see anything miss!
Hosted by Darren Baker
Jagdtiger - Takom 1:35 Blitz Kit 8001

barleeni

Joined: June 12, 2015
KitMaker: 43 posts
Armorama: 43 posts
Posted: Wednesday, October 07, 2020 - 08:17 PM UTC
barleeni
Joined: June 12, 2015
KitMaker: 43 posts
Armorama: 43 posts
Posted: Wednesday, October 07, 2020 - 08:26 PM UTC
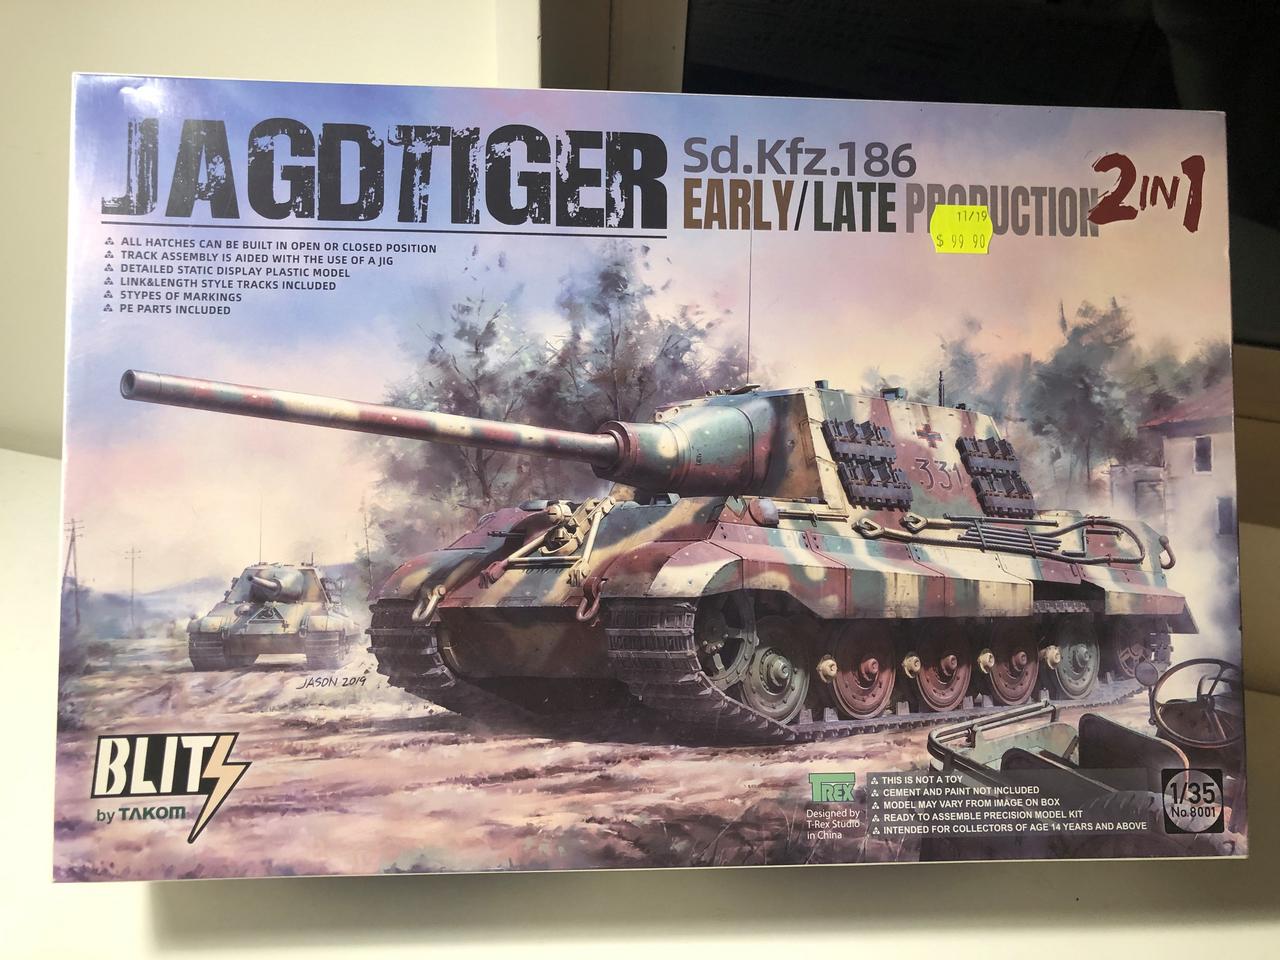
So first up, the obligatory box pic (fingers crossed the images load....):
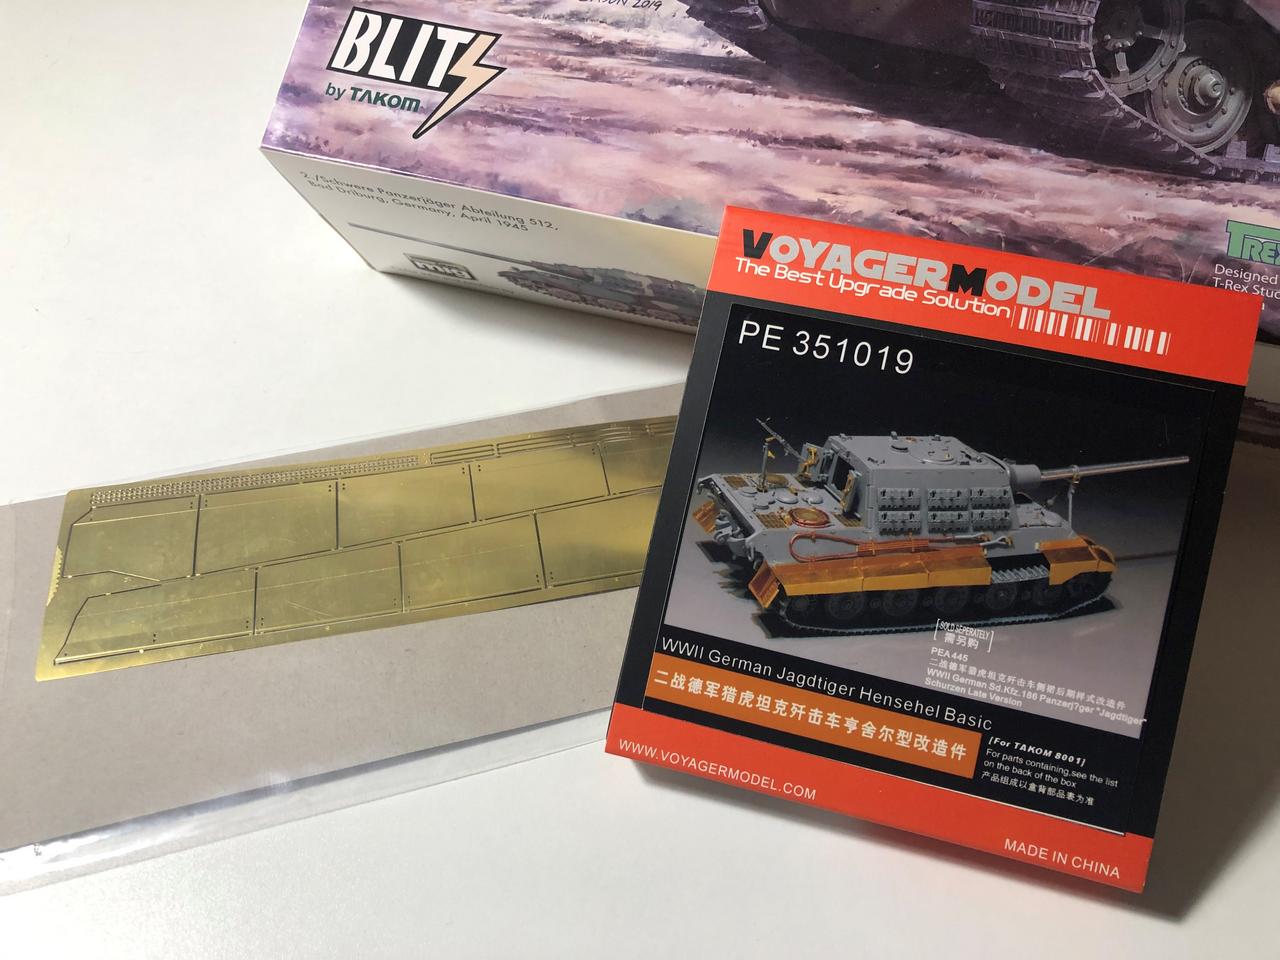
And another obligatory picture of some of the upgrades, the Voyager Shurzen set, and the Voyager General PE Upgrade set (specific to the Takom kit though). The Voyager PE set was the biggest hold up on making a start, I preordered these 2 sets in April!)
And another obligatory picture of some of the upgrades, the Voyager Shurzen set, and the Voyager General PE Upgrade set (specific to the Takom kit though). The Voyager PE set was the biggest hold up on making a start, I preordered these 2 sets in April!)
barleeni
Joined: June 12, 2015
KitMaker: 43 posts
Armorama: 43 posts
Posted: Wednesday, October 07, 2020 - 08:37 PM UTC
Previous to this build, I had essentially only worked with Tamiya kits, and in truth the only kit I have worked on since returning to the hobby after a 20 year absence is Tamiyas Panzer III Ausf. N.
After a long absence, the Tamiya kit was a pleasant surprise - great, easy, clean kit. But then this, this Takom Jagdtiger kit is beautiful!!!!! Super clean, and super crisp! Nice texture on the main surfaces.
I was a bit hesitant on making much of a start on the kit while waiting for the delayed Voyager items, so didn't want to do too much. I did though plod away with a few things.
First off, was to sharpen up the bottoms of the schurzen mounting brackets which are moulded on the hull sides. As its most likely ill be leaving the schurzen off on my kit I thought it was worth the time and effort to do this (otherwise this would all be covered up with the schurzen!).
These shouldn't have the tapered bottom face (just a side effect of the moulding process). And additionally, drilled small holes in those schurzen mounts, first up the before photo:
Then the after photo:
barleeni
Joined: June 12, 2015
KitMaker: 43 posts
Armorama: 43 posts
Posted: Wednesday, October 07, 2020 - 08:52 PM UTC
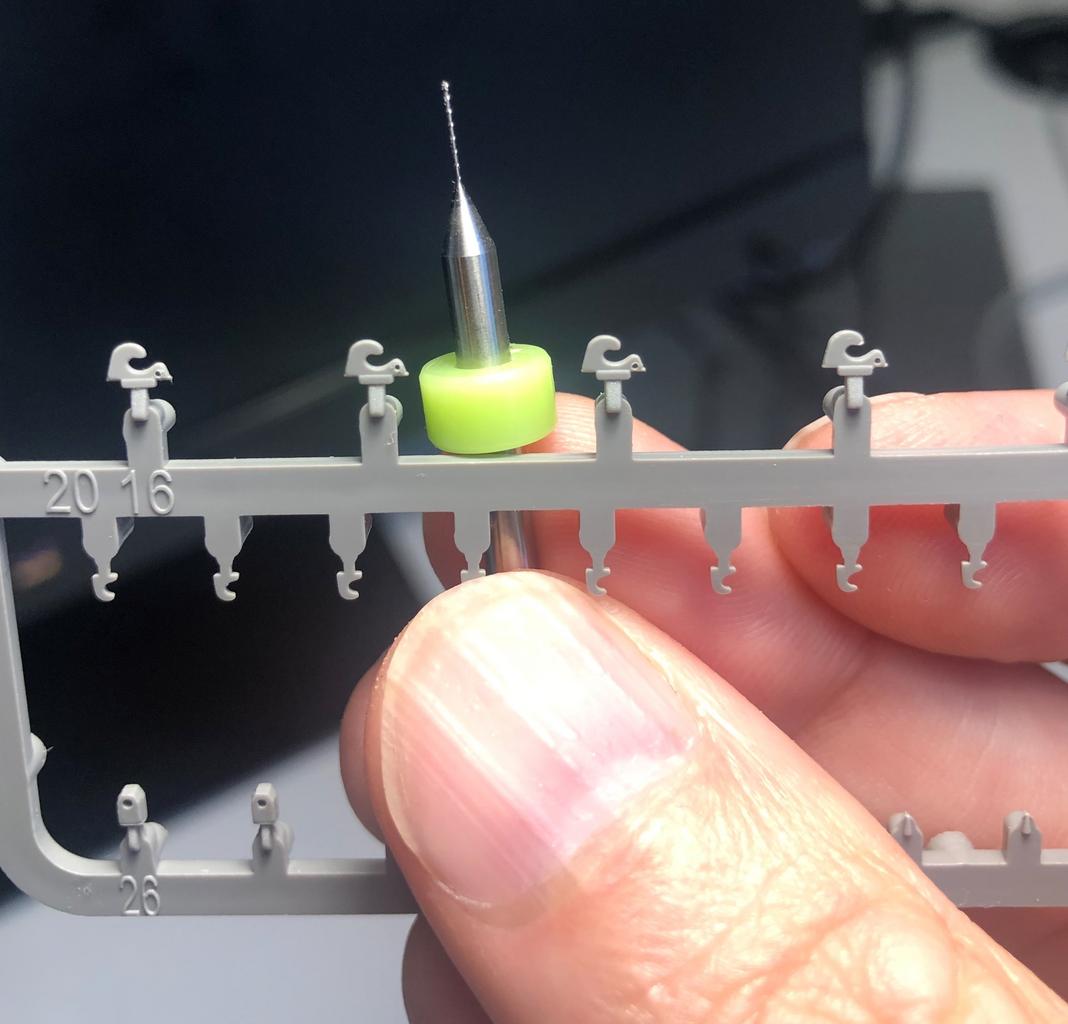
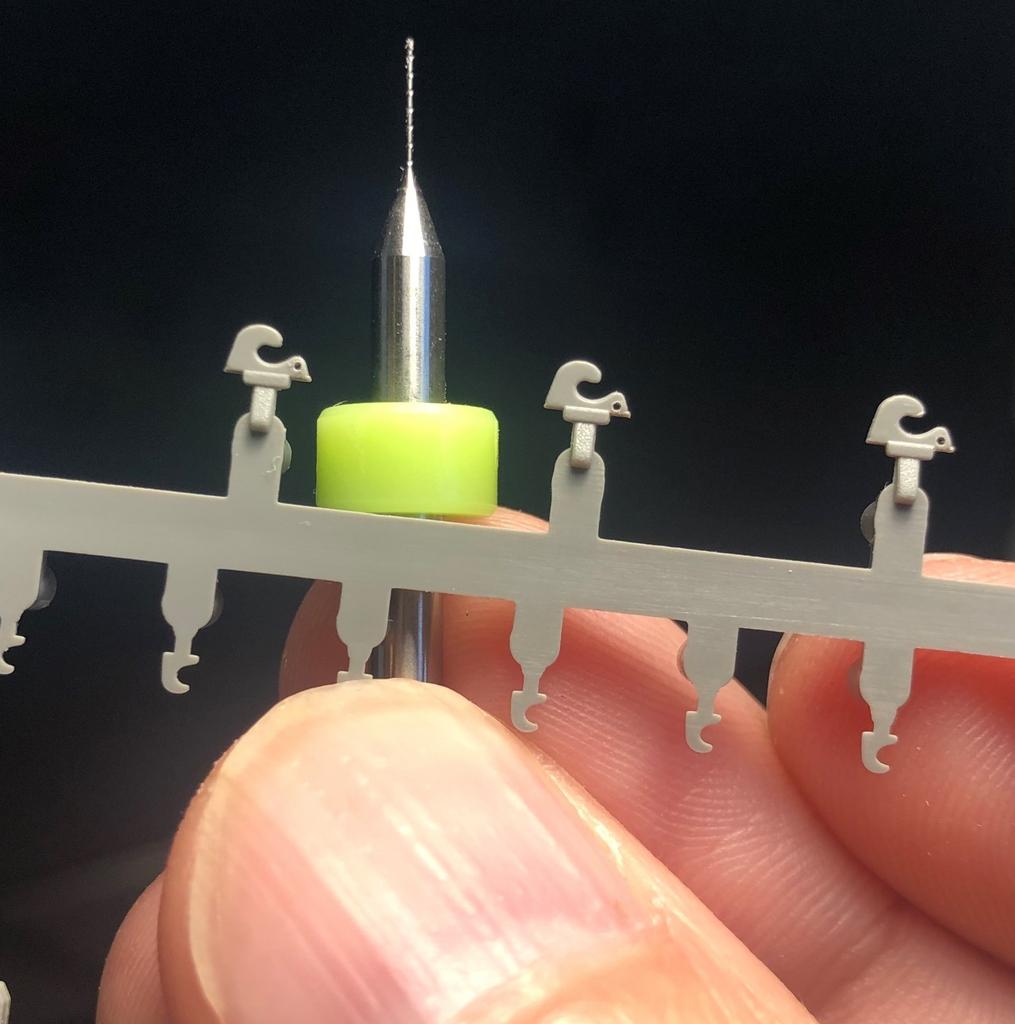
Next up, I thought id challenge myself by seeing if I could drill the holes I have seen on reference photos on the front of some of the stowage hooks (you can tell I was really clutching at straws whilst waiting the Voyager items!). The Takom kit doesnt include these holes, so gave it a crack. From memory the drill bit was 0.3mm diameter.
These hooks feature both on top of the rear deck, and also on top of the casement (I think that's the word im looking for? the top of what would be the 'turret' if it was a turret). To be honest...... I dont think anyone would notice these small added holes unless I point them out, they are now virtually invisible to the naked eye when dry fitted.
The finished product:
And the reference photo which gave me the idea (which I believe is the 'late' variant Jagdtiger Serial 305083, currently residing at Kubinka). You can see the hook with the hole at the bottom right of the image:
barleeni
Joined: June 12, 2015
KitMaker: 43 posts
Armorama: 43 posts
Posted: Wednesday, October 07, 2020 - 09:00 PM UTC
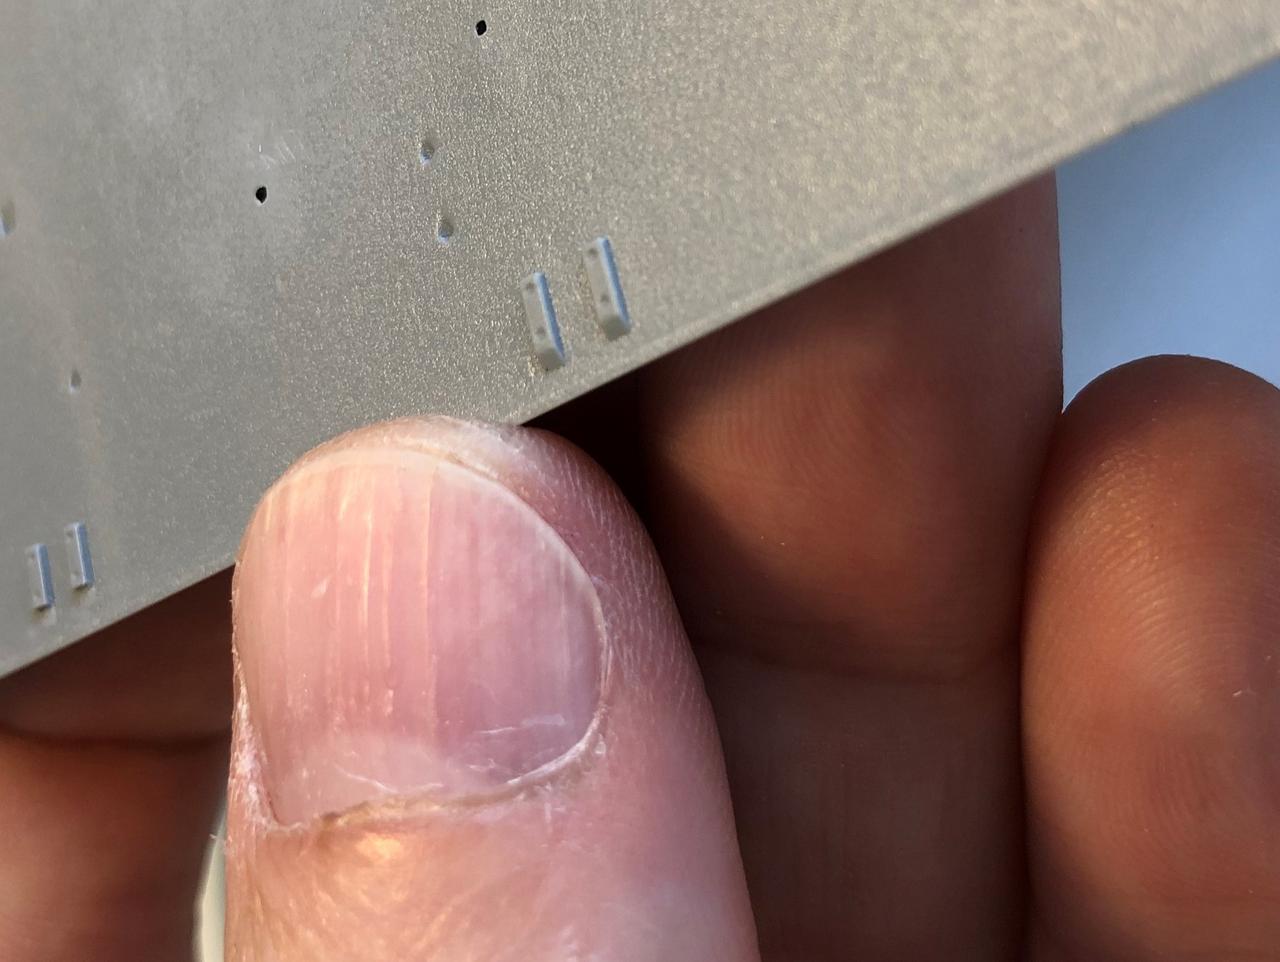
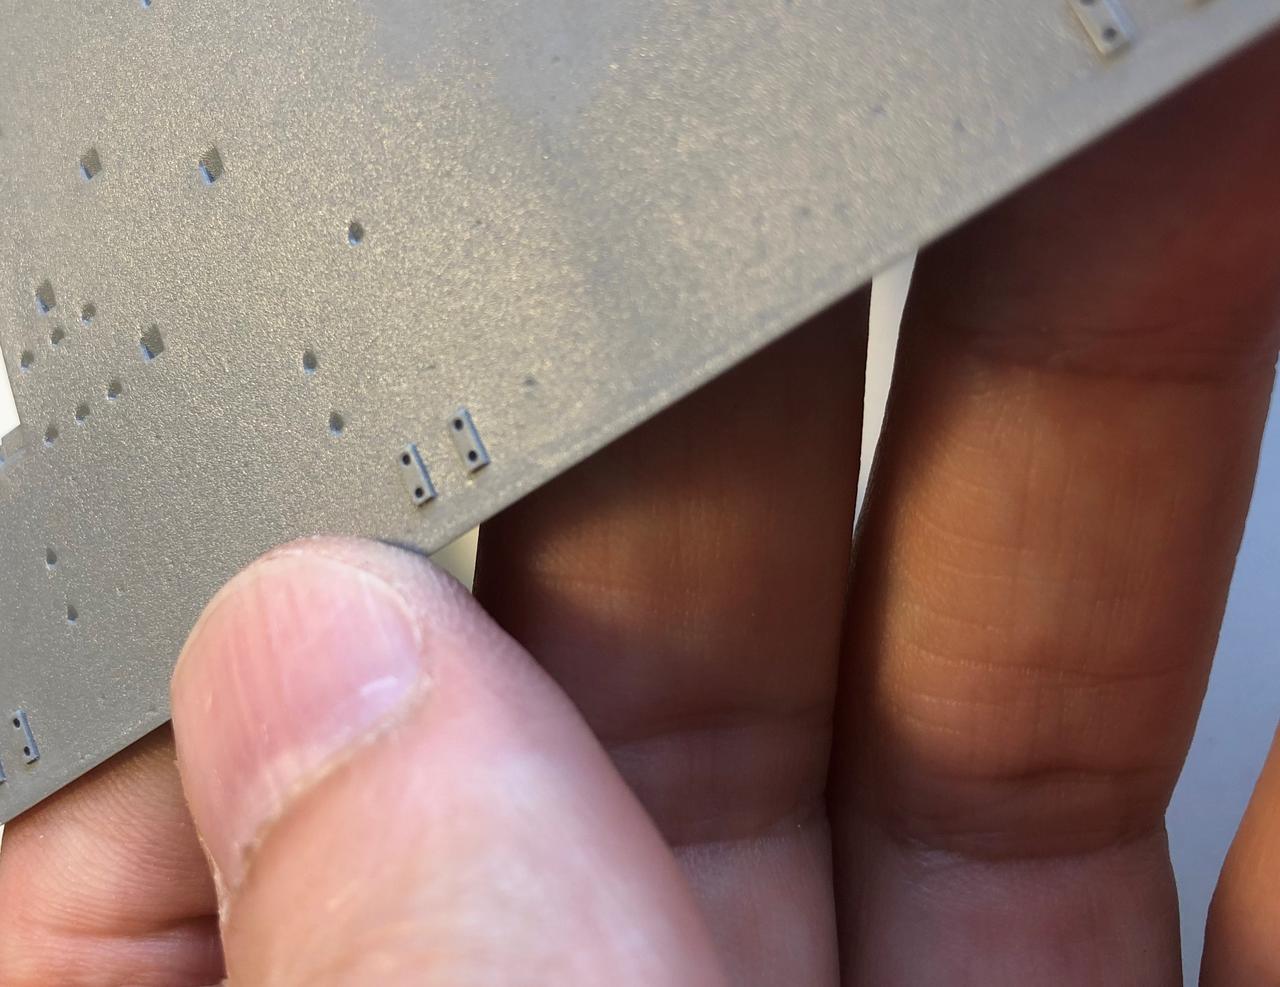
Here's a look at just one of the four 'frets' that came with the T-Rex Panzer Clamps set TR-35010. The kit comes with four differing frets, this one is all larger closed clamps, there's another fret with smaller closed clamps, and another with a mix of sizes in the open position.
I am struggling to take good photos capturing the tiny detail!

I removed one clamp from the fret (nerve racking moment), and had a bit of a play to see if I could get it to slide over the Takom kits sledgehammer...... no luck as yet though, doesn't look like it will go. The T-Rex items seem very brittle / non-elastic so maybe I wont get to use them on this kit.
I am struggling to take good photos capturing the tiny detail!
I removed one clamp from the fret (nerve racking moment), and had a bit of a play to see if I could get it to slide over the Takom kits sledgehammer...... no luck as yet though, doesn't look like it will go. The T-Rex items seem very brittle / non-elastic so maybe I wont get to use them on this kit.

varanusk


Joined: July 04, 2013
KitMaker: 1,288 posts
Armorama: 942 posts
Posted: Wednesday, October 07, 2020 - 09:59 PM UTC
Very interesting project, thanks!
I should get one of these JT someday...
I should get one of these JT someday...
barleeni
Joined: June 12, 2015
KitMaker: 43 posts
Armorama: 43 posts
Posted: Thursday, October 08, 2020 - 04:08 PM UTC
So I have managed to make good progress on this project to date, the posts from yesterday reflect how things were a little while ago, and I thought I had taken some interim progress photos, but infact I cant find them! So, photos from hence forward were taken as of today.
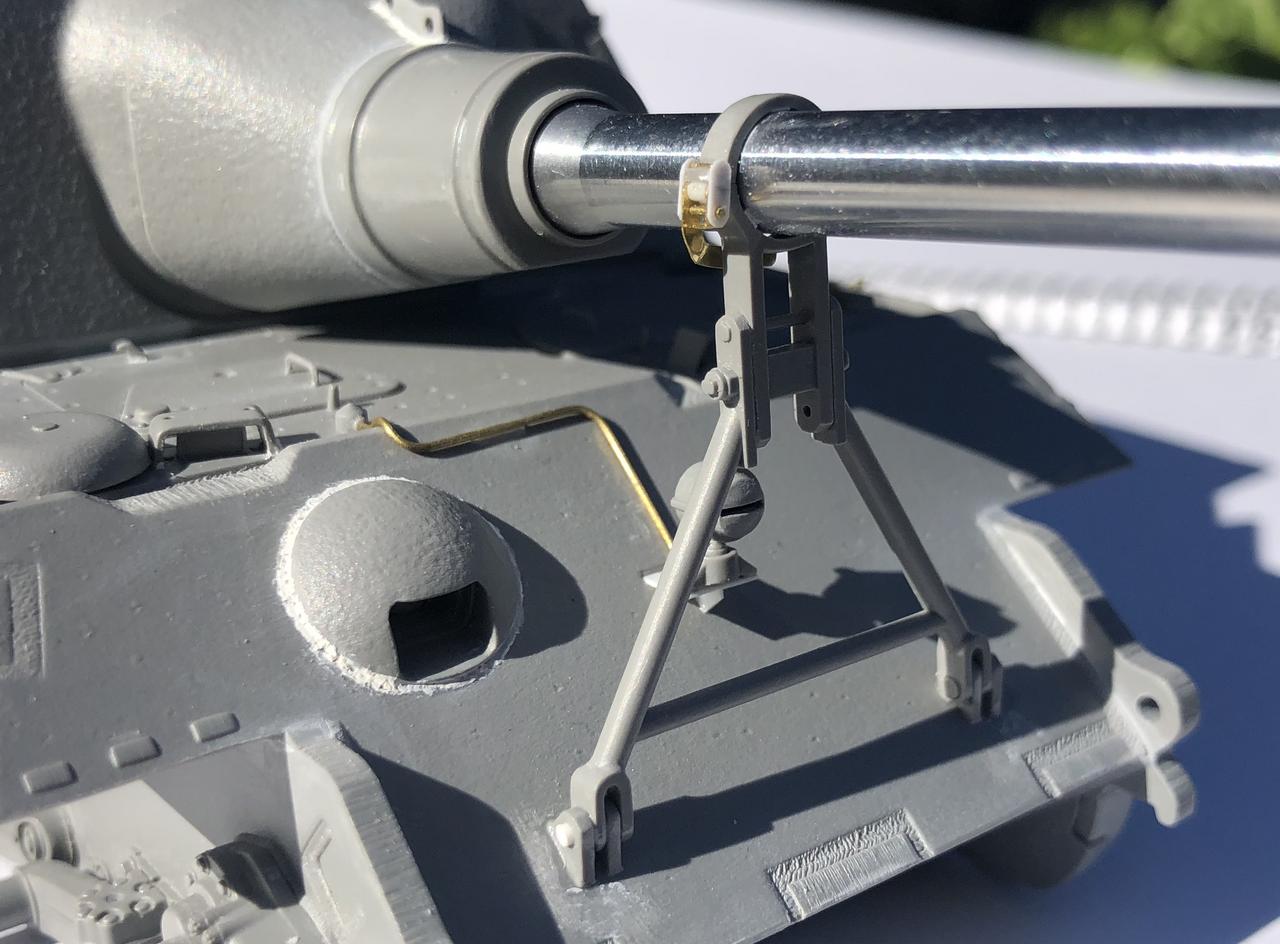
I am particularly happy with my barrel travel lock, its a bit of a hybrid of the Voyager PE and some styrene. Hard to catch the detail in the photo, but its my favorite little upgrade to date.
Couple of things on this:
- There are 3 styrene 'shims' inside the circular ring of the lock to give a tight fit over the barrel (supposed to be there).
- Added / drilled an extra hole in the inside of the travel lock (better seen in the second photo). This extra hole is for when the travel lock is stowed, and is where the locking pin would pass through in its stowed state.
- Added weld bead around the front MG mound.
- Used brass tube for the Notek conduit
- Scratched in some flame cut edges to steel plates.
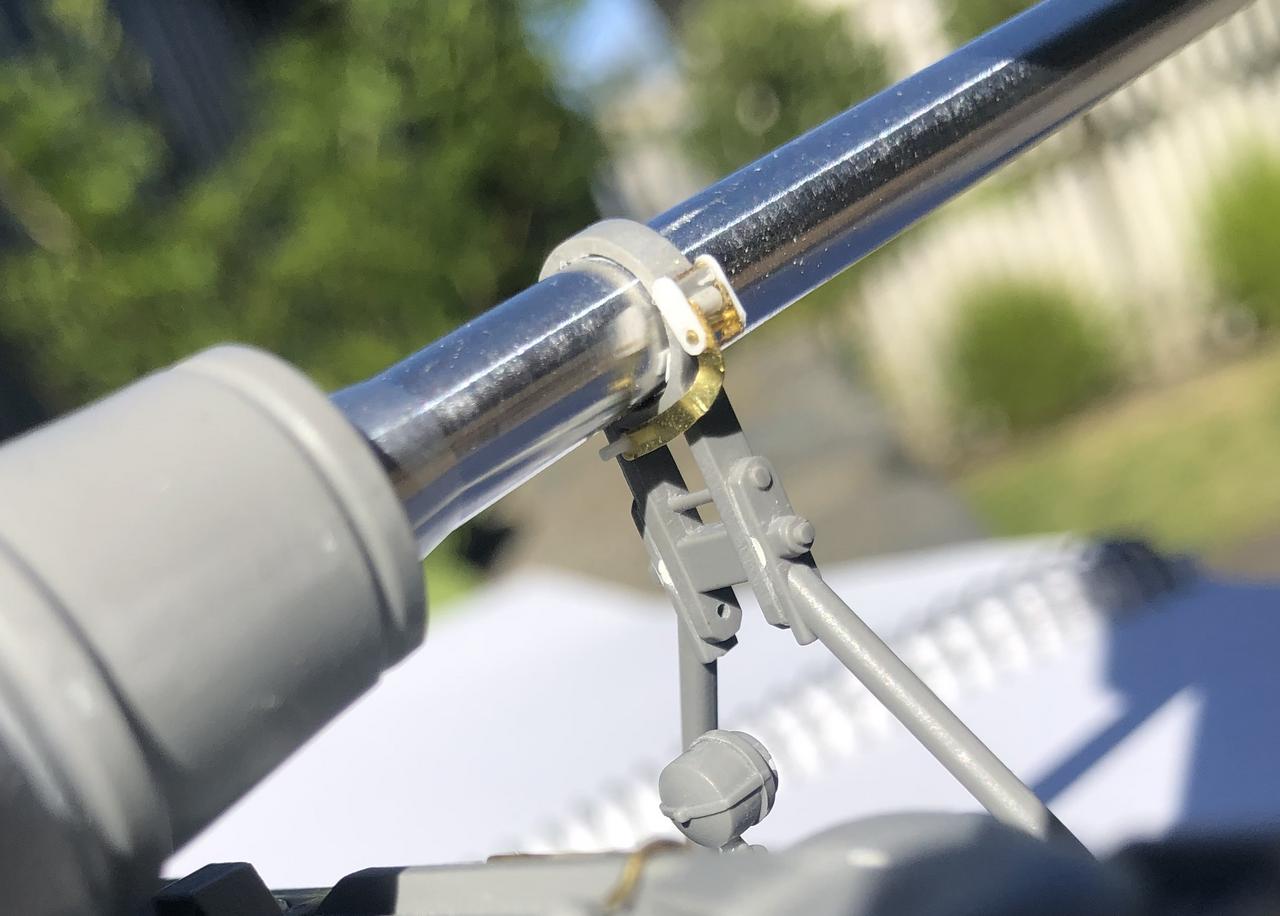
The inspiration for the travel lock clamp comes from this image found on the net:
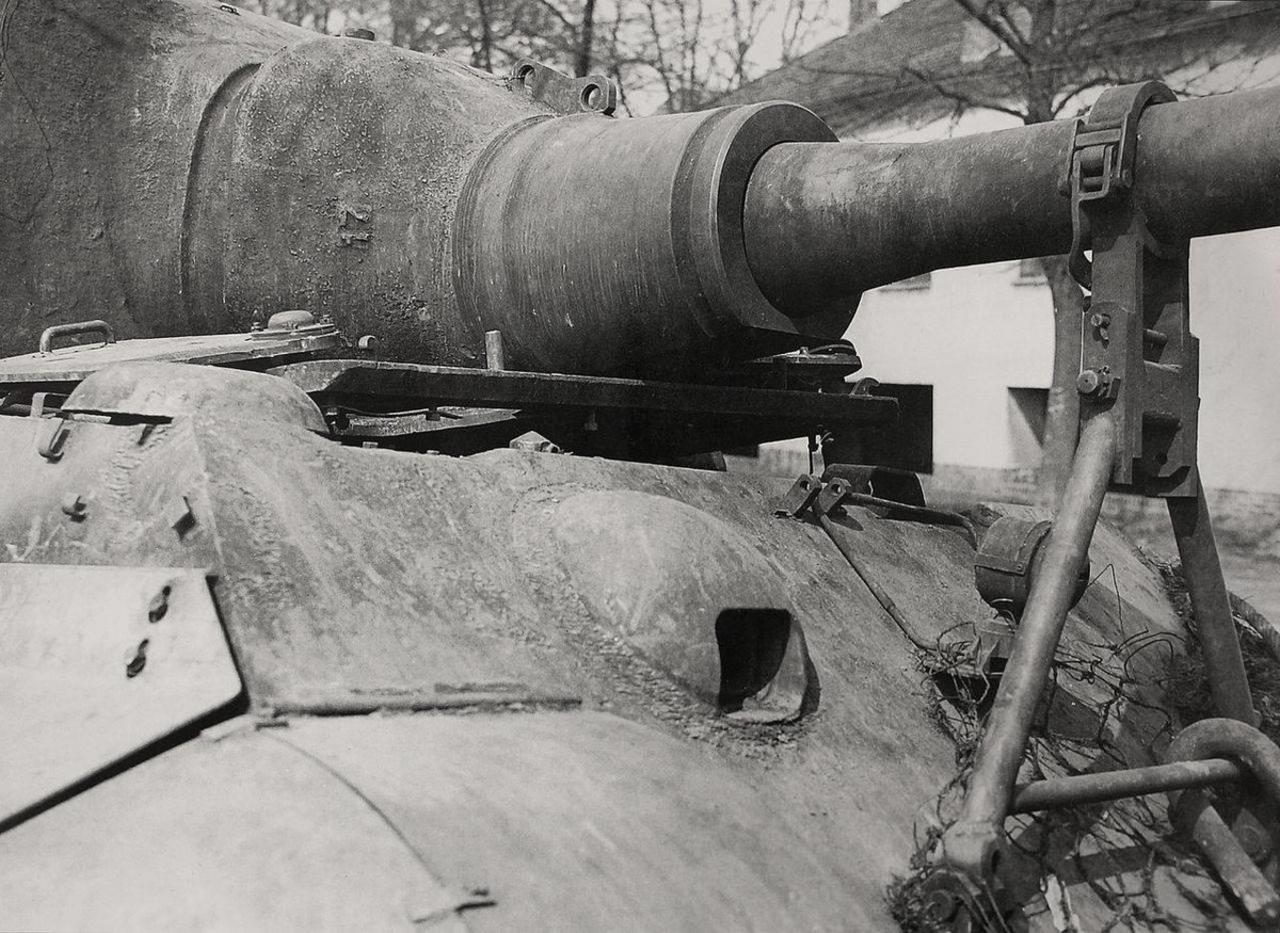
PROBLEM IS... whilst im happy with my work here, its a real shame, as to date this is also the one mistake I am aware of! I am building an 'early' variant, and I have unfortunately used the 'late' variant travel lock part from the kit!!!!! The late variant is a bit more robust, the earlier variant has a more spindly round lateral cross member connecting the sides of the travel lock, rather than the rectangular block connection. The reference photo shows the late variant. Sigh........
I also notice that the reference photo shows there is a very prominent casting mark on the mantlet..... I might need to look into that. I have seen a few similar photos. Quite a few have the same number 17!!
You can also see on this reference photo, that there are tabs sitting either side of the notek conduit near the top of the sloped plate. These seem to only be visible on 'late' variants, hence they don't feature on my kit (Takom doesn't include them at all).
I am particularly happy with my barrel travel lock, its a bit of a hybrid of the Voyager PE and some styrene. Hard to catch the detail in the photo, but its my favorite little upgrade to date.
Couple of things on this:
- There are 3 styrene 'shims' inside the circular ring of the lock to give a tight fit over the barrel (supposed to be there).
- Added / drilled an extra hole in the inside of the travel lock (better seen in the second photo). This extra hole is for when the travel lock is stowed, and is where the locking pin would pass through in its stowed state.
- Added weld bead around the front MG mound.
- Used brass tube for the Notek conduit
- Scratched in some flame cut edges to steel plates.
The inspiration for the travel lock clamp comes from this image found on the net:
PROBLEM IS... whilst im happy with my work here, its a real shame, as to date this is also the one mistake I am aware of! I am building an 'early' variant, and I have unfortunately used the 'late' variant travel lock part from the kit!!!!! The late variant is a bit more robust, the earlier variant has a more spindly round lateral cross member connecting the sides of the travel lock, rather than the rectangular block connection. The reference photo shows the late variant. Sigh........
I also notice that the reference photo shows there is a very prominent casting mark on the mantlet..... I might need to look into that. I have seen a few similar photos. Quite a few have the same number 17!!
You can also see on this reference photo, that there are tabs sitting either side of the notek conduit near the top of the sloped plate. These seem to only be visible on 'late' variants, hence they don't feature on my kit (Takom doesn't include them at all).
guni-kid

Joined: July 21, 2007
KitMaker: 521 posts
Armorama: 514 posts

Posted: Thursday, October 08, 2020 - 07:14 PM UTC
Very nice and clean build! A real joy to look at your pictures, so keep it up, you have just gotten yourself another follower 

ColinEdm

Joined: October 15, 2013
KitMaker: 1,355 posts
Armorama: 1,229 posts
Posted: Friday, October 09, 2020 - 02:09 AM UTC
Great work so far, looking forward to seeing more progress.
barleeni
Joined: June 12, 2015
KitMaker: 43 posts
Armorama: 43 posts
Posted: Friday, October 09, 2020 - 09:37 PM UTC
Most of the hull is all complete, the fit of all of the main parts was very good, credit to Takom for a well thought out kit. The only problematic element was fitting the front plate on the casement, this needed some trimming to get it to fit, and I have read similar comments from other builders, so it wasnt just me. This just required some careful trimming and a number of back and forths to get it to snug into place.
I have started fitting out the rear of the vehicle, image here shows progress. I have used some of the T-Rex parts here to retain the 'C' shaped shackles (the T-Rex parts are a very dark grey). I haven't yet added the wingnuts that should be present on those. I also filled in the cavities where the rear mud flaps sit. I intend on using the Voyager etched mud gaurds, so the cavity needed filling to suit. I have kept the moulded hinges for the mudgaurds - as I am not keen at all, nor brave enough to try and make the hinges from brass as per Voyagers instructions.
Some of the holes for mounting D-shackles needed drilling out, and I also added some more flame cut marks to the cut edges of the heavy plate.
Earlier in the build while I was awaiting the Voyager PE kits, I did manage to download the Voyager instructions from their website. From this I could see that the Voyager kit came with replacement etched foliage loops which feature at various locations on the hull, so I thought id trim all of the moulded loops off while I waited for the PE to arrive (a lot of the moulded loops actually looked very good, but some weren't so well moulded, so off they came). Then to my horror, when the Voyager kit arrived I saw how tiny and fiddly the parts actually were. There was some serious self doubt about the chances of actually getting them on the kit. The Voyager kit came with a little bending template in one of the frets to help form the loops profile (as an aside it took me an age to find it on the fret, as it wasn't labelled in anyway). After a few attempts I found I couldn't use the template provided, so ended up forming the loops with tweezers, which was fine once I got into a routine to give some consistency to the shape.
Four of the loops on the front of the casement:

There's another four loops on the back wall of the casement, and another eight on the rear deck. In total there are thirty-four all up. It was a fairly tedious process, I would form about four at a time, then fit those. I used strips of masking tape on the hull as a guide to keep them all in straight formation.
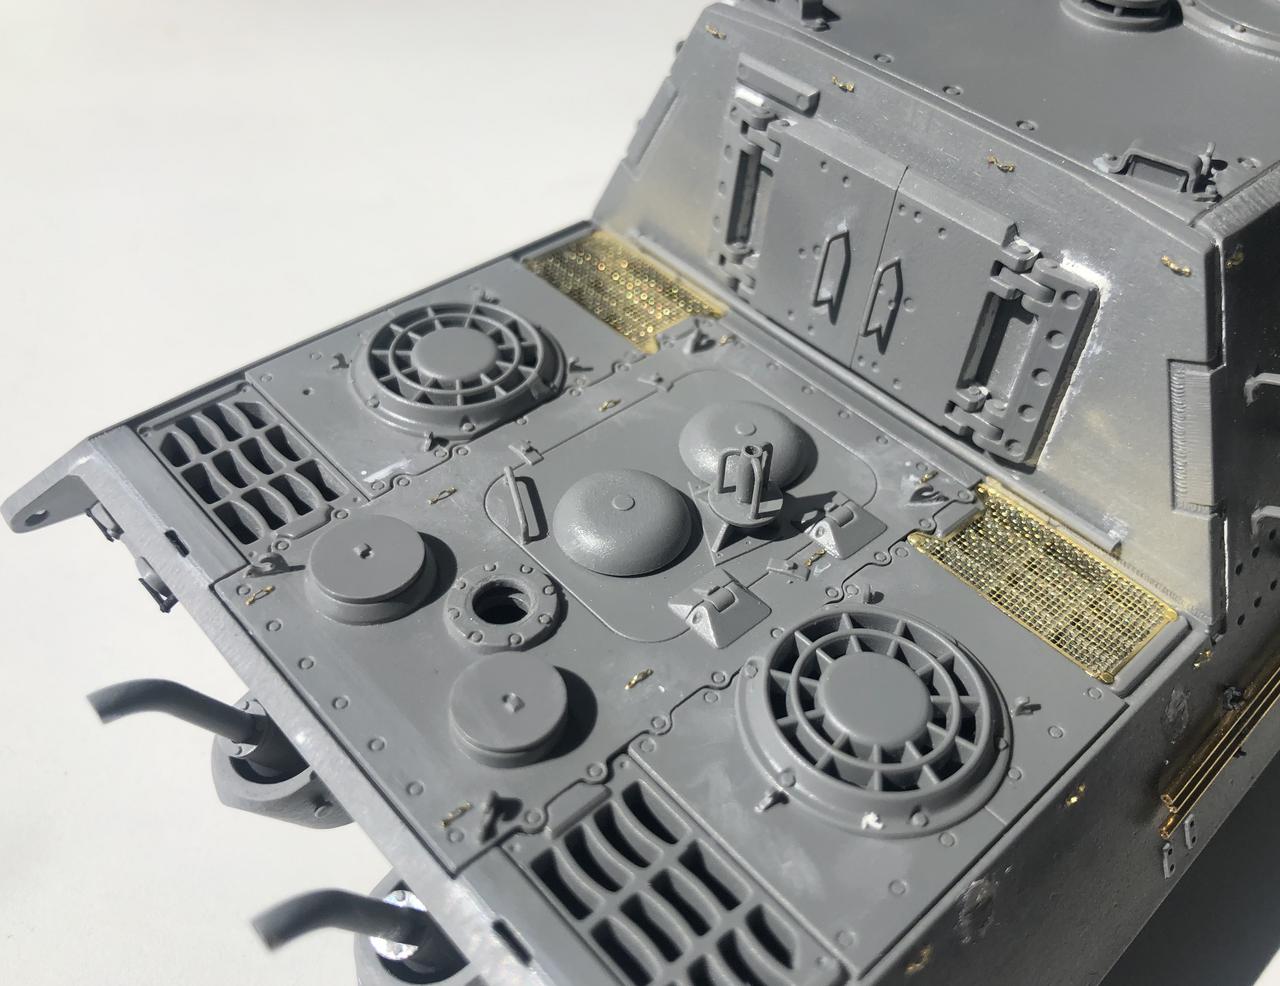
I have also added some weld beads around the rear hatches. I am using the Voyager PE mesh screens on the rear deck rather than the Takom ones, I have only fitted two so far as I still have a bit of puttying/sanding to do on the hull sides which means a bit of man handling which gives rise to the chance of me damaging them, so I have left off for now.
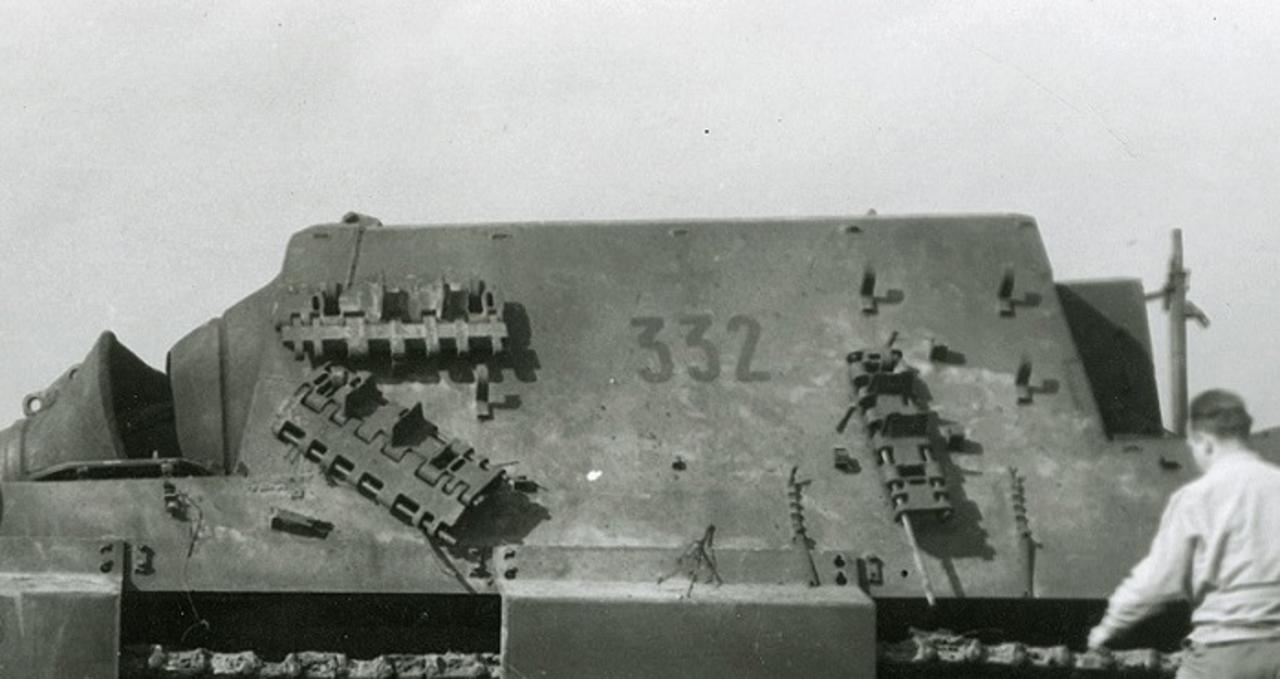
Back onto those foliage loops, both Takom and Voyager show just four loops running down the side of the casement, right up just under the top edge of the hull. However, on quite a few photos it appears to me as though there are five. The difference being that Takom and Voyager exclude the fifth one right at the back end, just before the corner of the casement rear wall. This image below is one of the clearer images showing what I think is a fifth loop, being the right most loop shown in the photo (well looks like just a smudge... but im picking its a loop....).
Currently im working on tools and clasps.
Please feel free to let me know if anything is amiss, and thanks for looking
I have started fitting out the rear of the vehicle, image here shows progress. I have used some of the T-Rex parts here to retain the 'C' shaped shackles (the T-Rex parts are a very dark grey). I haven't yet added the wingnuts that should be present on those. I also filled in the cavities where the rear mud flaps sit. I intend on using the Voyager etched mud gaurds, so the cavity needed filling to suit. I have kept the moulded hinges for the mudgaurds - as I am not keen at all, nor brave enough to try and make the hinges from brass as per Voyagers instructions.
Some of the holes for mounting D-shackles needed drilling out, and I also added some more flame cut marks to the cut edges of the heavy plate.
Earlier in the build while I was awaiting the Voyager PE kits, I did manage to download the Voyager instructions from their website. From this I could see that the Voyager kit came with replacement etched foliage loops which feature at various locations on the hull, so I thought id trim all of the moulded loops off while I waited for the PE to arrive (a lot of the moulded loops actually looked very good, but some weren't so well moulded, so off they came). Then to my horror, when the Voyager kit arrived I saw how tiny and fiddly the parts actually were. There was some serious self doubt about the chances of actually getting them on the kit. The Voyager kit came with a little bending template in one of the frets to help form the loops profile (as an aside it took me an age to find it on the fret, as it wasn't labelled in anyway). After a few attempts I found I couldn't use the template provided, so ended up forming the loops with tweezers, which was fine once I got into a routine to give some consistency to the shape.
Four of the loops on the front of the casement:
There's another four loops on the back wall of the casement, and another eight on the rear deck. In total there are thirty-four all up. It was a fairly tedious process, I would form about four at a time, then fit those. I used strips of masking tape on the hull as a guide to keep them all in straight formation.
I have also added some weld beads around the rear hatches. I am using the Voyager PE mesh screens on the rear deck rather than the Takom ones, I have only fitted two so far as I still have a bit of puttying/sanding to do on the hull sides which means a bit of man handling which gives rise to the chance of me damaging them, so I have left off for now.
Back onto those foliage loops, both Takom and Voyager show just four loops running down the side of the casement, right up just under the top edge of the hull. However, on quite a few photos it appears to me as though there are five. The difference being that Takom and Voyager exclude the fifth one right at the back end, just before the corner of the casement rear wall. This image below is one of the clearer images showing what I think is a fifth loop, being the right most loop shown in the photo (well looks like just a smudge... but im picking its a loop....).
Currently im working on tools and clasps.
Please feel free to let me know if anything is amiss, and thanks for looking
guni-kid
Joined: July 21, 2007
KitMaker: 521 posts
Armorama: 514 posts
Posted: Sunday, October 11, 2020 - 06:25 PM UTC
Again: Super nice and detailled build! I am truly impressed!
Just as a sidenote (and yeah, me being a wisea** here): It's not a "casement" you are actually talking about (which is something like a window frame) but a "casemate", coming from the German "Kasemattpanzerung" which translates to "casemate armor".
Looking forward to seeing more of your Jagdtiger!
Just as a sidenote (and yeah, me being a wisea** here): It's not a "casement" you are actually talking about (which is something like a window frame) but a "casemate", coming from the German "Kasemattpanzerung" which translates to "casemate armor".
Looking forward to seeing more of your Jagdtiger!
barleeni
Joined: June 12, 2015
KitMaker: 43 posts
Armorama: 43 posts
Posted: Sunday, October 11, 2020 - 07:10 PM UTC
Quoted Text
Again: Super nice and detailled build! I am truly impressed!
Just as a sidenote (and yeah, me being a wisea** here): It's not a "casement" you are actually talking about (which is something like a window frame) but a "casemate", coming from the German "Kasemattpanzerung" which translates to "casemate armor".
Looking forward to seeing more of your Jagdtiger!
Casemate it is then! thanks. I find the hardest part of this blog is using the correct terminology, as I never talk or write about what I do, I just do what I do. Thanks for following and keeping me in check.
barleeni
Joined: June 12, 2015
KitMaker: 43 posts
Armorama: 43 posts
Posted: Sunday, October 11, 2020 - 07:25 PM UTC
A little bit of progress. Currently working on two fronts, puttying up and tidying some holes on the hull sides and getting that all sanded and ready for adding the tools and tow ropes etc, and on the other front is the tools themselves.
No shortcuts that I know of with the Voyager clasps, I reckon they are about 45min each for myself from removing from the fret to getting them on the tool. The fire extinguisher was easier to start with a bit of round styrene rod than try and use the Takom part and shaving off the moulded features. I think the styrene was 3.2mm diameter. Slow going this phase. I have also completed the sledge hammer at the front of the hull, and this has been placed already.
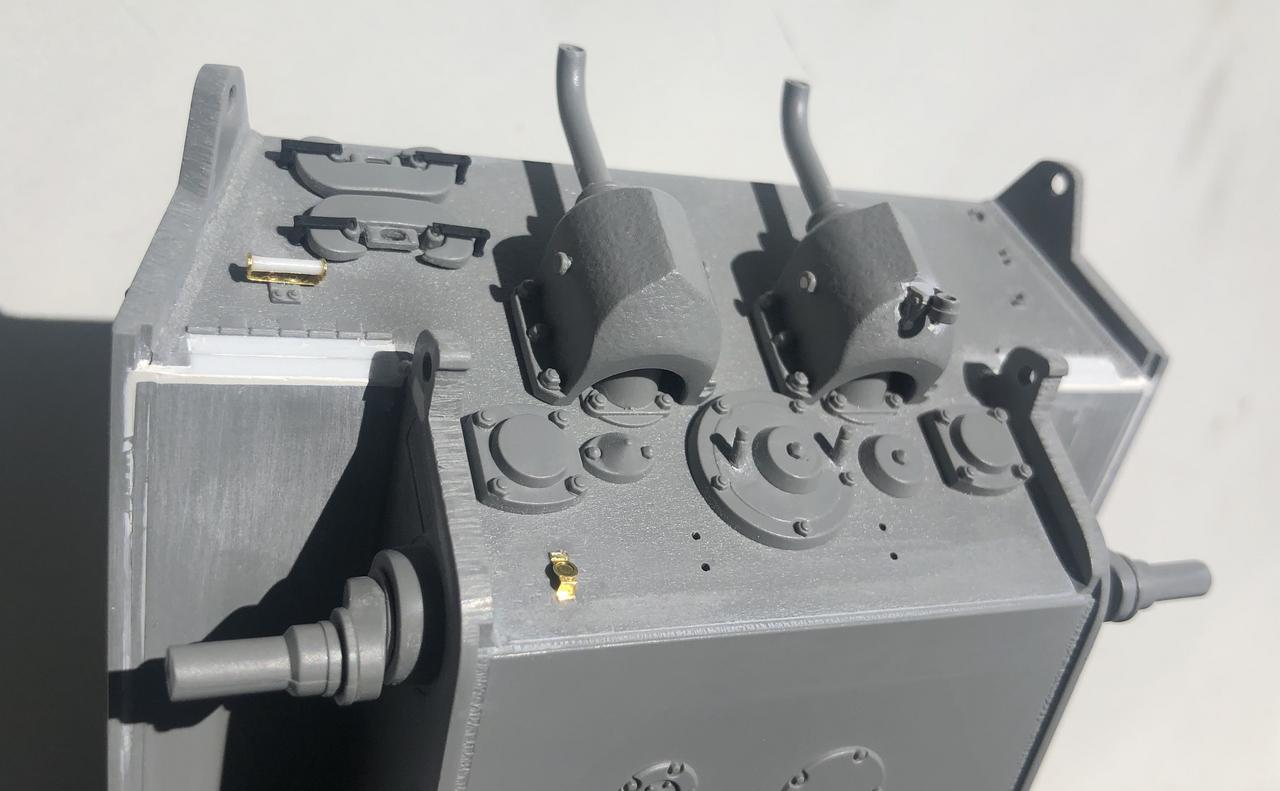
Im also trying to replicate a trick I have seen Sam Dwyer do, which is to form a ring (as per photo below) which he places on top of the circular vents on the rear deck. If you want to check out what I mean, have a look at his instagram account (well worth a follow if you have instagram, look for "sd_scale_models"). Theres some WIP photos of his Takom Panther G where you can see this if you look hard enough.
No shortcuts that I know of with the Voyager clasps, I reckon they are about 45min each for myself from removing from the fret to getting them on the tool. The fire extinguisher was easier to start with a bit of round styrene rod than try and use the Takom part and shaving off the moulded features. I think the styrene was 3.2mm diameter. Slow going this phase. I have also completed the sledge hammer at the front of the hull, and this has been placed already.
Im also trying to replicate a trick I have seen Sam Dwyer do, which is to form a ring (as per photo below) which he places on top of the circular vents on the rear deck. If you want to check out what I mean, have a look at his instagram account (well worth a follow if you have instagram, look for "sd_scale_models"). Theres some WIP photos of his Takom Panther G where you can see this if you look hard enough.
barleeni
Joined: June 12, 2015
KitMaker: 43 posts
Armorama: 43 posts
Posted: Monday, October 12, 2020 - 08:46 PM UTC
Wondering if anyone has any insight into the casting numbers on the Jagdtiger mantlet. Is there any correlation between the casting number and the chassis serial number? Seems like I can reasonably easily shave off some suitable numbers from the sprues of the kit, which look about the right size, which I can then glue onto the kit mantlet...... but what number to choose?!!??
WilliamHarry

Joined: August 07, 2009
KitMaker: 32 posts
Armorama: 30 posts
Posted: Tuesday, October 13, 2020 - 03:04 AM UTC
Excellent build of a beautiful kit! Thanks for this log!
The JagdTiger has always been a favorite of mine, both the Henschel and Porsche variants, although it did not accomplish much in the months after it was introduced. In contrast, the Ferdinand/Elefant was the highest scoring tank destroyer of the war in terms of its kill: loss ratio but has been much more maligned.
Keep up the wonderful work on this!
Bill
barleeni
Joined: June 12, 2015
KitMaker: 43 posts
Armorama: 43 posts
Posted: Sunday, October 18, 2020 - 02:52 PM UTC
Small update, im still beavering away on tools. The end is in sight fortunately. The jack block that comes with the kit has good texture on the main face, but is a little lacking the sides. Therefore I have scoured out two of the sides to show that the jack block is actually 4 small blocks strapped together. On the opposing sides, I have scratched in a bit of texture to match the texture on the main face. The moulded handle on the side is very crisp, so I have left that as is (there is a photo-etch replacement, but it isnt really any better).

And heres the whole family together. For the jack itself, I removed the moulded on handles and replaced with some handles formed from brass round. In the centre of the image you can see some numbers (1 and 5) that I shaved off from the sprue, those are what im thinking of gluing onto the mantlet as casting numbers... not certain on this though as yet.

Hopefully it wont be too long until these all get married to the vehicle itself!
And heres the whole family together. For the jack itself, I removed the moulded on handles and replaced with some handles formed from brass round. In the centre of the image you can see some numbers (1 and 5) that I shaved off from the sprue, those are what im thinking of gluing onto the mantlet as casting numbers... not certain on this though as yet.
Hopefully it wont be too long until these all get married to the vehicle itself!
barleeni
Joined: June 12, 2015
KitMaker: 43 posts
Armorama: 43 posts
Posted: Sunday, October 18, 2020 - 02:58 PM UTC
Quoted Text
Excellent build of a beautiful kit! Thanks for this log!
The JagdTiger has always been a favorite of mine, both the Henschel and Porsche variants, although it did not accomplish much in the months after it was introduced. In contrast, the Ferdinand/Elefant was the highest scoring tank destroyer of the war in terms of its kill: loss ratio but has been much more maligned.
Keep up the wonderful work on this!
Bill
Thanks for checking in Bill, much appreciated! Im not sure what it is, but I too am a fan of the Jagdtiger. Its hard to tell how good or bad the Jagdtiger really was, I think its a victim of circumstances as much as anything.
Hope you keep following this one...... and hopefully I dont loose you and other followers to the new forum!!!?
guni-kid
Joined: July 21, 2007
KitMaker: 521 posts
Armorama: 514 posts
Posted: Sunday, October 18, 2020 - 07:16 PM UTC
Well, I'll stay for following you till the end here! 
Very nice work on those tools! And the cast numbers are a cool idea, interested to see how those will turn out!
Very nice work on those tools! And the cast numbers are a cool idea, interested to see how those will turn out!
WilliamHarry
Joined: August 07, 2009
KitMaker: 32 posts
Armorama: 30 posts
Posted: Monday, October 19, 2020 - 08:58 AM UTC
I will follow along as long as you keep posting! And, your tools are fantastic! Well done so far!
Bill
Bill
TankManNick
Joined: February 01, 2010
KitMaker: 551 posts
Armorama: 543 posts
Posted: Monday, October 19, 2020 - 12:22 PM UTC
Nice upgrades! It is also good to know you won't use ALL the PE bits. Gives the rest of us hope! (Those PE sheets can be intimidating until you get into the details.)
 |

WEB HOSTING BY


Copyright ©2021 Armorama and Kitmaker Network, a subsidiary of Silver Star Enterprises
All Rights Reserved. Please read our Conditions of Use and Privacy Policy.
All Rights Reserved. Please read our Conditions of Use and Privacy Policy.