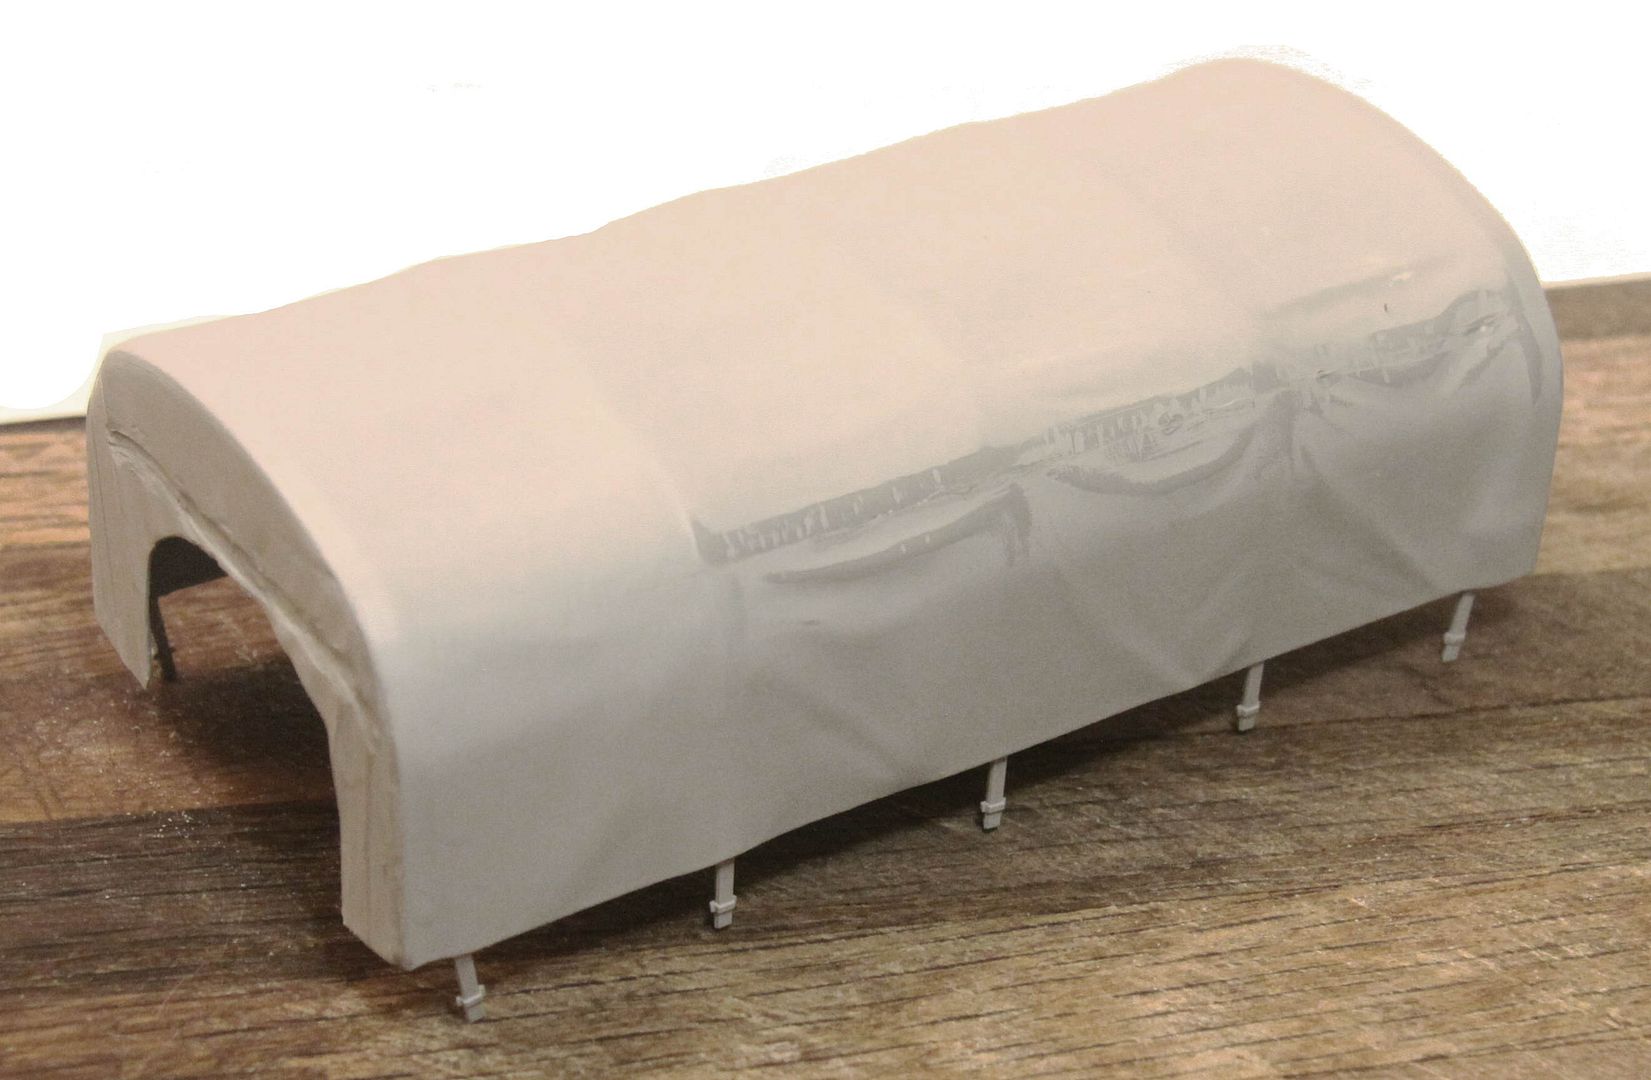
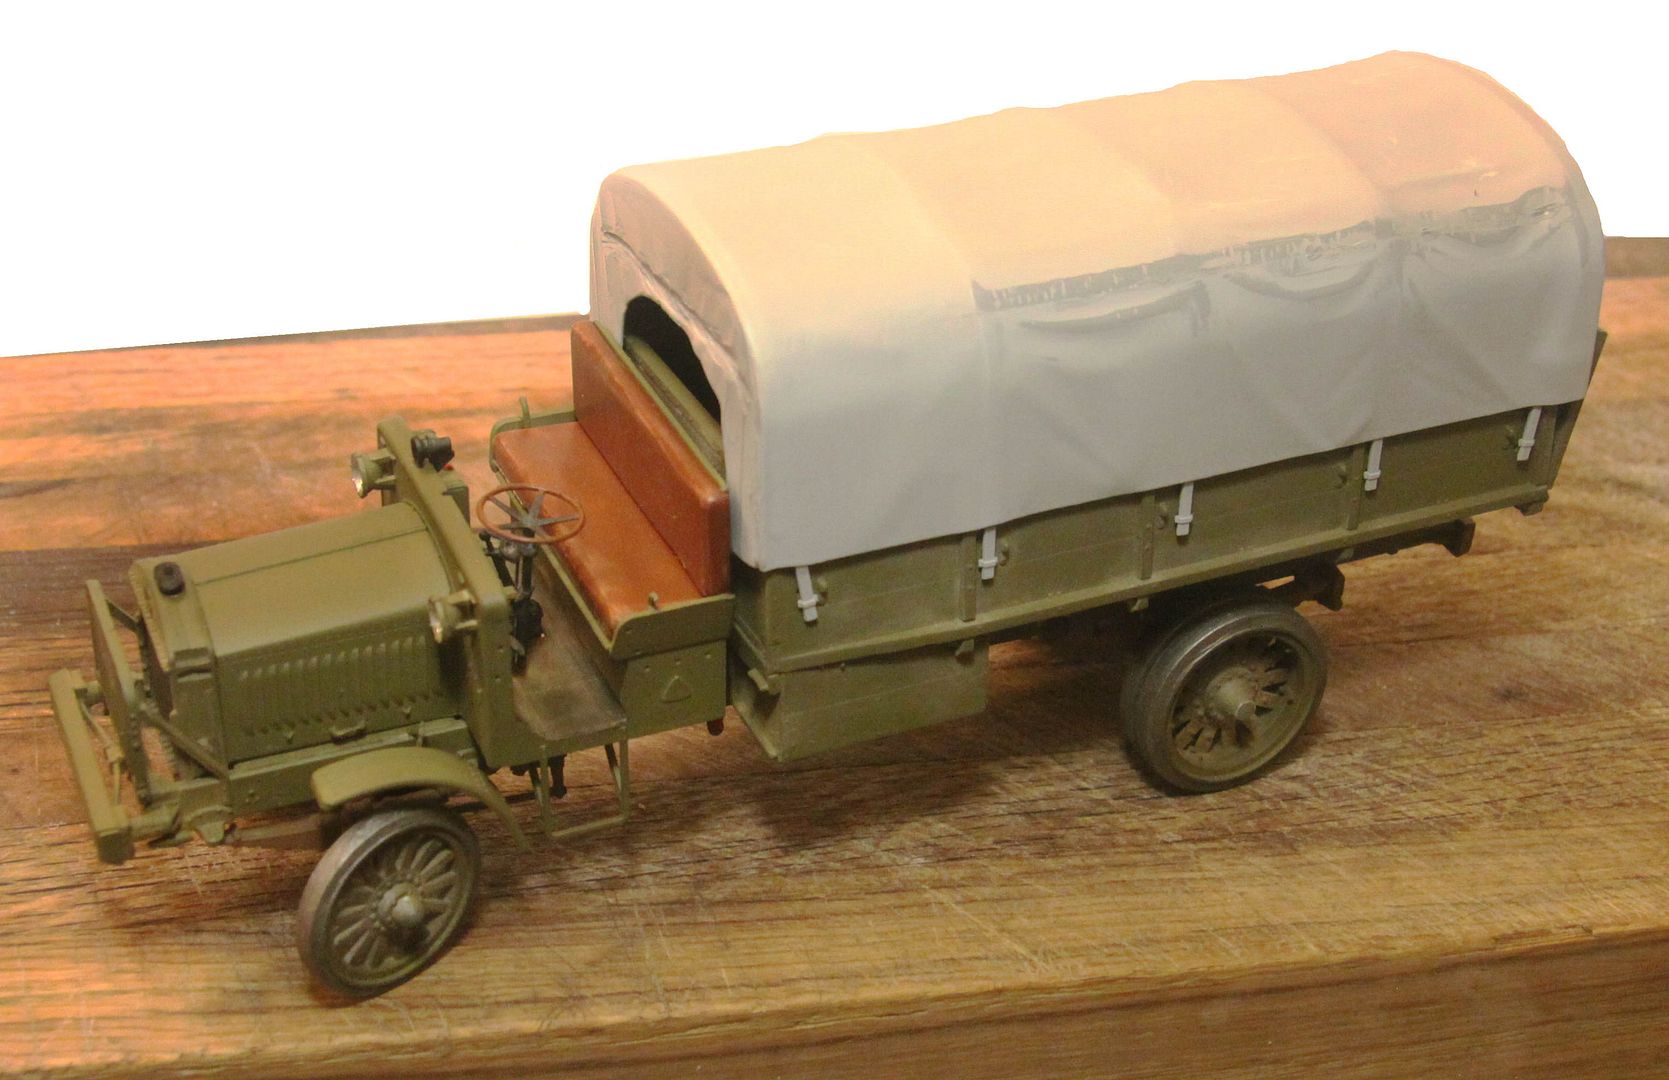
The unit depicted by the ICM kit is actually the earlier Series 1 truck that actually made it into the war. This can be identified in that the vehicle has electric headlights and electric searchlight. (Something quite new for the day.)
The later Series 2 vehicles eliminated the modern electric lighting in favor of the much more common (and familiar) acetylene gas powered lights. However the Series 2 vehicles came too late to make it to Europe and join the fight.
I considered "updating" this vehicle with the addition of some O Gauge railroad caboose lantern "headlights**" and a scratch built acetylene tank but again as I say these later vehicles never made it to the continent.
** In the day these carriage style acetylene headlights came in all sizes from something small enough to fit in a cigar box up to monsters the size of a lady's very LARGE hatbox. Therefore no concern need be given for the small difference in scale of the O Gauge railroad caboose lights should you consider using them.
Hosted by Darren Baker
Standard B Liberty Truck Photos
Posted: Monday, September 24, 2018 - 02:23 AM UTC
Posted: Monday, September 24, 2018 - 09:18 AM UTC
Wheels on, seats in and brush guard installed.

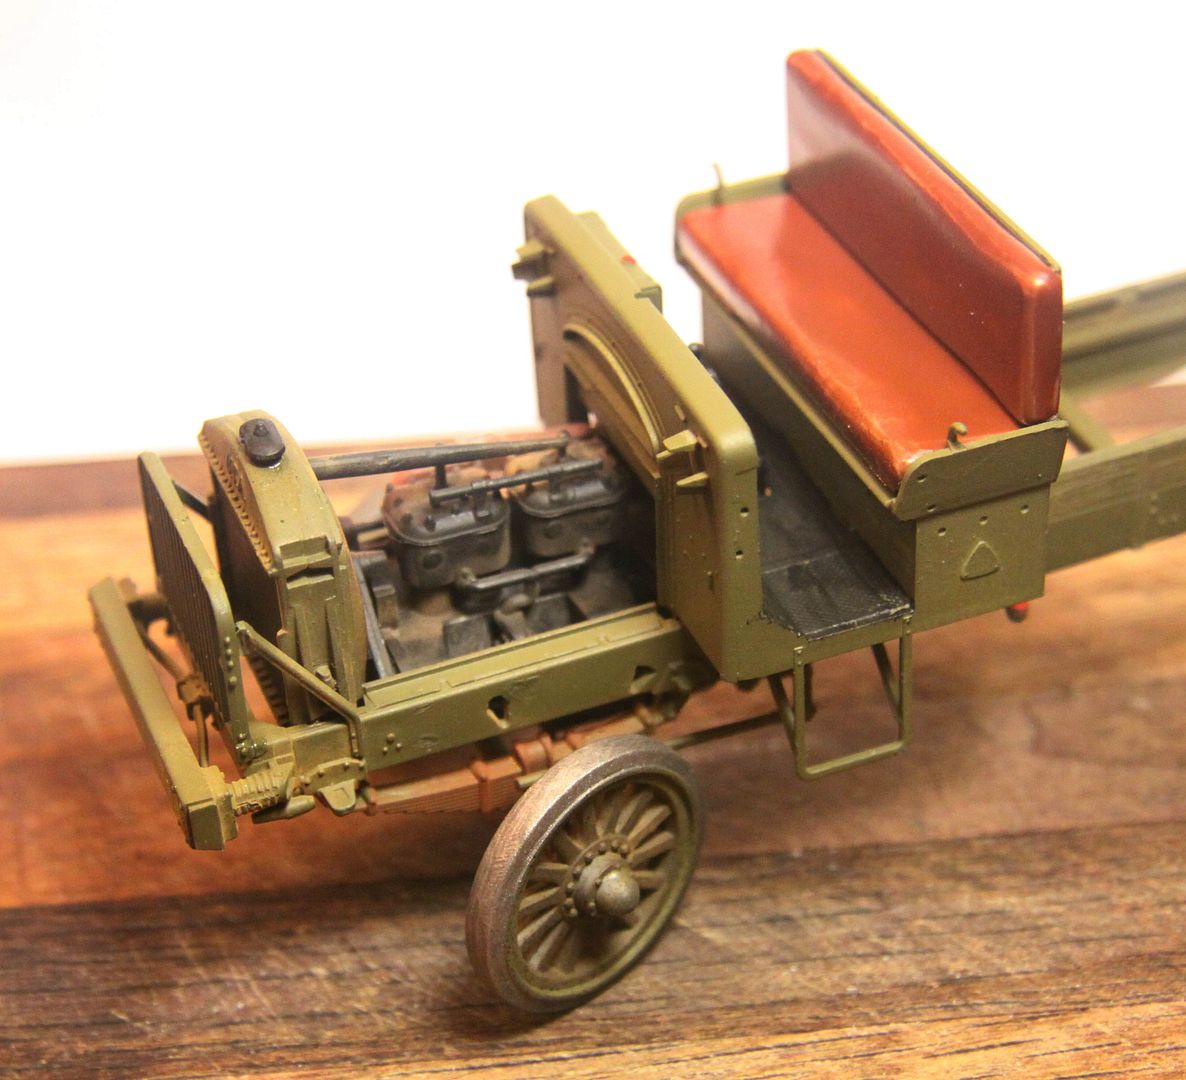
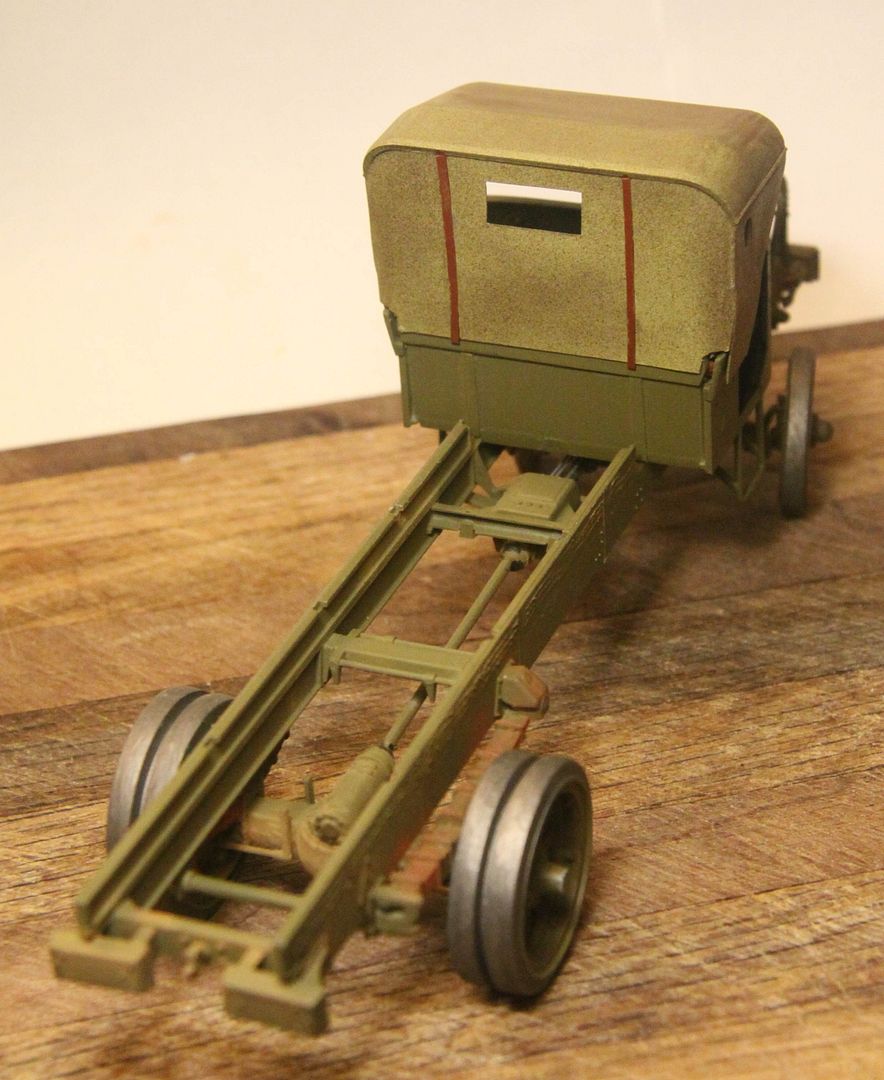
That frame is looking rather bare. No reenforcement beams for the tow hitch and no mechanical brake rigging to fill all that space between the rails.
 Interior details added to the cloth top. The brown leather bands would, in actuality, go all the way down and loop around under the cloth and back up again to the outside frame member but I deleted the portion directly behind the seat back in order to reduce unnecessary thickness between the cab and the loadbox.


That frame is looking rather bare. No reenforcement beams for the tow hitch and no mechanical brake rigging to fill all that space between the rails.
 Interior details added to the cloth top. The brown leather bands would, in actuality, go all the way down and loop around under the cloth and back up again to the outside frame member but I deleted the portion directly behind the seat back in order to reduce unnecessary thickness between the cab and the loadbox.
Posted: Tuesday, September 25, 2018 - 02:08 AM UTC
ICM gives us the option of two styles of bearing covers (cups) for the front wheel spindle bearings. One small and bullet shaped and the other much longer and beer can shaped. Interestingly however, there is only one of the longer bearing cups included in the kit???? I have double checked both the kit and the instruction sheet, only one of the larger wheel bearing covers is included yet historic reference photos indicate that two are required.
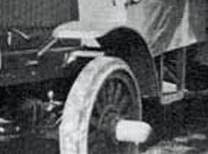
The presence of these larger spindle bearings sticking out each side must have made for some fun times when driving down narrow tree lined European lanes.**
** It now appears that there was only one oversized spindle cup (on the driver's side only - as only one is included in the ICM kit molding.) This longer cup contained a "mile-o-meter" to measure vehicle use and distance traveled. Many modern over the road trucks use a similar device to confirm the driver's reported mileage as taken from the vehicle's odometer.
Posted: Tuesday, September 25, 2018 - 05:23 AM UTC
Working now on cab details, the bonnet (hood) and construction of the load box. Gotta get working on those fenders real soon!
Note: I left the tailgate ajar on purpose. I intend to add some small chain supports to hold the tailgate in this position.
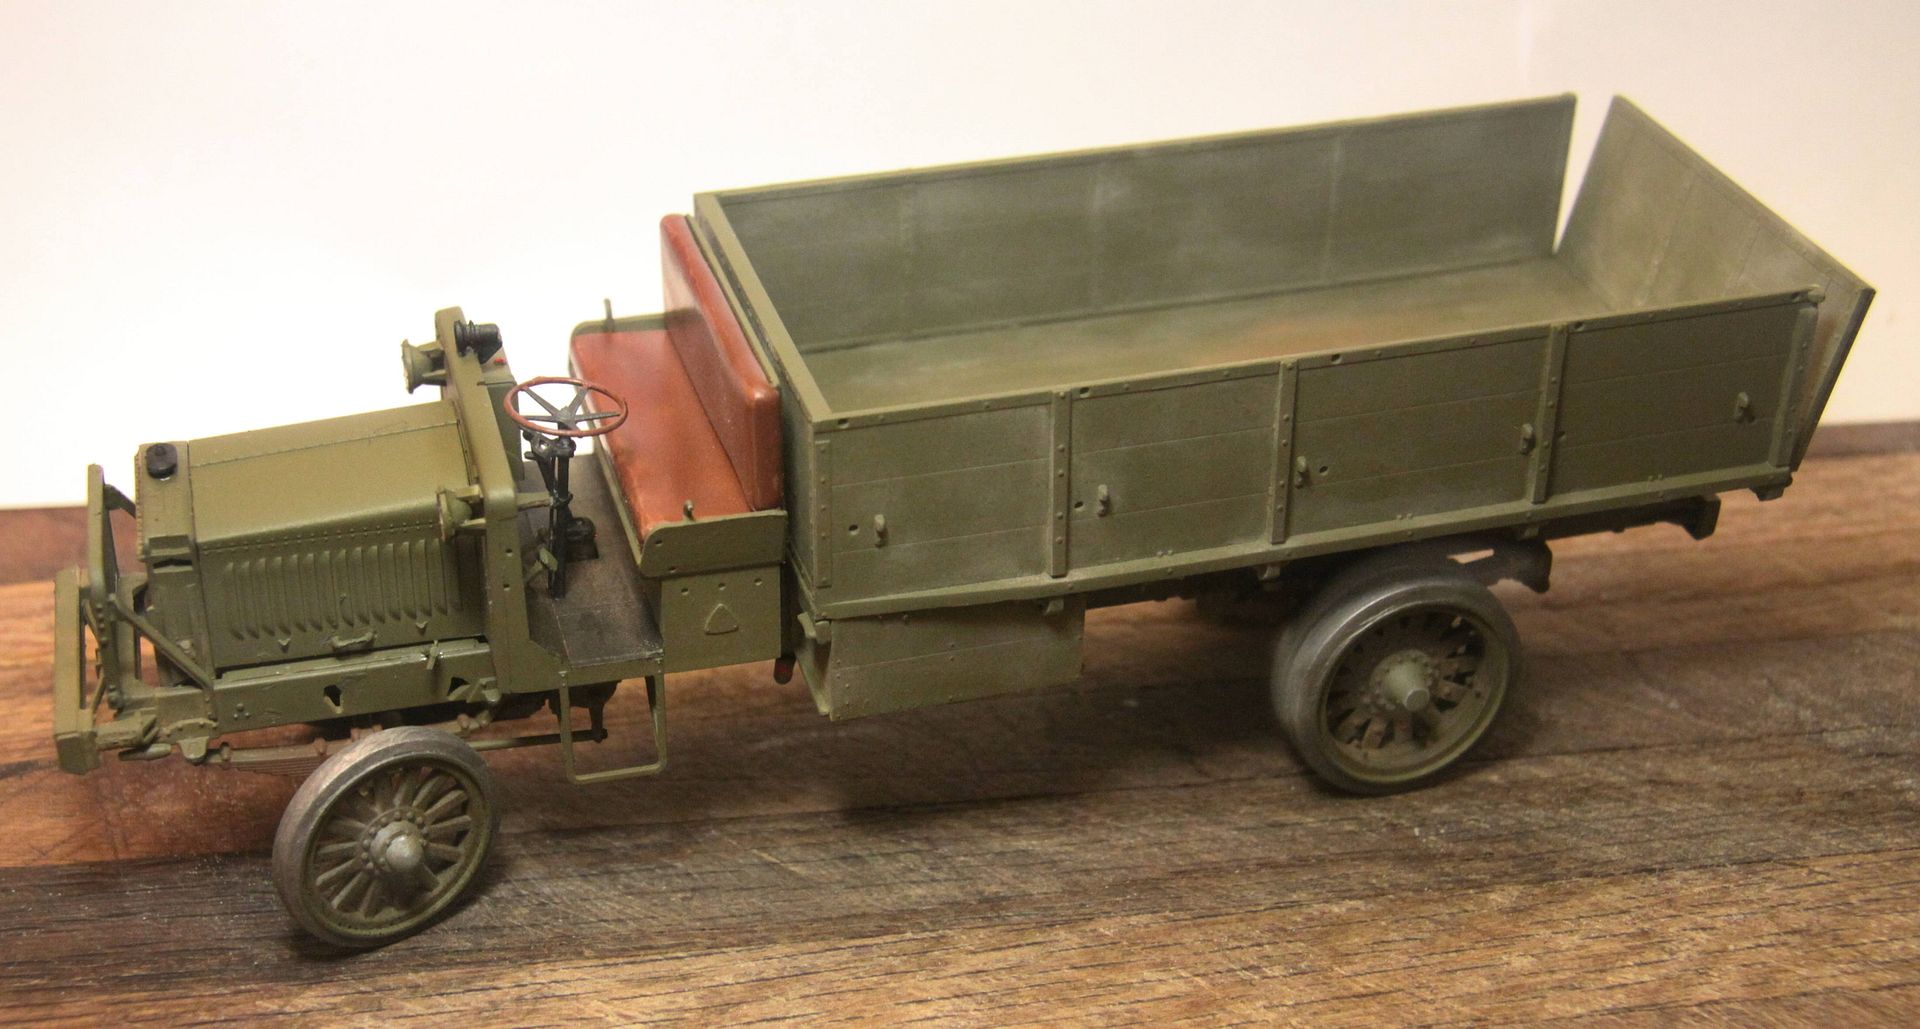
Again all weathering is created using various colors of pastel chalk scrubbed into the fresh paint with a stiff, short bristle brush.
Note: I left the tailgate ajar on purpose. I intend to add some small chain supports to hold the tailgate in this position.

Again all weathering is created using various colors of pastel chalk scrubbed into the fresh paint with a stiff, short bristle brush.
Posted: Tuesday, September 25, 2018 - 07:21 AM UTC
The Fenders are in!
Those fenders with their brackets fit GREAT! Be sure to sand down the mounting points where they meet the frame. Sand just enough to knock off any burrs and high points and they should slide right in!
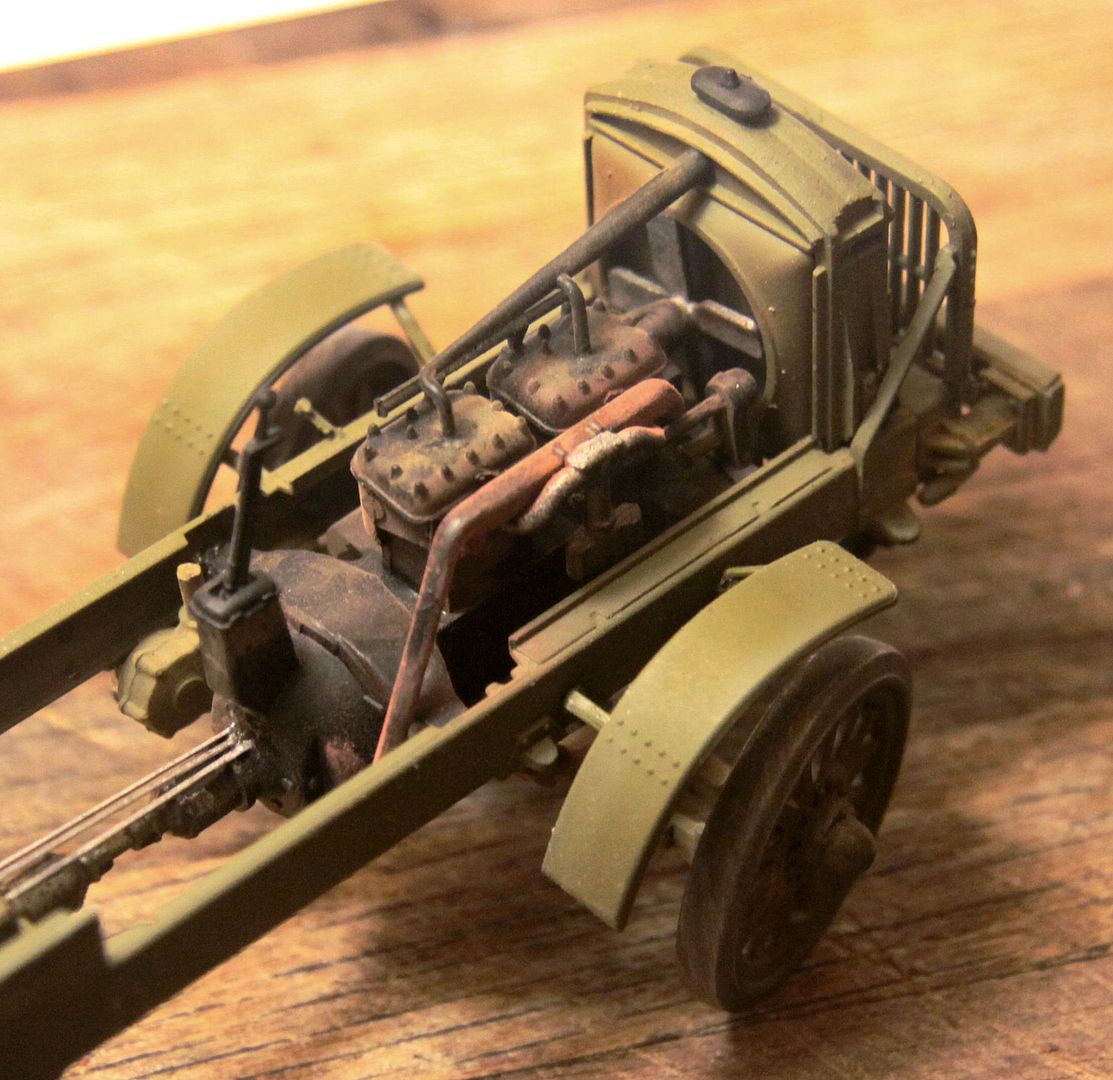
Added shift linkage between gear shift tower and transmission. Will be adding brake linkage as well just as soon as I figure out the routing from Frenchy's great reference photos!
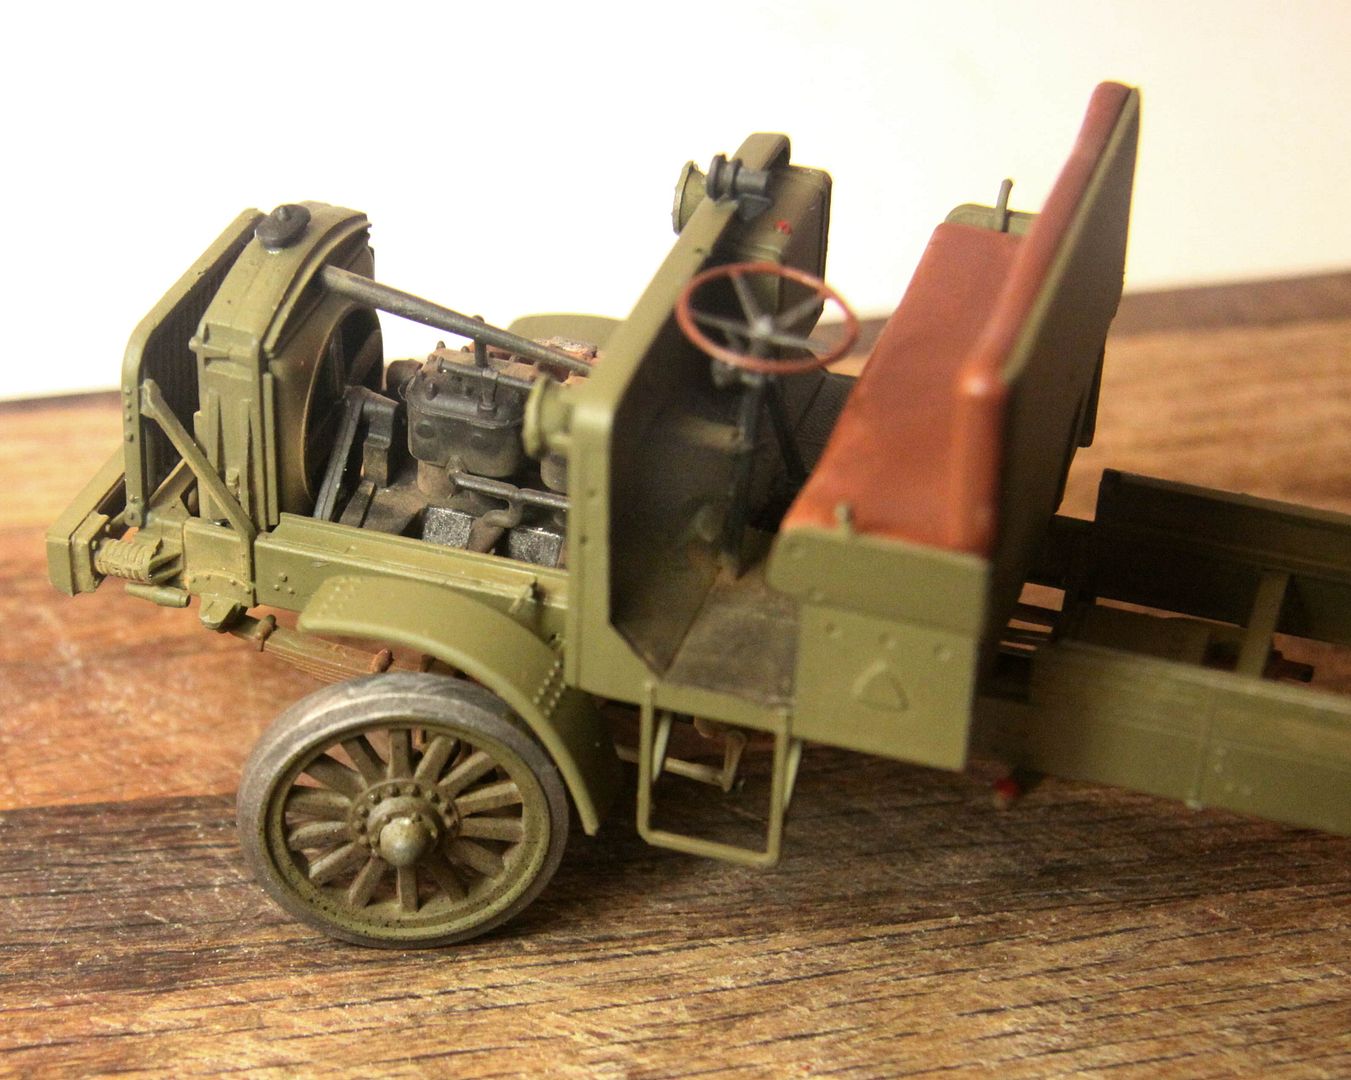
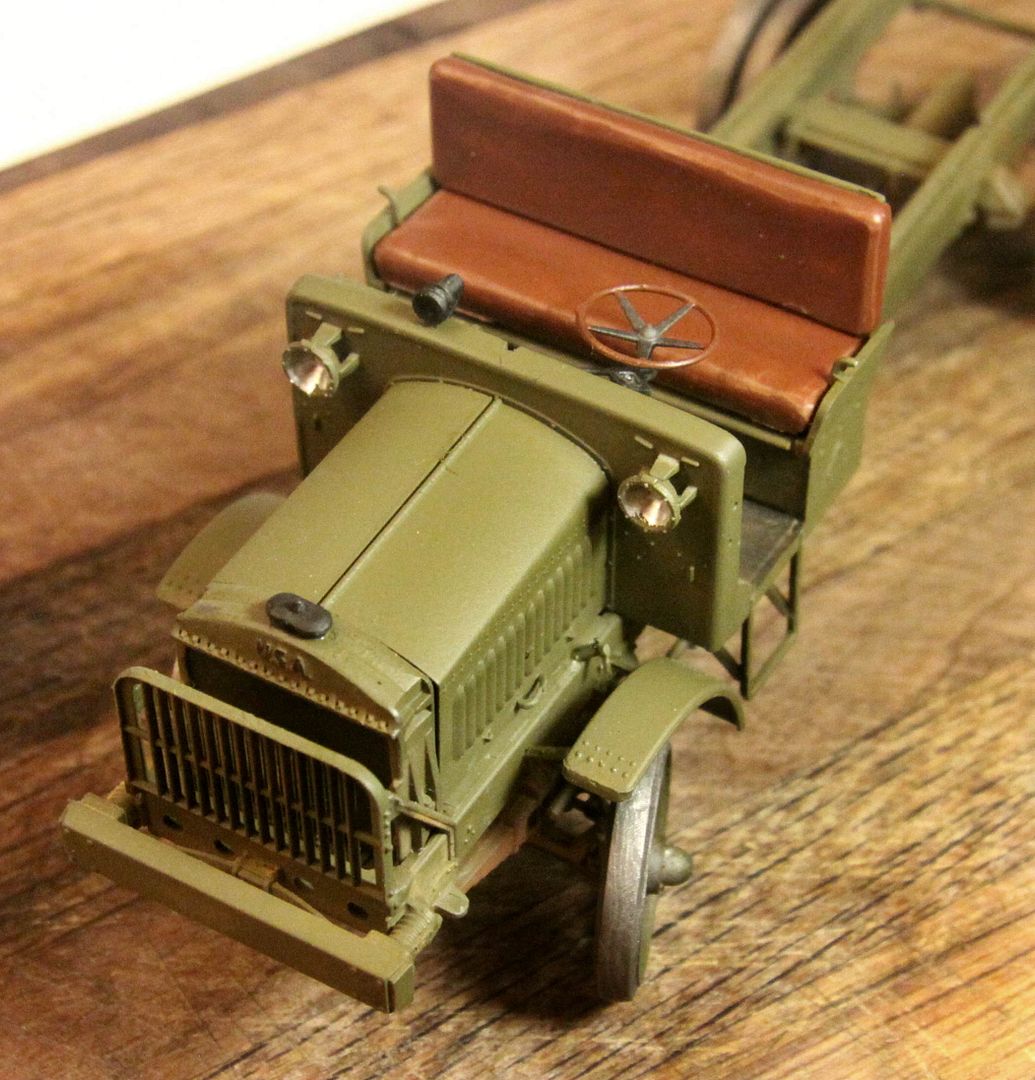
The bonnet (hood) remains removable. It is molded in two pieces. (Left half/right half.) To give it some flexibility going on and off I simply joined it with a piece of clear tape running down the underside.
Those fenders with their brackets fit GREAT! Be sure to sand down the mounting points where they meet the frame. Sand just enough to knock off any burrs and high points and they should slide right in!

Added shift linkage between gear shift tower and transmission. Will be adding brake linkage as well just as soon as I figure out the routing from Frenchy's great reference photos!


The bonnet (hood) remains removable. It is molded in two pieces. (Left half/right half.) To give it some flexibility going on and off I simply joined it with a piece of clear tape running down the underside.
Posted: Tuesday, September 25, 2018 - 07:28 AM UTC
Posted: Tuesday, September 25, 2018 - 06:29 PM UTC
Almost done - just the searchlight and a few minor details yet to add:
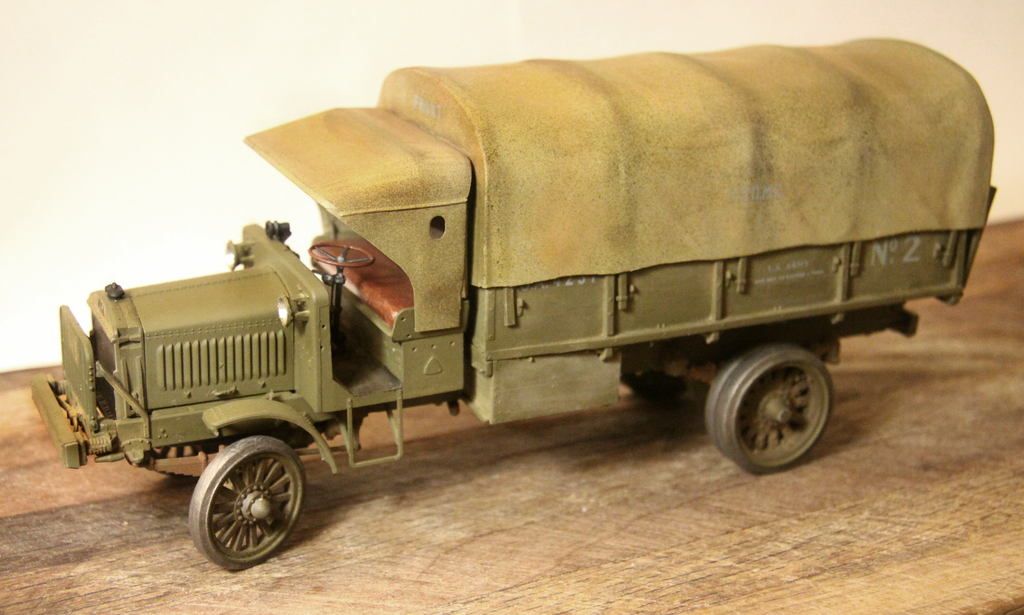
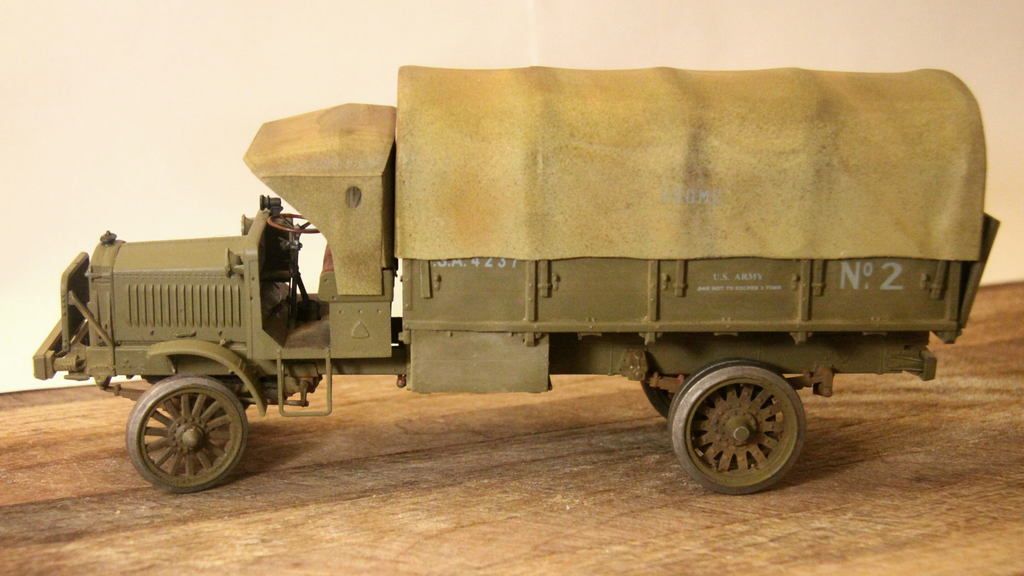
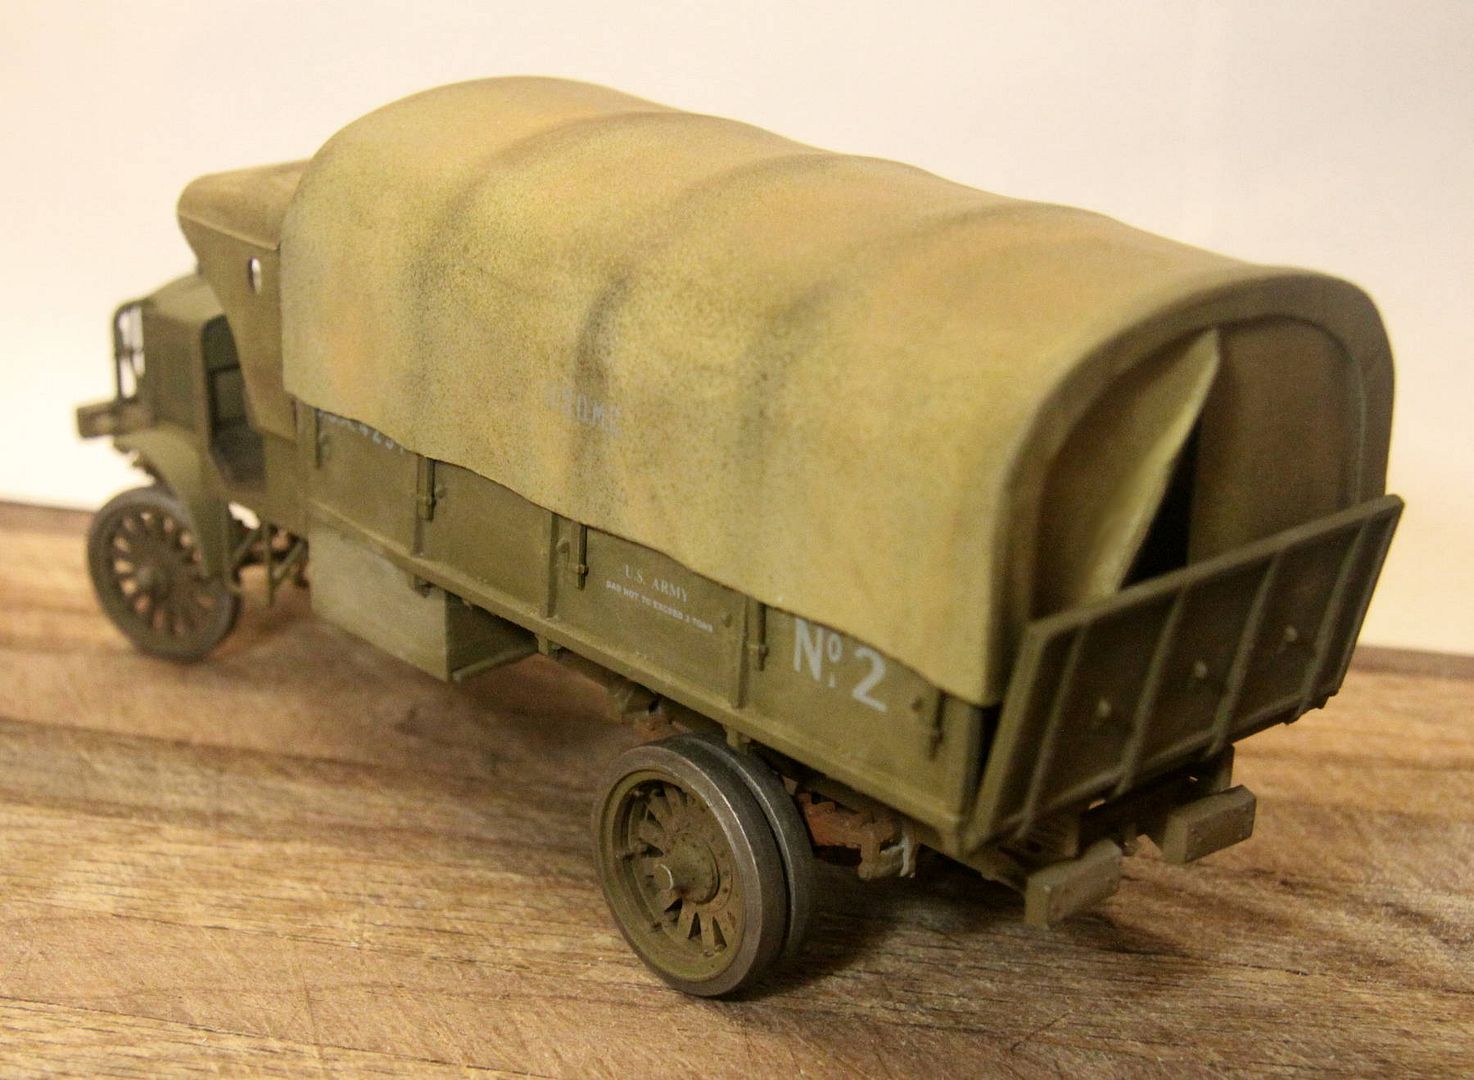
I spoke early on of the kit being well engineered; as examples of this
- the truck was built right out of the box and sits properly and evenly with all four wheels touching the ground without additional adjustment.
- when the engine was installed in the frame followed by the radiator, the fan slid right into the radiator cowl, perfectly centered with very little clearance between the two. (Just as it should!)
- the placement of the cab on the frame is very exact. Thanks to this the built up hood dropped into the space precisely with no adjustment.
Posted: Wednesday, September 26, 2018 - 01:04 AM UTC
The "USQMC" and "Front" decals have been applied to the canvas top in the above photos but the low contrast blue color of the lettering is truly LOW contrast against the kaki canvas!
I wish that lettering had been printed in black!
The same color is used on the vehicle markings and they show up nicely against the olive drab of the truck.
p.s. The lettering was applied ON TOP OF THE WEATHERING so that is not the cause for the low visibility.
I wish that lettering had been printed in black!
The same color is used on the vehicle markings and they show up nicely against the olive drab of the truck.
p.s. The lettering was applied ON TOP OF THE WEATHERING so that is not the cause for the low visibility.

RobinNilsson

Joined: November 29, 2006
KitMaker: 6,693 posts
Armorama: 5,562 posts

Posted: Wednesday, September 26, 2018 - 01:24 AM UTC
Those markings really blend in well 
The images could be used to test the eyesight: How many markings can you spot in this image?
/ Robin

The images could be used to test the eyesight: How many markings can you spot in this image?
/ Robin

Frenchy

Joined: December 02, 2002
KitMaker: 12,719 posts
Armorama: 12,507 posts

Posted: Wednesday, September 26, 2018 - 02:00 AM UTC
Quoted Text
I wish that lettering had been printed in black!
From the Manual of the Motor Transport Corps (ca.1919) :

Nice job on this truck Mike.
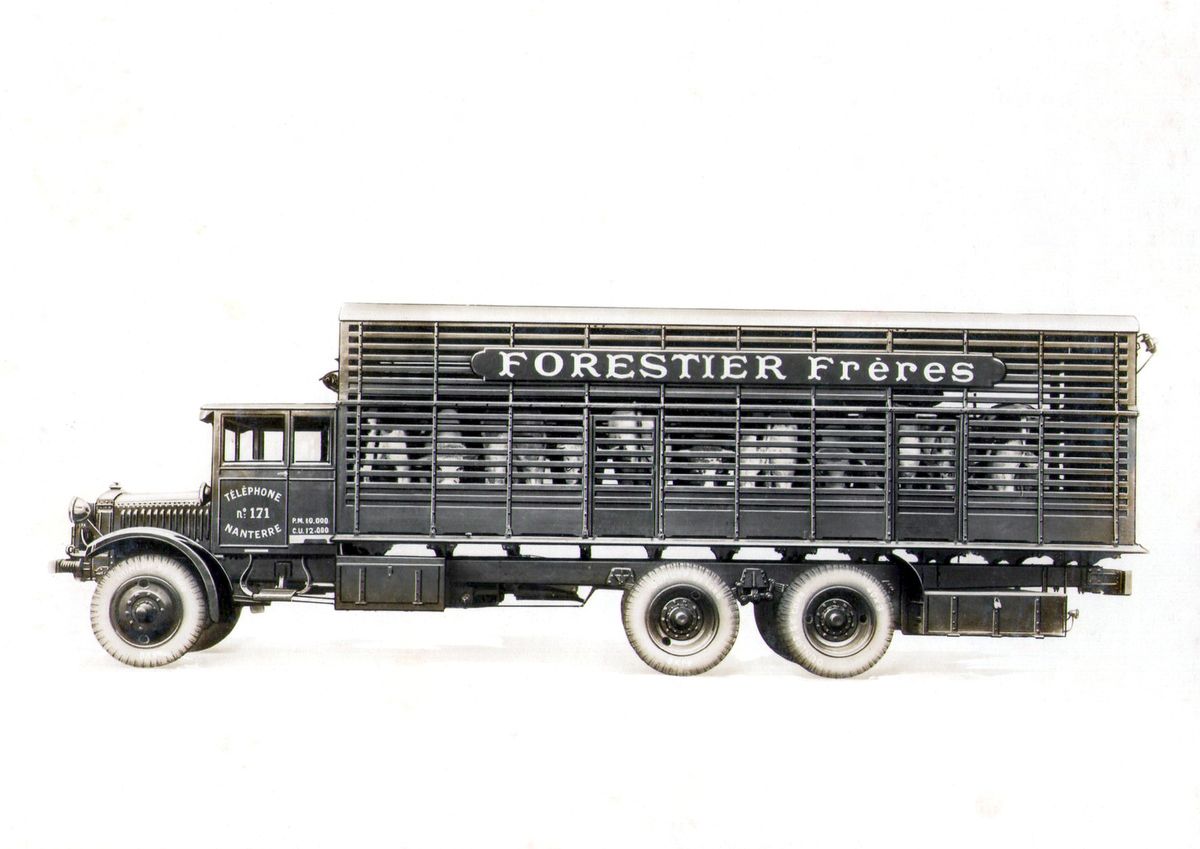
Did you know that after WW1 an enterprising Frenchman called Louis Willeme bought almost all the 9500 (!) Liberty trucks (+ spare parts) that have been sent to France at the end of the War (most of them after November 1918), and refurbished them to sell them on the civilian market ? He even used them as donor chassis to build his own "Willeme" trucks :

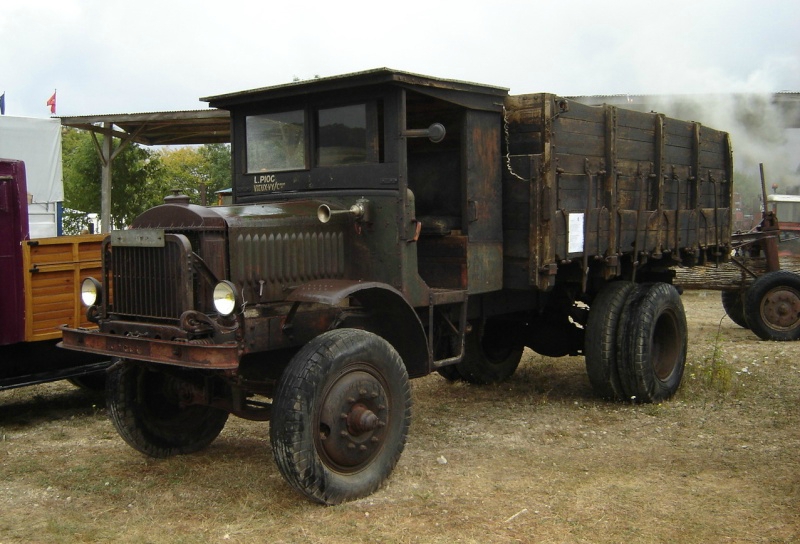
H.P.
Posted: Wednesday, September 26, 2018 - 02:11 AM UTC
Oh my . . . I really like that very strong, stocky conversion you show in the second photo! Makes me want to buy a second kit!
Posted: Wednesday, September 26, 2018 - 02:13 AM UTC
So the "low contrast" blue color is incorrect ????

RobinNilsson

Joined: November 29, 2006
KitMaker: 6,693 posts
Armorama: 5,562 posts

Posted: Wednesday, September 26, 2018 - 02:21 AM UTC
Quoted Text
So the "low contrast" blue color is incorrect!
Ahem ...
"From the Manual of the Motor Transport Corps (ca.1919) :"
Was this manual in use in 1917 or 1918 ?
Not saying it was or was not, just curious ...
Could it be that they specified white to get some contrast?
/ Robin

Frenchy

Joined: December 02, 2002
KitMaker: 12,719 posts
Armorama: 12,507 posts

Posted: Wednesday, September 26, 2018 - 02:33 AM UTC
Quoted Text
Oh my . . . I really like that very strong, stocky conversion you show in the second photo! Makes me want to buy a second kit!
Only one kit
 ?
?
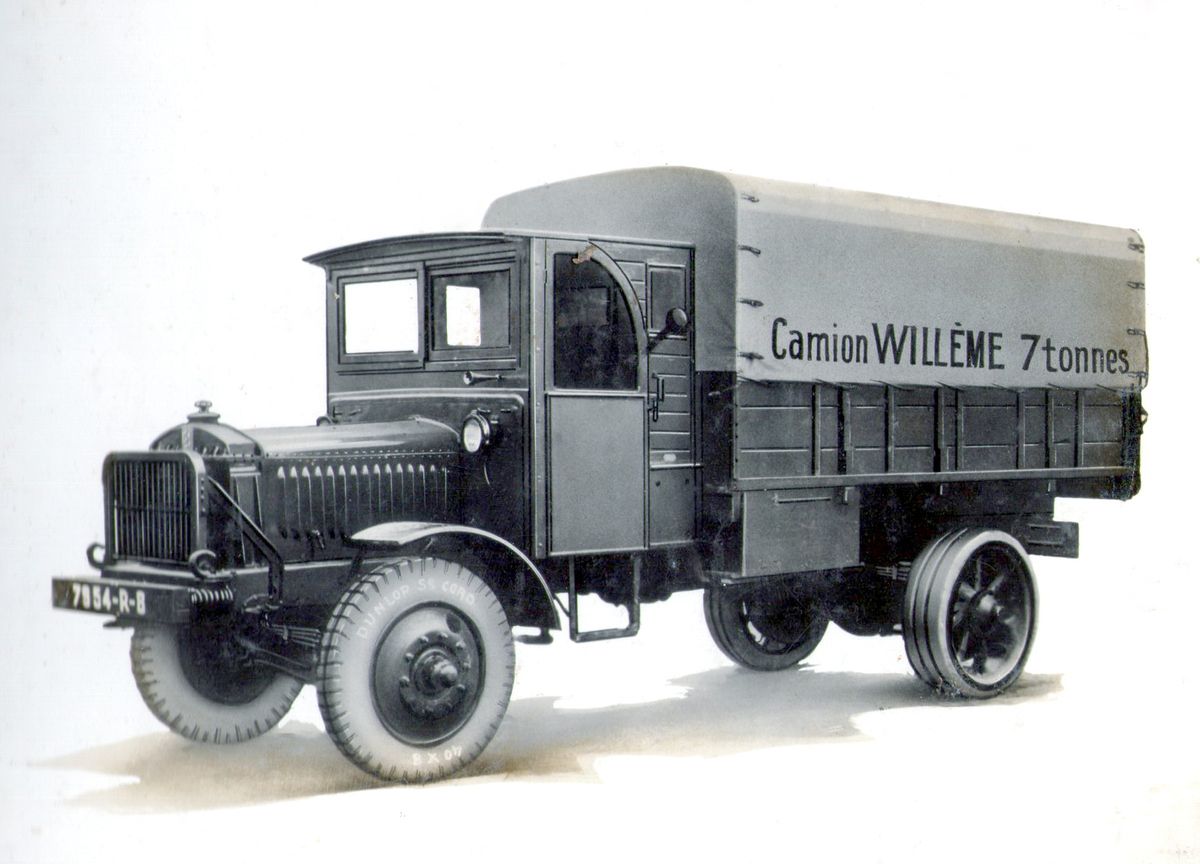
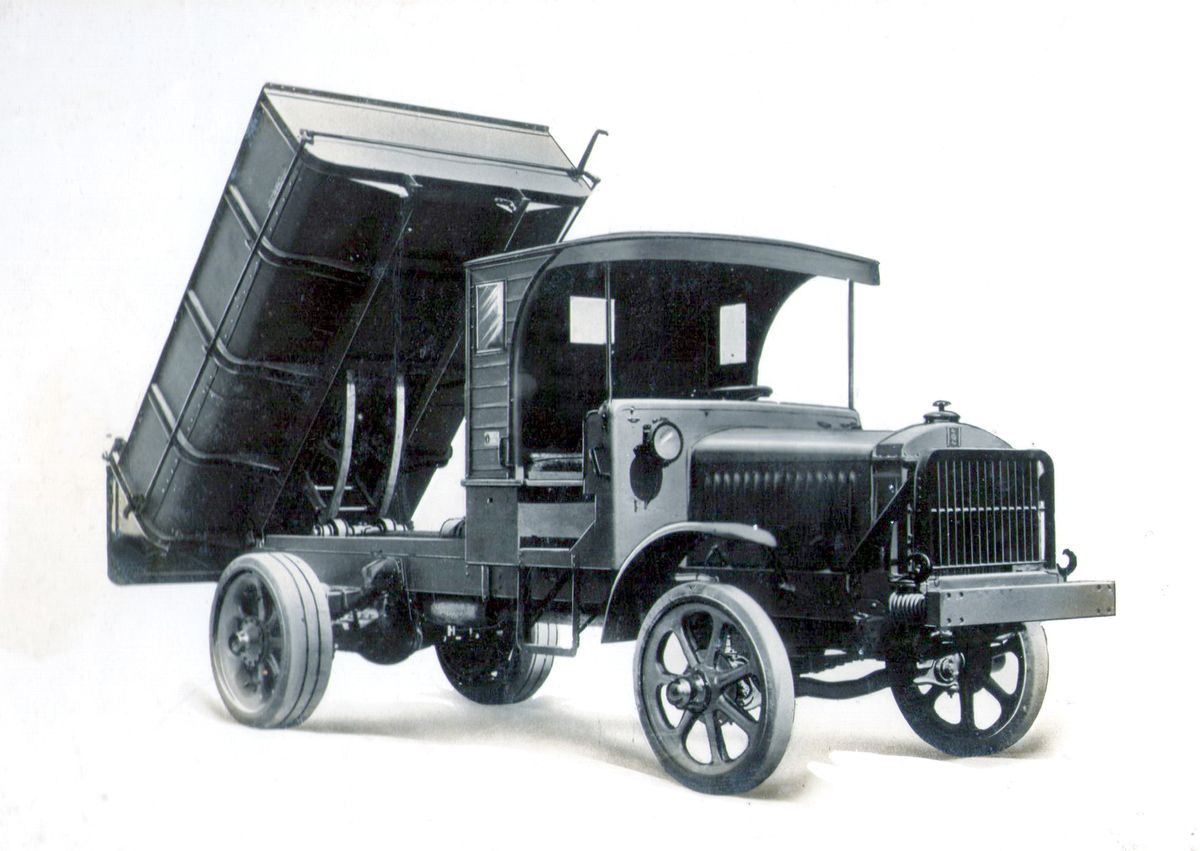
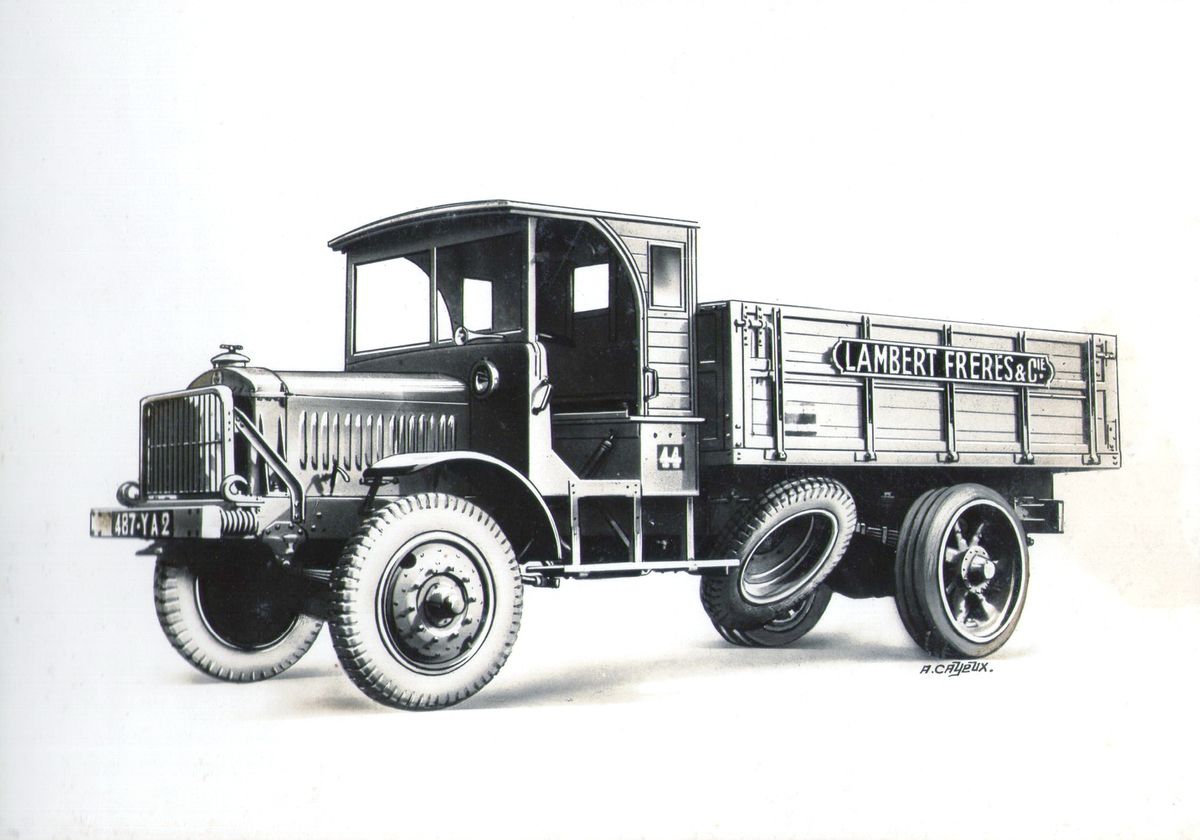
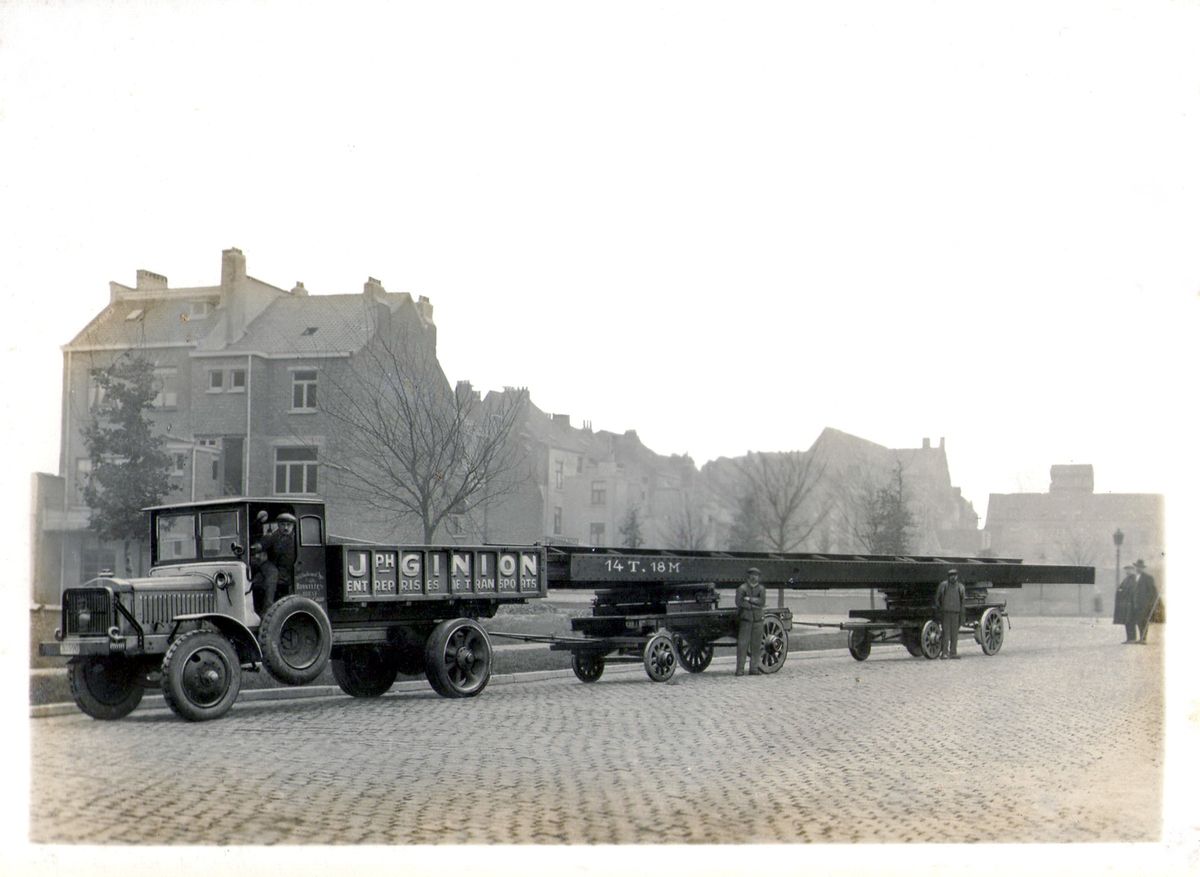

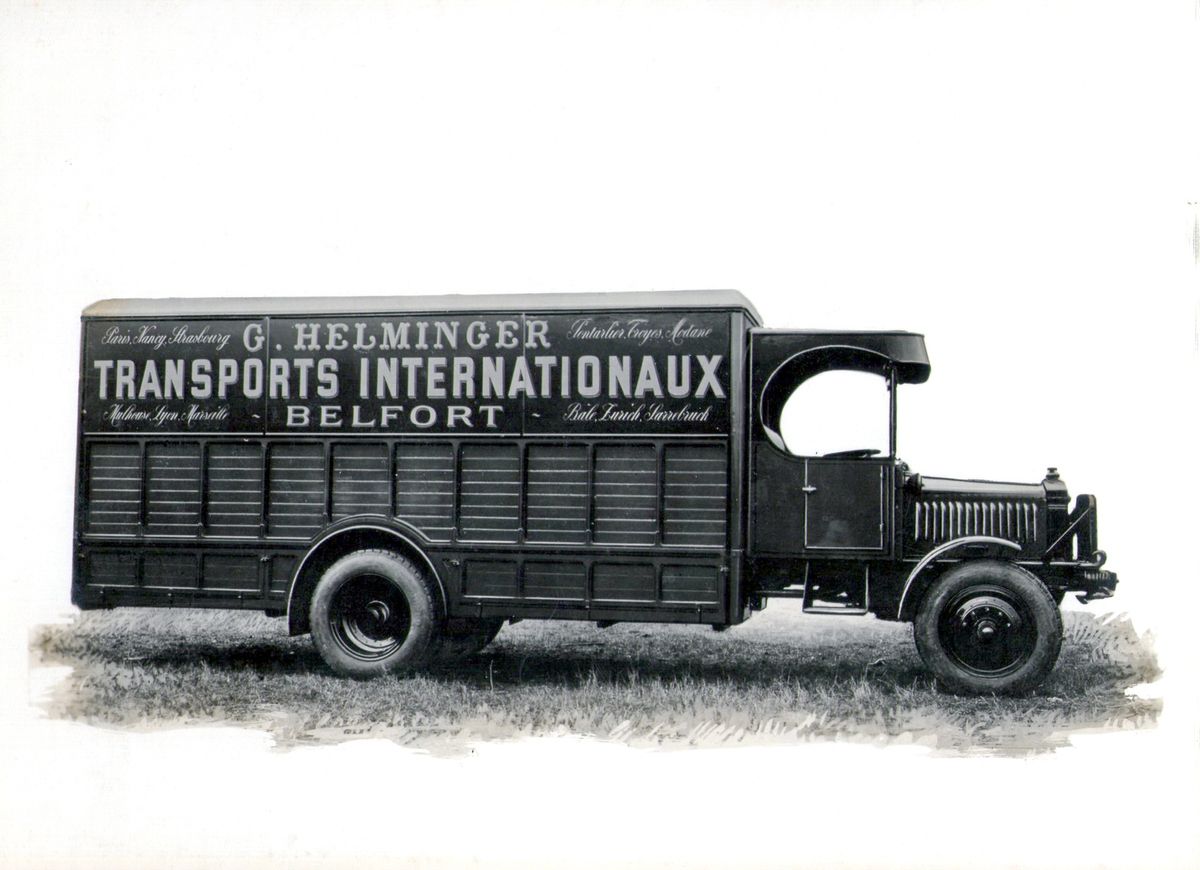
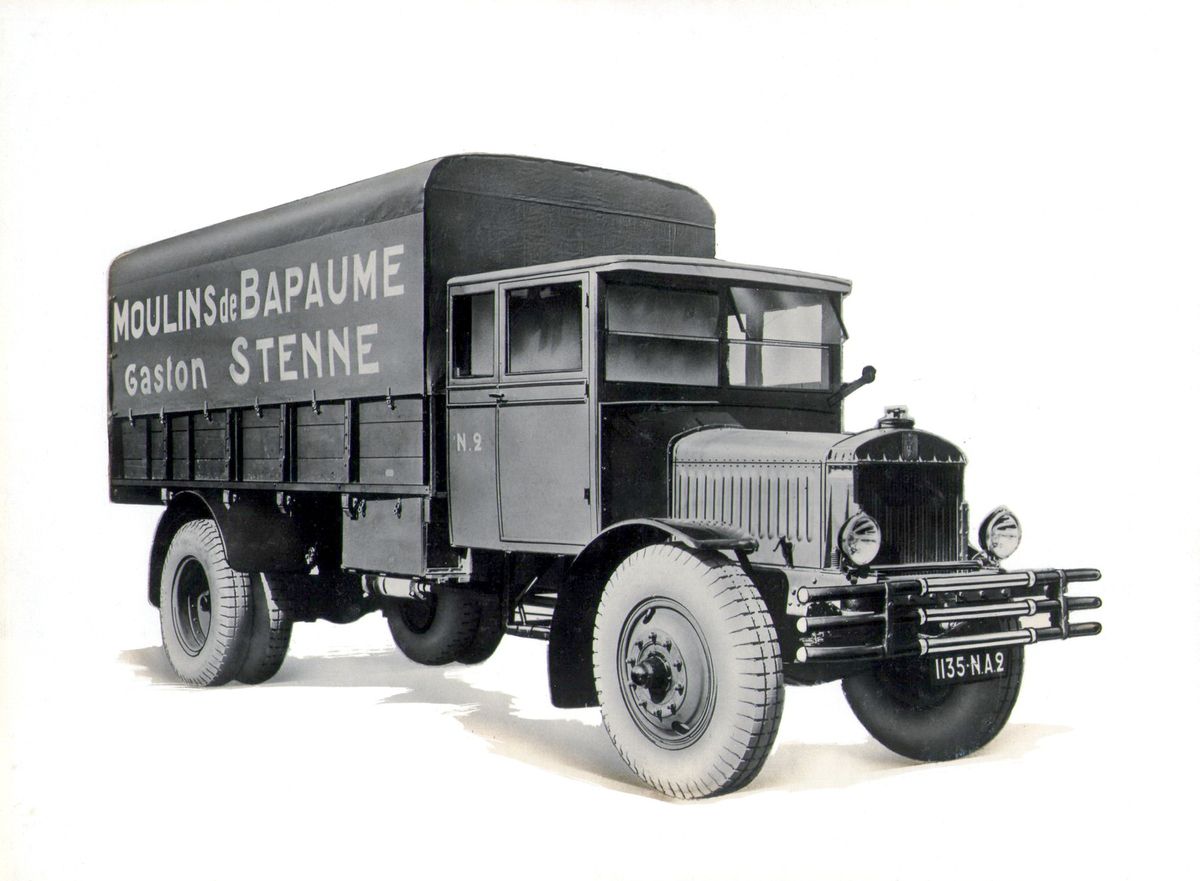


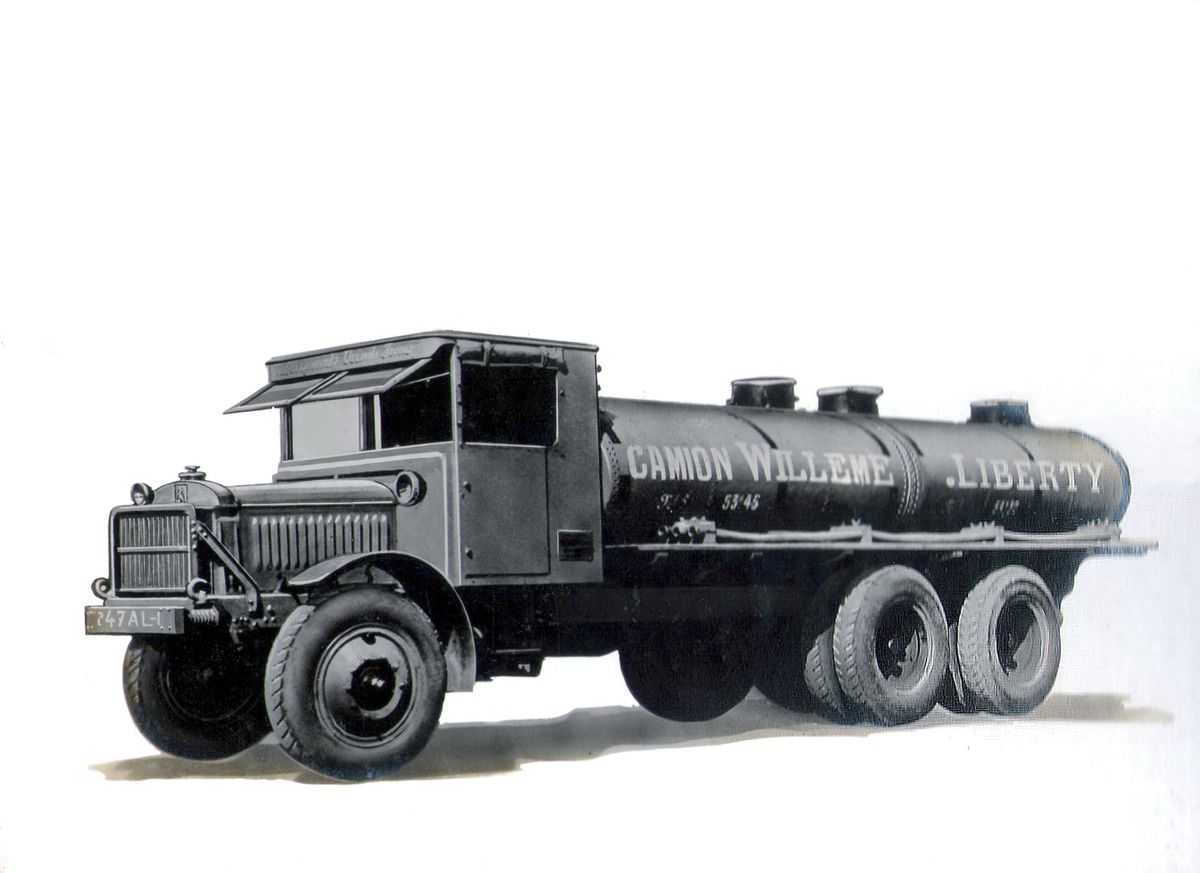
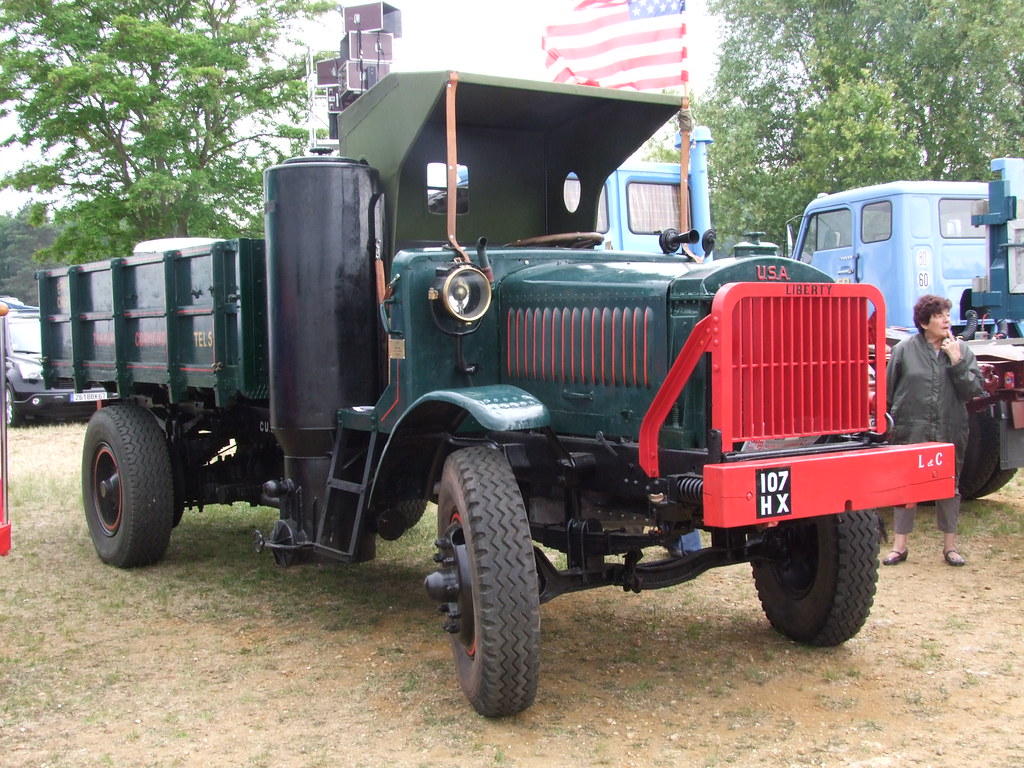
Here's another restored Willeme Liberty (fitted with a wood gas generator) :
H.P.

Frenchy

Joined: December 02, 2002
KitMaker: 12,719 posts
Armorama: 12,507 posts

Posted: Wednesday, September 26, 2018 - 02:45 AM UTC
Quoted Text
Ahem ...
"From the Manual of the Motor Transport Corps (ca.1919) :"
Was this manual in use in 1917 or 1918 ?
Not saying it was or was not, just curious ...
Could it be that they specified white to get some contrast?
I don't know
 but here's the page the info comes from :
https://libertytruck.org/2018/07/11/liberty-truck-paint-and-markings-part-1-you-guessed-it-lead/
H.P.

RobinNilsson

Joined: November 29, 2006
KitMaker: 6,693 posts
Armorama: 5,562 posts

Posted: Wednesday, September 26, 2018 - 04:23 AM UTC
Thanks for the link!
The truck at the top of the page definitely has the letters in some other paint/colour than white
The truck at the top of the page definitely has the letters in some other paint/colour than white

Posted: Wednesday, September 26, 2018 - 04:37 AM UTC
Excellent job on the Liberty,Mike!
And nice refferencies(as usual),Henry-Pierre!
This thread-and all linked material-is a magnificient companion in a cold and dull SE European evening!

And nice refferencies(as usual),Henry-Pierre!
This thread-and all linked material-is a magnificient companion in a cold and dull SE European evening!


Frenchy

Joined: December 02, 2002
KitMaker: 12,719 posts
Armorama: 12,507 posts

Posted: Wednesday, September 26, 2018 - 06:52 AM UTC
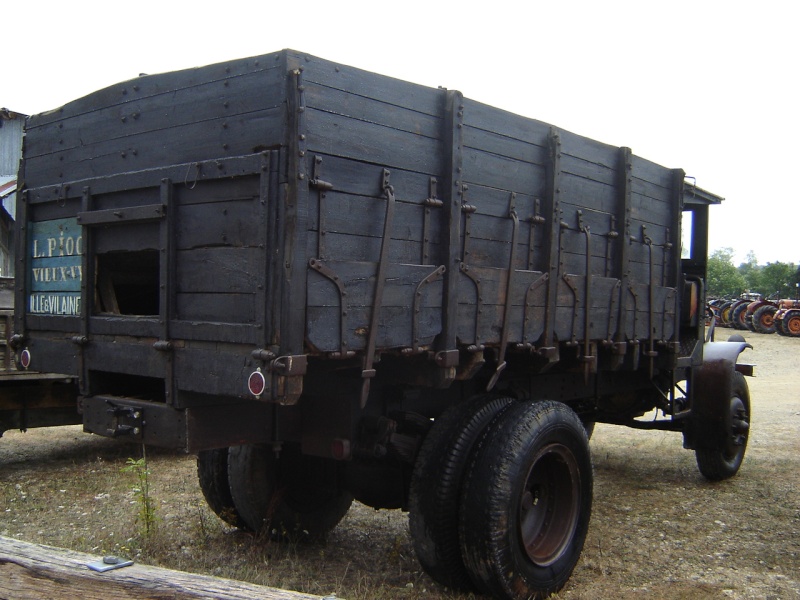
Here are two more views of the Willeme Liberty for Mike. This one had been fitted with a Deutz diesel engine and used until 1966...

H.P.

H.P.
Posted: Wednesday, September 26, 2018 - 07:33 AM UTC
Robin - you make a very good point - what directives as to color were in force during the war ??? I agree with you, I don't think the printing on the canvas in the top photo is low contrast blue. Probably more likely Olive Drab or Black.
Angel - Thank you. I will remind you of your comment above about cold nights next summer when it is again too hot to work in your upstairs hobby room!
Angel - Thank you. I will remind you of your comment above about cold nights next summer when it is again too hot to work in your upstairs hobby room!
Posted: Wednesday, September 26, 2018 - 07:43 AM UTC
Angel - can you recommend a set of after market resin tires and wheels that would come close to the ones shown on the truck in question? Were not the wheels you used for your air compressor something similar? (Not dualies but similar rims?)
Posted: Wednesday, September 26, 2018 - 07:48 AM UTC
Opinions please:
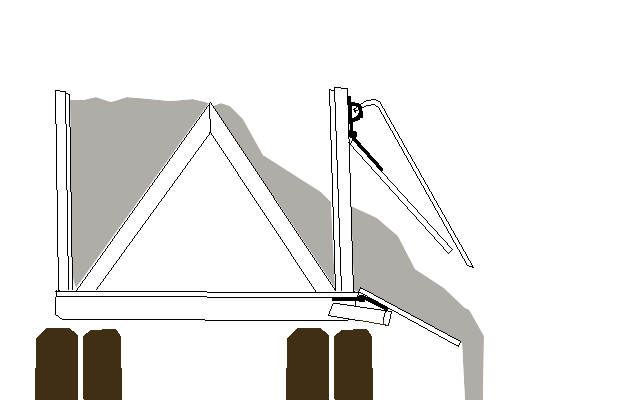
I would say the bed on that truck has been modified to function as a delivery truck carrying residential coal for heating.
It looks like it might have an inverted "V" floor. (Hence the open hatchway at the center rear. Used as stowage for shovels and other tools.) Then four chutes on each side that can be opened individually to dispense coal.
What do you fine folks think?


RobinNilsson

Joined: November 29, 2006
KitMaker: 6,693 posts
Armorama: 5,562 posts

Posted: Wednesday, September 26, 2018 - 08:09 AM UTC
Quoted Text
Robin - you make a very good point - what directives as to color were in force during the war ??? I agree with you, I don't think the printing on the canvas in the top photo is low contrast blue. Probably more likely Olive Drab or Black.
Angel - I will remind you of your comment above next summer when it is again too hot to work in your upstairs hobby room!
The appearance of the letters on the canvas is somewhere in the same range as the coats the passengers are wearing.
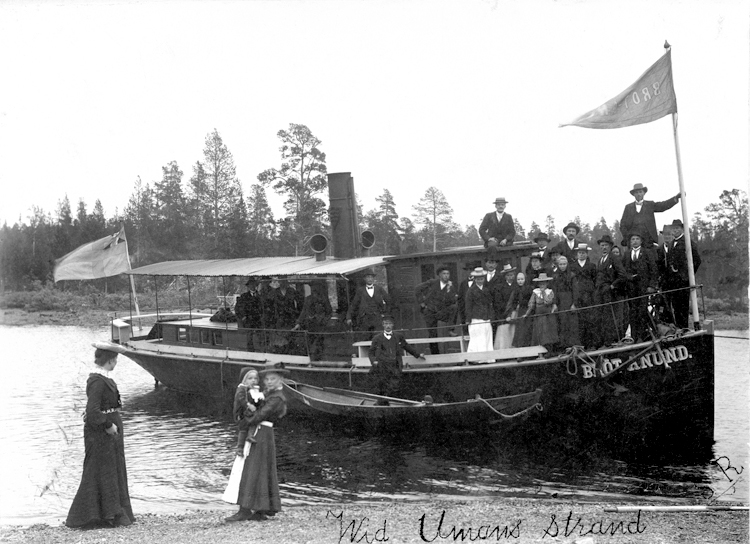
The Swedish national flag is a yellow cross on a light blue field. Sweden and Norway were united under the same king, two nations but only one king. This union was dissolved in 1905. During the union years the Swedish flag had a small Norwegian flag inset in the upper blue field nearest the flag pole.
This photo shows some steamer with the union flag on the flag pole. Note that the yellow cross appears darker than the blue fields which are nearly white in the photograph.
I do not know if the chemistry of photographic film had changed a lot between 1905 and 1917-1918 so this is not an attempt at being scientific.
This photo is from 1940, they are celebrating the Day of the Swedish Flag. This was the closest we came to having a national day (our 4th of July) until 10-15 years ago

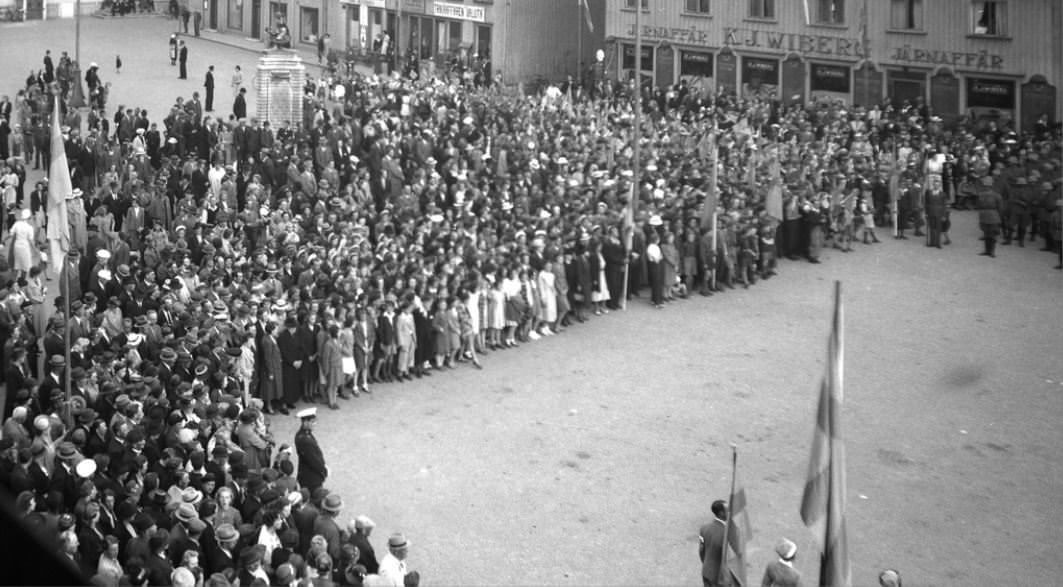
Now the 6th of June is officially our national day but most people don't really care except for the fact that it is a day off from work

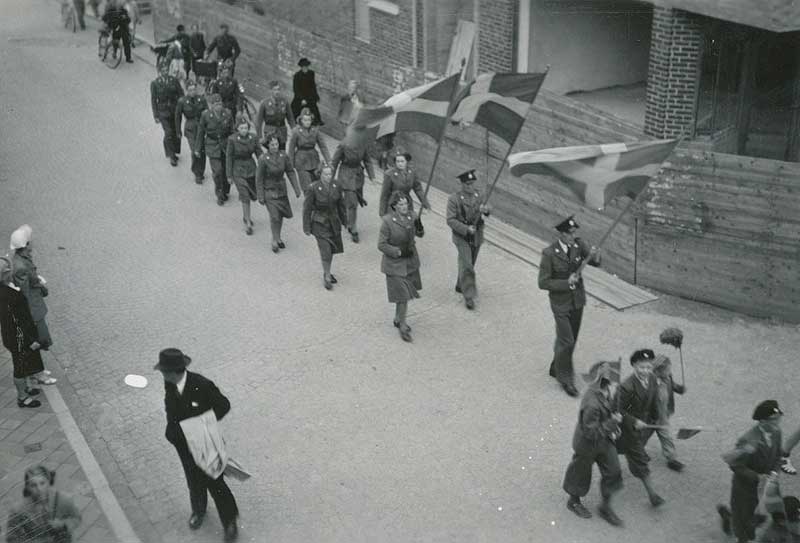
This photo from 1949 shows the light blue as darker than the yellow
A contingent of Swedish troops in 1918.
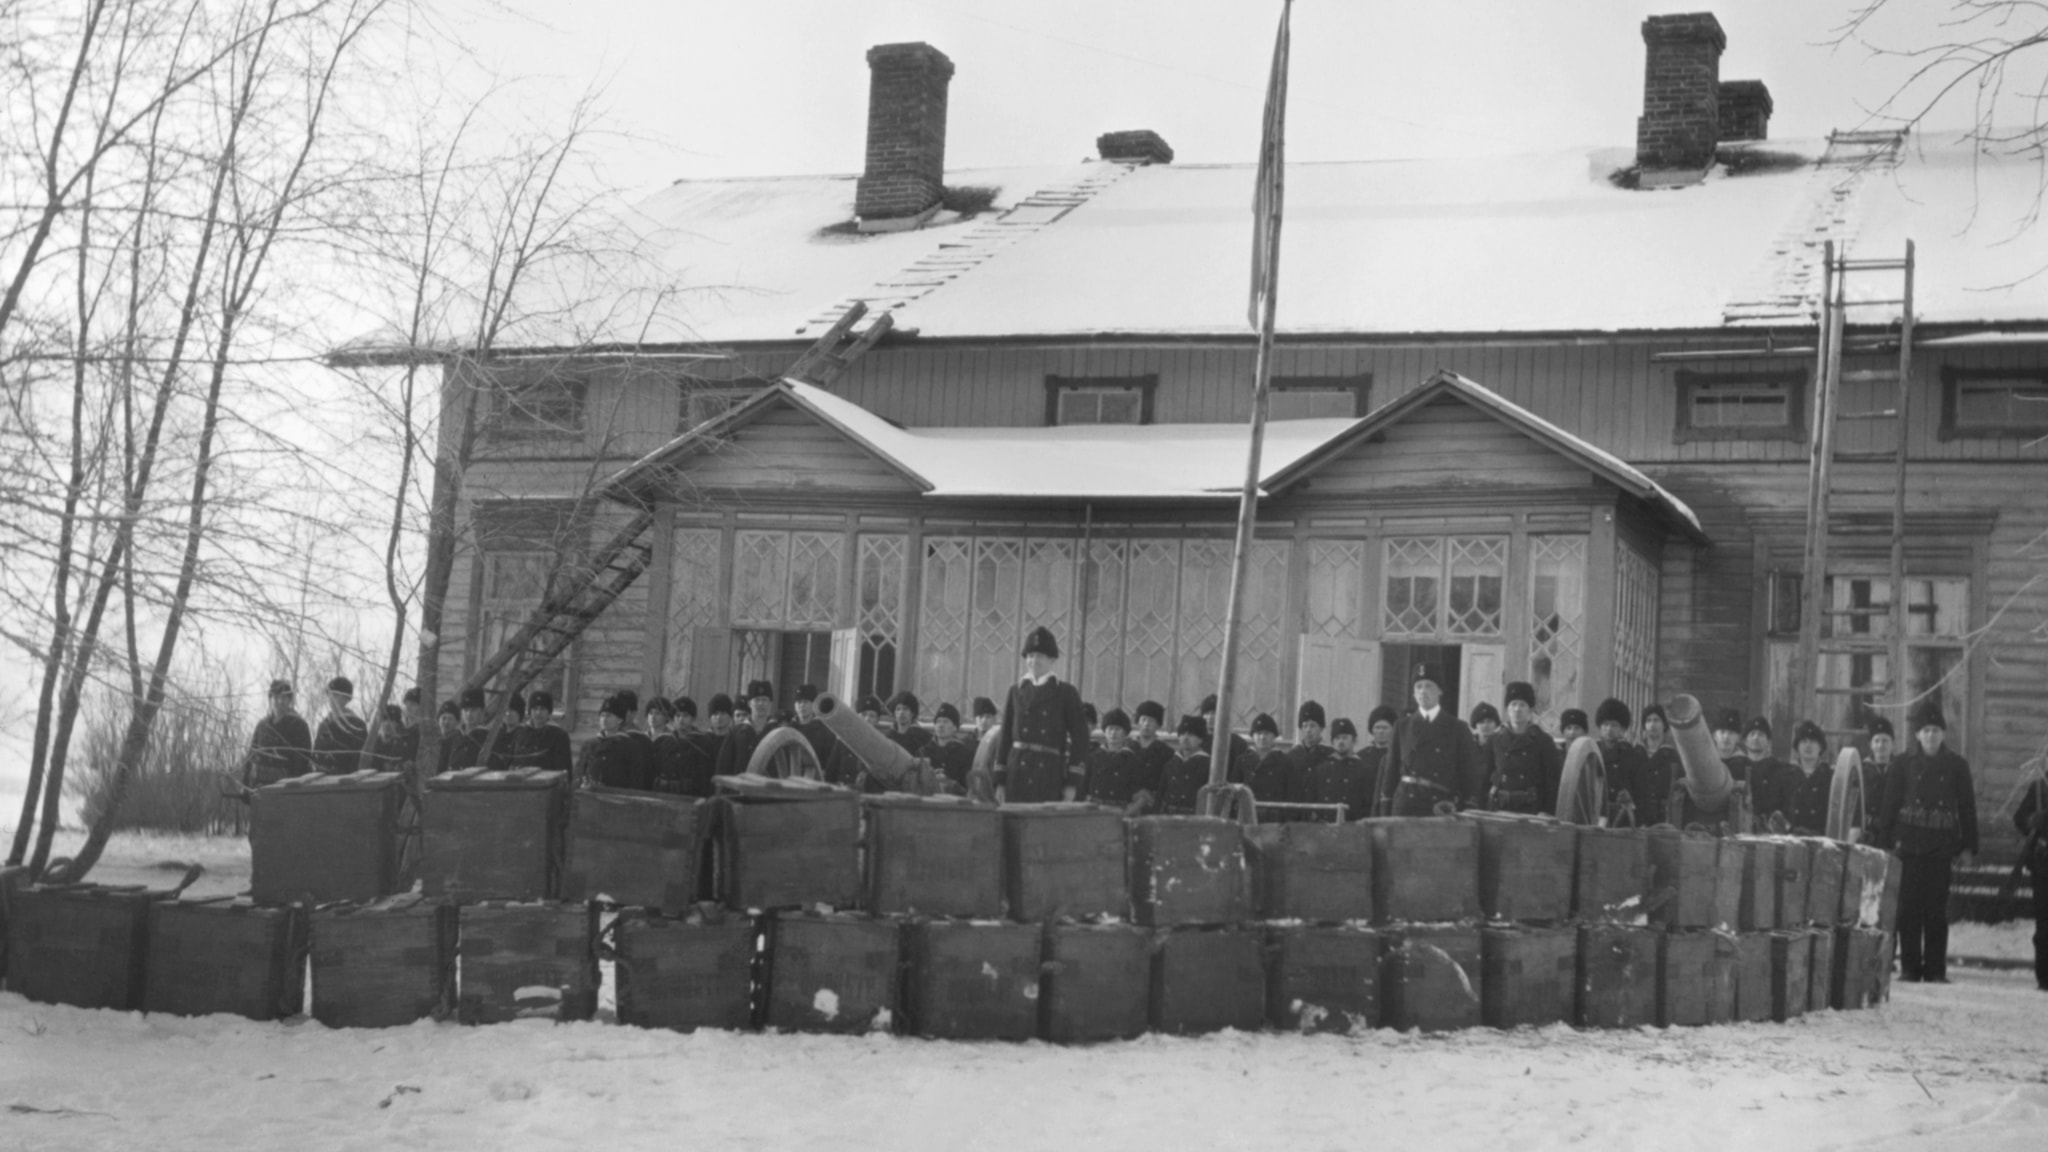
Note that the flag is mostly white in the photo ...
Celebrating Karl XII, Swedish king, died 30th of November 1718 on the same date 1918
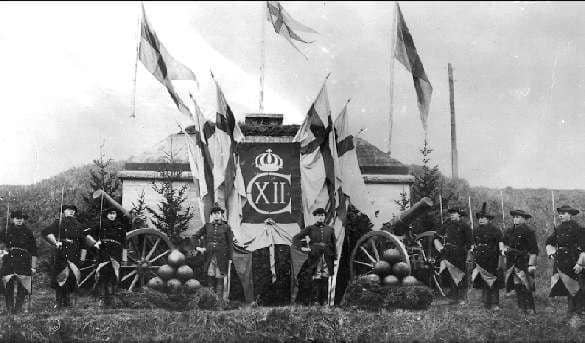
I would assume that Swedish photographers used the same chemistry as American photographers.
/ Robin

Frenchy

Joined: December 02, 2002
KitMaker: 12,719 posts
Armorama: 12,507 posts

Posted: Wednesday, September 26, 2018 - 08:16 AM UTC
According to the pics caption, this truck was used by a quarry owner in Brittany. It had a 8 ton load capacity...The side chutes could have been used to spread gravel for instance 
H.P.

H.P.
Posted: Wednesday, September 26, 2018 - 08:23 AM UTC
The directives as to color would have been US Army directives so I am sorry Robin but I fail to see the significance of your analysis of the Swedish flag colors.
Also there would have been many different shades of lite blue from almost white to quite darkish medium blue.
To make matters even more complicated, Black & White film (both then and now) responds least to pale blue light.
Also there would have been many different shades of lite blue from almost white to quite darkish medium blue.
To make matters even more complicated, Black & White film (both then and now) responds least to pale blue light.

RobinNilsson

Joined: November 29, 2006
KitMaker: 6,693 posts
Armorama: 5,562 posts

Posted: Wednesday, September 26, 2018 - 09:26 AM UTC
Quoted Text
The directives as to color would have been US Army directives so I am sorry Robin but I fail to see the significance of your analysis of the Swedish flag colors.
Also there would have been many different shades of lite blue from almost white to quite darkish medium blue.
To make matters even more complicated, Black & White film (both then and now) responds least to pale blue light.
What I attempted to show was how black&white photographic film at that time reacted to light blue. Especially that light blue looks like a light gray in photos from the early 20th century. If we can agree that blue comes out as much lighter than in real life then text on the canvas in the photo of the truck at the top of the page that Frenchy linked to could at least be interpreted as something else than blue.
Possibly olive drab, brown, black, even red but not blue and not light blue. I chose the Swedish flag since I know what it should look like, what it looked like back in 1918 and how it comes out in b&w photos, I used it as a colour reference based on your comment about low viz blue.
I have now checked the decals in my kit and I would describe the colour as a light to medium blue-grey rather than a light blue.
/ Robin
 |


