_GOTOBOTTOM
Campaigns
Where Armorama group builds can be discussed, organized, and updates posted.
Miniature Magic Narcissus in-progress
Emeritus
Visit this Community
Uusimaa, Finland
Joined: March 30, 2004
KitMaker: 2,845 posts
Armorama: 808 posts
Posted: Tuesday, August 09, 2005 - 05:44 AM UTC
Here are finally some in-progress pics of my entry for the miniature magic campaign.
Image hosted by Photobucket.com
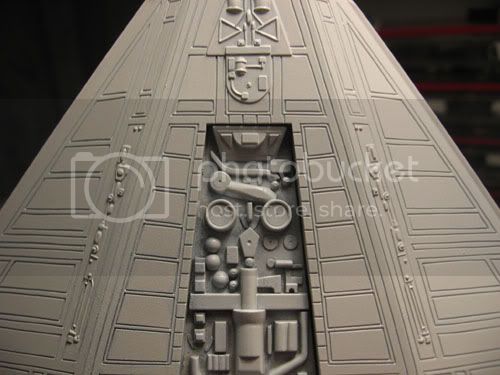
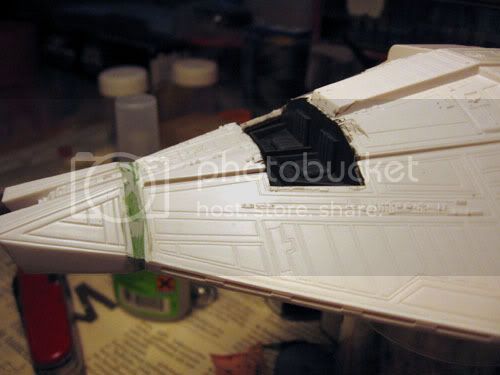
This pic shows the spartan cockpit and the nose, which was the most troublesome aspect of the kit. The cockpit will not be very visible when the model's finished, so I just painted it dark grey, applied a black wash and drybrushed the seats with a lighter grey.
Image hosted by Photobucket.com
But back to the nose. That's horrible. The surfaces just don't line up, no matter how you try to fit it. The angle of the surfaces are wrong in both the upper and lower parts. Getting the nose fit how it's supposed to will require seriuos cutting, re-assembly and puttying. I didn't want to waste my limited days on that. I just made a 2mm extension to the nose from sheet styrene and applied putty to the joint and filed it smooth. That way the nose looks better than with just the kit-supplied parts.
Image hosted by Photobucket.com
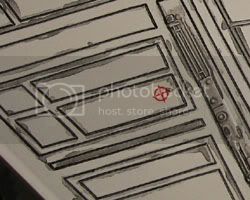
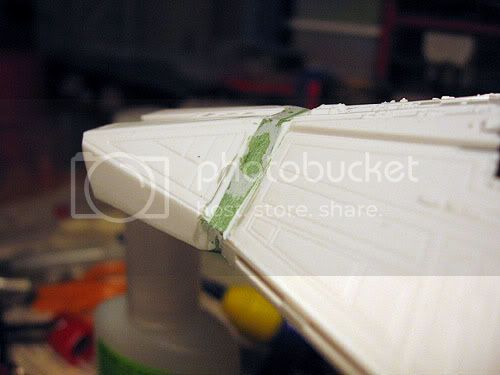
Here's a pic of the belly of the shuttle. Again I was forced to use some putty to get things nice and smooth.
Image hosted by Photobucket.com
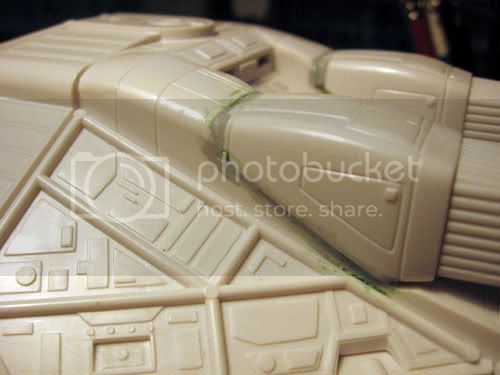
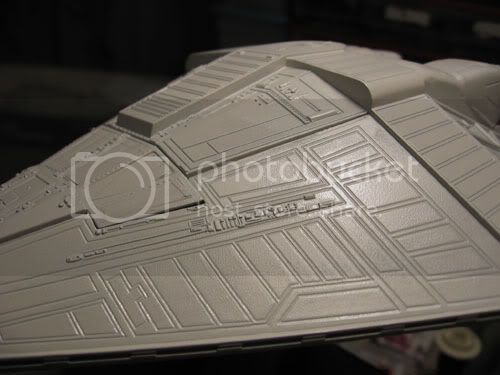
And finally, a shot of the thruster pods in place. The edges facing the hull should be more round, something that's better done before gluing the pods to the hull. I didn't, so I smoothed the joints with two-part putty.

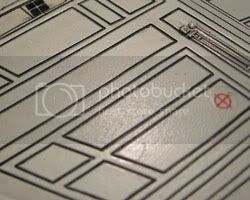
Now it's about ready to be painted. All I have to do is attach the canopy, check those puttied seams and I'll be ready for painting.
Art
Visit this Community
Michigan, United States
Joined: March 20, 2004
KitMaker: 604 posts
Armorama: 318 posts
Posted: Tuesday, August 09, 2005 - 06:04 AM UTC
Looks good so far. Not being familiar with the kit, what scale is it?

Art
95bravo
Visit this Community
Kansas, United States
Joined: November 18, 2003
KitMaker: 2,242 posts
Armorama: 504 posts
Posted: Tuesday, August 09, 2005 - 06:22 AM UTC
Is that the old Halcyon kit?

Emeritus
Visit this Community
Uusimaa, Finland
Joined: March 30, 2004
KitMaker: 2,845 posts
Armorama: 808 posts
Posted: Tuesday, August 09, 2005 - 06:41 AM UTC
Yes, it's the Halcyon kit from the early 90's, 1:144 scale.
95bravo
Visit this Community
Kansas, United States
Joined: November 18, 2003
KitMaker: 2,242 posts
Armorama: 504 posts
Posted: Tuesday, August 09, 2005 - 07:32 AM UTC
For some reason I was under the impression that it was a resin kit. It looks plastic from here. I must have been thinking of the Sulaco....I've always wanted one of each as well as the Nostromo....cool ships. Can't wait to see yours finished. Will it have a Ridley too?????
Emeritus
Visit this Community
Uusimaa, Finland
Joined: March 30, 2004
KitMaker: 2,845 posts
Armorama: 808 posts
Posted: Tuesday, August 09, 2005 - 07:59 AM UTC
Yes, it's all styrene. I have the impression that sulaco's styrene too. That nostromo would surely be a nice kit to get. Too bad it's about the rarest of all halcyon kits.
I don't think it'll have ripley. (or the alien hanging from the thruster!) In such a small scale you couldn't tell if the figure is male or female. :-)
Emeritus
Visit this Community
Uusimaa, Finland
Joined: March 30, 2004
KitMaker: 2,845 posts
Armorama: 808 posts
Posted: Saturday, August 13, 2005 - 05:33 AM UTC
Now I've sprayed on the white using a spray can.
Image hosted by Photobucket.com
I first primed the model with vallejo's grey primer. Then I painted the panel lines and other recessed detail with thinned grey acrylic. I had then intention of spraying the white on carefully so that the grey would show in the recesses. I first sprayed the underside, I was thinking that if I don't get it right it doesn't matter so much and I could get the upper hull better. Just guess what happened? The underside (the lower pic) came out exactly like I wanted, but I failed with the upper hull. The grey doesn't show ver well, and I got some slight orange peel on the front (I had to sand and re-spray). It's perfectly acceptable, but I have to accent the panel lines some more again. Now it has been drying for a couple of days. A few more days and I can probably start thinking about decals and weathering.
Emeritus
Visit this Community
Uusimaa, Finland
Joined: March 30, 2004
KitMaker: 2,845 posts
Armorama: 808 posts
Posted: Monday, August 22, 2005 - 06:49 AM UTC
Now I've got the decals on and the panel line painting underway. I tried with acrylics, they dried too quickly. Then I tried enamels. No succes, the paint got flat and started to lift when I tried wiping the extra paint off.

Then I remembered my experience with johnson floor wax (future, klear, whatever you call it) brushed over Lifecolor's black wash. Bingo! Future removes that stuff in seconds!

I then applied this lifecolor "oil" (a ready-to-apply black wash) to the panel lines and let it dry. The beatifull (or extremely ugly, if you don't know this phenomen and remove you carefully applied wash effects...) part is that future removes this stuff even if it's completely dry. This is how the model looked like after applying the wash:
Image hosted by Photobucket.com
Then I just wiped off the extra wash with cotton-tipped swabs dipped in future. Really idiotproof. (at least on this model, with large panel lines) And here's the results:
Image hosted by Photobucket.com

The underside went much smoother than the upper (again... ), there I had sprayed the white on a touch too thick. Some panel lines got too swallow and I have to touch up those parts. Additionally, I got some orange peel to the paint job on the upper hull, I have to touch up some white parts that resisted the wiping. (I start to believe the instructions to apply washes to a gloss surface. :-) )

Now I have to apply some weathering and the model is finished.
 _GOTOTOP