


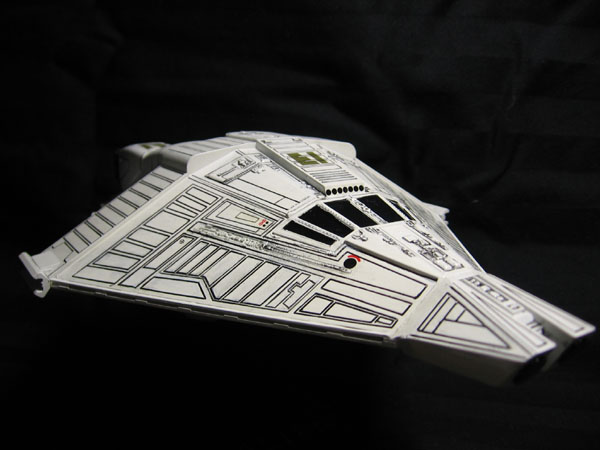

The kit was a pleasant build, exept for the nose, which was quite awful. The angles of the nose pieces didn't match the angles of the front fuselage in anyway. To fix this properly, one must cut the whole nose apart and re-assemble it. Great amount of puttying and filing expected. I just built a 2mm extension to the nose and puttied the gaps and sanded smooth. Now the diffetent shapes don't show that badly.
The cockpit was extremely spartan, only very simple seats. In fact, nothing fancier is needed, as the smoked canopy makes the area very dark (and the cockpit interior is to be painted dark grey), so I made no efforts to improve it.
Other than the nose, assembly went smoothly. Well, the thrusters' egdes should have been rounder, which is better done before attaching them to the fuselage. I didn't sand them, I noticed that issue after they were attached, so I applied putty to the seams to smooth thing up.
The model was then primed and then I sprayed it gloss white. I tried to do a preshade affect on the panel lines. I got it right only on the belly, so I accented the panel lines with lifecolor oil colored wash and wiped off the extra with q-tips dipped in future (future removes that stuff like magic). Due to some orange peel and heave coat in some spots, some panel lines didn't come out that great so I used a thin marker pen to draw them. Other details were also accented with lifecolor wash and wiping with future.
I wasn't sure if the decals would work properly after more than a decade but they worked perfectly and snuggled down to the panel lines with a little micro sol. The last thing was to remove the masks from the canopy and the rear hatche's window and attach the front thrusters. The rear window got some spray due to sloppily applied masking tape and there were some smugdes. I think I'll paint the whole window black because there's no way to remove the paint smugdes without damaging the clear part.
But there it is, my first campaign entry on Armorama.

Ps. Should I put a pic in the campaign gallery myself, or is it done by the people running the campaign?
Edit: july 13th 2017 - another build thread migrated from PB. Wow, editing a twelve years old message, probably my personal record so far!


