_GOTOBOTTOM
Campaigns
Where Armorama group builds can be discussed, organized, and updates posted.
My Montezuma entry in progress
Emeritus
Visit this Community
Uusimaa, Finland
Joined: March 30, 2004
KitMaker: 2,845 posts
Armorama: 808 posts
Posted: Monday, November 07, 2005 - 11:08 PM UTC
Okay, now I have made enough progress on my entry for the Montezuma campaign to show some pics of it. The finished entry wil be an M3 with a tanker figure mounted on a simple oval base, with some equipment scattered around and perhaps a tree or two (if there's enough space on the base)
Image hosted by Photobucket.com
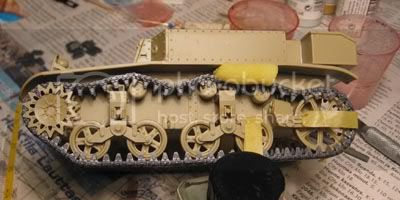
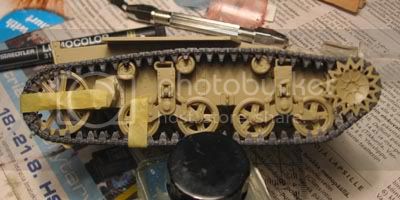
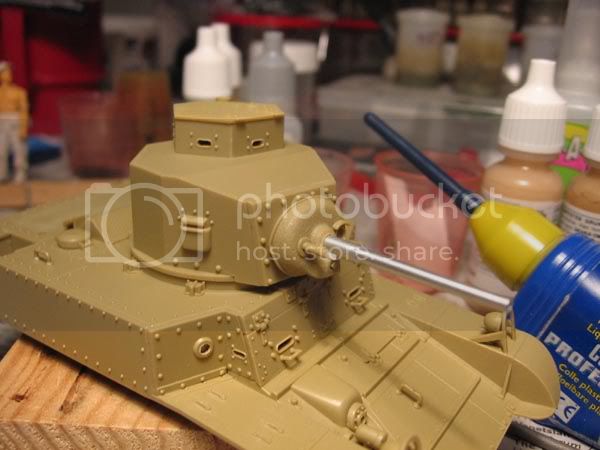
That's academy's M3 stuart, being built pretty much straight from the box. The first pic shows the tracks being assembled. I used the indi-tracks that came with the kit as the great-looking flexible tracks were made of that horrible "bucket" plastic that refuses to work with just about any glue on earth (and the pins used for the heated screwdriver method looked too tiny to be of any real use).

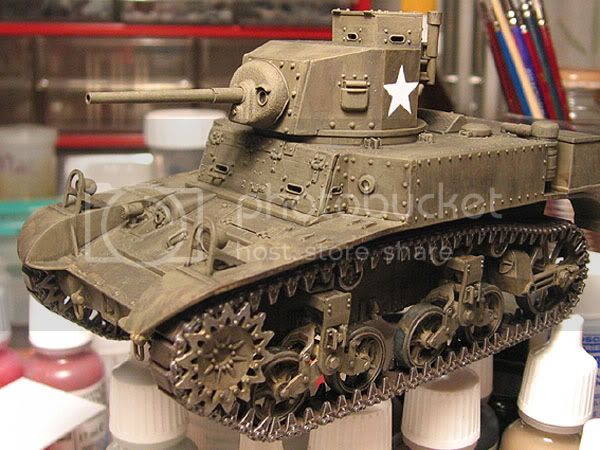
After reading some reviews I decided not to use the interior because it's accurate for later M3's. The only aftermarket part I have used so far is an aluminium gun barrel from eduard. Visible in the turret pic is also one of the modified MG's. The barrels in some of the kit parts weren't round (I also ruined one by drilling the hole off-center), so I cut them off and replaced them with styrene rod inserted to holes drilled in the cooling jackets. The vision slots on the commanders cupola were solid so I opened them. The kit didn't come with parts to make the sponson machine guns found on the earlier M3's so I made the barrels for them from parts found in the spares box. To mount the MG's I glued styrene plates to which I drilled holes for the barrels.
Image hosted by Photobucket.com
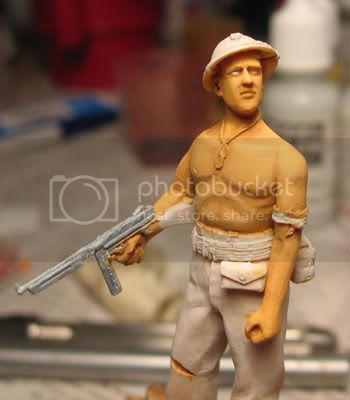
The figure's by warriors. The thompson SMG was partly warped and because it didn't want to straighten even after being soaked in hot water, I cut off and replaced the offending parts with a styrerene gun from dragon. (the two parts are visible under the single coat of light grey on the gun)
How does the skin look so far? This is my first ever attempt to paint human skin by painting the shadows and highlights instead of drybrushing.

What do you think? Opinions, questions, and suggestions are all welcome.
:-H
Emeritus
Visit this Community
Uusimaa, Finland
Joined: March 30, 2004
KitMaker: 2,845 posts
Armorama: 808 posts
Posted: Wednesday, November 09, 2005 - 01:39 AM UTC
Damn, why these beautiful kit-supplied indi-traks alway have some issues regarding length?
Just take a look:
Image hosted by Photobucket.com
I used 25 link for the top run. That was 2 or 3 millimeters too short. Without side skirts I can't hide the gaps anywhere. I had to use 1 extra link, bu that in turn results in an ugly loose track. With a russian tank this would pass, but with a tank with return rollers this looks a bit odd, or what your opinion?
Emeritus
Visit this Community
Uusimaa, Finland
Joined: March 30, 2004
KitMaker: 2,845 posts
Armorama: 808 posts
Posted: Wednesday, November 09, 2005 - 08:58 PM UTC
I was suspecting a similar lenght problem with the other as well. Just guess what happened...
Image hosted by Photobucket.com
Yep, they fitted perfectly. Just my typical luck. Now I have to cut a lenght from the flexible tracks to make a replacement piece for the saggy side. Why do these things always happen to me?
Emeritus
Visit this Community
Uusimaa, Finland
Joined: March 30, 2004
KitMaker: 2,845 posts
Armorama: 808 posts
Posted: Saturday, December 10, 2005 - 05:23 PM UTC
Here are some more in-progress pics of my entry.

The figure is practically finished. All it needs is some dirt and grime to blend it to base later and a few touch-ups and some small details to paint (like the belt buckles).

Here's the completed stuart tank, minus the tracks. At this stage it only has an overall coat of OD. I left the sponson machine guns and upper & lower hulls separate to ease painting. (quite a must, as the tracks can't be installed if the hulls are joined.

Here's the base, with painting underway. There's something I learned with this one. Modeling clay DOES shrink, and don't fix the dried clay base to the wooden base with PVA. The base warped a little, I should have used epoxy.

So, how does my project look so far?
Jacques
Visit this Community
Minnesota, United States
Joined: March 04, 2003
KitMaker: 4,630 posts
Armorama: 4,498 posts
Posted: Saturday, December 10, 2005 - 07:29 PM UTC
I do not ahve a Academy M3 handy, but my thought is that the idler is supposed to be loose until the tracks are finished so that it can be adjusted to tighten the tracks...would that work?

Otherwise I am looking ofrward to seeing this complete!
Emeritus
Visit this Community
Uusimaa, Finland
Joined: March 30, 2004
KitMaker: 2,845 posts
Armorama: 808 posts
Posted: Saturday, December 10, 2005 - 08:02 PM UTC
The idlers on the kit attach to the hull with two locator pins. They're not designed to be adjusted, but that would be recommended, as the kit's height issue is "fixed" by working the suspension arms. Nothing has been done to the idler, so it misses the ground by about 1mm. This shouldn't be too hard to fix. I would only do this if the tank's not going to be in a diorama, the issue can be easily hidden with the terrain and weathering.
dexter059
Visit this Community
Region de Valparaiso, Chile
Joined: July 28, 2005
KitMaker: 1,569 posts
Armorama: 1,385 posts
Posted: Saturday, December 10, 2005 - 09:41 PM UTC
Beautiful work on the tracks, congrats!
Emeritus
Visit this Community
Uusimaa, Finland
Joined: March 30, 2004
KitMaker: 2,845 posts
Armorama: 808 posts
Posted: Wednesday, December 14, 2005 - 12:10 AM UTC

some progress on the tank. I washed it with lifecolor's "oil" wash and drybrushed with the original OD. I think I'll apply the decals at this point. I have to settle for just the mandatory white stars as the kit didn't come with any fancy marine markings and it's too late to order some aftermarket decals as the deadline's next week.
Emeritus
Visit this Community
Uusimaa, Finland
Joined: March 30, 2004
KitMaker: 2,845 posts
Armorama: 808 posts
Posted: Tuesday, December 20, 2005 - 02:54 PM UTC
Some more progress again.
The kit decals were rubbish. They were stiff and didn't react to micro-sol. I ended up using stars from an afv-club M18 hellcat. These were better, but they still silvered a little, although I tried to trim away as much of the carrier film as possible.
bf443
Visit this Community
Idaho, United States
Joined: May 16, 2003
KitMaker: 895 posts
Armorama: 283 posts
Posted: Wednesday, December 21, 2005 - 09:58 AM UTC
Eetu,

I like your Marine Stuart. I sure it will be enhanced even more with the figure and base. Congratulation on a good job.

I am also building a Stuart (Tamiya M3) Diesel assigned to Midway. I hope to have it done by New Years. Maybe we should have a "Stuart Group Build" for 2006.

Brian
 _GOTOTOP