Hi to all:
IŽm quite new to this forum so I presented... I would like to show my first stages in the M4 sherman ..I hope you liked..
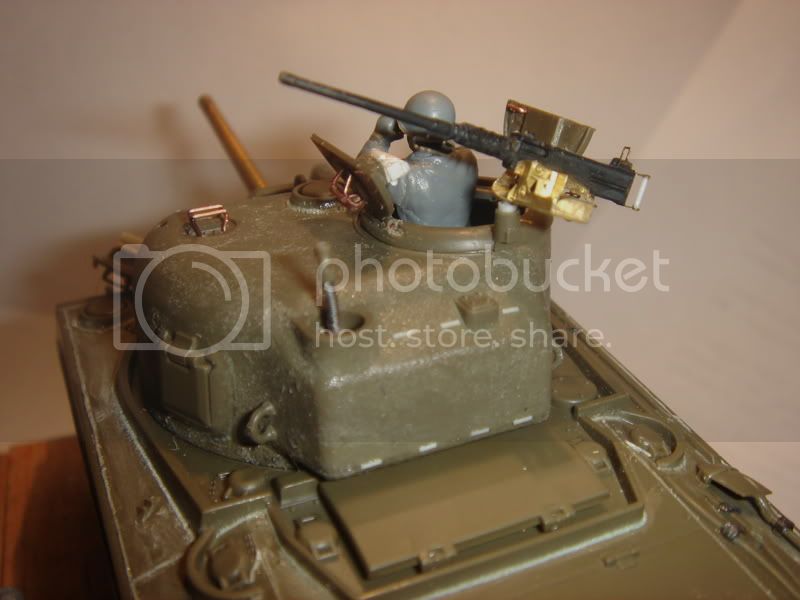
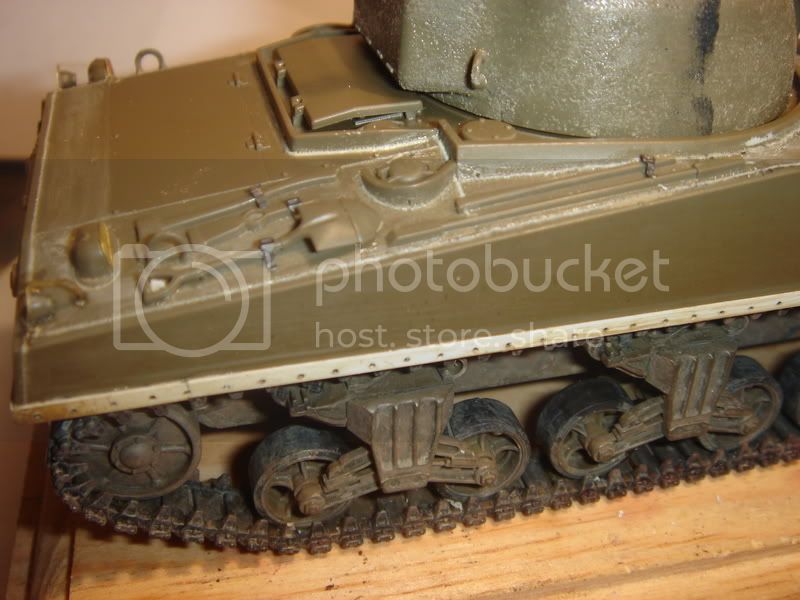
I remade all the texture from turret to transmission cover.. added periscopes and protectors to all visors.
The machine gun 50mm was dressed with the excelent set from Lion Roar who by the way comes with a canon .
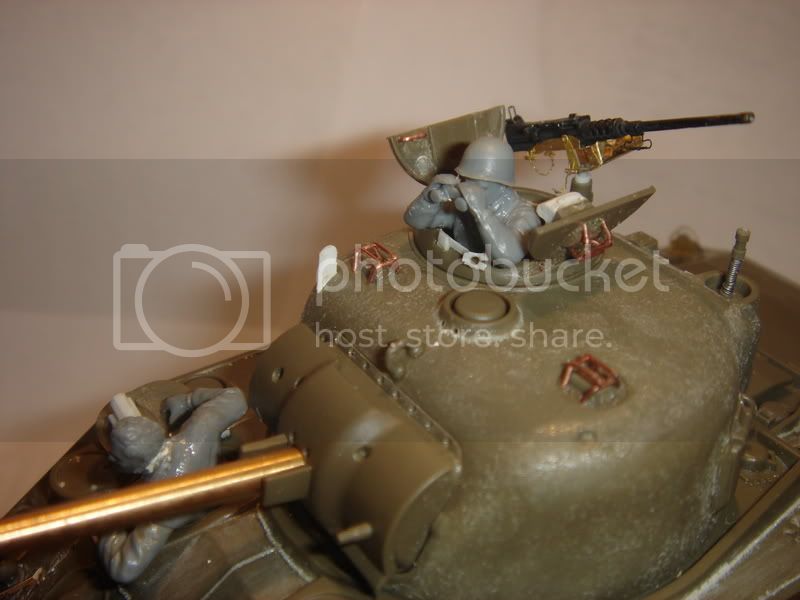
I will try to paint this litlle gem into a Sherman in Italian front Monte cassino.
Any comment ?.
Cheers
Gabo.
Hosted by Darren Baker
my sherman in progress
gabo
Veracruz, Mexico
Joined: January 09, 2006
KitMaker: 20 posts
Armorama: 19 posts
Joined: January 09, 2006
KitMaker: 20 posts
Armorama: 19 posts
Posted: Tuesday, February 06, 2007 - 05:41 AM UTC
Sabot
Joined: December 18, 2001
KitMaker: 12,596 posts
Armorama: 9,071 posts
KitMaker: 12,596 posts
Armorama: 9,071 posts
Posted: Tuesday, February 06, 2007 - 05:49 AM UTC
Looks like you're turning that 48th scale Tamiya Sherman into a solid build. Looks great to me, are you using the Tamiya US Infantry & tank crew?
Posted: Wednesday, February 07, 2007 - 11:25 PM UTC
Hi Gabriel,
Way too small for me but looking good.
Cheers
Al
Way too small for me but looking good.
Cheers
Al
INDIA11A
Ontario, Canada
Joined: January 09, 2005
KitMaker: 577 posts
Armorama: 446 posts
Joined: January 09, 2005
KitMaker: 577 posts
Armorama: 446 posts
Posted: Thursday, February 08, 2007 - 12:00 AM UTC
Looking very nice. The .50 cal is really excellent and I love your crew positioning. Please keep us advised of your progress.
Doug
Doug
trahe
Virginia, United States
Joined: April 03, 2006
KitMaker: 1,158 posts
Armorama: 950 posts
Joined: April 03, 2006
KitMaker: 1,158 posts
Armorama: 950 posts
Posted: Thursday, February 08, 2007 - 12:01 AM UTC
Looking good so far. Let us know how it turns out.
koenele
Oost-Vlaanderen, Belgium
Joined: January 17, 2006
KitMaker: 4,194 posts
Armorama: 408 posts
Joined: January 17, 2006
KitMaker: 4,194 posts
Armorama: 408 posts
Posted: Thursday, February 08, 2007 - 01:02 AM UTC
looks very good; the lionroar is a very good addition!!
keep us updated...
koen
keep us updated...
koen
ShermanSam
Drenthe, Netherlands
Joined: August 22, 2002
KitMaker: 136 posts
Armorama: 105 posts
Joined: August 22, 2002
KitMaker: 136 posts
Armorama: 105 posts
Posted: Thursday, February 08, 2007 - 04:51 AM UTC
looks nice,
the crew you used, whera are they from?
greets Sander
the crew you used, whera are they from?
greets Sander
gabo
Veracruz, Mexico
Joined: January 09, 2006
KitMaker: 20 posts
Armorama: 19 posts
Joined: January 09, 2006
KitMaker: 20 posts
Armorama: 19 posts
Posted: Thursday, February 08, 2007 - 05:58 AM UTC
Thanks to all for your response, First, the comander an driver is from the US Infantry set (tamiya) and the other one is a german tank comander from the German Infantry &tank crew (Tamiya), just have to reshape arms and uniform, cut off the head and turn a little, their hair was made it with a hot needle.
when I took these photos They still was in their original pose , in the next photos you will see these changes.
Meanwhile I started to paint it, I always paint with acrylics, the first coat was a mixture of tamiya paints Desert yellow with Buff.
At this point I will start to paint the camouflage pattern.
saludos!!!
see ya !!
Gabo.
koenele
Oost-Vlaanderen, Belgium
Joined: January 17, 2006
KitMaker: 4,194 posts
Armorama: 408 posts
Joined: January 17, 2006
KitMaker: 4,194 posts
Armorama: 408 posts
Posted: Friday, February 09, 2007 - 06:02 AM UTC
looking good... cant wait for further progress!!
take care
koen
take care
koen
HONEYCUT
Victoria, Australia
Joined: May 07, 2003
KitMaker: 4,002 posts
Armorama: 2,947 posts
Joined: May 07, 2003
KitMaker: 4,002 posts
Armorama: 2,947 posts
Posted: Friday, February 09, 2007 - 06:29 AM UTC
Hola Gabriel
Wow you are putting in the hard yards here, and I have to say it is paying off! I think in this scale and smaller is where photo etched parts can really come into their own... As mentioned the .50 cal dresses up fantastically...
The periscope guards look great too...
Is it to be an Italian setting?
Cheers
Brad
gabo
Veracruz, Mexico
Joined: January 09, 2006
KitMaker: 20 posts
Armorama: 19 posts
Joined: January 09, 2006
KitMaker: 20 posts
Armorama: 19 posts
Posted: Friday, February 09, 2007 - 12:54 PM UTC
Hi Koen, Brad & to all .
Yes!!! this tank will represent a Sherman of the 576th Tank Btn. In Monte Cassino.
By the way those periscope guards were made it wit cooper wire because I donŽt be able to obtain other source, if you wacht closely youŽll see that the tool belts are from another photoetched set from my spare box.. It was from an Eduard Lav 25 detail set.. yes... I know it was 1/35... but those bucles looks so 1/48 .!!!!... .
The weld beads were made it with stretched sprue glued witth Tamiya Extra thin Cement and after the cement cures, small cuts with the knife was applied.
I hope to obtain a camera with a friend because mine suffer a "small" accident . so IŽll be in touch in few days.
Saludos to everybody.
Gabo