_GOTOBOTTOM
Armor/AFV: 48th Scale
1/48 scale discussion group hosted by Rob Gronovius
Hosted by Darren Baker
Tamiya's Achilles
JPTRR
Staff MemberManaging Editor
RAILROAD MODELING
#051
Visit this Community
Tennessee, United States
Joined: December 21, 2002
KitMaker: 7,772 posts
Armorama: 2,447 posts
Posted: Monday, September 08, 2014 - 11:19 AM UTC
Hi Group,

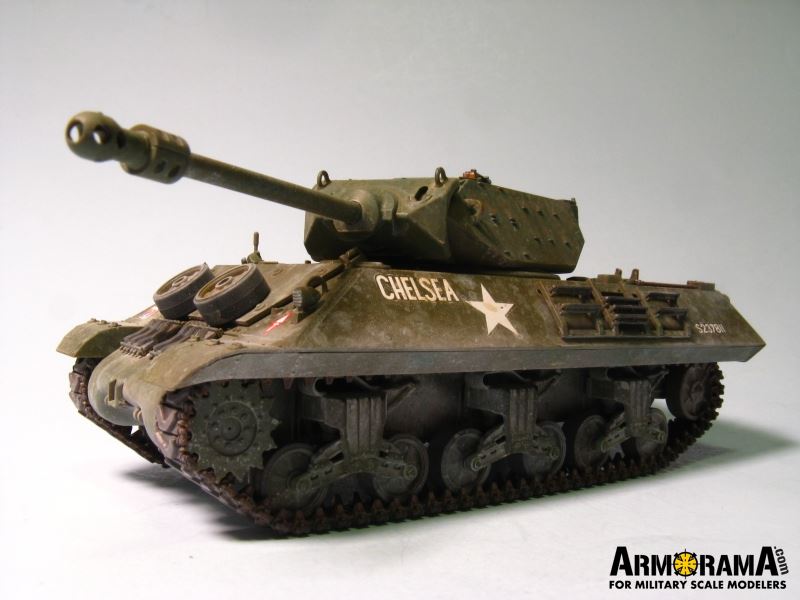
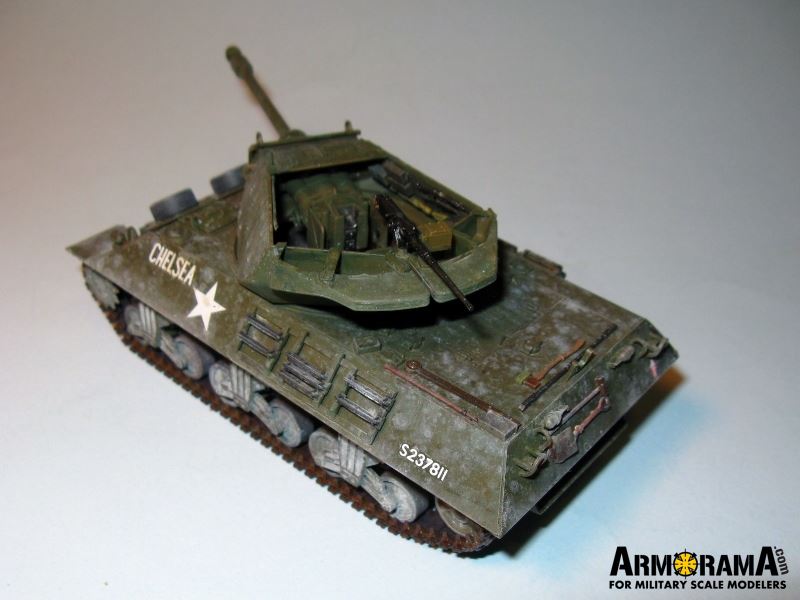
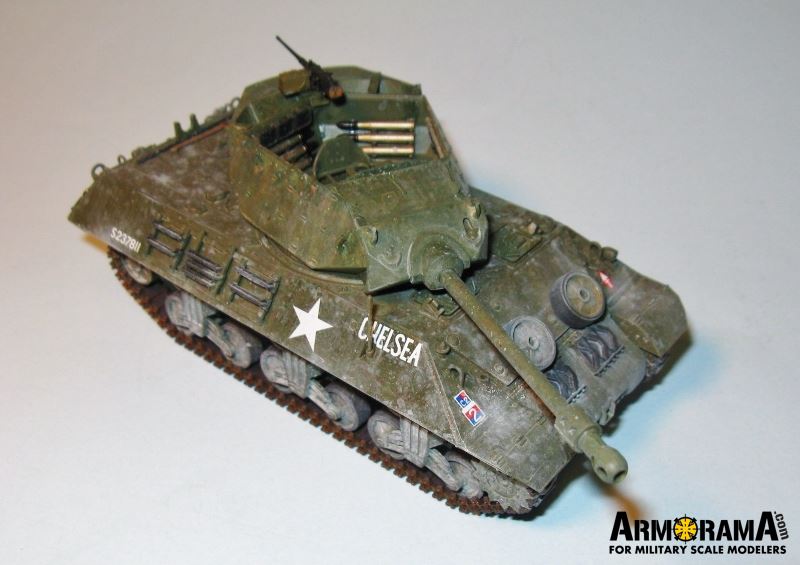
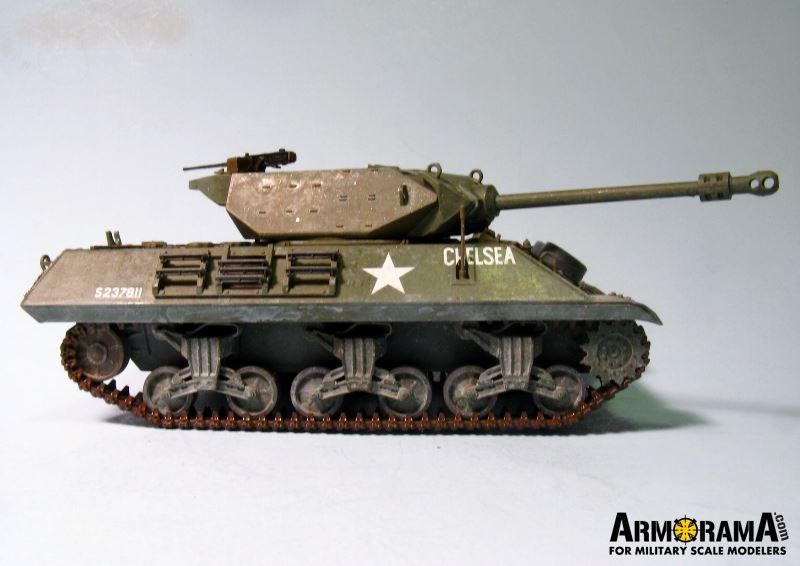
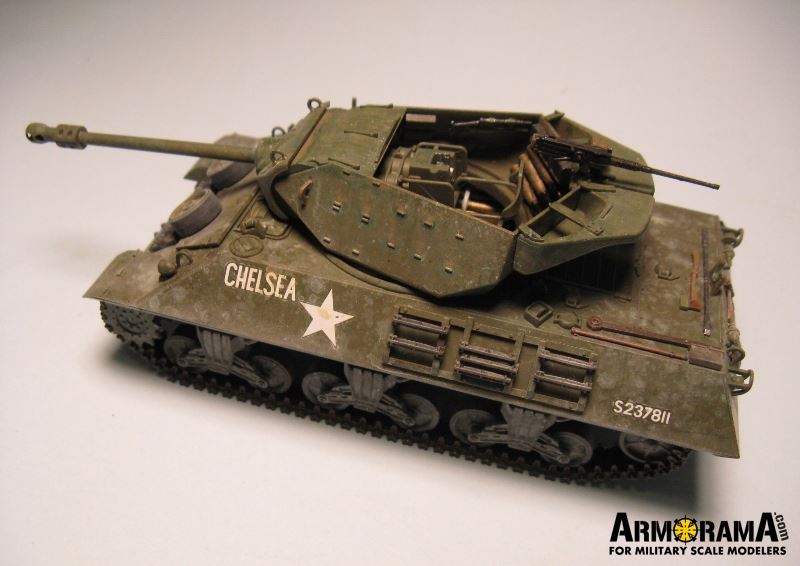
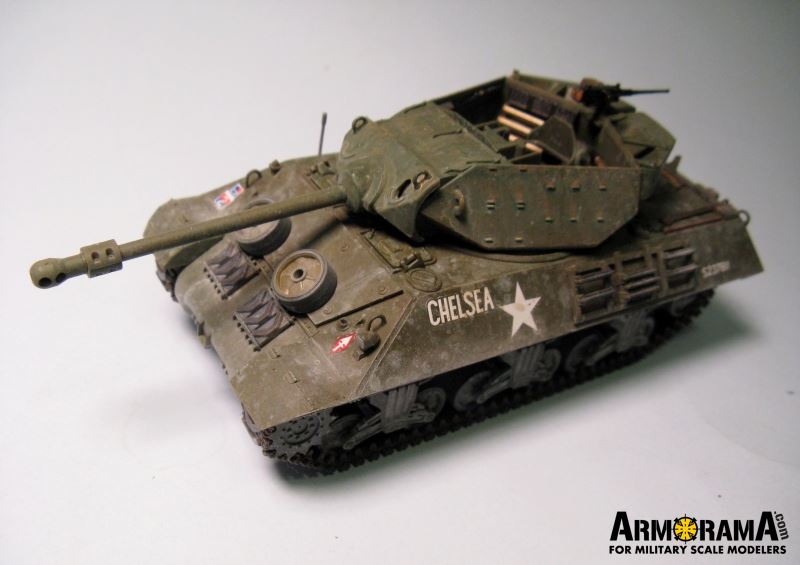
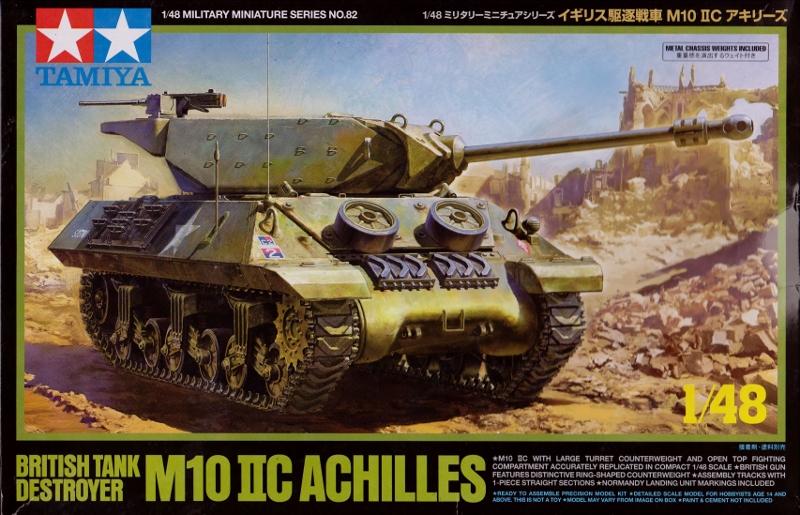
A couple of weeks ago I was entrusted to review Tamiya's 1/48 M10 IIC Achilles British Tank Destroyer:


Want to see the review? See Link to Item

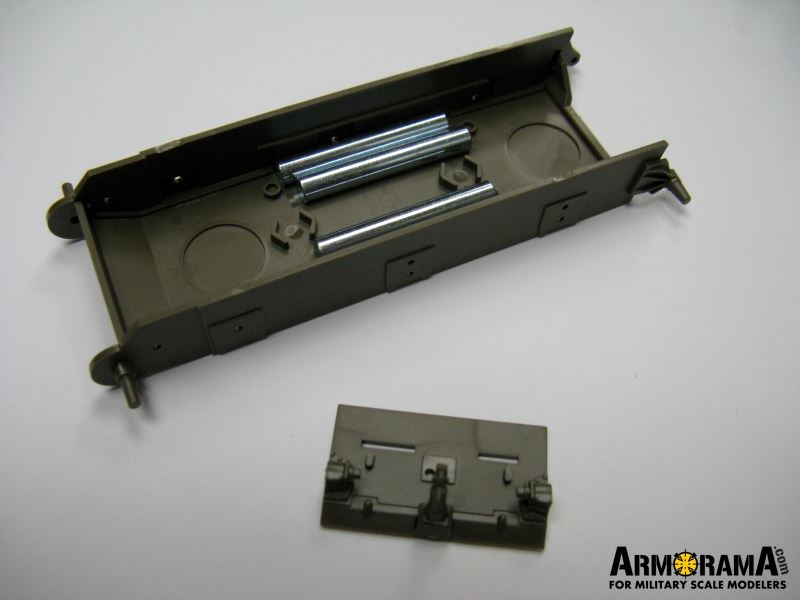
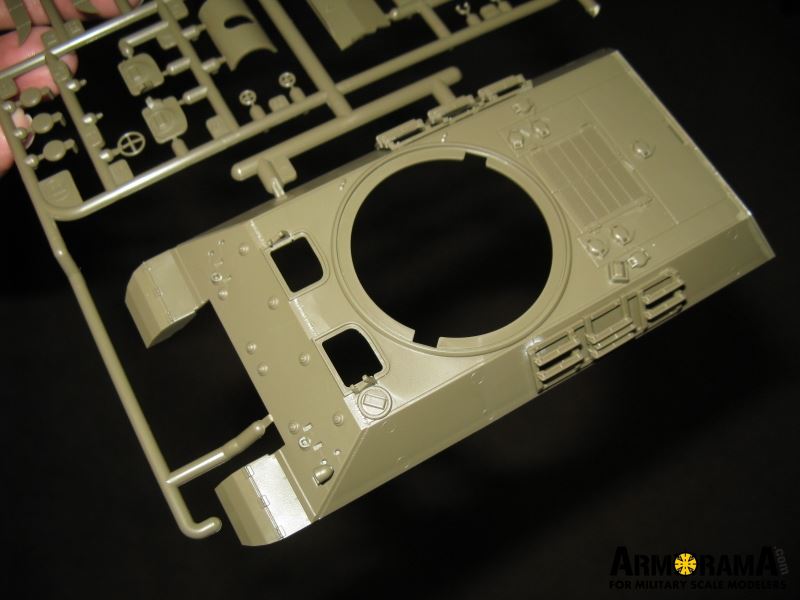
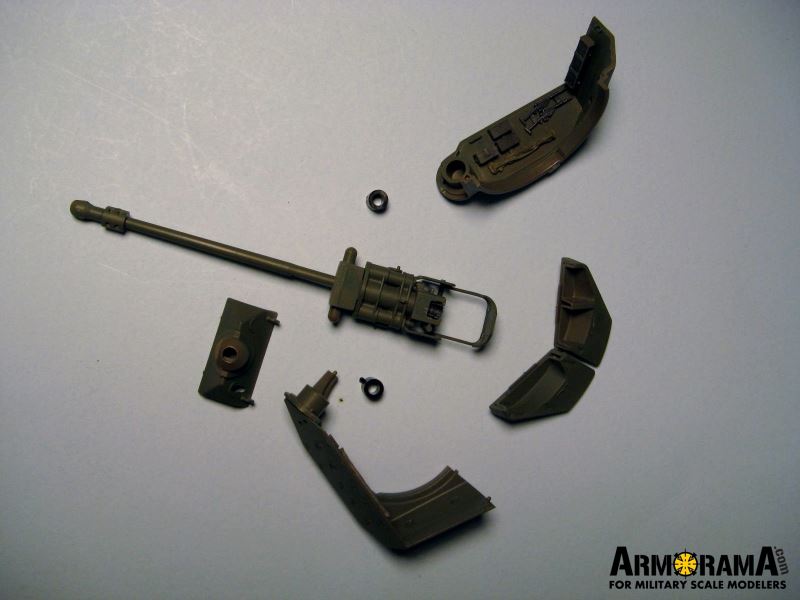
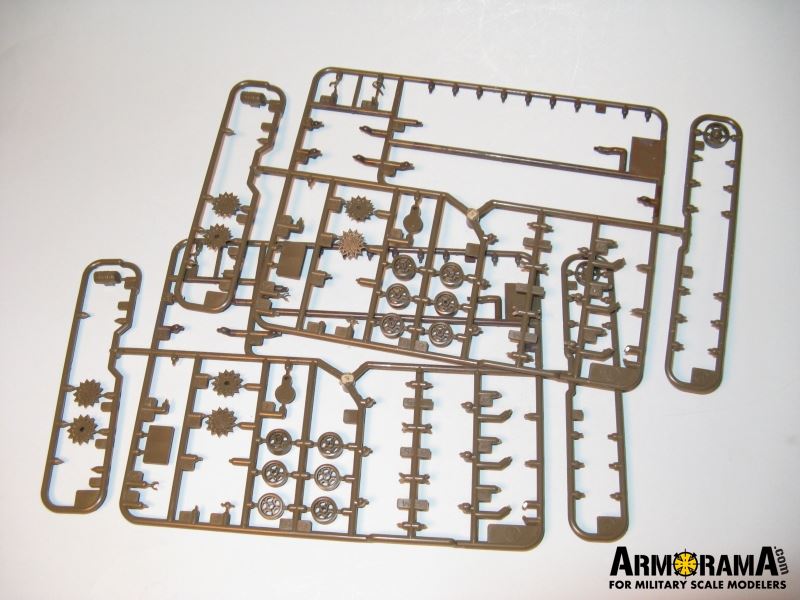
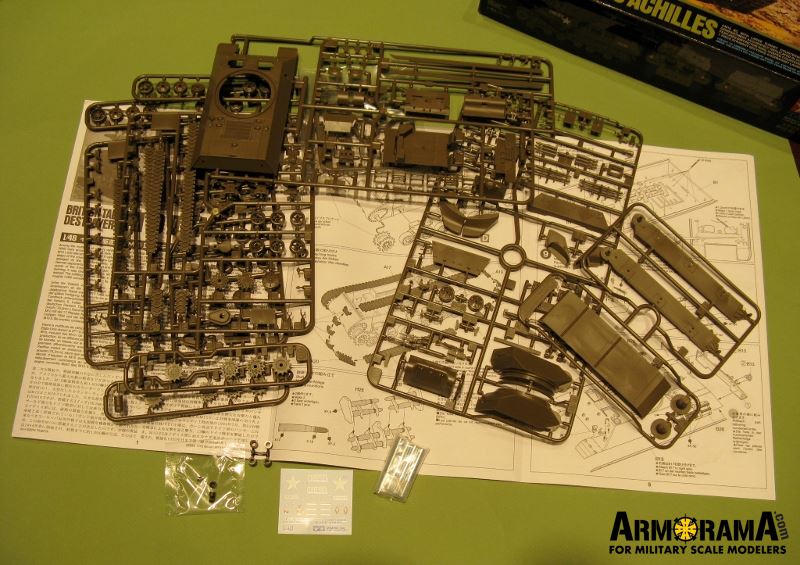
What is in the box? Instructions, decals, two small packs of poly caps and metal weights, and six olive sprues of parts.


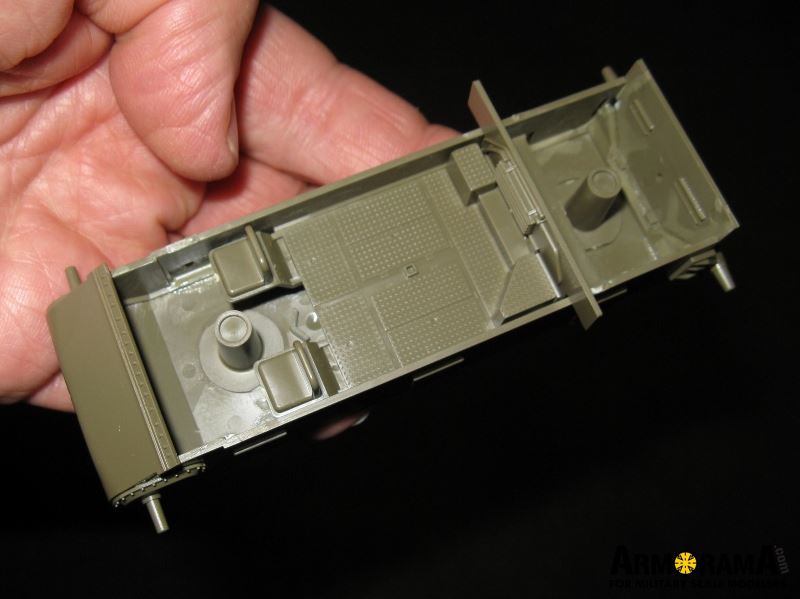
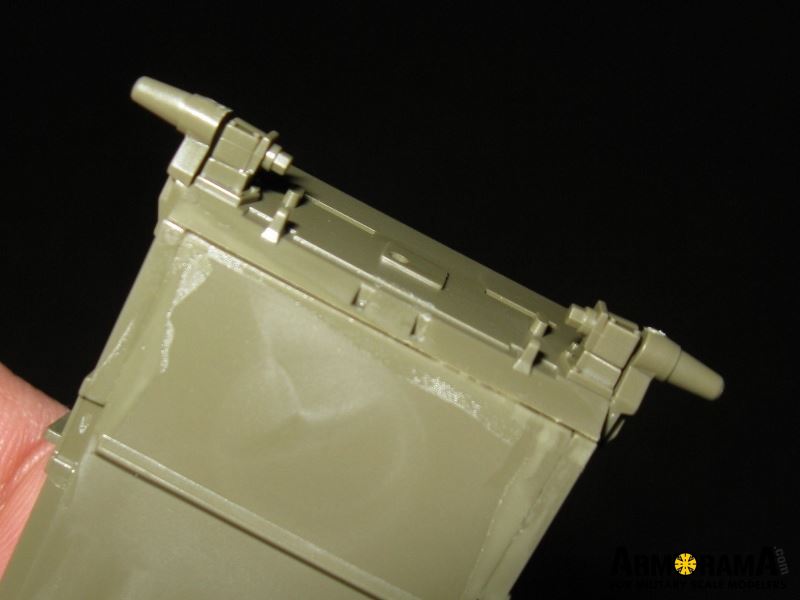
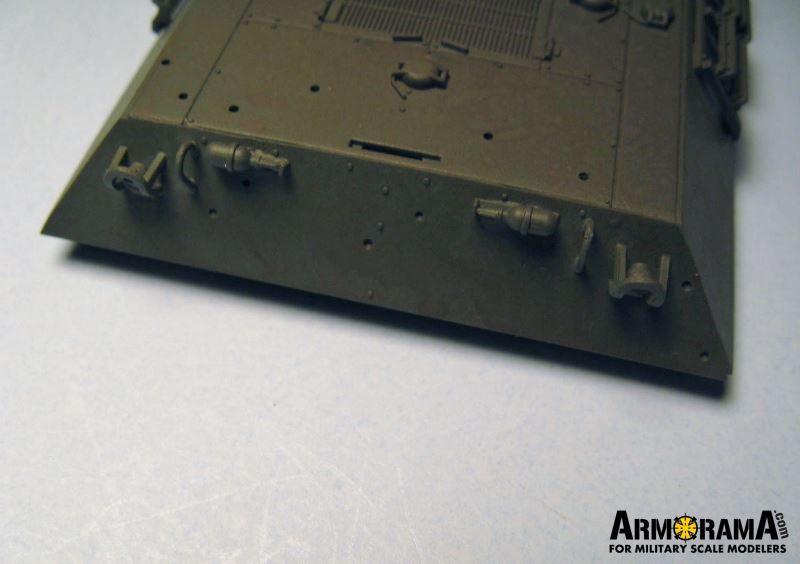
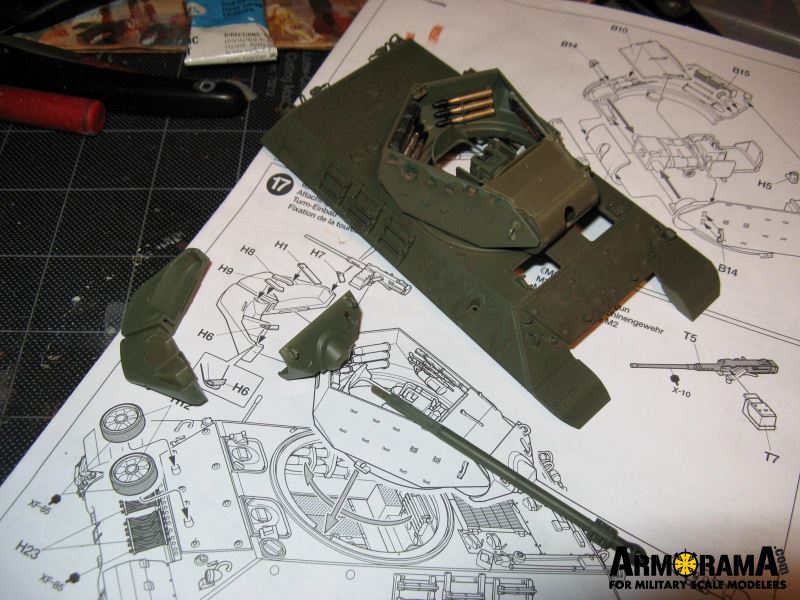
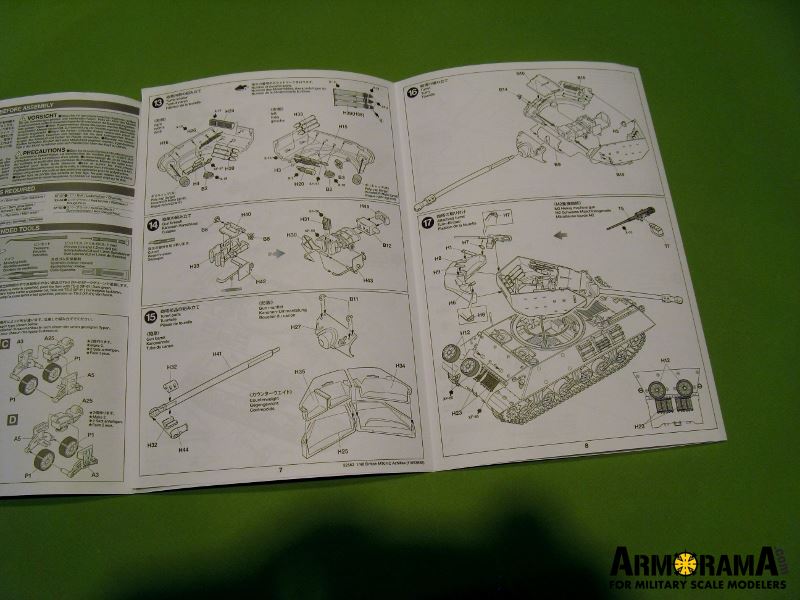
Typical of Tamiya the kit has been well engineered and the fit is trouble free. Tamiya also makes good assembly instructions.


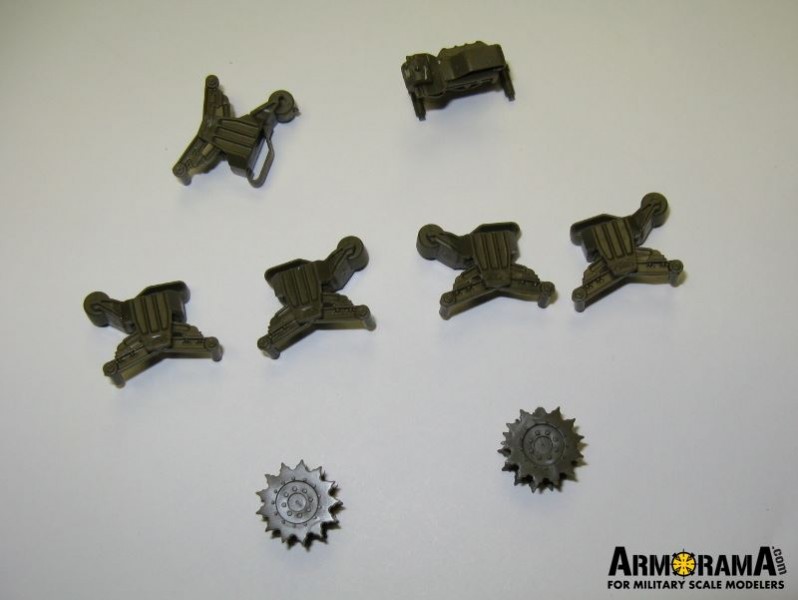
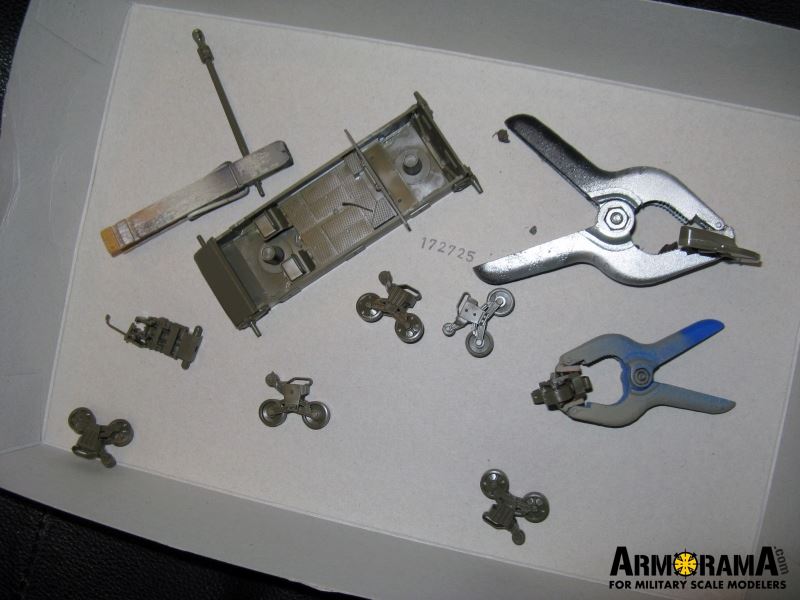
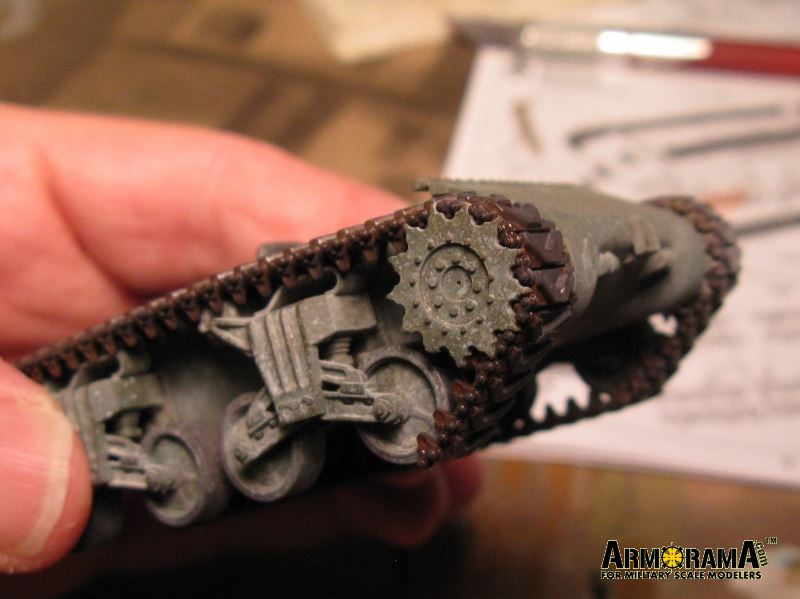
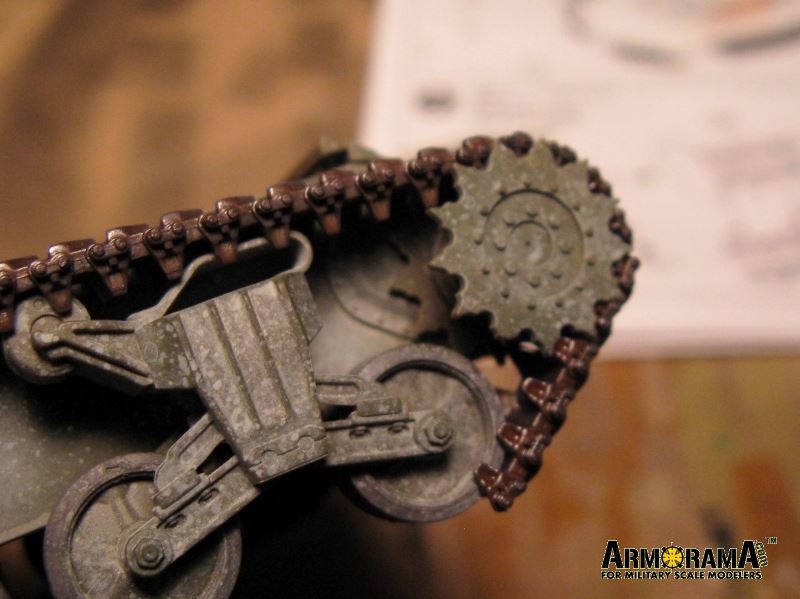
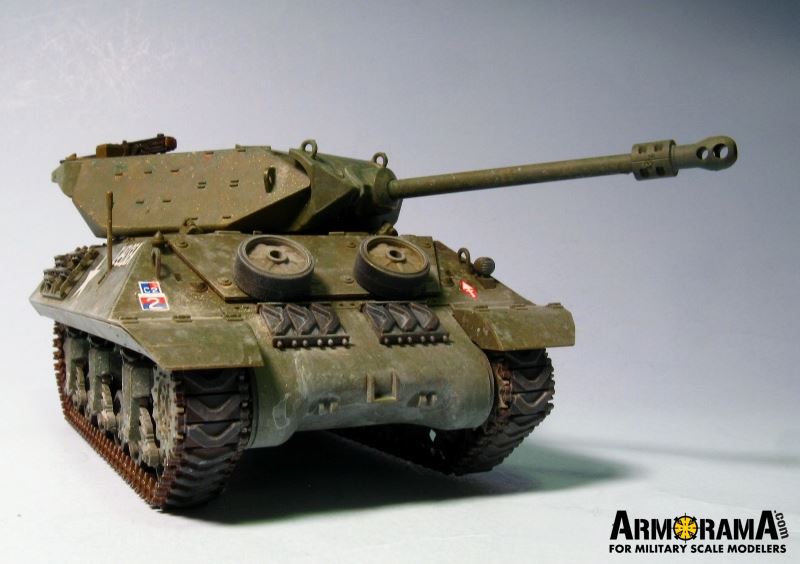
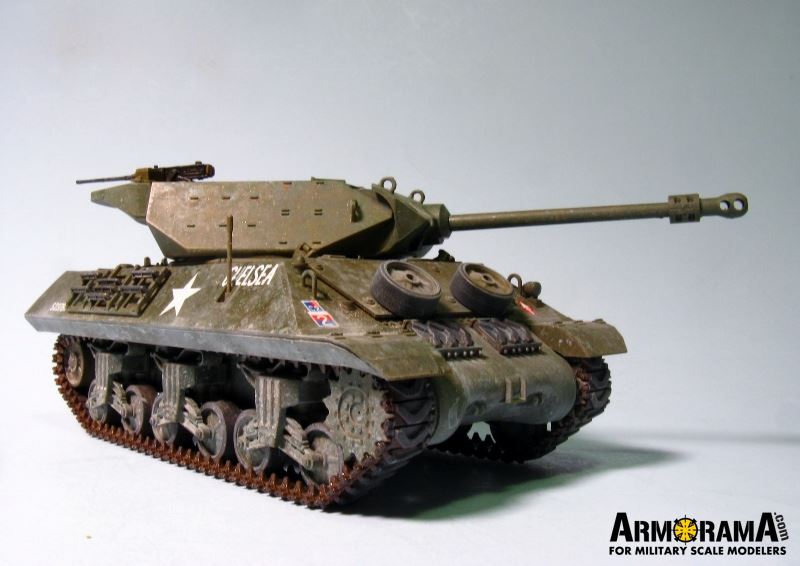
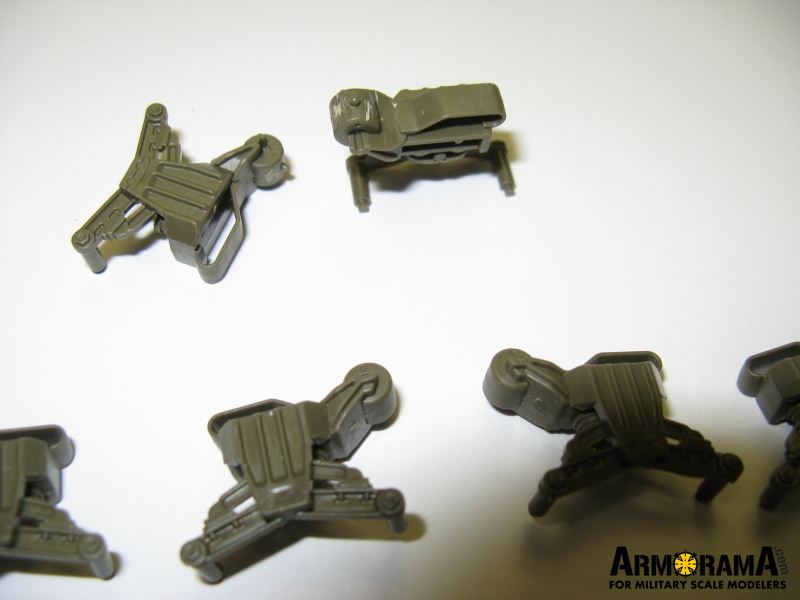
The first step is assembling the Vertical Volute Spring Suspension (VVSS) bogies. Pay close attention to the instructions as there are four steps to build six VVSS assemblies. Three different rear faces build the suspensions, and the two different parts of return rollers are used, too. Then be aware that you orient the return rollers in the opposite direction for the right or left VVSSs.


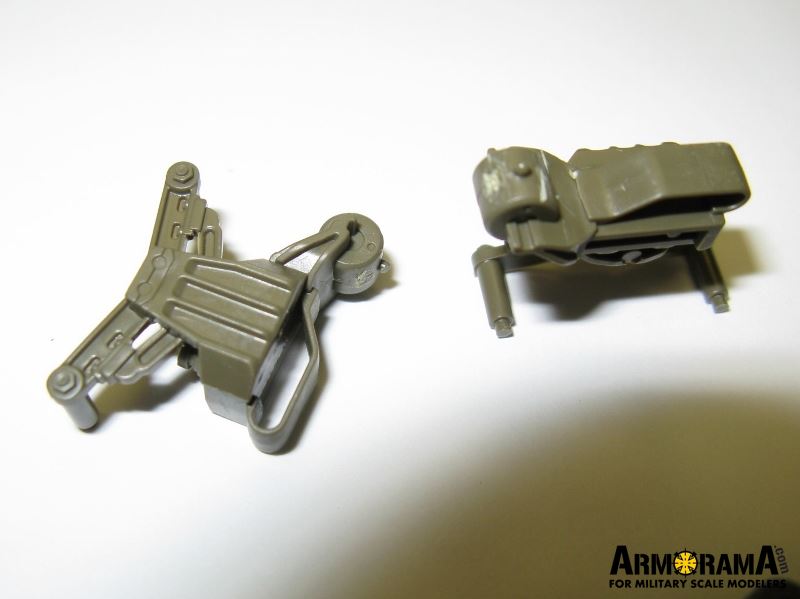
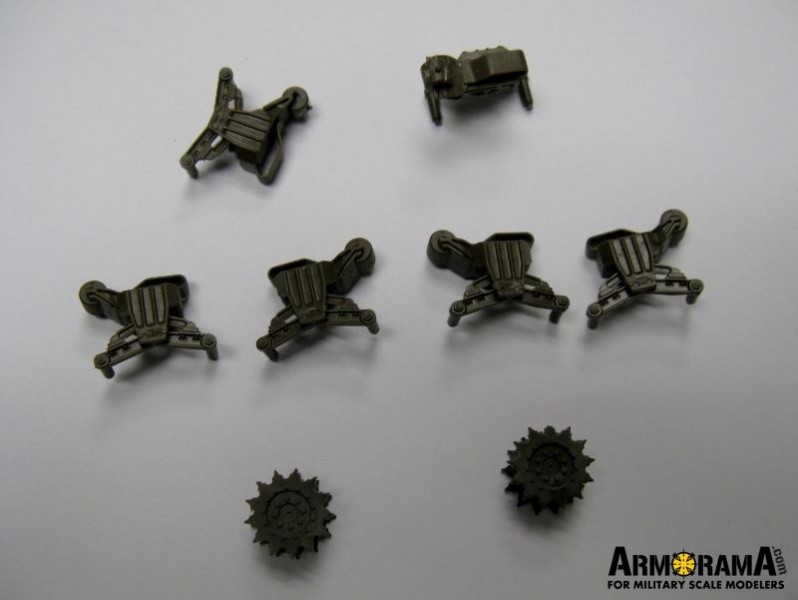
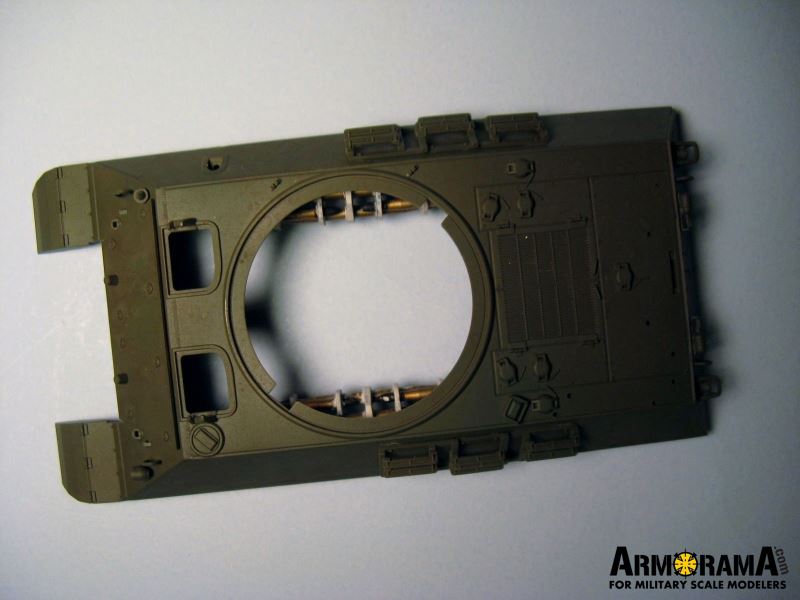
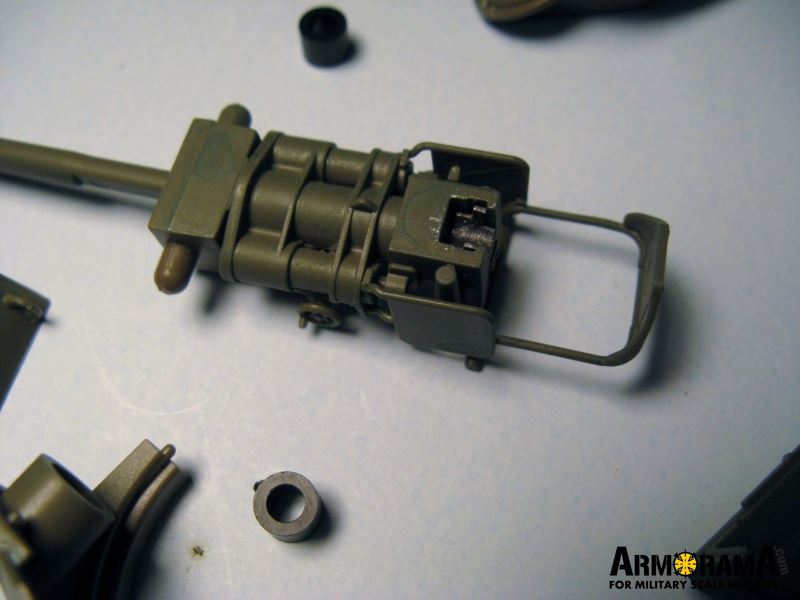
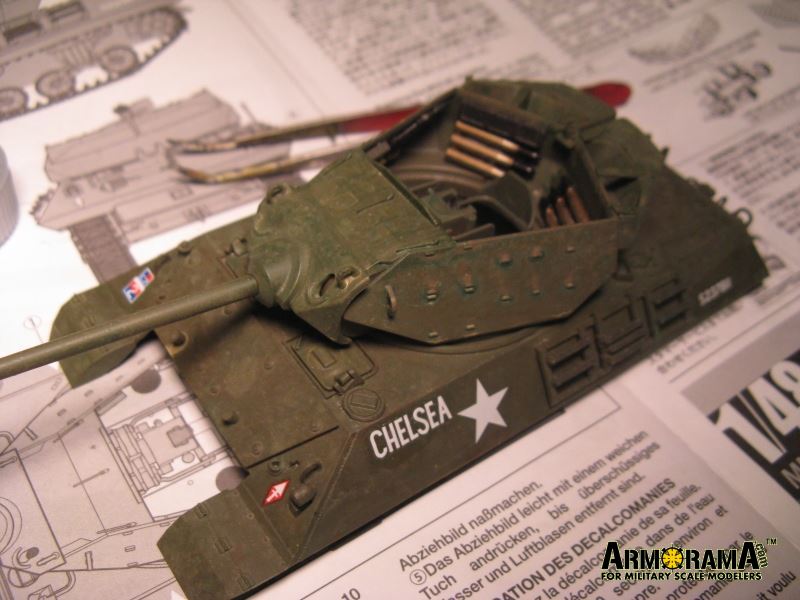
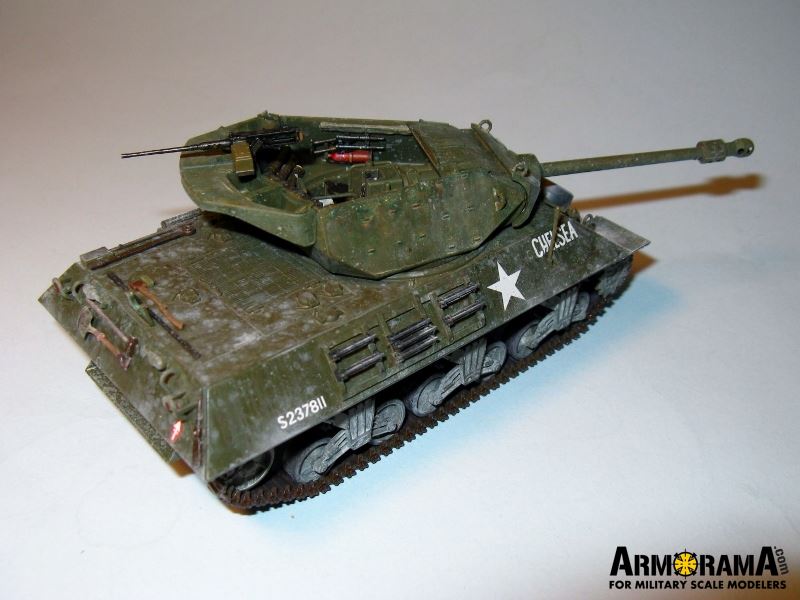
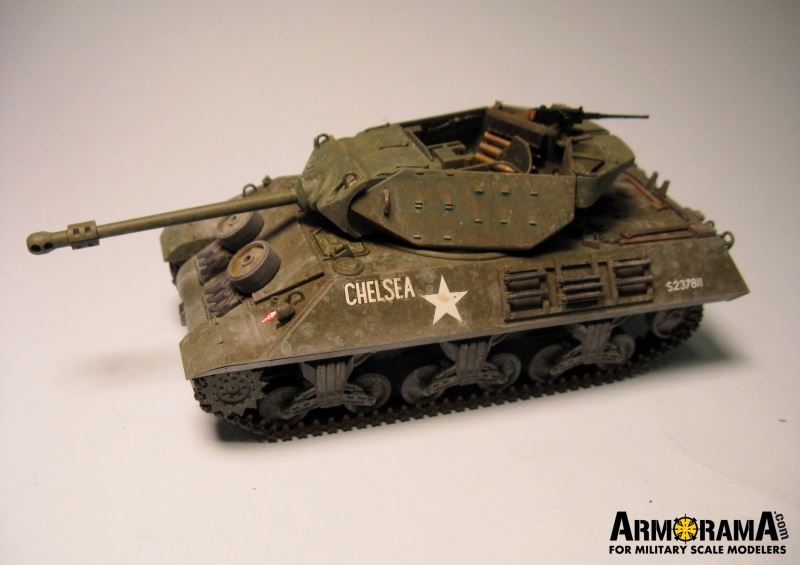
(Slightly different lighting to expose detail)
JPTRR
Staff MemberManaging Editor
RAILROAD MODELING
#051
Visit this Community
Tennessee, United States
Joined: December 21, 2002
KitMaker: 7,772 posts
Armorama: 2,447 posts
Posted: Monday, September 08, 2014 - 11:30 AM UTC
The build continues with the multi-part chassis. I don't know when they quit casting these in metal for their 1/48 series. It is built with a floor, sides, a back, and four weights. The rear plate has several parts to attach.

Once the weights are in, a token hull interior is installed. Plates for the sprockets are separately attached:


The rear plate fits well except on the idler axles. Gap filling will be required:


I decided to start attaching certain parts to the hull while it is on the sprue. The spare track framing is on:


Various and sundry assemblies and sub assemblies on display here:


To facilitate assembly, I initially assembled the VVSS with CA, then followed up with liquid cement and clamping. I used the same technique for the 17-pounder gun tube and counterweight.

What you see is approximately 2.5 hours of somewhat distracted modeling time.

Check back for more soon!
JPTRR
Staff MemberManaging Editor
RAILROAD MODELING
#051
Visit this Community
Tennessee, United States
Joined: December 21, 2002
KitMaker: 7,772 posts
Armorama: 2,447 posts
Posted: Monday, September 08, 2014 - 02:23 PM UTC
This is my source for information:

TM 9-731G. 5. 3-INCH GUN MOTOR CARRIAGE M10A1
GastonMarty
Visit this Community
Quebec, Canada
Joined: April 19, 2008
KitMaker: 595 posts
Armorama: 69 posts
Posted: Saturday, September 13, 2014 - 04:52 PM UTC

A major issue of this kit is the lack of sponsoons which means the tracks can be seen through the open turret (alledgedly!)...

The tranny cover is also 16.2 mm high vs 17.6 actual, but for once this subject easily allows covering the tranny cover completely with stowage, so it is not as crucial an issue as it is on the hull mg equipped variants.

Gaston

JPTRR
Staff MemberManaging Editor
RAILROAD MODELING
#051
Visit this Community
Tennessee, United States
Joined: December 21, 2002
KitMaker: 7,772 posts
Armorama: 2,447 posts
Posted: Monday, October 06, 2014 - 05:12 AM UTC
Hi Gaston,

Thanks for the input. I am disappointed with the open undersponson; as we'll see next, the big racks of ammo can obscure that somewhat, especially after the turret is on.
JPTRR
Staff MemberManaging Editor
RAILROAD MODELING
#051
Visit this Community
Tennessee, United States
Joined: December 21, 2002
KitMaker: 7,772 posts
Armorama: 2,447 posts
Posted: Monday, October 06, 2014 - 05:22 AM UTC
Hi group,

I managed to sneak away from everyone and everything that I'm supposed to be doing, and managed some painting and gluing!

First, the sponson ammo racks;


No tools yet but this is the butt of the upper hull,


Main components of the "war room"


Next, dirtying up the hull and suspension, and putting that turret together.

JPTRR
Staff MemberManaging Editor
RAILROAD MODELING
#051
Visit this Community
Tennessee, United States
Joined: December 21, 2002
KitMaker: 7,772 posts
Armorama: 2,447 posts
Posted: Tuesday, October 14, 2014 - 03:08 PM UTC
OK, so the mud hasn't gotten spattered yet but there's been progress!

After the turret is assembled, the gun tube fits through the mantle and into the rear of the gun.


The bustle counterweight is assembled separately and then fitted to the turret. Low tabs on the lip of the bustle fit into shallow troughs on the turret for alignment, although they are not sufficient to support the component. I used CA to attach it. Next, five brackets are attached to the bustle spanning to the turret edge.
JPTRR
Staff MemberManaging Editor
RAILROAD MODELING
#051
Visit this Community
Tennessee, United States
Joined: December 21, 2002
KitMaker: 7,772 posts
Armorama: 2,447 posts
Posted: Tuesday, October 14, 2014 - 03:55 PM UTC
More and more parts are on, time for some paint. Base color was broken up by "spatter painting".

JPTRR
Staff MemberManaging Editor
RAILROAD MODELING
#051
Visit this Community
Tennessee, United States
Joined: December 21, 2002
KitMaker: 7,772 posts
Armorama: 2,447 posts
Posted: Monday, December 01, 2014 - 10:23 AM UTC
Well, it's certainly been too long since an update. I've started applying dust and decals. Here's the decal shot:
GregCloseCombat
Visit this Community
California, United States
Joined: June 30, 2008
KitMaker: 2,408 posts
Armorama: 2,394 posts
Posted: Tuesday, December 23, 2014 - 11:22 AM UTC
Hi. Nice job on this
I like the turret interior parts. I have the MR models achilles conversion for the M10 but this looks easier so may upgrade. Thanks for this review.
JPTRR
Staff MemberManaging Editor
RAILROAD MODELING
#051
Visit this Community
Tennessee, United States
Joined: December 21, 2002
KitMaker: 7,772 posts
Armorama: 2,447 posts
Posted: Friday, January 23, 2015 - 03:32 AM UTC
It's been embarrassingly long between updates but here's the latest.

These two shots show the semi-separate link tracks. Tamiya provides a long top length that spans from sprocket to idler. It is the "master track" as it attached to the front return roller via a pin/slot, creating proper alignment for the subsequent parts.

Four links mount into the teeth of the sprocket. They fit so well that this could be considered a 'snap tight' kit!
Next, the short length from the sprocket down to the first bogie. It also mounts so tightly that I did not apply cement!


The tank rests upon another long piece that spans from the first bogie to the last one. The another intermediate short length reached from the ground to the idler. It needs cement. Finally, you place five more individual links around the idler to complete the track. One side fit so tight that no cement was needed, while the other side needed cement. However, I went back and used Tamiya extra thin glue to make sure all of the links bonded togther forever.

I used a variety of products to model the weathering:

Polly Scale for the rubber treads
Wilder Dark Rust for the edges
Lifecolor Dust for the, well, dust!
JPTRR
Staff MemberManaging Editor
RAILROAD MODELING
#051
Visit this Community
Tennessee, United States
Joined: December 21, 2002
KitMaker: 7,772 posts
Armorama: 2,447 posts
Posted: Friday, January 23, 2015 - 12:09 PM UTC
Final assembly meant attaching the 'fiddly parts' such as the pioneer equipment, spare tracks and bogies.


It was at this point that I noticed that Tamiya missed something! Two if the 'fiddly parts' I saved for last are the guards for the headlights. But then I noticed they are not used on Achilles. I scrutinized the box art, instructions, etc., and noticed the guards are not used. However, Tamiya does not mention filling of the divots the guards fit into. Also, all images show some type of round fitting covering the mounting bracket for the headlights. Those round fitting are nowhere to be found in the instructions nor on the sprues. They are illustrated as part of the assembled model, just not mentioned in assembly.


While that oversight is disappointing, those divots will not be difficult to fill or hide under stowage.

JPTRR
Staff MemberManaging Editor
RAILROAD MODELING
#051
Visit this Community
Tennessee, United States
Joined: December 21, 2002
KitMaker: 7,772 posts
Armorama: 2,447 posts
Posted: Friday, January 23, 2015 - 12:15 PM UTC
I touched up the dust, simulated the headlamp lenses with paint and...

...ladies and gentlemen, I present brave Achilles!


JPTRR
Staff MemberManaging Editor
RAILROAD MODELING
#051
Visit this Community
Tennessee, United States
Joined: December 21, 2002
KitMaker: 7,772 posts
Armorama: 2,447 posts
Posted: Friday, January 23, 2015 - 12:24 PM UTC
I think this is a good model. I enjoyed building it. Typical of Tamiya, it is well molded and assembly just fell together.

Pay close attention to the assembly of the VVSS.

Used care with the fine lift rings and thin tools.

I am troubled by the missing fittings on the glacis. Using raised circles on the hull sides to align applique armor bolts is something I thought died out in the 1980s. I wish the .50 caliber machine gun handles were molded as a separate part instead of solid in the butt of the gun.

Still, I am quite happy with my model. I don't think anyone will go wrong buying and building it for one's 1/48 military collection. Go ahead, treat yourself!


Here is the link to the review: Tamiya M10 IIC Achilles
JPTRR
Staff MemberManaging Editor
RAILROAD MODELING
#051
Visit this Community
Tennessee, United States
Joined: December 21, 2002
KitMaker: 7,772 posts
Armorama: 2,447 posts
Posted: Friday, January 23, 2015 - 12:25 PM UTC
I almost forgot. Here are some of the spare parts (including some tools) this kit affords you:
JPTRR
Staff MemberManaging Editor
RAILROAD MODELING
#051
Visit this Community
Tennessee, United States
Joined: December 21, 2002
KitMaker: 7,772 posts
Armorama: 2,447 posts
Posted: Friday, January 23, 2015 - 11:29 PM UTC

Quoted Text

A major issue of this kit is the lack of sponsoons which means the tracks can be seen through the open turret (alledgedly!)...


Gaston, alledgedly was a good call. Happily, the hull ammunition storage completely blocks any sight of the tracks.
BornToDig
Visit this Community
Maryland, United States
Joined: December 25, 2002
KitMaker: 345 posts
Armorama: 311 posts
Posted: Monday, February 02, 2015 - 07:05 PM UTC
That turned out nicely.

I've been following your build throughout. I'm disappointed that Tamiya did not include all the parts from the original M10 kit, as those are hard to come by anymore, but it is what it is. The lack of adequate hull fittings is also not surprising, as they're known to cut corners.

Nevertheless, it is nice to see an Achilles in this scale, and judging from your photos and posts, it looks like it was a fun kit to build. I'll certainly be picking one up when I clear my current 1/48 afv projects.

Thanks for sharing.
DaGreatQueeg
Visit this Community
Napier, New Zealand
Joined: August 01, 2005
KitMaker: 1,049 posts
Armorama: 841 posts
Posted: Monday, February 02, 2015 - 10:45 PM UTC
Nice review and build! Must pick up one of these at some stage ......

On the lights and brush guards, almost all wartimne pics show them so it must be that Chelsea is without them hence the instructions leaving them off. If using alternative decals they can be fitted solving the gap problem.

cheers
Brent
russamotto
Visit this Community
Utah, United States
Joined: December 14, 2007
KitMaker: 3,389 posts
Armorama: 2,054 posts
Posted: Tuesday, February 03, 2015 - 01:17 AM UTC
This was a nice build review, Fred, and it turned out great.
JPTRR
Staff MemberManaging Editor
RAILROAD MODELING
#051
Visit this Community
Tennessee, United States
Joined: December 21, 2002
KitMaker: 7,772 posts
Armorama: 2,447 posts
Posted: Thursday, February 26, 2015 - 06:22 AM UTC

Quoted Text

... it looks like it was a fun kit to build.


Ralph, it certainly was! And despite it taking about 5 months for me to complete, it is an easy model to build.

Brent, that is good information - thank you for clarifying the detail shown in wartime photos of Chelsea.

Russ, thank you.
jinx46
Visit this Community
Attica, Greece / Ελλάδα
Joined: March 07, 2015
KitMaker: 18 posts
Armorama: 18 posts
Posted: Wednesday, March 11, 2015 - 12:10 AM UTC


Excellent work and review,

Thanks....
abbatoys
Visit this Community
Michigan, United States
Joined: October 12, 2014
KitMaker: 38 posts
Armorama: 22 posts
Posted: Wednesday, March 11, 2015 - 02:09 AM UTC
That is a nice build. I never heard of that tank name before. I like it..
 _GOTOTOP