Thanks guys, sorry I havenít replied up to now, been over on the new forum and was wondering where these mysterious messages were coming from!
Thanks G. Iíve never seen the trumpeter kit. Iím tempted by the new RFM ones though.
Thanks Michael, Iíve never seen these, I think I will be purchasing and retro fitting for sure!
Thanks Chris, itís a great kit, and is a really impressive display piece as itís pretty huge!
I posted finished pics over on the new forum, itís so easy over there, just drag and drop, no hosting sites to deal with;
https://forums.kitmaker.net/t/tamiya-challenger-2-op-telic-oob/699/42
Thanks, J.
Constructive Feedback
For in-progress or completed build photos. Give and get contructive feedback!
For in-progress or completed build photos. Give and get contructive feedback!
Hosted by Darren Baker, Dave O'Meara
Tamiya Challenger 2 Opí Telic, OOB
iwatajim

Joined: December 15, 2008
KitMaker: 246 posts
Armorama: 171 posts

Posted: Monday, December 07, 2020 - 12:01 AM UTC
Chris64inthesky

Joined: February 18, 2010
KitMaker: 2 posts
Armorama: 2 posts
Posted: Sunday, December 06, 2020 - 06:46 AM UTC
Hi Jim, what a great job. Your beautiful chally makes me want to build my challenger, still sleeping in his box. I'll follow the way you did.
Cheers,
Chris
Cheers,
Chris
mshackleton

Joined: December 16, 2007
KitMaker: 559 posts
Armorama: 517 posts

Posted: Monday, November 30, 2020 - 08:09 PM UTC
Quoted Text
Thanks Max, I need to look for another solution for my antennas, the ones I did for the chieftain are slightly too thick, and I just never get consistent enough results from stretched sprue for three the same.
https://www.scorpion-miniature-models.co.uk/product-page/smm3527-clansman-antennae-and-bases
andromeda673

Joined: July 30, 2013
KitMaker: 584 posts
Armorama: 525 posts

Posted: Monday, November 30, 2020 - 04:44 PM UTC
holy crap incredible work, really great work actually. At least you are building the good kit, and not the disaster that is the Trumpeter kit. I built that one, and I don't know why I did.
iwatajim

Joined: December 15, 2008
KitMaker: 246 posts
Armorama: 171 posts

Posted: Monday, October 26, 2020 - 09:25 AM UTC
Hi Richard,
Thanks again. Did you miss my reply to you over on the new forum? Here you go mate;
Rich, I painted the tracks with Tamiya xf1 black, with a little clear gloss added to make it more satin. Then I gave a wash with AK4062 light dust deposit and when dry removed from the rubber blocks and road wheel contact patch on inside with cotton buds. Then I applied Mig pigment 3018 Middle East dust. I worked the pigment in dry by brush, then removed the excess first by brush and then used cotton buds again on the rubber pads and contact points. The tops of the tracks that are hidden have all my experiments with different colours and processes still on them!
Cheers,Jim.
Posted: Monday, October 26, 2020 - 09:14 AM UTC
They look excellent Jim ! As I said earlier, great job all around with this kit. Can I ask how you weathered the tracks ?
iwatajim

Joined: December 15, 2008
KitMaker: 246 posts
Armorama: 171 posts

Posted: Monday, October 26, 2020 - 08:23 AM UTC
Hello again. So I have painted the kit figures, a first for me since I was a kid! And they are now in position.
Just some pics with a nice background to do and thatís this project complete.
Thanks, Jim.


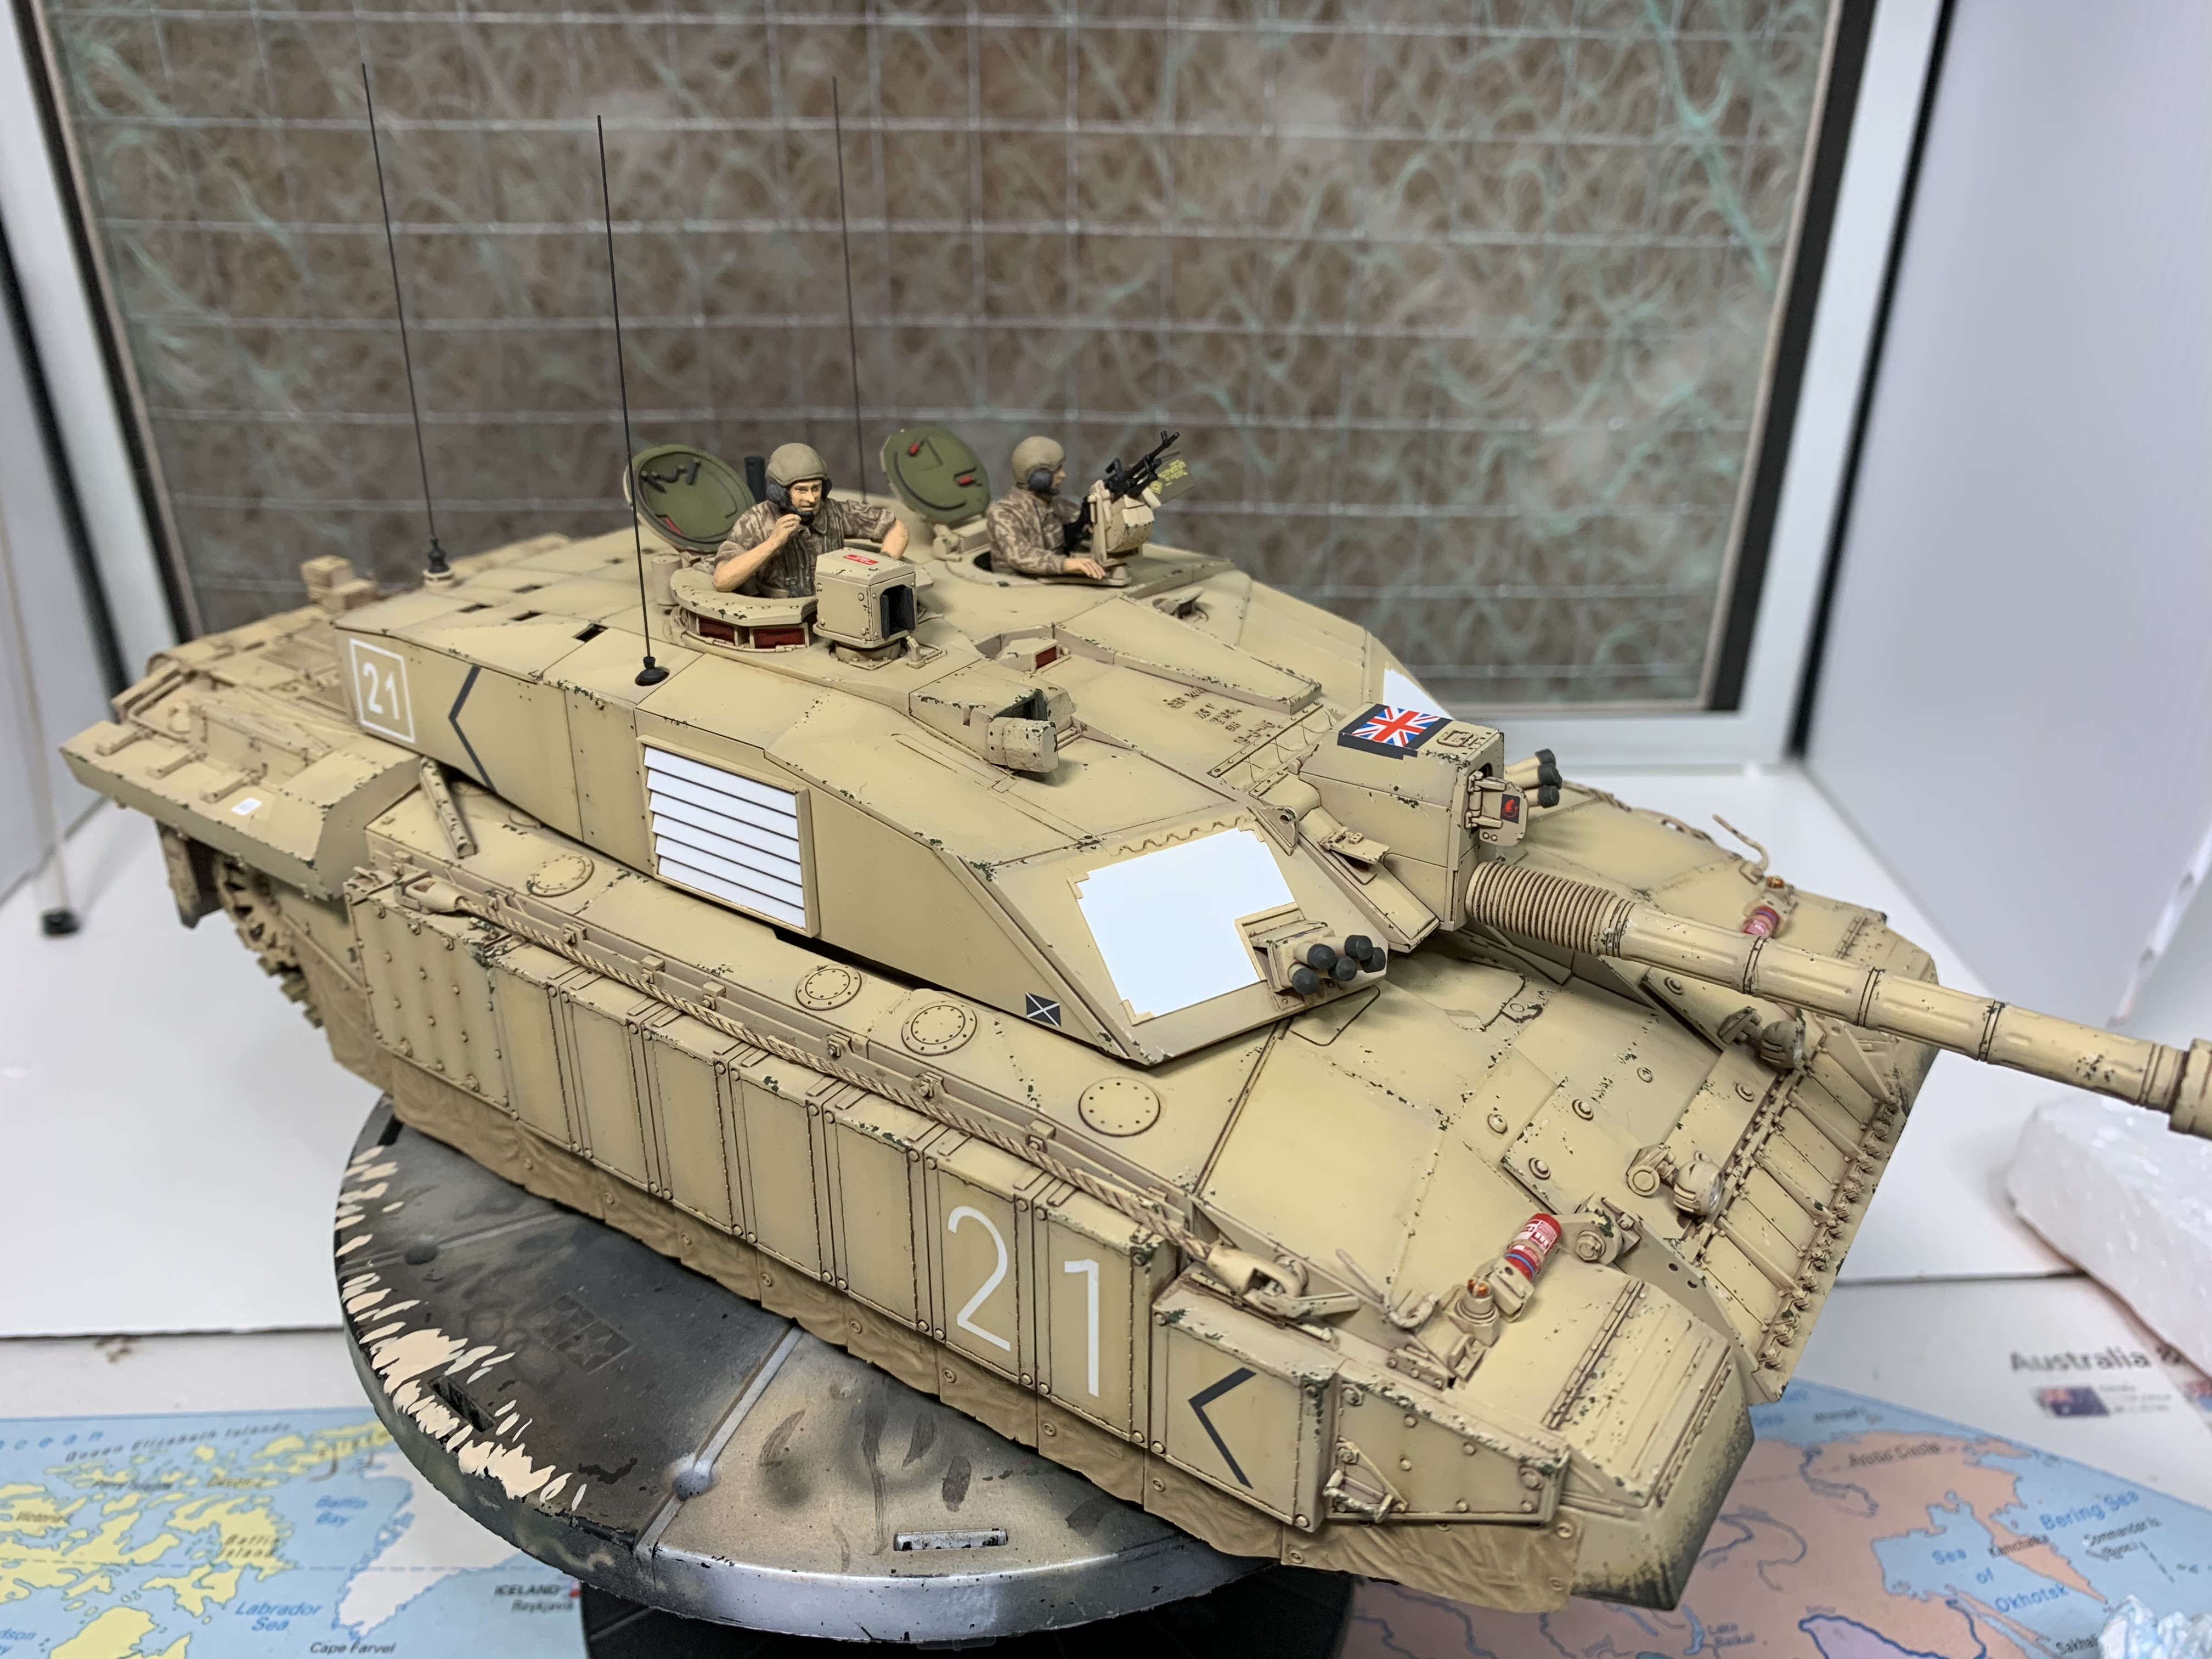
Just some pics with a nice background to do and thatís this project complete.
Thanks, Jim.


iwatajim

Joined: December 15, 2008
KitMaker: 246 posts
Armorama: 171 posts

Posted: Friday, October 23, 2020 - 08:02 AM UTC
Antennas now added using Maxís excellent suggestion of 0.3mm brass tube. Thanks Max!
All parts added and just a couple of little things to do. Will post final pics when I have a decent background.
Thanks, J.
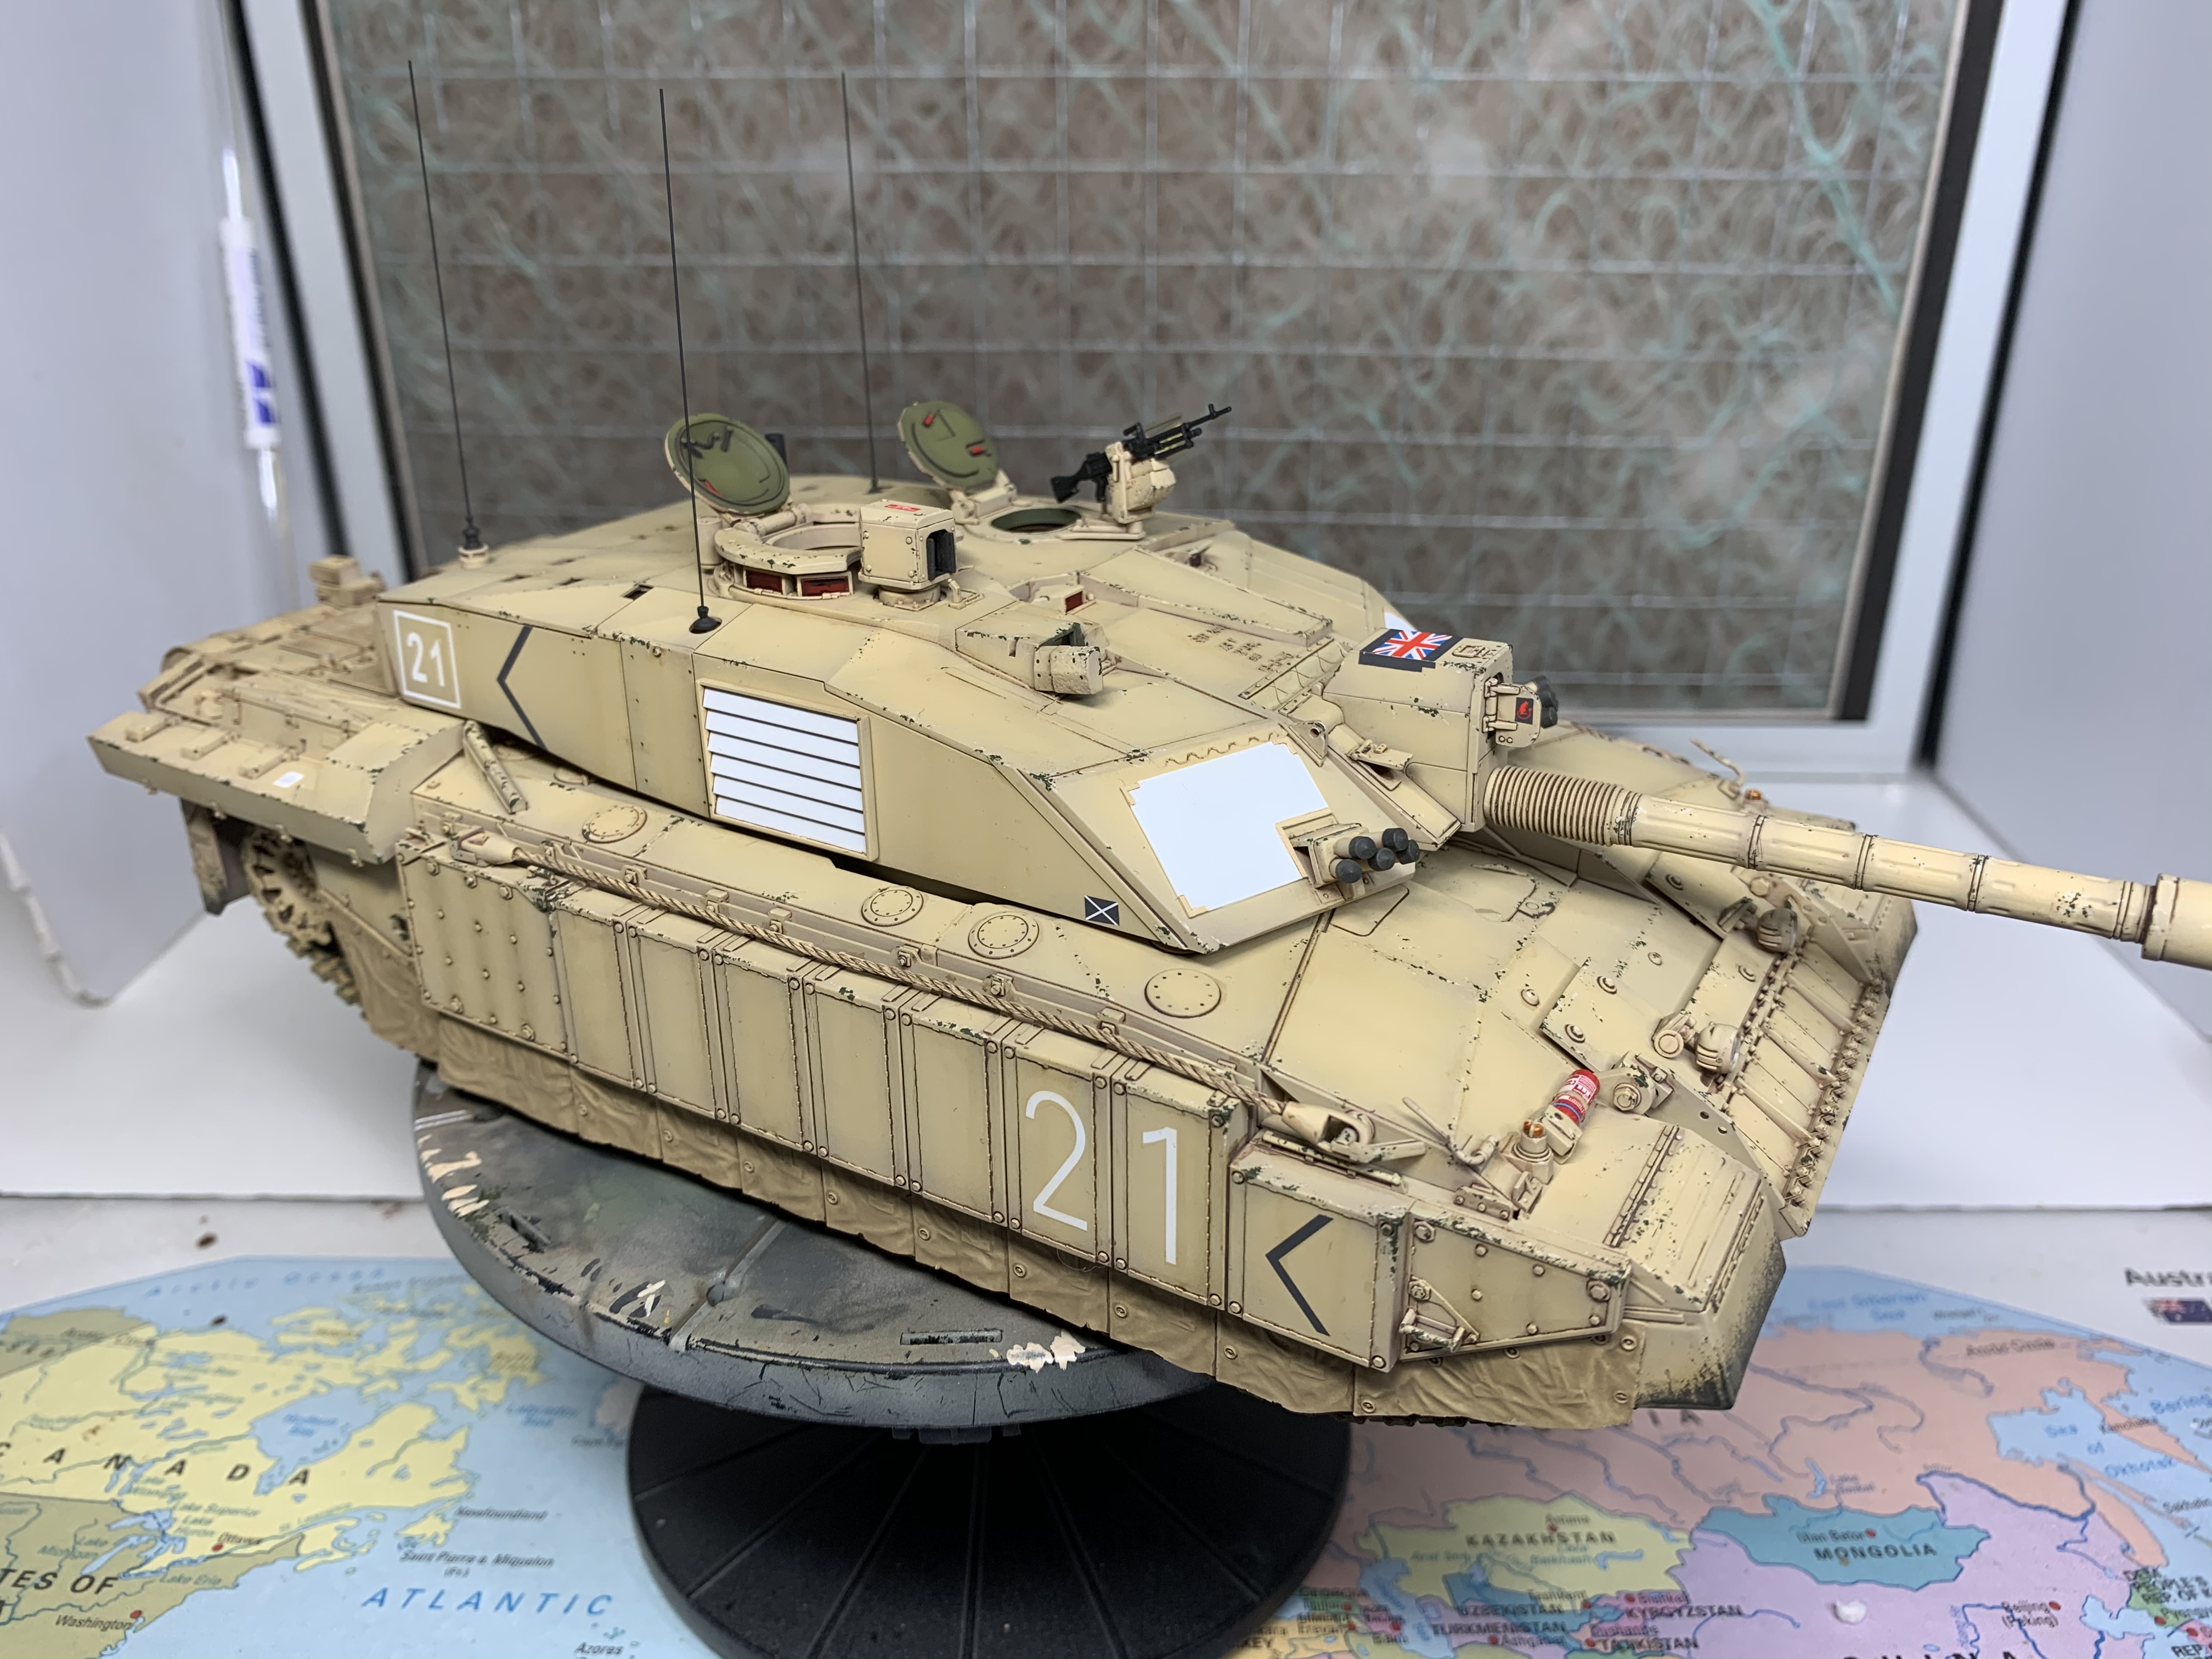
All parts added and just a couple of little things to do. Will post final pics when I have a decent background.
Thanks, J.

iwatajim

Joined: December 15, 2008
KitMaker: 246 posts
Armorama: 171 posts

Posted: Tuesday, October 20, 2020 - 11:20 PM UTC
Ok, so didnít like the vision blocks. I took the red confetti stuff I was using and spayed multiple layers of Tamiya smoke on it. A nice deep colour that is darker than the pic would have you believe, and I used this red in all the blocks, which I am much happier with.
Some light weathering on the hull and antennas then onto the next one.
Thanks, Jim.

Some light weathering on the hull and antennas then onto the next one.
Thanks, Jim.

iwatajim

Joined: December 15, 2008
KitMaker: 246 posts
Armorama: 171 posts

Posted: Monday, October 19, 2020 - 08:35 AM UTC
Thanks Dale, itís very much my pleasure.
Iíve started posting progress on the new site but will continue here too until all is switched over.
The tracks have AK dirt and dust deposits, the same stuff as used on the canvas skirts, applied. Itís amazing the difference the base colour makes to the effect these products have! I used some mig gulf war sand pigment to lighten the rubber mudguards and am working on the road wheels with it too.
I have attempted the anti reflective vision blocks with some shiny confetti material, mostly red with a forced optical effect attempt on the commanders cupola using purple/lilac too. Will see how I feel about this before gluing everything in place.
Nearly there!


dhines

Joined: November 17, 2015
KitMaker: 407 posts
Armorama: 373 posts

Posted: Sunday, October 18, 2020 - 12:31 PM UTC
I am very much enjoying your build Jim,thank you for sharing with us. Best regards.......Dale
iwatajim

Joined: December 15, 2008
KitMaker: 246 posts
Armorama: 171 posts

Posted: Sunday, October 18, 2020 - 09:08 AM UTC
Thanks Max, another great option, I think I need to invest in some of that tubing for my Star Wars bwing guns too. Excellent.
Thanks again,Jim.
Thanks again,Jim.

maximus8425

Joined: May 12, 2006
KitMaker: 331 posts
Armorama: 320 posts

Posted: Sunday, October 18, 2020 - 08:45 AM UTC
I started using Albion Alloys slide fit brass tube packs for my antennas. They're a bit more expensive but are really good for imitating antennas where the lower section is slightly thicker than the upper. I use their SFT 2 pack which has 0.3, 0.5, 0.7 & 0.9 tubes which all fit inside each other. You cut them by marking the desired length and then use the sharp edge of a craft knife to roll the tube back and forth. With very little pressure the blade scores and then eventually cuts it with no nipping or collapsing of the tube which would happen if you used cutters for instance. The link below is just to show what they are like.
https://www.ebay.co.uk/itm/Albion-Alloys-0-3mm-0-5mm-0-7mm-0-9mm-Slide-Fit-Brass-Tube-Pack-1pc-of-ea/323896079157?epid=2255922960&hash=item4b69b5f335:g:CZ8AAOSwSnRdZS9S
https://www.ebay.co.uk/itm/Albion-Alloys-0-3mm-0-5mm-0-7mm-0-9mm-Slide-Fit-Brass-Tube-Pack-1pc-of-ea/323896079157?epid=2255922960&hash=item4b69b5f335:g:CZ8AAOSwSnRdZS9S
iwatajim

Joined: December 15, 2008
KitMaker: 246 posts
Armorama: 171 posts

Posted: Sunday, October 18, 2020 - 08:31 AM UTC
Thanks John, I will look into both those options, got a range near me. Going to try some stretched fuse wire too.
I have painted the void behind the gun sight lens black which I think will give the correct effect. And the headlights are painted chrome.
And the tracks are weathered, just need to make the road wheels dusty.
More pics soon, nearly there!
Cheers,Jim.
I have painted the void behind the gun sight lens black which I think will give the correct effect. And the headlights are painted chrome.
And the tracks are weathered, just need to make the road wheels dusty.
More pics soon, nearly there!
Cheers,Jim.
Johnnych01

Joined: June 29, 2019
KitMaker: 604 posts
Armorama: 506 posts

Posted: Sunday, October 18, 2020 - 04:11 AM UTC
That's correct Jim, headlights on Chally 2 are normal, reason Chieftain had IR headlights, was back then that was the only night vision available for the driver and he had his own IR sight he would fit when needed.
Ref the antennas, I have always used 0.5mm evergreen styrene rod or plastract rod also in 0.5mm. It stays upright and gives a bit instead of kinking if you hit or knock it. I recently found some flower arranging wire in the Range stores about the same diameter which also works well.
Ref the antennas, I have always used 0.5mm evergreen styrene rod or plastract rod also in 0.5mm. It stays upright and gives a bit instead of kinking if you hit or knock it. I recently found some flower arranging wire in the Range stores about the same diameter which also works well.
iwatajim

Joined: December 15, 2008
KitMaker: 246 posts
Armorama: 171 posts

Posted: Sunday, October 18, 2020 - 01:49 AM UTC
Thanks Max, I need to look for another solution for my antennas, the ones I did for the chieftain are slightly too thick, and I just never get consistent enough results from stretched sprue for three the same.
One more question, the headlights on the front armour plate, are they IR? Looking at pics they look dark coloured rather than normal headlights.
Edit: looking again at other pics they look normal, so will paint chrome silver behind the clear parts.
Thanks again, Jim.
One more question, the headlights on the front armour plate, are they IR? Looking at pics they look dark coloured rather than normal headlights.
Edit: looking again at other pics they look normal, so will paint chrome silver behind the clear parts.
Thanks again, Jim.

maximus8425

Joined: May 12, 2006
KitMaker: 331 posts
Armorama: 320 posts

Posted: Saturday, October 17, 2020 - 09:43 AM UTC
Hi Jm,
Yes the antennas would be 2 metres long as Clansman was still the radio system in use during the early Telics. Bowman didnt come into service until the early months of 2004 so units would have been trained and equipped ready for future Telics. My unit completed Bowman training in 2005 and started receiving vehicles soon after.
Yes the antennas would be 2 metres long as Clansman was still the radio system in use during the early Telics. Bowman didnt come into service until the early months of 2004 so units would have been trained and equipped ready for future Telics. My unit completed Bowman training in 2005 and started receiving vehicles soon after.
iwatajim

Joined: December 15, 2008
KitMaker: 246 posts
Armorama: 171 posts

Posted: Saturday, October 17, 2020 - 08:43 AM UTC
Thanks again guys,
Yeah John, those cases that fit the tank with proper length aerials arenít cheap! Ha!
Great info Max, thanks. The colour is just a small piece of Christmas tinsel placed behind the clear lens so I can swap that out for something else more appropriate no bother. I only stuck the coloured parts in with blu tac for this very reason.
Quick question fellas, if you donít mind, on that subject, would the aerials be 2 metres like the chieftain ones? The pics Iíve seen would suggest at least that long...
Thanks again, Jim.

maximus8425

Joined: May 12, 2006
KitMaker: 331 posts
Armorama: 320 posts

Posted: Saturday, October 17, 2020 - 08:18 AM UTC
Hi Jim,
Another small point is that you have painted the sight lens on the Thermal Imager Sensor Head (TISH) red this is in the armoured box immediately over the barrel. This sight does not have an optical path at all as it is a purely electronic sight and so does not need an anti laser coating to protect the crews vision. The sight picture is displayed on what are effectively small TV screens within the turret. The lens is a very shiny gun metal colour as it is made from Germanium Crystal, not glass.

Another small point is that you have painted the sight lens on the Thermal Imager Sensor Head (TISH) red this is in the armoured box immediately over the barrel. This sight does not have an optical path at all as it is a purely electronic sight and so does not need an anti laser coating to protect the crews vision. The sight picture is displayed on what are effectively small TV screens within the turret. The lens is a very shiny gun metal colour as it is made from Germanium Crystal, not glass.

Johnnych01

Joined: June 29, 2019
KitMaker: 604 posts
Armorama: 506 posts

Posted: Saturday, October 17, 2020 - 03:04 AM UTC
You're going to be spending alot of money on display cases Jim lol..... It deserves nothing less.
iwatajim

Joined: December 15, 2008
KitMaker: 246 posts
Armorama: 171 posts

Posted: Saturday, October 17, 2020 - 02:06 AM UTC
Thanks guys!
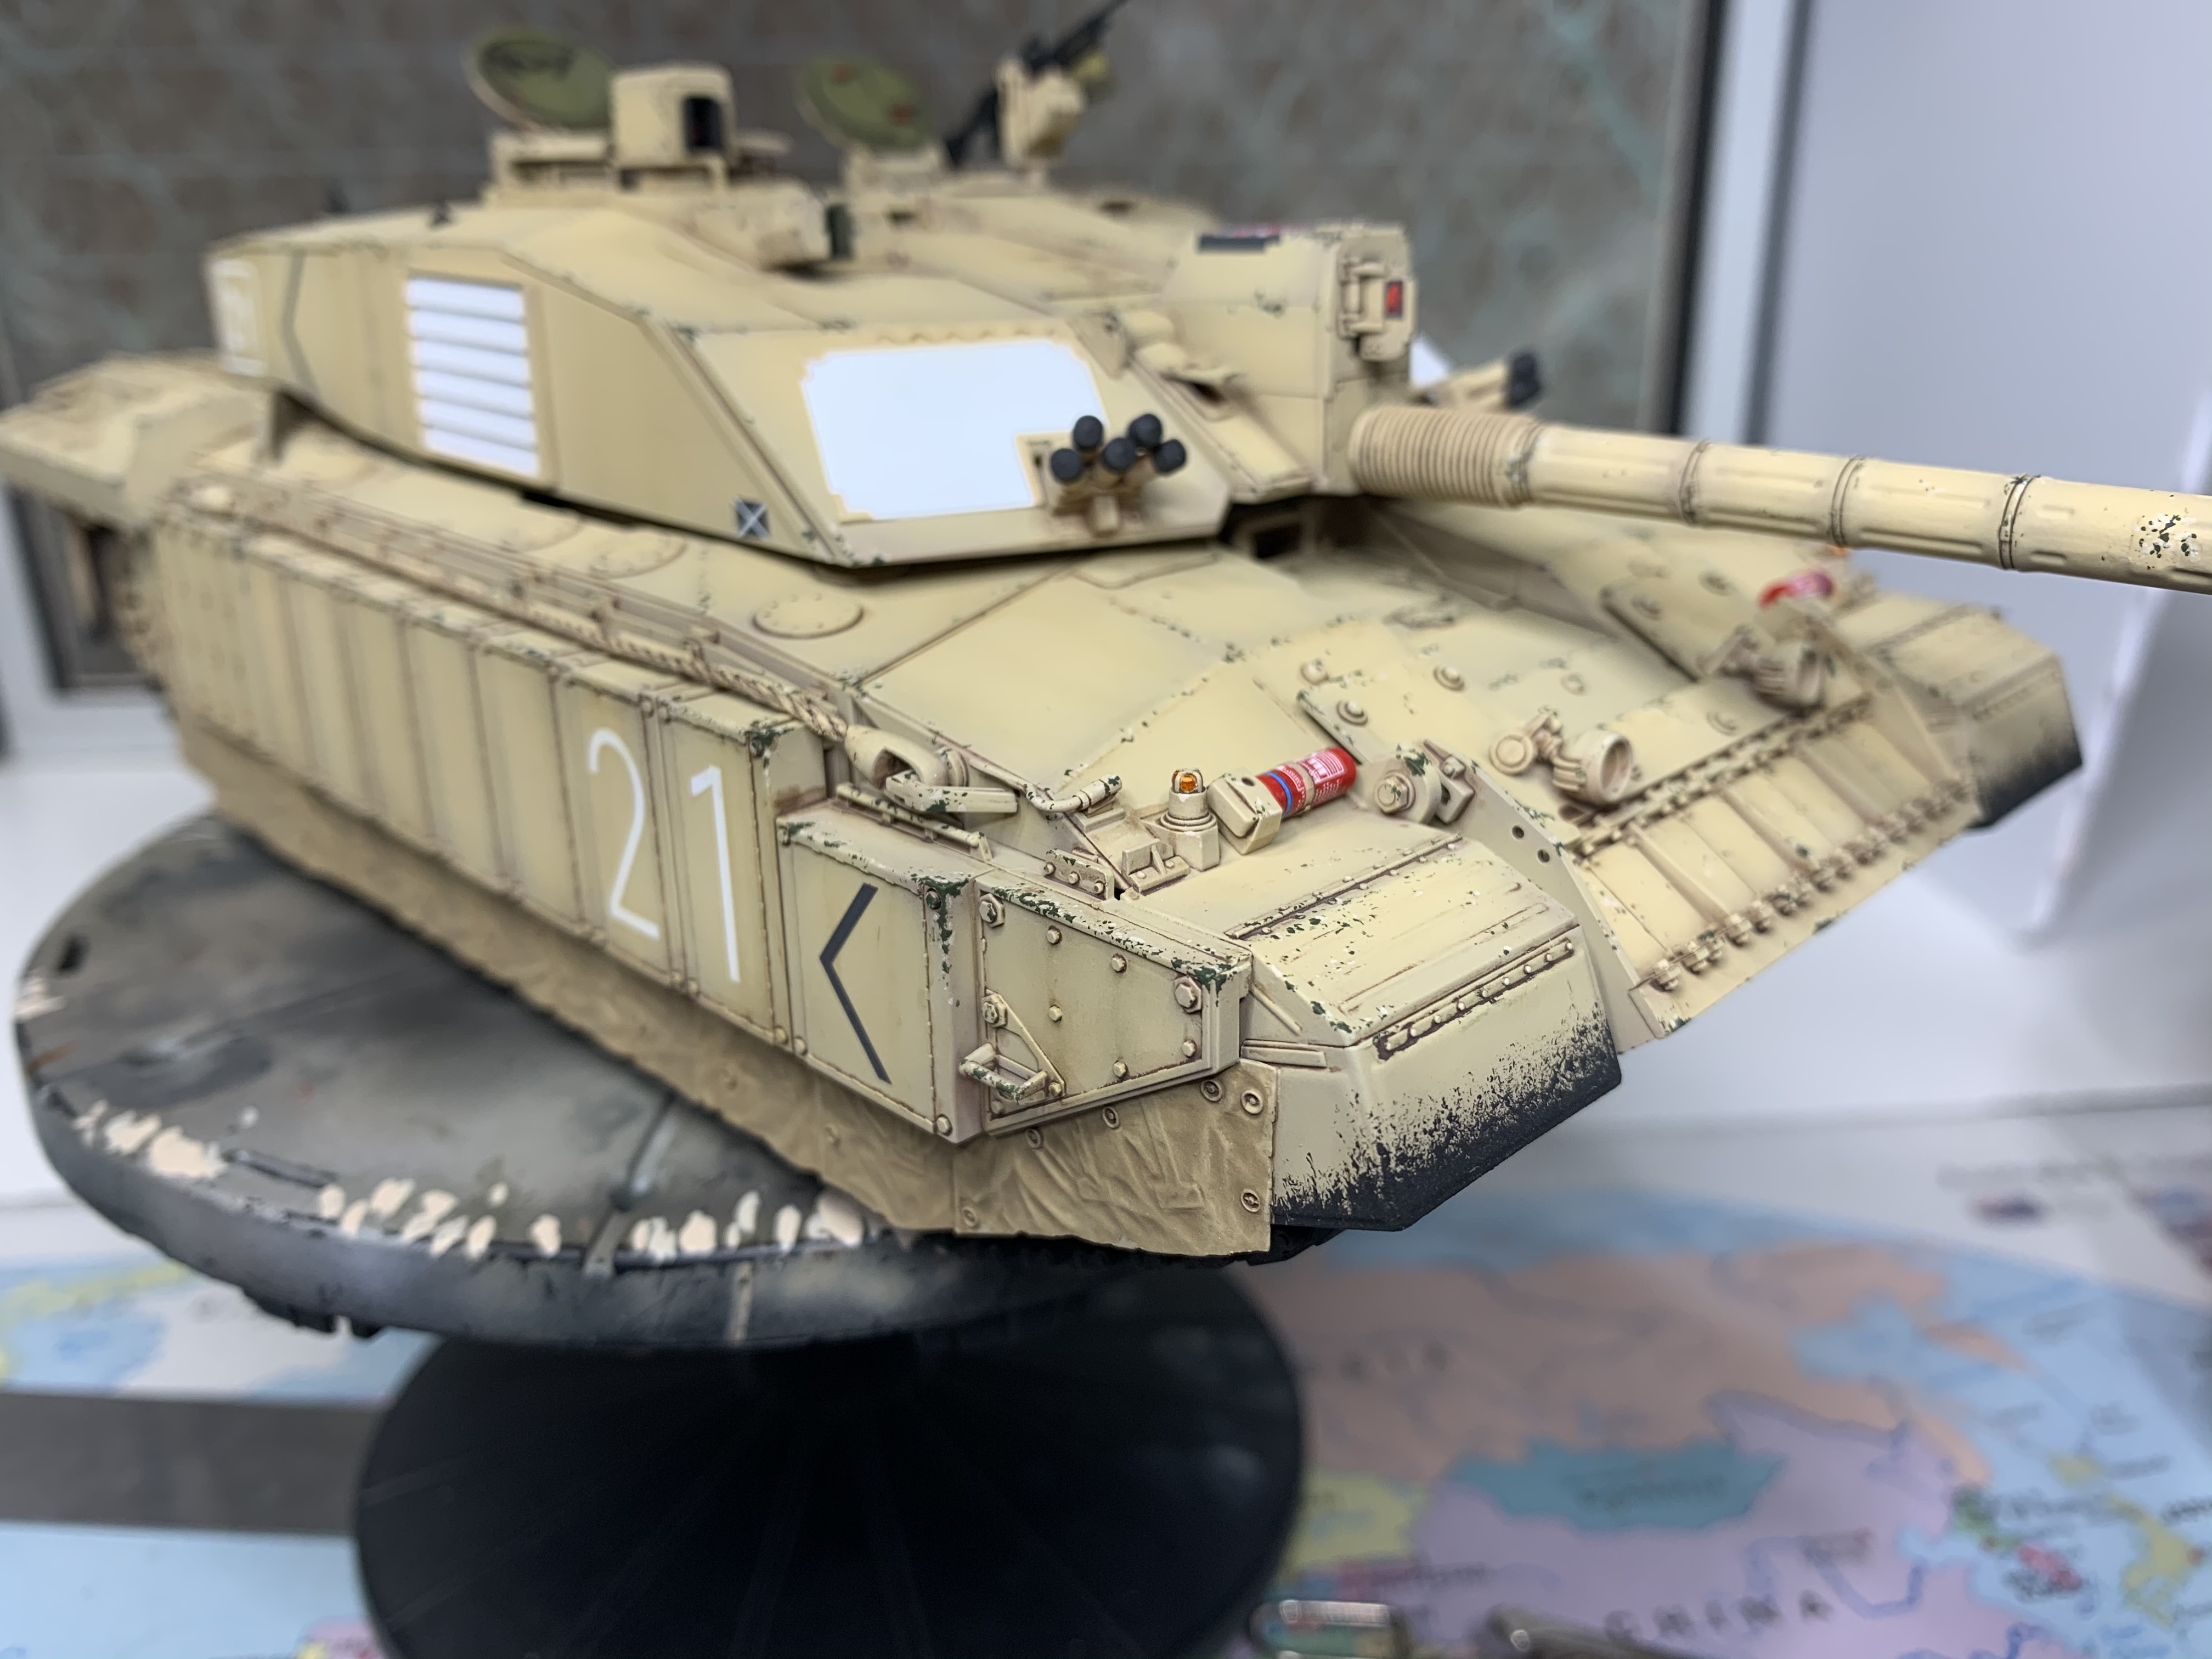
Thanks John, the chipping was a rather zen experience on this one, I really enjoyed doing it. I have painted the amber lights, tamiya chrome enamel followed by some tamiya clear orange. May add a light wash once properly dry.
Thanks Max, itís great to hear it looks like the real thing from one who has been around them. I would love to paint the Jerry cans but they re just too awkward, so will put it down to a rushed paint job followed by a balling out! Ha!
Got some of the optics on now, difficult to figure out colours but have used some red tinsel behind the clear parts. I painted the back of the clear parts on the gun sight and little turret black leaving the lens part clear. And I drilled out a piece of black plastic for the lens in the box in front of the little turret. The small square on the gun sight got some green tinsel, which I think adds a bit of interest. The bright lights for the pics make them shine a lot more than natural light.
Couple of pics and thanks again.


maximus8425

Joined: May 12, 2006
KitMaker: 331 posts
Armorama: 320 posts

Posted: Friday, October 16, 2020 - 09:18 AM UTC
I like it a lot, exercised with Challys in Poland on Drawsko Pomorski and on Ops in Basra and it's looking really familiar. Dont forget the jerrycans on the rear. As a rule they aren't painted, left hand would be black as it's a water jerrycan and right hand green as it is likley being used for oil.
Johnnych01

Joined: June 29, 2019
KitMaker: 604 posts
Armorama: 506 posts

Posted: Friday, October 16, 2020 - 09:03 AM UTC
That's a real top job Jim. The finer details are superb. Chipping is perfect and just the right amount in the correct places. The wear and tear weathering on the front mud flaps is brilliant. Overall weathering cannot be faulted. Don't forget the front side/ amber lights under the armoured cages.
Really really good job.
Really really good job.
iwatajim

Joined: December 15, 2008
KitMaker: 246 posts
Armorama: 171 posts

Posted: Friday, October 16, 2020 - 07:52 AM UTC
Thanks John, Thanks Dylan, as always your kind words are very much appreciated!
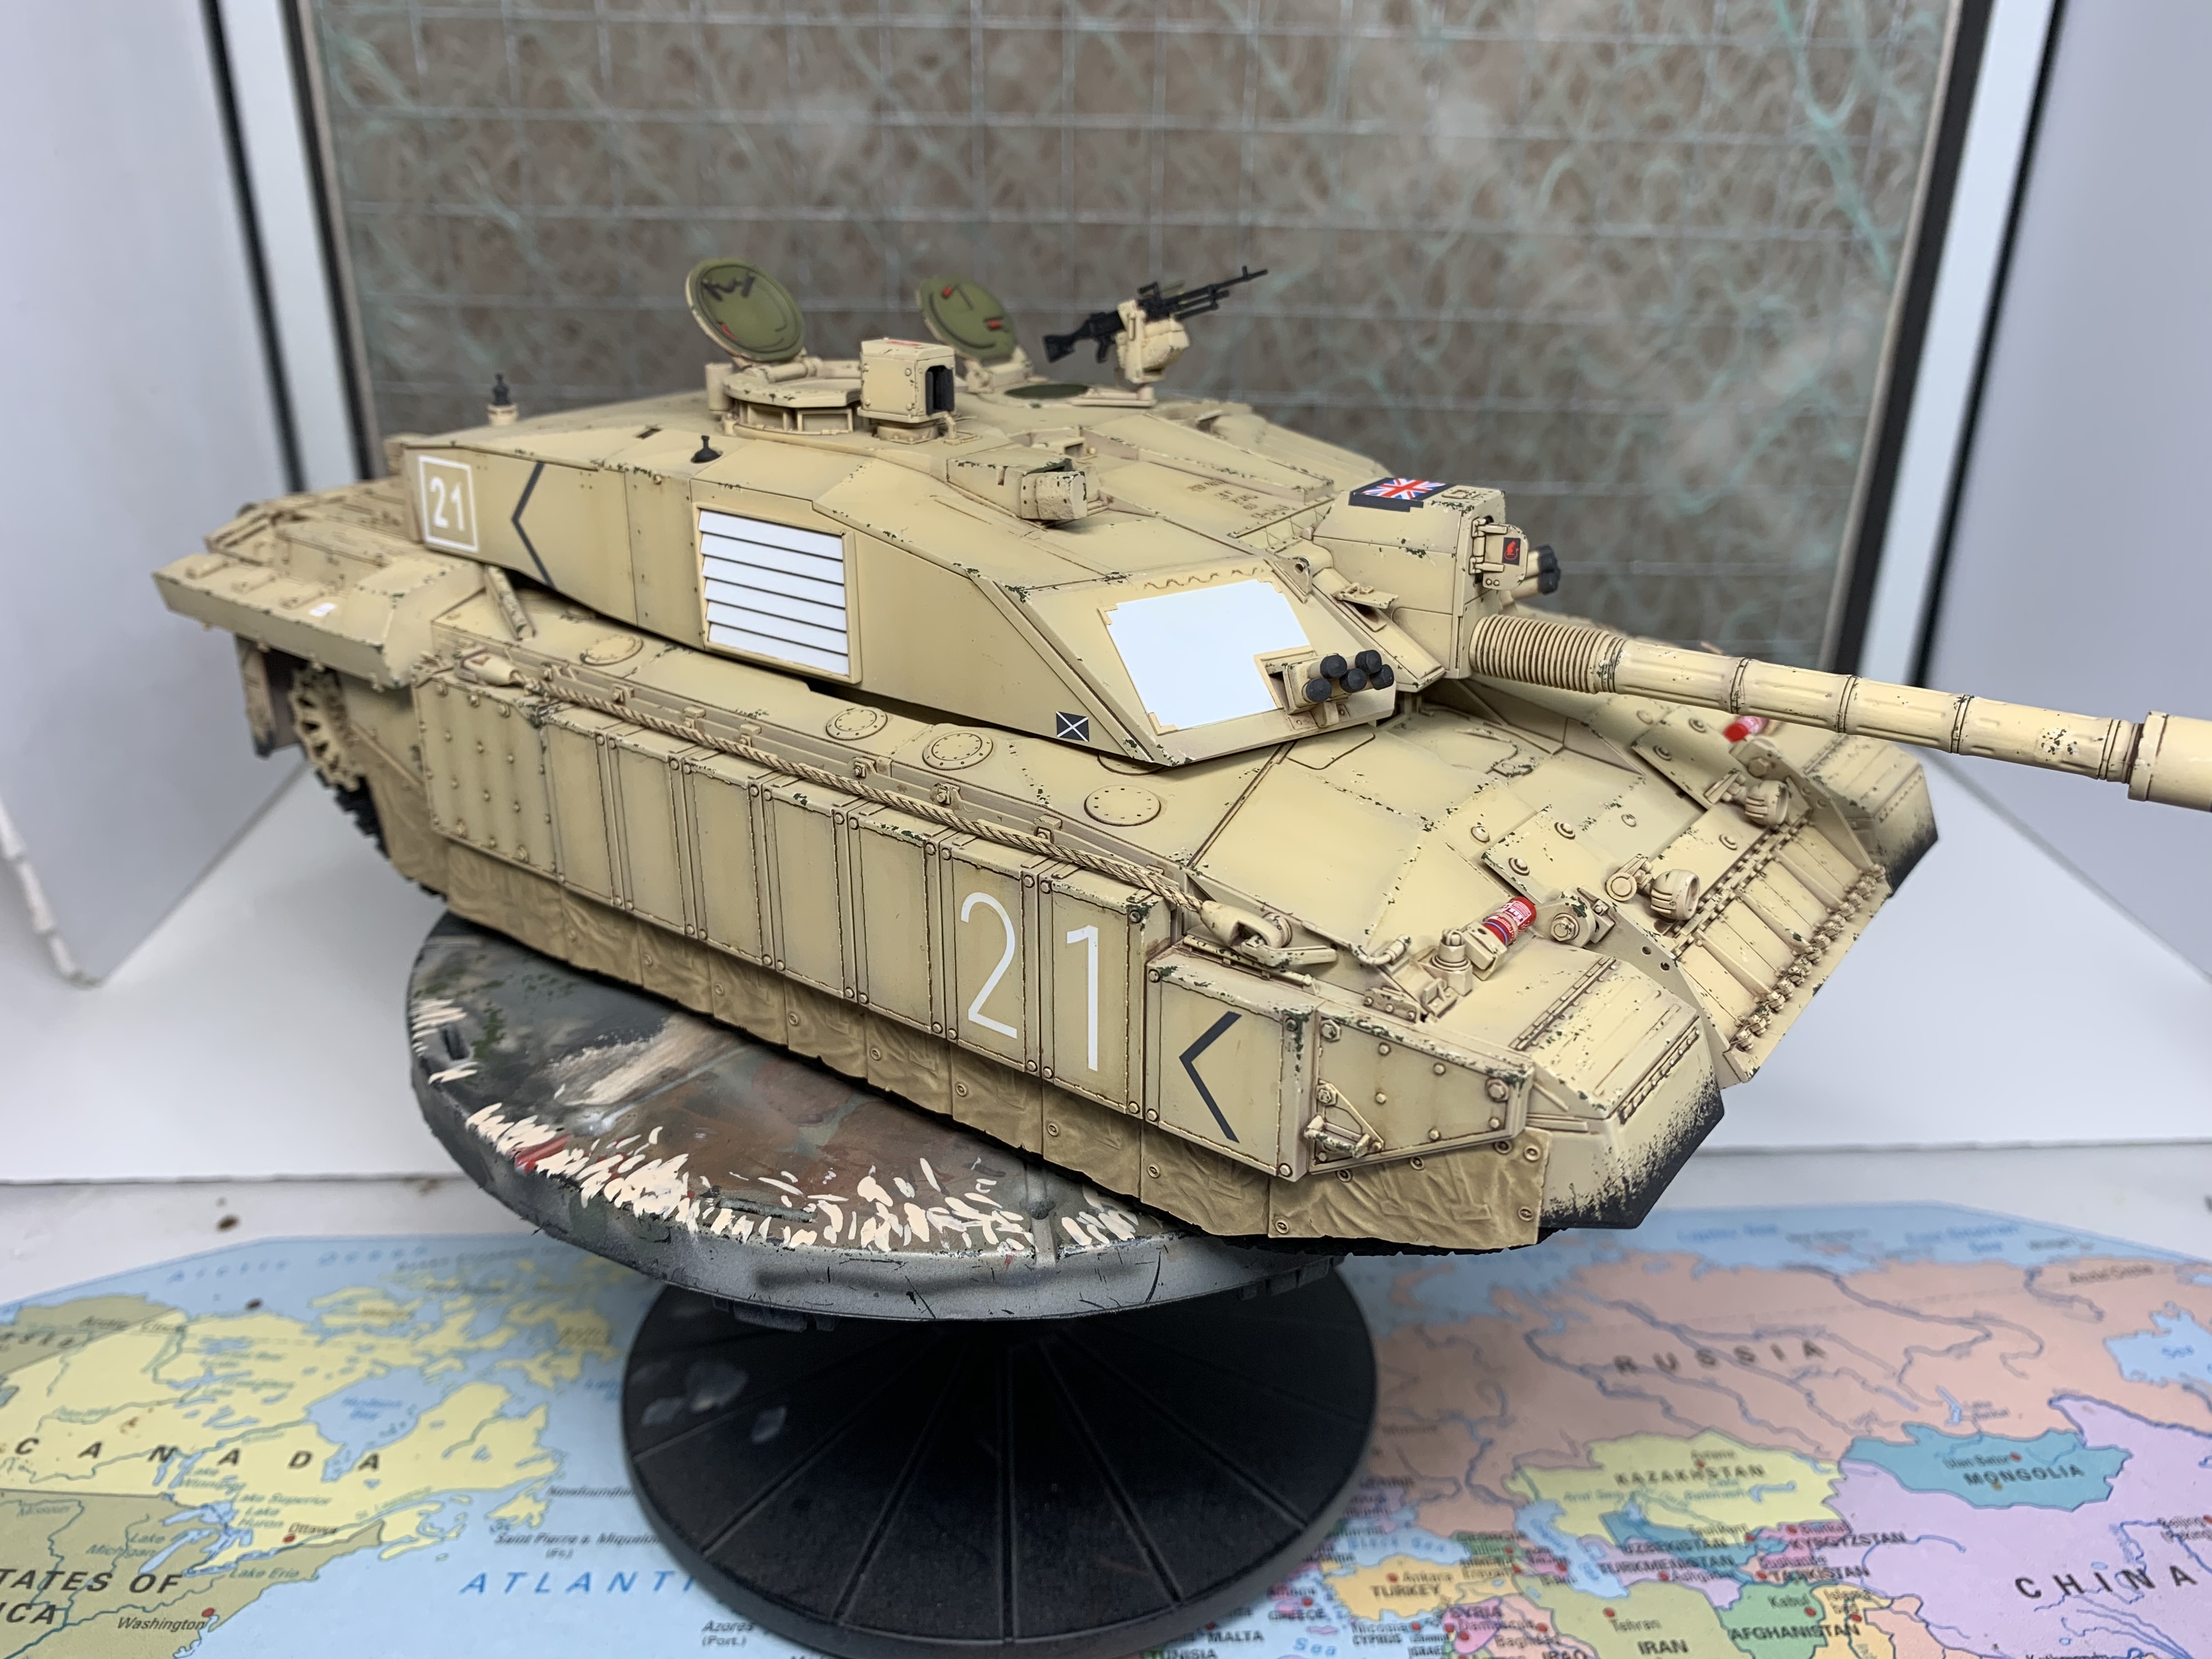
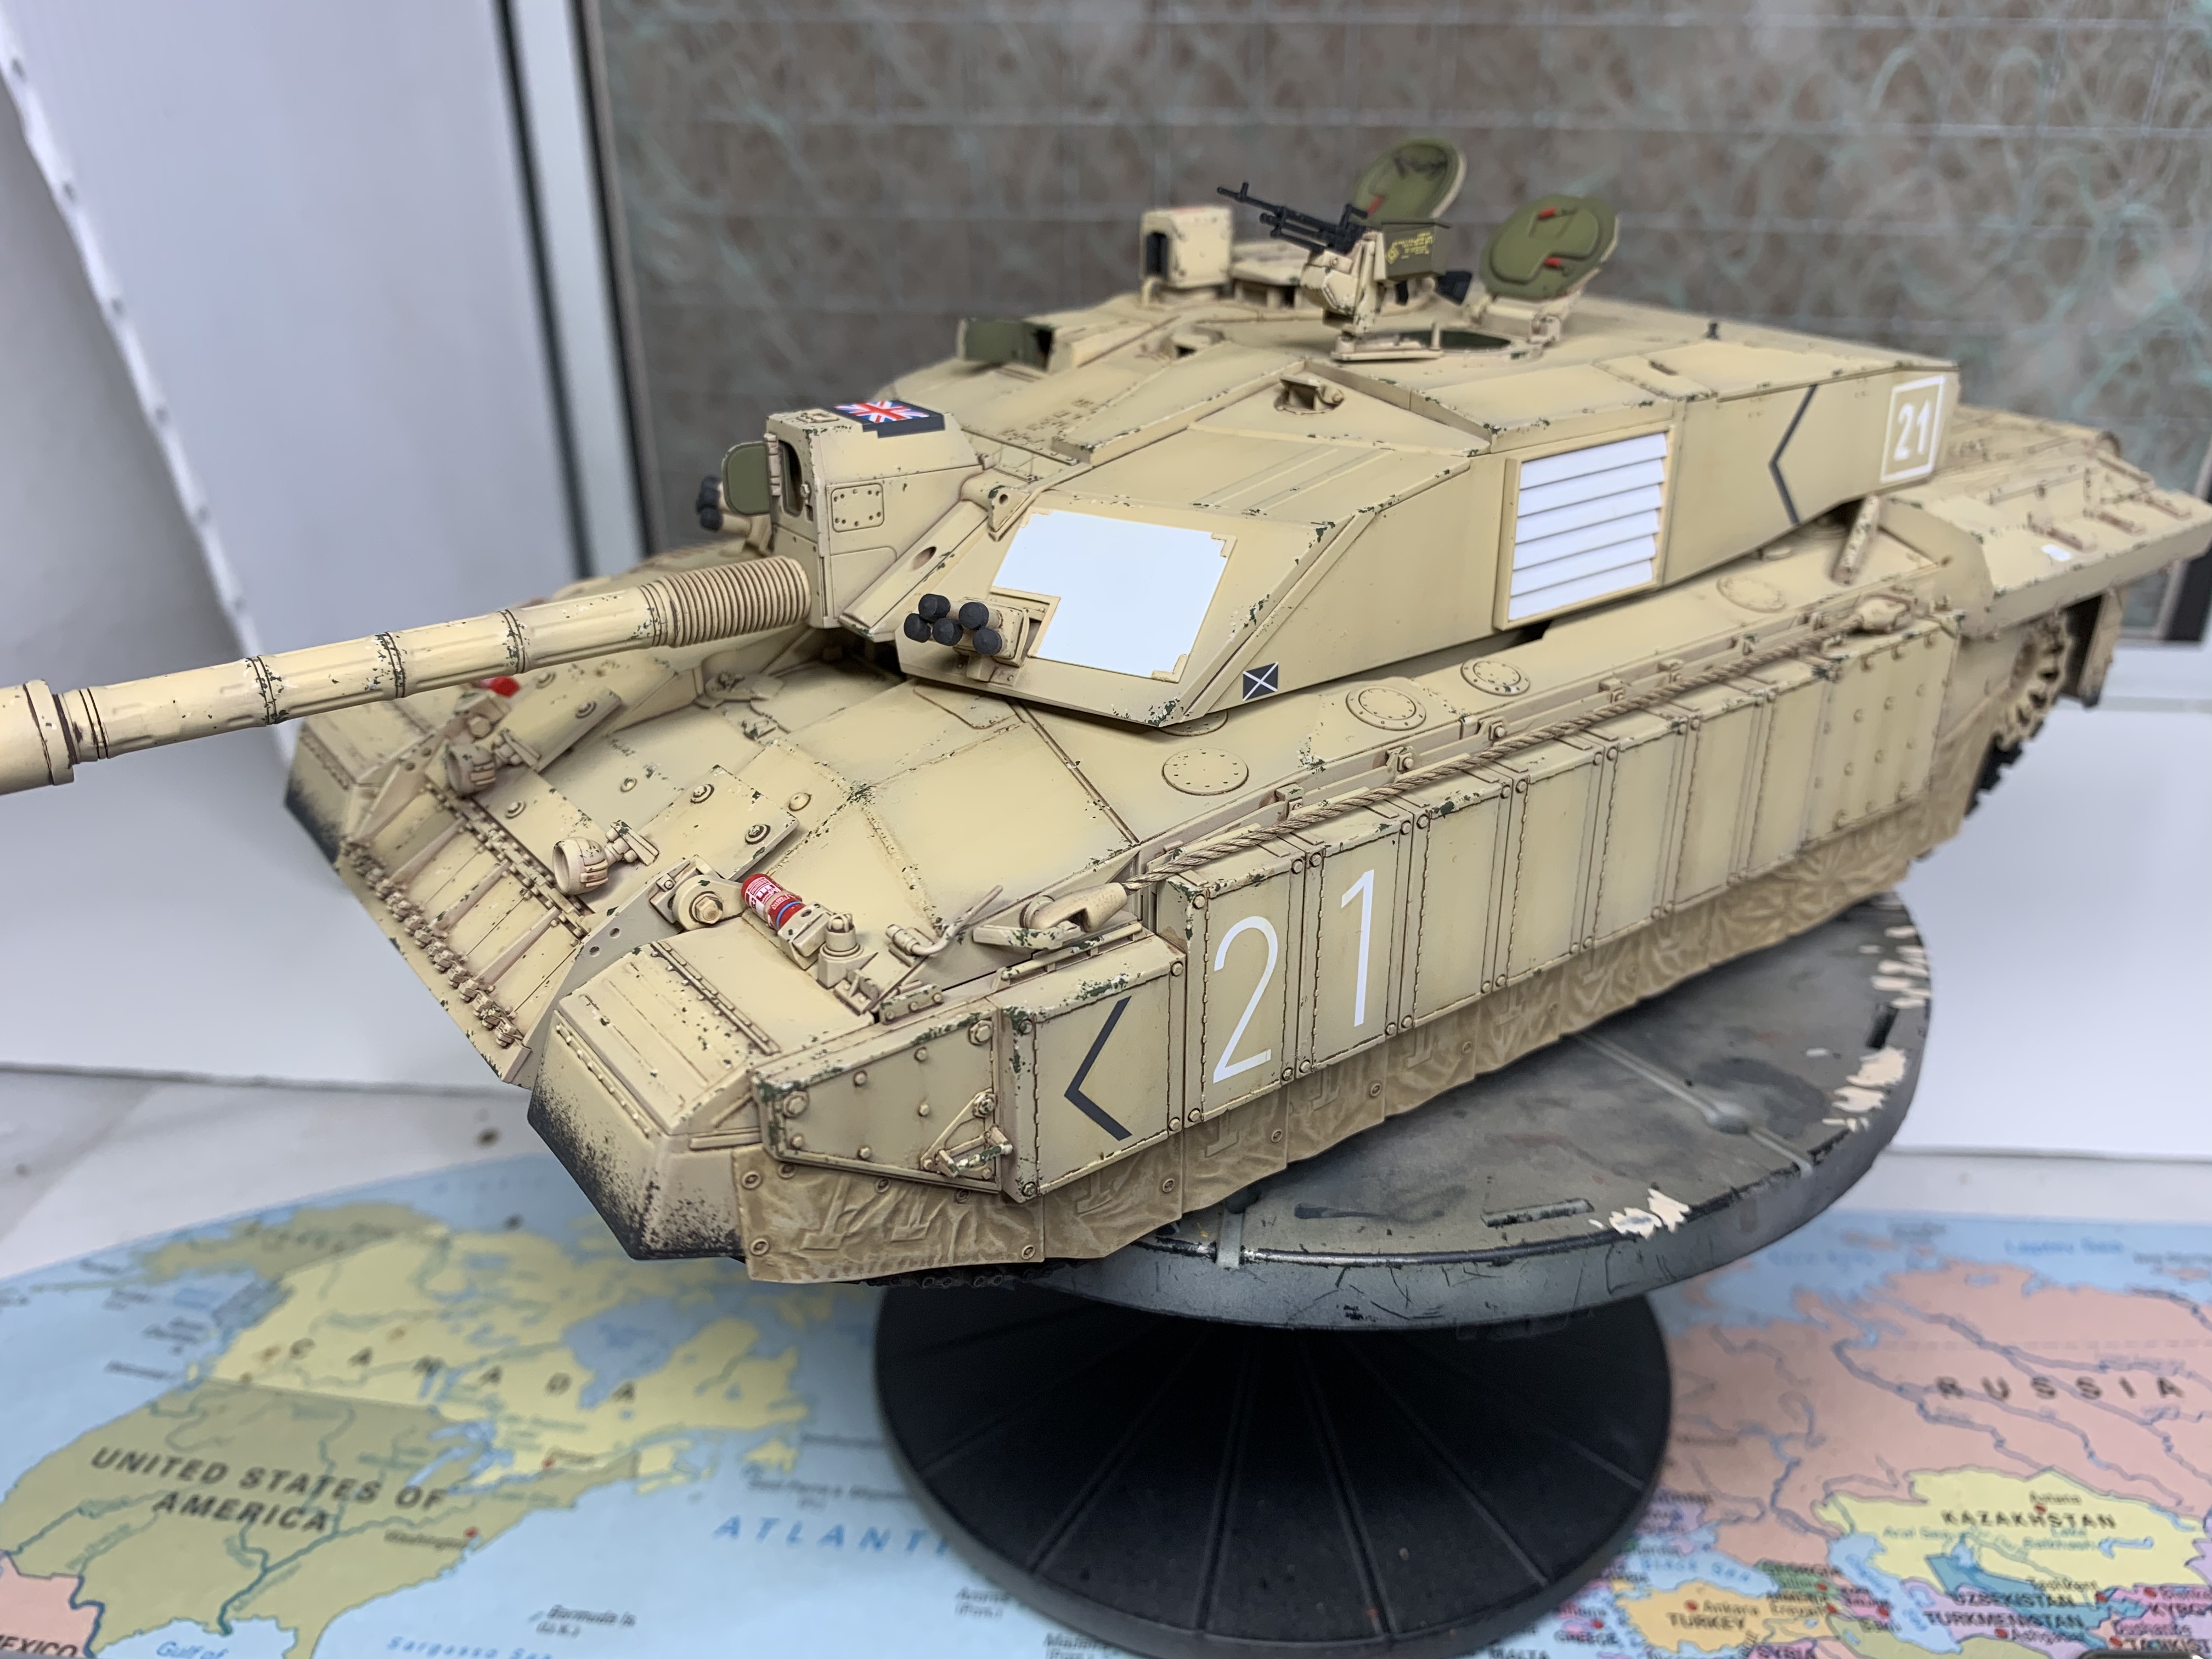
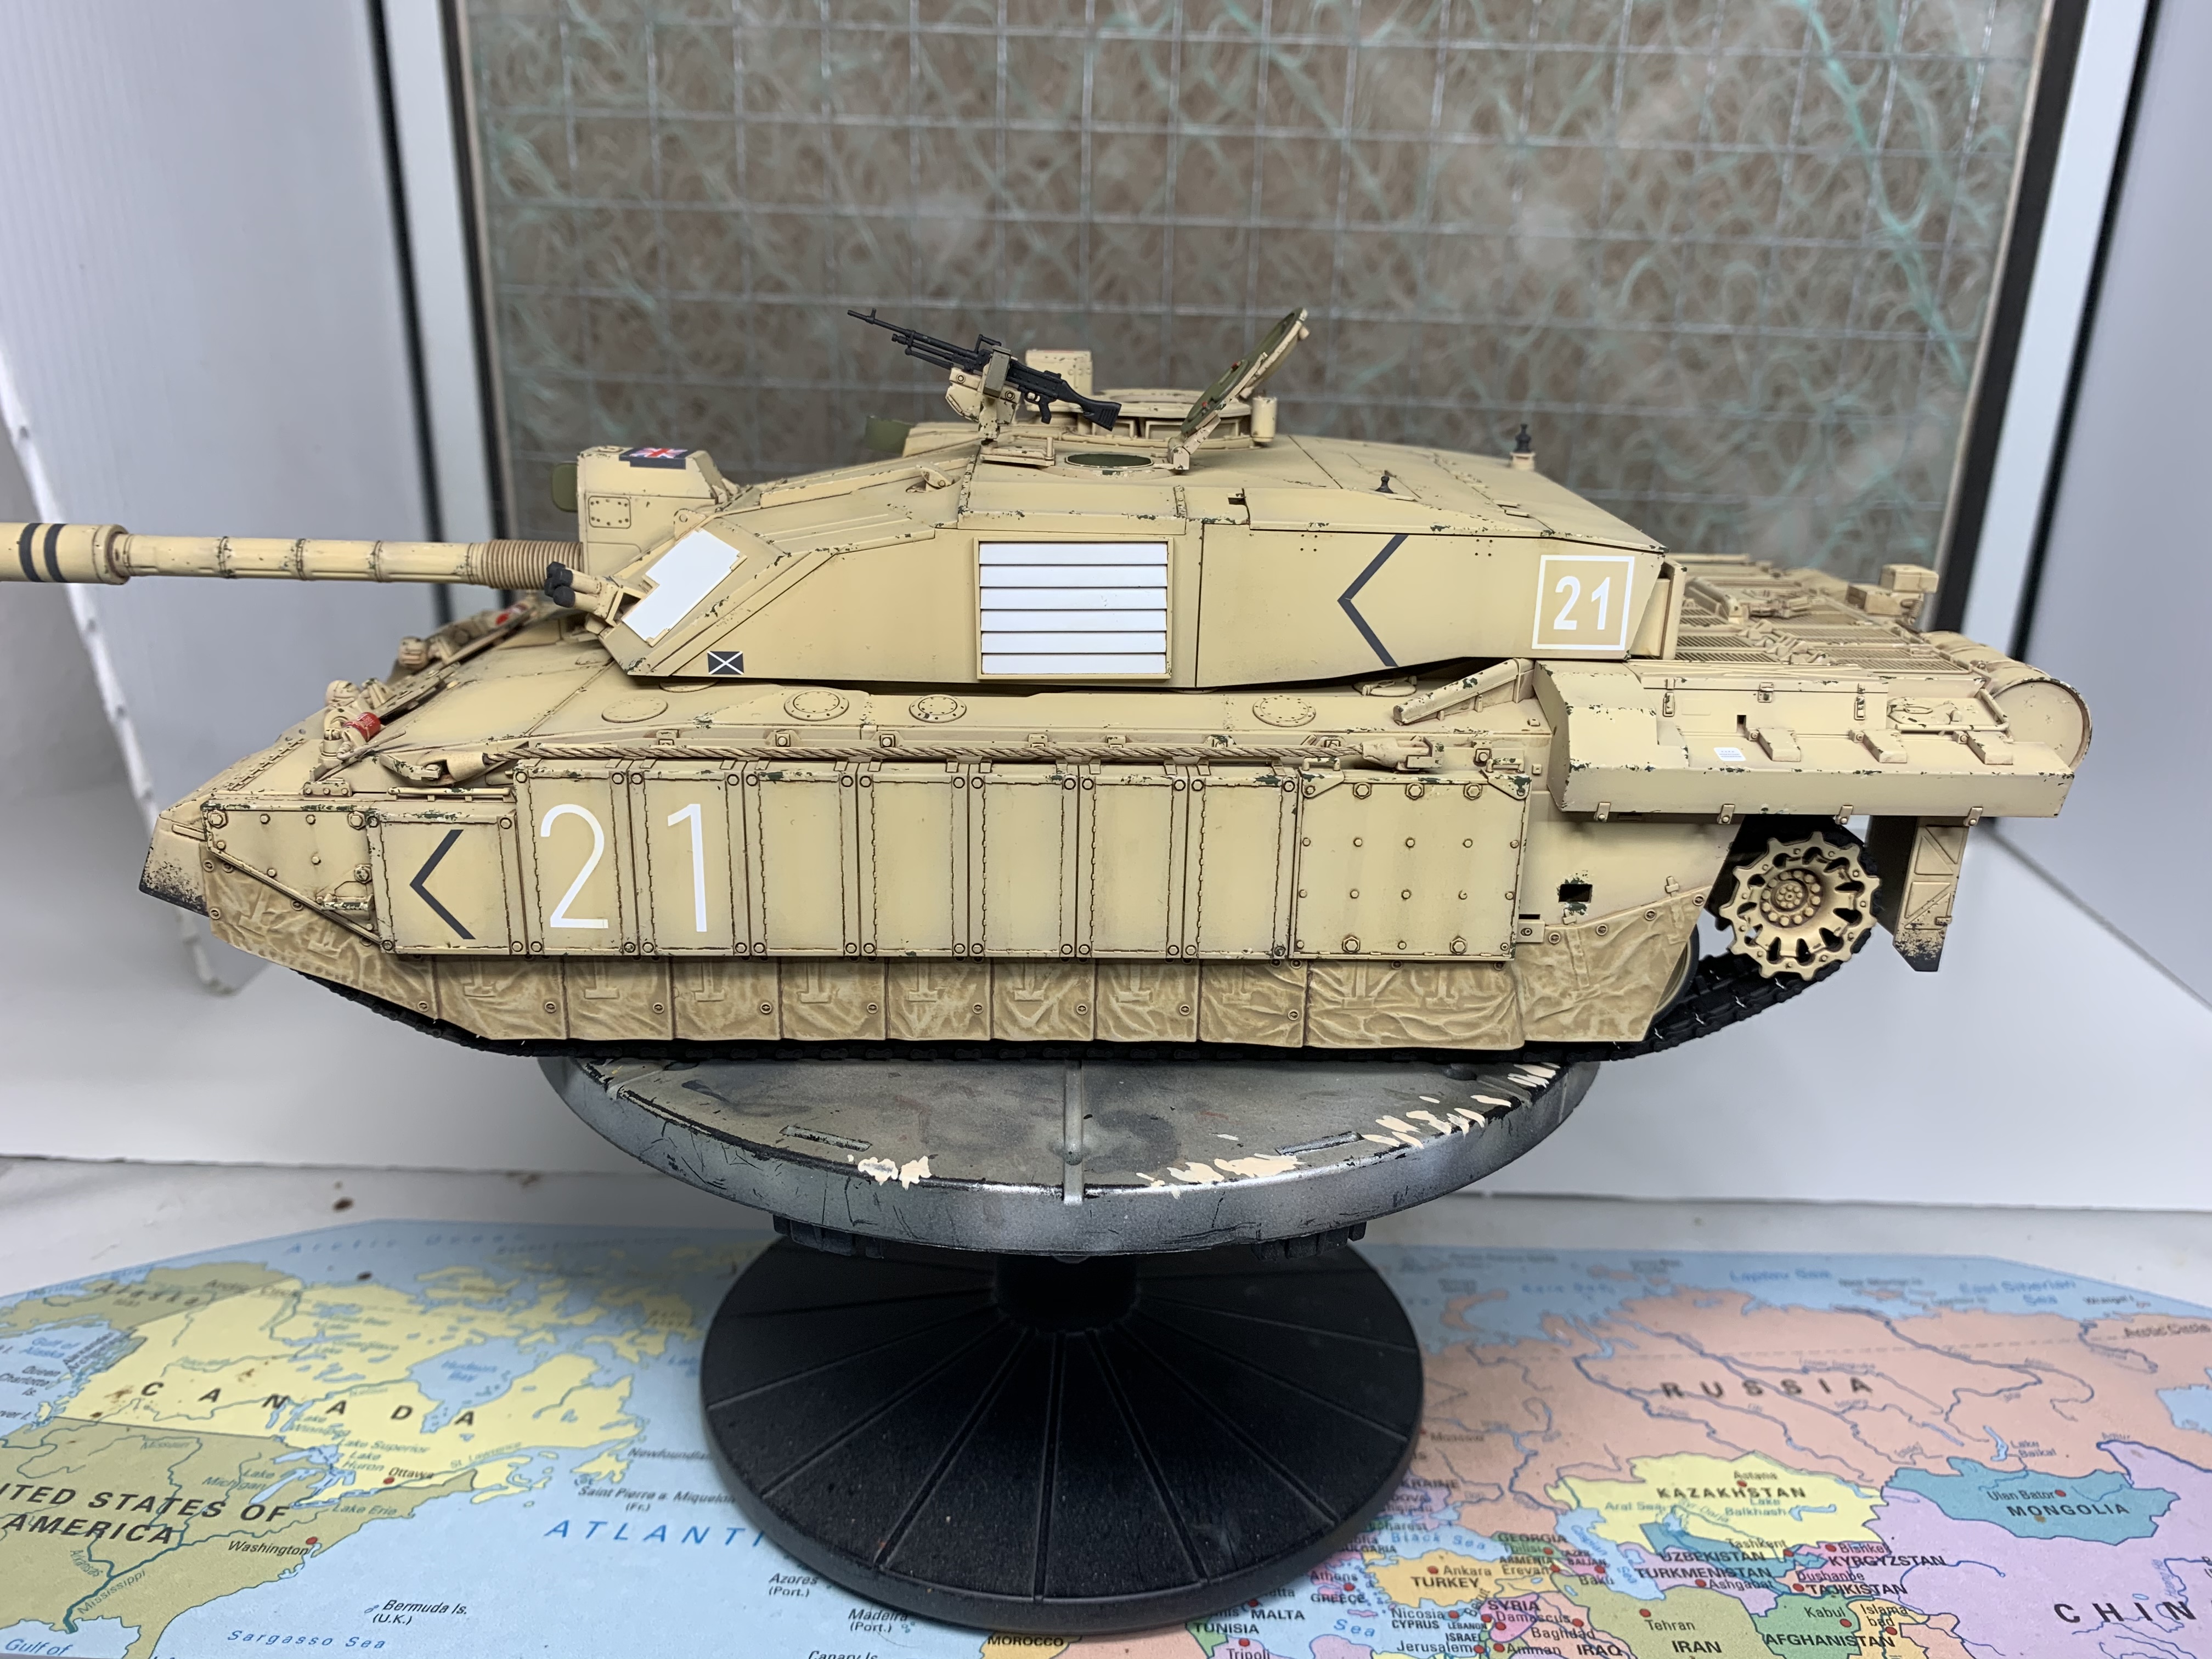
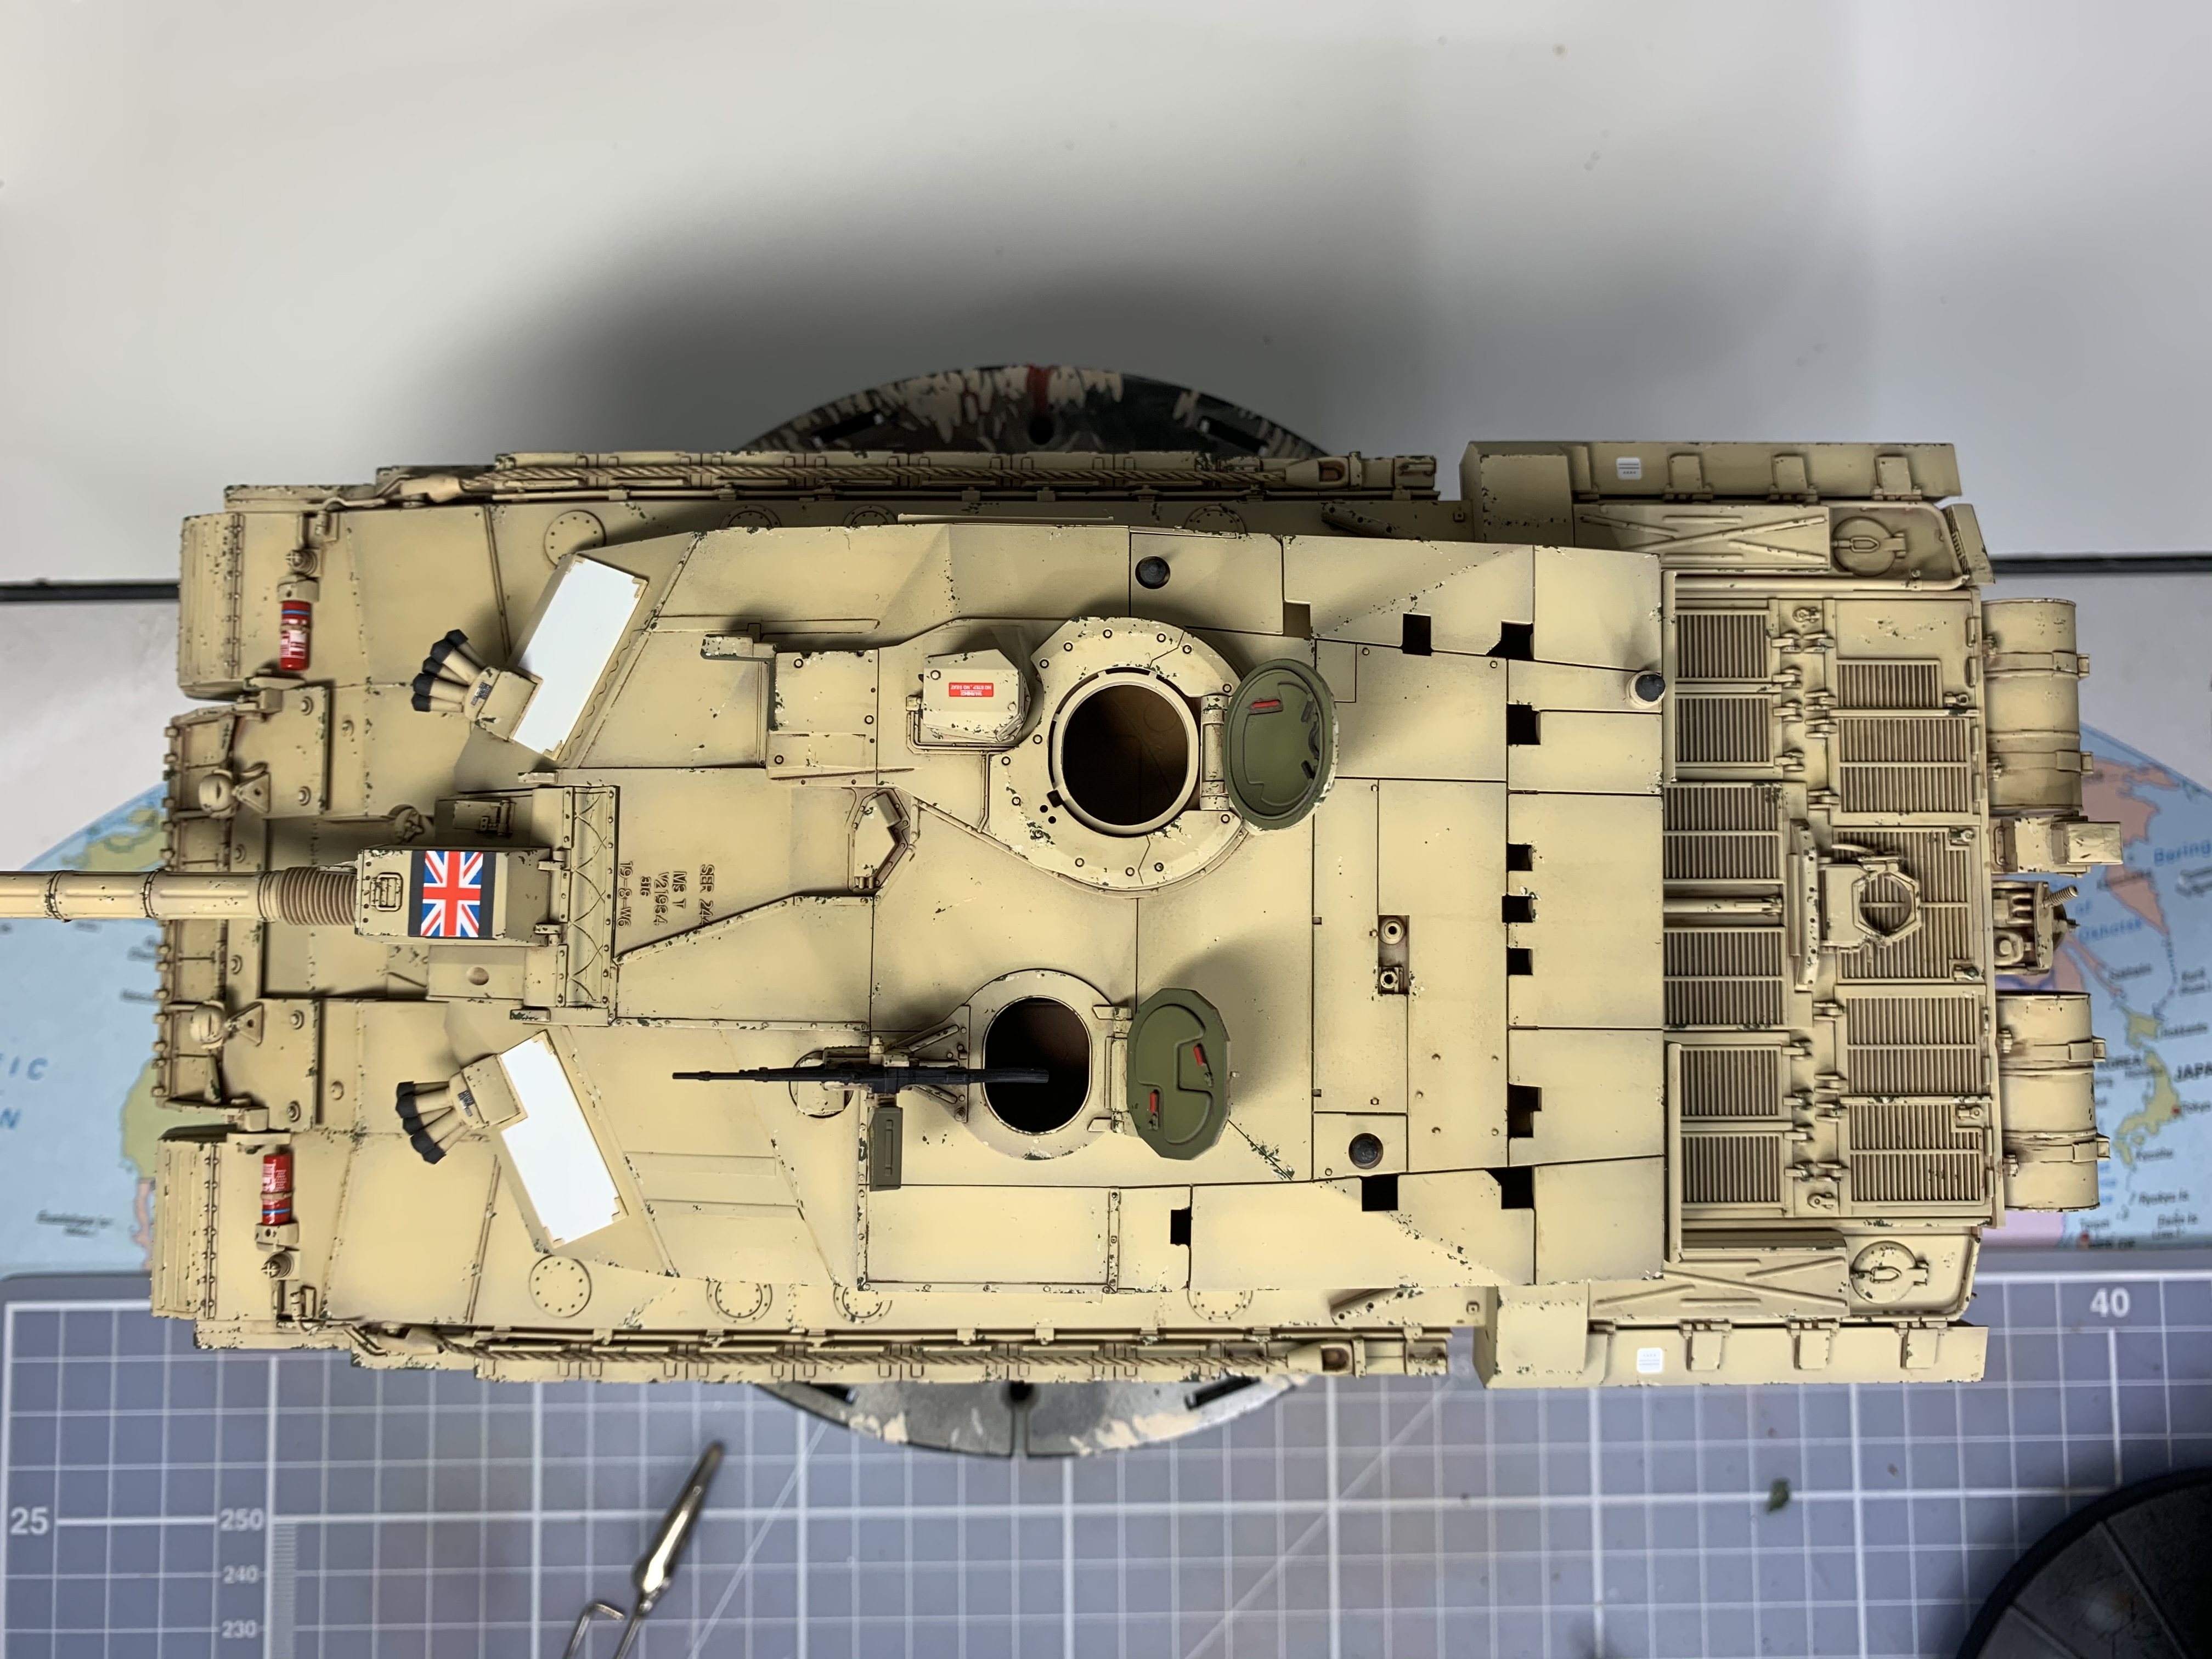
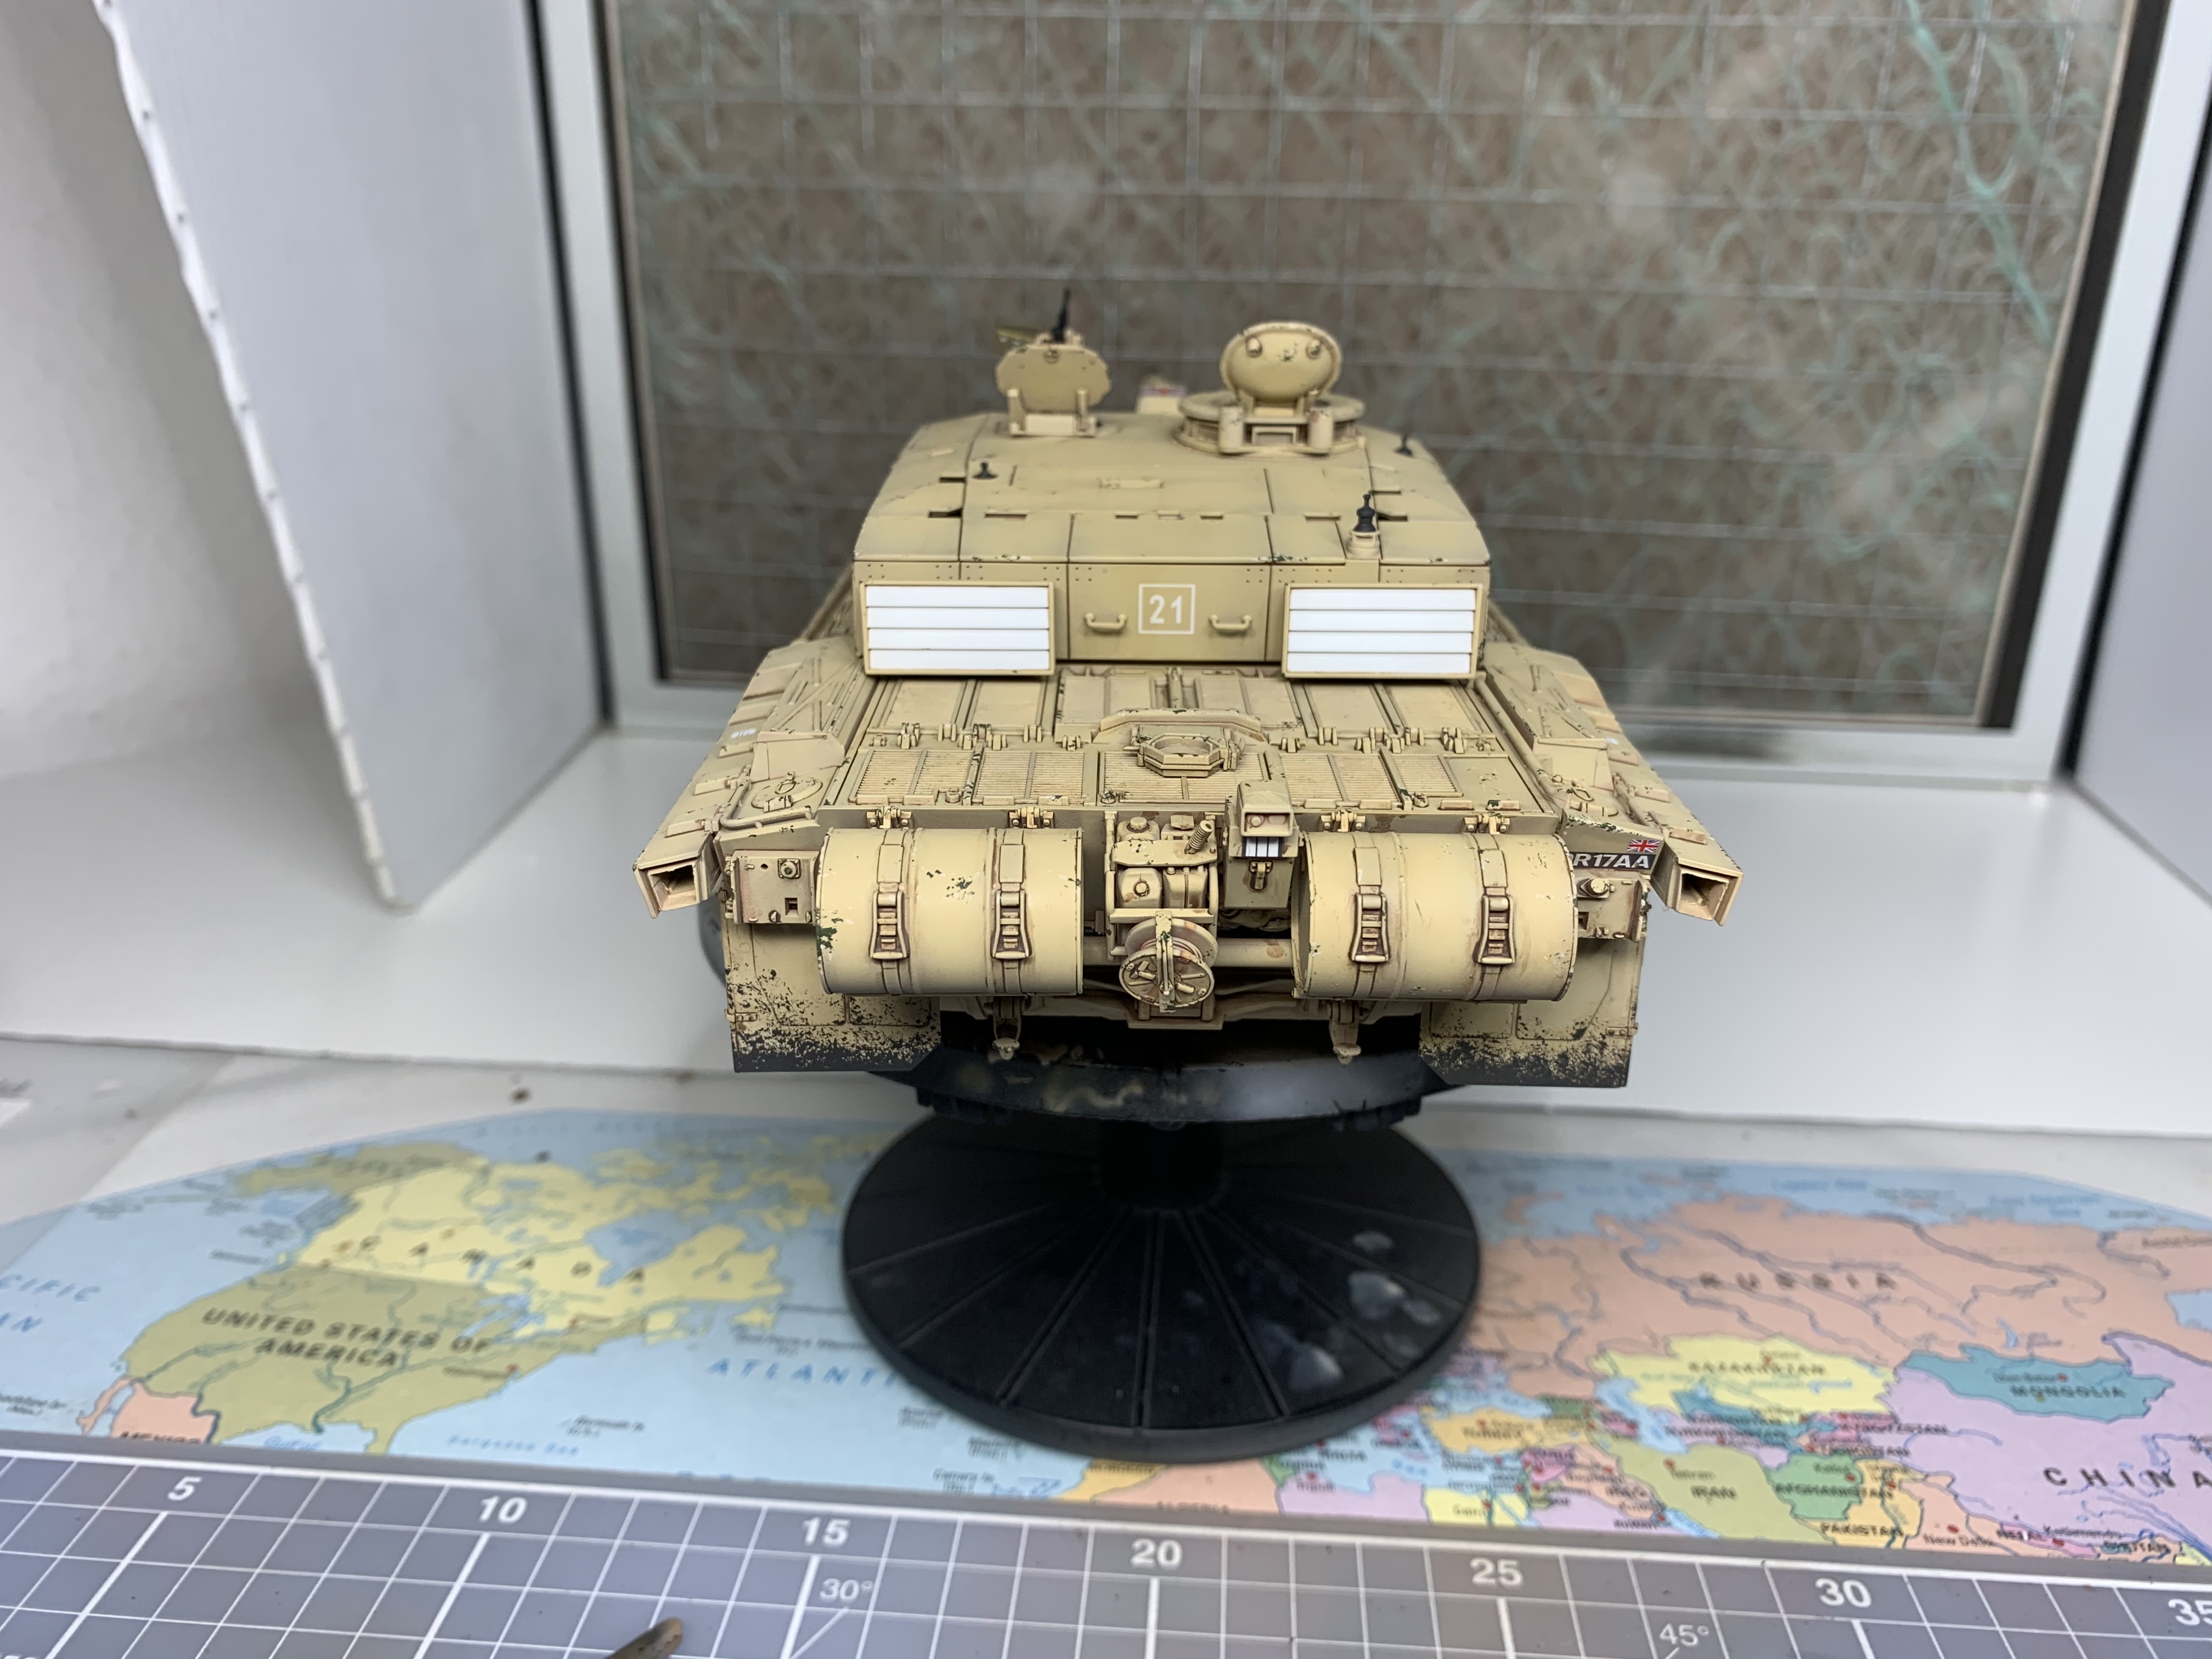
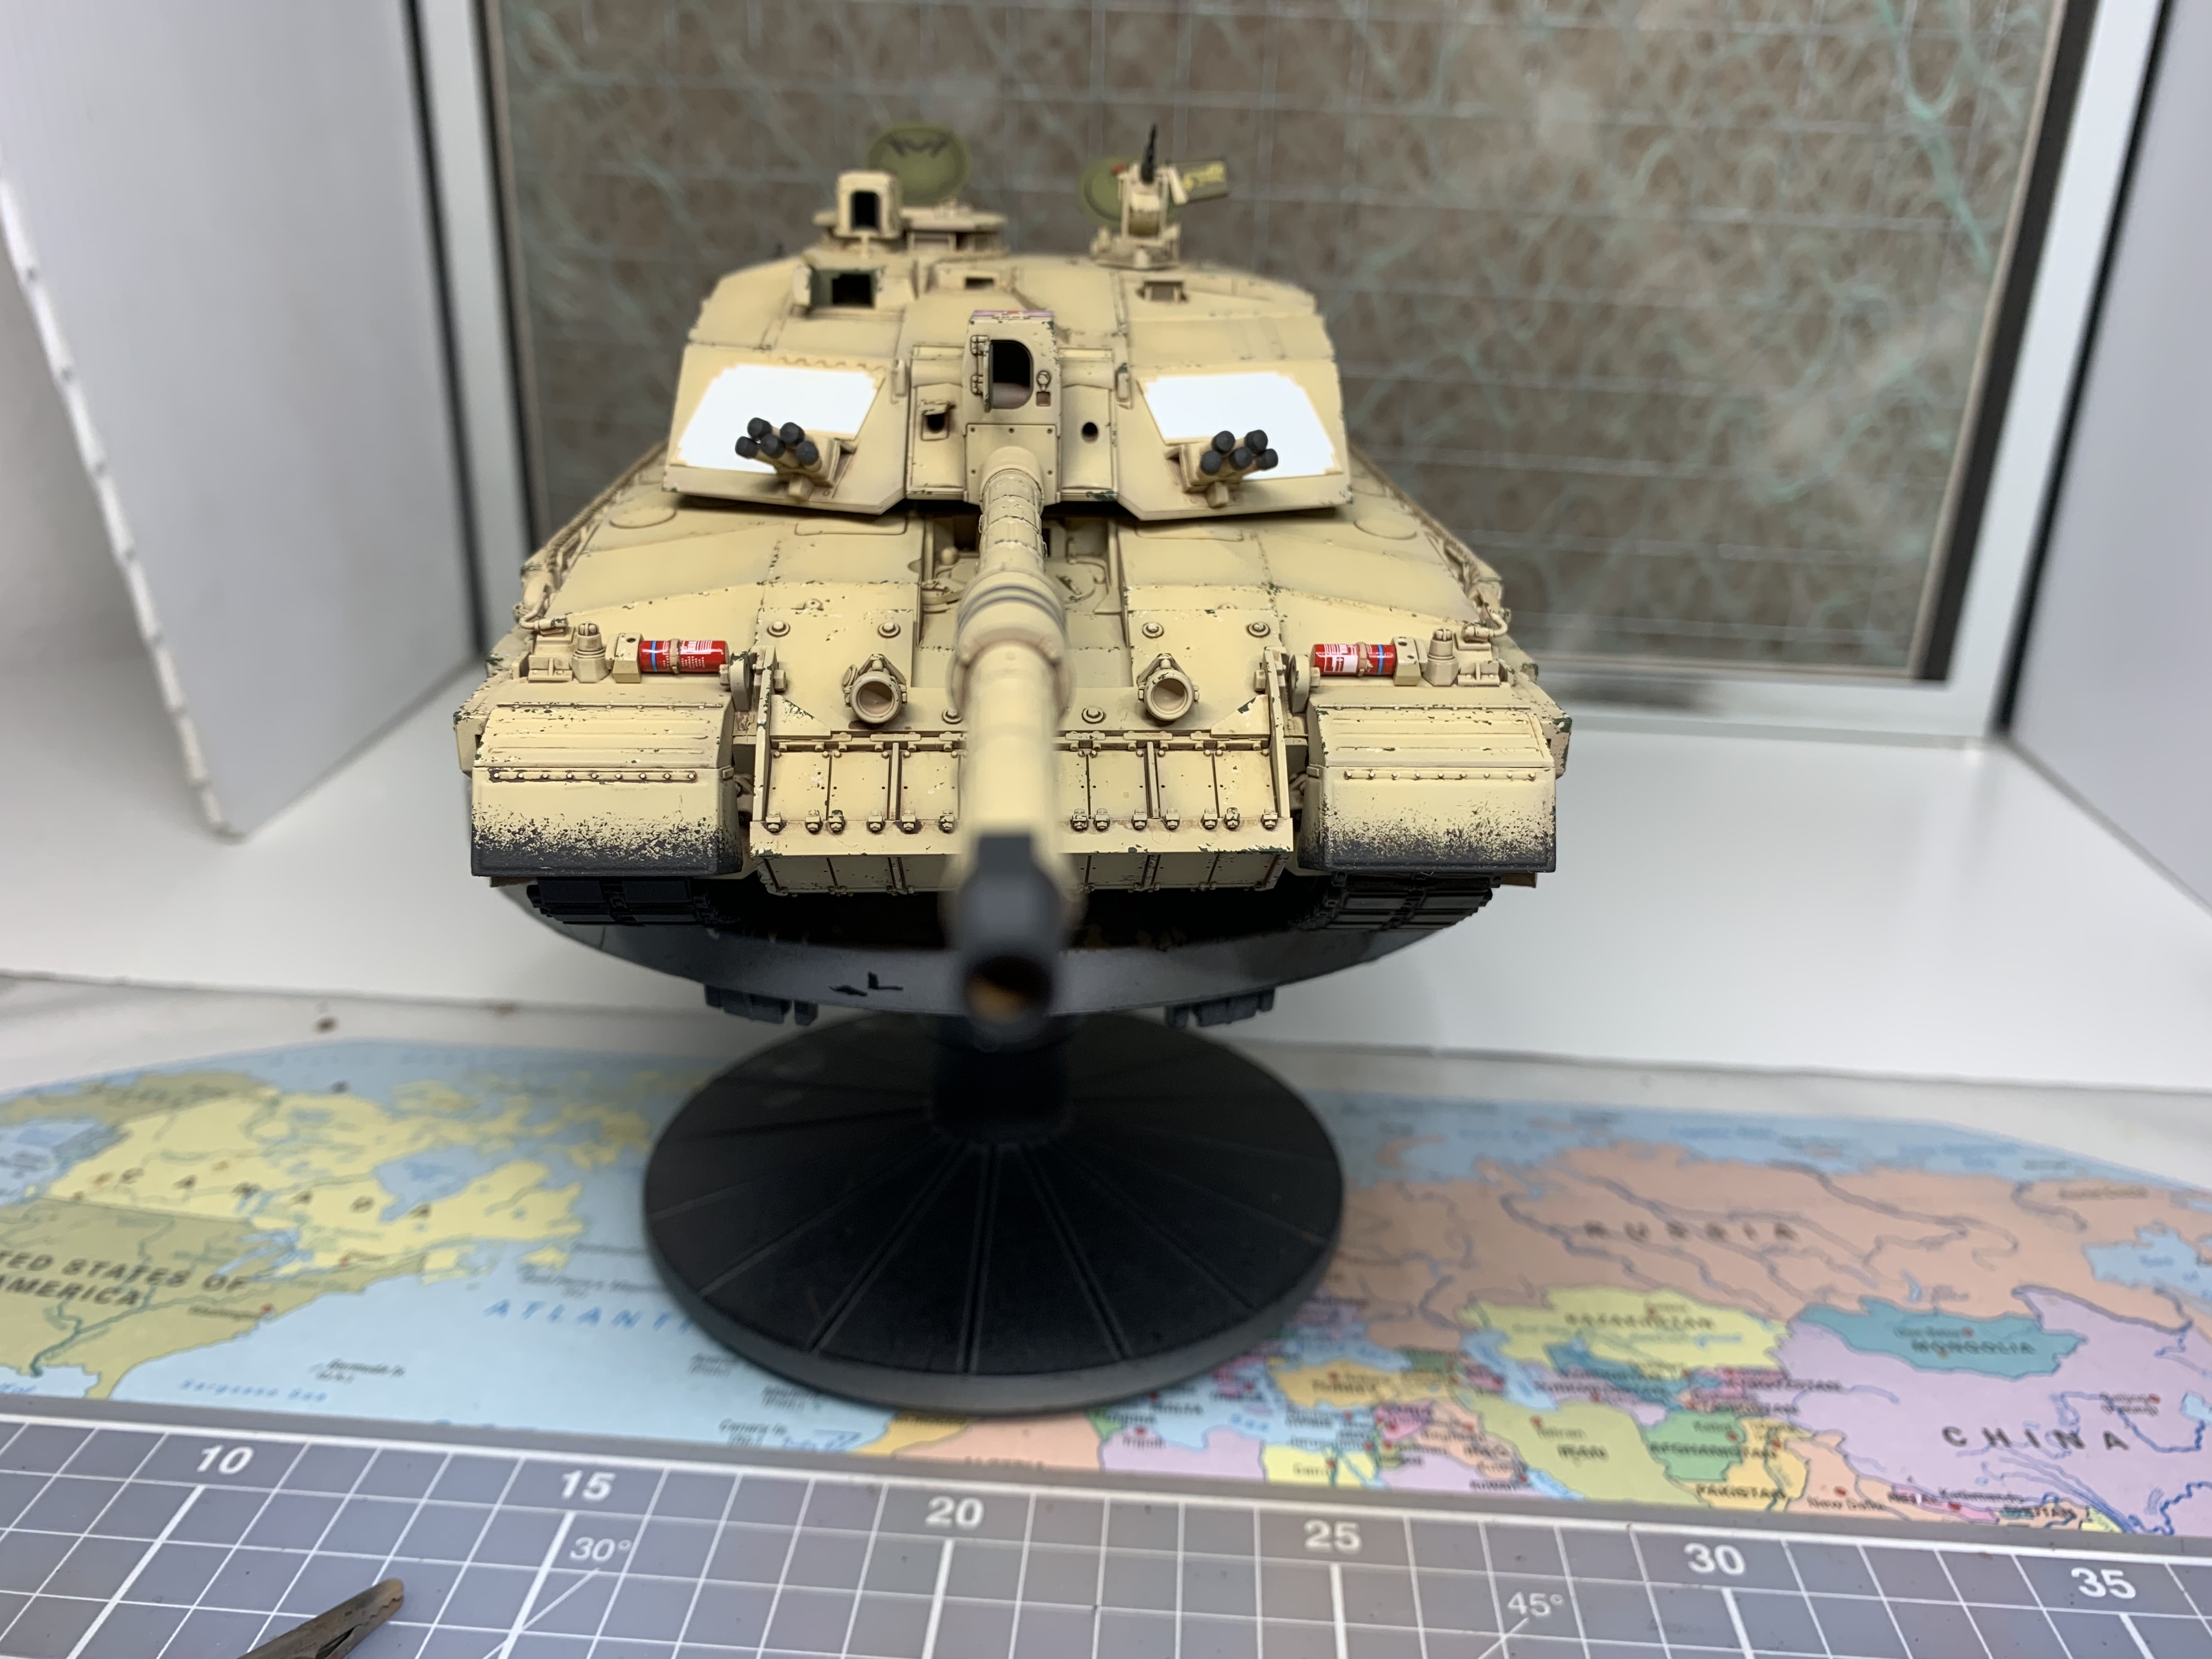
I have highlighted the green chips with humbrol 121 Portland stone to give them some depth. I have given the skirts a wash with AK4062 light dust deposits. The front mudguards have the paint worn through to the rubber treatment. Still experimenting with the tracks weathering. The lights still need fitting too.
And the matt coat is on! As usual for me it is Winsor and Newton galleria acrylic medium matt varnish mixed 50:50 with tamiya x20a thinner.
I have the optics sorted for the gun sight, the commanders little turret and the open box in front of that, just not fitted yet. The commanders cuppola vision blocks are going to be an issue as access is restricted, but I shall prevail!
Thanks for checking in.
More pics;


dylans

Joined: March 05, 2009
KitMaker: 394 posts
Armorama: 380 posts

Posted: Tuesday, October 13, 2020 - 03:32 PM UTC
that looks fantastic Jim
 |


