Introduction
The 155mm Grand Cadence de Tir (GCT) Self-Propelled Howitzer was developed by the French state-owned armaments manufacturer GIAT (now known as Nexter) during the 1970s with the first production run between 1977 and 1988; an upgraded version, the AU-F1 T, was produced between 1988 and 1996. All production models were based on GIATs own AMX-30 main battle tank body, and as well as being deployed by the French Army, a total of 155 were exported to Saudi, Kuwait and Iraq. The turret was designed to be compatible with other MBT bodies, and during the 1990s GIAT presented the GCT turret mounted on a T-72 chassis at various arms fairs, and competed for a contract to supply turrets to the Indian Army for use on either T-72 or Arjun bodies.
All three photos of a GCT T-72 I could find were obviously taken at arms fairs, one of them clearly providing the model for the box art of this kit, which is Hobby Bosss second GCT variant, following their GCT AU-F1 based on the AMX-30 chassis last year. This review will run through the full build of this T-72 variant kit.
Contents
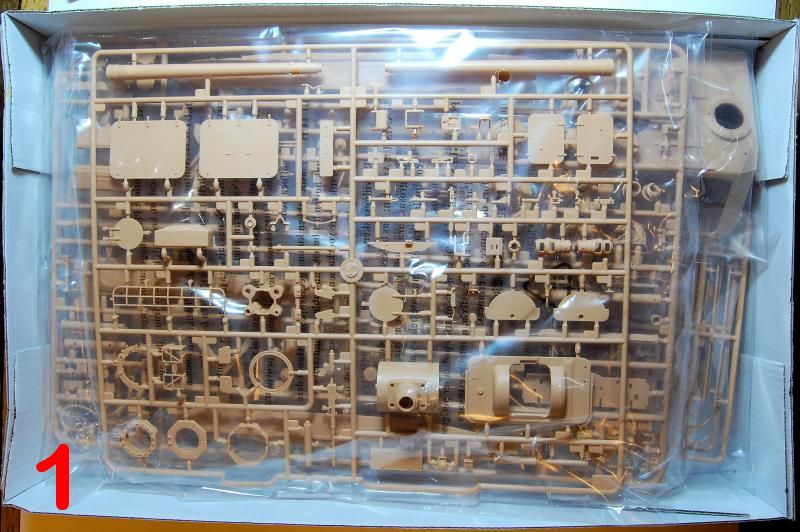
As soon as the sprues are unpacked from the sturdy compartmentalised box (photo 1, 2), it is clear that the T-72 is sourced from other kits, but taking them in order:
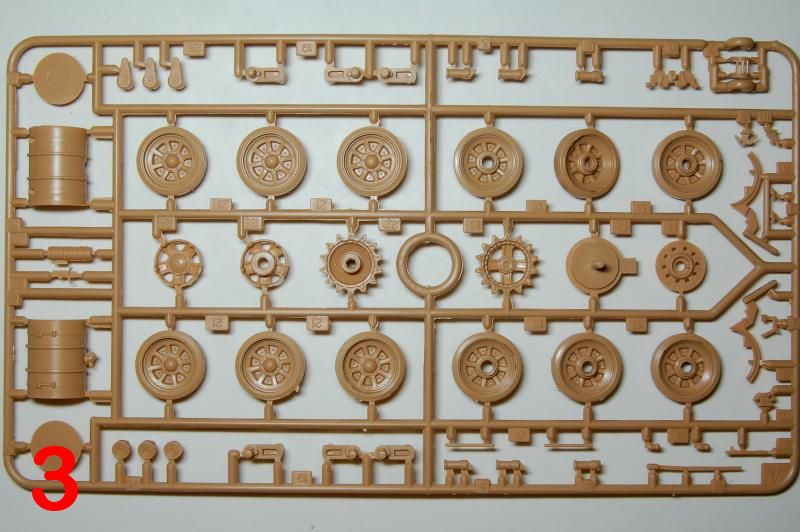
- Sprue A x2 road wheels, idlers, sprockets, suspension arms and fuel tanks, in tan (photo 3)
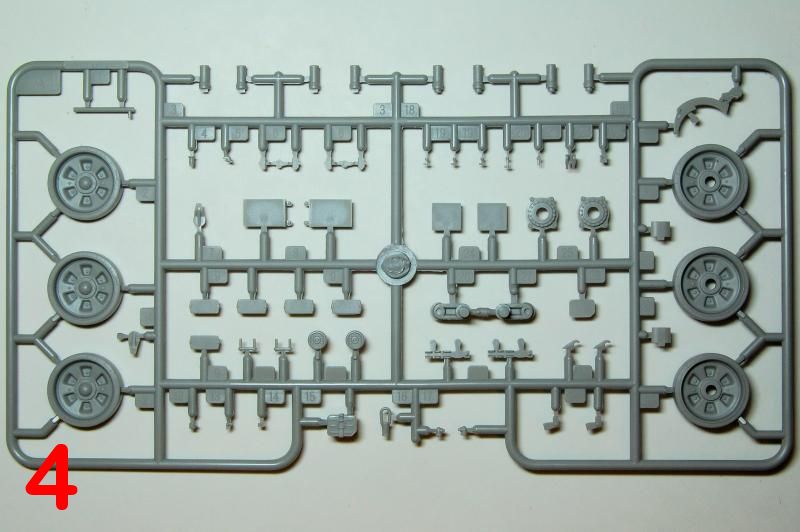
- Sprue A1 x2 more road wheels and suspension components, in grey (photo 4)
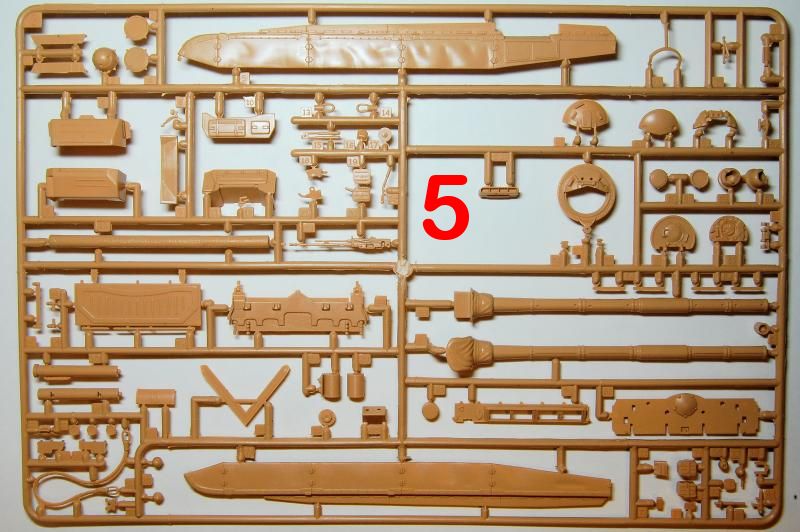
- Sprue B T-72 body components (photo 5)
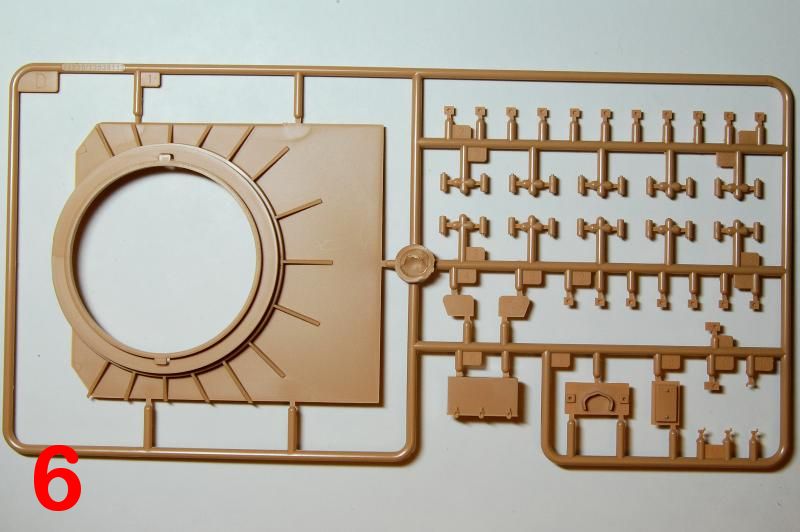
- Sprue D the GCT turret base and details (photo 6)
- Sprue F the GCT turret rear (photo 7)
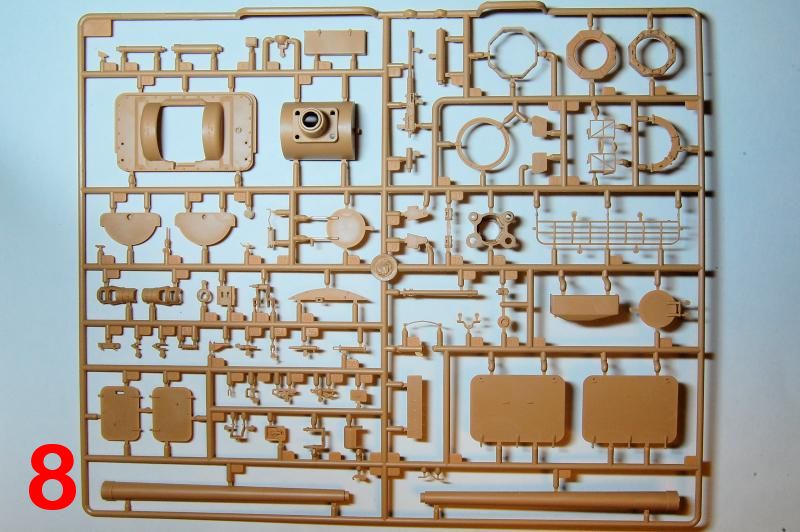
- Sprue G the main GCT sprue (photo 8)
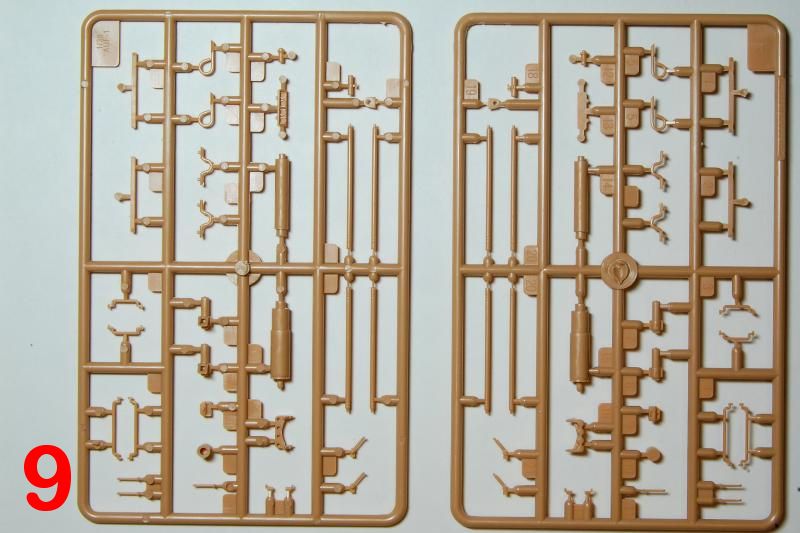
- Sprue H x2 GCT turret details (photo 9)
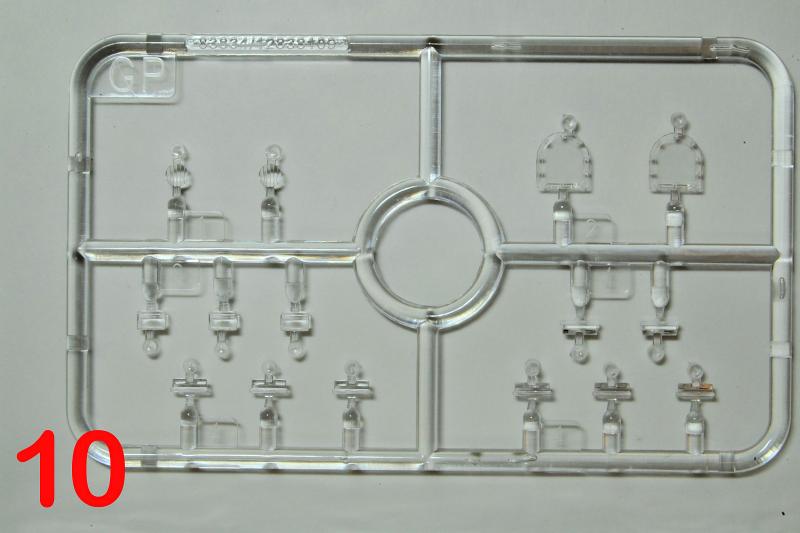
- Sprue GP clear parts (photo 10)
- Turret (photo 11)
- Upper hull (photo 12)
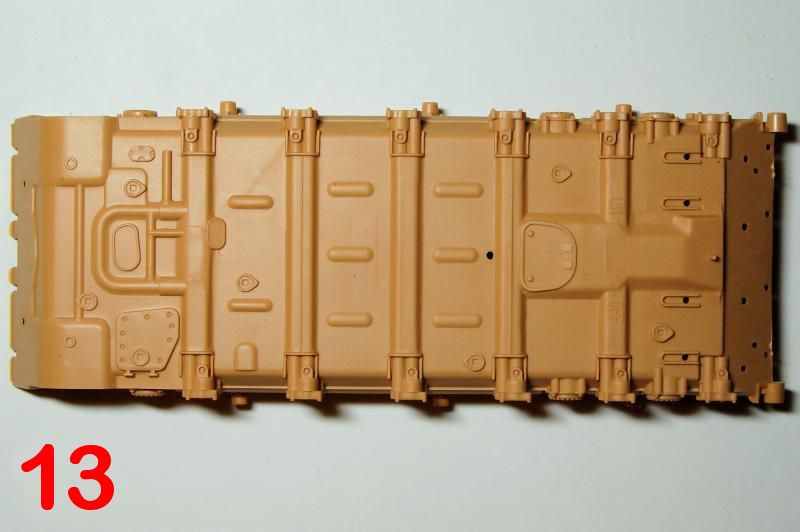
- Lower hull (photo 13)
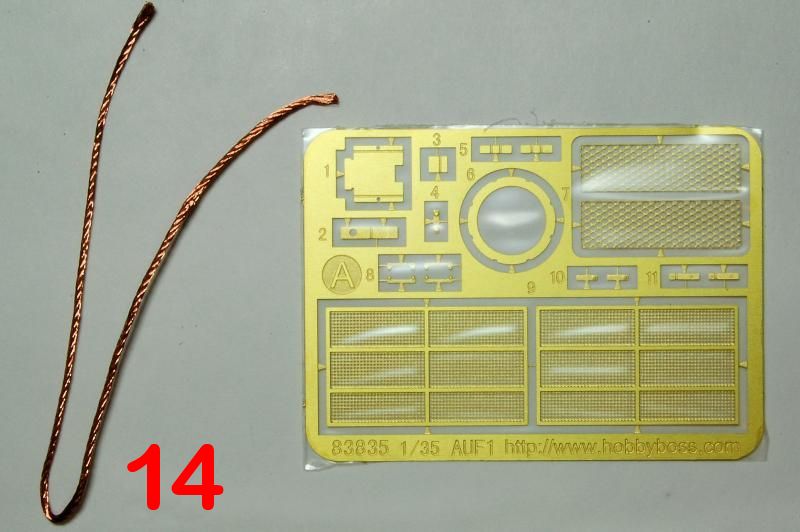
- PE-A Photo-etched sheet of T-72 and GCT details (photo 14)
- Brass rope (photo 14)
- Poly caps, brass wire and vinyl tube (photo 15)
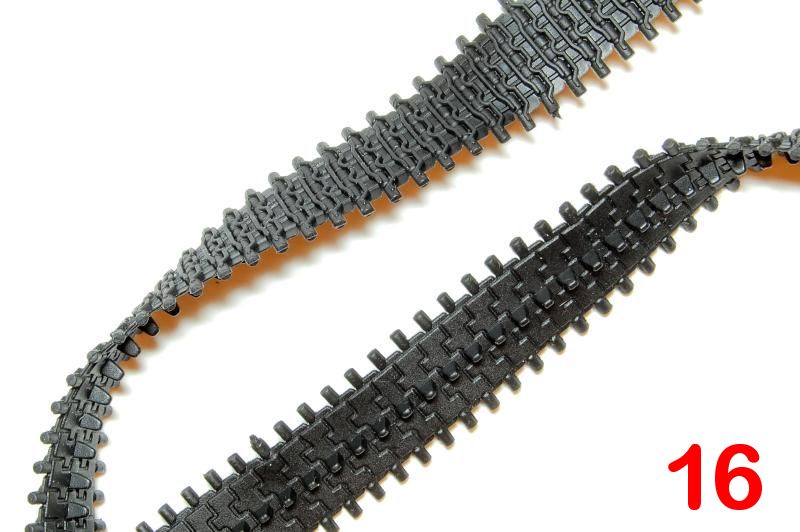
- Flexible plastic tracks (photo 16)
- Finally a couple of single parts, C4, the drivers hatch, and F7, the gun mount (in the bag in photo 7)
Review
Not being familiar with the Hobby Boss range, I searched their catalogue for a T-72, but found none. It was obvious however that at least three different kits are involved: the very finely moulded tan sprues from HBs own GCT kit, some decent looking T-72 wheels in grey styrene, and most of the other T-72 parts in tan styrene and looking, well, variable, to say the least. The remains of a blanked out ON-OFF switch on the hull bottom, and the resemblance of the main sprue to Tamiyas first T-72 kit, led me to suspect that the source was the old Trumpeter motorized kit (sometimes sold under the Hobbycraft label) and which it has long been rumoured was a copy of the Tamiya kit.
Armorama member Jacques Duquette was kind enough to confirm from my photos that this was indeed the case for the hull and sprues A and B, and he also identified that the grey wheels, sprue A1, are from Trumpeters
new T-72B / T-90 kits. So lets not worry too much
in the box we have many nice looking GCT parts, those new Trumpeter wheels, and as for that old motorized kit, it seems that the hull was often thought of as not being too bad, while it was the turret that always came in for a pasting, and thankfully it isnt here!
The Build
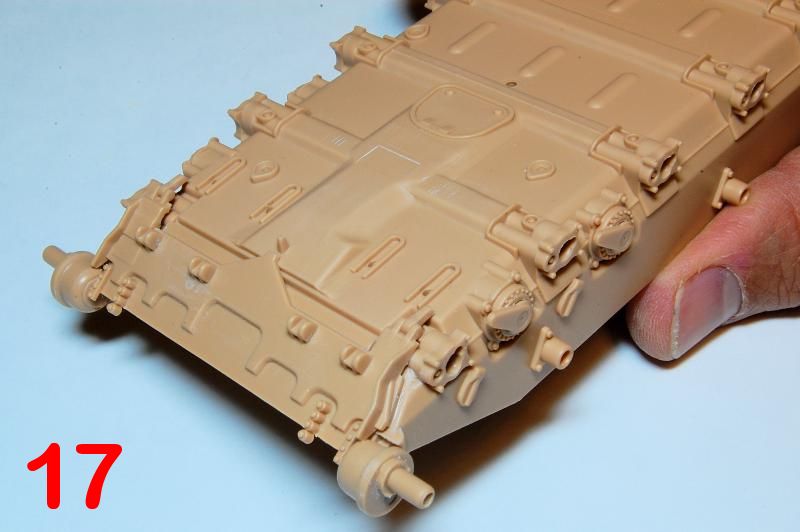
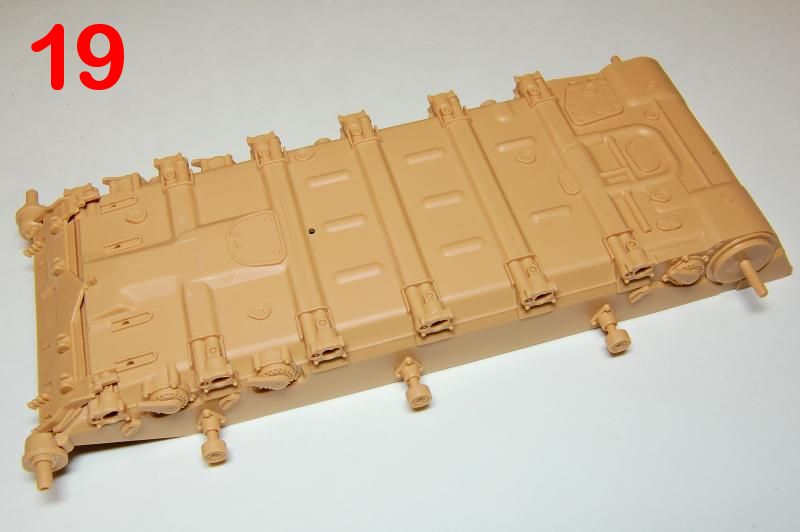
First we build the T-72, and picking up the hull bottom, apart from the ON-OFF writing and a large circular mould mark on the base, its not a bad looking piece, chunky but with reasonably sharply moulded details. We are straight into some quite vigorous cleaning up with the flash and mould lines on the bow spade plate, as well as the idler and sprocket axles, all of which, nevertheless, fit on to the hull in a satisfactory manner (photos 17, 18, 19).
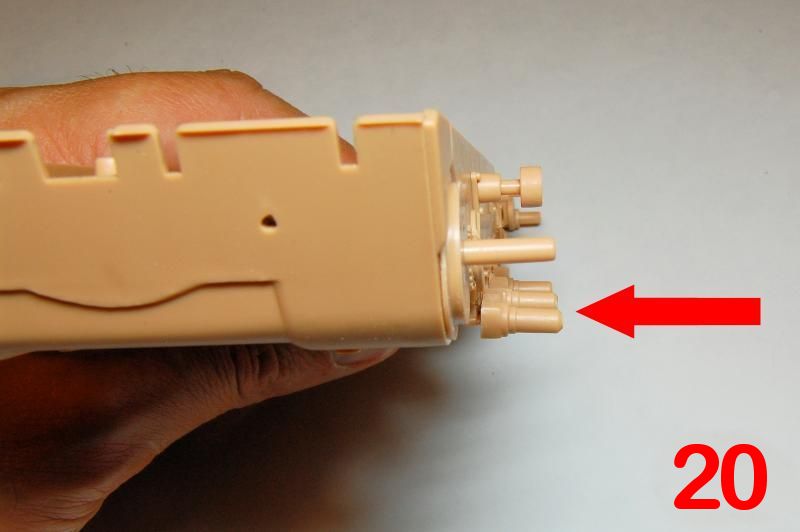
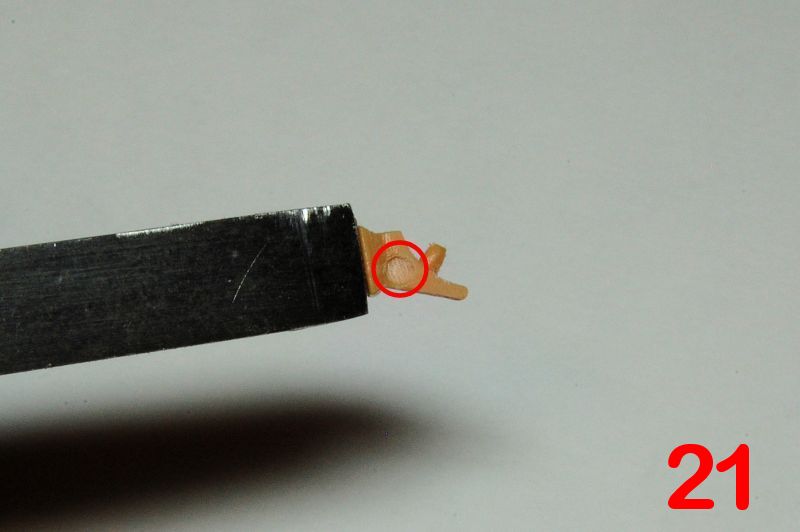
A little trouble comes in step 2 with the road wheel arms which fit tightly but have a tendency to angle downwards (arrowed, photo 20); trimming the axles a little shorter and enlarging the mounting holes helped, and this was particularly the case with the front most axles. The crudity of some of these old parts becomes more apparent when details are added to the rear hull plate: the un-ditching beam brackets and tow hooks both have sizeable ejector pits which need filling (photos 21, 22).
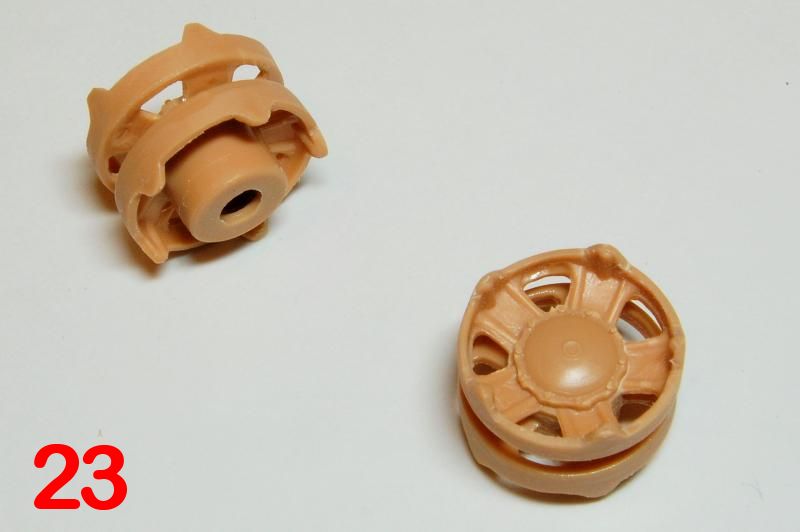
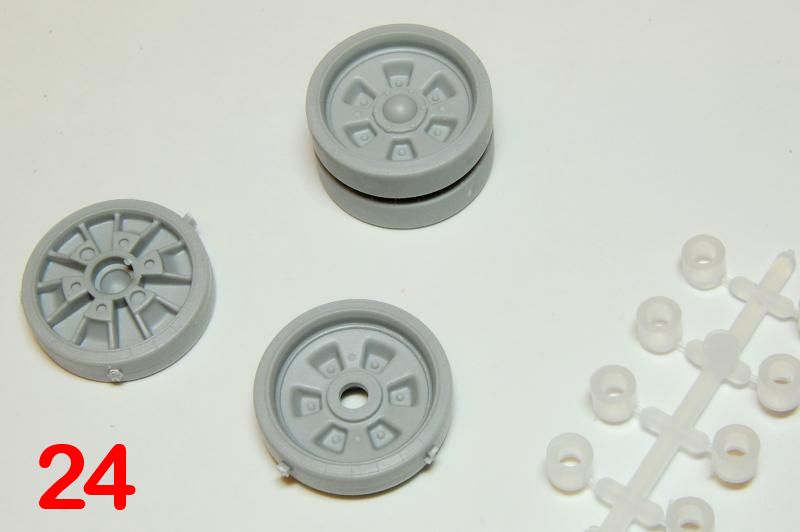
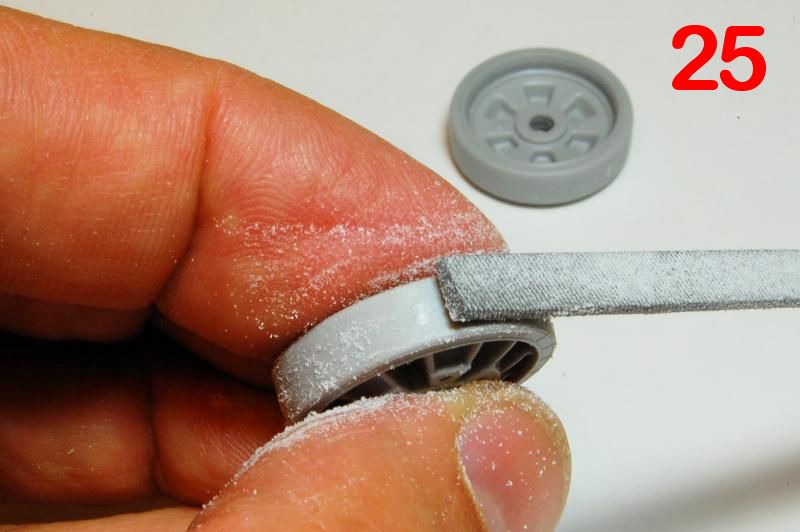
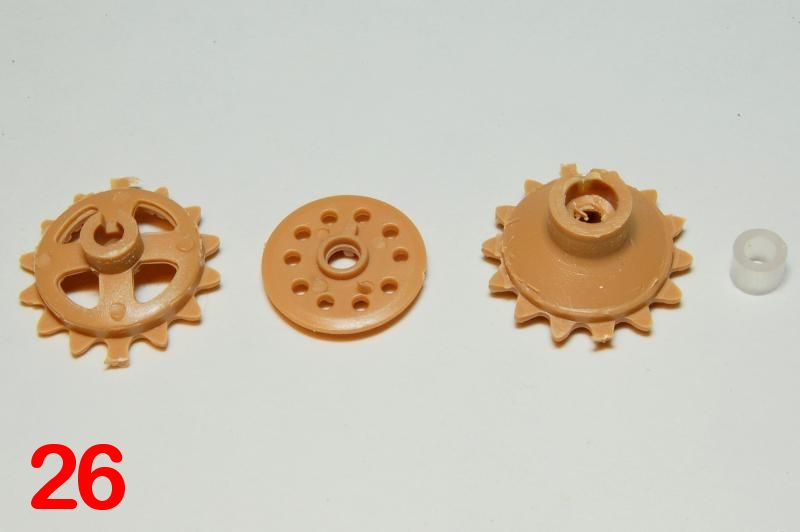
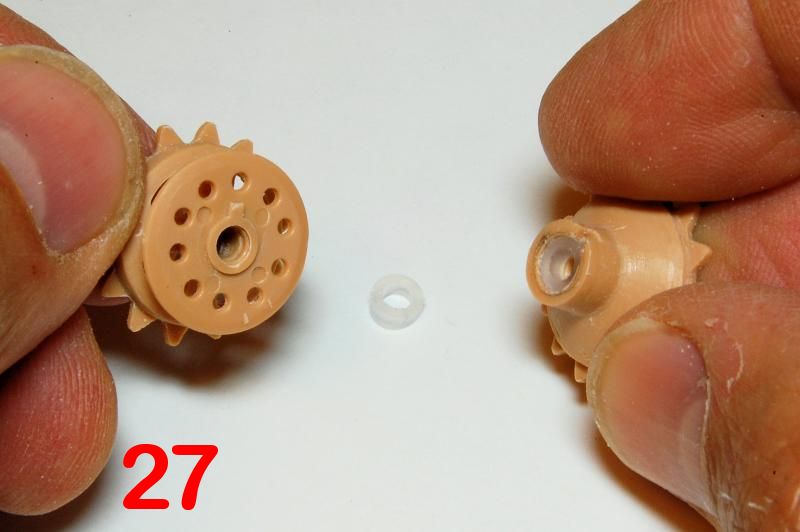
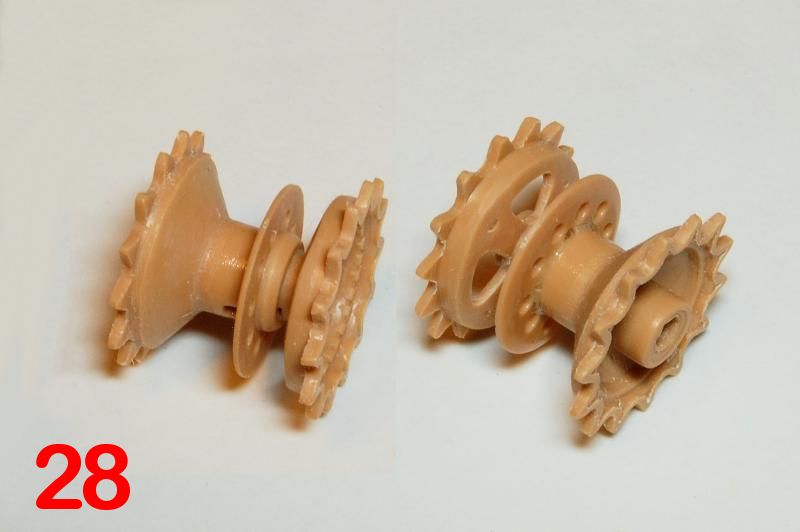
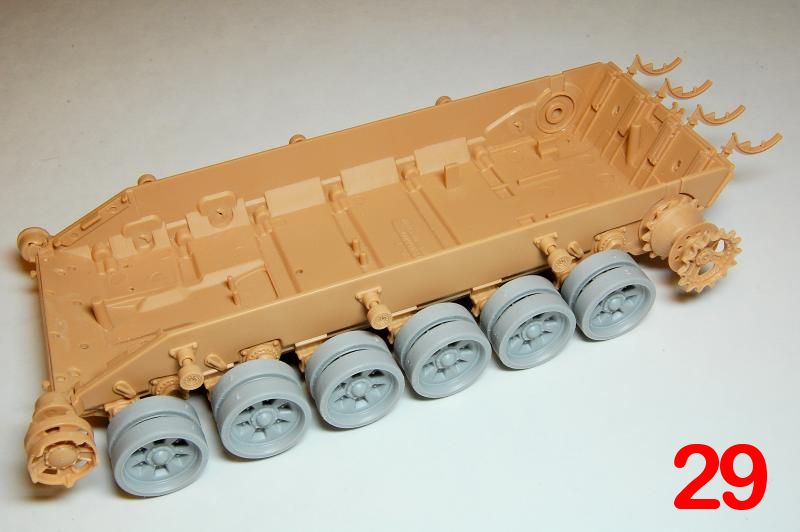
The idlers need reshaping with a file for a more precise appearance (photo 23), while the grey road wheels have crisp detail (photo 24), but still required some filing to remove the quite thick attachment points and tyre seam (photo 25). The sprockets are in four parts (photo 26). I cut about a third off the poly cap in order to fit it inside the wheel (photo 27, 28). With the poly caps in place the wheels can be test fitted, and all seems OK (photo 29) note too the fuel tank brackets.
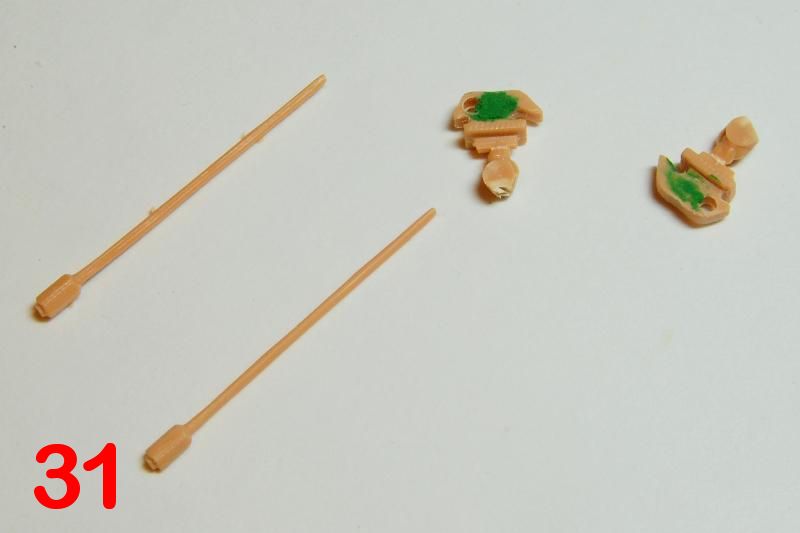
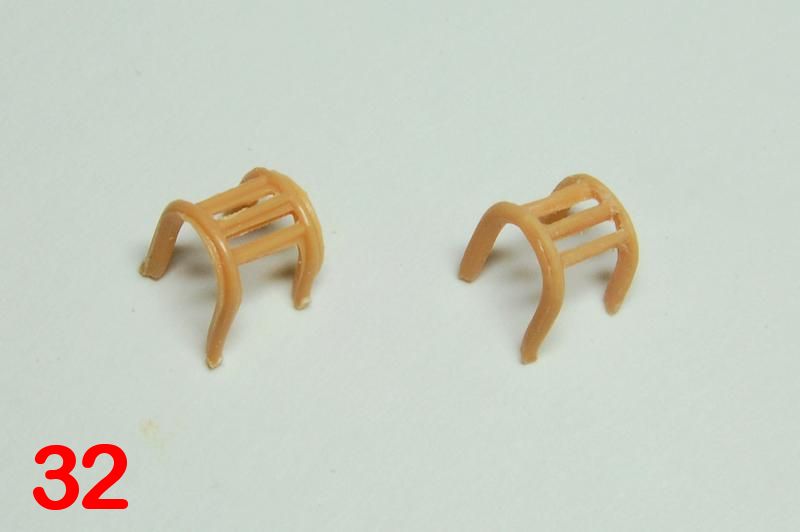
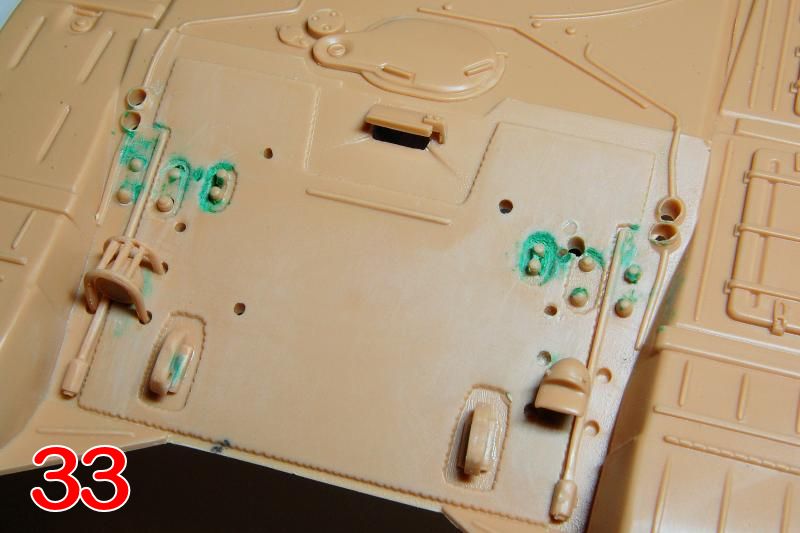
We move on to the T-72 hull top and start off with the headlamps and exhaust outlet, both of which are acceptable, though the exhaust would benefit from work to give it greater depth (photo 30). Inevitably there are further small crude hull details to deal with the front tow hooks and cable conduits (photo 31), headlamp cages (photo 32) and the glacis plate with over size holes and odd bolt details, all of which could really do with more work than I did (photo 33). Youd need to refer to photos of the real thing for all of this, and note, for example, that the tow hooks should have big casting seams, and that the appliqué armour plate should have rough edged cuts and welds so improve the details, but dont make it look too pristine.
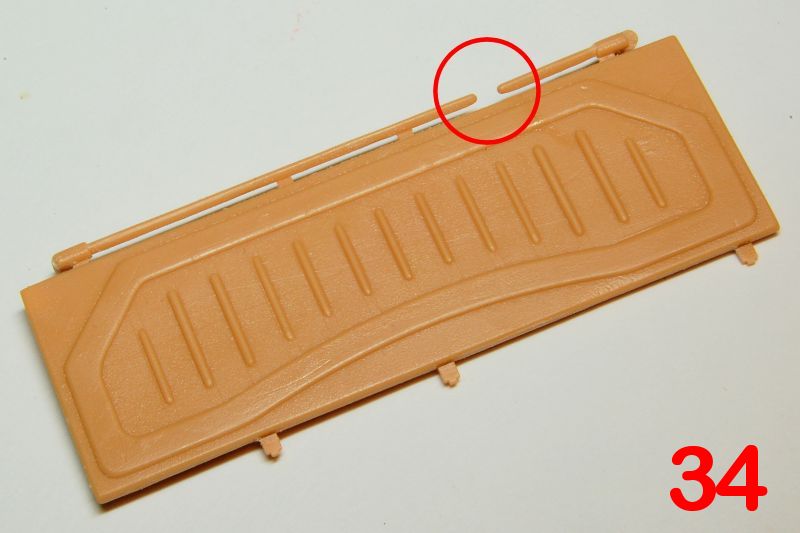
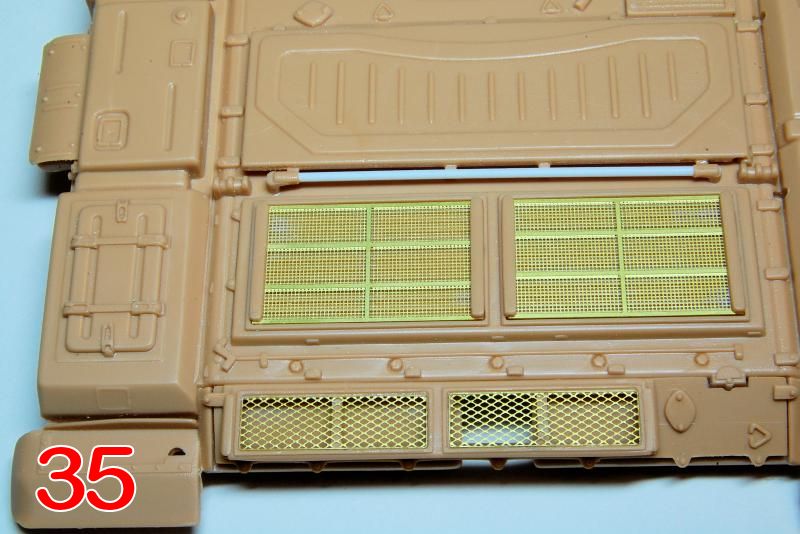
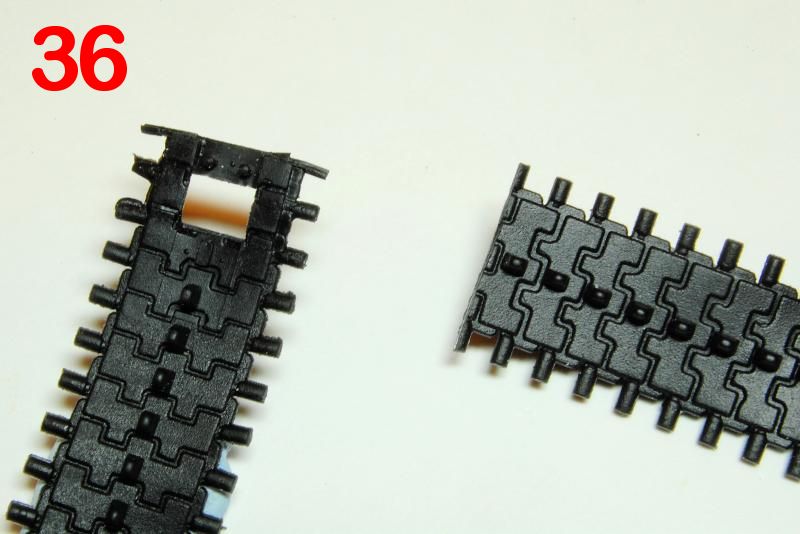
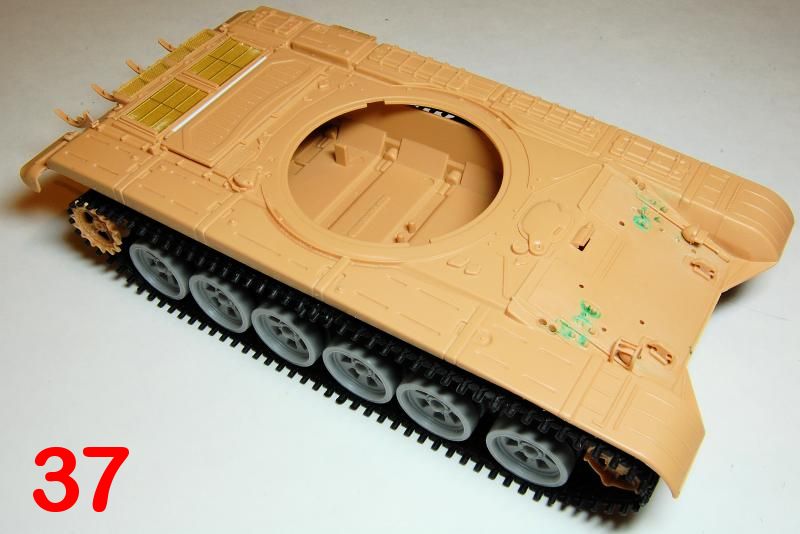
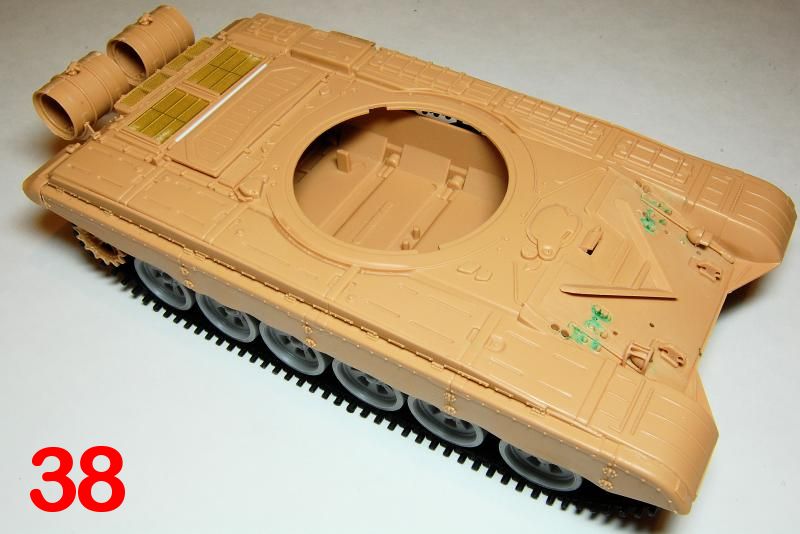
At the rear there is an engine hatch that was missing some plastic (photo 34) so the hinge was replaced with plastic rod (photo 35) and in the same photo we can see the very nice photo-etched screens that fitted perfectly in place on the engine deck. The tracks were considerably too long and I removed the whole of the narrow joining strip from one end, and the final tooth from the other (photo 36). The instructions claim that the tracks can be glued using plastic cement, but neither Humbrol Liquid nor EMA had any effect at all, so I sewed them. They could then be easily stretched over the wheels (photo 37) and with the side skirts in place the lumpy track joint is well hidden (photo 38). Fitting the skirts flush to the hull took a fair amount of scraping and filing, and it seemed that they are actually about 1mm too short.
So one advantage of the primitive T-72 is that the hull builds up quickly, being relatively simple and of few parts; on the other hand there is probably work to be done on some of the small details, although the etched screens do brighten things up somewhat. For now I left the auxiliary fuel tanks with their wire and vinyl fuel lines, the tow cable and the log to one side.
Moving on to Hobby Bosss GCT sprues was a bit like driving across certain European borders, where the ridged and poorly patched road of one country gives way abruptly to the well maintained and smoothly quiet surface of another, and you drive on, appreciative of the step change in quality. These parts are all precisely moulded and with only the subtlest of mould seams, so slight that the hardest part of removing them is being able to see them.
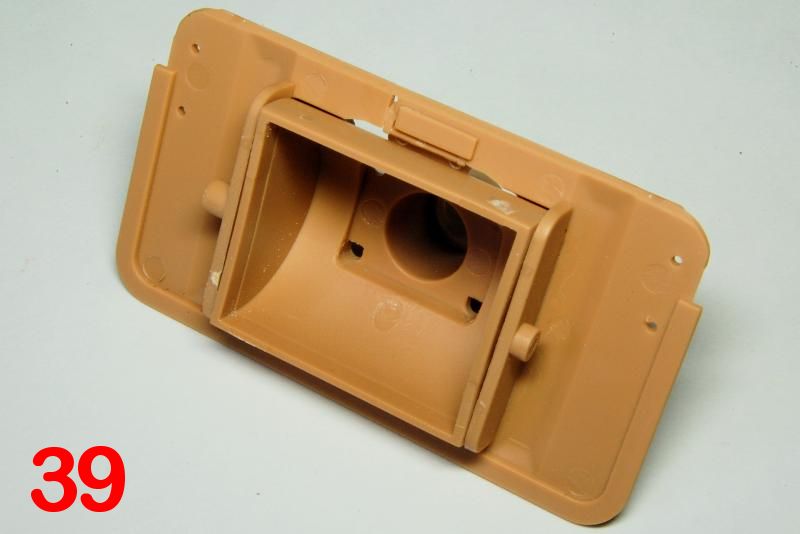
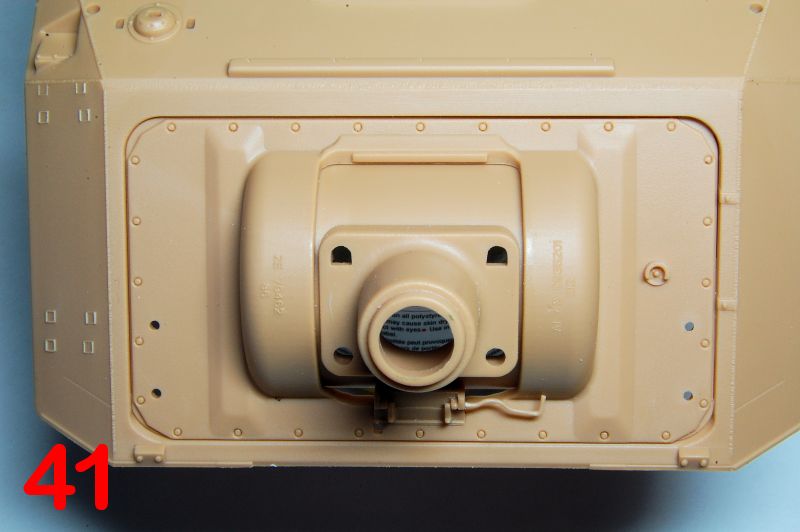
Starting with the gun mantlet (photo 39), despite that quality, I ran straight into uncertainty with the instructions over parts G27 and G48 (photo 40). I think the bent rod poking out to the right is a locking bar which, on the real thing, slides in and out of the component it is attached to, and can be seen in photographs to sometimes have its end pointing up, sometimes down. The instructions point it down, but attaching it that way will reveal a couple of ejection marks, so I attached it pointing up. Note that the writing moulded on to the mantlet should be there and it pays to be sure that the swivelling gun mount parts are all the right way round as they are not symmetrical. The mantlet then fits exactly into the turret aperture (photo 41).
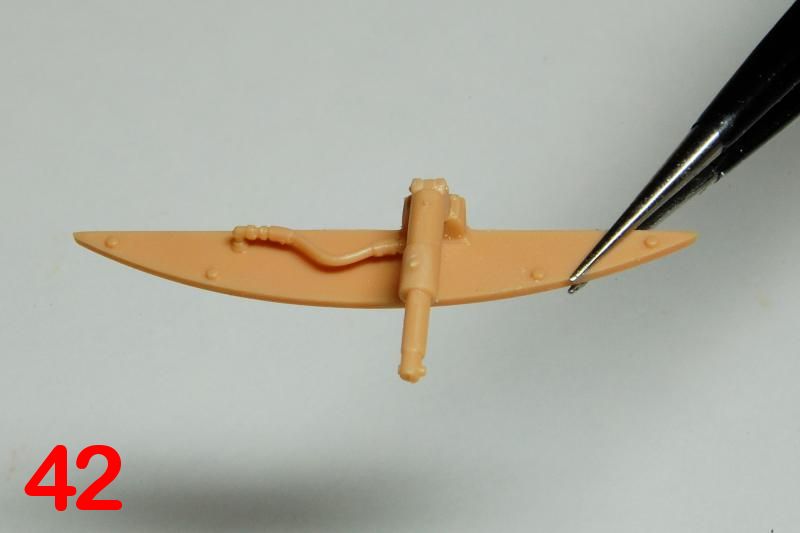
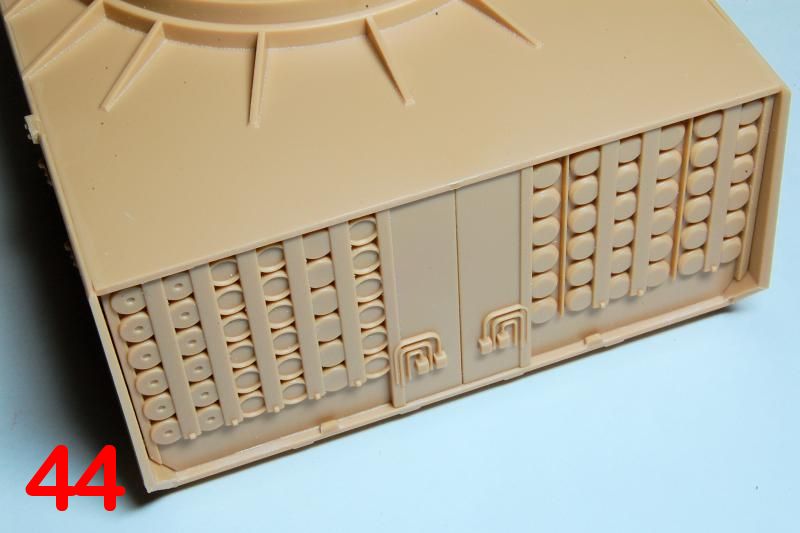
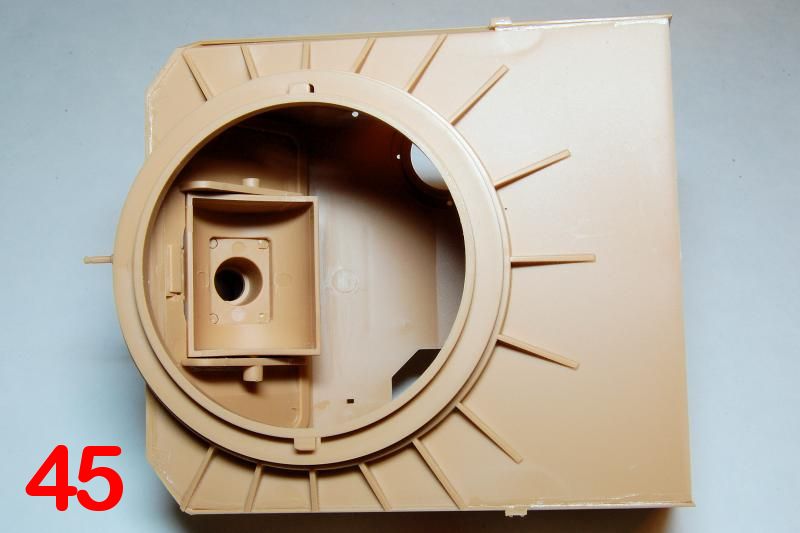
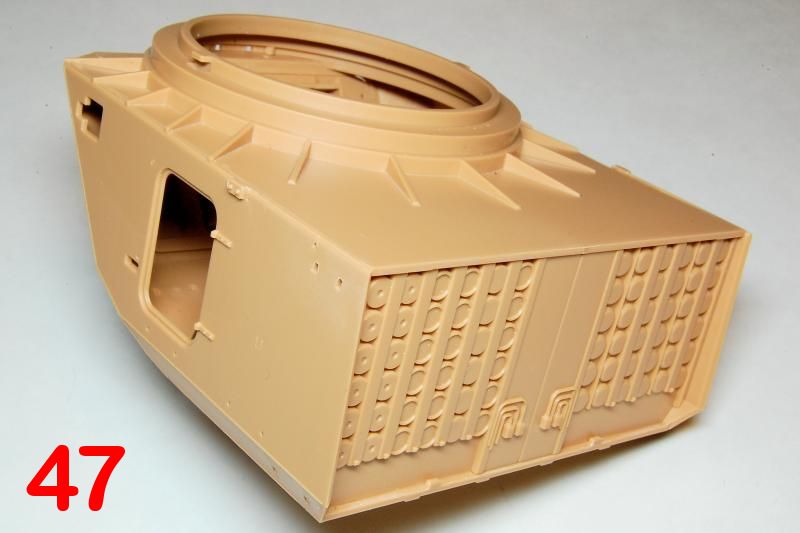
The hydraulic line that fits at the front of the turret is a fiddly affair with a pin on pin mounting that takes some care to get in place (photo 42). The inner back plate, consisting of the ammunition racks, and base of the turret are shown assembled in the same single step, but the back plates should go in first, followed by the base; some moulding tabs needed to be removed first to allow a true fit (photos 43, 44, 45, 46, 47).
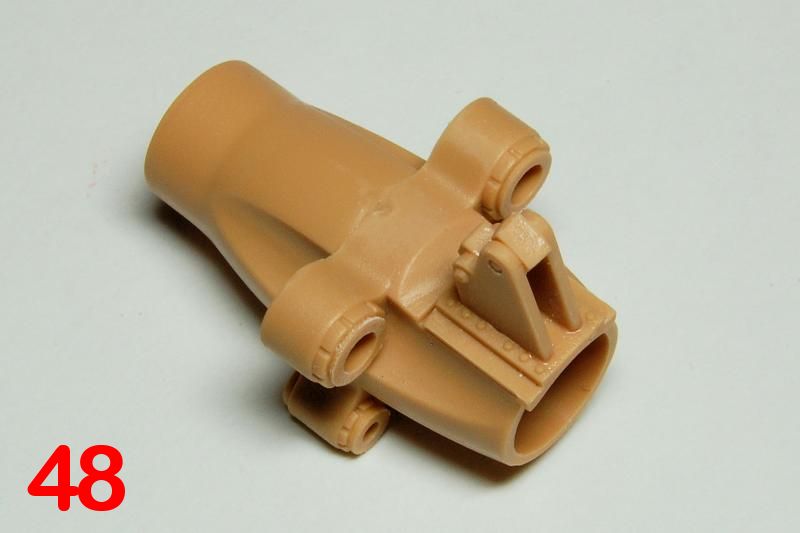
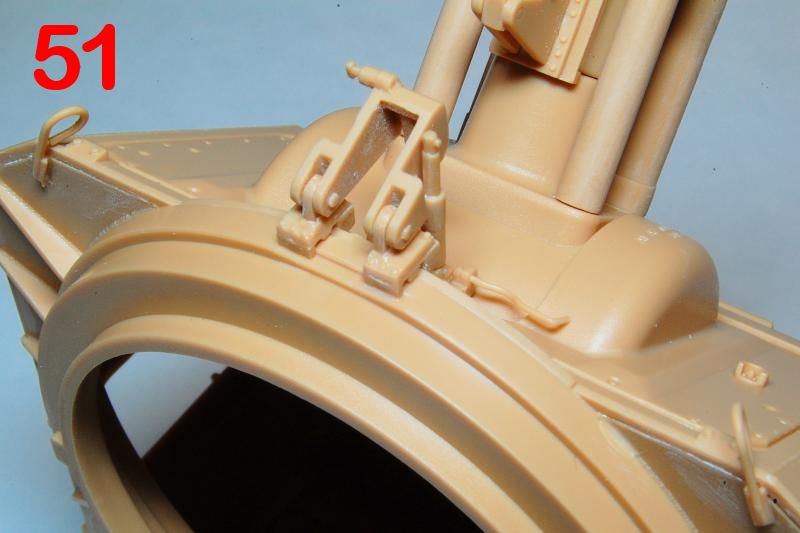
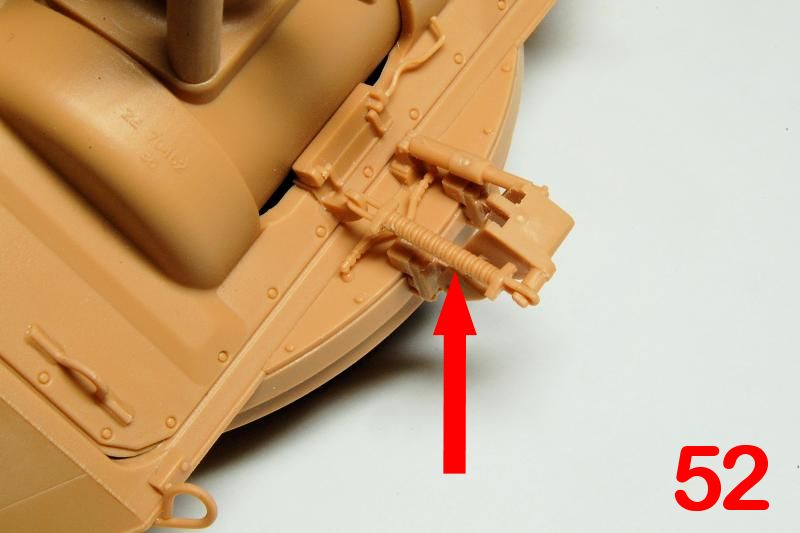
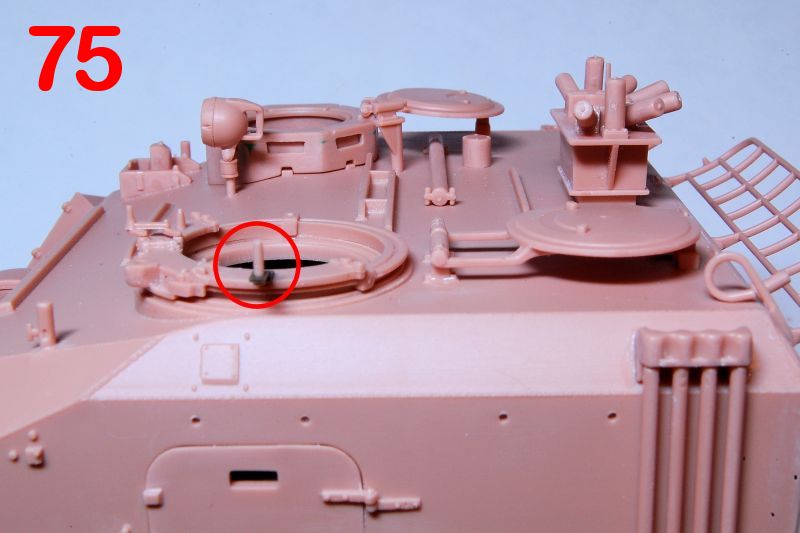
The big gun mounting and recuperator mechanisms are built next and all have extremely good fit making a solid mount for the gun tube (photos 48, 49, 50). In photo 51 you can see the travel lock attached to the turret ring, and I had to force those connectors open with finger and thumb nail in order to get them over the brackets. Although the gun elevates perfectly well, and the travel lock has a working hinge, you need to choose if the gun is to be locked down or not, since there is a spring (photo 52) between the swivelling lock and its mounting but unfortunately its not a real spring so it is actually not possible to engage and disengage the travel lock. I actually took the spring off again, deferring the decision for now.
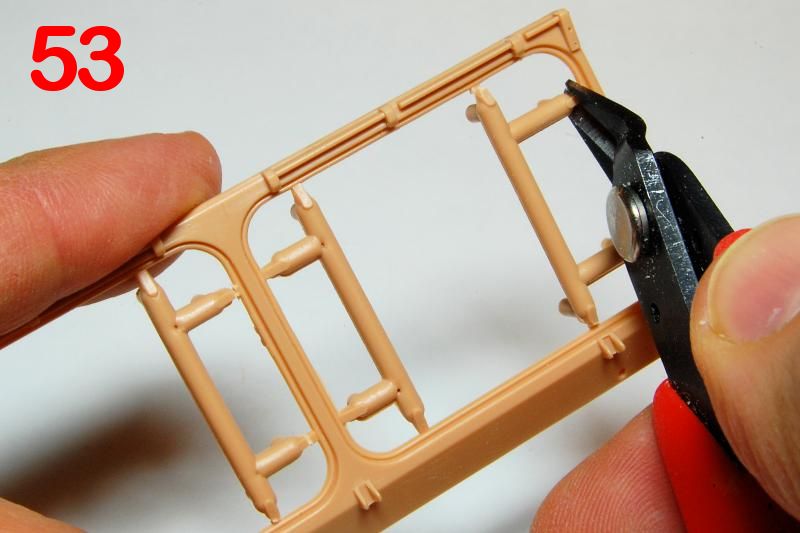
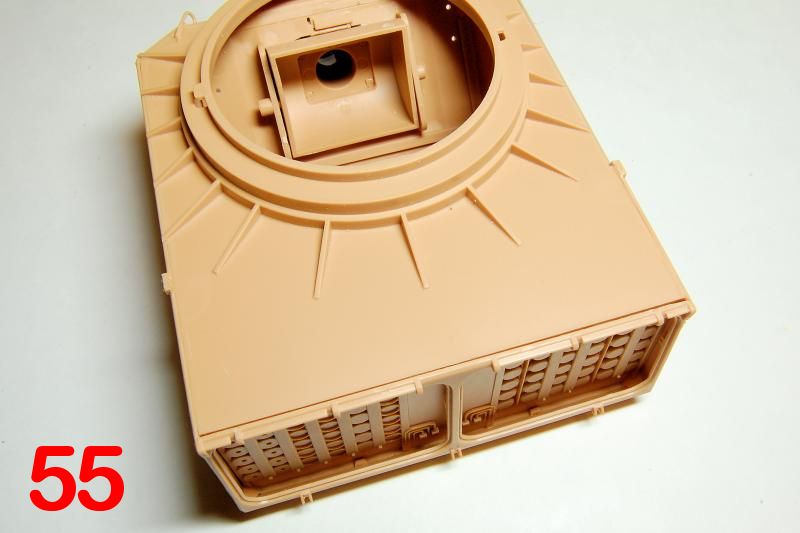
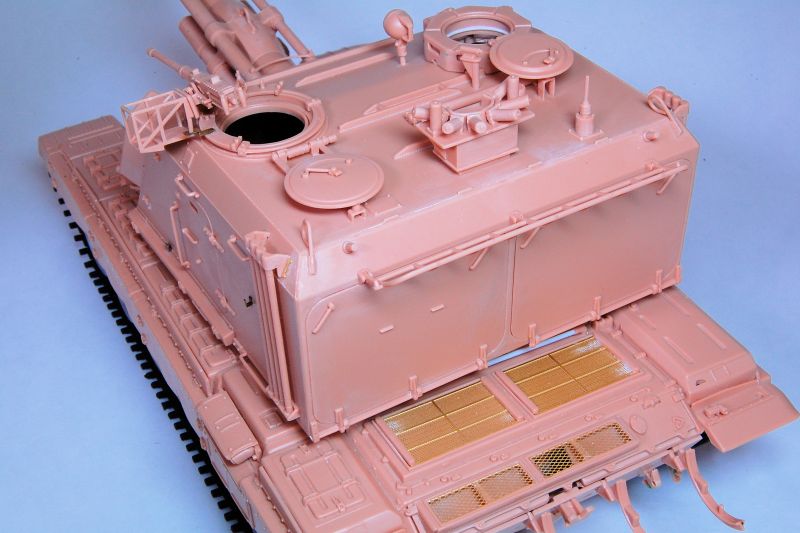
Working on the plate that takes the two big rear doors requires some care as theres a number of attachment points right on the thin inner rim (photos 53, 54, 55) that you dont want to damage, especially if planning to fix the doors open.
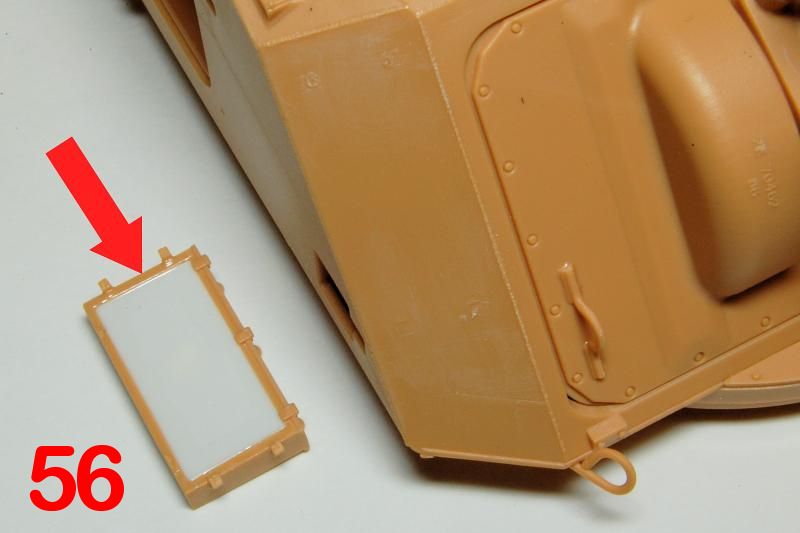
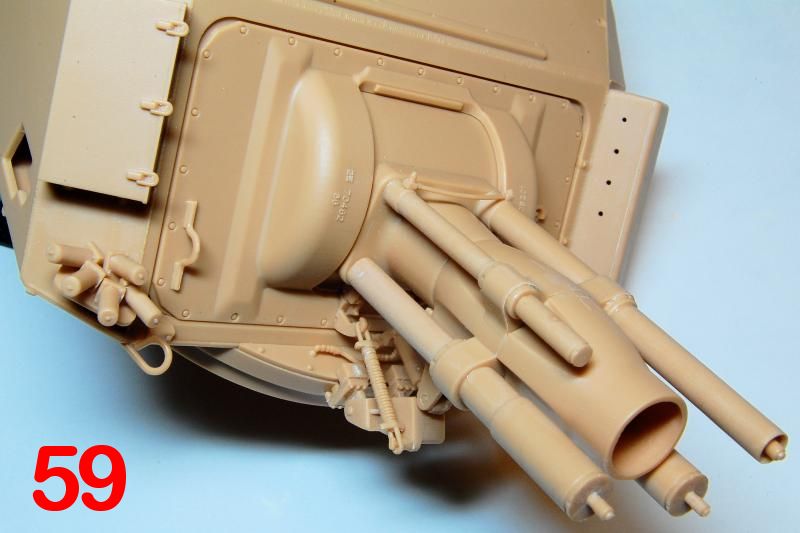
Step 15 is a busy one with many details being attached, in fact looking at it again now, I can see one that I missed! The box that fits on the left hand side of the turret is fitted slightly away from the surface on four tiny brackets and I wasnt convinced that the hollow interior wouldnt be visible from a side view, so I filled it with some styrene sheet (photo 56, 57). I suppose this box might be better left off until the base coat of paint is applied. Constructing the smoke grenade launchers takes up some time as each one has to be attached to its base prior to assembly onto the mounting plate; I found it easier to attach them to the bases with the latter still on the sprue (photo 58). The mounting plates have only small guide marks to position them by, so care is needed to configure them at the right angles (photo 59).
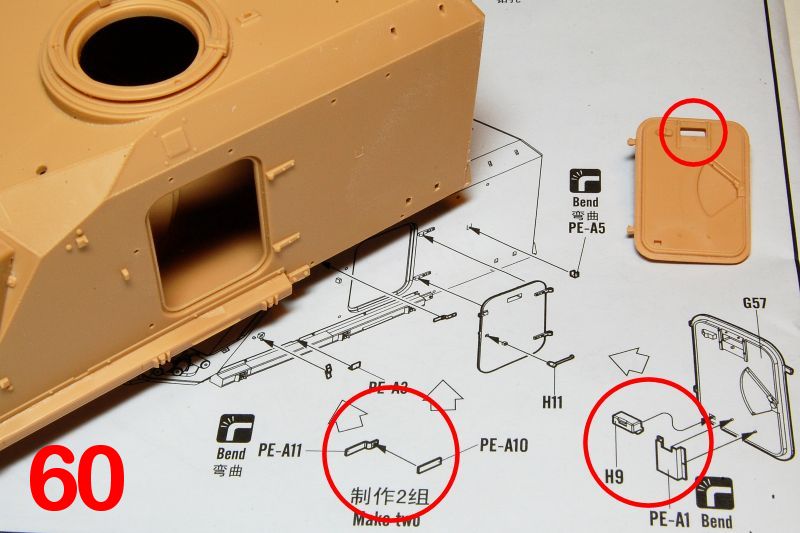
The instructions indicate an etched part for a fitting on the inside of one of the turret side doors, but as there is no other detail inside the turret to tempt you to fix the doors open, I ignored it. Theres also two brackets to be built from metal parts to go towards the front of one side, but I ignored these as well because a) they were fiddly to make, and, better still, b) I found photos of several vehicles with these brackets missing. At the top of the side doors there is what appears to be a vision port, but no transparency is indicated to be fitted into it, though there is a likely looking part (3) on the sprue that is never called out (all photo 60).
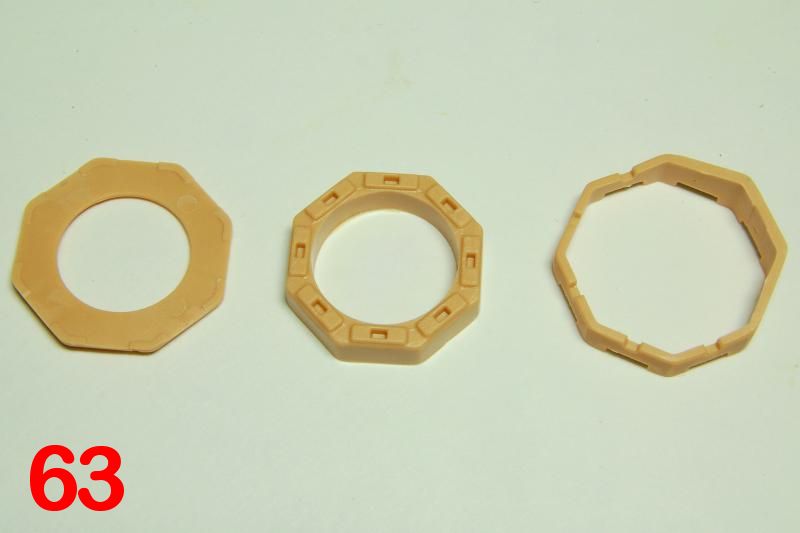
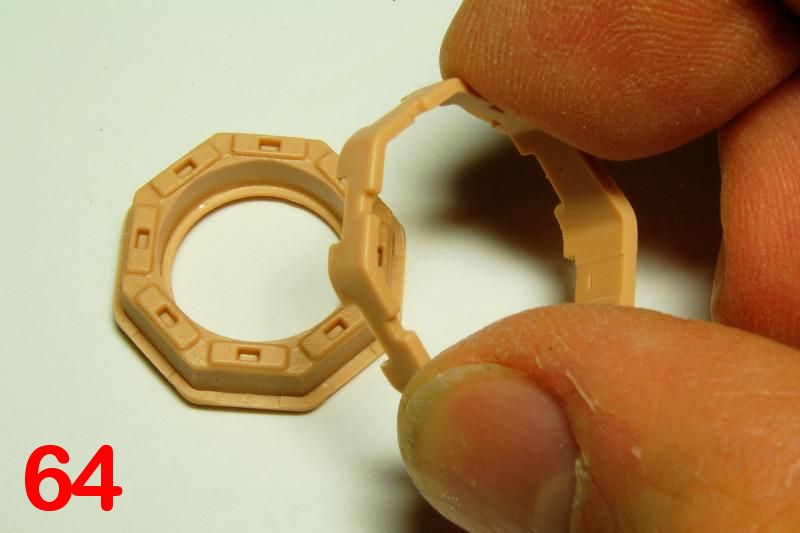
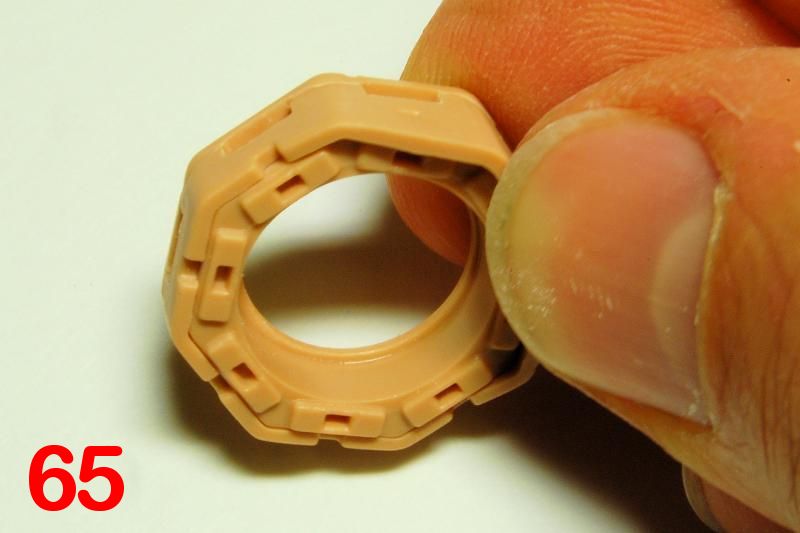
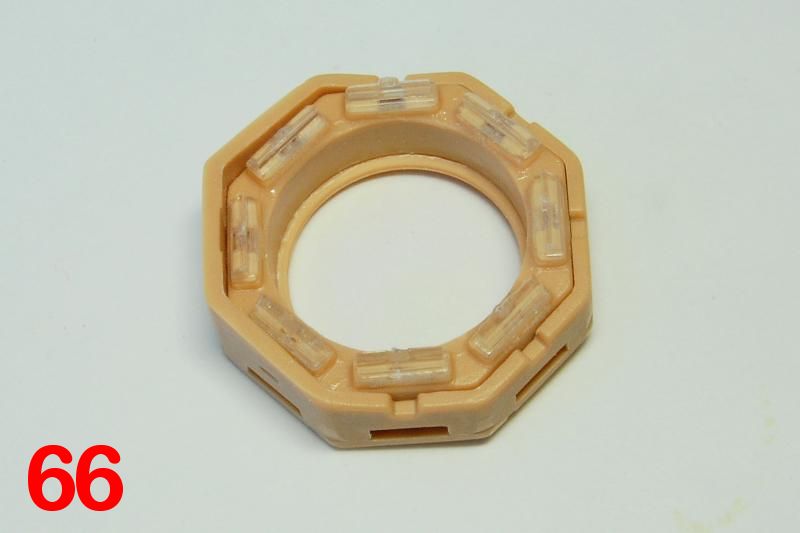
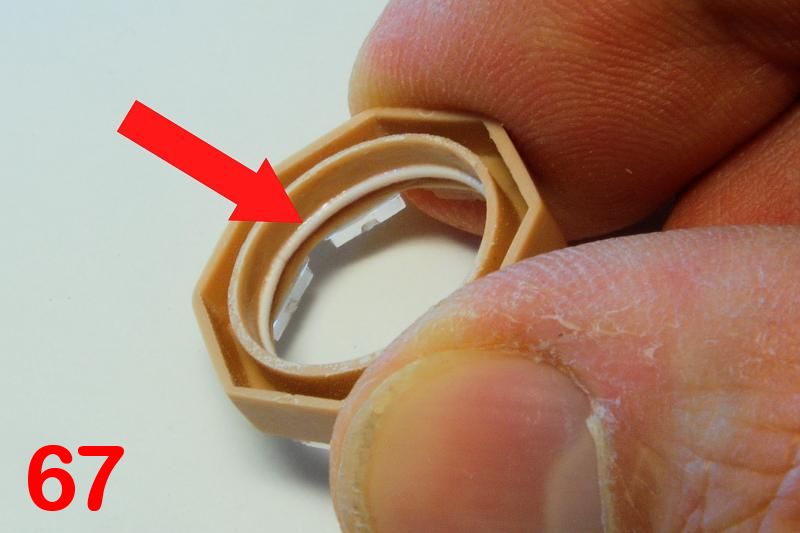
At first I found the commanders octagonal cupola a little confusing: theres eight transparent blocks to be assembled, but they are for the bottoms of the periscopes, not the tops, so they sit down inside the rim of the hatch. The three rings (photo 63) fit together perfectly (64, 65) and then the transparencies are glued in place (66); unfortunately the sprue attachments are on the outer side rather than the mounting side, but then again, most people will either close the hatch making them completely invisible, or if leaving it open, insert a commander figure. From studying photos of a real hatch it seems that a ring is missing from the inside of the hatch rim, so this was added from half-round strip (photo 67). The fit of the cupola top is good, but some small gaps remained to spoil the very square appearance that is apparent on the real thing, and these were treated with some filler (photo 68). In all my photos this cupola remains unglued for later painting purposes.
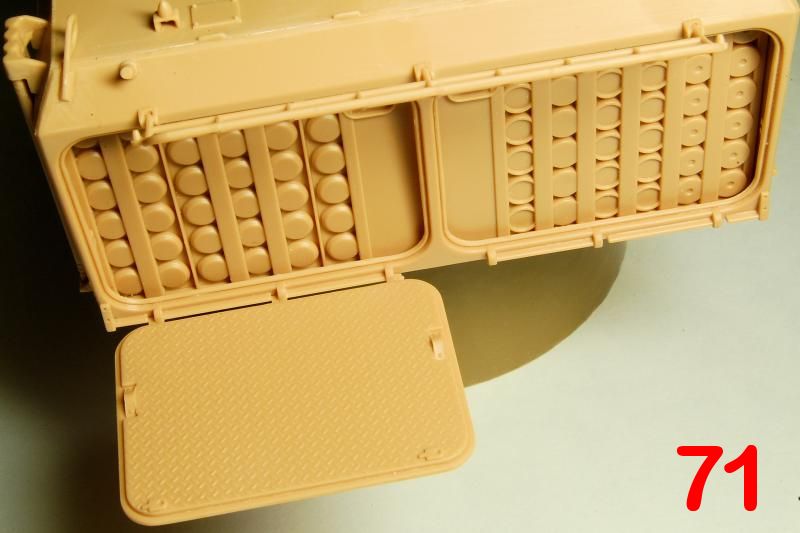
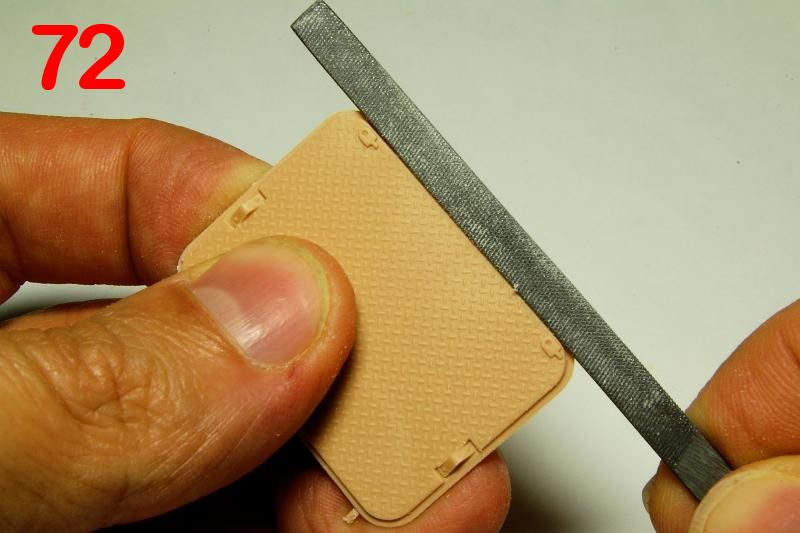
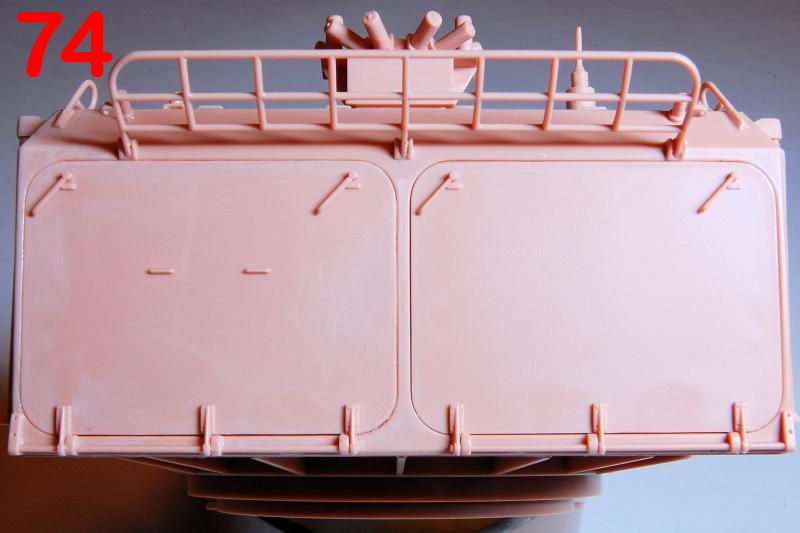
I thought the view of the ammunition racks wasnt good enough to be worthy of display without some considerable extra work (though some of that could mainly be a case of careful painting) and so opted to close them up. Photos of the real thing show the rear doors to be very flush fitting, so I did some work to thin down the edges to get them to seat deeper in to the aperture (photo 72, 73). Contrary to what is shown in the instruction, with the doors closed, the four handles should all sit at about 7 to 8 oclock, rather than 12. (photo74). Take care not to mix the doors up, the left door has some small loops in the centre which could be replaced with wire. Theres a little more metal detail on the rim of the other hatch (photo 64 [24]) and at the tops of the barrel cleaning rod brackets.
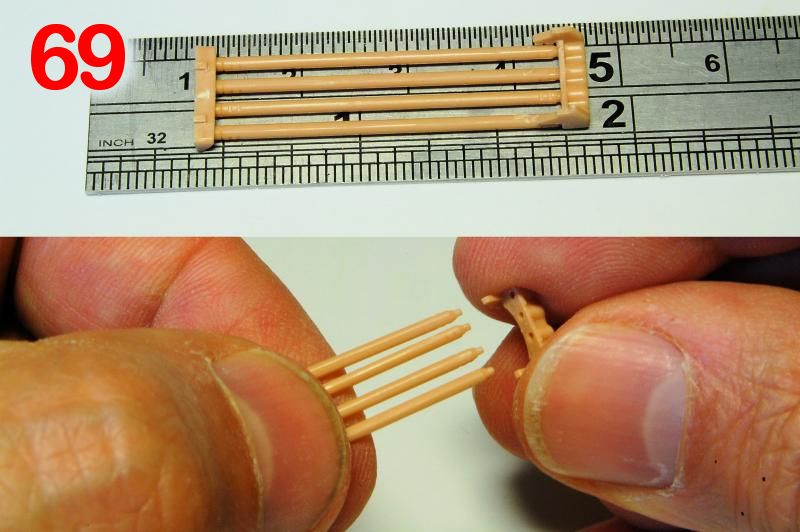
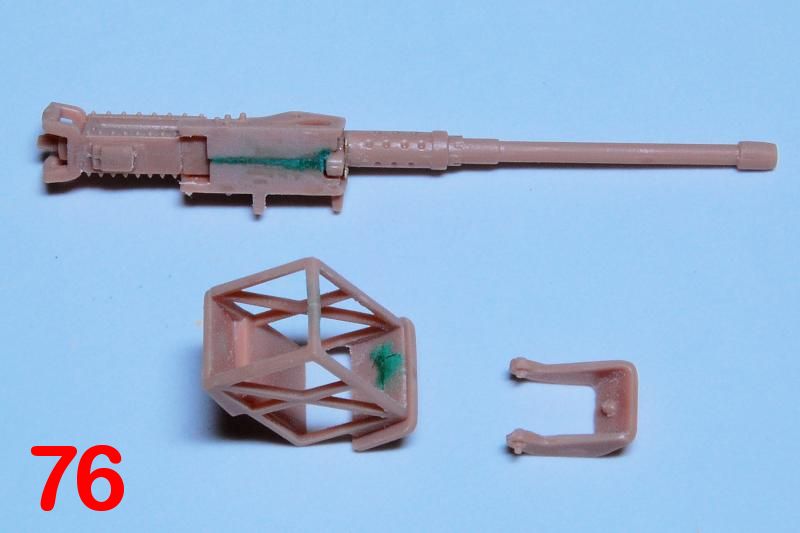
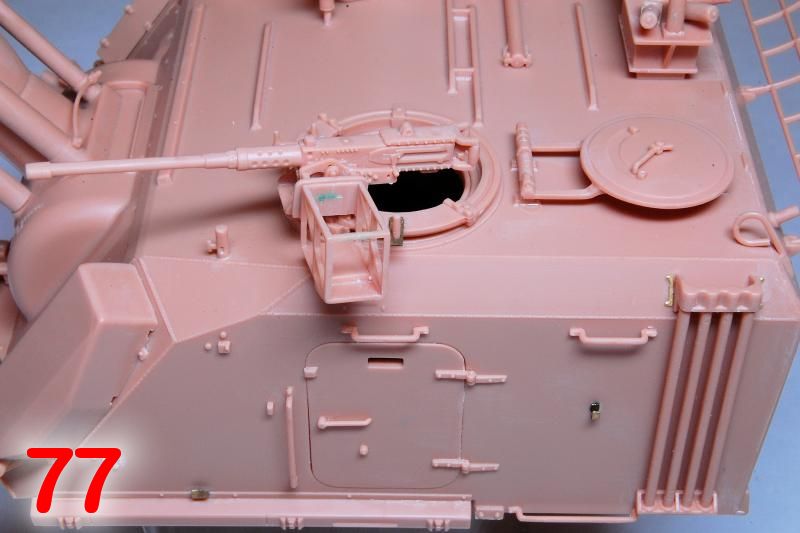
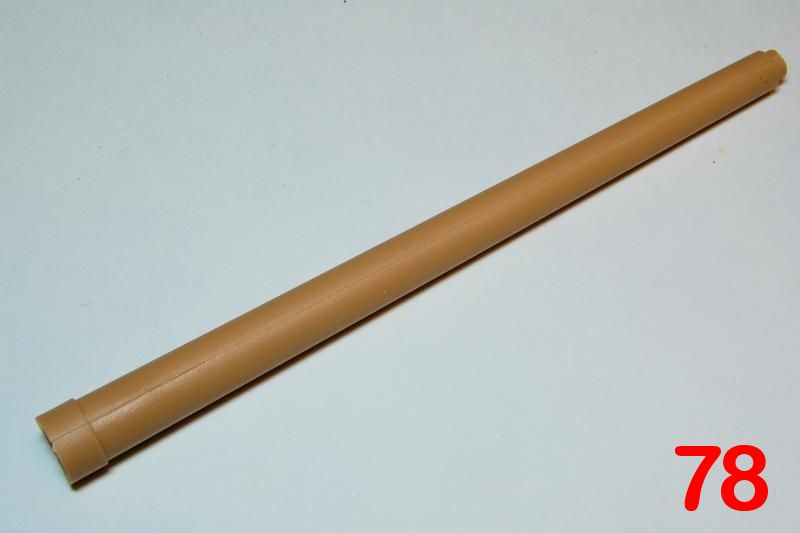
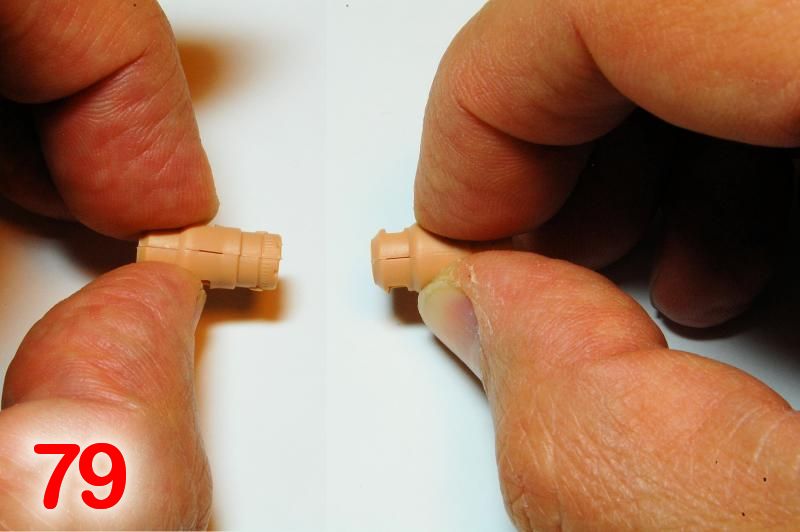
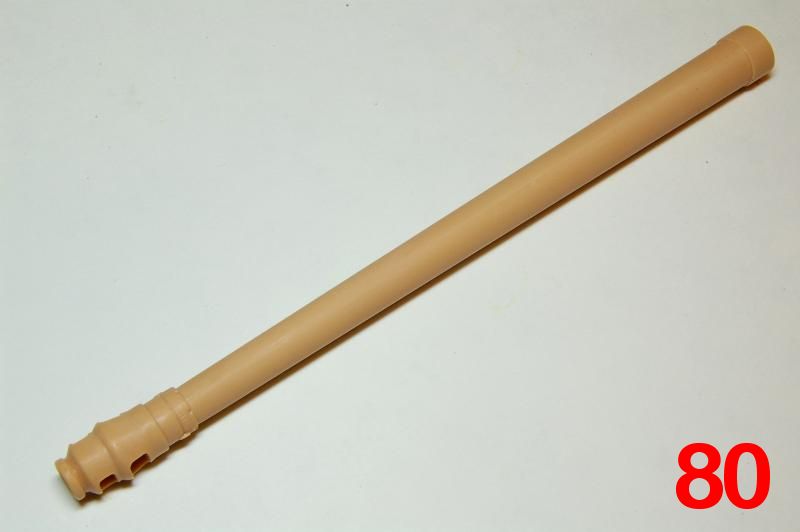
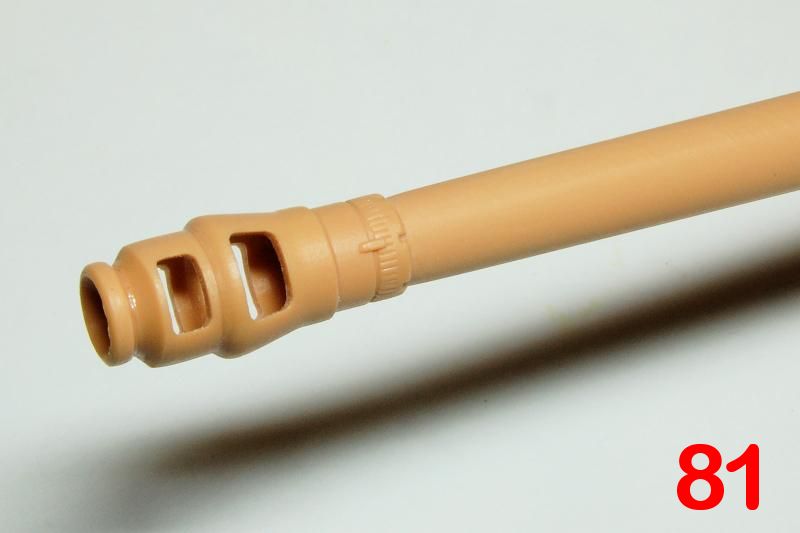
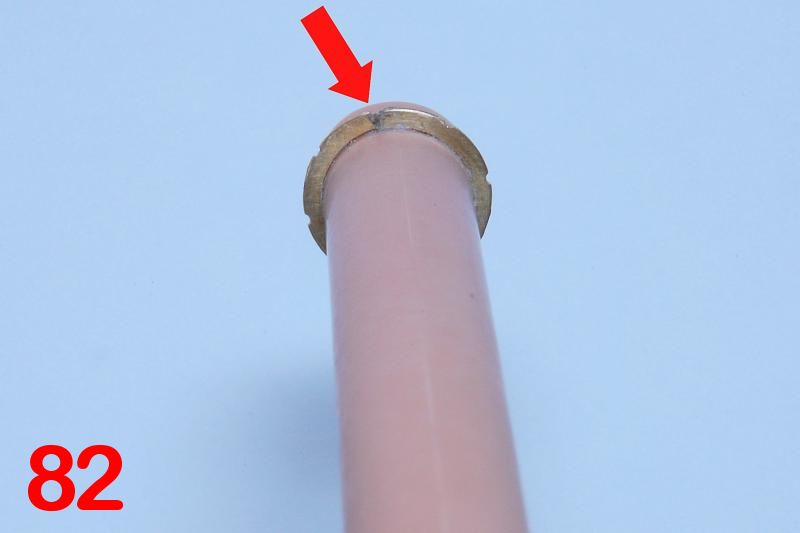
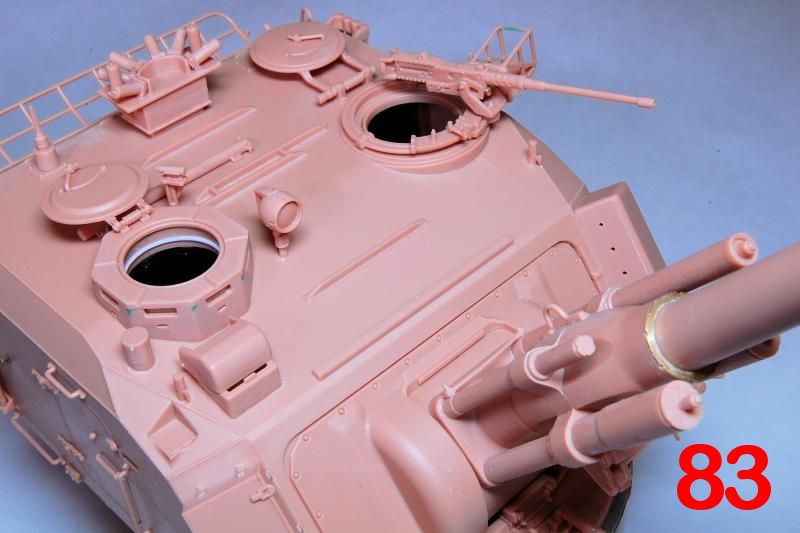
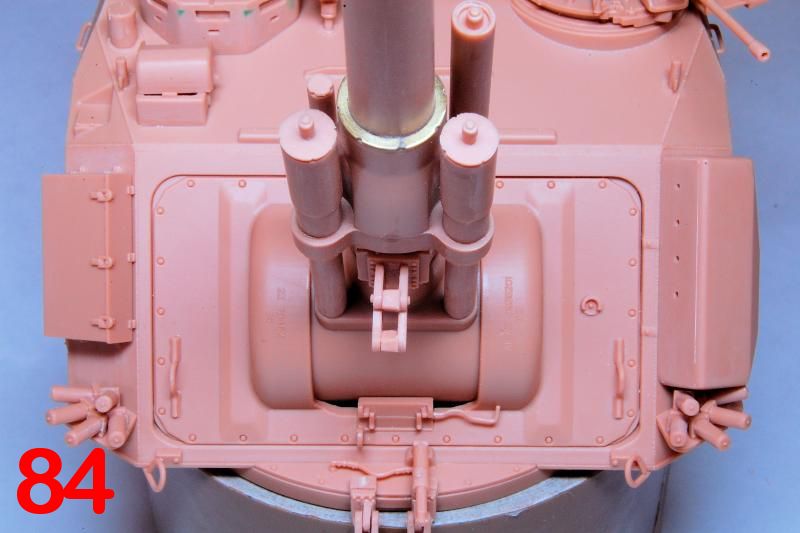
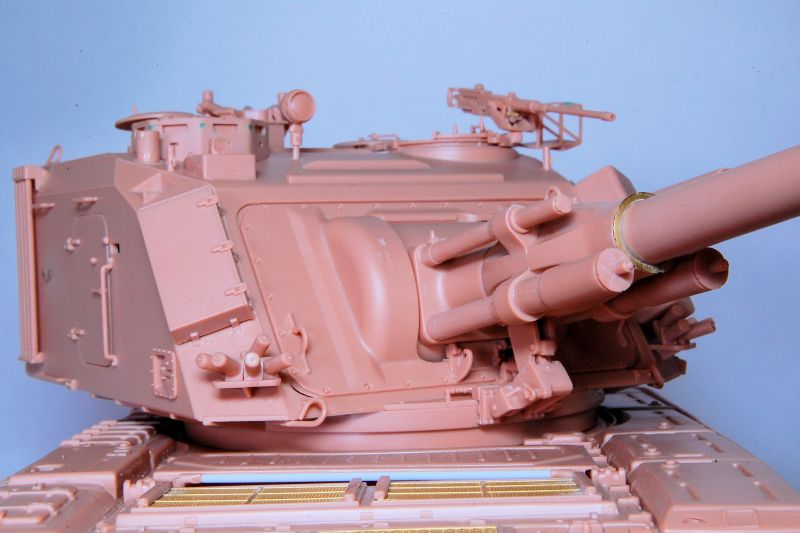
The detail on the .50-calibre M2 machine gun isnt the greatest, though I suppose it need not be fitted at all. Some filler was needed on a couple of the joins (photos 76, 77). The 155mm gun barrel went together well and looks acceptable in terms of straightness, rigidity and join (photo 78) while the muzzle brake had a small gap on either side (79) but it was possible to fill this with just liquid cement. I made a mistake in not threading the metal ring on to the barrel first before attaching the muzzle brake; with the brake in place the ring doesnt fit over either end, so rather than undo all of the work Id done with the gun barrel, I split and re-joined the ring and positioned it underneath when fitting the gun barrel (photo 82, 83, 84). The gun barrel fitted so tightly that it could surely be fitted after painting if desired. One possible inaccuracy is that the barrel appears to taper along its entire length, while it seems to me that on the real thing there is a straight cylindrical sleeve for about a third of its length, this being the part that is unpainted and part of the recoil mechanism.
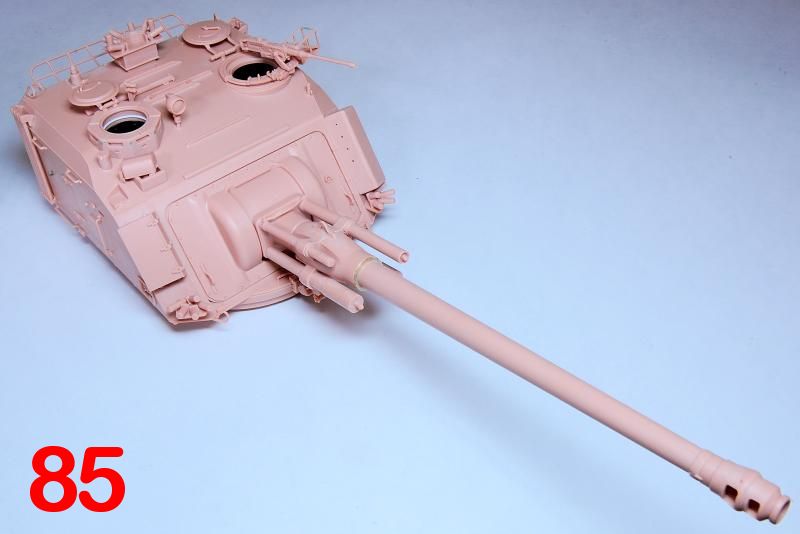
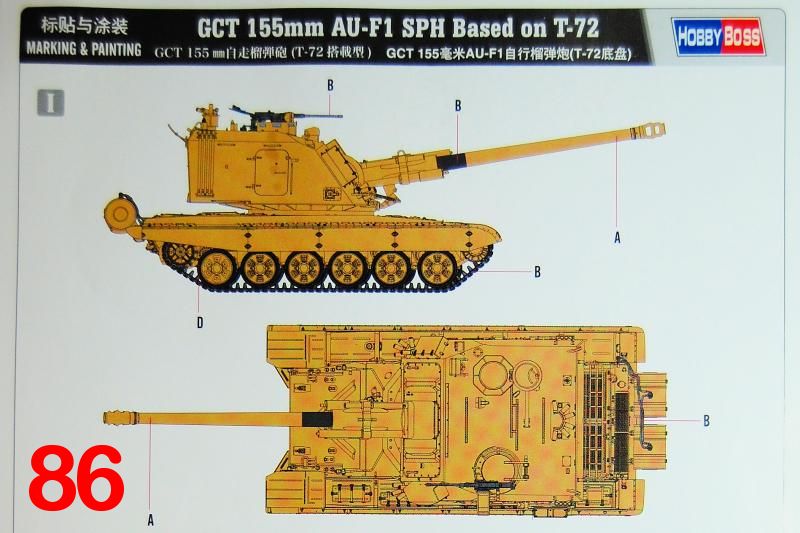
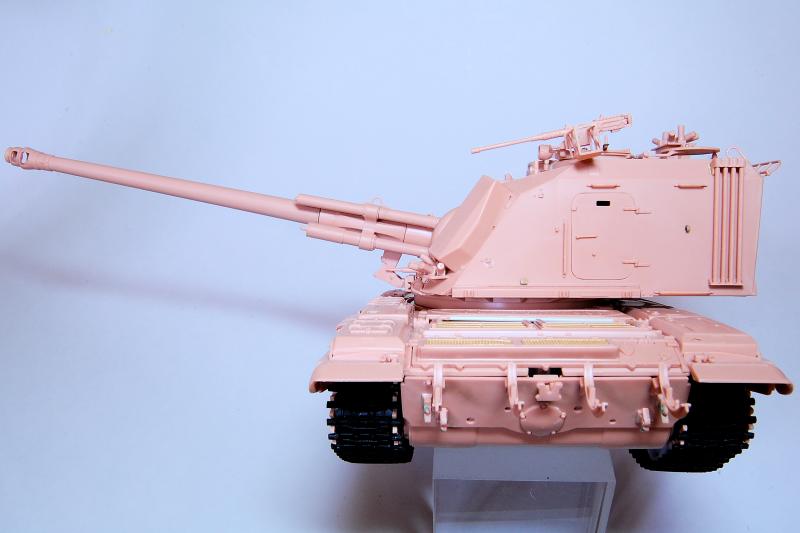
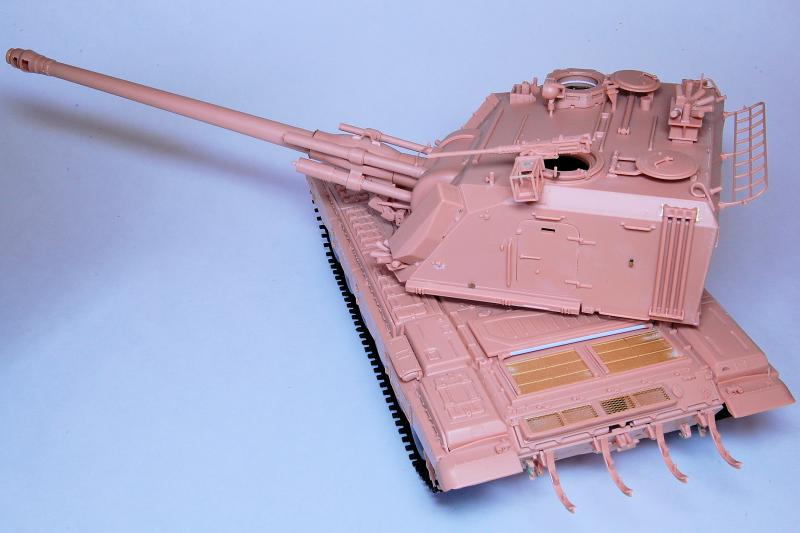
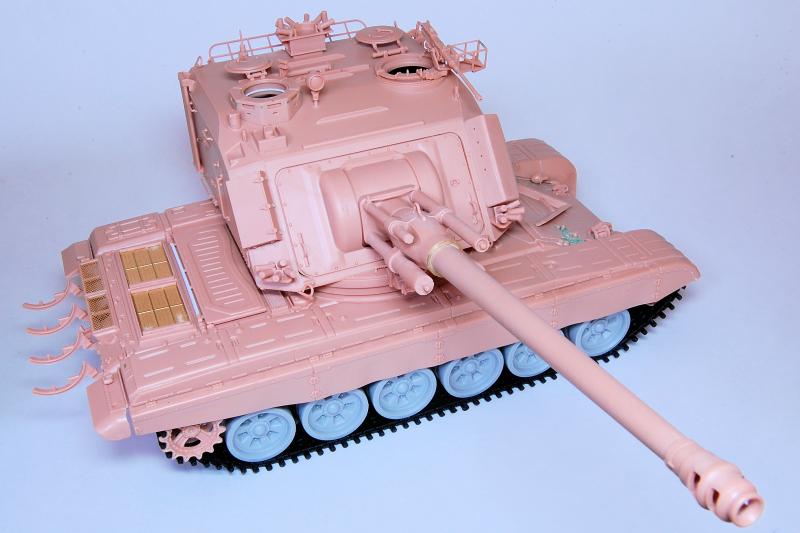
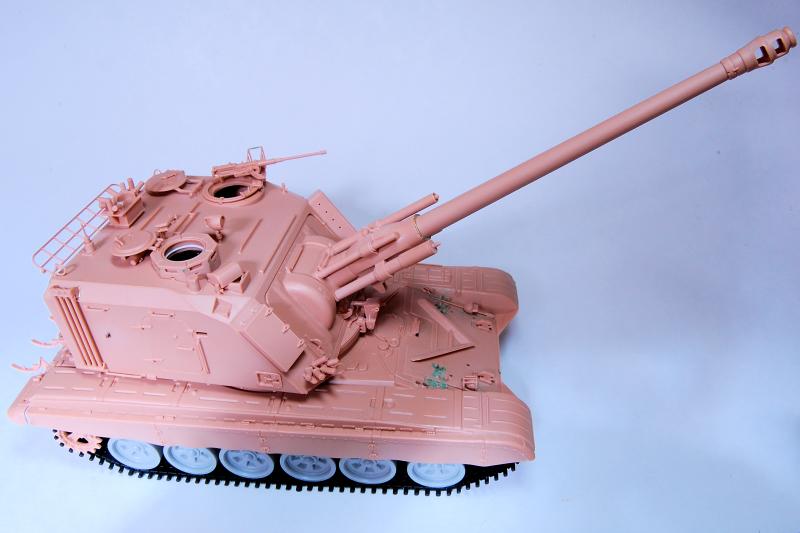
With that the turret is complete (photo 85) and all that remains is to mount it on the T-72 hull we made earlier. As for painting, the colour guide (photo 86) gives an overall sand finish as per the arms fair example, with just the recoil section of the barrel, the .50 cal, and the fuel lines being picked out in black; no decals are included.
Conclusion
So a kit with various contradictions: the turret and gun are very nicely moulded, with crisp detail and excellent fit and just a few minor issues regarding small gaps; the T-72 hull itself is from one of Trumpeters early efforts and although the major parts look acceptable, the small details go from rough to very rough and some work on the glacis plate in particular will be needed to get to a standard that complements the turret. On the other hand there is the inclusion of the etched screens that certainly lift the rear end of the T-72, while at the same time, the turret, while well detailed on the outside, features no internal detail to speak of, other than the bottom ends of the periscopes and a couple of details on the insides of the doors. Although all the doors and hatches can be positioned open, its not that inviting, particularly in the case of the side doors; as described above, leaving the rear doors open is an option that may well look OK once the ammunition racks are painted, but that internal detail is just a single moulded piece and is quite simplified.
In terms of accuracy, the turret looks pretty consistent with photos of real examples. Although almost all photos you can find of the GCT are on the AMX chassis, interestingly, in the case of the smoke grenade launchers and the rectangular locker on the left front of the turret, some effort has been made to provide parts that match the photo of that T-72 version at the arms fair: the smoke grenades are drastically different from the AMX examples, and the locker, rather subtly has three hinges rather than two, so kudos to Hobby Boss for bothering to make these changes for these parts it is sprue D that has been changed out from the AMX version kit.
As far as accuracy of the T-72 goes, well, theres a large body of discussion on T-72 kits, and I understand that this model has its origins in research carried out by Tamiya on an East German example that has a large slab of applique armour on the glacis plate. Of course the exact machine represented by this kit existed, it seems, only as a prototype, so the modeller can I suppose decide whether to represent that prototype, with its all over new sand paint job and no markings, or to go for what might have been, had GIAT secured the contract to supply the Indian Army, or some other army, with a large number of them. I expect theres a number of modellers with unbuilt T-72s stashed away and this could potentially appeal as a means of producing something a little more unusual looking. The tracks of course are thin and rubbery, and need replacing, the cheapest way being the Trumpeter links set.
Comparing with the review of the AMX based version, this kit would be considerably quicker to build, with 21 instruction steps rather than the 26 of the AMX (I guess Meng's AMX version is an even more involved build as it contains an interior). I cant help thinking that the enormous turret and long gun looks a bit more at home on the T-72 than on the AMX-30, with the Russian tanks slightly wider body and extra road wheel providing a chunkier mount. The finished model still manages to look impressive, despite the shortcomings. This kit can be picked up for around £30 which pitches it at the cheaper end of the 1/35 big armour market, although it is certainly the case that Hobby Boss took the cheaper option when it came to furnishing the tank parts.
References
Carl Schulze & Walter Bohm Rolling Steel: NATOs Self-Propelled Guns (Concord Publications, 2004)
Chars Francais Au-F1 Photo Gallery
Prime Portal Au-F1 Photo Gallery


Comments