Build Review
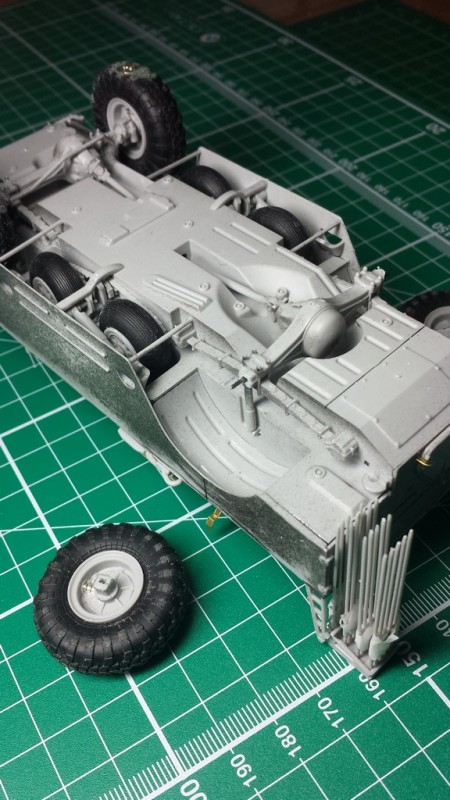
The first two steps of the instructions detail the need to make some new holes in the hull and fill others. This is due to the differences between the NBC variants of the BRDM-2 including externally mounted tools, spare flag poles and air intake fittings for the interior NBC detection equipment. The axles and suspension parts are fitted following this, although not the wheels at this stage. I felt that
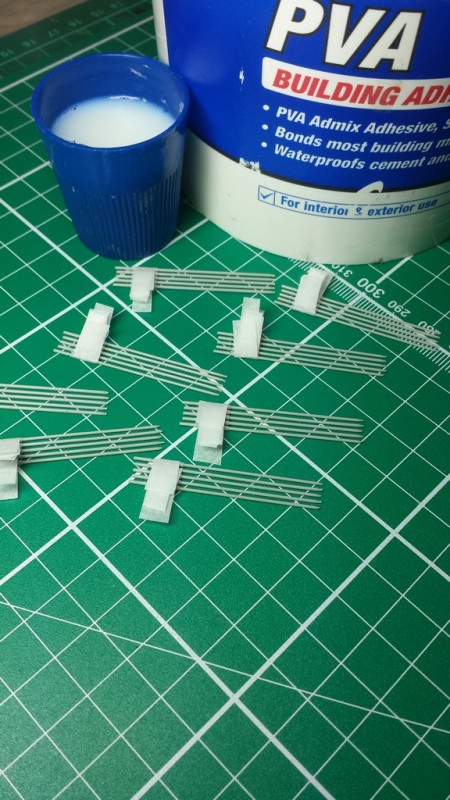
Trumpeter had over complicated things on quite a number parts of this kit particularly where perfect alignment is required, the axles are an example of this. The majority of kits will have one part; or two half part axles at most, this model has 4 part axles. They comprise of two central half parts (differential) and two end parts extending from this. Despite my best efforts there will no doubt be fitting problems resulting in the vehicle sitting unevenly when the wheels are fitted. The central un-ditching wheels are quite complex, but look great once compete Im sure with some careful building (including making working shock absorber rods) they could be made workable.
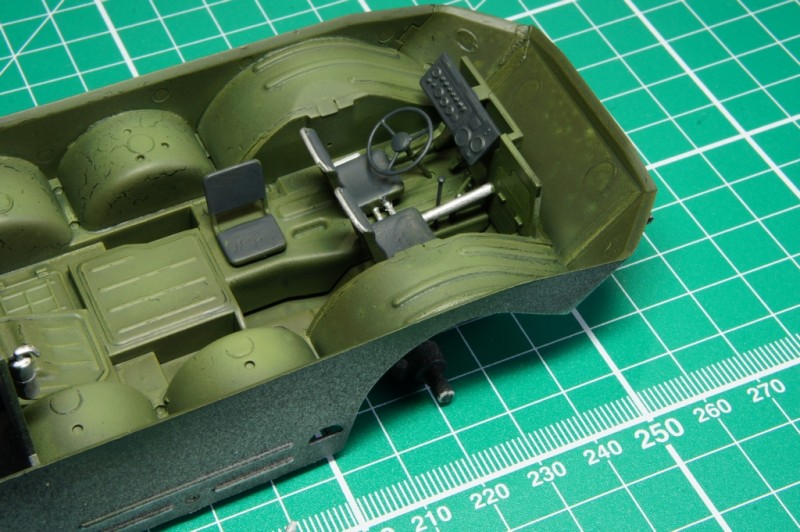
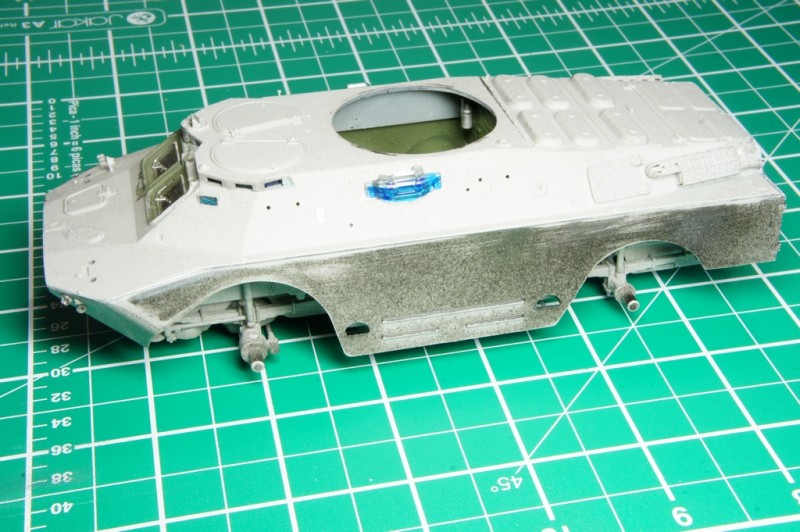
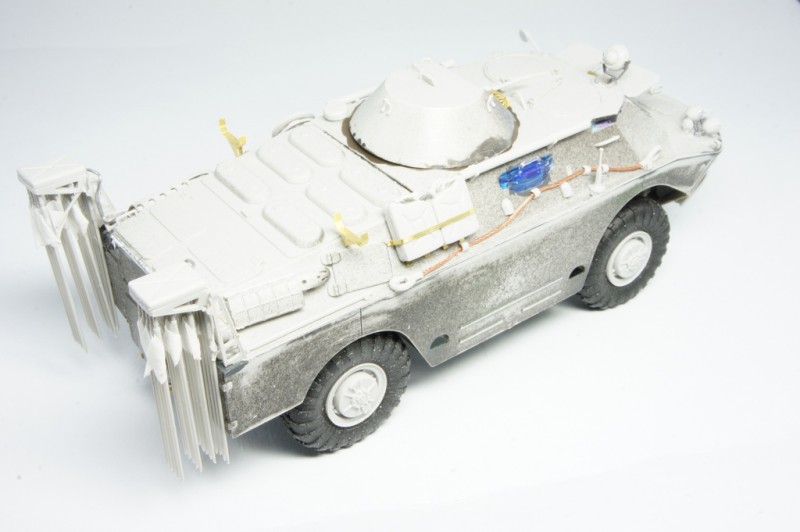
With the axles and driveshafts fitted, the spartan interior parts were fitted; as mentioned during my in-box review, none of the NBC equipment is included, however unless youre going to open up the two upper hatches the interior is 99% hidden anyway. With this in mind I held off any interior detailing and simply painted the lower portions of the interior a dark green and the upper parts light grey/white. I picked out the seats and steering wheels with matt black and felt that the interior was complete at this point. At this stage I also jumped ahead and completed the turret interior, allowing me to paint the entire interior prior to hiding it away.
The upper hull is the next area of the model that I think is overly complicated. I am not sure why
Trumpeter decided to take the route of a multipart upper hull (complex shapes?) but again, making up this part from a number parts will (and did) cause fit problems later on. The front and rear quarter panels on the real vehicle are separate parts, and should display weld lines where they are fitted to the hull sides. These are not represented in the kit and I ended up having to use filler and sanding the joints smooth to get a good looking fit, here the instructions would have you start to fit the exterior hull fittings and fixtures. As I had expected fit problems when putting the upper and lower halves together I decided to complete the hull at this stage, ensuring that Id fitted the interior clear parts, including periscopes first. Fitting the upper and lower hull halves proved problematic, as expected. I ended up using multiple clamps and a lot of super glue, followed by filler. Leaving the exterior parts off proved to be a good decision as I spent a lot of time here handling the model and filling gaps.
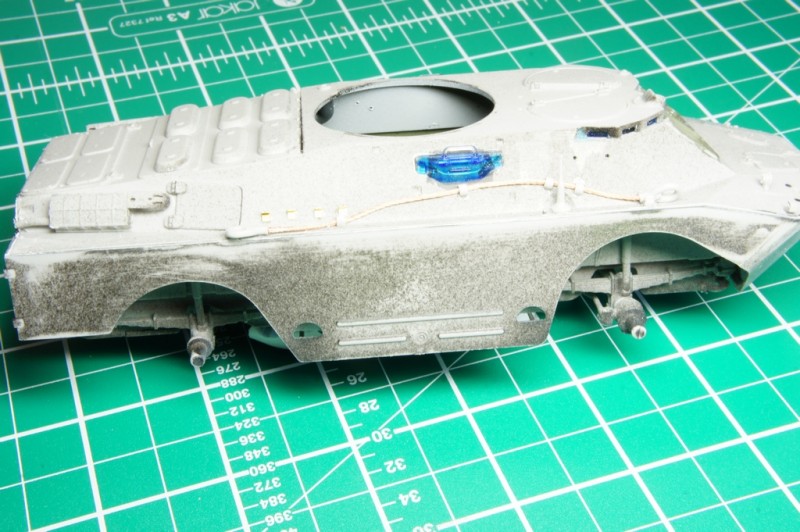
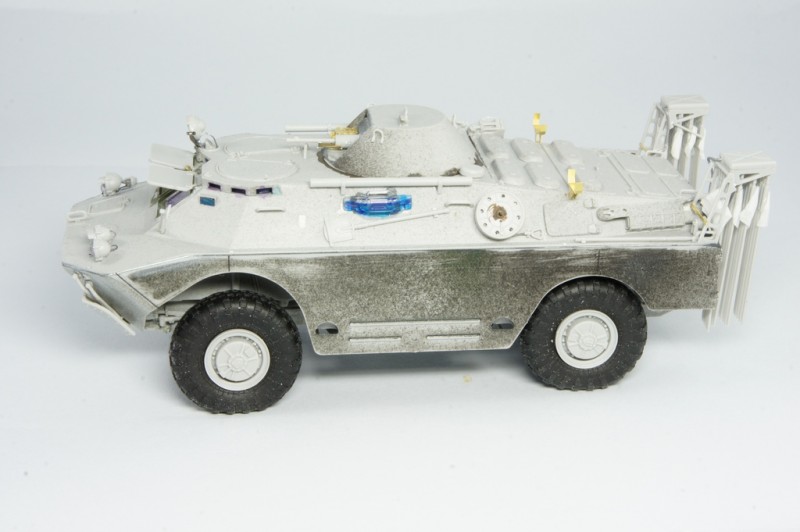
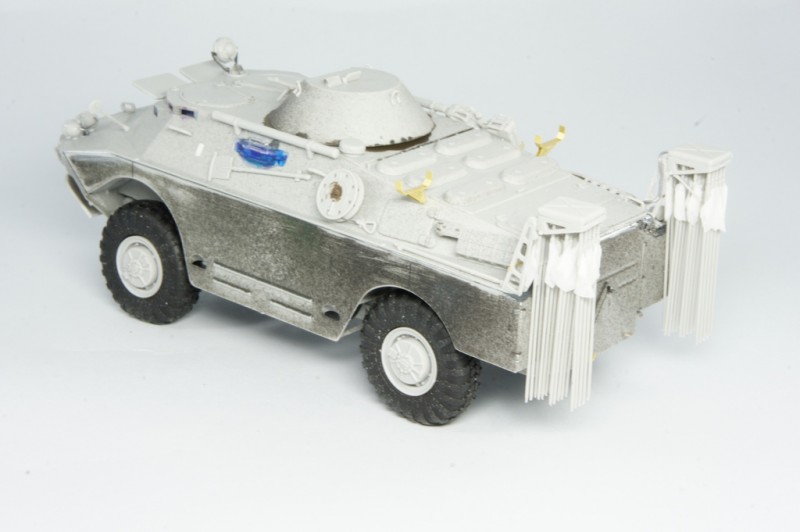
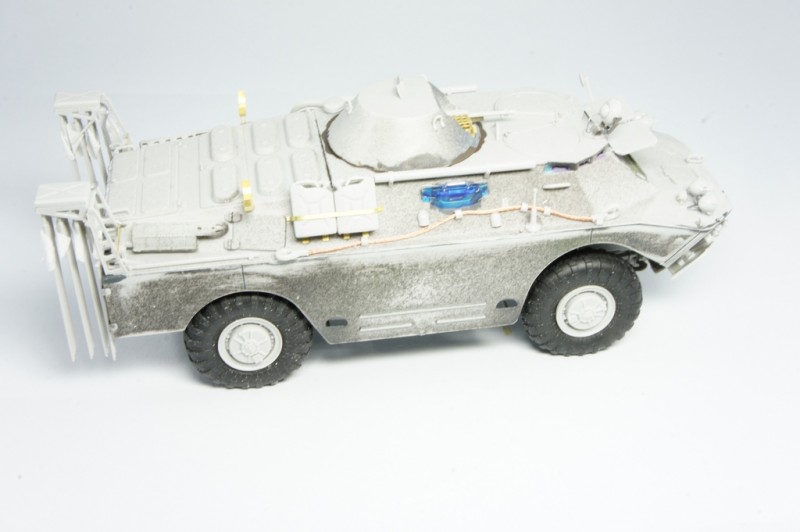
With the body of the vehicle now complete the rest if the instructions deal primarily with the exterior hull fittings. There are some quite small parts here and I confess that a few of them are still resident in my carpet! Theres a lot of scope for detailing here and I am sure that any of the BRDM-2 etched brass sets will have parts that could be used. Unfortunately the mounts for the headlights are wrong the lights should mount onto brackets, not directly onto the hull. I did not correct this but did add some electrical cables from a hole directly in the centre of the light cluster. When putting the wheels together I left out the rubber bungs accidently, however the fit is reasonably tight anyway and any give will allow me to compensate for the axle fit problems mentioned earlier
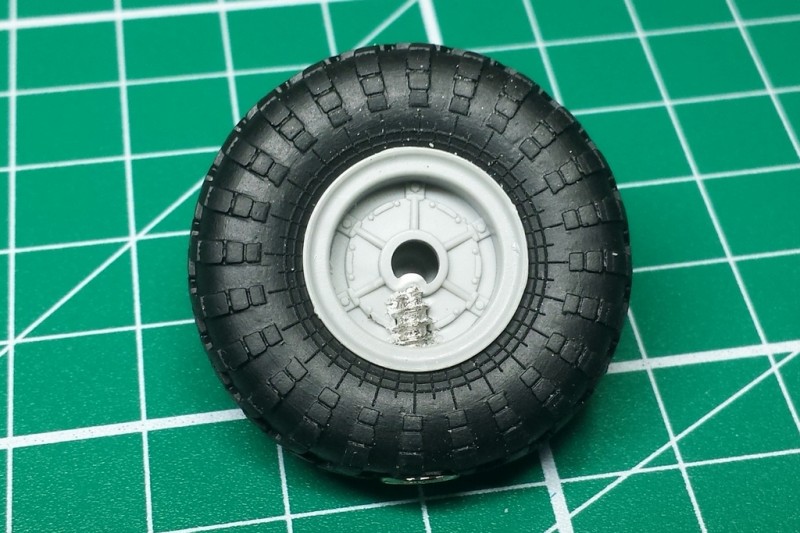
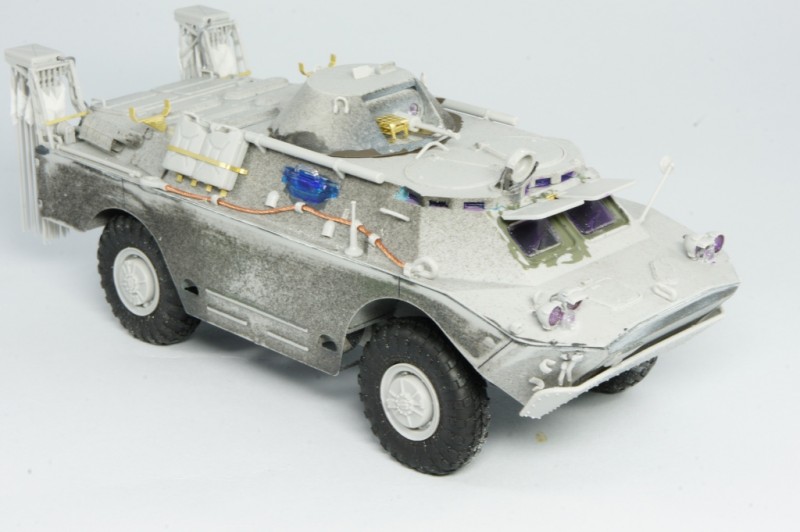
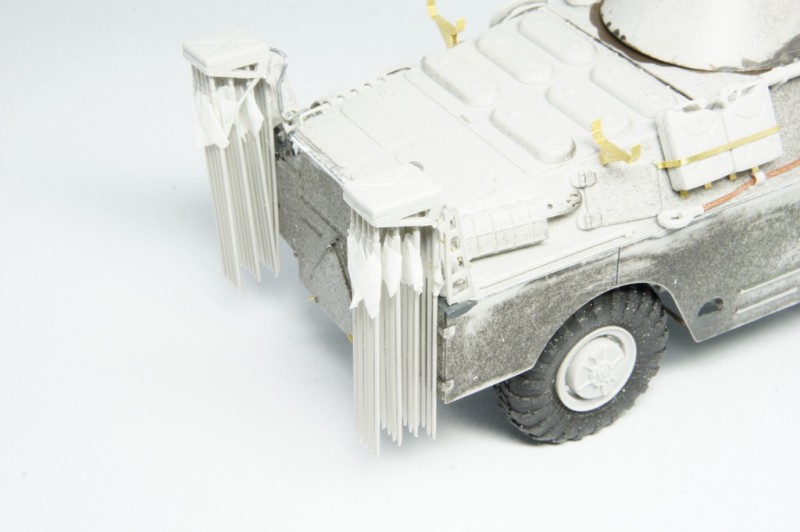
The front splash plate is quite difficult to fit, the instructions are not very clear here and I ended up gluing the main plate to the front hull, then bending the arms to fit afterwards. I added some flags to the flag poles as the
Trumpeter items looked a bit flat and too tidy, I made these from small squares of baking parchment. I first glued these to the individual poles with CA; and then soaked them in a water / white glue mix and shaped the flag with a toothpick. I also added the prominent cable between the squib firing box and cable outlets just above the exhaust silencers, these are very visible on walk around pictures.
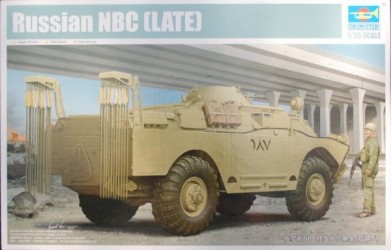
I fitted the vinyl tyres to the wheel hubs and then drilled a hole through the bottom of the tyre and up into the hub. Through this I screwed a small wood screw this pushed the bottom of the tyre upwards and gives a good impression of a weighted tyre. The only drawback is that you have to countersink the screw head to get the wheel to sit flush on the ground. When I fitted the wheels and managed to snap both extensions on the rear axle. As mentioned before, I thought that the whole axle design was a bit overly complicated and so it proved here. I drilled out the inside ends of the extensions and pushed a thick piece of piano wire through the differential portion of the axle. To this I glued the end extensions; resulting in a much stronger bond.
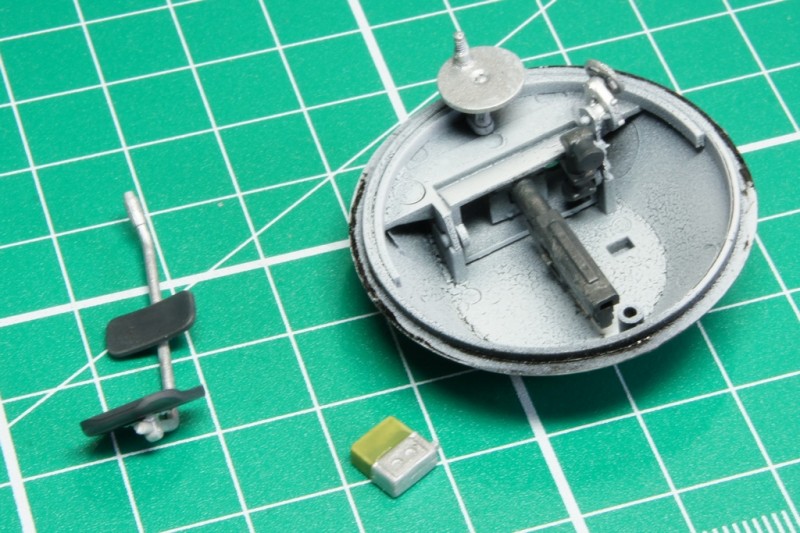
The turret exterior is very basic (as per the real thing), the flare firing rack is made up of etched brass parts but does not contain any flares. A strange omission considering the rest of the model is depicted 100% complete. The MG gun needs a bit of sanding to remove seam lines and the end also needs drilling out.
To finish off the build I added the missing weld lines, using Archer Transfer weld lines, above the wheel arches and front end. Ive found when using the Archer weld lines, dipping them in Future/Klear after soaking them results in a much better surface bond. I also added an electrical cable to the rear of the searchlight into an inlet on top of the assistant drivers periscope.
Conclusion
With painting to follow, I think that
Trumpeter have taken a step backwards with this one it reminds me of an old
Dragon kit! The axles and upper hull, both parts that need to be full aligned to result in an accurate finish, are overly complicated and end up causing fit problems later on. I think I got away with a bit of filler on the hull parts; but the 4 wheels arent flush on the ground.
Well, I tried to build a model out of the box and failed! Although I will say that it is the most out-of-the-box model Ive built in many years. You could go all out and super detail this kit, add all tool clamps and replace the flag poles; and also put flares in the turret rack but Im afraid I lost interest after the hull and axle dramas.
Please see my inbox review
HERE Live links
Please see my photo feature
HERE Live links


Comments