The Academy Models Israeli Magach 7C Gimel (Model number ACD 13297) caught my attention primarily due to its looks. Like most Israeli Defence Force (IDF) non indigenous Main Battle tanks (MBTs) the IDF loves to enhance their machines based on experience and practicality. To me this makes modelling Israeli armor a particular pleasure, the final result is usually an armored vehicle that has the unique features of an older AFV turned into something new.
History
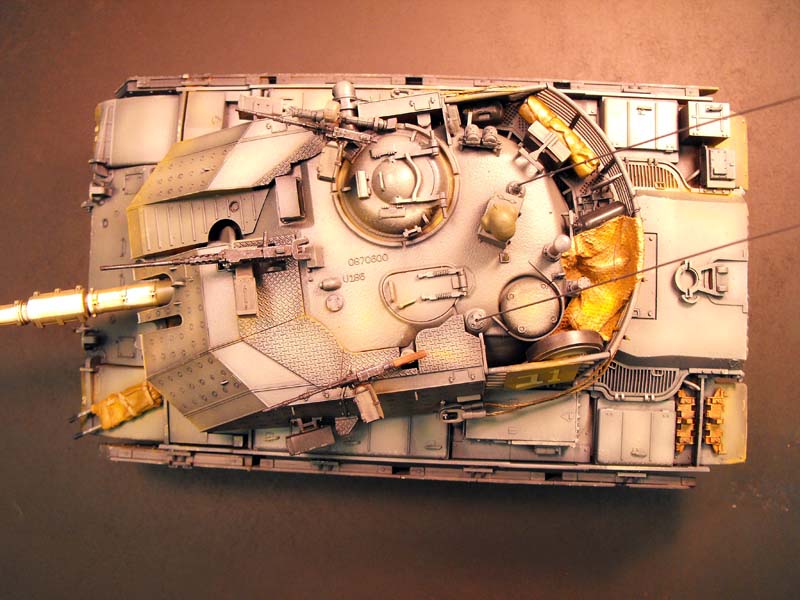
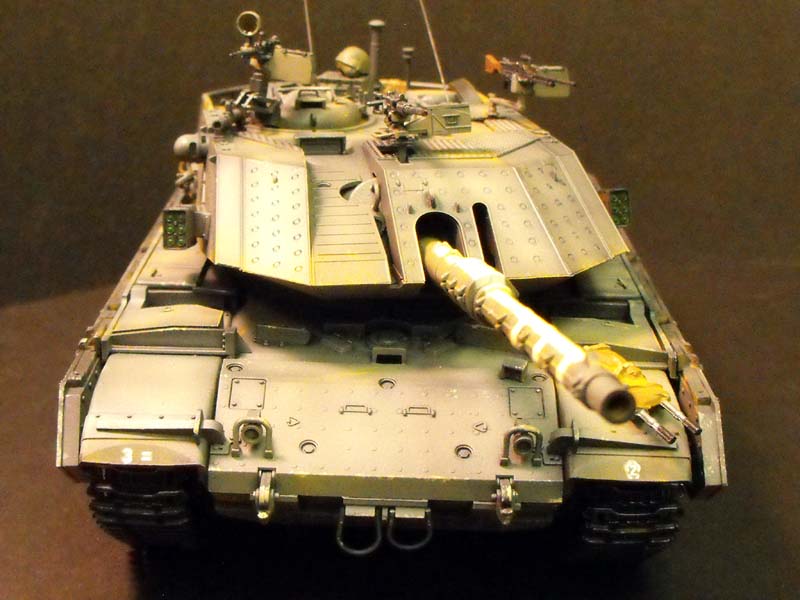
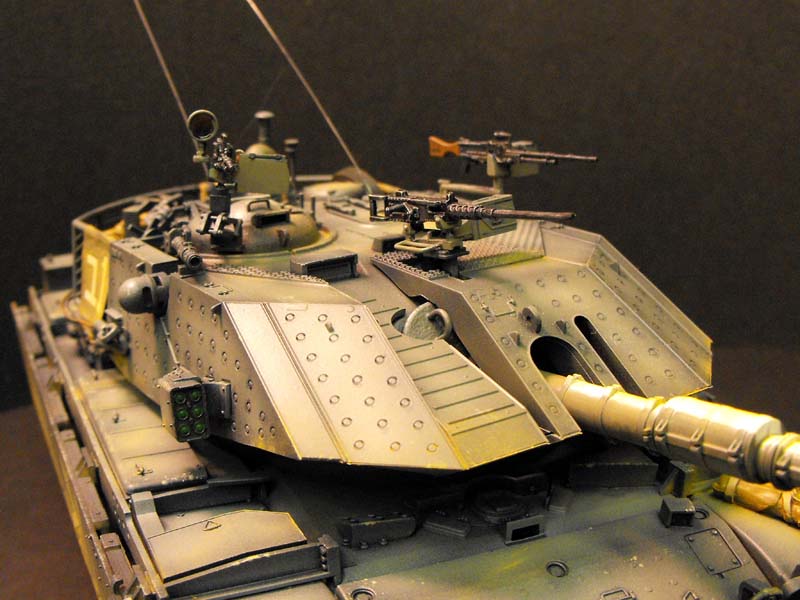
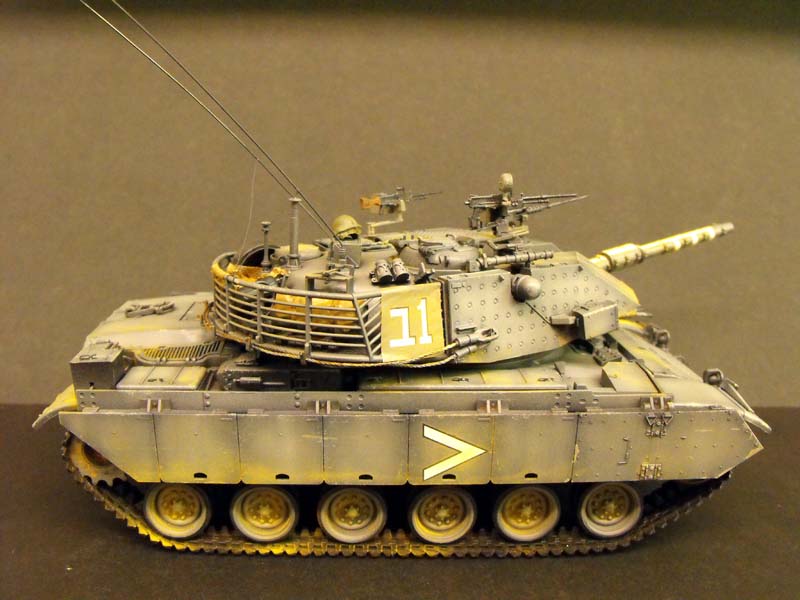
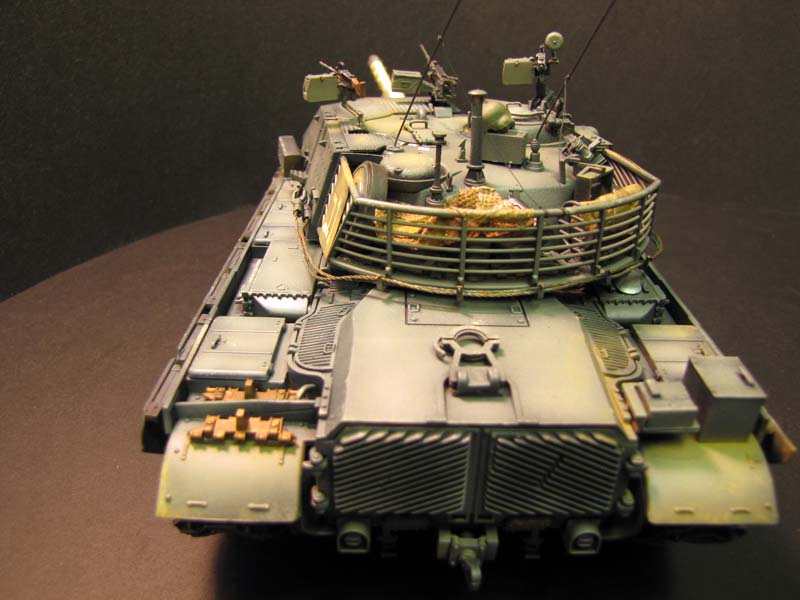
The Magach 7c Gimel is an Israeli Defence Force tank based off of the American M60 Patton tank. It saw service from the mid 1990s, although the Magach 7C has been gradually been replaced with Israelis indigenously produced Merkava, the Magach still sees service with the IDFs reserve forces. One of the most noticeable visual differences of the 7C from the earlier models is the additional sloped frontal armor attached to the turret. The tracks are from the Merkava Mk 1 and the suspension has been beefed up for improved off road capability.
The Kit
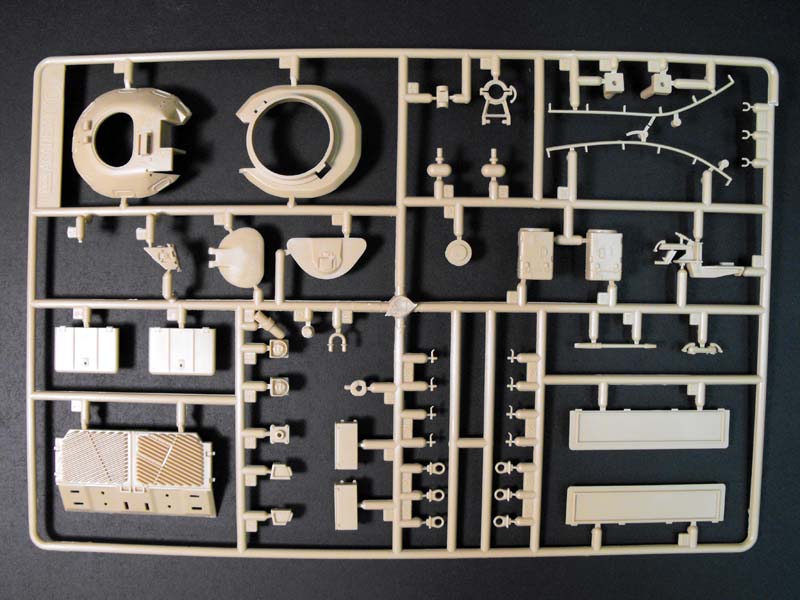
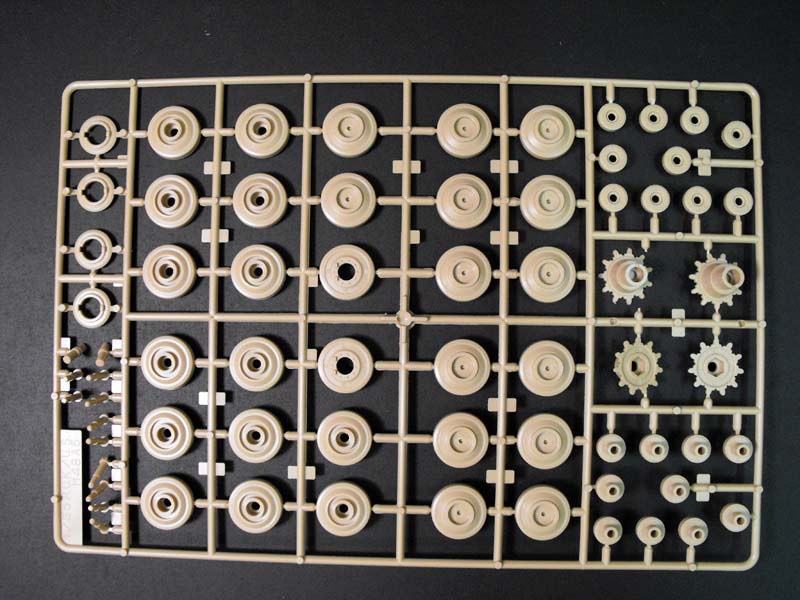
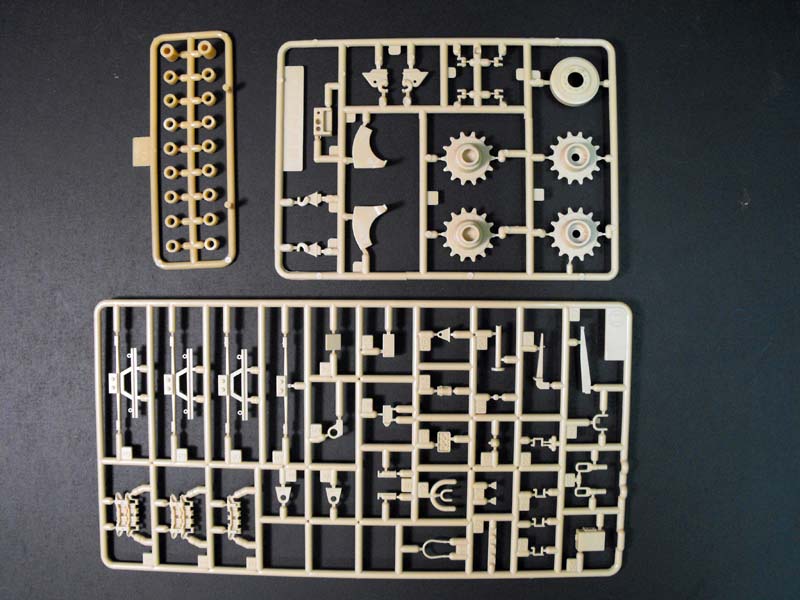
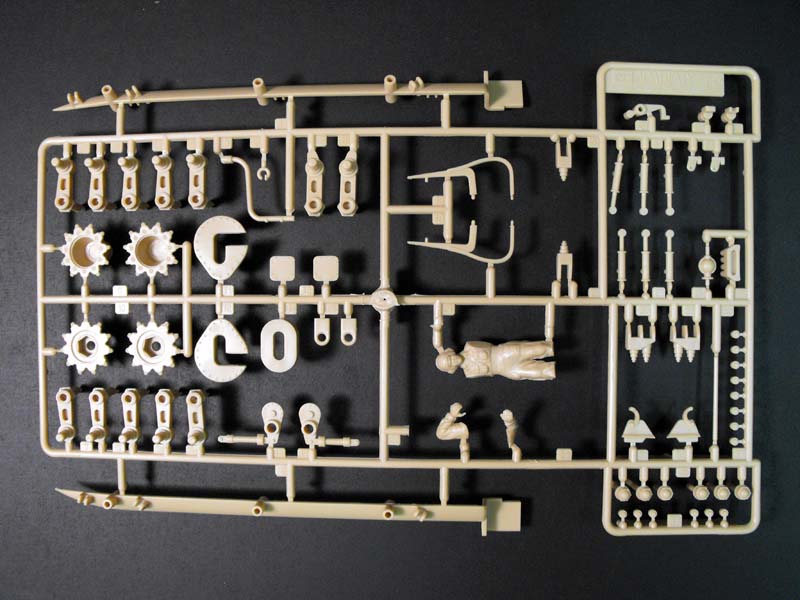
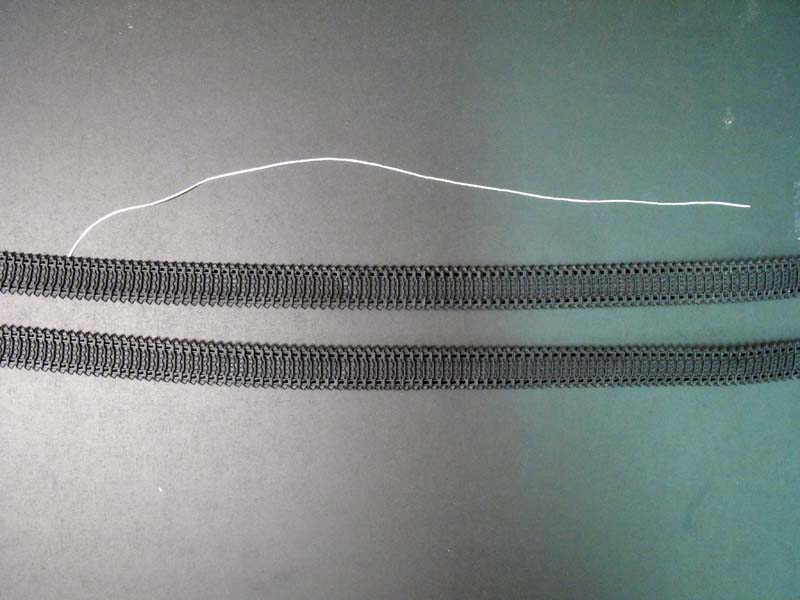
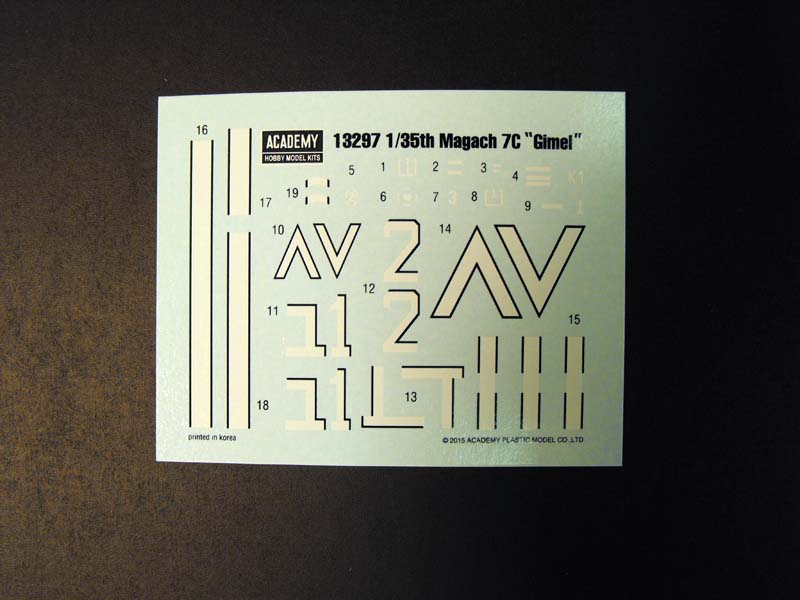
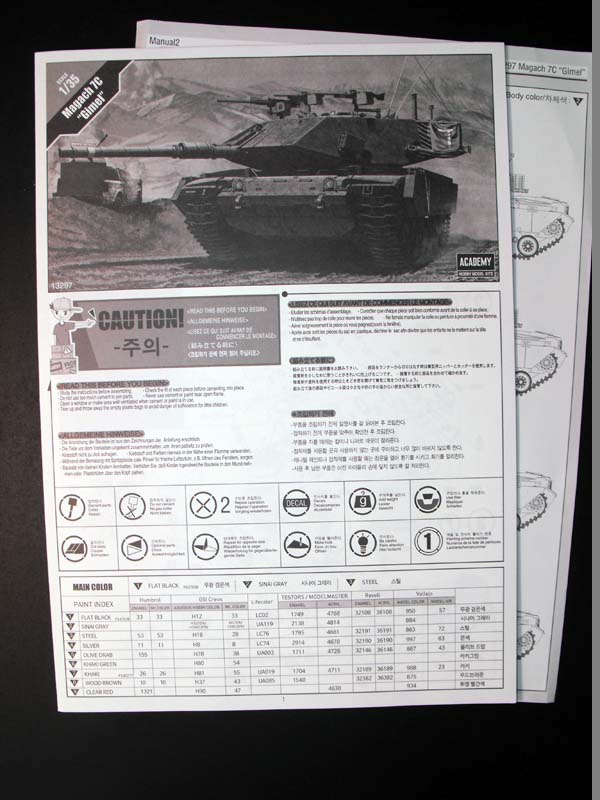
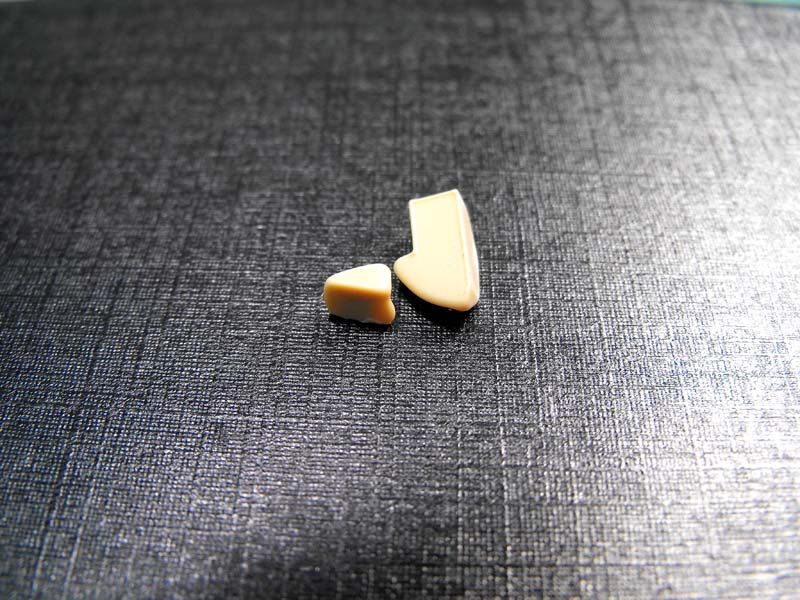
The box art is excellent with a very nice painting done by Kim Jeonghwan. The box sides show multiple variations of the AFV with the different markings but no specific unit is called out. The Academy Models kit consists of an upper and lower hull, poly-caps for the running gear, a small decal sheet, two flexible tank tracks, white string for the tow cable and ten putty colored sprues. All of the sprues were individually bagged. One sprue is duplicated. I did find two plastic pieces floating around one of the bags, I put them aside to see where they would go later but neither one was actually used. Several of the sprues are from older kit releases while five of the sprues are designed specifically for the Magach 7C. The following is a breakdown of each sprue and its original origin.
Sprue A 1998 ROK/US M48 A5, this consists of the running gear and wheels.
Sprue B 1990 M60A3.
Sprue C 1998 M60A1.
Sprue E 1993 IDF M60A1 Blazer.
Sprue H 1993 IDF M60A1Blazer.
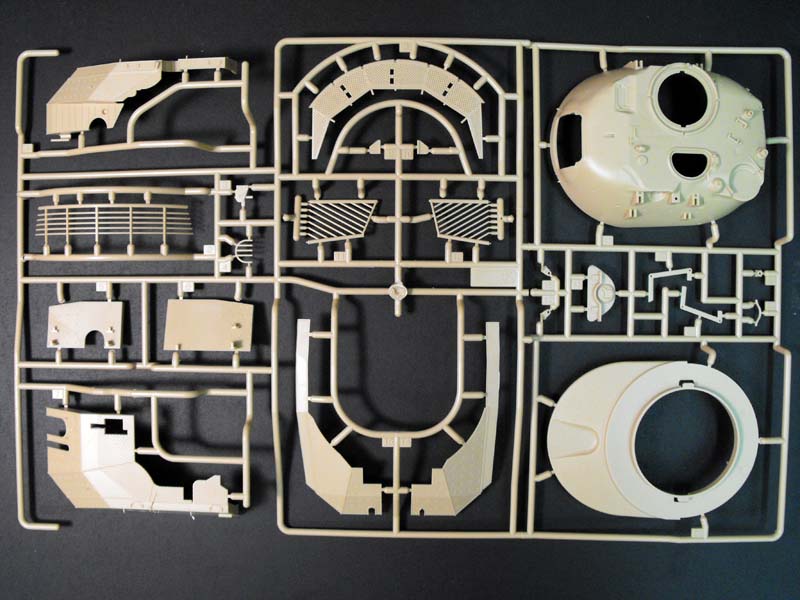
Sprue S - Specific to the Magach 7C, I could not find a date on this sprue or any of the sprues specific to the Magach 7C.
Sprue T Specific to the Magach 7C, no date.
Sprue U (times 2) Specific to the Magach 7C, no date.
Sprue V Specific to the Magach 7c, no date.
At the end of construction your extra parts box will be slightly fuller due to all of the non-used parts.
The instruction sheet consists of four black and white double sided pages in a fold out format. Color call outs are for Humbrol, GSI Creos, Lifecolor, Testers/Model Master, Revell and Vallejo. There are a total of 15 build steps called out although I did not follow Academys order specifically. An additional double sided sheet is included, this consists of the sprue layout on one side and the decal/marking options for each specific vehicle on the other. A front and left side view of each vehicle is included. Academy calls this sheet the painting and decal placement but the actual color call outs appear throughout the instructions and not on this specific sheet, however the decal call outs are present.
The Build
I usually like to build as much of the model as I can before priming and painting. I prefer to use either Tamiya Extra Thin or Testers Liquid Cement (in the black bottle with a hypo looking applicator) for my adhesives. I also look ahead and try to complete my upper and lower hull in a way that allows me to address any seam issues and allows me to turn the model over without knocking parts off. I will use Academys steps for ease of clarity but will note where I deviated from these instructions. So with all that being said let me grab a glass of scotch, put some Frank Sinatra on my radio and lets start this build.
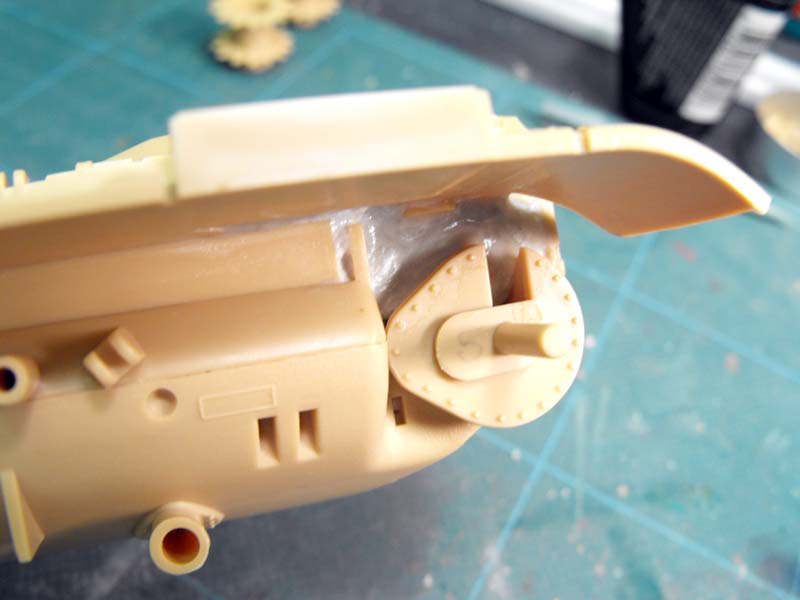
Step 1 This step starts the lower hull; it shows parts B1 and B2 that are temporary fixed with cellophane tape, I was at a loss as to why you would want to do this instead of gluing them, I looked ahead and could not see any reason not to glue them. I went the adventurous route and glued them on and suffered no ill consequences for doing it. A word of note at this step, the instructions show an overhead view of the upper hull and specific areas that need to be removed or filled, I missed this at first and figured out my mistake later in the build. If you do the requested parts removal now it might save you some head scratching later.
Step 2 Continues with the lower hull parts to include the shocks. I eventually came back to this step after I had attached the upper and lower hull and filled all of the seams.
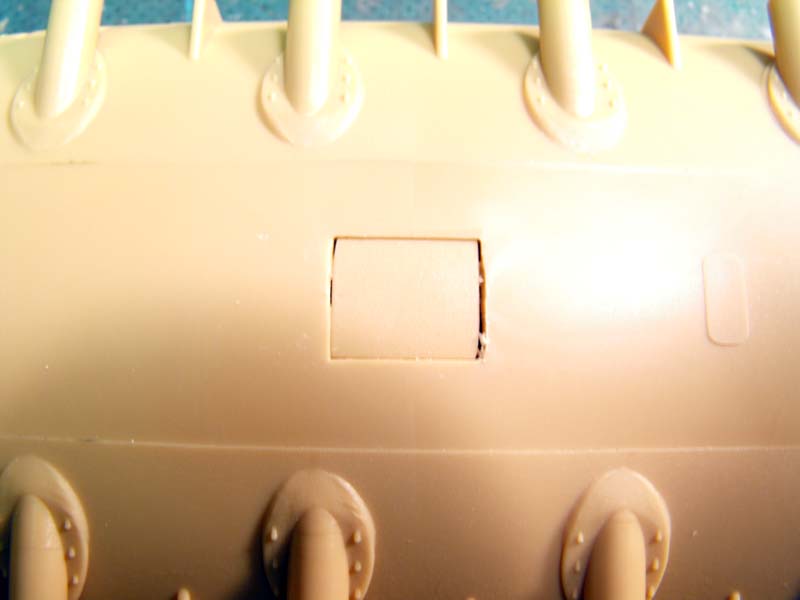
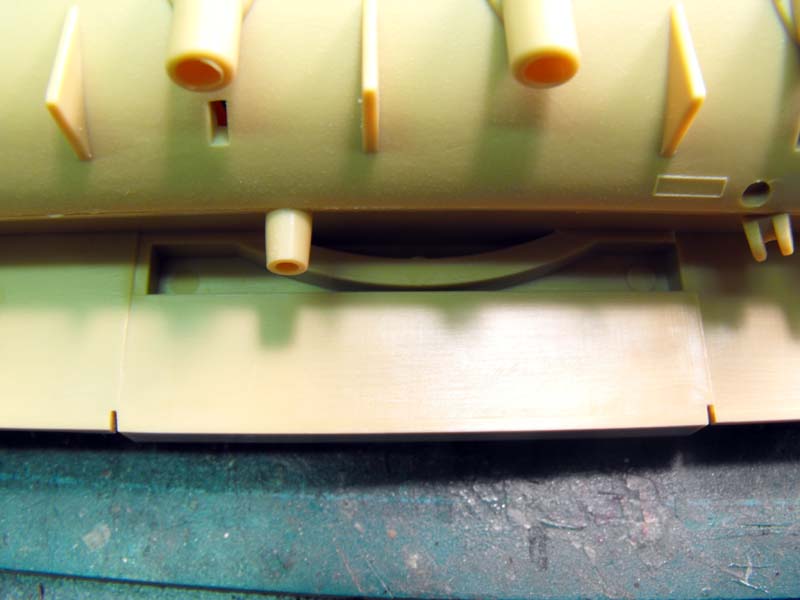
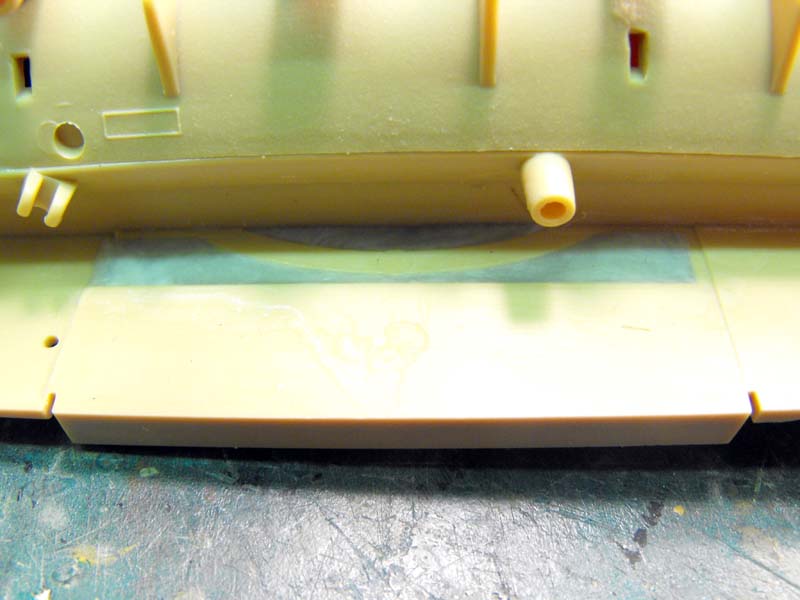
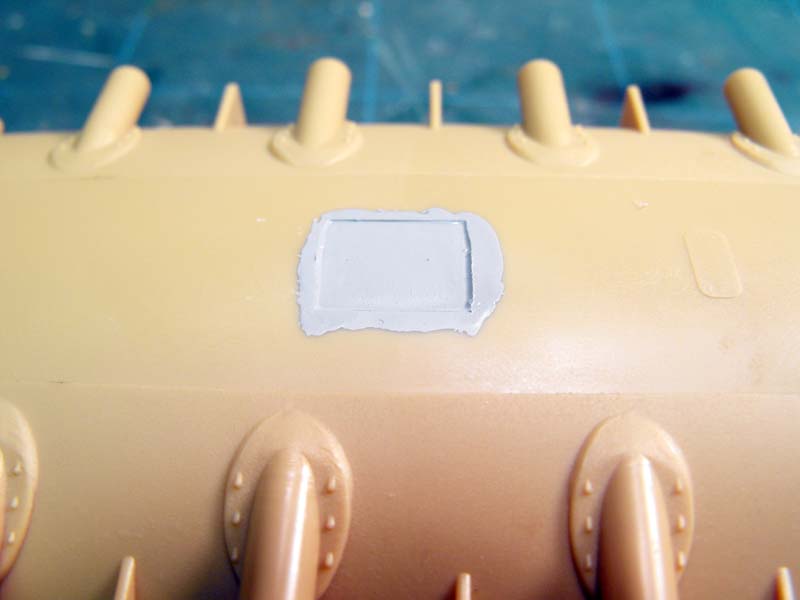
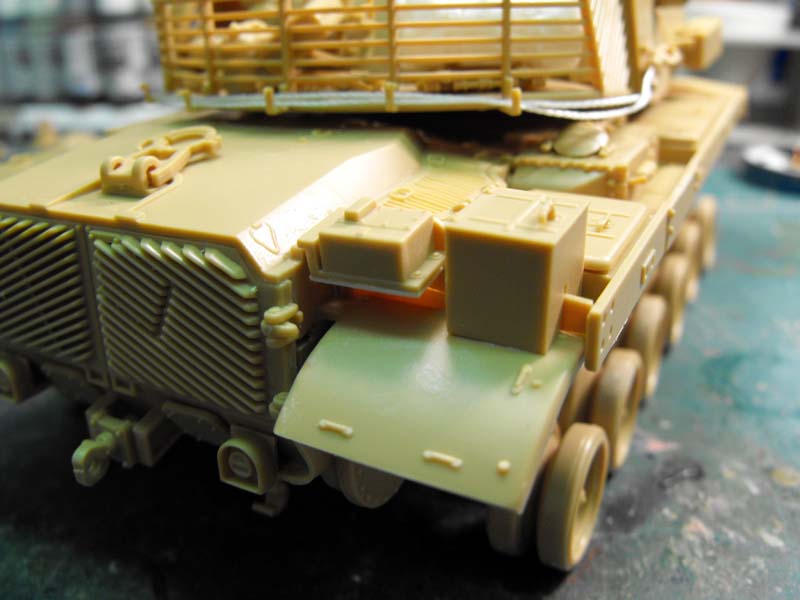
Step 3 Continues with the lower hull, swing arms are attached along with the upper road wheels. A call out for piece L39 is shown, this is needed to fill an access hole for motorization. This piece is like my love of Hip Hop music, non-existent, so I used some sheet styrene to make up a cover. I also noticed a significant gap at the rear idler wheel area. I was unsure if the side skirts would cover this, not wanting to chance it I backed this gap with sheet styrene and filled it with two-part epoxy (Aves Apoxy Sculpt).
Step 4 Front and rear hull parts are attached along with the road wheels. A lower hull part piece is called out; this is to fill a motorization hole. This rectangular piece of plastic is found attached to the front sprue area of the upper hull. I did leave the road wheels off for easier painting.
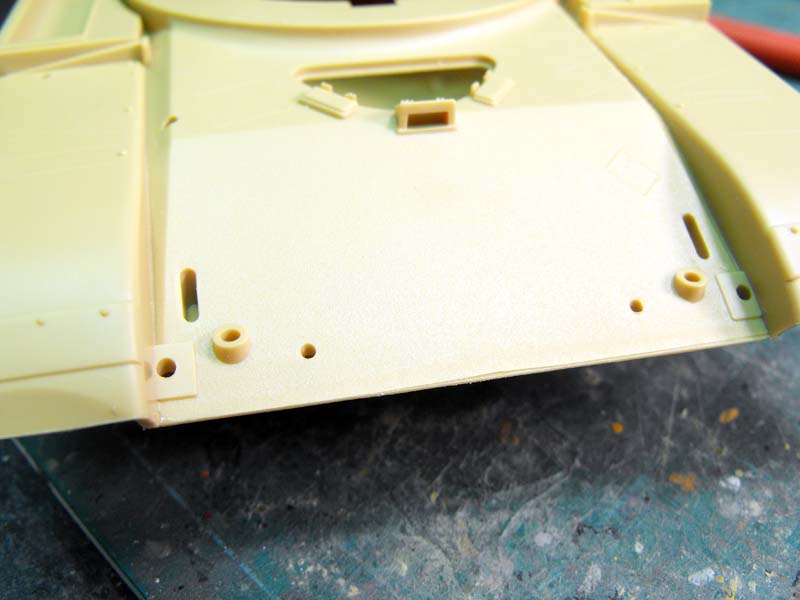
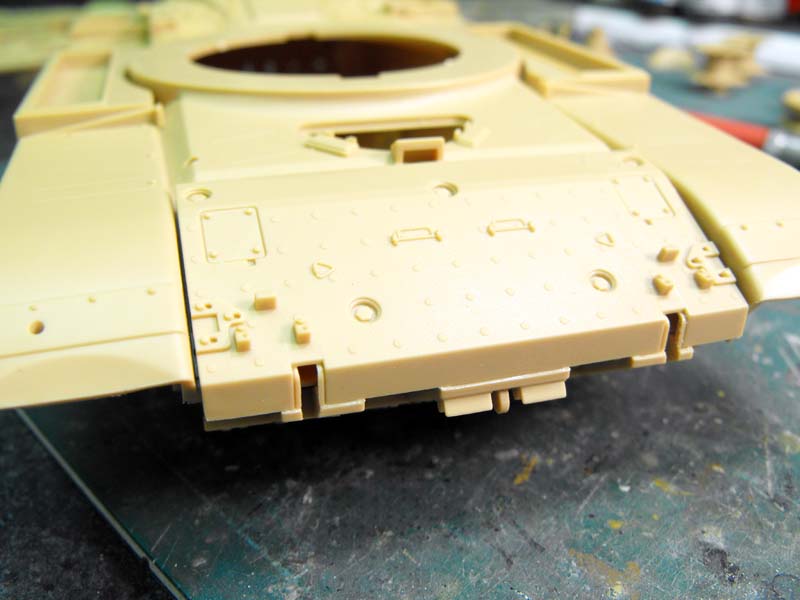
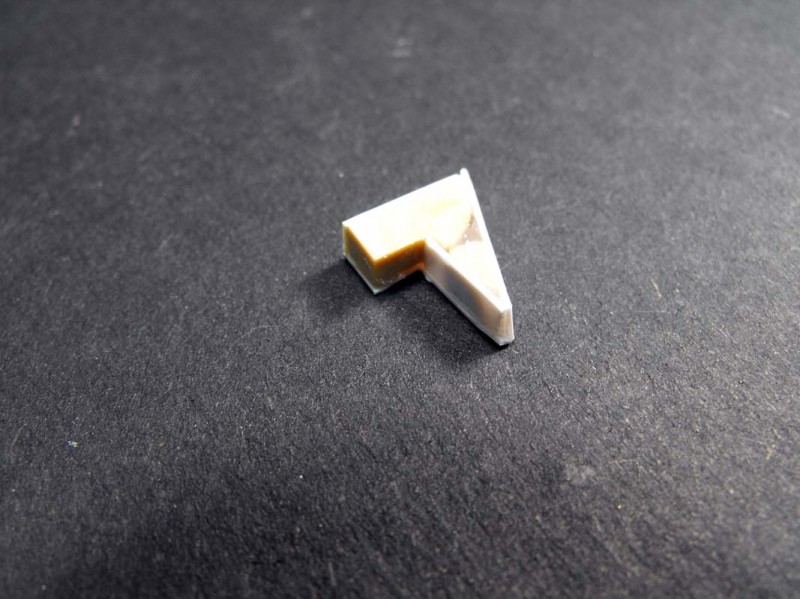
Step 5 This begins fitting pieces to the upper hull. It was here where I found odd scratches to the front hull. I thought this might be a guide to attach specific Magach 7C parts to the hull, but like my thinking that everyone loves my charming personality, I was wrong. I could not see what these scratches were used for so I figure they must have been used in an earlier Academy release. This stage also has the placement of pieces from sprue T, these are unique to the Magach 7C. An overhead view is provided to help with the placement. On my sample piece T3 was a short shot. This piece was totally unusable and I had to scratch build it. As I will note in step 8, I attached pieces V2 and V3 (side skirt hangers) to their appropriate support arms in this step so I could get everything lined up appropriately.
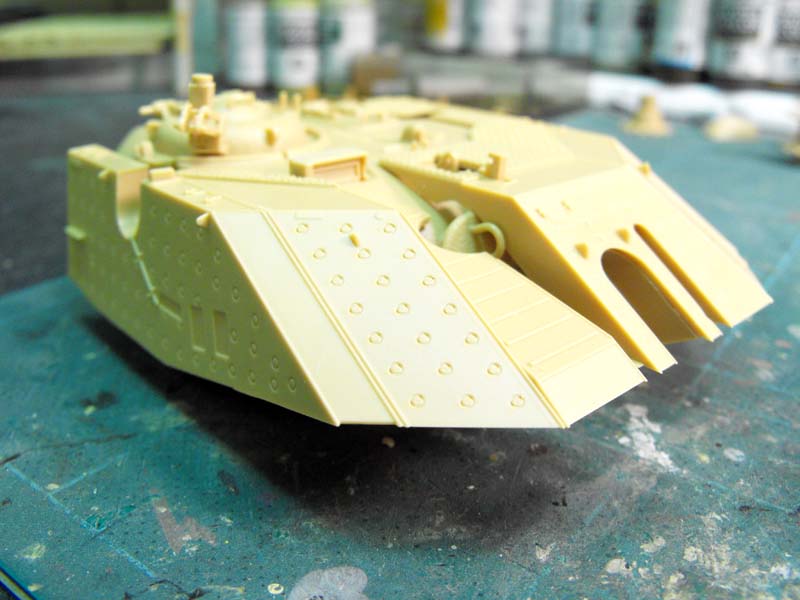
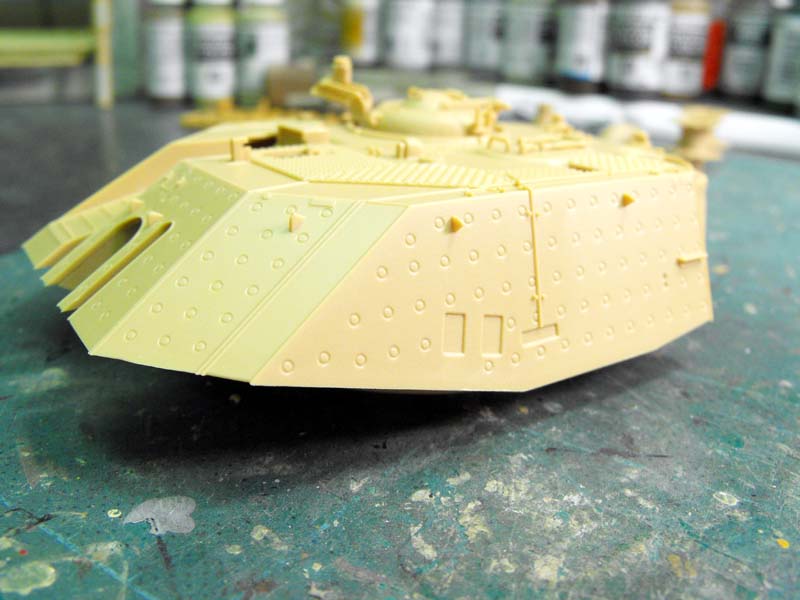
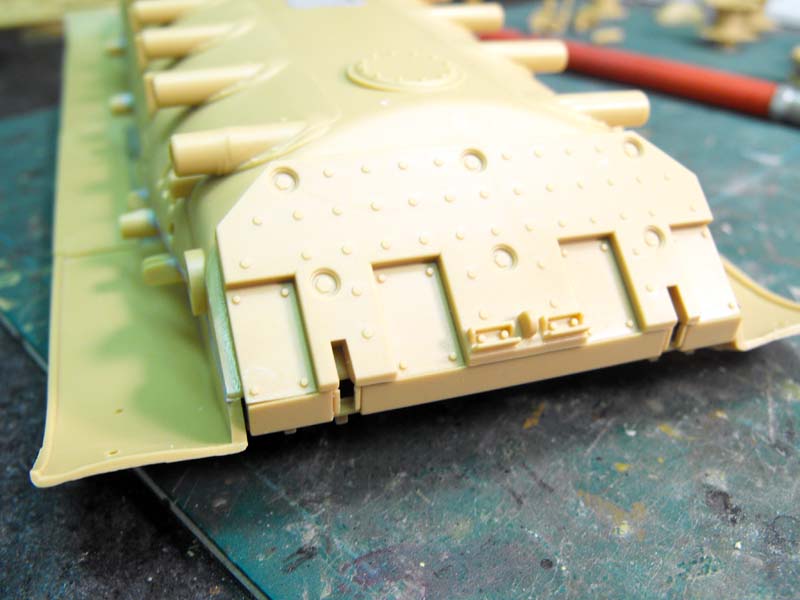
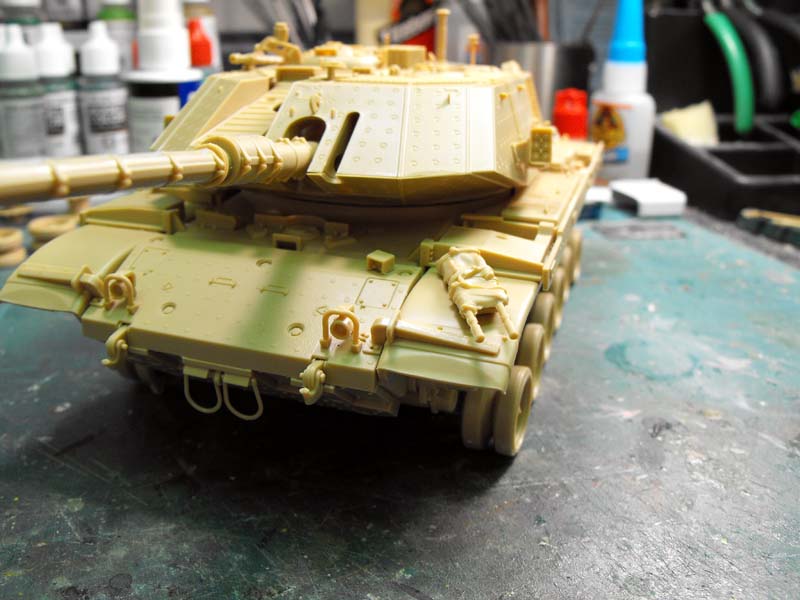
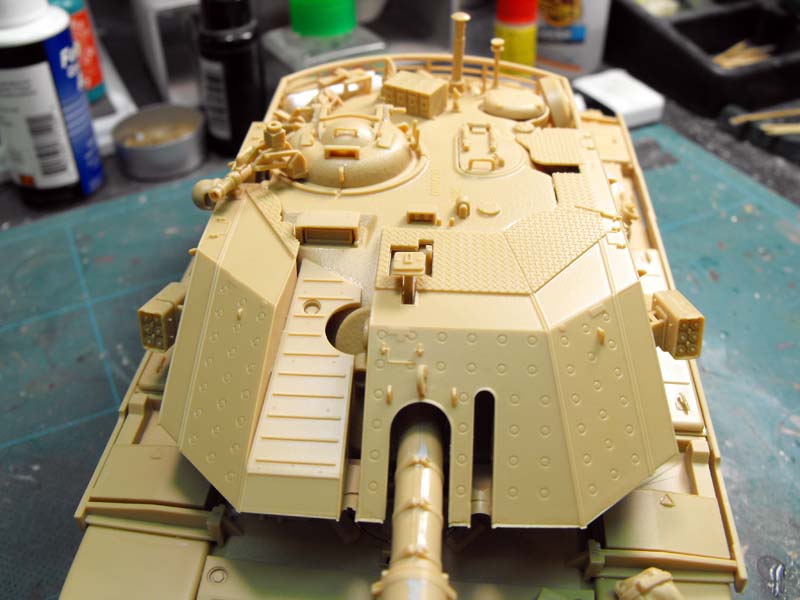
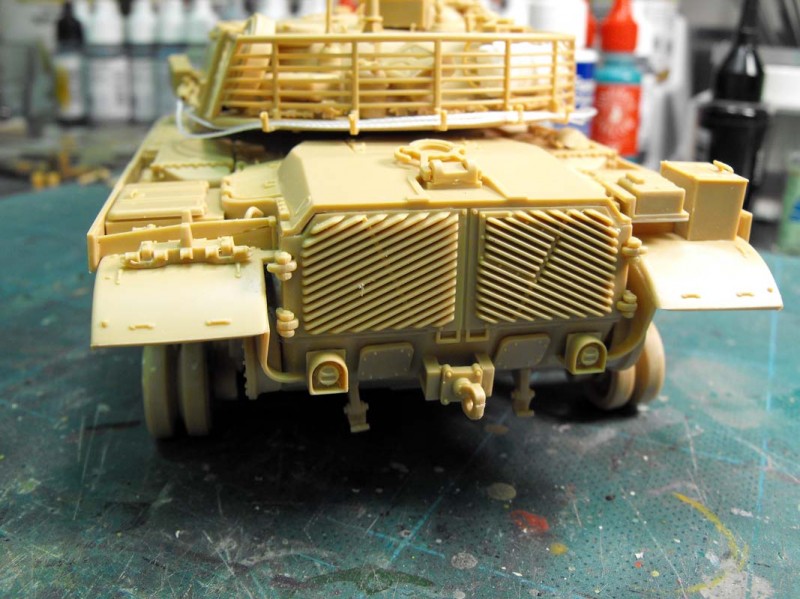
Step 6 Additional armor to the front upper hull is put on, this was straight forward and no problems were encountered.
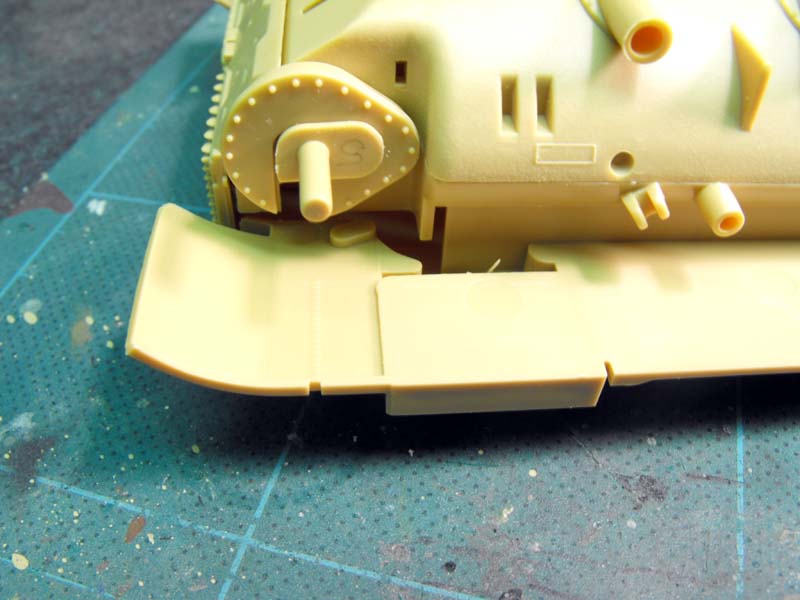
Step 7 The barrel travel lock is attached along with the drivers hatch. The drivers hatch can be posed open or closed, I wanted my entire vehicle buttoned up so just like my step-mom use to advise me when I ran my mouth, I just glued it shut.
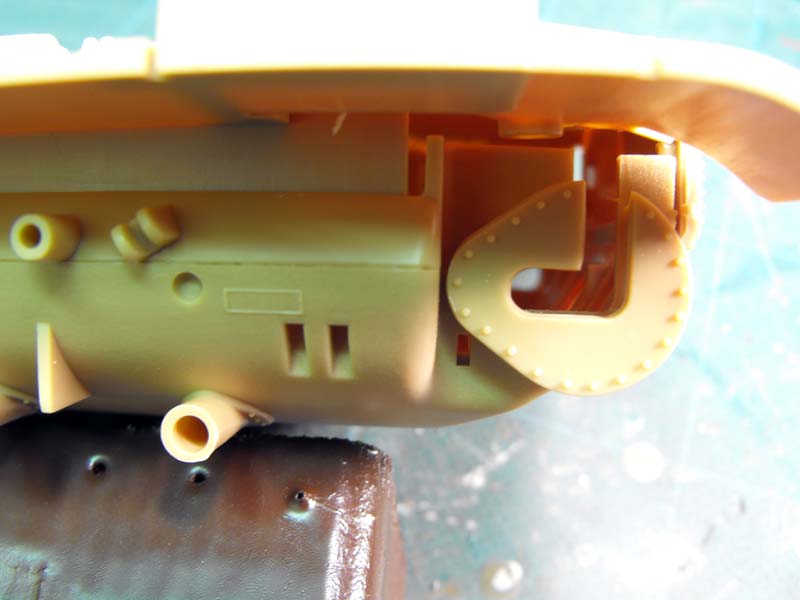
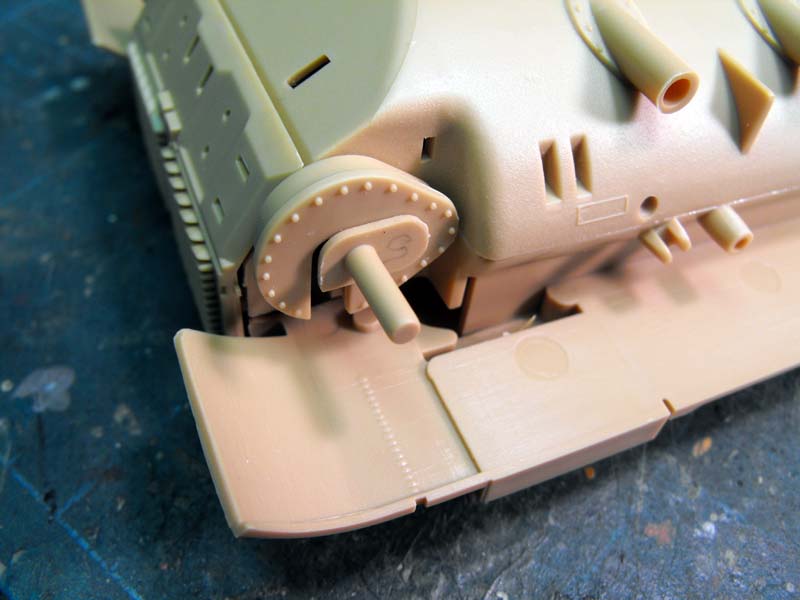
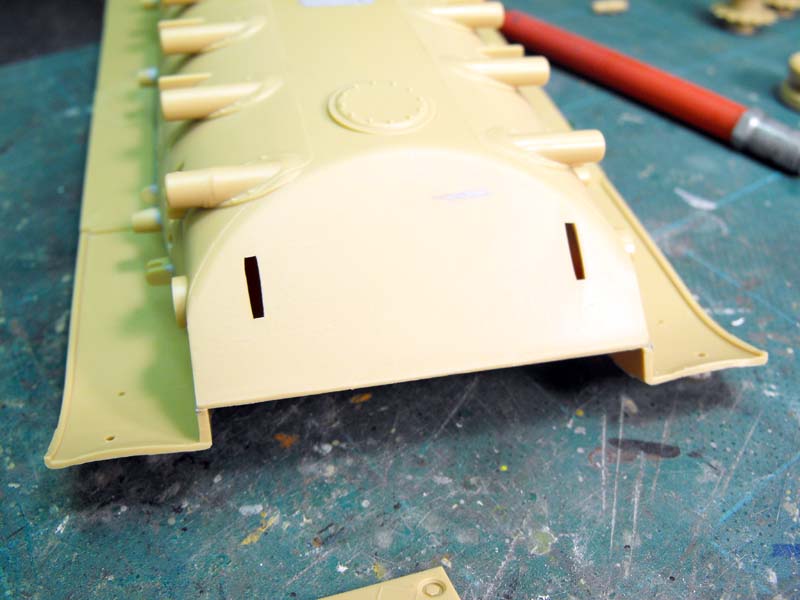
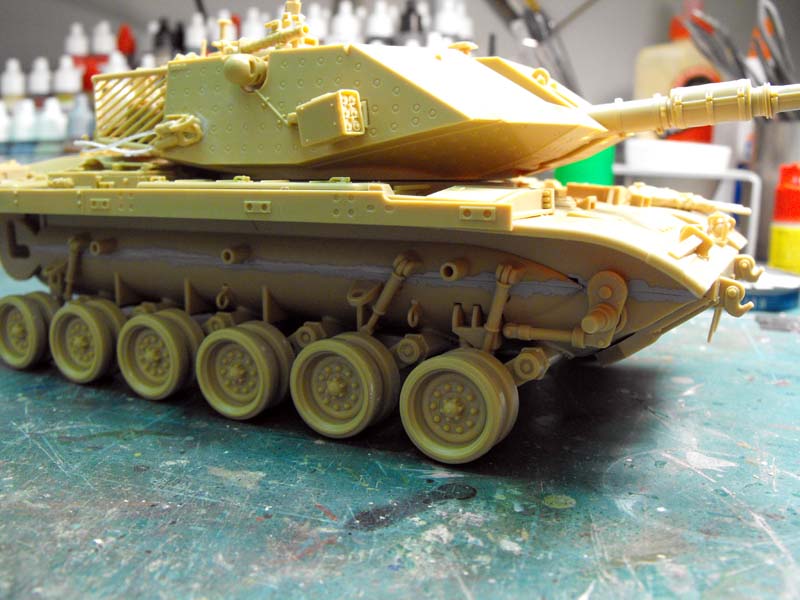
Step 8 This is a multi-step affair. Academy would have you build both side skirts as complete pieces. I would caution you on this as I believe it would be very difficult to get piece V2 and V3 (the upper side skirt attachment) to properly mate with their respective attachment pieces. These attachment pieces were attached to the upper hull in step 5. You can build the side skirts using the spring arms (pieces U3 and U5) along with the side skirts (pieces T1 and T2) and attach them later. I actually attached the side skirts at the end of the build as this allowed me access to install the tracks and do painting and weathering without the skirts being in the way. Another note at this step, a rear external radio/communication box is attached to the rear right fender. You get two choices for this so check your references. I chose piece V46, I did have to create a bottom for this piece as the piece is created hollow, and this hollow bottom can be easily seen. I used thin sheet styrene for this, an easy fix.
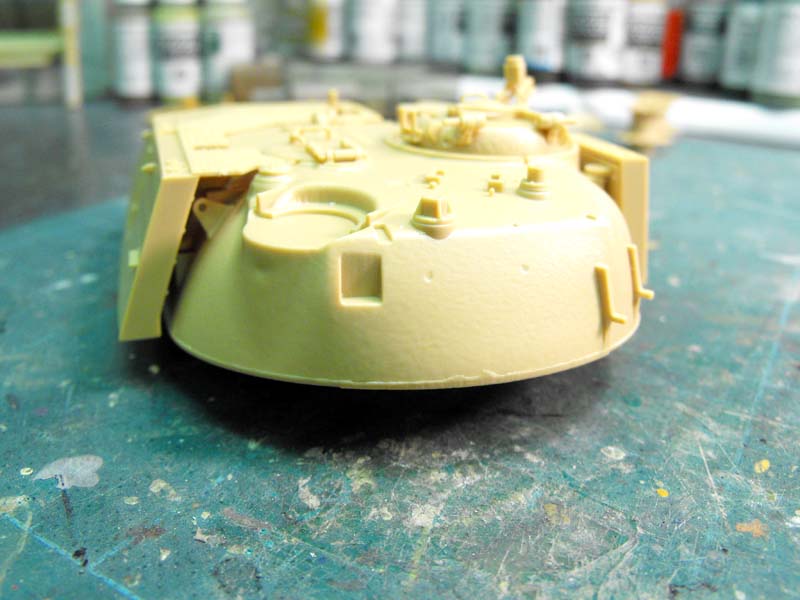
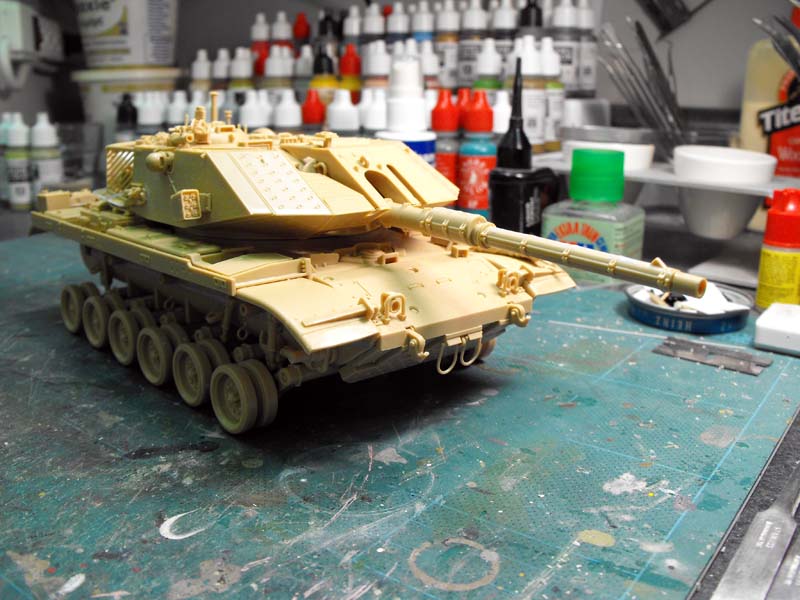
Step 9 The turret starts to get dressed up. Academy provided us with a two-piece barrel, it went together ok, with all the thermal protection pieces molded on it was slightly difficult to get to some of the smaller areas to sand them.
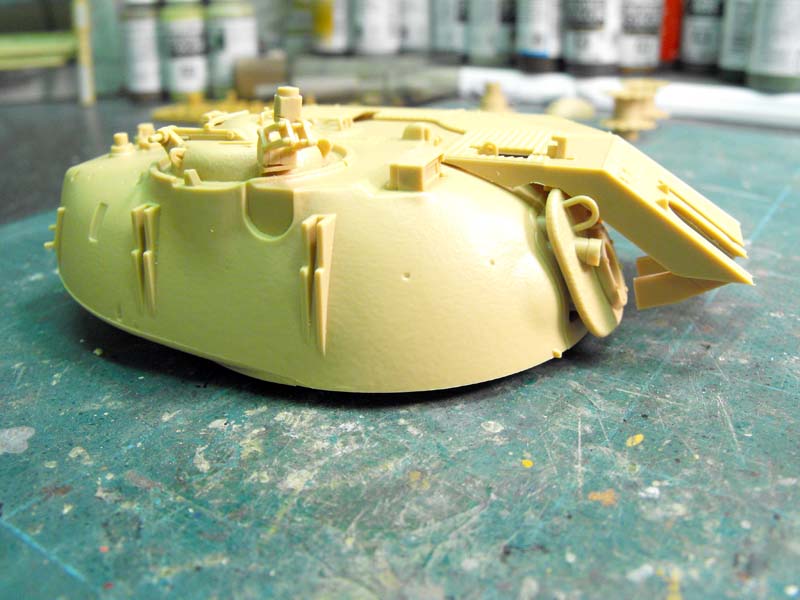
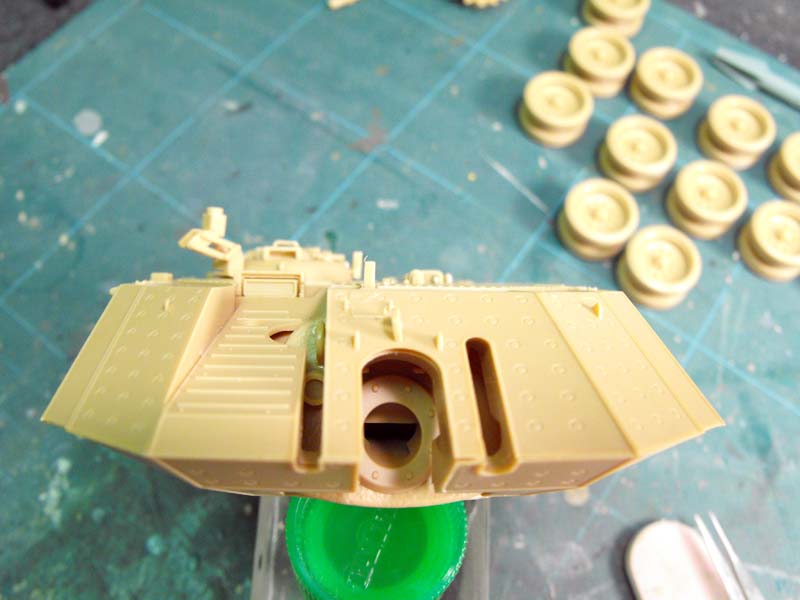
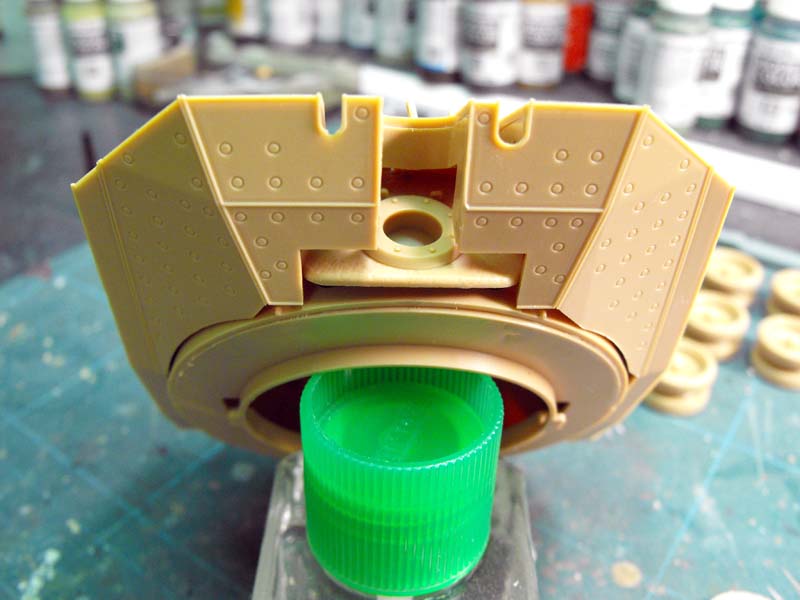
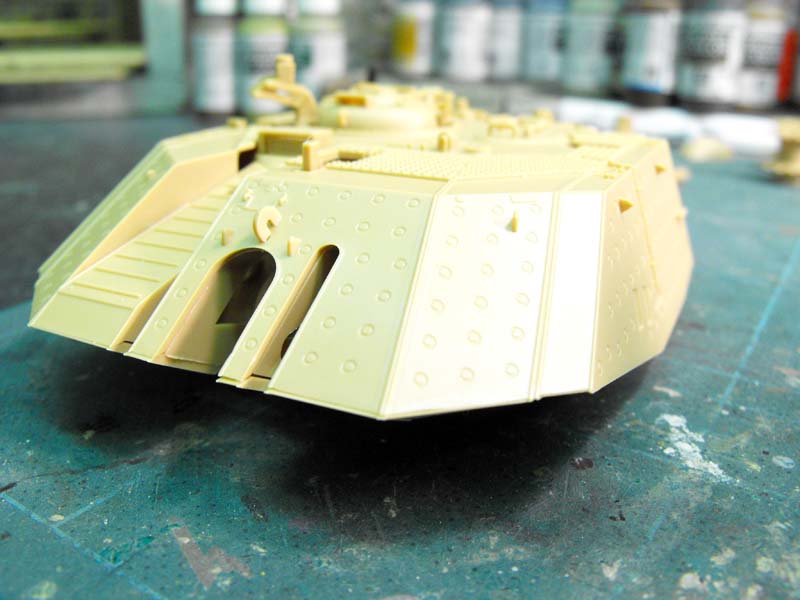
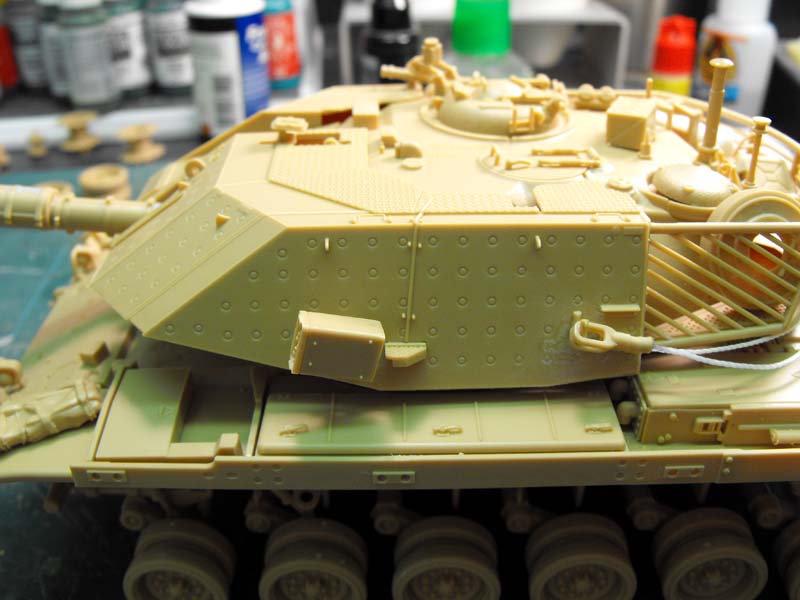
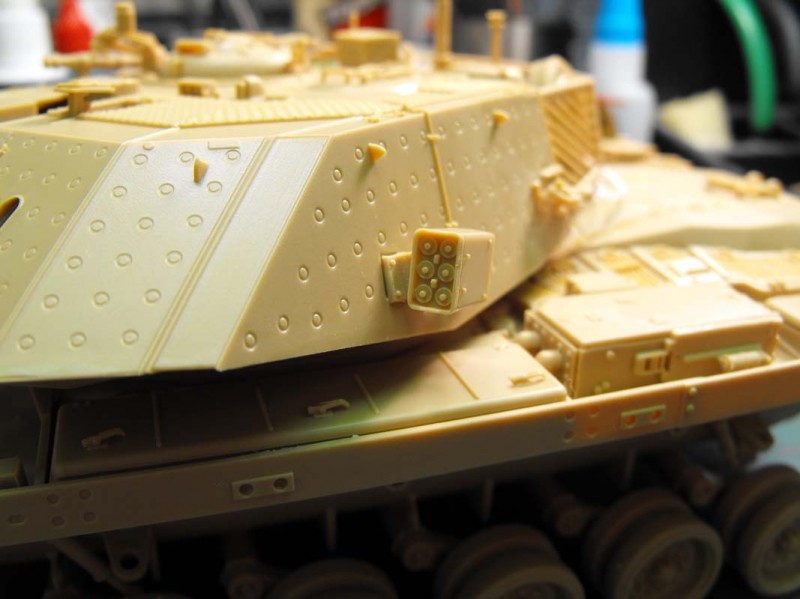
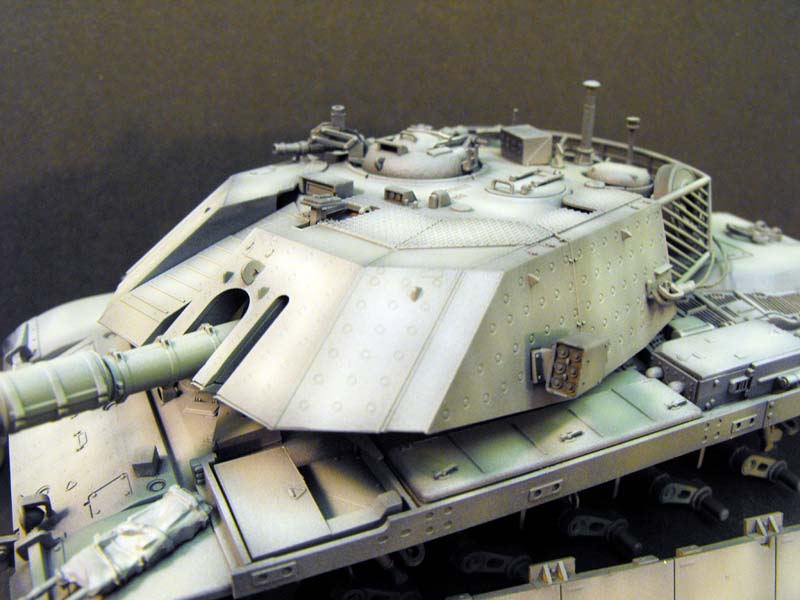
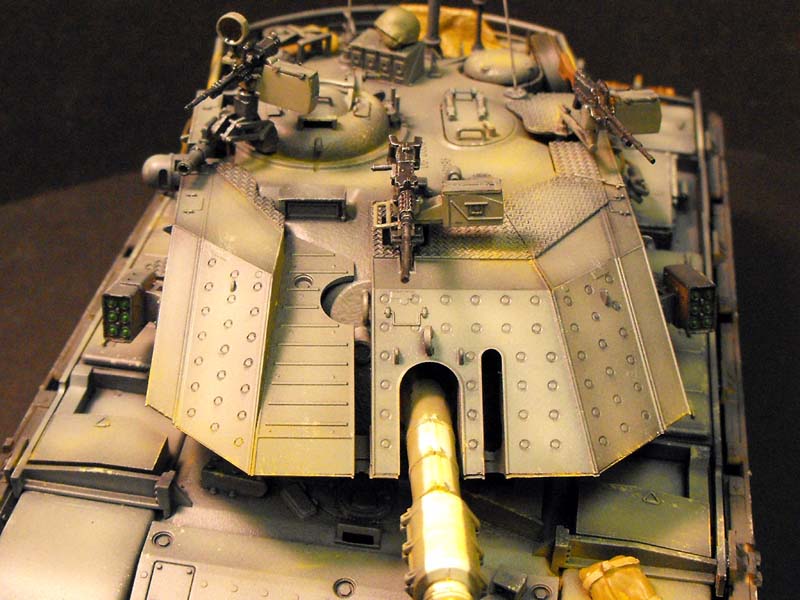
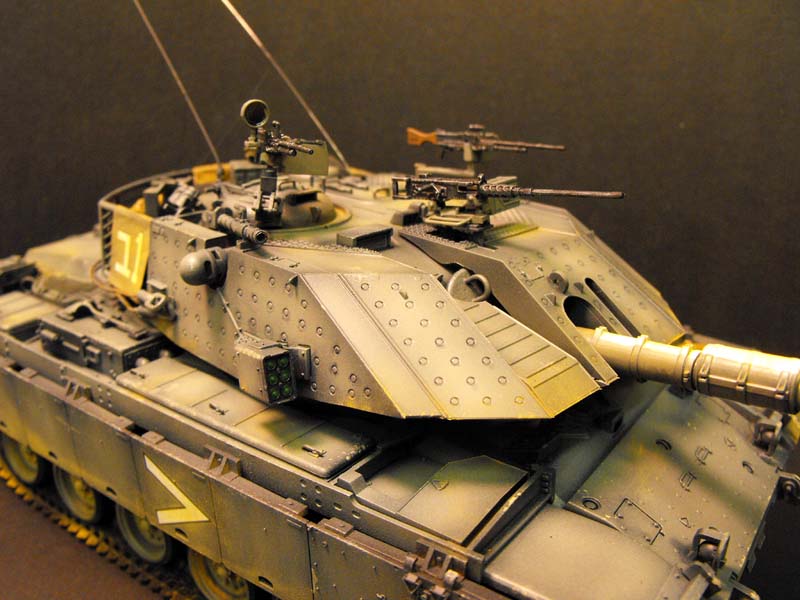
Step 10 More turret pieces added to include the add-on sloped armor. This is what gives the Magach 7C its distinctive, and in my opinion, bad ass appearance. The only note is the instructions call out part U61 as a commanders hatch grab handle; this is in reality part V61. The commanders vision ports are like my wallet after my kids get a hold of it, empty, if this wasnt a sample model I would have filled them in with epoxy putty and painted them. This is also the case for the front drivers vision port. I should note here that all of the new parts for this version are fairly sharp (excluding the short shot of part T3). I was very impressed with the fit and finish of the add-on sloped armor.
Step 11 A nice short and easy step, the lower portion of the sloped armor is added.
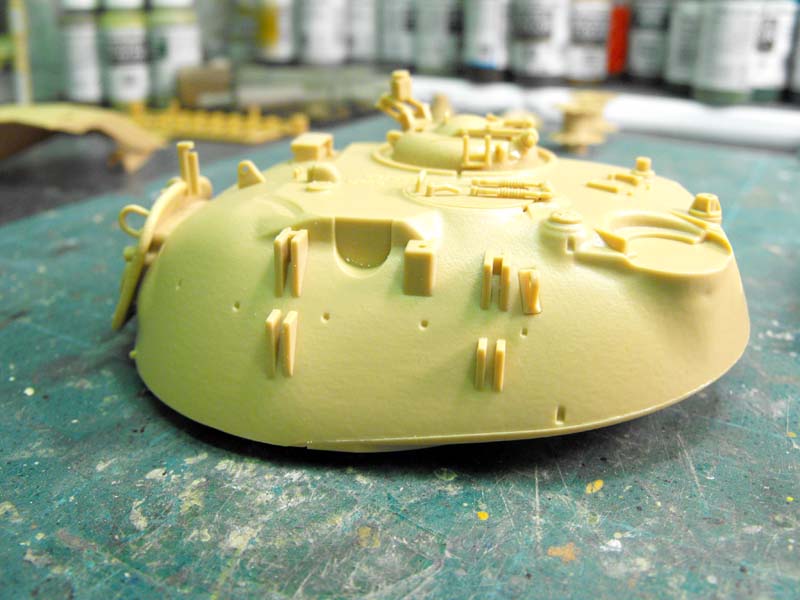
Step 12 Bits and pieces are added to the turret to include the commanders close action mortar tube and his ammo can storage.
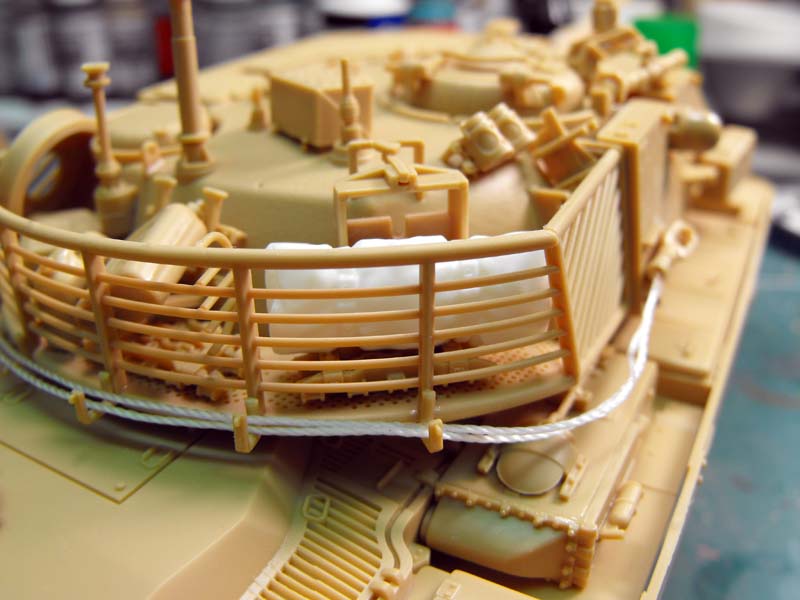
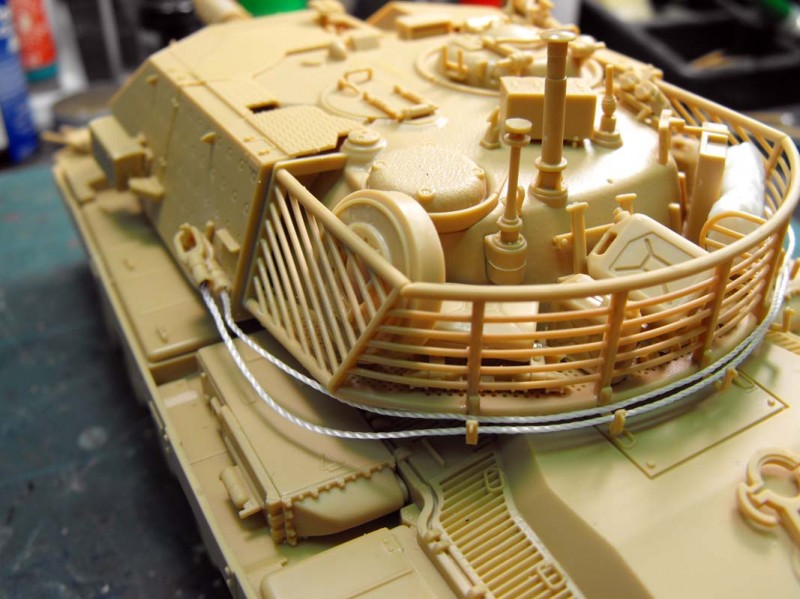
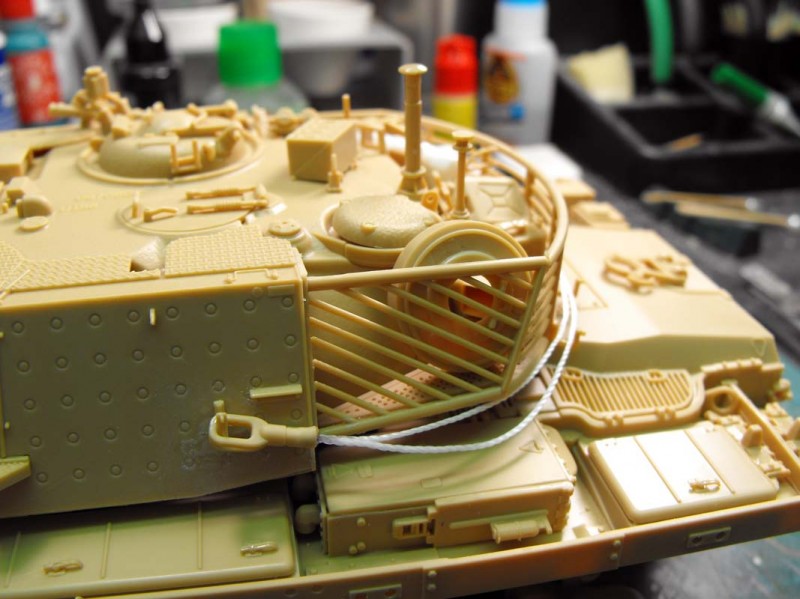
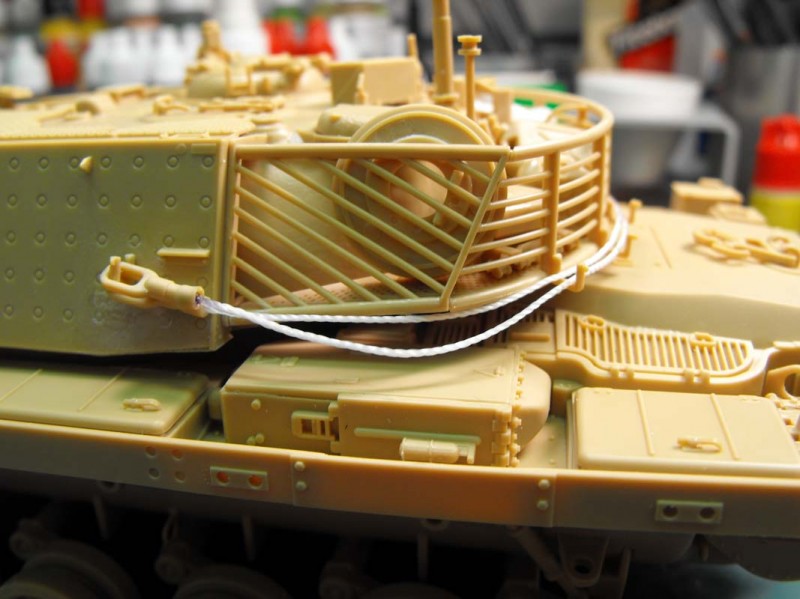
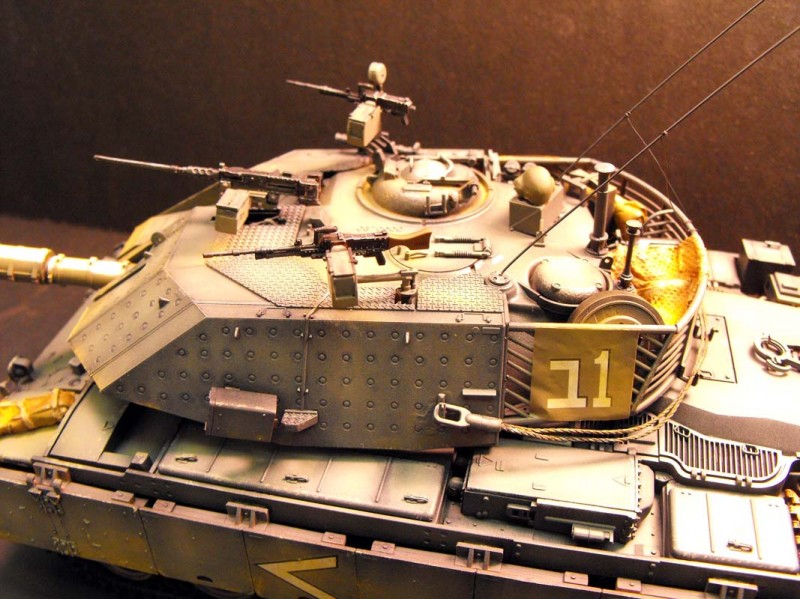
Step 13 This continues dressing up the turret, these are the steps I really enjoy as it begins to make everything look busy. In this step you also put together and attach the rear turret bustle. This consists of five pieces that come together to create the tube constructed bustle. This was arguably the most finicky part of the kit but with some patience (I have a ton of it, just ask my wife when we go shoe shopping) and some slow setting glue I was able to get the bustle put together and attached to the rear part of the turret without if falling apart. The instructions have you add the tow cable holders at this stage, I held off as I knew they would be easily broken off, I added them at the very end of the build when I placed the tow cable in it, more on this later. You also make extra equipment that can be placed in the bustle, I built them and added it to make it look full. I also added a white glue soaked tissue tarp for some color. My references show the stretcher is placed on the front left fender, nowhere in Academys instructions do they tell you this.
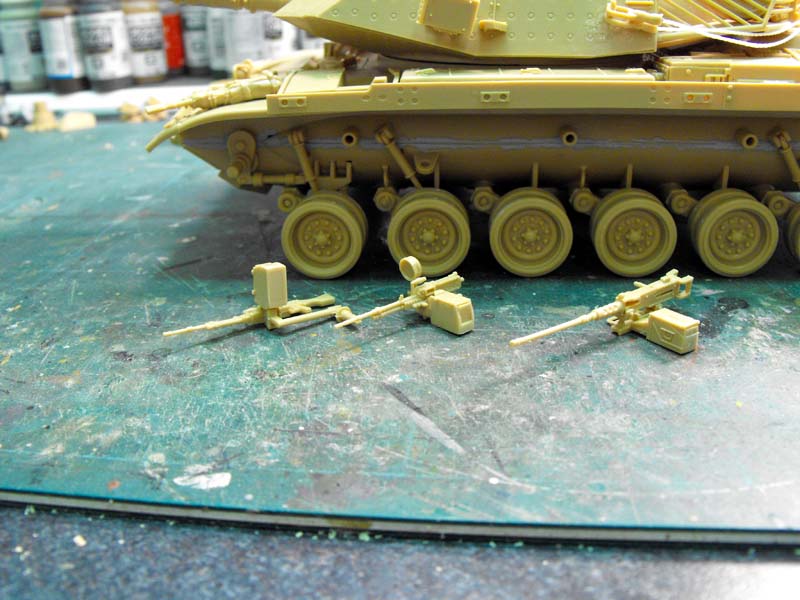
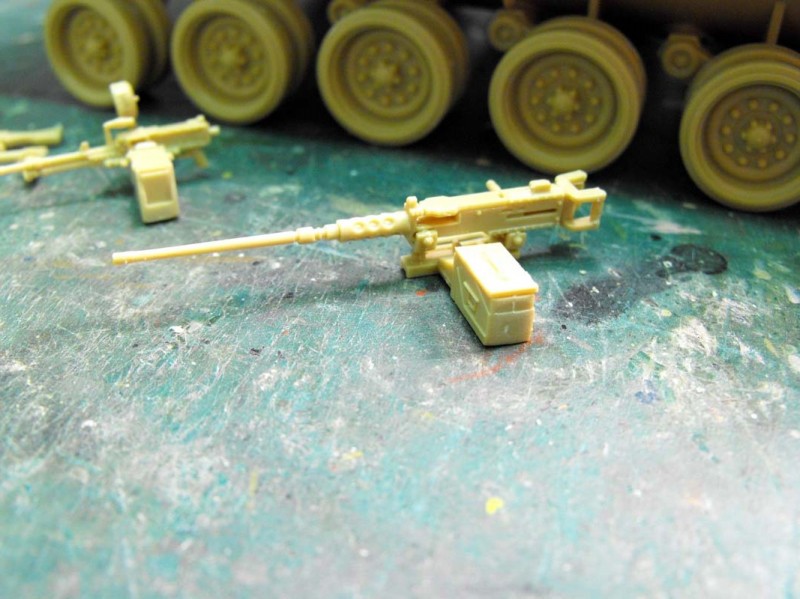
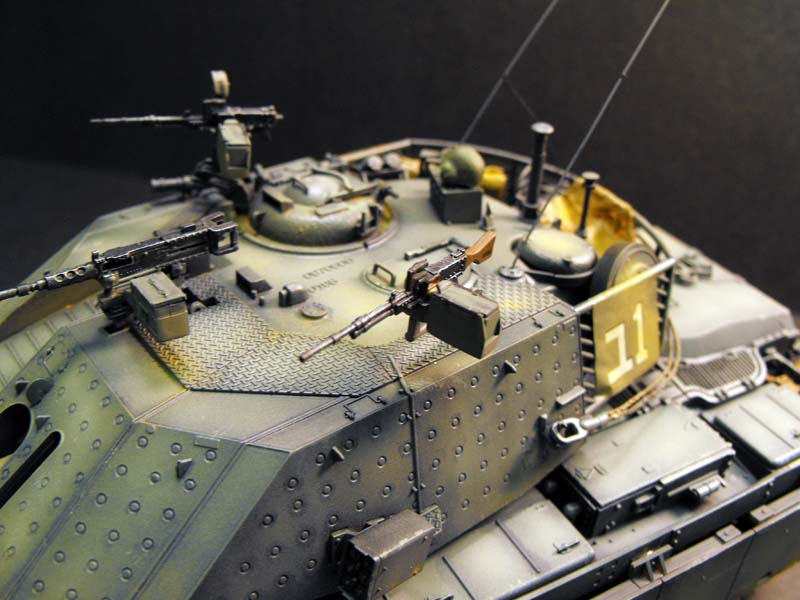
Step 14 All three machine guns are built at this stage, I build them but waited till painting and weathering was completed before I attached them.
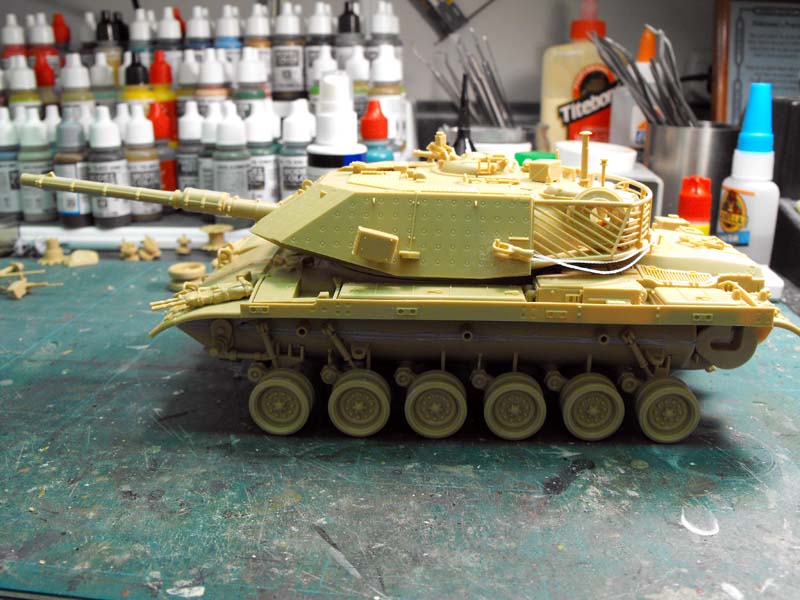
Step 15 The final step, the turret is attached to the upper hull and the tow cables are attached to their hangers. I used the string provided but found out the length the instructions call for is slightly too short (oh the jokes I could add here but Ill refrain). I would add about 5mm more too each cable to get nice sag. Since this was a sample build I used the string and did not replace it with actual copper cable which is my standard practice. According to the instructions the tracks are added at this stage after heat gluing them together. I waited to all of the painting was completed and the road wheels were attached before I added them. I had left the rear idlers loose to see how much play I would need for a good fit. I ended up putting the idlers as far forward as I could, this still left me with a very tight fit. The rear of the track where it runs over the rear idler is slightly bowed in due to the tight fit. Again if this was not a sample I would opted for some link to link, I know some modelers find them tedious but I think in this case they would have spiced up the kit a bit.
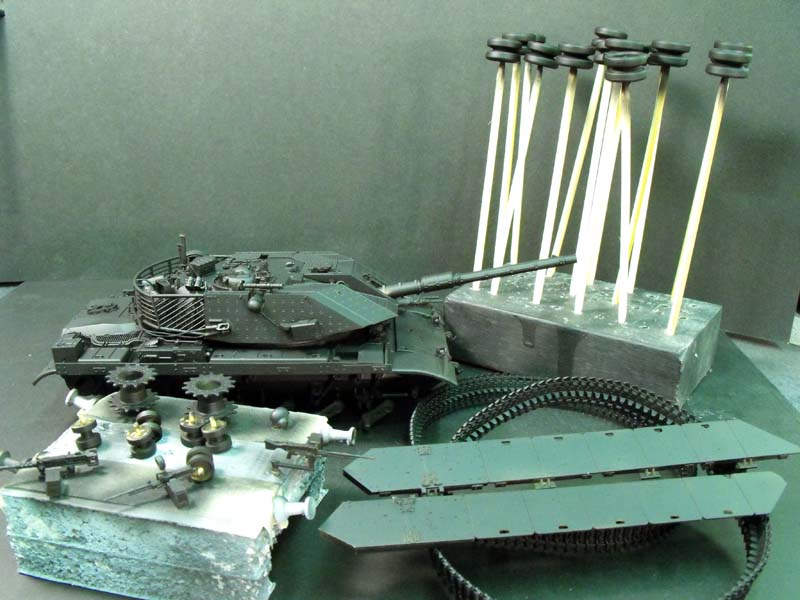
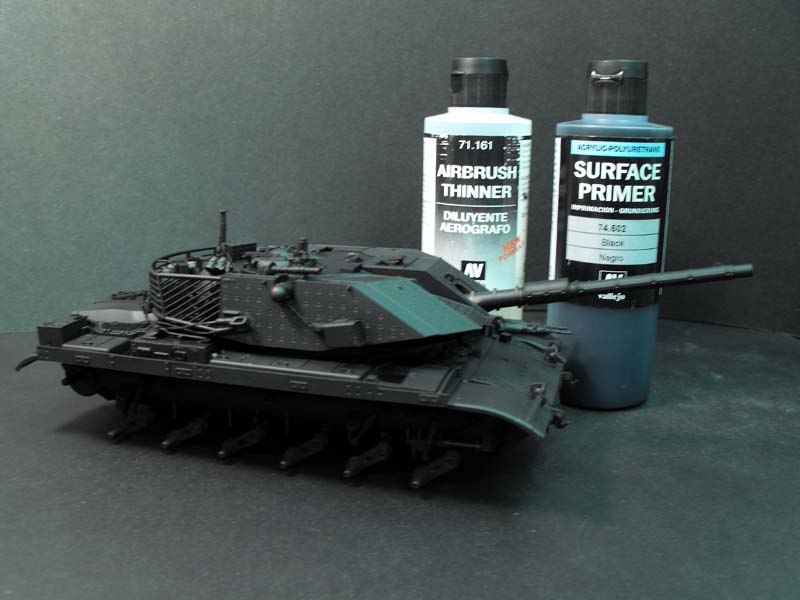
The paint
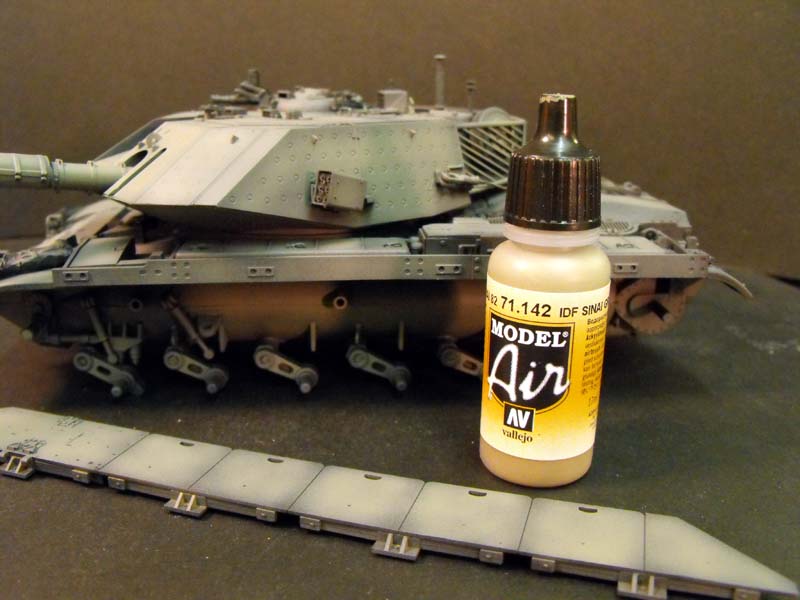
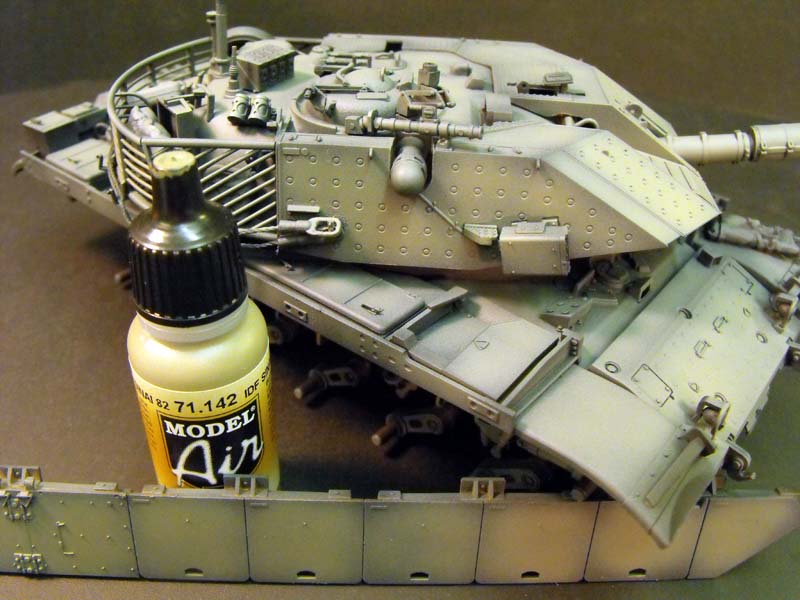
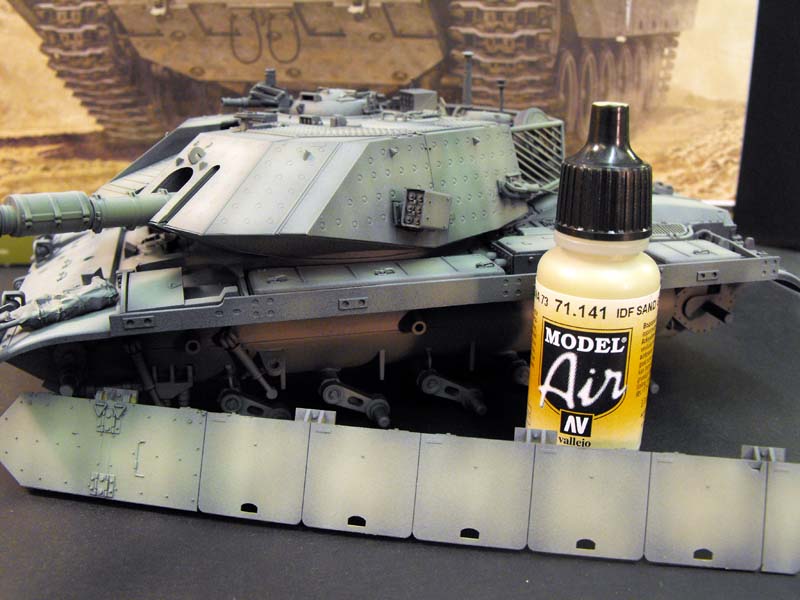
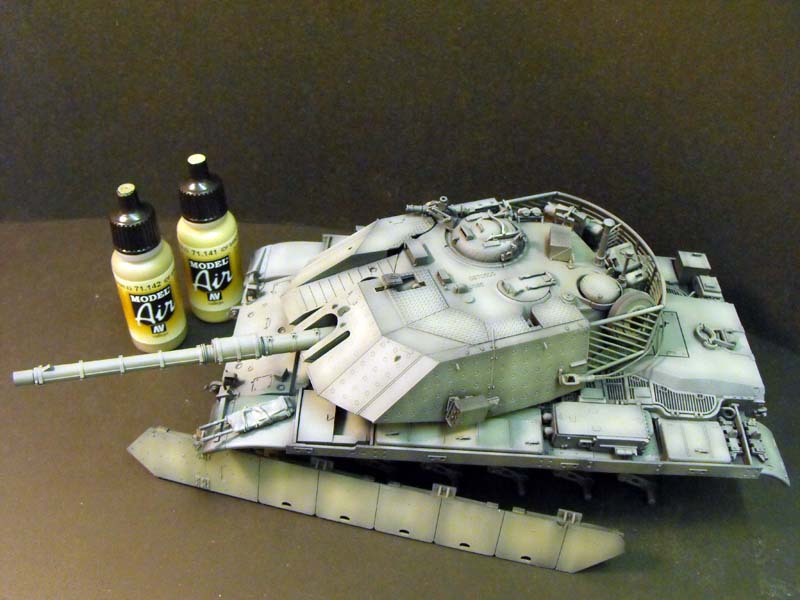
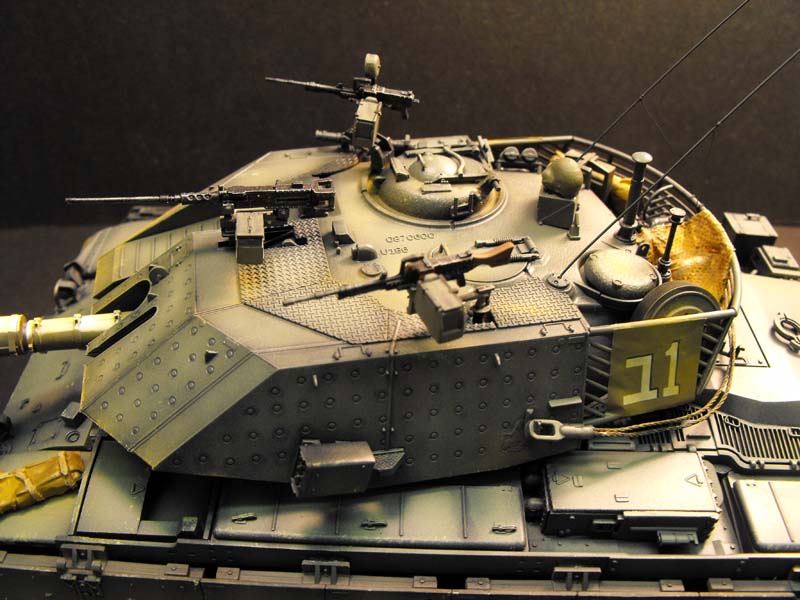
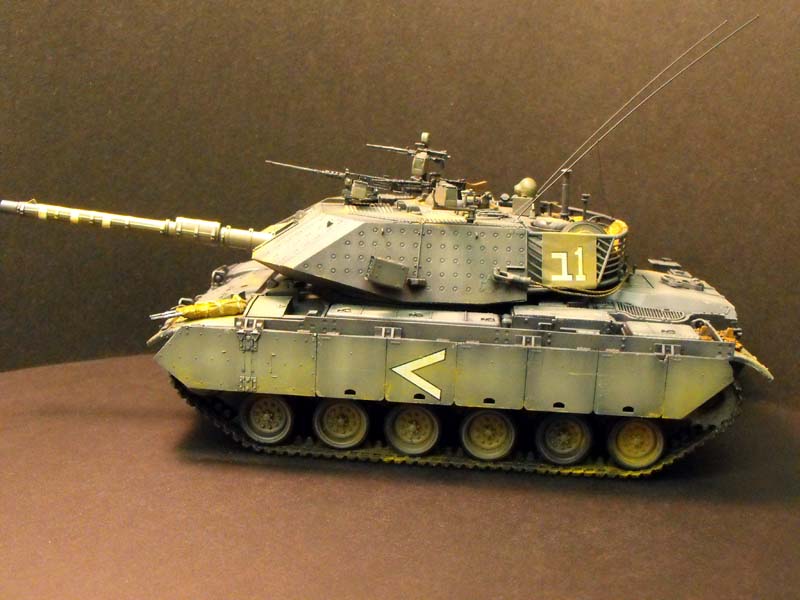
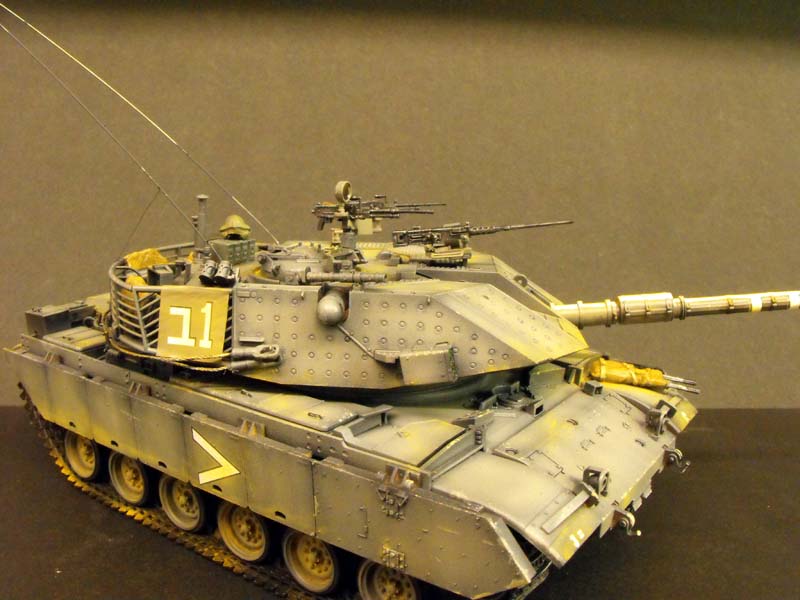
I started off by wiping down the kit with Polly S kit cleaner. I usually use this or 90 percent isopropyl alcohol with a cotton ball to eliminate any dust and grease from the kit. My primer as of late is Vallejo Black Primer shot through my Paasche VSR 90 airbrush. My newer painting technique is a more artistic approach to finishes. I like to stick to the original color of the vehicle pretty close but use shadows, highlights and weathering to my advantage to really showcase the vehicle. After my primer coat of black I used Vallejo Model Air IDF Sinai Gray 82 number 71.142, I did this in a looser color pattern trying to leave some shadow throughout the vehicle. I then switched to Vallejo Model Air IDF Sinai Gray 73 number 71.141, this is a little lighter color. The Sinai Gray 73 is a very close match to the Academy call out for Vallejo 884 Stone Gray. Using this color I shot the middle of panels and along top edges for more highlights. I also used this color to vertically streak the sides of the side skirts causing a little variation in the paint. In my research for the color of the vehicle I found the Sinai Gray color used by the IDF to be somewhat elusive. Different photographs of the Magach show this color to be anywhere from a sand gray to a blueish/green gray. I decided I like the bluer tint and went with this color option.
After my overall base coats were complete I used Tamiya X-22 gloss varnish to hit the area that would receive decals, I used to use Future but noticed it tends to darken my paint in the areas I spray it. This was my first time using X-22 and found it to work fine. I choose my decaling options for the Second Company (Chevron facing forward), B Platoon (Beth in the Hebrew alphabet) tank number One. This was labeled as Option 4 on the Academy Decal Placement sheet, no further information was provided about this vehicle (or any other vehicle for that matter). I was very hesitant to use the white decal for the gun barrel as I did not believe it would conform satisfactory. I usually would mask and paint this but since this was a sample model I thought I would try it. Much like my attempt at slam dunking basketballs, the decal attempt failed. I was able to get the barrel decal removed before too much damage was done. It just would not lie down and conform to the barrel even with copious amount of Micro Set and Micro Sol. I ended up masking and painting it. The other decals went down with no problem, the two decals that are platoon identifiers and are attached to the turret basket I first put down on aluminum foil that had been painted the tanks base color. After the decals dried I cut them out and attached them to the turret basket with super glue.
The weathering
Prior to weathering I flat coated the entire model with Krylon Matte Flat spray from a rattle can. In my opinion this paint dries to a semi-matte finish which I prefer, I think it gives the vehicle a little more life than a very matte finish. I painted equipment on the model using a host of Vallejo paints. I gave the model an overall pin wash with Windsor and Newton Blue/Black Oils, in keeping with the cooler tone of my paint scheme. I used the lighter Vallejo Model Air Sinai Gray 73 for my light scratches and good old Vallejo German Camouflage Dark Brown got the darker scratch areas. I finished up the weathering with a light coat of Doc OBrians Weathering Powders Desert Sand and Gritty Yellow pastels, these weathering powders were purchased through Micro-Mark. I kept this weathering fairly light as I didnt want to overdo the dust effect and hide any of the details.
After the weathering was completed I added the three machine guns and the two radio antennas, I used thin florist wire for these as none are provided. My references show these two antennas to be either tied down (more urban areas) or upright if out in an open area so either option is viable, I chose to have them tied down as they give the tank a more rakish appearance (sort of like my 1994 Geo Metro had).
Suggestions
Overall the kit is not bad, the new tooling of specific Magach 7c parts are nice and crisp, other than the short shot for T3. Seam lines were easily taken care of and the model definitely looks the part. If it was not a review model I would have replaced the tracks with link to link, especially due to their tight fit. Also take note of my suggestions when installing the side skirts, if you follow Academys instructions I think you may have a tough time lining everything up.
Overall Impressions
Overall I really enjoyed the kit, it was a fast build and I always like the look of Israeli armor. I little extra detailing could go a long way. My references were from Israeli Military Vehicles by John Myszka for the marking explanations and the Internet for overall color and in action shots. Israeli Military Vehicles by John Myszka is a little hard to come by now and fairly expensive, its a good overall reference for Israeli armor but definitely not needed for this build.
In closing I appreciate Jim Starkweather and Darren Baker for giving me a shot at building and reviewing a kit for them. The kit itself was provided by MRC. If you have any questions of suggestions please feel free to contact me.
SUMMARY
Highs: Newly tooled parts for the 7C version are impressive. A nice easy build with no major problems. Kit builds up to a fine rendition of the vehicle.Lows: One misshapen part, rubber band tracks are a very tight fit. Barrel decal will not snuggle down and was unusable. Small errors in the instructions.Verdict: Overall a welcome addition to any Israeli armor collection.
Our Thanks to MRC! This item was provided by them for the purpose of having it reviewed on this KitMaker Network site. If you would like your kit, book, or product reviewed, please contact us.
About Jim Bednarz (cpd730) FROM: ILLINOIS, UNITED STATES
I am a detective with a metropolitan police department in Illinois. I have been modelling for about twenty five years, I dabble in armor, aircraft, sci fi and figures. I'm an avid history buff and enjoy time with my family and a good book (with a glass of scotch...with the book).
Awesome build! What material do you use for the identification marker on the side of the turret basket? I tried doing a search on how to make it but I don't know what it's called.


Comments