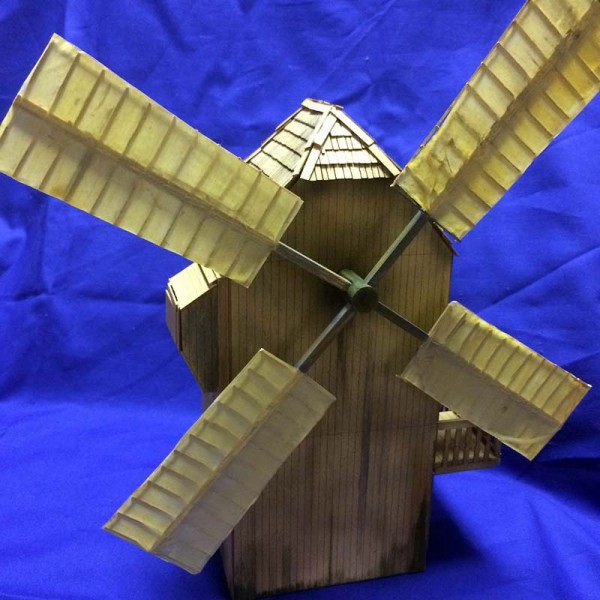
PlusModel has filled a longstanding gap in the world of 1/35th scale modelling. No, not a retooled Sherman or Tiger but an important part of the European landscape before, during, and after the war years, the windmill! We have had lots of buildings that have come our way over the past several years both intact and damaged but to the best of my knowledge, no windmills until now.
Review
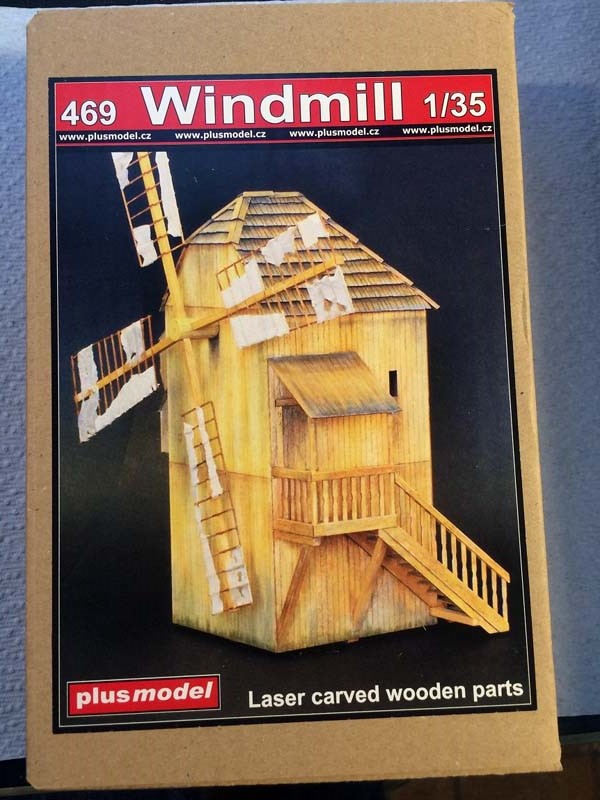
The kit, #469, is a made from laser cut wood and cardboard that will require some slightly different skills in order to build. The contents are well protected in bubble wrap and poly zip bags and packaged in a heavy cardboard, hinged lid box with a nice picture of a finished windmill on the box top in full color which will come in handy later on. Be careful with the unpacking as the wood is quite thin and easy to damage if you get in to much of a hurry.
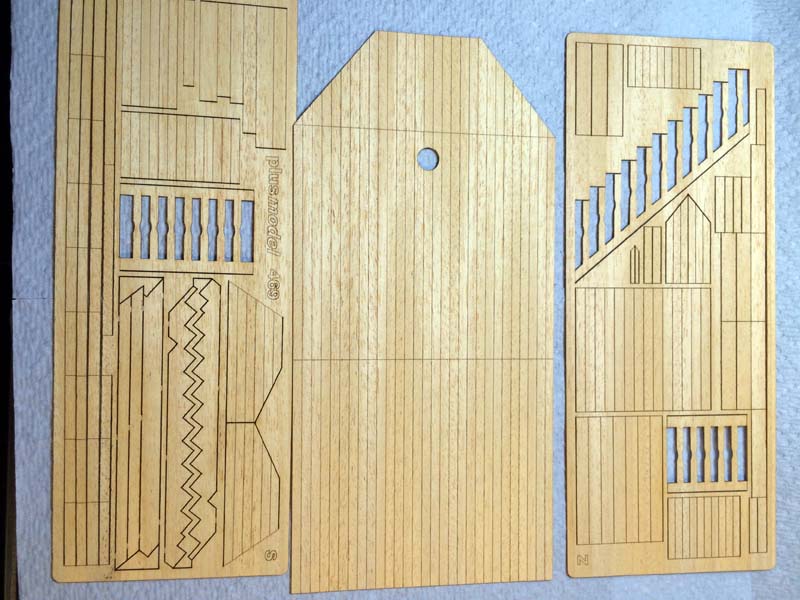
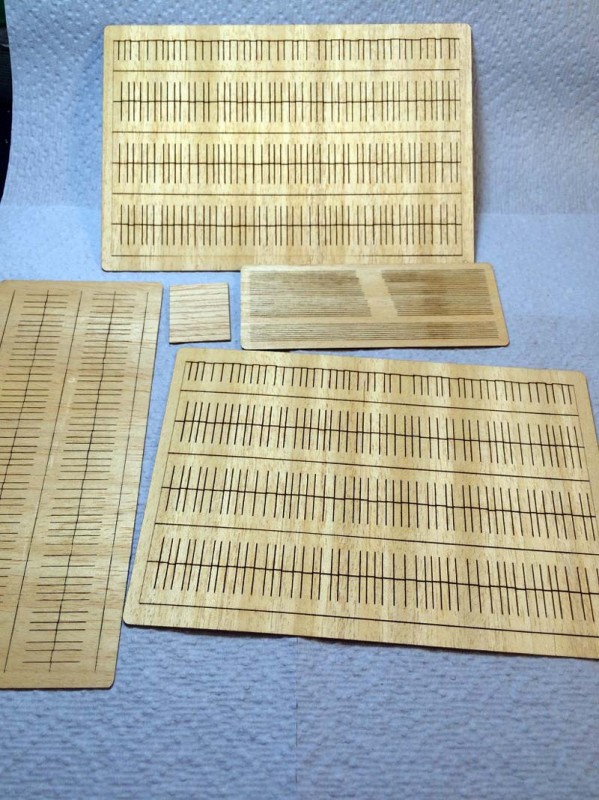
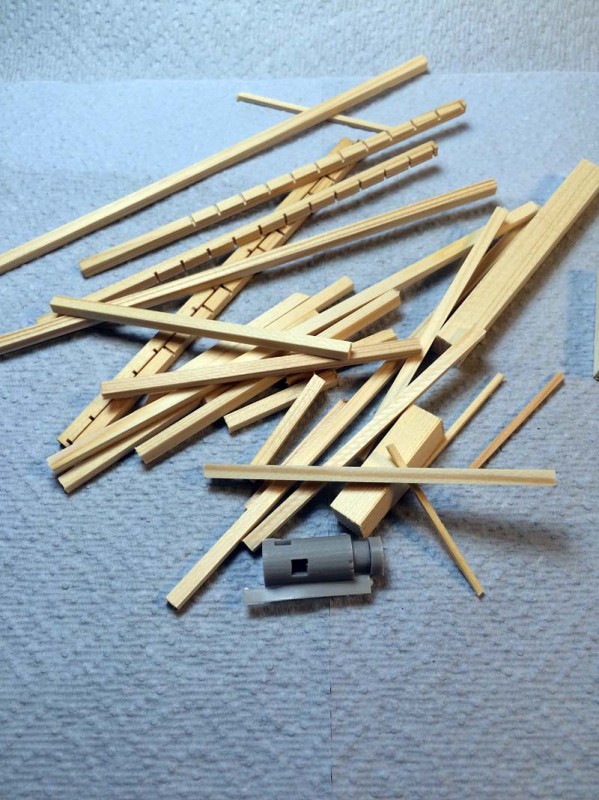
Inside you will find the four large mill walls, cardboard floors and roofing, 10 to 15 or so pieces of basswood for various stringers, porch supports and vanes. There are two large sprues S and Z which have the pieces for the stairs, a machinery buttress, and other smaller pieces, a small piece of thicker wood that is for all of the rails and stiles for the vanes, a resin piece for the mill axle, and three sprues that are unmarked that are for the roof shingles of the mill. The main portions of the windmill are made of the four large sides which are all single piece cuttings.
The Build
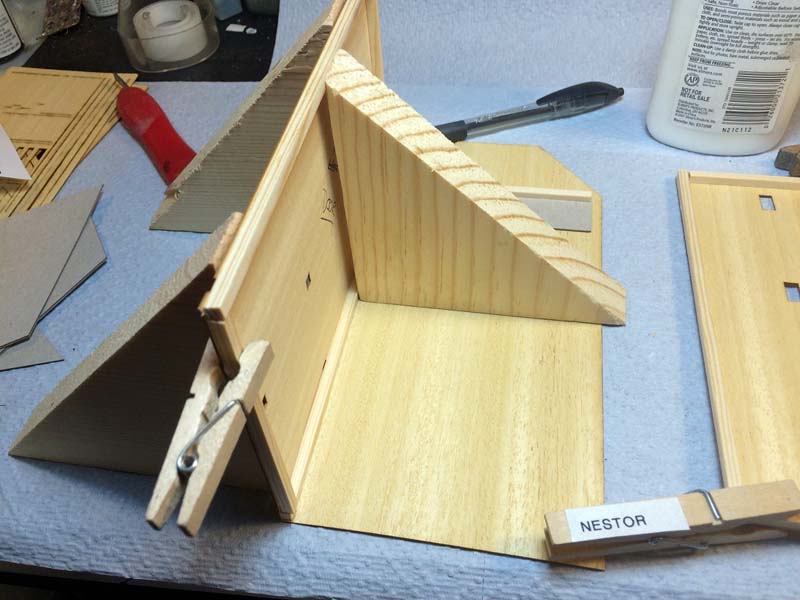
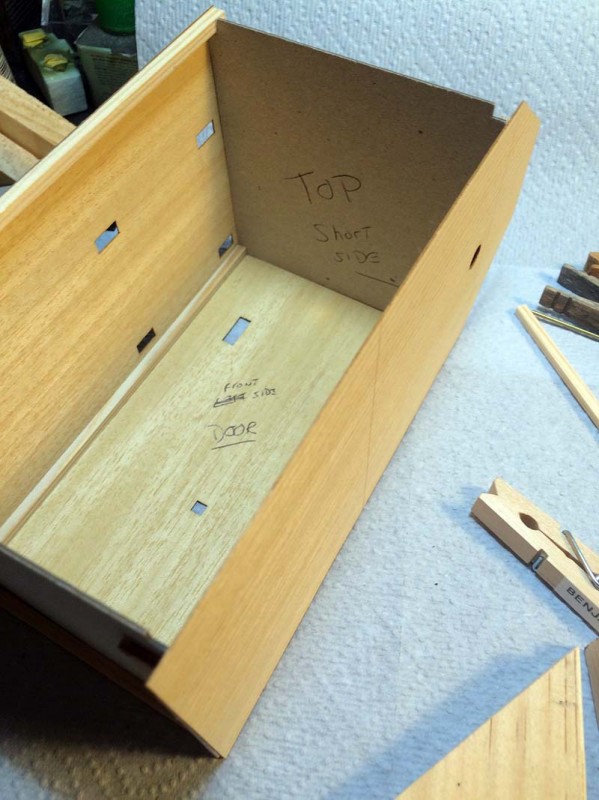
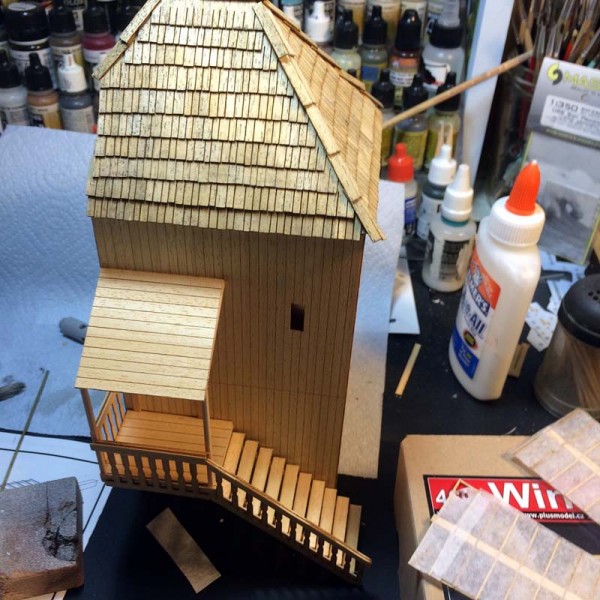
The build up of the windmill starts by using three cardboard spacers inside the mill for the bottom, middle, and top. The wooden sides are strengthened with basswood stringers as the sides by themselves would more than likely warp without the additional support. The cardboard floors are designed to fit between the stringers and provide additional strength while keeping everything nice and square. I had little problem with much of this as it is fairly intuitive once you see the direction that the build goes.
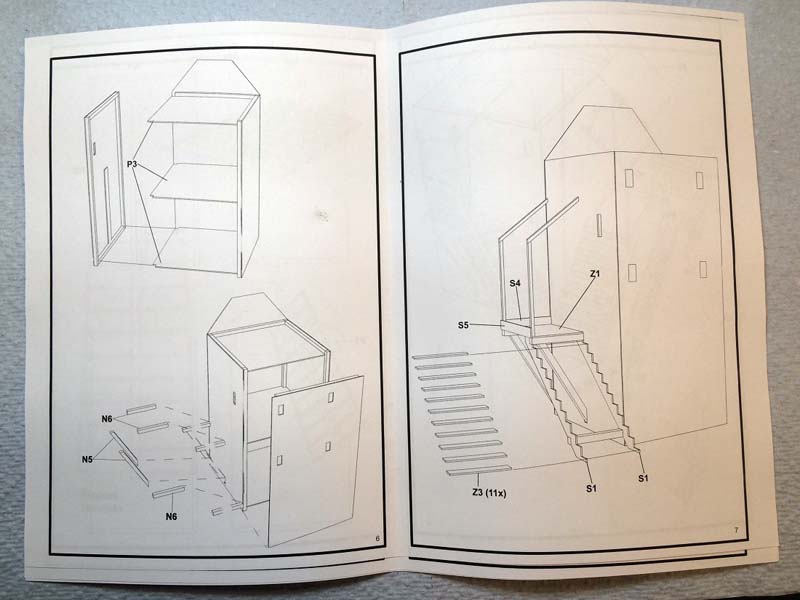
Its a good thing it is intuitive as it is because the instructions leave more than a bit to be desired. If you are the type who gets bugged because DML miss identifies or leaves out one or two out of five hundred plus parts in their instructions I would wave you off of this kit from PlusModel! Im guessing after building this that somewhere in the area of fifteen to twenty percent of the parts are not marked or never called for in the instructions, hence the value of the photo on the cover of the box with a finished mill.
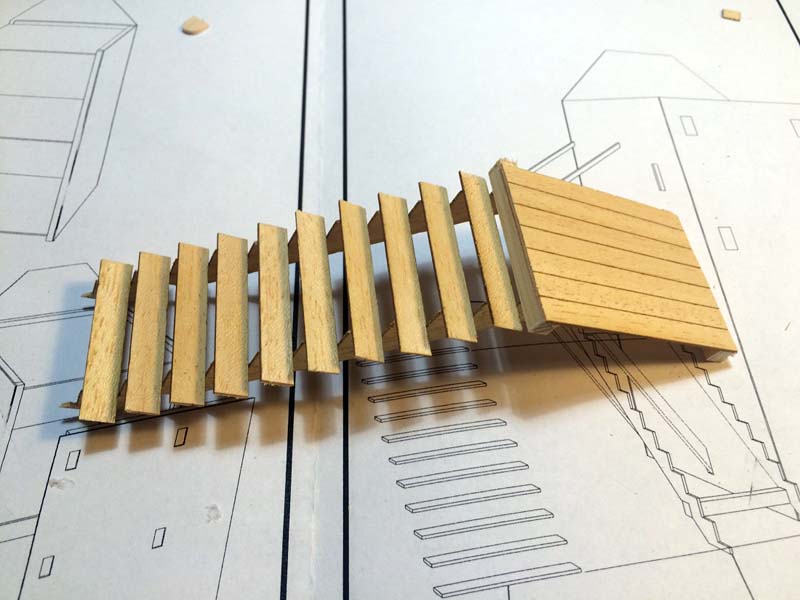
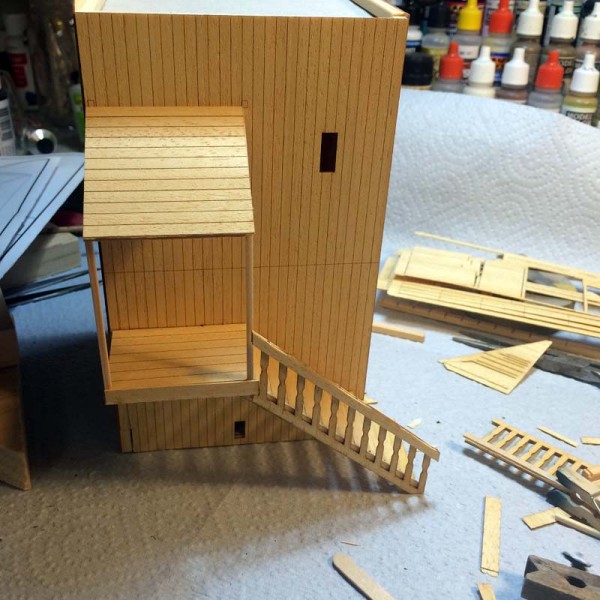
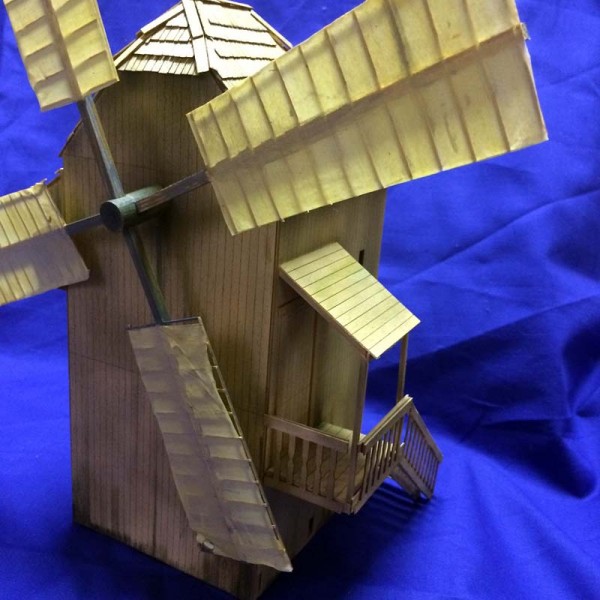
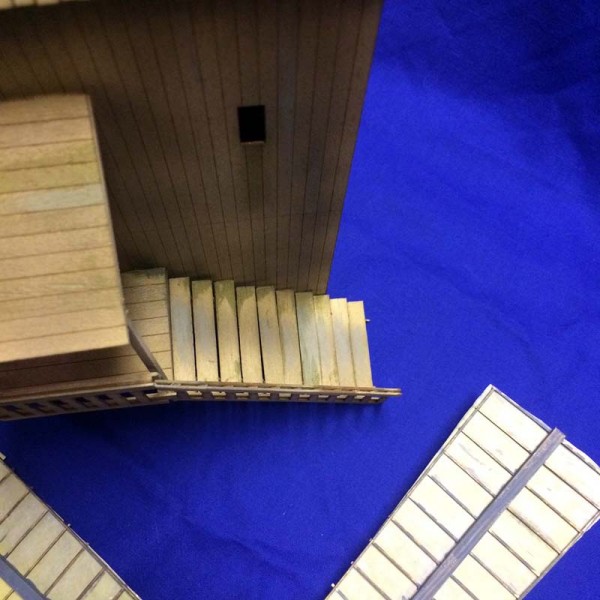
Once the main mill building is finished most folks will work on the stairs and the porch. The stair pieces all come from the laser cut sprue so be careful when removing them from the runners as the wood has a tendency to split in ways that you may not want; I lost a few bits and bobs before I got the hang of it. I used plain old white glue but there are some places in the building of the porch as well as later on where a quicker, stronger glue would have been helpful. As it is you will need to be careful as only a few attachment points have anything more than just a spot on the wall for a butt joint.
One thing I noticed working through the stairs and porch was the tendency of the wood to warp up when glue was applied. I know this was because of the moisture content of the glue but be prepared with some kind of clamps or clothes pins available. The rail for the porch and stairs was a bit of a disappointment as it required three pieces to provide the correct thickness but the size was always a bit off from a good fit and my build suffered a bit from it. One thing to keep in mind however was the nature of the material; wood, which means with a selection of cocktail or coffee stirrers or even the runners from the laser cut sprues you can easily modify or repair pretty much anything in the kit.
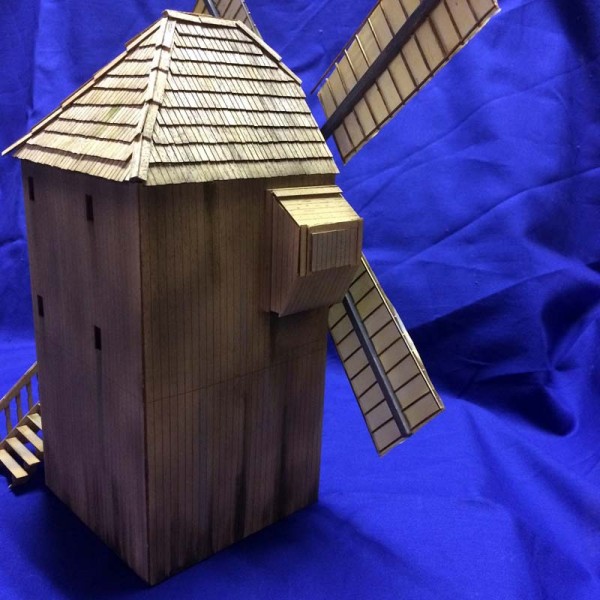
I had the biggest problem with the buttress for the machinery or gear housing (not really sure what it is for) some of the pieces simply didnt come close to fitting where they were supposed to. To make matters more difficult, this was the back side of the box photo and no photo of the rear of the mill is provided so you are on your own. I just kind of jury rigged it with pieces I had and called it done. If you dont want to mess with it you can even omit it completely without any problem with very little effort. I think if I build another I wont even bother with it.
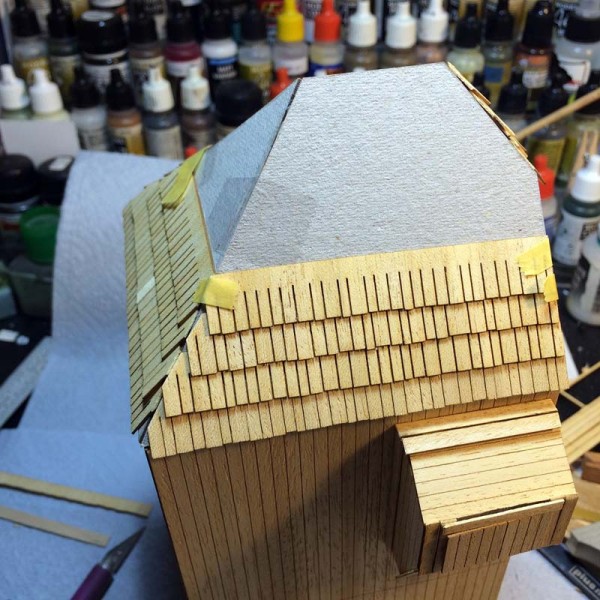
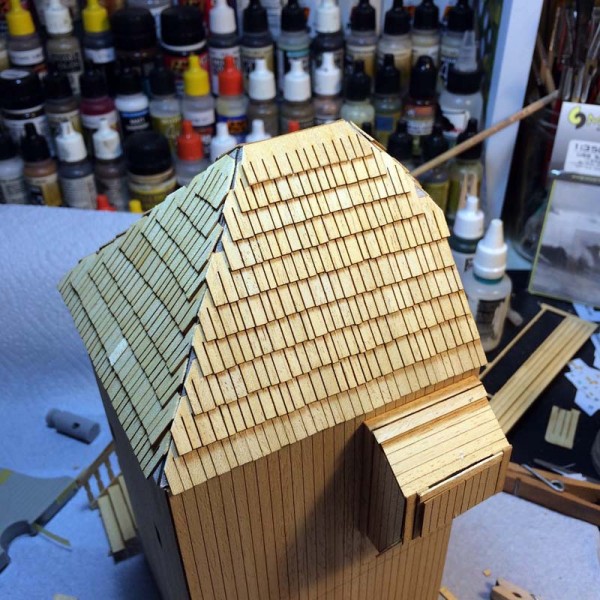
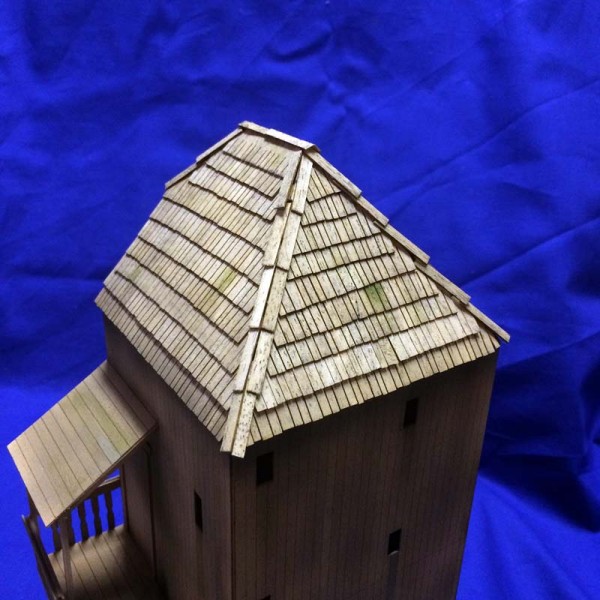
The roof is a bit tricky to get lined up. It is built with four angled pieces of cardboard as a base that the wood shingles are laid over top of to hide the cardboard underneath. Here is another area where the instructions are a bit lacking, Other than a line drawing from one perspective without any callouts for parts that is all the instruction you get for the roof. Nowhere does it tell you that the three sheets of laser cut material that are never mentioned are for the roof shingles, good thing the photo on the box shows it shingled otherwise you would be completely in the dark. Once you figure out the shingles and flashing it is a bit tedious but not unworkable.
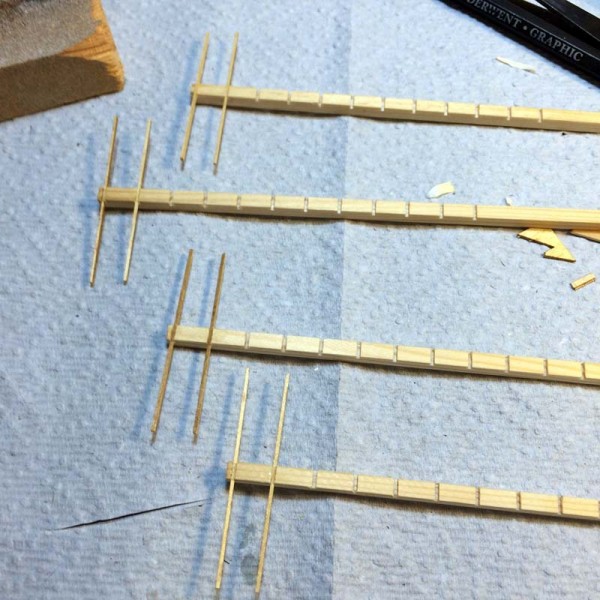
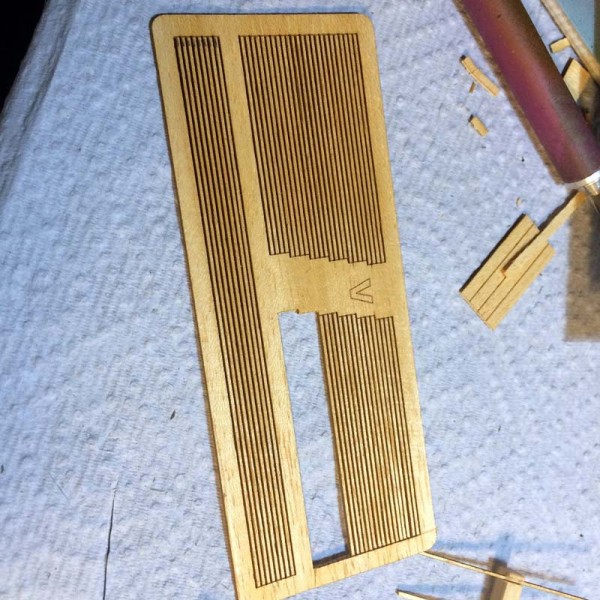
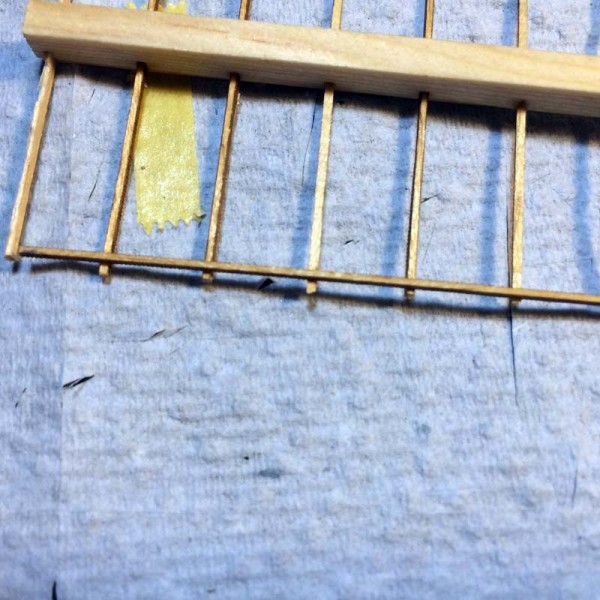
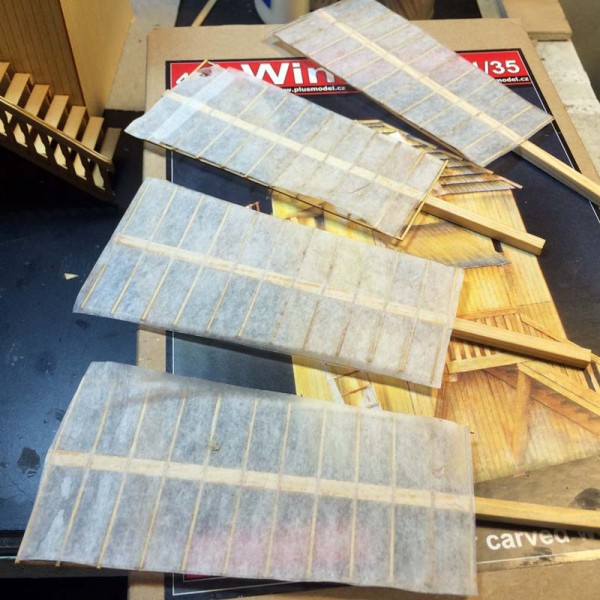
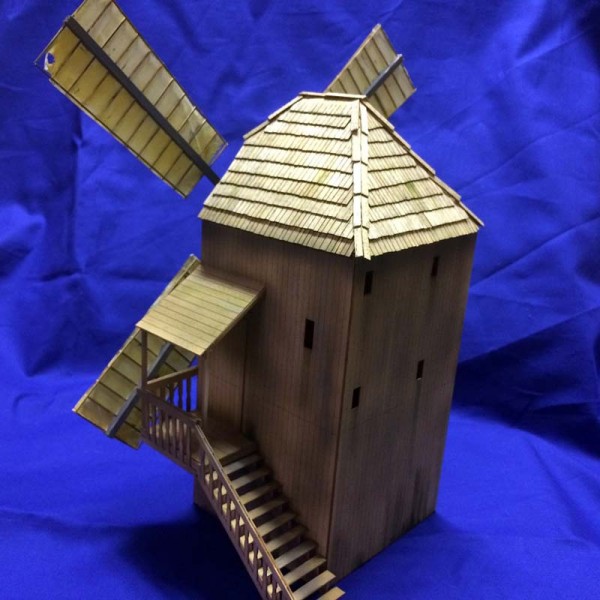
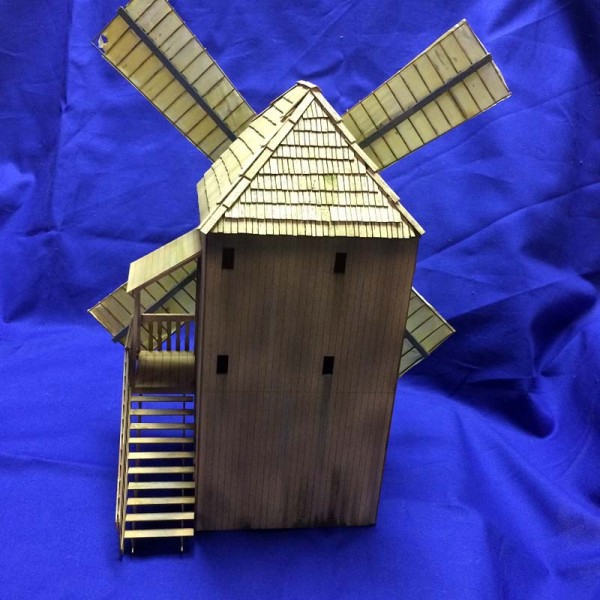
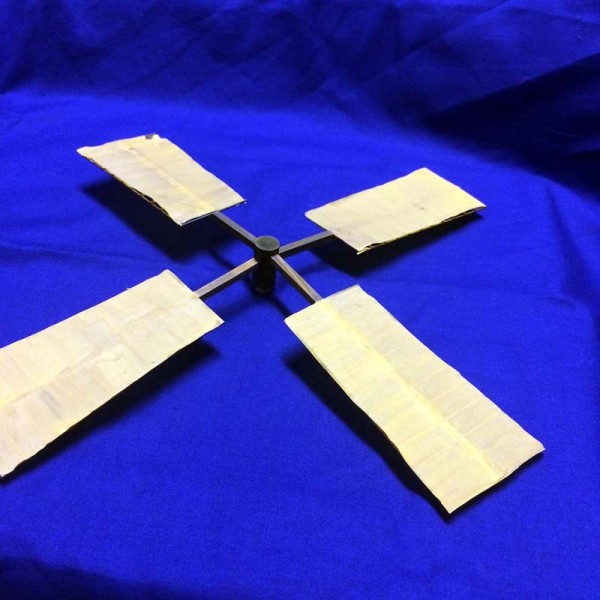
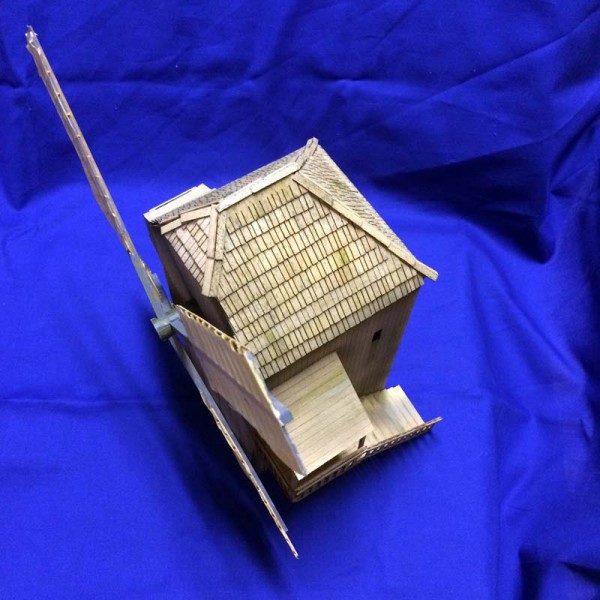
The vanes also are a bit of a figure it out for yourself affair with a couple of line drawings but nothing telling you that the parts come from the V sprue are the rails and stiles. Once you figure it out this part of the build will most definitely require some type of clamping to keep everything lined up correctly. It took an extra hour or so to ensure that everything was together with the vanes. The kit provides no sail material so I used glue soaked tissue paper that I later painted with Humbrol Linen 71 for extra strength. The four vanes attach to the one resin piece, the axle which holds the four vanes nice and tight.
With everything figured out to the best of my ability and a day to dry nice and solid I put a bit of paint and weathering to it. I used an old bottle of MIG wood ageing solution to weather the wood shingle roof and misted a couple of coats of Vallejo Concrete 131 and then used some washes and filters along with some of the AK Slimy Green dark and light to add the mossy crud that can grow on old wood buildings.
Conclusion
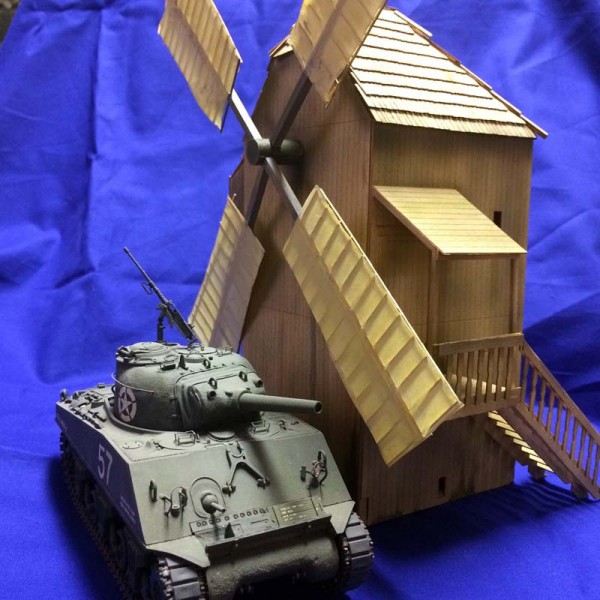
I was impressed with the size of this thing, a full 30 cm (12 inches) when the vanes are straight up and down. The mill itself is 24 cm tall (9.5 inches) with a footprint of 17x 12 cm (about 4 ½ x 5 ½ inches). Just to give a quick Armorama comparison that makes the mill about 4 times as tall as a 1/35th scale Sherman tank or a Tiger!
Outside of the sheer size of the mill, I enjoyed the build as it was quite a change of pace from my normal workbench routine. While the instructions will leave you guessing a good bit of the time most of the build is fairly intuitive and modifying any parts for better fit is a simple affair. I really like the way the roof and the shingles look and hope that PlusModel will see fit to use them in future building releases or offer them as a stand-alone purchase.
SUMMARY
Highs: Impressive when built at 30 cm in height. It's size alone will make it an eye catching model. The laser cut wood is easy to work with and replacements for any broken pieces are easily created. Lows: Instructions are only about 2/3 complete. Some parts just don't fit.Verdict: A solid effort that I would recommend to anyone looking for something different as long as they can be flexible.
Our Thanks to Plus Model! This item was provided by them for the purpose of having it reviewed on this KitMaker Network site. If you would like your kit, book, or product reviewed, please contact us.
About Rick Cooper (clovis899) FROM: CALIFORNIA, UNITED STATES
I have been modeling for about 30 years now. Once upon a time in another century I owned my own hobby shop; way more work than it was worth. I tip my opti-visor to those who make a real living at it. Mainly build armor these days but I keep working at figures, planes and the occasional ship.
That's what you'd expect - only this one has a porch and a set of steps to get in the way! I'm normally of the looks-like-a-Fruitbat-to-me persuasion, but this is a terrible missed opportunity ...
PlusModel usually make their products based on a real life local object. I wonder what the source for inspiration would be. Is it a remodel? Location with prevailing winds? Be good to find out.
Webpage about a post mill in England.
LINK
The "stick" attached to the back of the mill is the "handle" used to turn the mill to face the wind. The bottom of the stairs should probably be free from the ground.
See post above about the probable origin of the mill from Plus Model.
This wiki-page about windmills in Poland says that the mill in
LINK
Lednogora is a post mill. Maybe the wooden walls around
the bottom have been added later, when the mill was taken
out of operation?
/ Robin
Maybe if the lower enclosure is only attached to the upper (rotating) part of the windmill and the foundation is "circular" then maybe the "skirt" can rotate around the foundation ? Hard to tell with all the grass around the bottom of the windmill ...
/ Robin
Blimey, wish I hadn't mention it now ... !
For what it's worth, I reckon the mill in the kit is an [b]ex[b]-mill. Like the one in the lowest photo, it's been disabled and fitted with a skirt and a permanent staircase. I say this because (i) if a turning mill had stairs that reached the ground, you'd expect at least a rut, if not a properly built track; while (ii) if the stairs were cantilevered off the mill, they'd be so long that they'd bob about uncomfortably and might fall off altogether. It's more likely that the mill would be turned into the wind, braked, and then a ladder used to get in and out.
Also, the stairs in the kit have a load-bearing member below the banister, so they must rest on the ground.
It's still a nice accessory, though.


Comments