The SU-100 evolved from the SU-85, which had used the 85mm D-5 gun in the superstructure of the T-34; once that D-5 had been incorporated into a rotating turret to create the T34-85, a more powerful tank destroyer on the same principle was conceived. The 100mm D-10S, developed from the existing S-34 naval gun, equipped the new machine and was mounted, with a newly designed mantlet, into a more heavily armoured casemate with an expanded commanders position and improved cupola.
This is a new release in Zvezdas relatively small range of 1:72 snap fit military vehicles, all from WW2. Previously I have built (and blogged on Armorama) their Panther Ausf D, a very nicely designed kit with excellent fit and at a good price. This review will show in detail the construction of the new SU-100 kit and we will see if it is up to the same standard as the Panther.
Contents
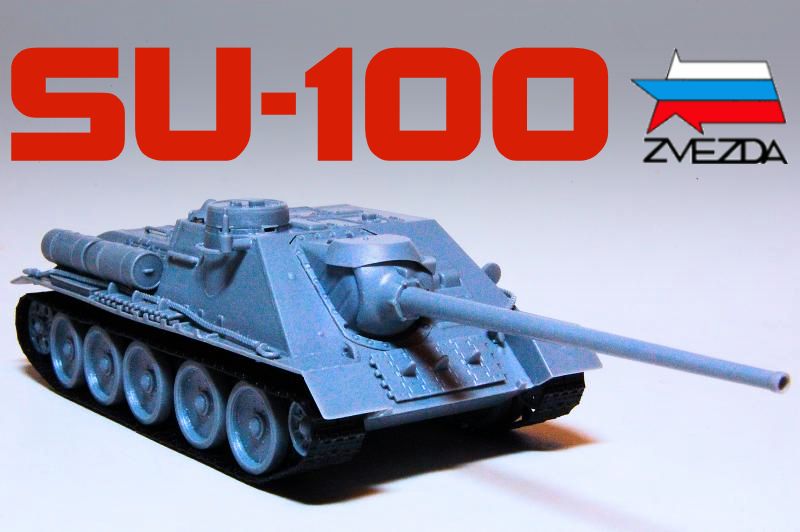
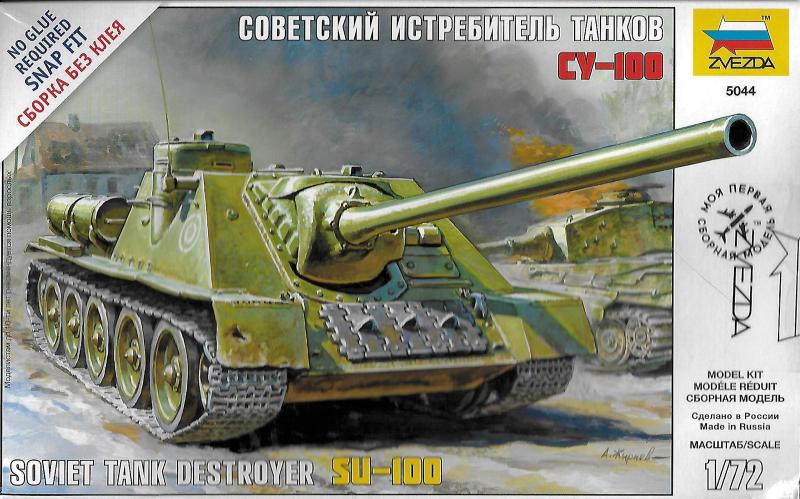
Using the same artwork as its 1:35 big brother, we have a side opening box with some photos of the completed model on the back. Inside we have:
Instruction sheet in black and white
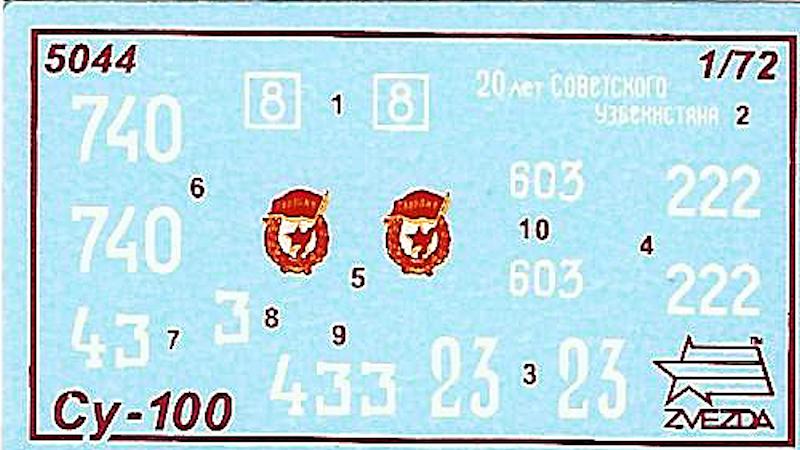
Decal sheet with five options
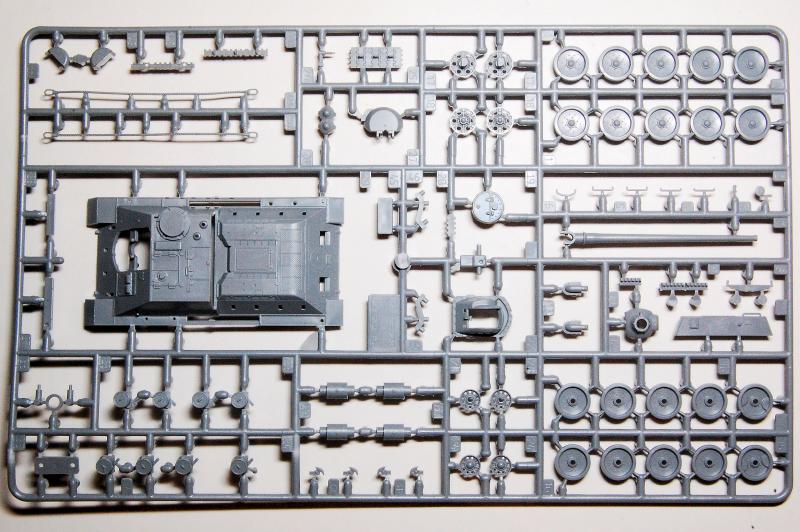
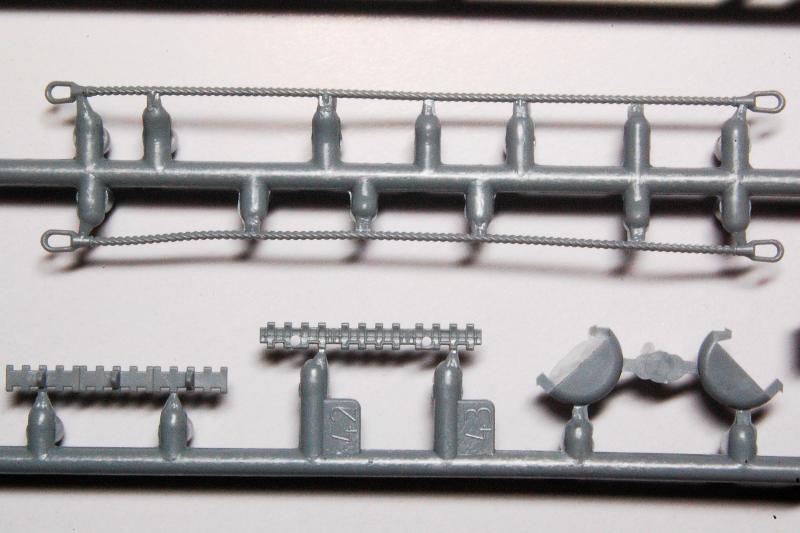
Main sprue in grey
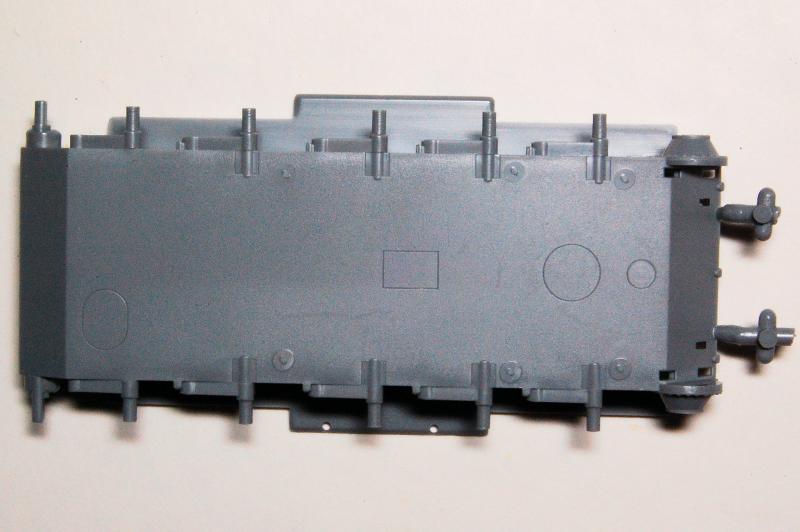
Hull tub in grey
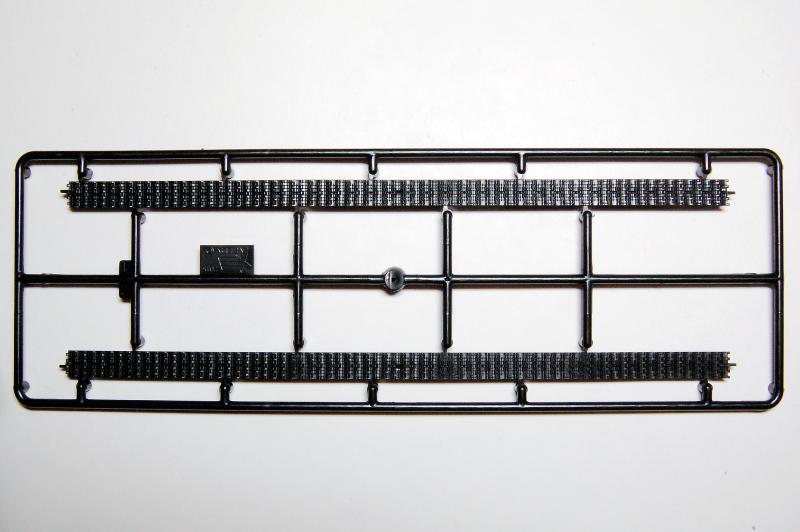
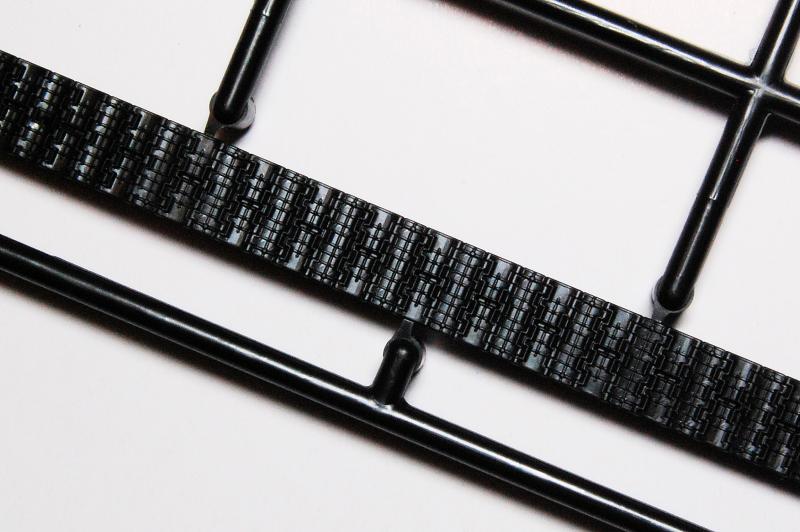
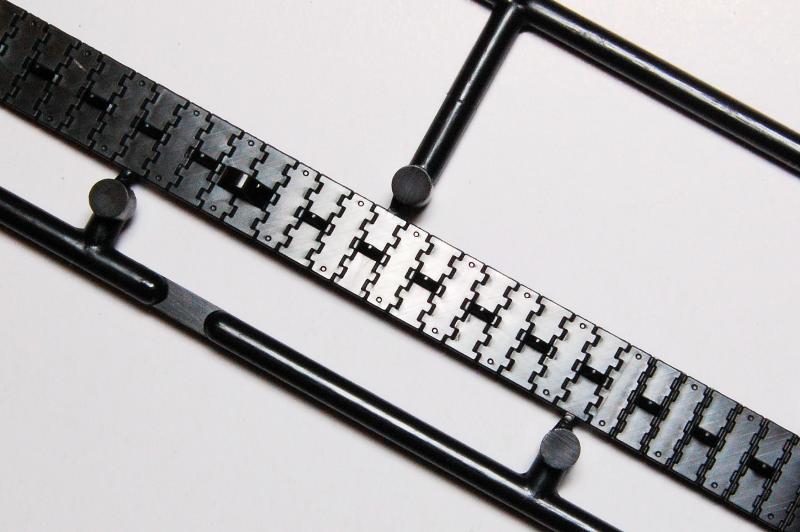
Tracks in black polystyrene.
Review
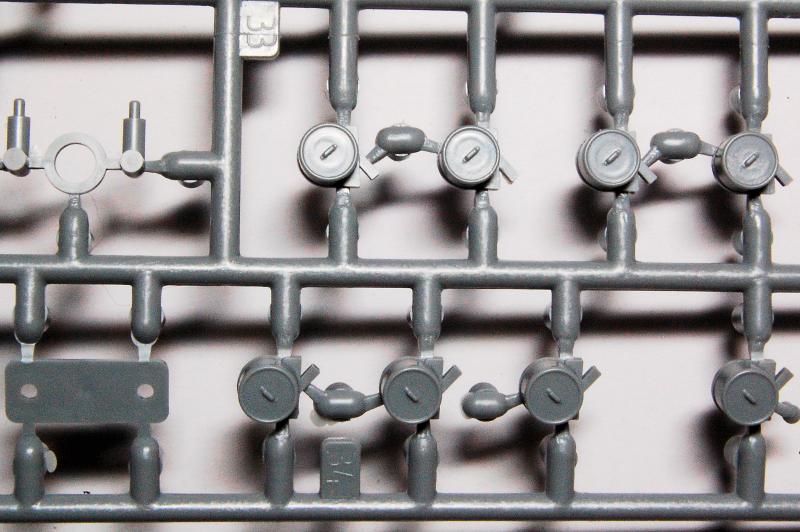
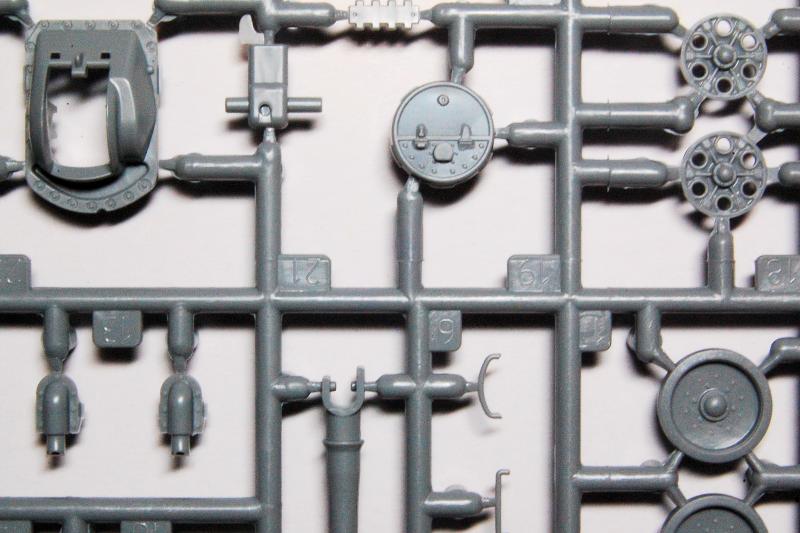
Mould quality and detail is very decent, though not necessarily of the very highest standard, with detailing appearing just a touch soft in places and with some occasional flash. There were however no flaws evident in the moulding as I had experienced with the Panther. Everything was still attached to the sprue despite some components being held by only a single point. The black tracks were very cleanly moulded and detailed on both sides.
The Build
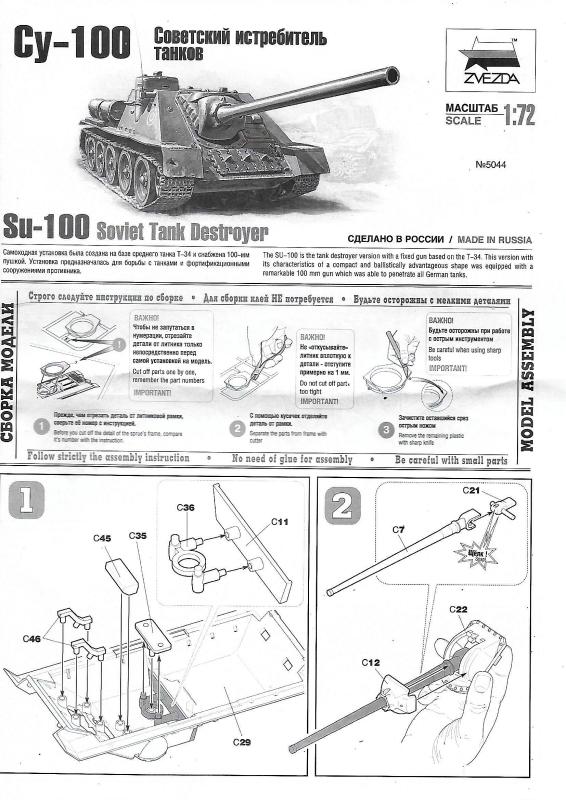
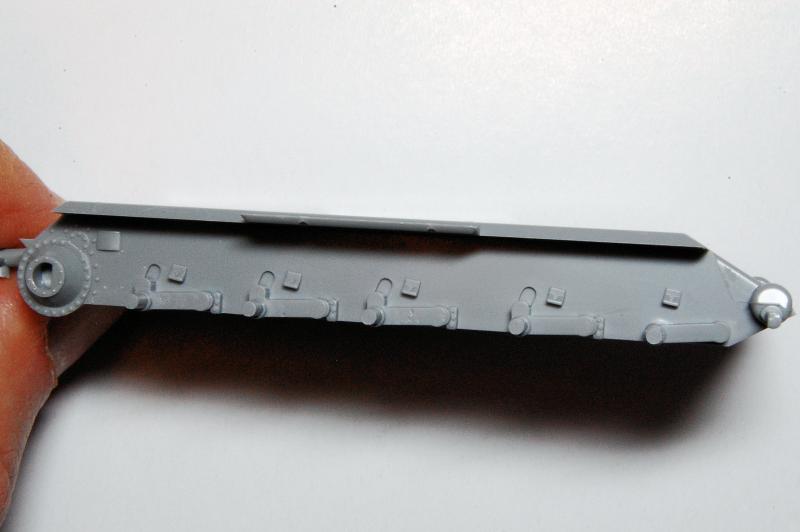
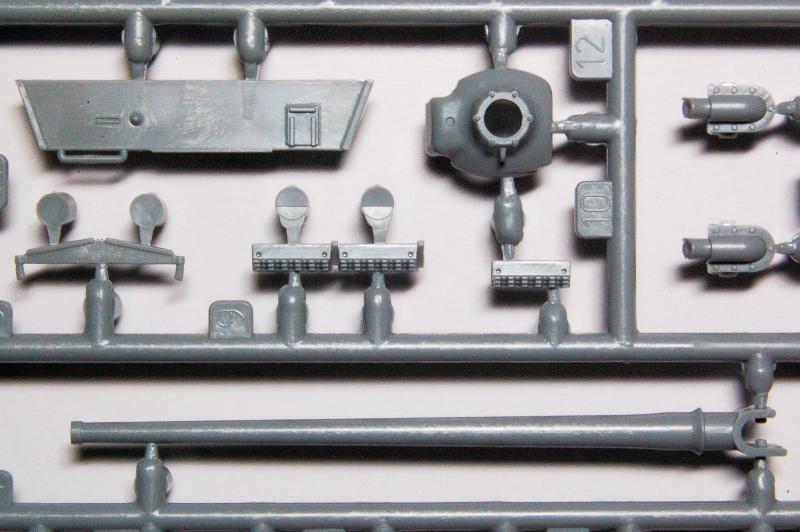
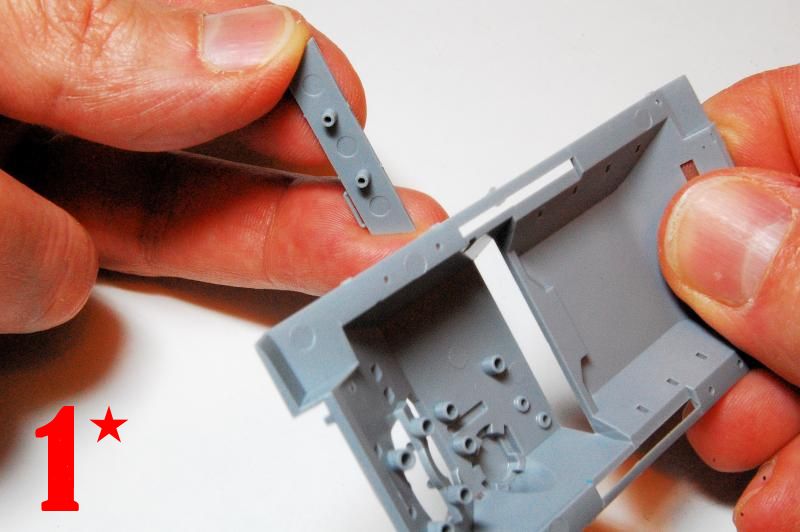
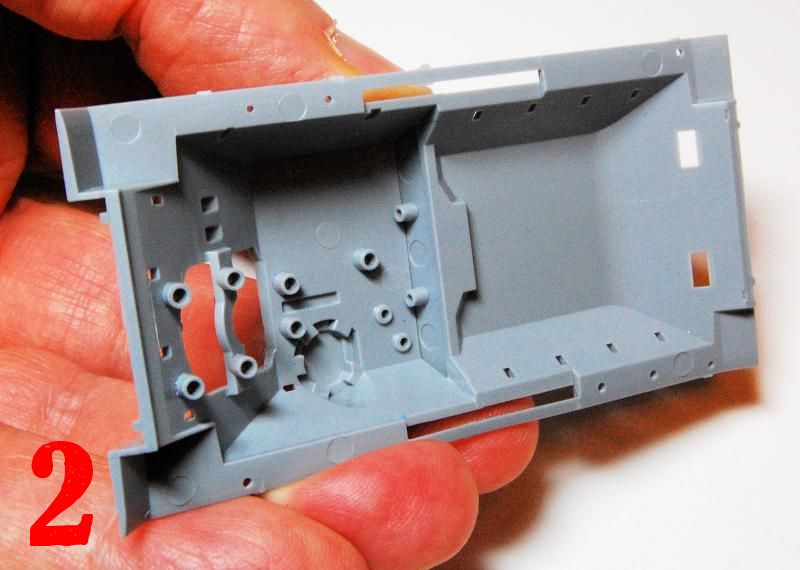
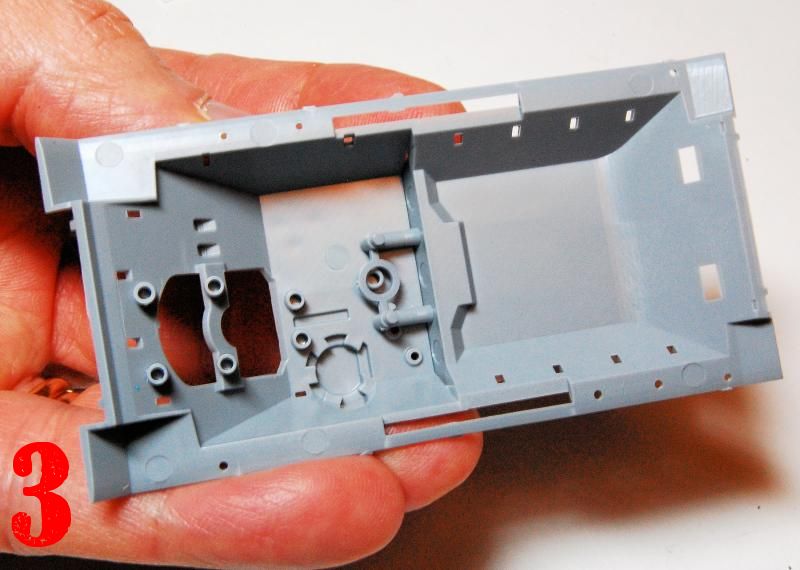
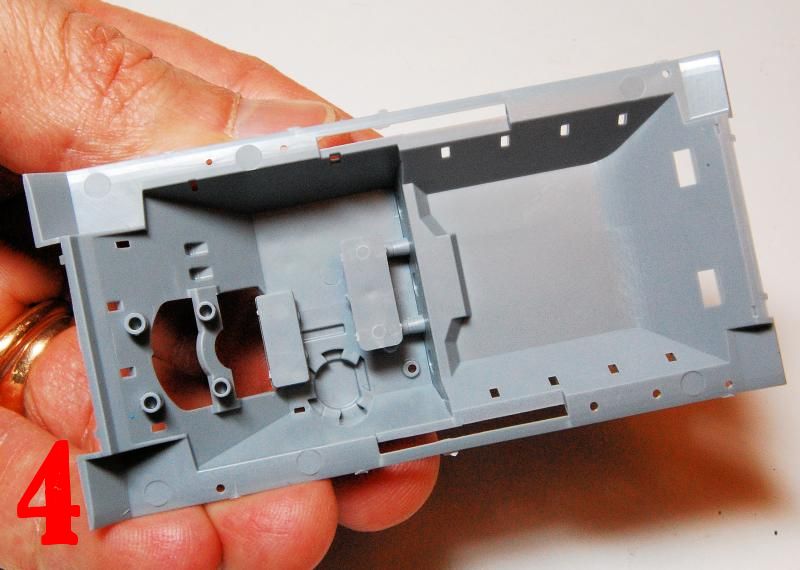
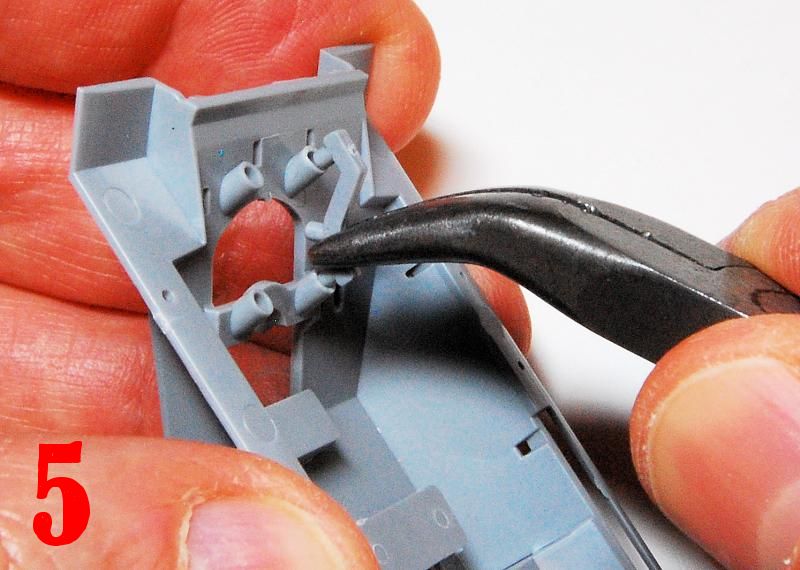
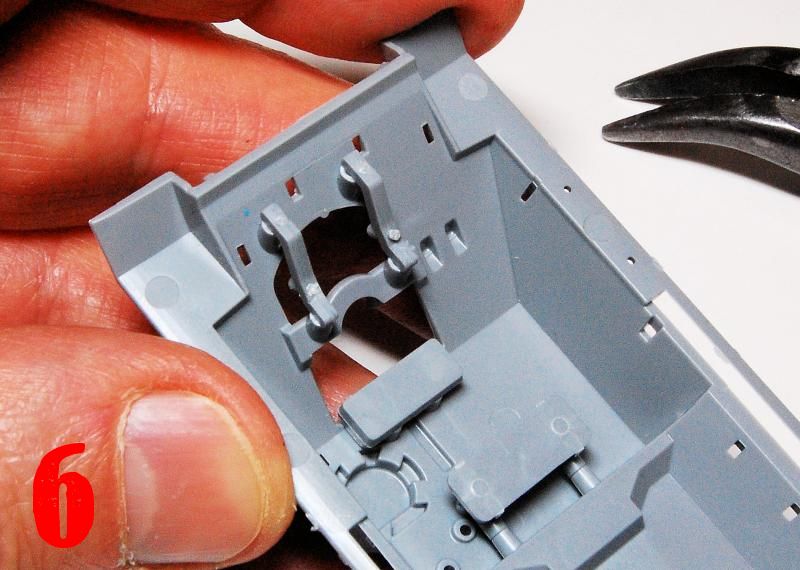
Construction starts with slotting the rear plate of the fighting compartment into the superstructure (photos 1, 2). It is held in place by a bracket (3) which in turn is clamped to the roof (4). Moving to the front, two supports fit into mounting tubes either side of the gun aperture (5, 6). No glue is needed for any of this, the parts all fit tightly.
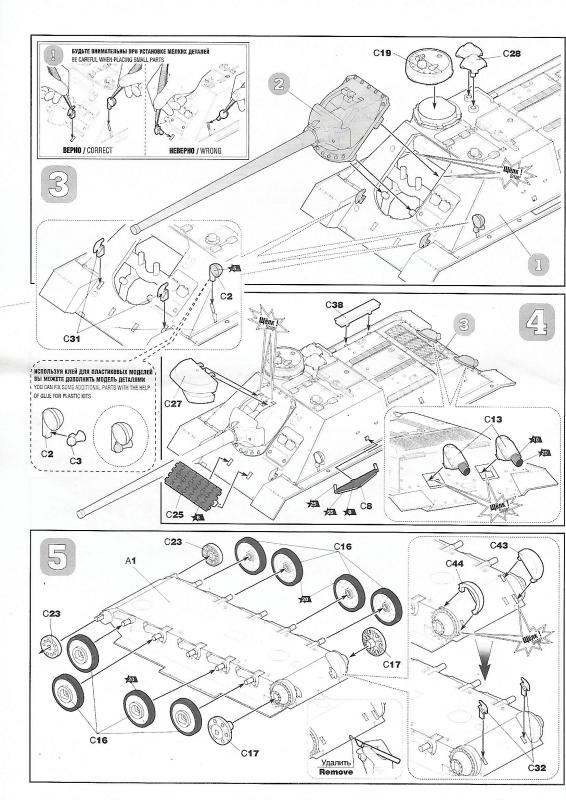
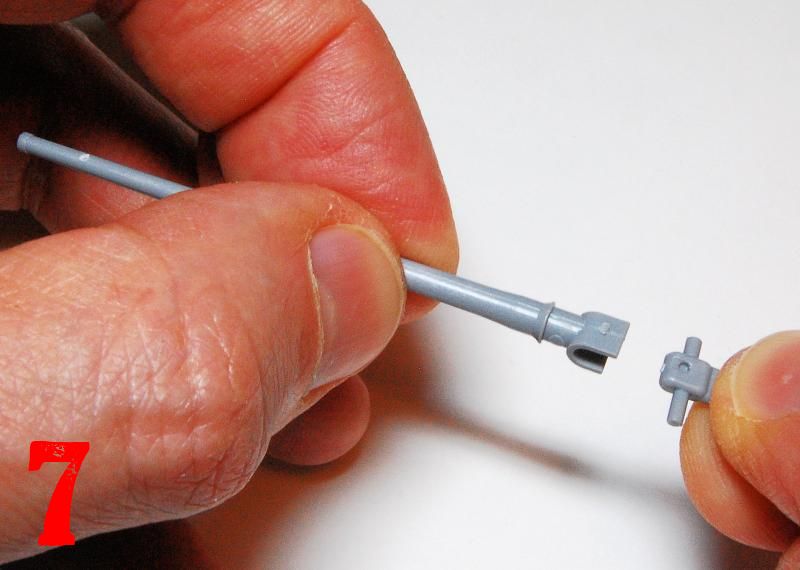
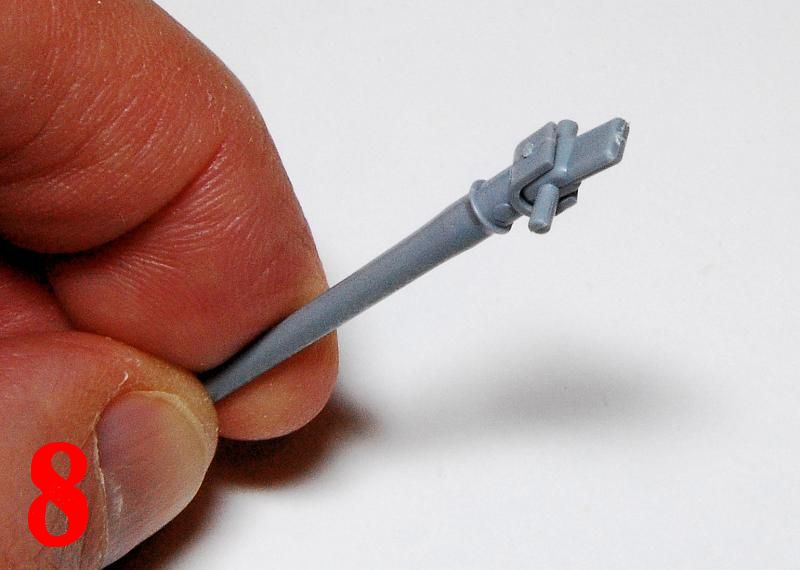
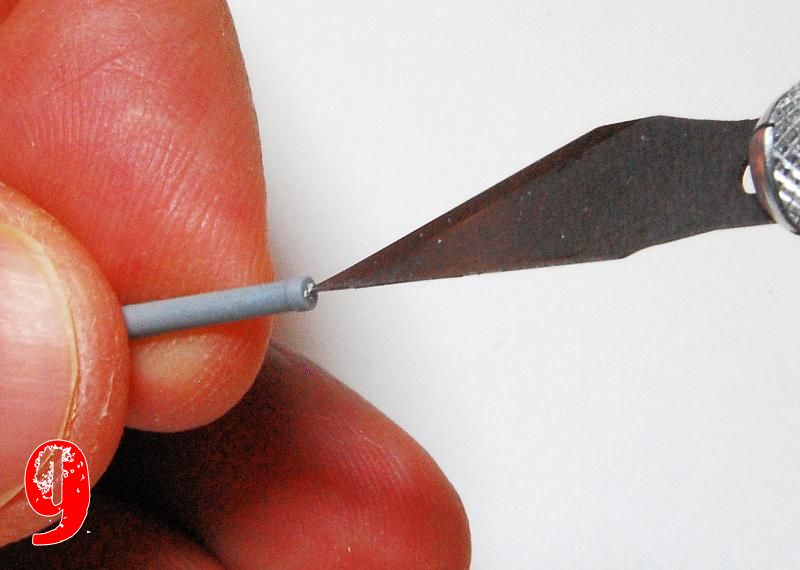
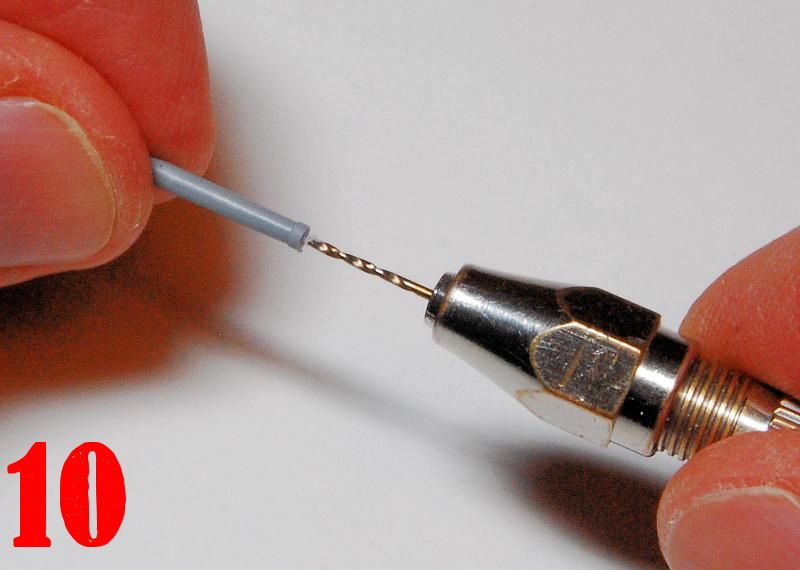
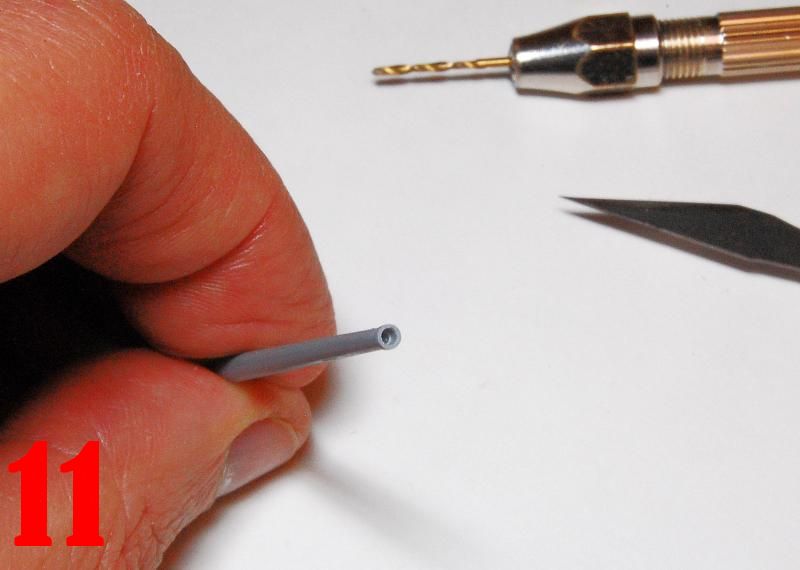
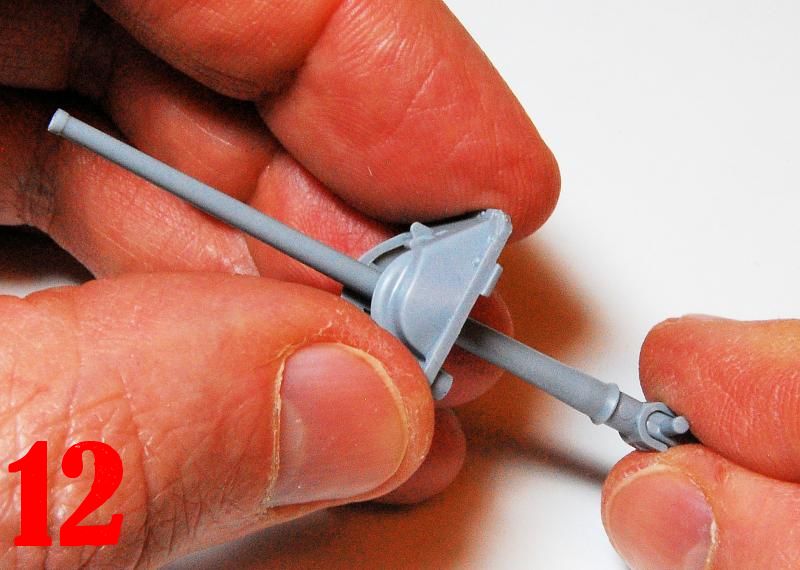
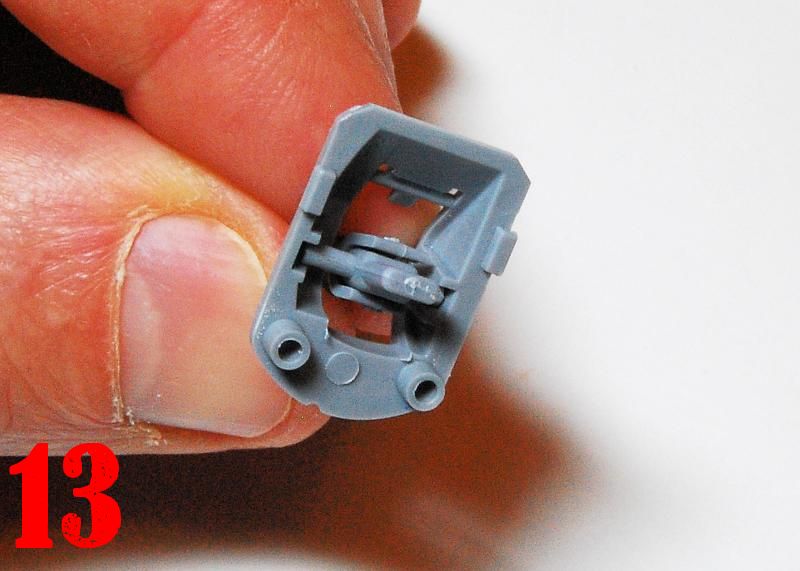
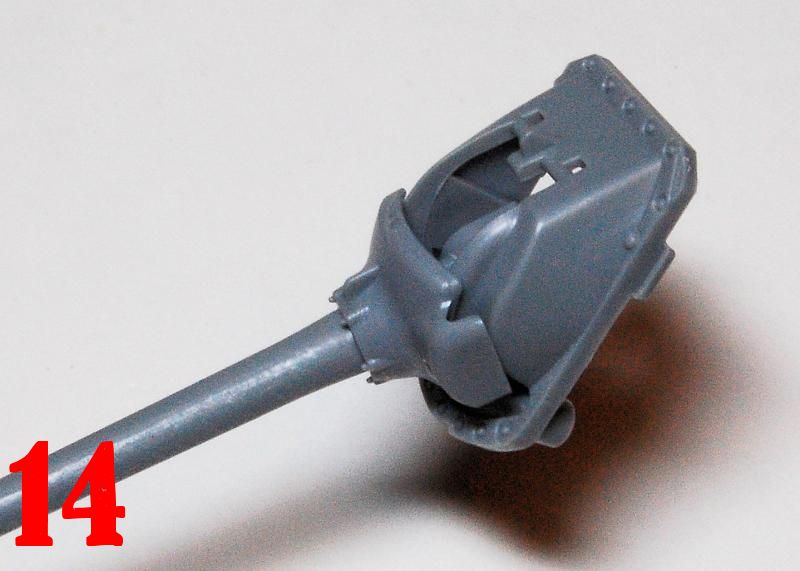
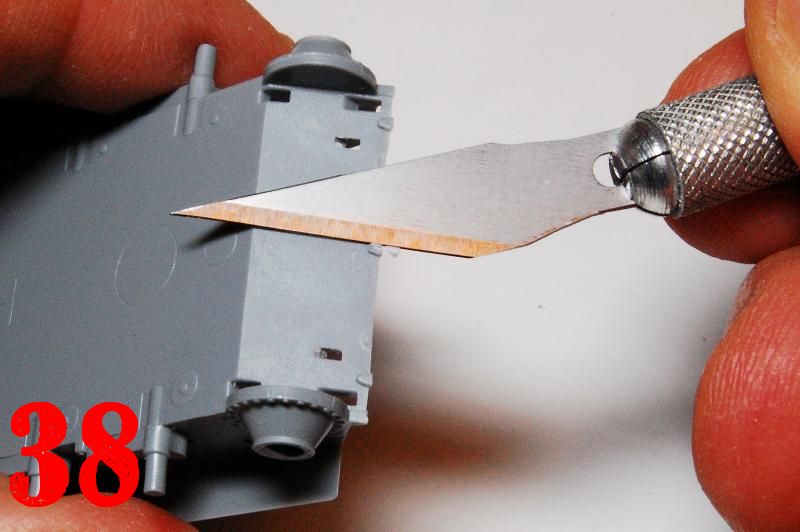
The breech end of the gun features a U-shaped slot that forms a joint to allow both elevation and traverse (7, 8). The muzzle is blank with no opening, so it was drilled out, starting with a pilot hole created using a knife (8, 9, 10). The gun then slots into the armoured mount from inside (12, 13) with the outer mantlet being slid down the barrel and into place (14). Note the presence of the lifting eye between the top two bolts, and another on the top of the big mount, which could be carefully drilled out. The gun assembly was set aside while some details were added to the superstructure.
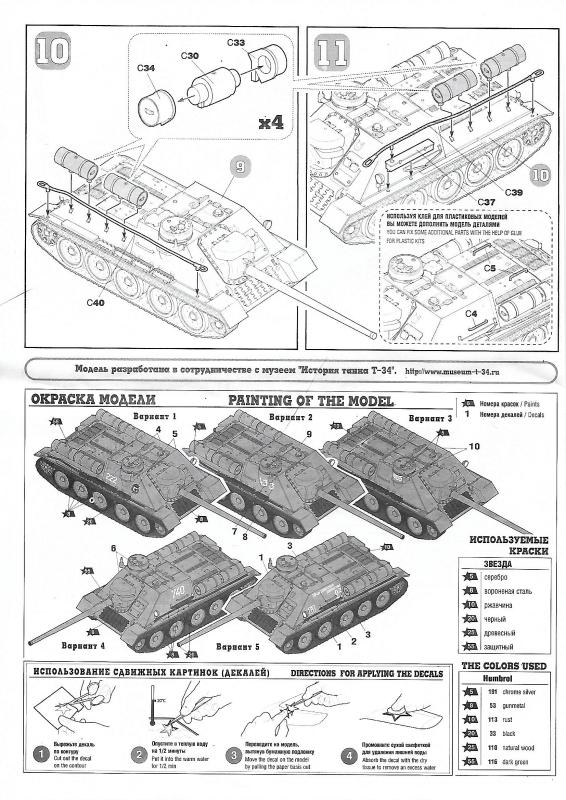
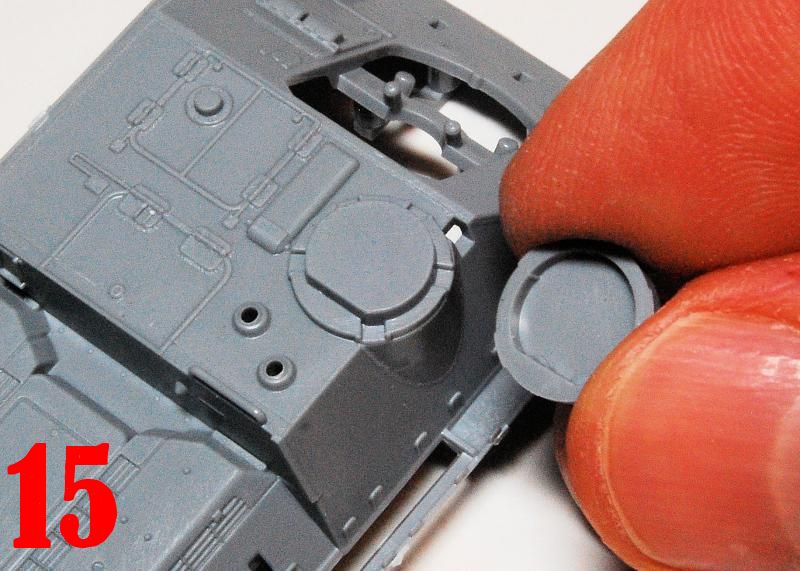
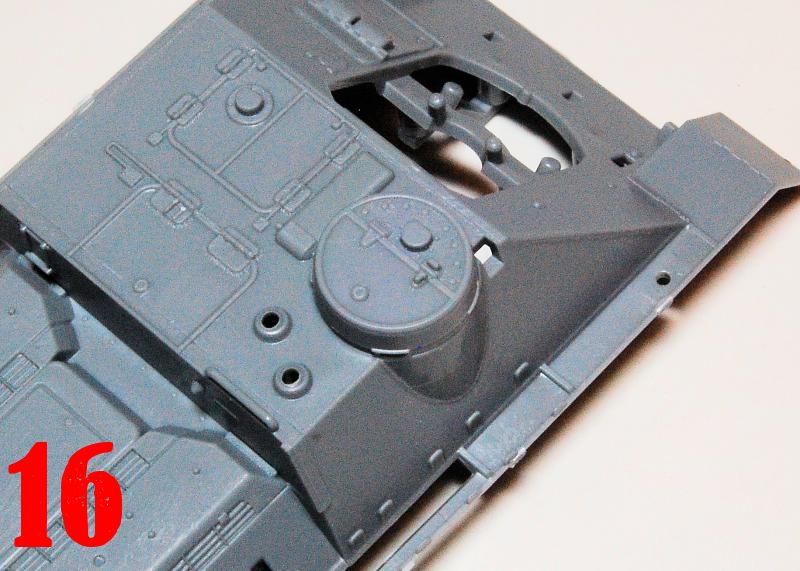
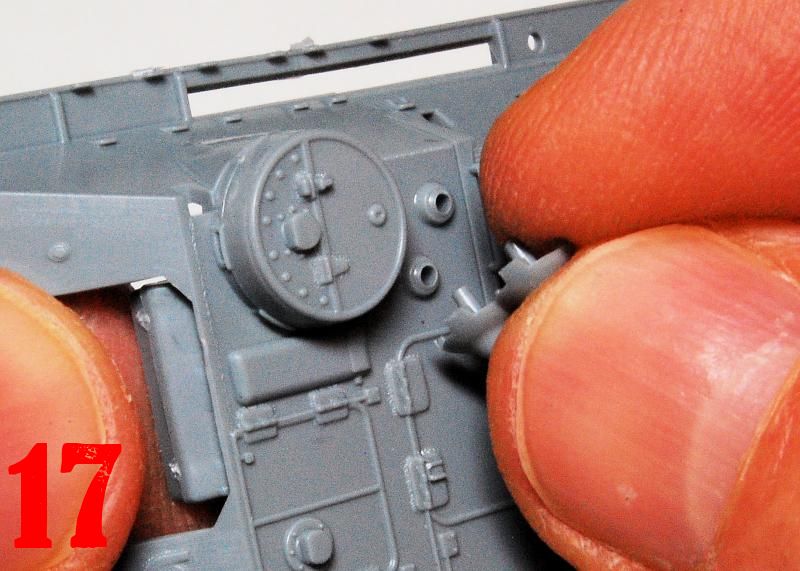
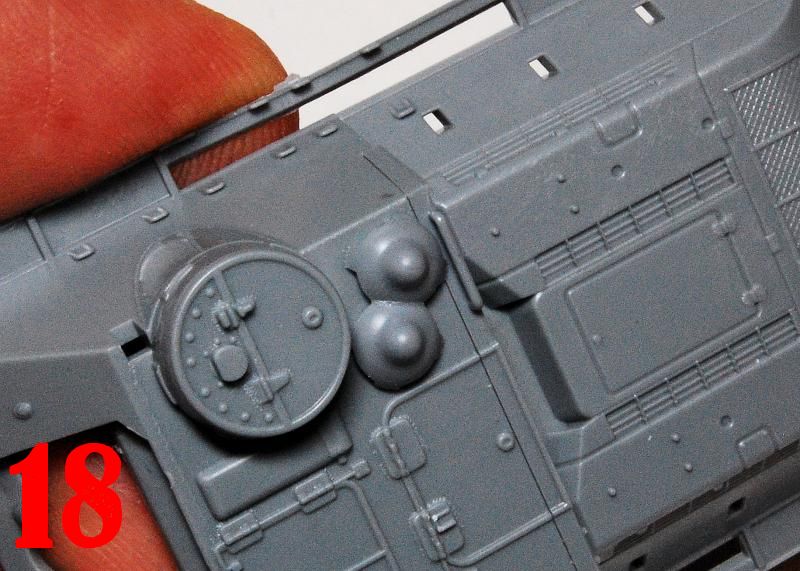
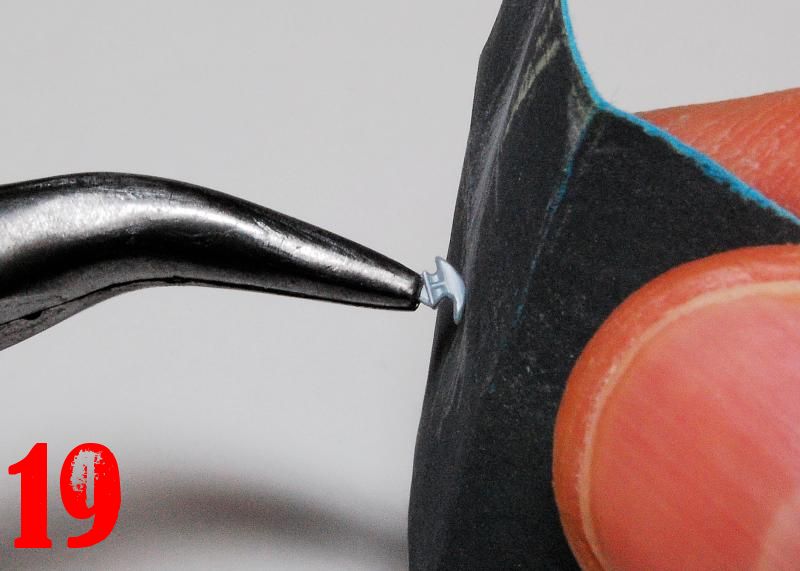
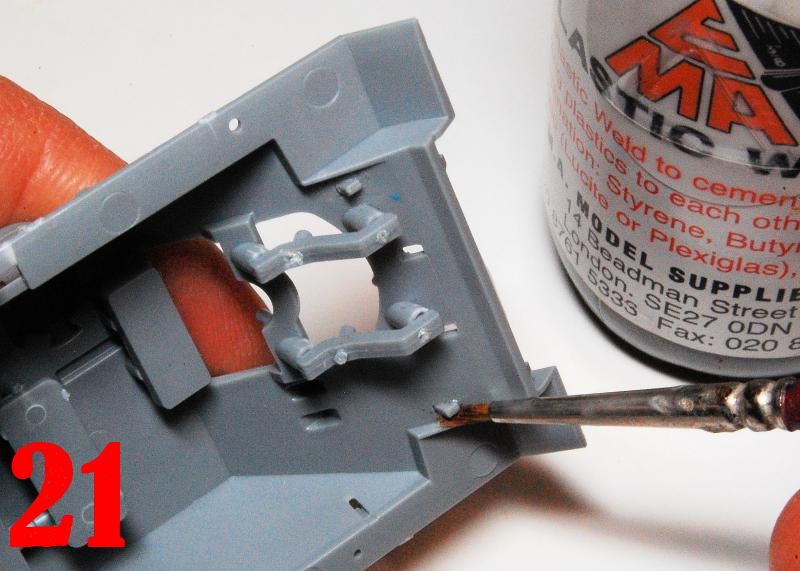
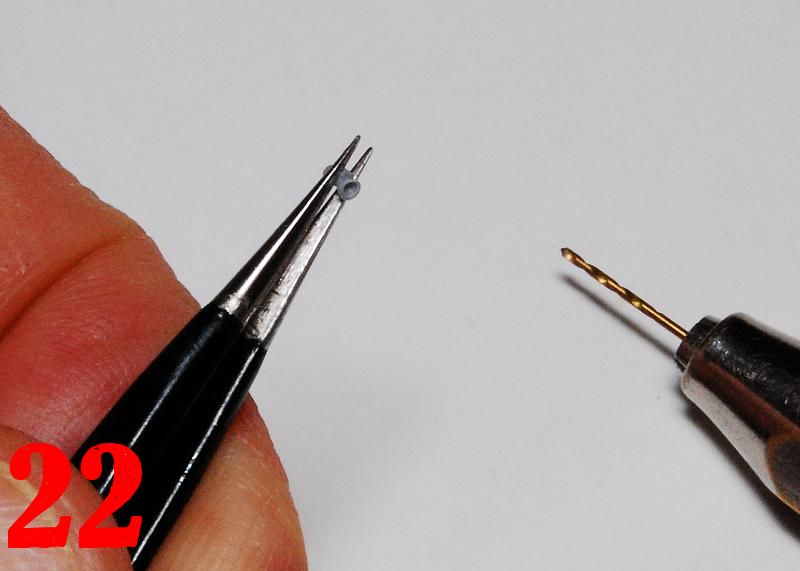
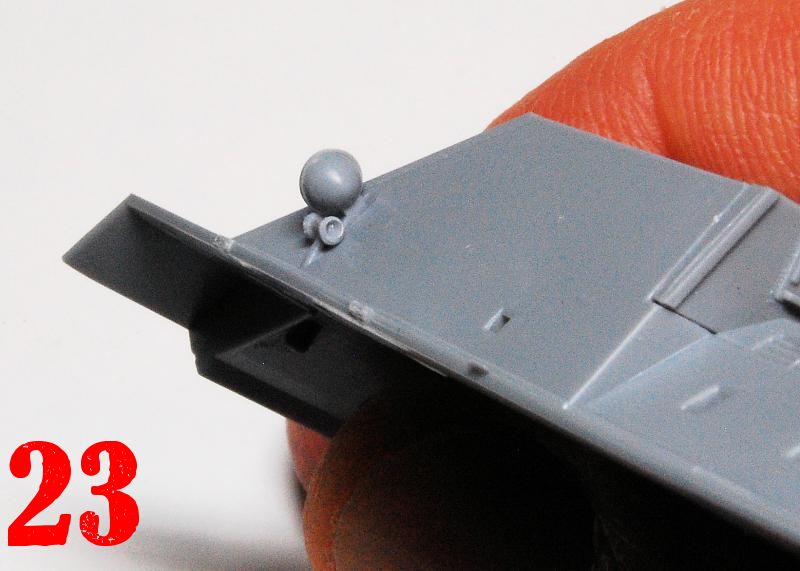
The commanders cupola is added to the roof, it can only be mounted one way, and for this I used liquid glue (15, 16), followed by the armoured extractor fan housings which clipped in place (17, 18). Tow hooks featured the usual moulding seam which was removed with emery paper before being mounted and then glued into place from the inside (19, 20, 21). The instructions suggest that if you want to add the horn underneath the single headlamp then it needs glue, the implication being that you could just leave it off if you were going glue-free. I also drilled this piece out prior to attaching it with the lamp (22, 23).
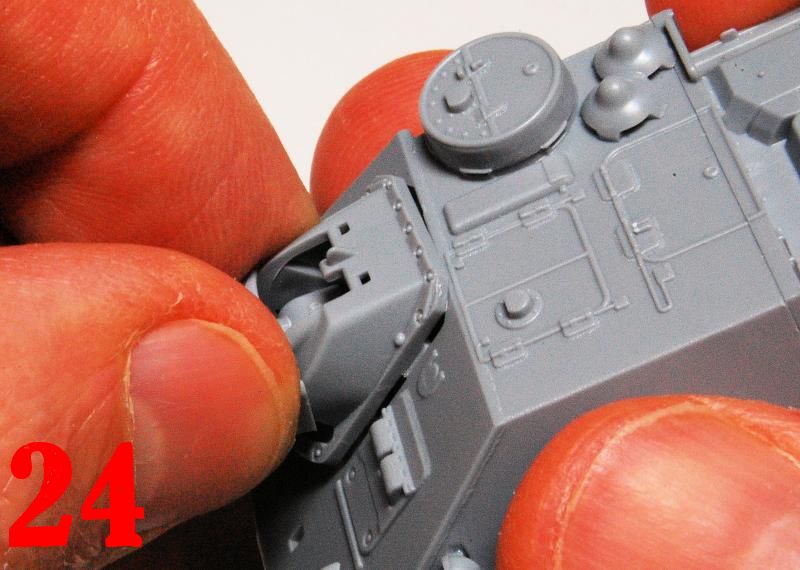
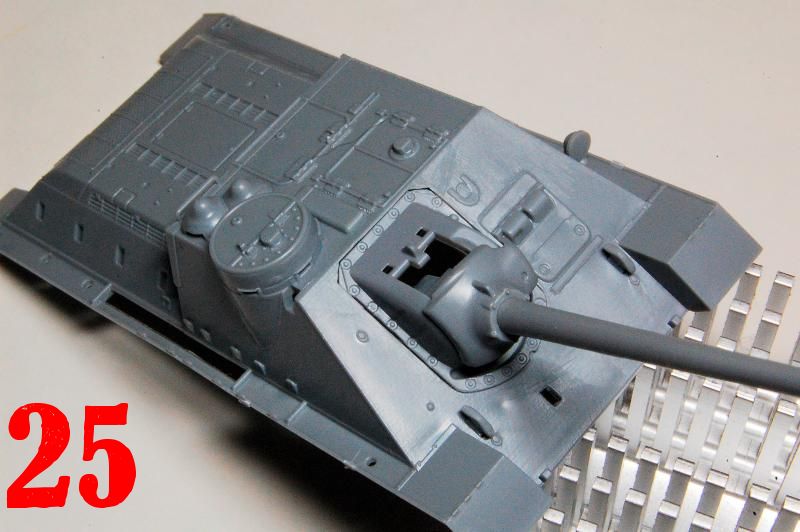
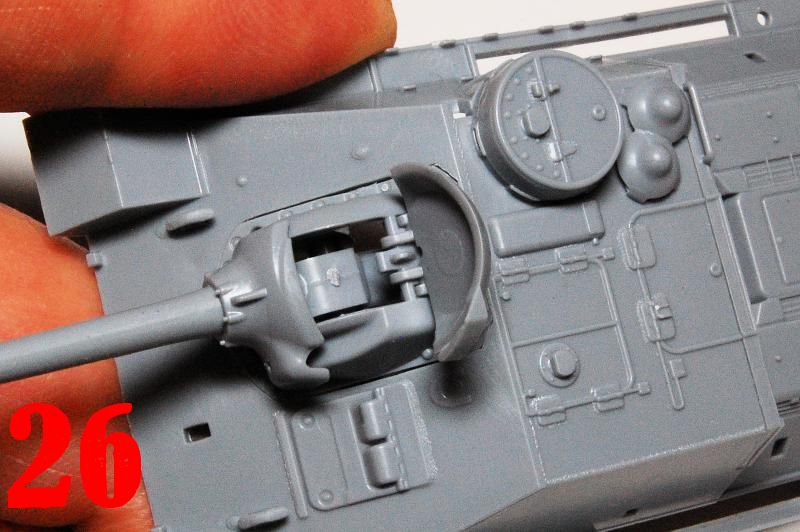
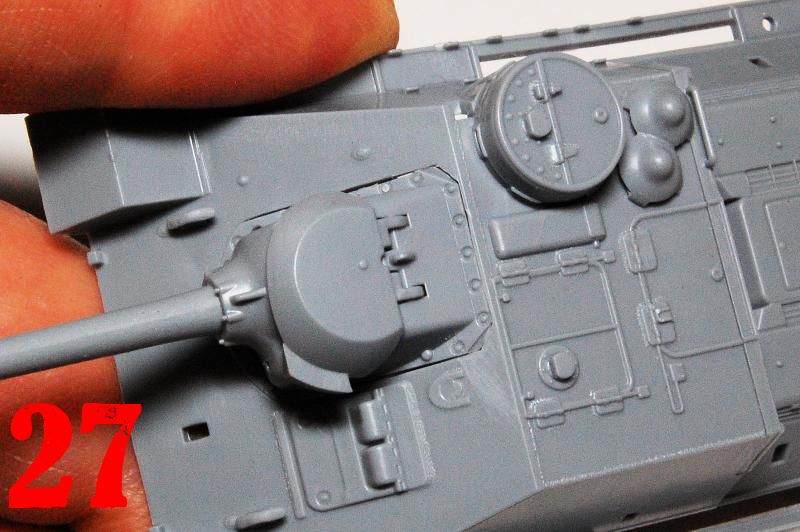
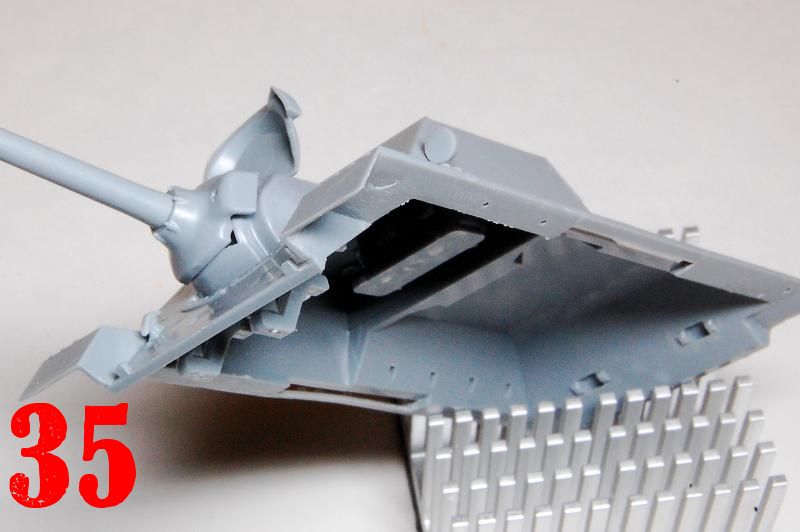
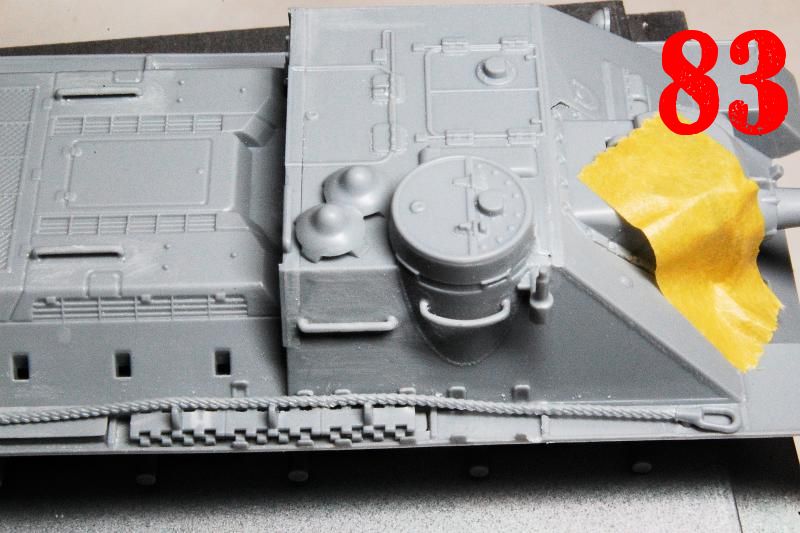
The gun snaps into place securely and perhaps overly flush, without any risk of breaking anything, (24, 25) then the top armoured plate of the gun mount is added as a hinged top (26, 27). This piece could be left until near the end of construction as, unglued, it tends to flap about, and eventually I added a piece of tape to protect it during handling.
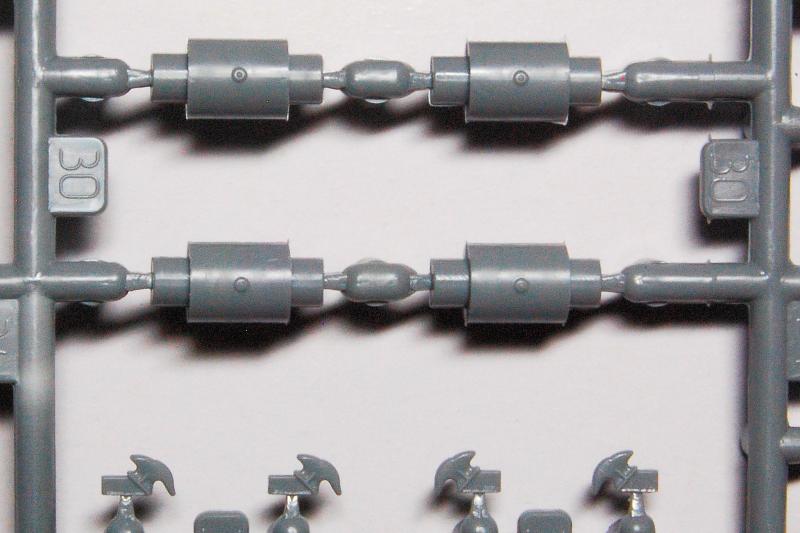
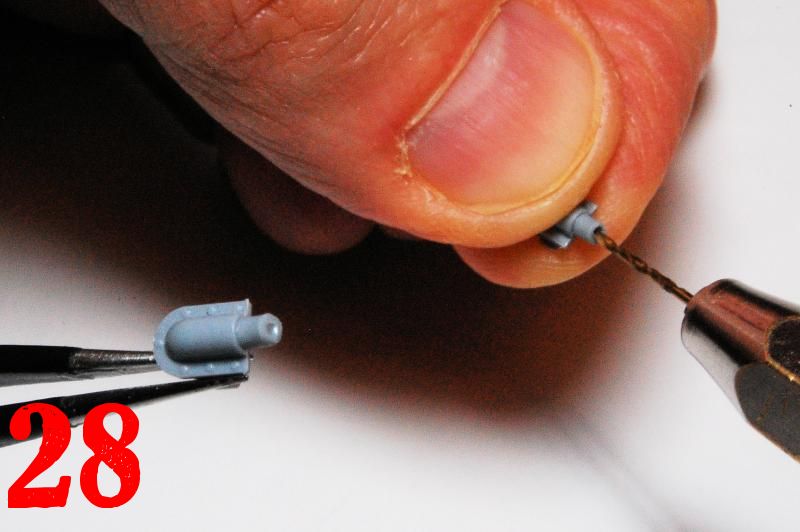
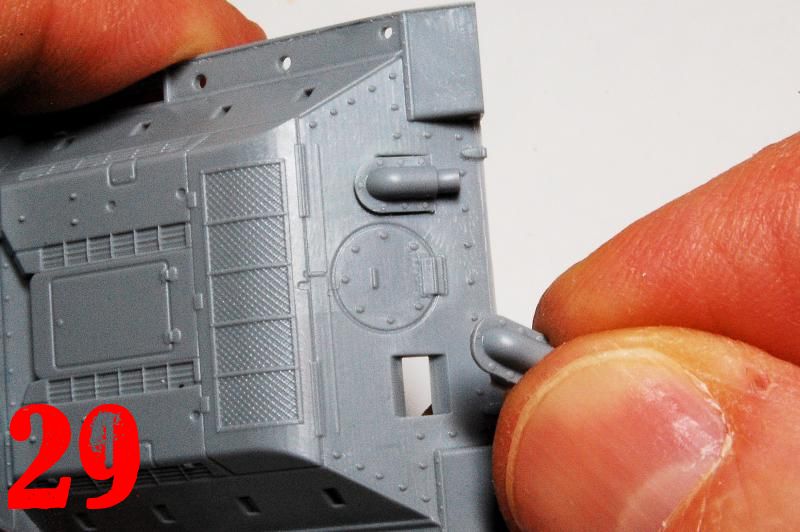
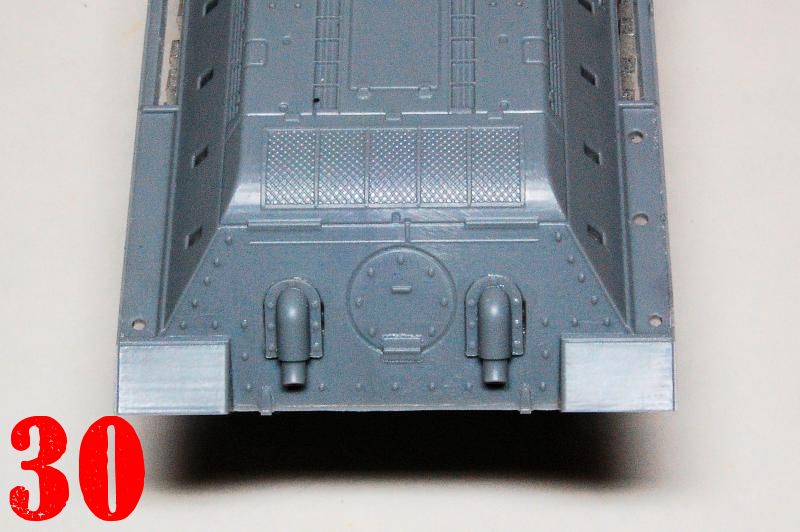
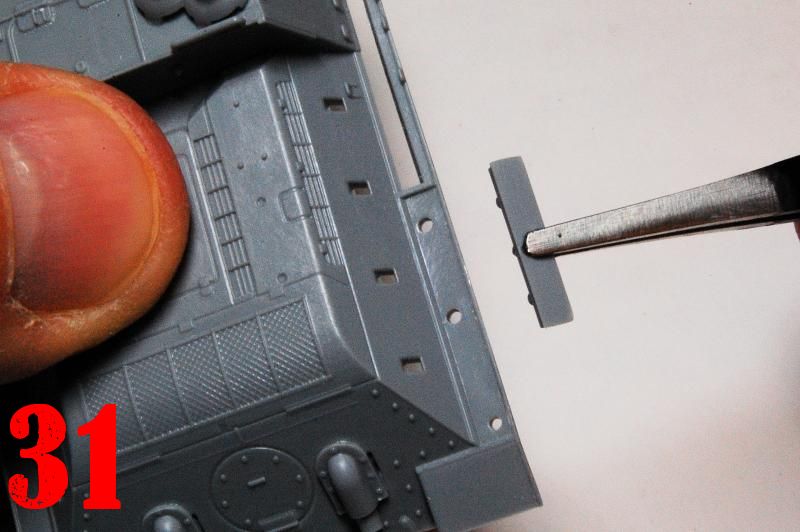
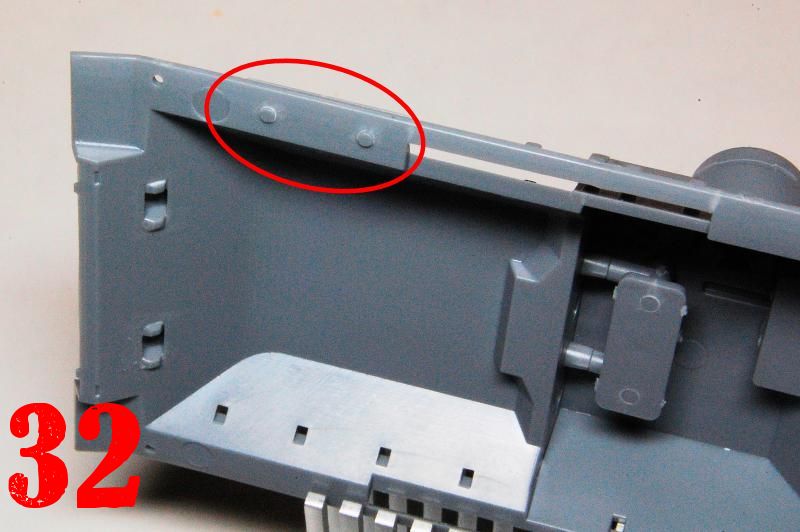
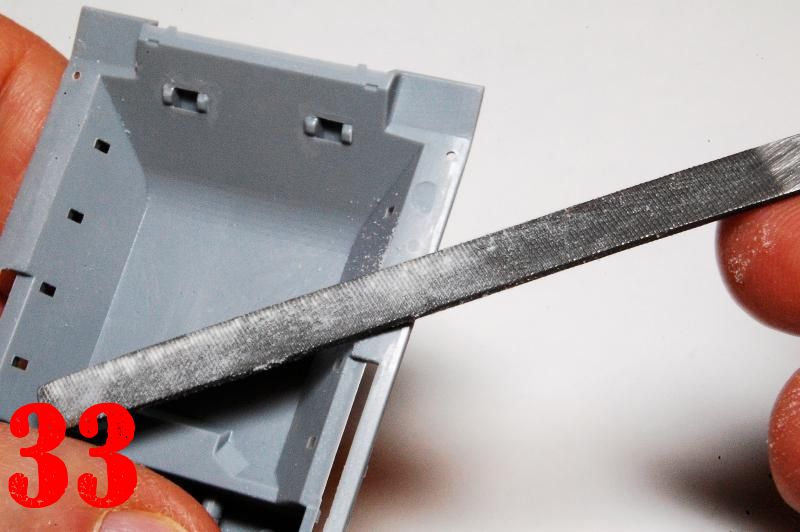
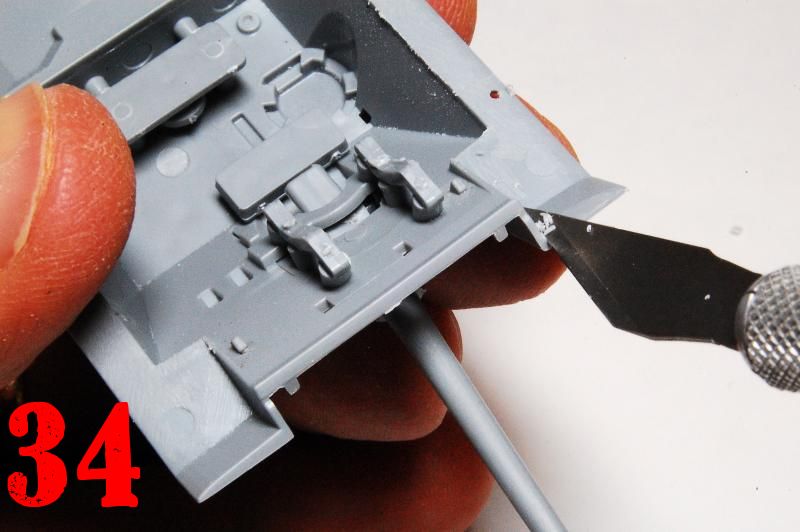
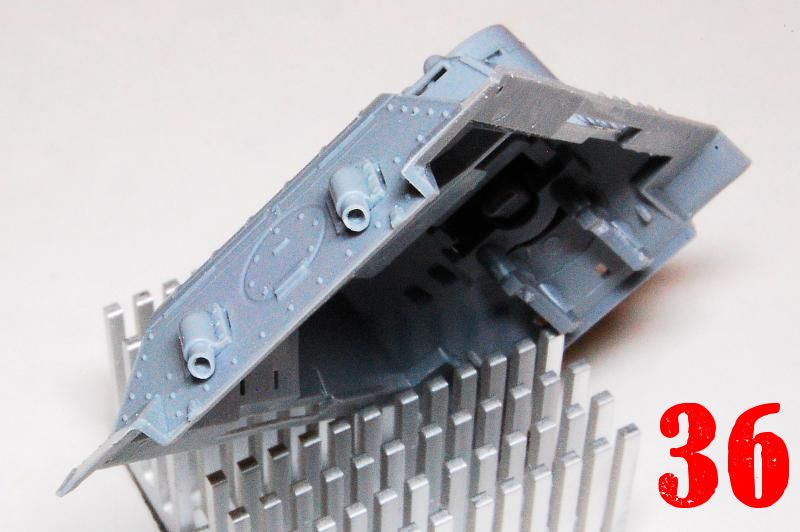
The exhaust pipes were drilled out and clipped into place (28, 29), and note that in this case the fit, while secure, is not exact, with a slight gap visible to the right of both components (30). The rear stowage box mounts to the track guard with pegs protruding a little through the guard, and it seems natural to glue it in place and then remove the protrusions (31, 32, 33). While doing that the track guards were thinned a little (34, 35, 35).
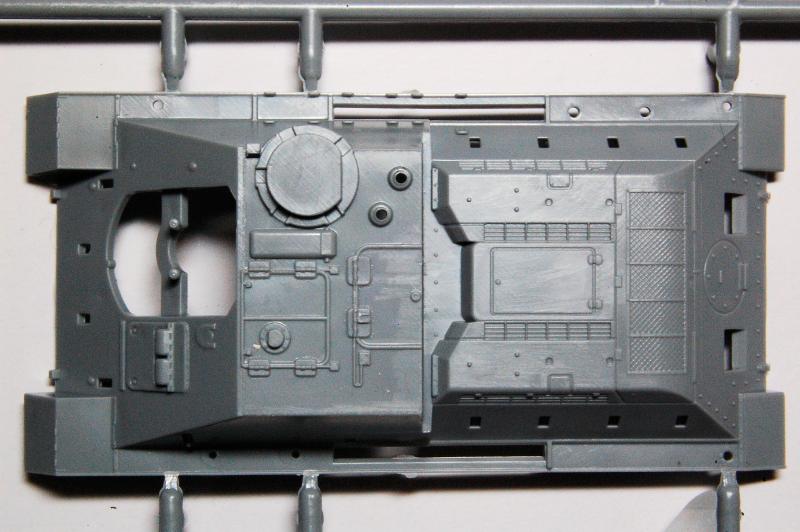
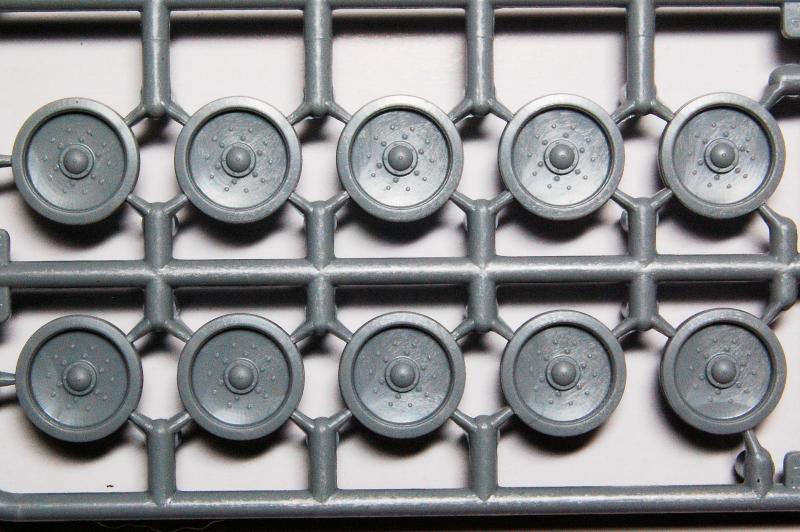
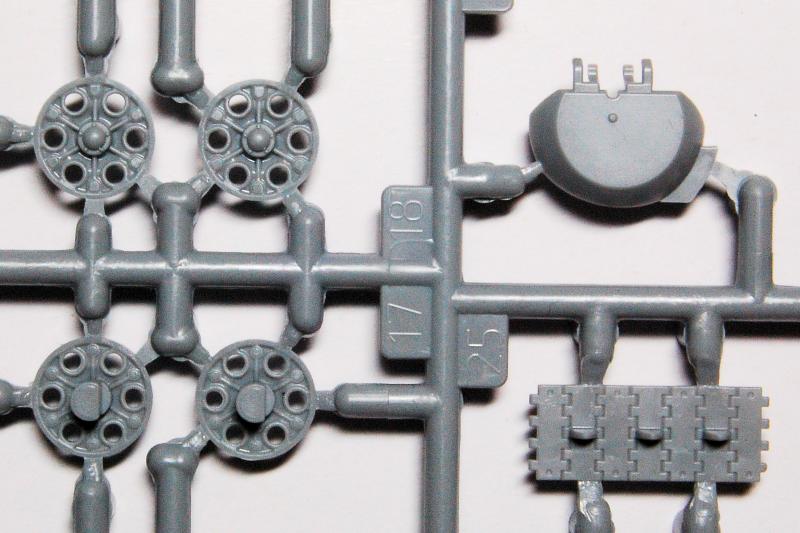
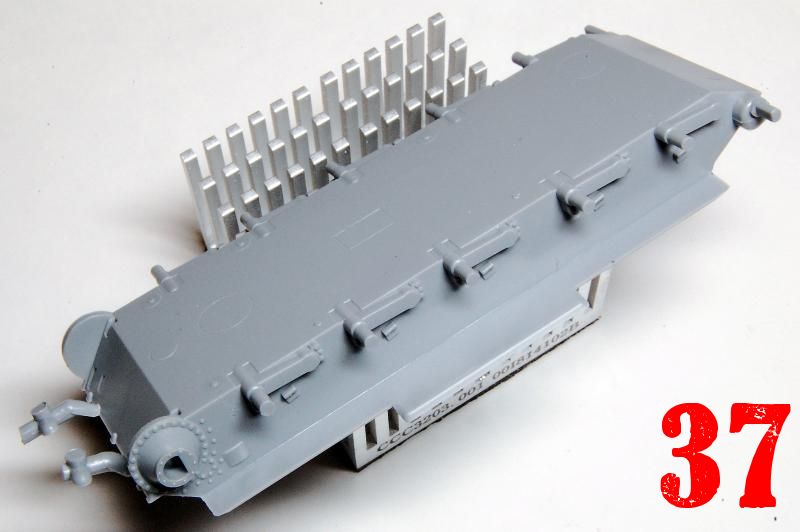
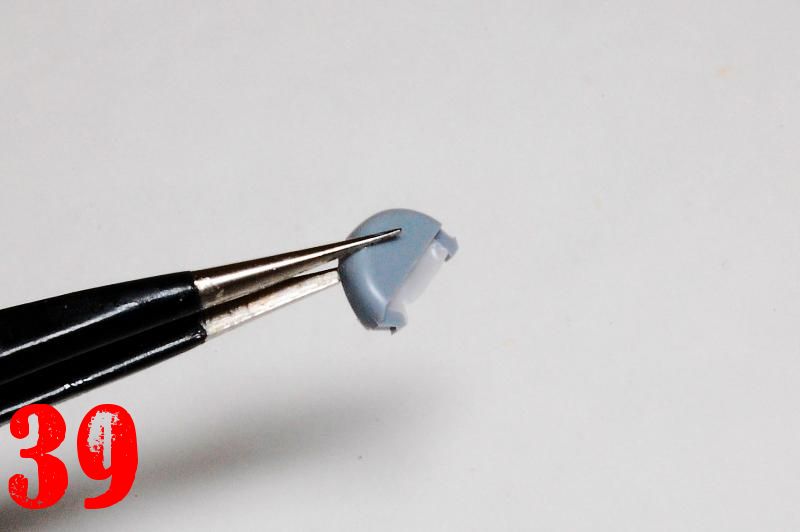
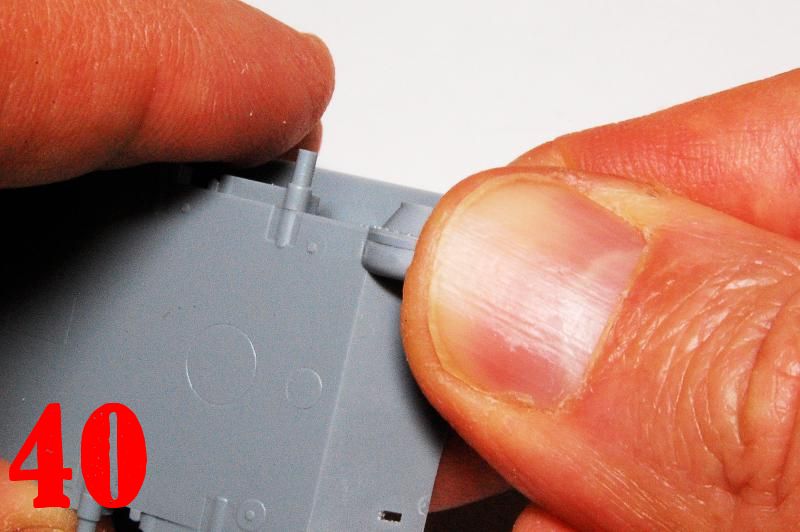
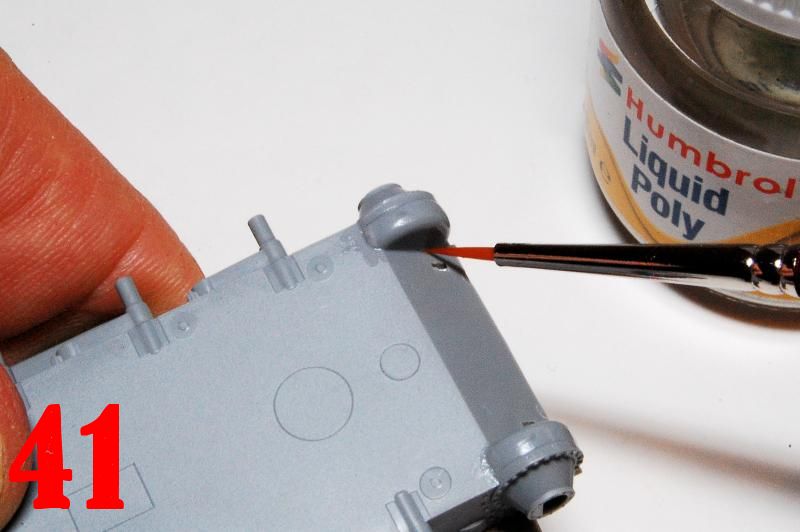
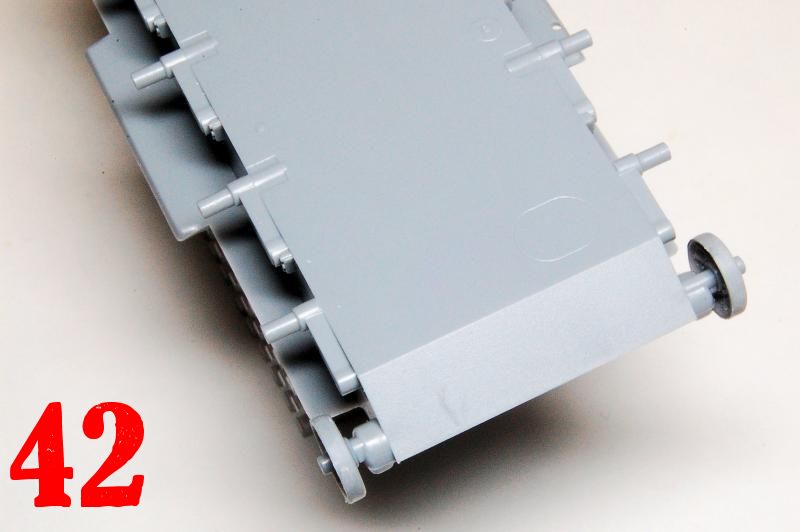
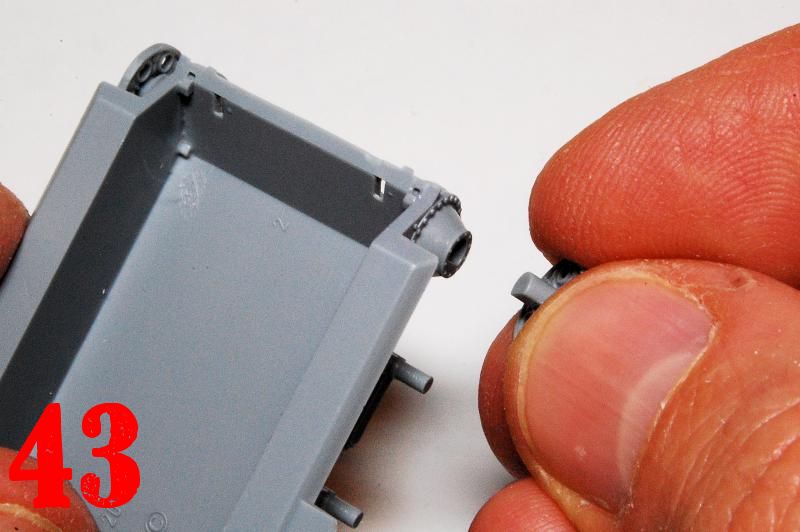
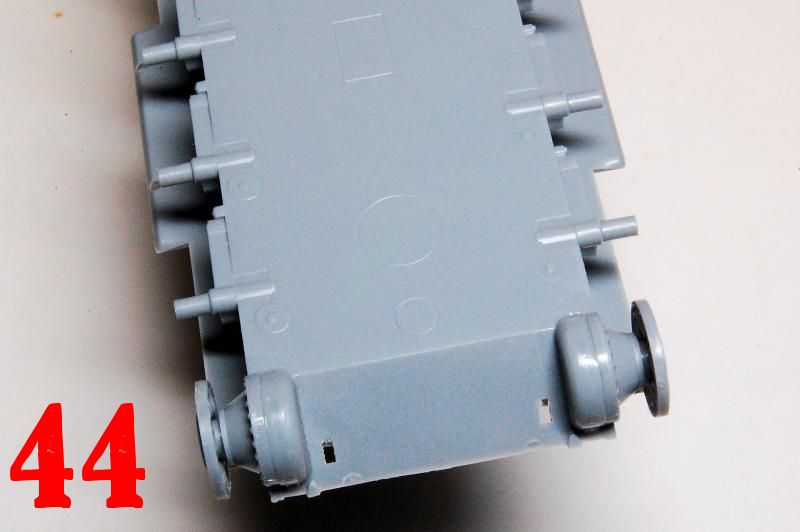
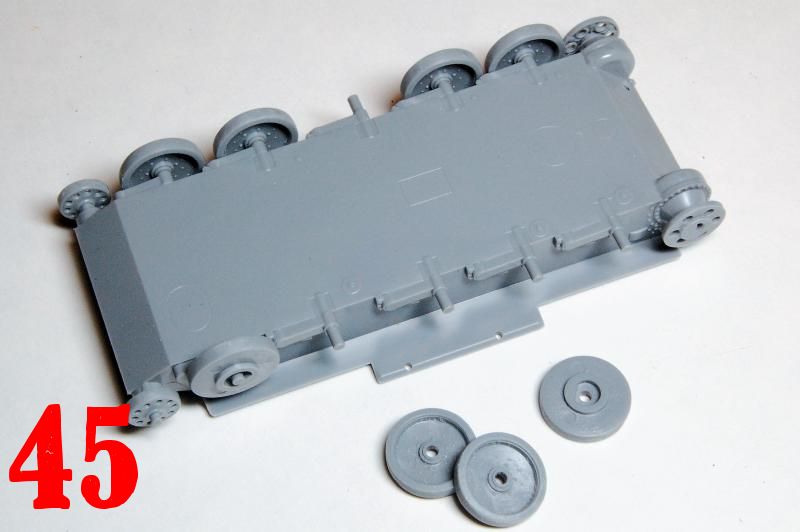
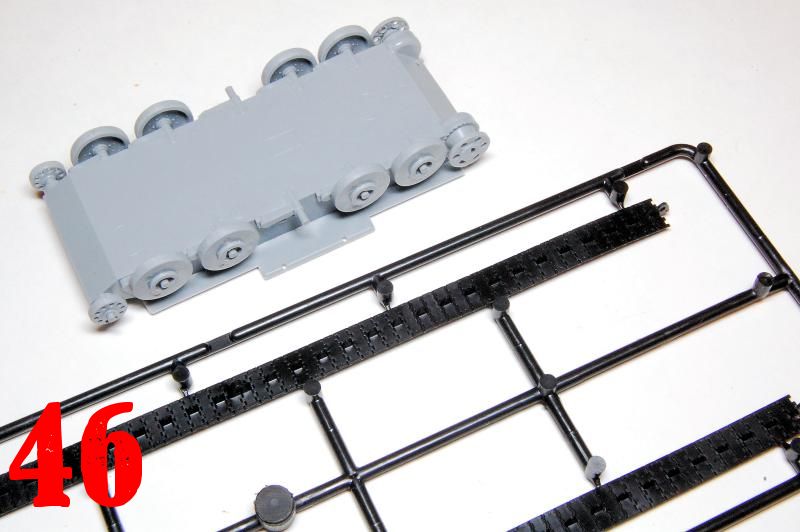
Moving to the hull tub (37) the first job is to remove the bottom half of the central third hinge on the rear, a feature of earlier T-34s, this hull presumably originating from the T-34-76 kit. The final drive covers had some flash (39), easily removed, and were slotted then glued into place (40, 41) as a welded join is definitely what is required here. We then proceed to dry fit the drive wheels (43) and idlers (44) which clamp firmly in place, followed by the outer four road wheels though, unlike the photos (45, 46) you should just go for one side at a time, as the wheels on one side will mostly fall off while you fiddle with fitting the track on the other side.
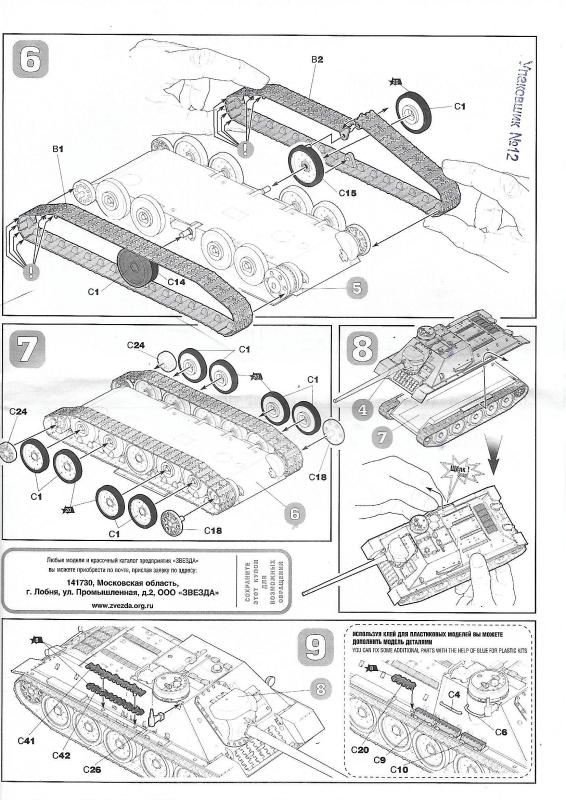
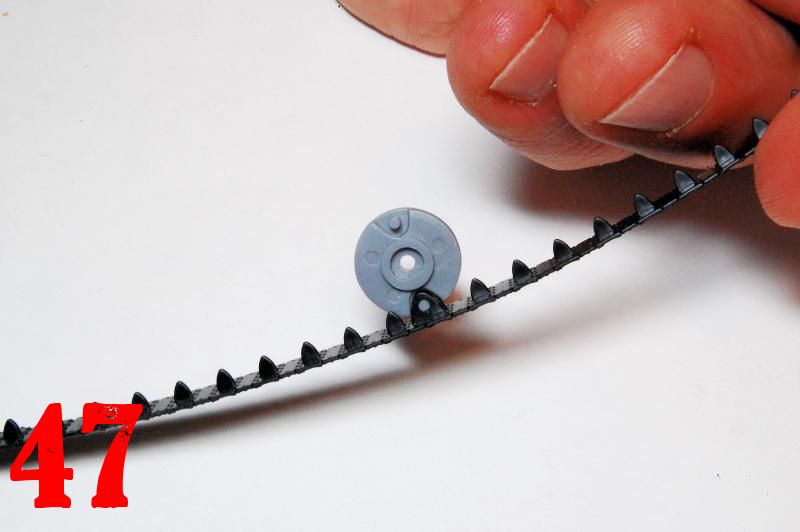
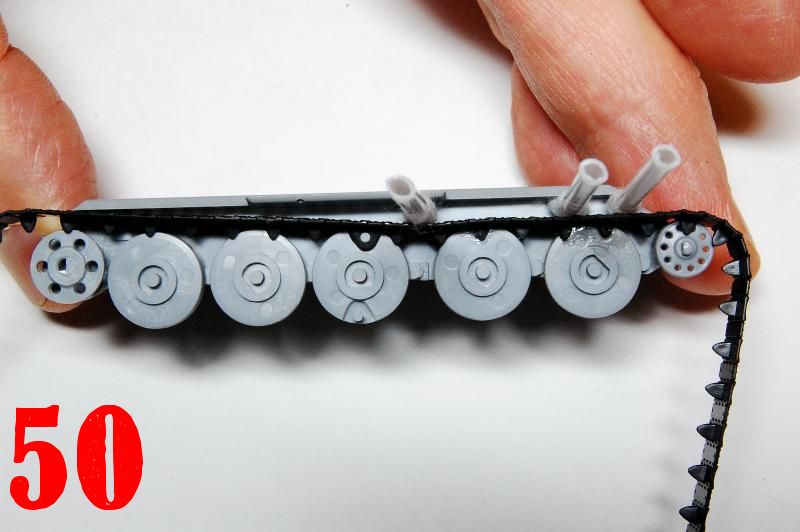
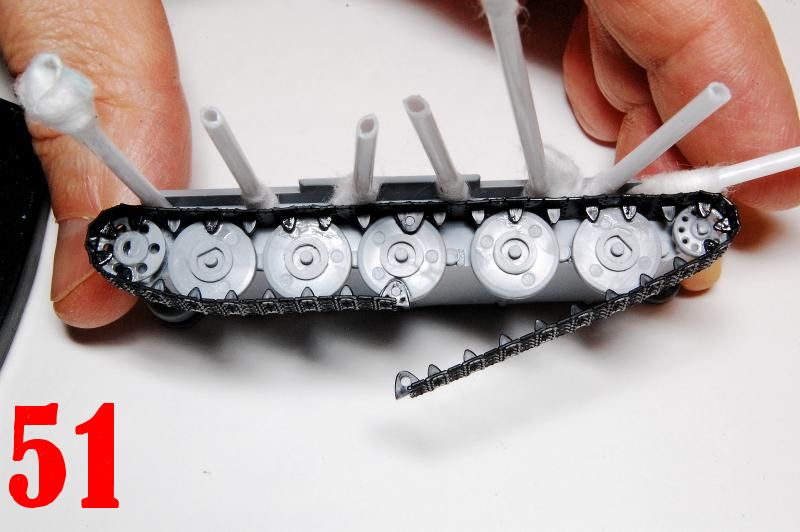
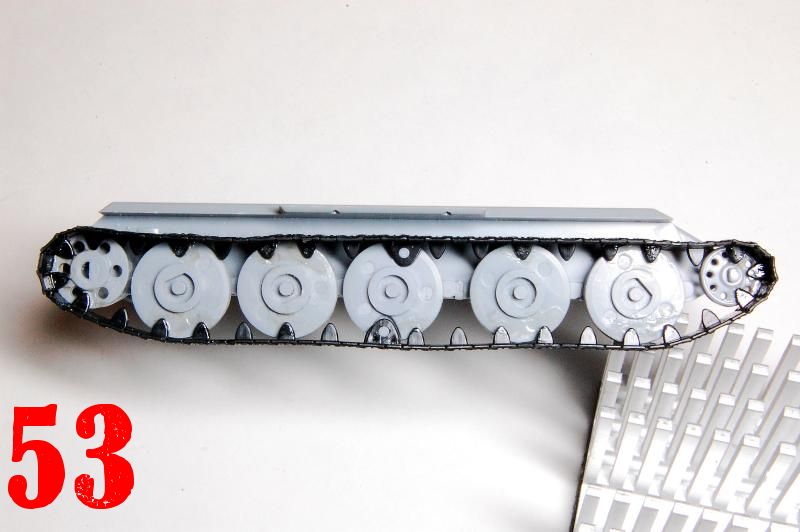
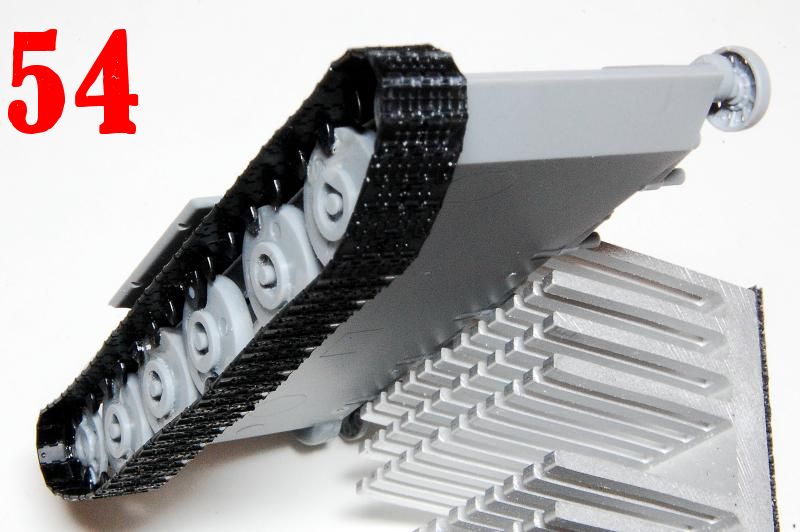
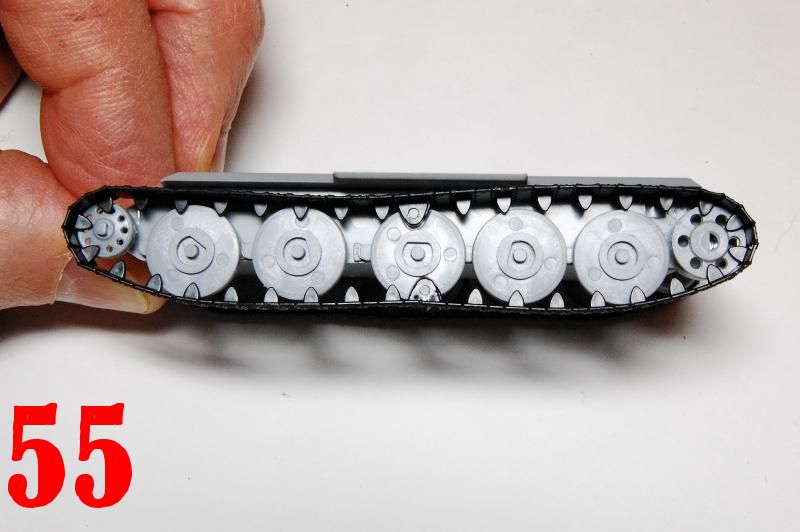
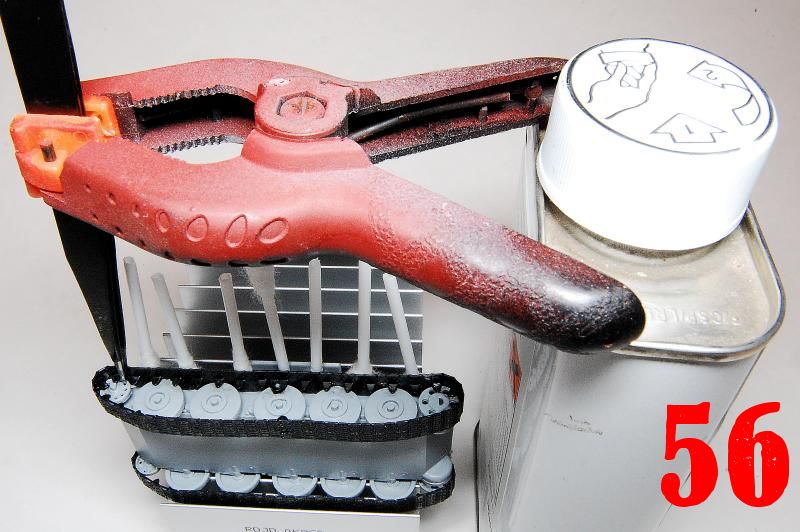
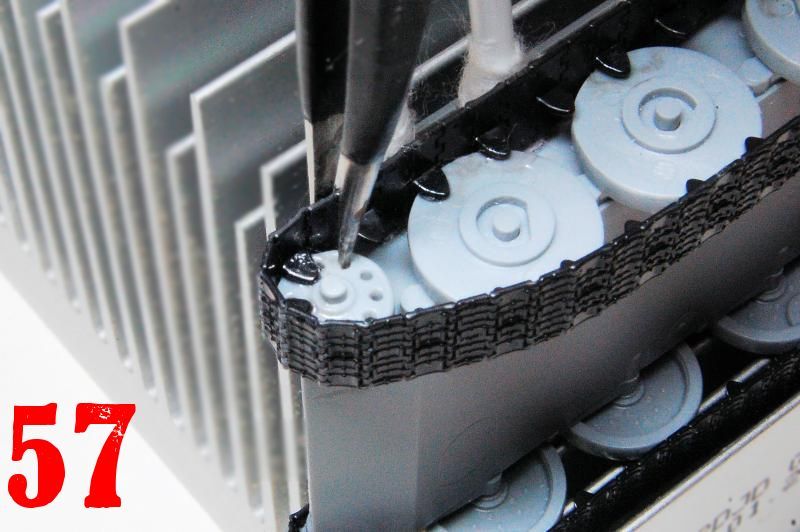
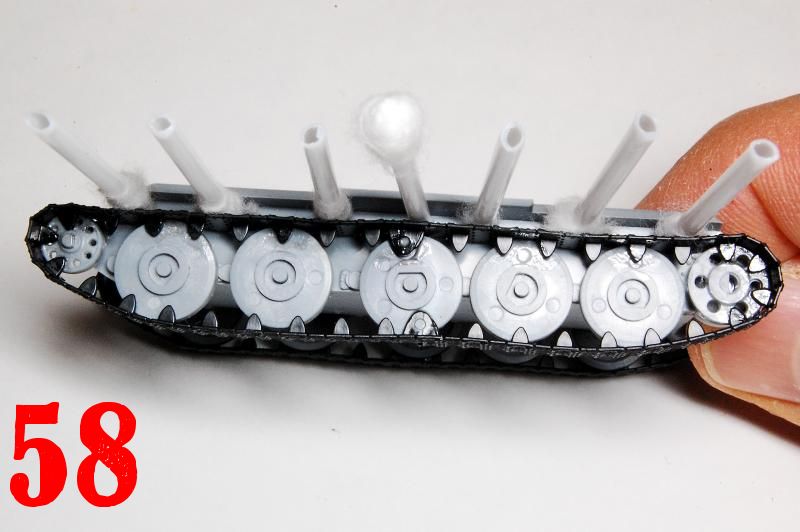
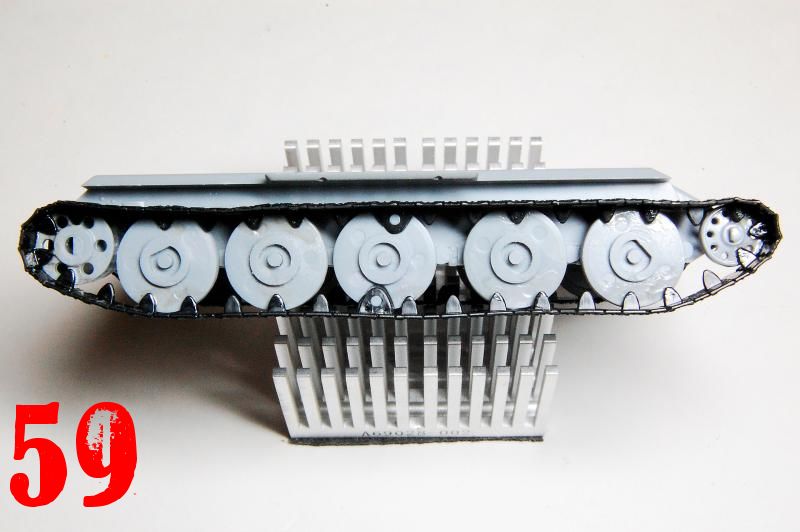
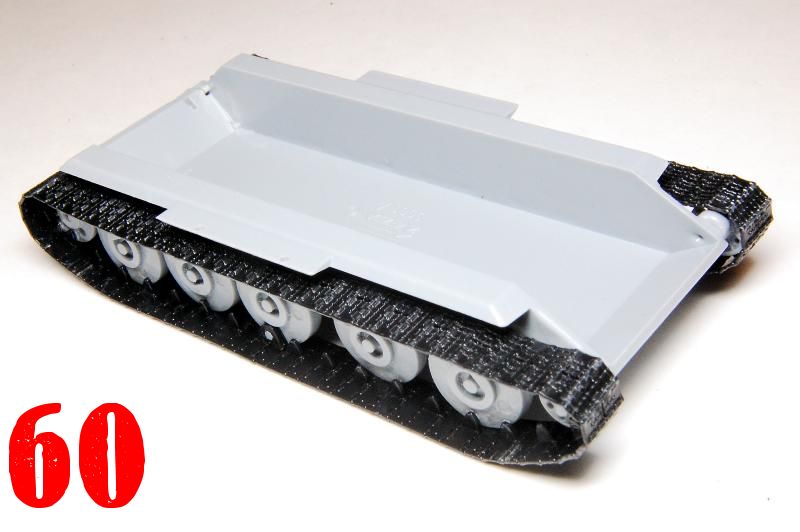
The tracks clean up very easily, with just the remnants of the sprue points to be sanded off. Each track includes a mounting bracket at the centre which clips on to one of two pegs on the special centre inner road wheel, and it made sense to me to attach this to the wheel before then mounting the wheel on the axle (47, 48), all without glue for now. The tracks then need to be carefully bent around the wheels, trying to make the tight curves even so that they keep in close contact with the idler and driver, to the point where the brackets at the ends of the tracks can overlap and both clip on to the lower peg of the centre wheel (49). T-34 tracks need to be in contact with the wheels at all points, and to achieve this some slack is needed on the top run, but not so much that the bottom run cannot be joined up. The upper run was forced on to the wheel tops by pieces of cotton bud with some cement applied where the teeth make contact (50). Having allowed the top run to set overnight, the bottom run was completed the next day, cemented in place, then the assembly was weighted down to ensure the wheels sat flat on the tracks, and again left overnight (51, 52), resulting in the wheels and tracks glued together (53, 54). The same method was applied to the other side, the tracks assembled and shown unglued (55), clamped into position (56, 57) and glued (58, 59). With both track assemblies complete (60) they were carefully removed from the hull, unfortunately snapping the right hand idler axle in the process (61).
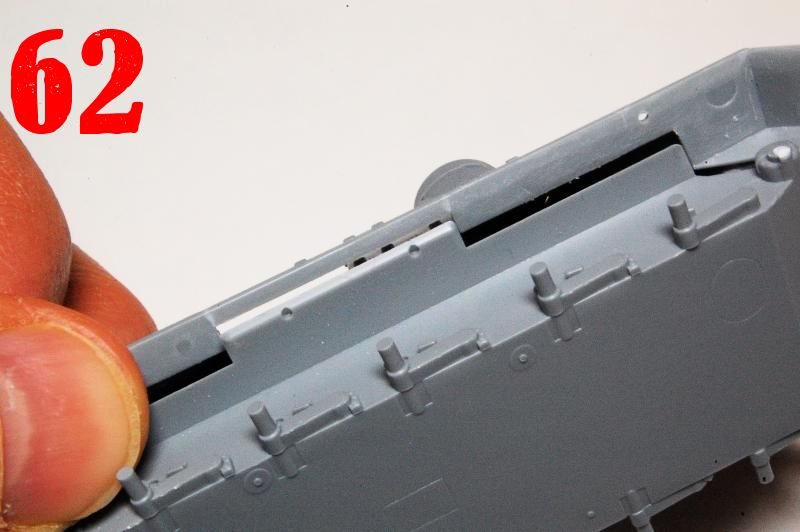
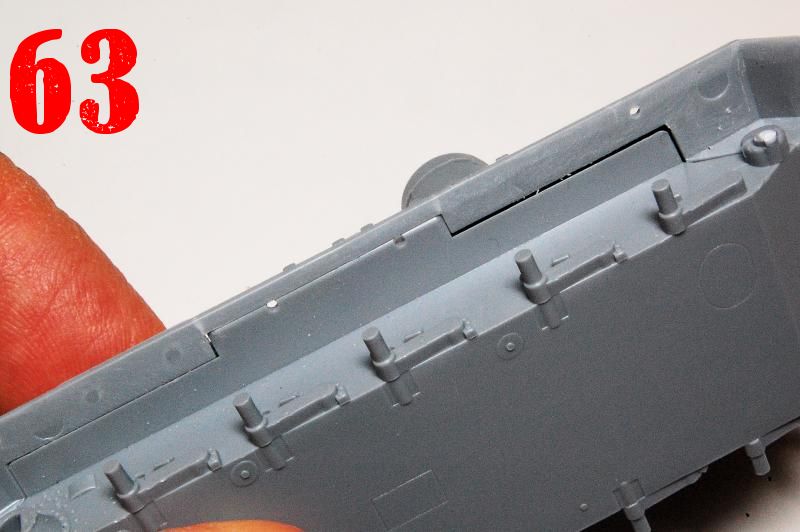
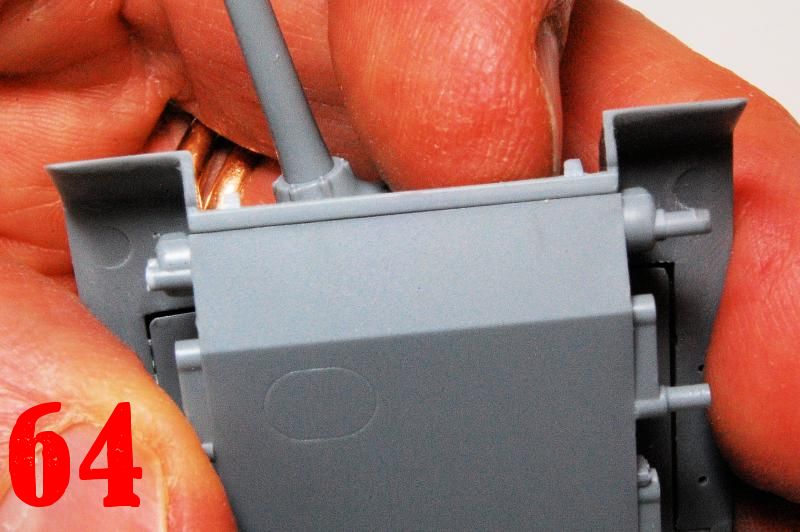
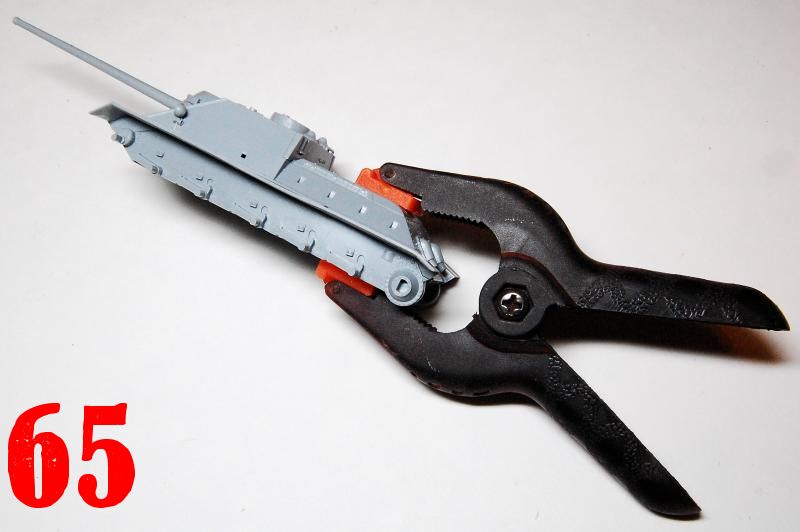
The upper and lower hull halves clip together with a gap only on the underside of the track guards (62, 63) although the fit at the front where the glacis overlaps the nose plate is near perfect (64). Cement was applied to seal all the joins and then it was clamped and left to set (65).
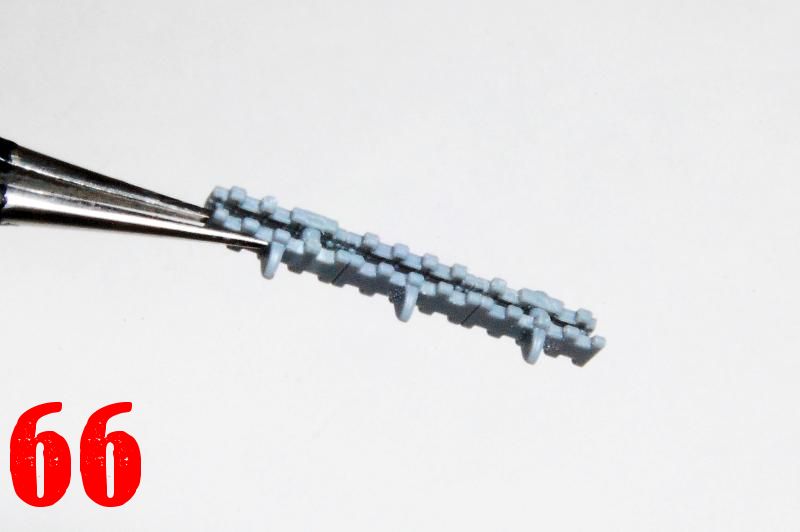
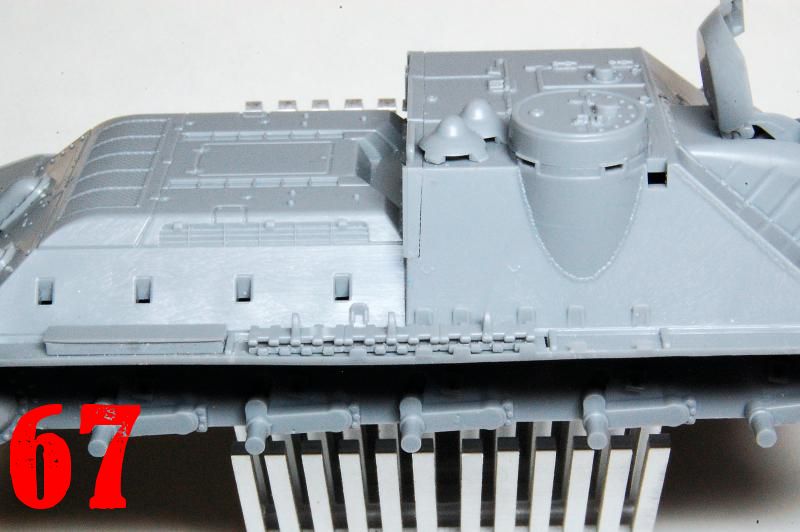
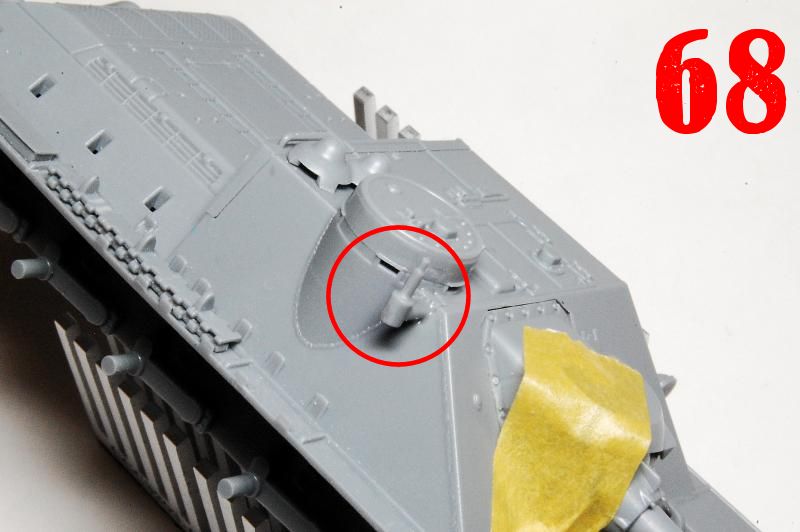
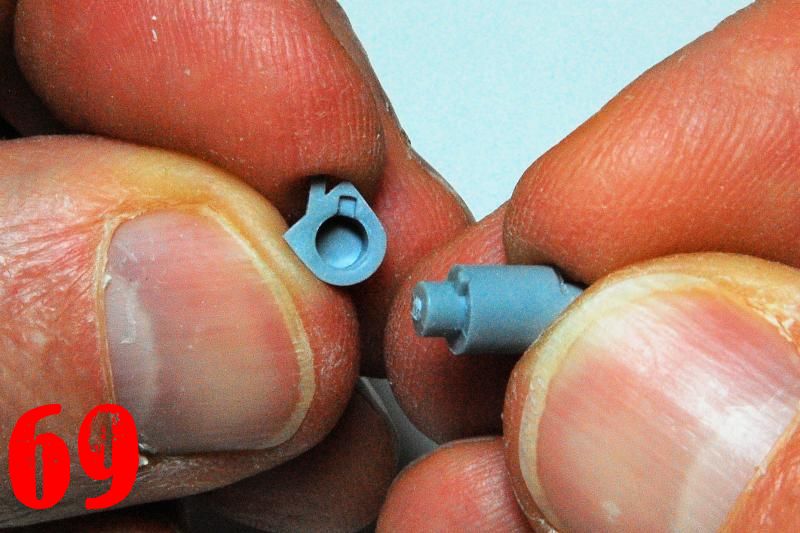
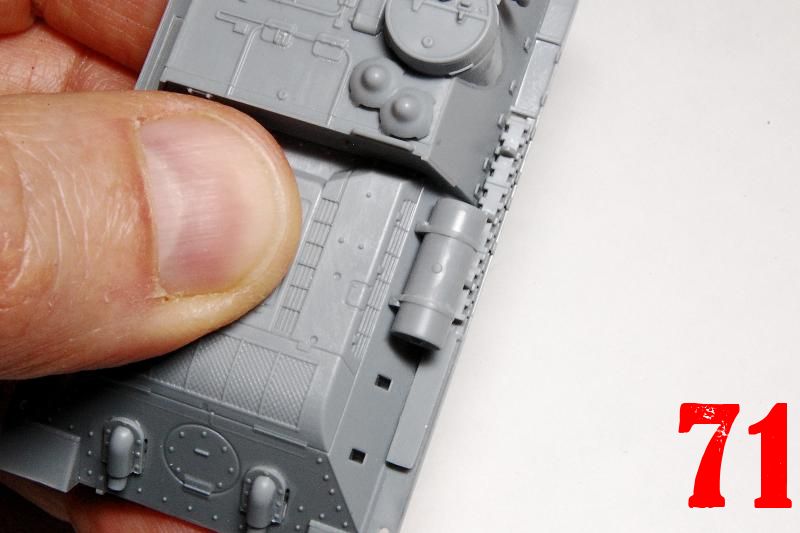
On to the final detailing, theres a choice between vertically or horizontally stacked spare track links, and here we see the two layers of horizontally stowed links slotting together and in place on the track guard (66, 67). The aerial mount attaches just in front of the commanders cupola; note the quite nice welding pattern of the joint between the curved and flat side plates (68). The fuel tanks each come in three sections, requiring a fair bit of clean up, with the mounts integrated and able to be slotted securely on without glue (69, 70). While secure and simple to build, these mounts look a little clumsy, although most of the thicker parts are well hidden once in place (71).
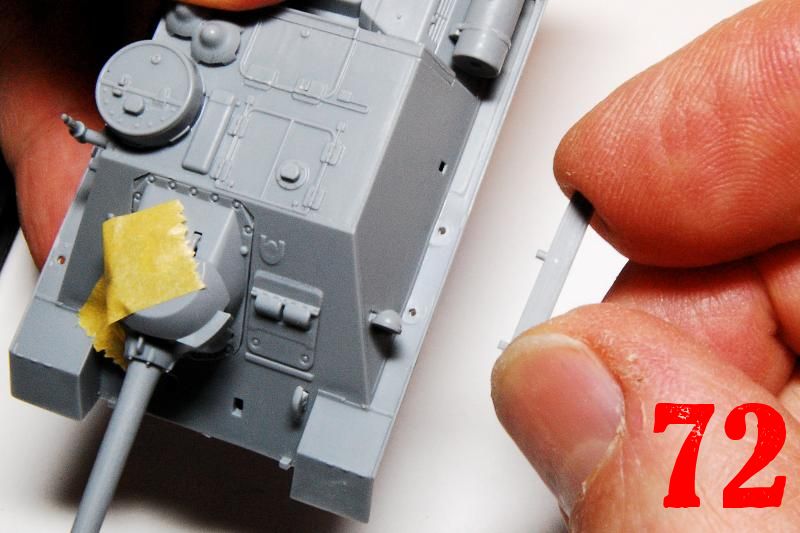
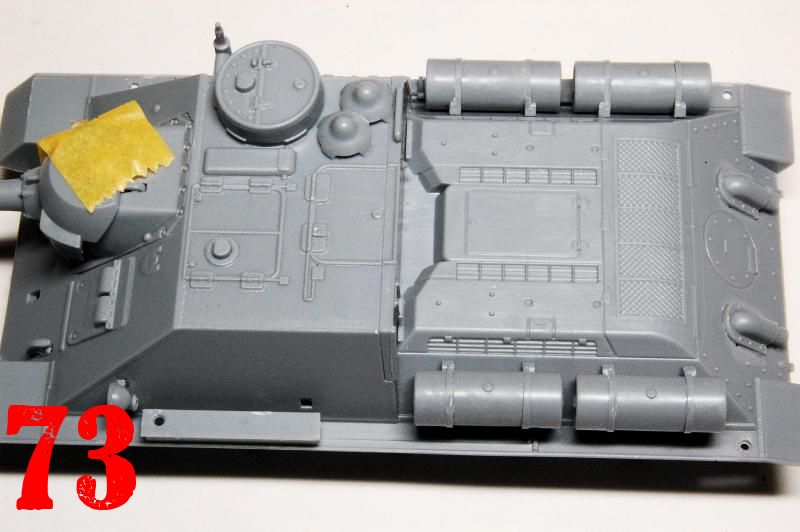
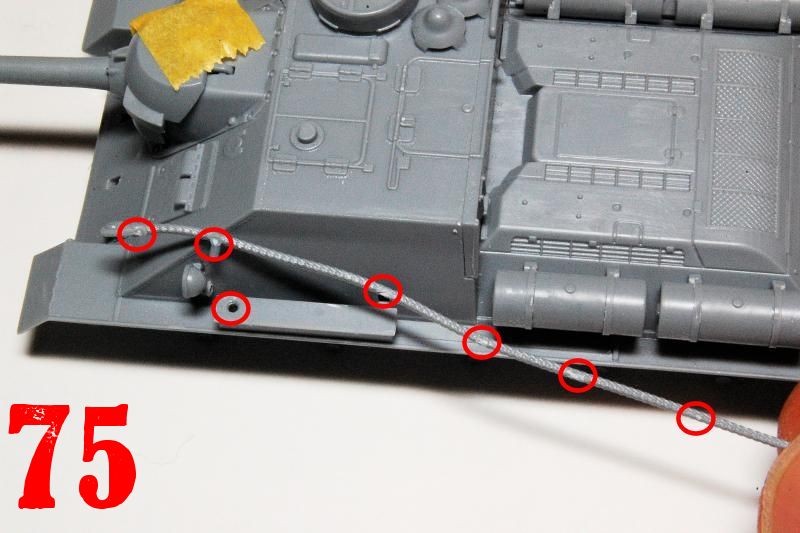
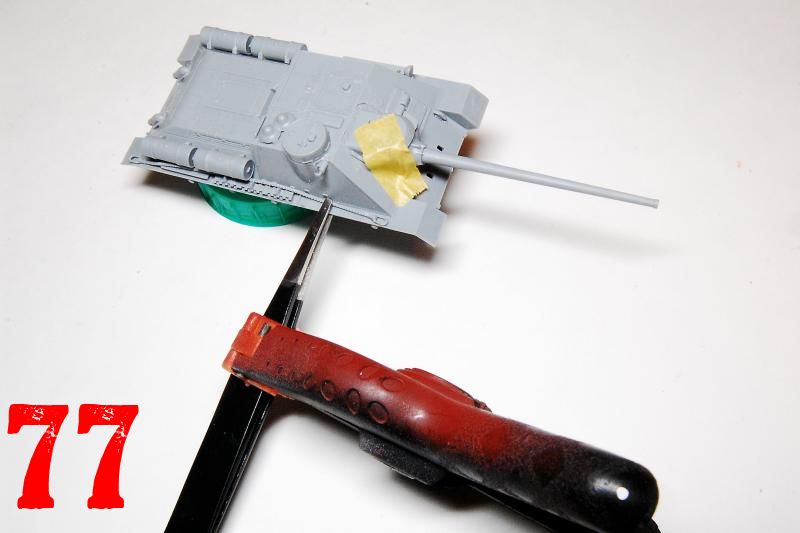
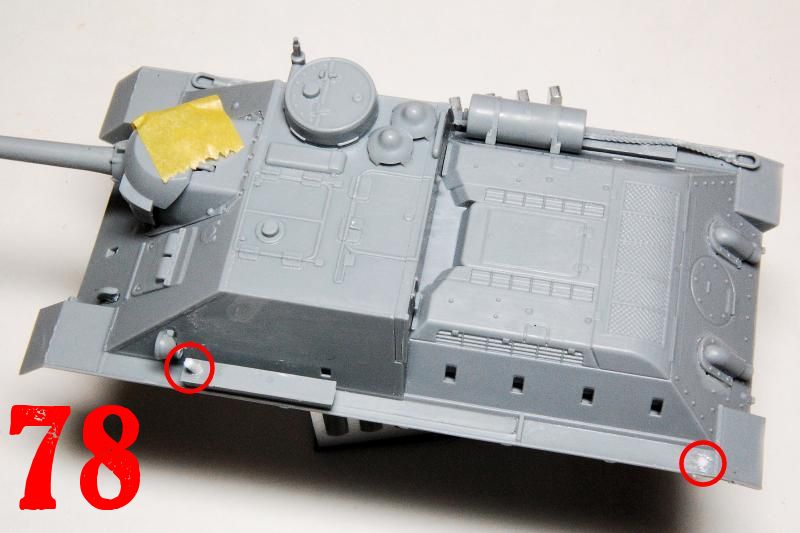
The stowage box that locates on the left front track guard has a hole to locate a tow cable (72, 73). While that was setting, the rear tow hooks were added (forgotten from earlier, 74). Because of the location holes and pegs, the tow cables are designed to go on specific sides, but unfortunately the left cable fits in such a way that the scars of the sprue mounts are displayed uppermost (75). So I removed all the mounting pegs and swapped them over, cementing the left cable to the right side instead (76, 77) and filled in the mounting holes (78).
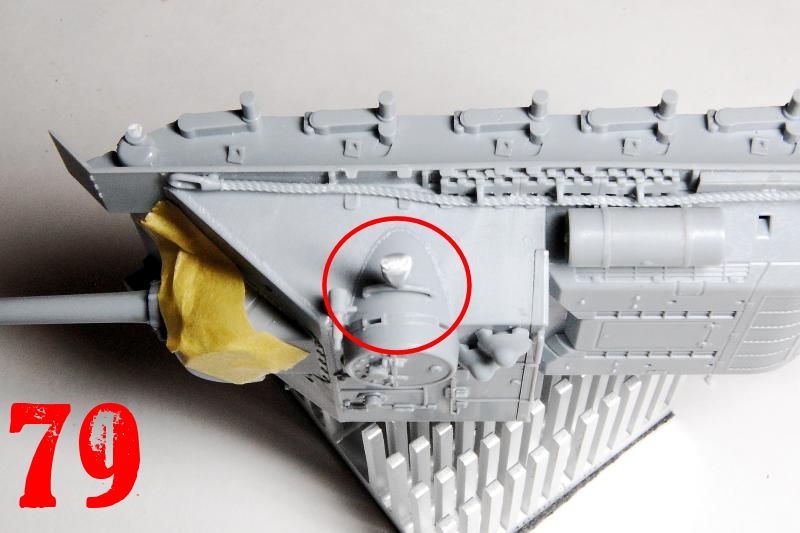
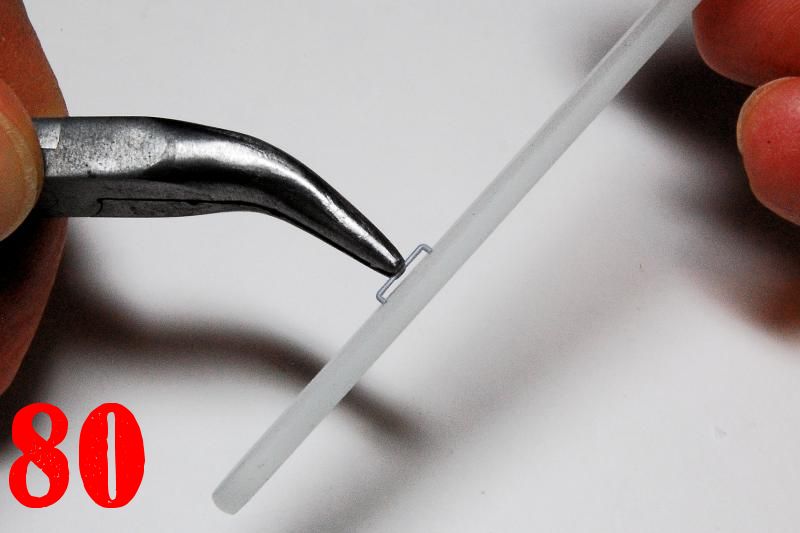
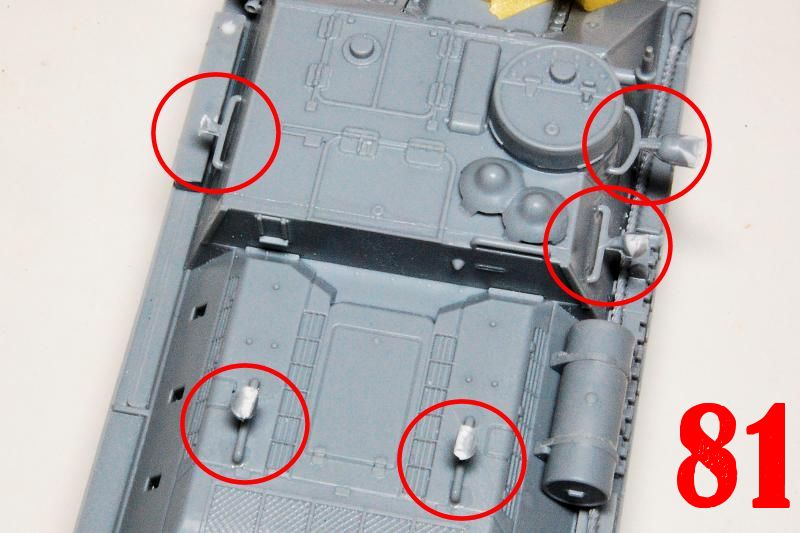
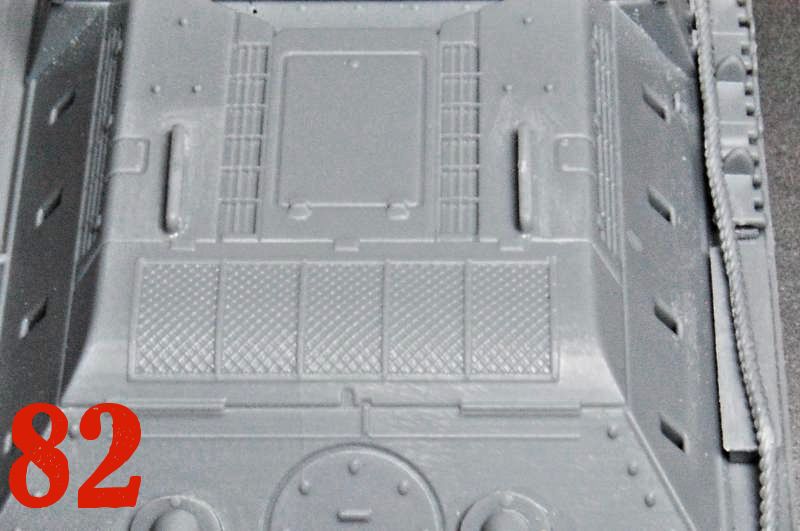
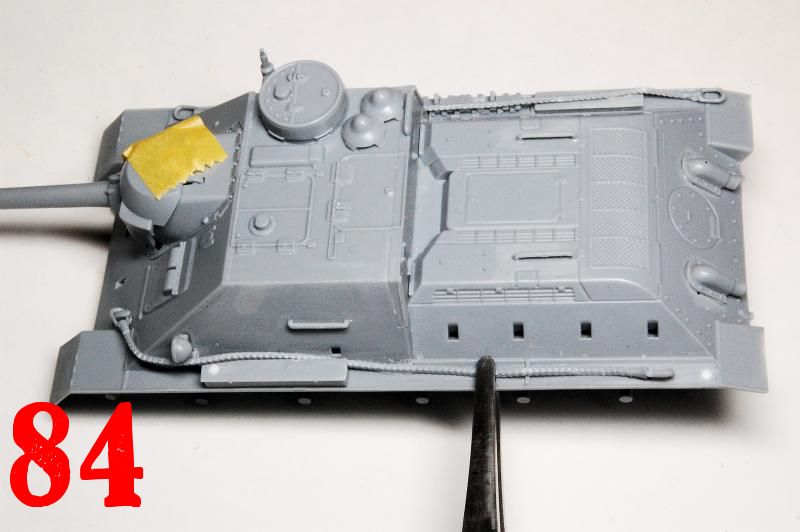
If you want to replace the supplied grab handles with wire items it might be best to do it before the hull halves are assembled so glue can be applied inside. When using the supplied handles, I find it easier to deal with them if a small piece of sprue remains (79, 80, 81), and then clean them up after they are firmly set in position (82, 83). The right hand tow cable was held in place with clamped tweezers on the left track guard while the cement set, one end being slung over the front tow hook in authentic style (84).
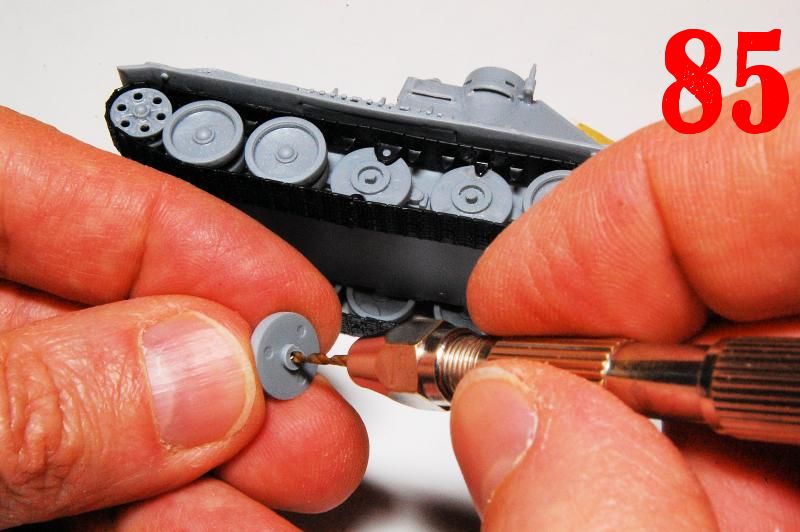
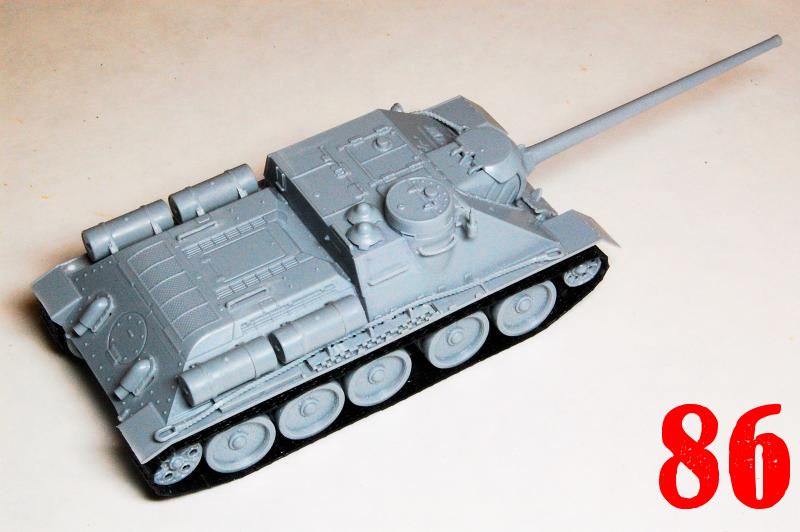
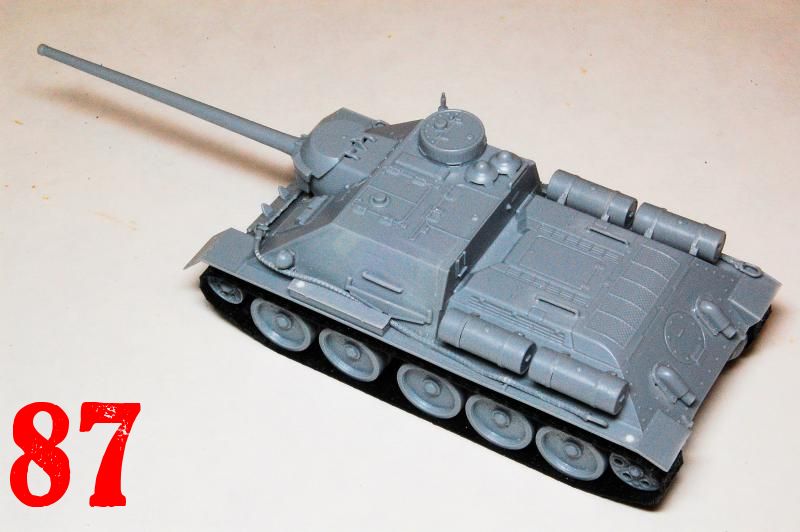
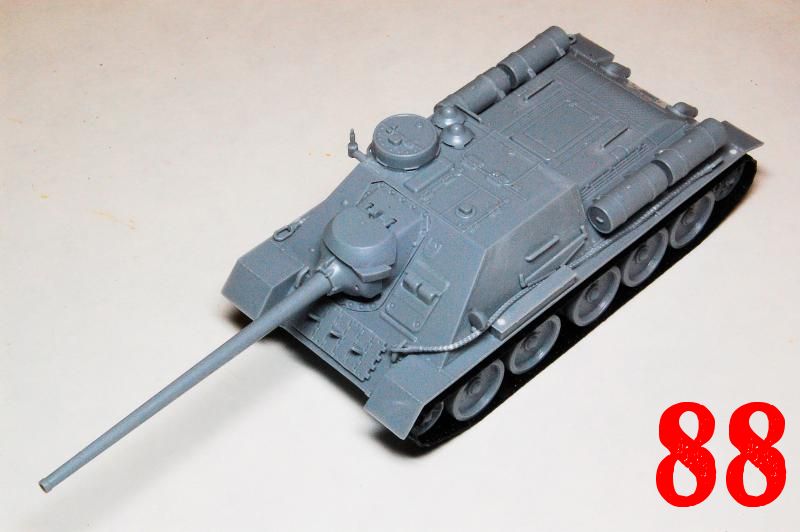
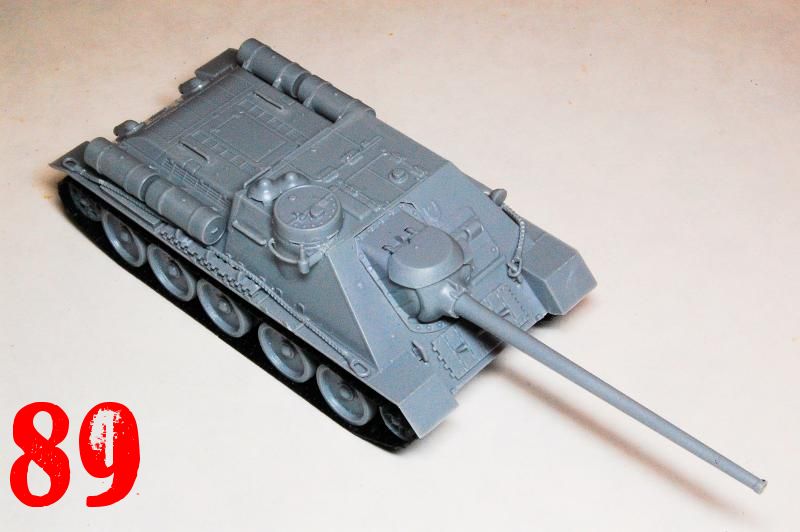
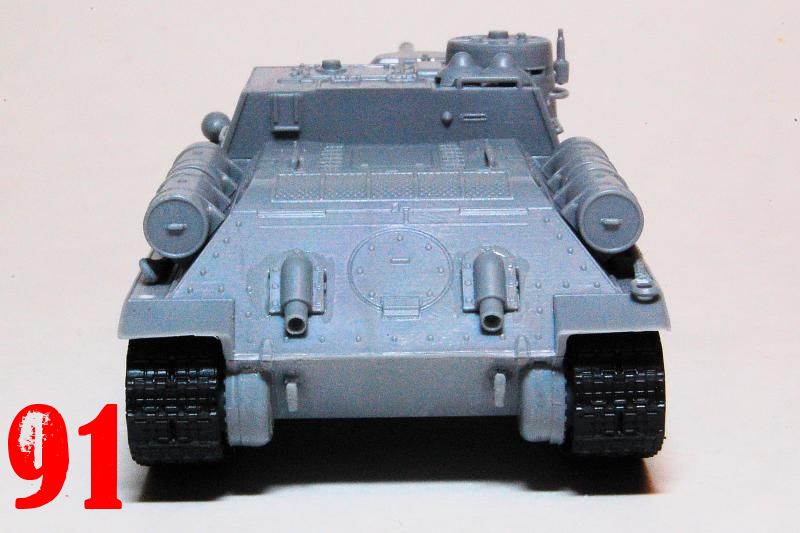
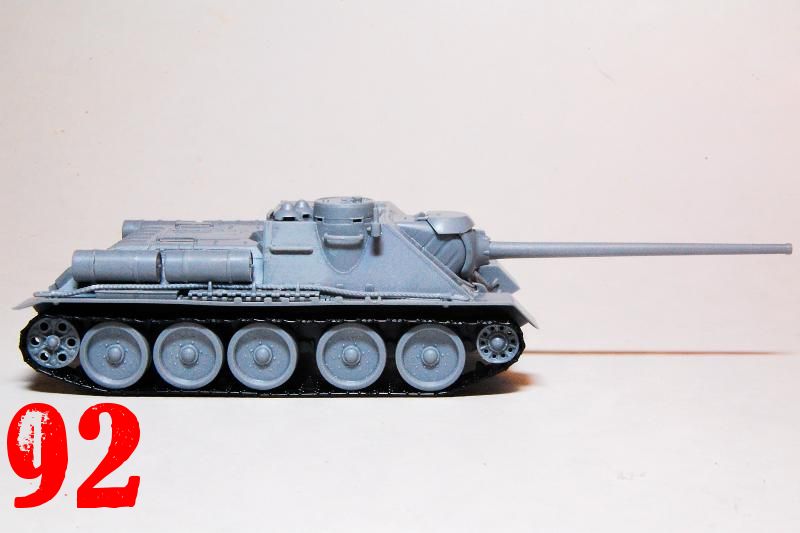
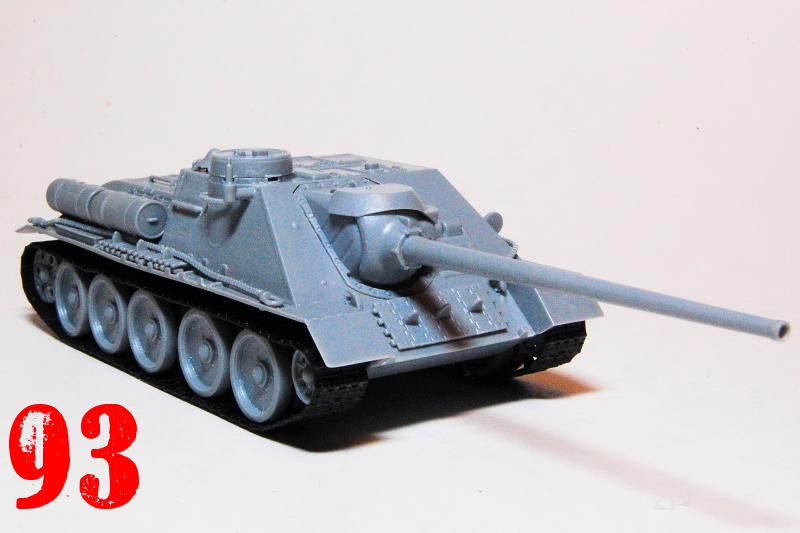
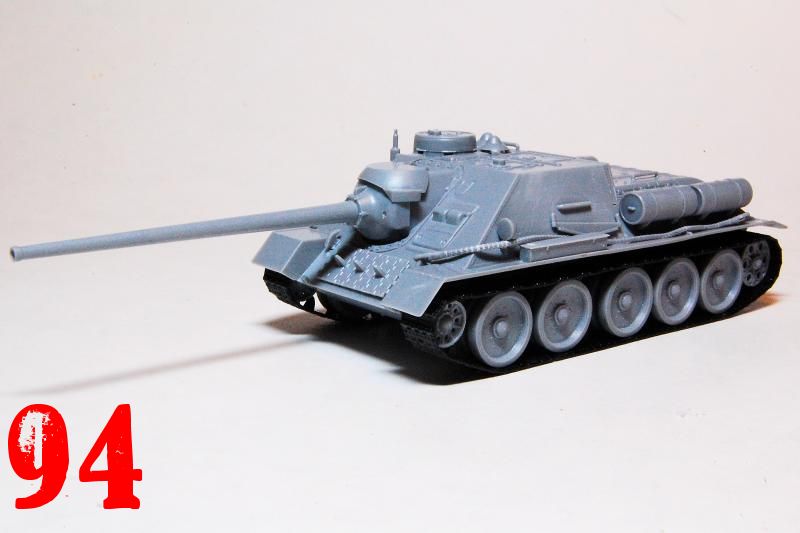
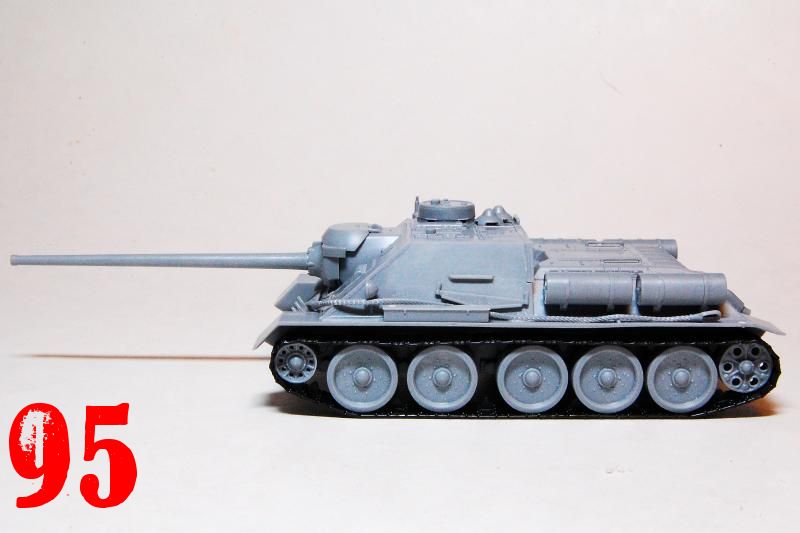
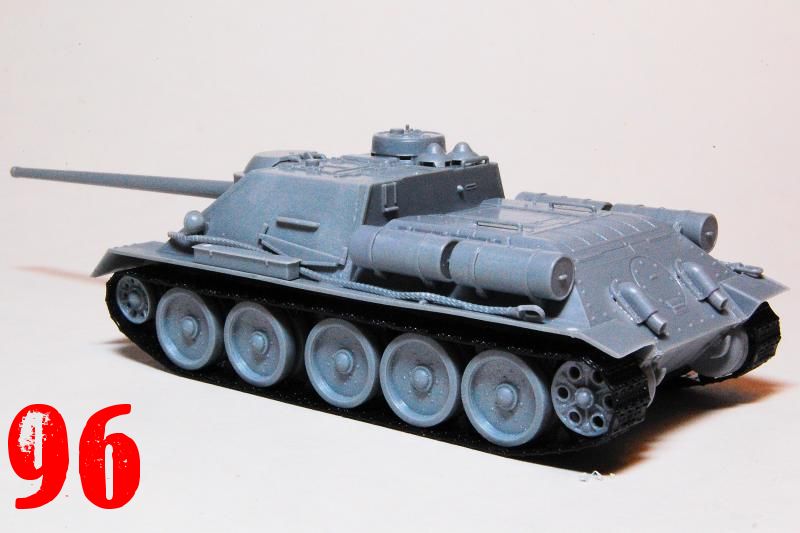
Finally track units and outer wheels were all dry fitted. The fit of the wheels to the axles and inner wheels was so tight in places that I enlarged the holes with a drill; these all remain removable for painting purposes (85). Photos 86-96 show the completed model as assembled out of the box, apart from the drilled out gun, exhausts and horn, and the transposed tow cables.
Conclusion
So a relatively well detailed kit for one that is meant to be snap fit, though having said that, some aspects wont work without glue. The fit of parts was mostly good, but in my view not quite up to the very high standard of Zvezdas excellent Panther. The tracks were more complicated to get right than on the Panther, partly due to the wheel layout, with T-34 tracks needing to rest on the wheel tops and there being no side skirts to hide behind. They are nonetheless quite a neat solution and far better than what modellers had to endure some years ago in this scale.
Having little in the way of detailed references, the model appears accurate as far as I can tell. The mantlet could be scuffed up a little to simulate rough casting, and the entire gun mount is perhaps set too flush into the front plate. The huge gun articulates superbly on the mount should you wish to place it in certain poses. There are decently moulded weld marks, a pistol port in the back plate of the fighting compartment and some subtle pipe runs for the rear smoke system. Neither side of the casemate features pistol ports, though some vehicles seem to have had them while others did not, and these would be quite simple to add if desired. Despite a little trouble with the tow cables, the items themselves are nicely detailed and add to the overall appearance, and full credit to Zvezda for including both them and the spare links, and not forgetting the well-stocked decal sheet that provides for five different vehicles. Not all model companies bother with these kinds of extras, while still seeing fit to charge double the price that this kit is available for.
Overall then, a nice kit that builds up quite easily and looks good straight out of the box, or it could be enhanced with some further detailing, either of ones own making or with some aftermarket extras such as engine deck mesh or, gun barrels etc. Excellent value.
References
In terms of references for this vehicle, many of the clear photos on the internet show post war vehicles, while authentic WW2 photos are rare and often very unclear, and (I believe) there are few if any well detailed books on the subject. There are though a couple of excellent videos on You Tube showing many close up shots of a restoration of what is claimed to be a mostly (though not entirely) original March 1945 model SU-100, links below.
SU-100 Rebirth of the Legend (World of Tanks North America, You Tube)
Inside the Chieftain's Hatch SU-100 (World of Tanks North America, You Tube)
SUMMARY
Highs: Liked the gun, tow cables, decal sheet, tracks, welds, most of it really.Lows: Gap around the exhausts, tow cables had to be swapped over.Verdict: Easy, fun build, seems accurate enough, and provides a low cost decent small model of this awesome looking tank destroyer.
Our Thanks to Zvezda! This item was provided by them for the purpose of having it reviewed on this KitMaker Network site. If you would like your kit, book, or product reviewed, please contact us.
About Matthew Lenton (firstcircle) FROM: ENGLAND - SOUTH EAST, UNITED KINGDOM
Earliest model memory is a Super Sabre my grandmother bought for me around 1972. Have always dabbled in painting and making things, and rediscovered doing that with plastic in 2008. Vowed then to complete the 30 year old stash, and have made some progress. Hobby goes hand in hand with BBC Radio 3...
Matthew,
Very first rate review of this interesting offering from Zvezda. Their "Snap-kits" make perhaps is the closet anyone has come to what the name implies. From a more experienced modellers point of view, it is somewhat a pity that the hatches aren't positionable and that there were some gaps after the placement of certain parts. The built model appears quite decent and overall compares favourably against the Dragon offering of the same vehicle and scale, as far as detail and overall look is concerned. However, I can foresee painting the suspension area could end up quite tedious, time and labour intensive. Again, very good review and thanks for the details it provides.
Cheers, 🍻
Jan
Jan, thanks, as always, for your feedback.
I realised after I had submitted the review that I had forgotten to mention the lack of openable hatches... (No longer being an Armorama staffer means I can no longer "post-post" edit.)
On the suspension painting, note what I did with leaving the outer wheels unglued from the assembled track units, as well as the track units also being unglued, so that should make painting easier.
Cheers, Matthew
Matthew,
I recall that in the review you mention attaching the outer road wheels with the "snap fit" and the tracks similarly but my thoughts were on the painting process of my last SU build. I'll be interested to see this one finished. BTW, I've been "tinkering" with the Zvezda 1/72 T-90 and it is anything but a "snap kit". This one might have been a better choice for me to build as I get slowly back into the hobby.😎
Cheers 🍻,
Jan
Jan, yes I noticed when checking out the Zvezda 1/72 range, it seems only the WW2 subjects are meant to be snap fit. The T-90 looks considerably more sophisticated a kit.
Matthew


Comments