I have to start this review with the confession that this build was quite a lot outside my comfort zone. I have never built a Russian AFV previously, but I always liked the Russian design and the steampunk look of it and genial in simple solutions (transversal engine, cast turret)and dumb choices in the same assembly (lack of turret floor). When Darren presented me with the opportunity to build this one, I just jumped on it and I have no regrets. As it went, the build was plagued with some incidents, most notable the passing of Hurricane Irma which thrashed my neighborhood and forced me out of my house for some six weeks. I have to apologize for the delay in completing this build and to thank MiniArt, Jim and Darren for providing this sample for review
Kit number 37015 belongs to the family of interbellum Russian armor launched recently by MiniArt. That is a superb effort generally very well received by the modelling community. The companys policy is to release two versions of the same model, one with full detail, the other with the minimum required for the interior. The version that I built is the one without full interior but even so the parts count is impressive.
The kit
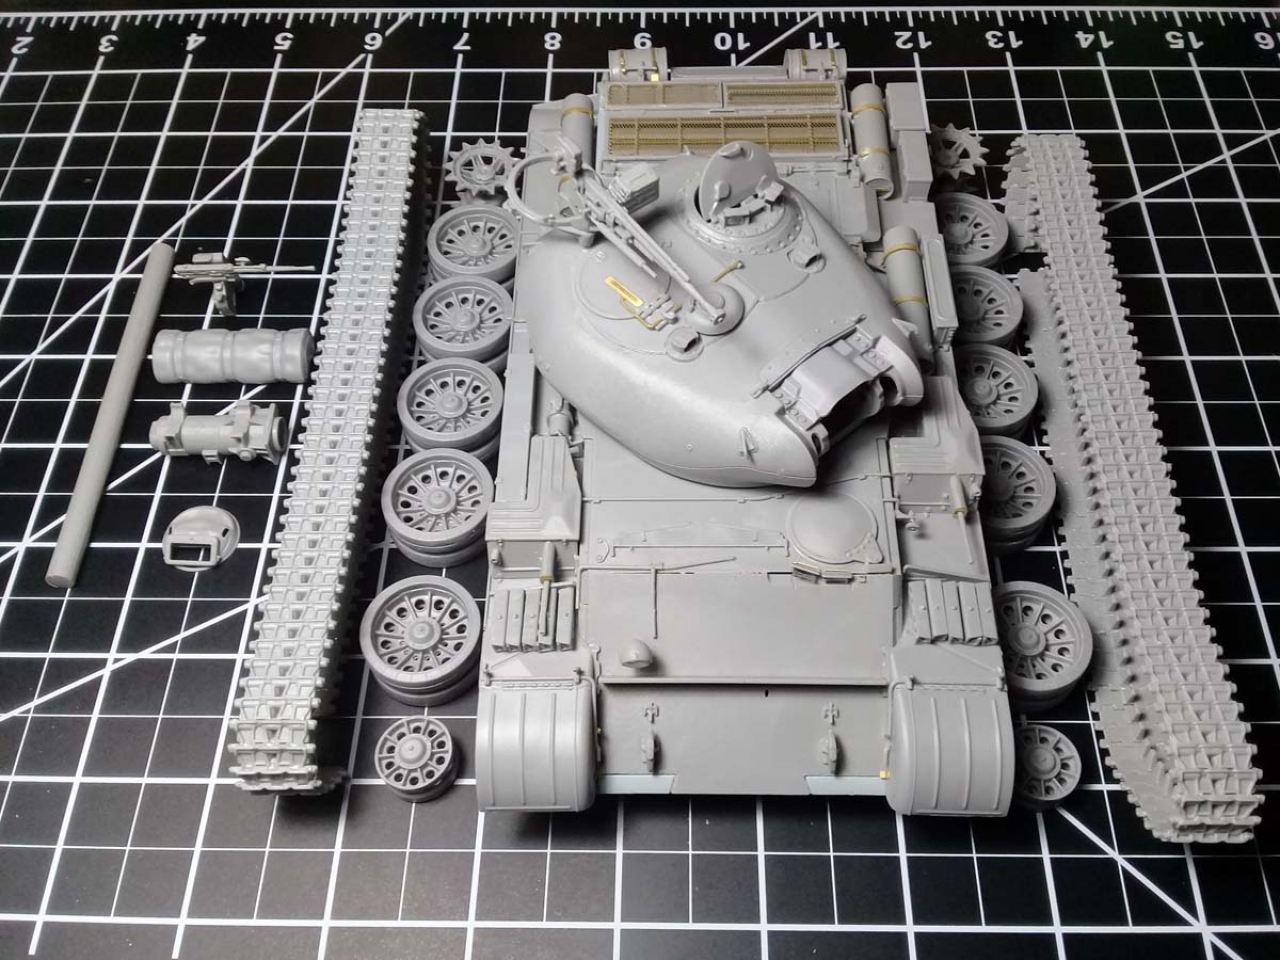
The kit comes in a sturdy thick cardboard box. The first impression is given by the sheer weight of the box. Under the lid, depicting a Russian green T54 in a dynamic posture, lay neatly packed 863 plastic parts, 93 photoetched parts and 14 clear parts, for a grand total of nearly 1000 parts. The numbers speak volumes about the level of detail, but also about the level of difficulty.
Styrene Parts
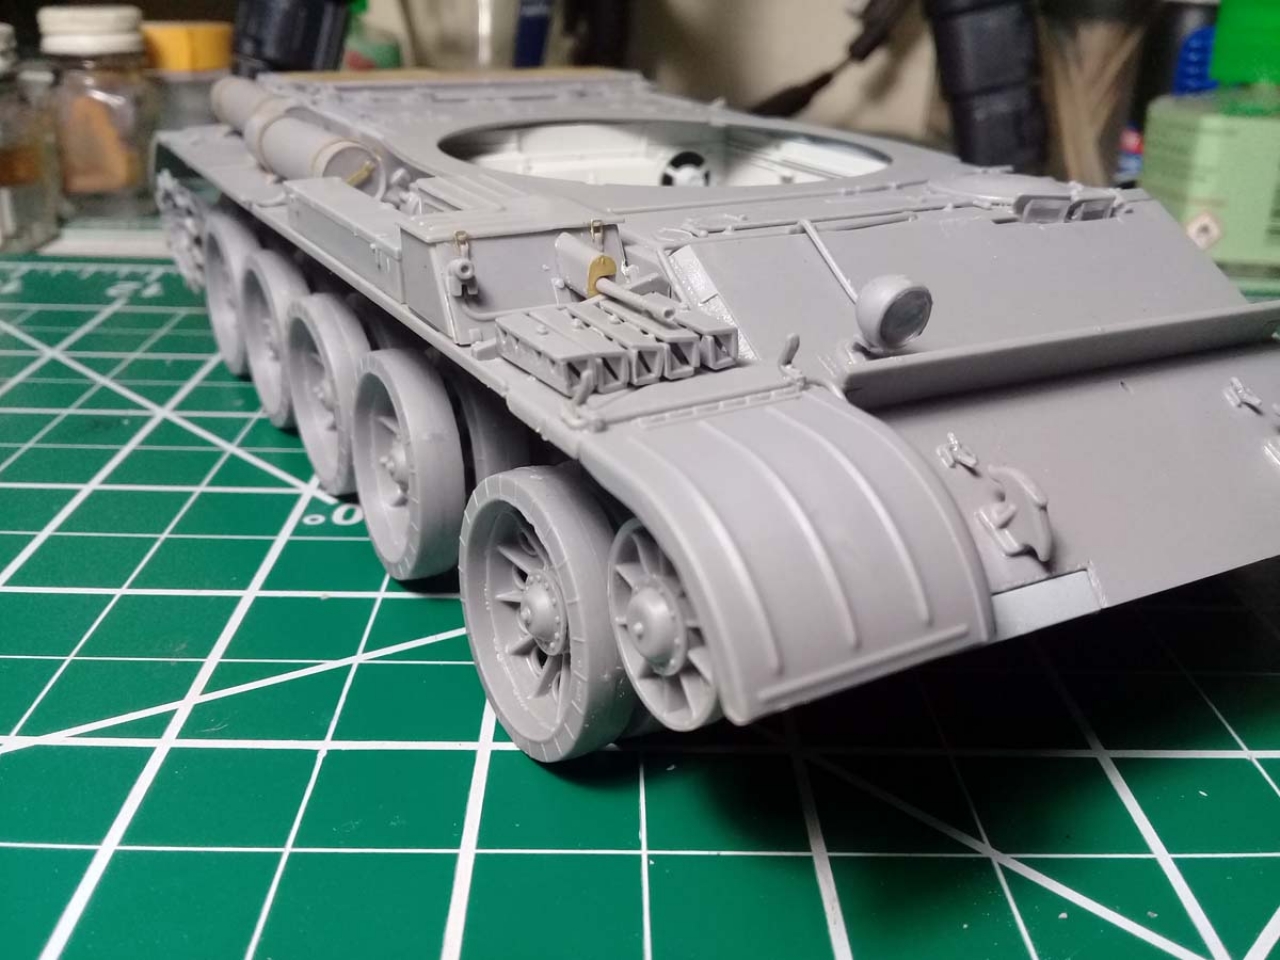
The styrene is of a very good quality, on the soapy side, and reacts very well to Testors glue and well to Tamiya extra-thin cement. The amount of flash is minimal, but the flash is present. I havent noticed any sink marks and the ejector pins are well concealed if any. MiniArt takes good advantage of slide-molding technology and the detail is crisp and abundant. The downside is the huge number of injection gates. Some parts (especially the long, thin ones) carry ten or more of those injection gates which make the part, in some instances, impossible to clean and to use. For example, the rails supporting the exterior stowage at the back of the turret have no less than 12 injection gates each (!). It takes a miracle to cut them from the sprue and to clean them without breakage. In my particular case, the miracle didnt happen. Ive seen other builds on this forum or YT and, invariably, the modeler ends up scratch-building those parts from wire.
Another inconvenience is the seemingly random disposition of the parts on the sprues. It has to do perhaps with the many versions of the tanks made by MiniArt but finding small parts is a permanent hassle. To counter the peril of accidental breakage by continuously shuffling the sprues, I sorted them by ranks and re-sealed them in zip bags. It costed me extra time but it worked fine.
Sprues Layout
Sprue A (x1) contains mainly lower hull parts, hatches and interior parts;
Sprue Ba (x1): turret ring, gun barrel, interior parts;
Sprue C (x1): small parts for the upper hull;
Sprue Ca (x1): various small parts;
Sprue D (x1): turret halves, fenders, hatches, small parts for upper hull;
Sprue E (x1): various small parts, engine deck, turret hatches;
Sprue Fh (x12): individual track links;
Sprue G (x1): interior parts and hatches;
Sprue Ga (x1): tool box parts;
Sprue Hd (x4): small suspension parts;
Sprue He (x4): gas tanks and brackets;
Sprue Hj (x1): Ammo box for AA MG. by mistake, the printed sprue count is 2, but inside the box youll find only one you need;
Sprue Hk (x10): road wheels;
Sprue Ho (x4): suspension arms;
Sprue J (x1): AA MG parts;
Sprue Ja (x1): AA MG parts;
Sprue Je (clear) (x1): periscopes, lenses;
Sprue K (x2): idlers, fender MG parts, turret hand rails;
Sprue Kb (x2): towing cables;
Sprue Kc (x2): suspension parts;
Sprue Kd (x2): sprockets, suspension arms;
Sprue Ke (x2): towing hooks, rear fuel tank parts.
Photo-Etched Parts
The photo etched parts are nicely done with great detail and precise bending lines. The metal is a little stiff and springy, and that might give problems. Some parts are in the lower range of visibility spectrum, but thats why theyre using PE, right? It would be nice though if MiniArt would offer the plastic parts as alternative to PEs. I found that not all the PE parts all that necessary and it is difficult to work with when sandwiched between plastic parts.
Decals
The decal sheet is minuscule and offers 5 graphic elements: Red stars (x3), tactical number 9 (x2), tactical number 224 (x2), tactical number 222 (x2), and tactical sign triangle (x3). I chose to do the version with the red stars but I have no clue where the third one should be, as the instructions are calling for two only. Apparently one triangle is also unused and the number 9 is called as number 6 (!).
Instructions
The instructions are printed as an A4 booklet containing 20 pages crammed with assembly drawings. The first four and the last two pages are printed in full color while the interior is printed in grayscale. The quality of the paper and the print are exceptional. The steps in the instructions are sometimes too busy to my taste but they are clear enough. As it happened, I misread them a couple of times, but I cannot blame that on MiniArt. There are very few mistakes in the instructions, which is laudable given the complexity of the build, and they are easy to spot and correct.
Instructions Layout
Page 1 (cover): three oclock and nine oclock half silhouettes of a T54-1 in Russian green color scheme and a list with the main kit features;
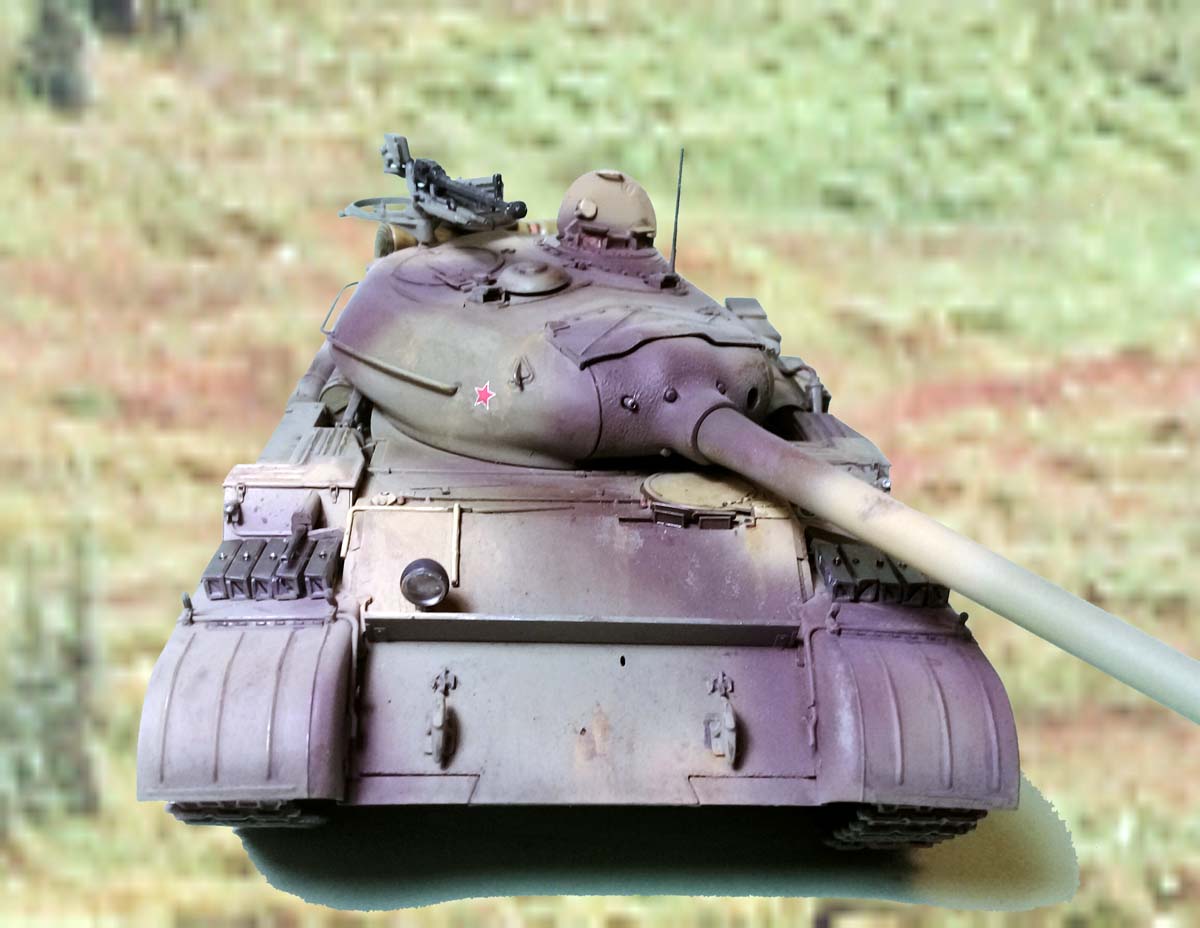
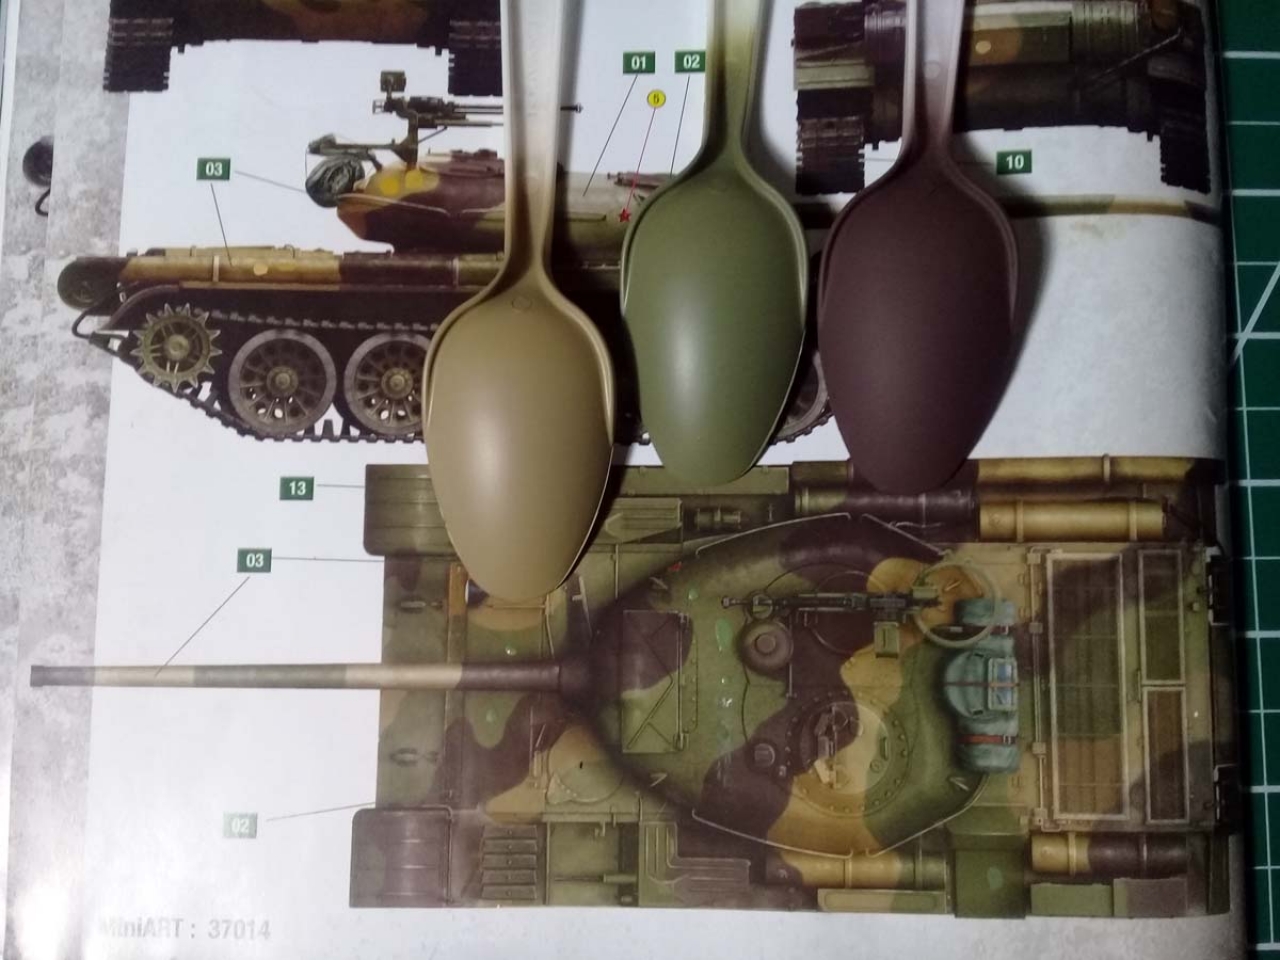
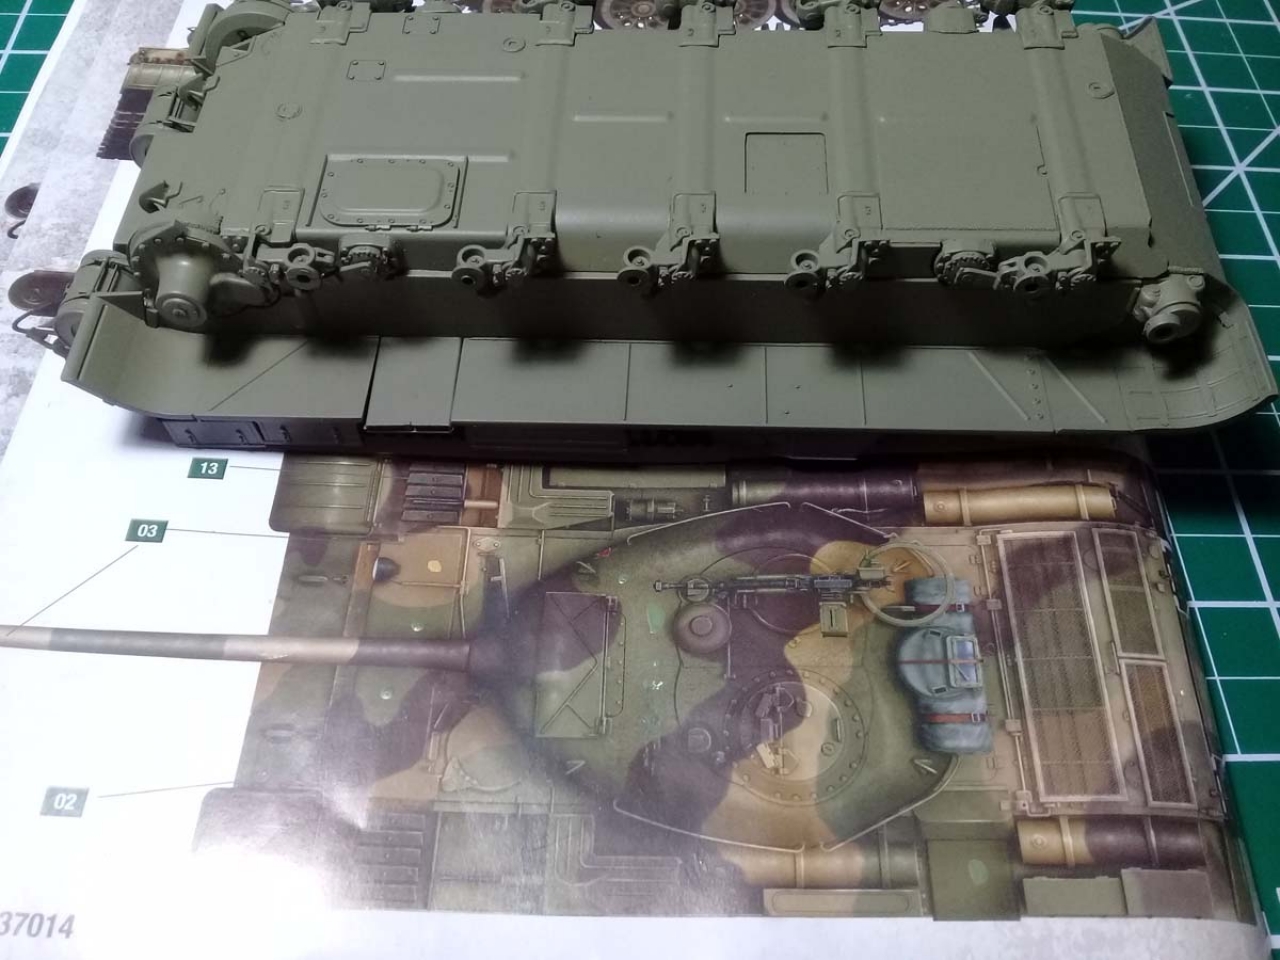
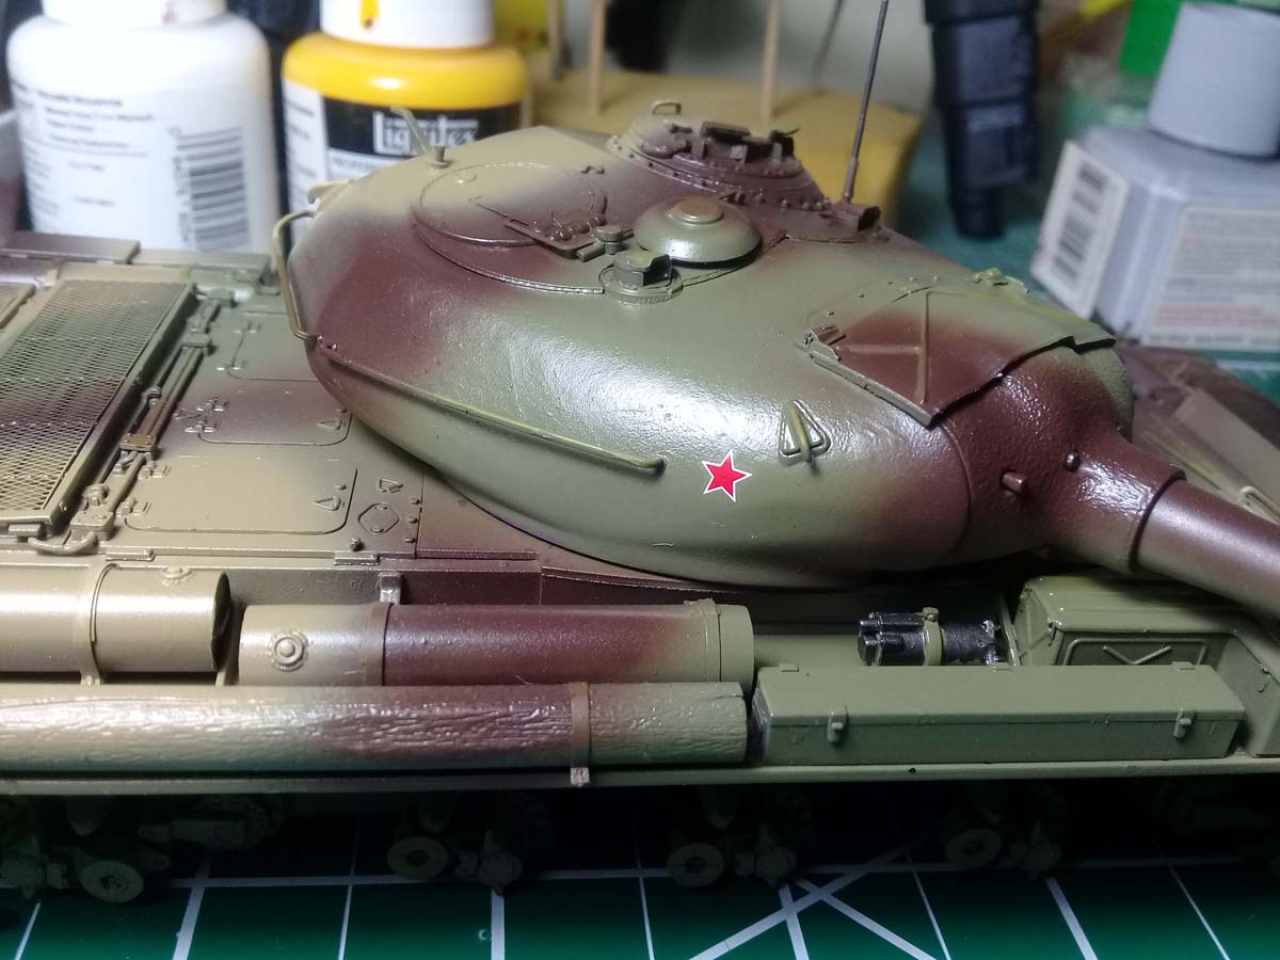
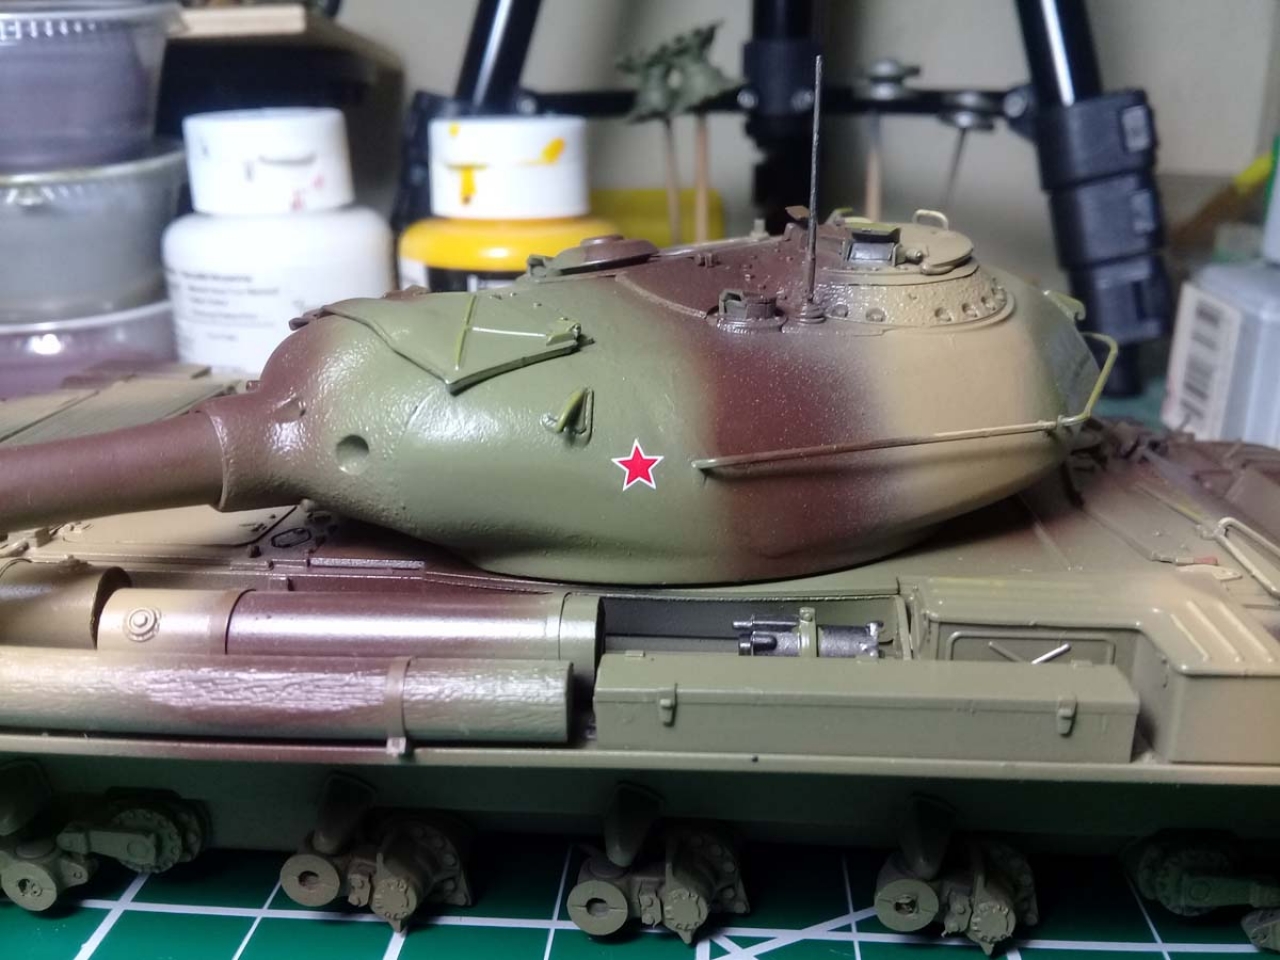
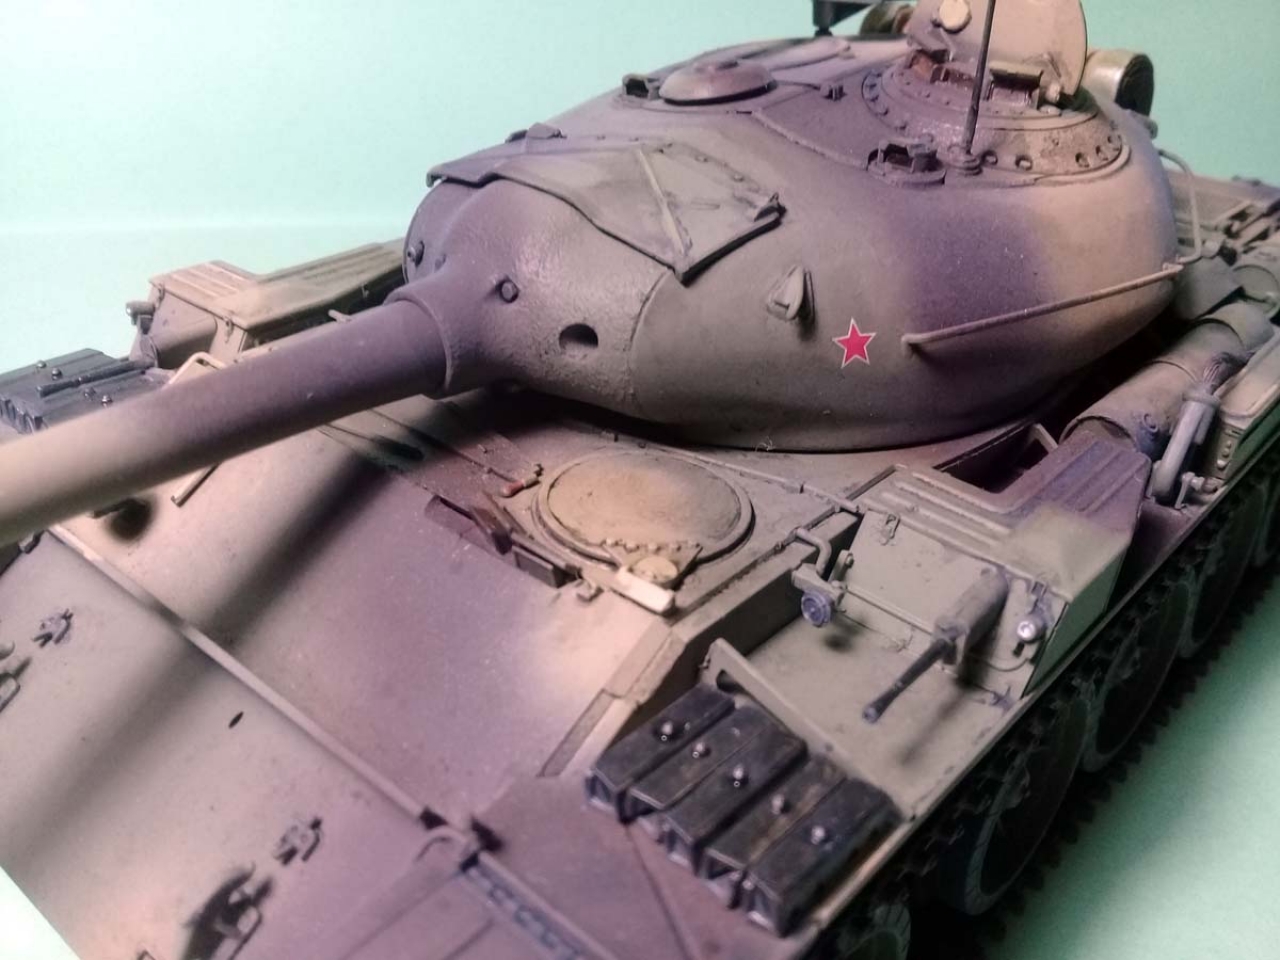
Page 2: full color five point view of a T54-1 option summer camouflage, designed for use during combat operations. The first half of the 50s. This is the only three-tone camouflage scheme, which I chose for my build. It seems to be a conjectural scheme but that suits me just fine!
Page 3: advertisements, sprues layouts with greyed out unused parts and photo renditions of PE fret and decal sheet, and the color chart. The color chart offers the colors description, a printed sample and the correspondent from five paint manufacturers (AMMO MIG, Humbrol, Mr. Color, Testors and Vallejo).
Page 4: decoding of symbols used in the instructions manual and sprues layouts.
Page 5-18: assembly diagrams;
Page 19: three point view of a T54-1 Soviet Army 50th years and two point view of Tank No. 6 initial batch. Landfill factory No. 183, Nizhny Tagil, summer 1947
Page 20 (back cover): four point view of Soviet Army, 50th years. Option winter tank coloration.
Assembly
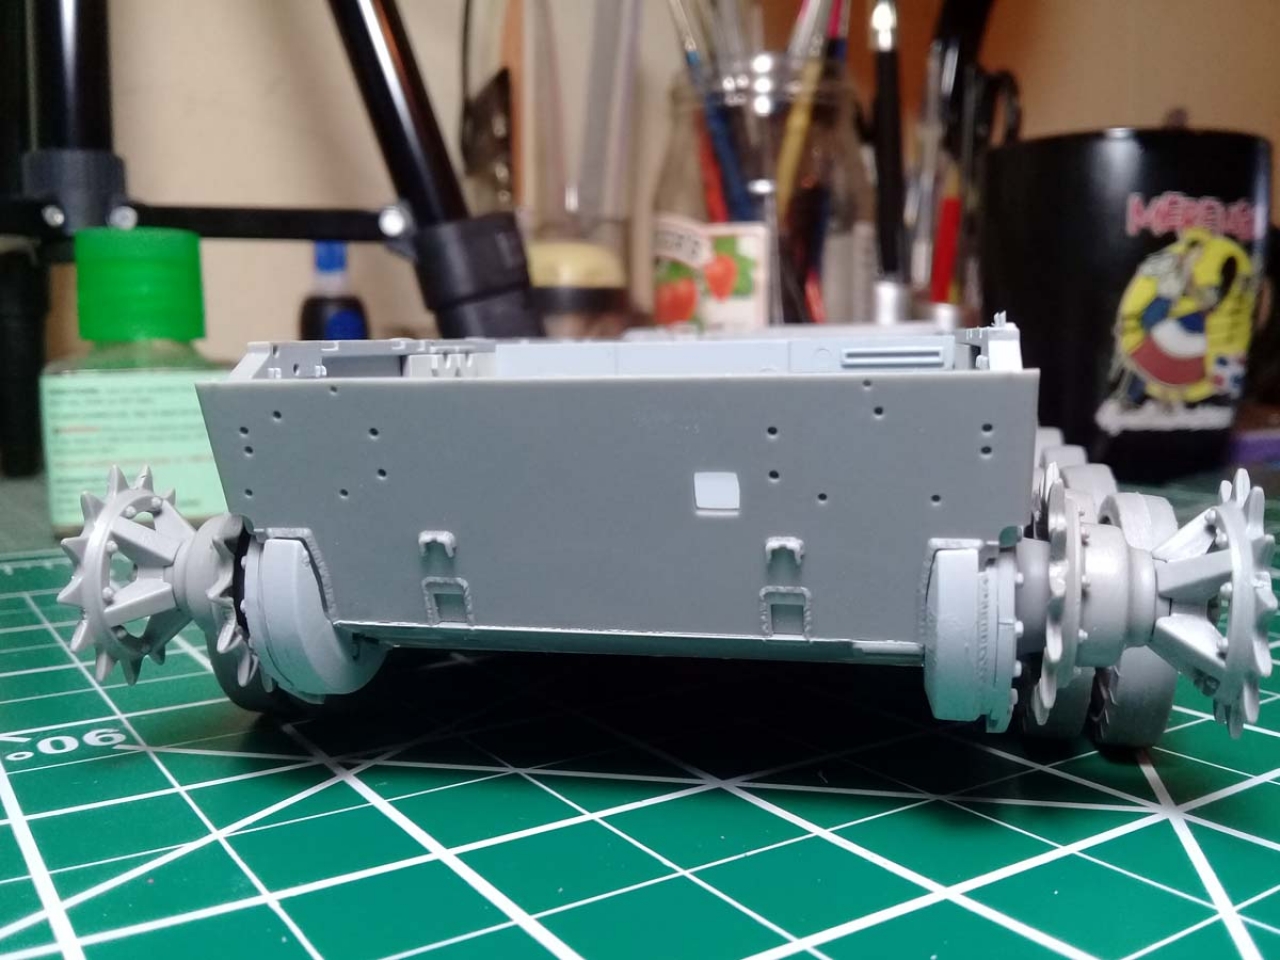
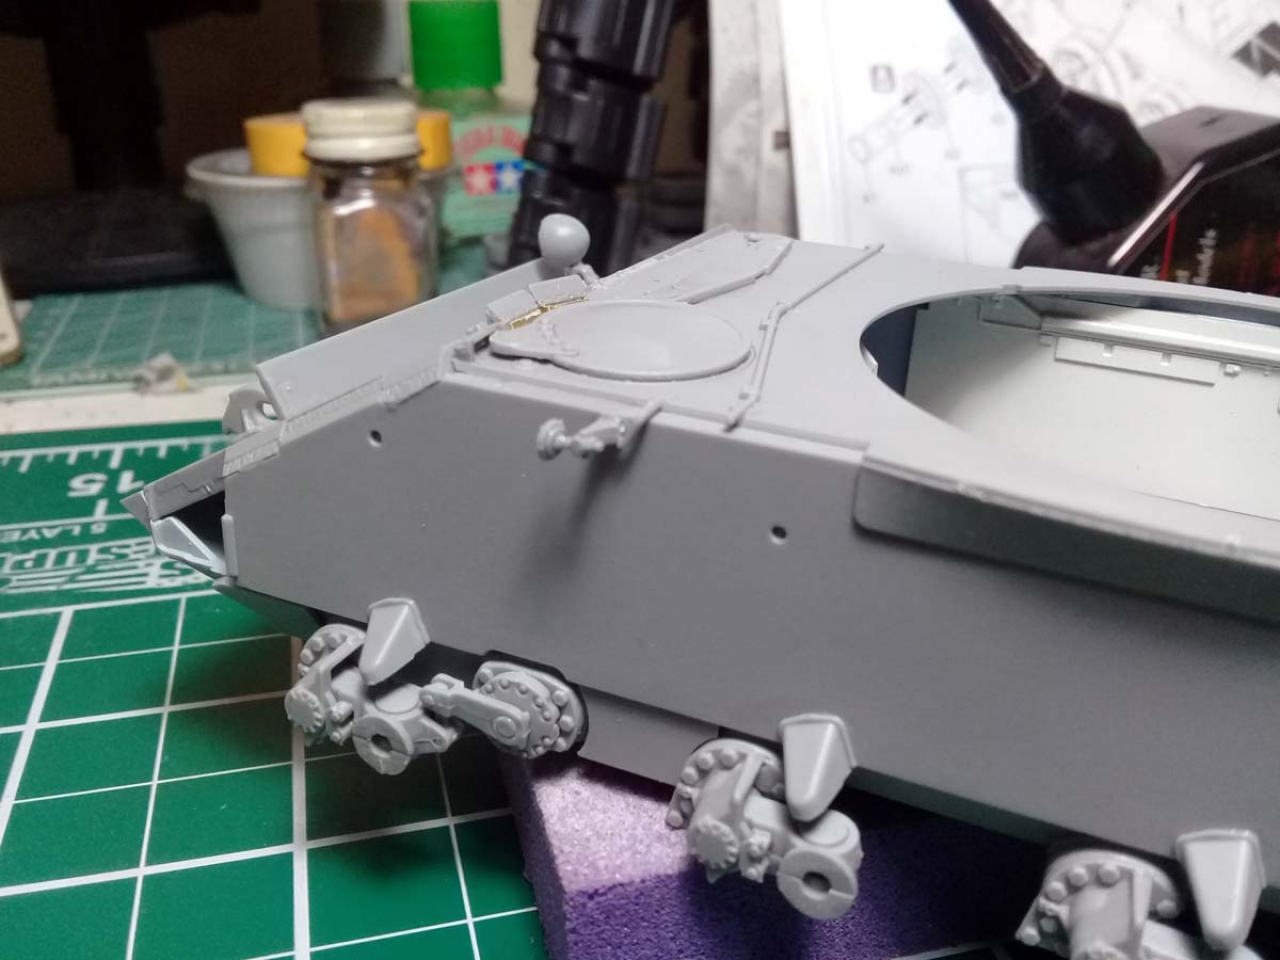
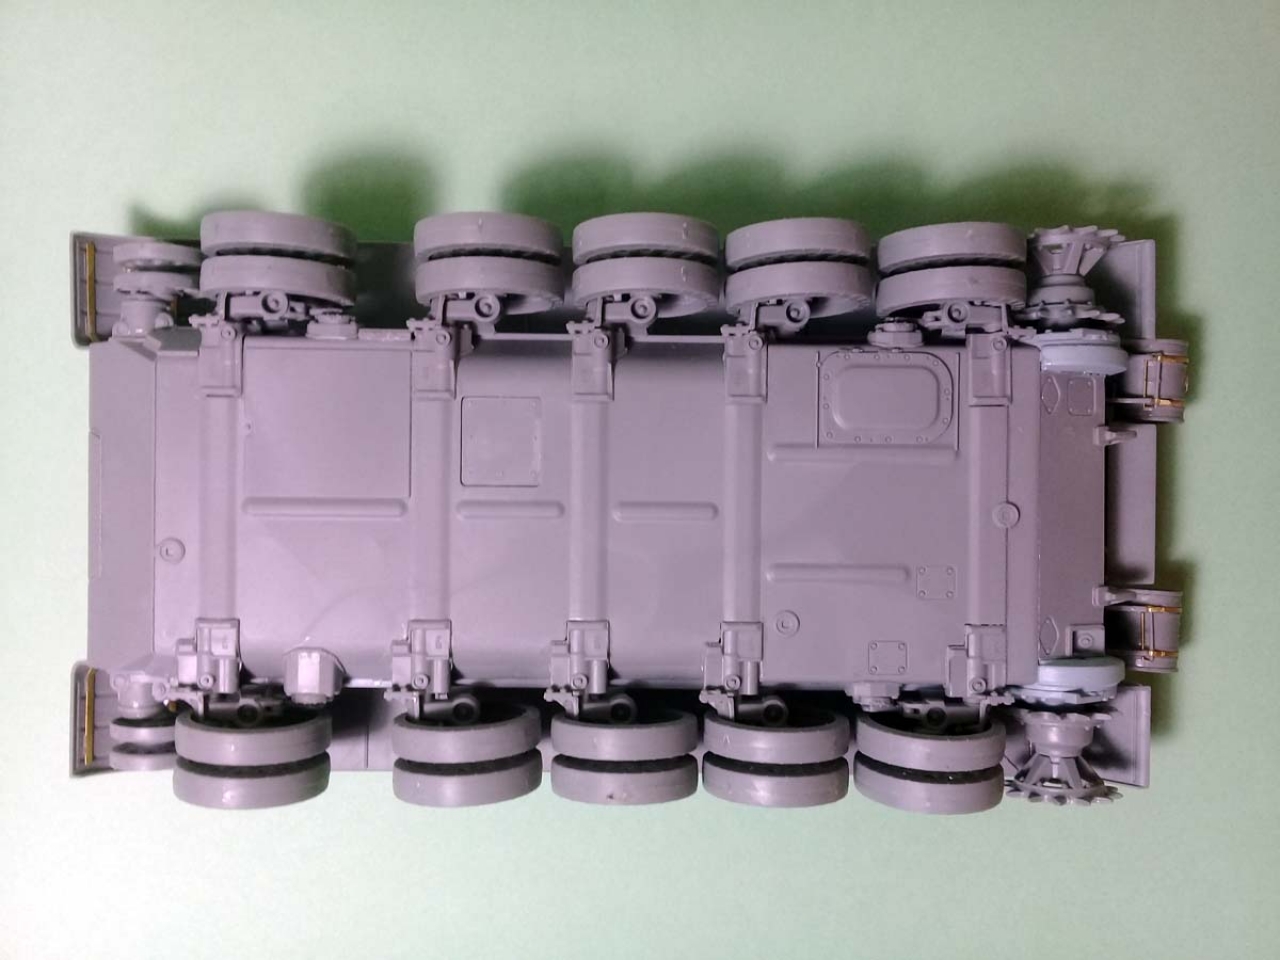
Steps 1-5: deal with the assembly of torsion bars and articulated arms housings. Nothing too complicated here and I had no problems whatsoever. Attention has to be paid though to the small flash that can prevent correct alignment and to the locator pins. The latter are very precise but they have enough play to give placement error. On two occasions I had to sand the assembled torsion bar ends to a flush surface, otherwise the inside of the wheels wont seat properly.
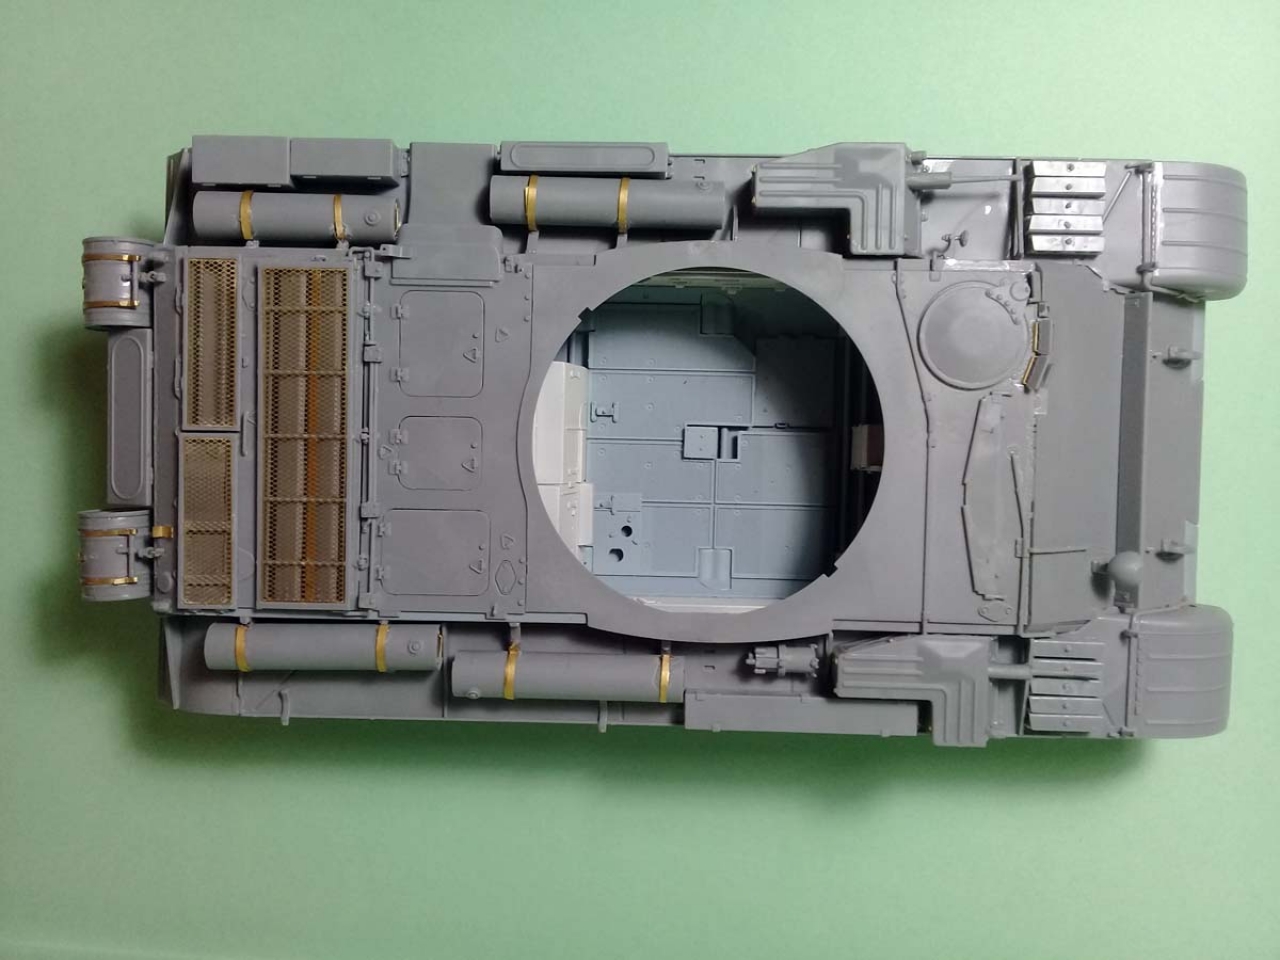
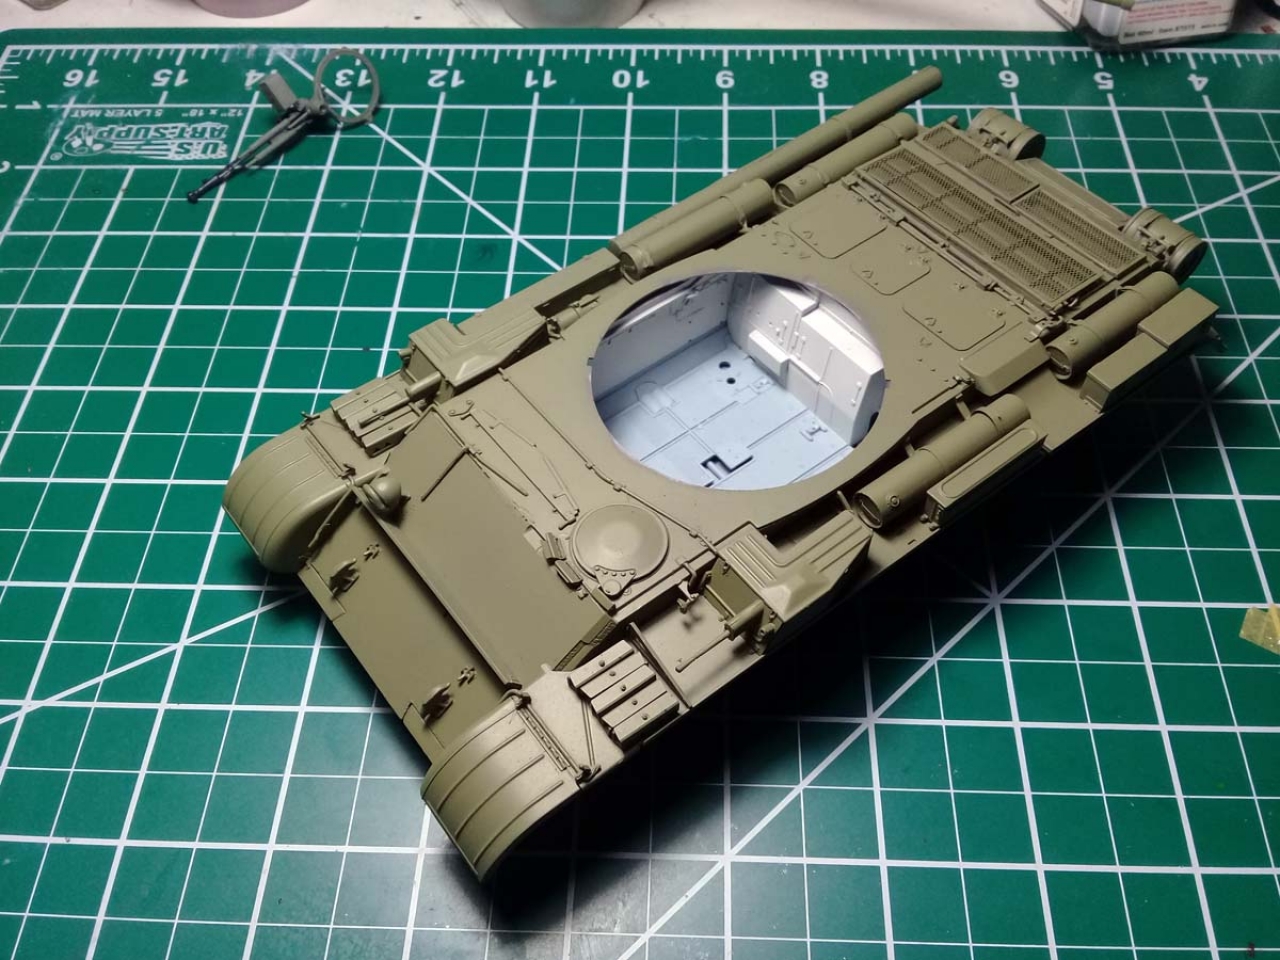
Step 6 and 7: installation of the working articulated arms on the right side, as well as the bottom plate under the turret. A characteristic of the T54 series is that the tank has no turret floor, in attempt to keep the low profile of the AFV.
Steps 8-12: assembly of the left side articulated arms, housings of the torsion bar ends, bearing casings and some under armor plates, as well as engine inspection hatch and interior subassemblies. Also those steps are calling for interior painting: interior white and grey-blue for the engine room.
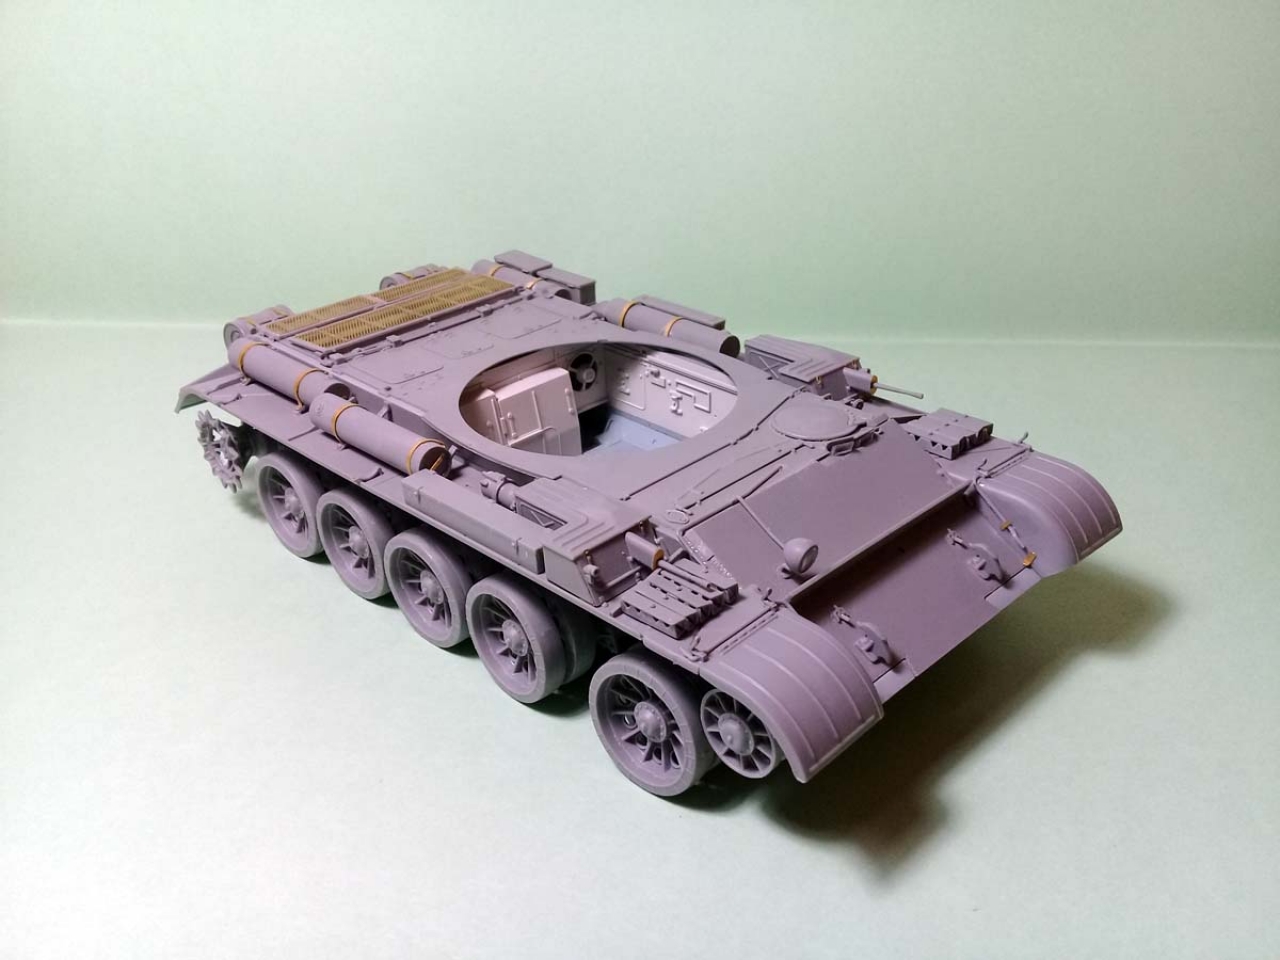
Steps 13-18: assembly of the hull sides. Those are multi-part affairs, with interior walls and external detail. Some interior detail is useless because is never to be seen again. My guess here is that MiniArt have copied the steps from the full interior instruction manual, without bothering to write off the unnecessary parts. The modeler has the choice to let them out, of course, if he wishes to hurry up the assembly. Ive chosen to install them, since this is an OOB full build review.
Step 19-20: Attachment of the sides and ends of the hull to the bottom plate. During those steps I was skipping back and forward into the instructions, because the hull is a composite structure and most of the required elements are sub-assemblies on their own, with external and internal detail. In order to achieve a good alignment, I made sure all sub-components were installed prior to completing the hulls final assembly. I treated this portion of the building as a single giant step spanning over a few days, because painting its also involved into the process. Eventually the result was excellent, without major problems. One single exception here: part E43, the plate between differentials housings at the lower rear end, was a little warped inwards and thus shorter. Some pressure and a good amount of Testors cement helped solving the issue.
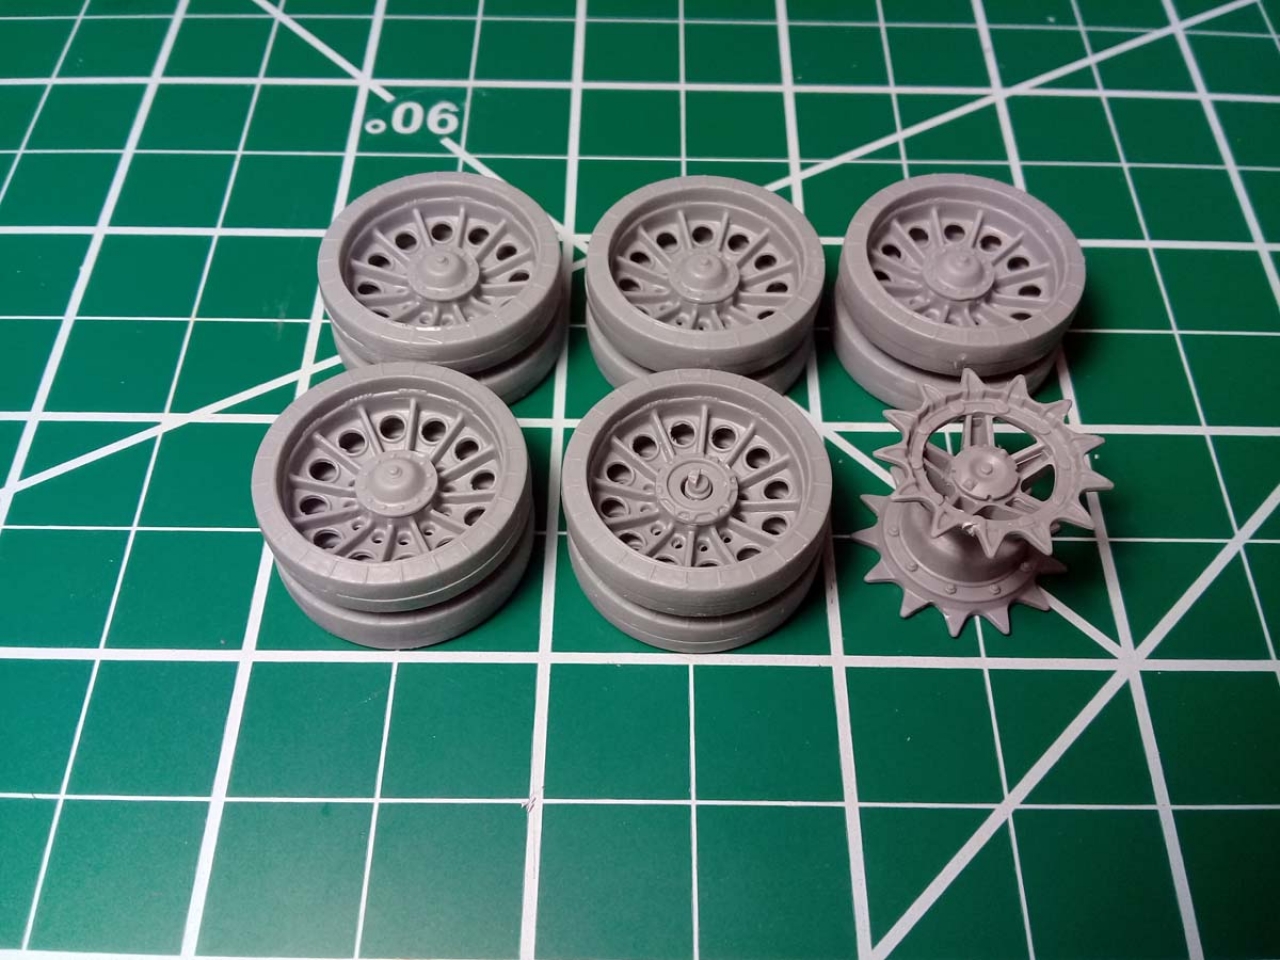
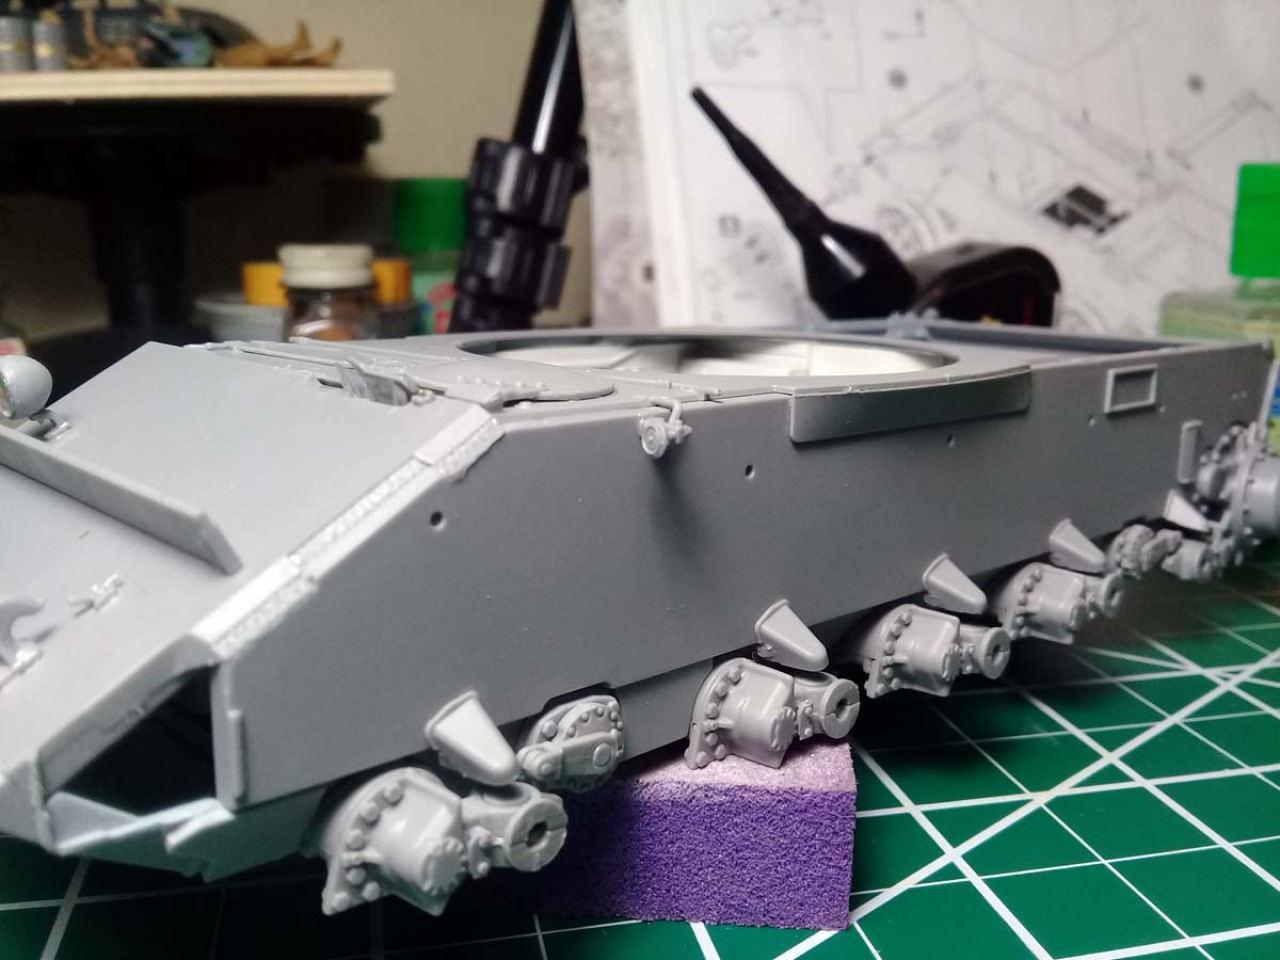
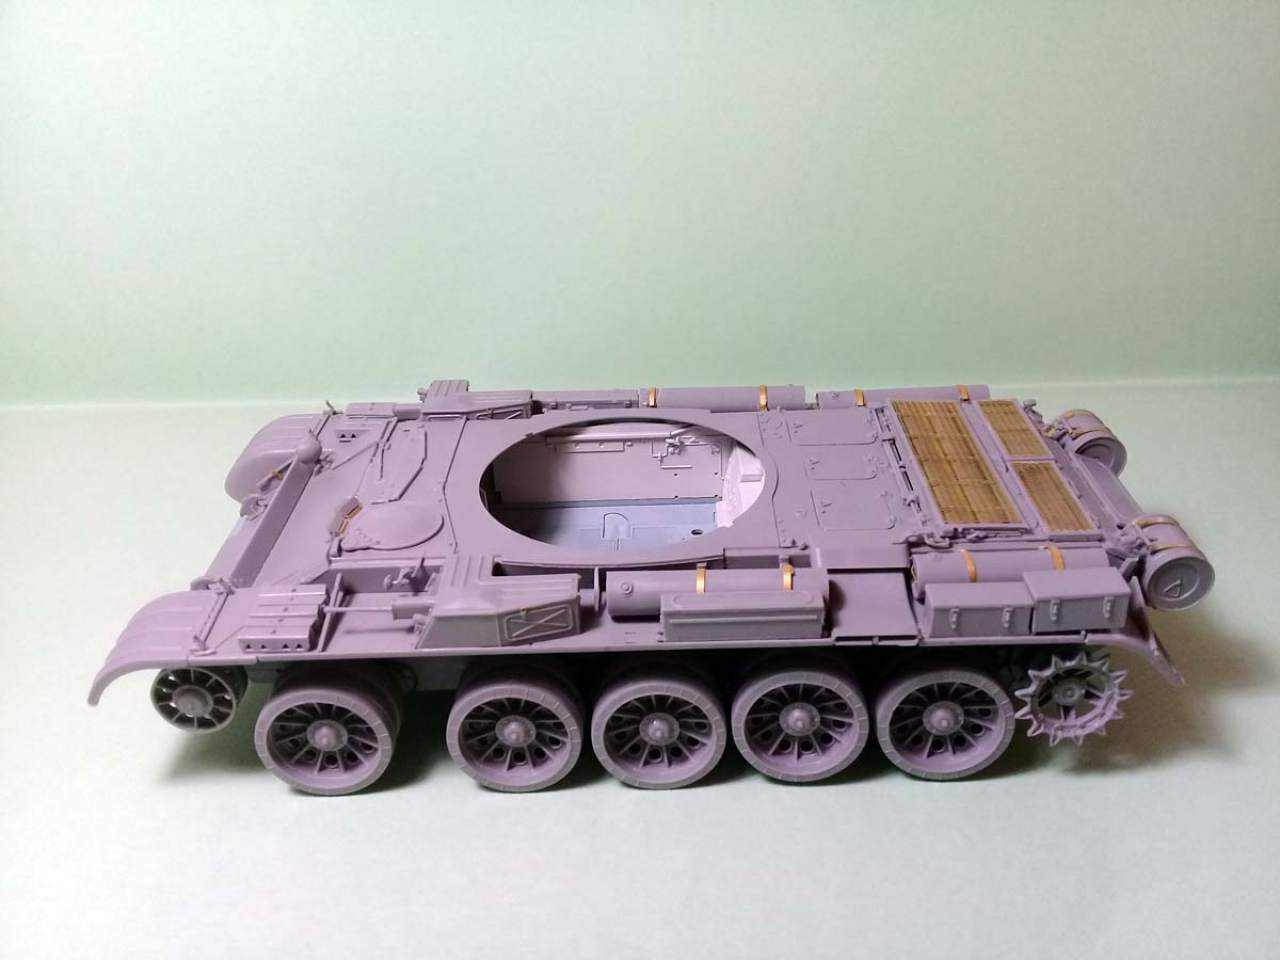
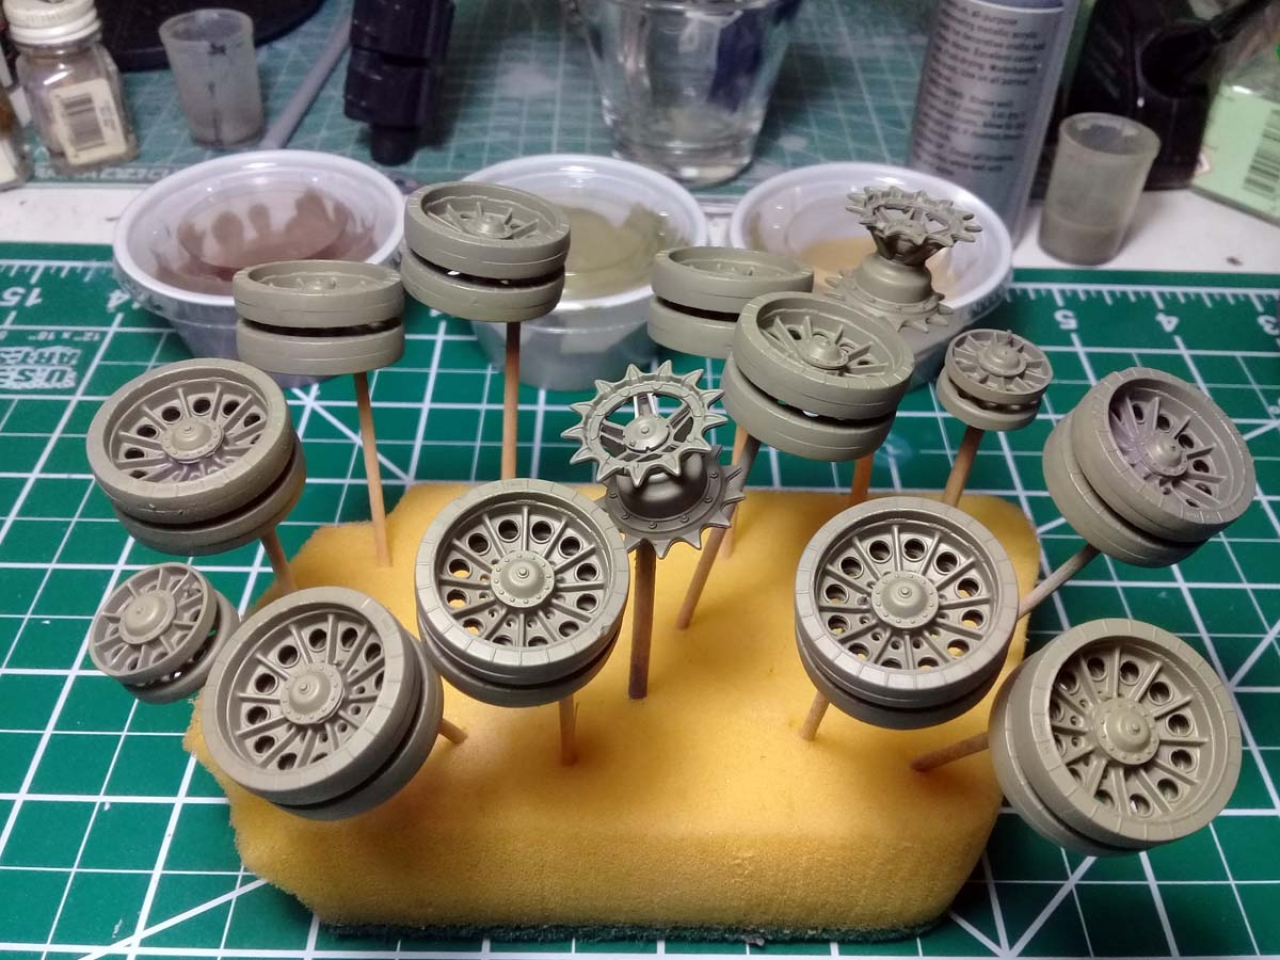
Step 21 (x10): Assembly of the road wheels was a straight forward process and quite easy. Attention must be paid to the bearing installation because their locator pins are minuscule and easy to miss. Also the parts have to be cleaned very well of flash for a proper fit.
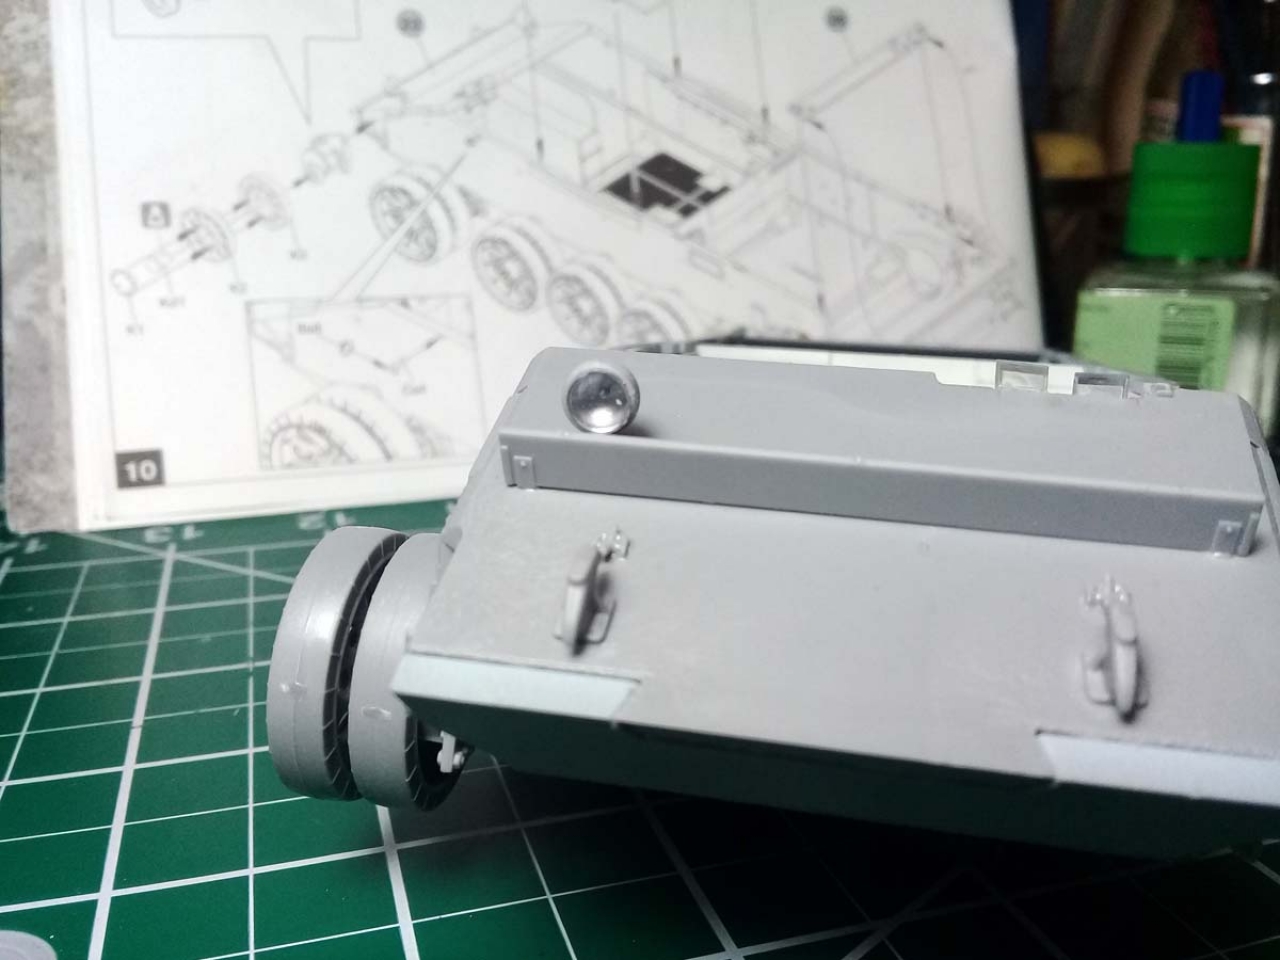
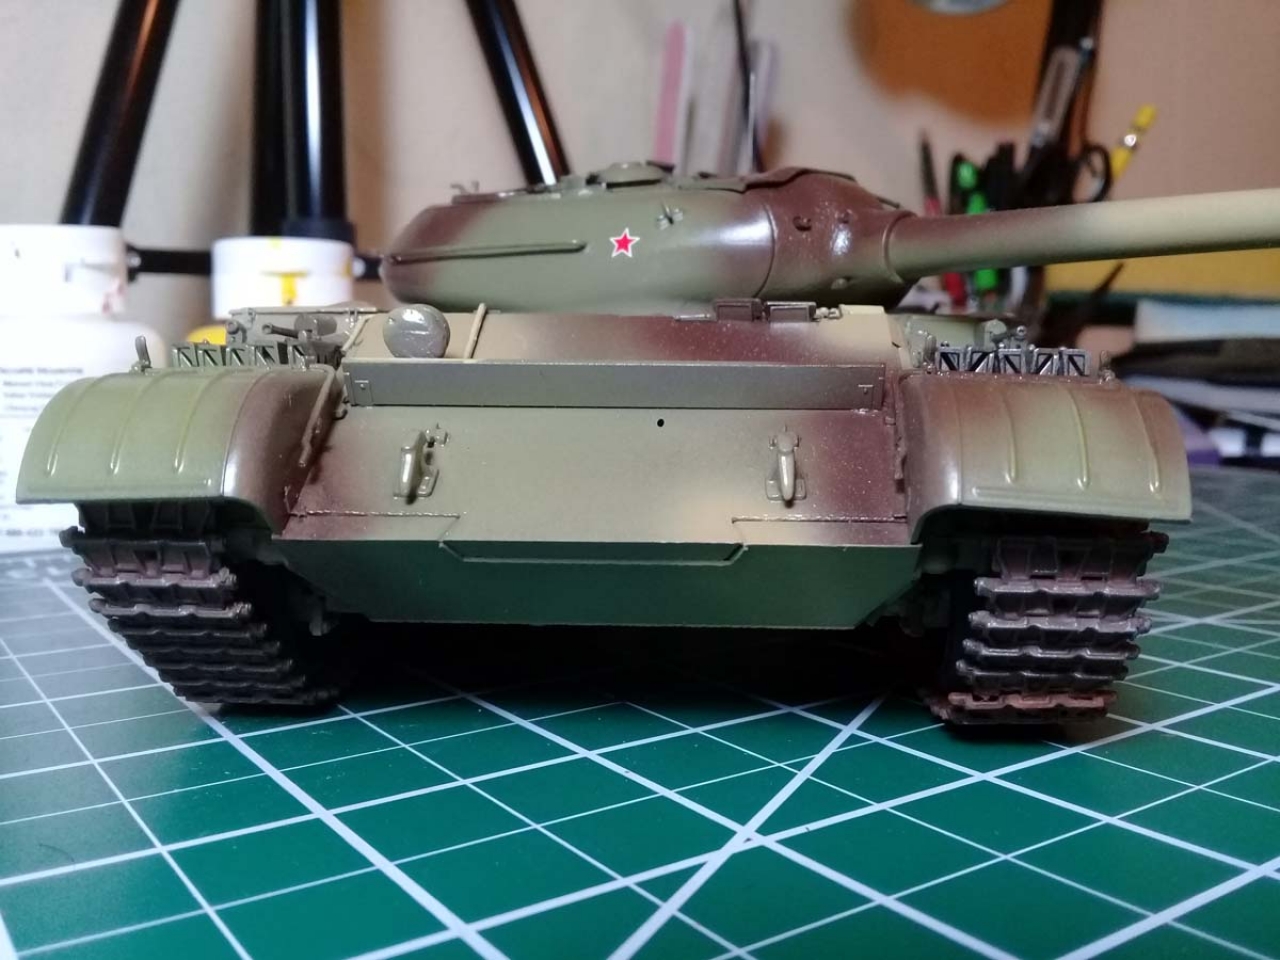
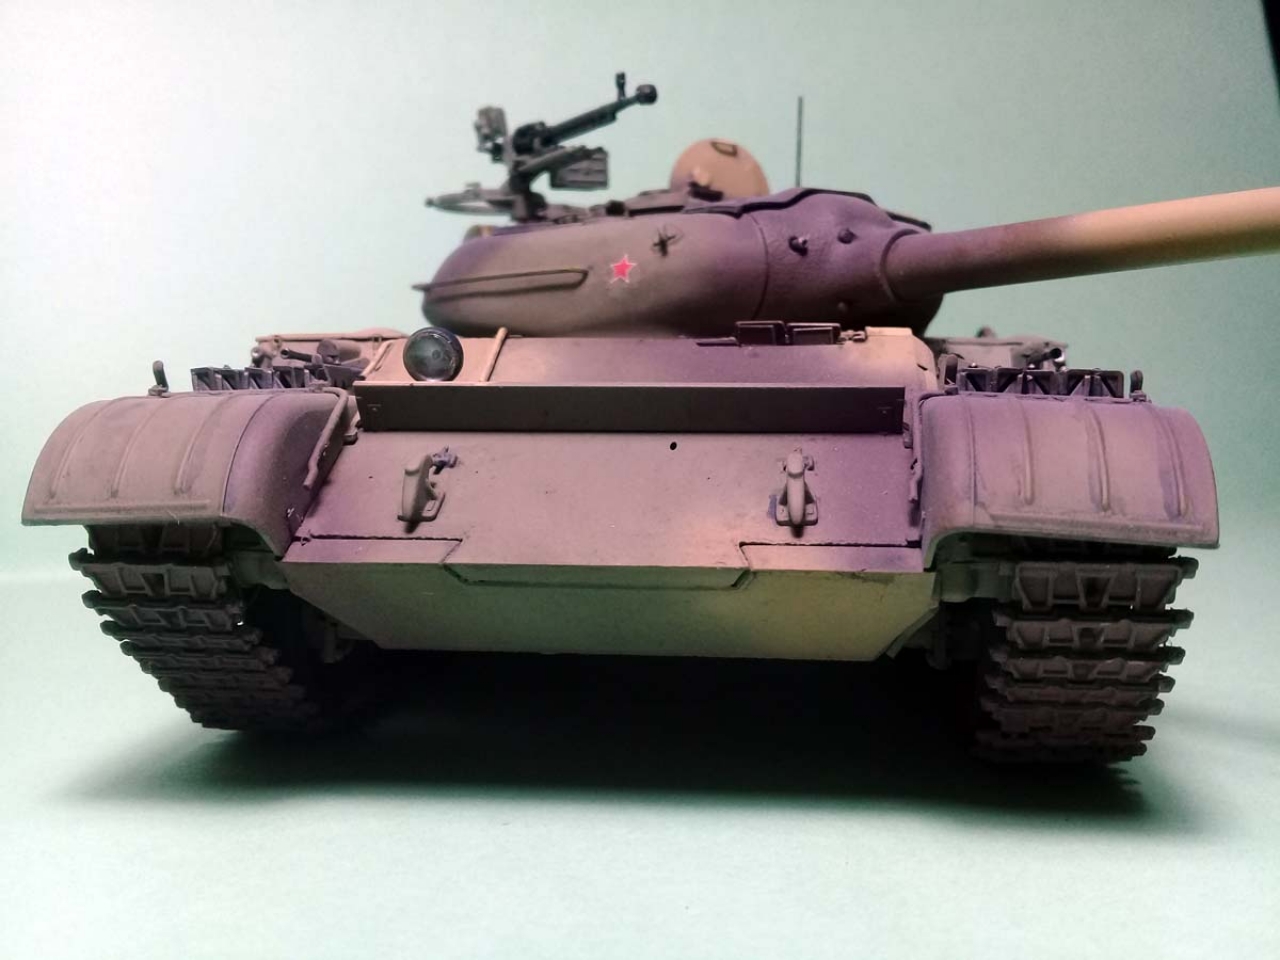
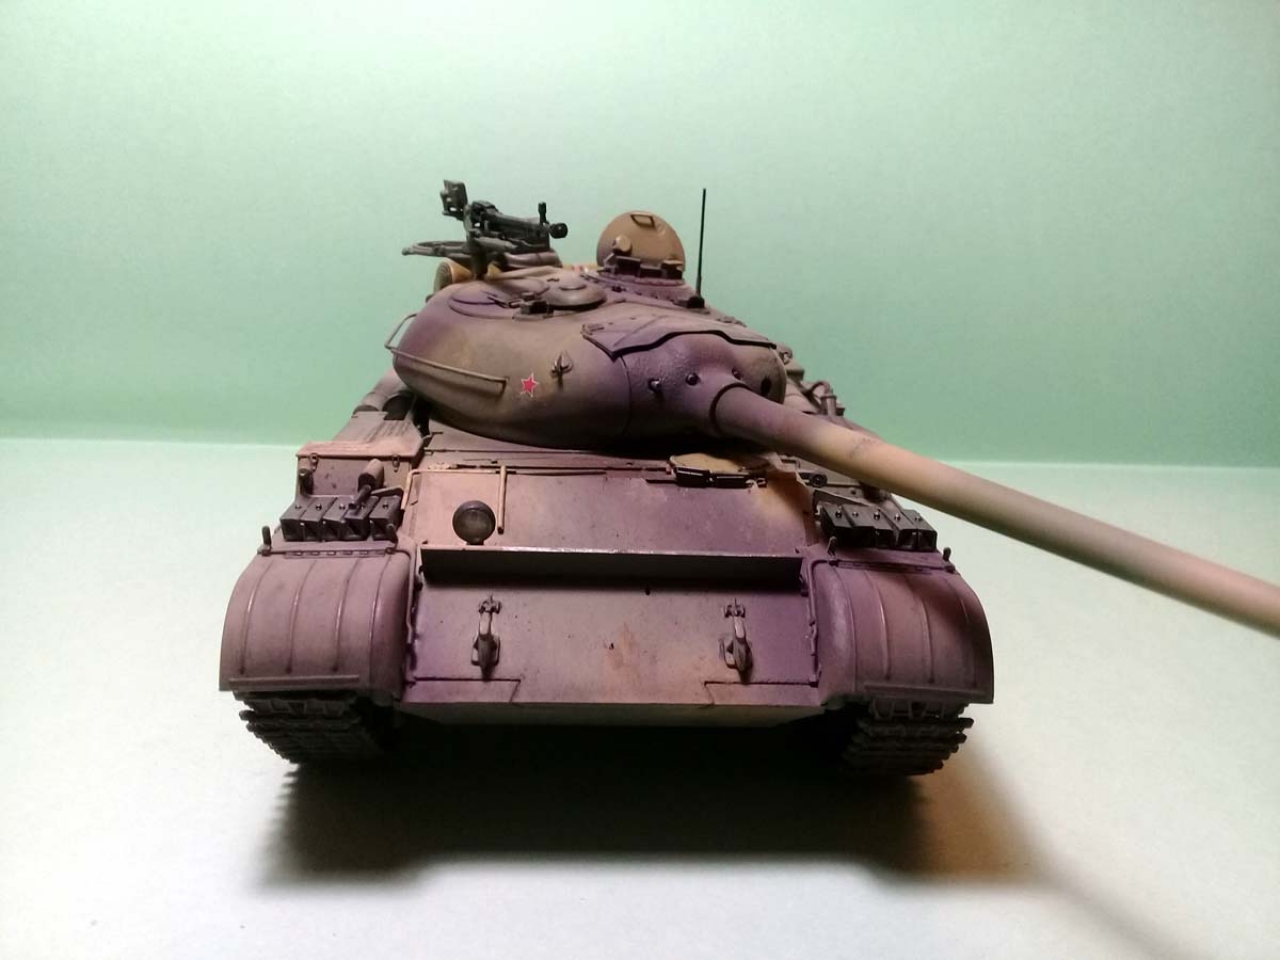
Step 22: offers the first optional assembly between a framed search light and a bare one. The protective shield on the front glacis it is also offered in two versions: a straight and a gouged one. I picked the options from the painting scheme in absence of the better reference, respectively the straight shield and the un-caged light. Step 22 also calls for the installation of the road wheels, but I glued only the bearing covers with the pins inside with permanent glue and I attached the wheels to the suspension bars with white glue so I could remove them later on.
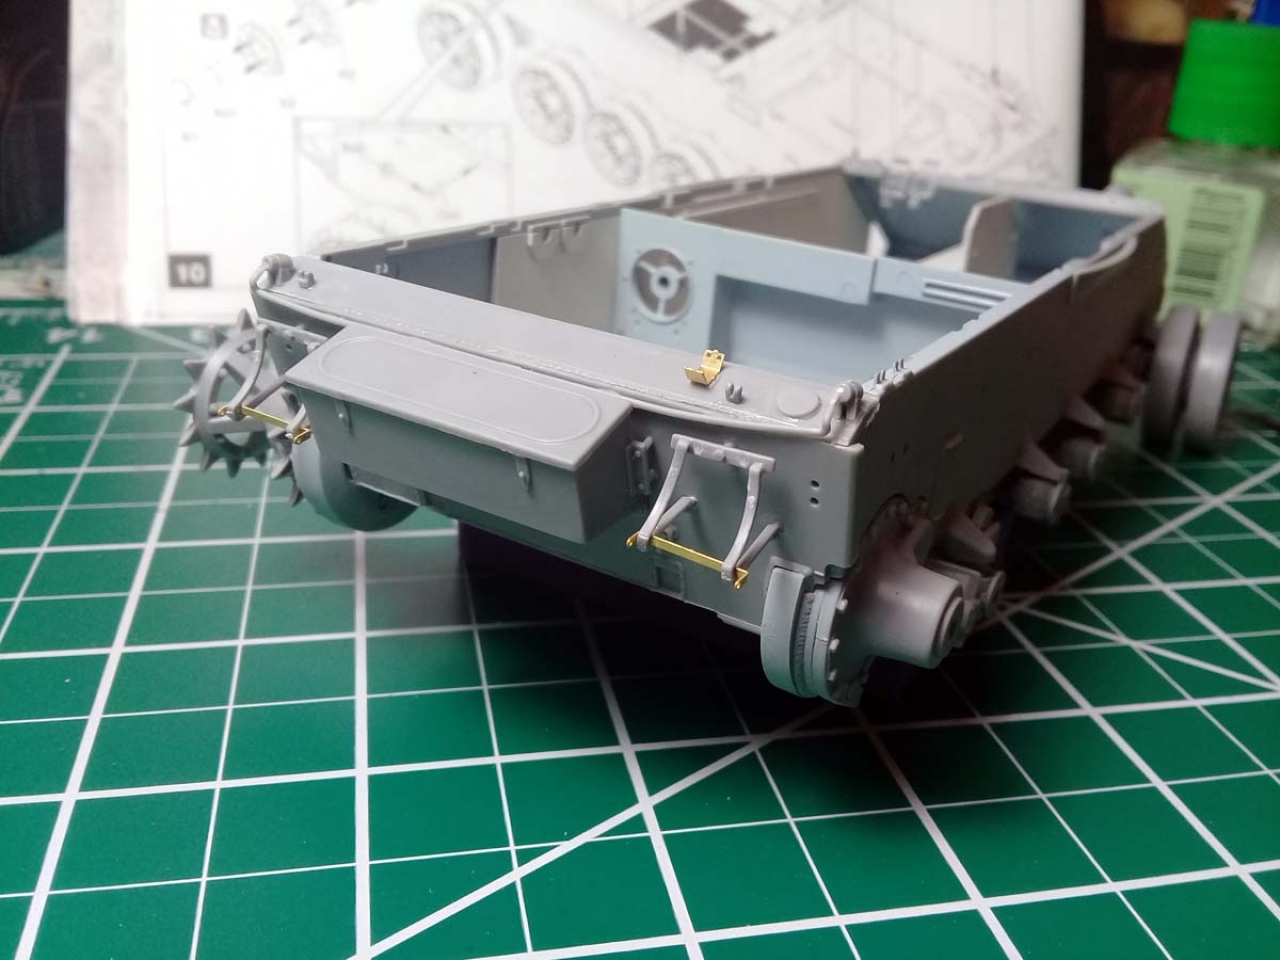
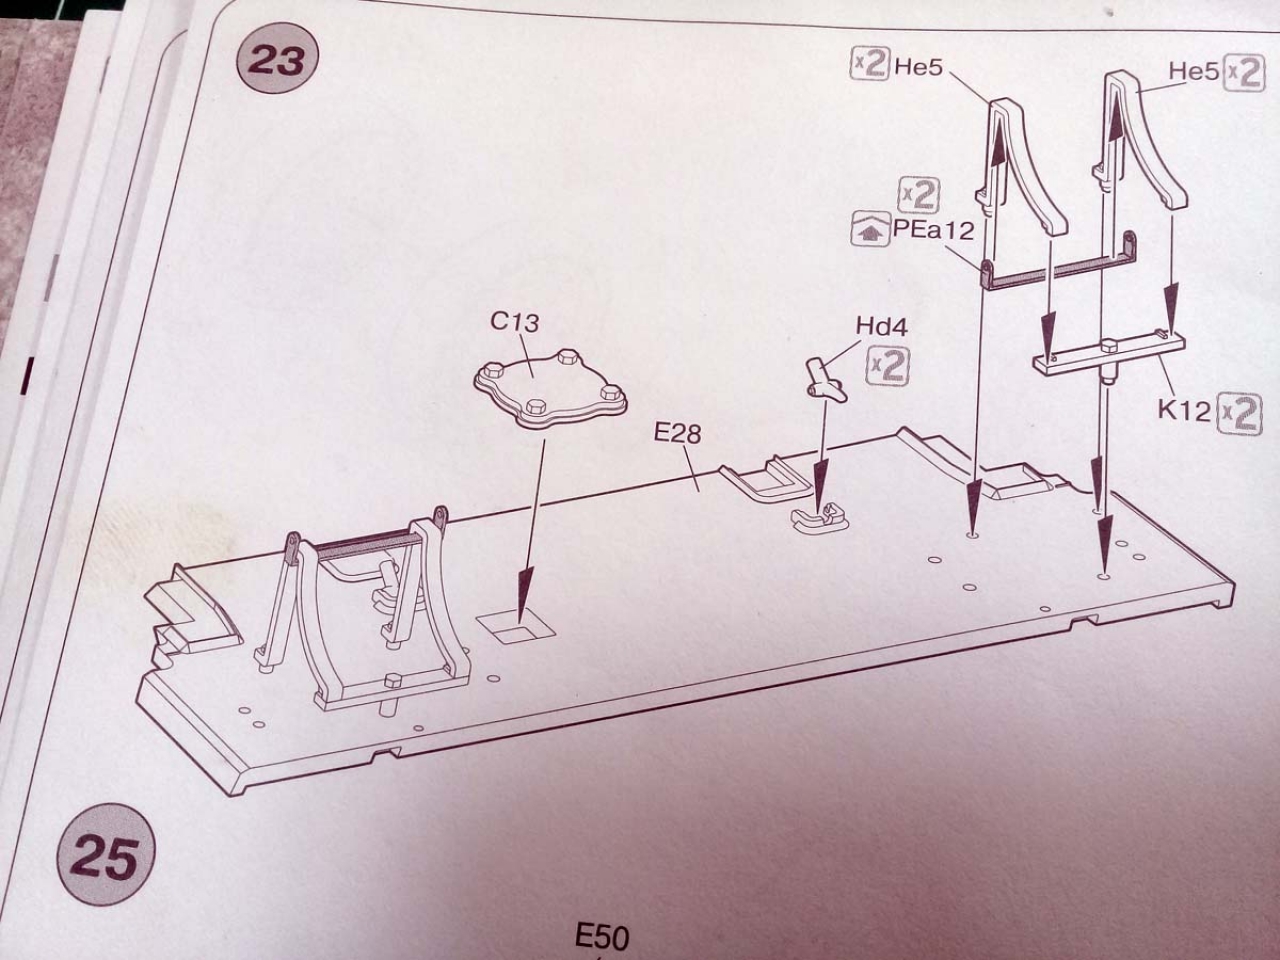
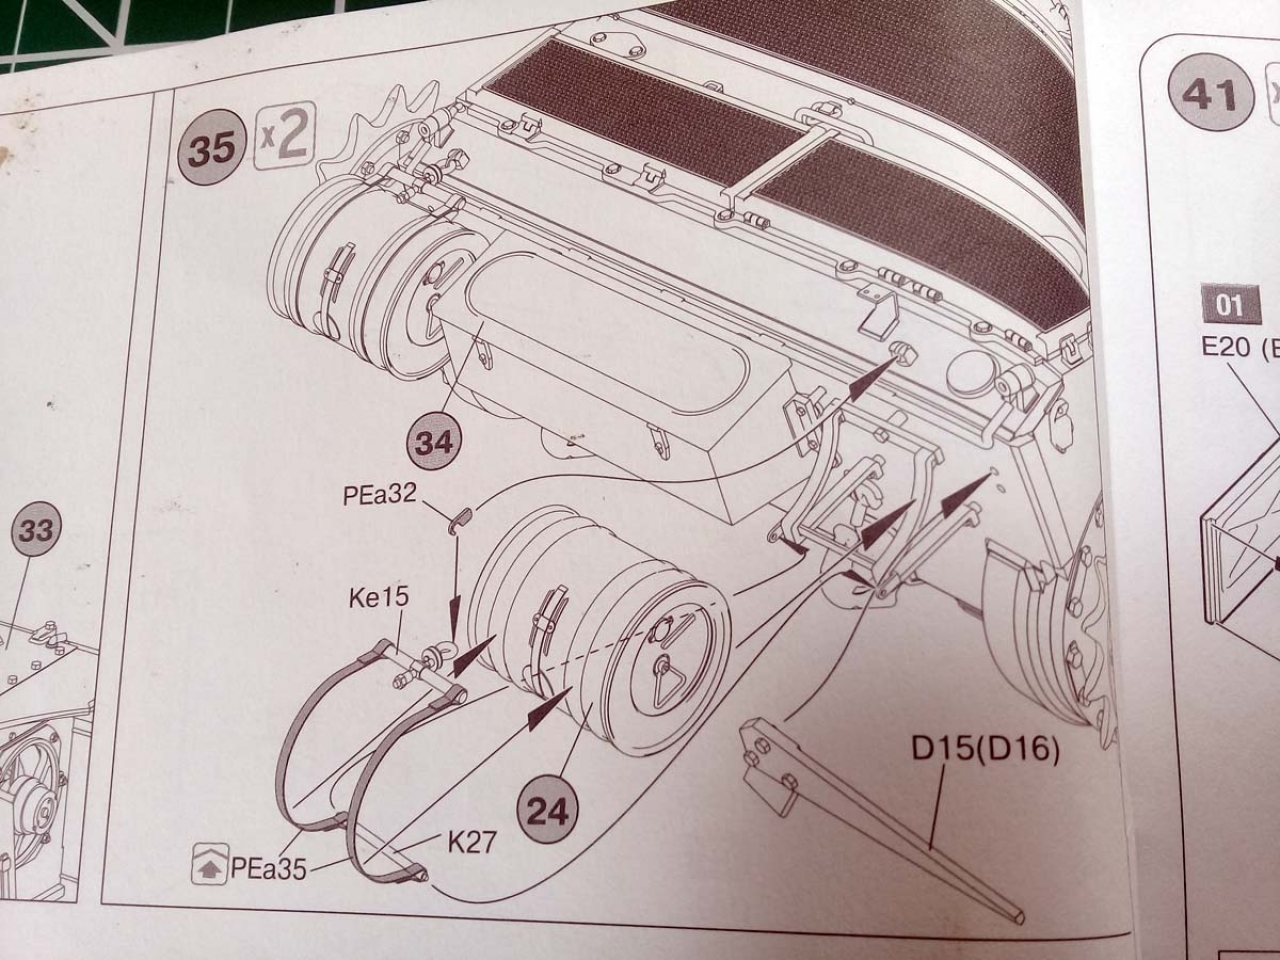
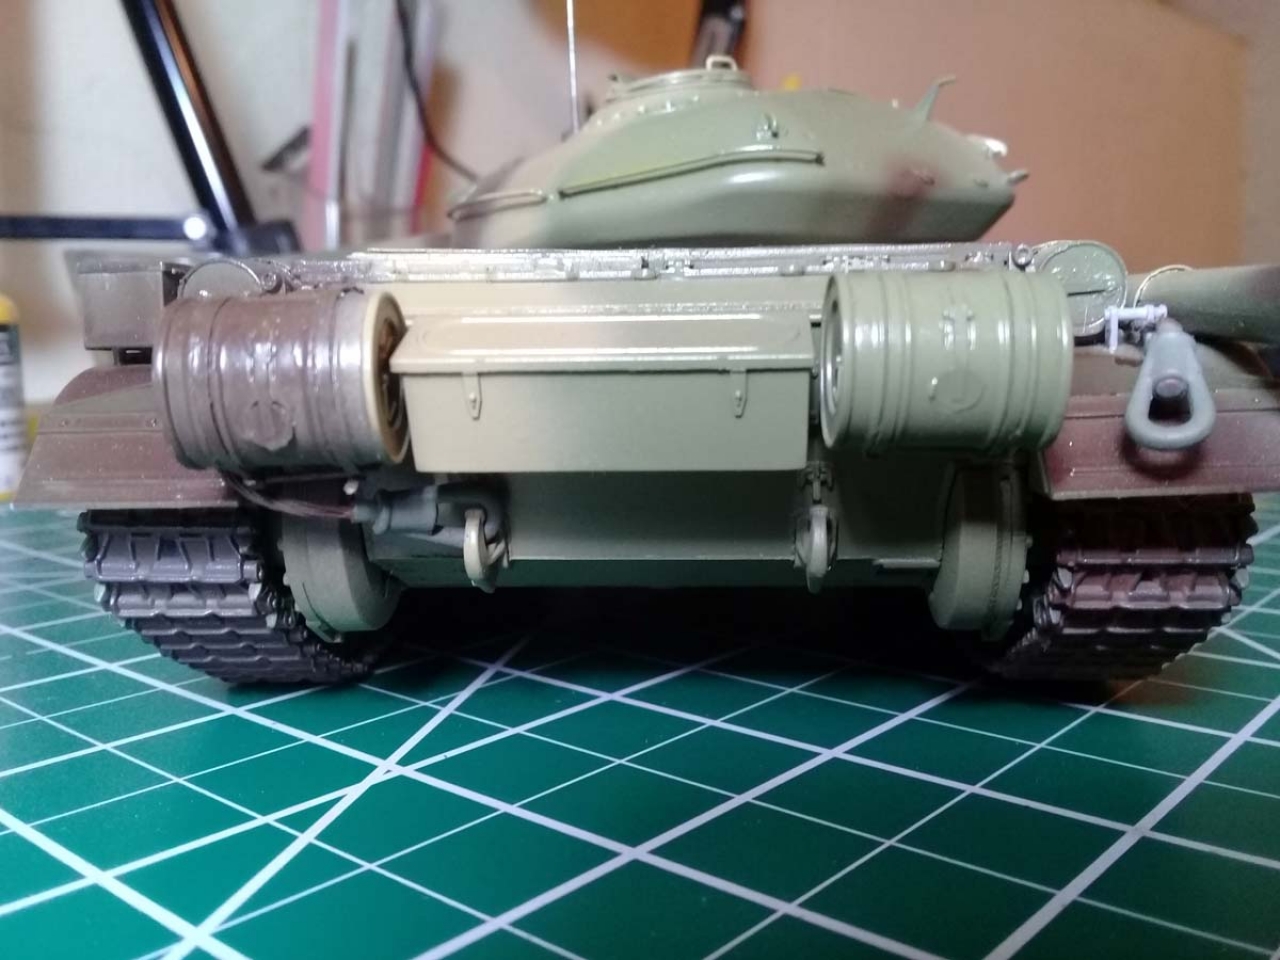
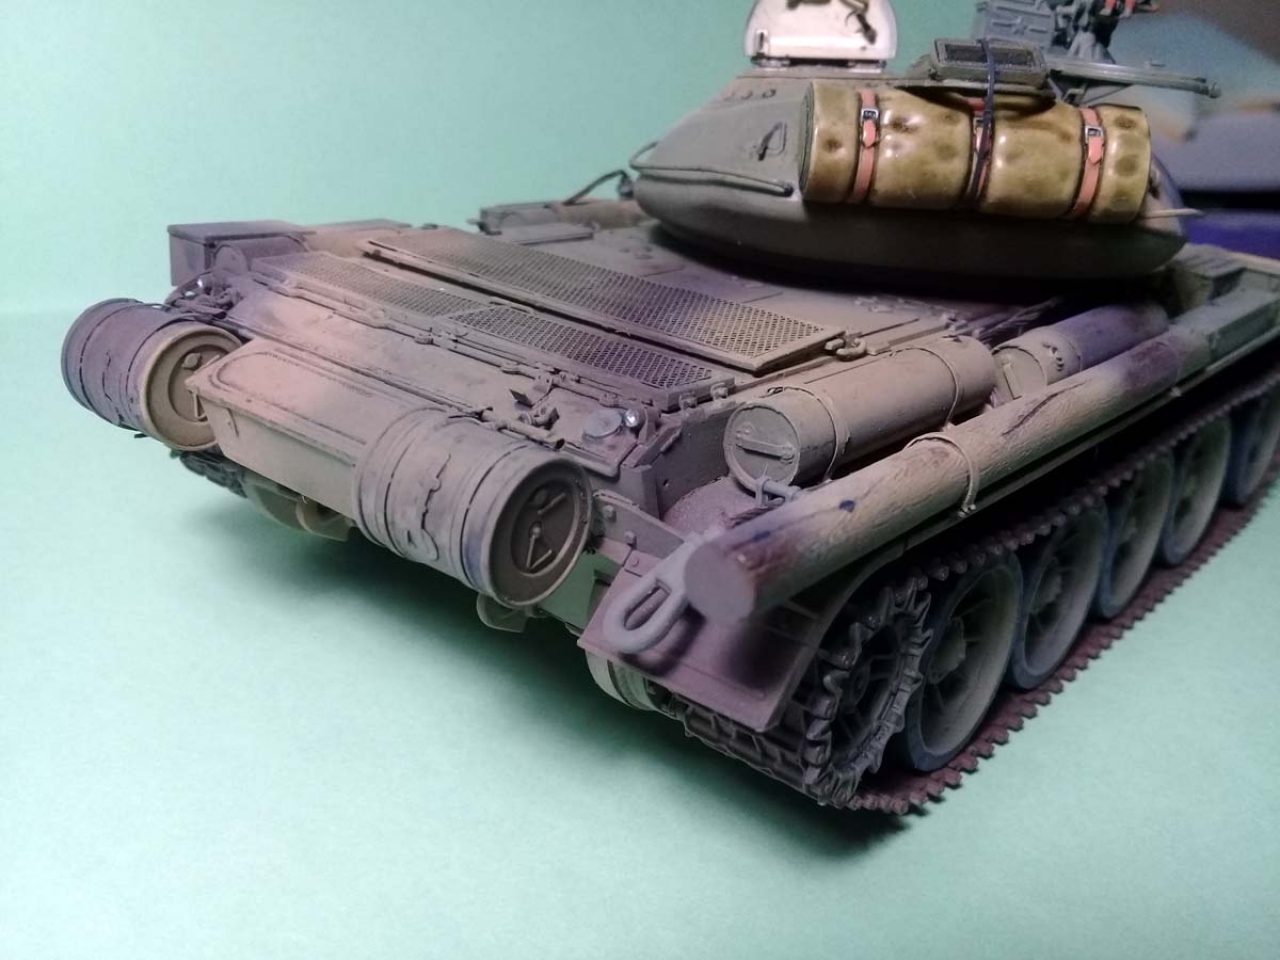
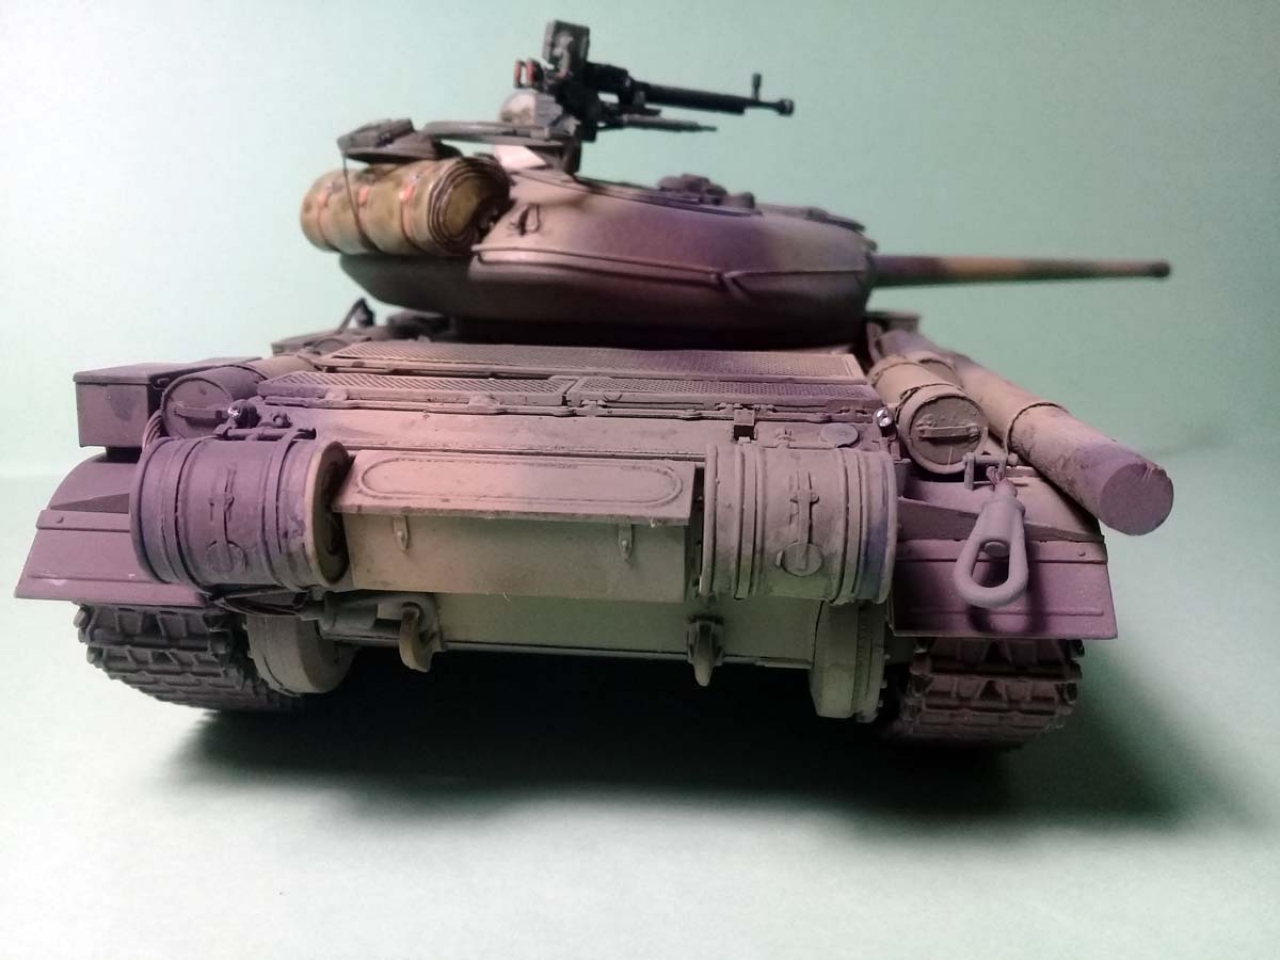
Steps 23-25: the assembly of the rear end of the hull and the jettisonable fuel drums supports. This steps turned out to be a rather bitter affair because lots of small styrene and PE parts are involved. Particularly the fuel drum supports are very unstable structures and I had a series of unpleasant events. First, one of the He5 parts broke when I removed it from the sprue and I had trouble completing the assembly. Second, the PEa12 does not fit tight and it fell several times from the both drum supports. The more I fiddled with the parts, the more problems Ive got. I decided to jump to Step 35, hopping that the installation of the fuel drums will add stability to the assembly. My guess was correct and I managed a stable although not perfect assembly. It triggered yet another error by installing the parts D15 and D16 ahead of the time. Those are the supports for the fenders. The locator pins offer enough play to get the things wrong and that is what Ive got. Later in the build I had to tear them apart and re-glue them for the fenders to seat properly.
Step 26: adds some more detail to the rear end of the hull, as the position lights. Its all good there, if you feel comfortable working with tiny styrene parts.
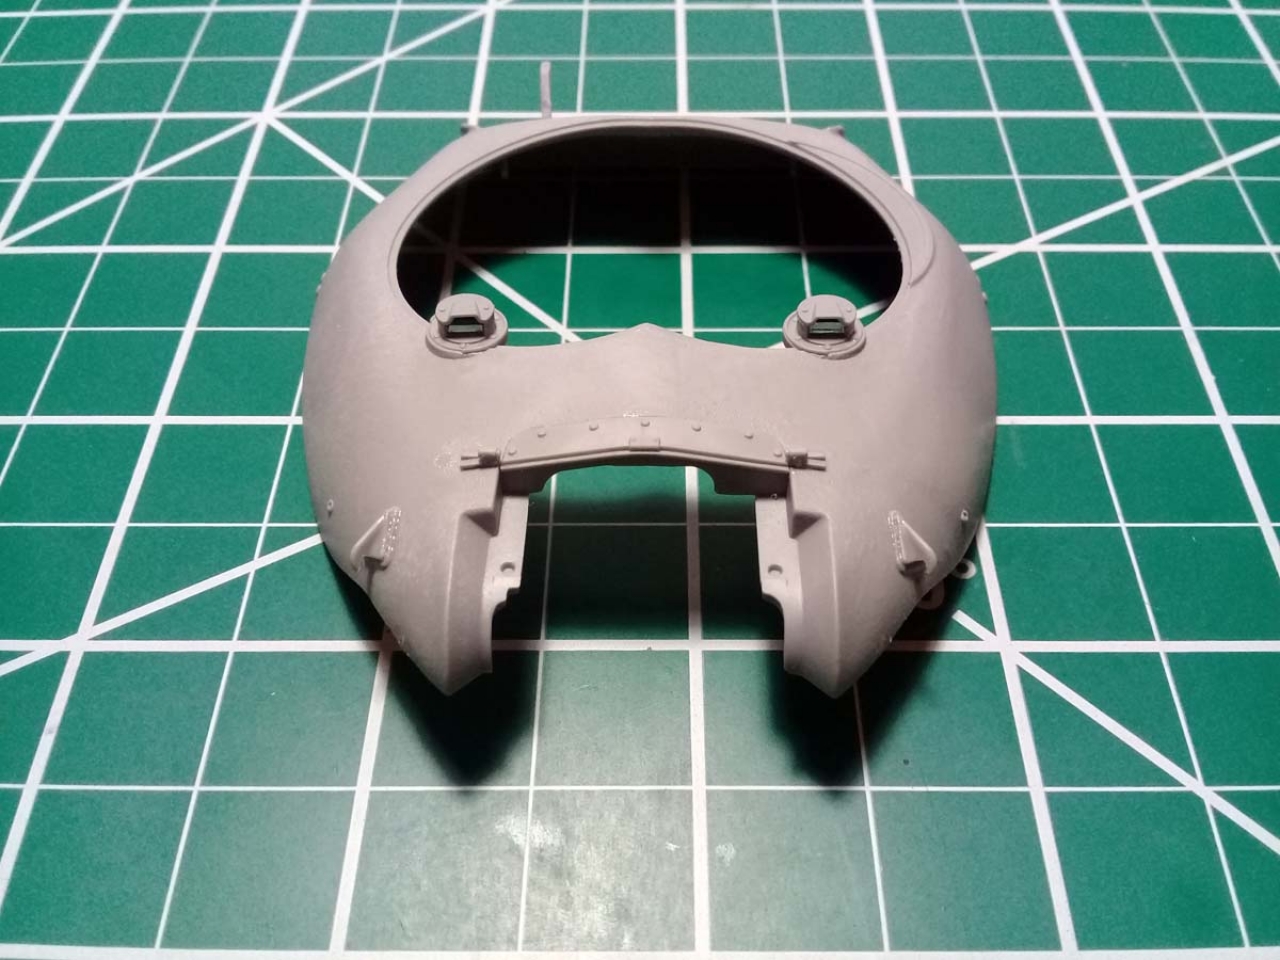
Step 27: details the drivers periscope covers
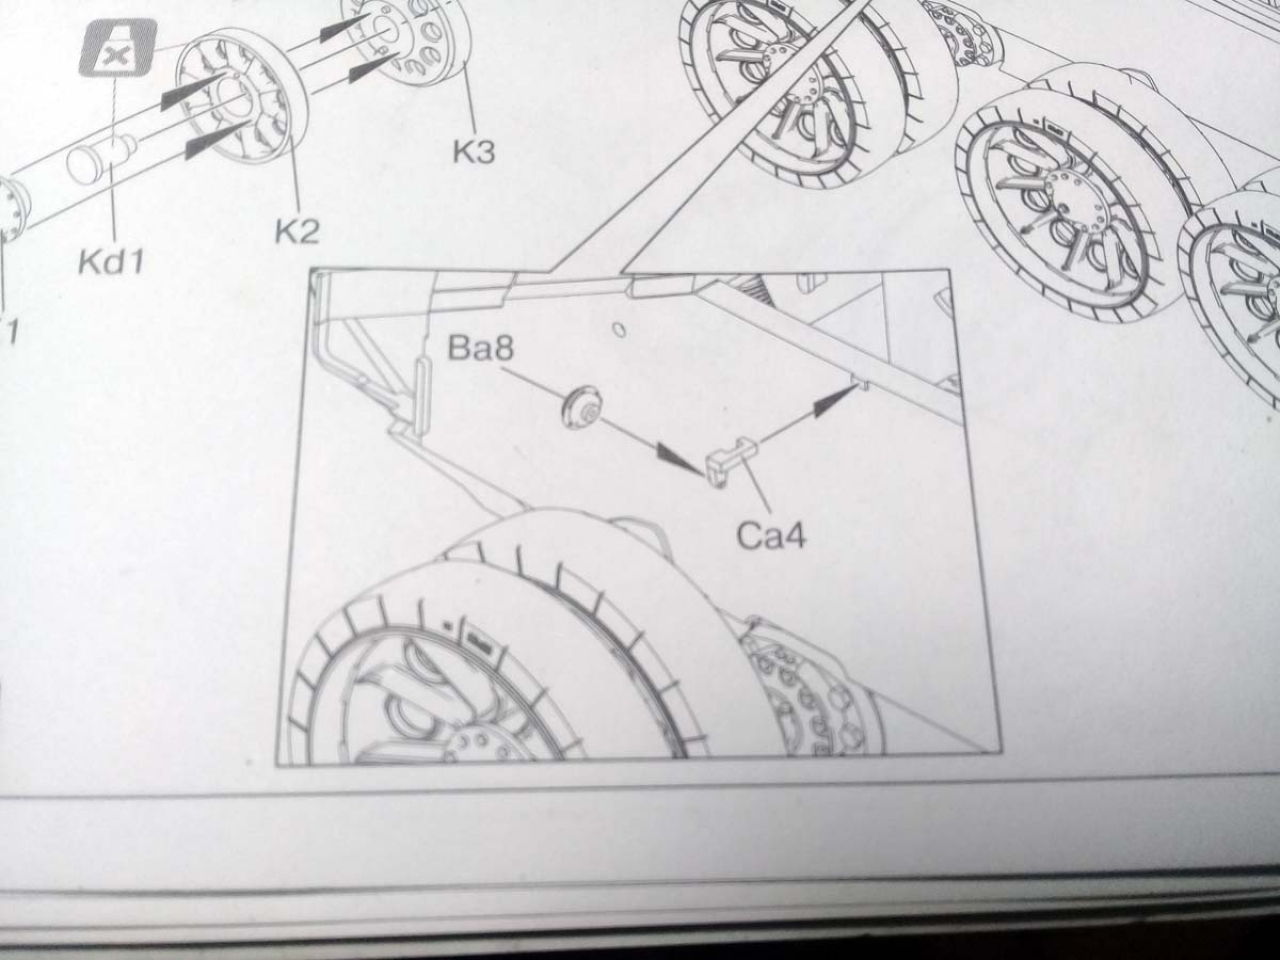
Step 28: adds together a few subassemblies: the left idler wheel, the rear upper hull plate and the front section of the top hull plate, with the drivers hatch. I found a little odd that MiniArt does not mention here the build option they provide. The driver has a canvas hood that can be built folded with the external stowage or stretched on its operational place. This is shown only at the Step 67 and I didnt note it until it was too late. Anyhow, the ring (Ca9) that secures the pivoting pin from drivers hatch (E22) splintered as soon as I touched it with Tamiya extra thin and I decided on the spot to seal everything up to avoid any further problems. At Step 28 Ive also lost one small part (Ca4) which I think it is the support for the horn (have had those beasts horns?!). The solution was to find a greyed out part of vague resemblance and to adapt it to fit. It worked.
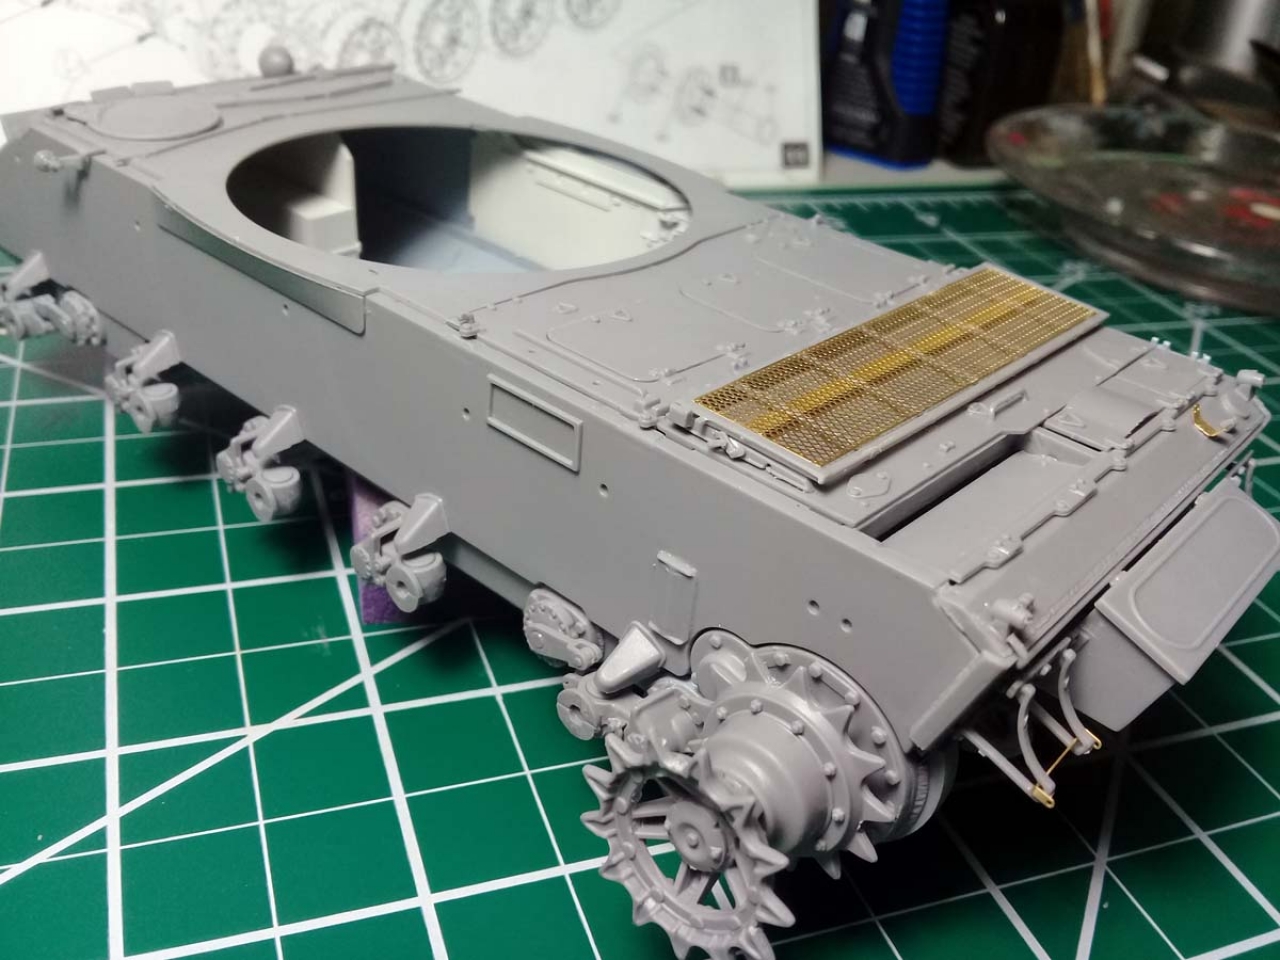
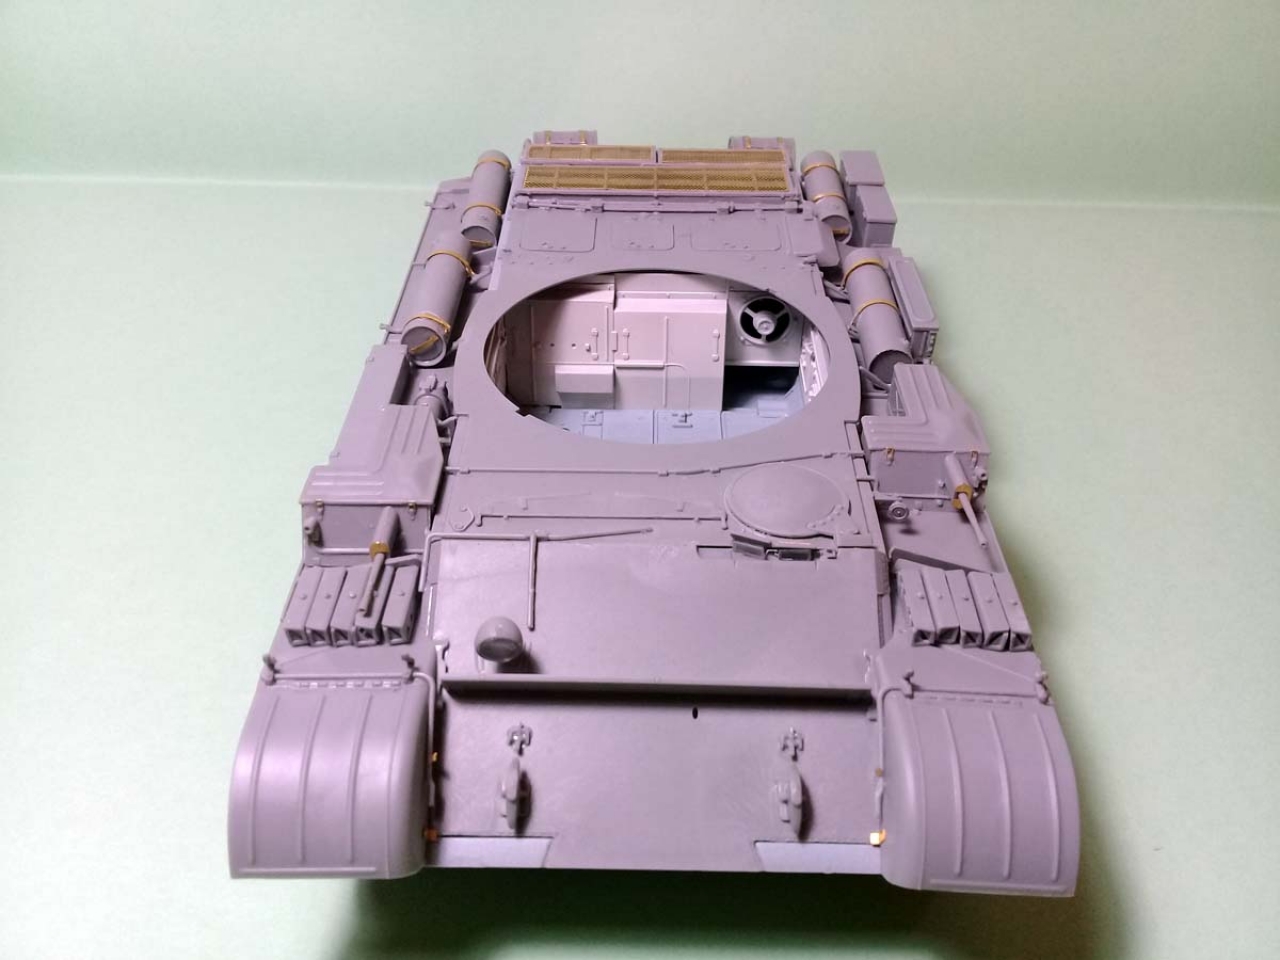
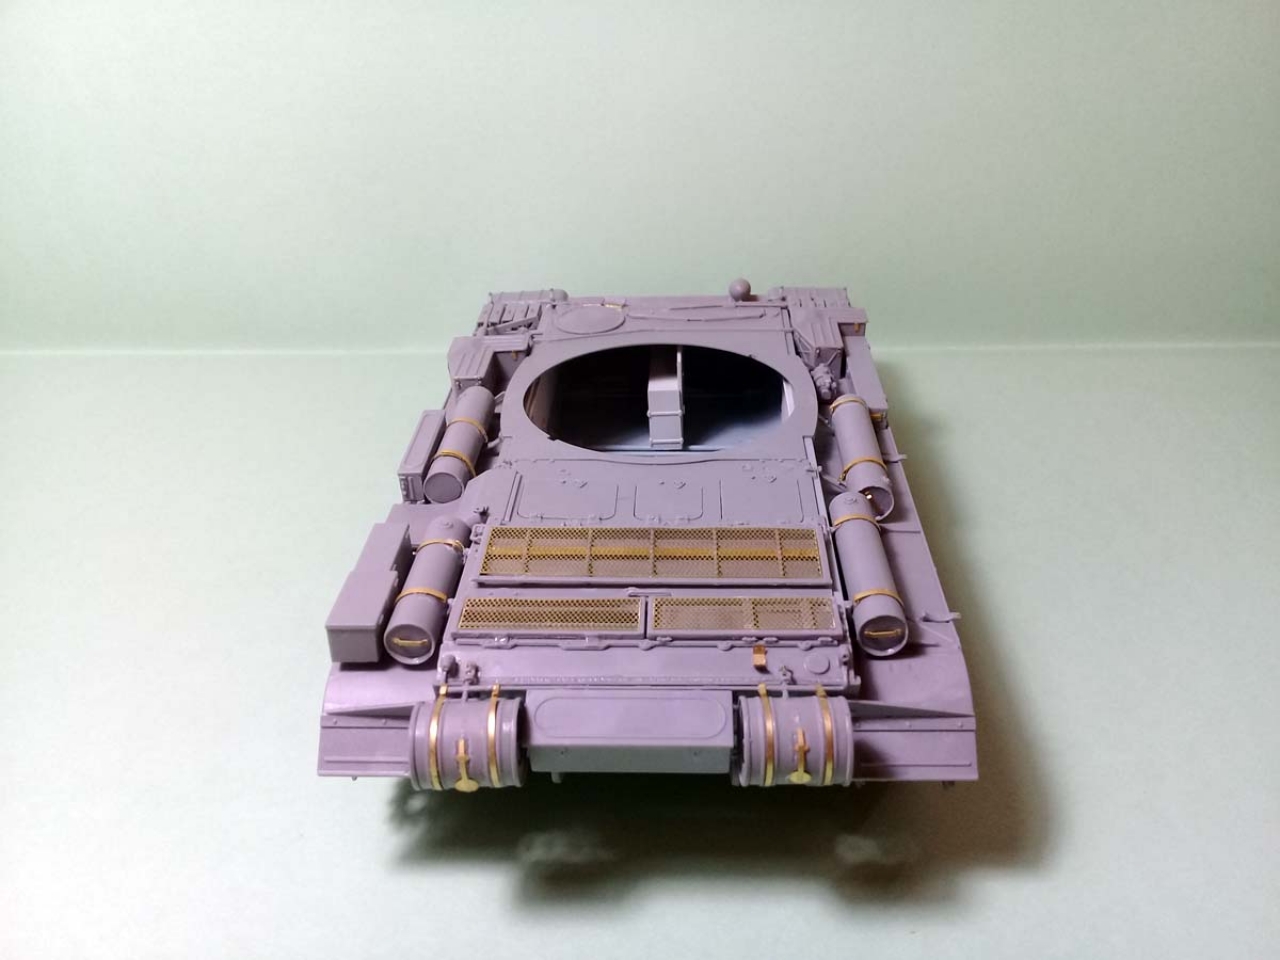
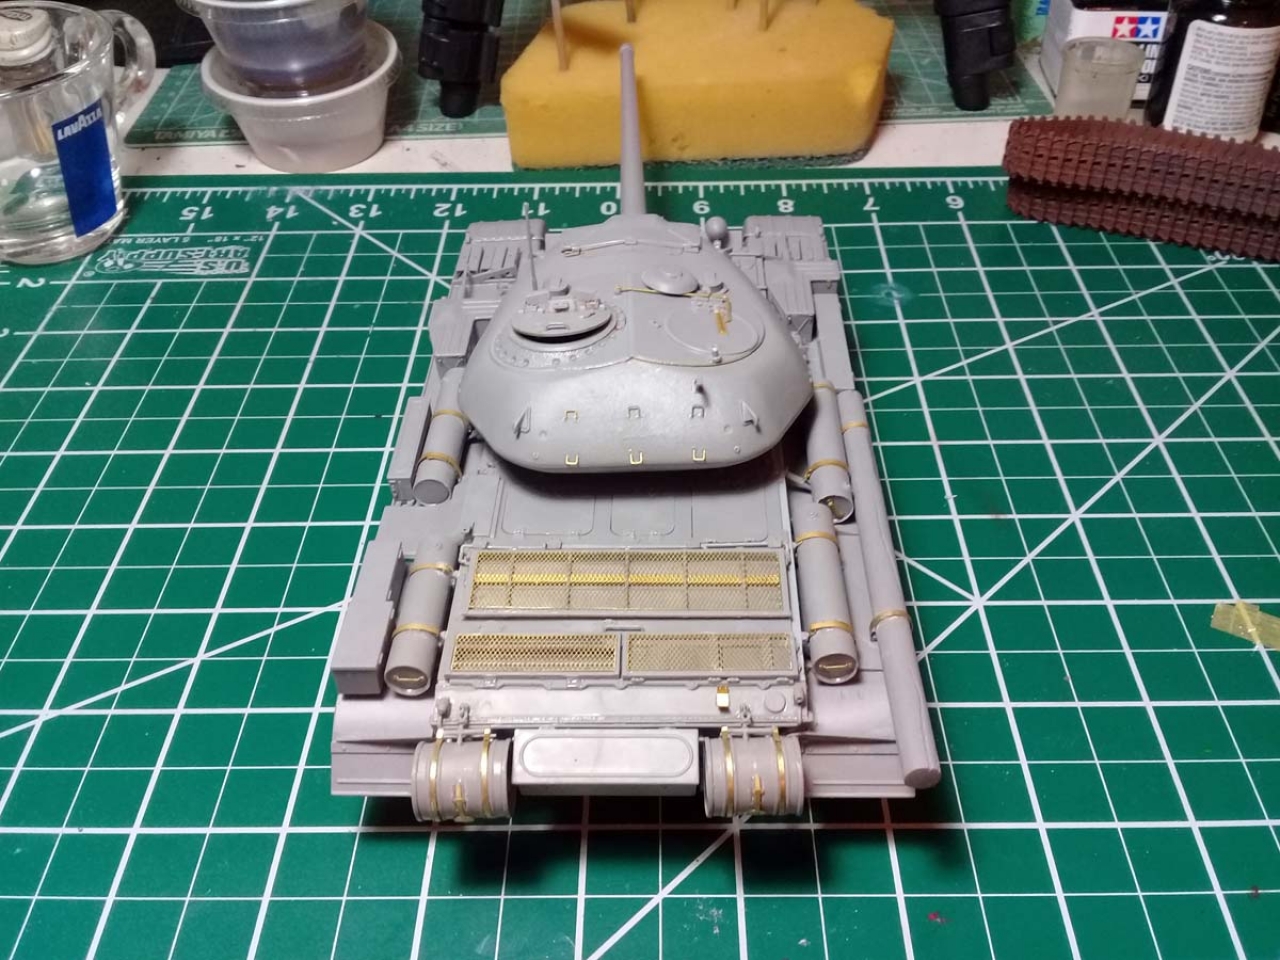
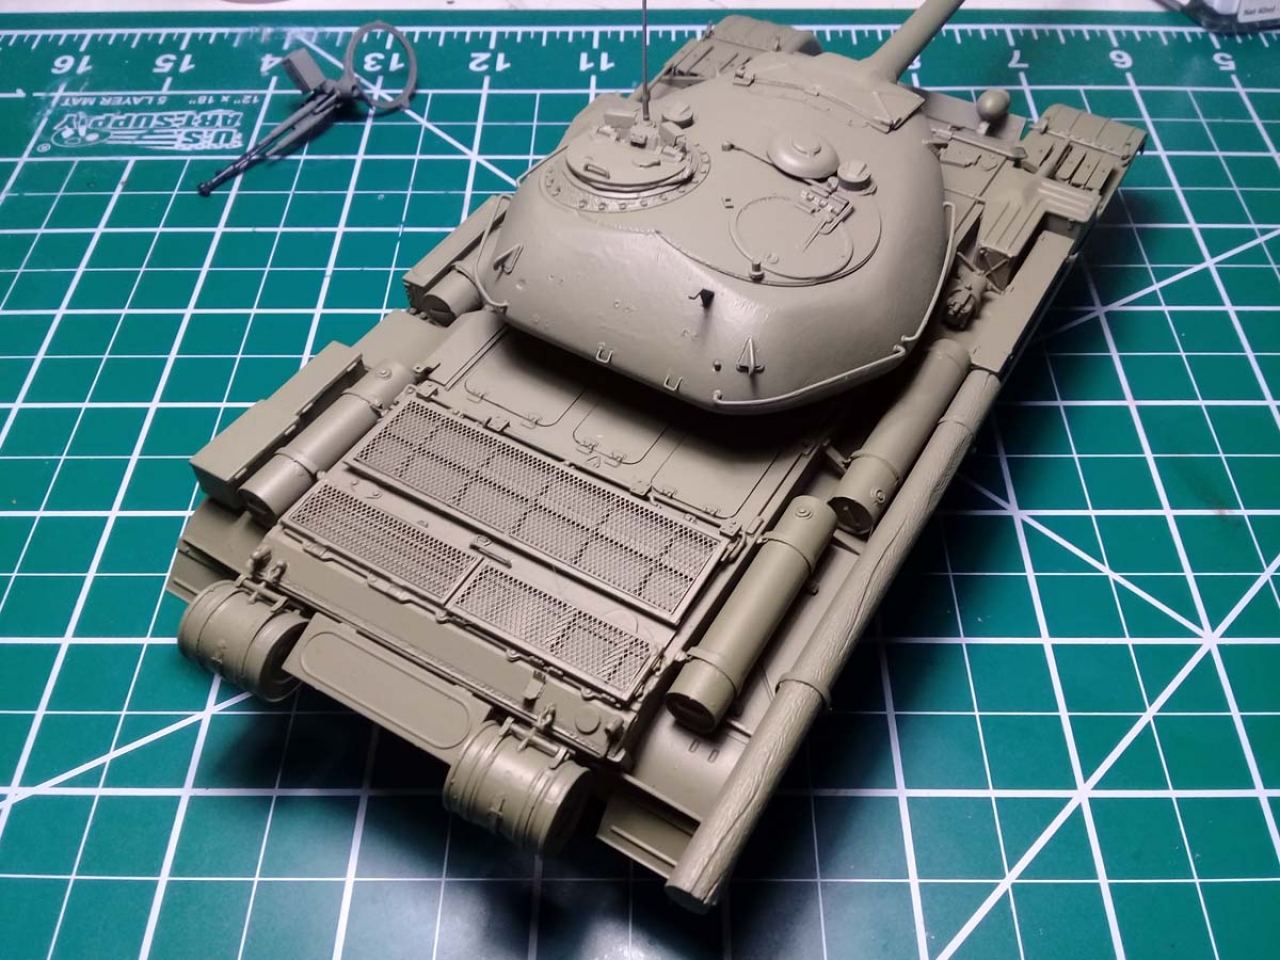
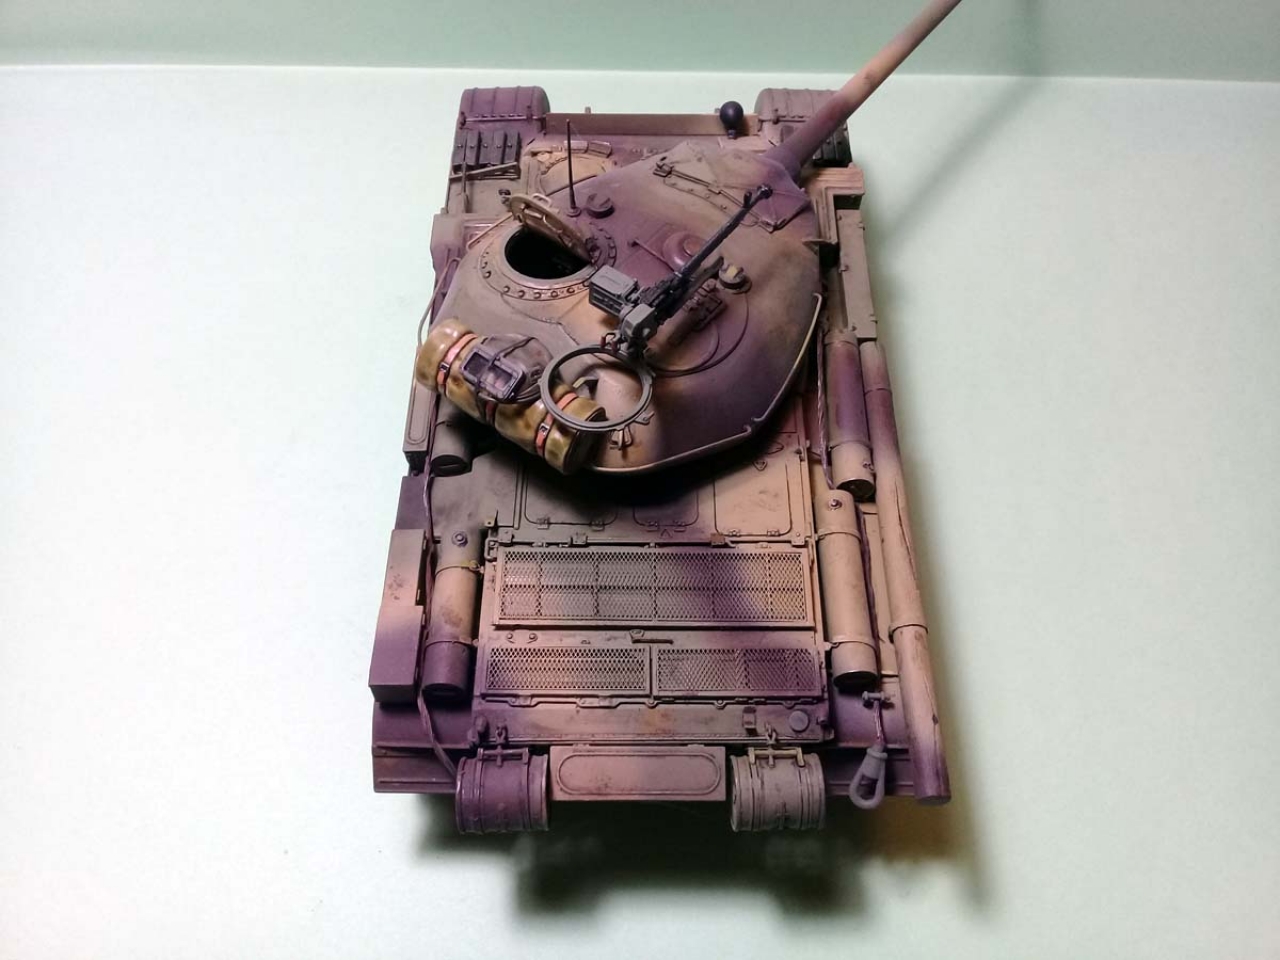
Steps 29-32: the assembly of the engine deck with grilles and hatches. Although small styrene parts and photoetched screens are involved, the steps are easy because the fit between metal and plastic is nothing short of perfect.
Step 33: puts together upper hull details (engine deck, radiator screens), the right side idler suspension and idler wheel, the rear towing hooks and the electric cable for the front search light. The only minor problem was given by part E11, again slightly bent inwards. I have noticed the warp since Step 31 and tried to correct it clamping down the part against a flat surface immediately after gluing the hatches, but a slight warp remained and gave me a minor gap between parts D39 and E11. Nothing of a tragedy, because the gap is masked by the elongated shape of the turret.
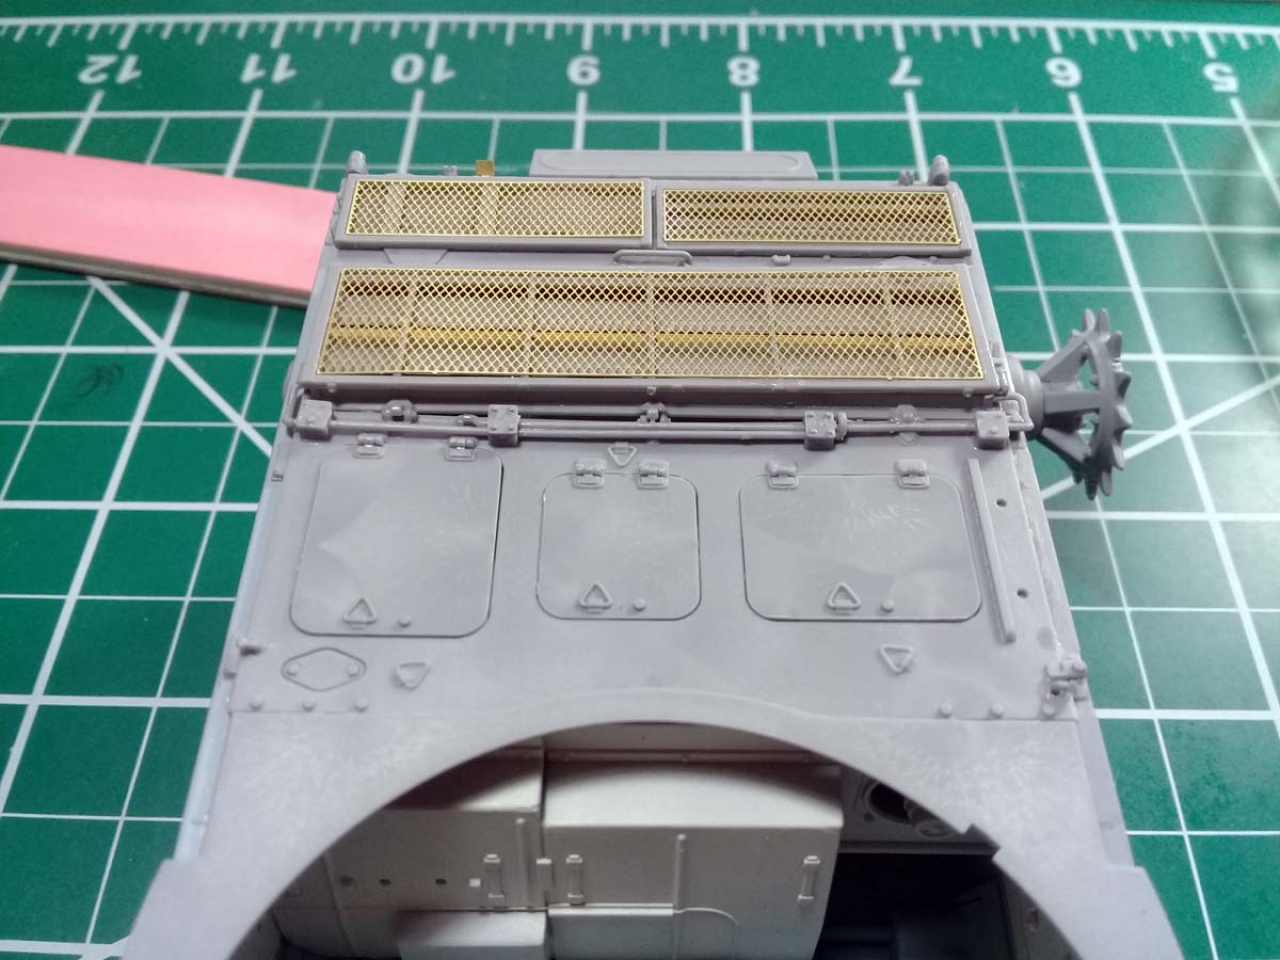
Step 34: deals with more cooling screens and their torsion springs and mounting elements. Again I made a mistake here and installed one of the screen upside down. Luckily Ive noticed it immediately while I was taking pictures of my masterpiece and rectified it. So, note of advice: the PE screens have a side keyed pattern pay attention to it!
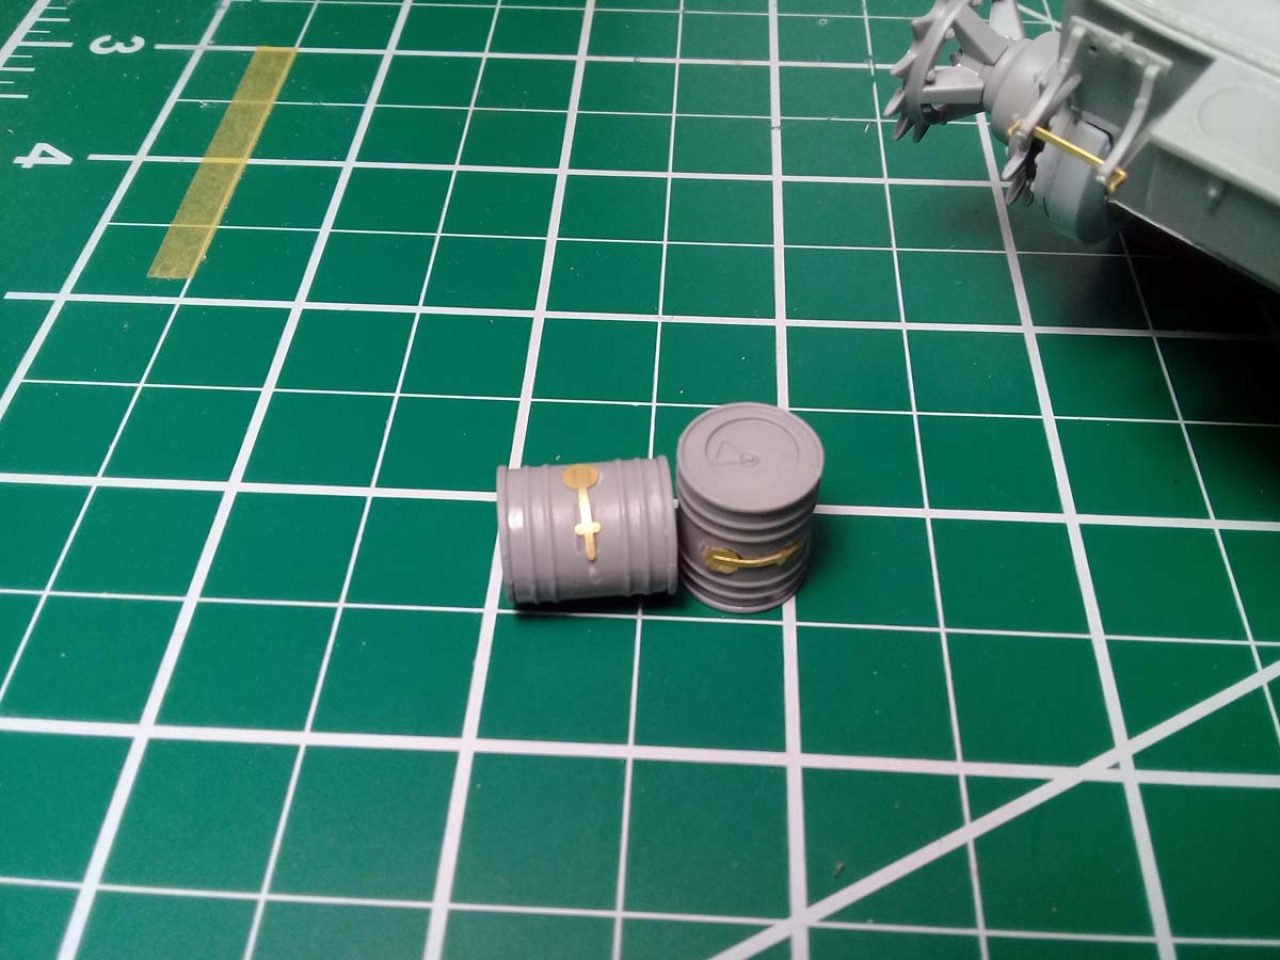
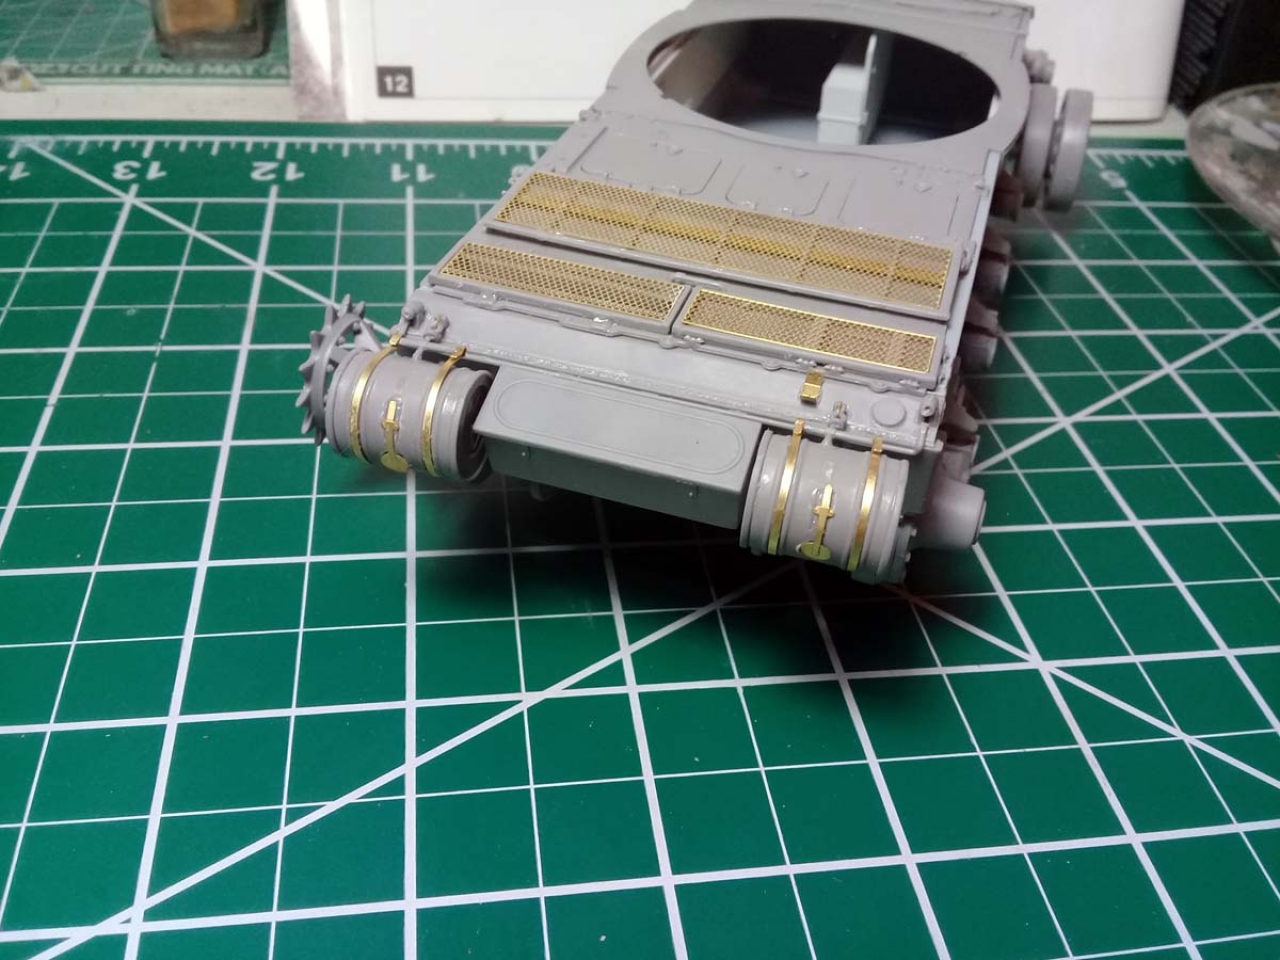
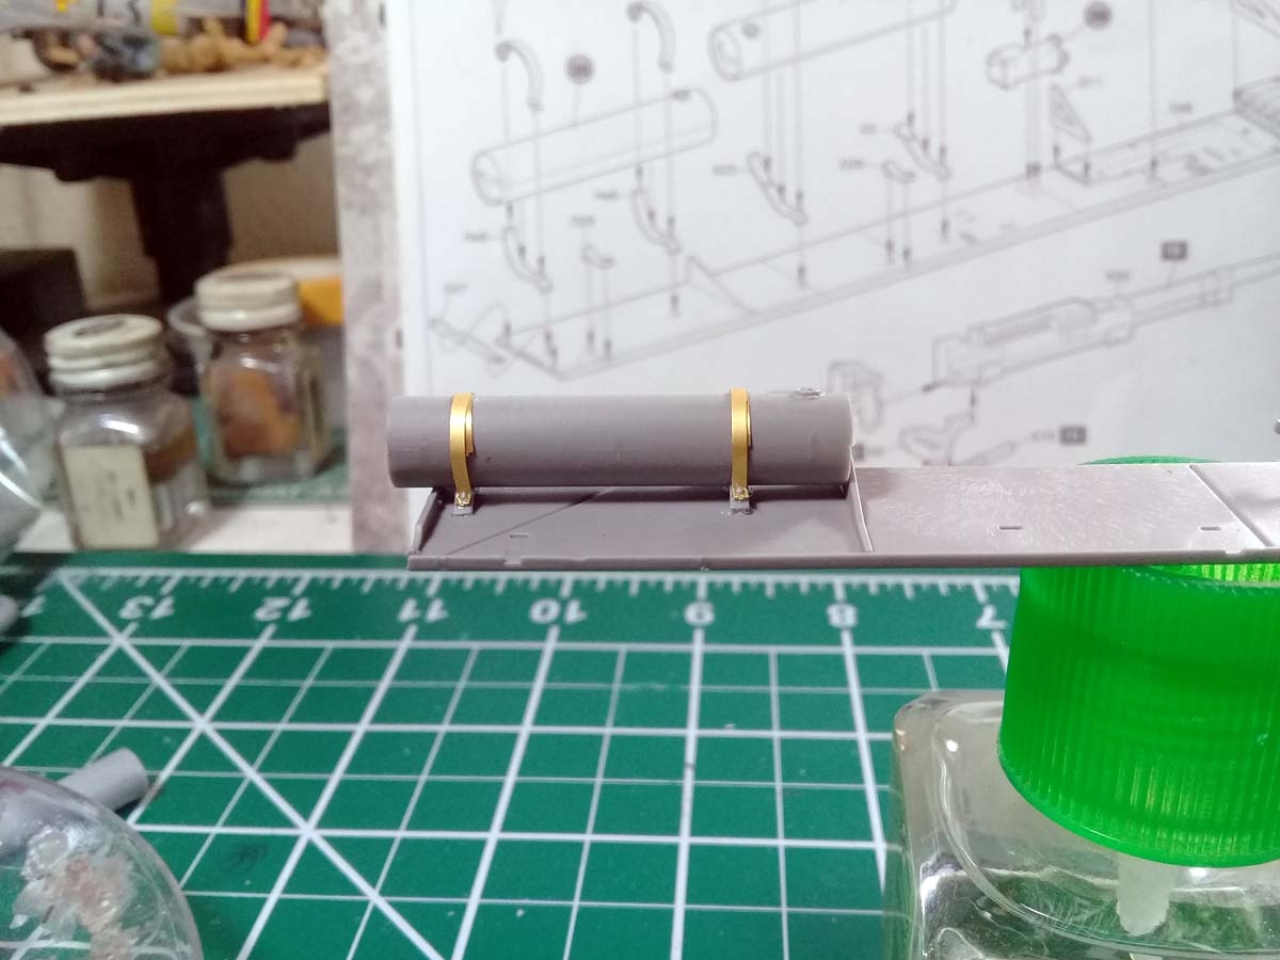
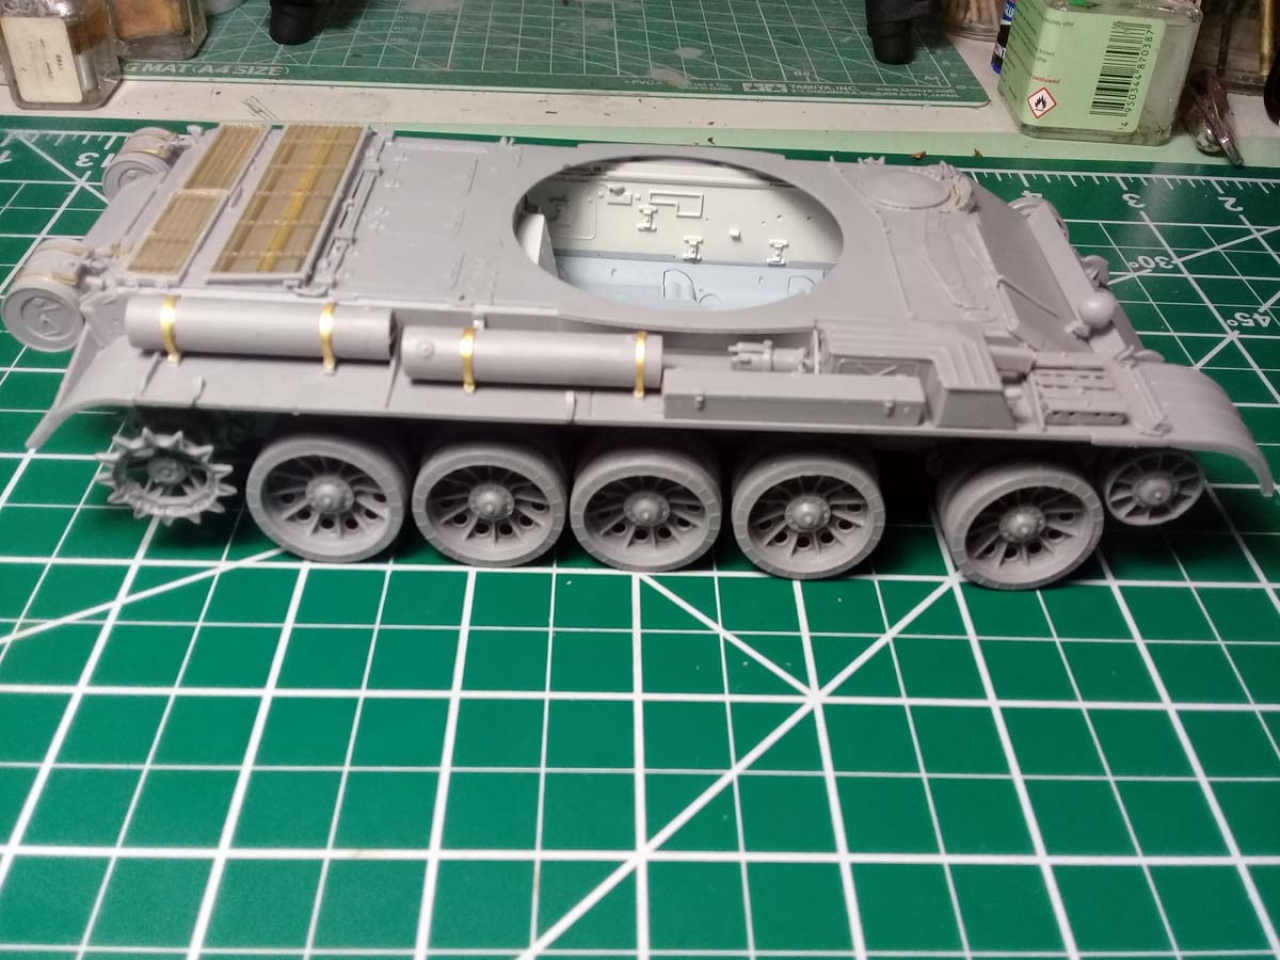
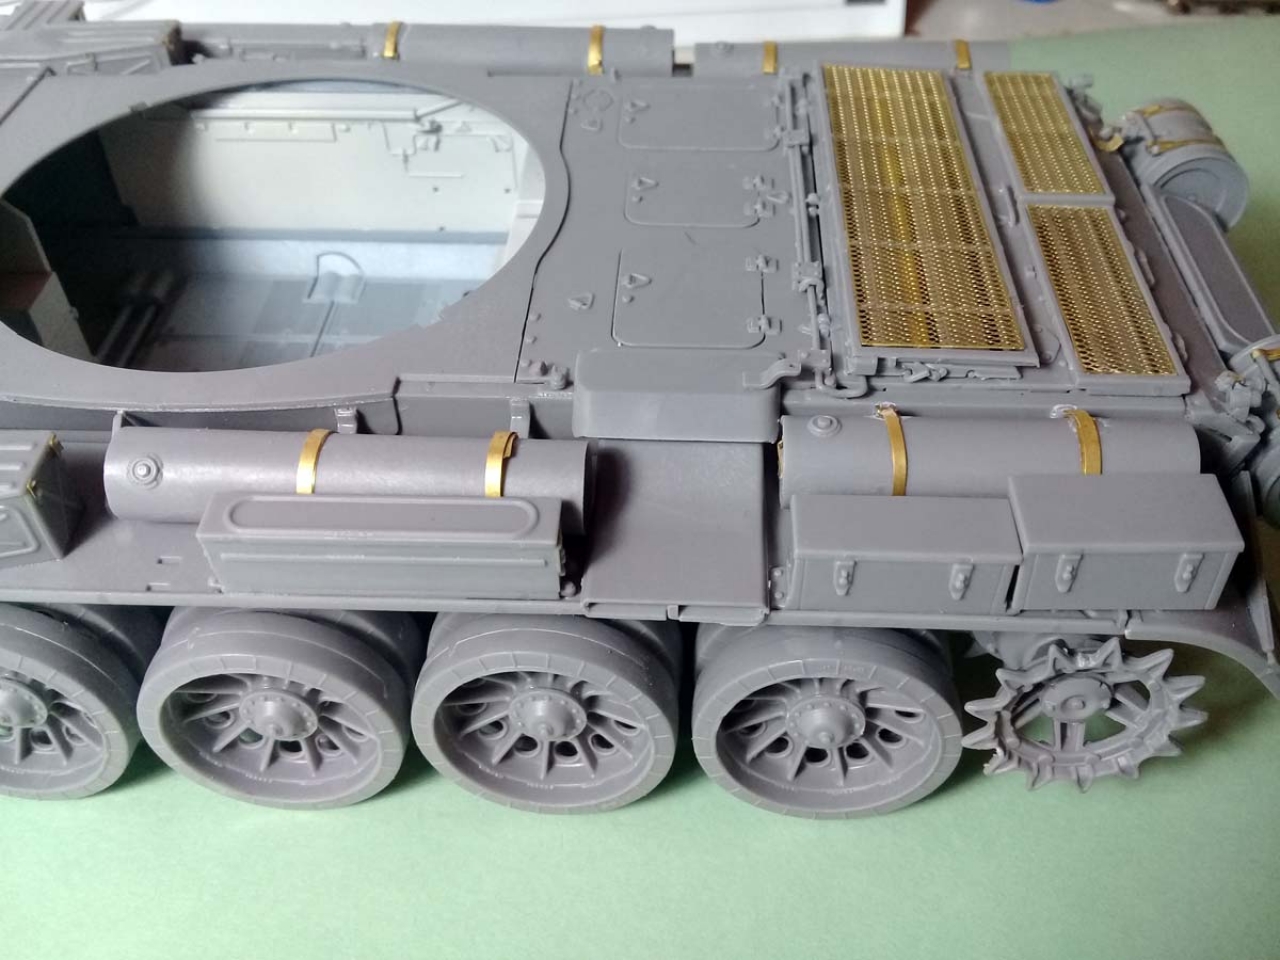
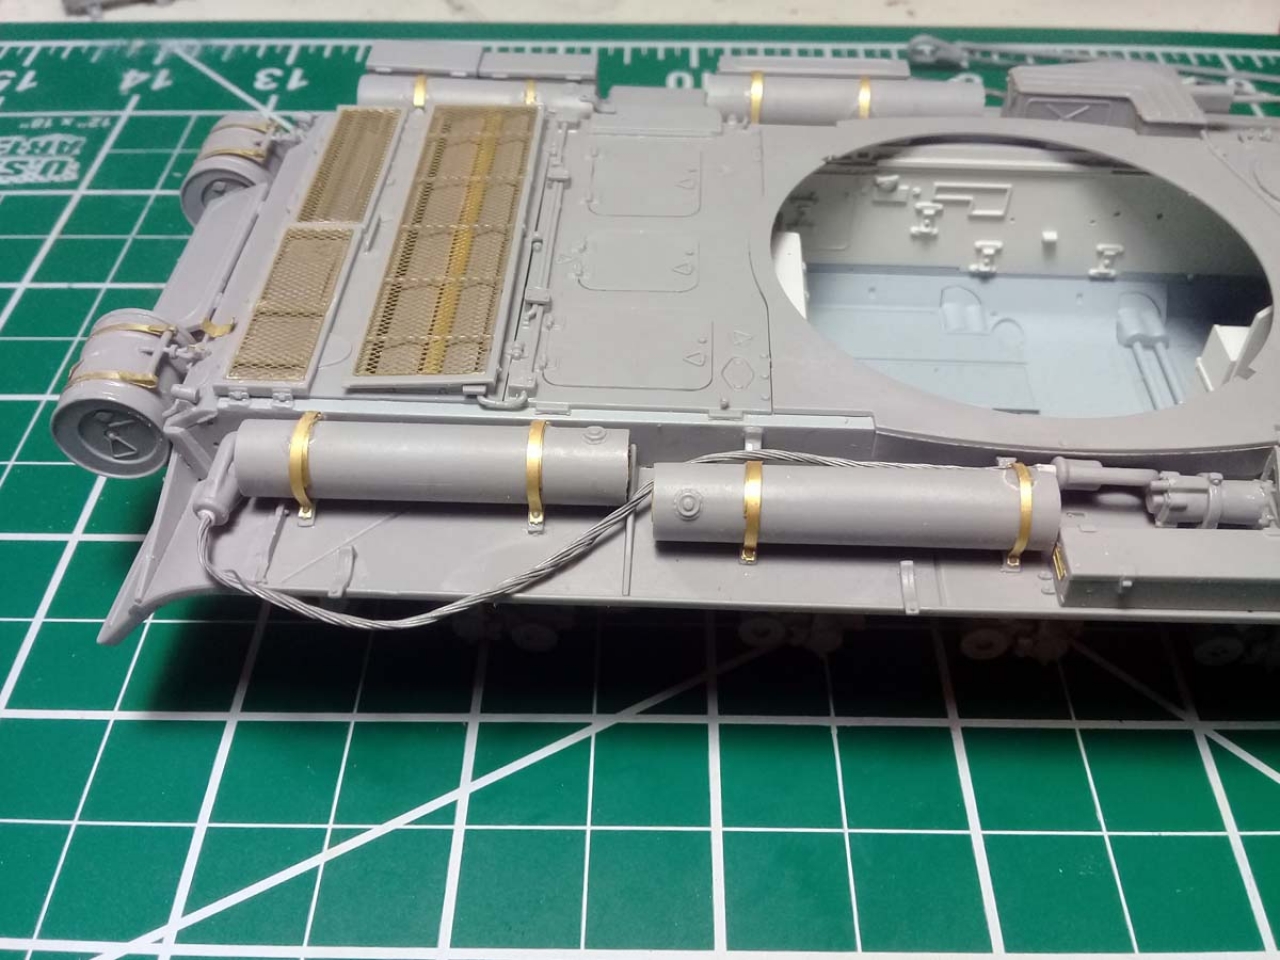
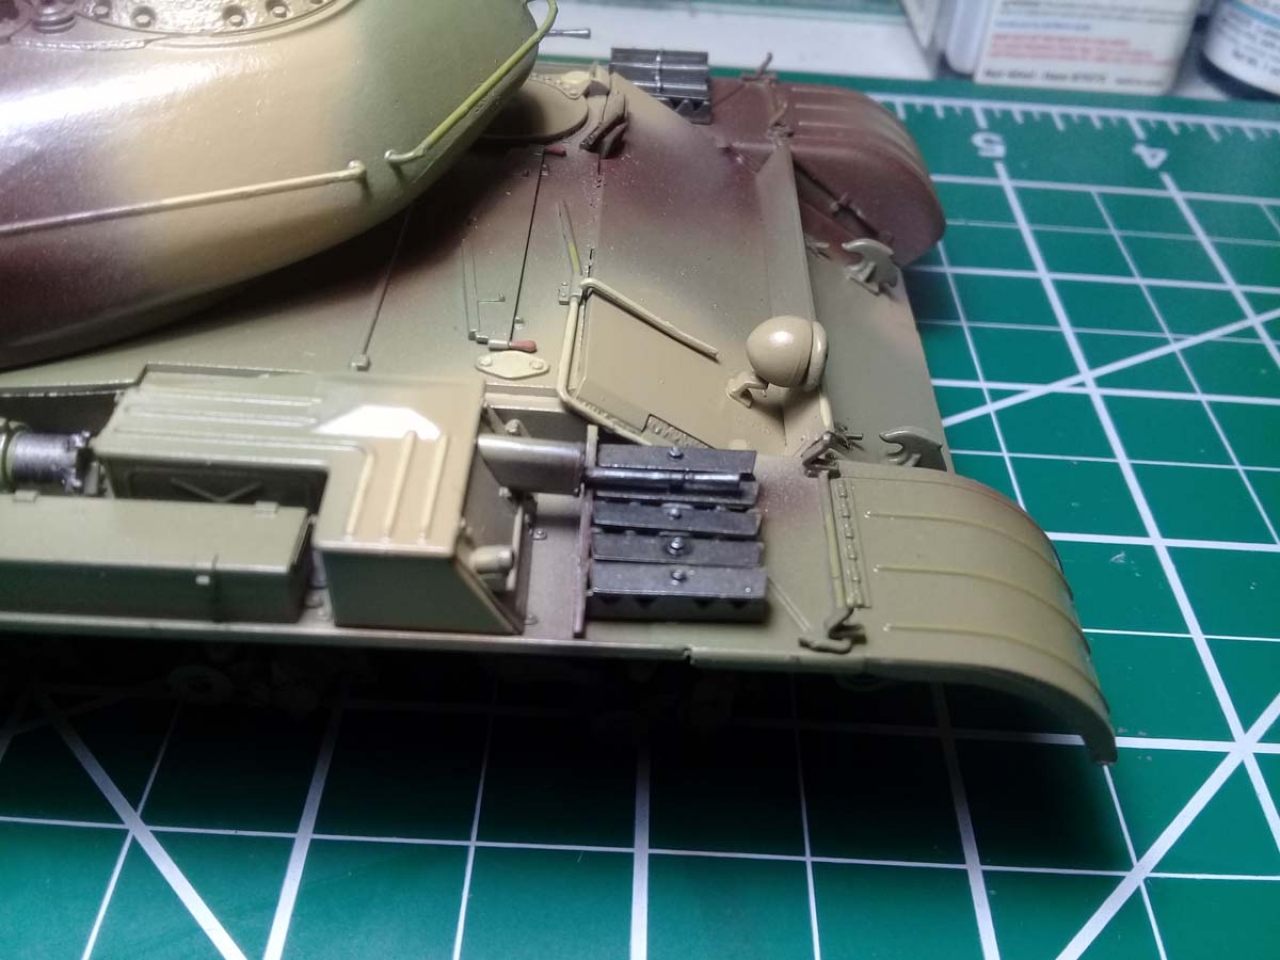
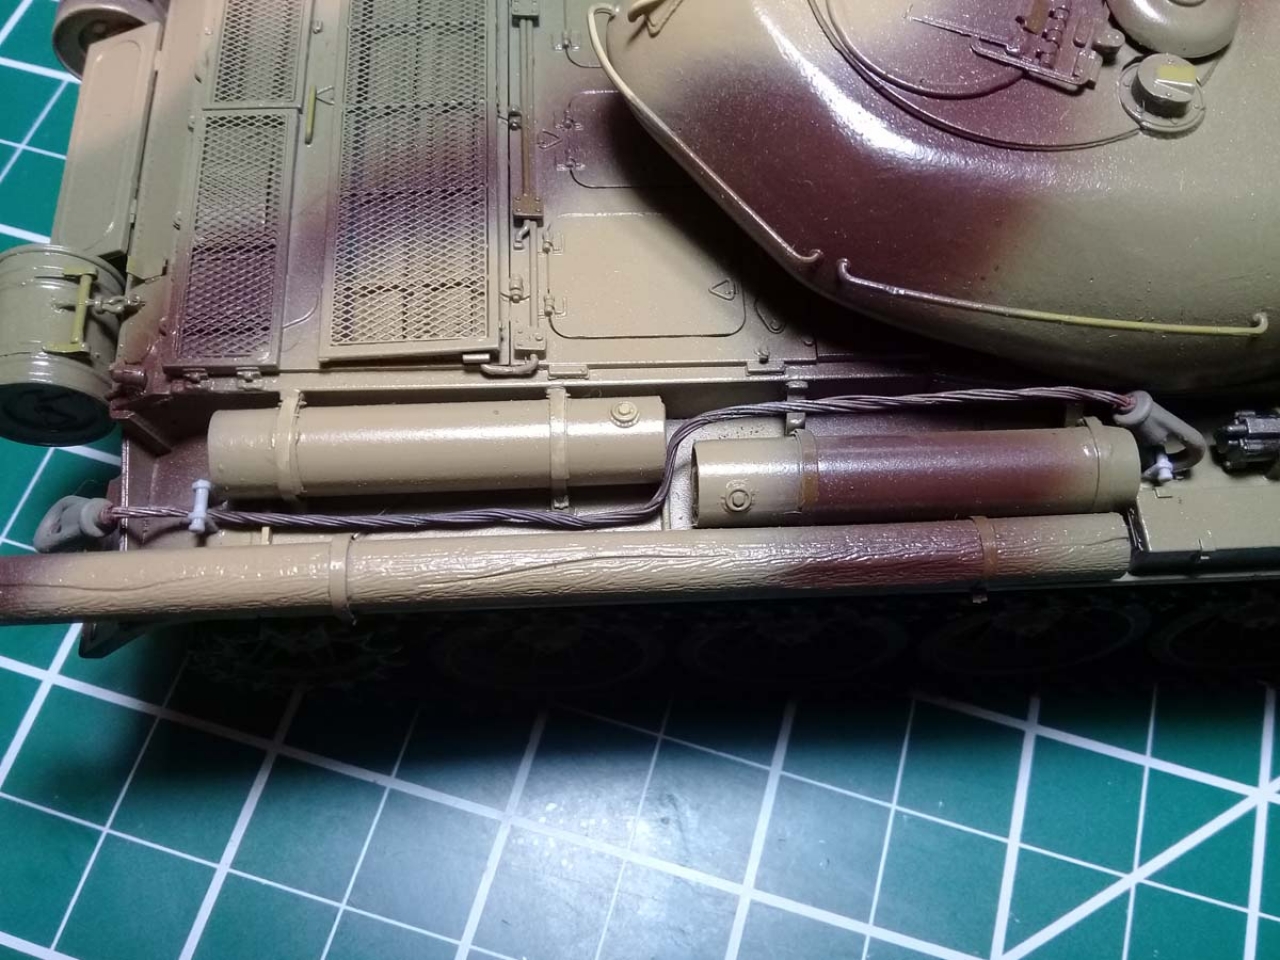
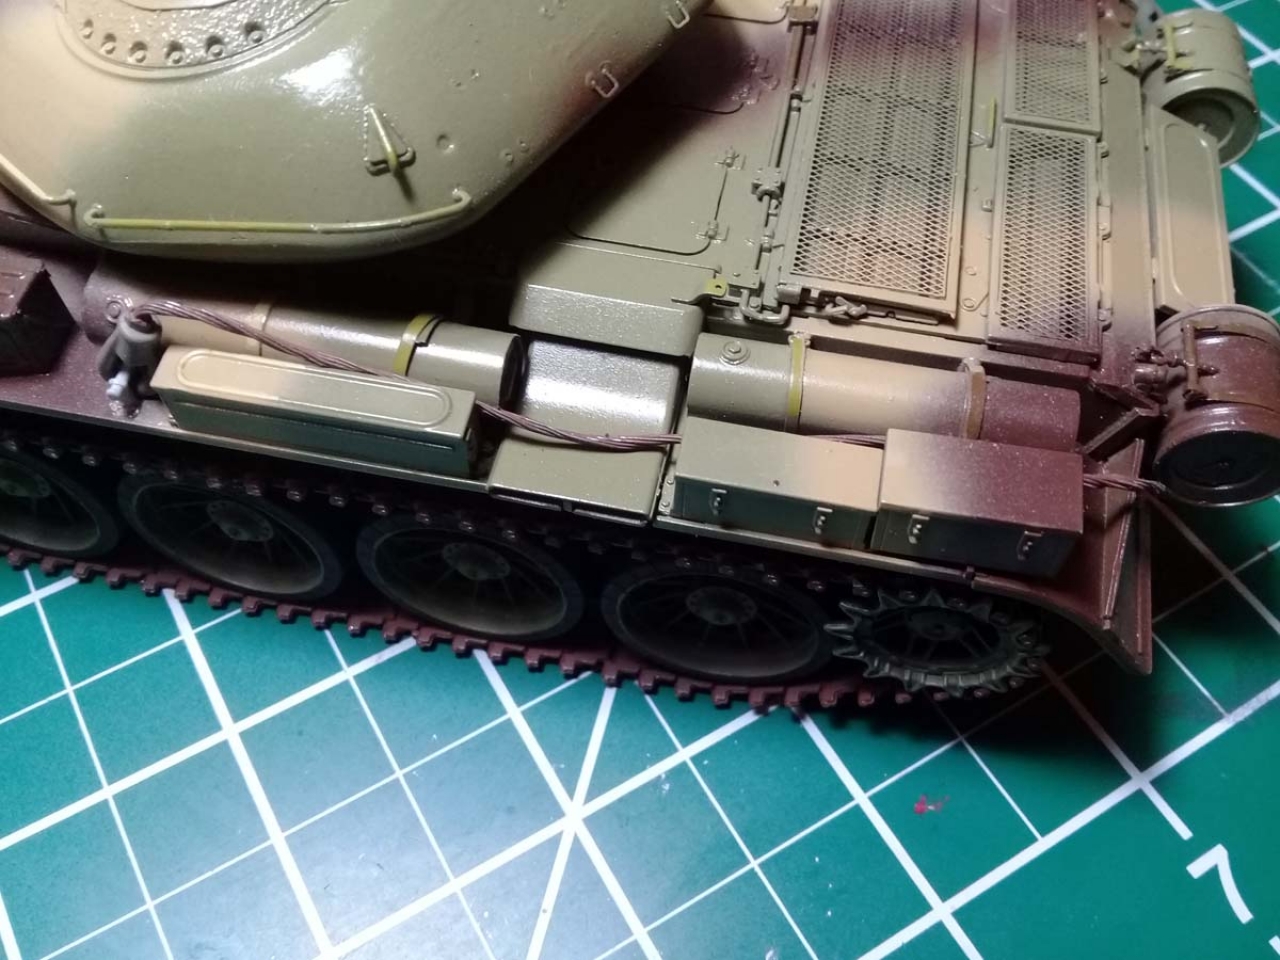
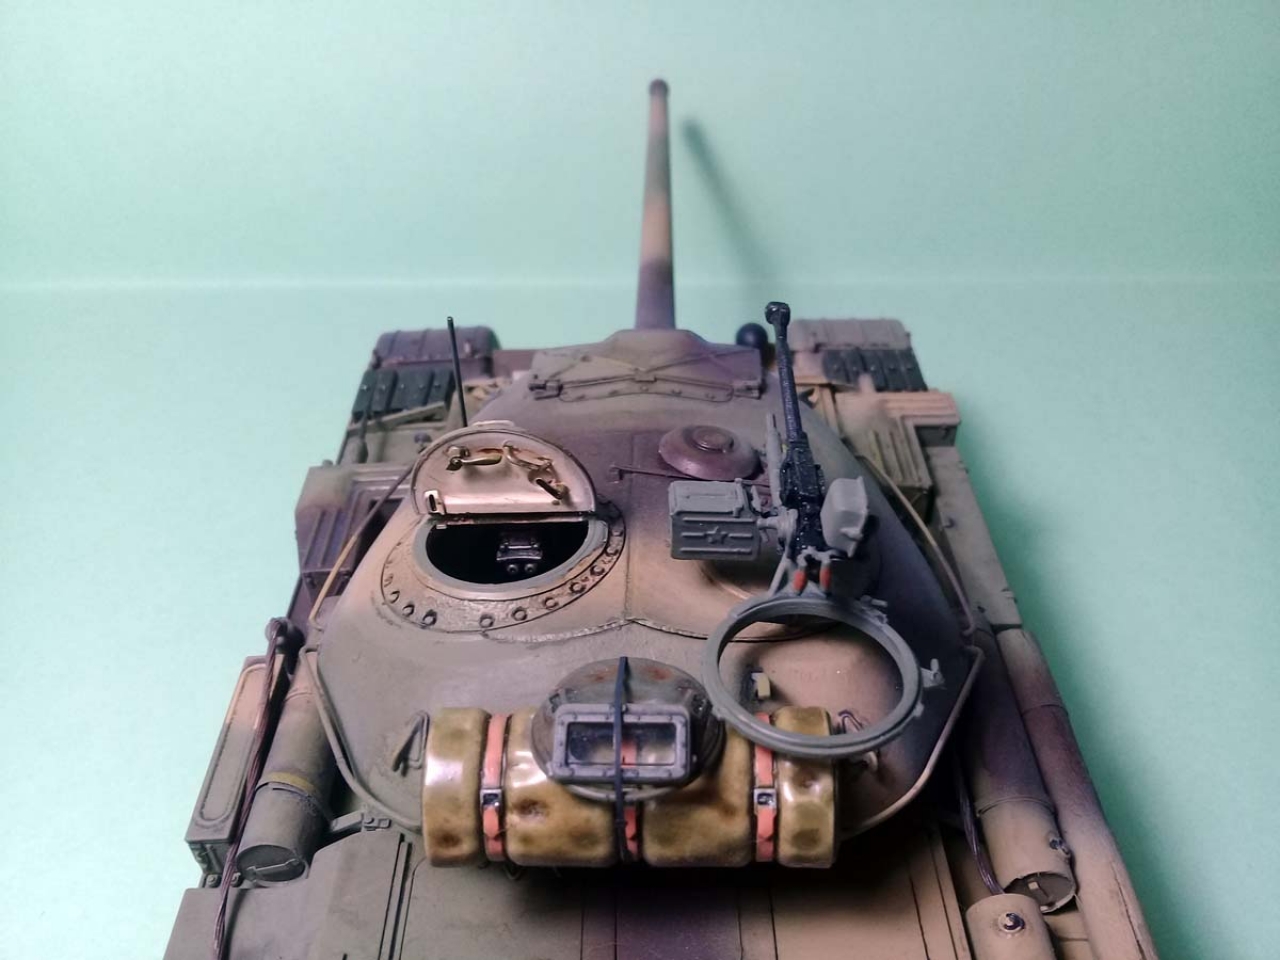
Steps 36(x3) and 37: assembly of fender stowage the characteristic cylindrical fuel tanks and one of the tool boxes. All good here if one can stand the small PE parts hassle. No locator marks for the fuel cylinders handles, so be careful to center them properly.
Step 38: hydraulic jack assembly easy as breeze!
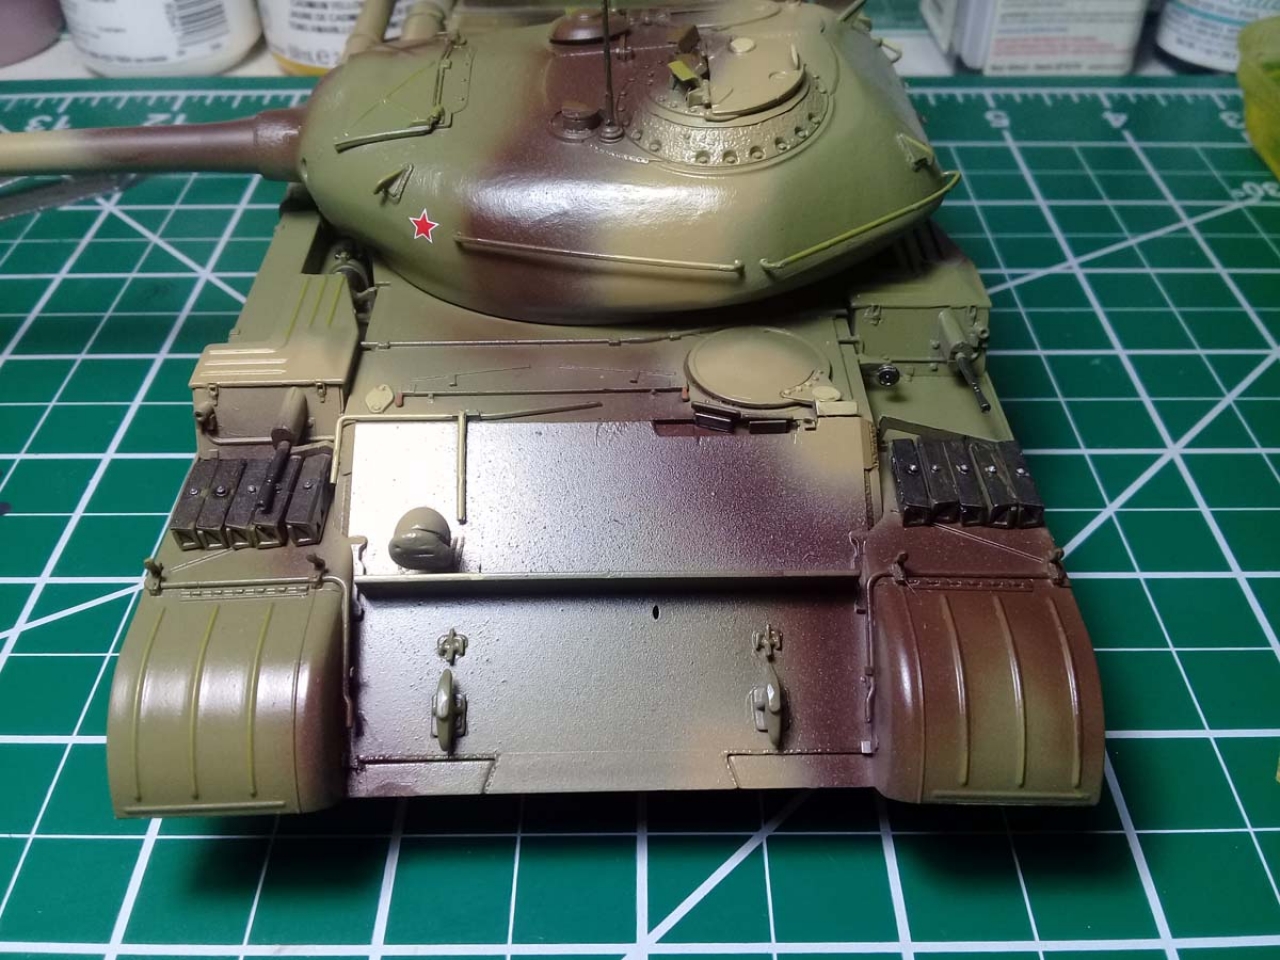
Step 39: is a hefty one, with scores of small parts to be assembled: fuel cylinder supports, jack support, fender supports, tool box, fender rib and five trios of things that I believe they are ice cleats. Particularly those cleats are fiddly assemblies and might justify some modelers claim of over-engineering. Patience, please!
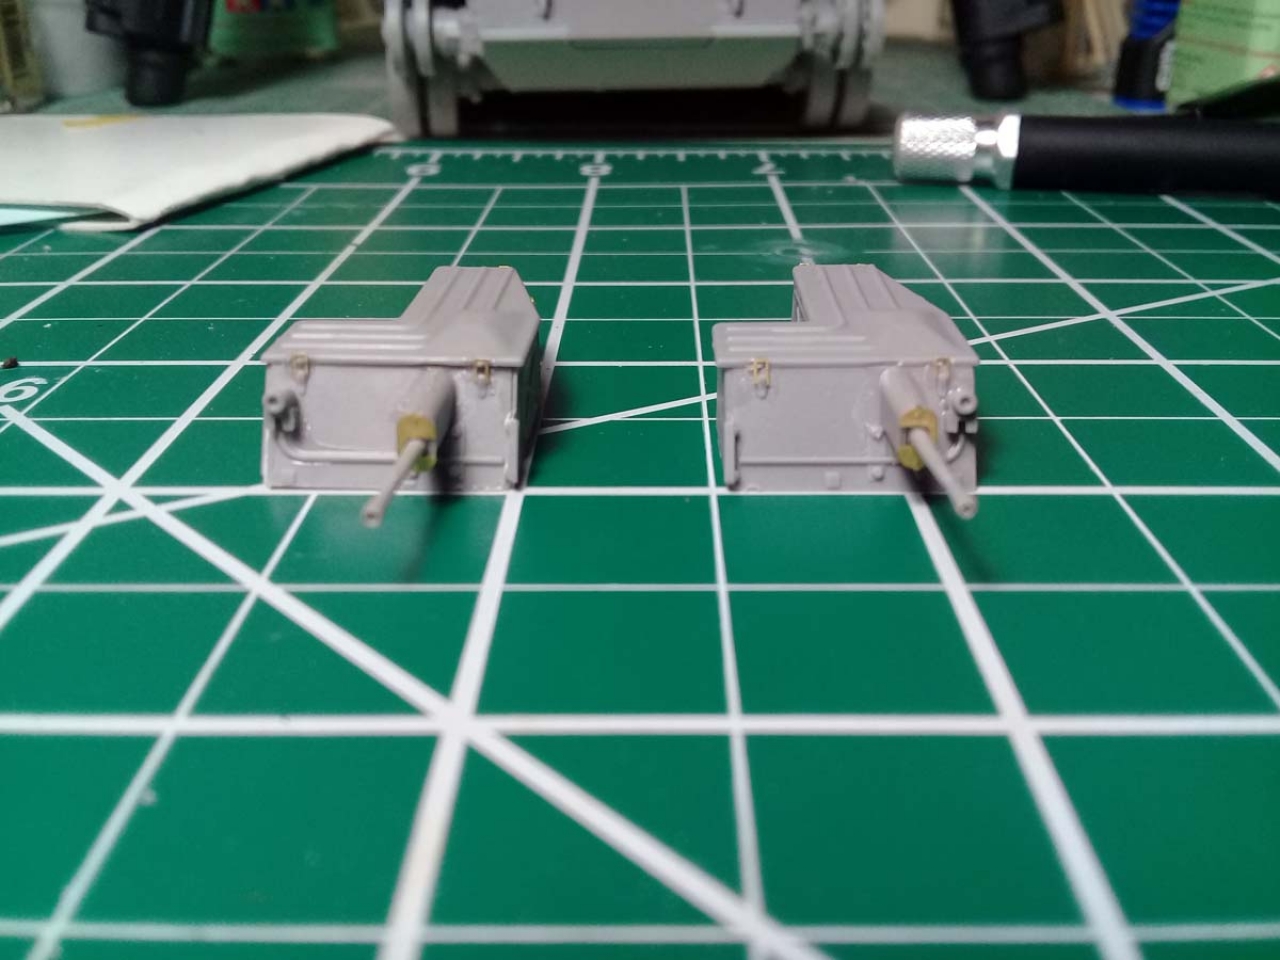
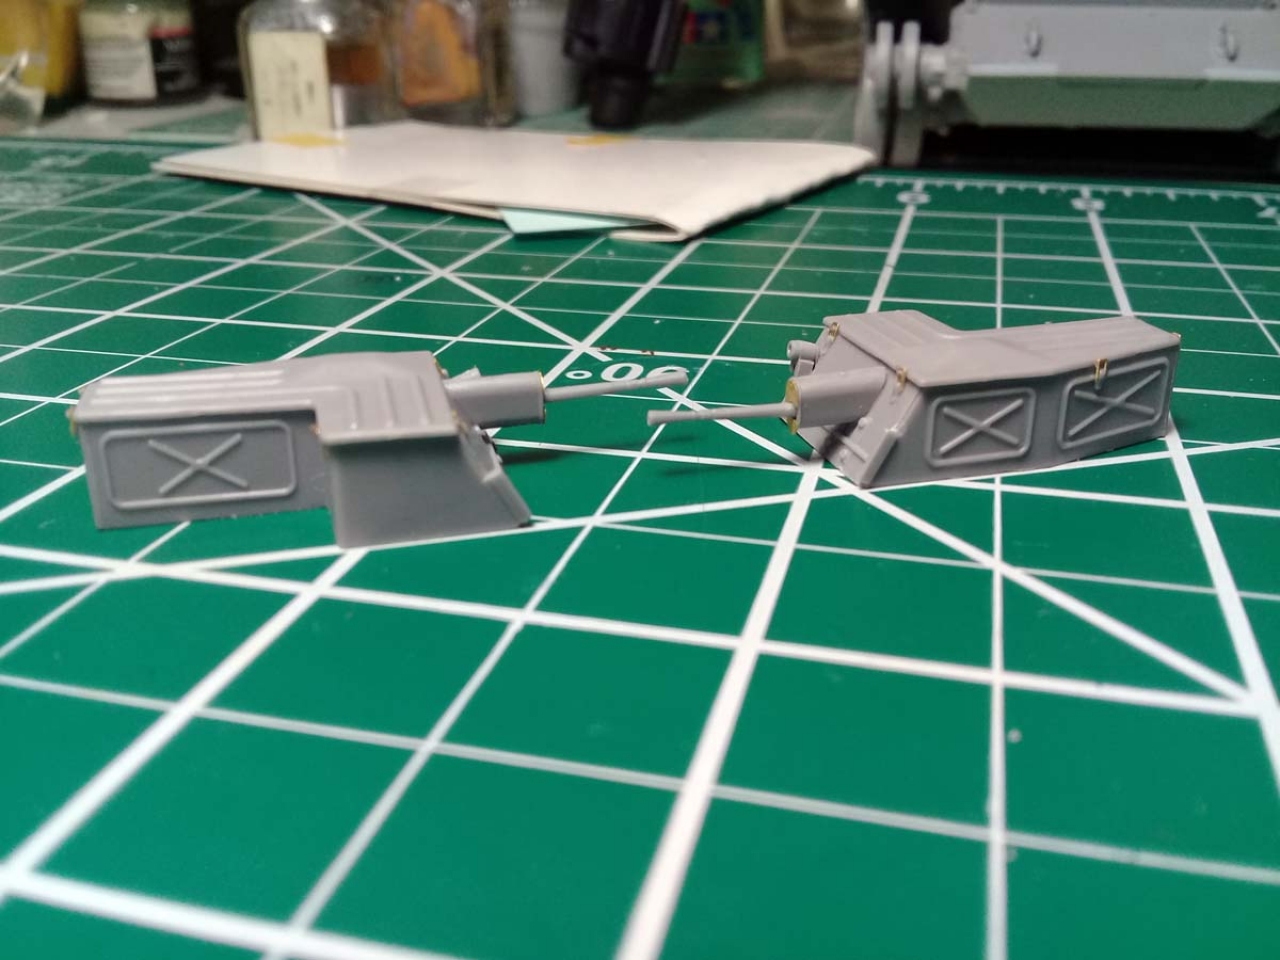
Steps 40-42: very peculiar fender machine guns, characteristic to T54. For what Ive seen, they were discarded later and replaced with even more fuel cells (!). These steps look easy enough on paper but proved to be quite difficult for me. My lack of skill has to do something with that for sure. Firstly, Ive tried to cheat a little here (blushing), by skipping the actuators (K9, K10). The reason why was the amount of flash. I realized that if I try to clean those parts of flash Im going to remain with shapeless pins and, besides, theyre not going to be visible after completion. Eh, well, Ive got immediately punished for my neglect on line of duty, because the actuators also set the transverse of the MG and without them I had a funny-eyed MG. To add insult to injury, MiniArt have lost somewhere between Step 40 and Step 41 the part K25, whose installation is not called out. That is, remarkably, the only omission in the MiniArt instructions. (Well done, MiniArt!) Another shortcoming is that the MG barrels are without the hole and I had to drill the muzzles. In doing so, I think I held one of the barrels a little too firmly and I put it out of shape. I never managed to get it perfectly straight again. The MGs boxes are also not easy because of the odd angles and I think part K29 is molded too thick, because it wont fit properly in either MG pillbox. The key to a good build here is to do the assembly on a perfectly flat surface and in one single session. The second MG gave me far less trouble than the first one in doing so.
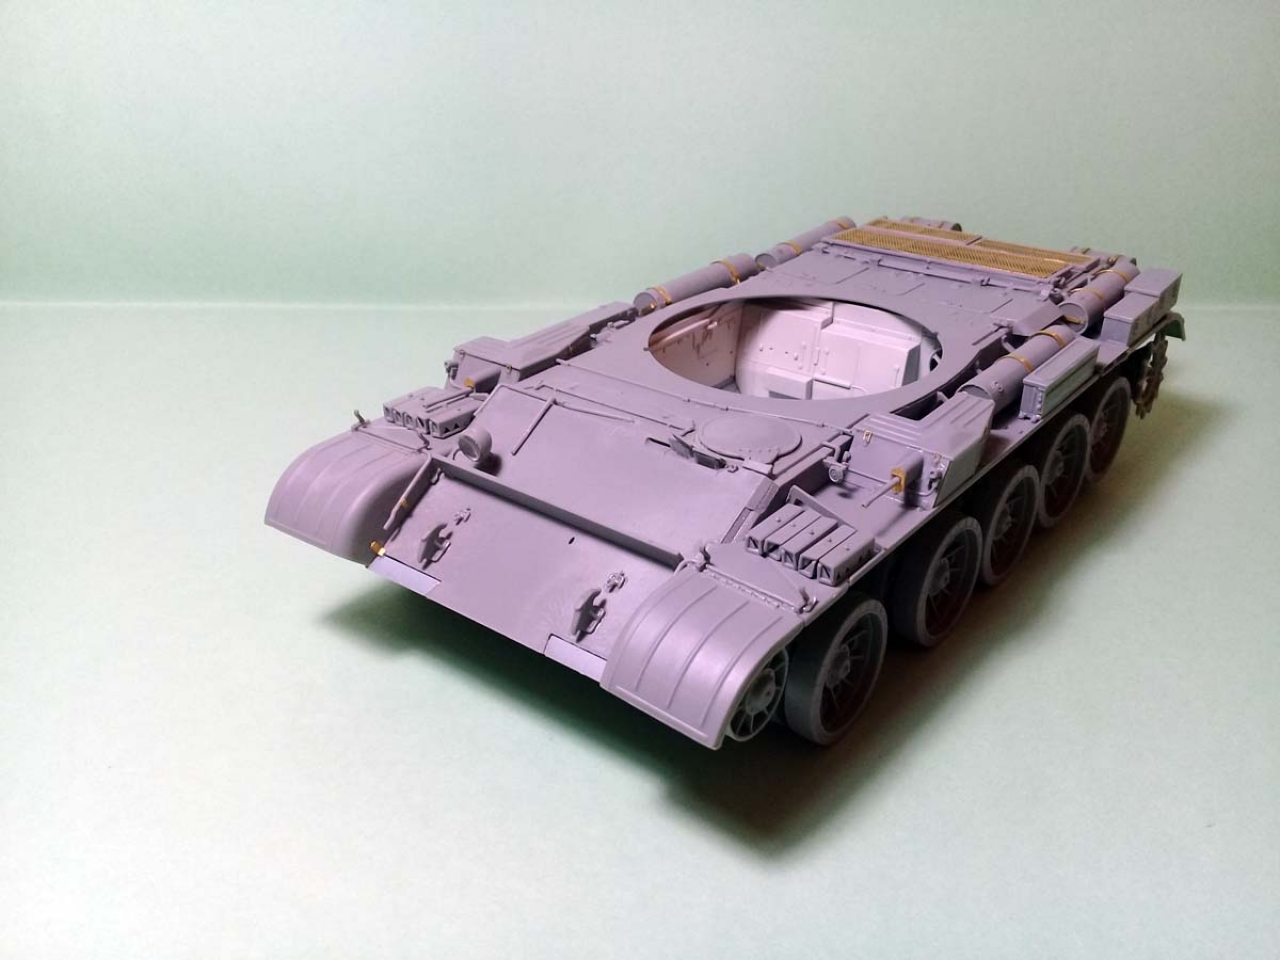
Steps 43-45: complete the left side fender. Although PEa5 and PEa6 are called to this step, I would recommend to attach first the completed fender to the hull and only after that the PE parts for proper positioning.
Steps 46-49: assemble the right side fender. This one is a little more complicated than the left side one because it is split in order to make room to the exhaust. Make sure the fuel cylinders are not interfering with the exhaust like they did in my case!
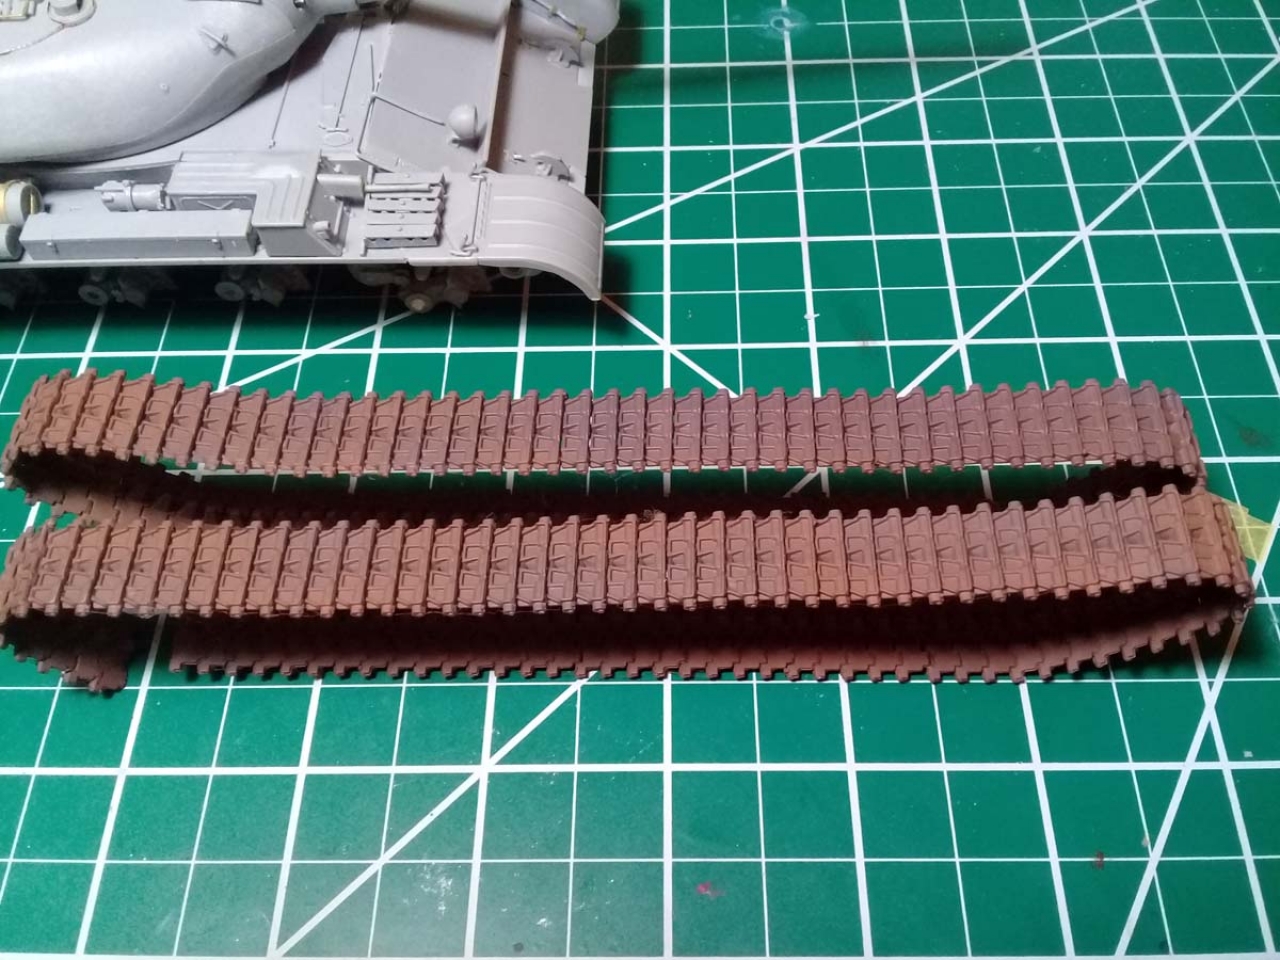
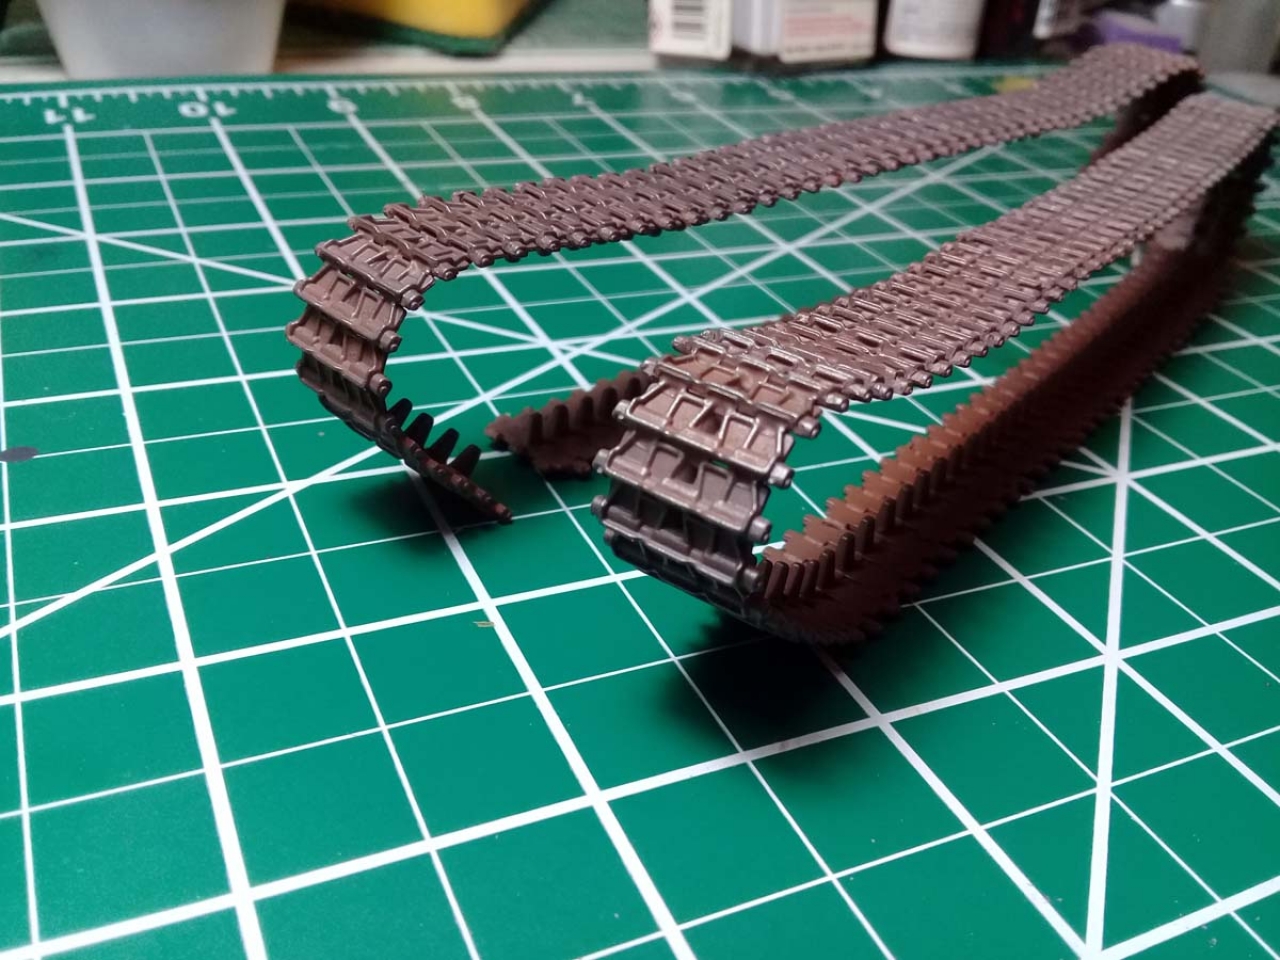
Step 50: the track links! Detested by many, loved by as many. Im falling in the second category, so no complaint here. If they are properly cleaned up, the links fit very well and the result is very good looking. There is another building option here. Each ninth link can be horned or bare. I couldnt figure out where the difference lays as there are not enough references in the instructions manual, so I choose to make all of them horned. And again I did a mistake here. When I wrapped the first track around the running gear, I did it in the wrong direction. I didnt notice that until I was taking pictures. Fortunately for me, the glue wasnt set completely (Long live Testors cement!) and I re-wrapped accordingly.
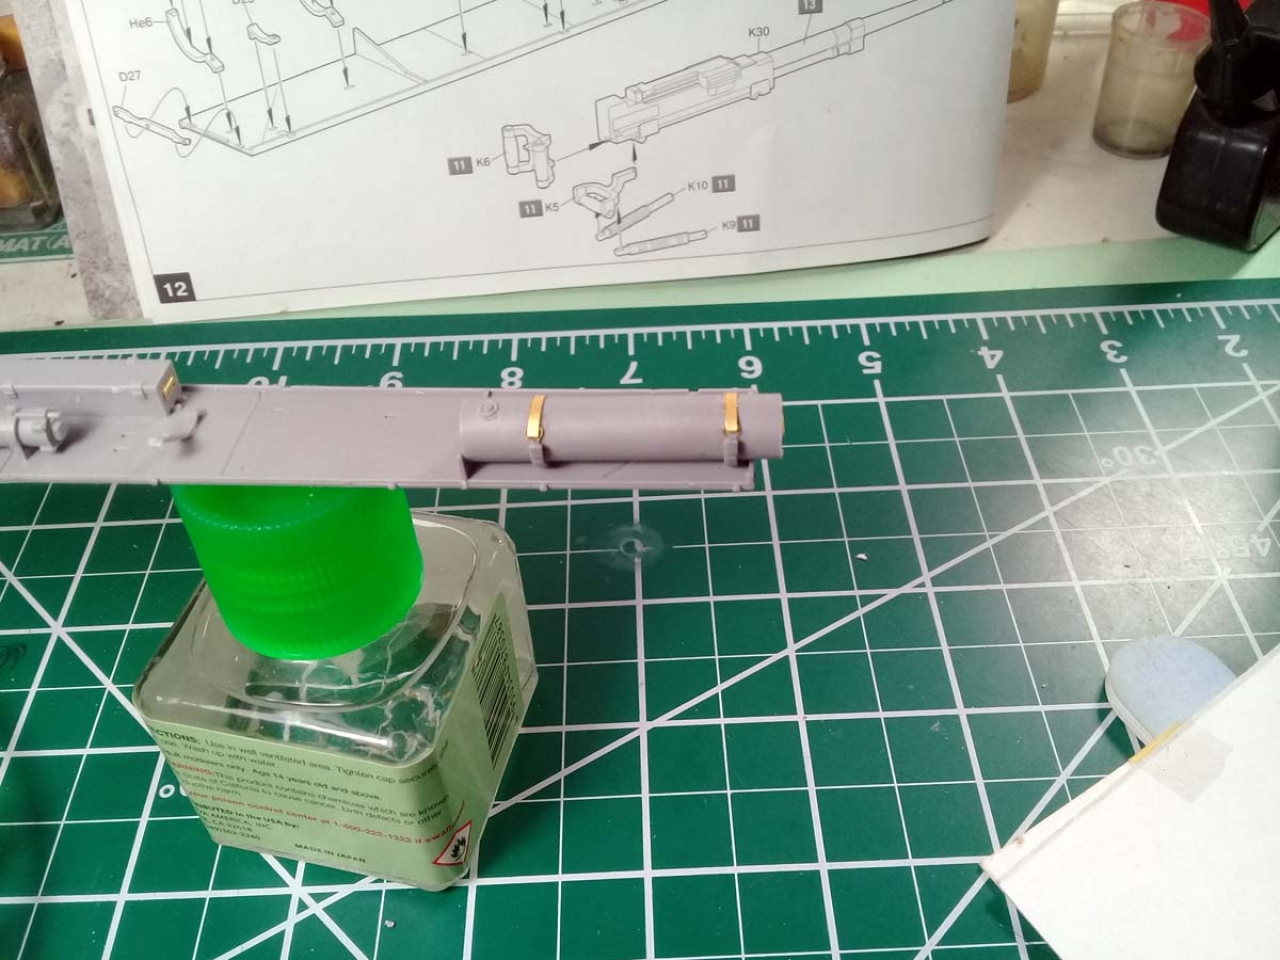
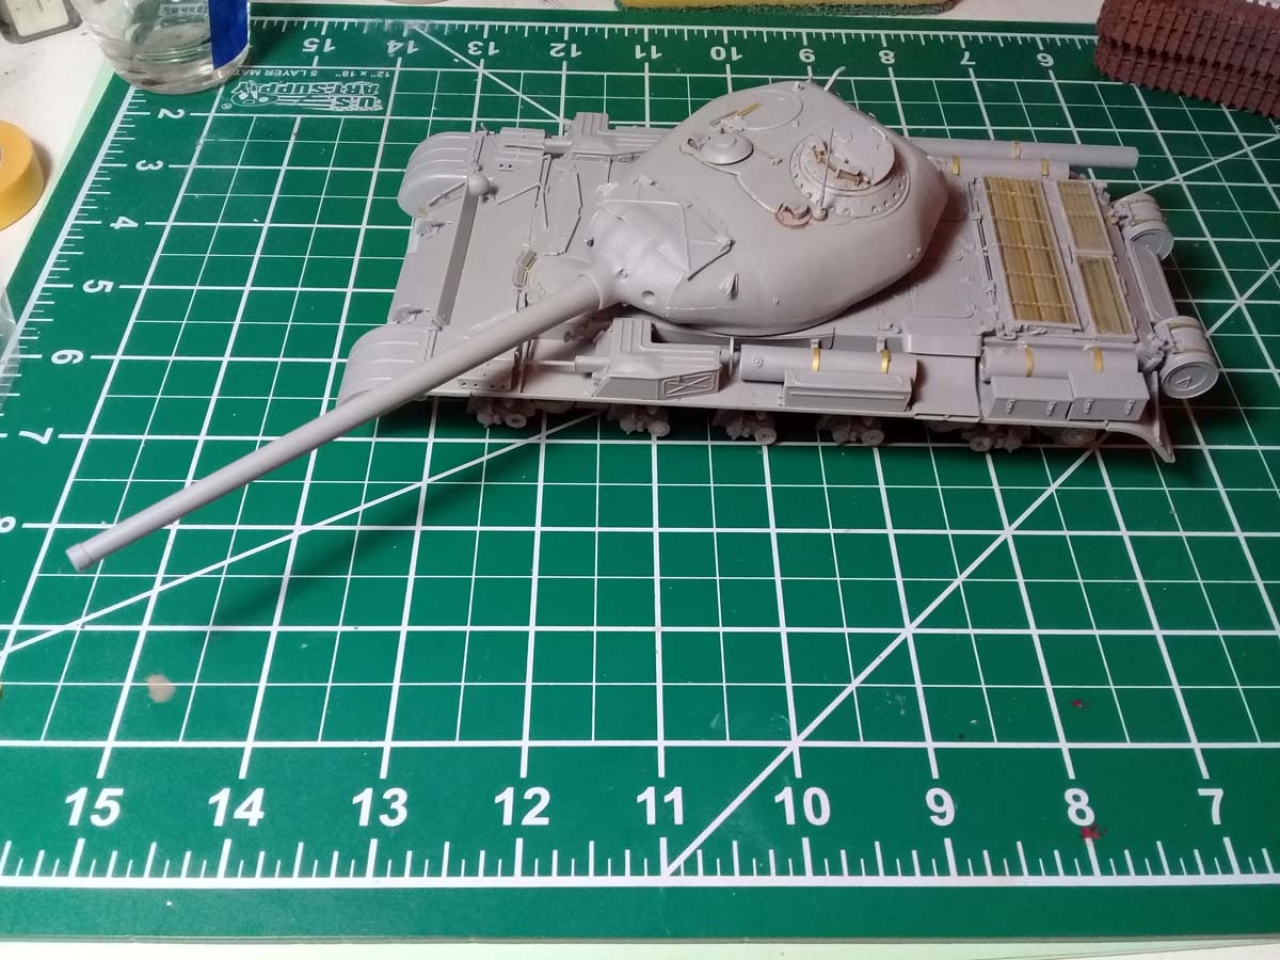
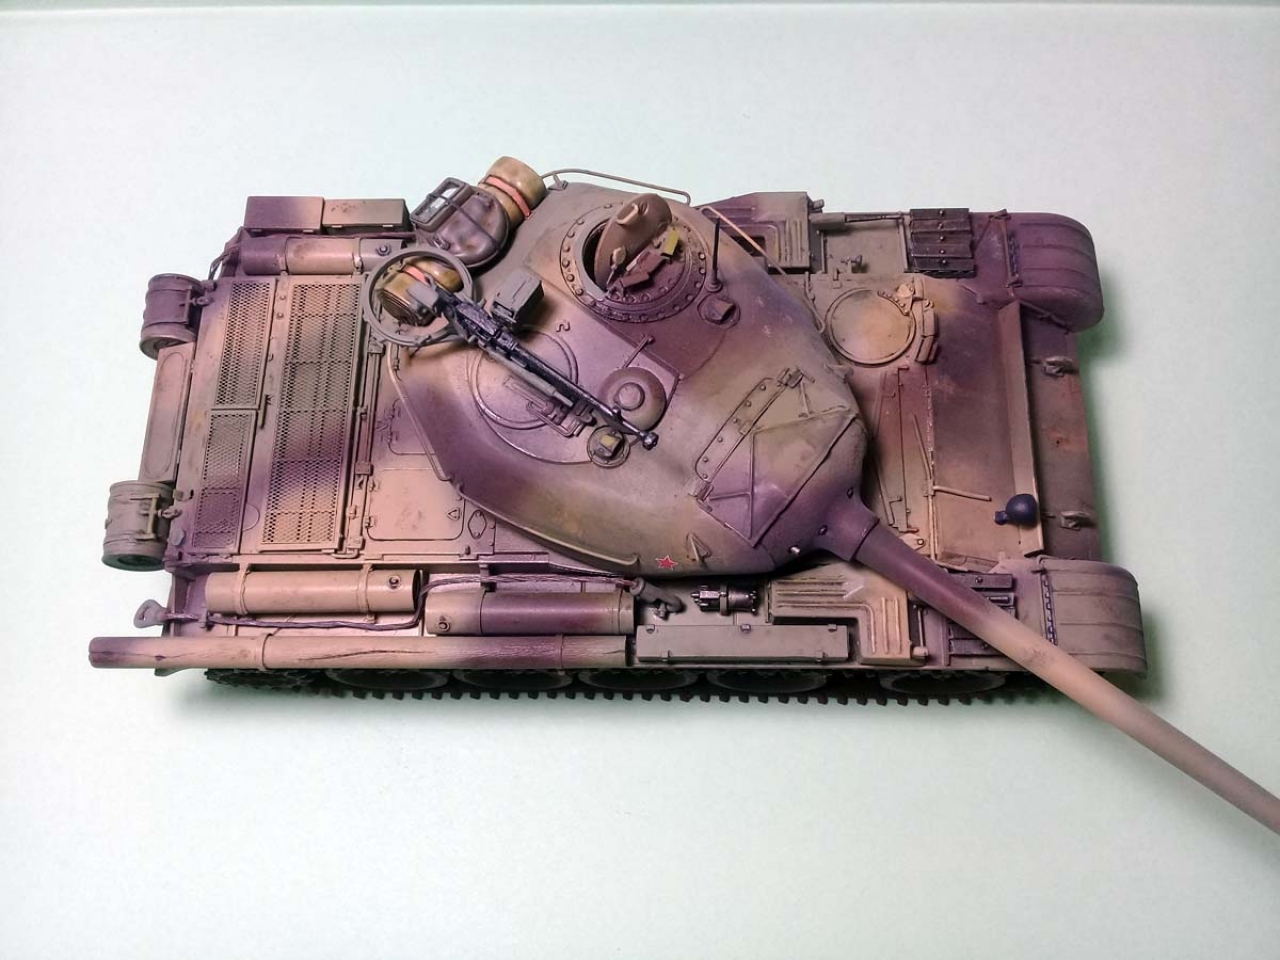
Step 51: puts together the fenders, the exhaust with its cover and the towing cables. The towing cables provided by the kit showed useless to me. They have too many injection gates and cleaning them will destroy much part of twisted wire detail. I made new ones from hanging wire, using the provided eyes. I had the impression that the eyes are a little out of scale and the final detailing substantiated that. The anchor pins are too close to the tool box on the left fender and too close to the fuel cell on the right side fender. The only way the eye can fit is pointing straight upwards and although I bent the cables as much I could, the bottom of the turret is still interfering with the cables when trained laterally at more than 60 degrees. Not big deal for me (This is not a toy!) but the modeler having in mind a certain diorama pose might want to consider that. Ive seen that the color guide shows actually only one towing cable attached but Ive got stubborn and I wanted them both.
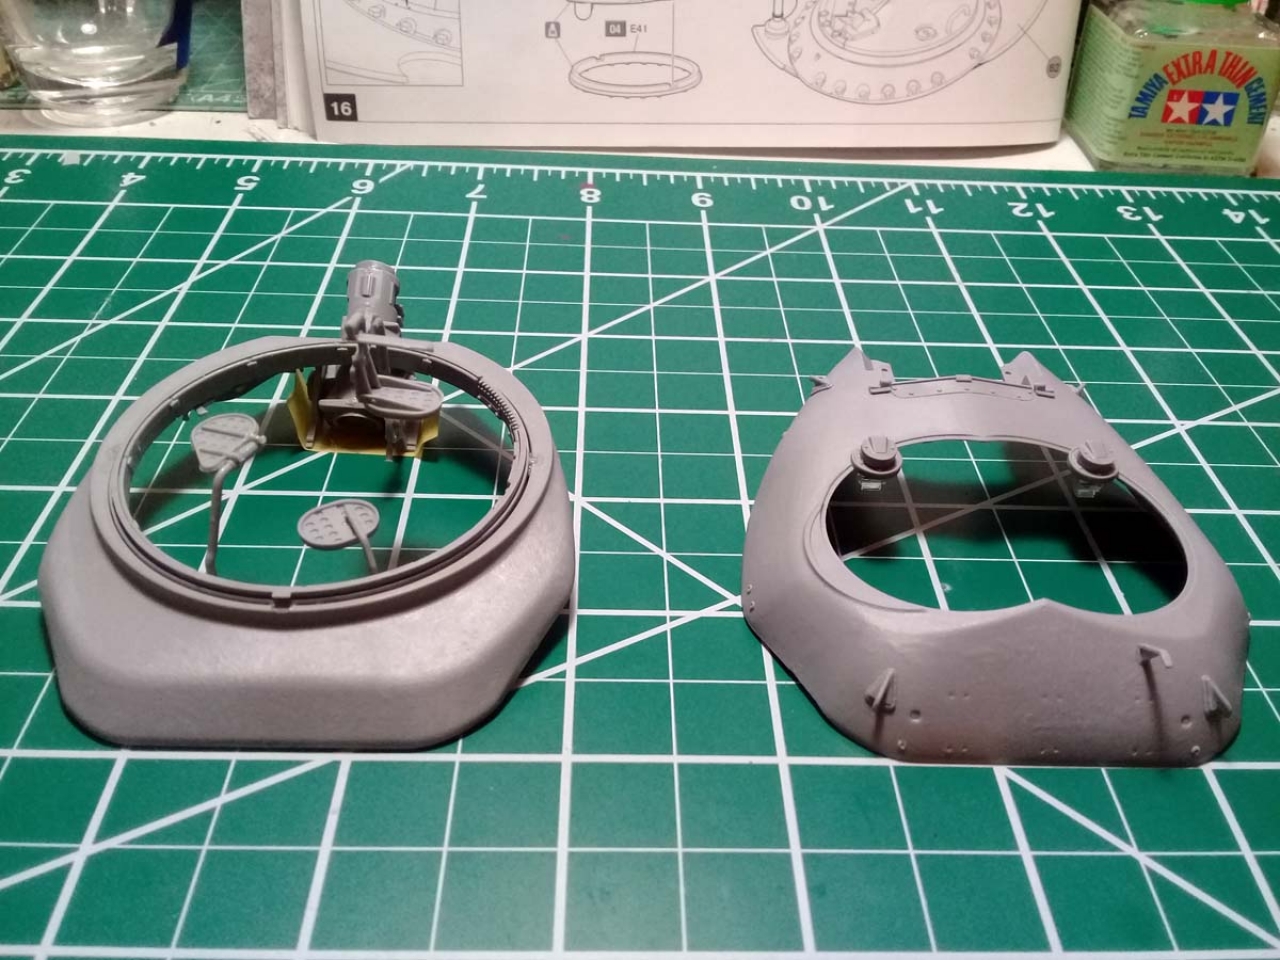
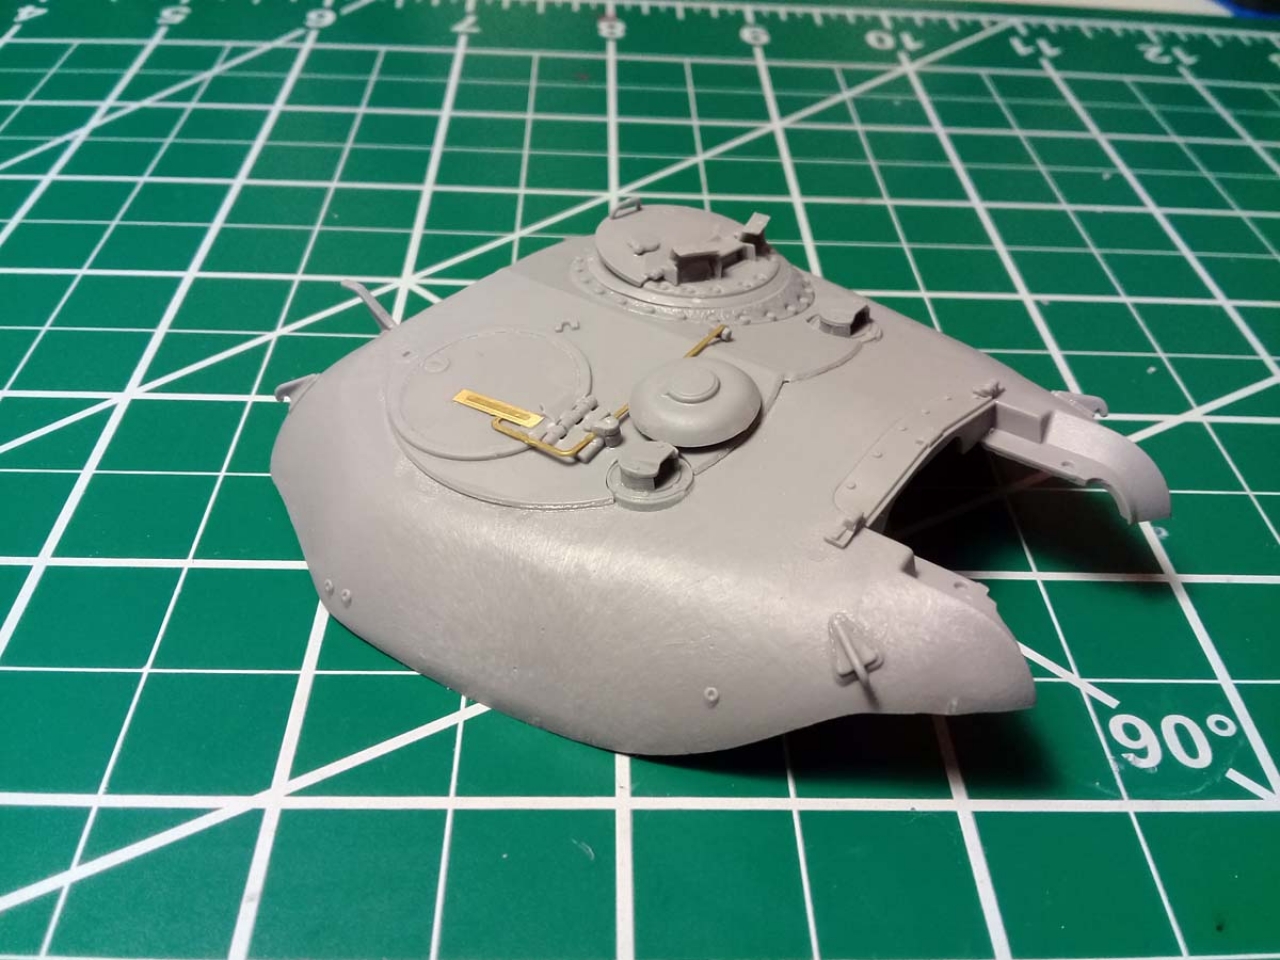
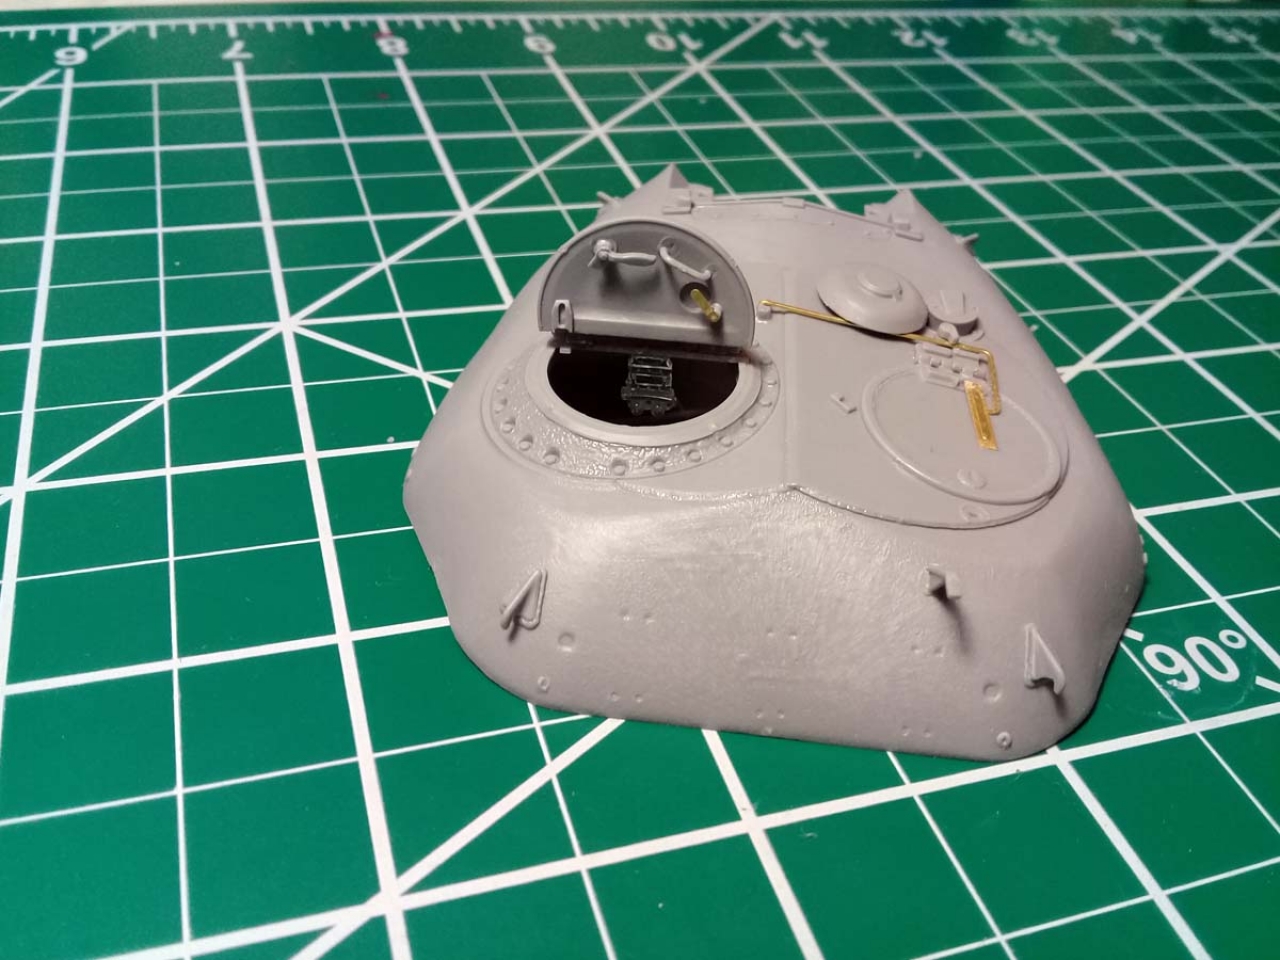
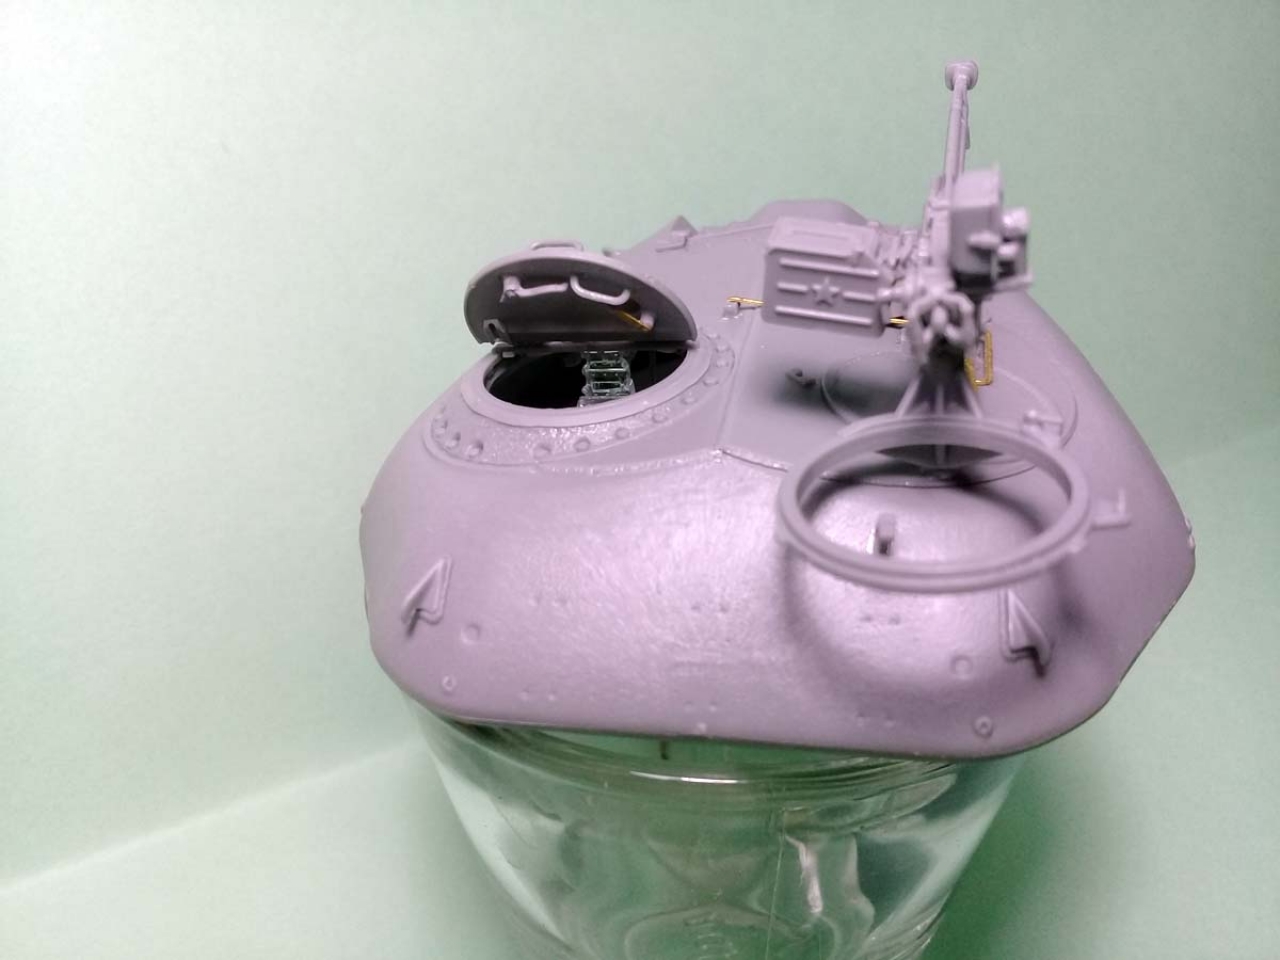
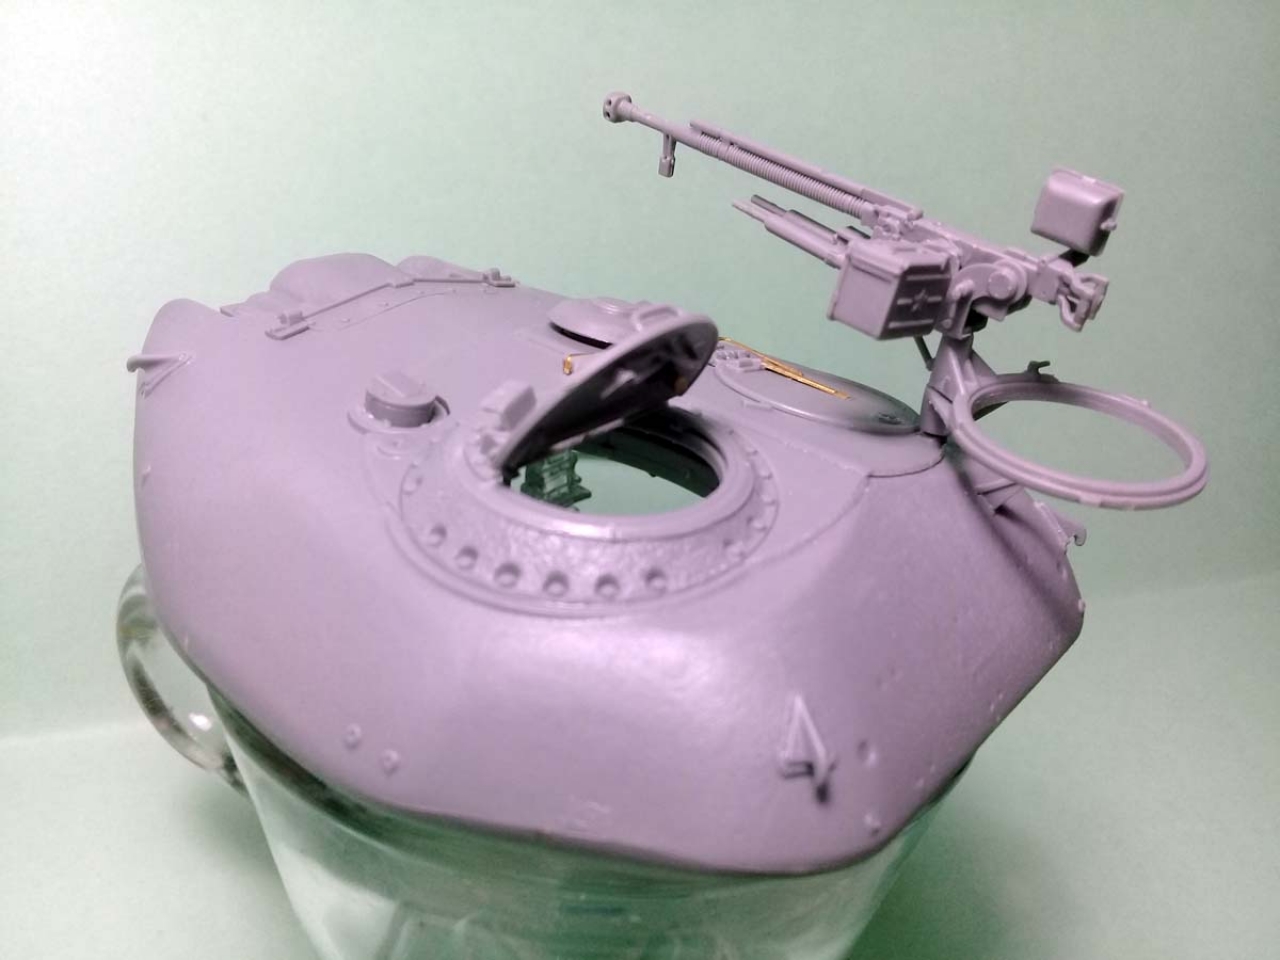
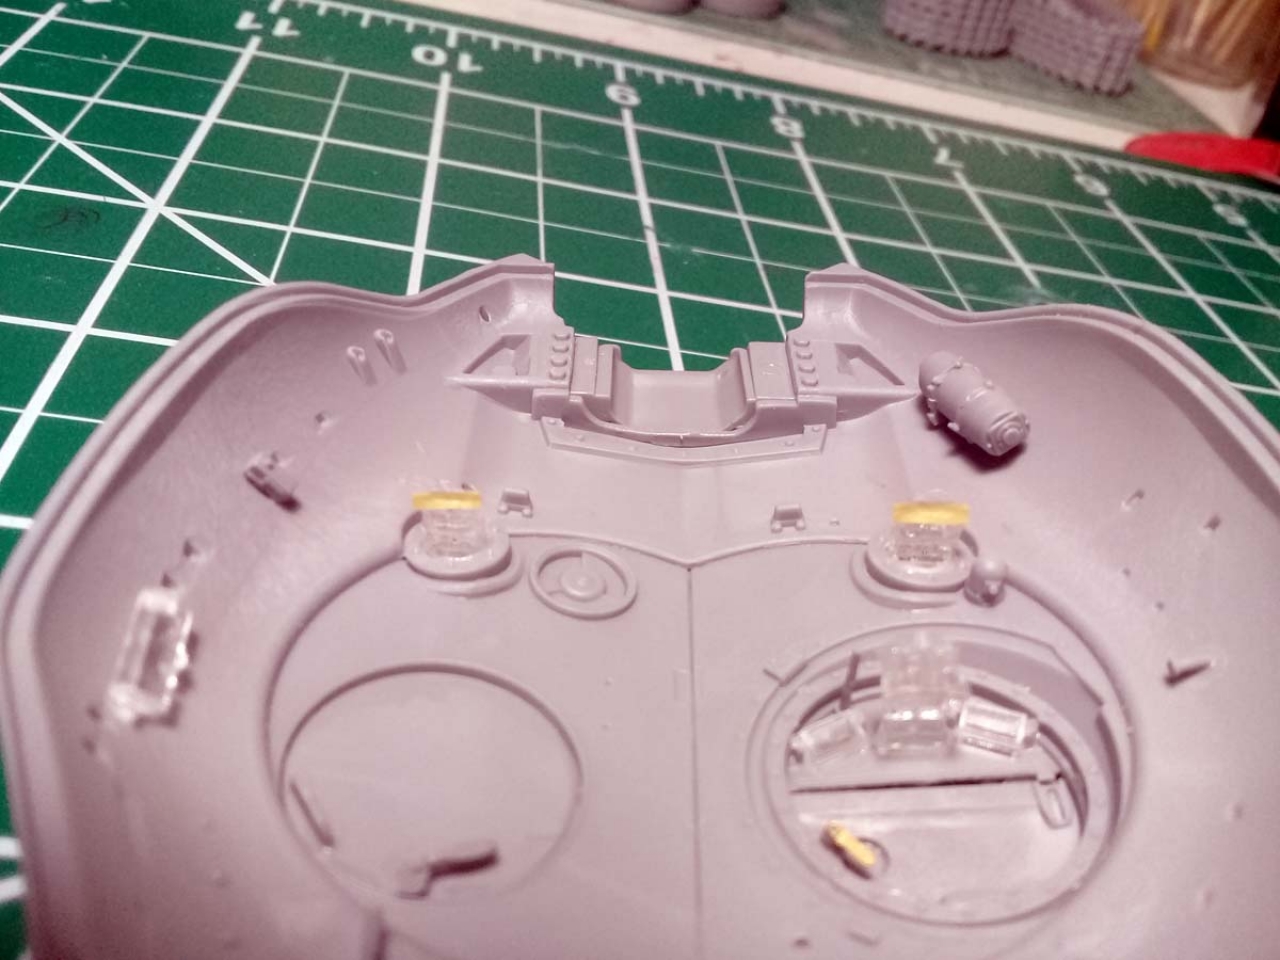
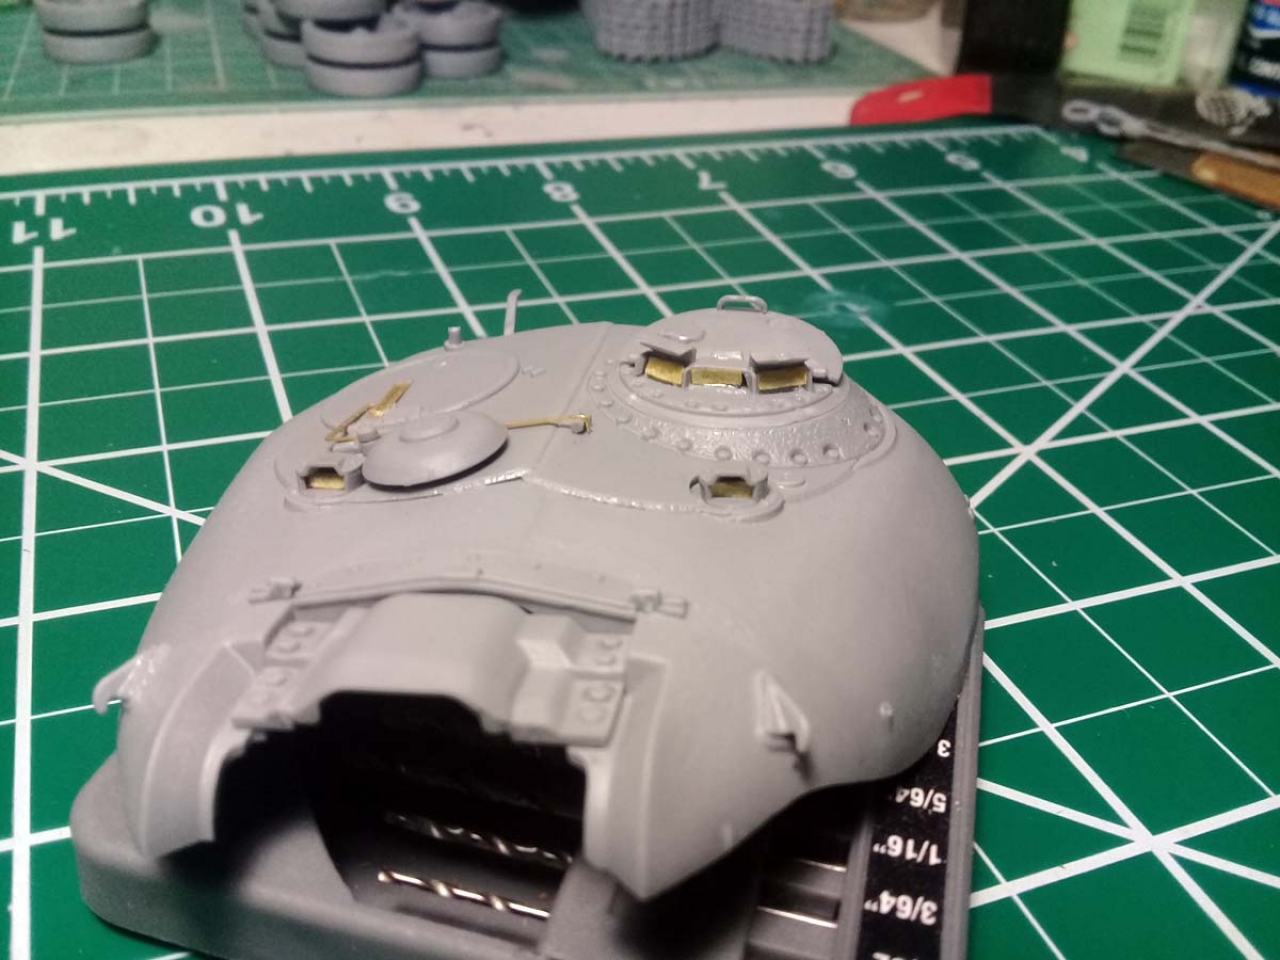
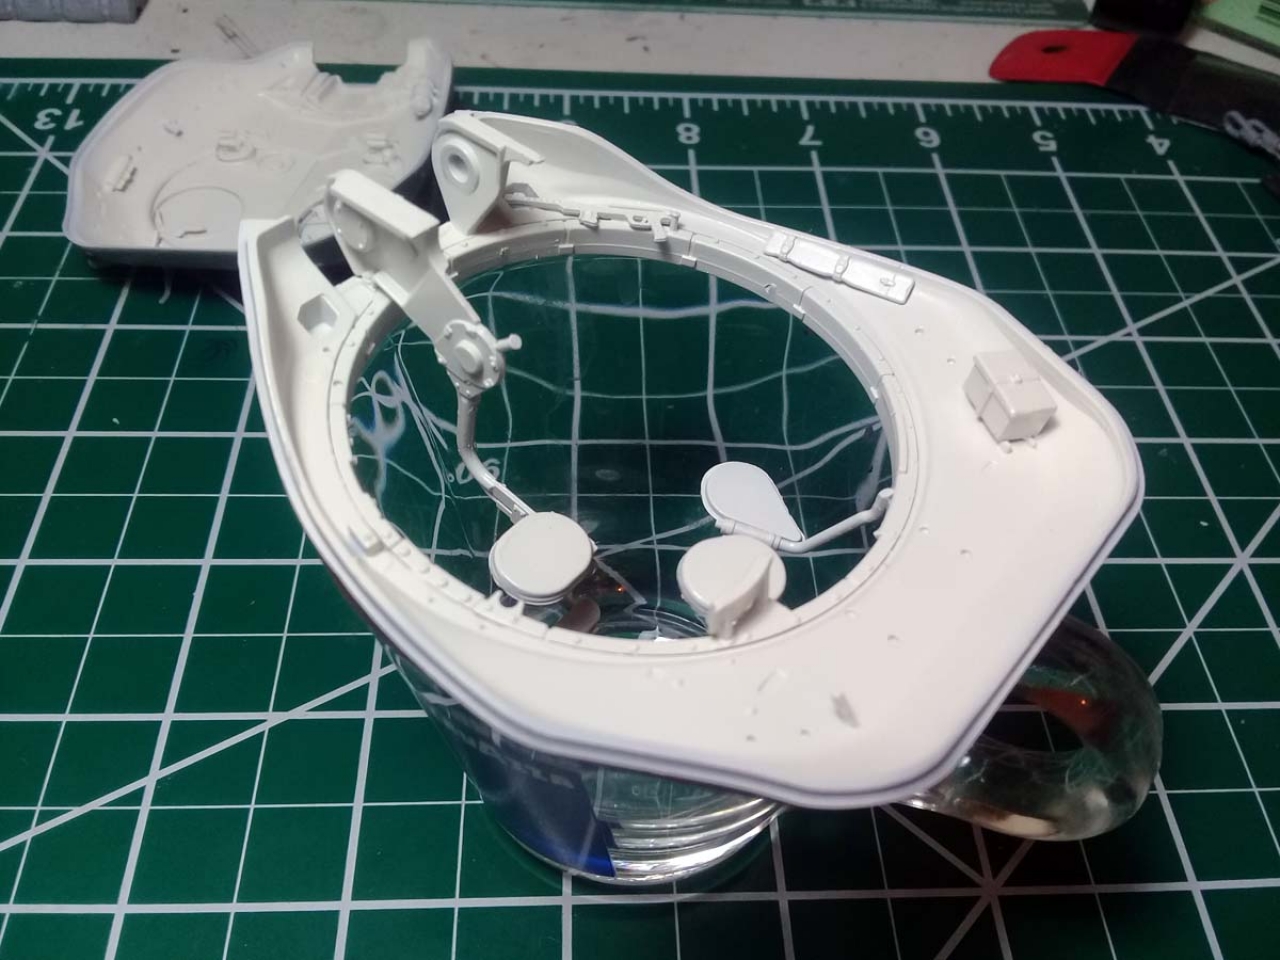
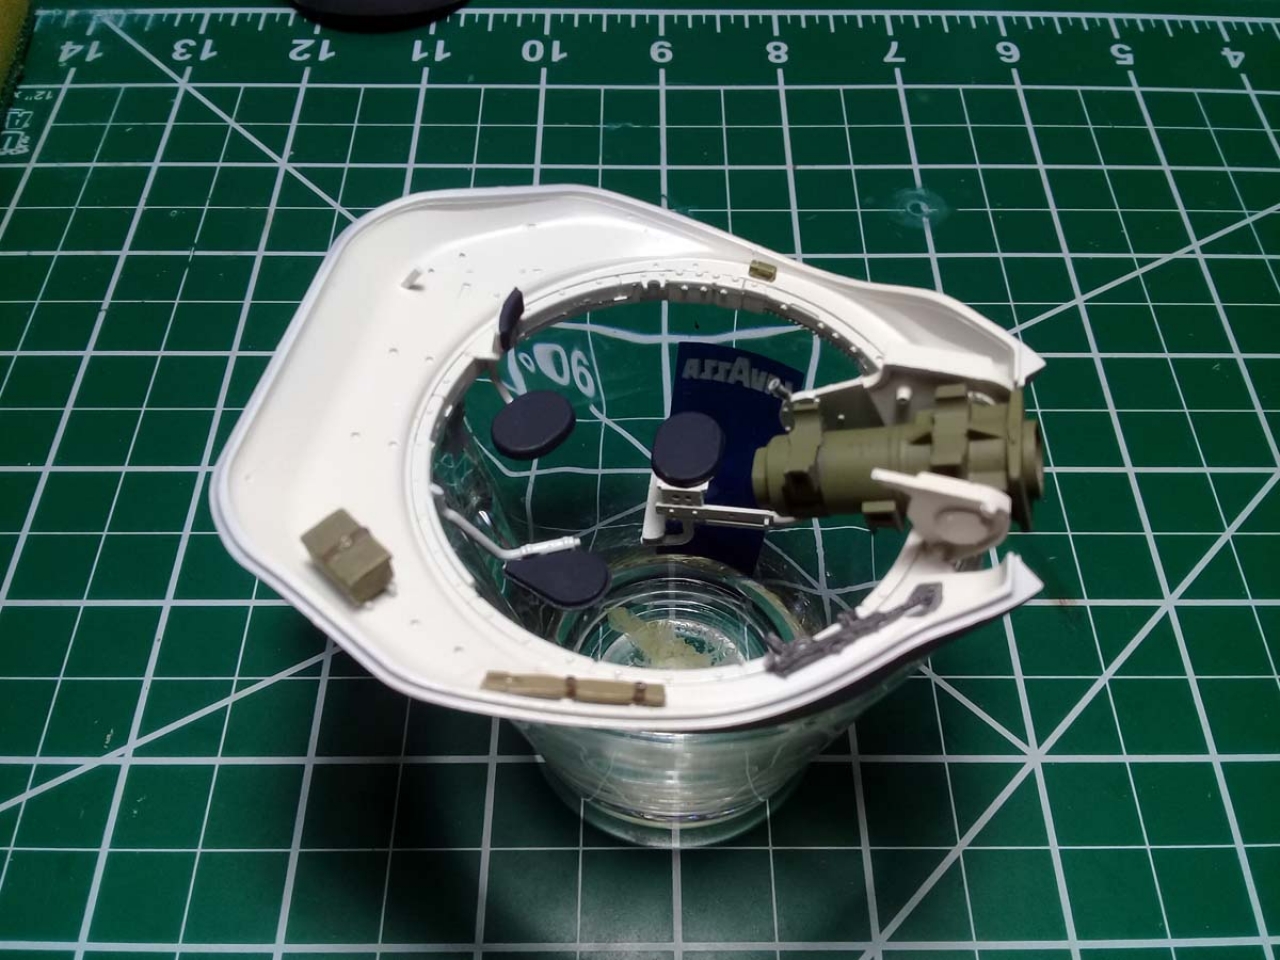
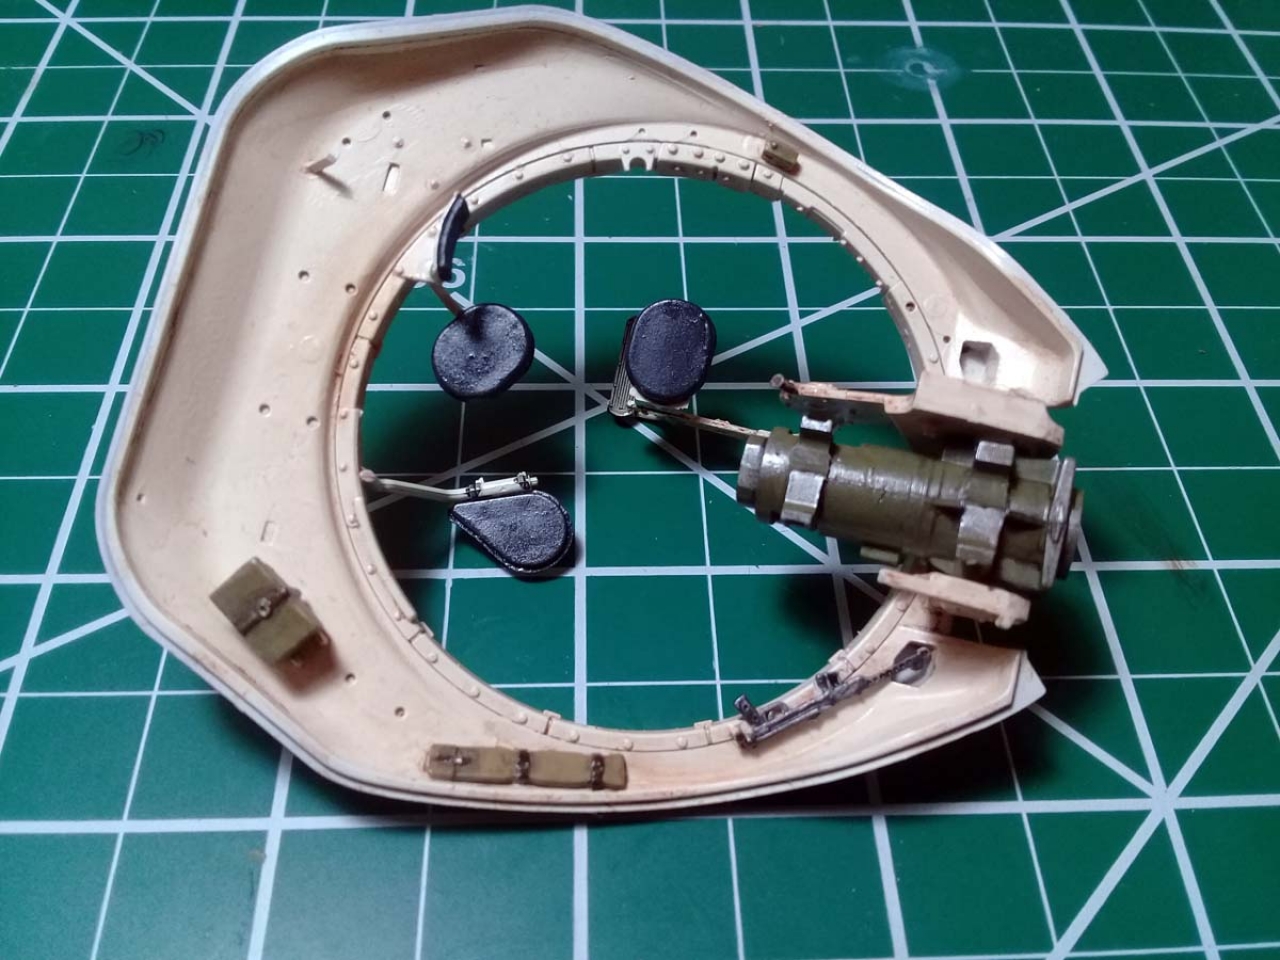
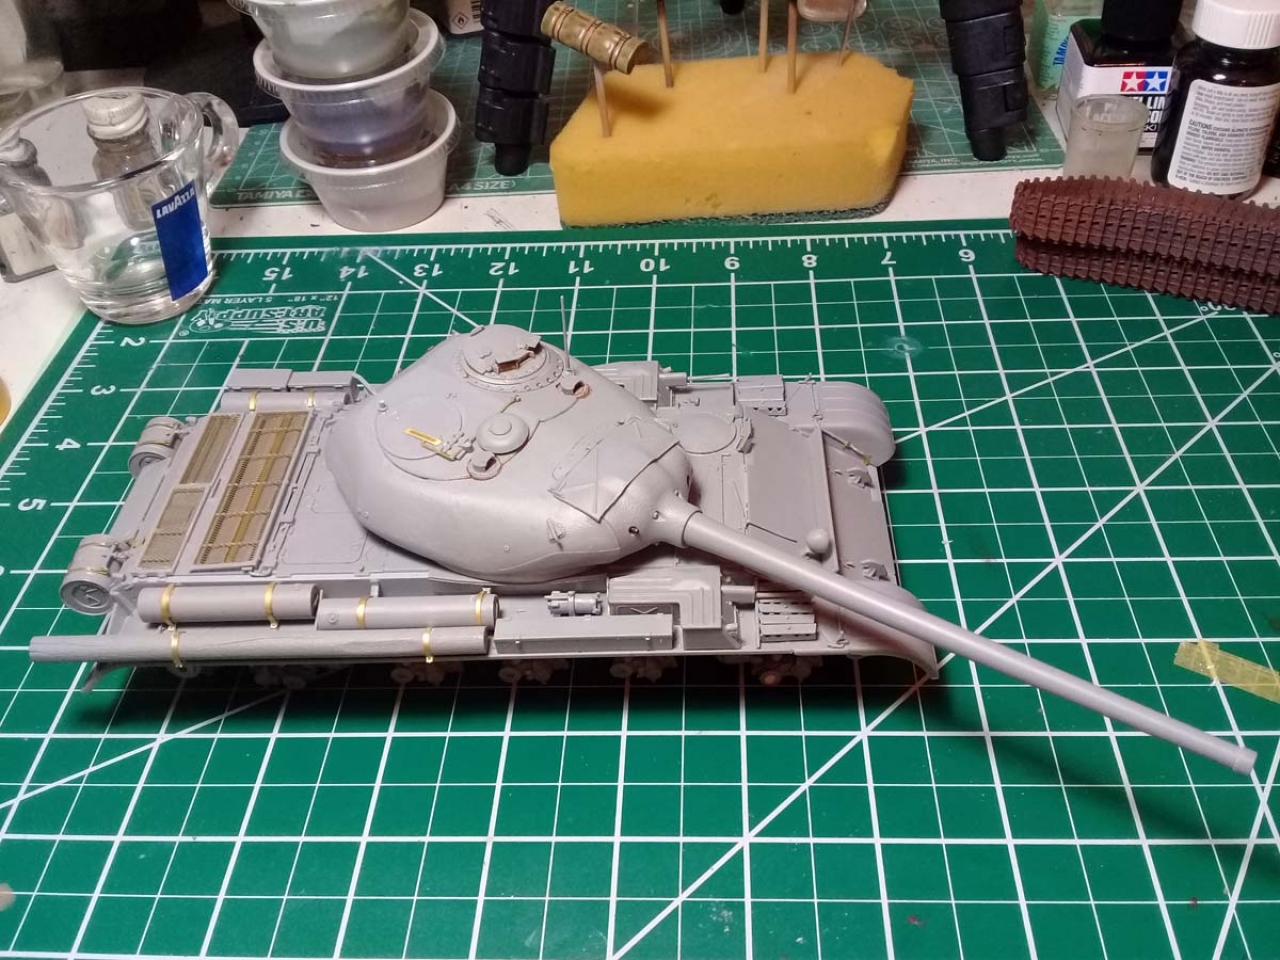
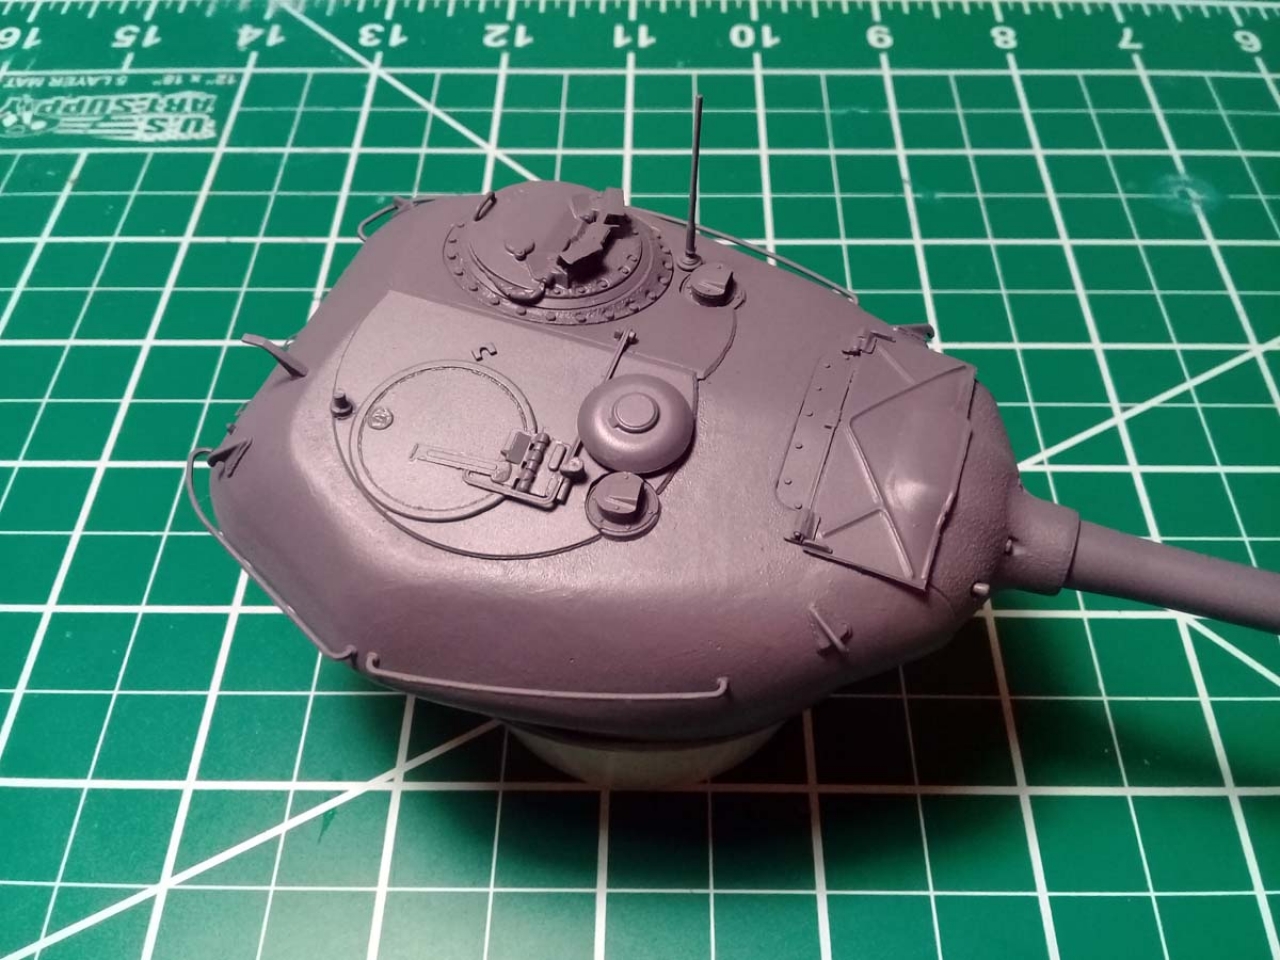
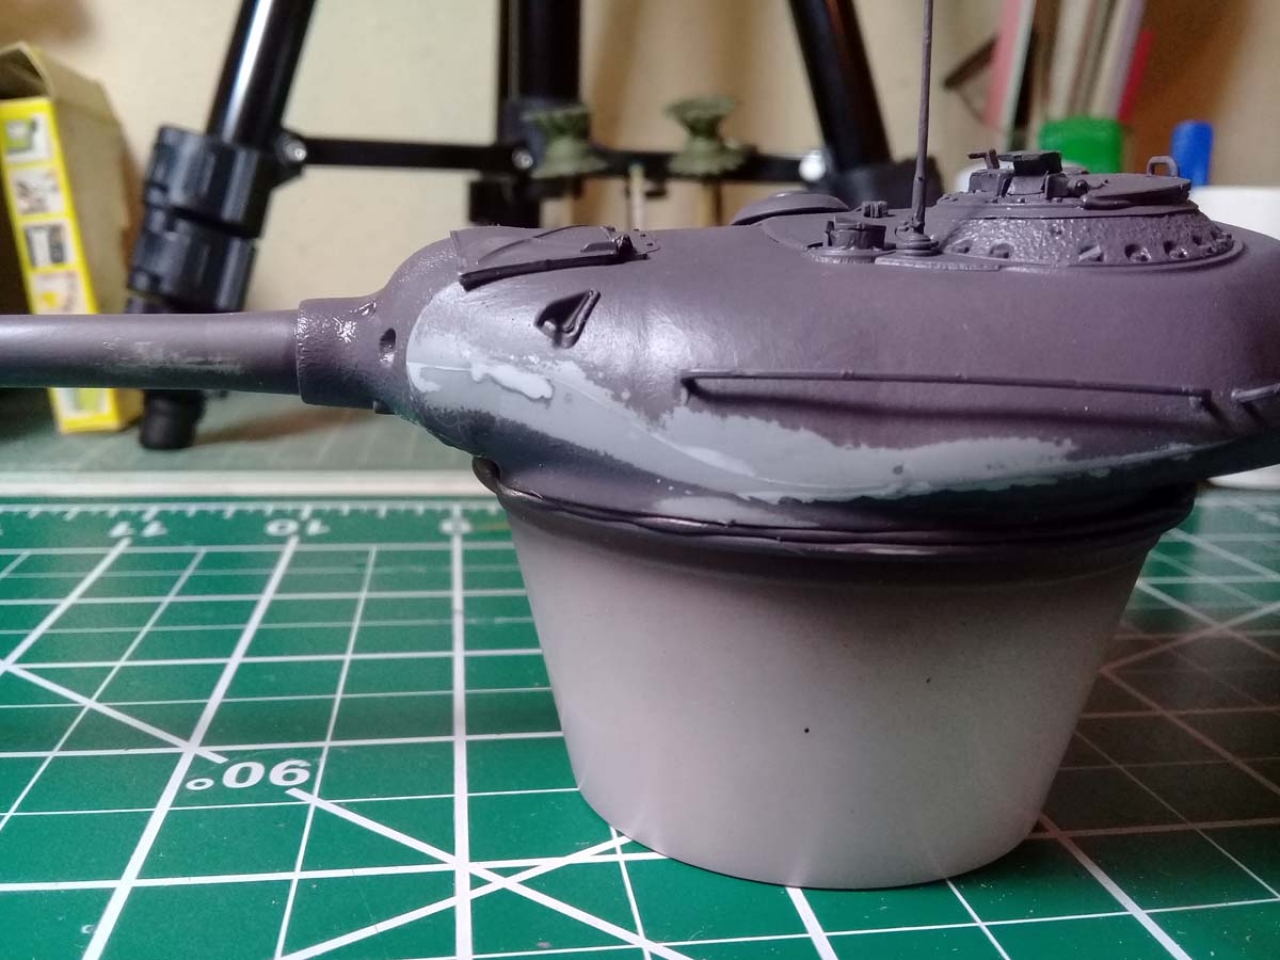
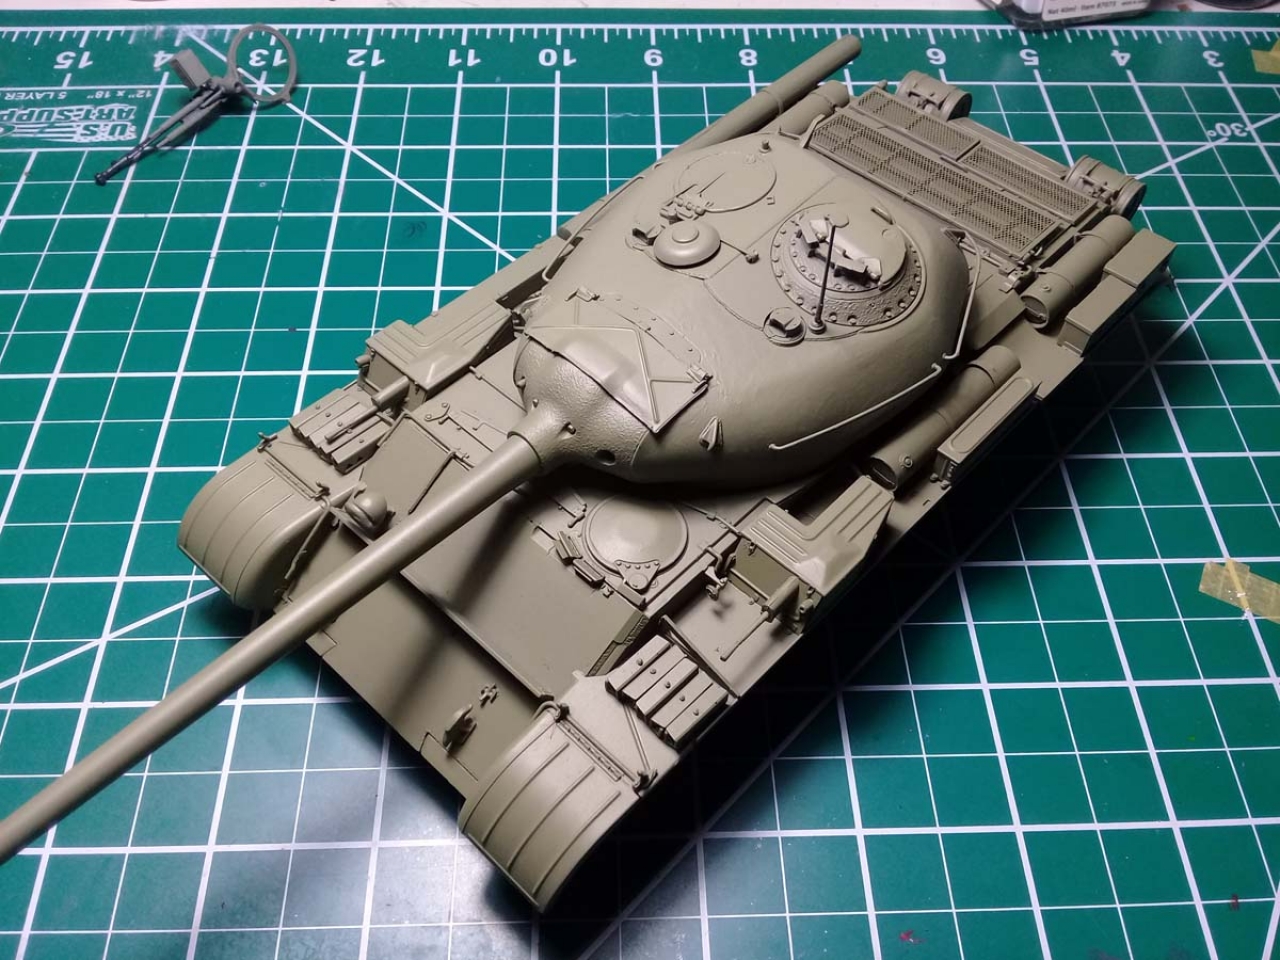
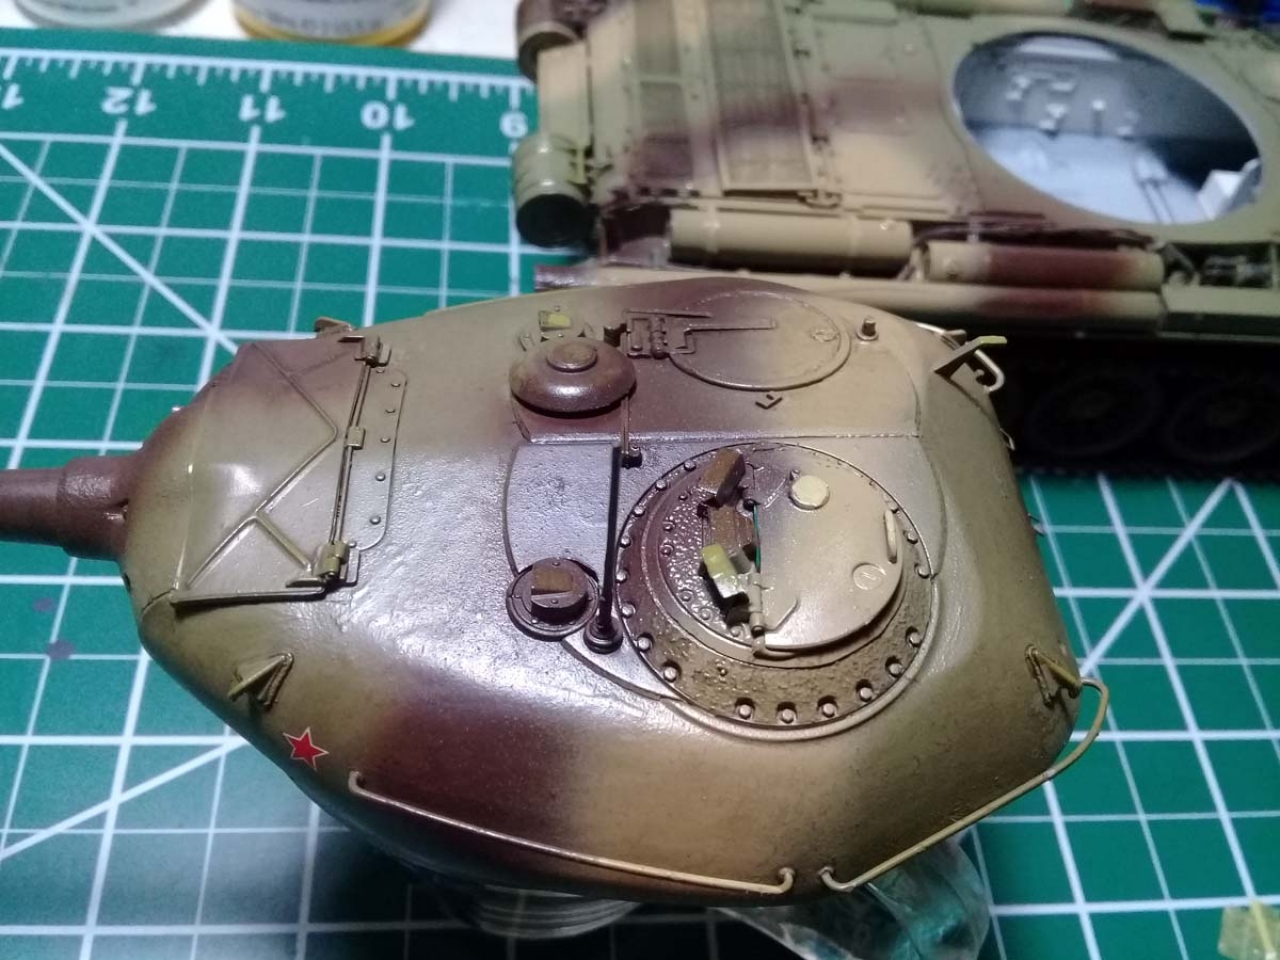
Steps 52-63: detail the turret assembly. There are lot of small parts, PE parts, clear parts and paint-as-you-go involved. Everything (well, almost) goes nice and smooth if some patience involved. The fit of the parts is good.
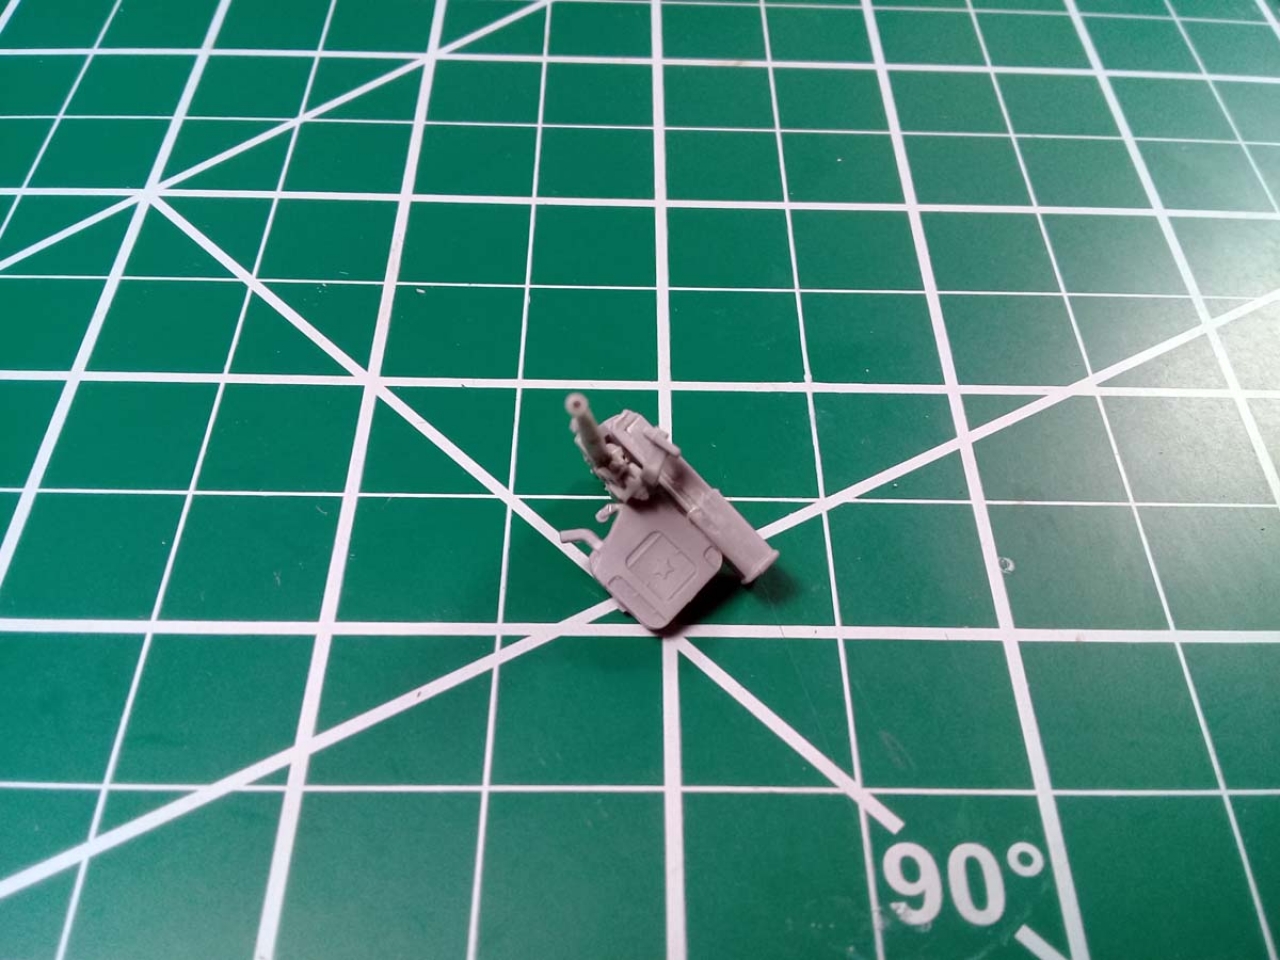
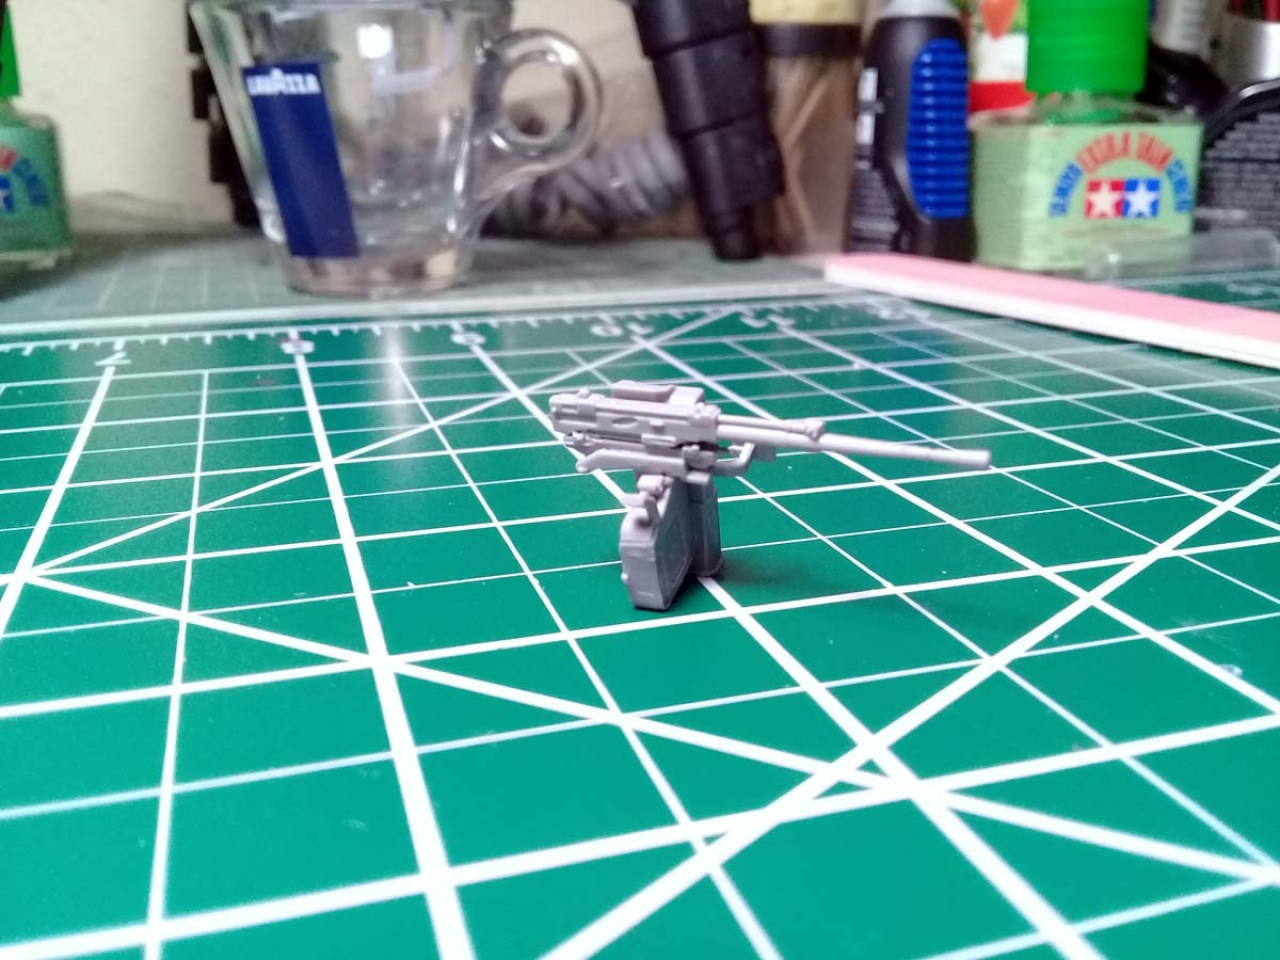
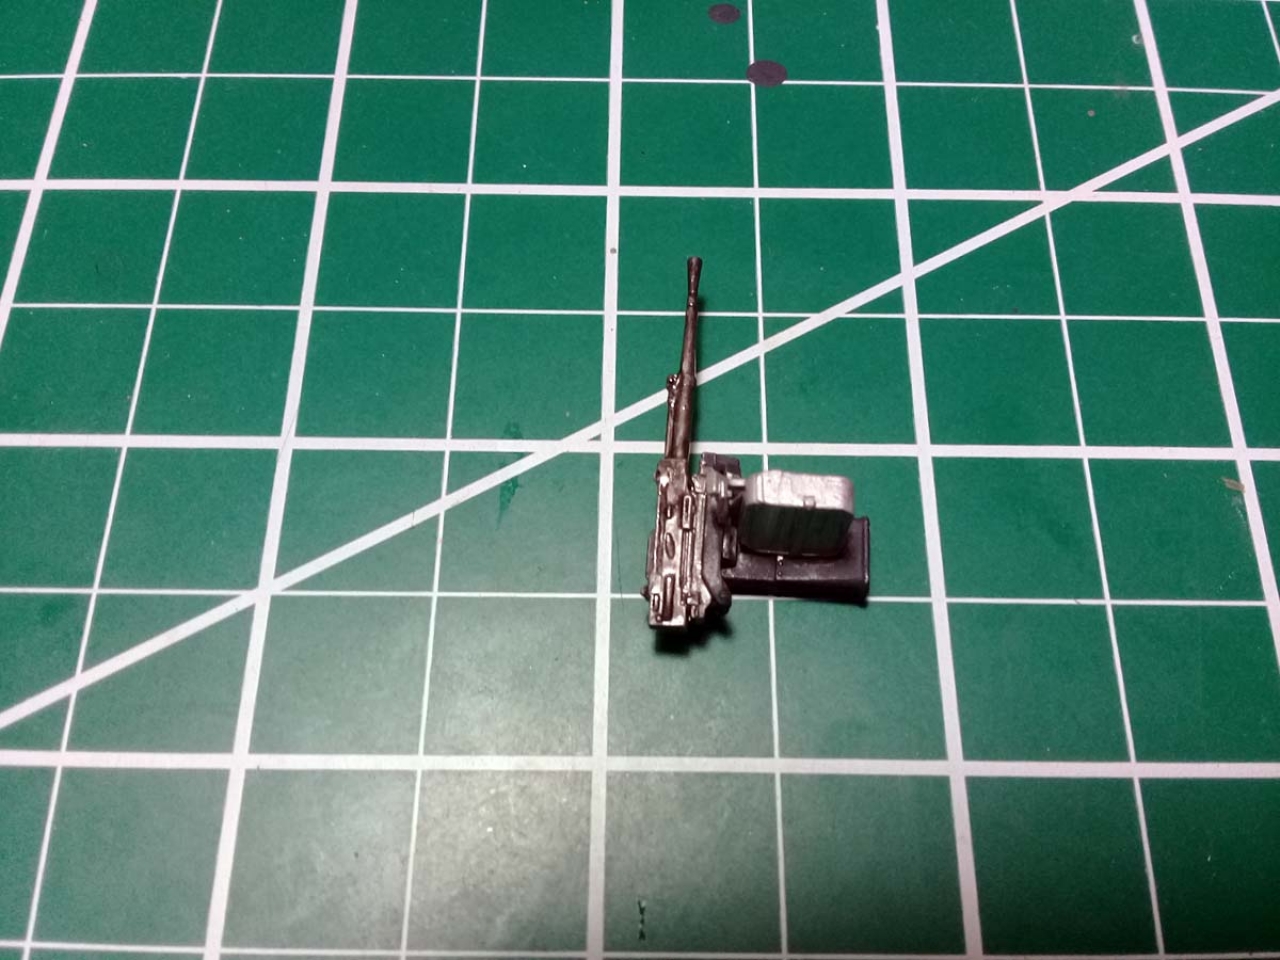
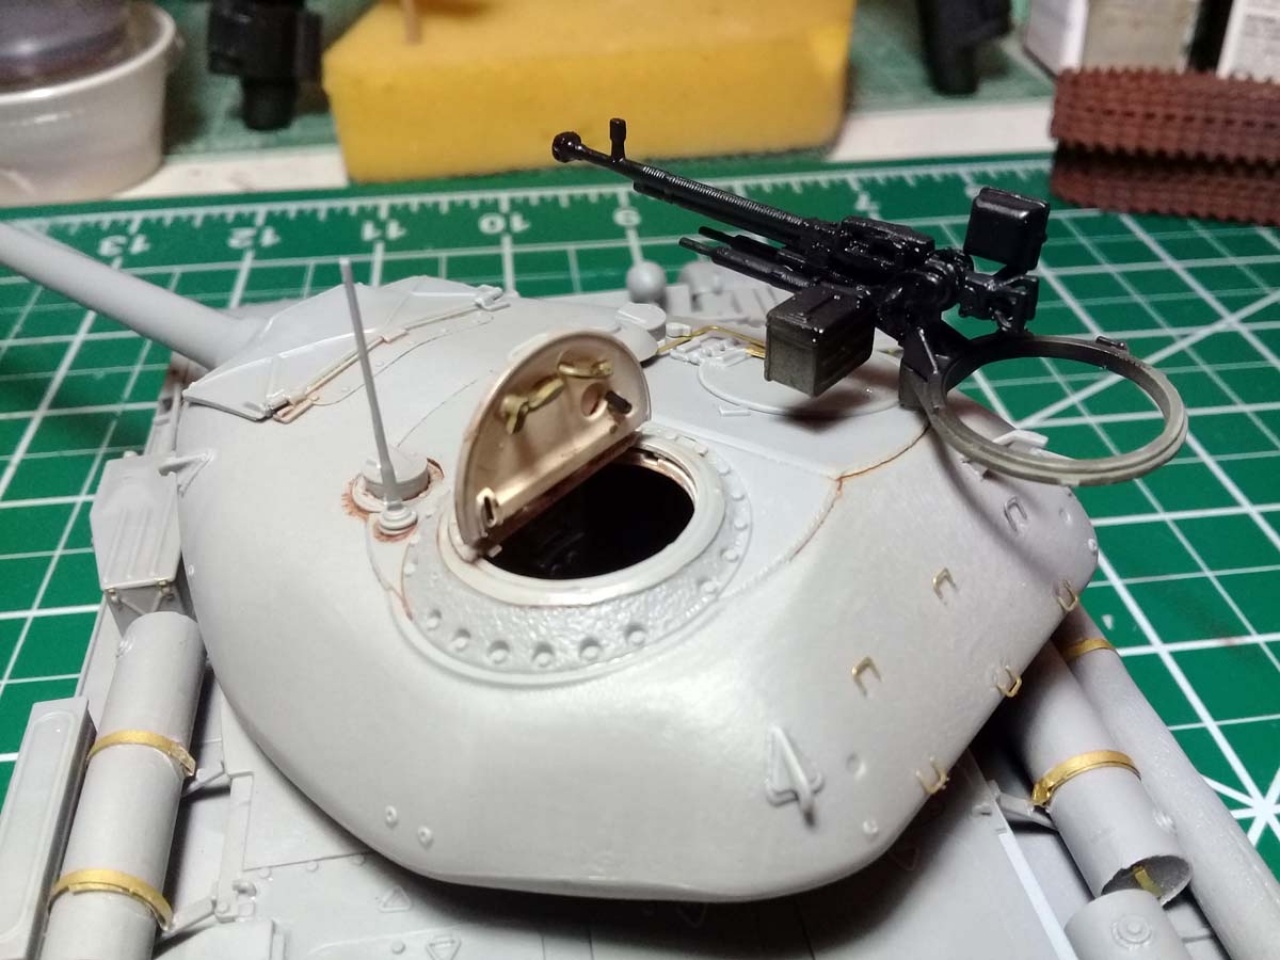
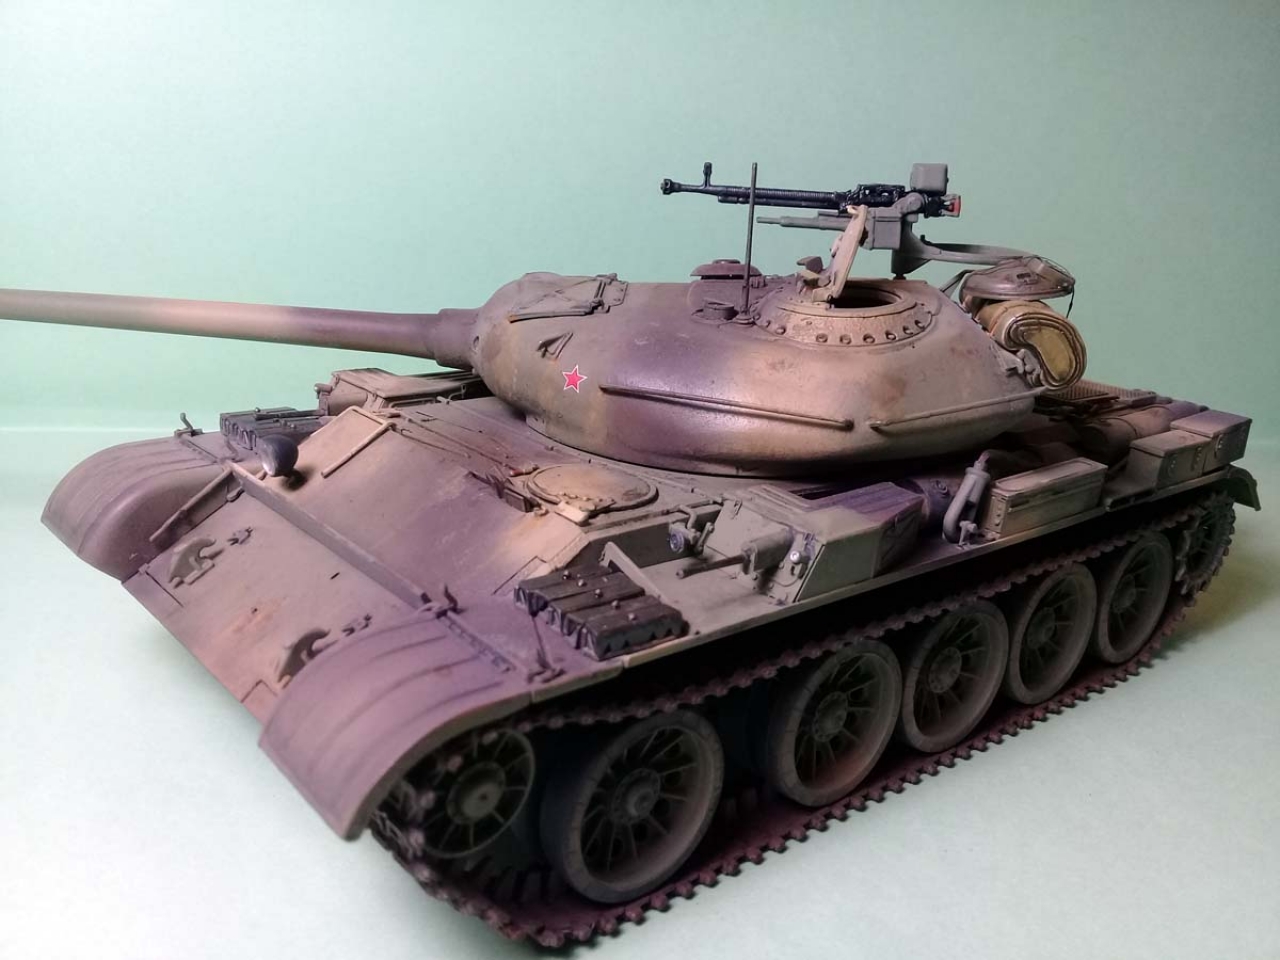
Steps 64 and 65: the assembly of AA MG. Well, that was my foulest modelling experience I have had in some time. First, the pins from part J11 are too thick for the holes in parts Ja8 and Ja6. At the first touch with Tamiya extra thin Ja8 cracked. It must be here that I did my worst mistake in this build: I installed without even noticing the barrel upside down and everything went wrong from there on. Fortunately I posted the pictures in my building blog and one of the close followers (Thanks, John!) called my attention. I was dismayed with my mistake, as the assembly was painted already and the glue since long dried up. I wanted to let aside the MG but then I thought that it is too much of a prominent feature for T54 and I decided to try and salvage what could be saved. I pried the assembly apart and sliced as clean as I could the styrene parts, not without damage. Eventually I could restore most of the plastic parts, but the PE parts are all gone bar one. I apologize, MiniArt!
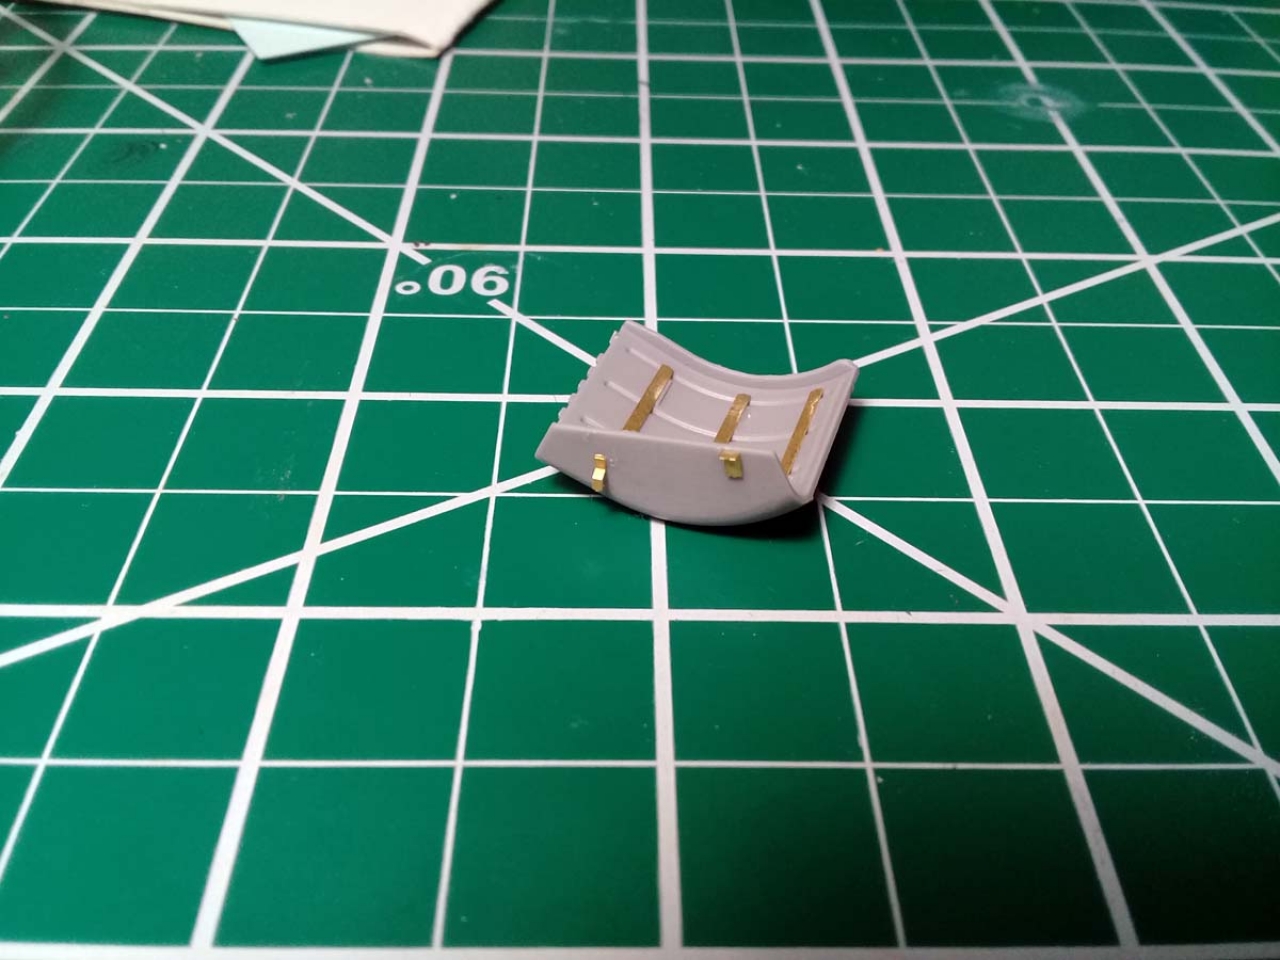
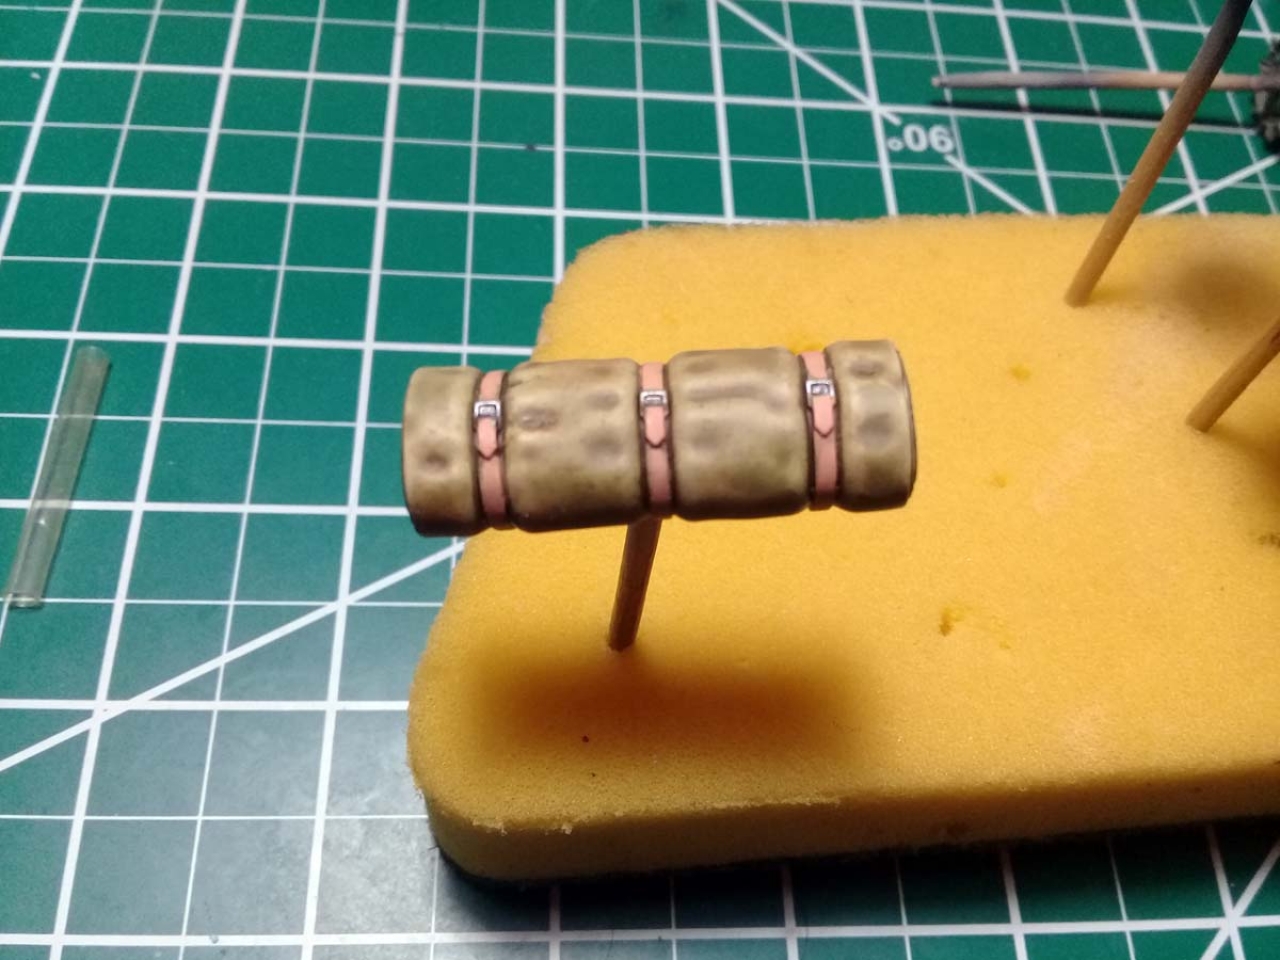
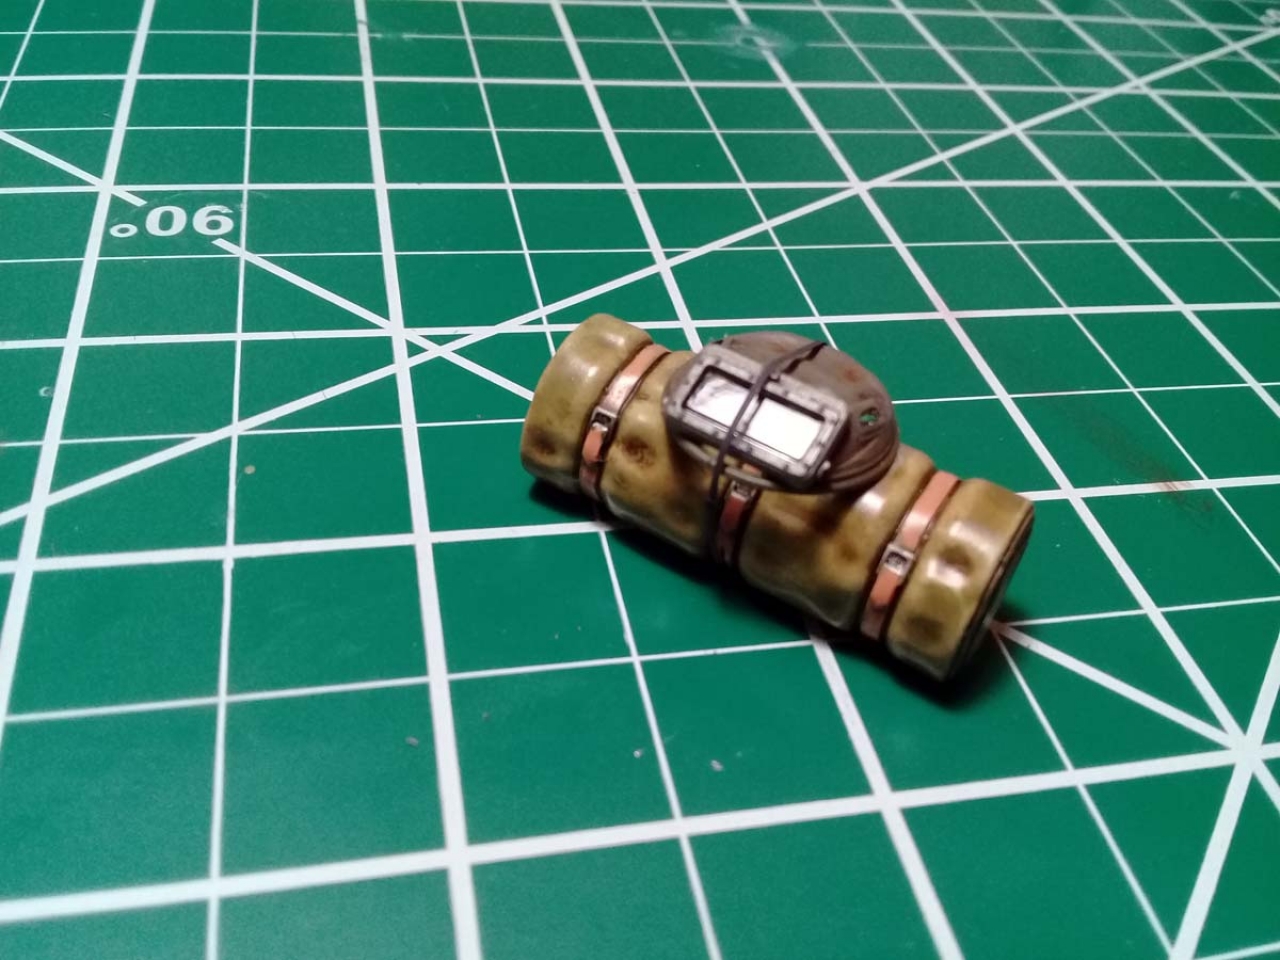
Step 66: it is another easy looking but hard to do step. The parts K11 are too thin and the injection gates too many and they broke even before I could remove them from the sprue. I realized then that only the heads can be seen on the completed building, the rails being covered by the rolled tarpaulin. I sliced the visible ends, glued them directly to the tarpaulin and modified the assembly for easier installation. No visible detail was lost on the completed build.
Step 67: I have called already that step in this review. It deals with the option of folded / unfolded drivers hatch hood. Because my hatch was already cemented on place, I was left with one single option: the folded one. Simple as it looks, this step it is not trouble free as well. The lateral windows have a poor fit and I was unable to install one of them; I made it instead using Kristal Klear. I chose not to use the PE wiper (PEa21) for fear of interfering with the PEa7 on the final assembly and I was right this time.
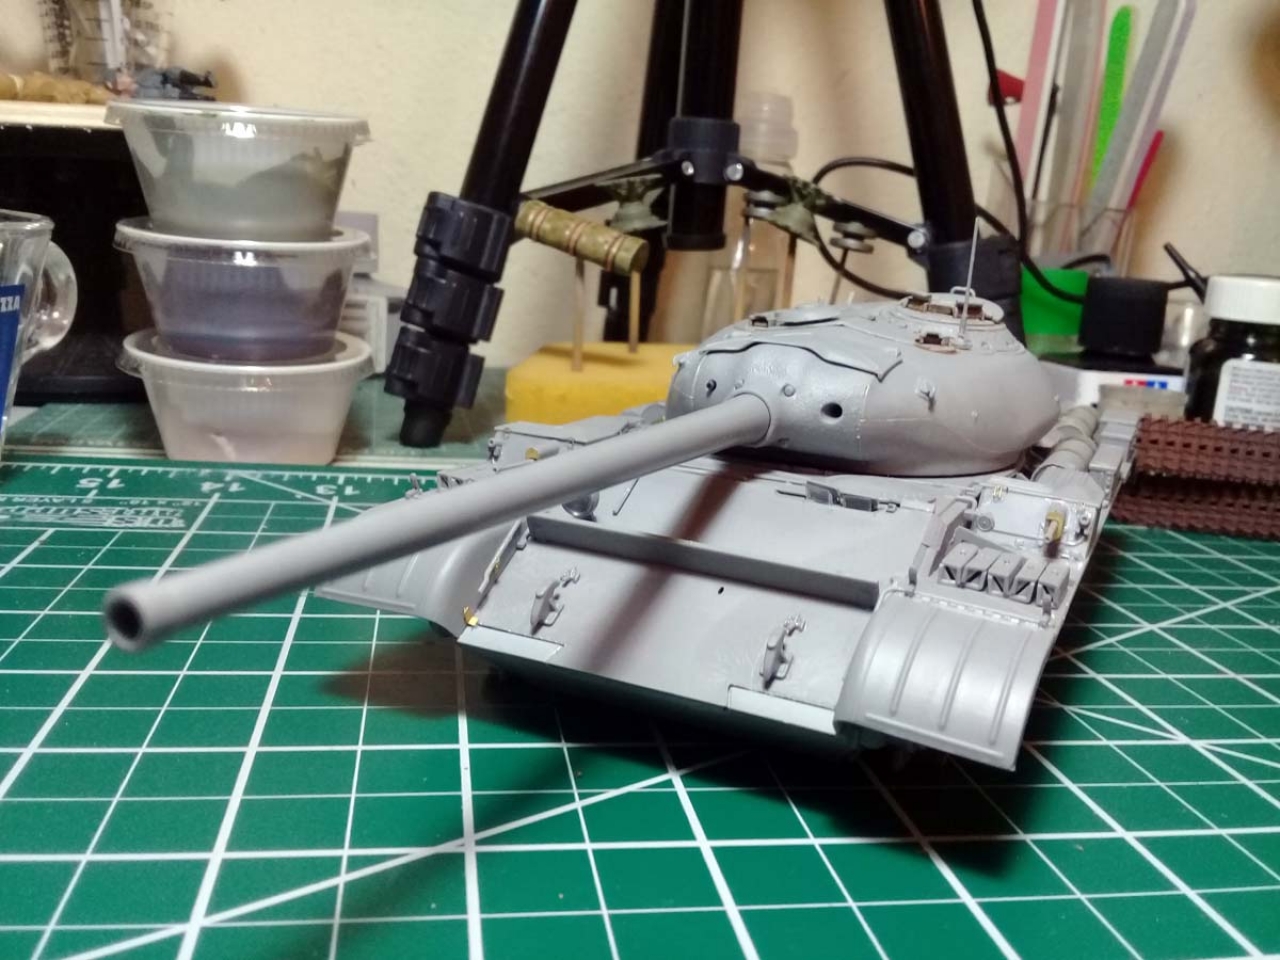
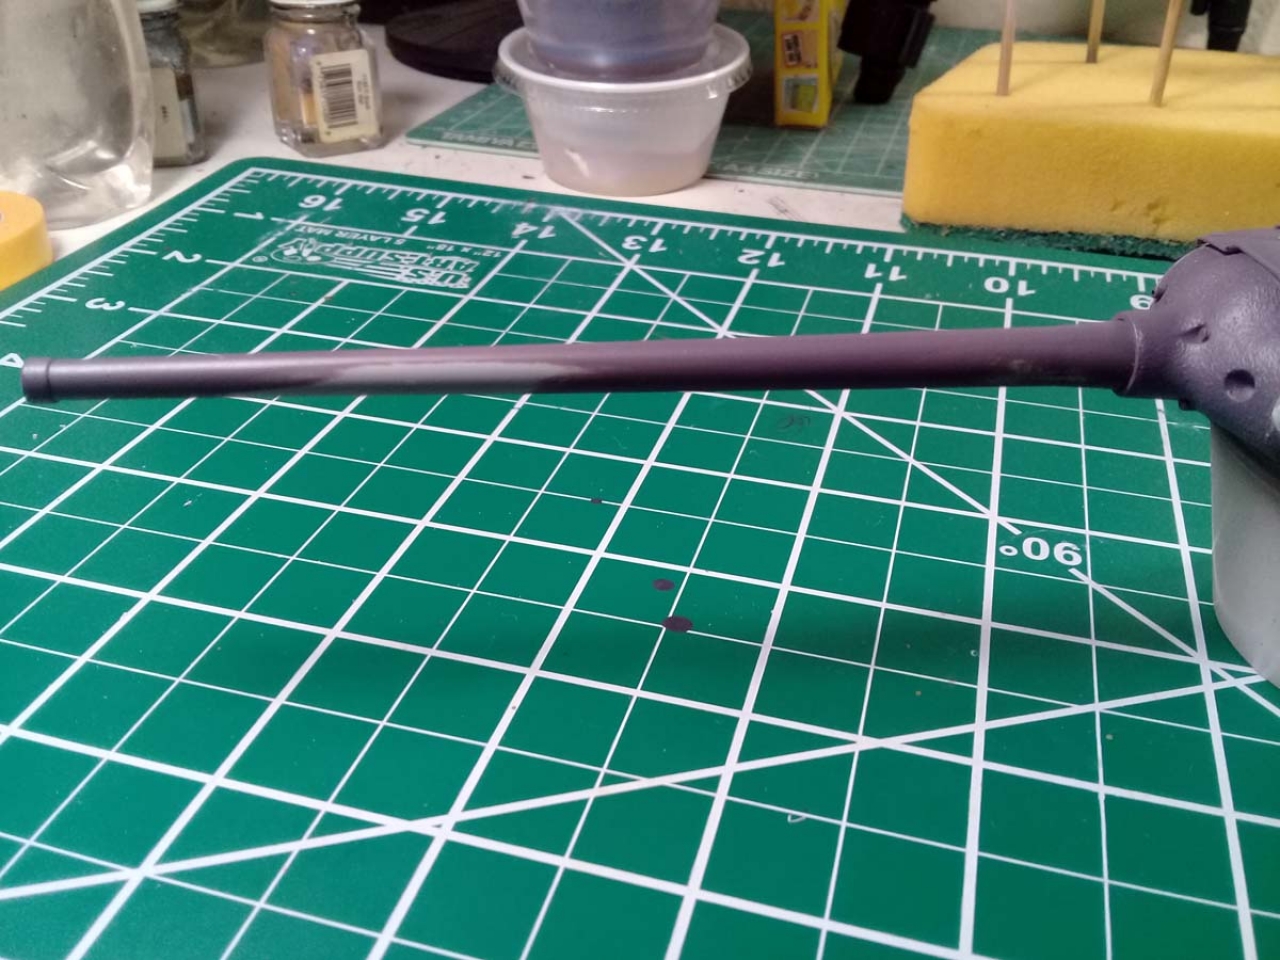
Step 68: the assembly of coaxial MG. The assembly proper is simple enough but the fit with the guns barrel is a bit of a problem because the barrel is intended to be moveable. Anyhow, the only bit visible after completion is the very tip of the barrel which I had to drill it out.
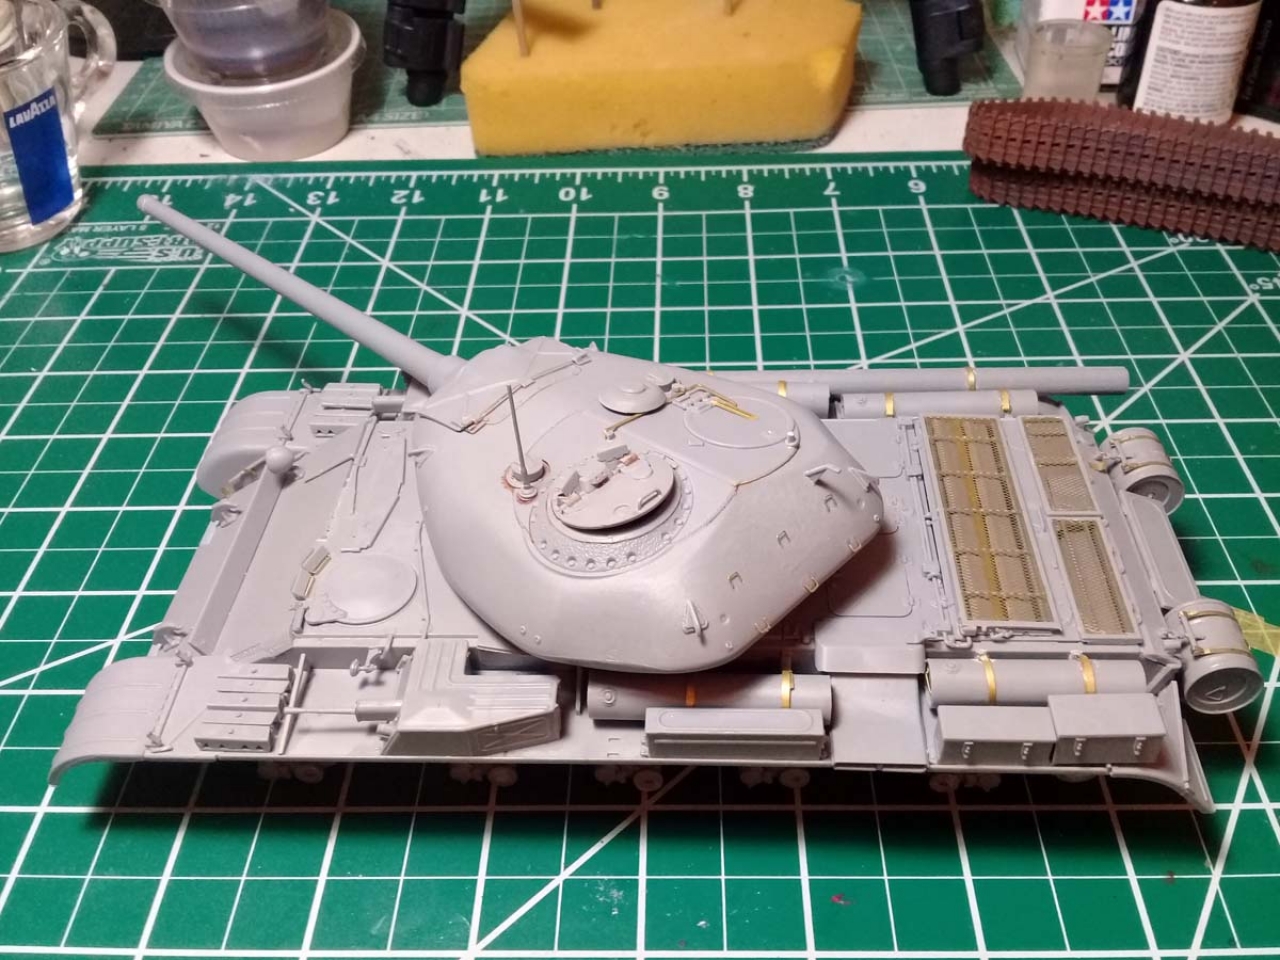
Step 69: completes the turret assembly. Everything fits well, with the exception of the turret halves. In my kit, the upper part protruded slightly over the lower part. That would have been easy fix at the loss of some casting detail if I wouldnt have installed the hand rails! Eventually Ive got it nicely done at some time expense.
Step 70: attaching PE parts to the rear fender support no drama here.
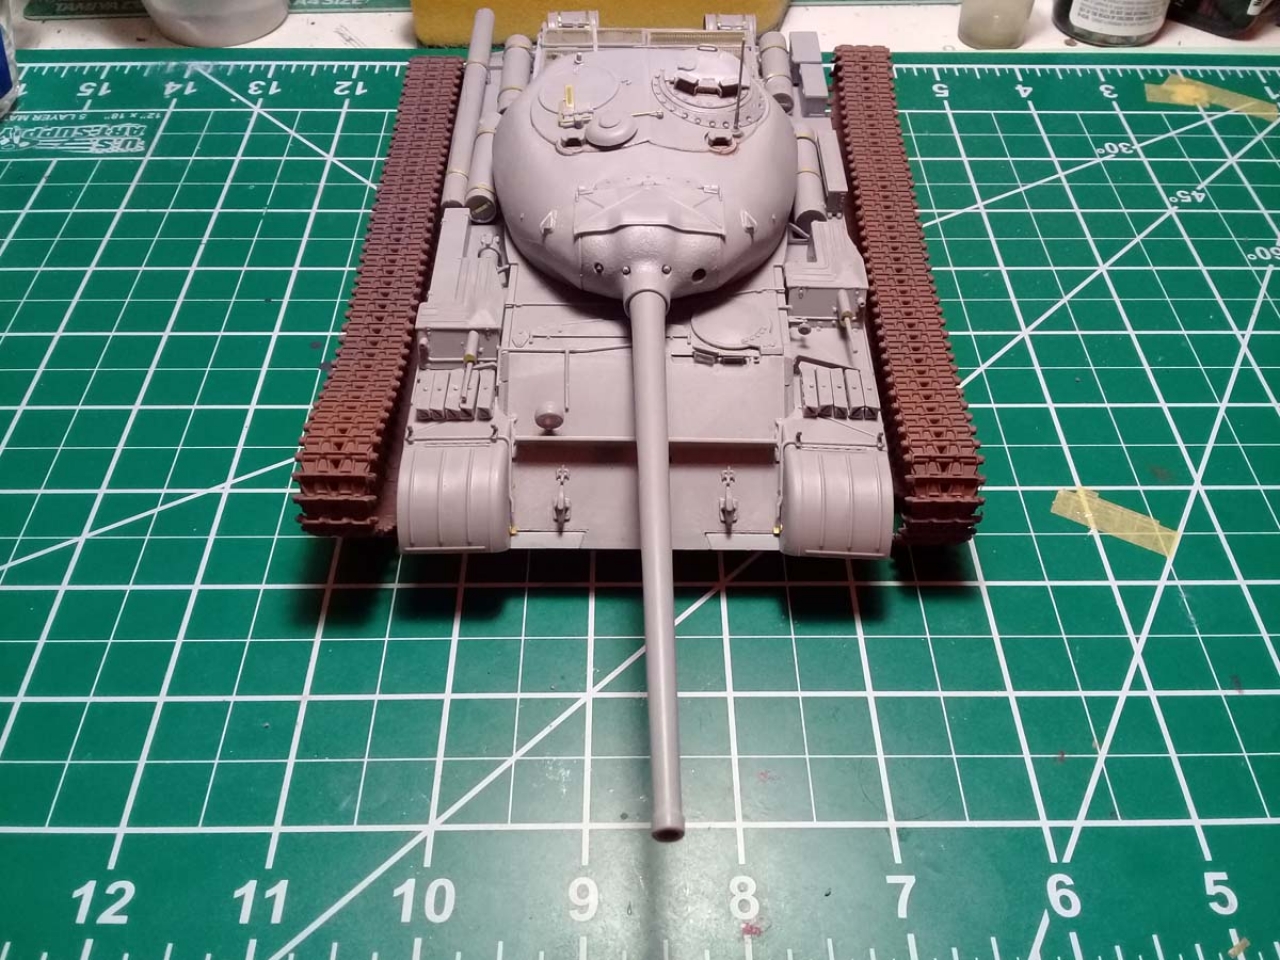
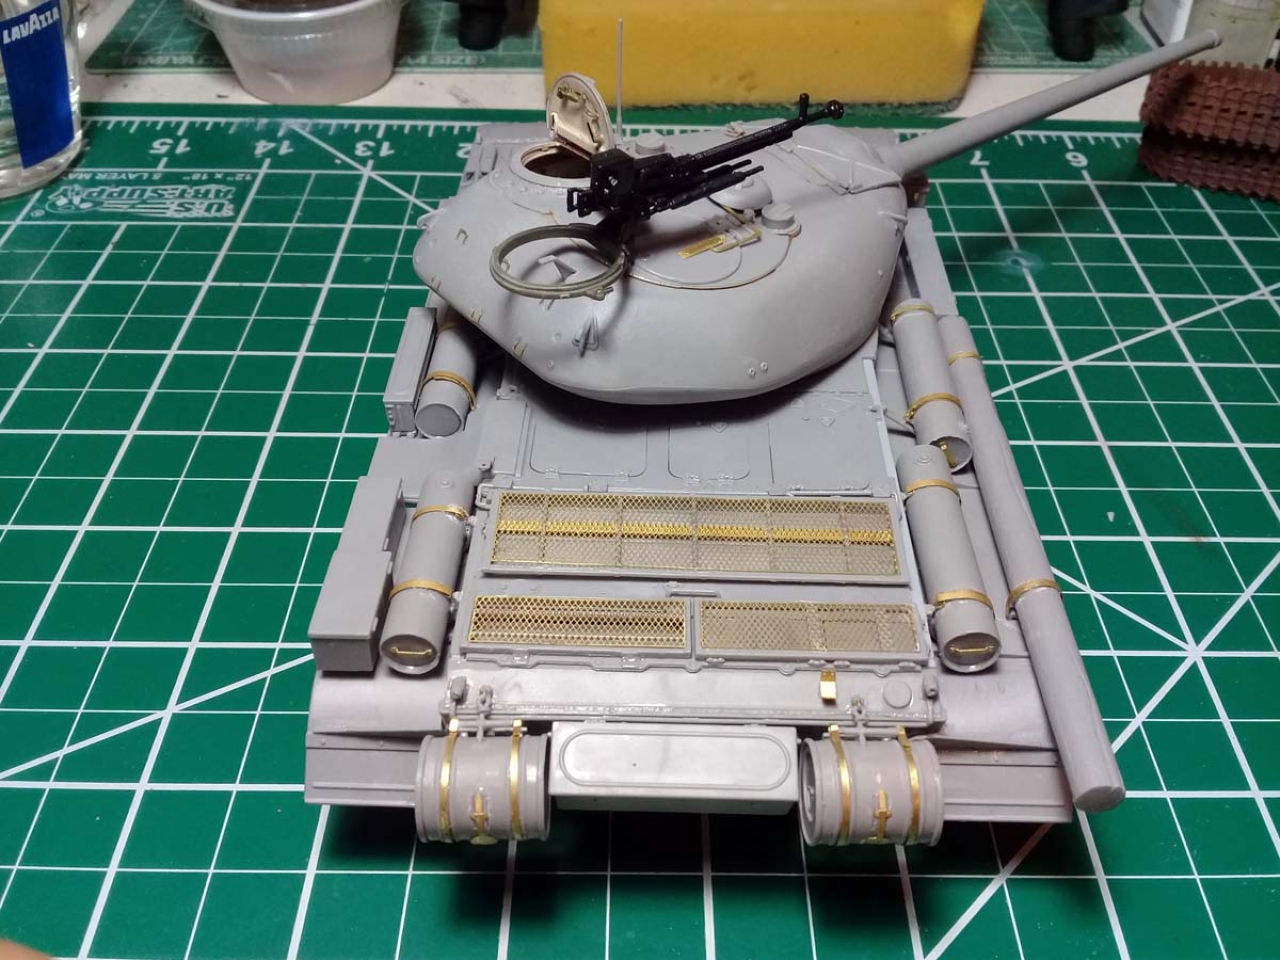
Step 71: final detailing with attaching the turret to the hull, the mantlets skirt and the external stowage at the rear of the turret. I also attached at this step radio antenna and the AA MG.
Conclusions to build
I was not expecting an easy build and it wasnt. On the positive side, the general fit is exceptionally good. On the negative, the sprues are in few occasions poorly designed and a very few parts are impractical. There is a trace of over-engineering in a few sub-assemblies that can be rendered easier at minimal loss or no detail loss. I have no serious complaint about this kit and the worst moments of this build were self-inflicted. The level of detail deserves all the effort and that is what matters at the end.
Painting
Interior painting: the hull
The instructions are calling for painting as early as Step 9 (out of 70) for the lower plate and, the bulkheads, the engine compartments and the hull sides and ends. Although paint as you go is a slow method, its up to my taste, because add diversity to the build. For the hull constructions are called two colors: white and gray blue. I decided to alter the instructions. First, the pure white is too stark and the gray blue I found a little too dark. I mixed my own enamels for this task. I chose enamels because they have good priming capacity and I wanted to paint in one go. Also the plastic cement I use penetrates better the enamel than the acrylics. Besides, I have a plentiful reserve of those and I find them easier to spray than acrylics.
White: I added some matt brown to gloss white for a satin off-white. It proved to be a lucky strike, at least to my taste.
Gray blue: I mixed it considerably lighter shade than the one recommended. I knew none of that is to be seen and I wanted to make it as light as possible in anticipation of open hatches. I mixed matt back with gloss light blue and gloss white for a satin finish. I diluted both colors with regular paint thinner and applied with a .2mm airbrush at low pressure. Everything went smoothly as anticipated. I decided to skip the painting of the hull interior detail for being a waste of time. From the same reason I did not apply any weathering.
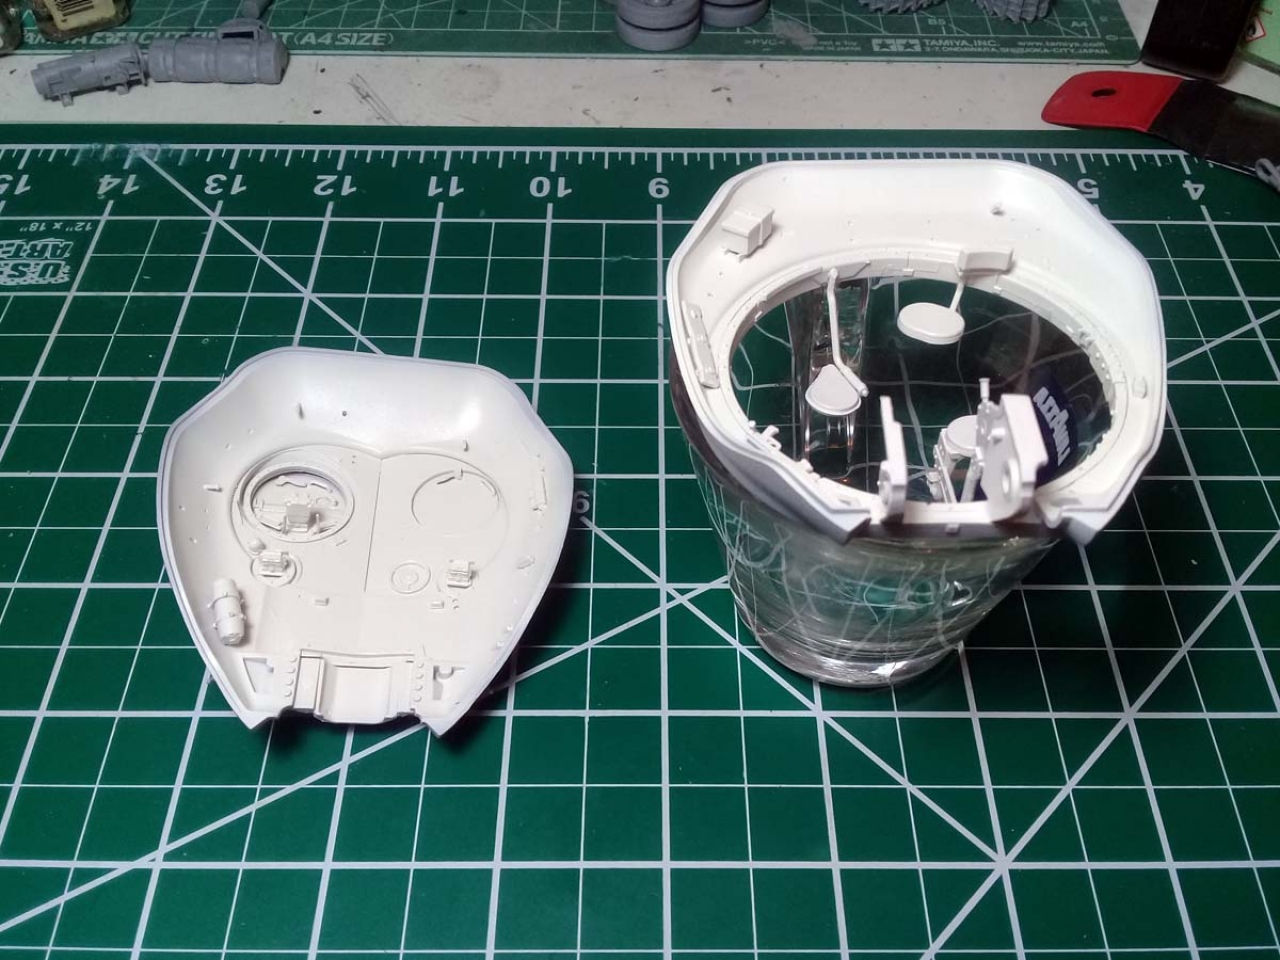
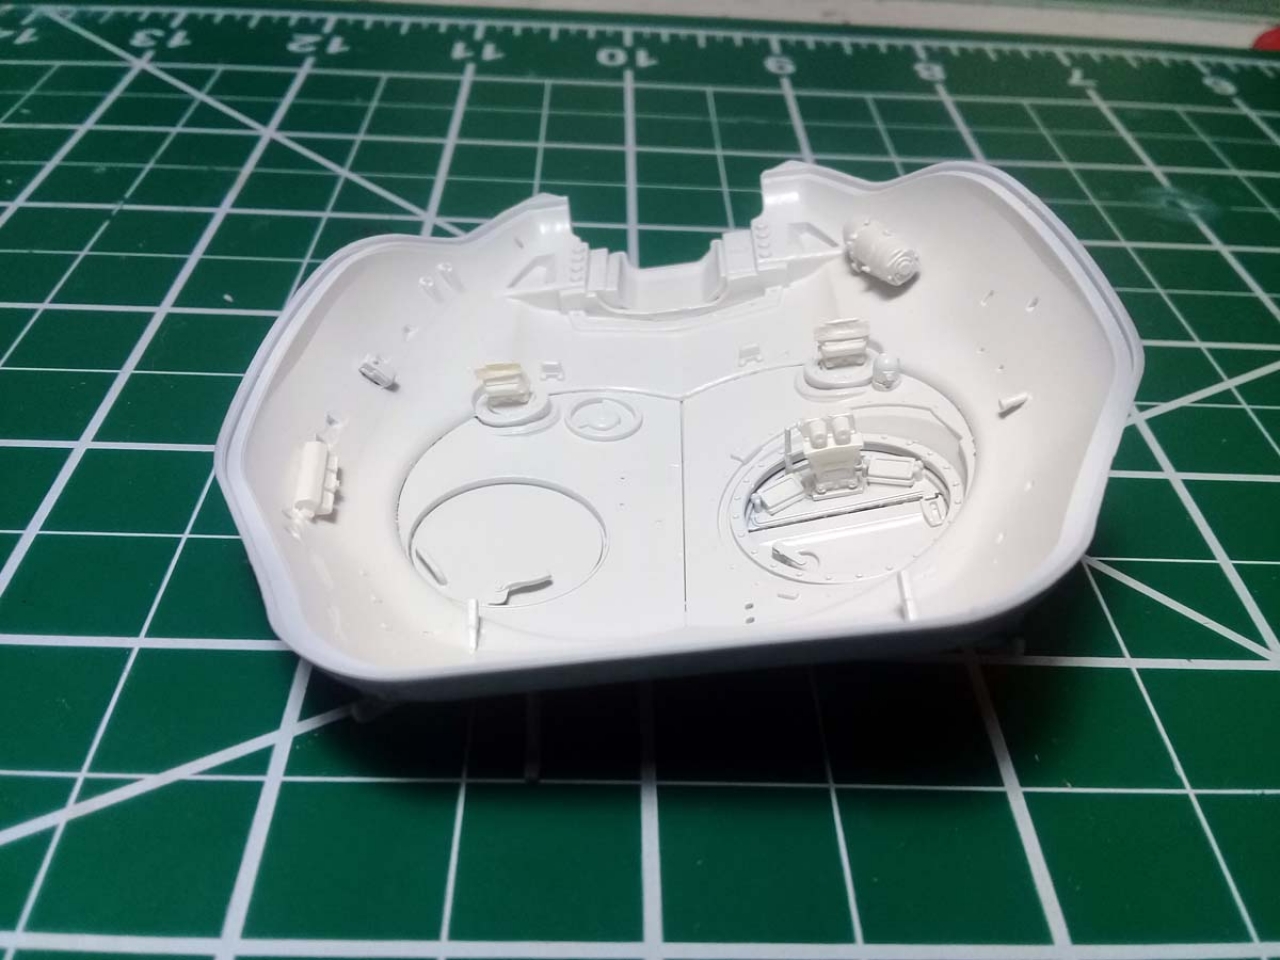
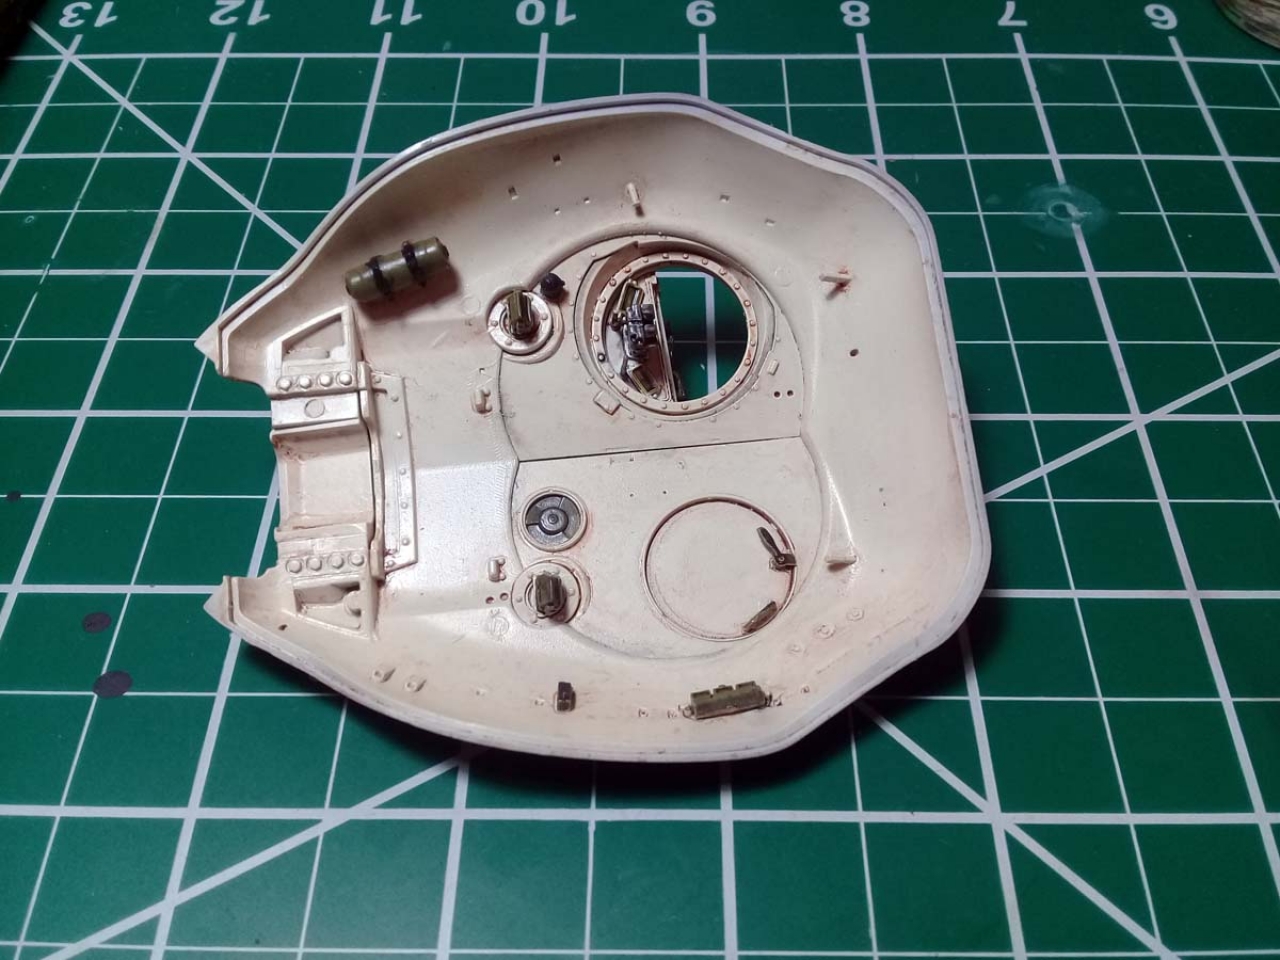
Interior Painting: the turret
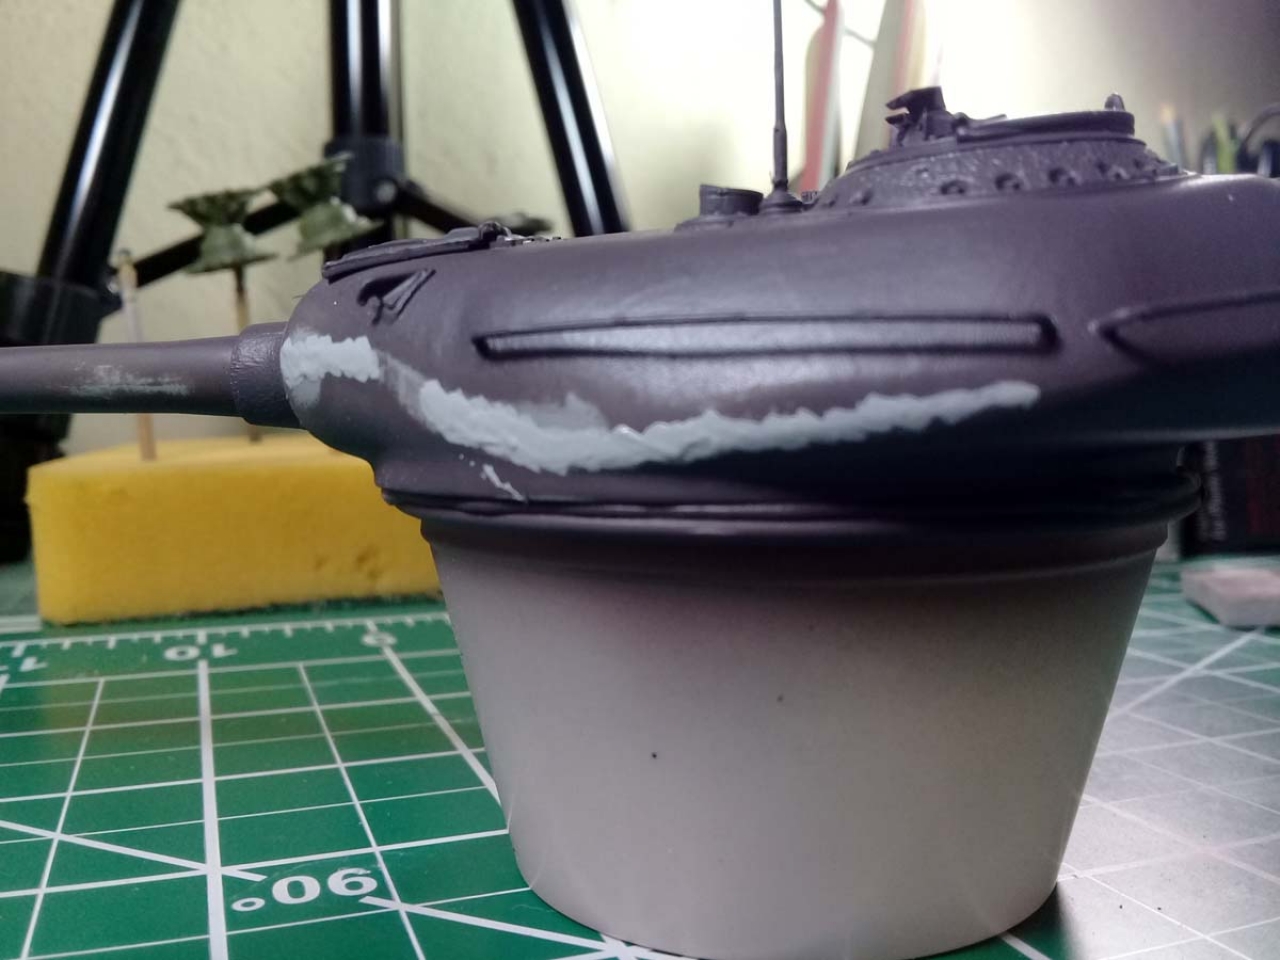
For the turret interior I used the same off-white enamel mix which I sprayed after I assembled the two halves of the turret. Prior to painting I masked the periscopes visor blocks with thin strips of Tamiya tape. For silver parts I used also enamel from Testors range. For other details I used craft acrylics diluted with IPA and applied with a brush. For gunmetal I mixed acrylic silver with gloss black. Because the turret interior was to be partially visible, I applied an oil wash obtained from transparent brown and odorless turpentine, applied with a soft brush.
Exterior Painting
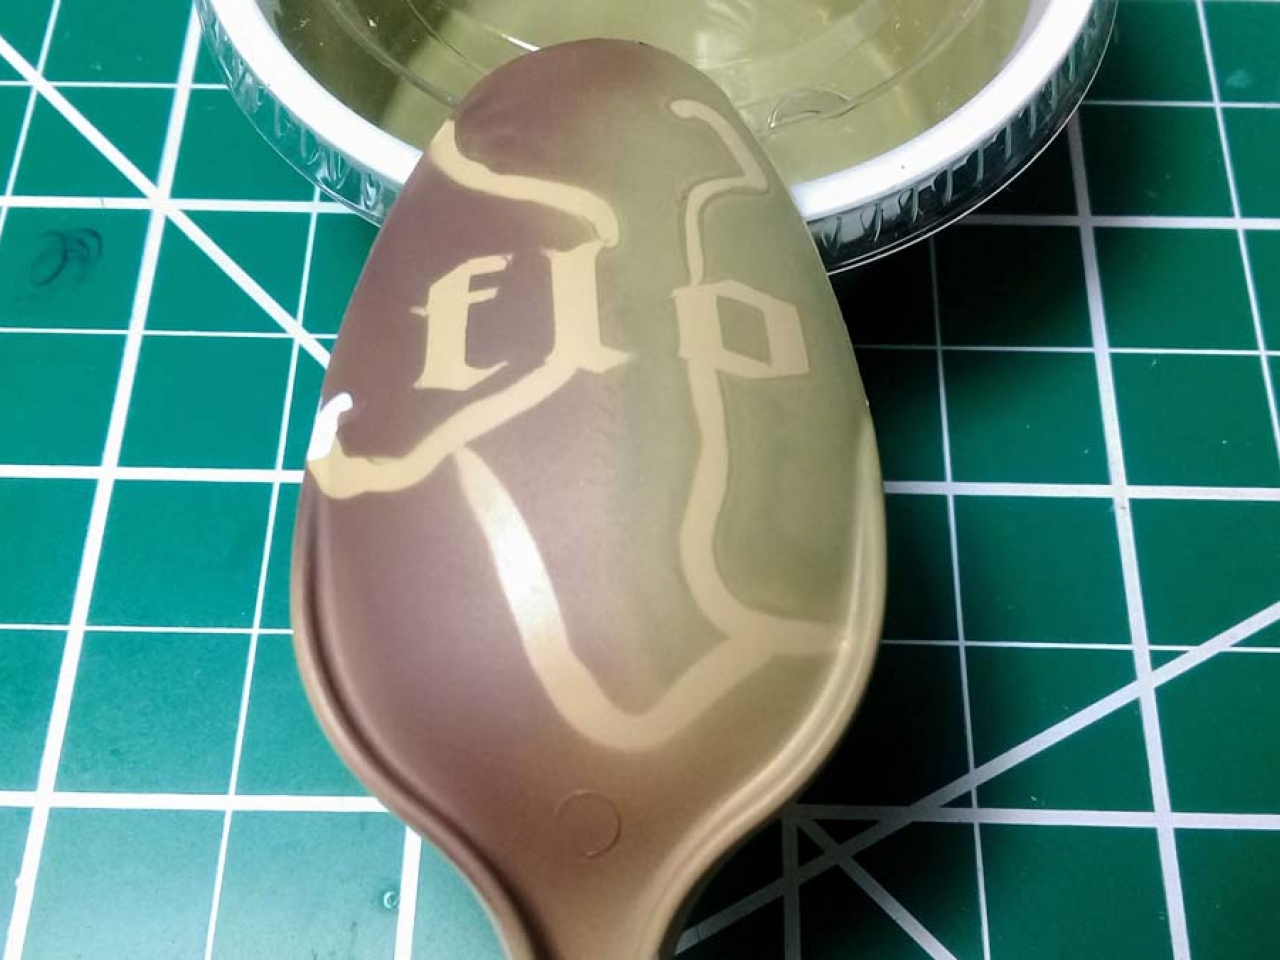
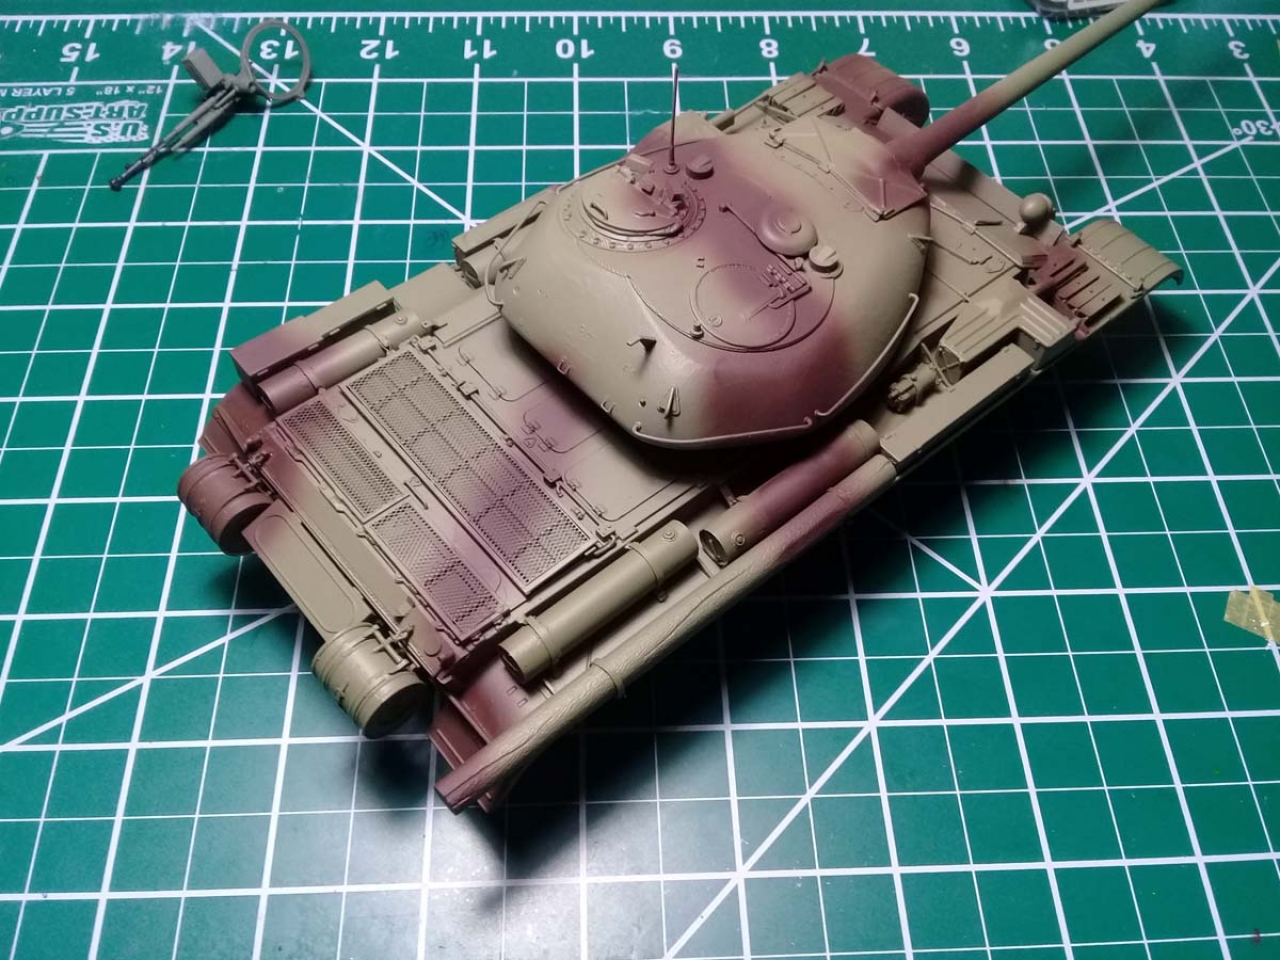
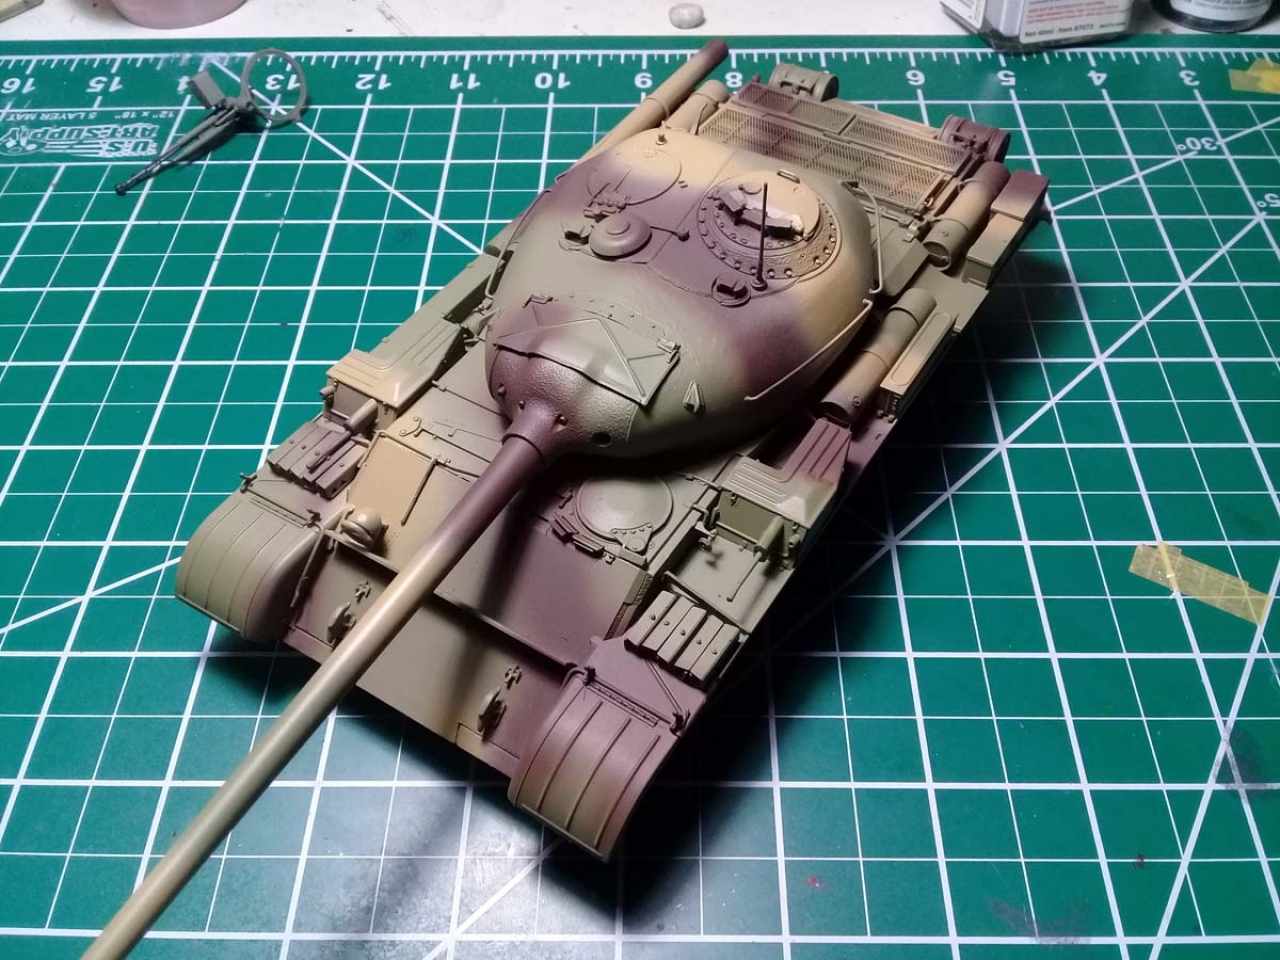
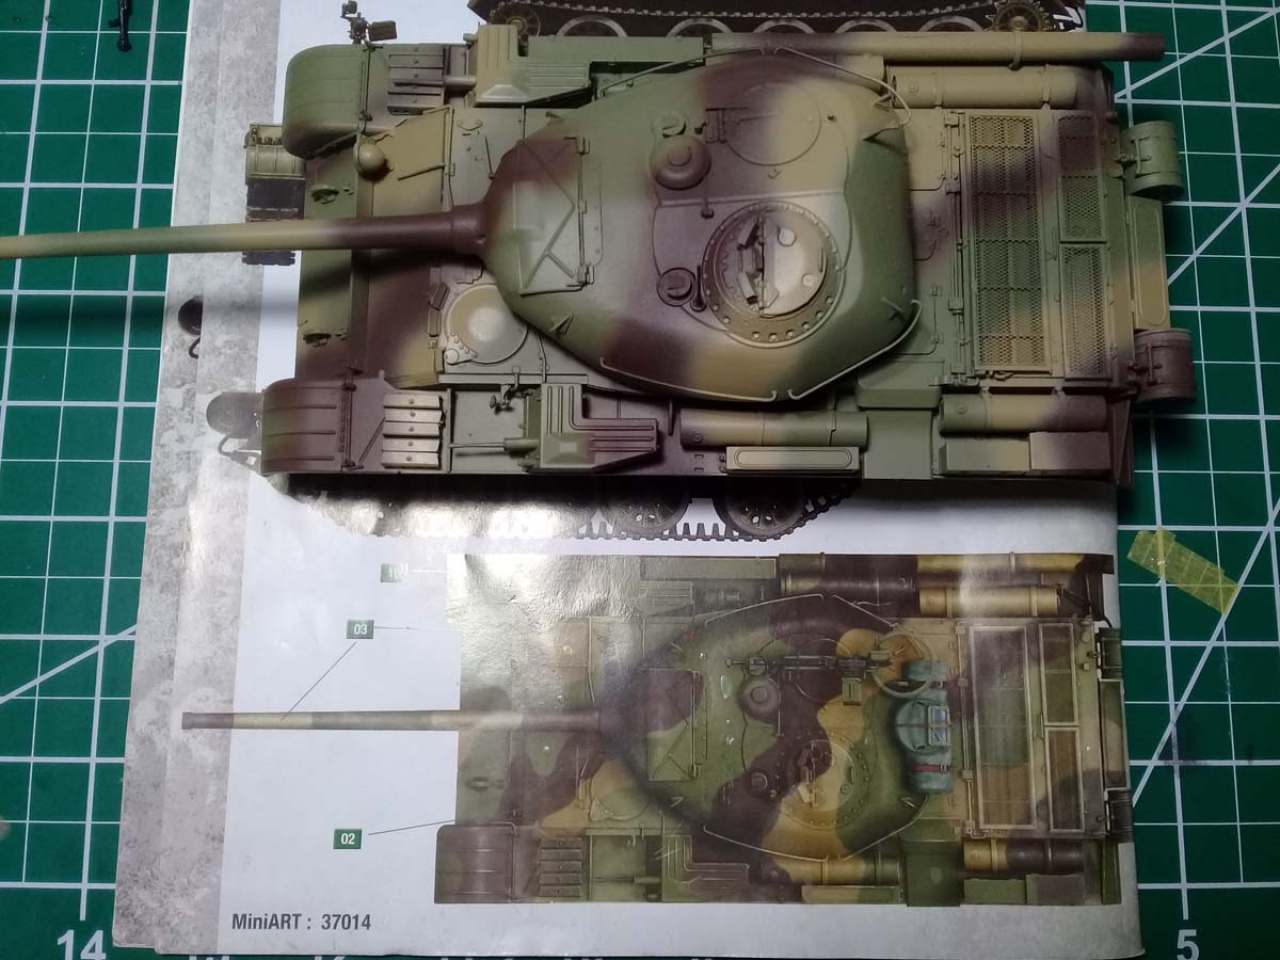
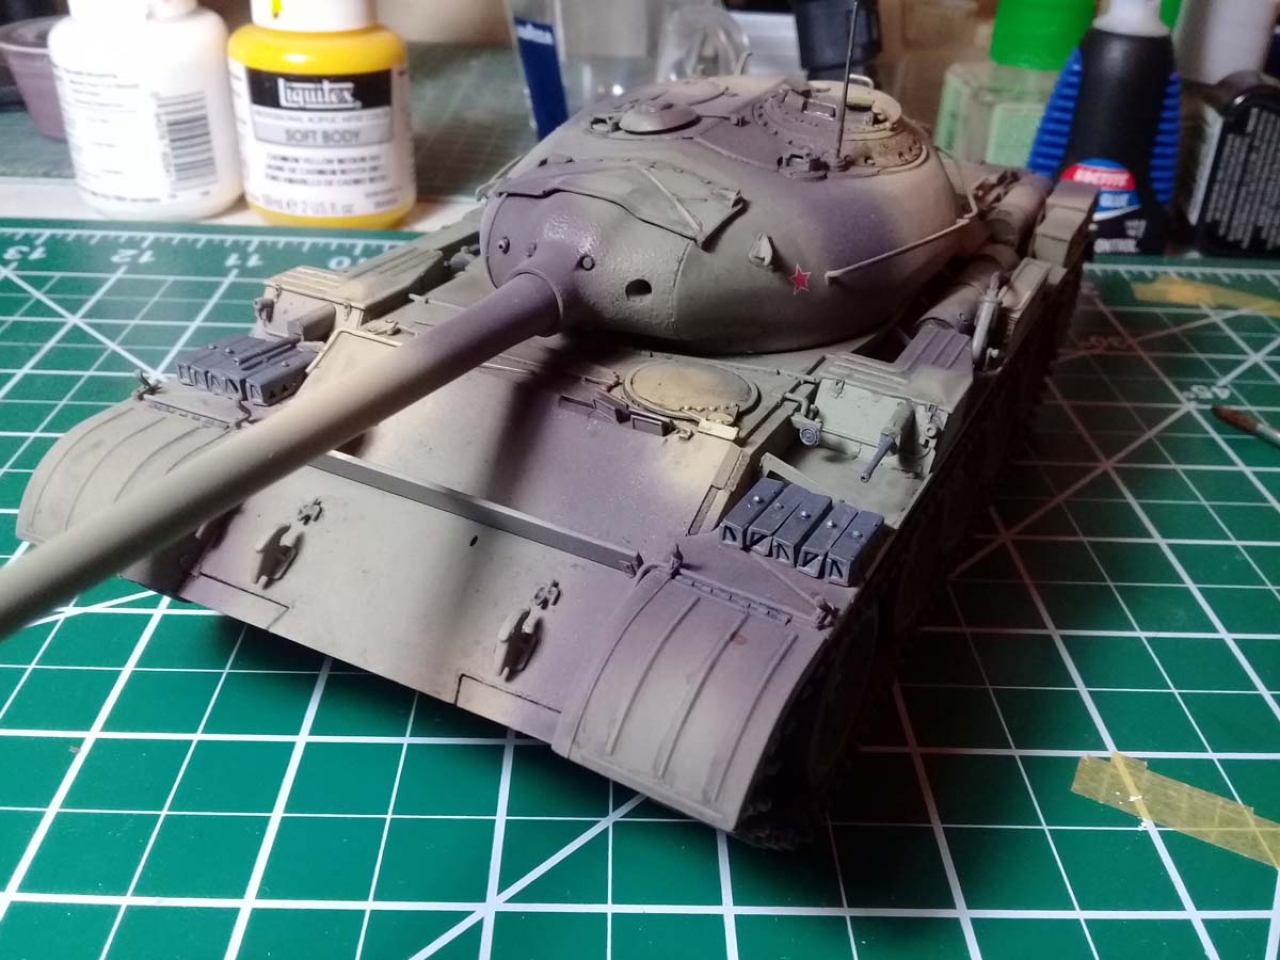
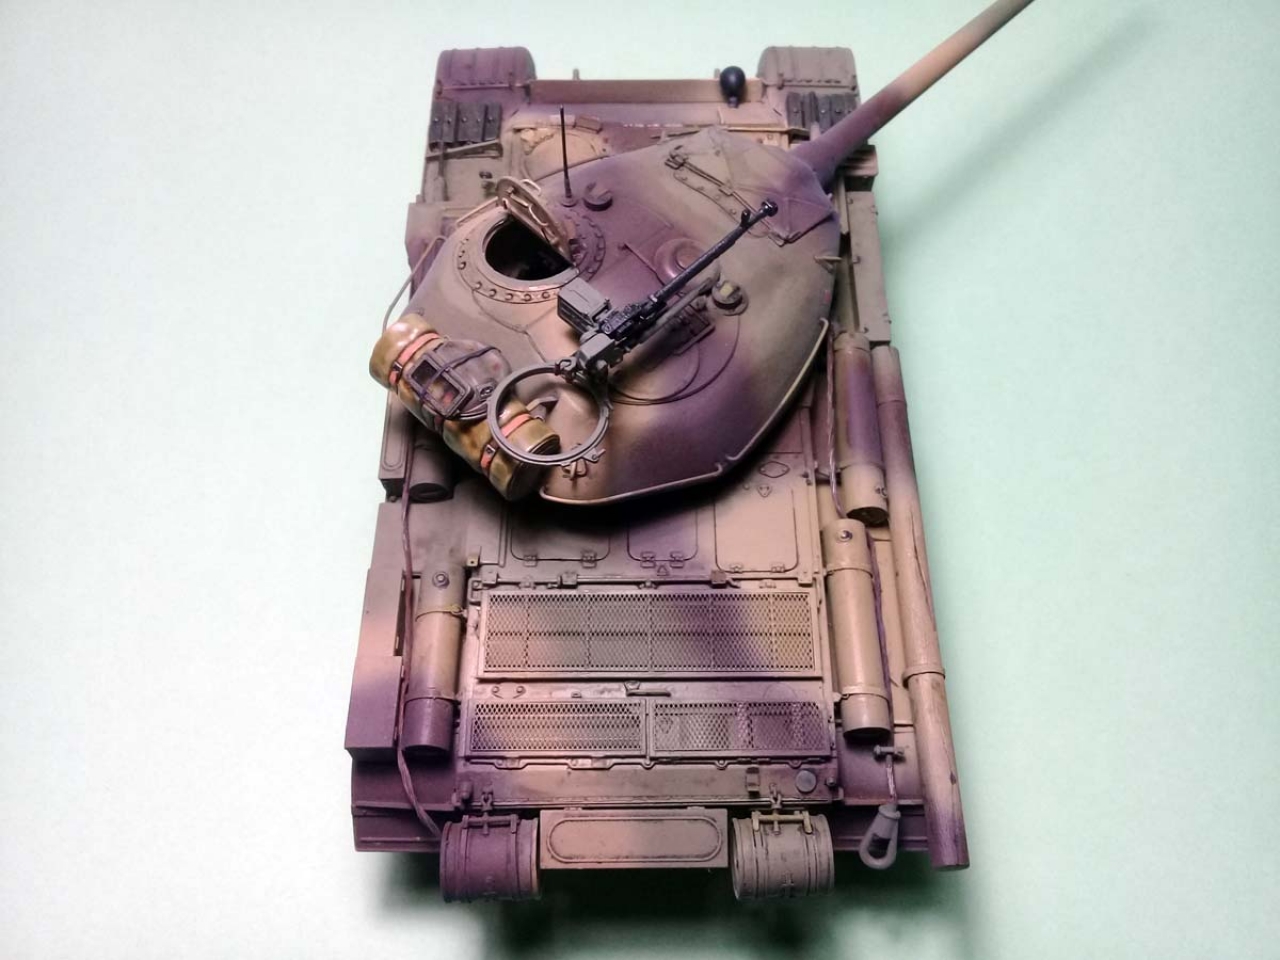
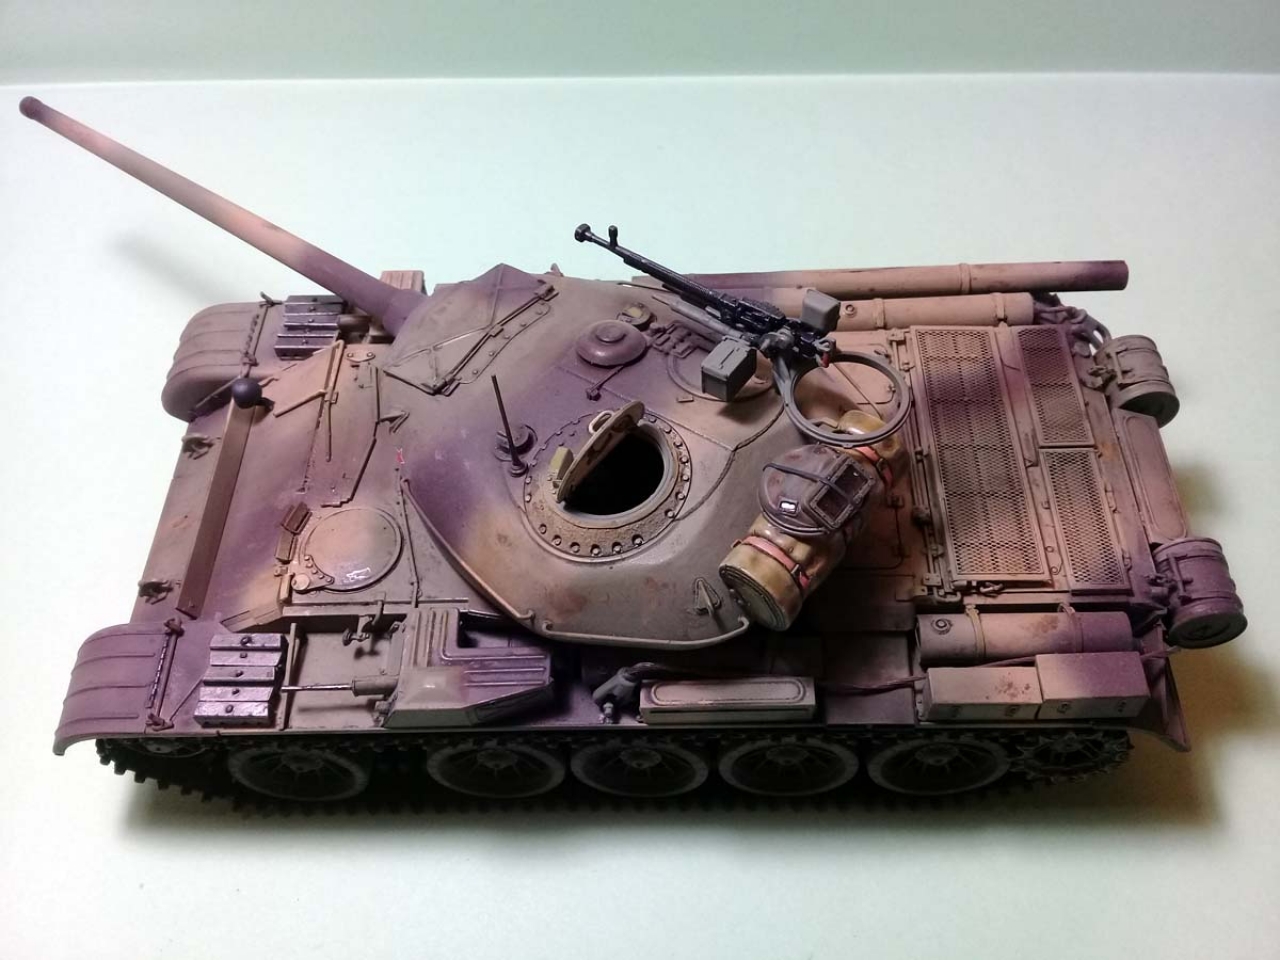
I started this build knowing already that Im going to paint it on three toned summer camouflage scheme, so I mixed my colors early to have time to test them. I had no other reference than the color rendition from the second page of the instructions manual. The color description didnt help too much (Russian Green 4BO, Dark Brown 6K and Dark Yellow 7k being all controversial and elusive colors). I also liked the color rendition and decided to come as close as possible to it.
At close inspection, I noticed that the rendering use a brown scale instead of a grayscale. That made things a little more difficult, but not impossible. I used a mix of Liquitex soft body acrylics diluted with IPA 50%.
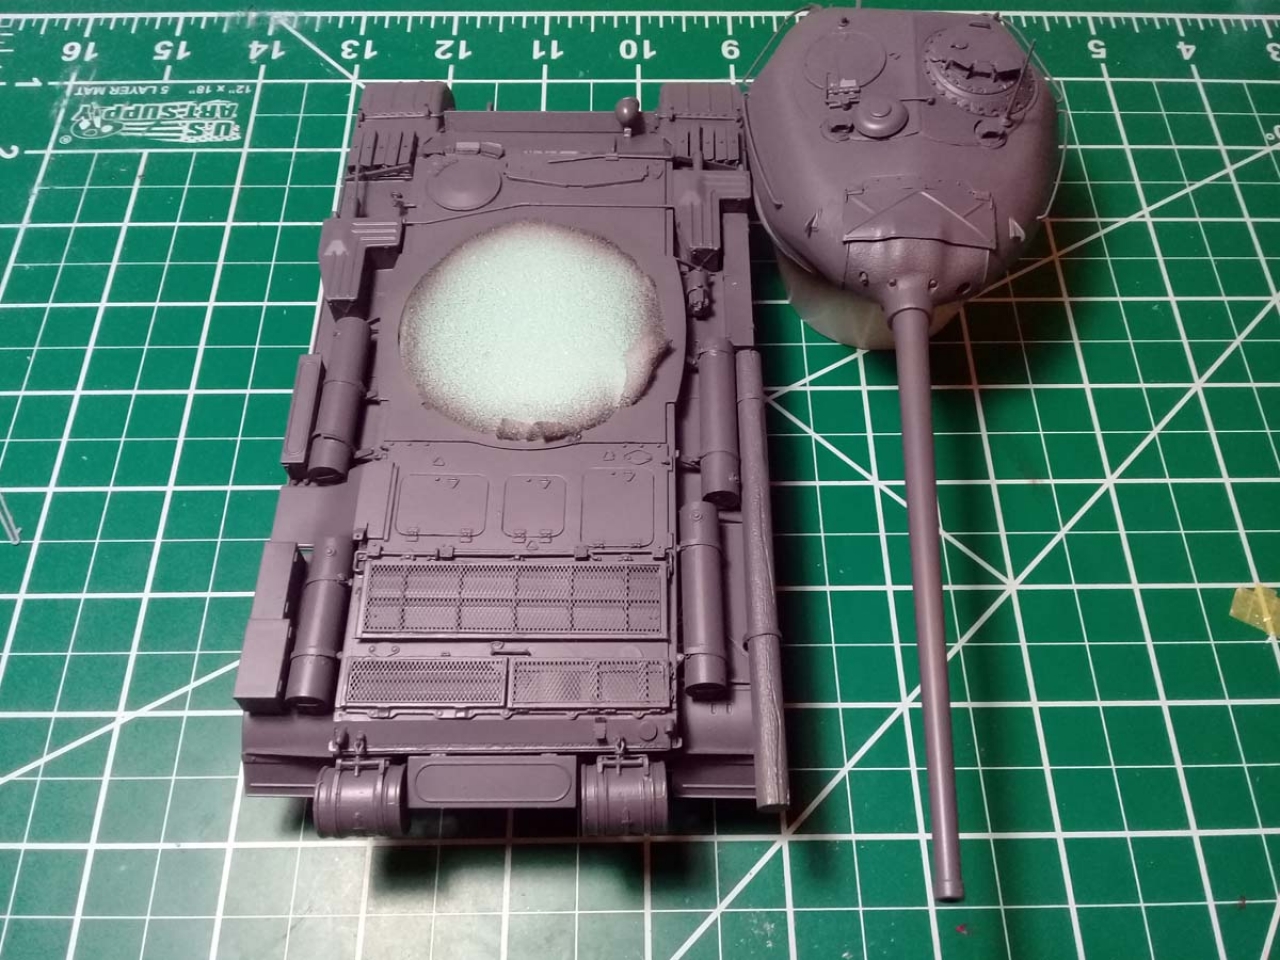
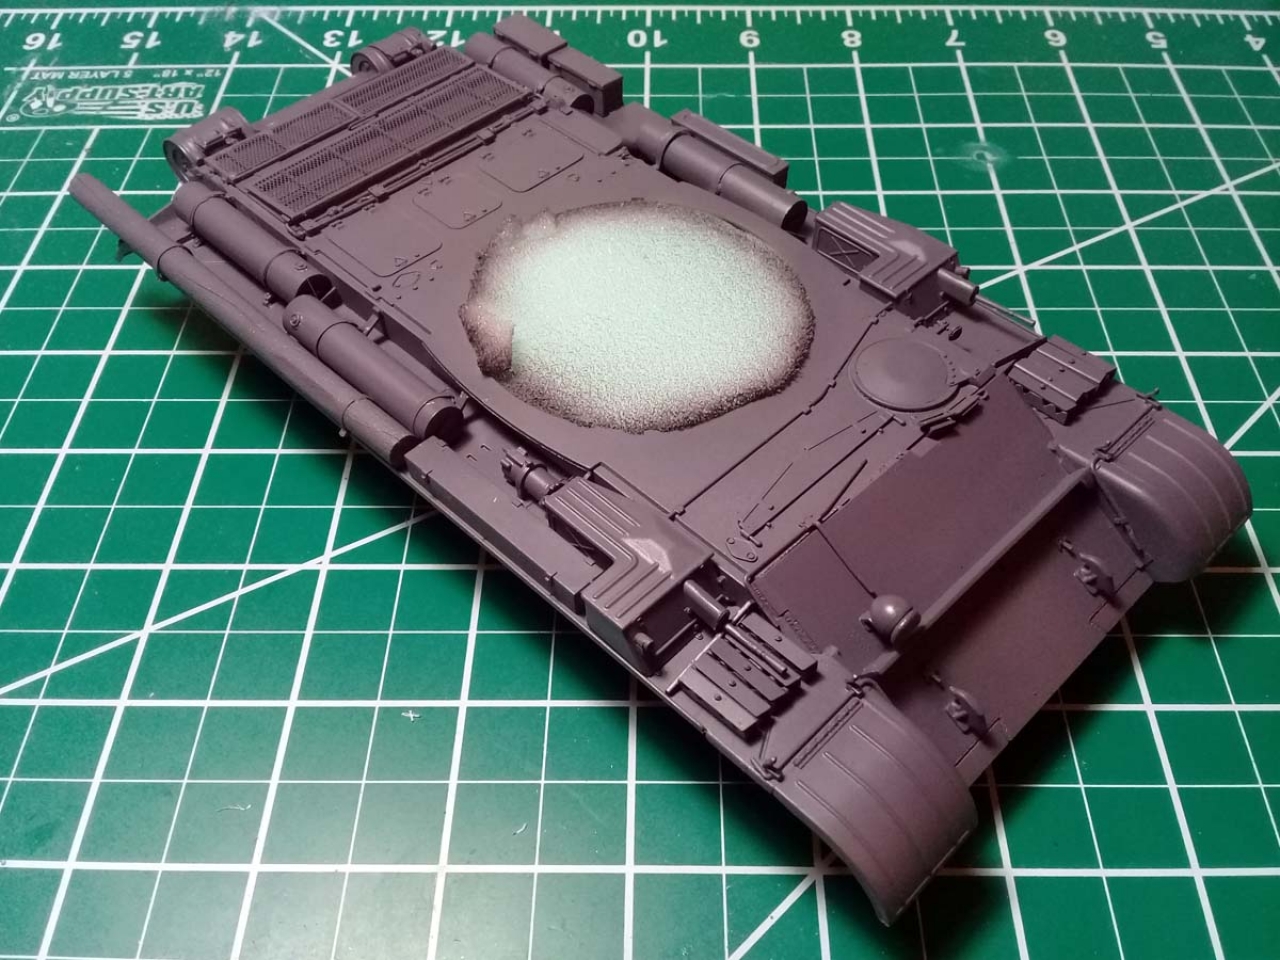
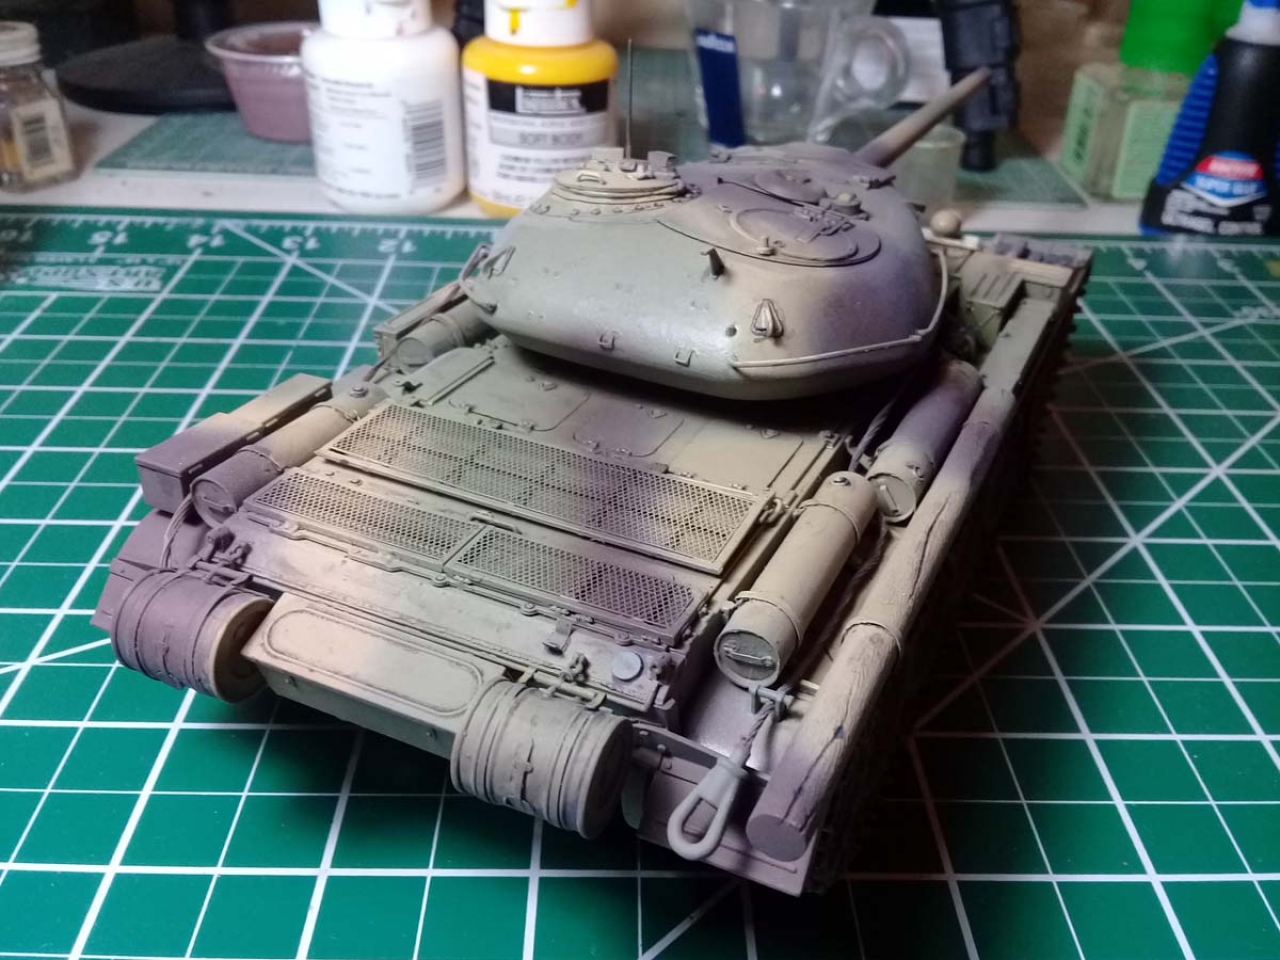
For primer I chose one of my old enamel bottles with an indefinite off black which I pompously called burgundy black but in fact was an aborted tentative to mix plum color. The paint itself was unspeakable ugly, but had the three qualities I needed: it was dark for pre-shading, it was easy to sand if needed and had a satin finish to give good adherence to acrylics.
The priming went without fuss, and I moved fast to painting.
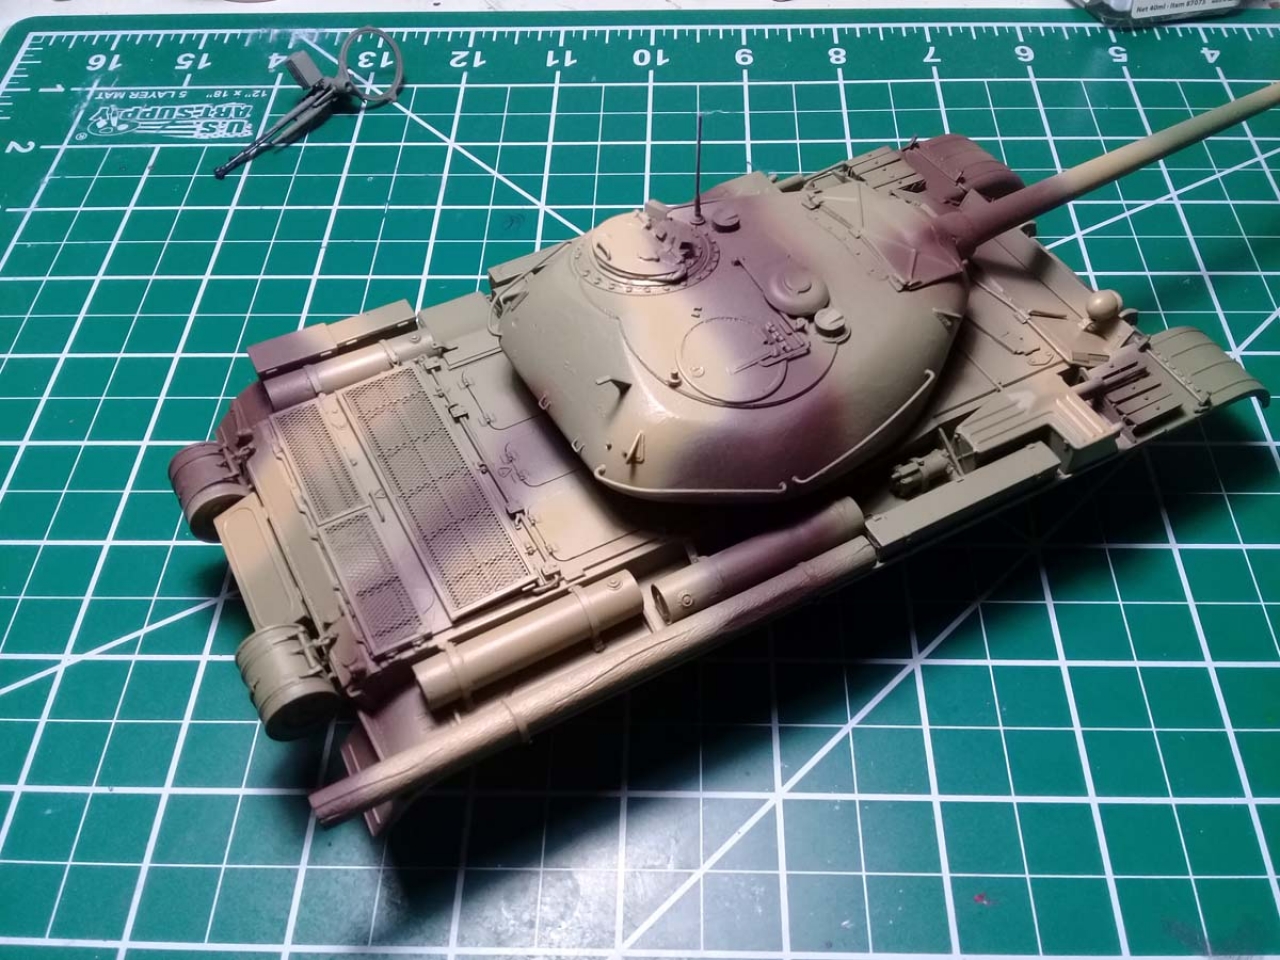
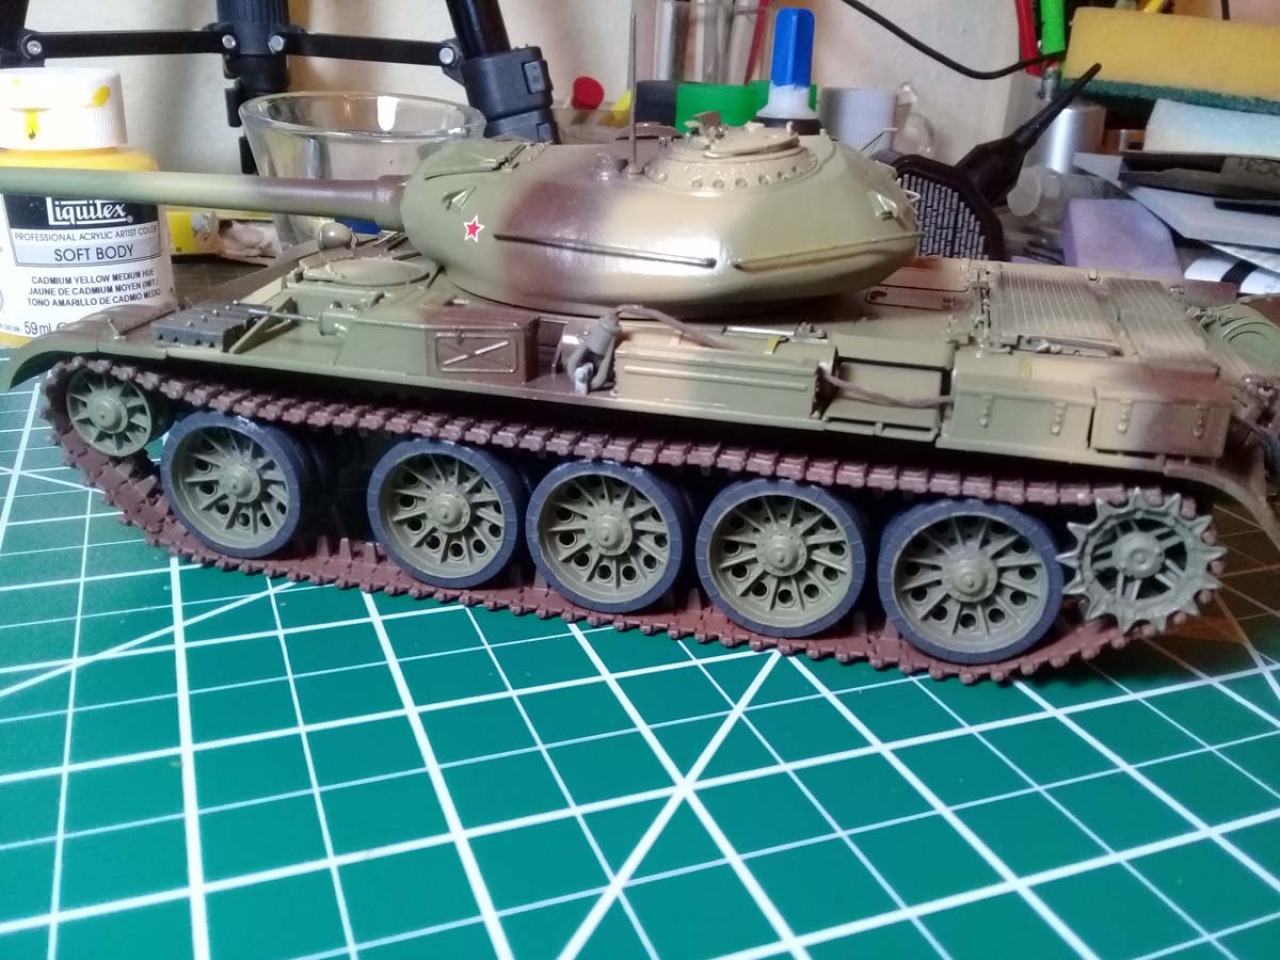
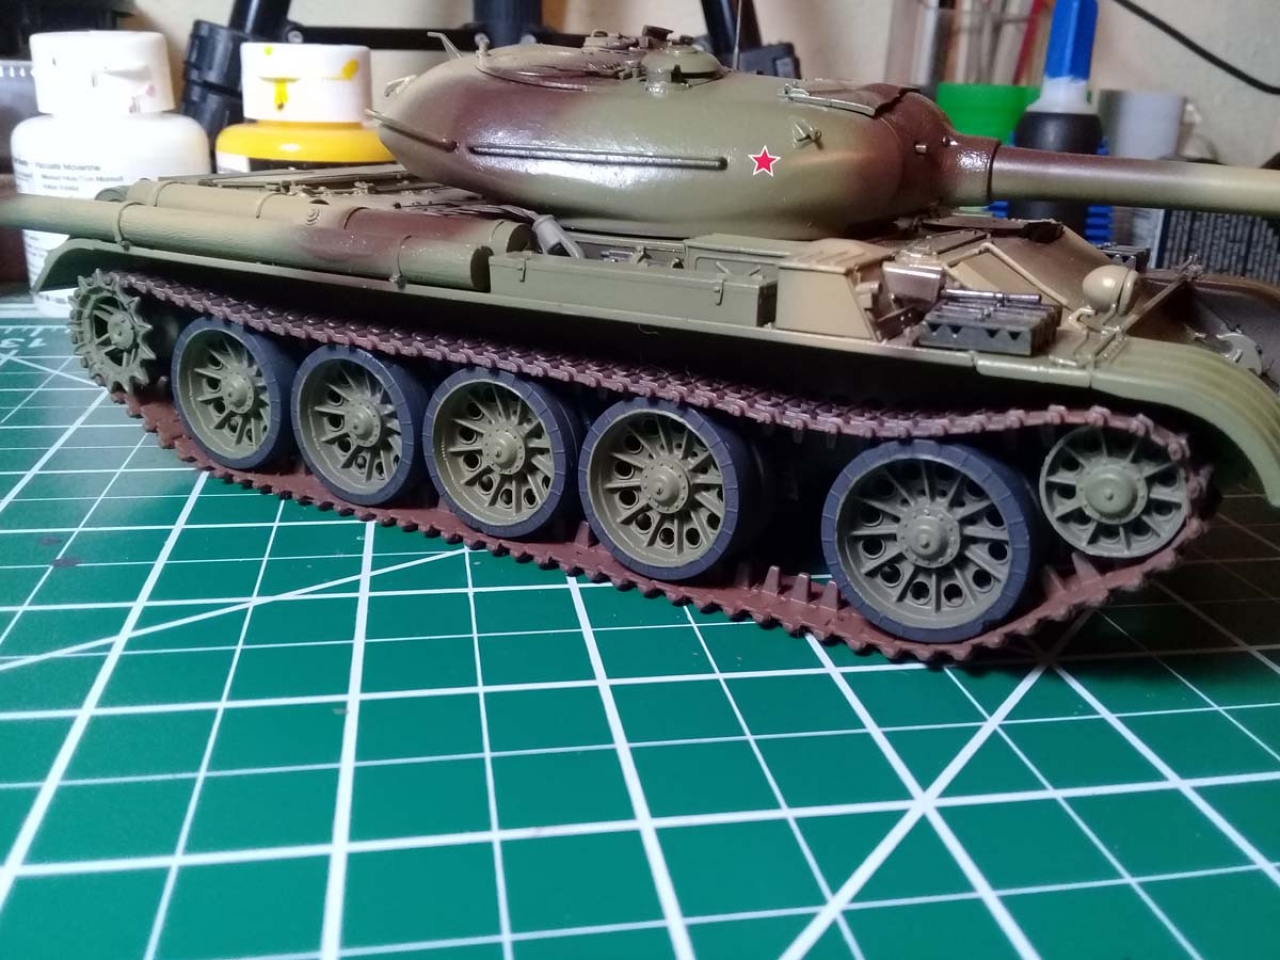
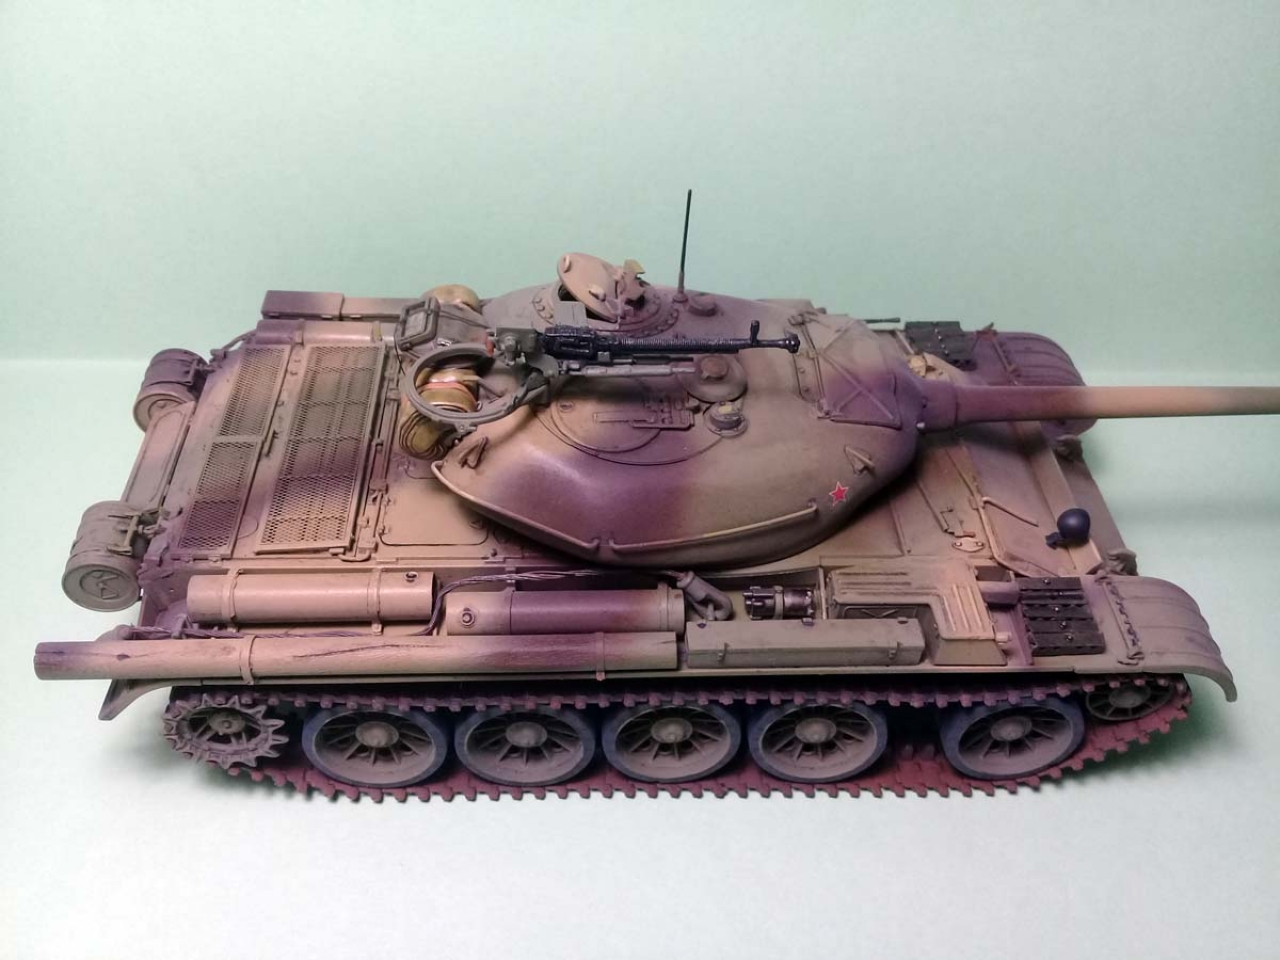
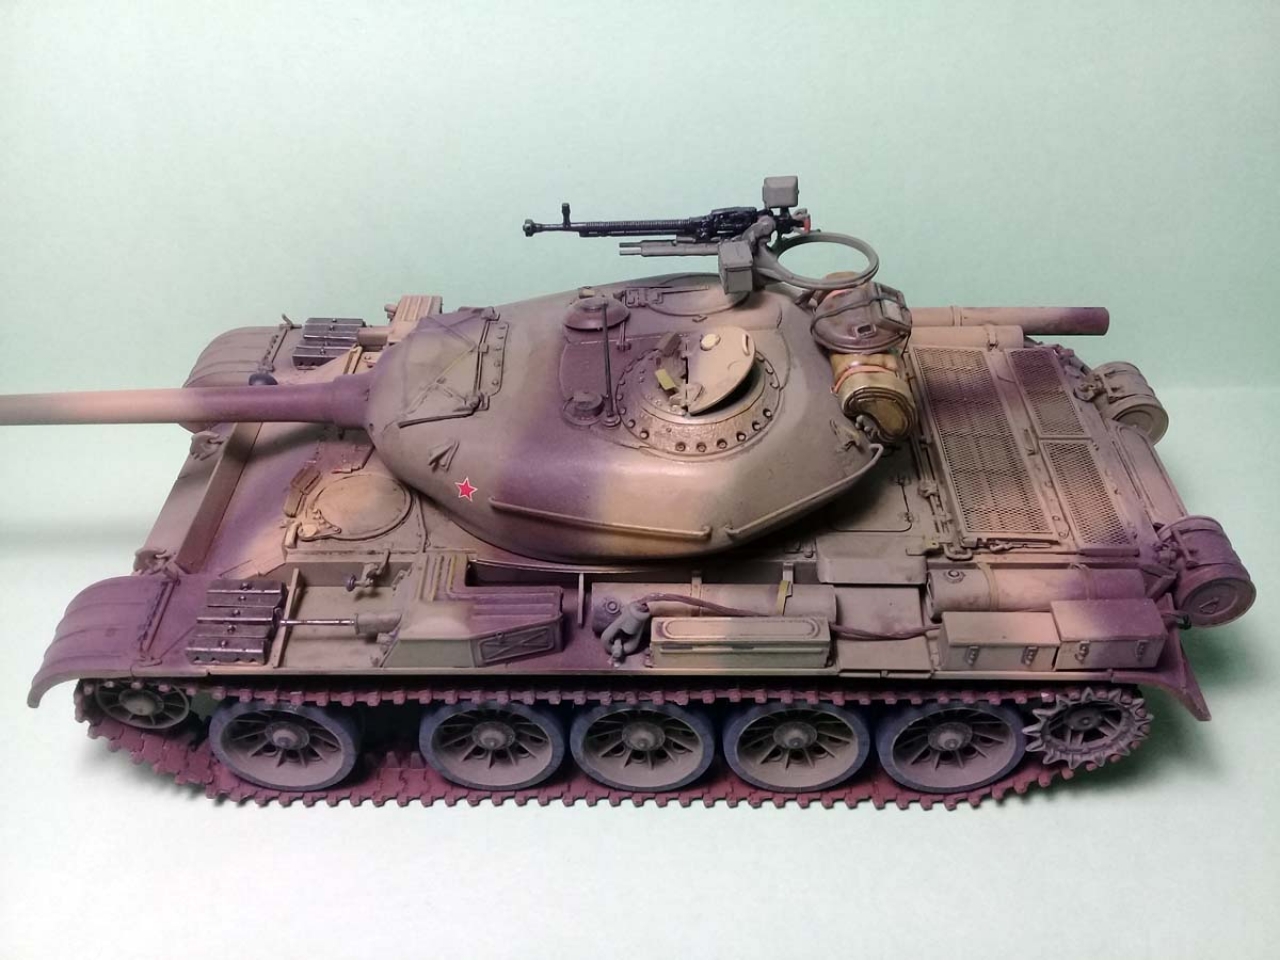
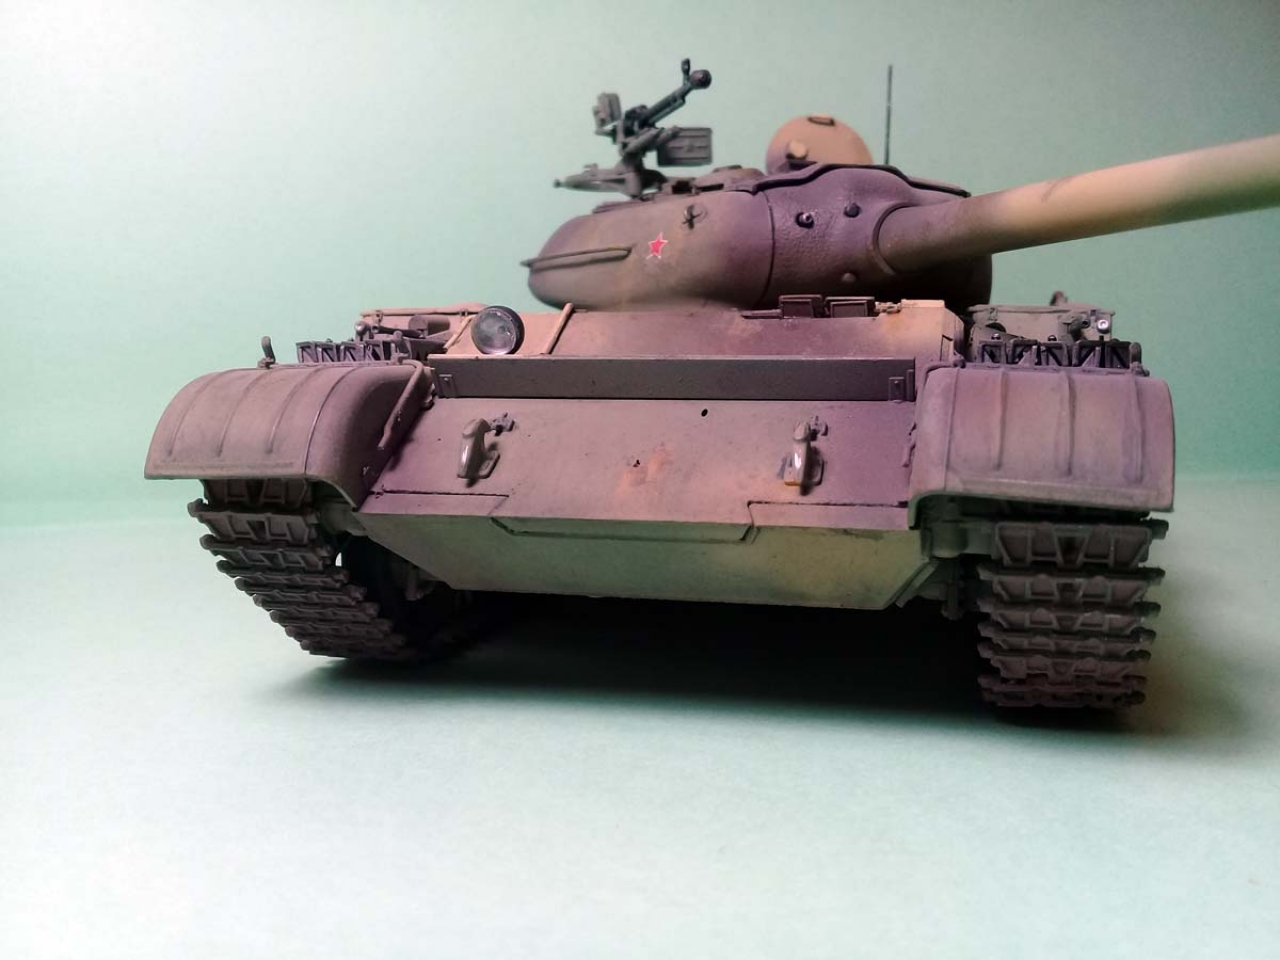
I tried first the Russian green on the bottom of the tank and, happy with the result, I covered everything with it, as it was probably the case in reality. I chose to spray brown next, because I sprayed free-hand and the brown patches looked easier to follow. Finally I applied the dark yellow and the touch-ups. I didnt managed a perfect copy of the pattern but satisfyingly close. Being a conjectural camo scheme, the small differences dont bother me at all.
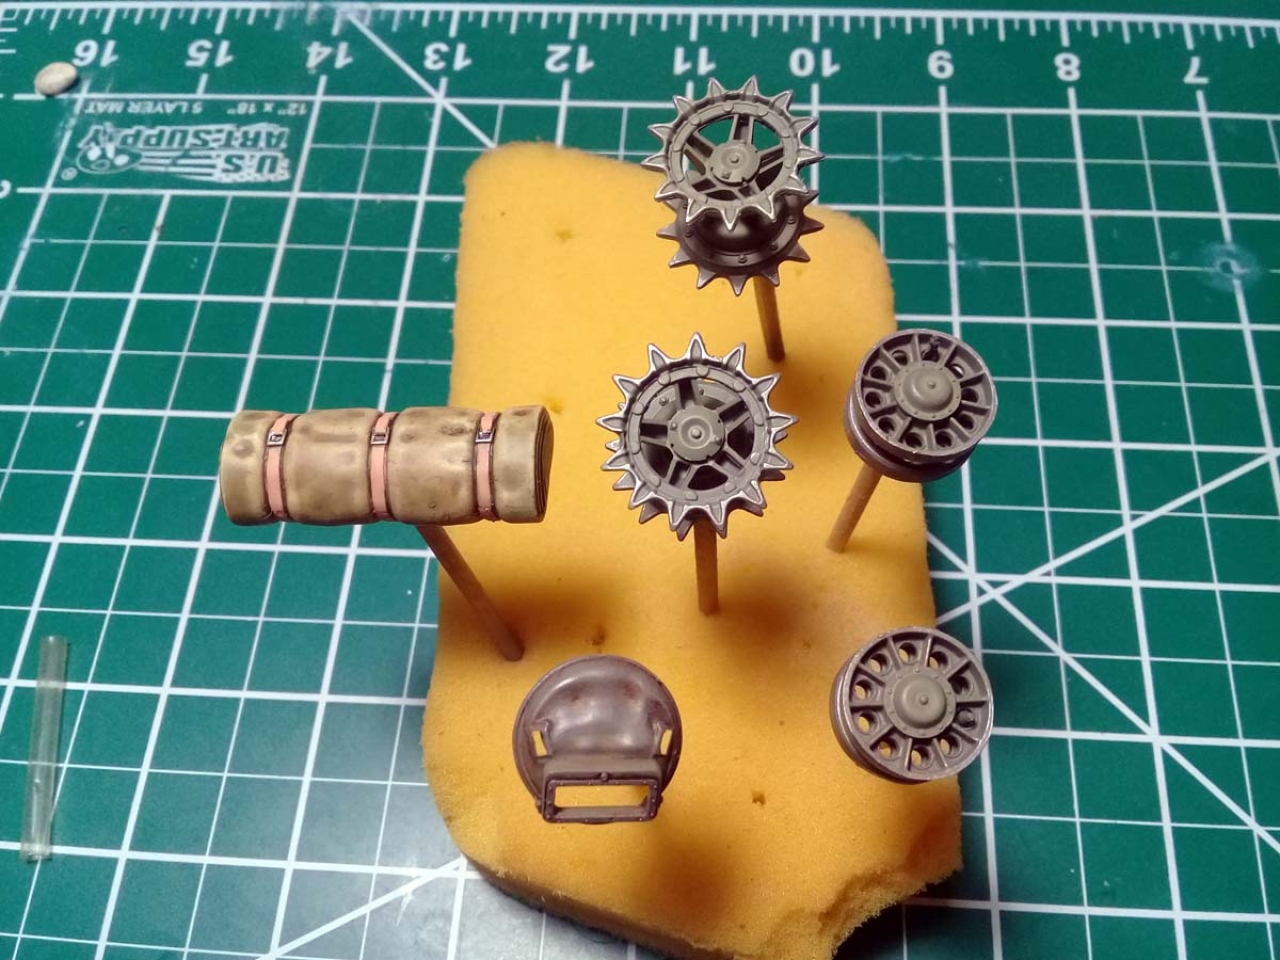
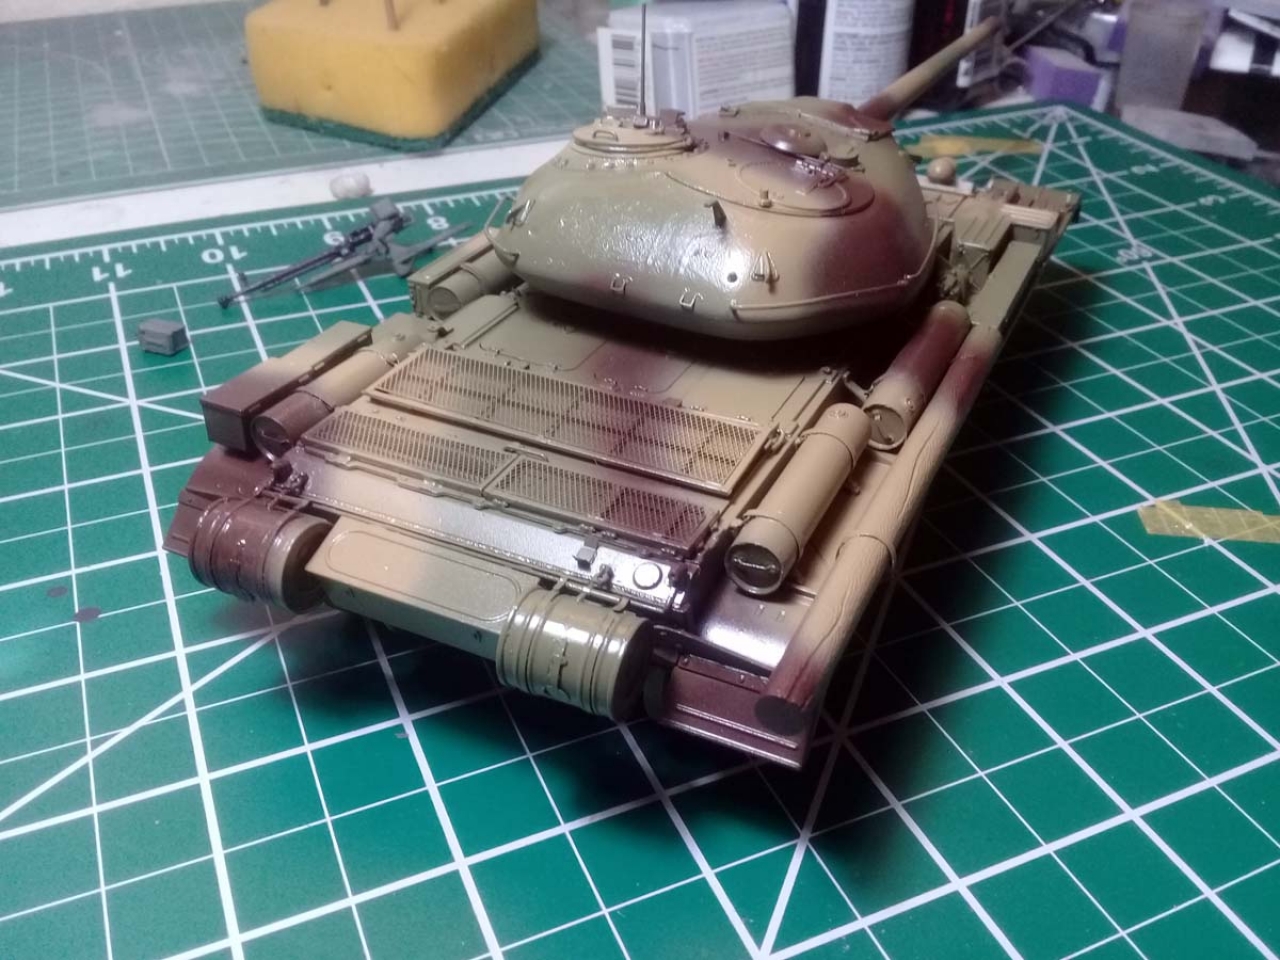
Separately, I primed and sprayed the wheels, tracks and all the other small parts that needed to be painted individually.
The tracks and towing cables were painted with rust after priming. I brewed two shades of reddish brown for this task to add some modulation. After painting, I dry-brush them with silver acrylic. I prefer to use acrylic silver for this task, because its shine is more muted than the enamels provide and I like it that way.
For detailing I used mostly craft acrylics or enamels for metallic colors. Some details were painted on the model (search lights, antenna, hydraulic jack etc.), others separately and added on later (tarpaulin, AA MG, towing cables).
Finally I sealed everything with a coat of Pledge in anticipation of decals and oil washes.
Decals
Decal application was all too easy and took me less than five minutes to stick one tiny red star on each side of the turret.
Weathering
After the decals were on place, I took the (wrong) decision to apply one more coat of Pledge. That in fact rejected my subsequent oil wash. I mixed my wash from Van Dyck Brown oil color and odorless turpentine, not too dark. I applied first on the lower hull where worked like a charm. On the upper surfaces, where I had two coats of Pledge, I had to work it in with my brush. I wasnt entirely happy with the result and I applied a few more accents with Tamiya panel liner black.
Further on I applied Vallejo clear matt. I also mixed a drop of brown with the clear matt at the end and I sent a few airbrush bursts aimed to the lower hull and running gear, for some dirt effect.
After the matt coat was dry, I brushed Pledge over the details that supposed to remain shiny: MG barrels, ice cleats, hydraulic jack etc.
With a HB pencil I applied a few scratches especially on the sharp edges of the objects or on the more exposed areas. I kept this to the minimum.
Using a sponge I dabbed new scratches and old scratches, also very temperately.
With matt enamel I added dots of fresh rust which I pull them into runs using a brush moist in thinner. I used the same method to add some random stains.
Finally, I used freshly ground pigments ranging from yellowish brown to dark grey to add dust and smoke effects, especially on the running gear, gun muzzle, exhaust area and lower glacis.
Conclusions
The build was a tedious one but it worth it. I have no major complaint regarding the quality of the kit; MiniArt put out a superb effort that has to be appreciated. I would gladly give this kit a 100% score, but I have to make a couple of amends for the poor design of the sprues (parts used in the same assembly spread out randomly and too many injection gates for thin parts rendering them unusable): -5%. The lack of clarity with regard of the building options and painting schemes in the instructions: -3%.
SUMMARY
Highs: Very good level of detail throughout the model.Lows: The high level of detail has lead to some parts that are all but impossible to use.Verdict: A model that has tested me but provided a very nice piece for the shelf.
Our Thanks to MiniArt! This item was provided by them for the purpose of having it reviewed on this KitMaker Network site. If you would like your kit, book, or product reviewed, please contact us.
Born in Romania, from a German father. Classical studies, Latin teacher. Currently holding French residency, business owner in a Dutch island where currently spoken language is English. At home I speak Spanish, though.
Interest in history and modelling: since babyhood, I grown with my father's stor...
Richard, it looks overwhelming at the beginning, but, you know: step-by-step. Shortly I will publish the YT video with the building process and you'll see that isn't all that "scary" after all.
Gabriel


Comments