The M1 Abrams has been in service with the US Military for some time now and has gone through a number of face lifts to keep it current. Entering service in the late 1970,s the Abrams has been around for 40 years with the tank we see today being a completely different beast. A number of companies have released models of the Abrams during its life with kits to suit every pocket, the best offerings have been accredited to Dragon Models with their releases in 2006/7 of the M1A1 AIM and M1A2 SEP, well this new offering from Academy which is an update of the 2016 release looks to be taking them head on. This offering from Academy is the M1A2 Abrams SEP V2 TUSK II in 1/35th scale.
Contents
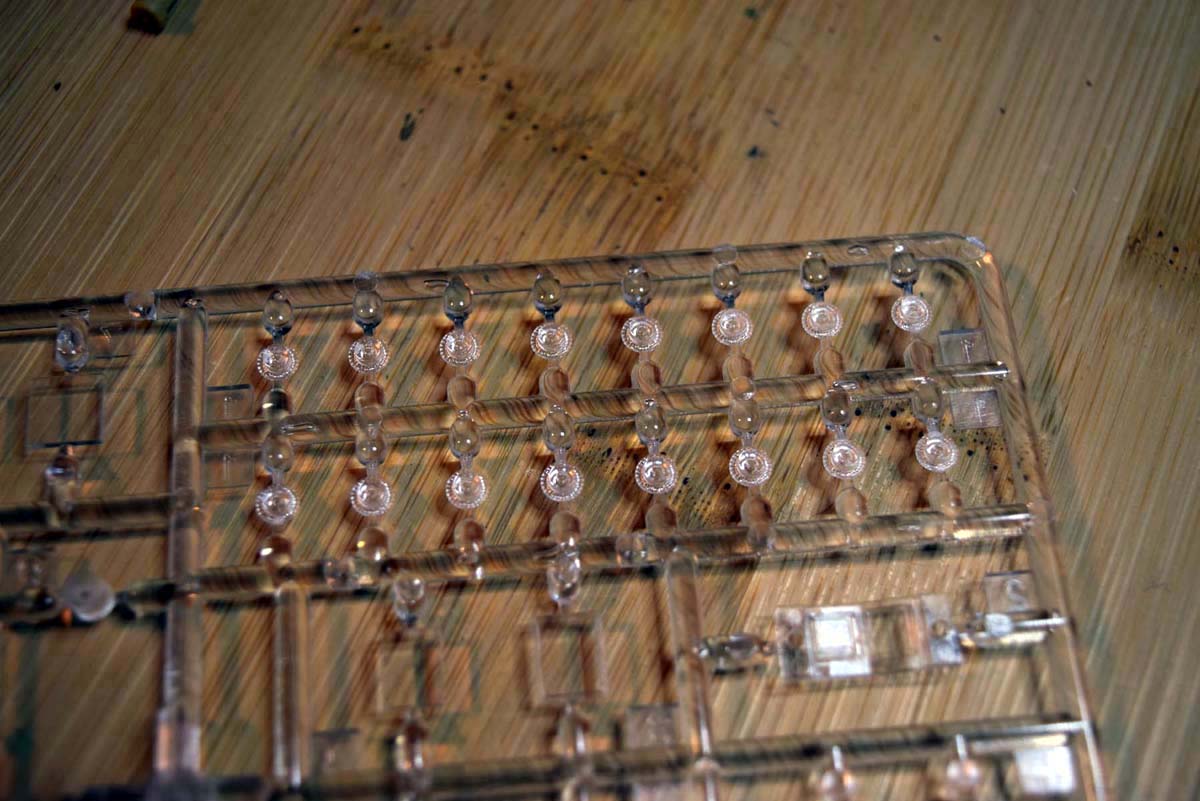
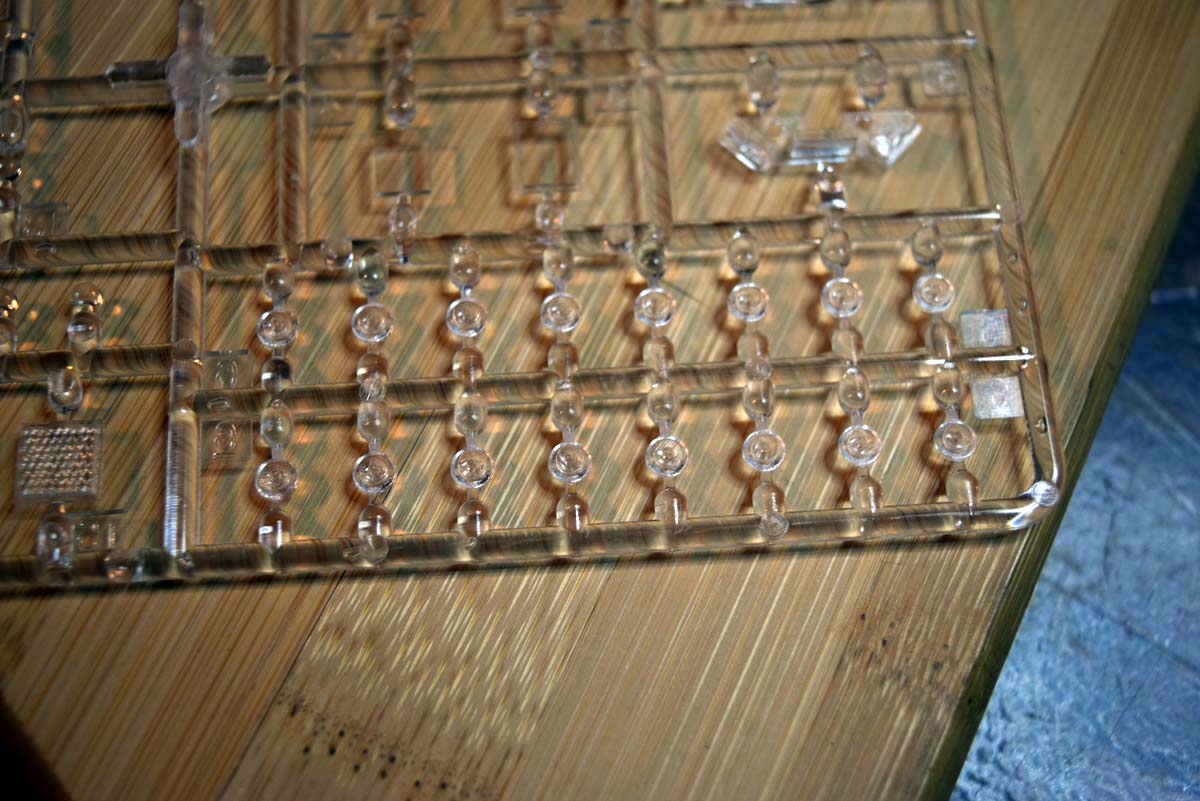
The box provided is quite substantial and well stocked when you look inside. There are four bags of plastic in the box, in my case only a few parts had come free of the sprues and these do not appear to be damaged. The only potential downside here is that a substantial sprue of clear parts has not been packaged by itself and so could easily become damaged; my example looks to be free of issues.
Review
A quick examination of the contents prior to starting the build reveals very little to be concerned about. Academy has provided both rubber band tracks and individual workable track links, the result is that all modellers should at least be happy regardless of the camp they fall into. The instructions are unusual in that they are provided in four manuals. A look at the contents has not highlighted any issues of note; there are of course ejector pin marks present that look to be well considered in their placement to avoid problems. There is a distortion on the front of the lower hull that will need to be tackled, the front has a bow look to it and it should be straight where it connects to the upper hull. One thing I do rate highly is the way the sprue has been marked, this has been done by having the code completely removed rather than having raised identification; perhaps not something you really care about, but as you get older the eyes are not so sharp and this makes my life easier. The model contents as provided are designed to enable the building of an M1A2 Abrams SEP V2 TUSK II or an M1A2 Abrams V2.
In order to build an M1A2 Abrams SEP V2 TUSK II you follow stages 1 to 35 and then stage 40
In order to build an M1A2 Abrams V2 you follow stages 1 to 29, 36 to 39 and 41
The Build
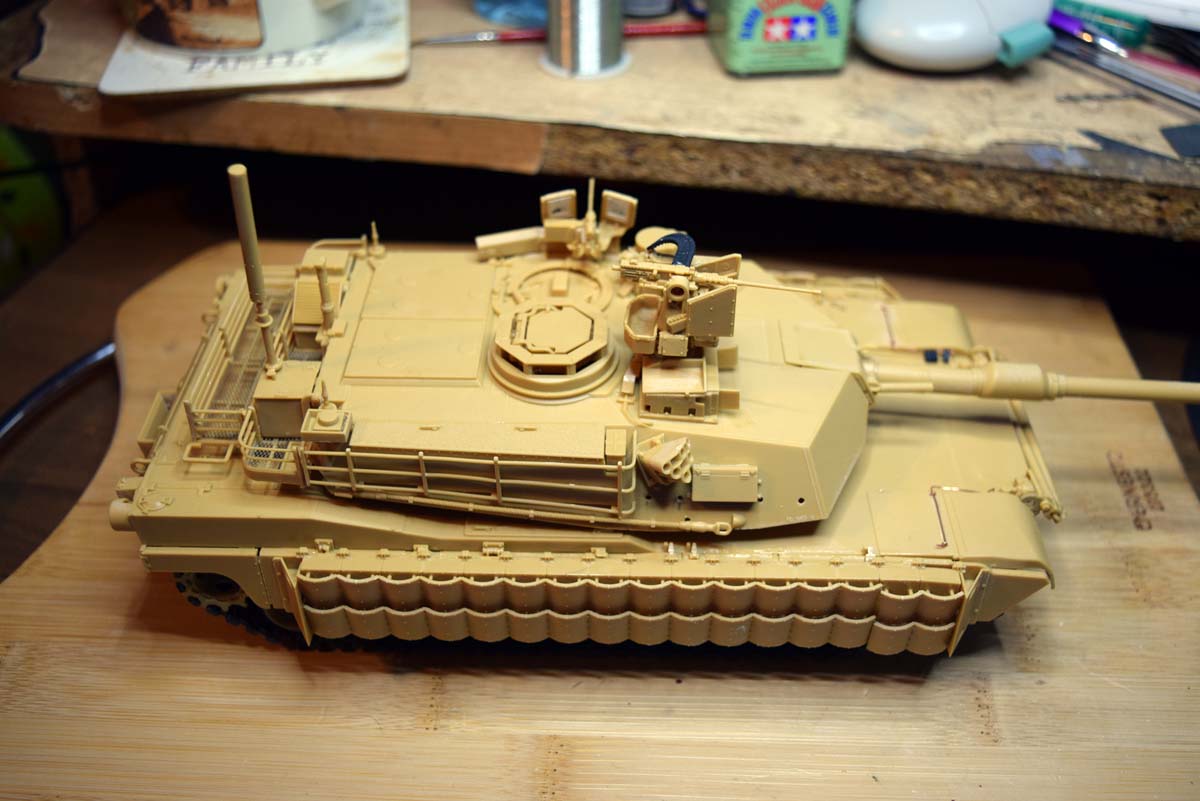
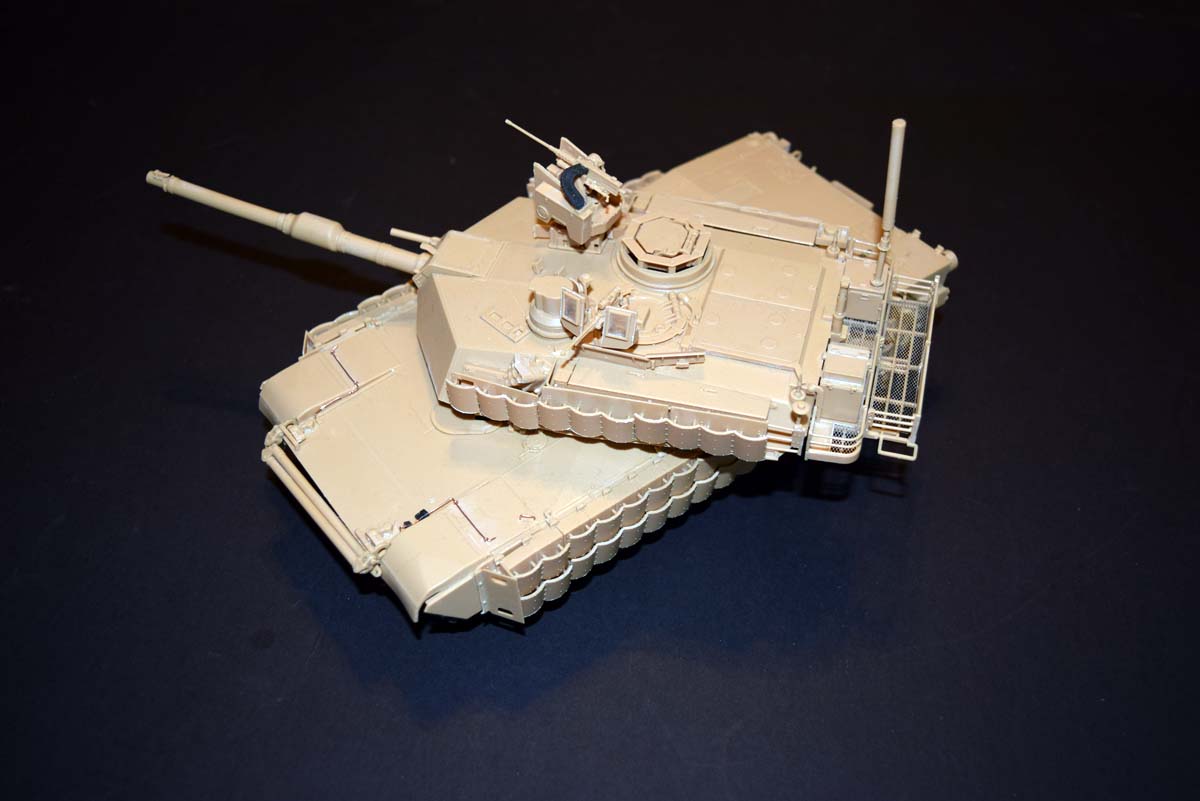
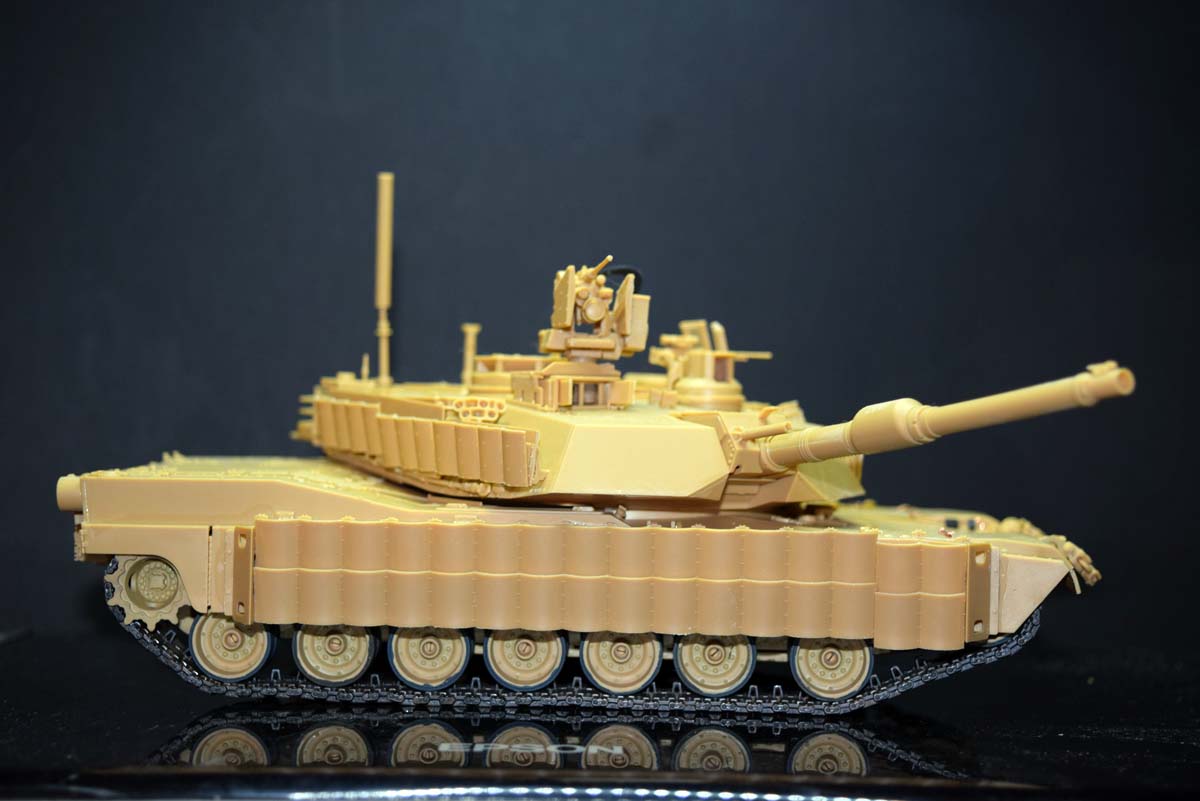
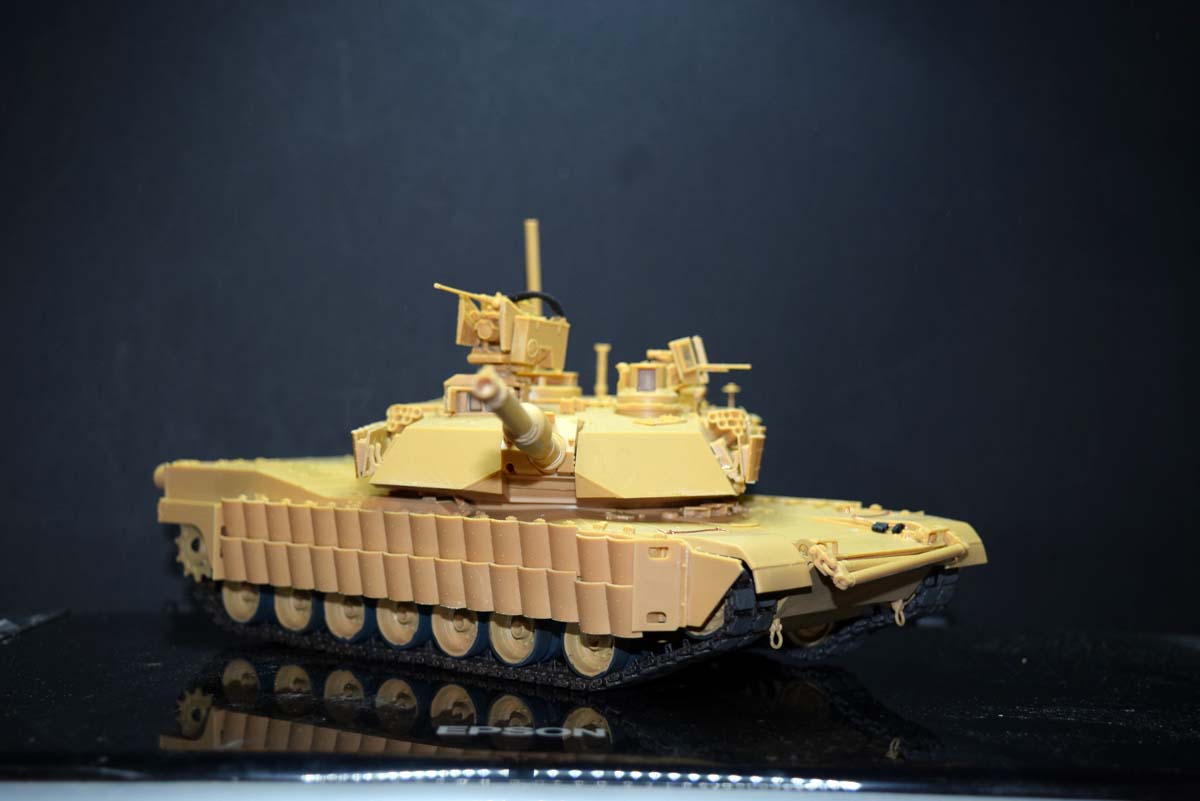
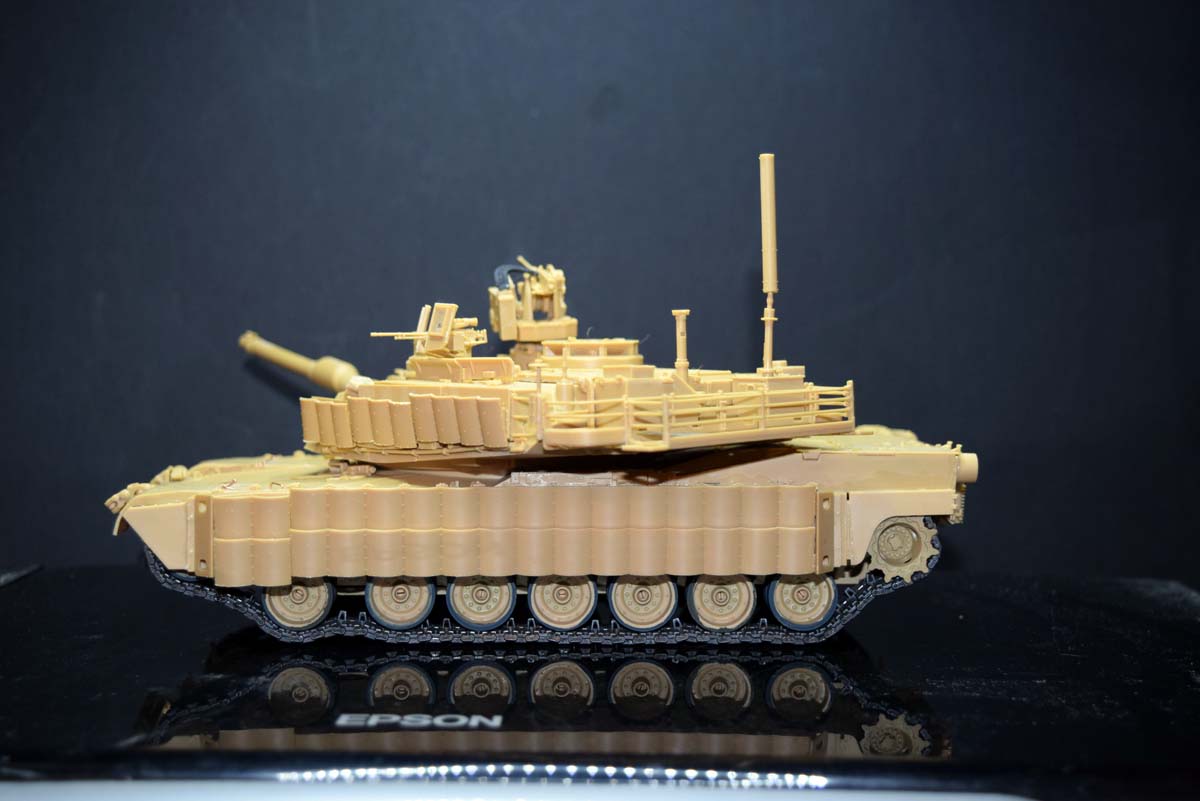
In my case I have opted to build the M1A2 Abrams SEP V2 TUSK II as it has all of the bells and whistles and provides you with the most complete look at the model.
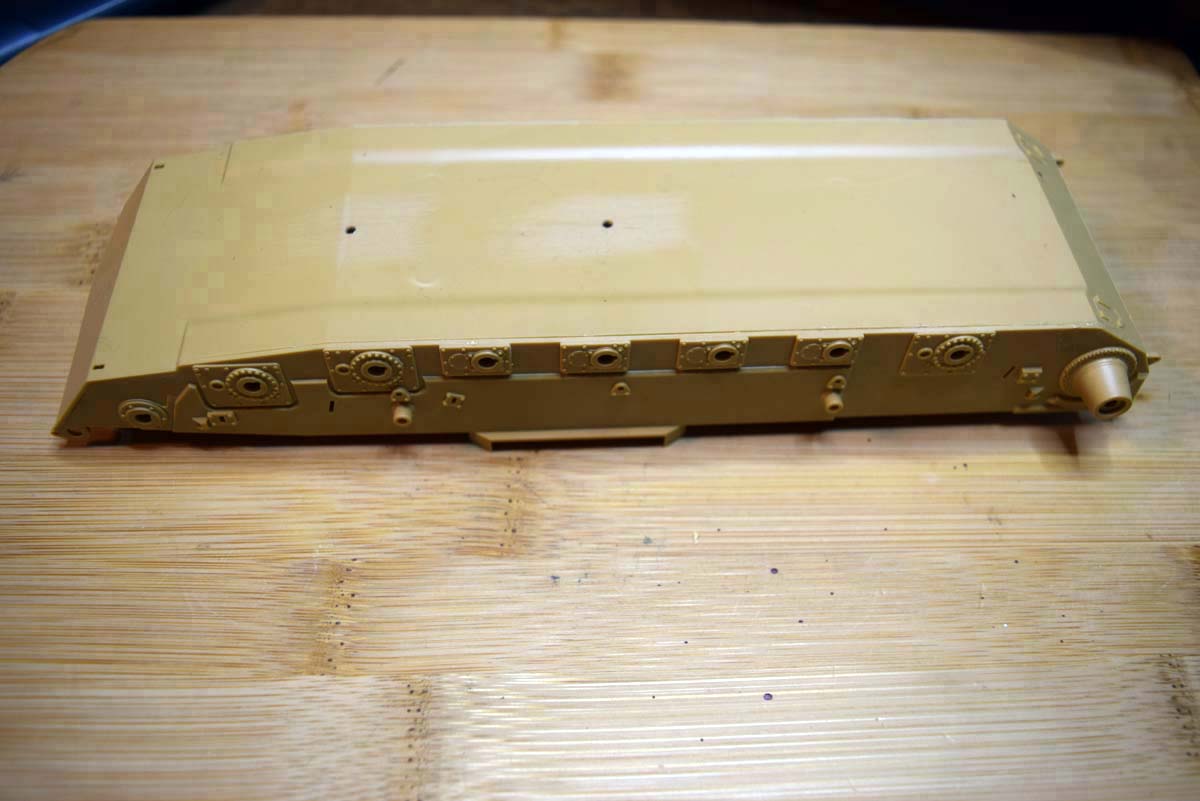
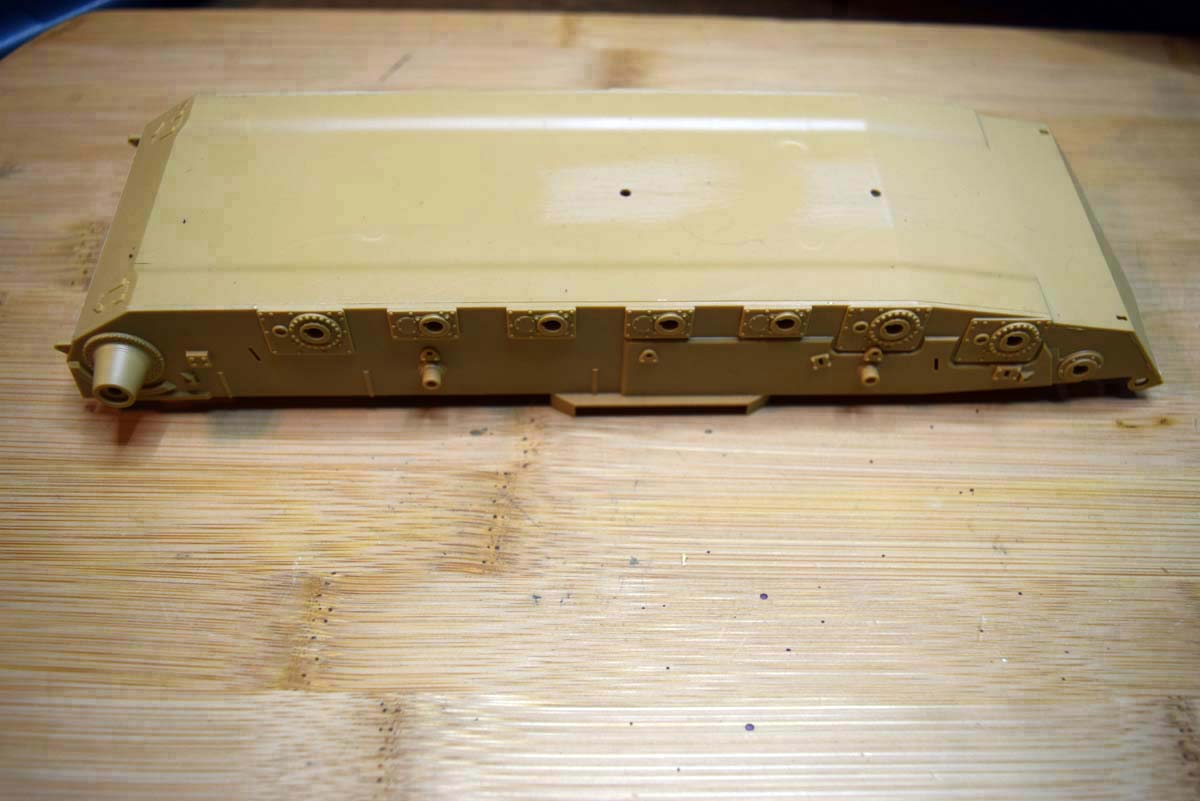
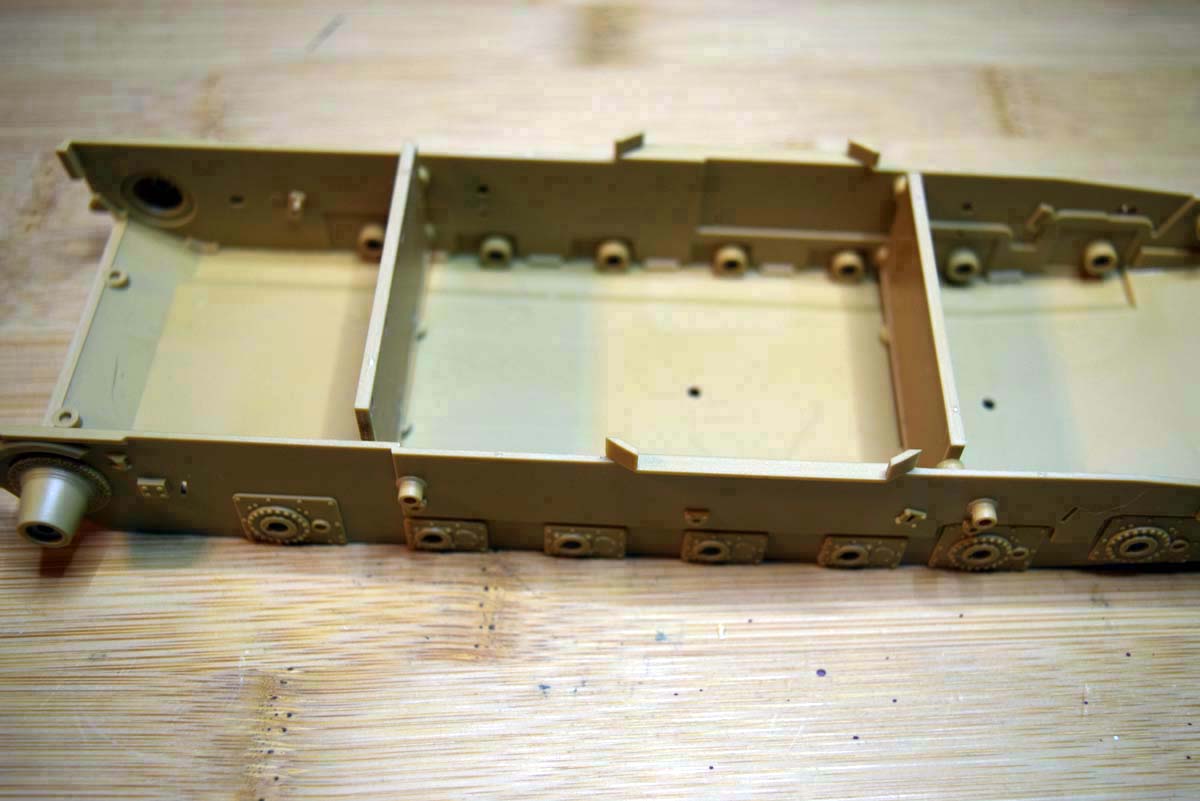
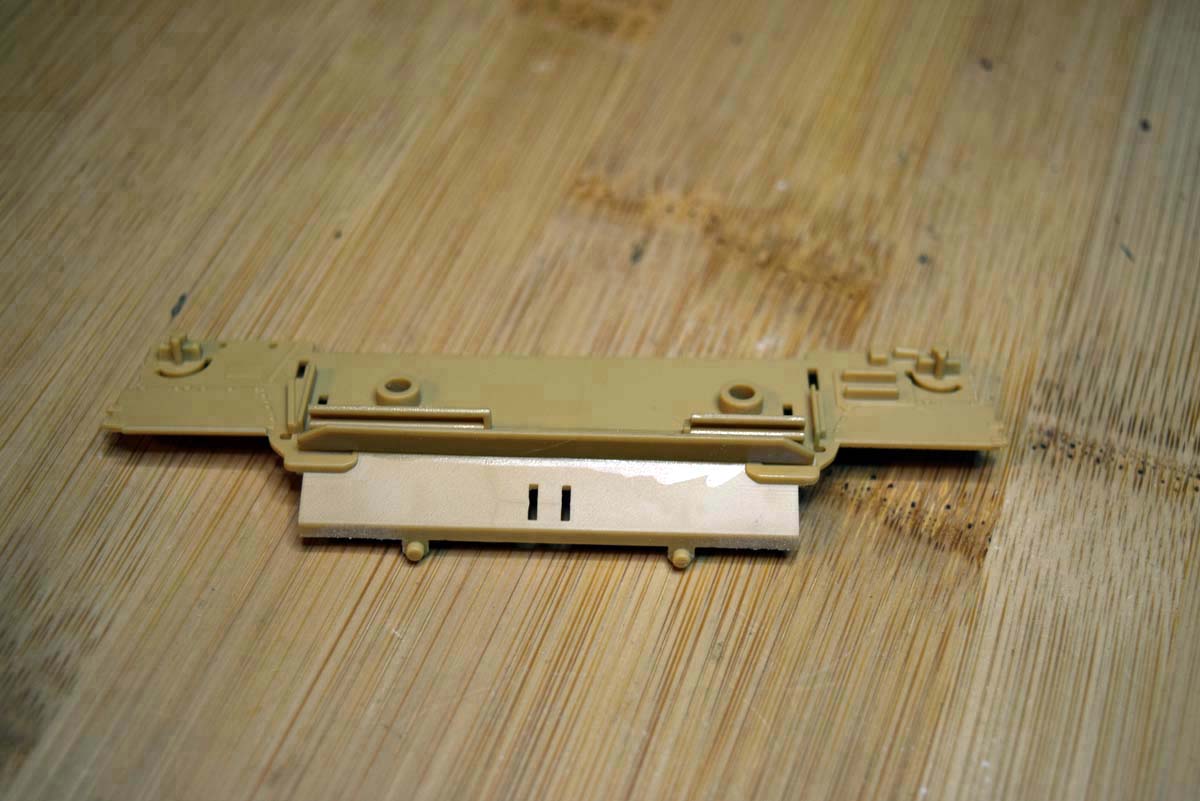
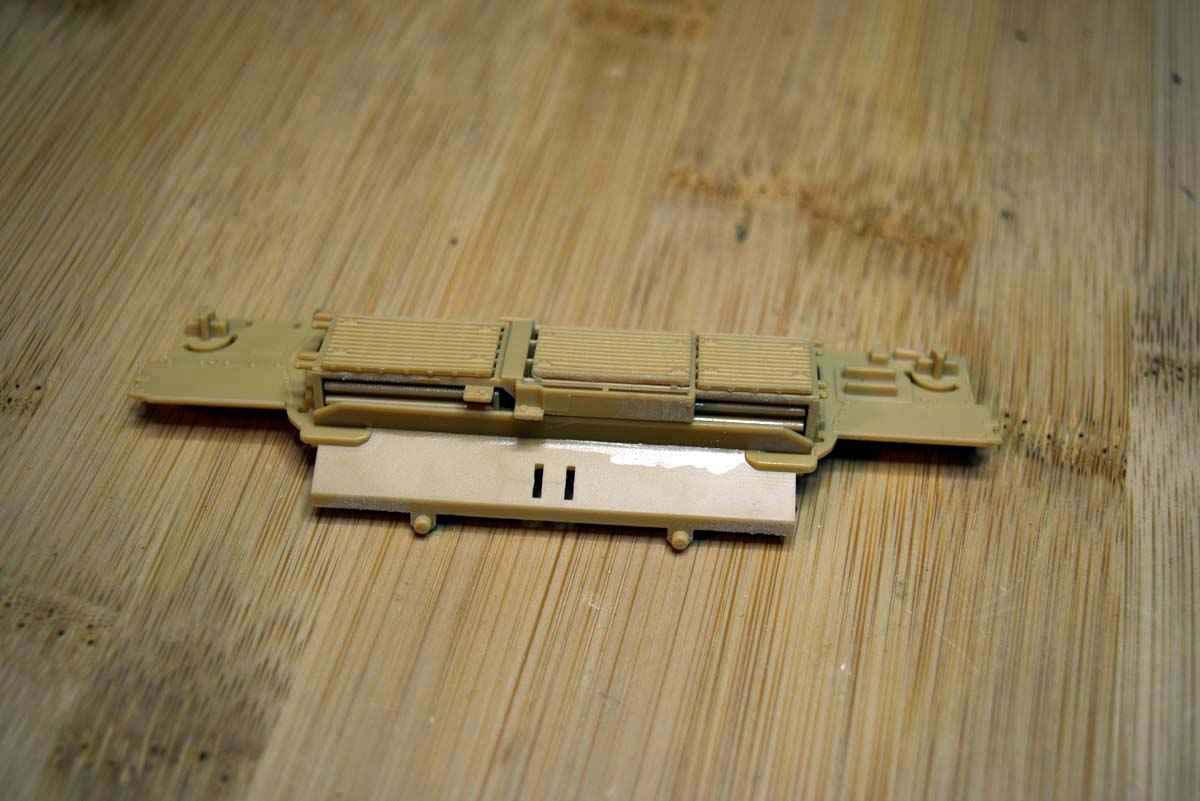
Stage 1 Lower Hull
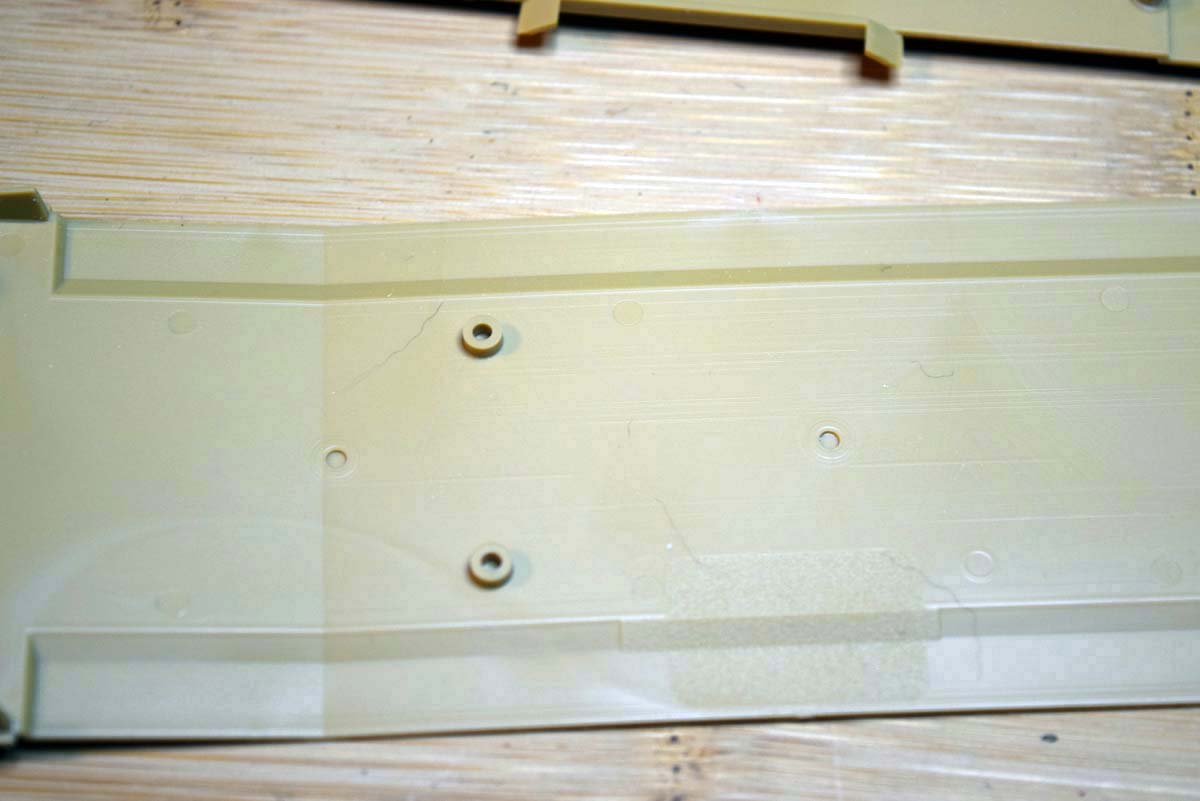
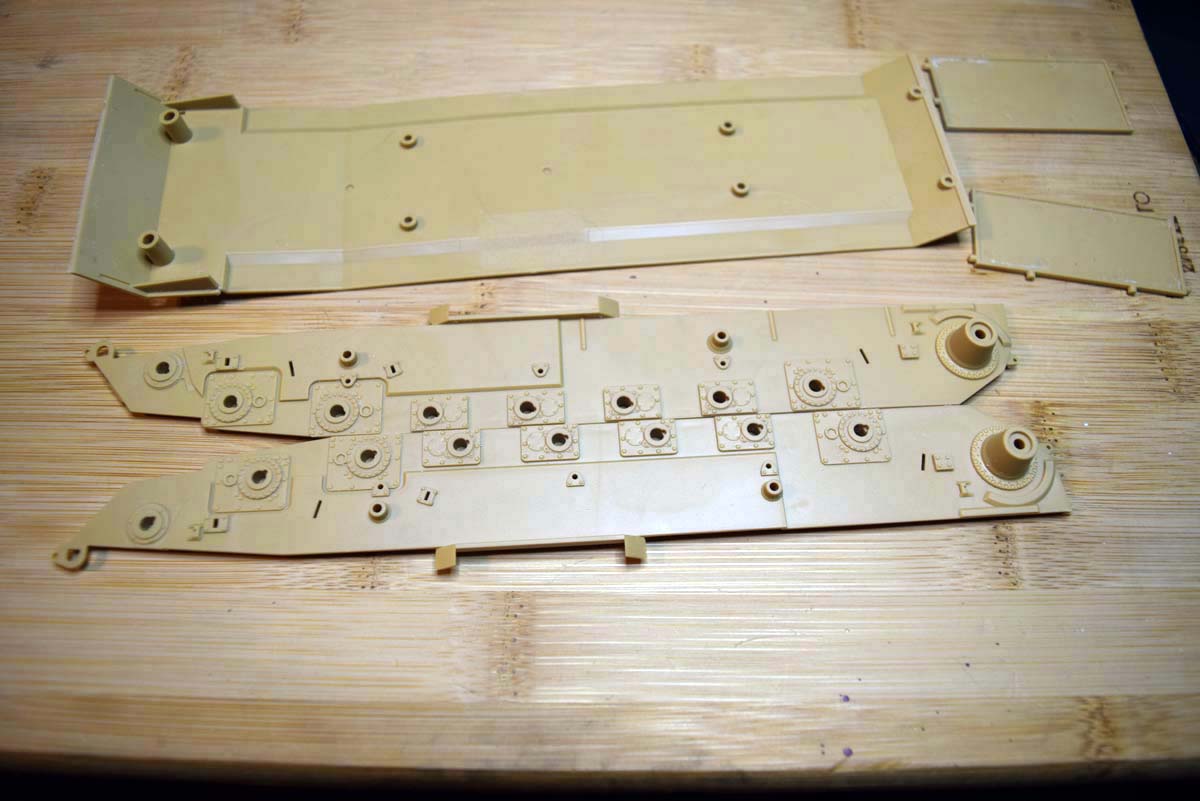
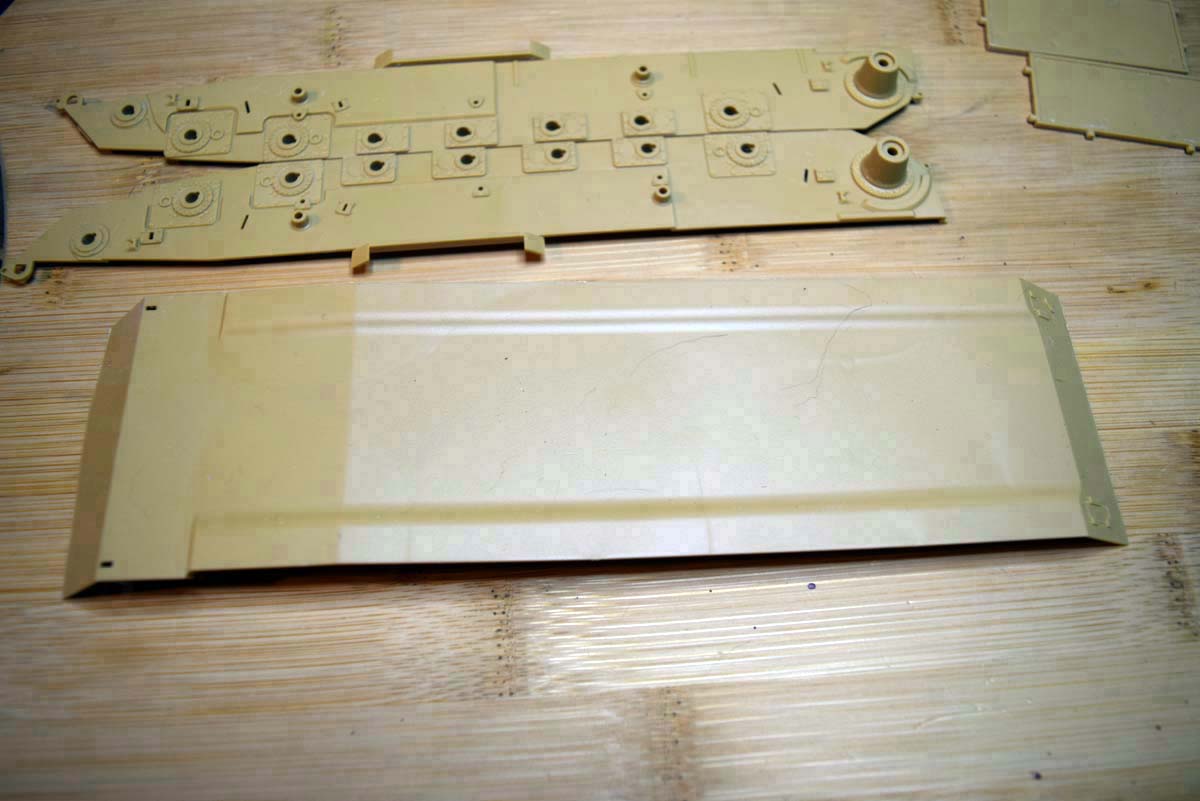
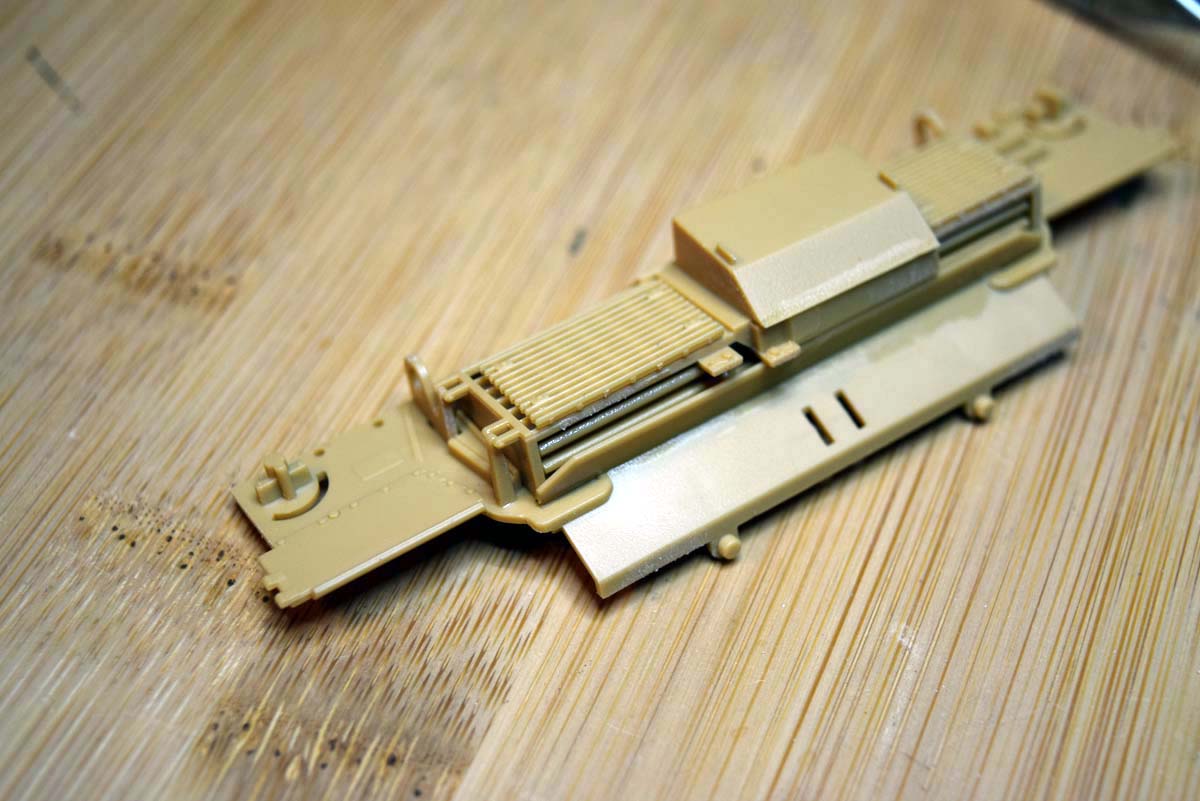
Right at the start you will need to decide which version you are building as there are two closed holes on the floor that will need to be opened if you are going to use the underside mine armour. The lower hull of the model has been moulded as a flat pack which has enabled Academy to provide a good level of moulded on detail on all faces. Assembly is managed via the use of two differently sized spacers that are attached to the floor of the hull and sides. These are quite a tight fit and so do require that you ensure they are fully home before applying glue. The middle and rear sides of the hull fit very well at this point, but the lower hull had lost its shape a little, this was easily corrected and the glue held everything firmly in the correct position.
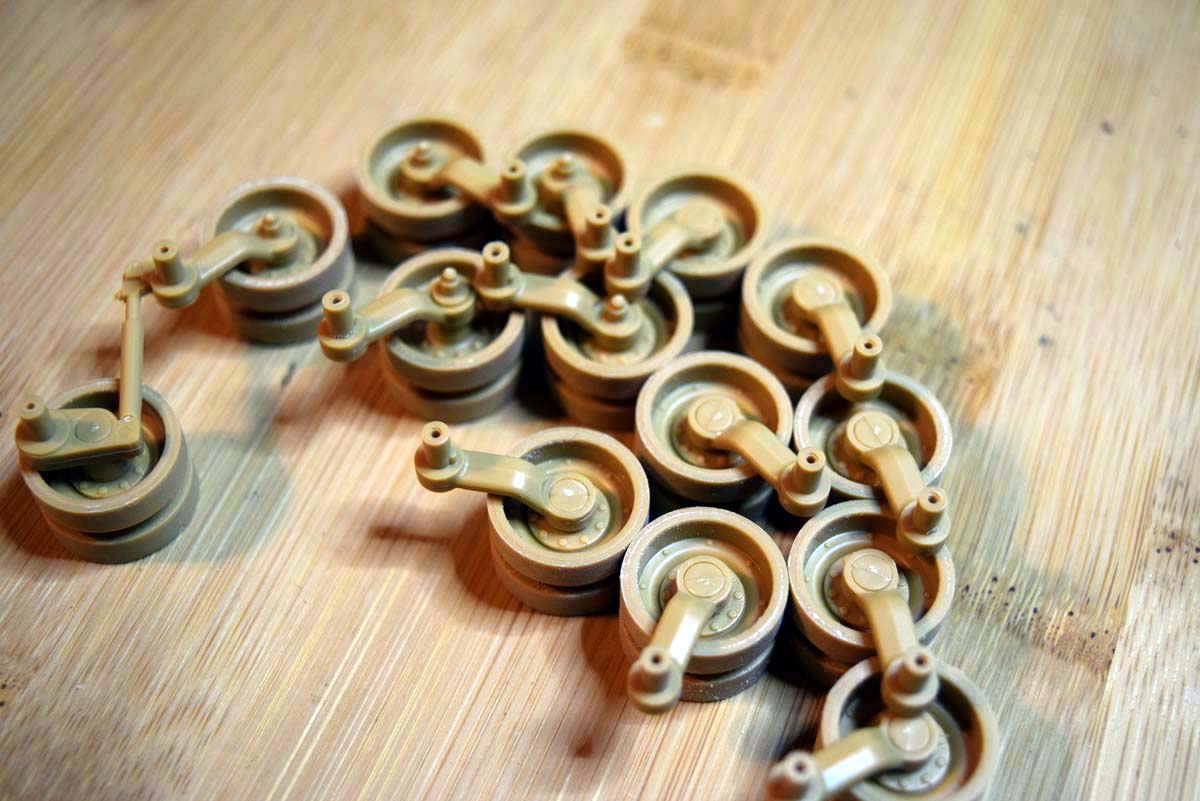
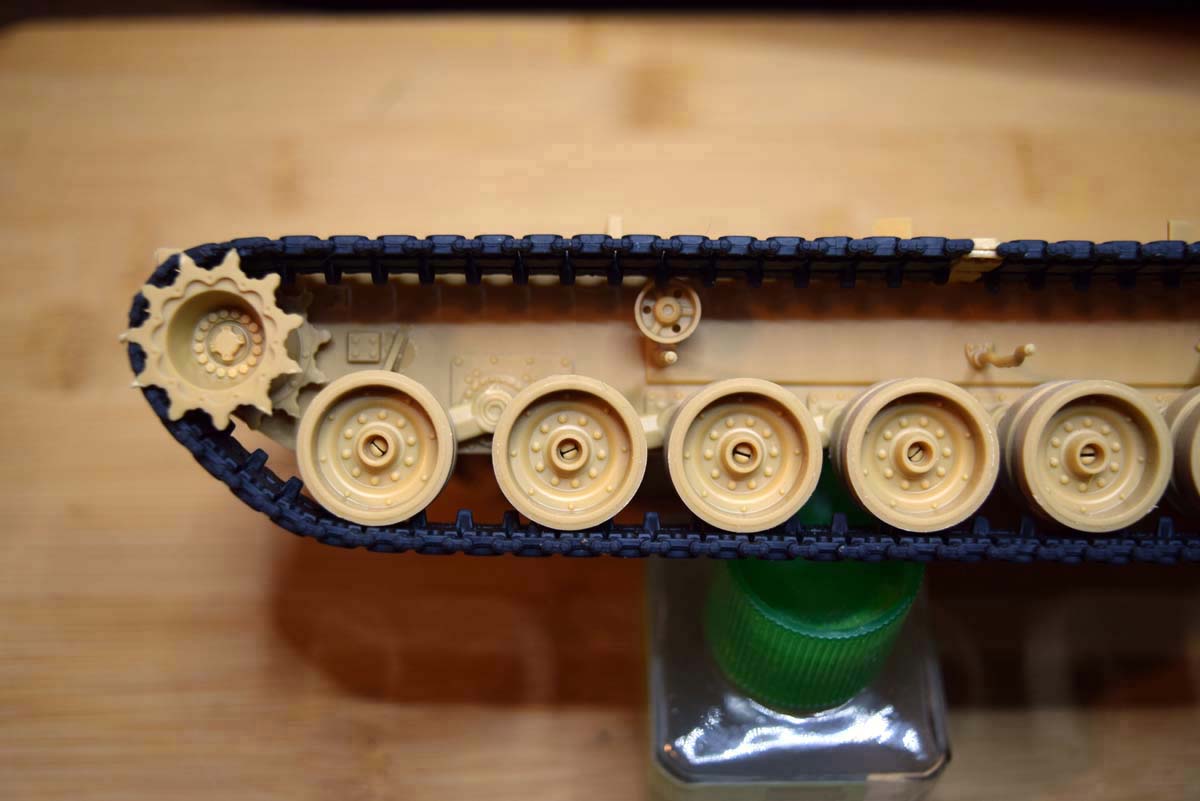
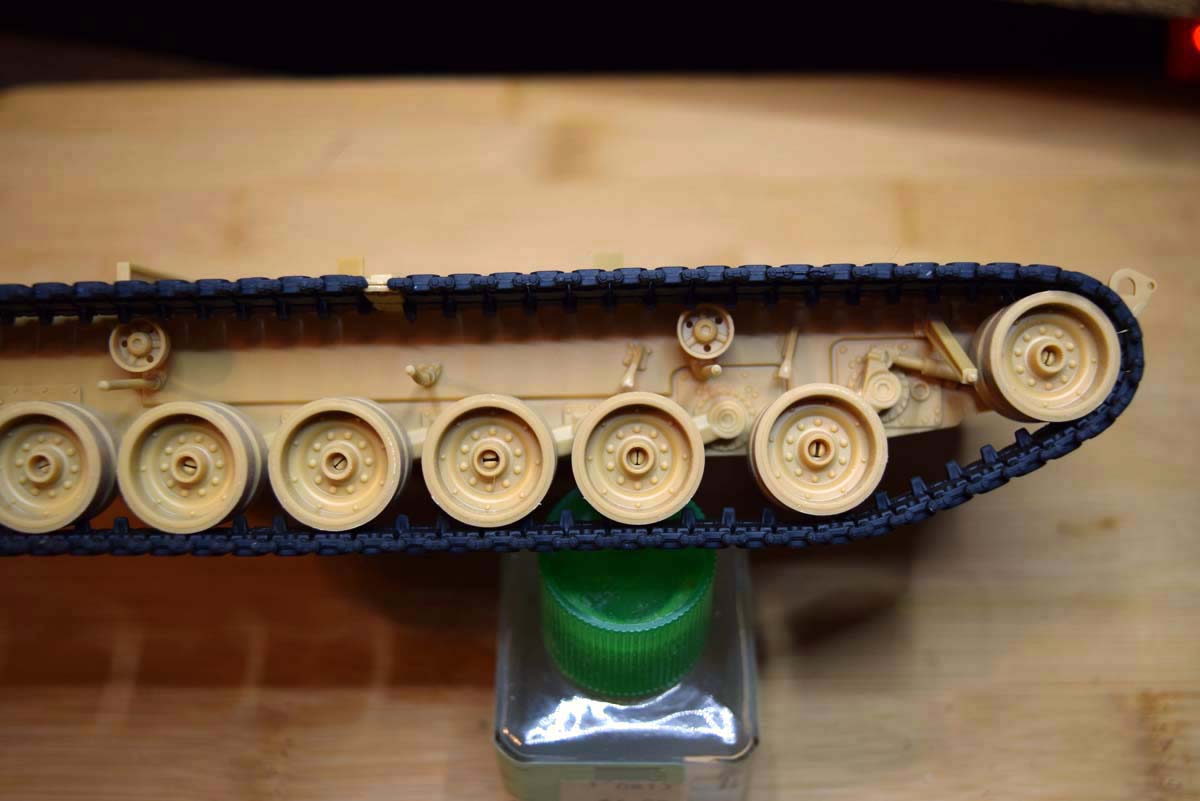
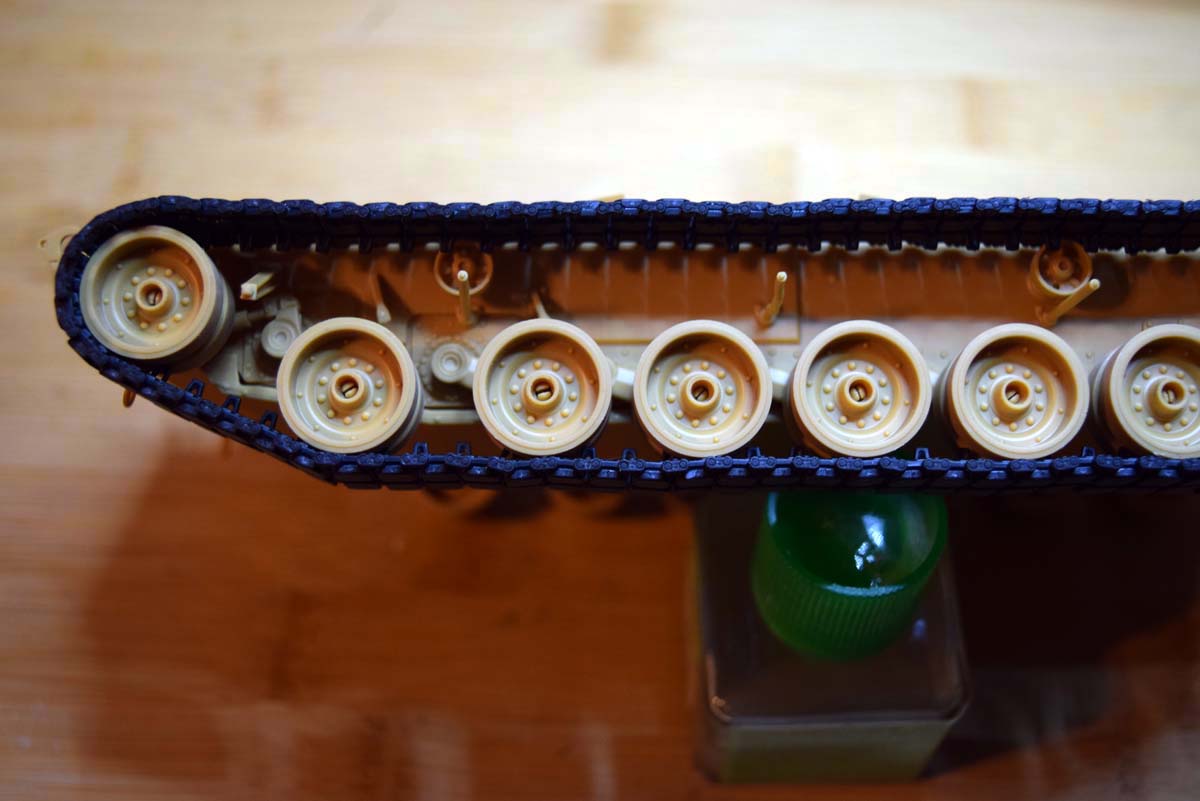
Stage 2 and 5 Road Wheels and Suspension
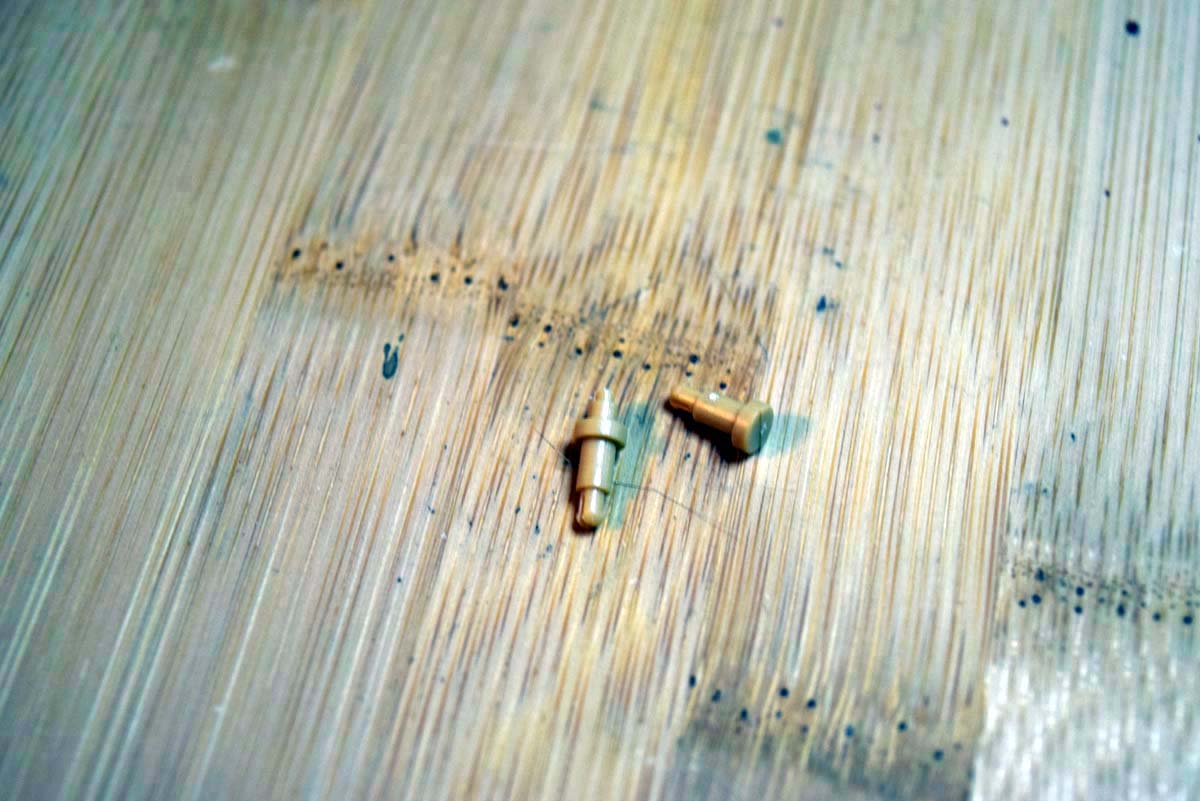
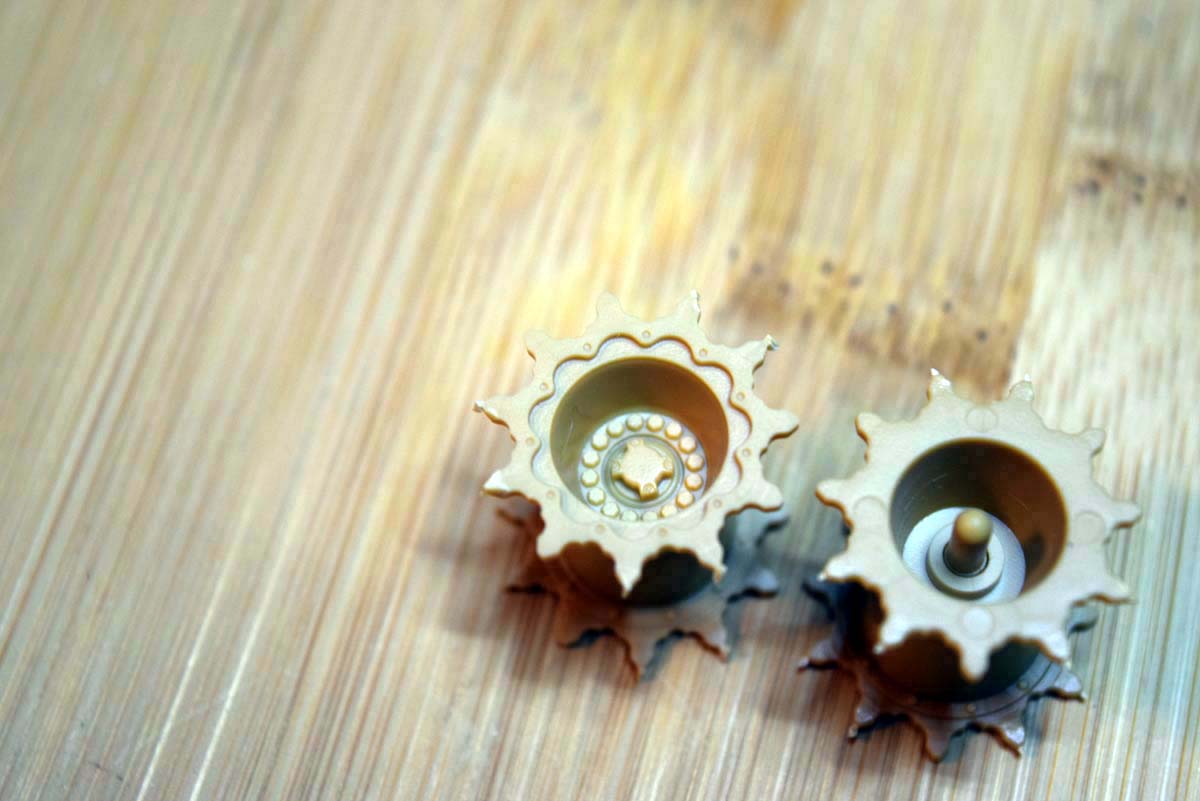
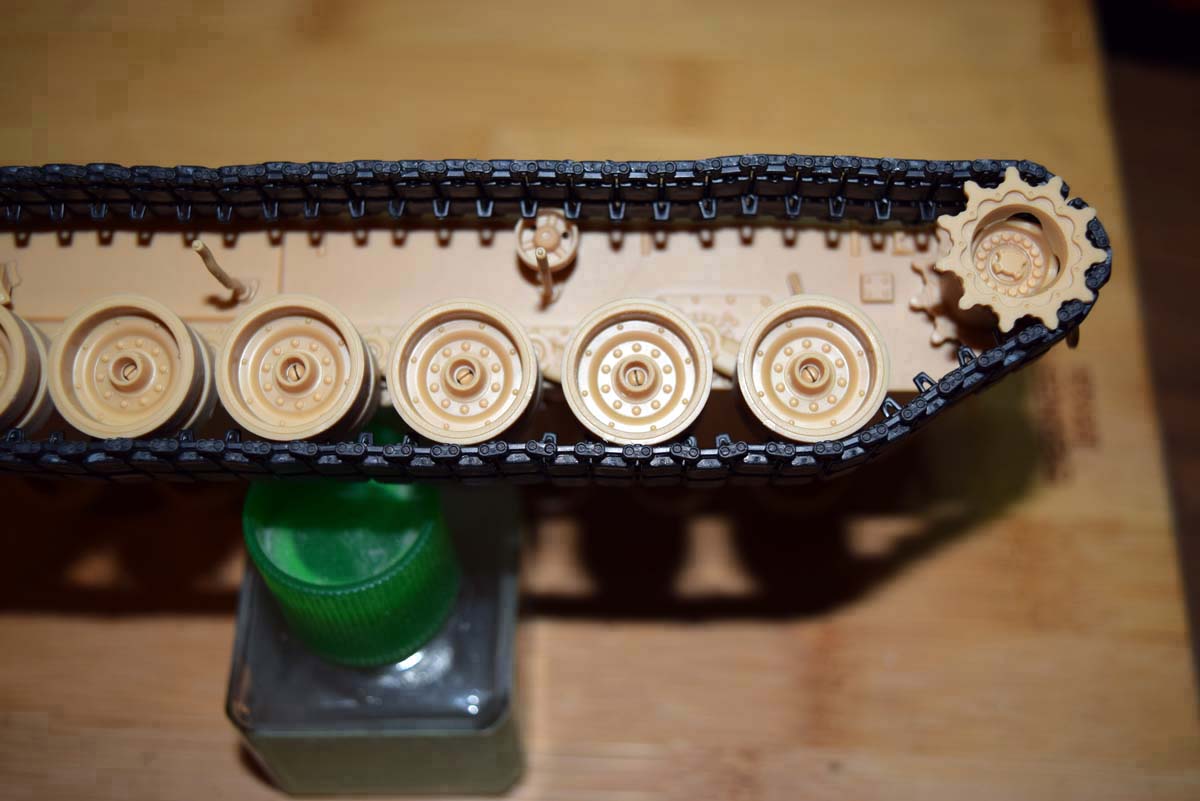
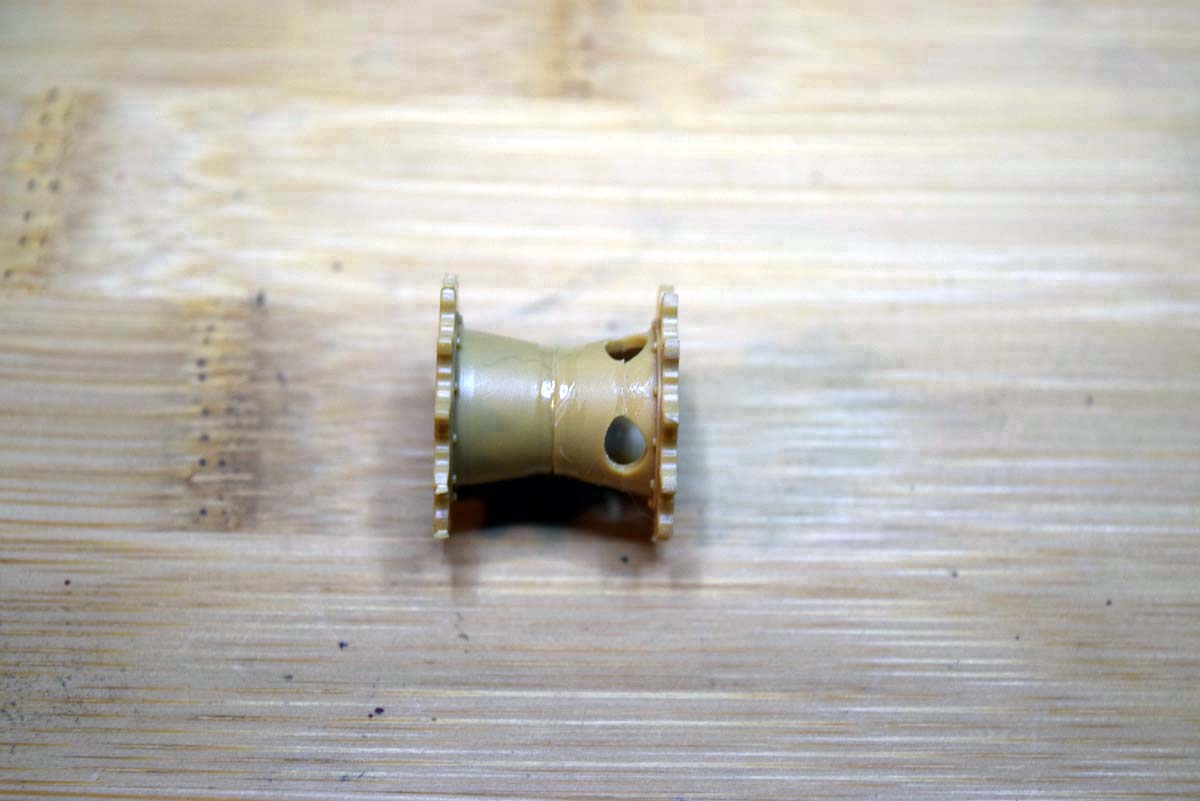
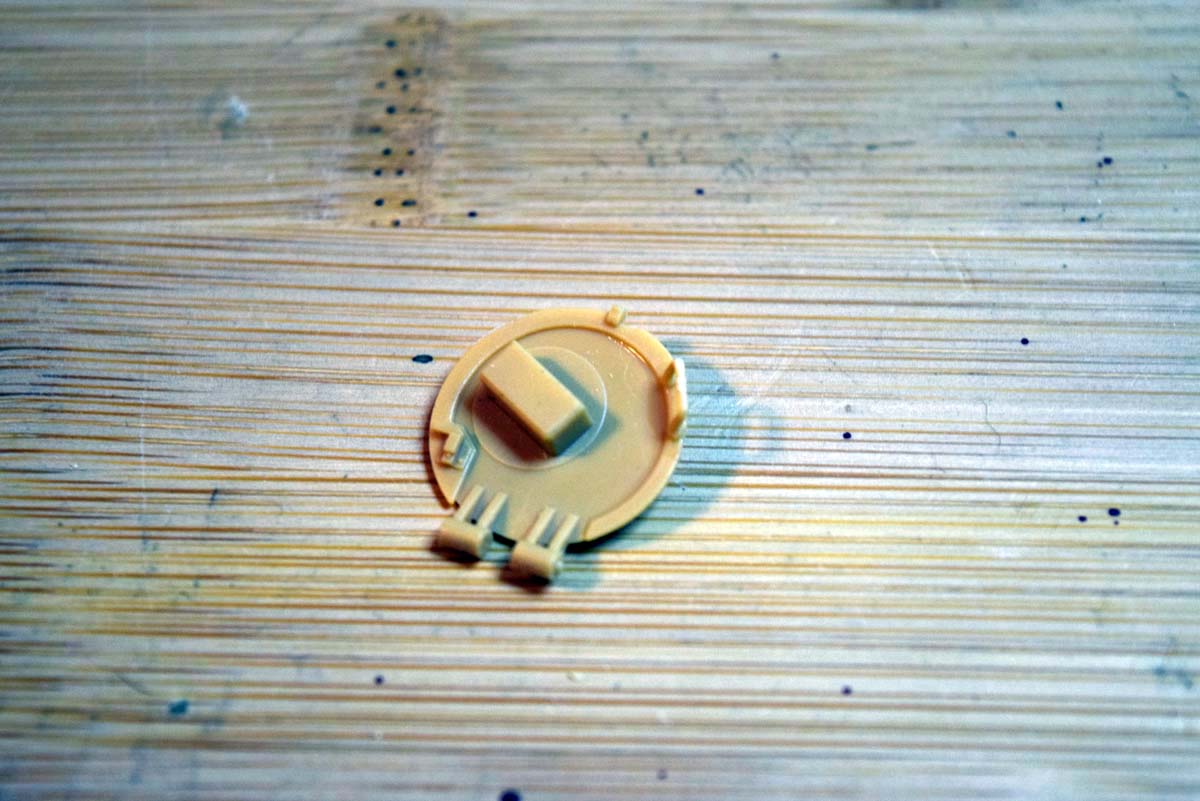
The road wheels require three points to be cleaned once removed from the sprue, but this is just part of the build. The wheels go together easily and look the part. The oil level window on each wheel station has been provided and there are two types provided in this boxing; I have not added these to the wheels just yet due to the need to paint the model. From memory I recall seeing these painted on the inside with X19 Tamiya Smoke to great effect on the look of the finished model. The wheels are attached to the swing arms by what I think of as an old fashioned peg and there are three types of peg so make sure you use the right ones where needed. I really like this method as it means I can secure the wheels on the model with ease and also remove them later for painting after. The wheels are designed to rotate but the suspension is fixed and so unless you play with your models I do recommend the wheels are cemented in place when ready. The drive wheel is also designed to rotate via the use of a T shaped peg trapped inside. I have no issue with this method, but I have found that it is very easy for the two halves to be poorly aligned, so take a little time to get this right.
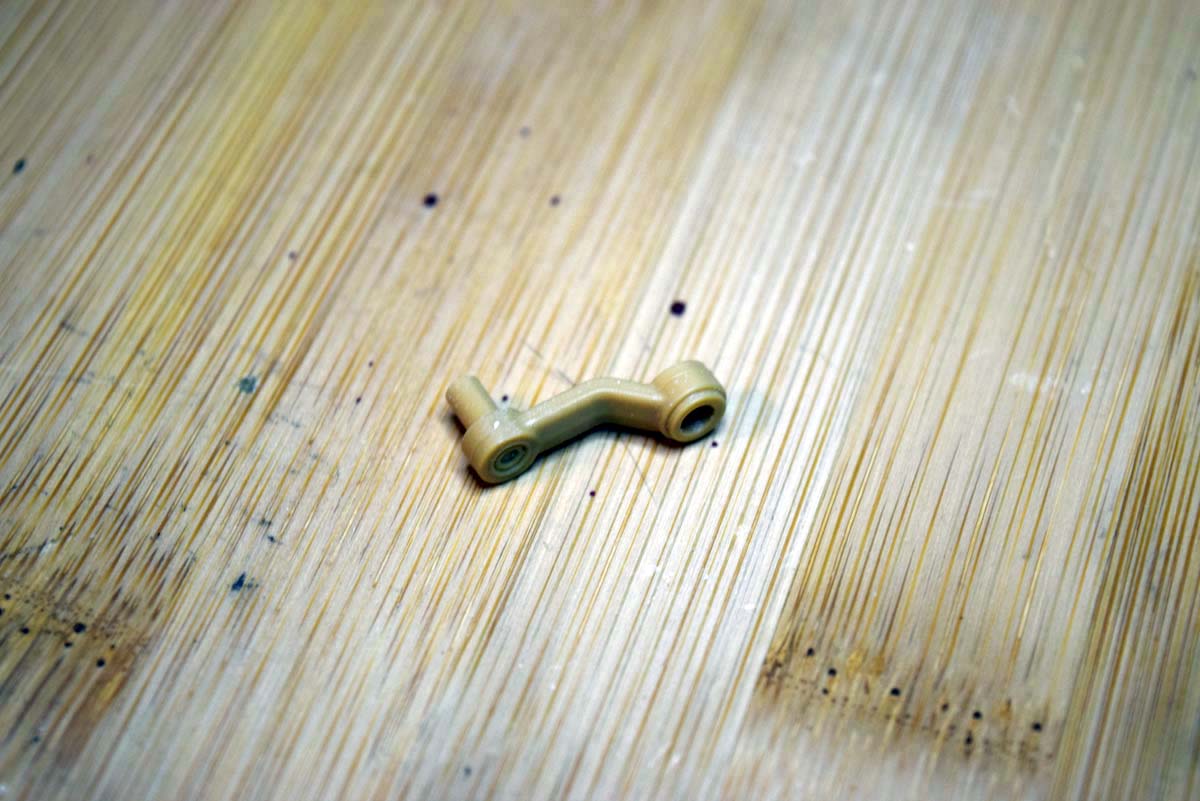
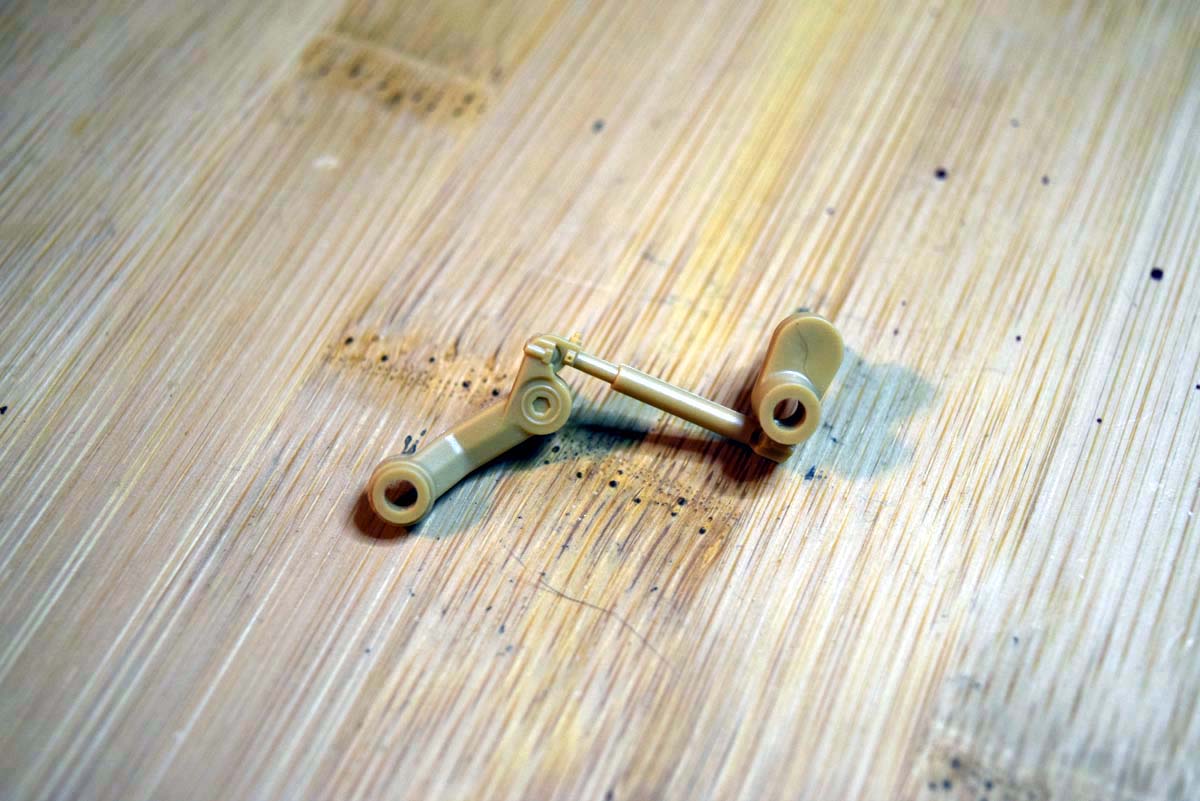
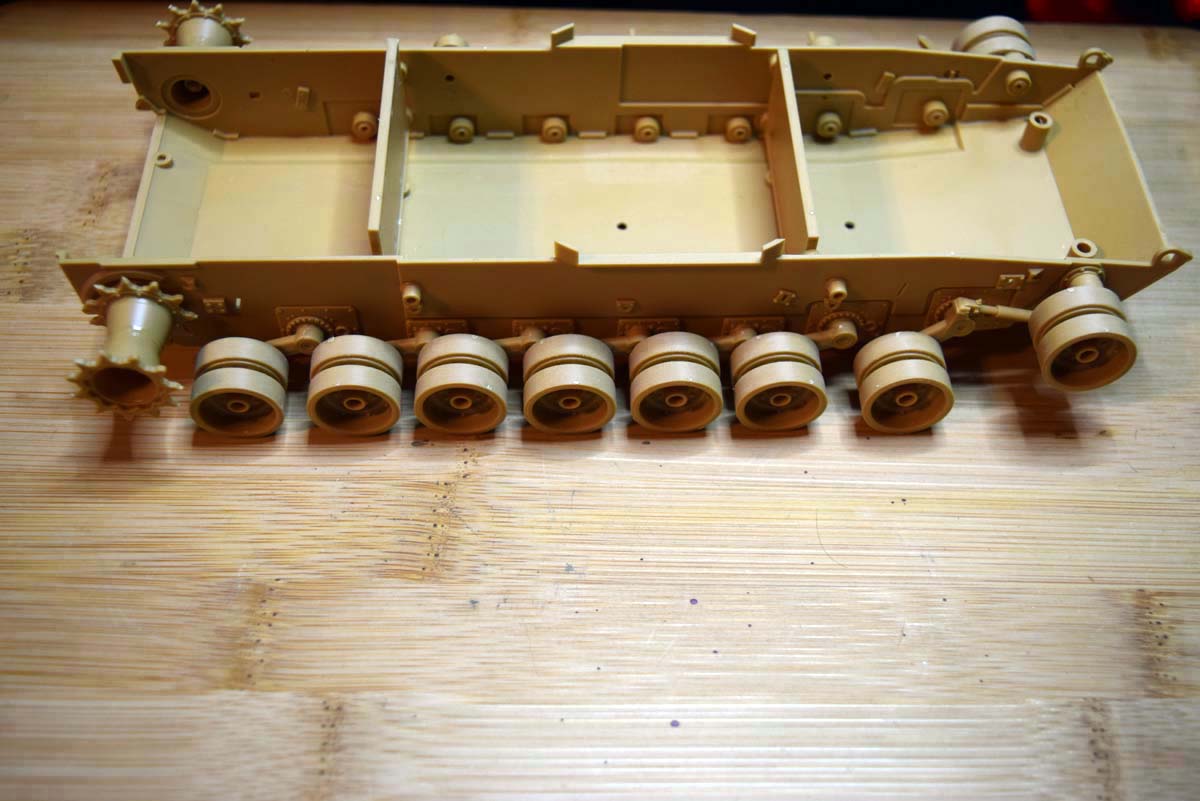
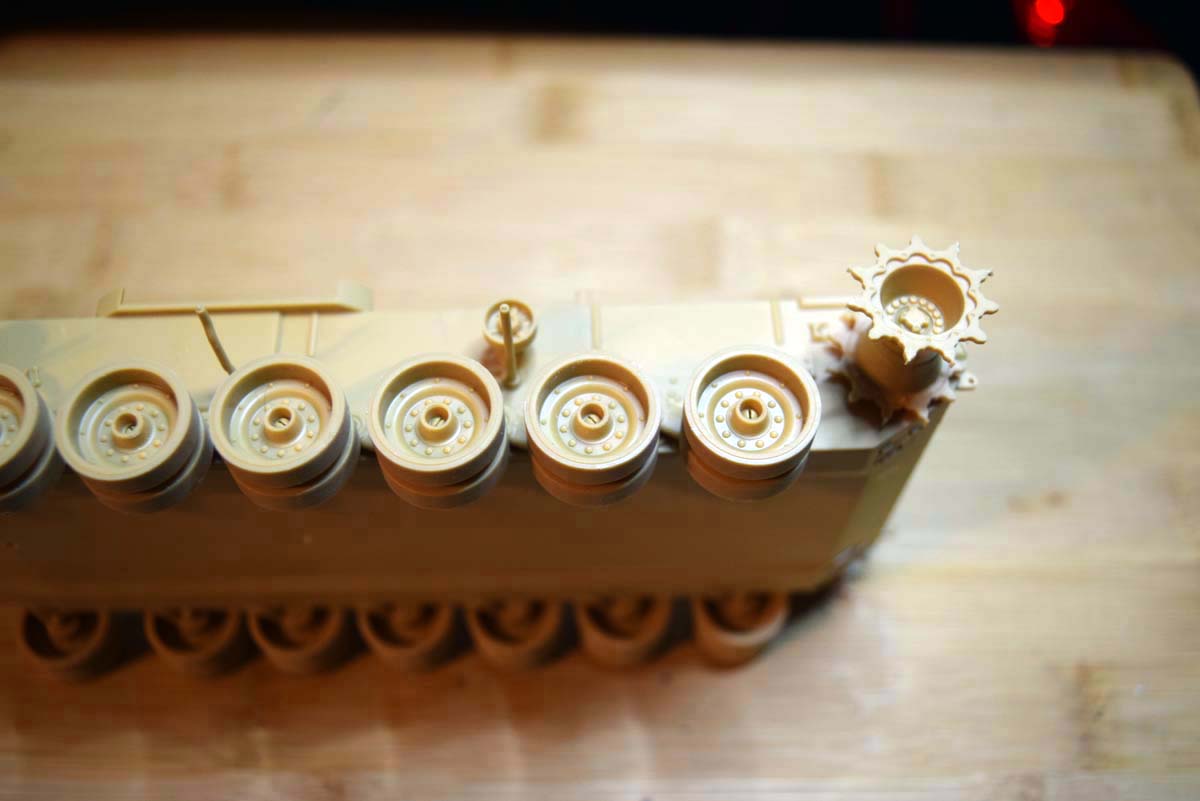
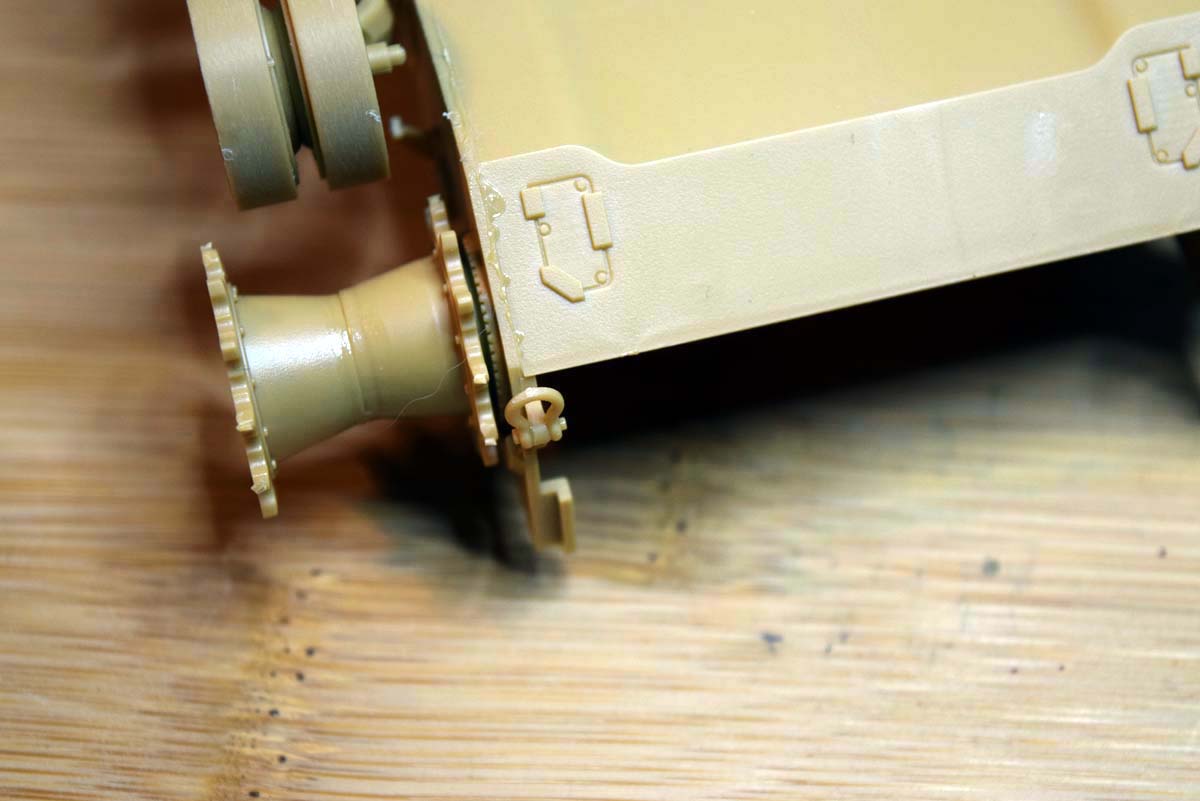
Stages 3, 4, 6 and 7 Attaching the Wheels to the Hull
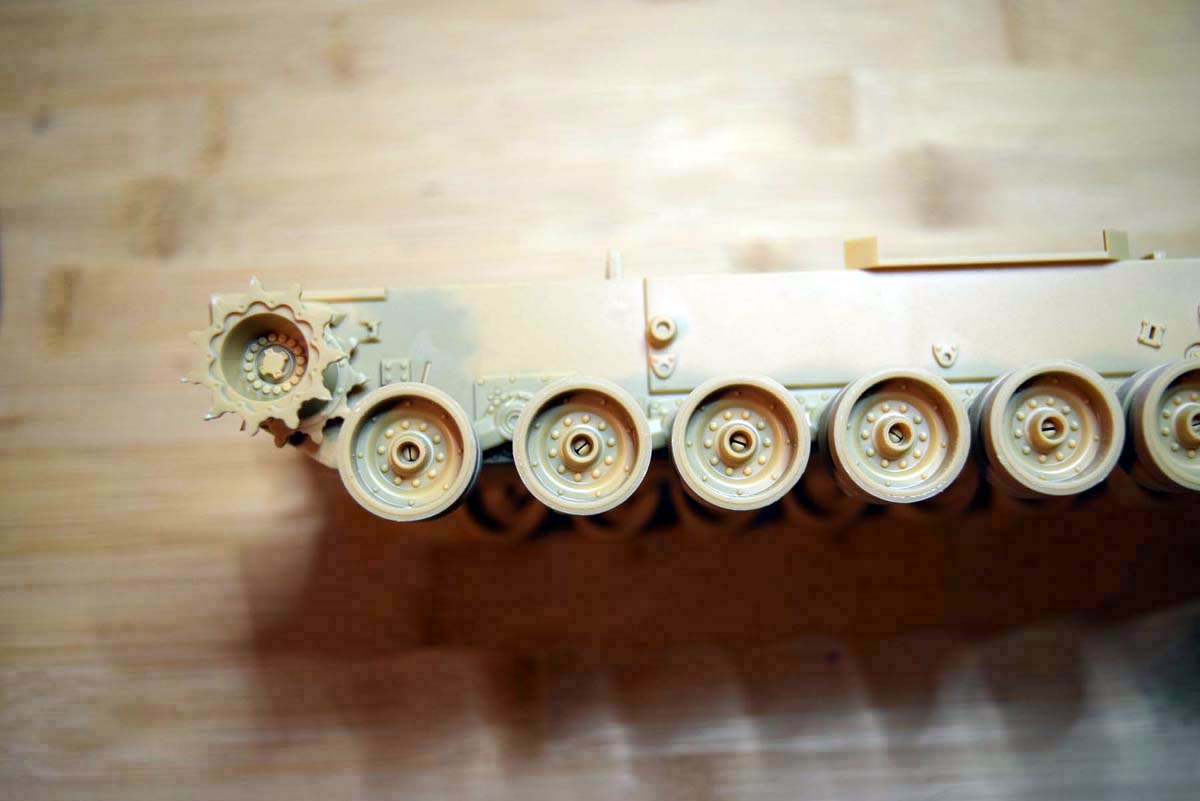
The suspension arms look ok to me, but I am not an expert on the subject when it comes to areas that are not easily seen. The suspension arms fit via a circular peg with a further small lug for securing the angle the arms are set at, there is a very small amount of movement still possible and so I would decide if you want it up or down and stick to it on both sides. I opted for down as the two front wheels are secured via a single arm that locks the wheels in place and this looks to me to have resulted in all of the wheels being in contact with the floor. The return rollers are well represented on the model. The various parts that support the side skirts look to be accurate representations of what is present on the real vehicle and they also all look to be accurately placed. The bracket behind the idler wheel was the only one that gave me any issues due to getting it in the right plane all round.
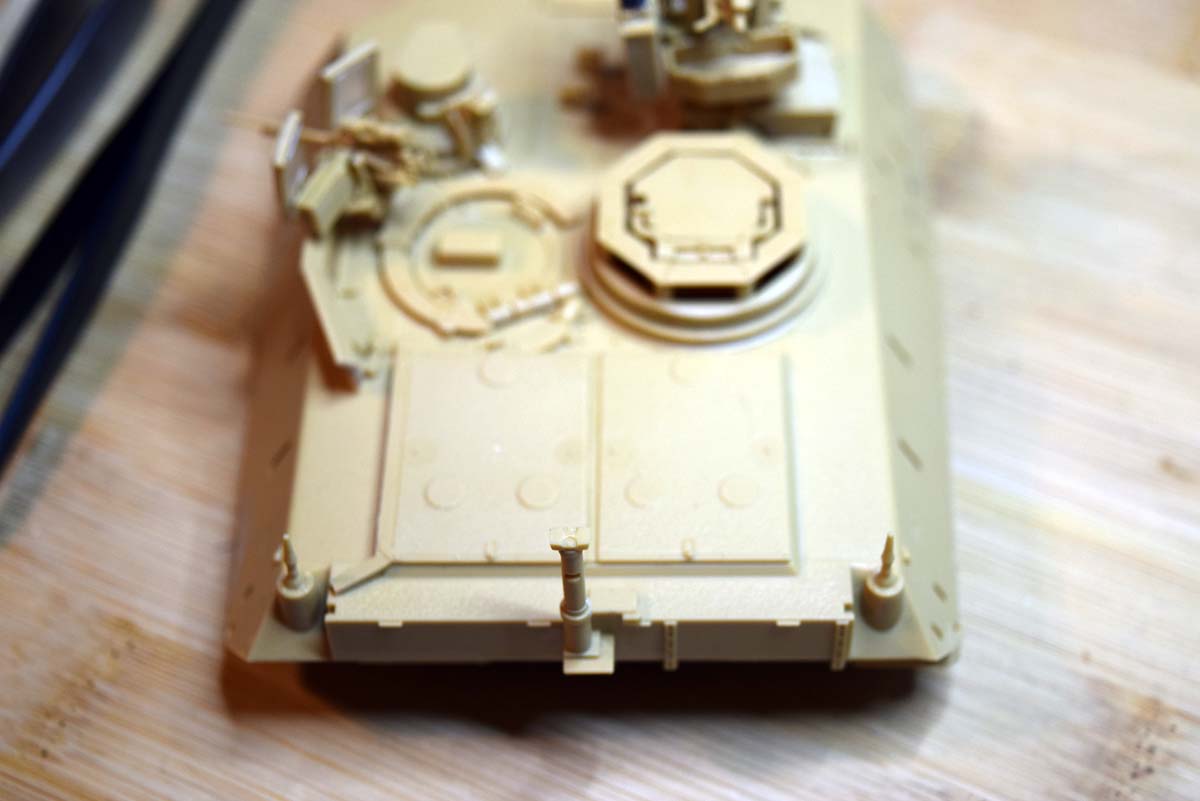
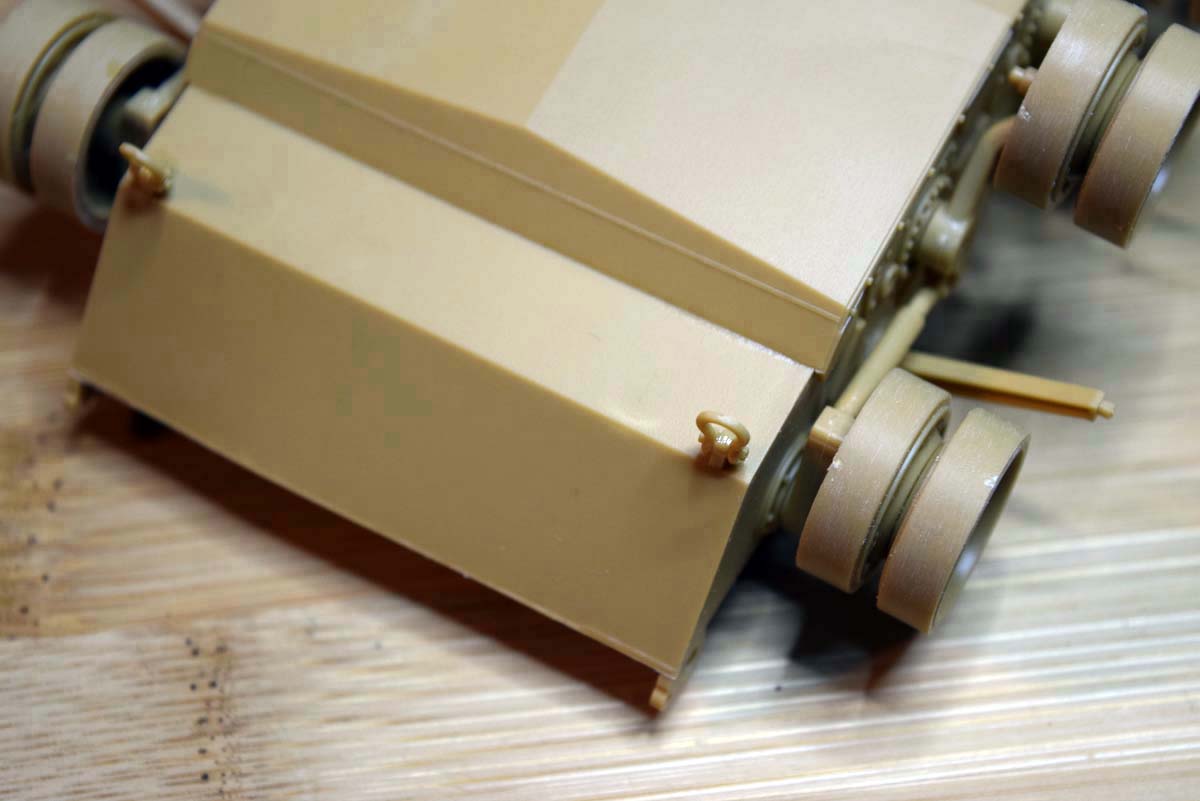
Stage 8 Belly Armour
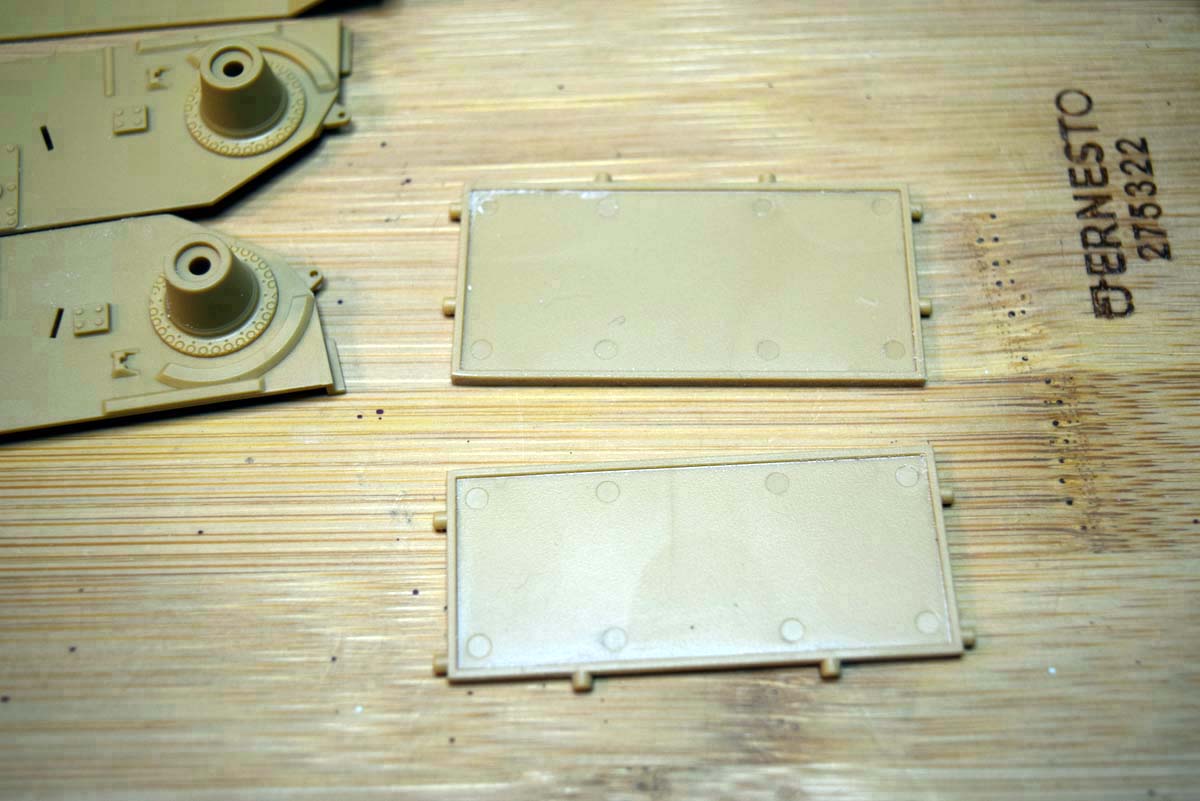
The Belly Amour package is an option rather than a must, but regardless of if you want it or not the fit is very good and easy provided you opened up the holes in the lower hull for the locators. The towing or hitching rings are also added at this point and they fit very well. I have glued mine in place as I am fed up of losing details like this on a model, but they will stay put without glue it is just that you could knock them off.
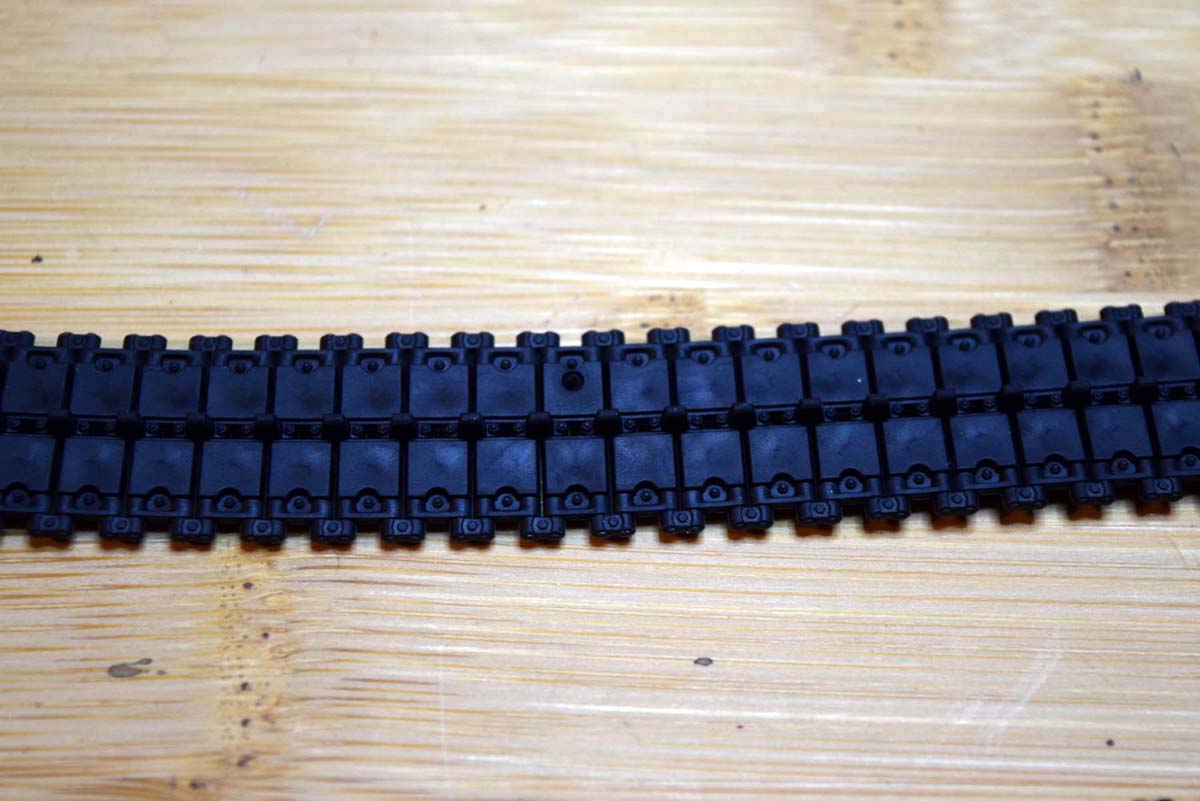
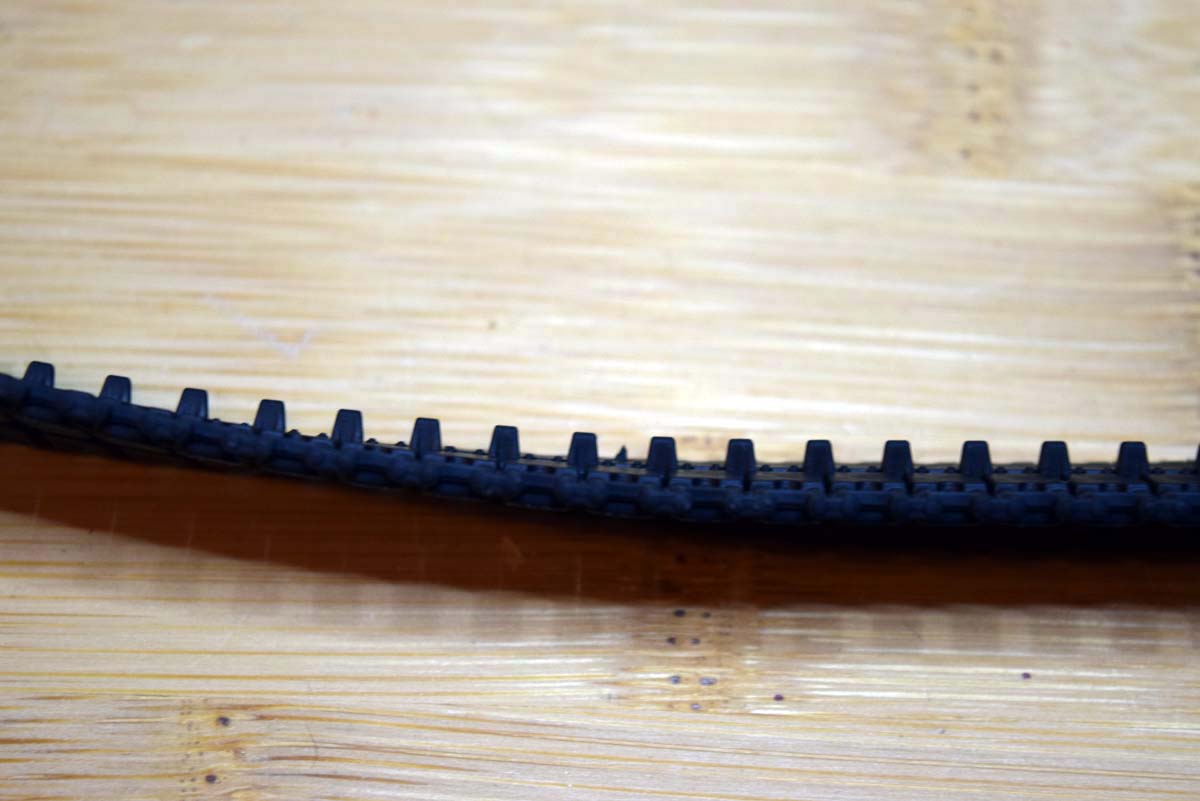
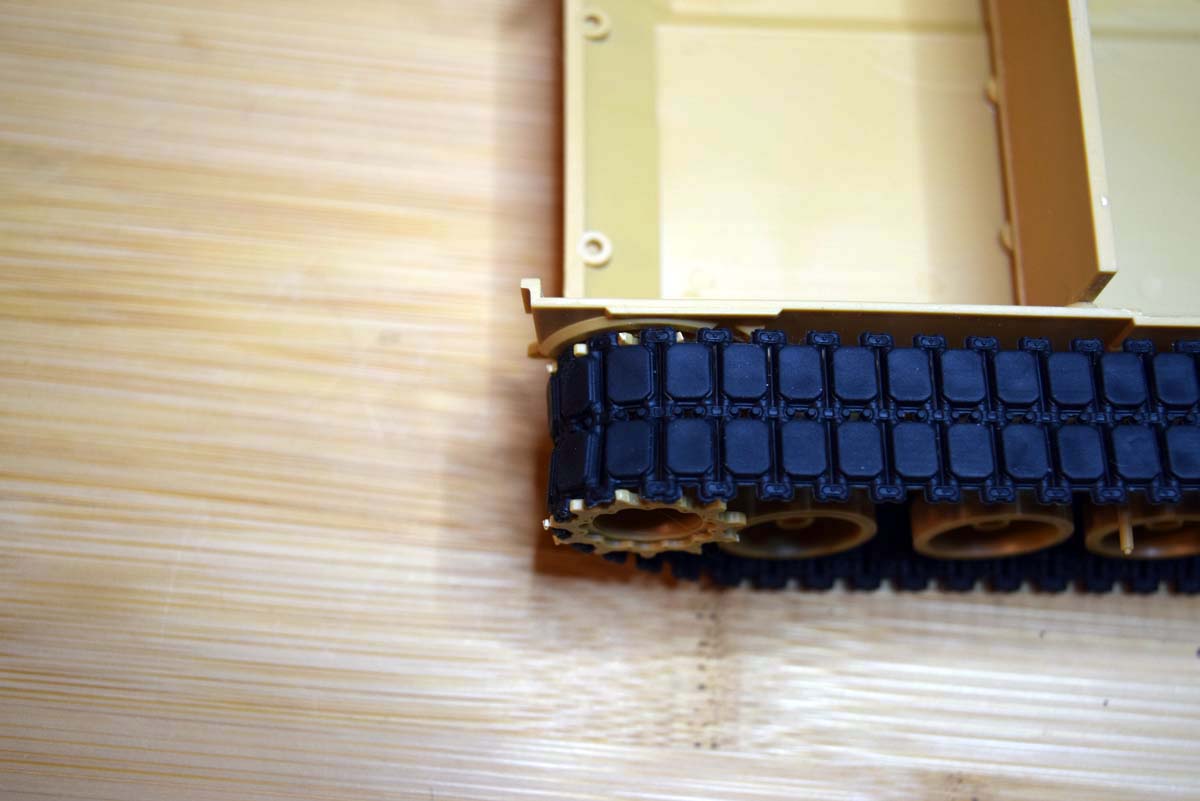
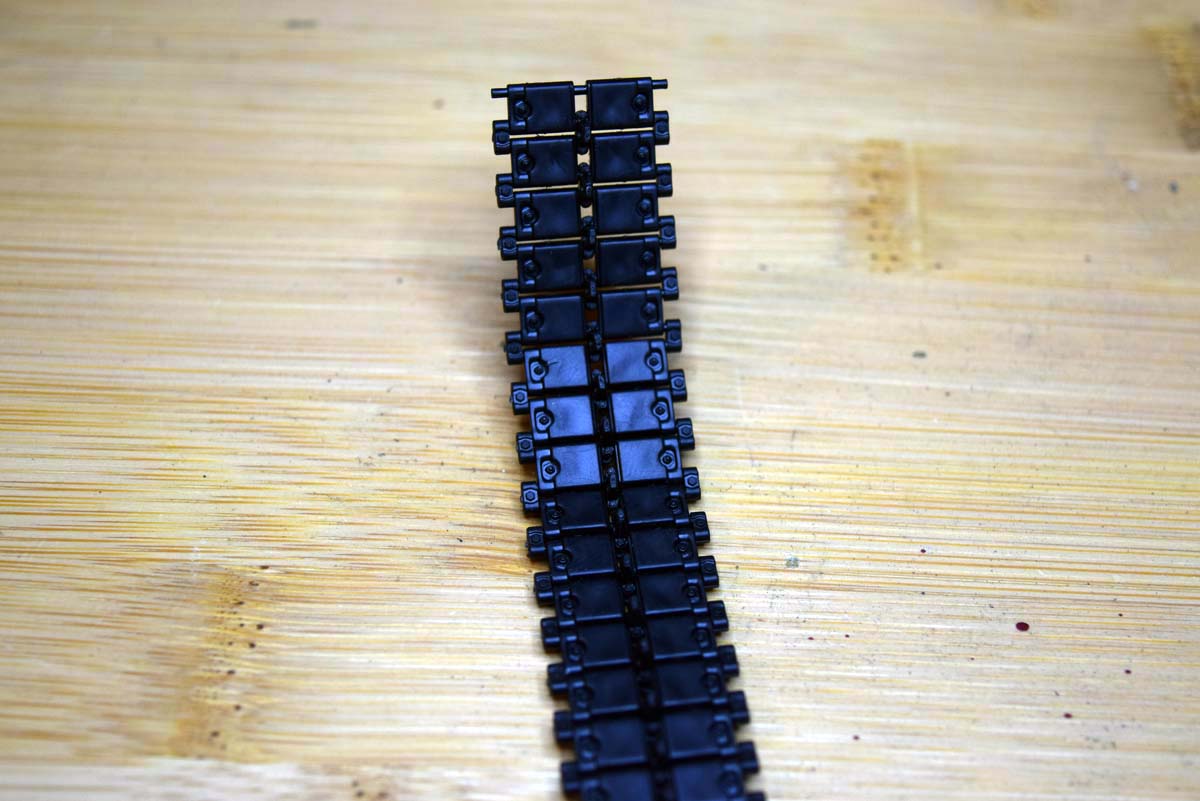
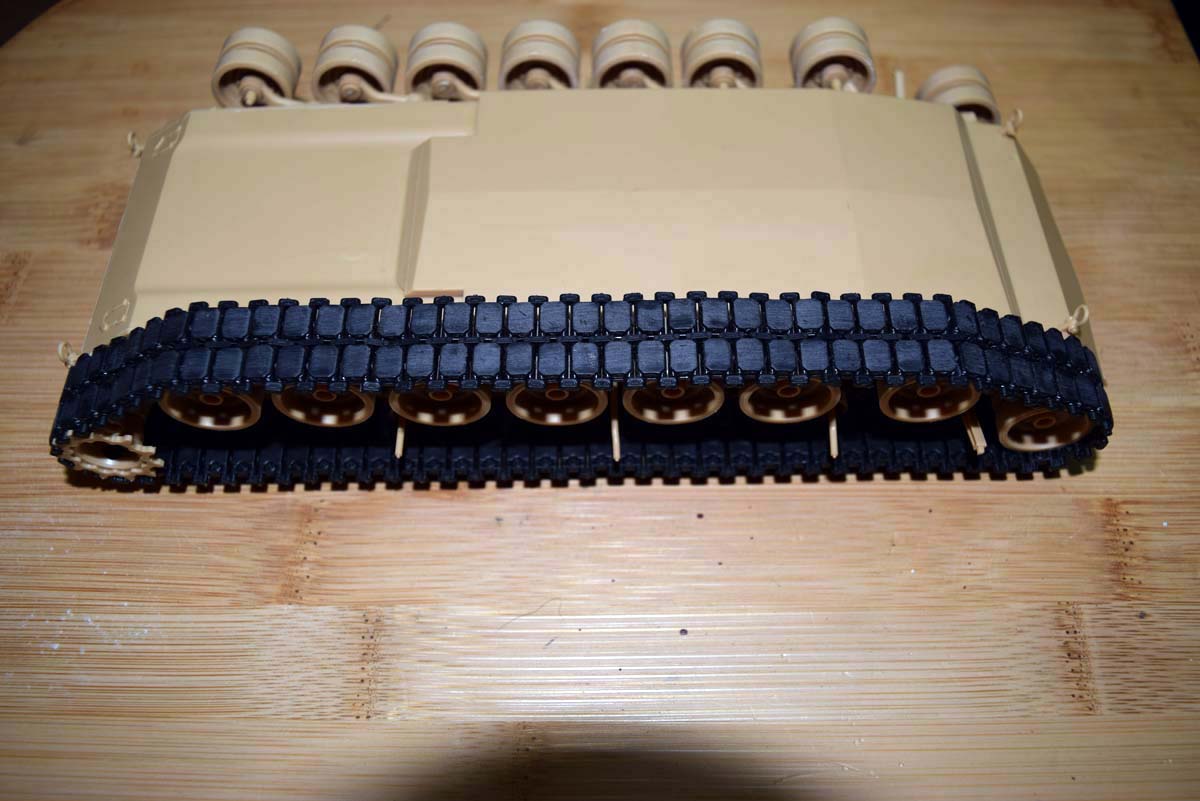
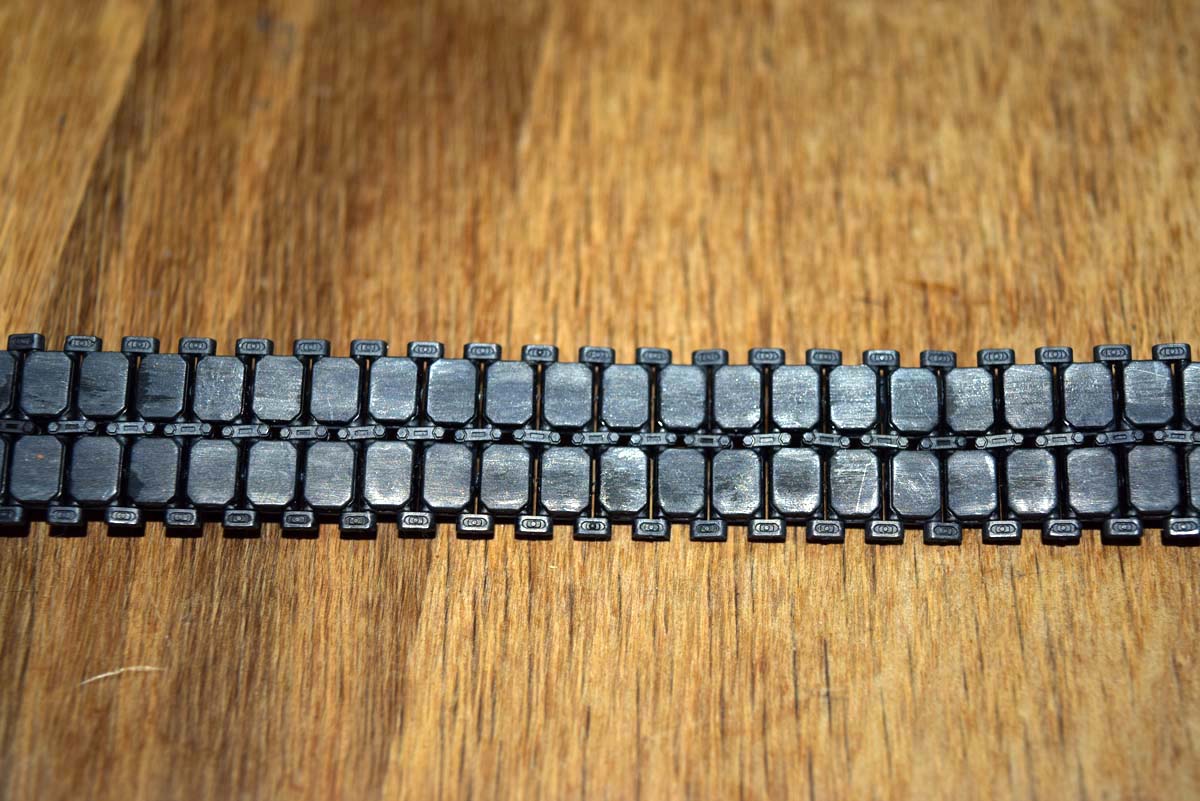
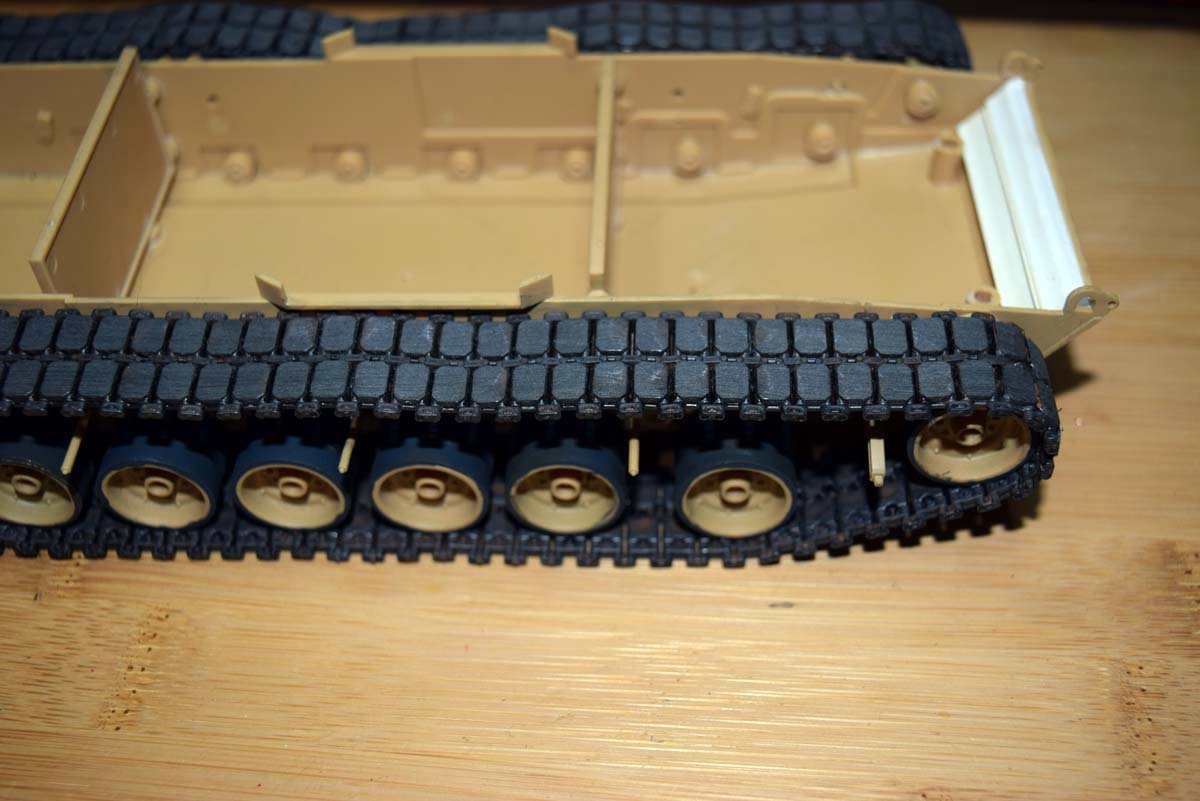
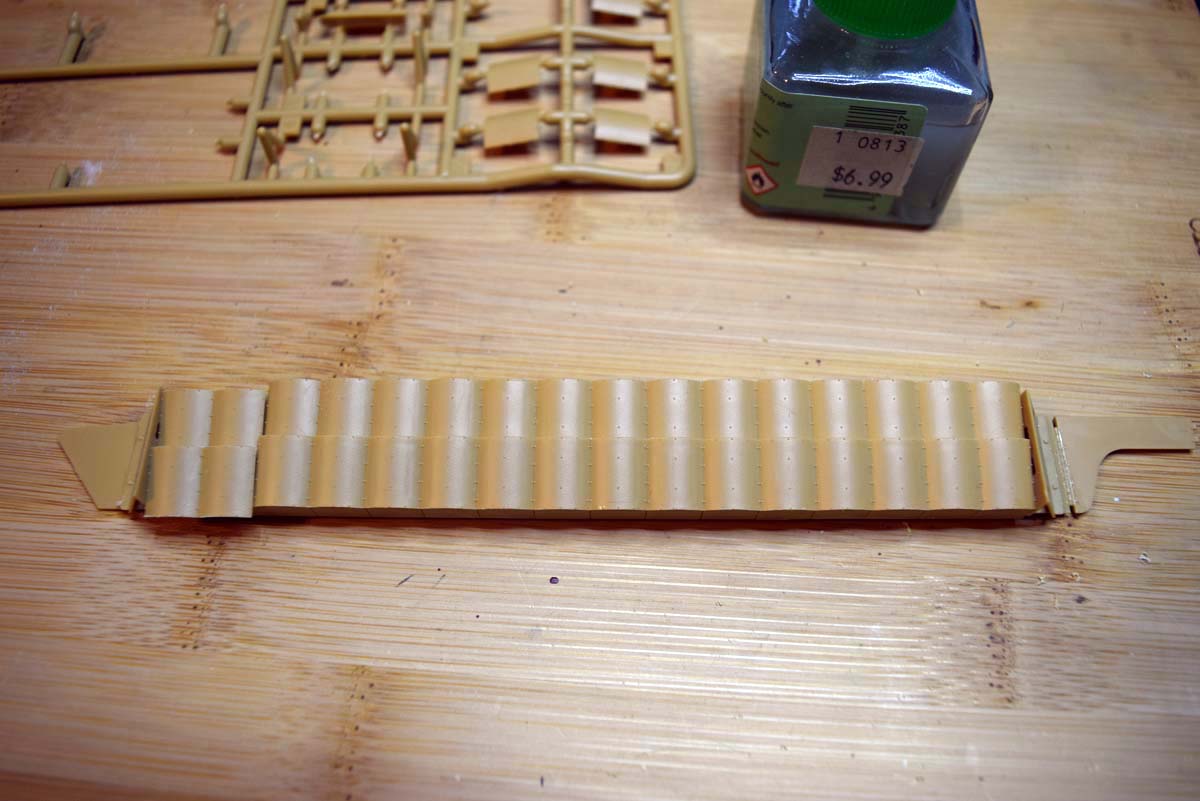
Stage 9 The Tracks Rubber Band
These tracks are the best rubber band tracks I have seen as regards how they go together. These have two slits at both ends into which locks a plastic track made of two halves; this holds the track together very well. The fit to the model is on the tight side with a very small amount of the track being pulled in between the drive wheel when fitted, but it is not excessive as to cause an eye sore. Detail wise they are good with the exception of the guide horns which are solid rather than hollow. The track side that touches the ground is very good as regards detail; the side that the wheels touch is also good but does require that three moulding stubs are cleaned up on each run.
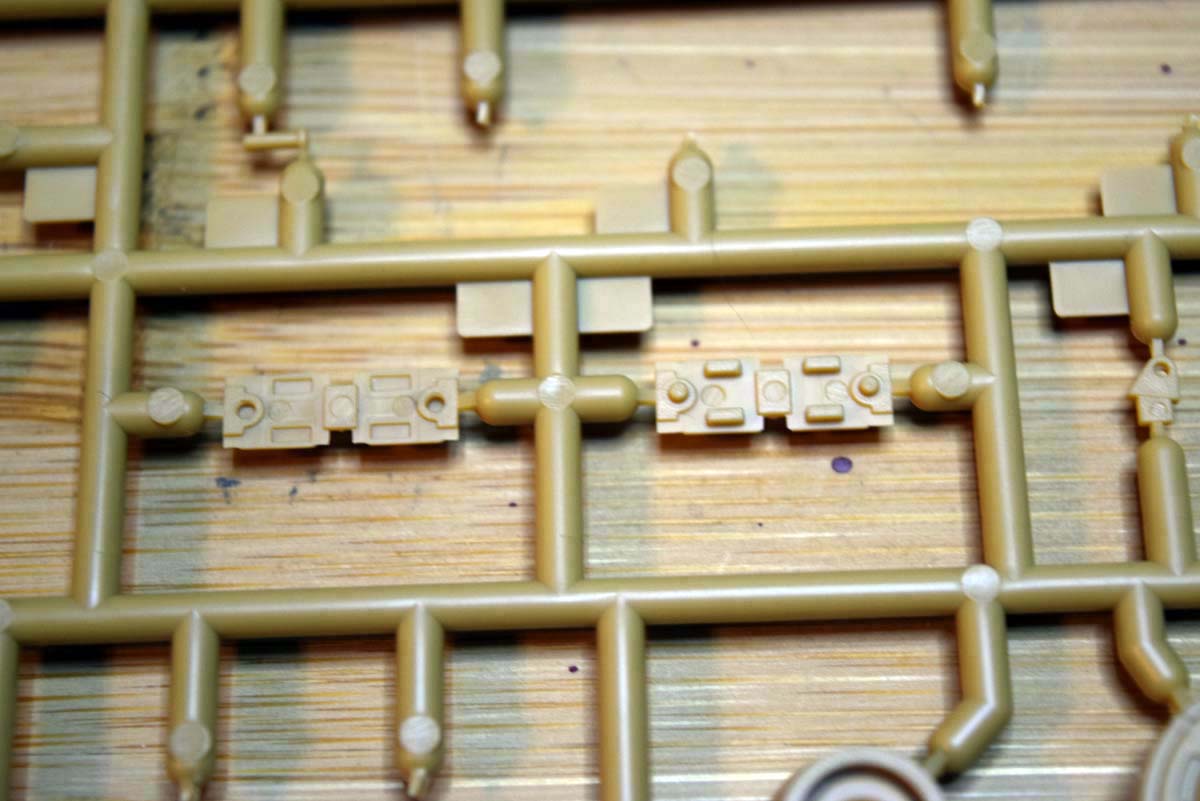
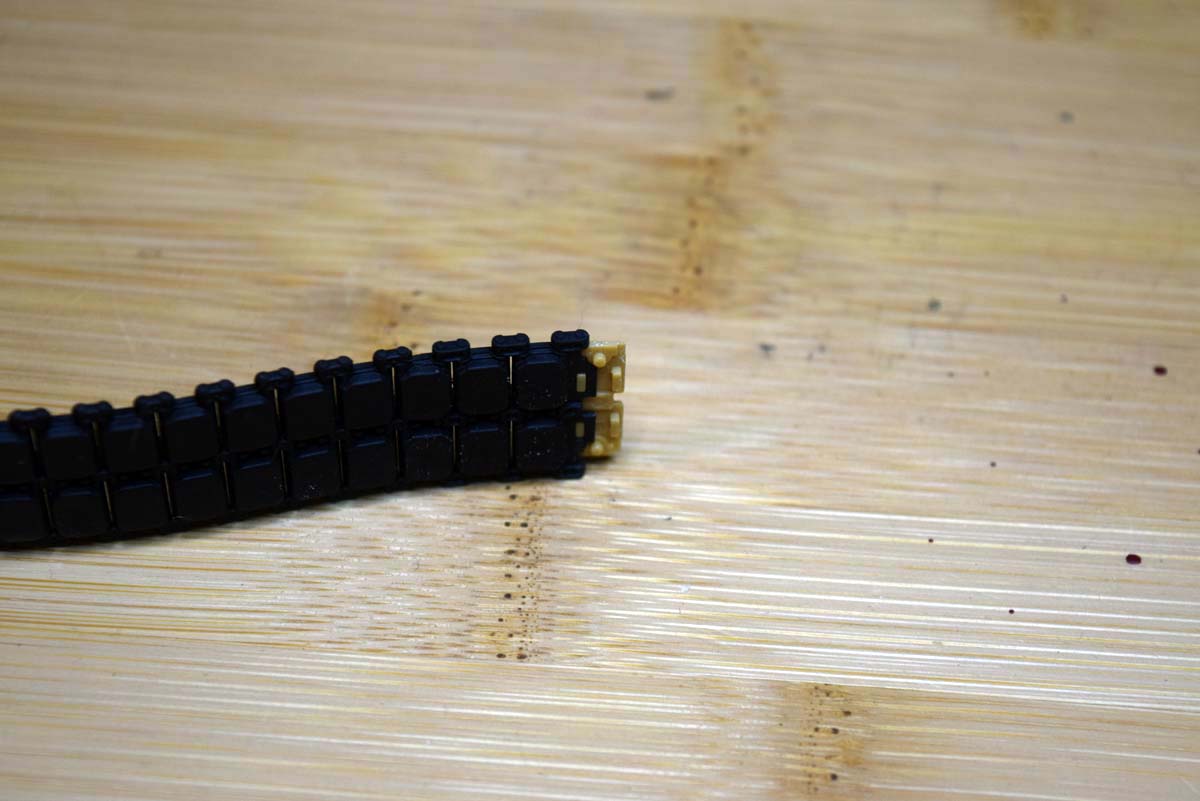
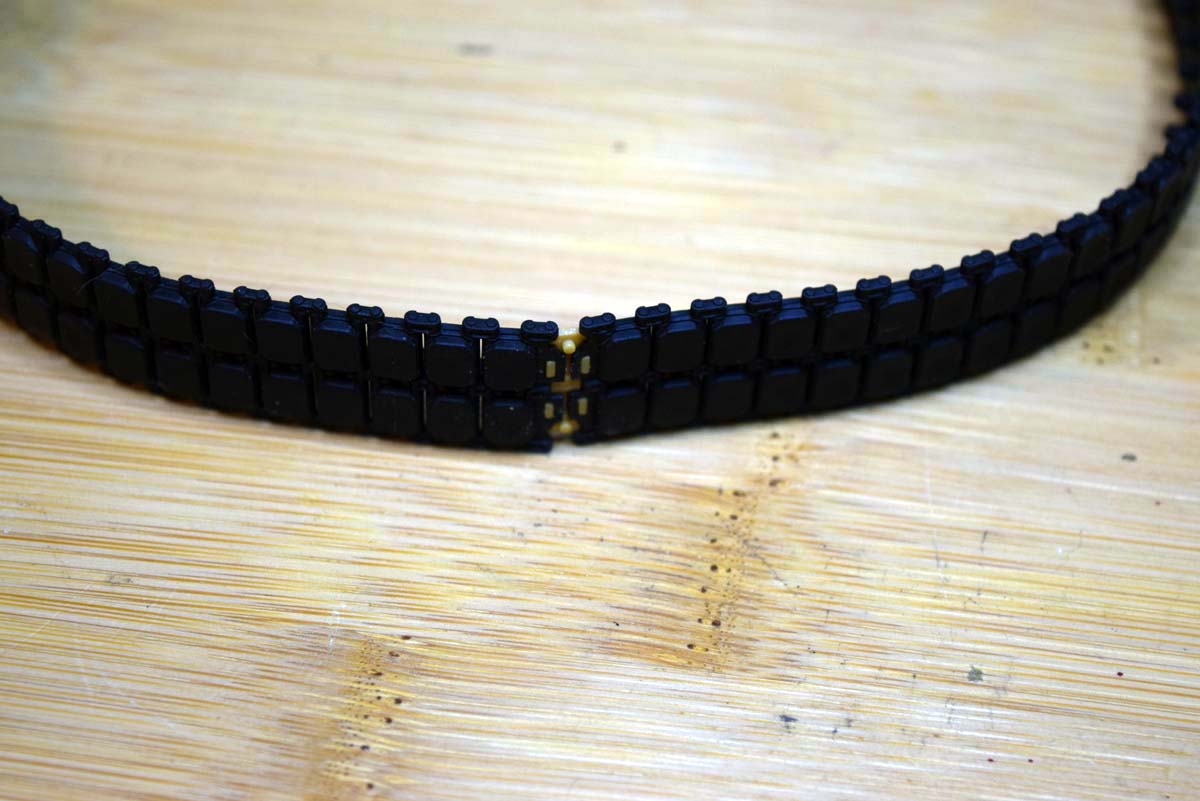
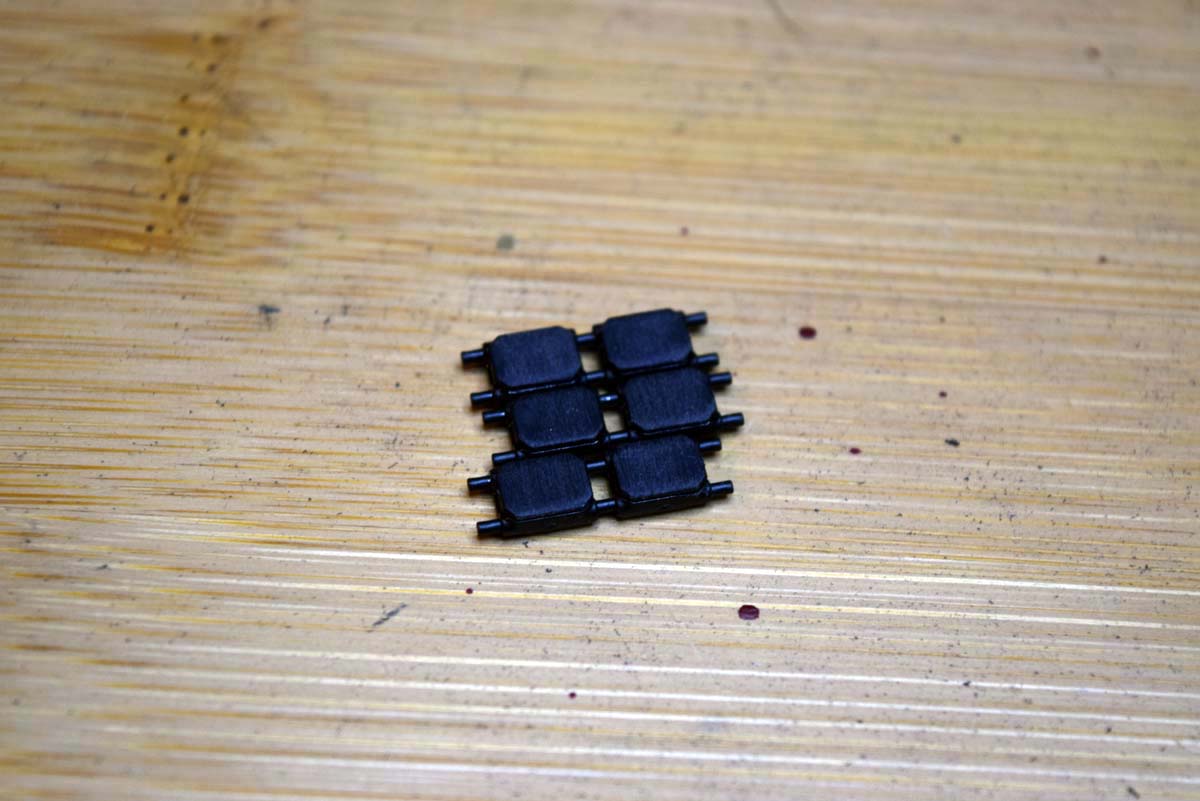
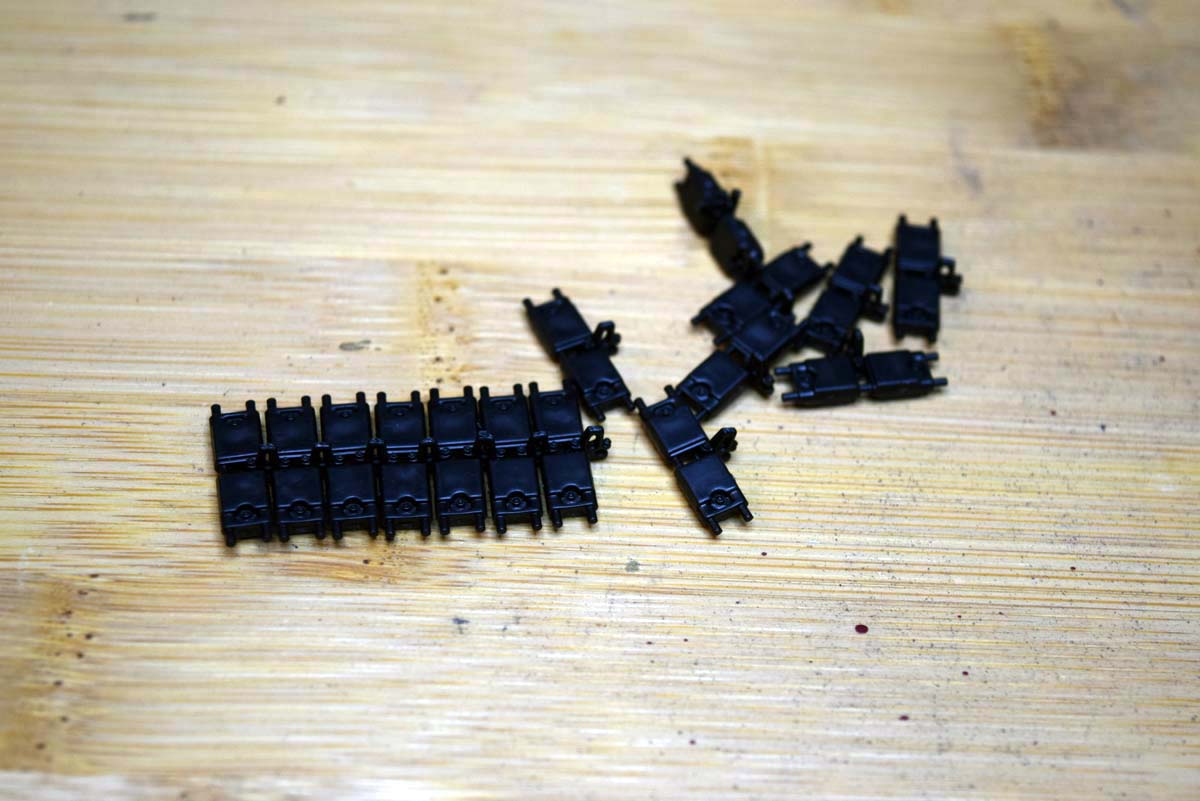
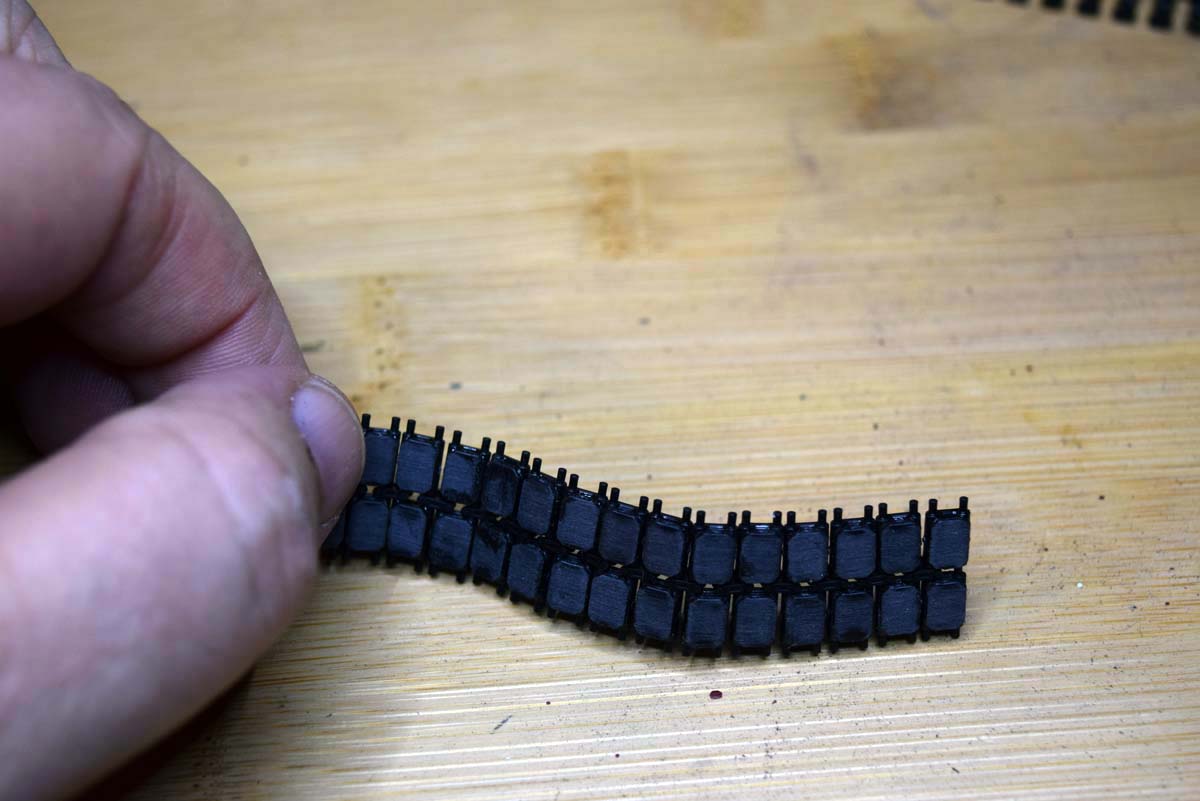
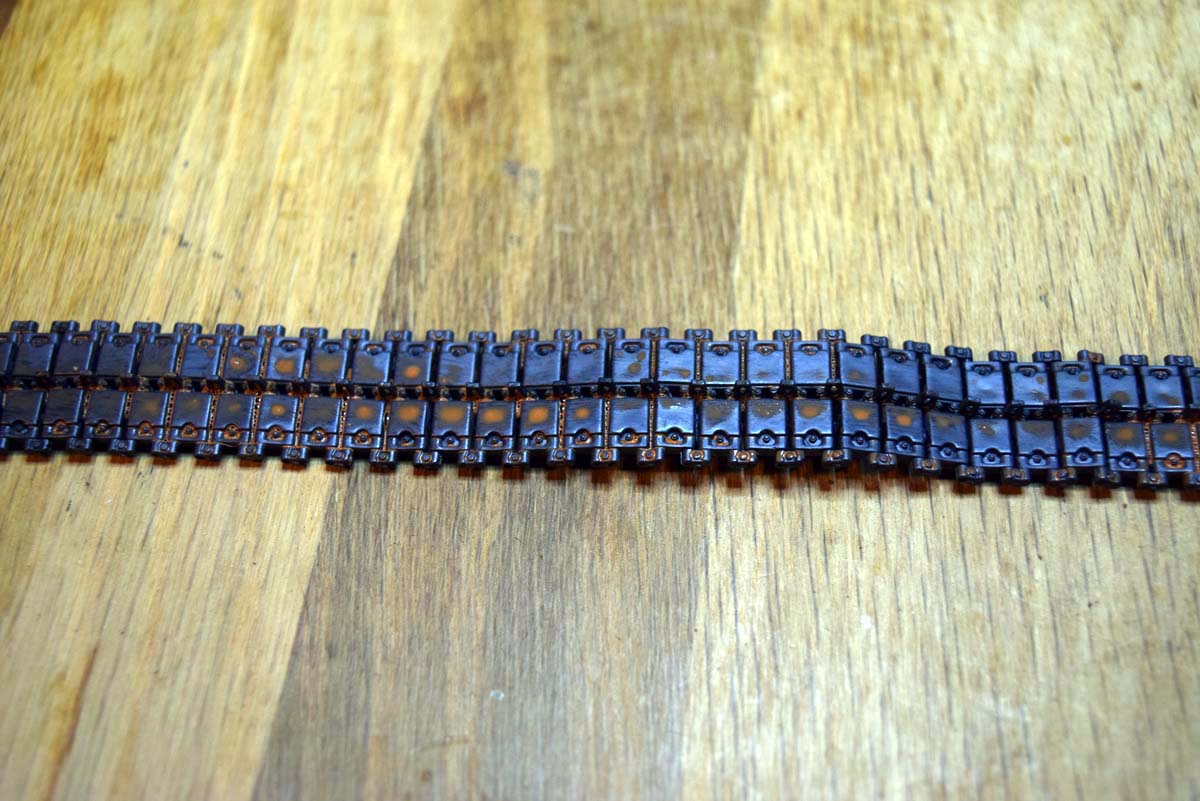
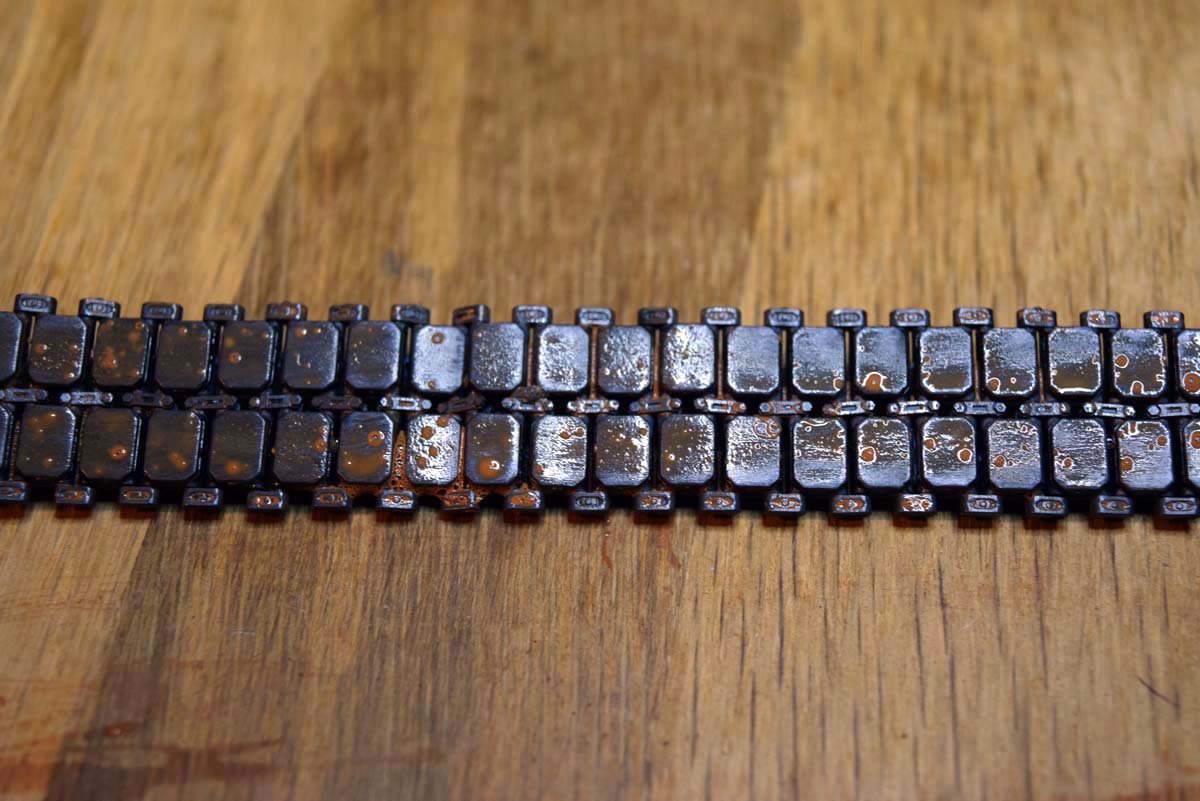
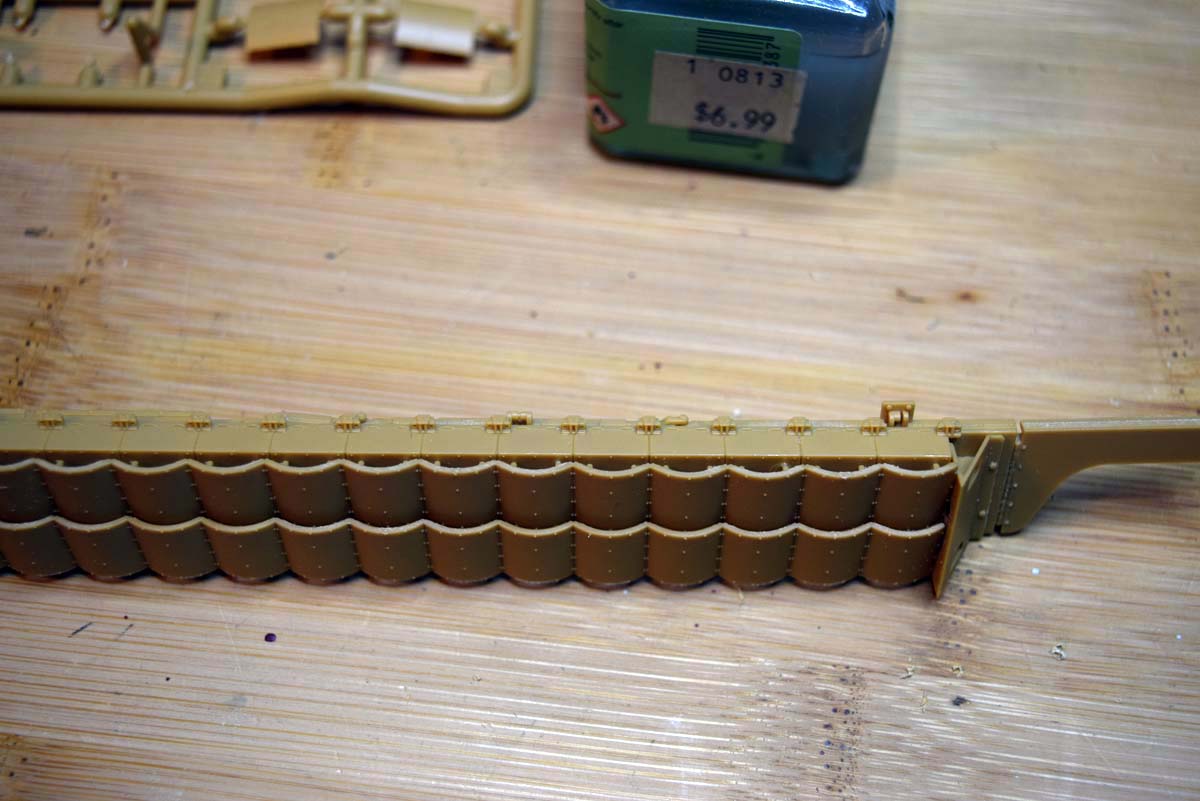
Individual Workable Track Links
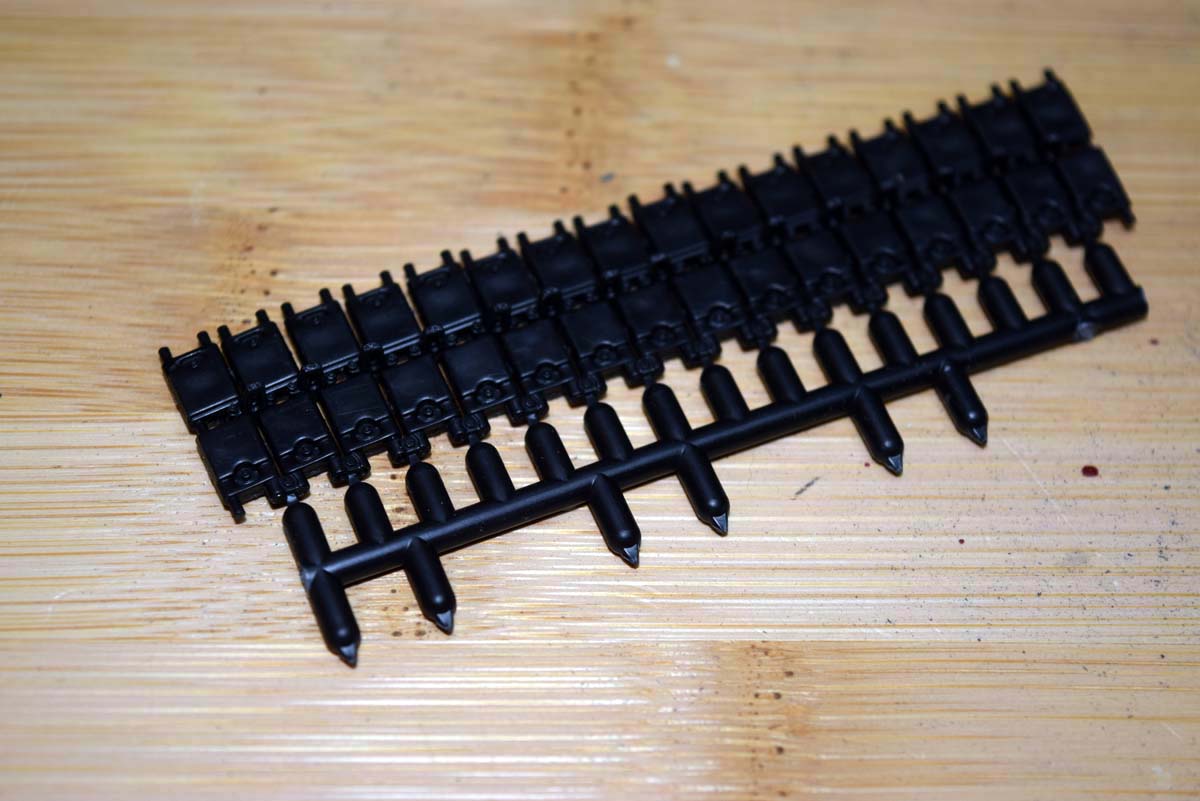
These tracks are excellent and if you have never dared tackle this sort of link before these will be a great introduction to them. The links have separate links, pads, guide horns and end caps; my first thoughts were that these were going to be a pain to clean up, but I was incorrect in that thought. I removed the track links with a good set of snips that left no clean up in most cases being required. I then sanded the track pads in one direction quite vigorously while still on the sprue in order to add a used look to them and this was then followed with removal from the sprue, again little or no clean up was required. The guide horns were next and with care no clean up is again required. I was a little irritated about the separate track pads at first, but then it occurred to me that it made leaving some off if wished easy, something that does happen and roughing up the pad surface meant that no damage was caused to the rest of the link detail.
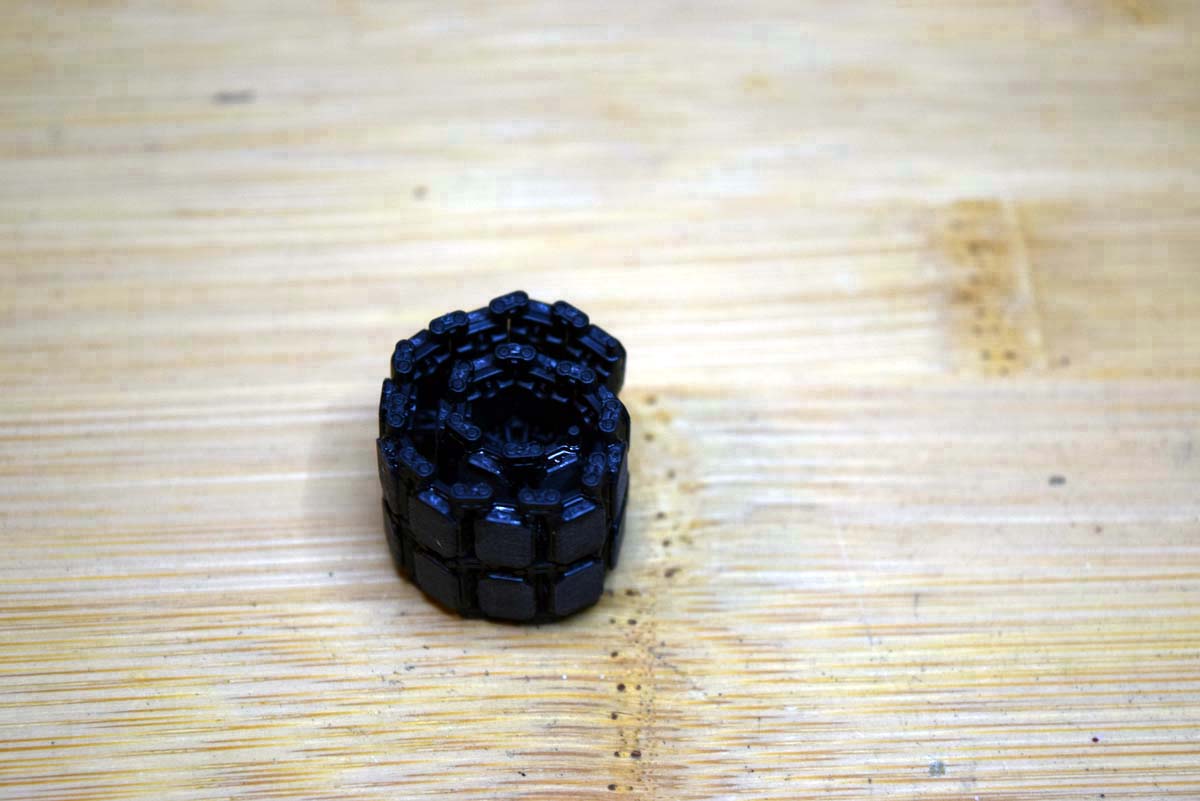
I then attached the track pads to the links doing one side and then the other to allow the cement to dry. Then I attached a guide horn to all but one of the links followed by attaching the links to each other, the guide horns hold the links very well. Next I cut a length of 15 end caps from the sprue and attached these to one side of the links; I found this caused the other side to splay out a little. (Please note that after the first track portion you then need 16 end caps). Due to the splaying out I cut the end caps into smaller lengths for the other side and other than the last three that I had to add singularly the result was easily achieved. The result of all this is a very nice looking and realistic looking track run that is quite stiff but fits the drive wheel very well. These are a very nice addition and I hope it is a trait that Academy will continue.
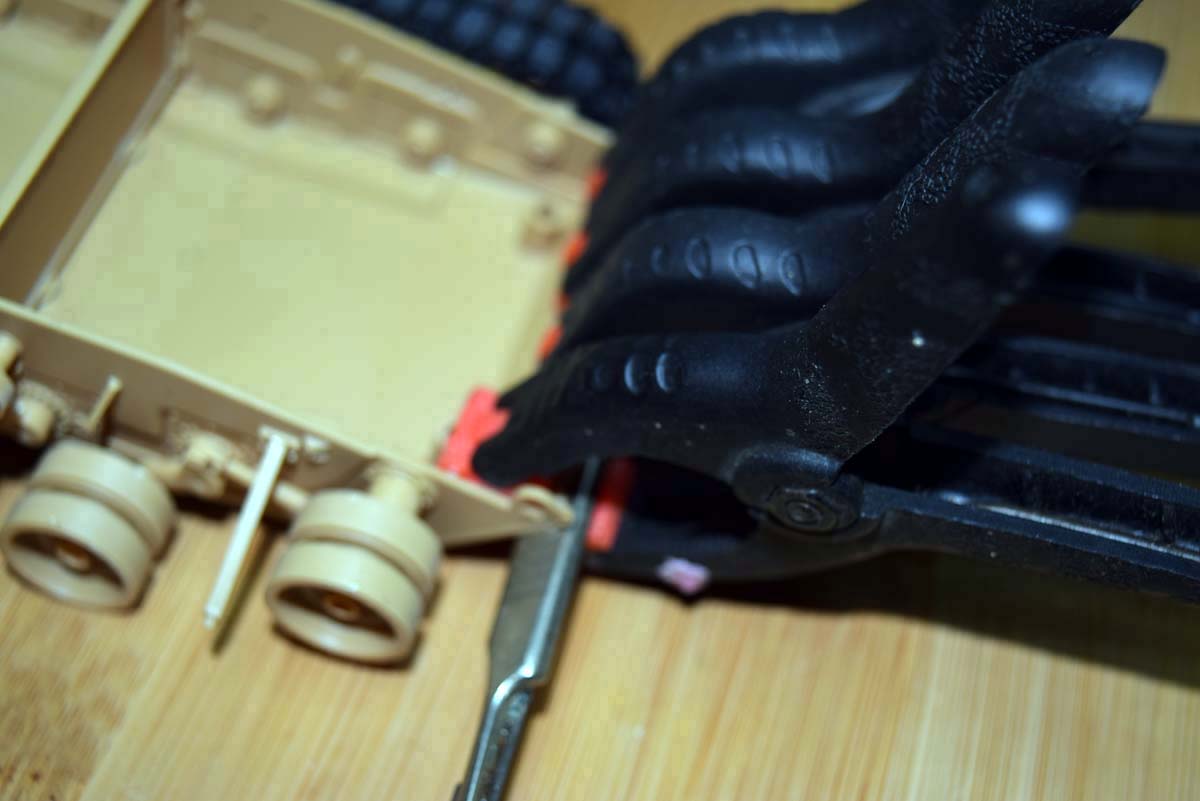
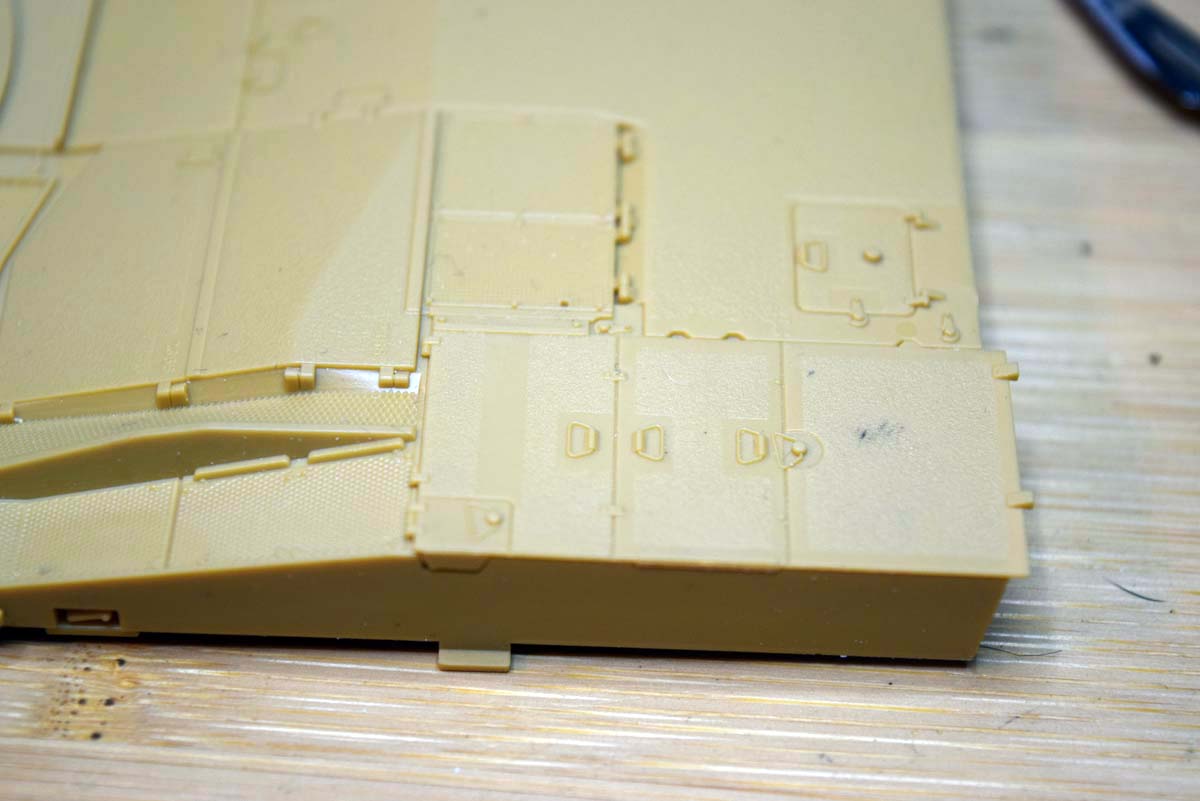
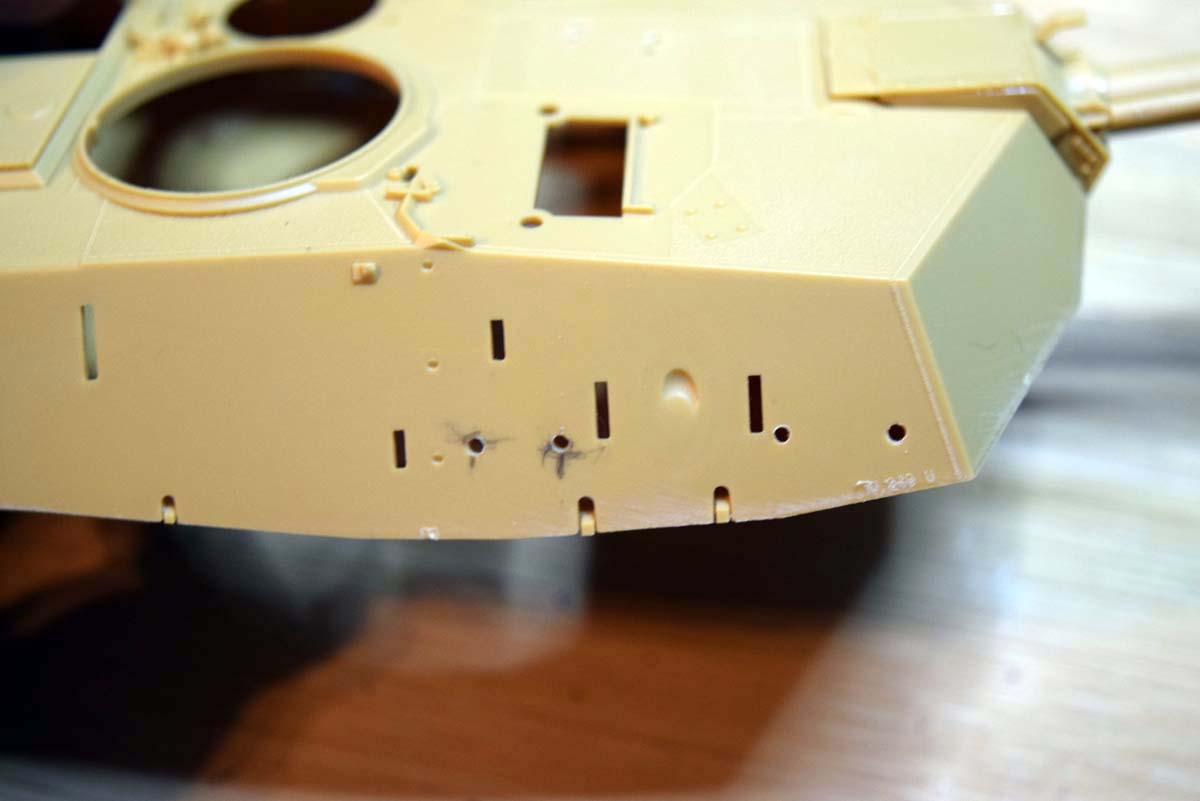
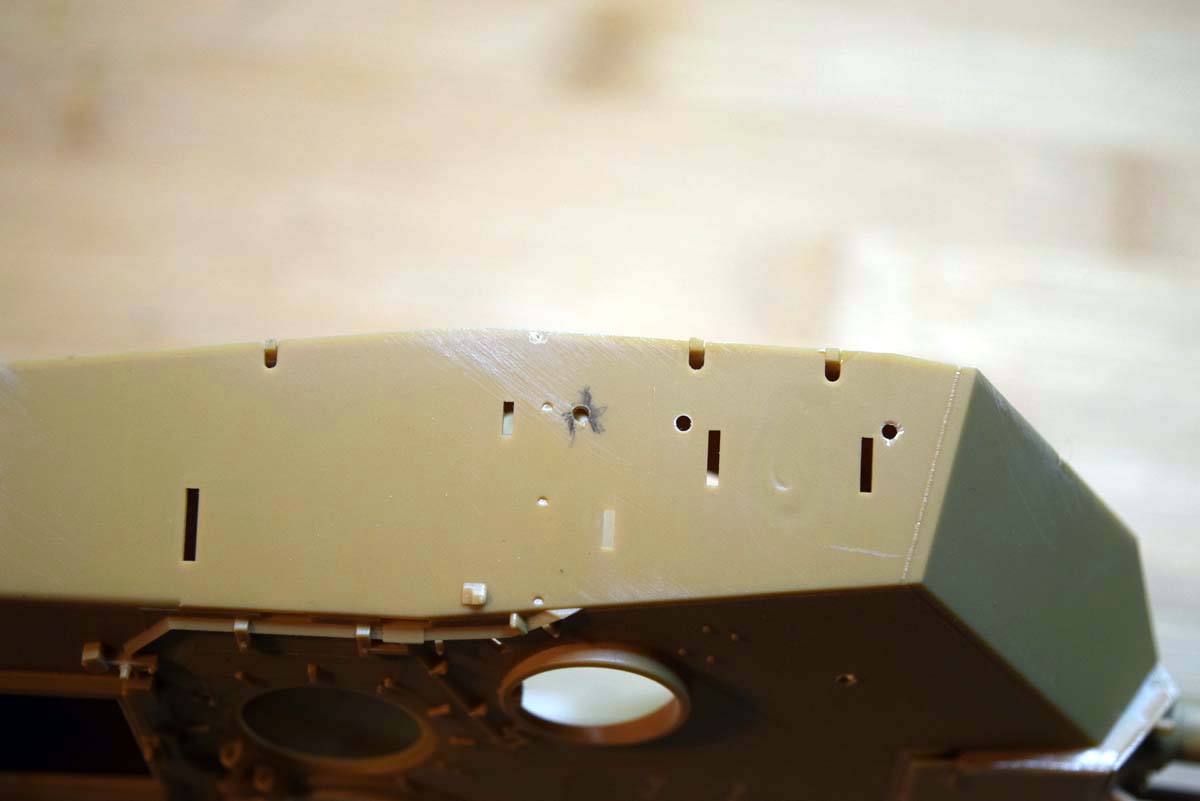
Fixing an Issue No1
On this offering the front plate of the lower hull had a nasty bow to it that needed to be fixed. I tackled this issue in three different ways, each being a little more involved with the third approach working a treat.
Attempt 1 Heat
I attached a straight edge to the hull via clamps and then used the directed heat from a hair dryer. I left the part over night but the bow came straight back when I released the clamps.
Attempt 2 Softening
My next attempt again involved clamping the part against a metal straight edge and softening the area affected. I used a liberal application of Tamiya extra thin to the rear face of the affected area and again waited over night. No joy the bow refused to go away.
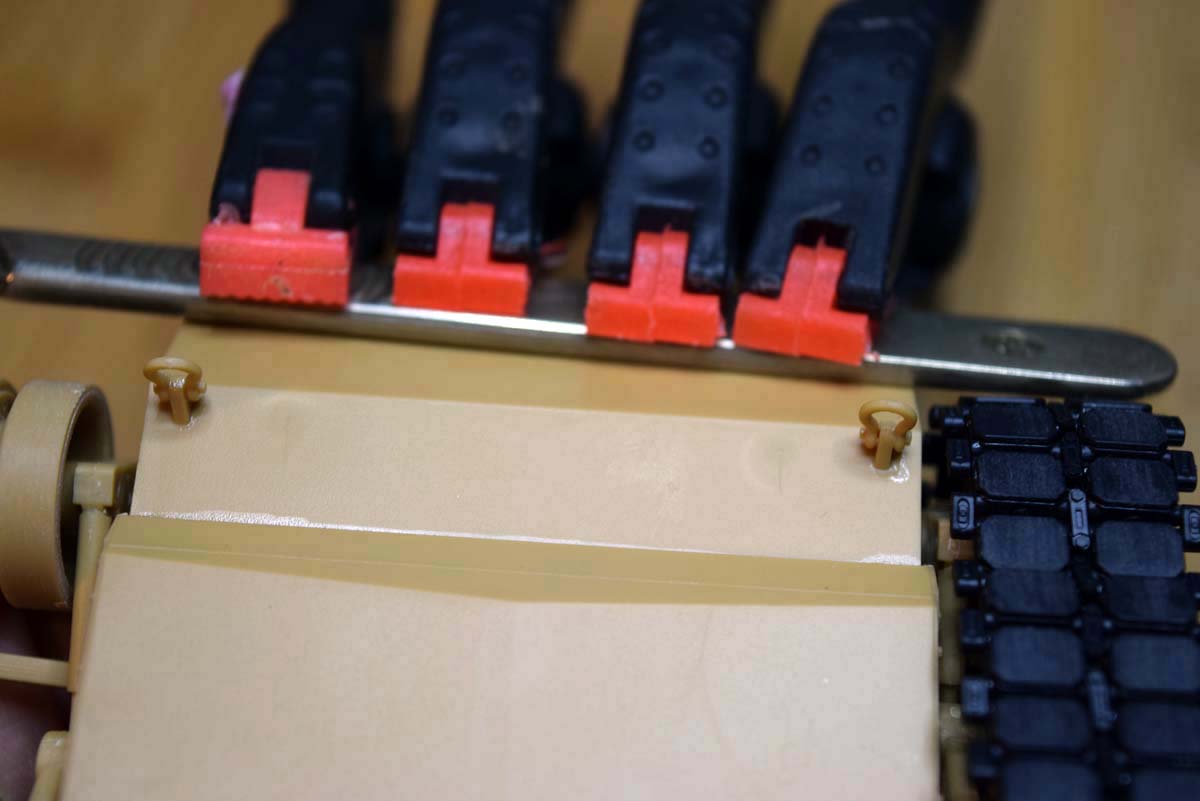
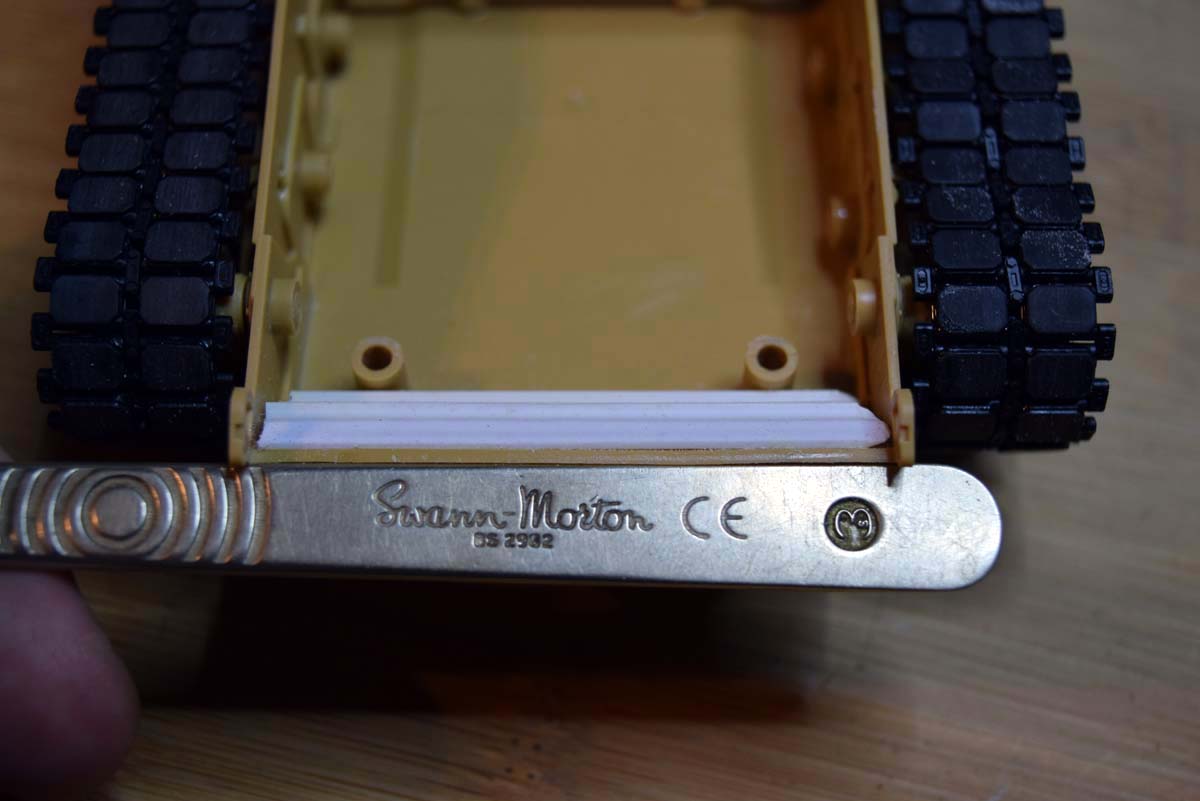
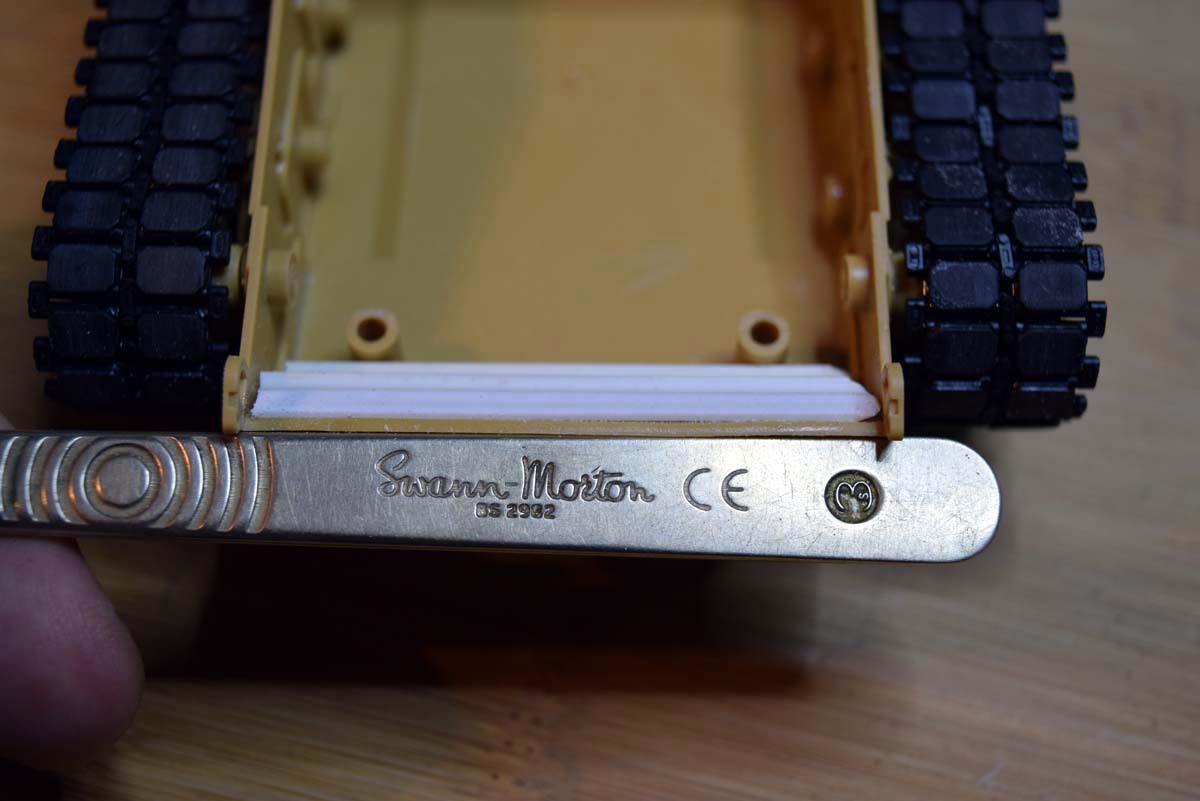
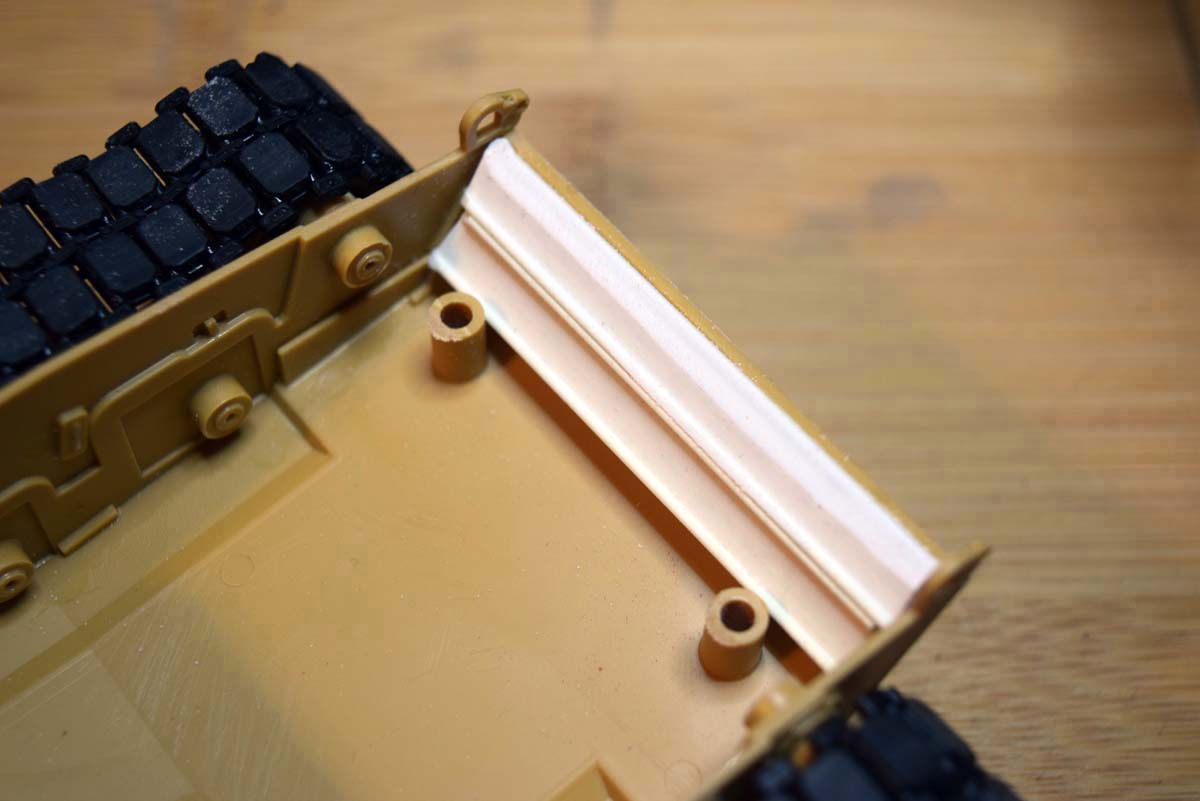
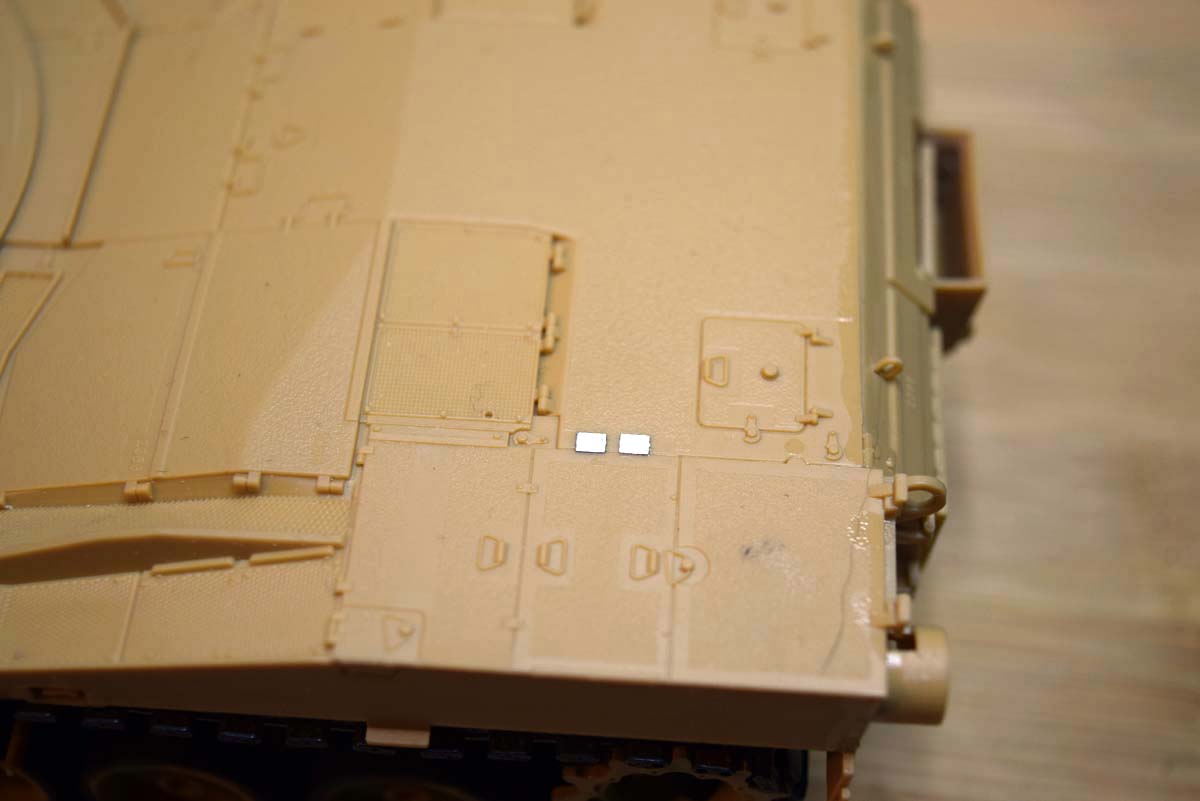
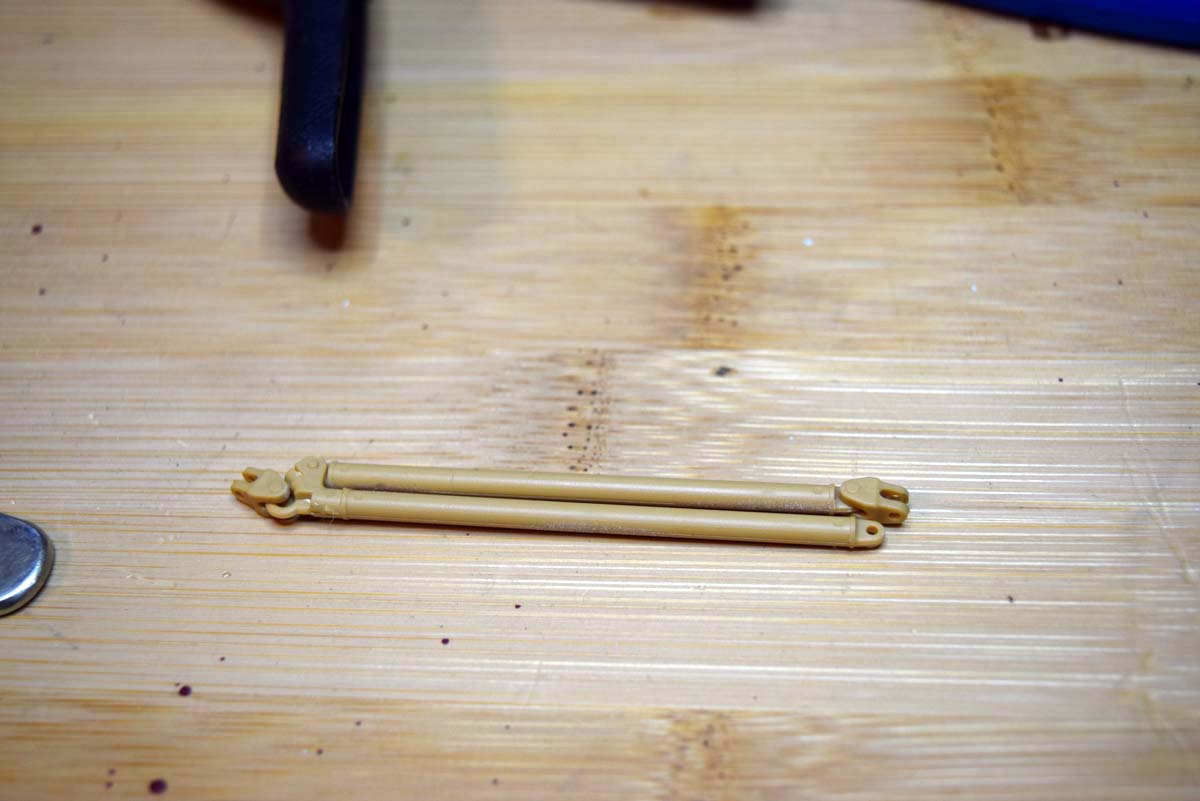
Attempt 3 Bracing
By now I was getting a little annoyed with this issue and decided to brace the area permanently, enter the spares and plastic rods. I found some I shaped rod and cut two pieces to the required length. A liberal application of Tamiya extra thin again and the plastic was applied again with the metal straight edge on the outer face and held in place with four clamps. This has fixed the issue as you can see but it did require some sanding as the top of one of the I braces which was slightly high.
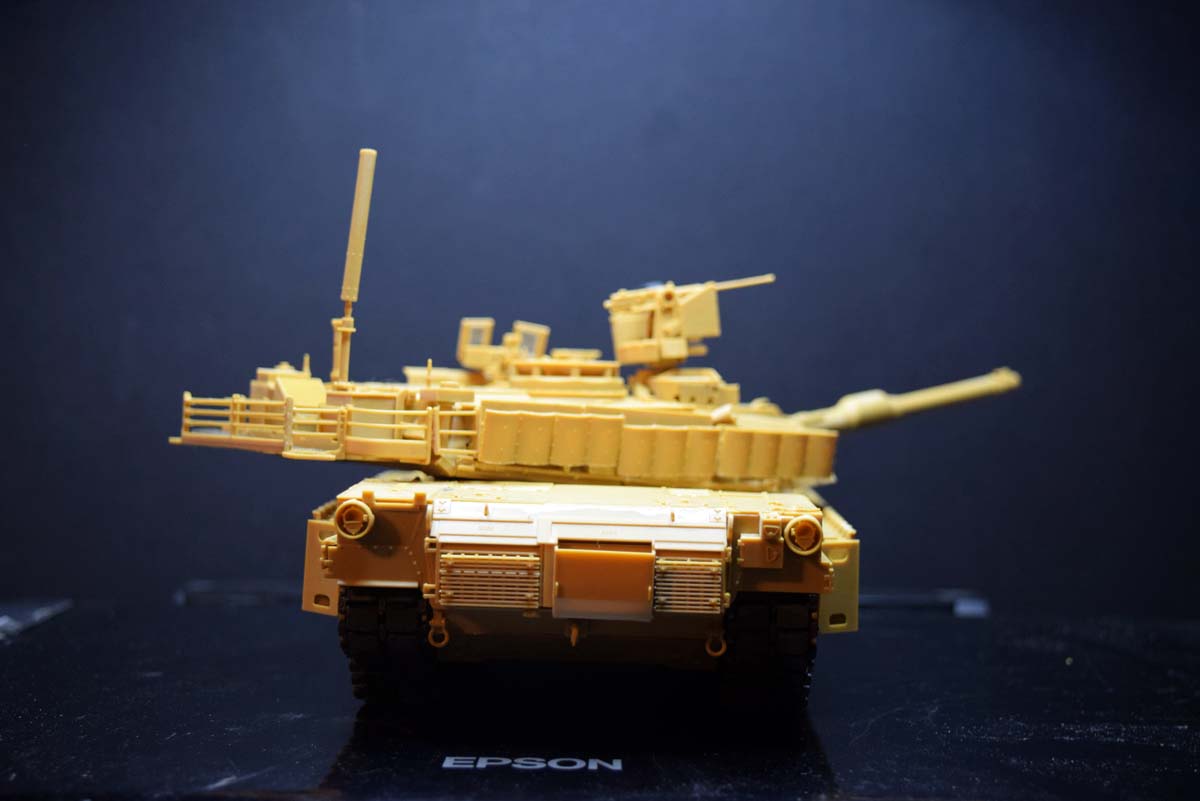
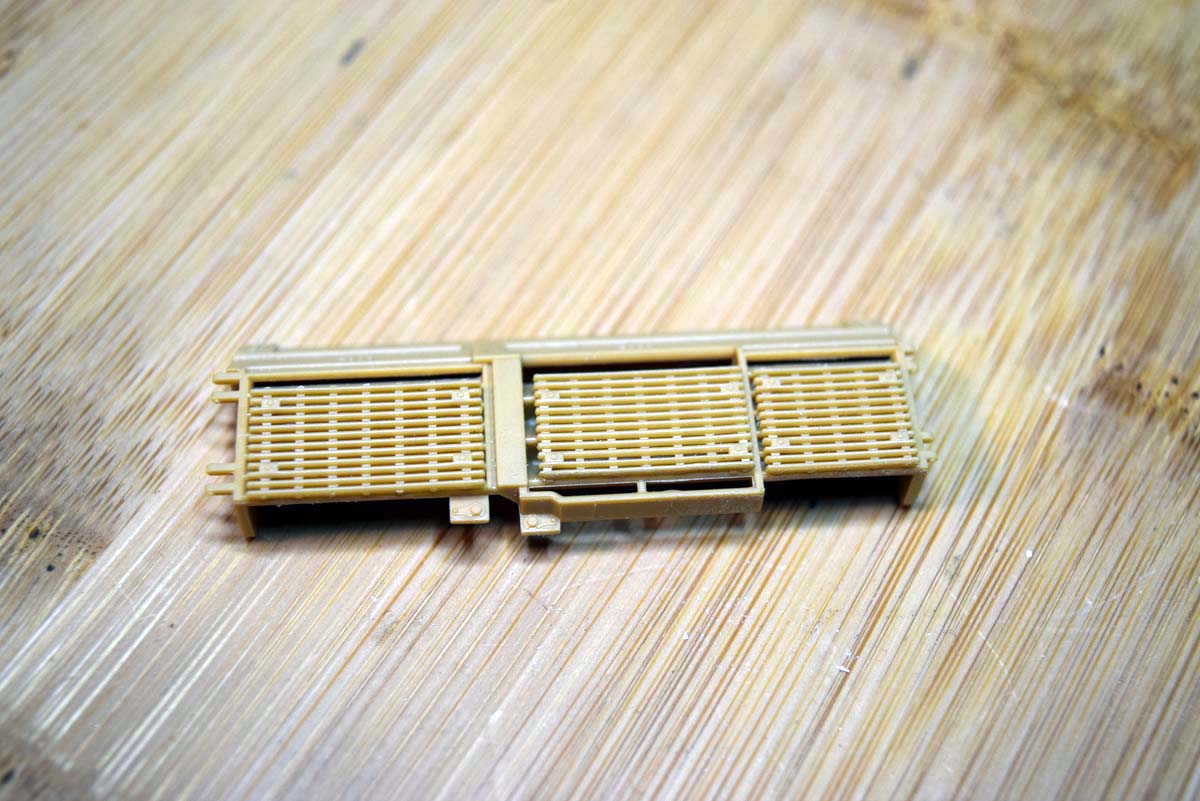
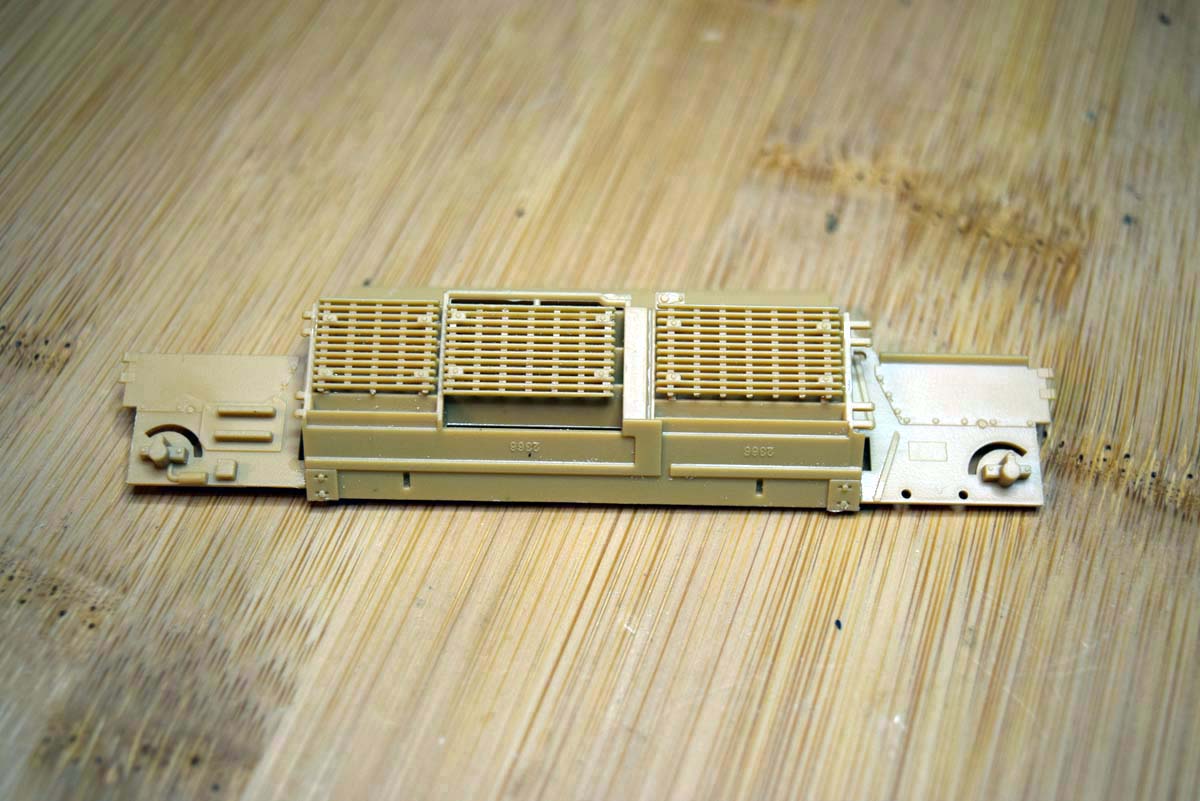
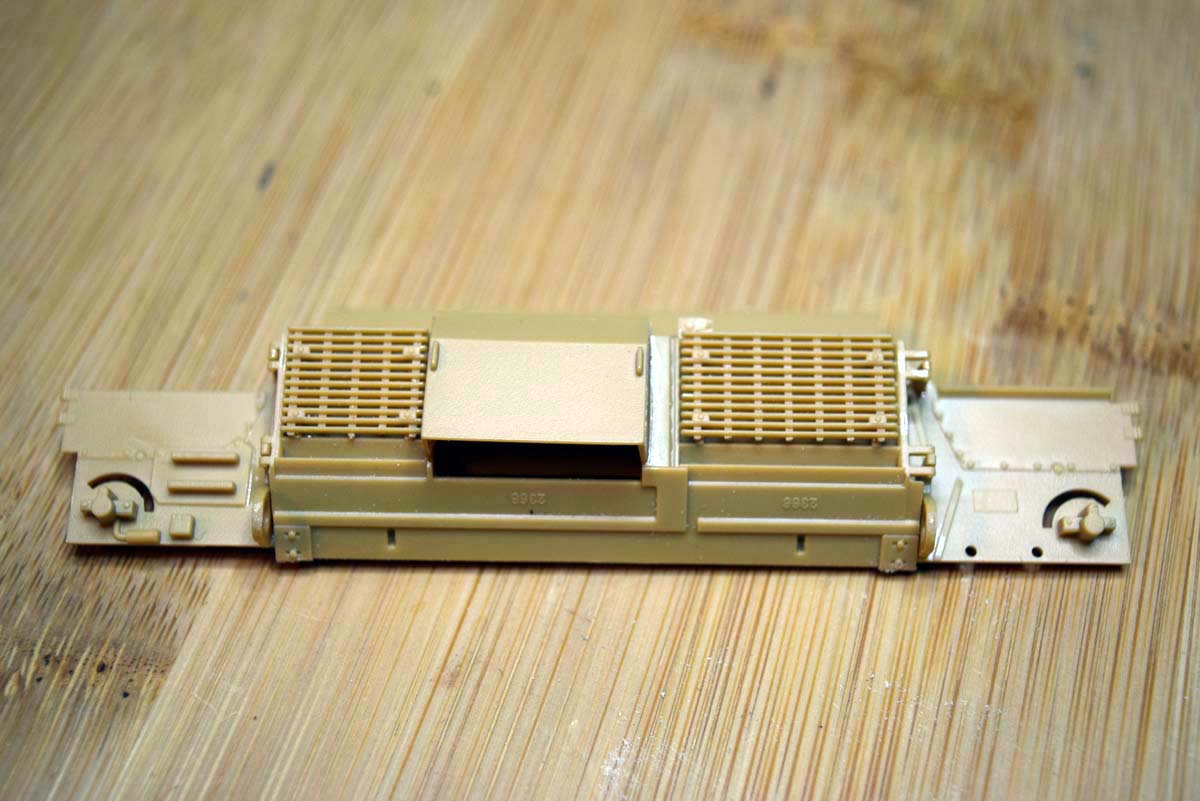
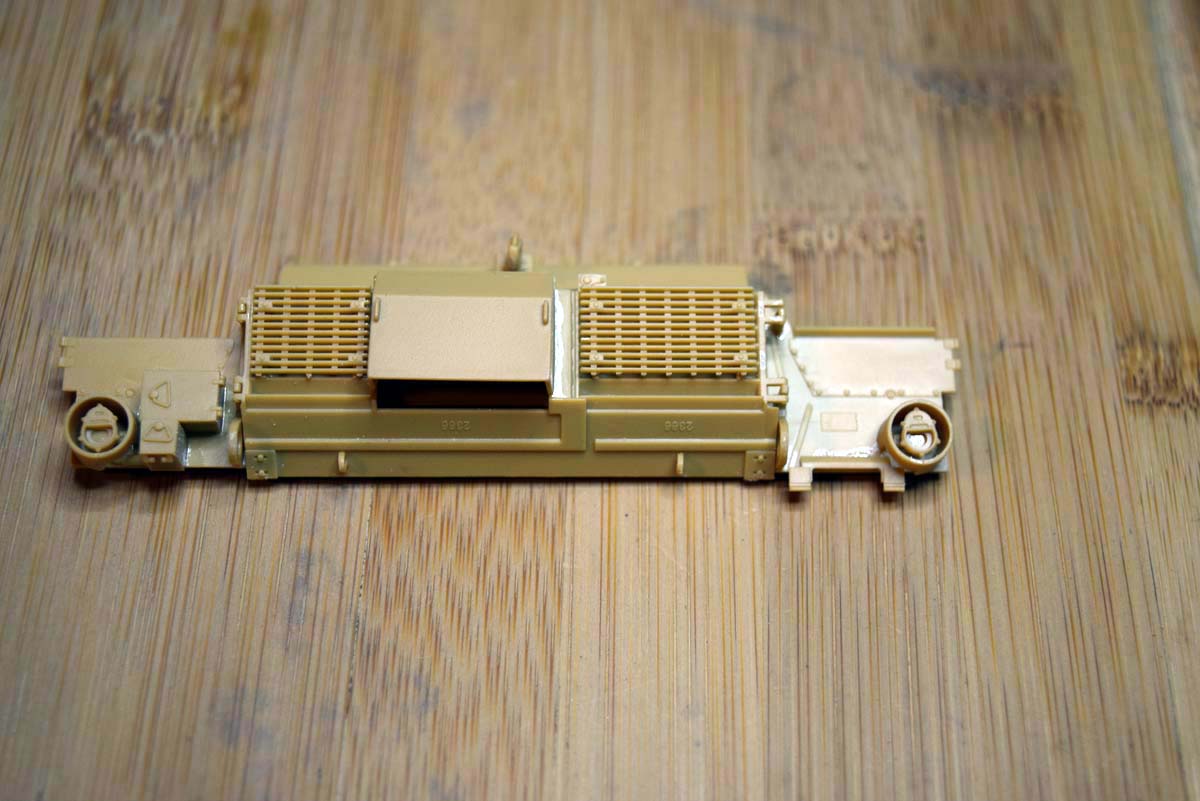
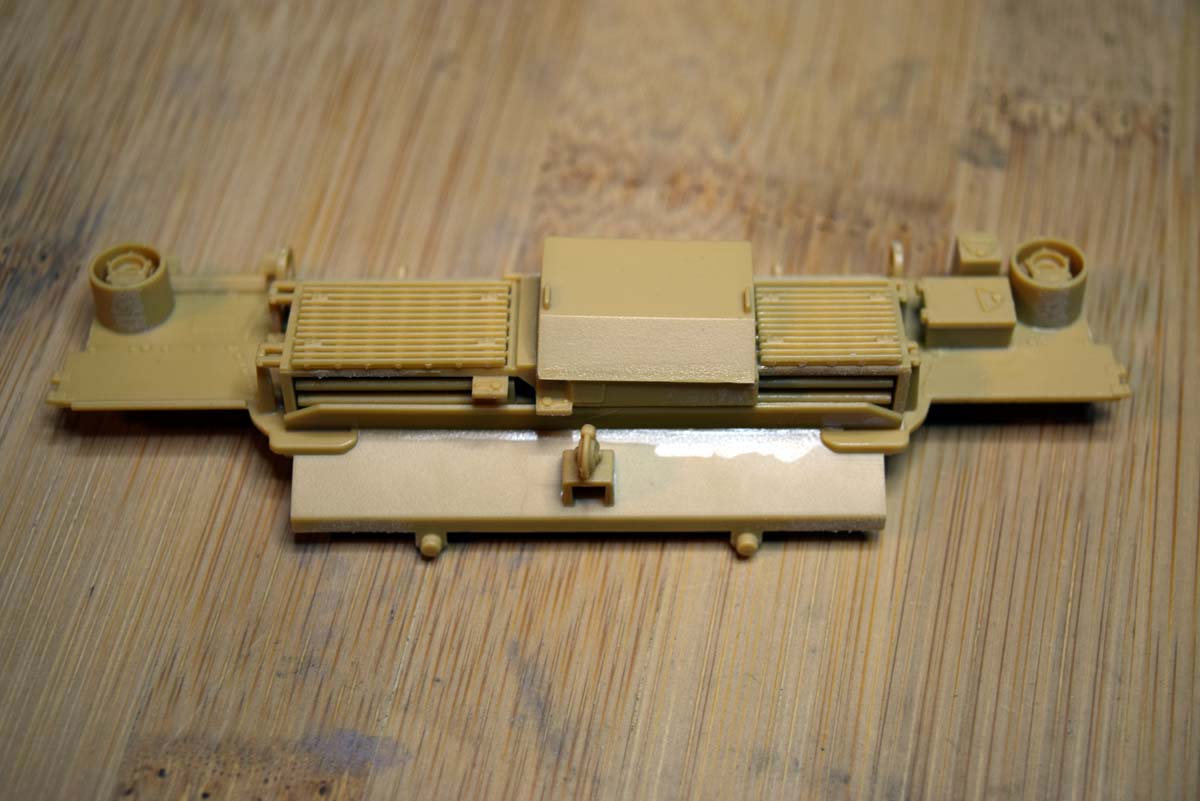
Stage 10 to 11 Rear of the Hull
The rear panel of this model is quite complicated in so much as you have to pay close attention to what you are doing to get it right. The panel itself is an easy start to the build process but when you move onto the vents you need to make sure that the three gratings are the correct way up; Note they are not all up the same way; the centre one or exhaust is the opposite way up to the ones either side. The hinge brackets for these panels are next and provided you know that is what they are positioning in easy. The deflector shown added here over the exhaust is an option rather than a must do, I have seen images of tanks where this part looks all but rusted out. The rear lights have a photo etched option as well as a plastic one which I like to see in terms of opening the model up to modellers of all skill levels. Clear lenses are provided for the rear light clusters, I have skipped this detail at the moment. When it comes to attaching the rear panel to the hull I hit the one aspect I really didnt like; Academy has gone for two large receivers for pins extending from the panel and two slots. I have found that the pins do not fit the holes and so these need reshaping/sizing to make it work and I would have preferred an alternate approach. With the pins thinned down a little the part fits into its home very well, but holes that are not big enough to accept the pins seems a common issue with this model.
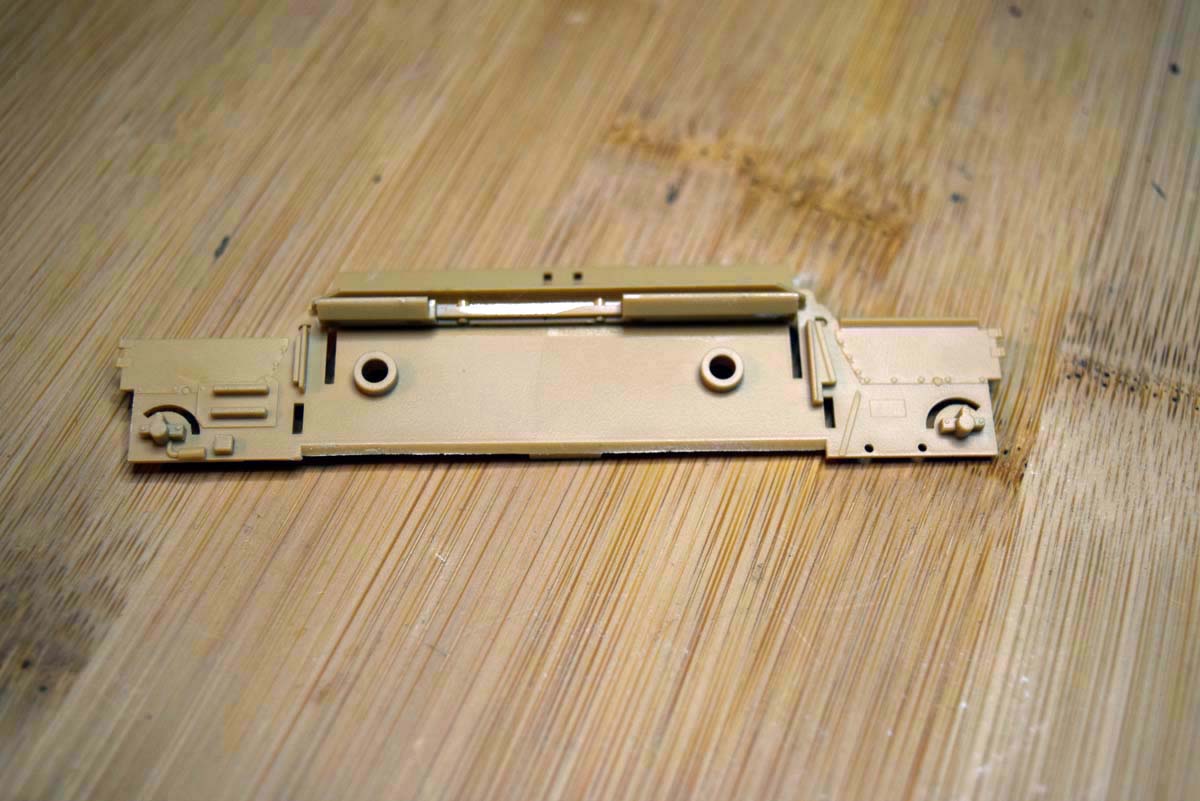
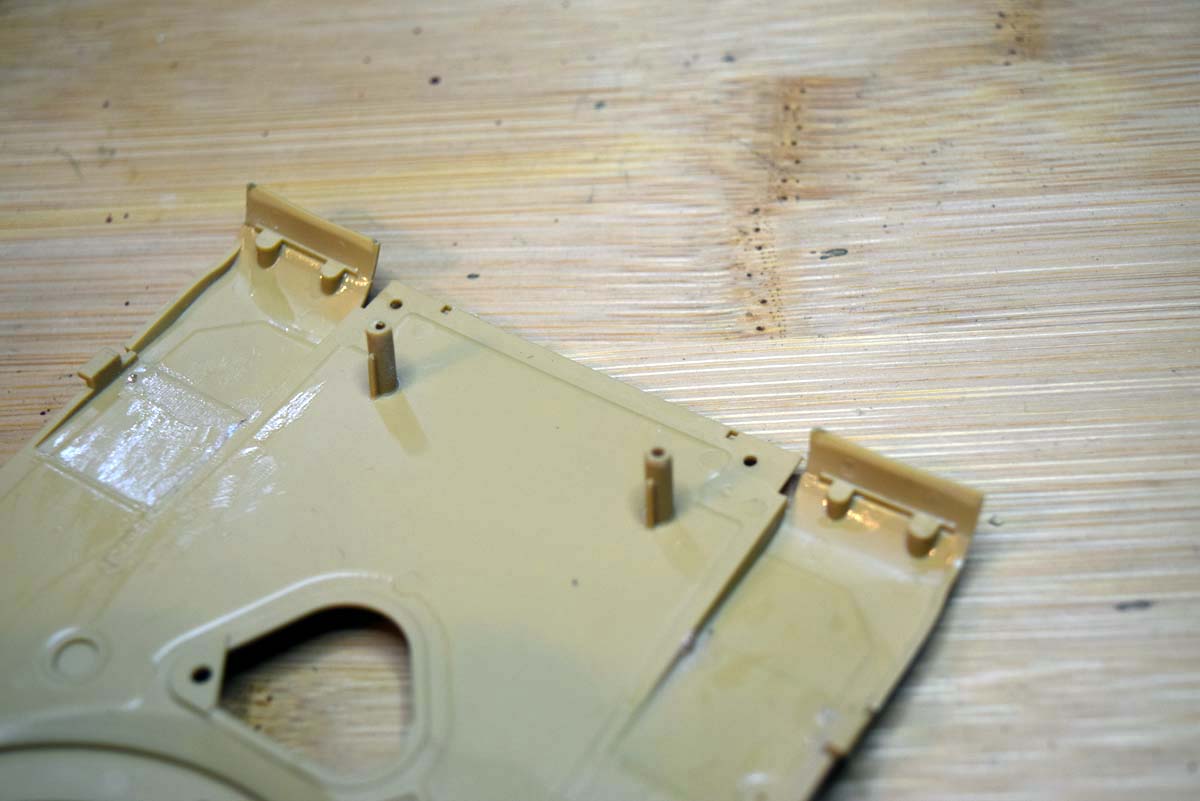
Stage 12 to 14 - Upper Hull
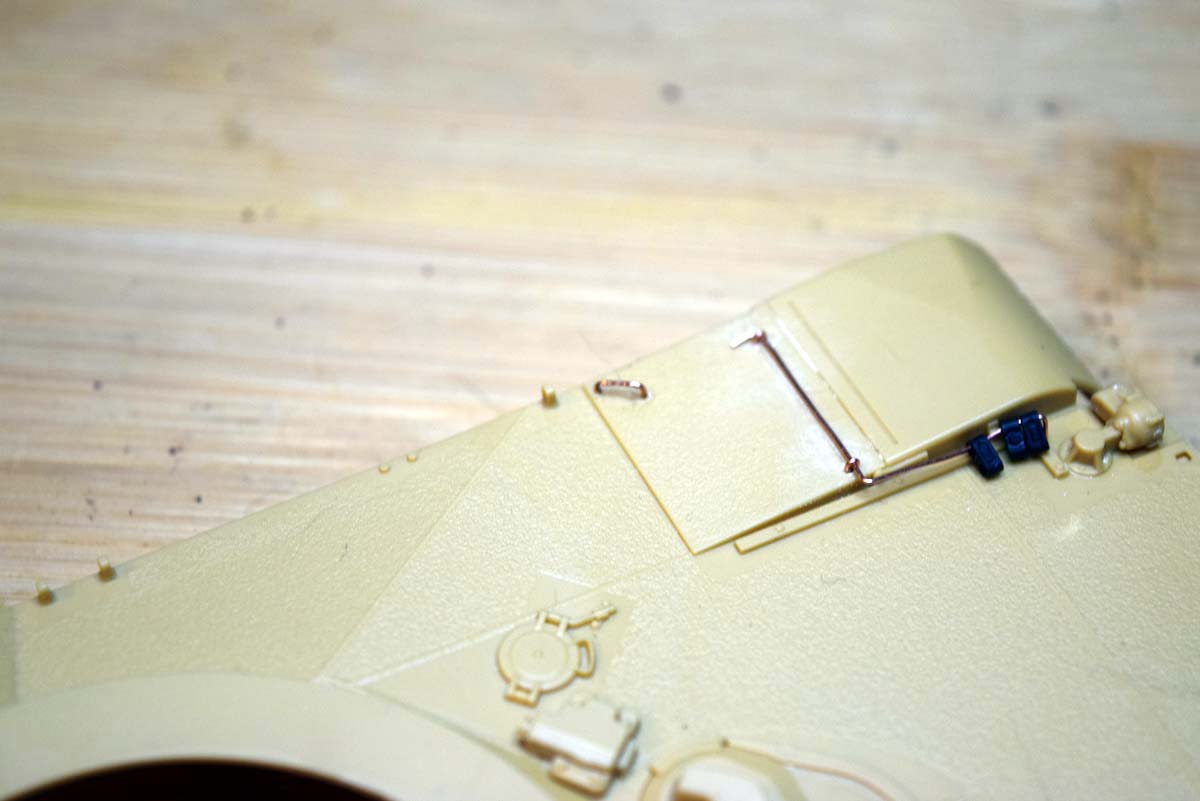
The underside of the upper hull is tackled first, and it has an unusual aspect usually reserved for rug runners. There are two pins at the front of the hull and a catch to attach at the rear, surprise the pins need to be thinned to obtain a fit you can get home. The rubber flaps on the front of the mudguards are solid plastic, but they have a nice look to them of which I approve. The drivers hatch does not have to be assembled closed and I left the periscopes out until after painting because I could. I replaced the grab handle on the left mudguard with a metal one I made due to being unhappy with the kit offering. The lights also have clear lenses and I again left them out until after painting.
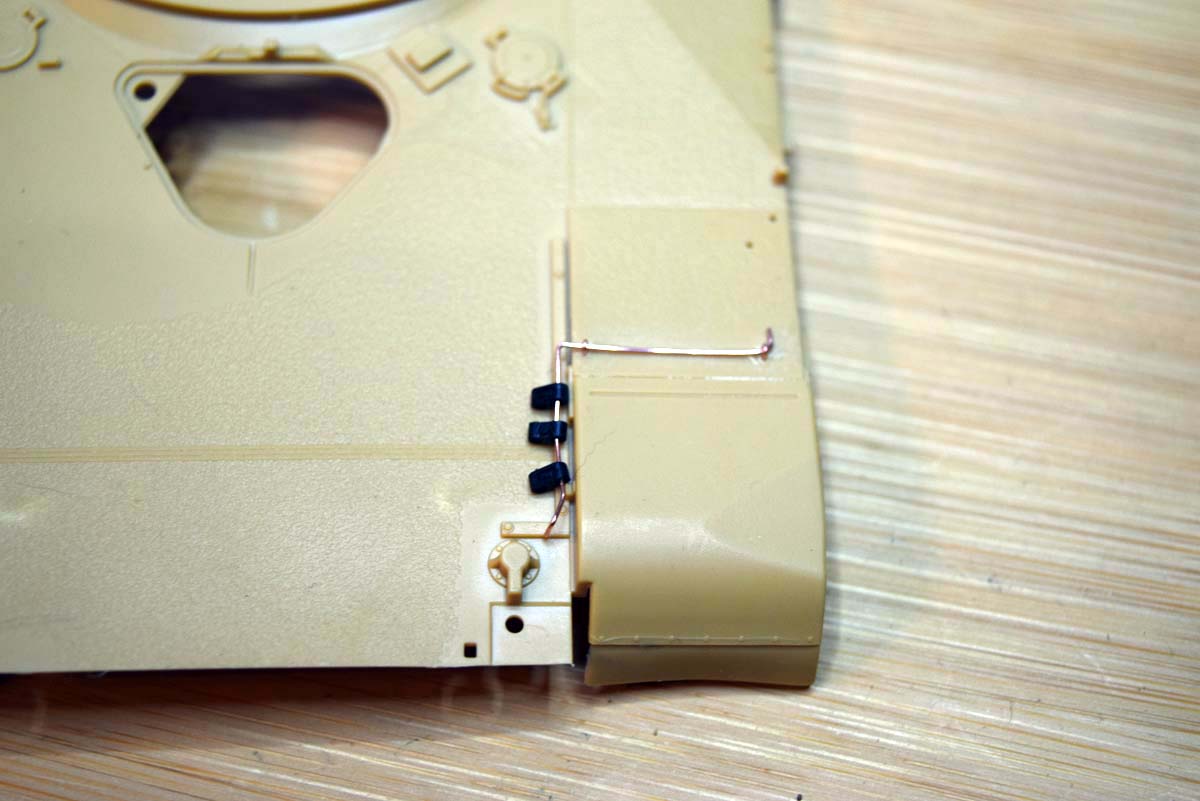
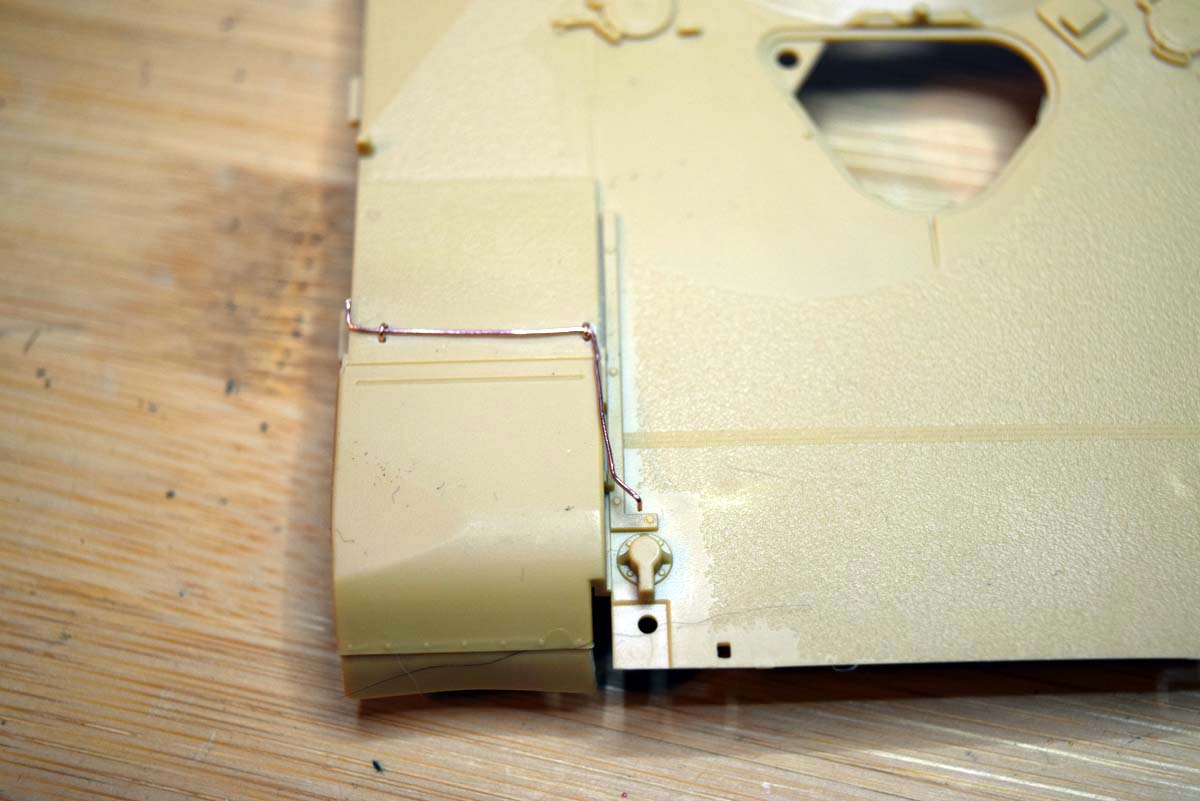
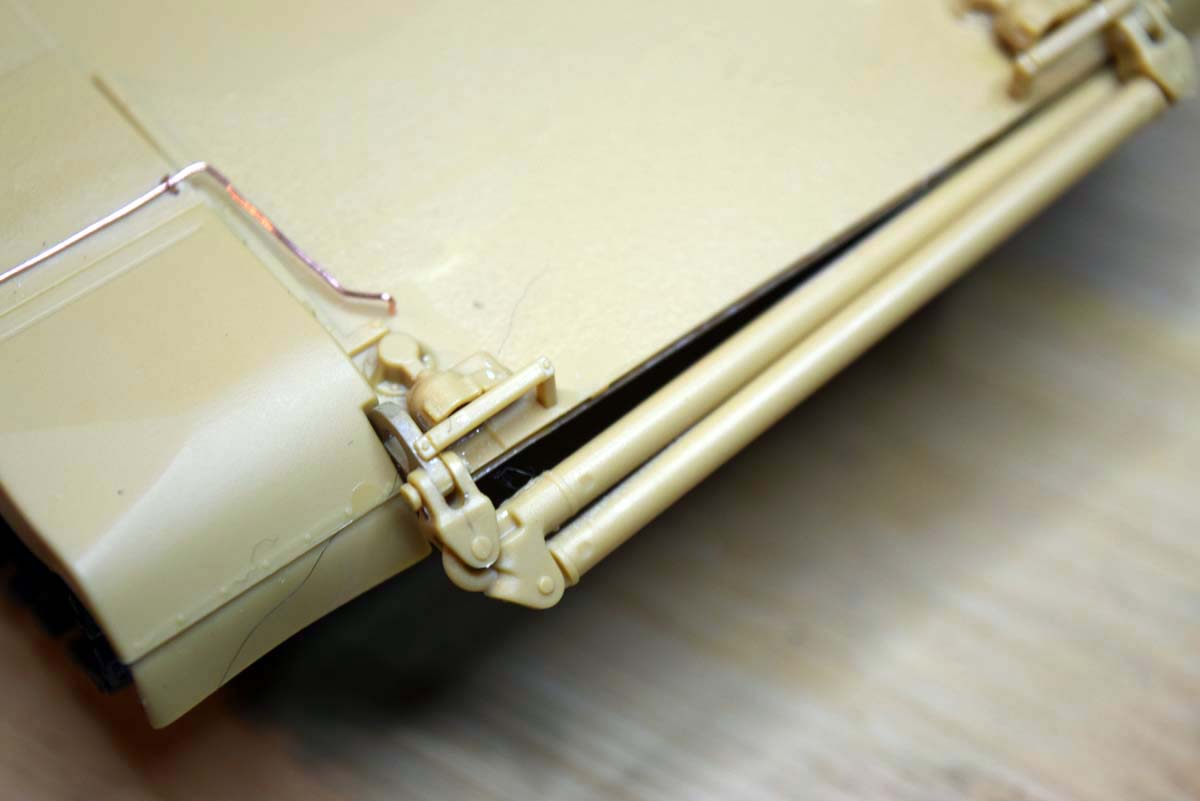
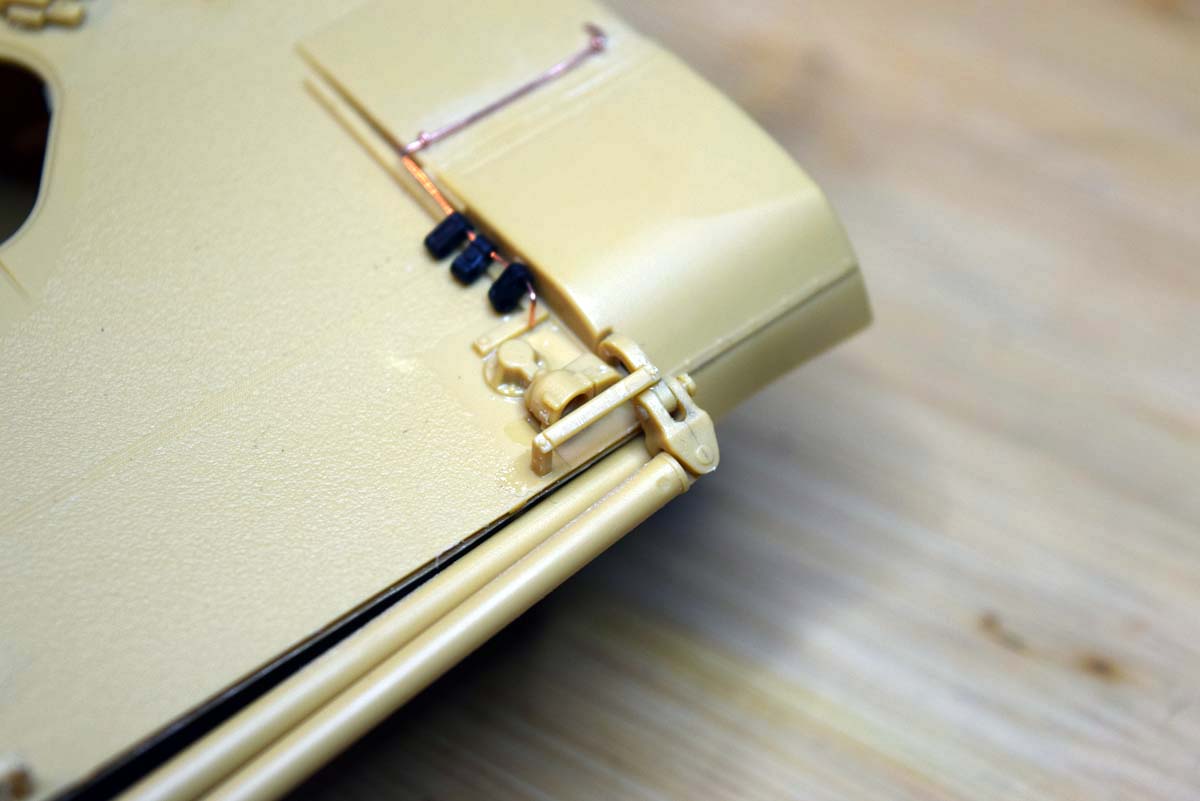
The upper and lower hull are then put together, I chose to glue them together as I was not happy with the join the clip system gave me. Another aspect I was not happy with is the lack of sponsons on the hull, something I consider poor in a modern kit offering. The springs for holding the front portion of the upper track guard down is a mix of moulded on detail and photo etch; I was really unhappy with this and so I scrapped off the moulded on detail and made complete springs with 0.5mm wire and secured them with loops made of the same wire. I drilled eight holes in the body and pulled the loops through and secured underneath, I am quite please with myself despite them not being perfect. A towing arm device and light guards are fitted here as well. The textured surface where needed is one of the best I have seen and should provide a good look in the finished model.
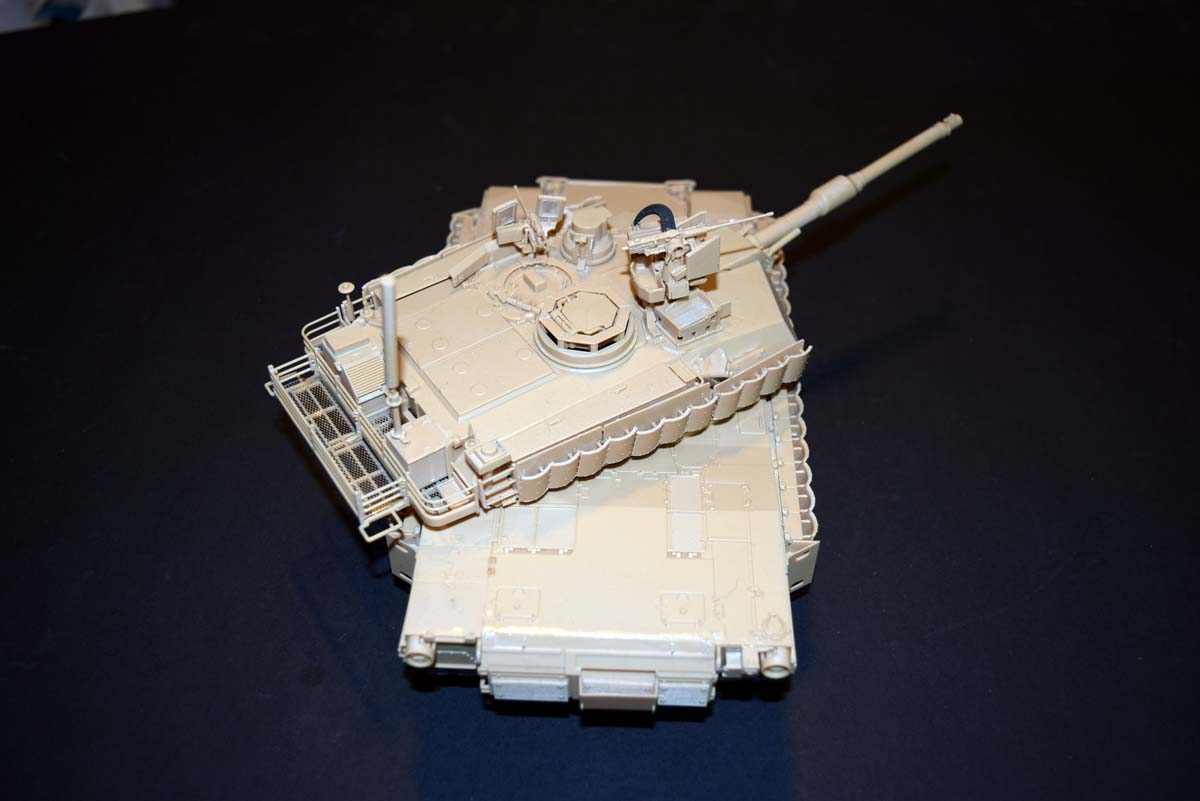
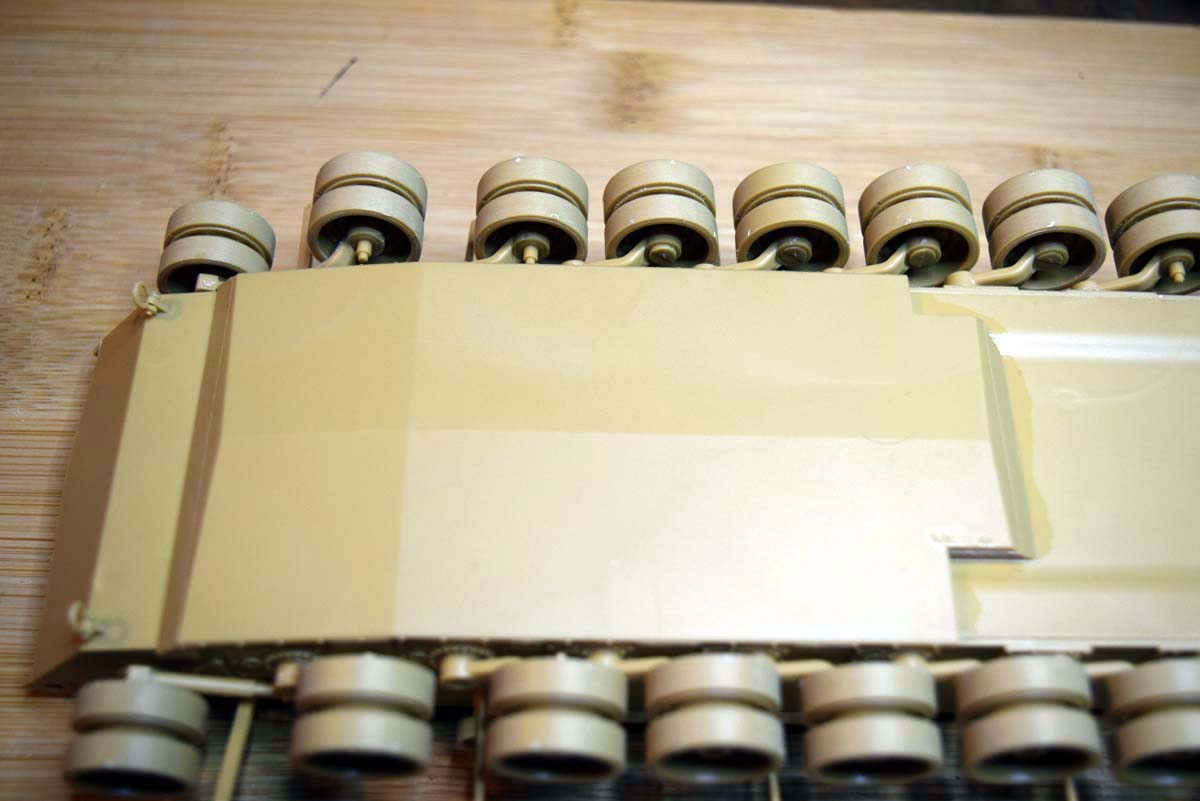
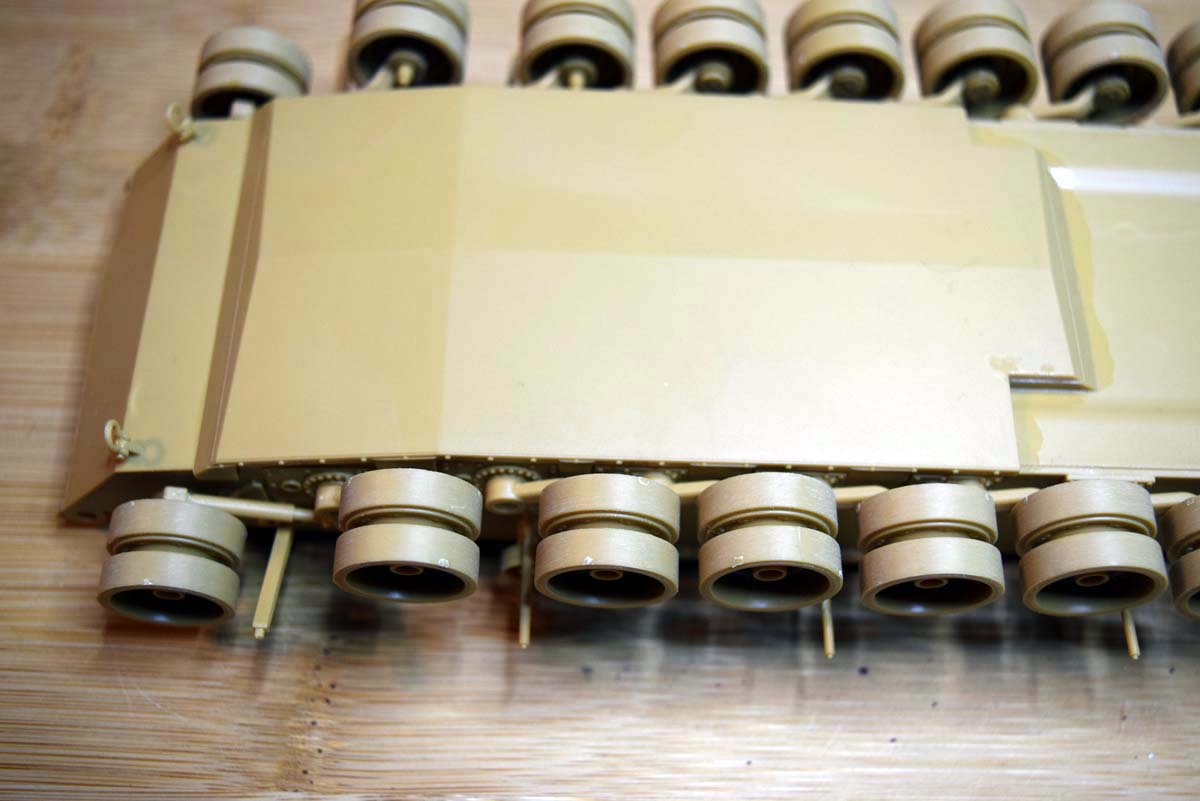
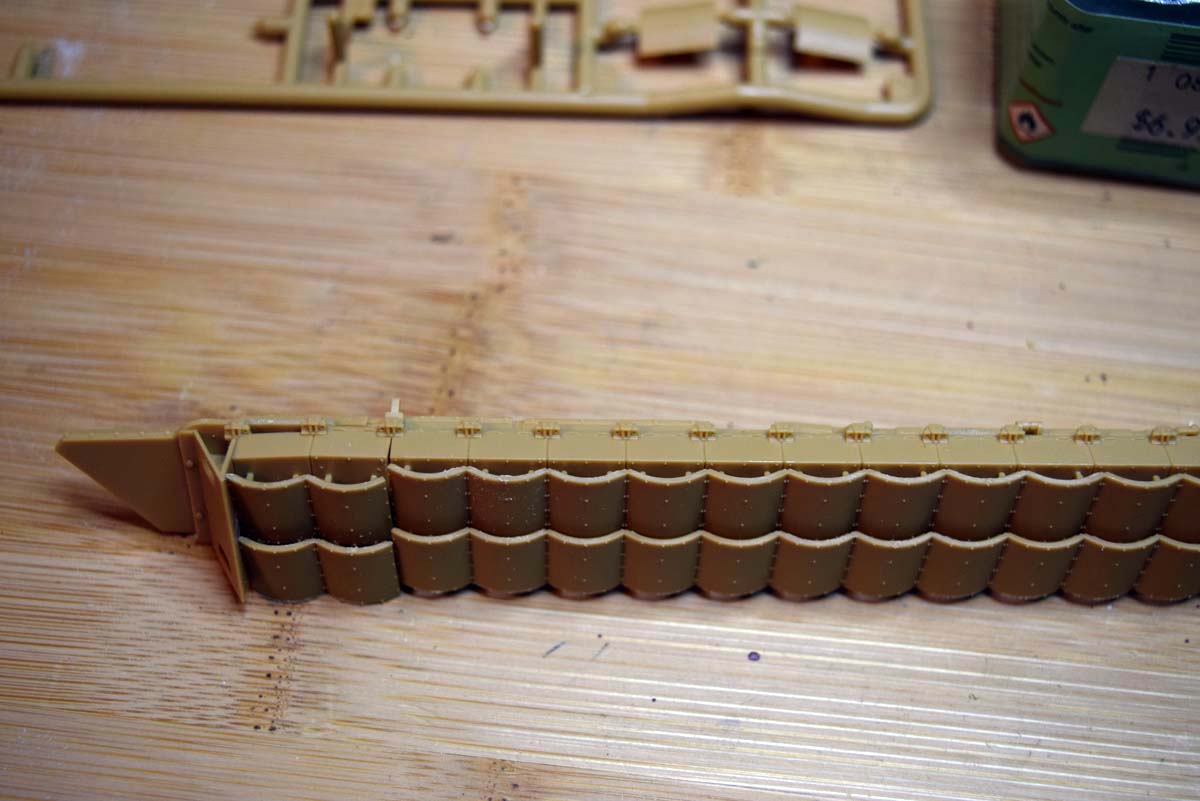
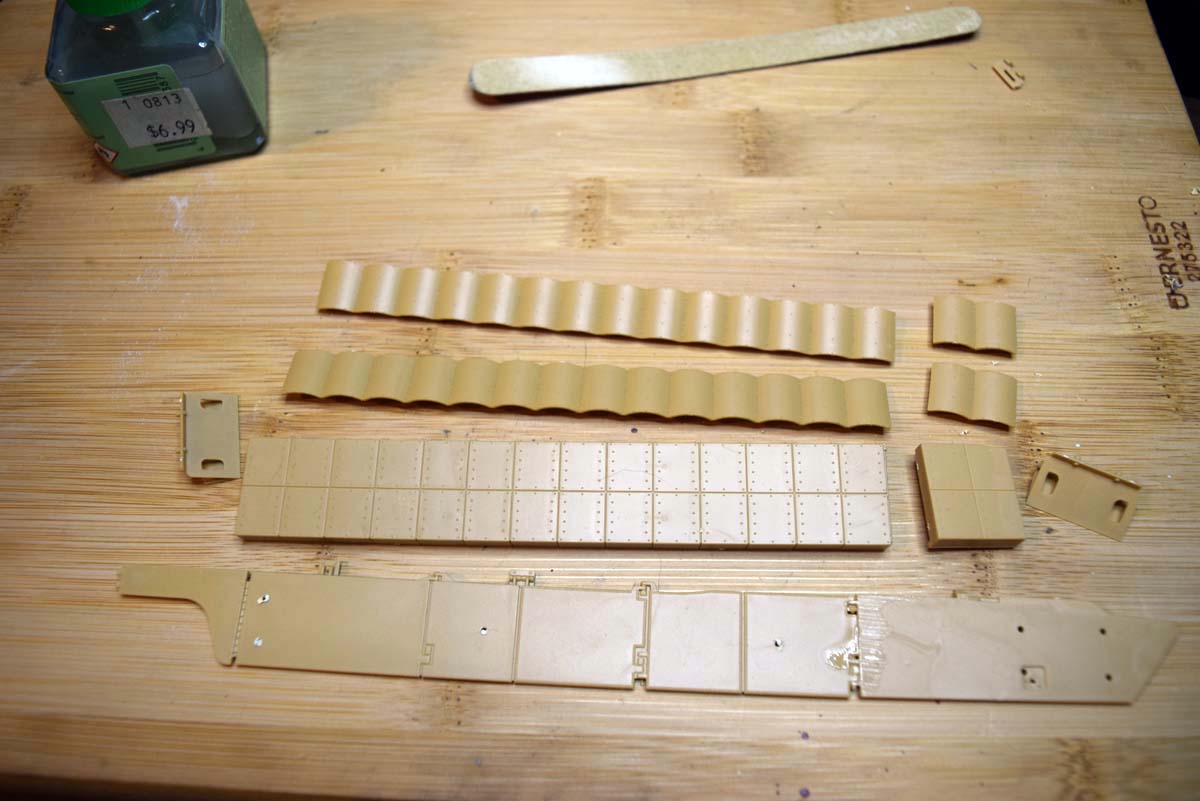
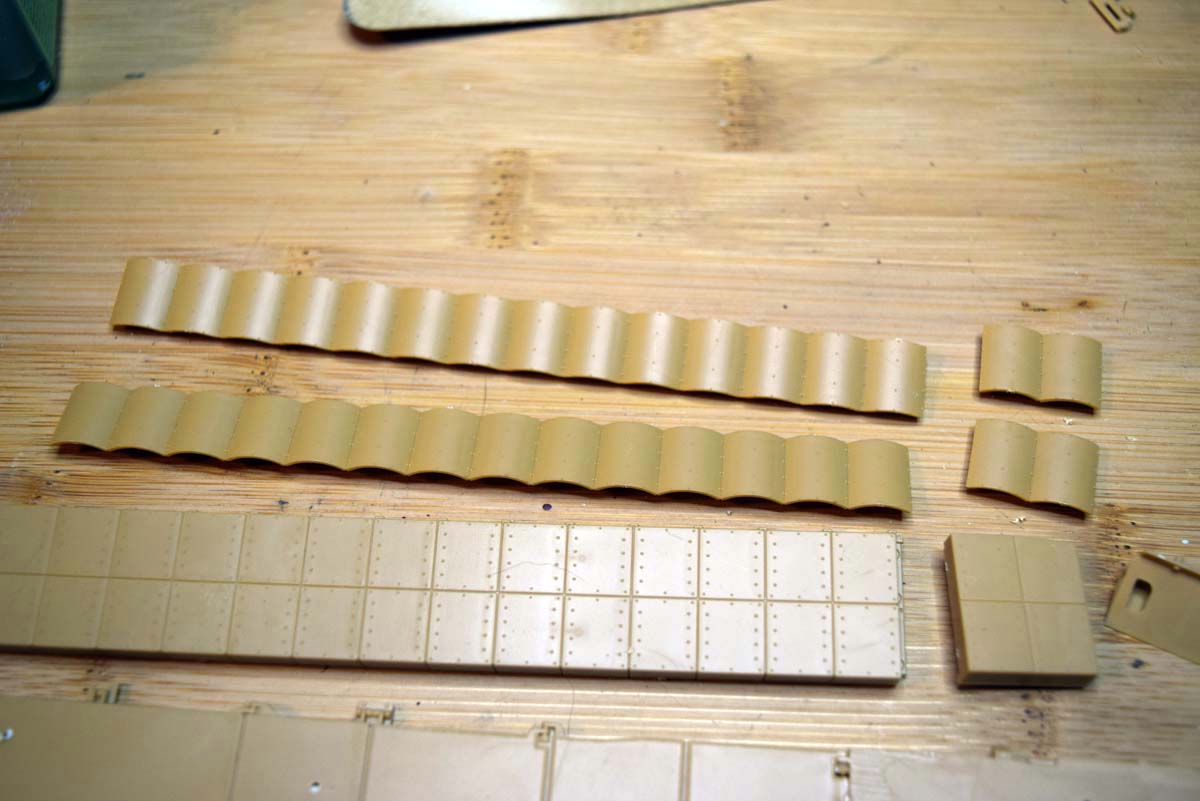
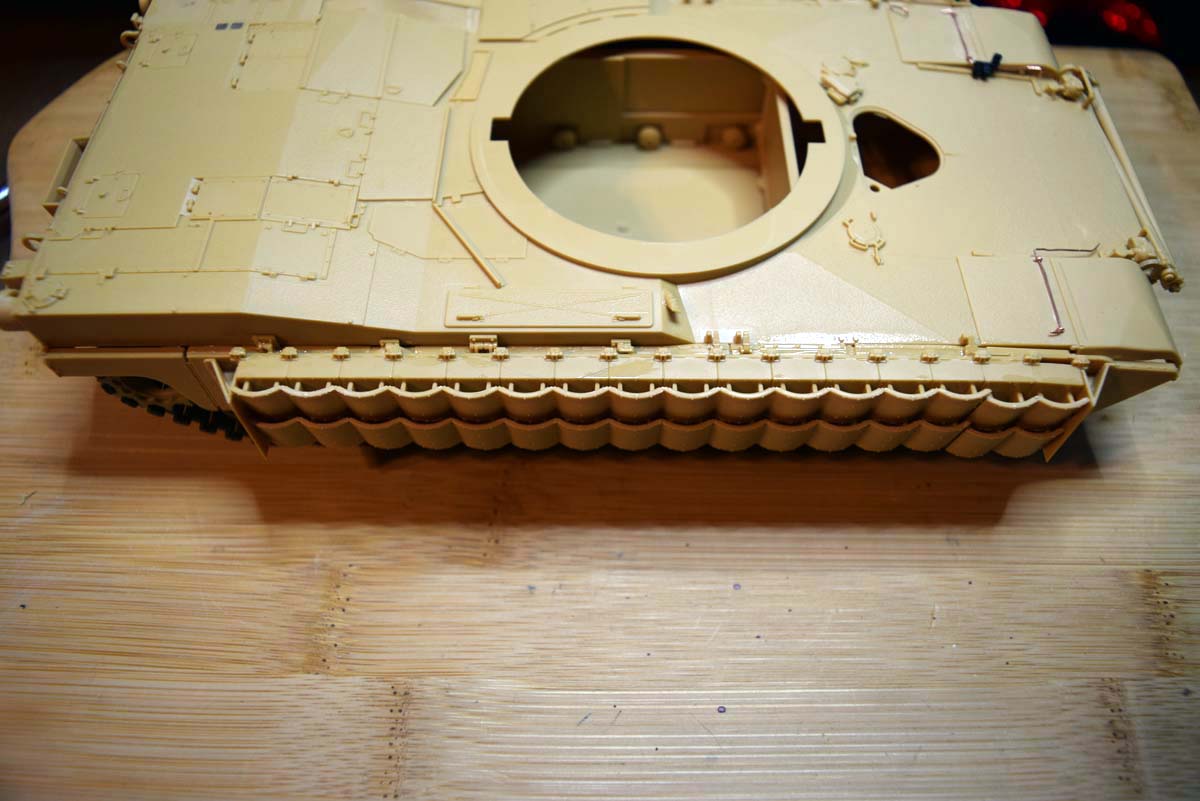
Stage 15 to 18 - The Skirts
The skirts for the model can be assembled clean or with all the armour currently available. I went for the full armour package, but it could also be held at the ERA type boxes as well if so desired. The skirts went together perfectly despite a few holes needing to be drilled, no drill size is mentioned in the instructions but again 0.5mm seemed right. Academy has also provided the option of using photo etched elements during the build process should you desire, I chose not to as I felt the photo etch did not provide something that the plastic had already provided. I attached the skirts to the model and I was again pleased with the ease of fit to the model. The armoured skirts do give the Abrams a more brutish look.
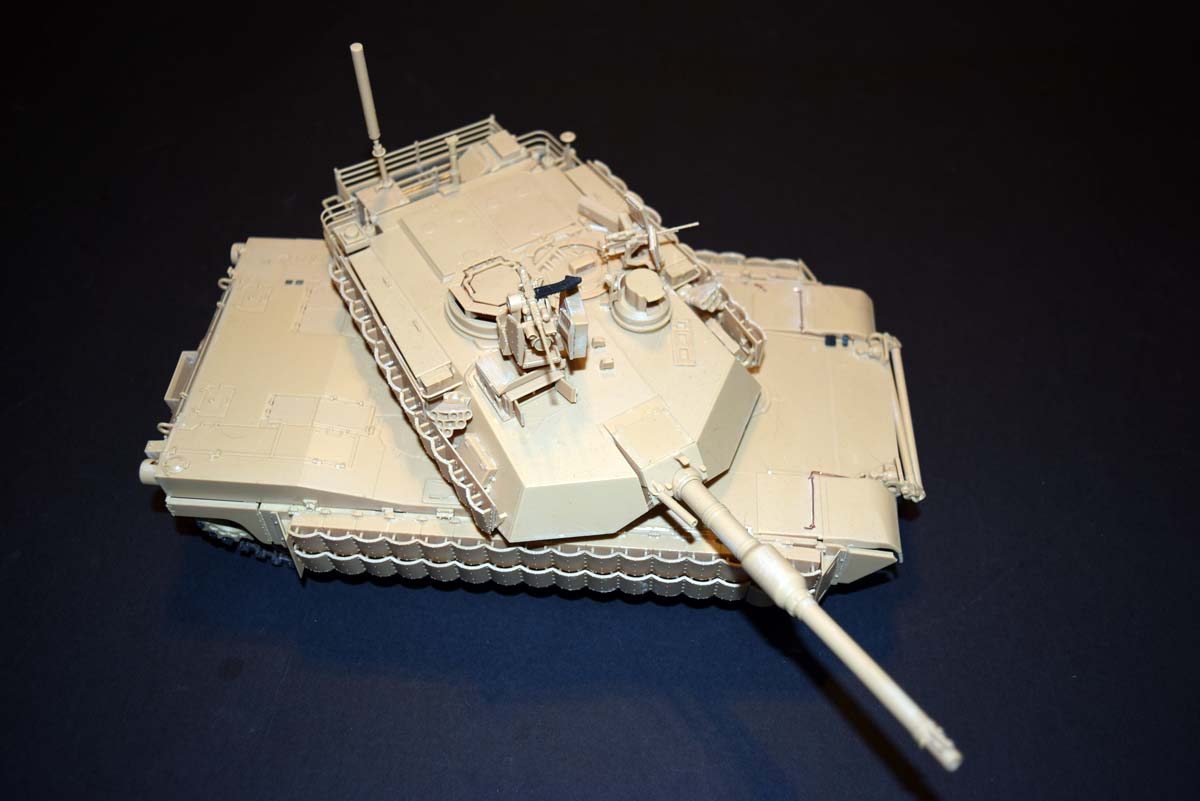
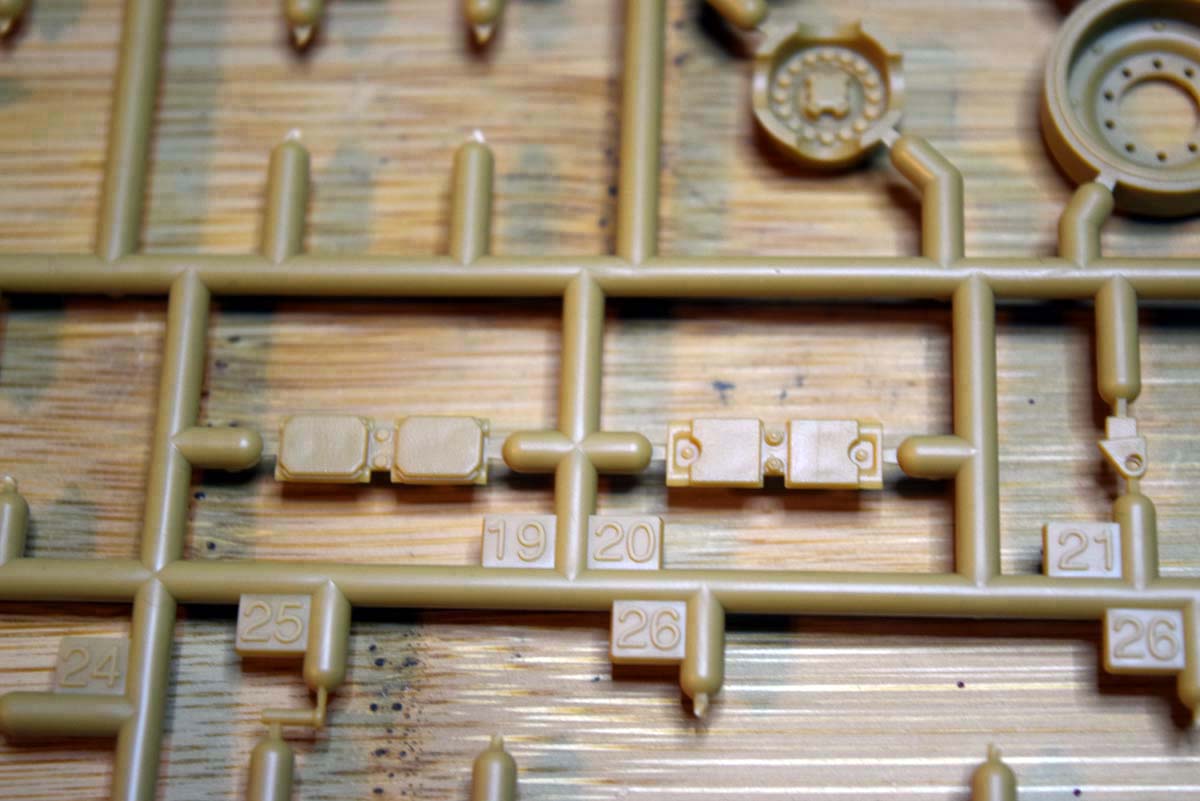
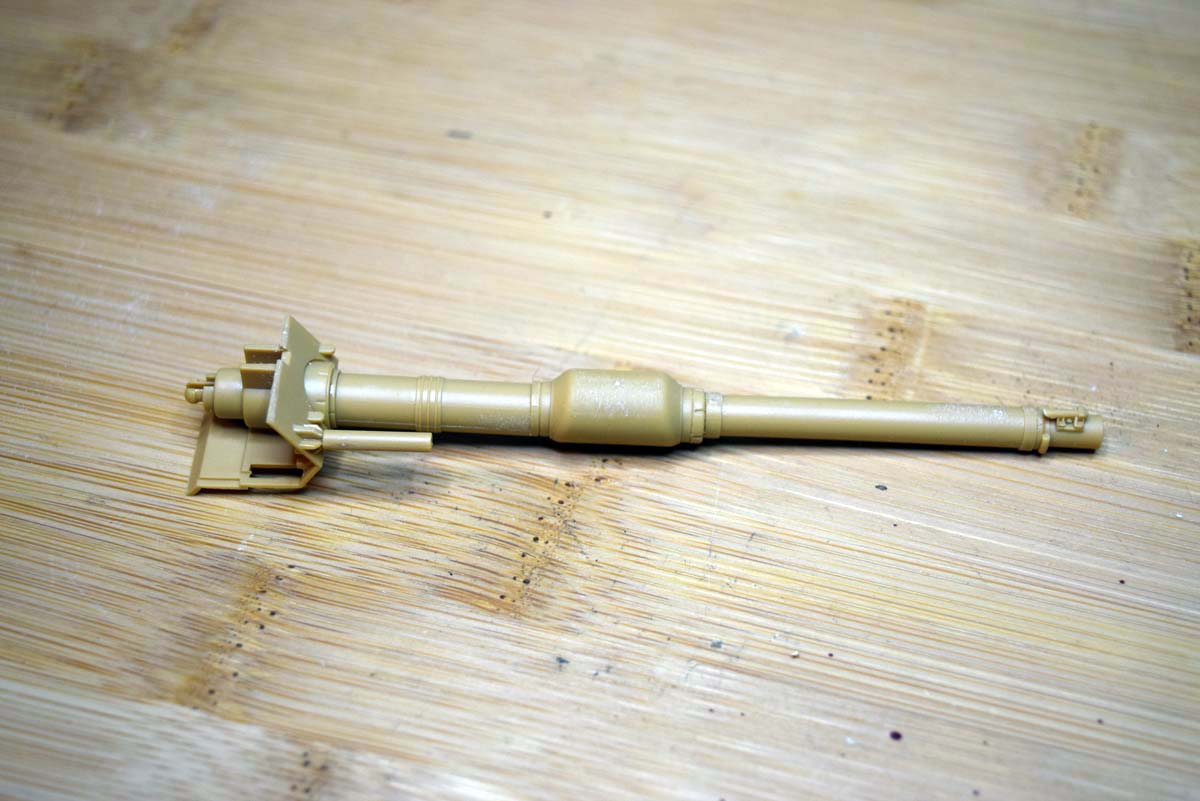
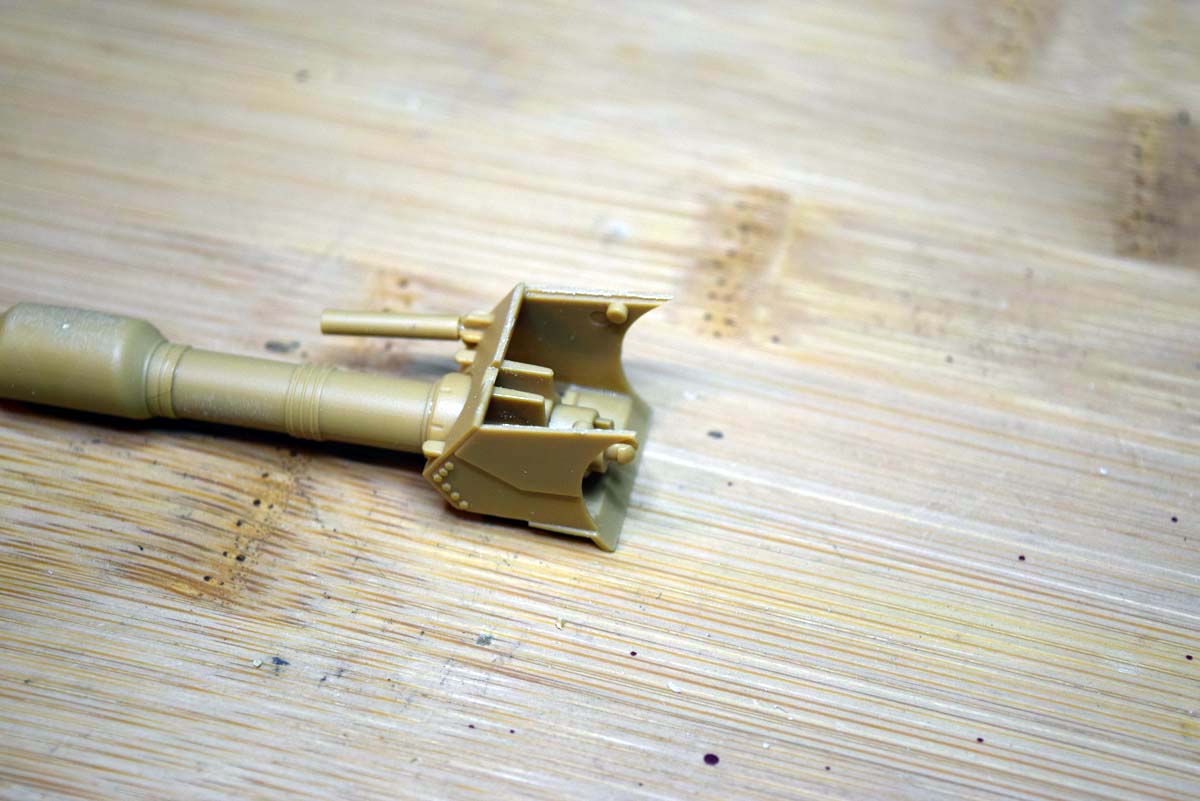
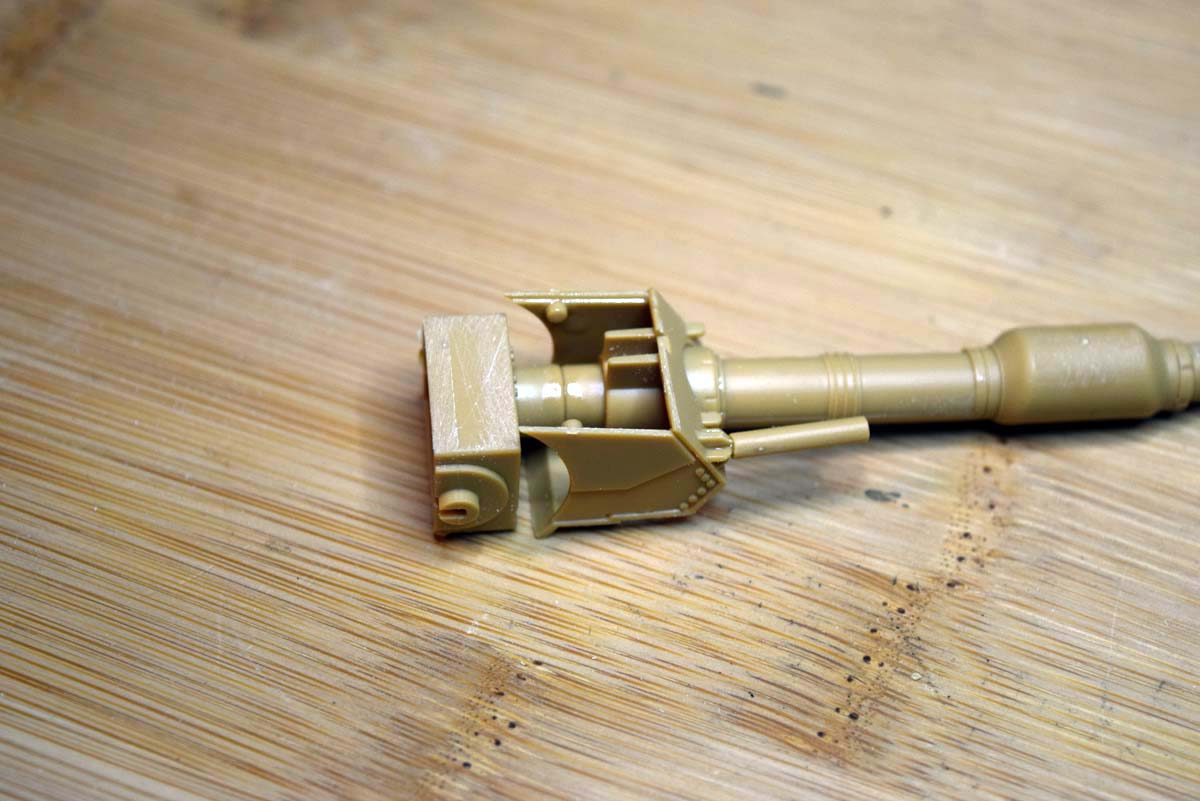
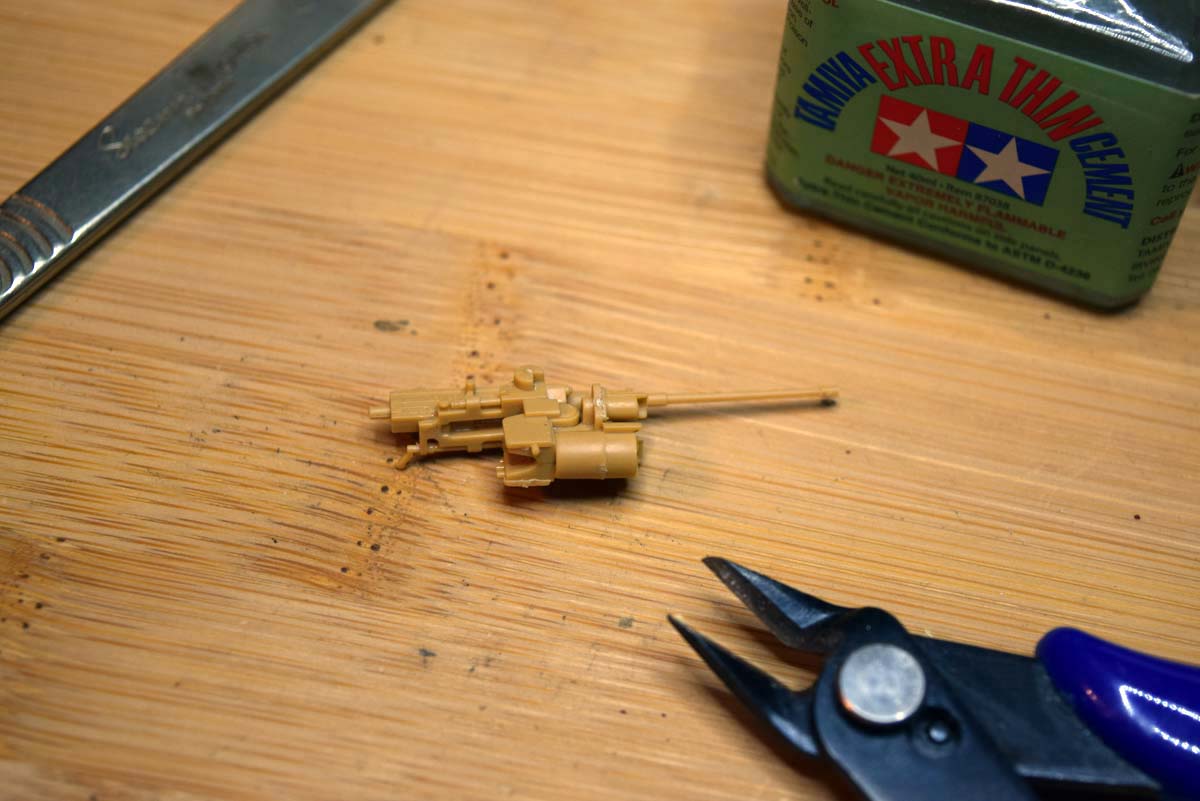
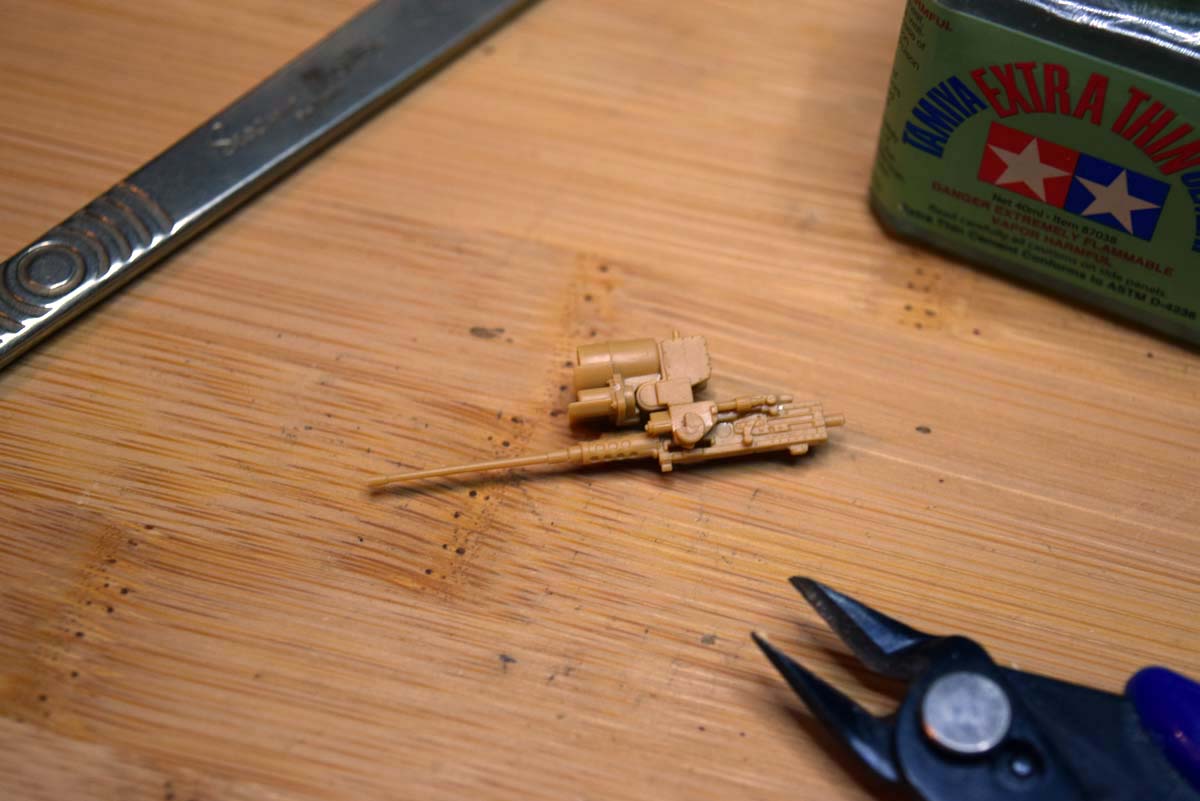
Stage 19 to 20 The Main Gun
The main gun barrel has been provided in three pieces, the front, rear and centre. There is a very light seam line that will need cleaning up, but the result is very pleasing. The elements of the gun are kept in line and correctly orientated by a raised line on the front portion of the barrel that connects through to the rear. Something that I learnt while making this element was that the laser receiver on the front of the barrel is off set. The back end of the barrel is designed to be moveable when attached to the turret, and despite being a snug fit it does look good and works. I am pleased with the way Academy has tackled this area of the model.
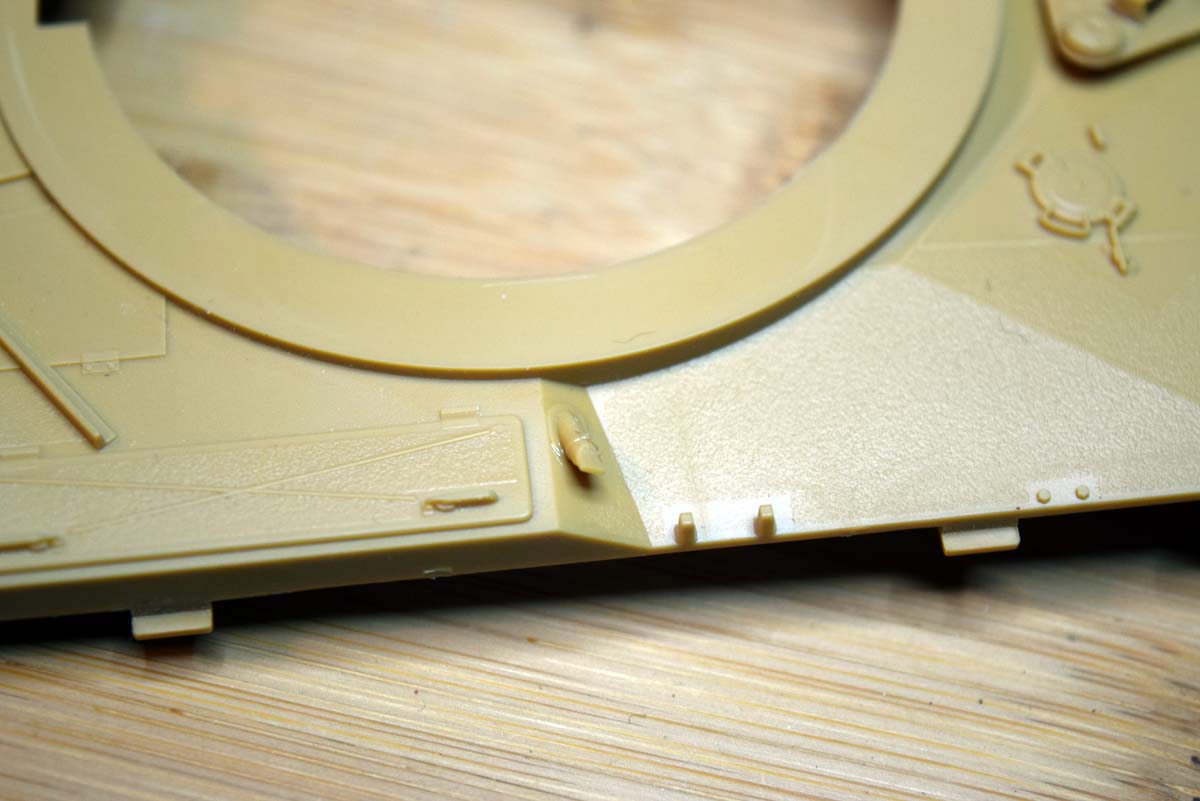
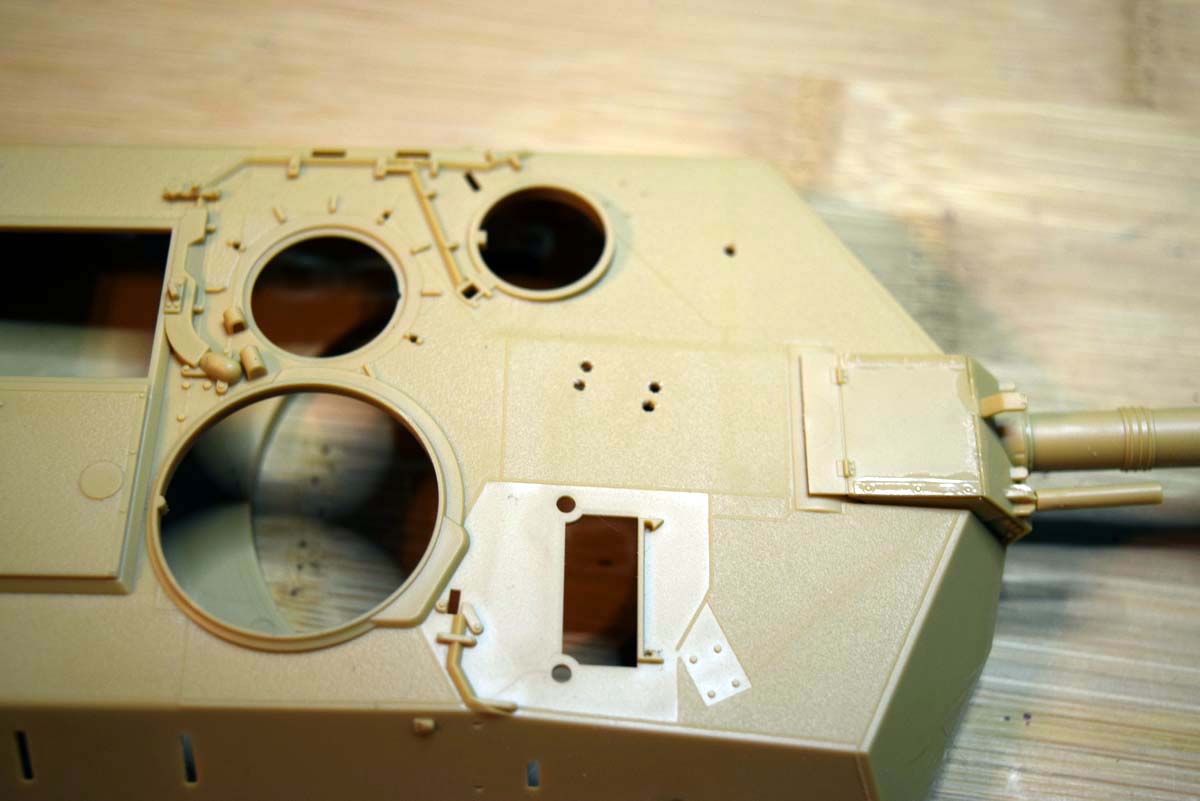
Stage 21 Closing the Turret
Before you bring the upper and lower turrets parts together you have to drill no less than 12 holes. So out came the 0.5mm drill again, what could be easier than drilling some holes in plastic? Nothing says I, but then I did not release that not all of the holes are marked and this creates a little issue. My solution to this problem was to drill the marked holes and luckily the parts that go into them also fit into the un-marked holes, a few marks with the pencil and the issue was overcome and the turret closed up. The fit of the upper and lower turret portions is very good despite pins and holes again being used.
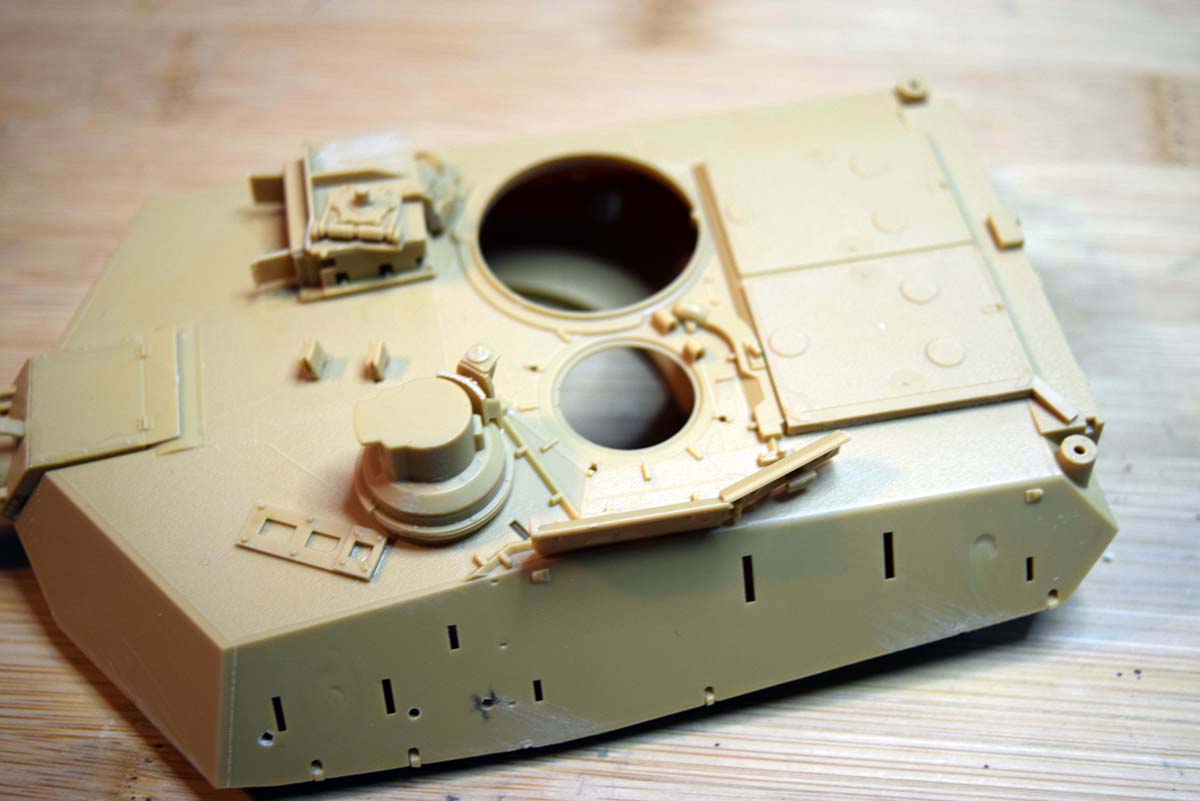
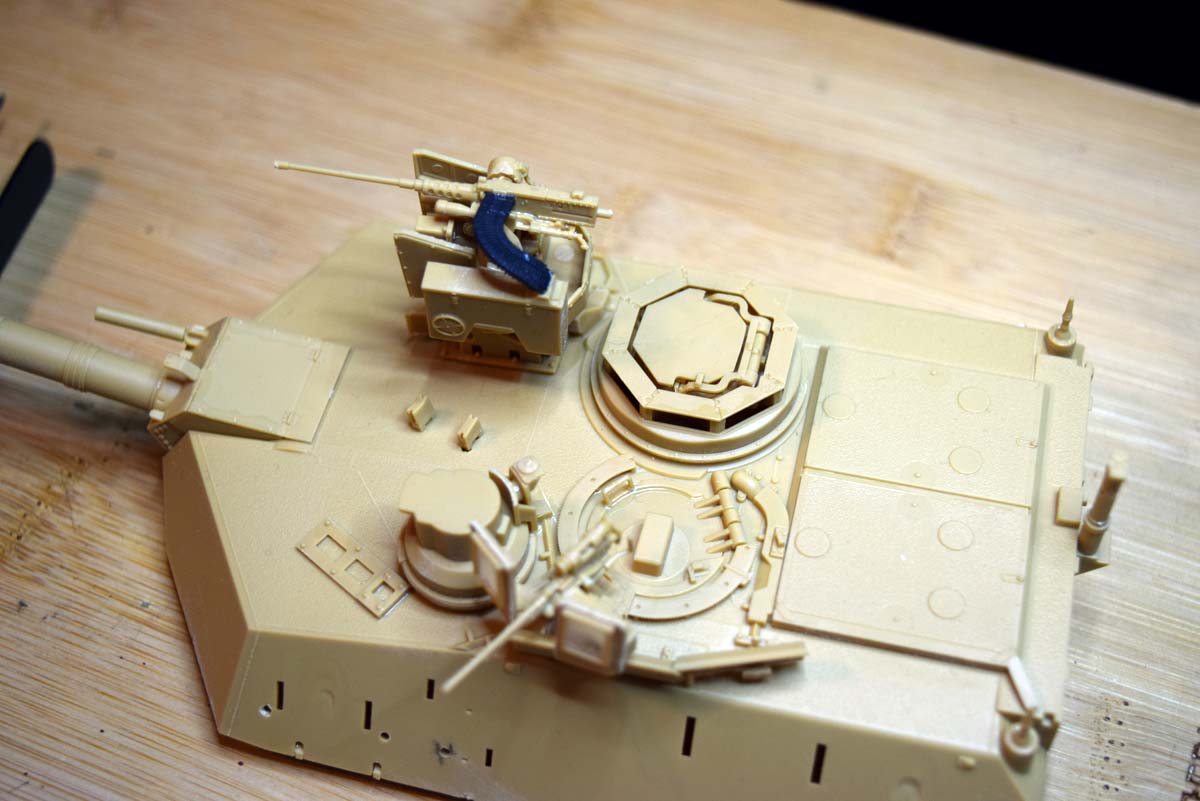
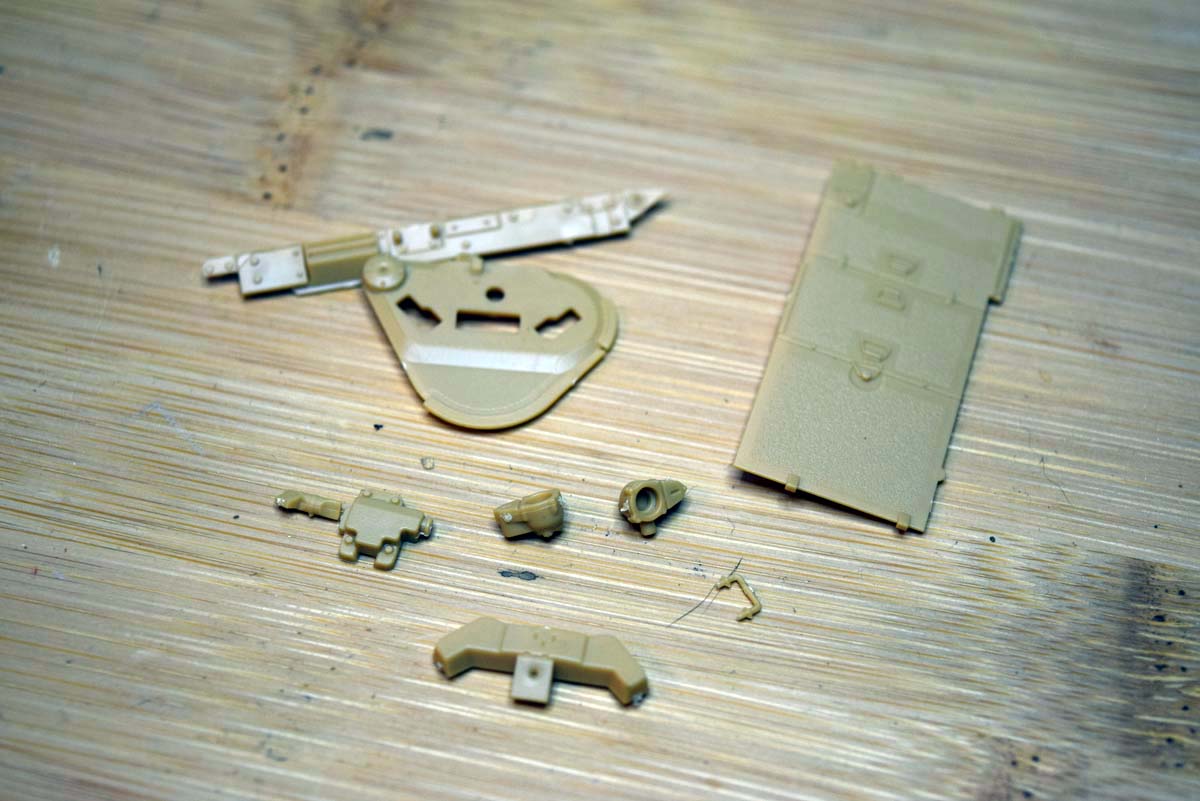
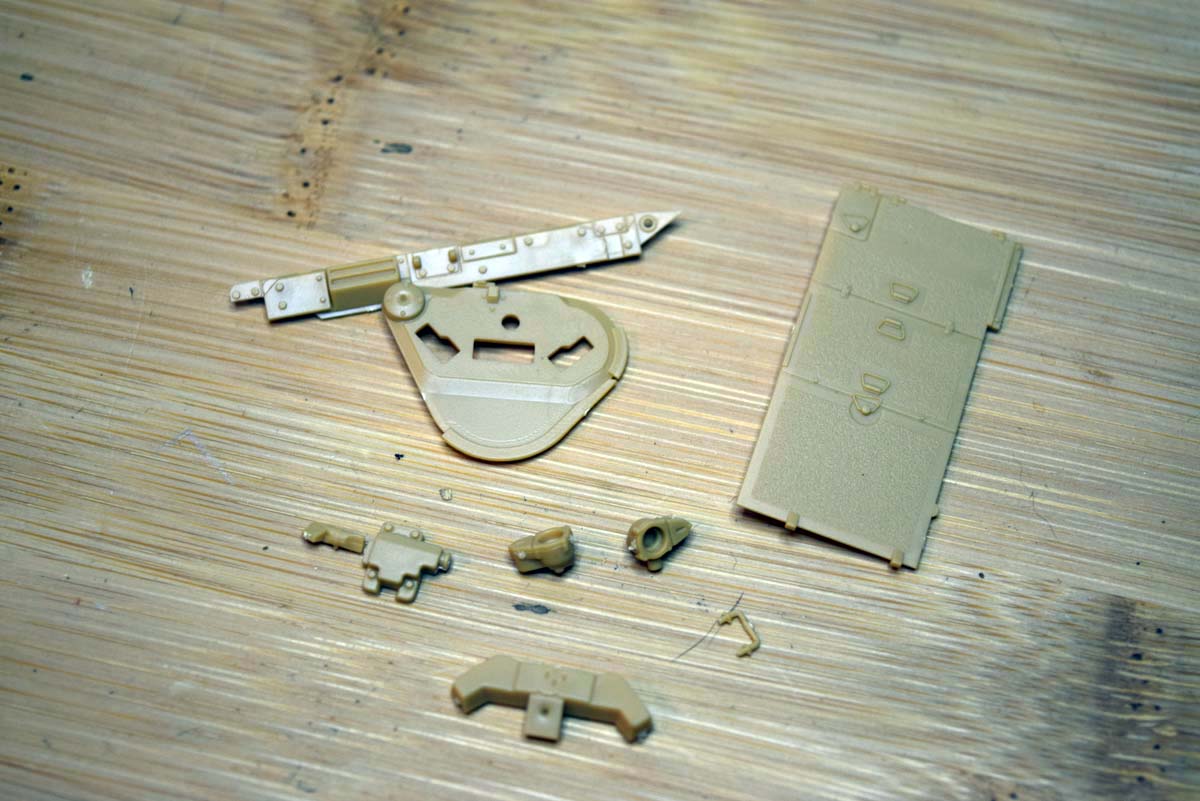
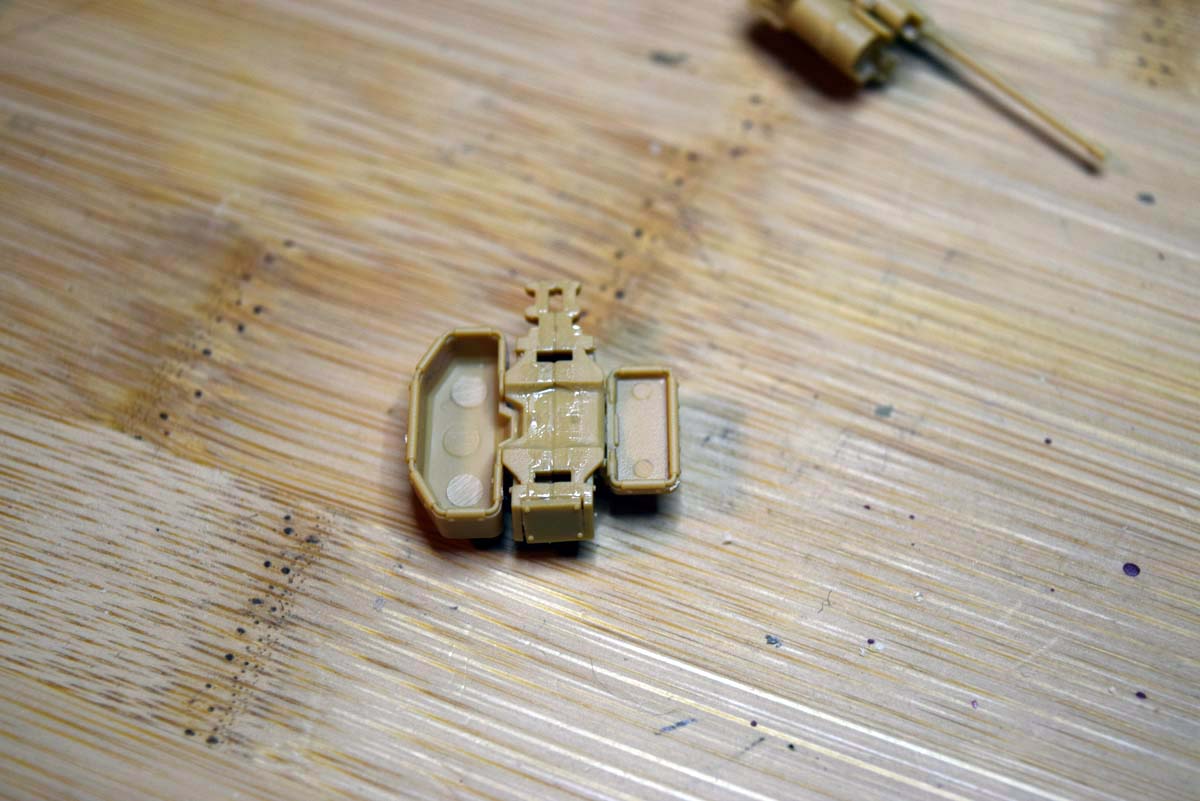
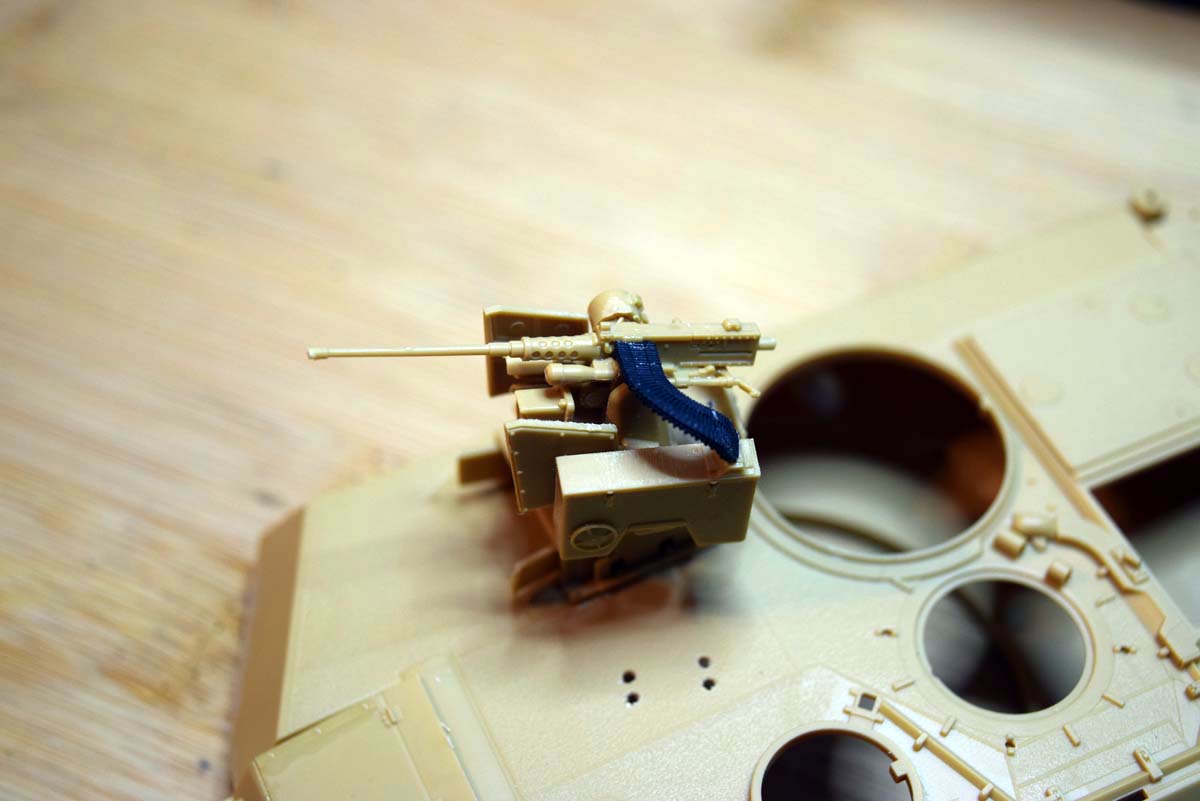
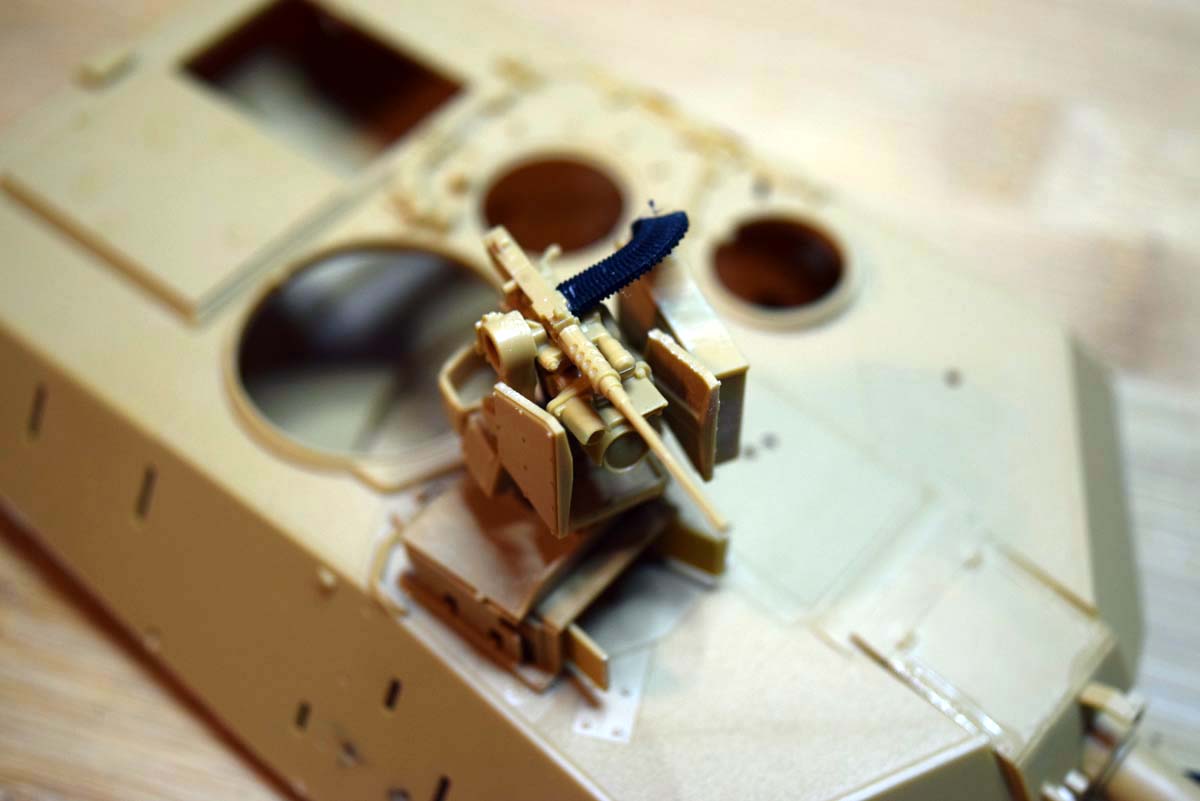
Stage 22 Commanders External MG Station
This section covers the assembly of the M153 CROWS station in front of the commanders hatch. I found this section surprisingly difficult and on several occasions found myself looking further on to make sure parts were correctly placed and/or angled due to the instructions not being completely clear. The barrel of the 50cal provided for this offering is quite good, but a replacement brass barrel would improve it further. This improvement would be due to the vents in the collar and the hollow end in the muzzle that is solid in the kit offering. The detail of the station is very good for injected moulded plastic, but I have seen resin that does improve this aspect in my opinion. The ammunition magazine has some good detail present which is good due to its large size. The feed from the magazine to the MG is made of vinyl rubber and quite good; one issue I encountered was that the instructions do not make clear how this connects to the magazine and so I had to check my own reference to get it right. If you so choose Academy has supplied a lot of Photo etched parts for this area with photographs of the real thing for placement of these elements, but I am afraid my hands are not up to these small parts.
During this stage you will also assemble the loaders hatch, this can be left free or secured in the open or closed position, but you will need to fill the hole if left open. The periscope in the loaders hatch cannot really be left off if you wish to complete the rest of the assembly and so the clear part will need protecting during the painting process. There is also a bracket for securing a spare wheel to the roof rather than the side rails.
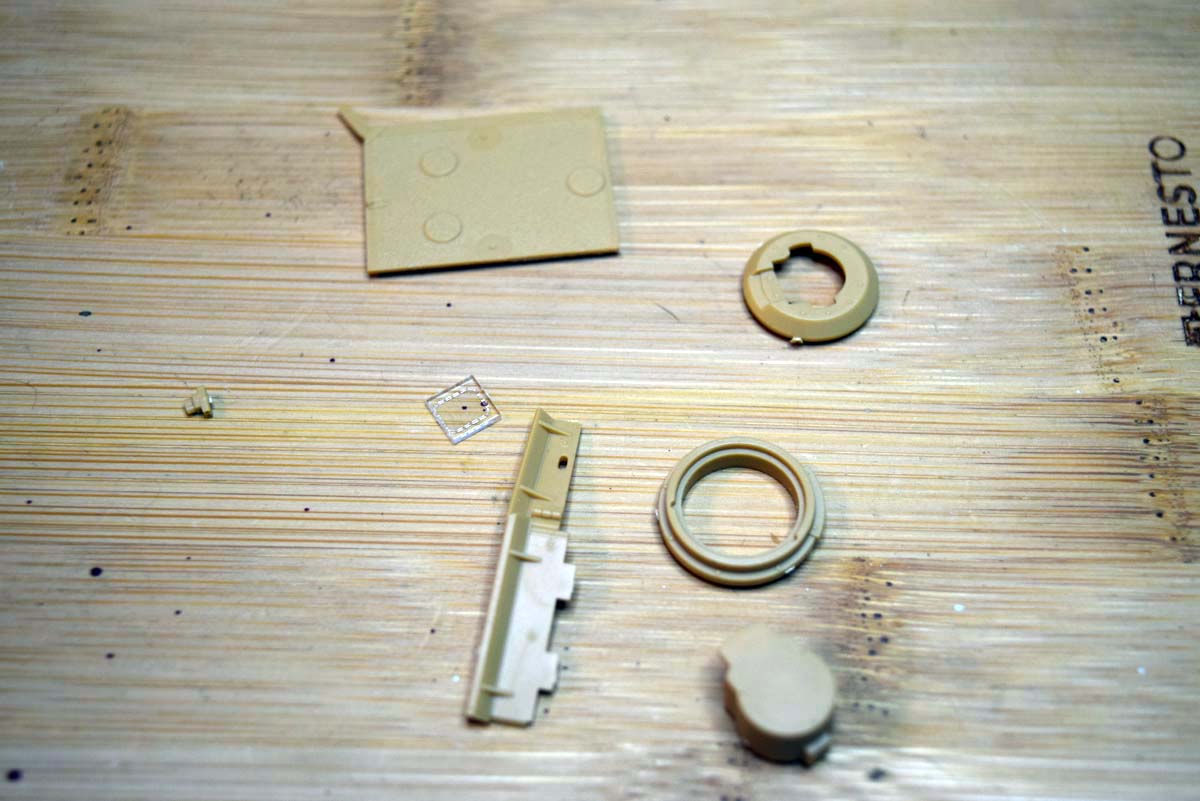
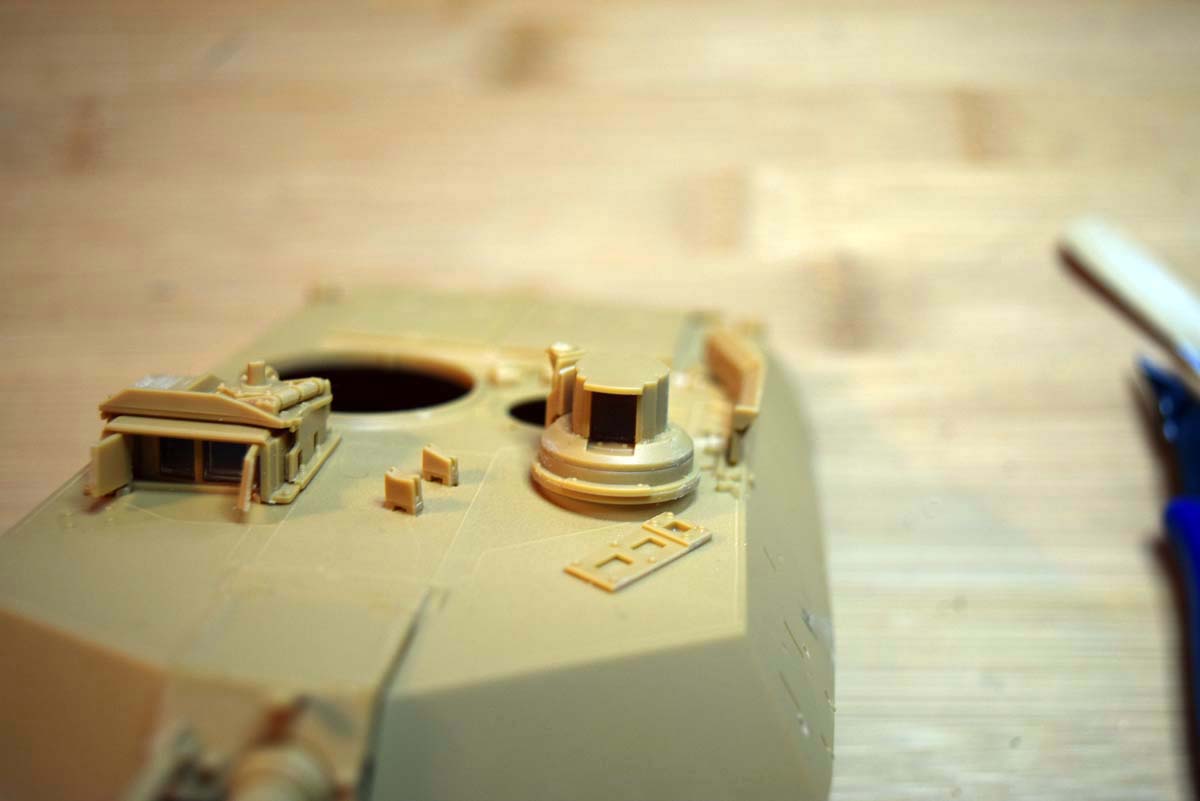
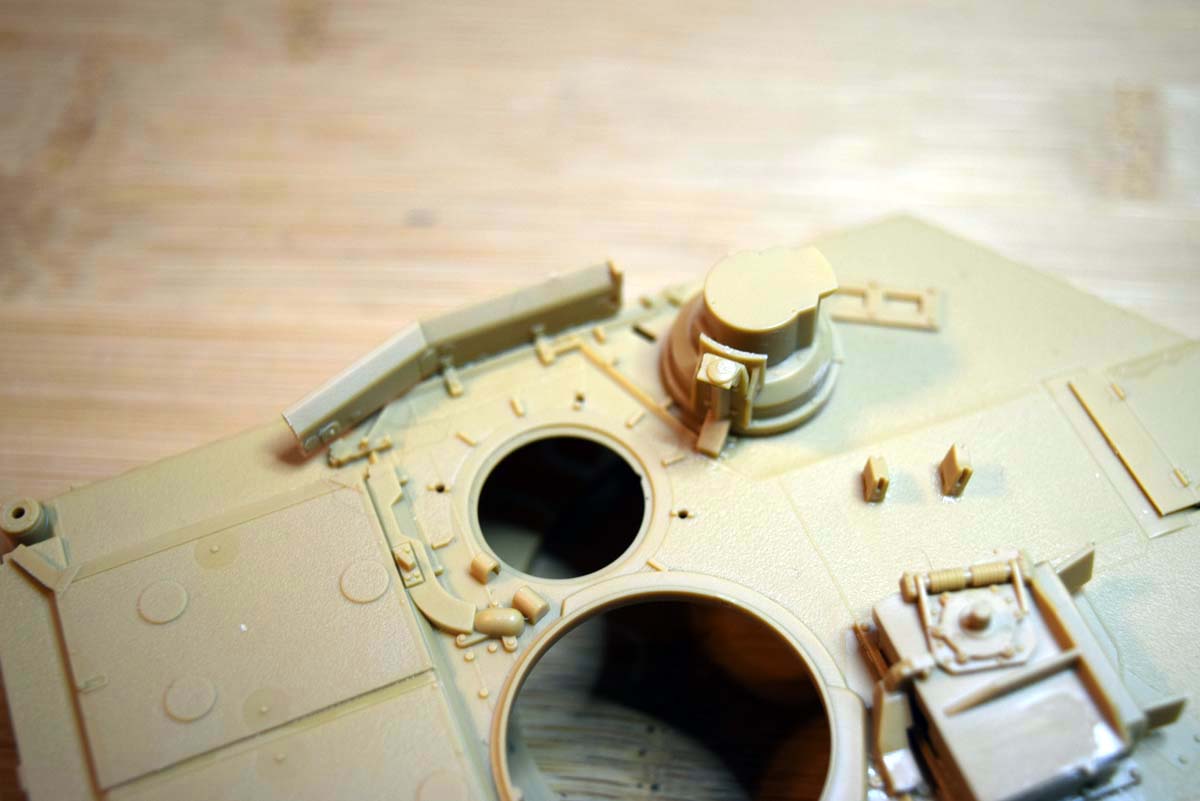
Stage 23 CITV
The commanders Independent Thermal Viewer (CITV) is next on the horizon and I like the ease of this element of the model. Unfortunately the clear part again needs to be added during the build and so protected again during the painting process. There is a locator on this piece during assembly, but I removed the one for attachment to the roof as it would have resulted the CITV view point looking at the loaders position. One of the ammunition panels at the rear of the turret is separate and fits well. The roof mounted armour plate for the loaders position is also added at this point.
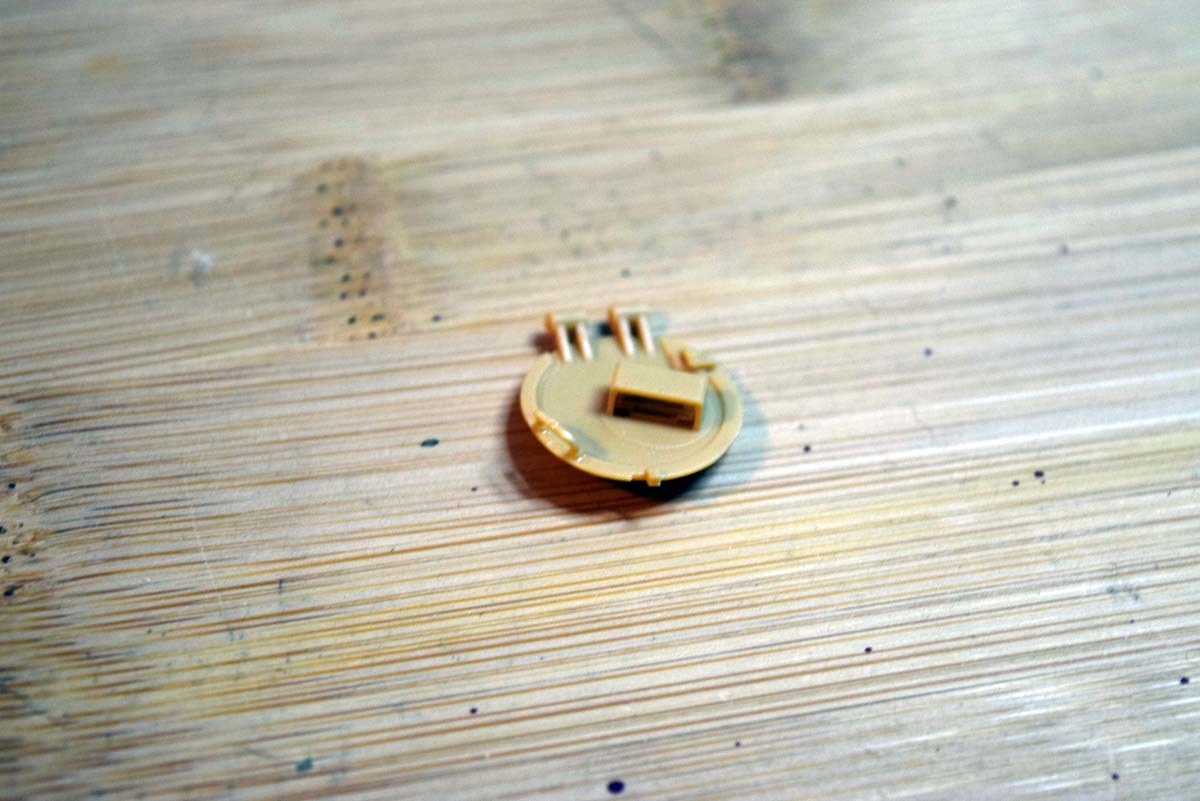
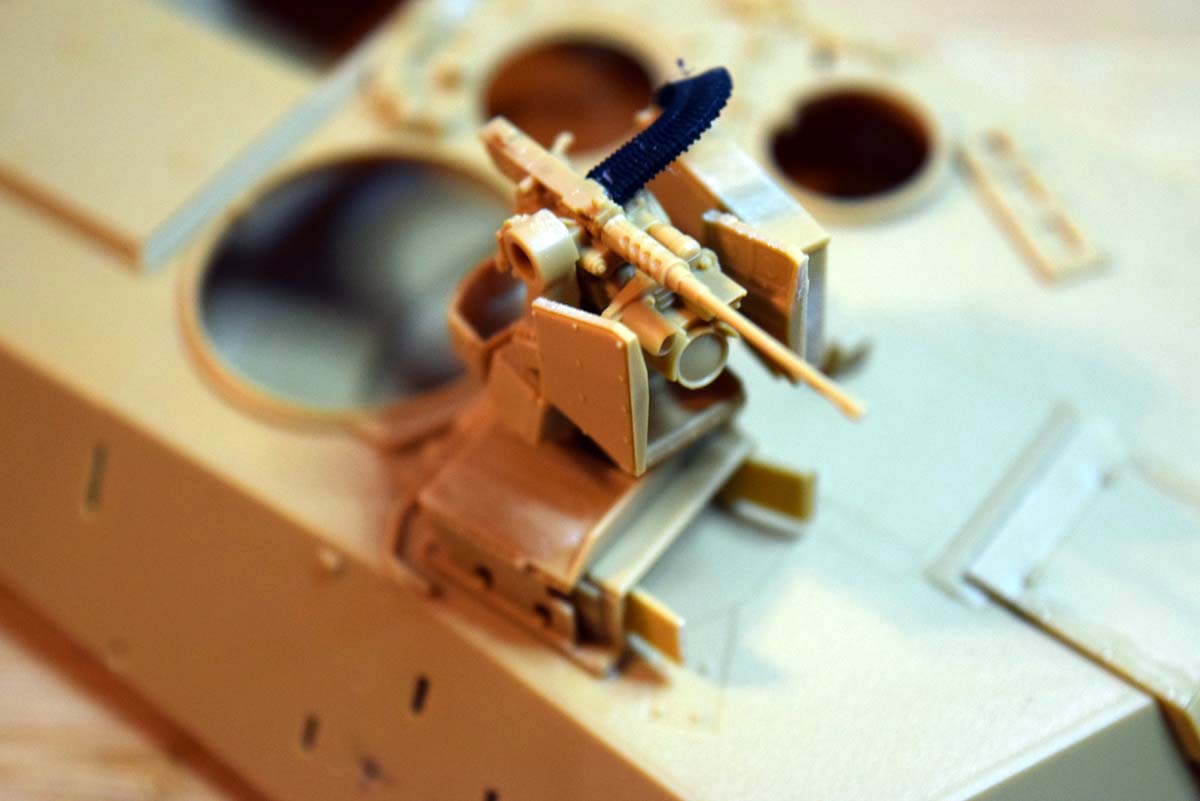
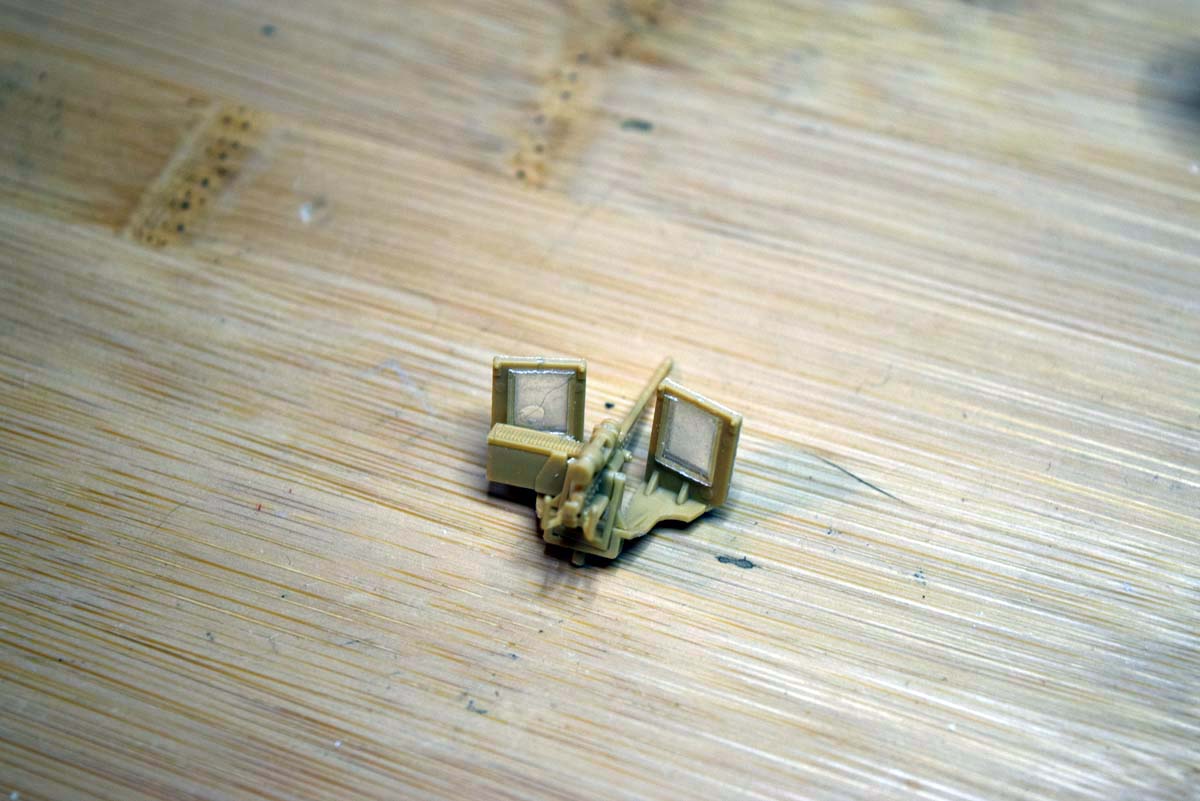
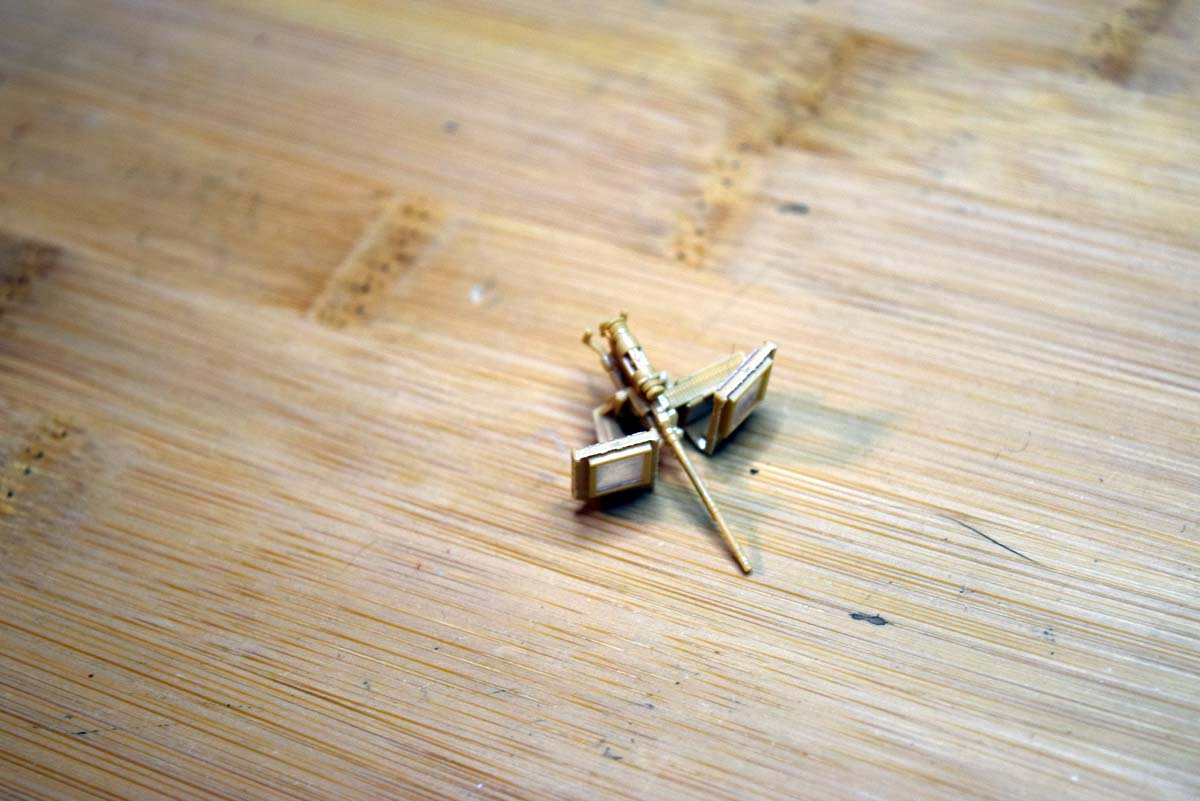
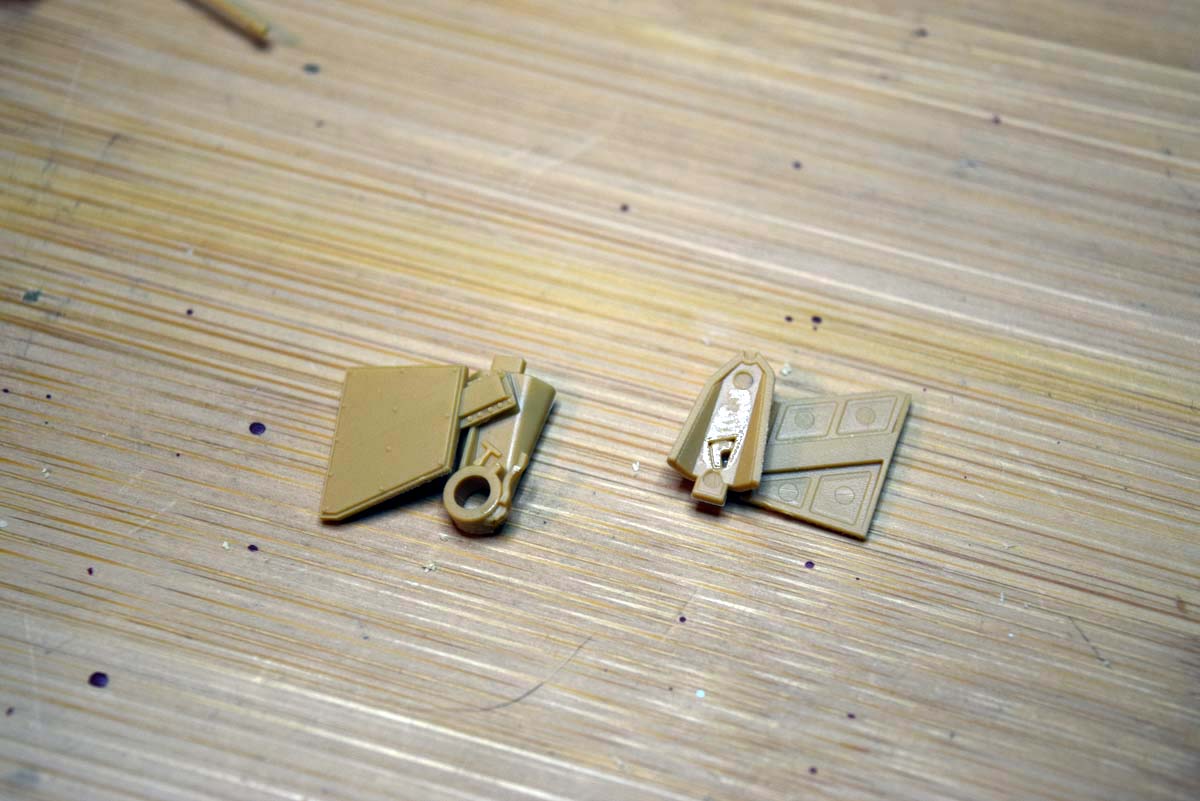
Stage 24 Loaders MG Station
The loaders station is next on the horizon and covers the building of the armoured gun shield II and M240B machine gun. The machine gun and shield are very easy builds, but there is an issue to catch you out and that one also caught me. The glazing on the gun shield is provided as two layered clear panels and when I cemented these in place I ended up with the glue creeping between the layers and damaging the finish; so I recommend that something like Klear is used to secure the clear panels in place as that will not mar the finish. The ring around the loaders hatch is particularly well done with the teeth on the ring being a great detail.
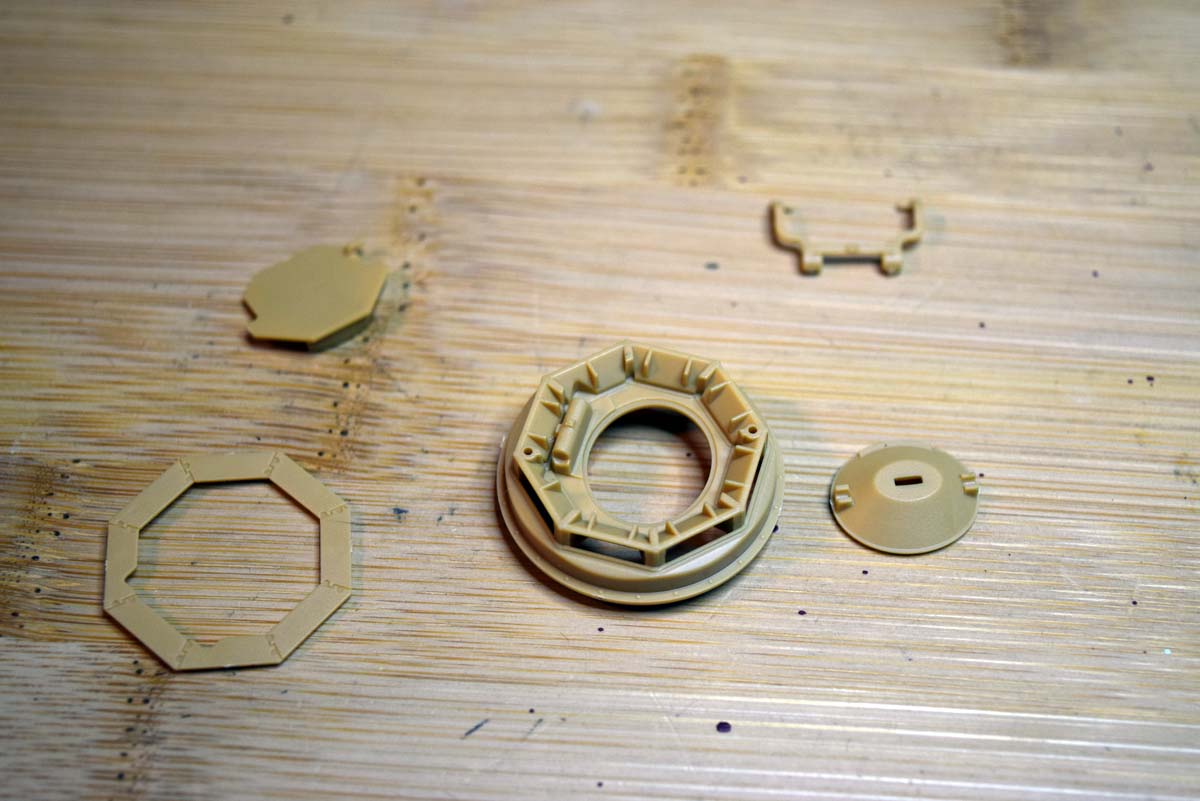
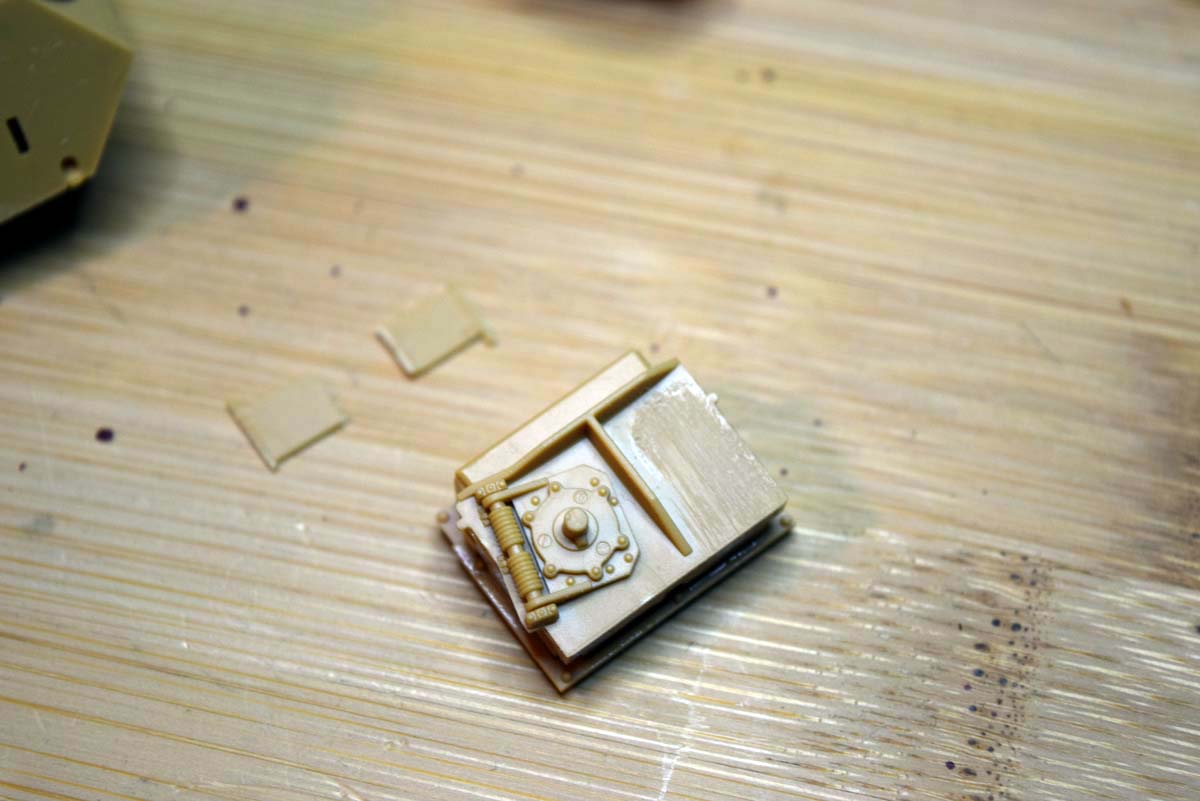
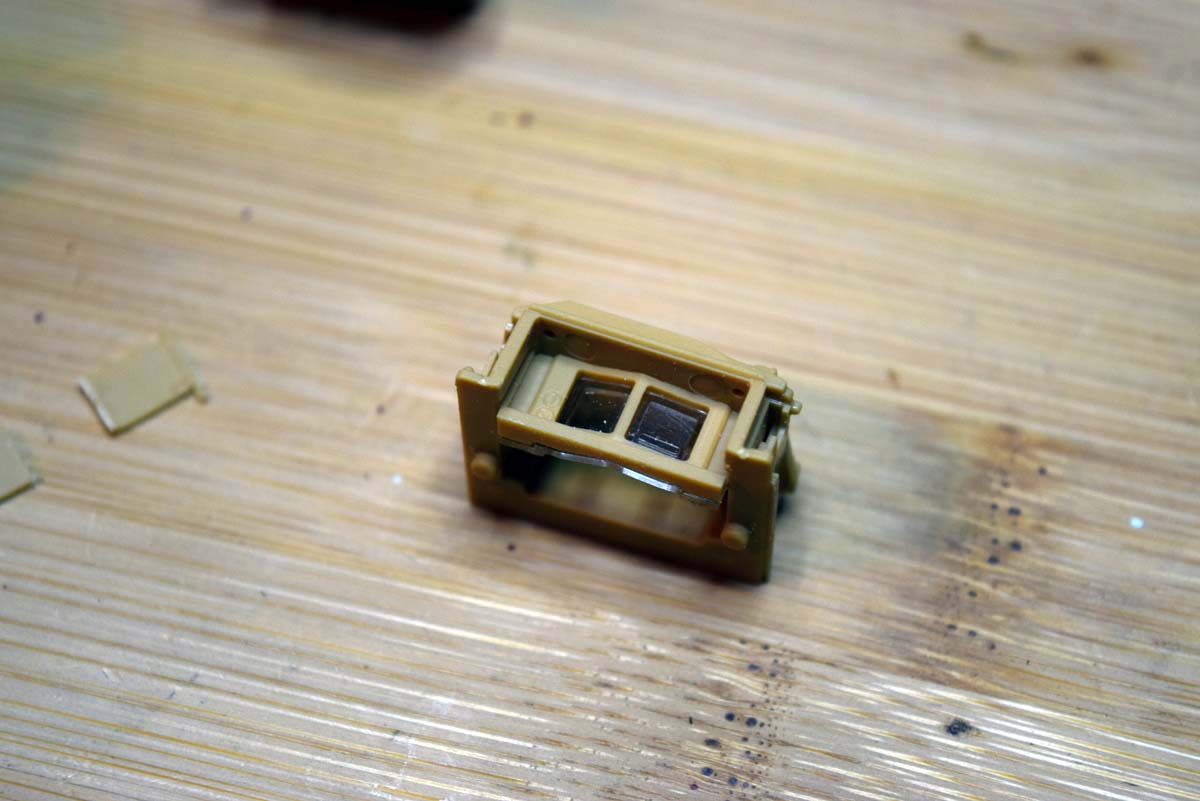
Stage 25 to 26 Commanders Hatch
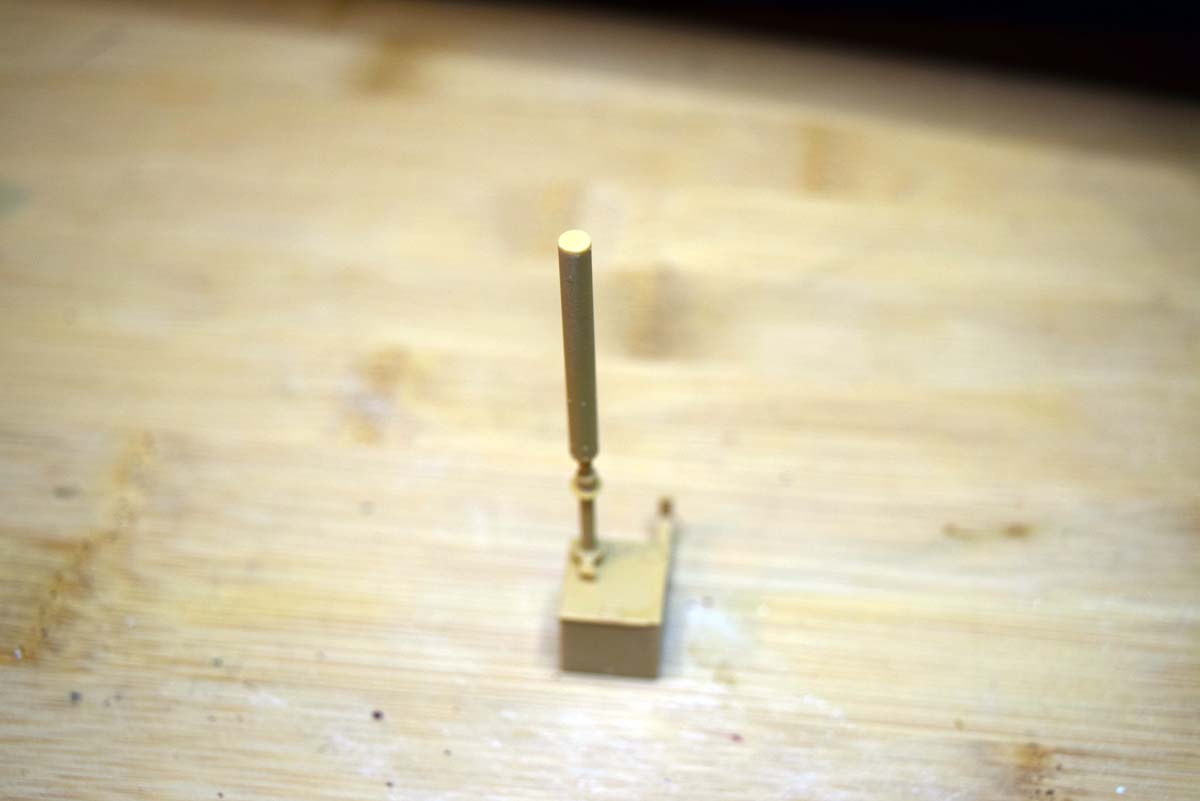
The commanders hatch has been well tackled by Academy with very nicely replicated detail. The housing with the periscopes can all be put together and the clear parts added after painting, a fact that I approve of. The actual hatch has been tackled in a way that means but remains workable and so a crew figure could be added at a later time if desired. The fit of the parts is aided by a locator tab in most cases ensuring accurate placement. The cross wind sensor and aerials/antennas for the ASIP radio system.
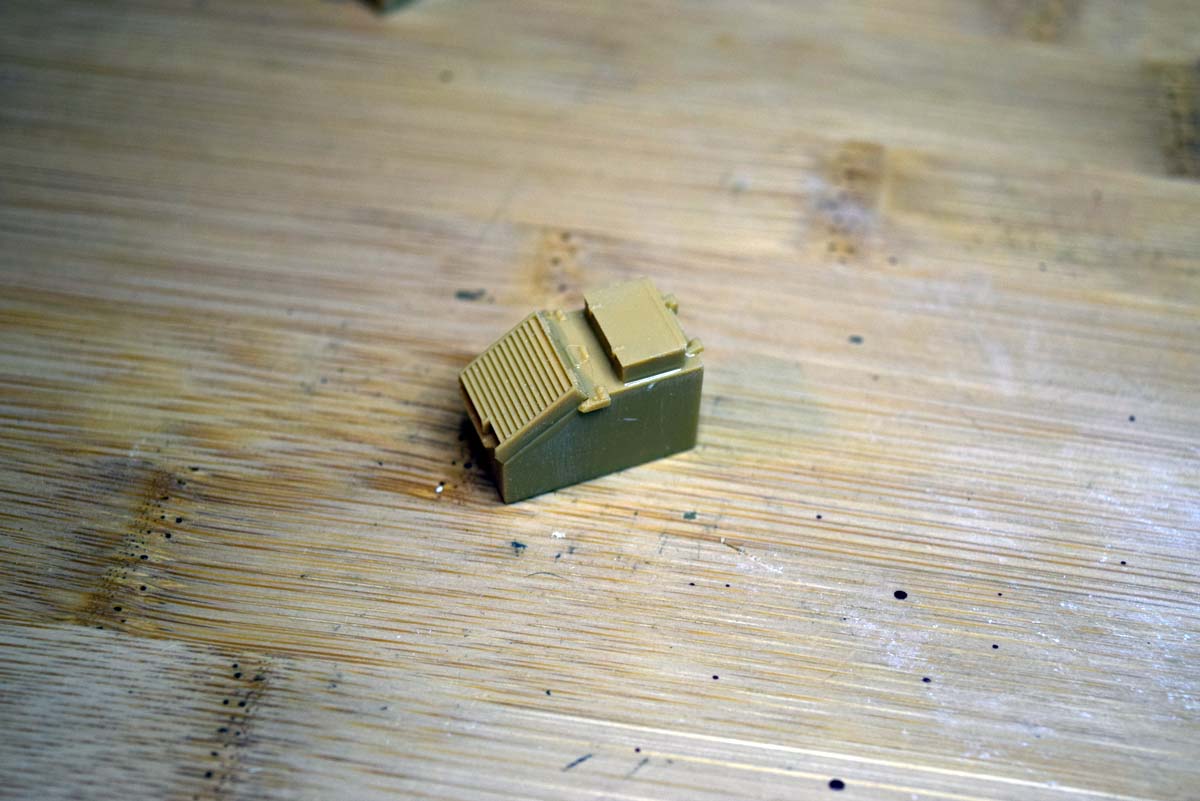
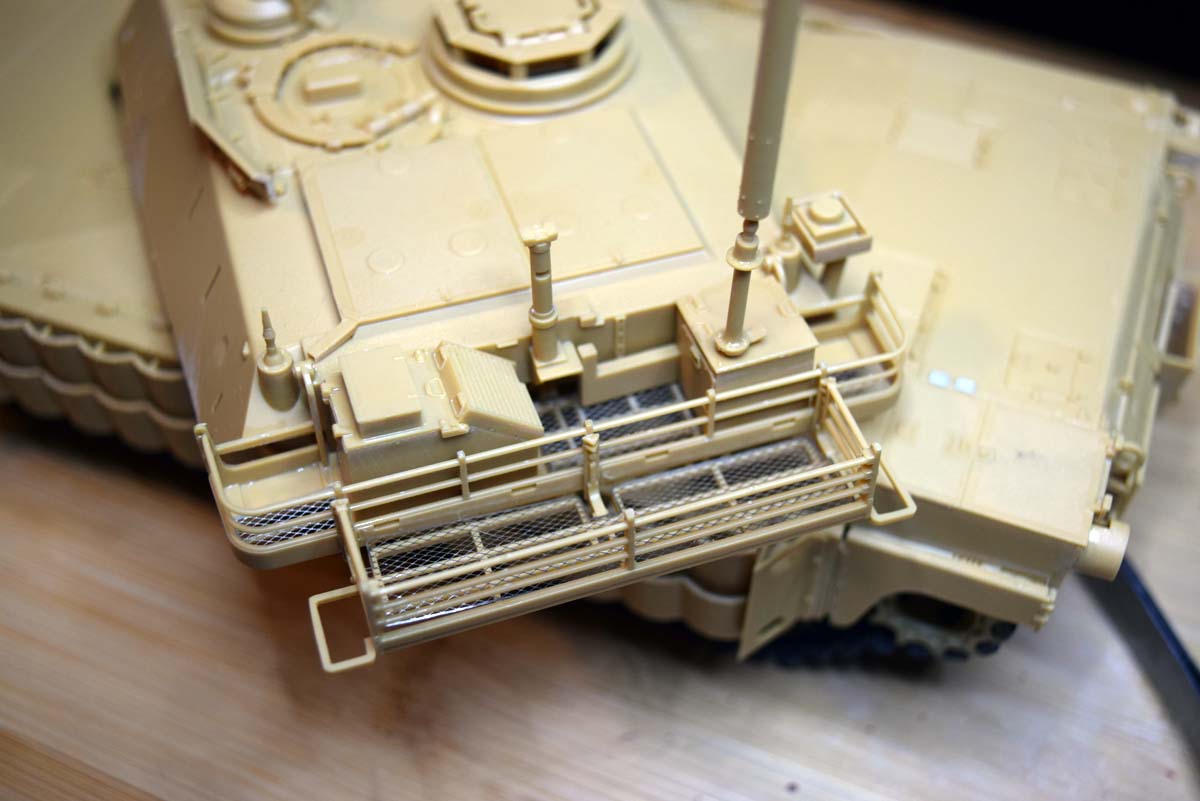
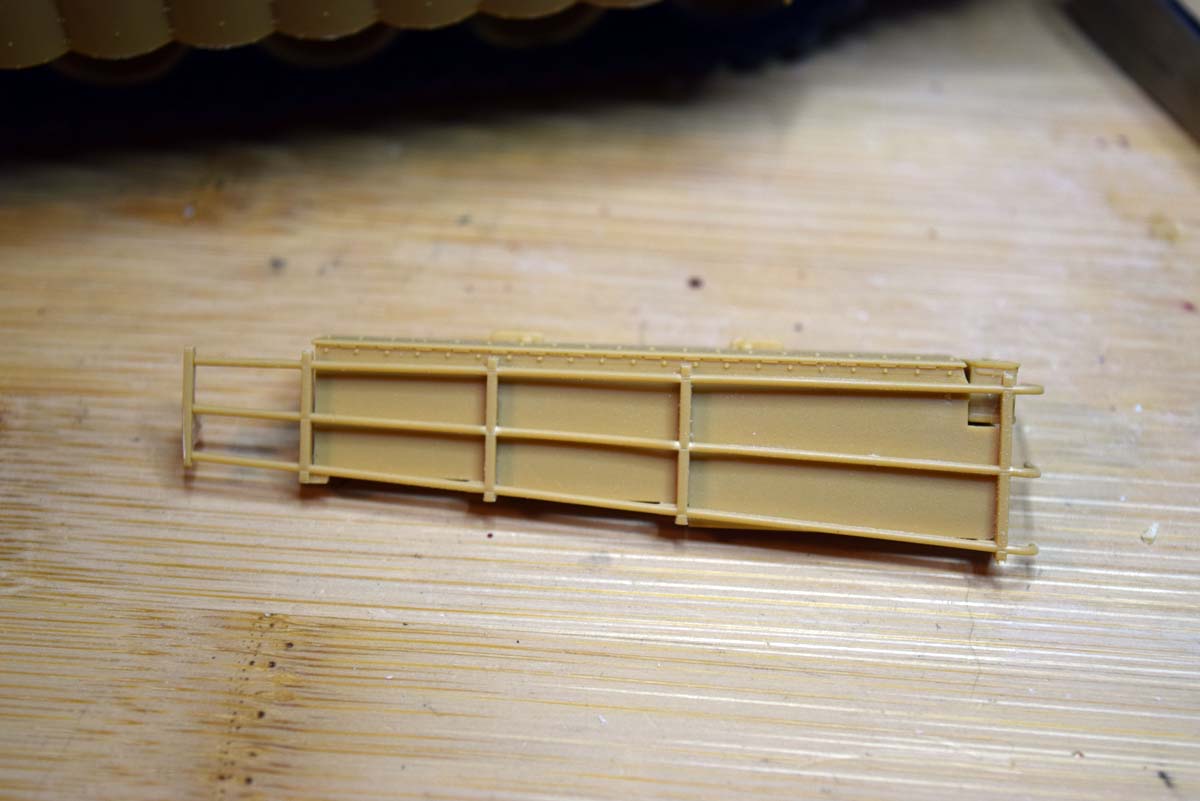
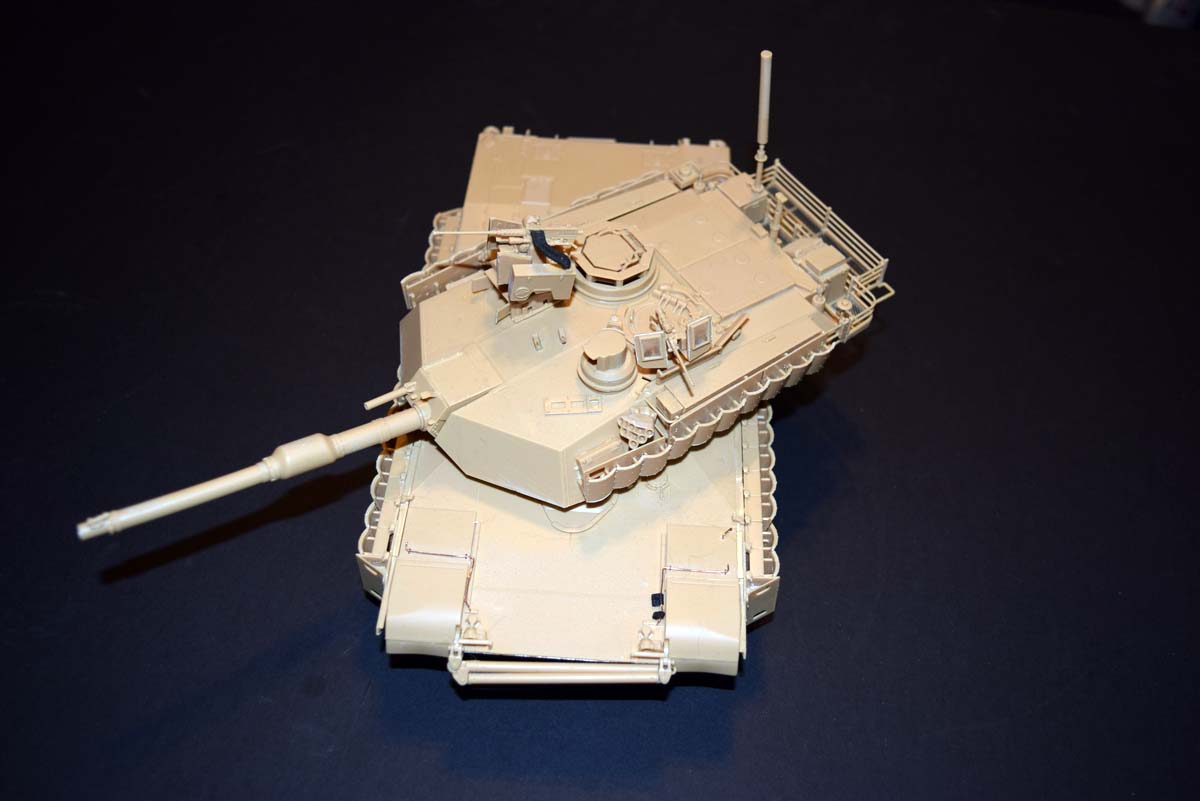
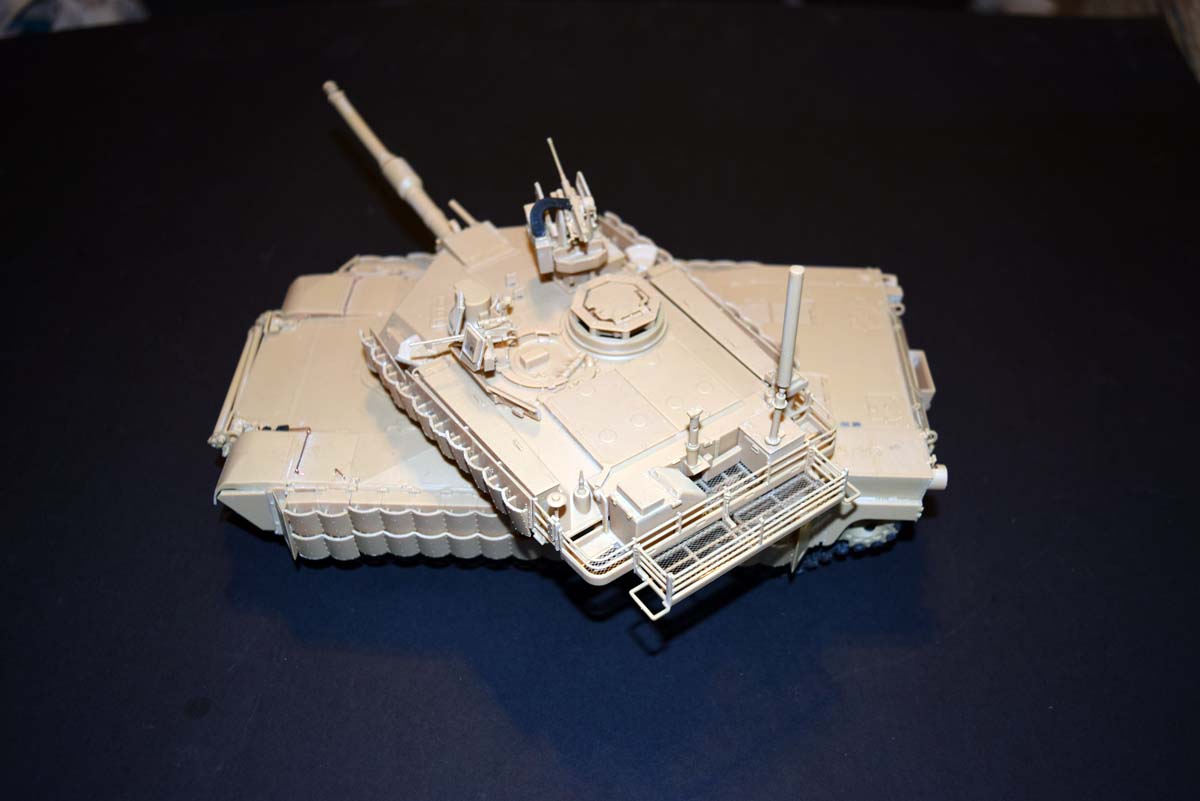
Stage 27 to 29 Bustle Rack and Mounted Parts
The bustle rack itself is very nicely done in that it assembles reasonably easily for those that dont like to test themselves, for those that do like to add a struggle to their builds there is some photo etched parts that are optional replacement for plastic parts. The floor of the bustle racks is provided in photo etch that I found fitted extremely well, so well that I only used PVA glue to secure them in place. Once this is done it is secures to the rear of the turret and it is a very good fit. The air conditioning unit is the first of the box structures you work on and once built and installed I was very pleased with the look plus it appears accurate. One thing I will say here is that the large number of handles present on this vehicle that are flat against the body of the tank would look better if added by the modeller rather than the moulded on detail. I should point out that I am not annoyed with Academy over this just that it is an option open to the modeller. The DUKE system is next on horizon and is easily assembled, but adding it requires alternate reference in my opinion as the instructions are weak in this respect. The last aspect in this area is the FBCB2 mount, looking at my reference I feel that Academy got the details wrong on this one.
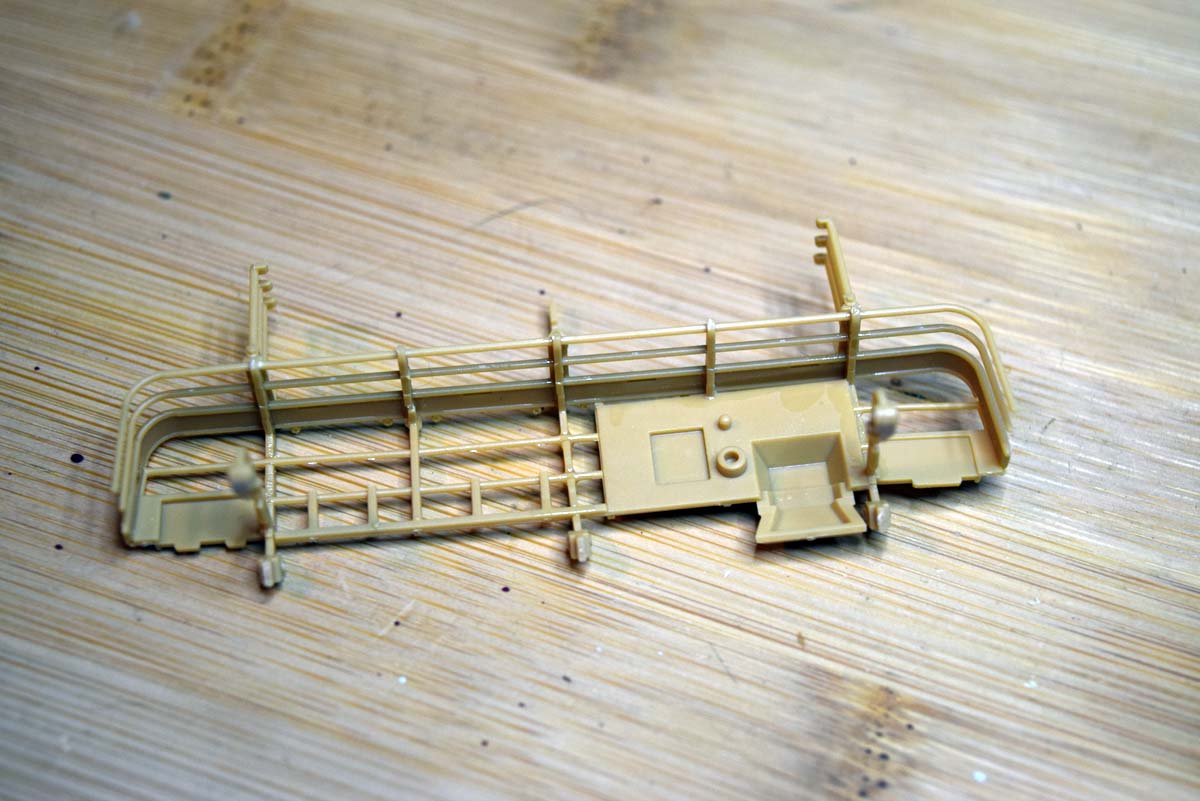
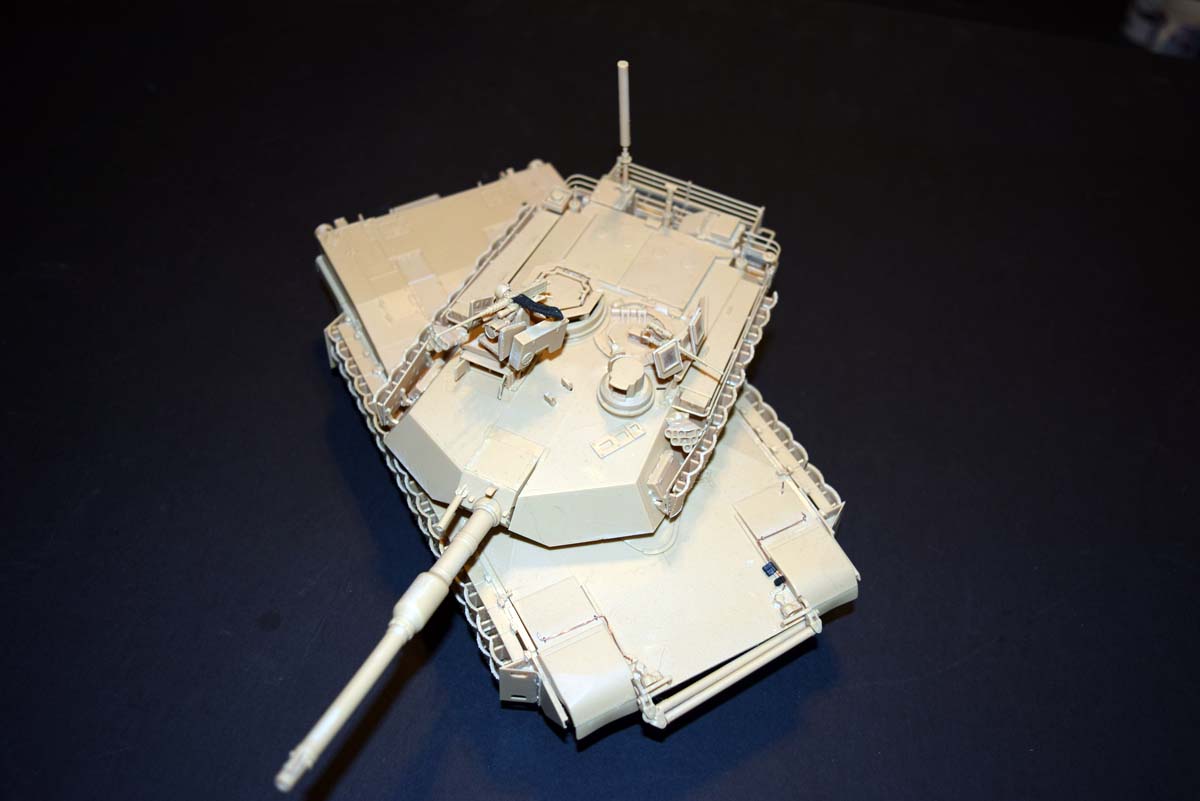
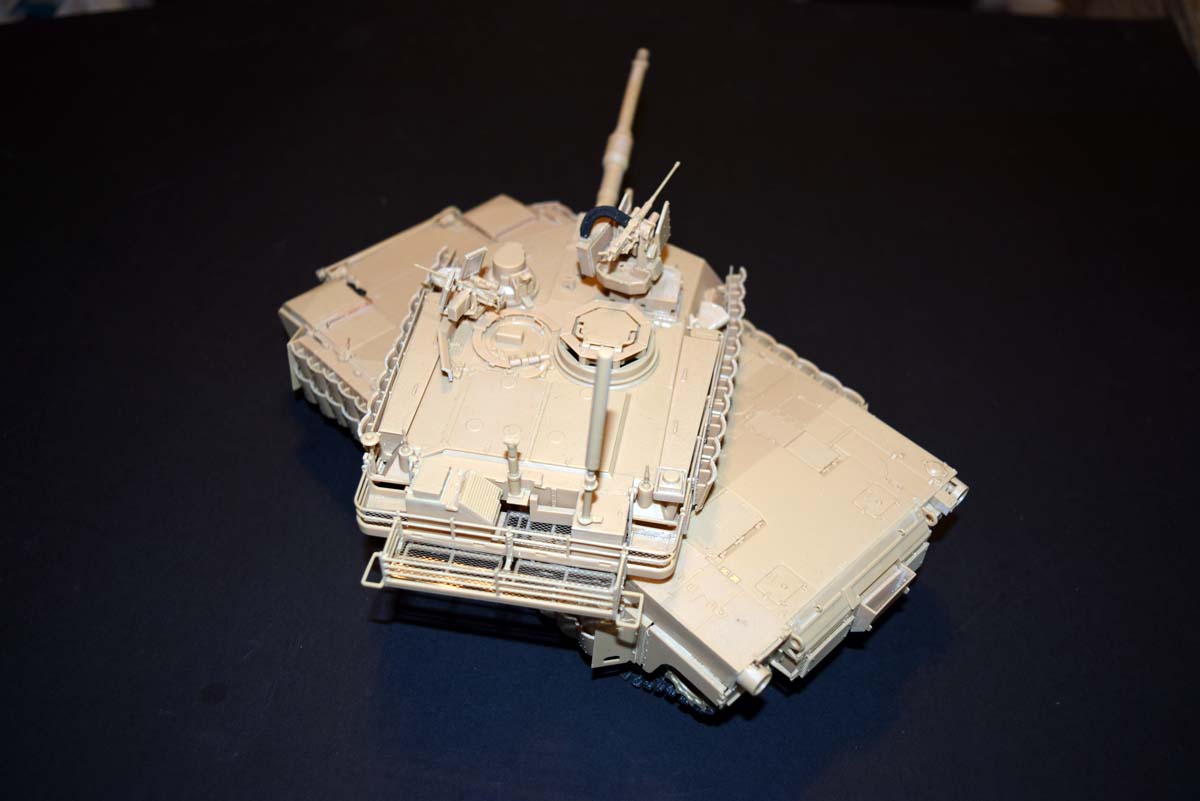
Stage 30 to 39 Side Turret Detail
Starting with the smoke grenade launchers which are made up of three elements that result in very pleasing finished items. The look of the angles would seem to be very accurate in my opinion and could only be further improved with the option of open or closed launcher tubes. The turret side rails around the storage boxes are nice from a scale perspective, but I found I had to apply a lot of pressure to get the connections home and I could see these being broken. Ammunition containers for the loaders MG are supplied to be stored here, these are quite nice but could be improved with photo etched straps. The metal cables stowed on the turret are very nice for injection moulded plastic and while I would usually replace plastic cables with metal these are more than good enough due to the limited view you have of them. A downside is that the connection of the two rear plates is difficult to align; I overcame this problem by attaching a twin scale plate that overlaps the join and then attaching the mounting plate to the turret.
The scale armour mounting plates have nice detail on them should you decide to show a model with the armour plates being added or removed. The armour scales themselves fit easily and I like the look of these elements on the model. One thing that the modeller will need to decide is the addition of a convoy light on the left side rack near the back of the tank. The parts go together well and look good, but I was unable to find these in use on a vehicle with this set up; however anything is possible I suppose. With that done you just need to add the turret to the hull for the last time and the model is complete.
Conclusion
This model rates very highly with me as it offers a nice mix of options as regards how you wish to finish the model. Assembly is straight forward for the most part with only the distorted hull issue causing me to cuss a little. Details on the model do appear accurate so far as my reference is concerned. The addition of the Def Model tracks is a very big plus to this model as they are a pleasure to build and add a nice improvement to the model, but I will say that the rubber band tracks are not bad either and the joining method meets with my approval.
SUMMARY
Darren Baker reviews and builds the M1A2 Abrams SEP V2 TUSK II from Academy in 1/35th scale.
Our Thanks to MRC! This item was provided by them for the purpose of having it reviewed on this KitMaker Network site. If you would like your kit, book, or product reviewed, please contact us.
Great review and info on the build.
Quote:
"Stage 27 to 29 Bustle Rack and Mounted Parts
The bustle rack itself is very nicely done in that it assembles reasonably easily for those that dont like to test themselves, for those that do like to add a struggle to their builds there is some photo etched parts that are optional replacement for plastic parts. The floor of the bustle racks is provided in photo etch that I found fitted extremely well, so well that I only used PVA glue to secure them in place. Once this is done it is secures to the rear of the turret and it is a very good fit. The air conditioning unit is the first of the box structures you work on and once built and installed I was very pleased with the look plus it appears accurate. One thing I will say here is that the large number of handles present on this vehicle that are flat against the body of the tank would look better if added by the modeller rather than the moulded on detail. I should point out that I am not annoyed with Academy over this just that it is an option open to the modeller. The DUKE system is next on horizon and is easily assembled, but adding it requires alternate reference in my opinion as the instructions are weak in this respect. The last aspect in this area is the FBCB2 mount, looking at my reference I feel that Academy got the details wrong on this one."
Can you elaborate more on the FBCB2? I think that Academy simply does not provide the top cover of the box.
In case anyone is interested, the Duke by Academy is far superior to the Dragon one, which is off scale and had wrong details.
Looks good, however, in that configuration, M1A2 SEP v2 W/TUSK II, it is not really accurate as an in-service tank. Other than training events like this video where the soldiers are being shown how to install them while on an Atlantic Resolve rotation to Europe, none have been added to M1A2 SEP v2s. The TUSK ERA is only used during wartime and has not been used operationally since Iraq. The M1A2 SEP v2 is a post-Iraq version of the Abrams.
Gino: Thank you for your input on this. I was aware that the configuration was questionable, but in this case I wanted a brutish look that at the same time showed the viewer the options.
Nikos: the location is off according to my reference and the top detail is wrong.
Great build review as always. Looks like another great addition to the stash from Academy, a great if underappreciated model company. Wondering how this one compares with others on the market like the Tamiya and Dragon offerings.
Thanks for the review Darren, always helpful.
I have the original release (the one with only rubber band tracks), and I found it great: not too complicated to build, good details overall but for a few issues, and you can´t beat the price!!! Maybe the rubber tracks are soft on guide horn details, but I can live with that.
Anyway, I just bought a DEF detail set and Legend stowage to give it a busy look.
Cheers!
terrific review Darren, really enjoyed reading it. i have the same kit and your pointers and advice are gold. i too think going the tusk II route, with the same reasoning
Other than the issue of the distorted area I found this one of the most enjoyable builds I have managed to get done and despite other options on the market I do think that Academy has a winner on their hands with this release.


Comments