The kit itself offers a very nice and complete section of wall, with various wall mounted lights and streetlights.
The kit is relatively simple, consisting of three wall sections, five pillars, two ruined end wall sections and two gates.
Plastic renditions of wrought iron are included to top the walls.
The pillars limit the layout to a simple corner, but because all section are separate you have some freedom as to which way the corner faces. This means that the wall can fit your diorama, and not the other way around, as is the case with most Resin and Plaster items. You can also choose to use the capstones or not, and you could leave the iron gates of for a less imposing wall. The lights give so many options that you will probably have difficulty deciding what to do.
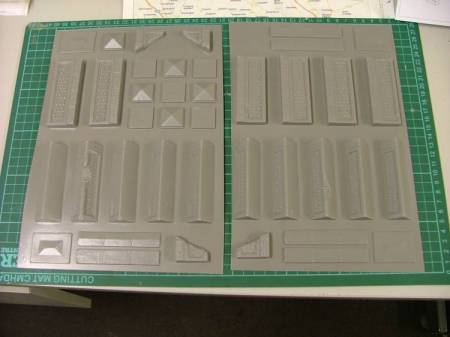
First a quick look at the contents.
The kit comes in a reasonably sturdy cardboard box, and contains two sheets of vacuum formed plastic, which behold the sections of wall, the pillars, the capstones and the bottom parts of the gates. Four identical white plastic sprues contain the wrought iron work and streetlights and we also get a sheet with German Propaganda Posters. One sheet of instructions shows what goes where.
The vac-formed sheets are flawless, but the detail of the bricks is a bit soft. Otherwise there are no problems, the corners are sharp and all parts are evenly formed without any thin spots.
The Plastic sprues show their age, as there is some flash to be cleaned up, and the lamppost have quite a seam running along their length. All parts clean up well though, to make handsome additions to this model, and enough are included to fill a sizable diorama. The sprues have one drawback; they are only detailed on one side. More of this later on.
The Posters are printed on slightly glossy paper, and included are the usual propaganda and recruitment posters, some street name signs and house numbers and an announcement poster. The posters will need to be dulled down a bit, but other than that they are perfectly reproduced and in register.
Preparing to go.
I'll write this to explain how to work with these Vac-form kits to those without any experience at all. So if it sounds like I'm talking down, that's not the case. I choose this kit, as all the parts are straight and easy to work with.
First of all, you will need a sharp hobby knife, an Exacto type is the most versatile one, but you can manage with any small hobby knife. Don't use a Stanley type hobby knife, it doesn't give enough control. Next are several sheets of different grade sandpaper. Sanding sticks etc. are not good enough, I'll explain later why.
A cutting mat is not essential, but you will need something firm to lie underneath the plastic you are cutting. Some large sheets of cardboard as used for model kit boxes would work, but don't use thick corrugated card, as that is not firm enough. For the plastic parts you will need the usual tools, clippers, knife, sanding medium etc.
I use Revell Contacta glue, which has the sticky consistency which we need. Thin liquid cement works, but not as good as I'll later explain. You'll need a level firm workplace, and if you are not working on a dedicated workbench in the garage it's advisable to cover the workplace in newspaper or like, as there will be a lot more dust and scrap than usual.
Are you ready? Then I'll begin..
I'm working on a cutting mat, so you can substitute my mat for whatever you use.
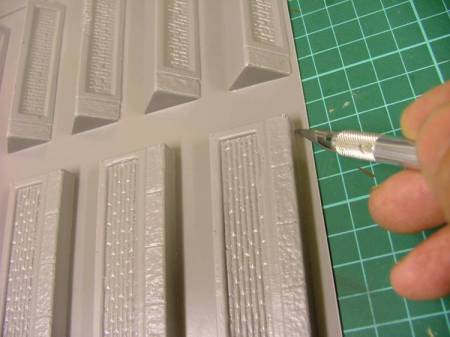
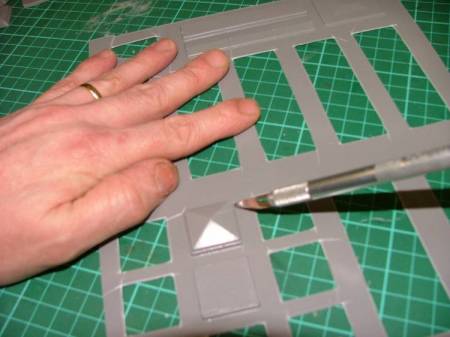
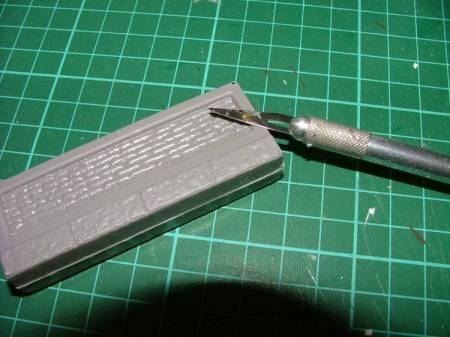
Take the first sheet of Vac-formed plastic, and select which wall part you are going to cut out. I'm doing a wall part first as they are the easiest items in this kit. Lay the sheet on the cutting mat and position the knifepoint in the corner as shown in the Photo. Now pull the knife along the crease/edge, with minimal pressure, just scoring the crease. Repeat this process (which is called a 'pass') several times. You will probably need 4 or 5 passes to cut through the plastic. If you would not use a firm underground, you will not get a nice, straight score as the plastic will bend away. Repeat this on all four sides of the piece. You will find that the middle of the crease cuts through earlier than the corners, so when you have cut all four sides just cut any remaining piece on corners in the same manner. Half the secret is to use only light pressure when making passes, as that avoids the knife slipping and not making a straight clean cut. Until you feel that you get more control over the knife it's best to make the cut at a 45-degree angle, but if you feel confident enough you can decrease the angle (i.e. lower your knife handle towards the work surface) but it does increase the change of slipping. Repeat for the opposite part of you wall section.
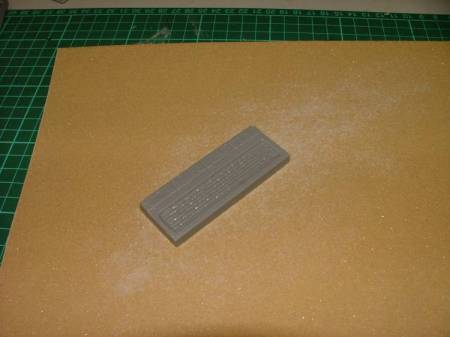
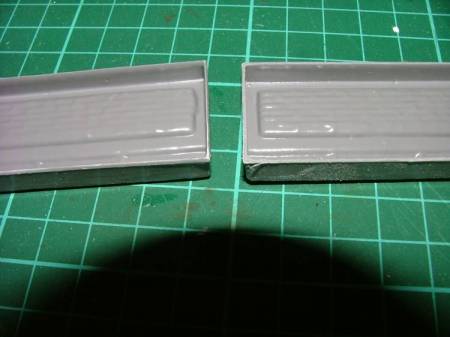
You now have two parts which look like 'normal' plastic parts, but they need to be cleaned up first. This is where the large sheets of sandpaper come in. You put the sheet on your work surface, and lay the piece on it, cut edges down. Then we start sanding, in big, circular motions. Using a fairly rough grid ( I use a grid 100 here) we sand down until the flange along the cut is gone. We want to end up with a square edge like a 'normal' part. When about done, use a finer grid (I'm using 220 here) to clean and smooth the edge. Use light, even pressure when sanding, to avoid sanding too much off one side. It helps to rotate the piece in your fingers as well. Keep checking by test fitting the pieces. When the fit is snug and the thickness of the wall satisfactory, the pieces are ready. The parts must be completely straight, which is why we use sheets instead of sanding sticks or the like. If the mating surfaces or not completely straight you wont be able to glue them straight. Believe it or not, but this simple technique is where people go wrong, and blame a kit for not fitting well.
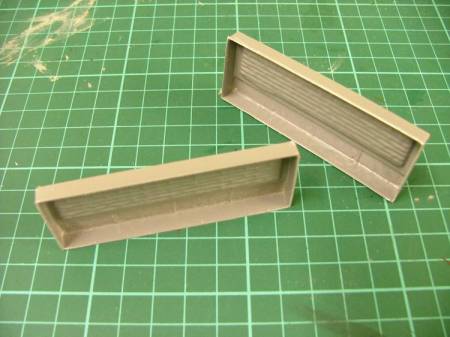
Gluing the pieces now is much like gluing an ordinary plastic kit, with one big difference, there are no locating lugs or edges. This is however where the MiniArt kits are really great. The plastic is quite thick, which gives good mating surfaces, and the parts fit perfectly. I use Revell Contacta glue because the sticky consistency gives you plenty of time to apply it and to position the pieces until all sides are lined up. Gently squeeze the two halfs together, and when the glue has dried, a quick swipe with a knife will reduce the seam to almost nothing. All that is needed now is a few passes with some fine sand paper and you're done. The many small pips along the edges are a by-product of the molding process as they are part of the mold line-up. They can be removed with your knife, and are easily filled with a touch of filler.
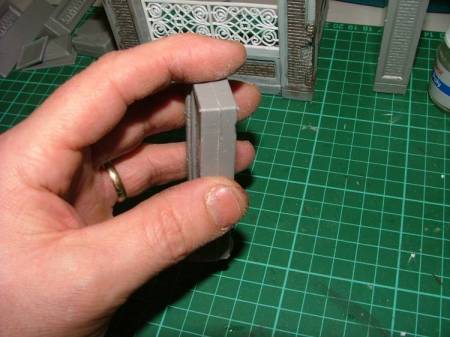
To build the pillars you follow the same process as for the wall sections, taking care to line up the top and sides. If there is any misalignment at all make sure it's at the bottom, as it's easier to correct or hide there. Take care when cutting and sanding the pillar capstones, as these have a seam going all the way around. The fit of these parts is however excellent, so a little time and care whilst cutting and sanding will really pay of here.
When you glue the pillars, as above, wait for the glue to dry and run your knife along the edge to eliminate any sharp edges, and finish with sandpaper to round of the edge. When finished the seam should have disappeared completely.
Putting the wall together.
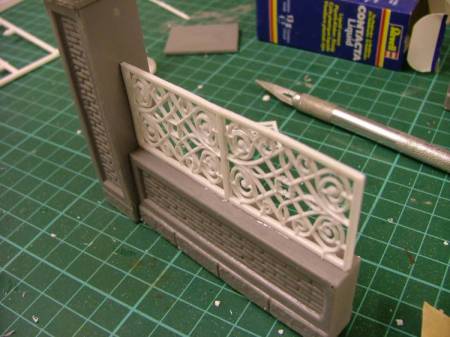
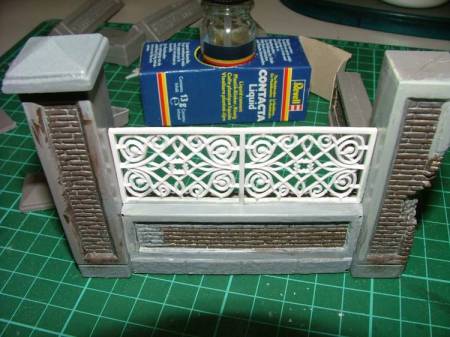
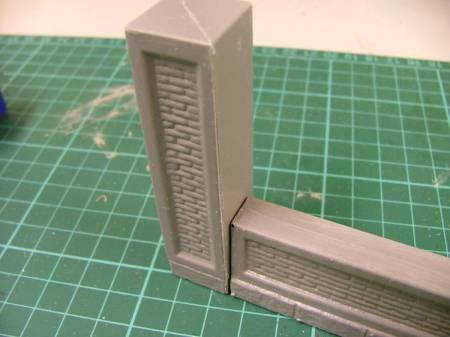
The MiniArt kit allows you to build the wall in different variations, with either minimal additional work or with the use of filler and whatever you like to throw at your models. You can for example add the wrought iron screens, or leave them off to create a lower wall. The capstones which go on the top of the wall can be used, or left off. I choose not to use them in this attempt, to show how the break-up of parts leave very few exposed seam lines. The seam lines on the wall part will all be hidden once installed, we set this apart for now. Next step is to sand the ends of a wall part flush before gluing them to their respective pillars. It now starts to look like a wall and at this point you will have to decide how you will dress the wall. you can use the screens without the capstones (like I have in this case) or indeed with the capstones. You can also use the capstones without the screens. The choice is yours.
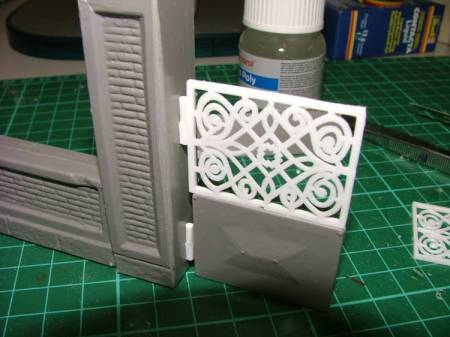
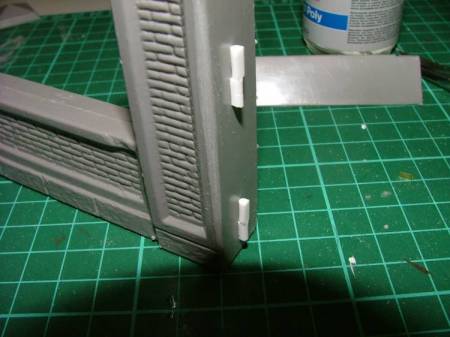
The gate follows the same process, the two parts are cut out and sanded to fit, and when installed they are topped with screens. They are mounted to the pillar with what can only be described as 'basic' renditions of hinges, but again, if you want you can of course replace them with something more elaborate if you want. I have simply used some pieces of brass, but some plastic ones are easy enough to fashion from some scrap. If you use the wrought iron screens, take note. The detail is only on one side, so make sure you face the detailed side to the side you will view. As you glue the screens in place you'll find that the second screen doesn't fit between the pillar and screen as it's slightly to long. No problem, just cut the edge of one and glue that to the other screen, they then fit perfectly and they also look better. Well, that's my opinion anyway.. .
Shedding light on the matter
the lights should pose no problem as they built up as normal plastic kits. They have a bit of flash to be removed, and the plastic is fairly hard, so care needs to be taken when cleaning up. Don't try to break parts of the sprue, use cutters or a knife. The plastic doesn't break neatly on the edge like so many kits, and damage is most likely. Many of the parts are quite fragile or intricate, so use those cutters. You get a total of four large carriage style lights, four small carriage lights, and four hanging lights of a more modern design. The box art gives you various ideas of how they can be used, and as you are unlikely to use all lights on your wall (read that as you shouldn't, you have twelve different light armatures. This is a park wall, not a Football pitch.. ) For added realism you should really add some clear acetate or plastic to the carriage style lights.
That about wraps things up, all that is left now is painting and adding it to a diorama of choice. But that as they say is another story
SAFETY NOTICE.
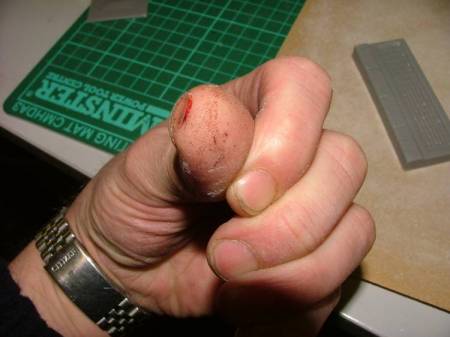
I know that you know, but Ill say it again. Be careful with knives Always cut away from your fingers, and if possible from your body. This is not namby pamby, I have the scars to proove it ( I dont know if the photo will be added, but I cut my thumb doing this one . :-{ ). Dont try to force a cut, and only use light pressure. If you need to force the knife somethings not right. Small sharp blades snap easily, and the damage you can do to yourself can be severe. Taking care cost nothing, and wont delay your work. A trip to casualty does
And in the immortal words of AJLaFleche, If you think maybe I should move my finger, do so immediately.
Good Luck
Henk
Thanks to Svetlana from MiniArt Ltd, who kindly provided this kit for review. MiniArt also sponsor our site as advertisers. Check out some of the other MiniArt Reviews on the site or have a look at their website.
SUMMARY
Henk shows us how he builds a vacuform kit from MiniArt
DETAIL:
70%
OVERALL QUALITY:
85%
EASE OF CONSTRUCTION:
85%
Percentage Rating
80%
Scale:
1:35
Mfg. ID:
35007
PUBLISHED:
Feb 17, 2006
NETWORK-WIDE AVERAGE RATINGS
THIS REVIEWER:
86.01%
MAKER/PUBLISHER:
85.88%
Photos
Click image to enlarge
About Henk Meerdink (Henk) FROM: ENGLAND - SOUTH WEST, UNITED KINGDOM