Mind-blowing and Incredible. Buy a box and youll discover exactly what I mean. This is another welcome addition to the second generation of Dragon figures featuring the slide mold technology.
Parts and Pieces
I did not include any pictures of the separate pieces since DMLs website has an excellent series of photos that allows a modeler to look at every piece, including the ability to focus in and out. This kit is injection molded plastic and I state with confidence that these figures rival any resin figure I have ever seen. The box is large for just four figures, and just at a glance, I would have figured that DML has over-packaged their product. But, the box is full to bursting with all kinds of goodies. Some of these goodies are; canteens molded in two pieces (the canteen and the drinking cup), bayonets, e-tools, holsters (molded open or closed), helmets for paratroopers and normal Schutze helmets and different weapons. The list goes on and on. At this rate, a modeler could fill a spares box after three kits.
The Kit
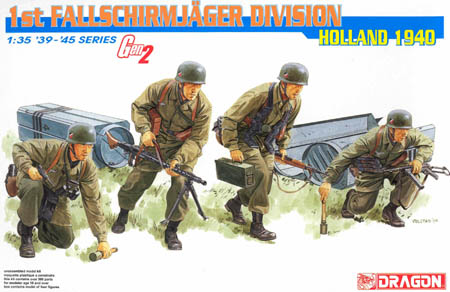
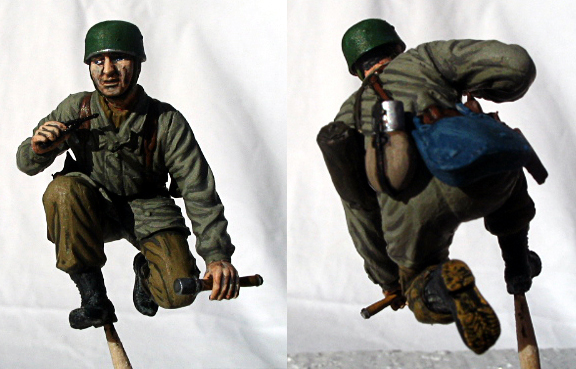
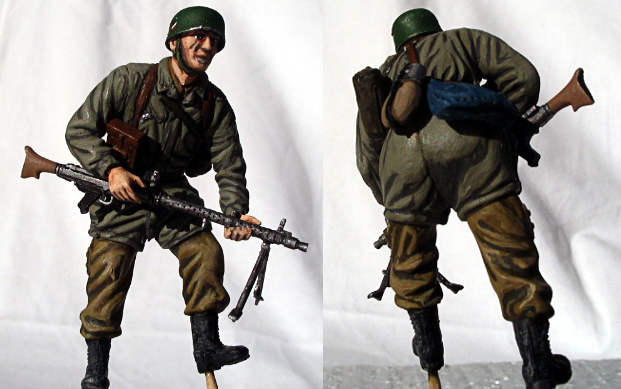
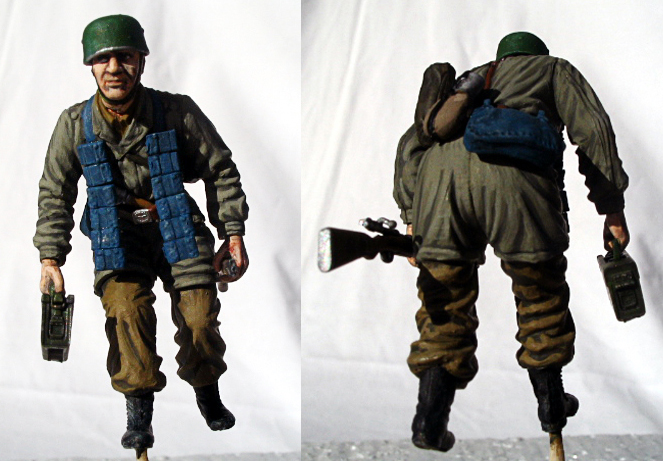
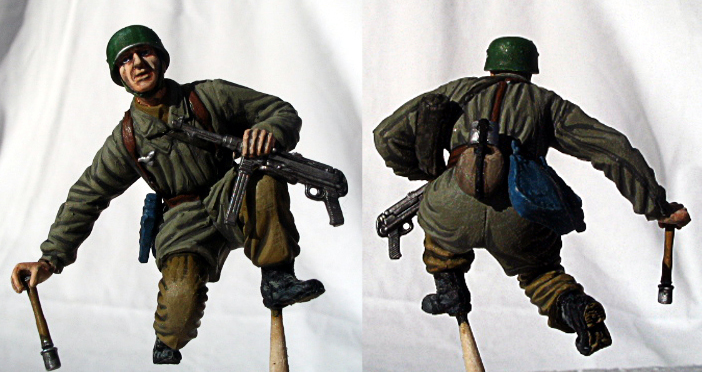
The kit represents men of the 7th Air Division, which jumped into Fortress Holland, in 1940. The operation in Holland was the first large-scale strategic use of the Fallschirmtruppe. The operation undertaken by the paratroopers was to capture important bridges and airfields, which was a success. The kit forms a group of four men wearing the jump suit typical of the early-war Fallschirmjager. These jumpsuits were the step-in type, not the later snap fastening model. They also all wear the side-laced jump boots which were typical of the early war years. The machine gunner carries an MG34 with a bipod either folded or deployed (It would have really been cool had DML allowed for putting the machine gun in the heavy machinegun role with the tripod mount. It was common for these MGs to be deployed thusly because they would be providing covering fire for the landing zone). Another man, probably the NCO of the group, is kneeling holding a pistol and potato masher hand grenade. The third man is a rifleman, sporting the well-known bandolier of rifle ammo, carrying a second can of ammo for the MG in one hand and a K98 rifle in the other. The last man is kneeling with a machine pistol and hand grenade (A neat touch on the MP40, which was initially produced in 1940, vice the MP38 version which was only manufactured for two years.) I really like the pose of the last figure I described. It looks very natural.
Building and finishing the kit
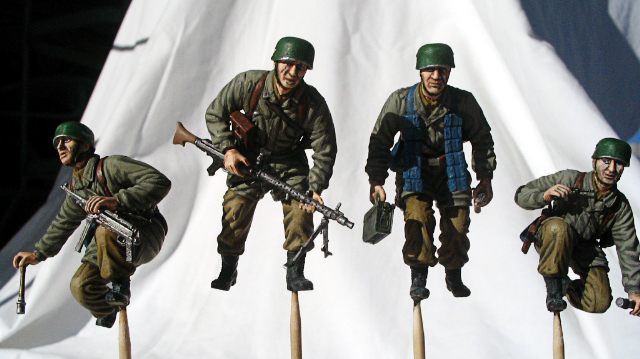
When Armorama staff sent me this kit for review, I had to build and paint them. The figures are relatively easy to put together and look really fantastic. Care must be taken in assembly, though, because there are so many parts for each figure. If care and patience are exercised, you will be rewarded with minimal seams to clean and hardly any gaps in joints. The saving grace is that the engineering is so exacting, the alignment is almost automatic. I love the way that they came together. The fit is tight and I purposely did not use filler on any of the figures (not that it was necessary). I built the kit out of the box as much as possible. I didnt use all of the equipment on the figures that was illustrated to use, but did add what I could that would still look natural. I assembled the figures torsos with legs, leaving the heads, helmets and hands separate. Its easier to paint the flesh tones that way (to me, anyway). After painting the separate assemblies, I then glued them together. Lastly, I painted the weapons and kit and super-glued them to the figures. Heres where I hit a snag. I have never, ever used photetch before. After sending several pieces into orbit by cutting them and not holding them down, I was able to cut a couple to use for the figures. I fought vigorously, but lost the battle of being able to bend them into anything natural looking and still be able to install them. I just need some more practice. There are also decals for the helmets and the containers. The decals are high-quality and went on the helmets with no problem. There was a little silvering on the edges, but dullcoat took care of that.
Speaking of the Fallschirmbombe, I did build one example but didnt paint it. The fit was good, but the placement of the wheels/casters was unclear and I think I got them wrong. They make a neat addition, and would be really great in a vignette or diorama.
Overall pros and cons
The pros blow the cons out of the water. This kit is absolutely stunning. The value for the dollar is incredible. I was not kidding about all the extras and goodies. There is enough equipment to outfit a section of men. The weapons and kit are all beautifully molded and include features like open or closed mess kits which are really exciting for potential settings for the figures. The figures are lifelike and perfectly sculpted. What could be done to improve these kits? Very little, I can tell you, but I have a few suggestions... 1 - Some inbox information about the subject would be welcome. Not everyone has a huge library of references or access to the internet. A single sheet of this is this and that is that would be really neat, which could include setting these figures into a context. At least naming the equipment would be nice. 2 - More explanation in the instructions, especially with these intricate figures, is needed. I assembled the figures, and realized that two of them had no belt buckles, and the tight fit allowed for no room to install them tardily. The photoetch parts are hard to deal with, especially trying to figure out the straps for the weapons. 3 - A little more information on the supply containers would be invaluable to the modeler. I have no information on how to attach chute lines (I know they had to have them) nor what the containers interior would/should look like. 4 A painting guide that clearly displays the accoutrements and what color(s) they should be individually.
Final word
This kit is outstanding and a benchmark in the hobby. I opened the box and just fell in love. I have always loved DML for their quality and value. They have requited my love by producing figure kits that are unbelievable in quality and value. In fact, I am trying to finish this review so I can start on the next set, Germania Regiment, France 1940.
Most Highly Recommended
SUMMARY
Mind-blowing and Incredible. Buy a box and youll discover exactly what I mean. This is another welcome addition to the second generation of Dragon figures featuring the slide mold technology.
Our Thanks to Dragon Models! This item was provided by them for the purpose of having it reviewed on this KitMaker Network site. If you would like your kit, book, or product reviewed, please contact us.
About Rob Lively (husky1943) FROM: FLORIDA, UNITED STATES
My name is Rob and I am a 42 year old, married, with two children. I am retired US Navy and now a Base Police Officer at NAS Pensacola, Florida. My main interest is WWII figures, but I do occassionally branch out into other periods. My concentration in WWII is the Sicilian/Italy campaign.