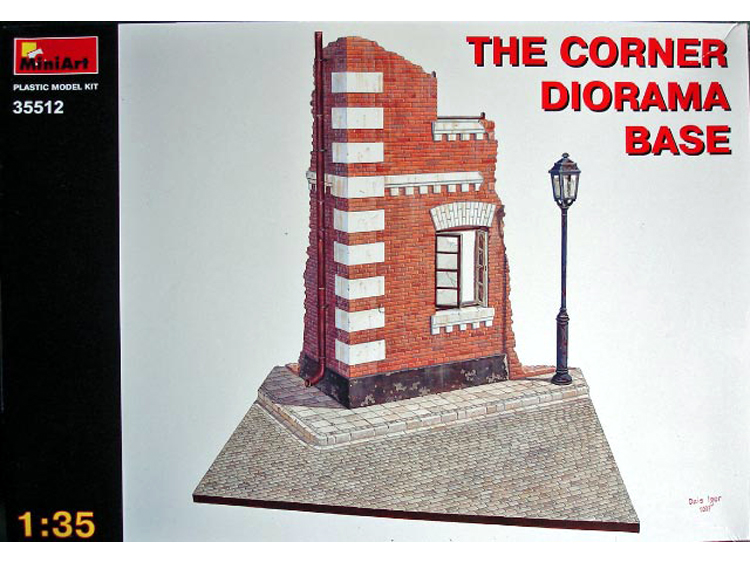
Another of Miniart's wide choices of European structures, the "Corner" is a diorama base with a building corner ruin, sidewalk section and a section of cobblestone street. The kit is presented nicely in a 9.5"X13.5"X 2.5" (345x240x60 mm) high gloss, sturdy box. When opened, the box contains two injected sprues, two sheets of vacu-formed parts and one page of instructions printed on both sides
Injected Parts:
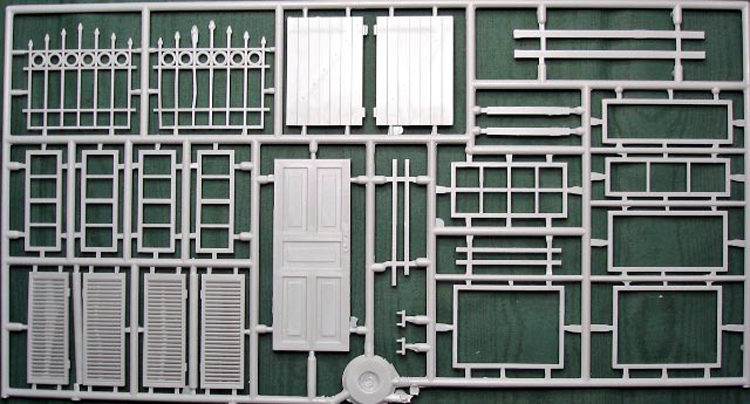
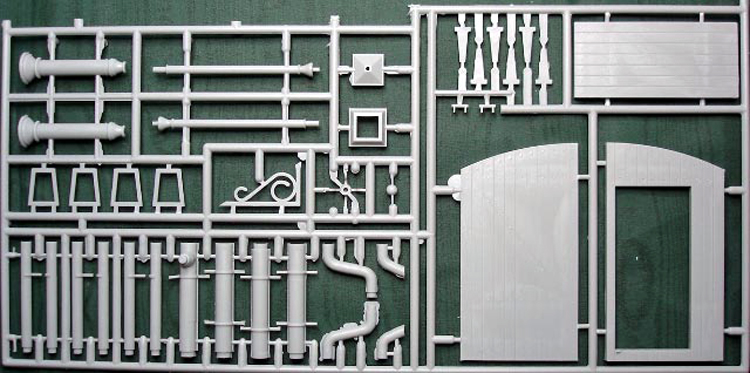
With all Miniart releases they supply the architectural features that normally don't come in a plaster/ceramic kit. The injected parts are common to some other kits so you get a bunch of extra pieces for future scratch builds. One sprue has windows and frames, a wooden door, shutters, cellar doors and ornamental iron fencing. The second sprue has a street lamp, ornamental wall sign hanger, downspout & hangers, a barn door with hinges. Considering the sparseness of this kit (a small section of the corner of the building) you will use one of the window/window frame, the gutter spout and the street lamp. That leaves a lot of extra stuff!
Vacu-form pieces:
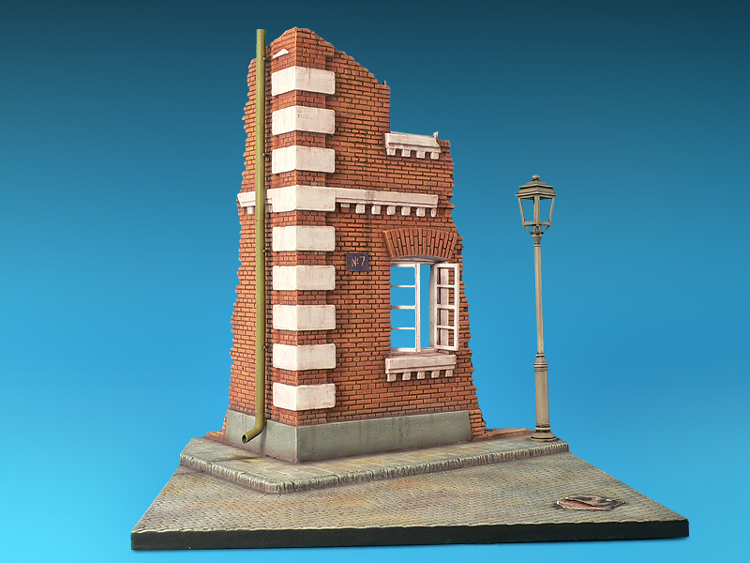
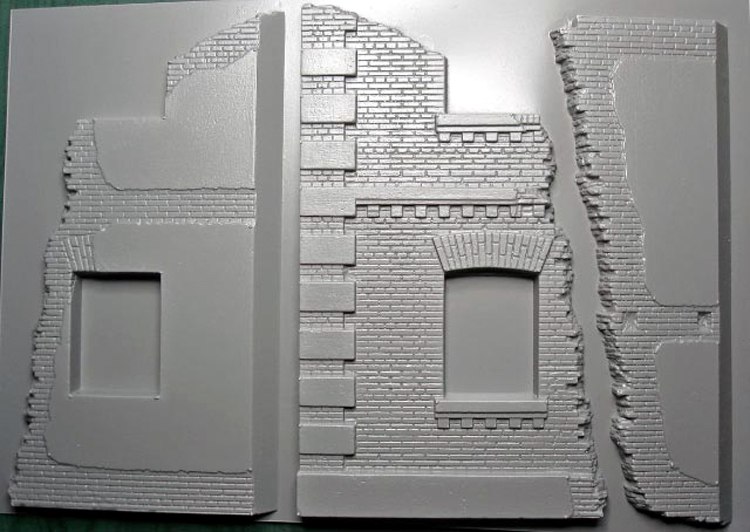
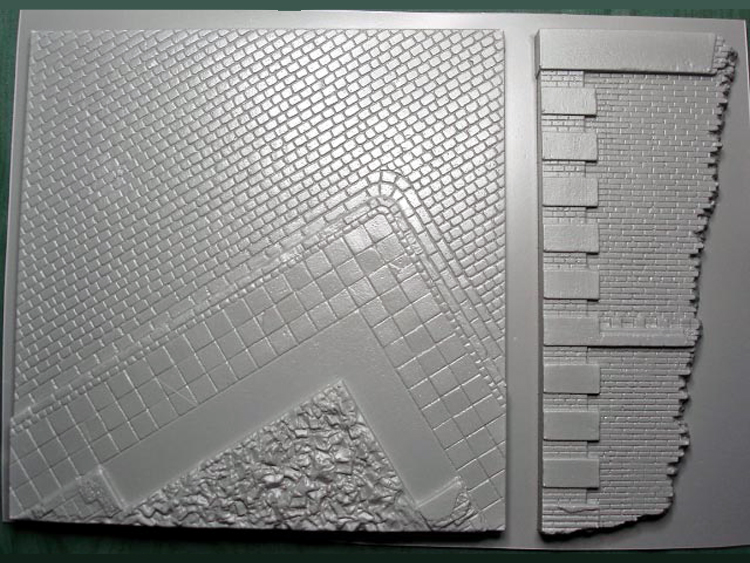
Of the two vacu-formed sheets the first has the base plate and a broken wall section. The second sheet has three wall sections.
editor update: The base piece street section measures 6.5"x7".
Build demonstration
I was fortunate enough to attend the Miniart seminar at the IPMS Nationals where the owner, designer and builder/finisher of Miniart was giving a demonstration on 'how to build' his product. Ironically he was using the kit that I am reviewing today as a demo. In spite of not having his own tools and glues he cut out all the pieces and assembled them within about 1/2 hour.
Here are the essentials: You need a heavy scriber (something sharp and sturdy) to scribe the lines several times right along where the molded section meets the flat sheet. Break the pieces off when scribed. Try to get a completely flat surface on the edges...sand the cut out pieces against a large flat surface. Using a gel type plastic glue, mate the edges and apply pressure so a little of the softened plastic squeezes out at the seams (kinda like building an a/c). Do sub assemblies and when everything is together clean up the seams with a small emery board or the like.
Impressions
If there is a weakness for the kit it is in the directions. Maybe I'm just inept at following 'the universal language' of pictures? If you (1) follow the sequence of the directions and (2) have good mating surfaces (3) use a glue that doesn't flash off too quickly; you will have an inexpensive yet nicely rendered building section to paint and weather to your preference. Visit the Miniart website for examples of painted up kits. These kits (Miniart structures) have been selling with a Dragon figure kit included as a bonus at various web stores for quite a while now which even sweetens the deal. I have no idea how much longer this "promotion" will last.
SUMMARY
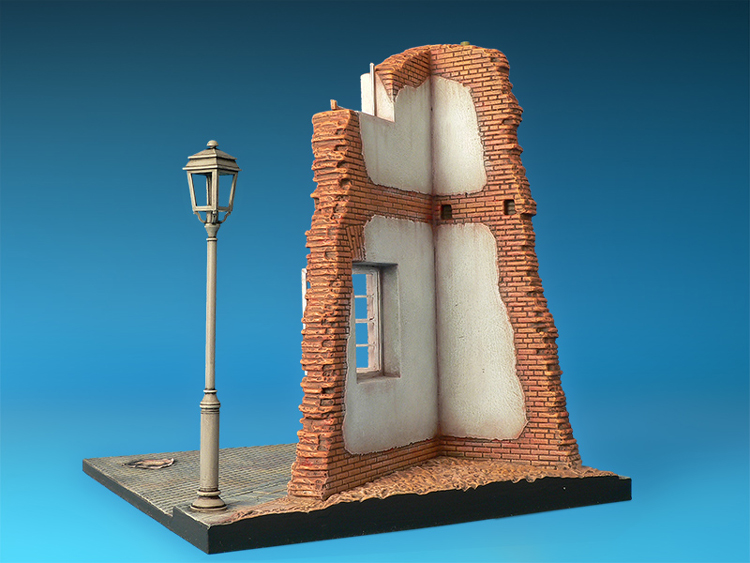
Highs: Relatively inexpensive. Material is easy to work. Extra parts included with each kit Finished piece is durable and light in weight (dioramas with multiple structures won't weigh a ton.) Detail on front and back of building walls.Lows: The directions could be a little more thorough. I needed to visually see the assembly process to understand how easy it really is. I made it more difficult than it is on the first kit I attempted.Verdict: These are excellent kits of very diverse subject matter. I think once people find out how nicely these kits build up companies that produce plaster buildings will become dinosaurs.
About Charles Reading (CReading) FROM: CALIFORNIA, UNITED STATES
I live in the mountains north of Santa Cruz California. I have been building now since the early 1990's when I rediscovered modeling. Most of my kits are built with dioramas in mind. I took a "creative block" hiatis for a couple years - 2011 to 2013. I wasn't active in the modeling world. During tha...
The measurement of the base piece is 6.5"X7" which might be pretty tight for a full size AFV to just be sitting on the cobble portion. If it was tracking up onto the sidewalk area, no problem. All in all probably better for a smaller vehicle or a softskin vignette.
Cheers,
Charles
Hey there guys,
As a seller of MiniArt products, I can say their stuff takes a little getting used to, but once you do, they are great.
Just some news, following this Corner Diorama set, MiniArt has a couple of more sets like this one coming out in the future as well.
Russian Street with Advertising Column
and
Street with Ruined House
No word on their release dates, the MiniArt site just says coming soon. Judging by the pictures on their site, the second one will be the first out, followed by the Russian Street one.
Well, LOL, years later going back through my reviews I see where no link was ever made to the photo feature of the finished diorama using Miniart's "The Corner" kit. Here is the link - =https://armorama.kitmaker.net/features/4836
and an image:
While these are not the easiest kits to build they're miles ahead of the old plaster models. I've built quite a few and have a cupboard full of them (literally! I've got about 20 to build) which shows my confidence in them. The more you build the easier they get and as Charles mentions there are stacks of spare parts to use at a later date if scratchbuilding. While the base on this one is quite small and not really suited for an AFV there's nothing saying that you have to use the base. In the past I've just used the building and constructed my own pavement/road to suit my needs.
If you just use this building OOB and no extra groundwork, there's just enough room in the front for a Hetzer. I think a T34 would hang over the sides a bit.
Karl,
Out of curiosity, why do you prefer these over plaster kits? My experience has been that when someone tries one of our hydrocal kits they swear off vacuform kits forever. Most of the Dioramas Plus line can can have basic assemble done in about 15 minutes.
Always trying to make our kits better so I appreciate your honest opinion.
Thanks in advance!
Randy Pepprock
Dioramas Plus
LINK
I personally like the hydrocal kits over the vacuform kits due to their ease of assembly, the fact they can be damaged and used with other kits. I usually take the Miniart kits and make plaster moulds out of them. I have also bought Diorama Plus kits and they are great and easy to build. If I can make a wish it would be for some more middle eastern buildings.


Comments