Sometimes a kit comes out that is special; Gentlemen, we have here a kit that I believe is very, very special indeed, Resicast have released their British Armoured Car 1914 Pattern, kit no 35.1185. To you and me thats the Rolls Royce Armoured Car.
I know little about the development of this kit other than it has taken 4 years or more to bring it into being. This is a kit that has been longed for and talked about by many over the years and we have here what appears to be an outstanding and detailed model of the 1914 British Armoured Car. Originally scheduled for release at Euro 08 the release was delayed by some last minute changes to the spec.
Interestingly, the development of British Armoured Cars was pioneered by one Commander Charles Samson of the Royal Naval Air Service and not, as one might expect, the Army. Working to designs prepared by his brother Felix, the Dunkirk shipbuilding firm of Forges et Chantiers de France armoured the Rolls Royce together with several other experimental vehicles. Samsons success led the Admiralty Air Department to design bodies for a variety of chassis, mainly the Rolls Royce.
The Rolls Royce was one of the most advanced vehicles of its day. It had full pressure lubrication, electric trembler coil starting and an internal lighting system. Powered by a six cylinder 40/50 hp engine it had a maximum output of 80hp giving the 3.5 ton vehicle a speed of 50mph (or 80 km/h if you prefer). Mind you it had no front brakes!!
My knowledge of the Rolls Royce is limited, I cannot tell you if the kit meets the exact specification of the vehicle but I can tell you what you get.
contents
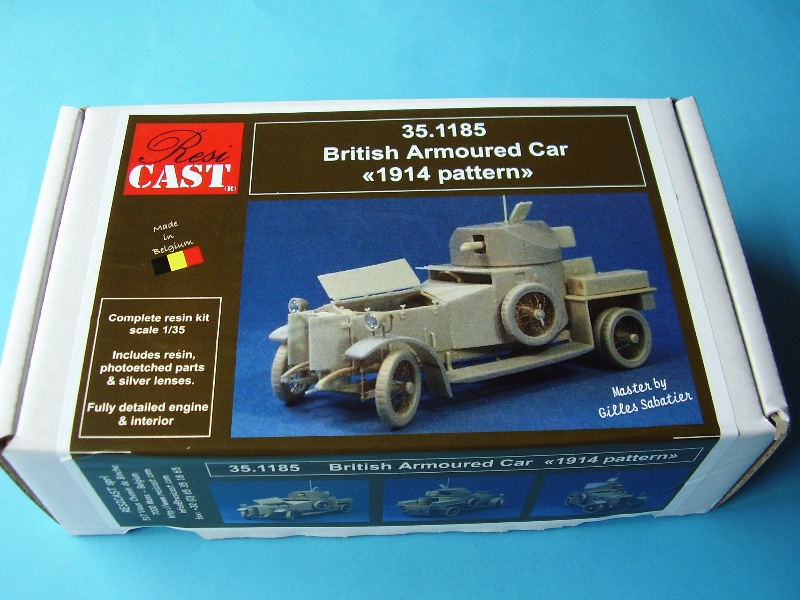
The kit comes in the familiar sturdy and professional Resicast box. Unlike the WW2 kits the background on the picture is a deep blue clearly signifying something different. On the box top is a good size colour picture of the completed model and on the front 3 further smaller pictures of the kit from different angles.
The parts are cast in a light grey resin, all the parts I examined were crisp and clear in detail with any air bubbles or damage. There are a lot of small individual parts that go to construct this kit and I will give a brief description of each bags contents below.
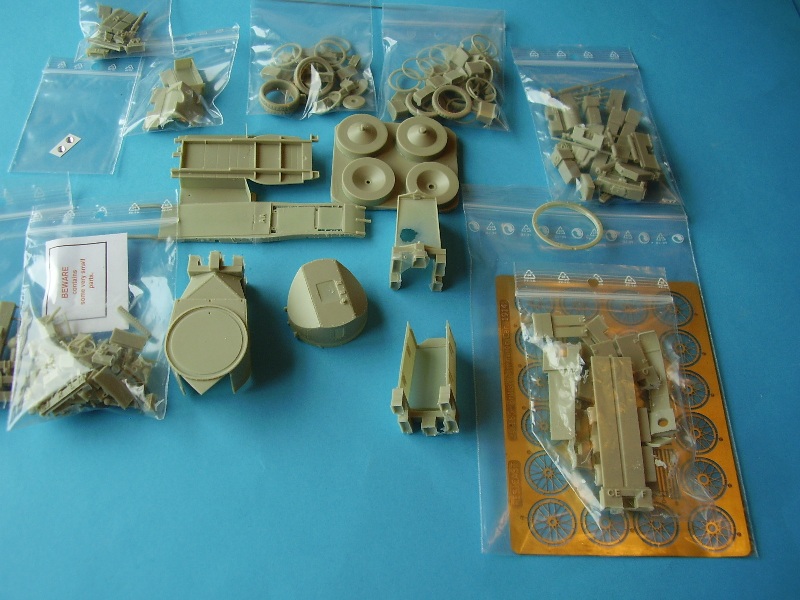
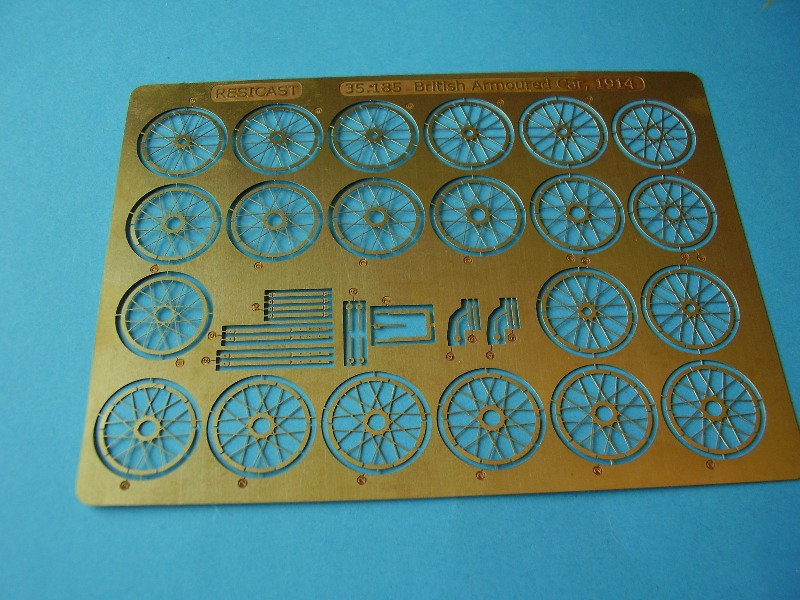
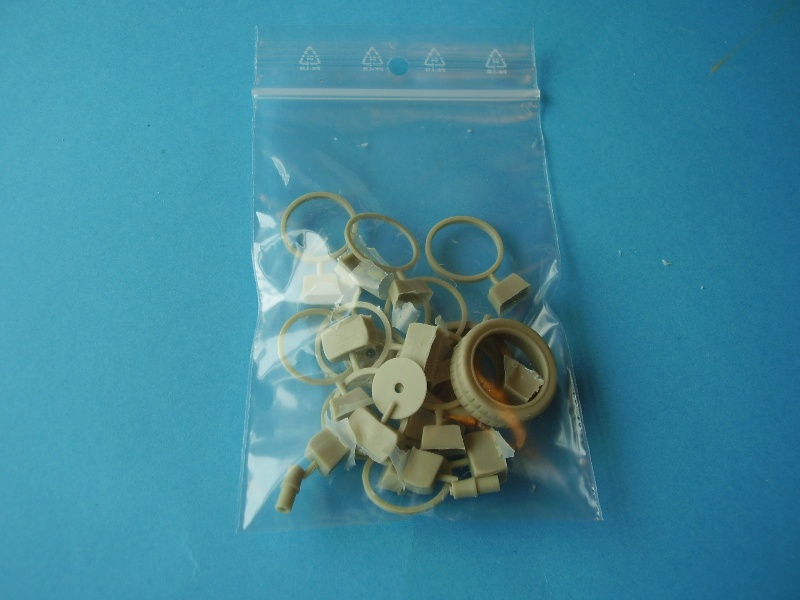
Packed in series of zip plastic bags further wrapped in bubble wrap for added protection. On opening the box and top layer of bubble wrap I found the kit building instructions, 5 small plastic bags and 2 lengths of brass rod, underneath the next layer were 3 further larger bags containing the wheel parts and engine/axel parts and underneath that 1 further bag with fenders and some body parts. Sitting separately were the chassis frame, tilt, turret and panels and a jig to assist in the making of the wheels. Finally on the bottom of the box a large fret of PE containing the spokes for the wheels, inner and outer support brackets, rear step, rear support and front and rear mudguard supports.
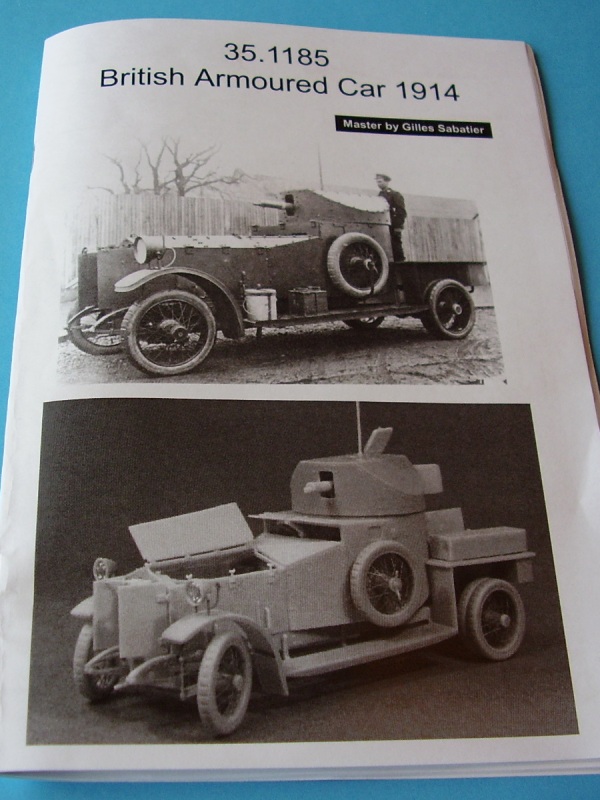
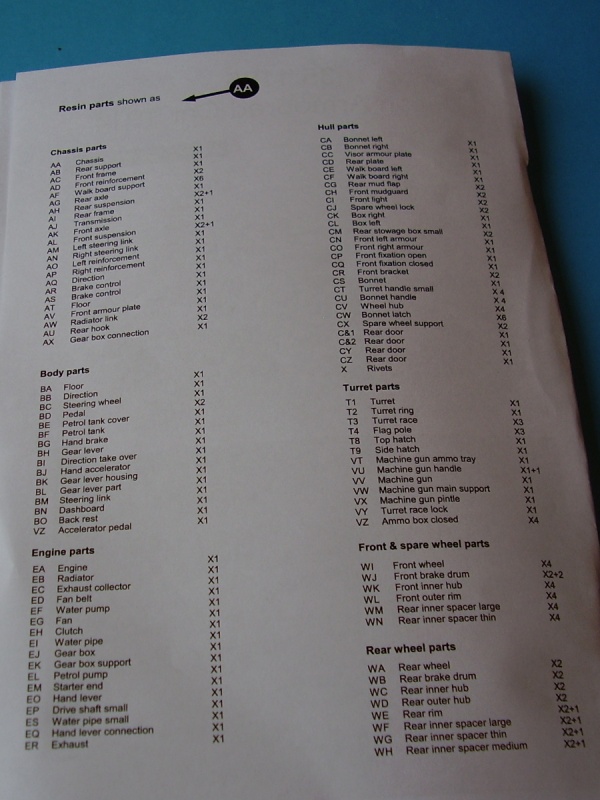
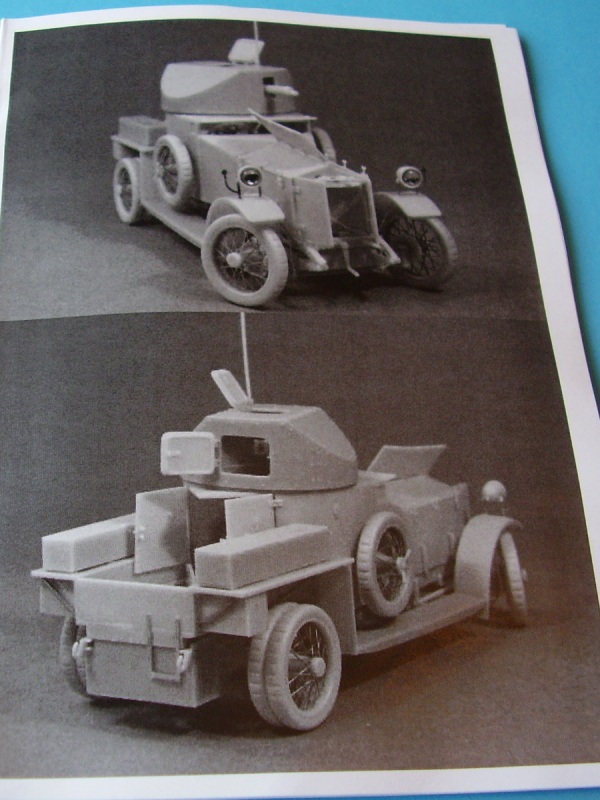
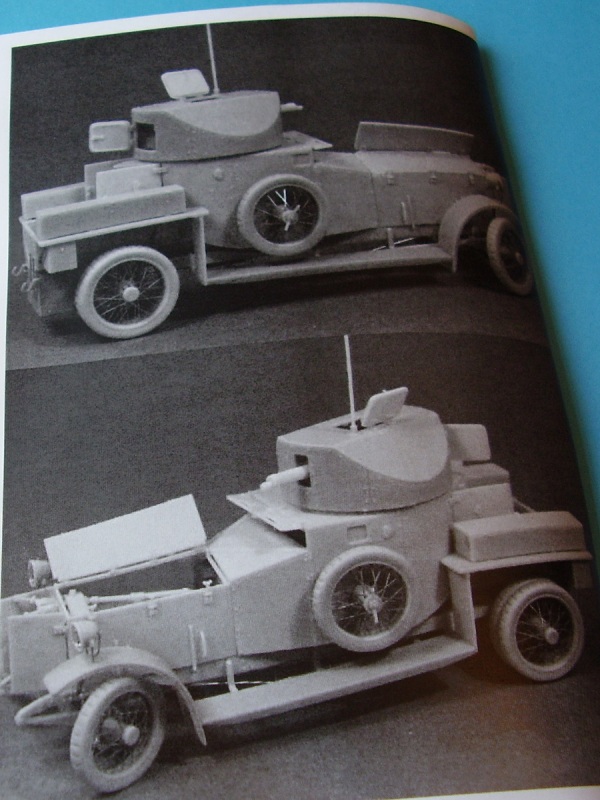
Included in the top of the box is a 40 page instruction booklet. The first page shows a B&W picture of the rear vehicle and a B&W picture of the model below. Page 2 gives a listing of the resin parts and page 3 a listing of the PE parts, and some general painting suggestions for the vehicle. Pages 4 to 33 are given over to the build instructions and pages 34 to 36 have pictures of the completed model with pages 37, 38 and 39 showing pictures of the real vehicle and planned variants for 2009, which will include some of the different turret designs used as the vehicle developed. The final page is a contact form for the company, should you find any problems with the kit.
***Note on the build instructions: Jeroen Plettenberg is busy assembling the kit for Resicast and has found some minor errors in the instructions and has also suggested some modification in the sequence of assembly. These amendments have been incorporated into a pdf document and this will be available to anybody who requests it.
Resicast has obviously already produced instructions but these will be amended when the first small supply is used up and the pdf document will be needed to compliment the first set of instructions.***
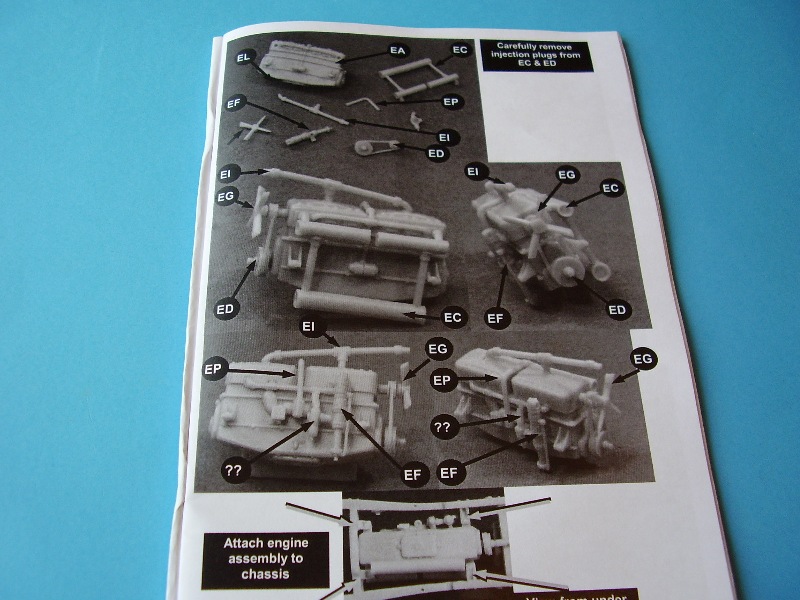
The quality of the black and white pictures is good, with the individual parts being identified, but see note above and below.
review
Whats in the Box? Well lots to be sure and I thought the best way to handle this was to look and comment on each individual zip bag and its contents. It is not possible to comment on every single fitting but I hope you will get a good feel for the quality and detail that comes with this kit.
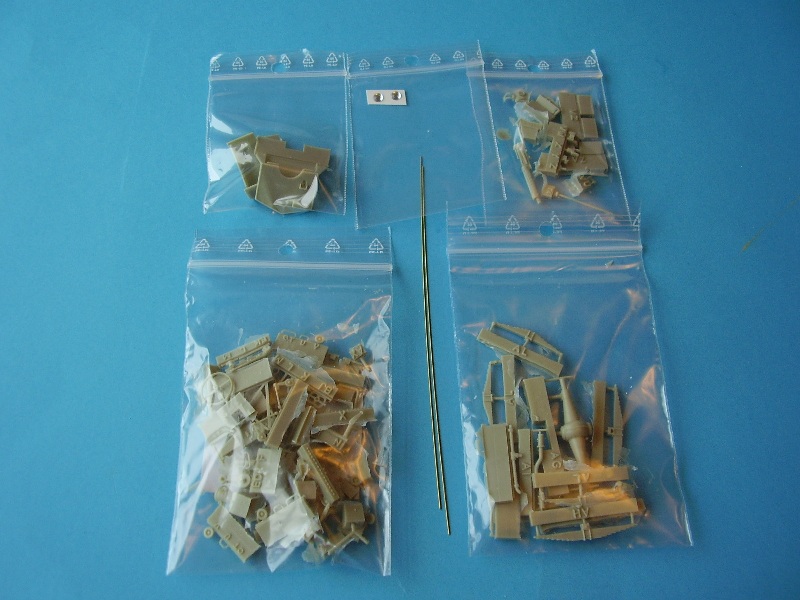
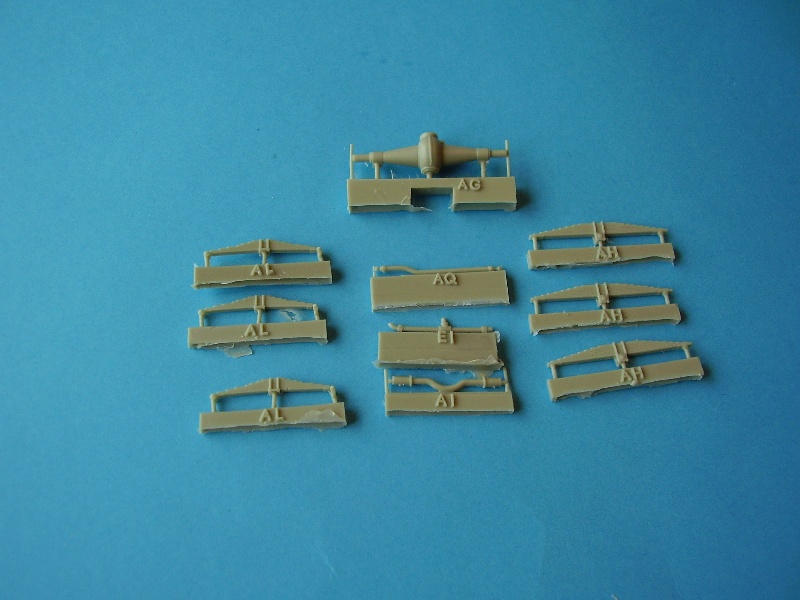
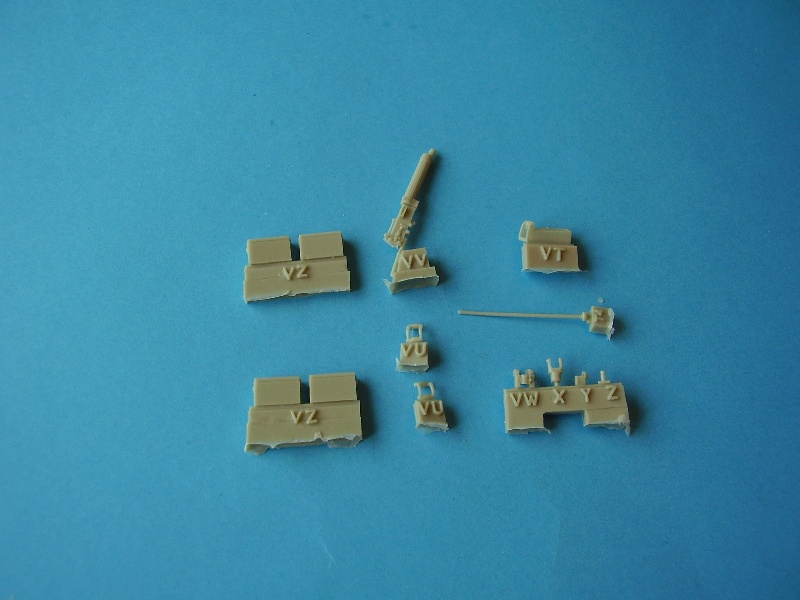
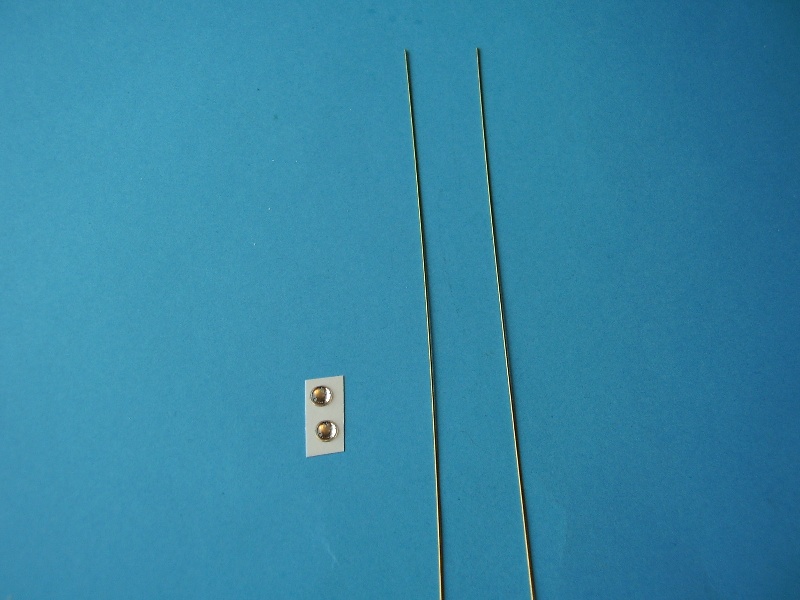
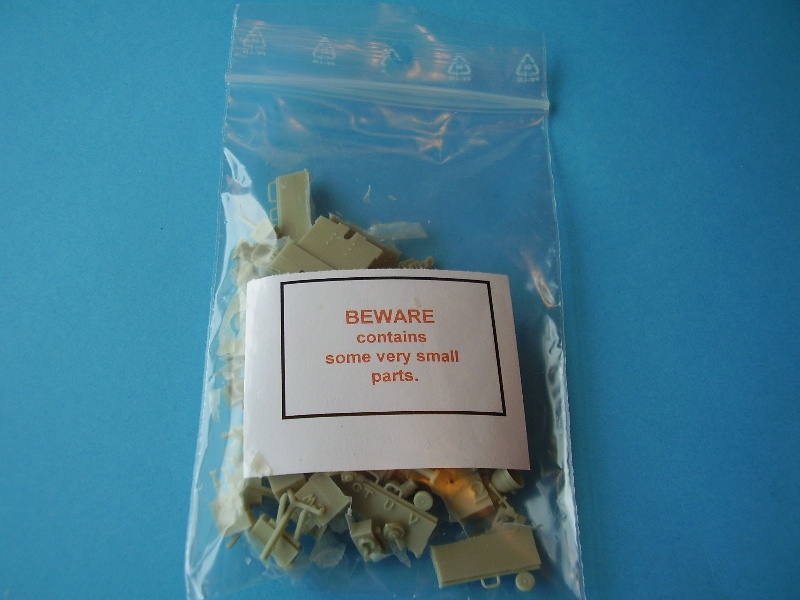
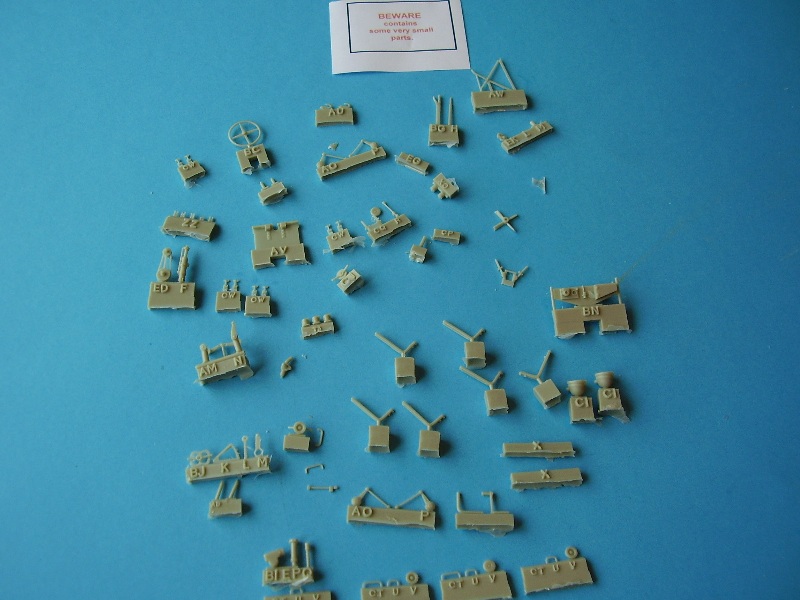
1st Layer 5 zip bags Bag 1:This contained the rear axel and front and rear suspension and some chassis parts. The detail is good and all parts should be easily removed from the spurs, so little clean up will be required. Bag 2: This contained the silver head lights, which are likely to be one of the last parts you attach and will add the finishing touch to the model. A very nice addition to the kit. Bag 3: This contained the Vickers machine gun, handles and fittings for the gun, 4 spare ammo boxes and an ammo box to attach to the side of the gun. The gun is of the appropriate early type and the barrel already has a small indentation, which you could deepen if you wished. Again minimal clean up of the parts should be required. Bag 4: This contained the front floor and petrol tank cover. These parts are very well defined with nice crisp detail and should be easy to remove from the spurs. Bag 5: Contains a BEWARE marker contains some very small parts. These include the steering wheel, gear levers, headlights, engine parts and a host of other small detailed parts that go to complete the kit. There are too many small parts here to write about individually but the level of detail is quite amazing and once again these should only require the use of a sharp knife and careful handling to avoid any damage or loss.
Also in this layer were 2 lengths of brass rod, the rods form part of the build process on the lower chassis so dont go cutting bits off for handles until you understand their use in the build process. The build instructions show how the roads are to be bent and affixed to the chassis.
2nd Layer 3 zip bags
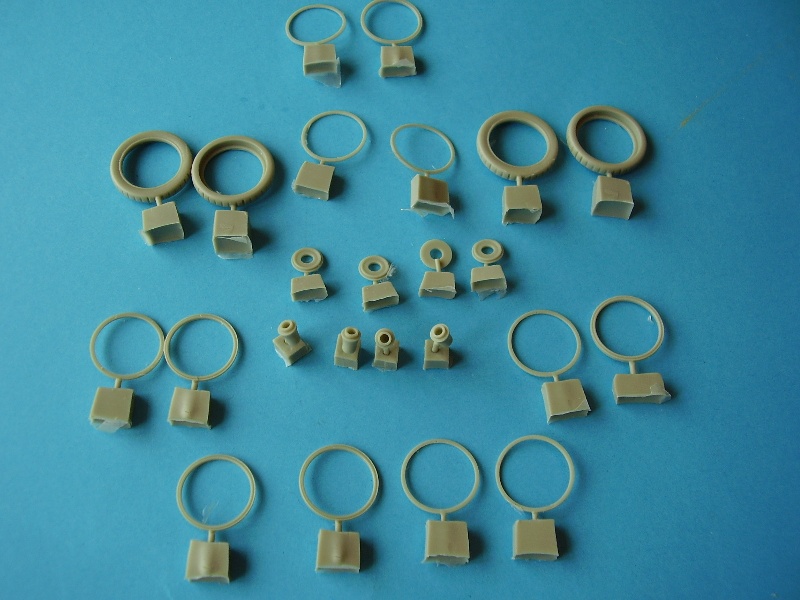
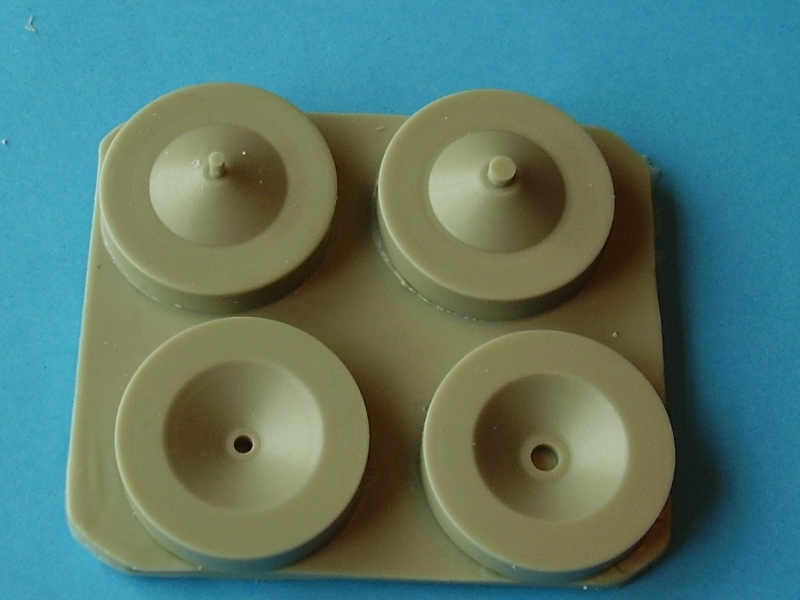
Bag 6: This contained the resin parts and tyres for the front wheels. The wheel assemble can be summed up as a sandwich of resin and PE parts. For some reason the spacers and outer rims are not numbered but there is a difference in thickness of the parts, so these will need carefully sorted before building begins. This bag also contains the wheel hubs.
The front wheels have a spacer thin, plus outer rim so these should be easily identified. The tyres are the narrow high pressure pneumatic type and appropriate for this time period. Care will need to be taken when removing the spacers and rims from the plugs but again this is should be a simple matter with the use of a sharp knife. The results of the combination of resin/PE/resin/PE/resin sandwich should produce a really impressive wheel indeed. You will need to pay close attention to the build instructions when making the wheels so dont rush this part of the build.
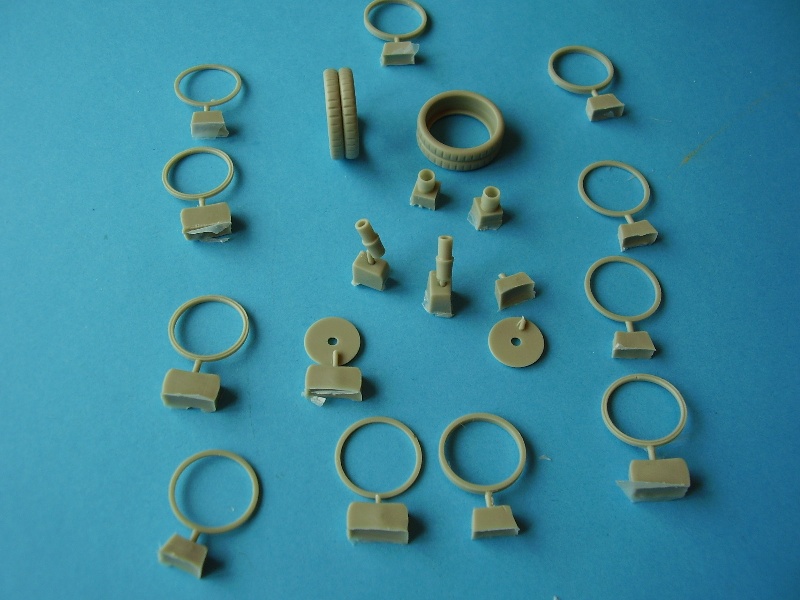
Bag 7: This contained the rear wheel parts, and the double tyres that were added to the vehicle to help take some of the extra weight when they were converted into armoured cars. Also in the bag are the spacers thick and thin and the outer rim. There are no markings on the spacers and outer rim so care needs to be taken in sorting them out. Again study the build instructions carefully as these parts are also a combination of resin/PE/resin etc but the end result should be an excellent.
I normally put everything into soapy water for a good soak before I start to build. (Note: With these parts I strongly recommend you keep the wheel parts separate to avoid mixing up the front and rear spacers and outer rims).
Careful study of the instructions will be needed when making the tyres and a test fit of the parts but you should end up with a superb set of wheels. To help facilitate this 2 wheel jigs are included in the kit to change the flat PE in conical shapes. The jigs will need separated from the pours they come in so a bit of sawing here. Remember to take normal precautions when working with resin and wear a face mask.
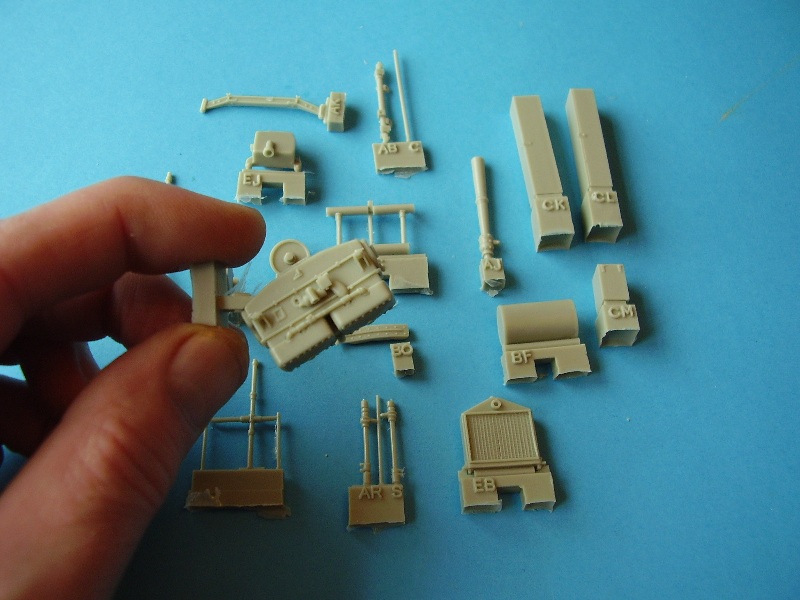
These are little mini builds in themselves, cleverly designed and engineered, small works of art in their own right. Looking at the build instructions the front wheels can be positioned for effect depending upon your desires position, so dont rush what you are doing, think ahead. Bag 8: This contained the engine, stowage boxes, radiator, drive shafts and parts for the front wheel assembly. Again, the use of a sharp knife or small razor saw will be needed, but little clean if your cut is straight. The detail on all these parts is very, very good indeed and will add considerably to the finished product.
3rd Layer
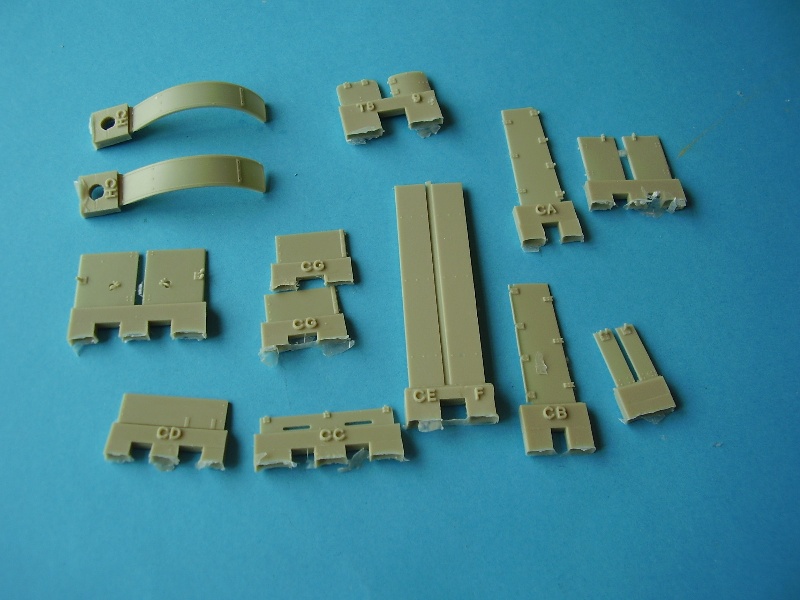
Bag 9: Contained the mud guards, a variety of door and panel parts, hatches and the walk boards for the side of the truck. All the parts should be easy to remove and require little clean up. The detail of the hinges on the bonnet hatches is very good and this can also be said for the other small hatches. Little or no clean up will be required with these parts.
The 3rd layer also contained the chassis, vehicle floor, turret, turret ring, bonnet left and right and the jig mentioned above. Flat on the box floor was the large PE fret containing the spokes for the wheels and some support fittings for the mudguards, rear step and lights. All the resin parts have beautiful detail inside and out. These have been cast with a fine film in to add strength when shipping and will need careful trimming with a sharp new blade.
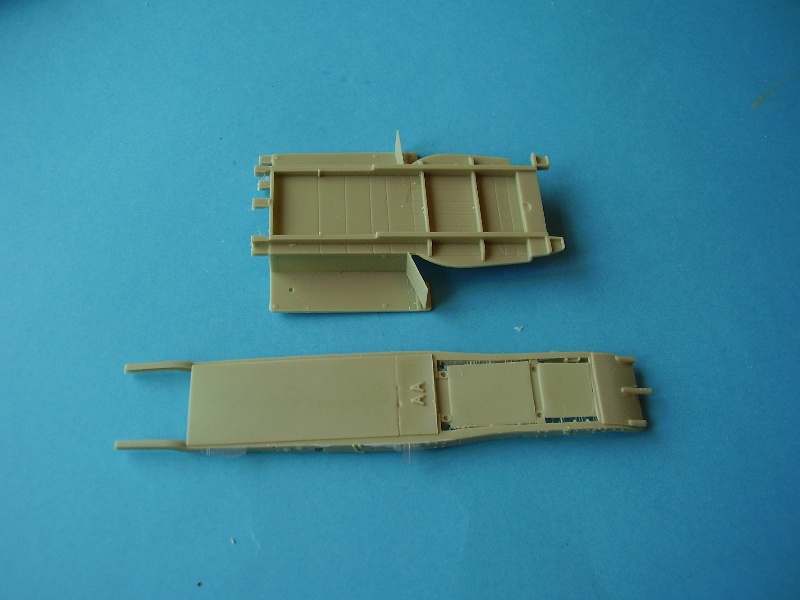
The chassis is a very delicate part and will need to be handled carefully to avoid any chance of damage, as this forms the base on which you will build the vehicle make sure you have studied and re-studied if necessary the build instructions.
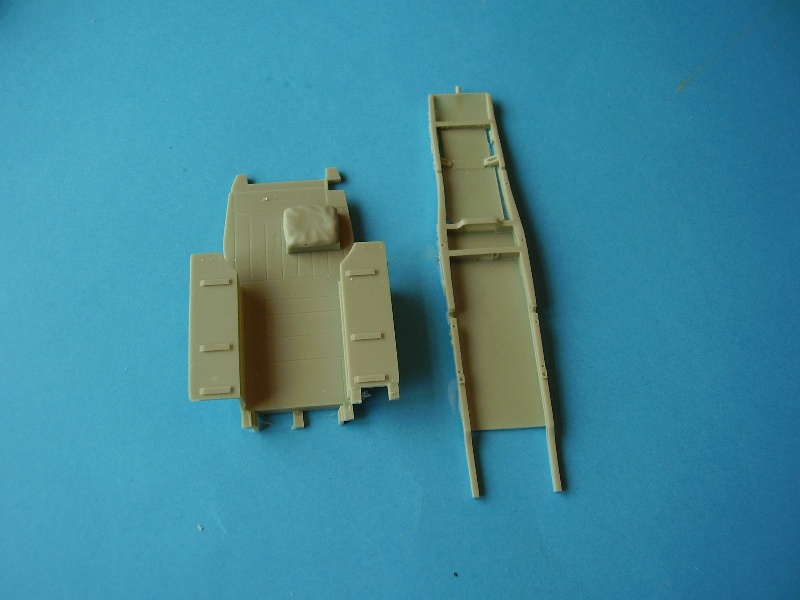
The cab floor comes with nice wooden detail both under and above with the drivers seat cast in place. There is very nice detail here and this will just require a little clean up to remove the pour stubs.
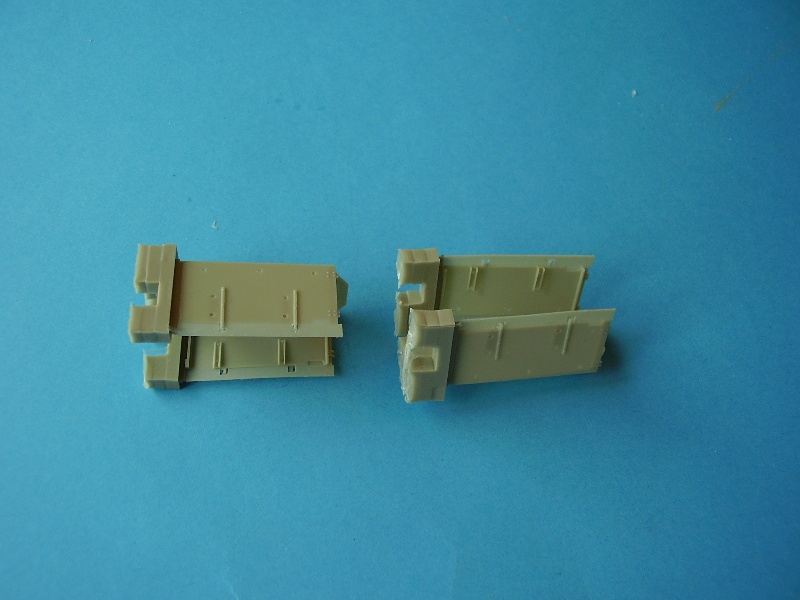
The side engine panels have excellent detail inside and out, this part will also require careful handling, a: to remover the pour stub and b: to remove the thin film protecting the part. In the kit I received there were 2 of these items. This part covers the engine and to it will be added the bonnet top and a range of small fittings all of which are provided in the kit.
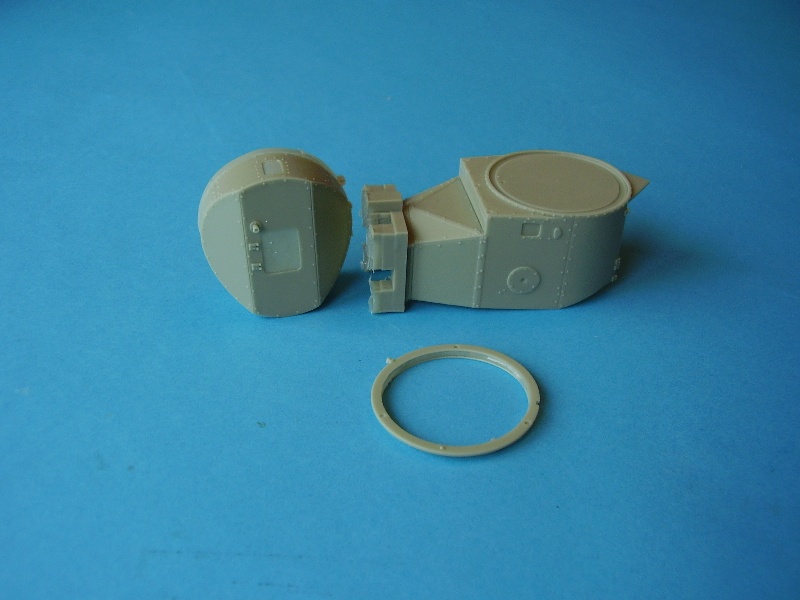
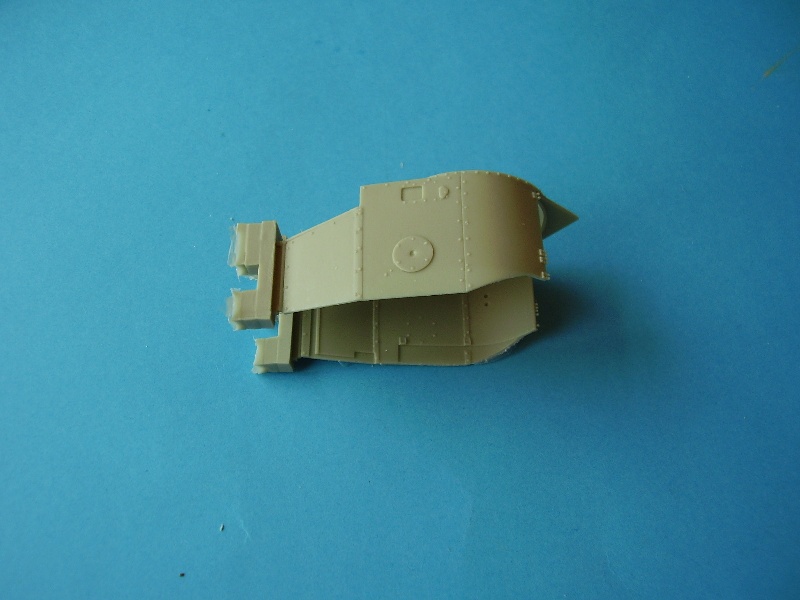
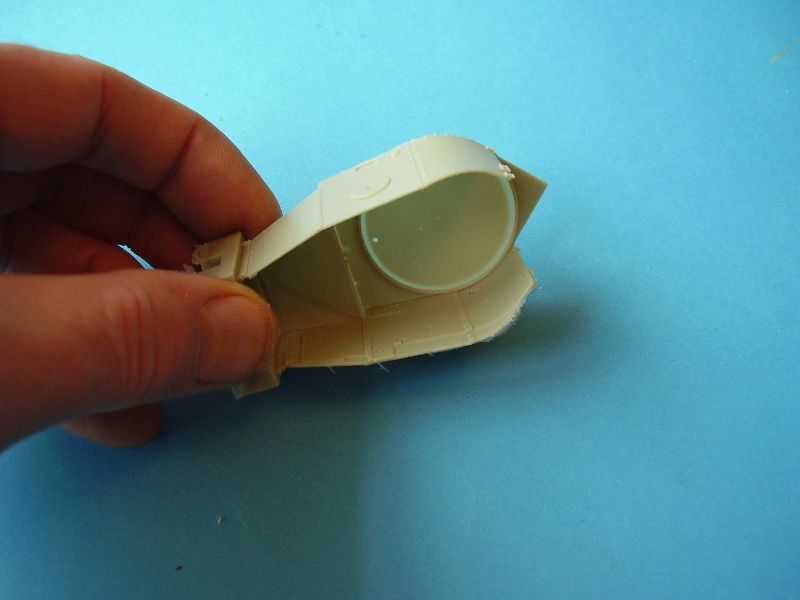
The upper body armoured hull is beautifully done with riveted detail inside and out and the same can be said for the turret. These items are cast as separate parts, and are expertly done to give superb detail inside and out and casing is of the highest quality. Again care will need to be taken when removing g the pour stubs and protecting film.
Gone are the days of a big lump of resin cast as a turret and a lower body. This kit has all the benefits of crisp resin detail but cast very much like an ordinary plastic kit in individual parts. The level of detail is just stunning and the quality absolutely 1st class. It is an amazing engineering achievement of quality and precision.
Conclusion
I do know that like many manufacturers, Resicast are proud of the models they produce, and rightly so, as they have given us some outstanding kits of quality and detail. This could well be resicast's most outstanding achievement yet. The kit was mastered by Gilles Sabatier and quite frankly is beautiful. The workmanship and quality of the parts cannot be faulted, every piece of the kit I look at is beautifully engineered. The detail inside and outside of the vehicle is absolutely 1st class. This, IMHO, is an outstanding model of the 1914 Rolls Royce Armoured Car coupled with absolutely superb casting.
This will not be a kit for the faint hearted, it is a delicate model that will require patience and skill to build, but will produce and amazing representation of this famous old girl. Time and care will be required in this build but the end result should be highly satisfying. This is a model to aspire to build, not to be hurried but savoured and enjoyed.
The cleverness of the wheel construction is evident and the inclusion of a jig for both front and rear wheels a great tool to assist building. My only thoughts here are that as the spacers and outer rims are not part numbered it will take a little extra time working out the build sequence.
I could find no flaw on any of the parts at all. There will be a little flash to remove and the thin film to remove from the main body parts as mentioned above. All the hatches and bonnet can be modelled in the open position thereby giving maximum exposure to the detailed parts inside. The silver head lights will add the finishing touch to what should be a beautiful and highly accurate model.
Notes and Additional CD
Builders will need to be sure to get the additional pdf file, with the revised sequence of build instructions. Resicast have produced a build CD to accompany the kit. It costs an extra 5 euro and contains detailed photographic build instructions and examples of the real vehicle. It will provide a very useful additional reference when building the vehicle.
SUMMARY
Highs: A beautiful representation of this famous vehicle. Engineering and quality of the highest level and busting with detail. As a stand alone model or in a dio this vehicle shouts quality at the highest level. The wheel jig is a real plus.Lows: Well there is cost. The unnumbered spacers and rims might cause a little initial confusion.Verdict: An outstanding model that should bring immense joy and pleasure to many. Quality engineering and casting with super fine detailing. Highly Recommended.
About Alan McNeilly (AlanL) FROM: ENGLAND - EAST ANGLIA, UNITED KINGDOM
Greying slightly, but young at heart. I've been teaching adults off and on for most of my life. Left the services in 85 and first started modelling in about 87 for a few years. Then I had a long spell when I didn't build anything (too busy) and really just got started again during the summer of ...
Hi Guys, not often I post here but am always "lurking". I'm finishing an Armo lanchester at the moment and the Roll is in the pipeline for an Xmas pressie. Just thought I would post a link to another excellent site which has some useful info :
LINK
Not sure how I'll finish mine but I'm wondering about decals at the moment.
Paul
Hi Pat,
Yip, 30s might well be right. Don't know the origine of the pic but the webbing looks right.
Paul,
Thanks for the link, I've put a live version here:
http://www.landships.freeservers.com/royce-royce_ac_info.htm
Not sure about decals, don't know if Graham has any planned or not.
Cheers
Al
Hi Guys,
a few more pics.
This looks like the Bovington example getting some Royal approval
One for the Americans
Not sure if I posted this one before
Al
Hello Guys and dolls
I am desperately trying to find a set of instructions for the Resicast Rolls Royce pattern 1914 kit along with the C.D that they sold for this kit.
If anyone could help I would be very grateful.
Kindest regards
Clive
Clive,
Just a thought (and forgive me if you've tried already) but why not approach Resicast - I have found him very helpful in the past.
There's a "Contact" bit on his website.
Brian
Hi Brian
Thank you for your reply and yes I have tried to contact him but I don't seem to be getting any reply.
I have always received great service from him in the past I can only hope that he is ok given the current global circumstances.
Kind regards
Clive


Comments