In the early years of the twentieth century, China began the slow and painful process of building a modern national military, led by dedicated officers trained in current military principles and equipped with current weapons. At first, China turned to Japan for military training and equipment but, as Japanese plans for dominating Southeast Asia infringed upon Chinese sovereignty, the relationship ended. Next, China allied herself with the recently successful revolutionaries of the Soviet Union. Unfortunately for the rulers of China, Soviet military training and equipment came with communist political indoctrination and the relationship soured.
In 1926, China once again approached Germany as a partner, resulting in a strong relationship that saw China rapidly expand her industrial base and military for imminent war with Japan. Though strongly positive for both China and Germany, with raw materials traded wholesale for modern equipment and training, the brief marriage ended in 1937 as Germany drifted toward alliance with Japan. China would begin her war against Japan using German equipment, fighting to buy time until other nations would come to her aid. As the Sino-Japanese war developed, the United States began putting political and economic pressure on Japan, eventually strangling Japans oil supply. This, in turn, led the Japanese to plan and execute a surprise attack against Pearl Harbor, bringing the United States into World War II. In an ironic twist of fate, the United States would become Chinas next supplier of military training and equipment.
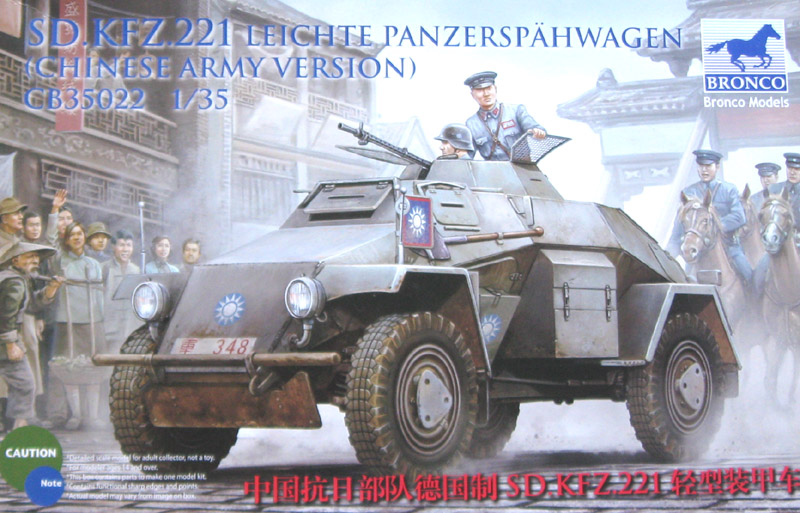
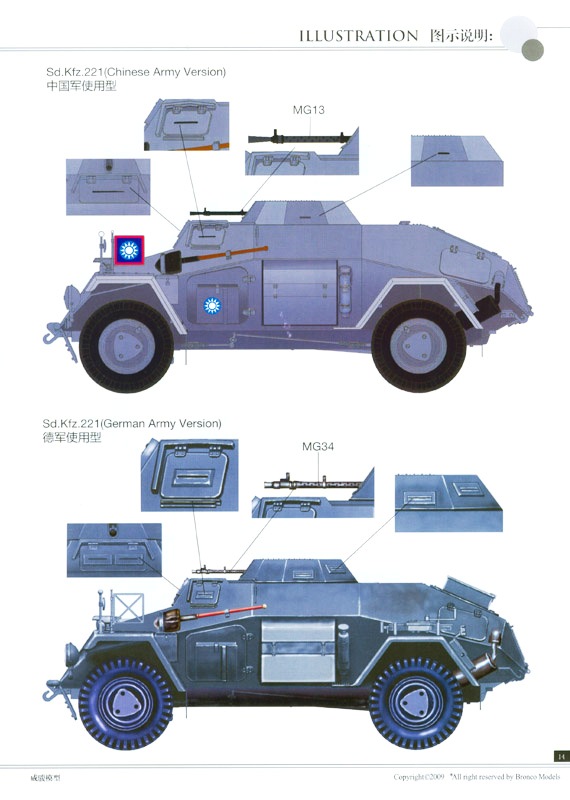
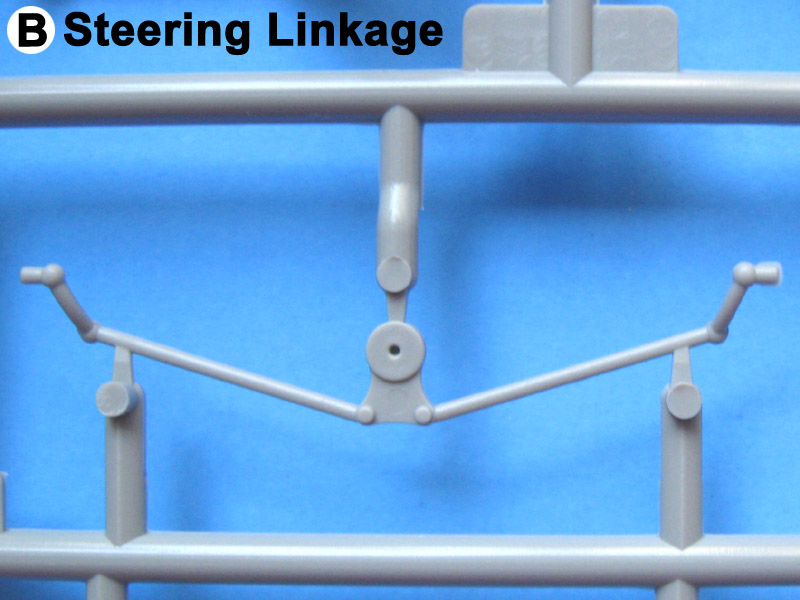
Bronco Models latest version of the German Sf.Kfz.221 Leichte Panzerspahwagen (light armored scout car) represents a vehicle sold to China in 1936. Evidence suggests these vehicles were supplied with few if any modifications from the production German version. The vehicles came armed with a single, turret mounted MG13 and used early tread-pattern tires.
The Kit
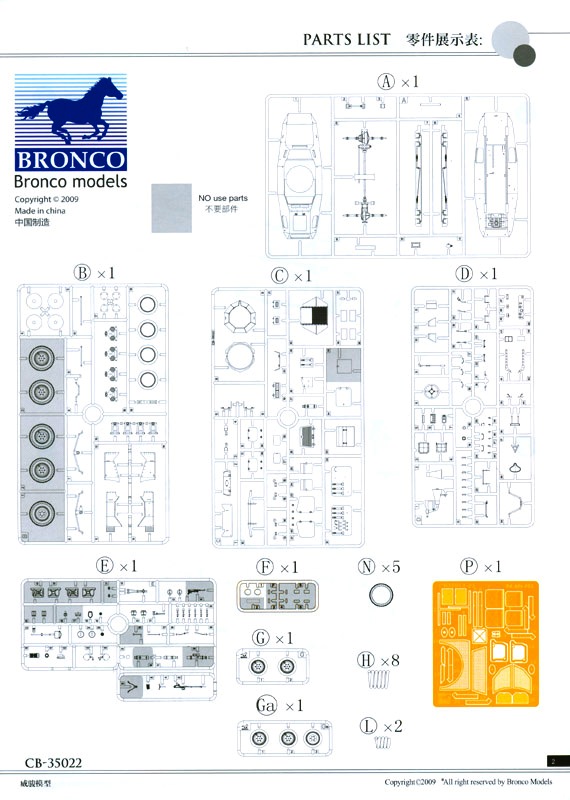
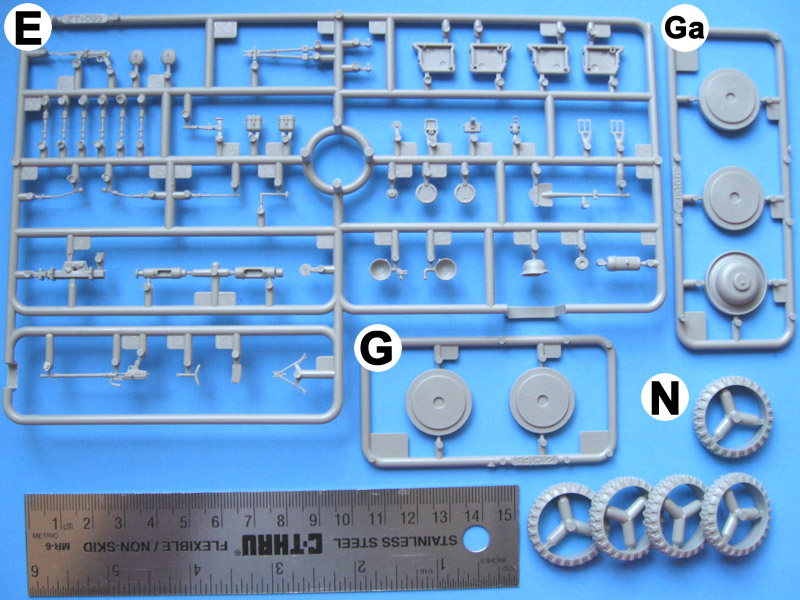
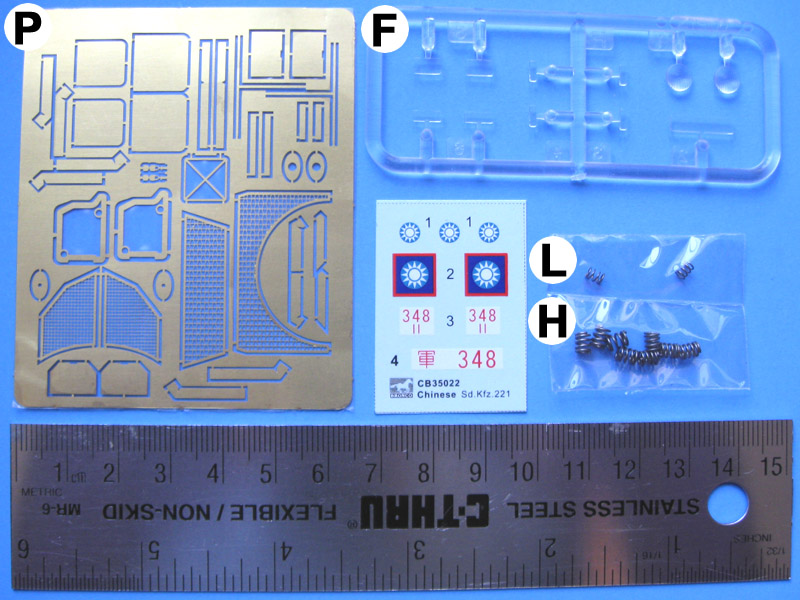
Bronco kit CB-35022 comes with 271 total parts. Of those, 239 comprise the model as shown and 32 end up in the spares bin. The 239 parts used include 190 in gray plastic, 2 in clear plastic, 10 metal springs, and 37 in photo-etched brass. The plastic parts are crisply molded with one small instance of flash and one sink mark. The sink mark occurs on the jack, in a difficult spot, but this version consigns that part to the spares bin. The suitably thin brass parts should bend to shape without resorting to expensive tools. In addition to all expected external details, the model includes a full interior with suitable German equipment for stowage. All part trees come individually wrapped to prevent damage from rubbing. The springs, decals, and photo etched brass parts come in a single bag.
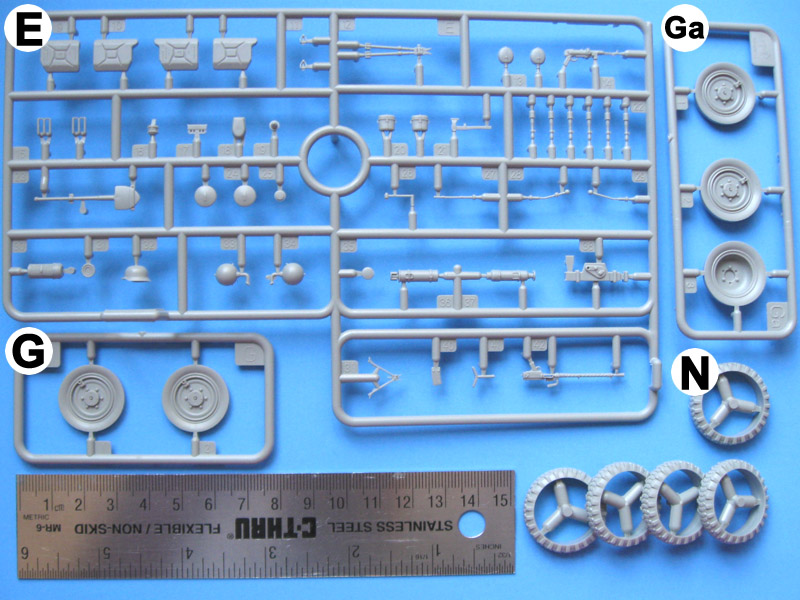
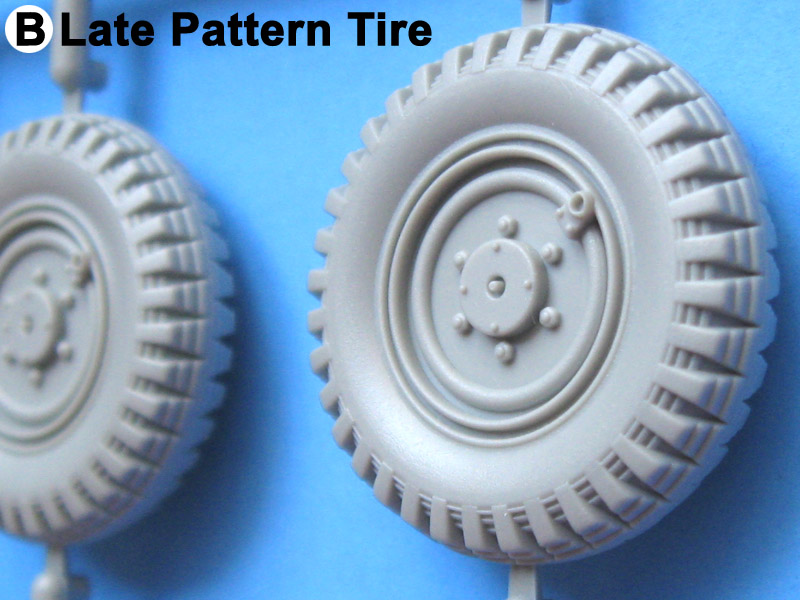
The spare parts include two nice Jerry cans with engraved stencils and photo-etched brass inserts. Five late pattern tires with integral hubs also end up in the spares bin. Though the tires lack backside rings and hubs, they fit equivalent Tamiya parts from 222 and 223 armored cars leaving a very small gap to fill. The Bronco late pattern tires have deeper tread groves, more crisp tread, more detail on the hubs, and more refined hub detail.
Decals:
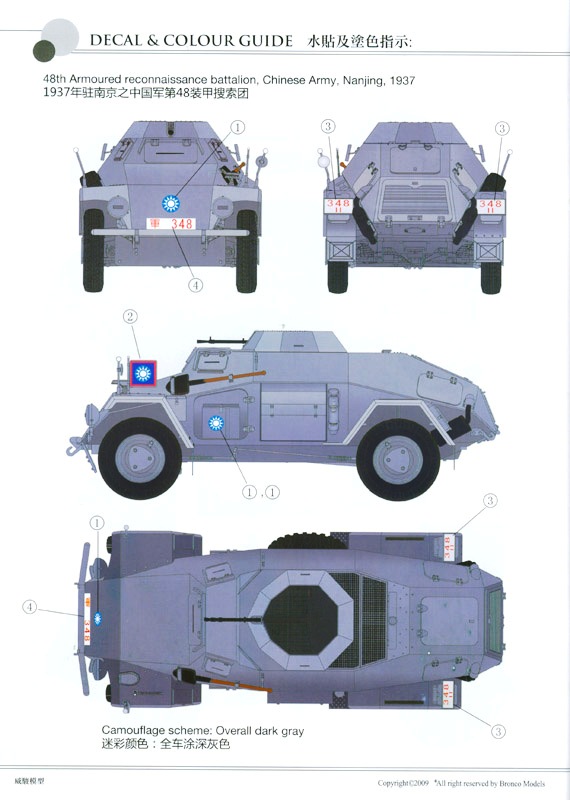
The decal sheet includes 8 external markings for one vehicle. The markings are cropped very close to the actual graphics, in perfect register, with very thin decal film. The blue used for the Chinese national markings looks very accurate. The deep blue and red on the pennant flag markings look a bit too vibrant to me. The decal sheet does not include interior stencils, tire pressure numbers for the fenders, or dials for the instrument panel. Chinese armored cars probably lacked some of these markings, but inclusion would allow the modeler more flexibility.
Instructions:
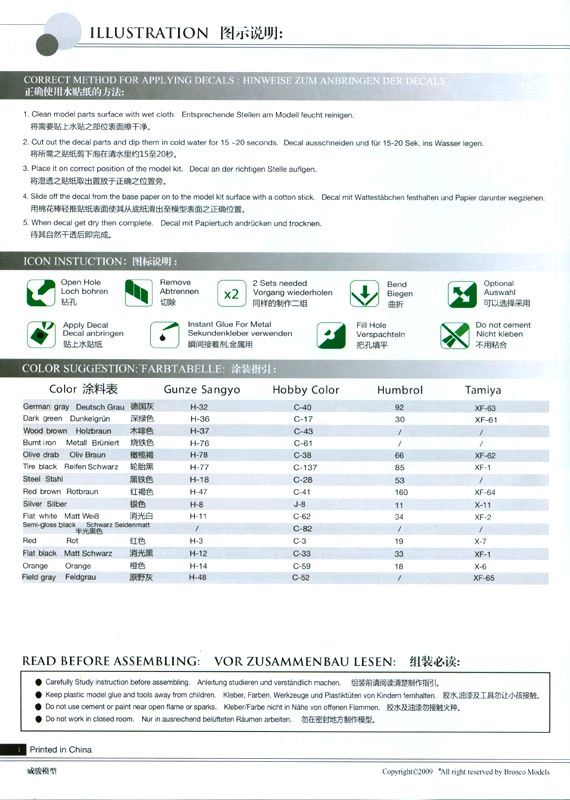
The kit comes with a 16 page, full color, glossy paper instruction booklet of very high quality. Color callouts list Gunze Sangyo, Hobby Color, Humbrol, and Tamiya paints. Construction takes 24 steps, with some steps broken into two activities. Large, easy to read construction drawings feature clear part callouts. Some parts appear in color. This will help typical modelers achieve good results, but for a completely accurate model, especially with regards to the interior, consult photographic references. All written instructions appear in English and Chinese. Construction icons also include German explanations.
in detail
The build sequence begins with external details for the lower hull, switches to the interior, moves to the upper hull, assembles the upper and lower hull, and concludes with remaining details. I recommend completing steps 4 though 12 and 16 first, then going back to step 1 and proceeding as instructed. This will allow the builder to glue upper and lower hulls together without putting external assemblies at risk.
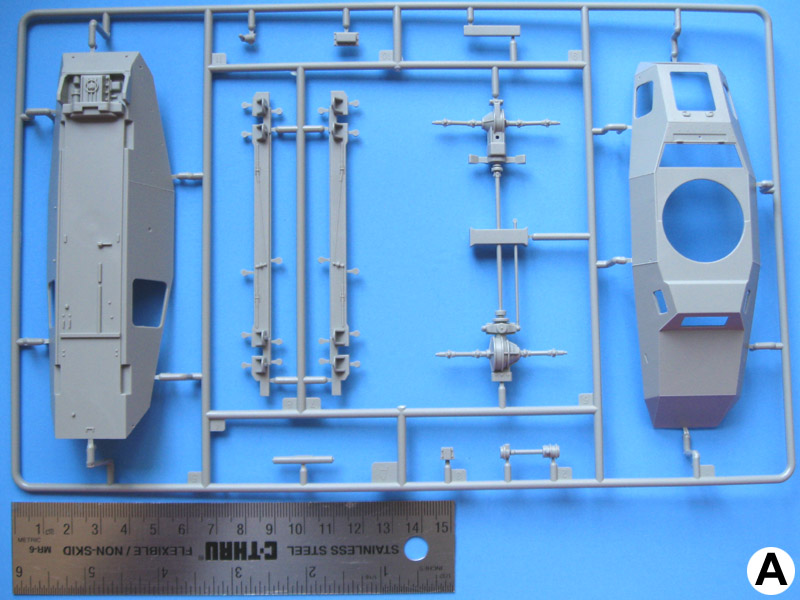
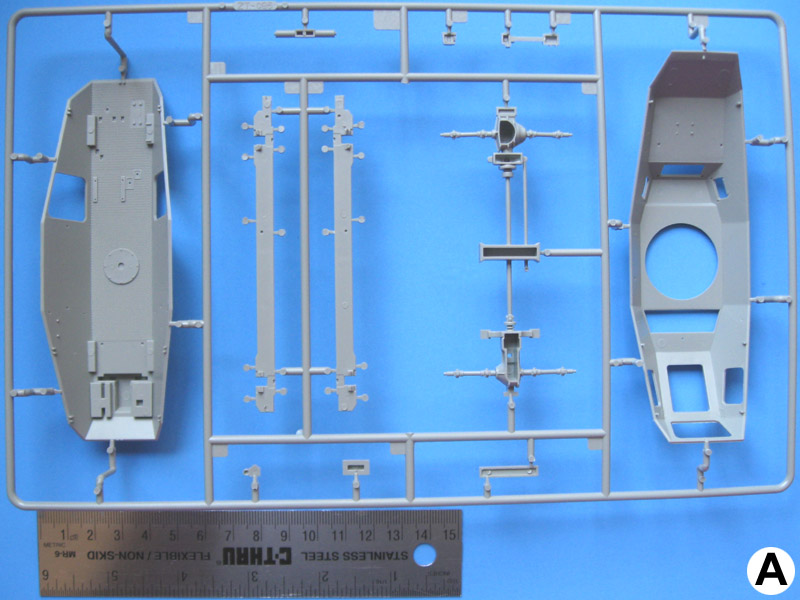
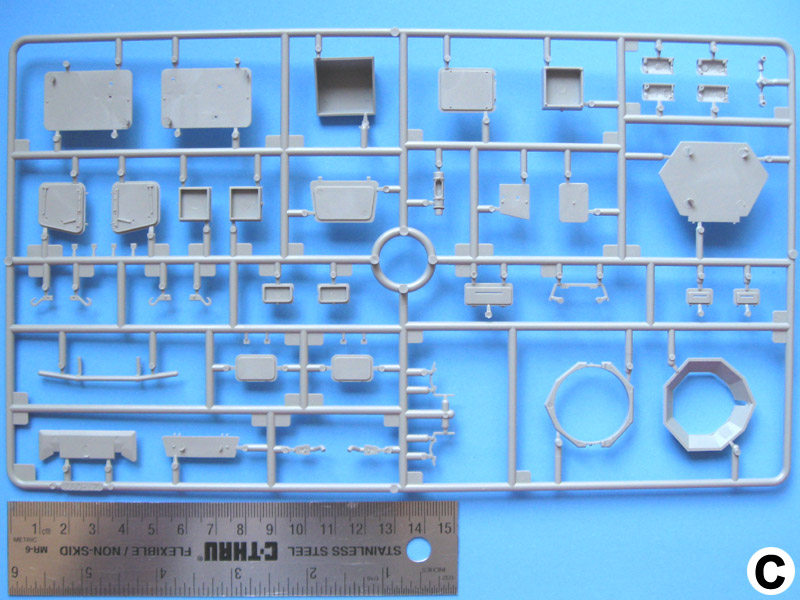
Hull:
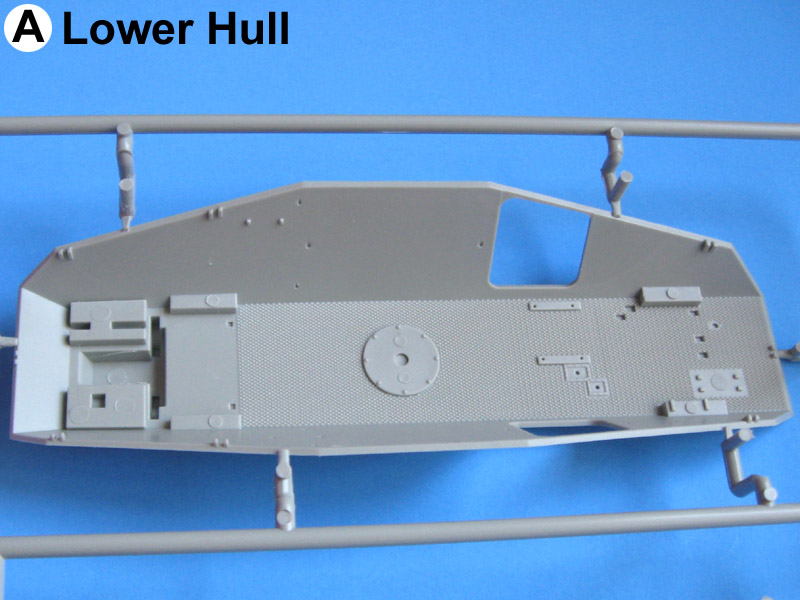
The upper and lower hull pieces feature fine weld bead detail except where they actually join. The upper hull includes openings for all three front vision ports, all four engine hatches, the turret, and the fighting compartment roof air intake. The lower hull includes an opening for each side door. These openings make it very easy to model the subject with all hatches open. All sprue attachment points to the hull pieces meet at the lip instead of the side so as not to mar the very subtle cast texture. The engine pan comes molded with the lower hull piece, but most other underside details come as separate parts.
Eight sets of pegs ensure accurate alignment of the hull pieces. Unfortunately, the front left pegs mesh improperly and require some minor surgery. The front three peg sets remain visible through the side doors so remove them for a more accurate model. The hull pieces fit very tightly and for a more accurate model, lay a fine weld bead where they meet. Crisp diamond pattern on the fighting compartment floor looks excellent and even scales correctly. All ejector pin marks lie in the interior on the roof or floor. Unless someone lifts up the model and looks through the doors at the roof, only one on the left front floor requires attention. It sits proud in an accessible location so one pass with a sharp knife will resolve the issue. The rear hull angles of the model deviate slightly from the single side view drawing in Panzer Tracts 13. However, comparison to a side view photograph of the actual vehicle shows that Bronco used correct angles.
Lower Hull:
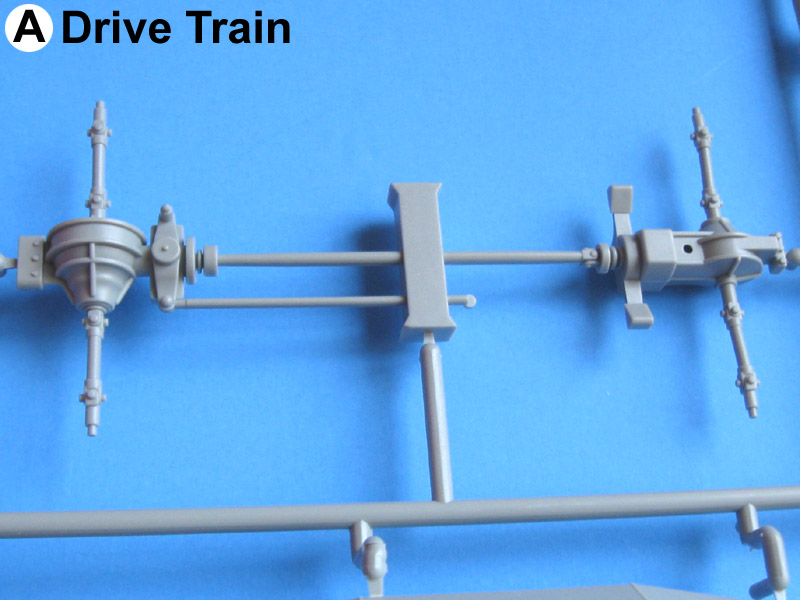
Lower hull assembly begins with attachment of frame parts to the lower hull, followed by various details and the power train. The frame parts and power train fit very well, but a fastidious modeler will want to remove the numerous ejector pin marks inside each frame member. All parts feature more refined and subtle details than those in the Tamiya 222 and 223 kits. Like Tamiya, Bronco chose to model the parking break linkages along the outside of each frame part in relief. Though the two kits feature a similar part breakdown, the Bronco parts tend to smaller dimensions and better definition. The tubular front bumper lacks the swept reinforcing bars that run from the ends to the frame. Early 221s may not have included this feature, but most four wheeled armored cars in German service include them. The armor plate under the nose features beveled edges to simulate a thinner piece, but the effect looks rather poor and some ejector pin marks also need attention. The metal springs for the suspension arms look excellent, a vast improvement over equivalent details in the Tamiya 222 and 223 kits.
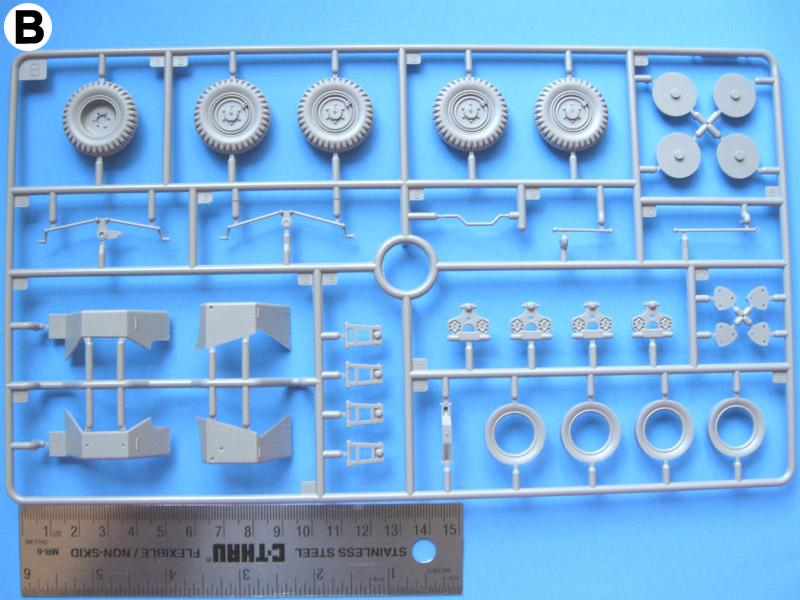
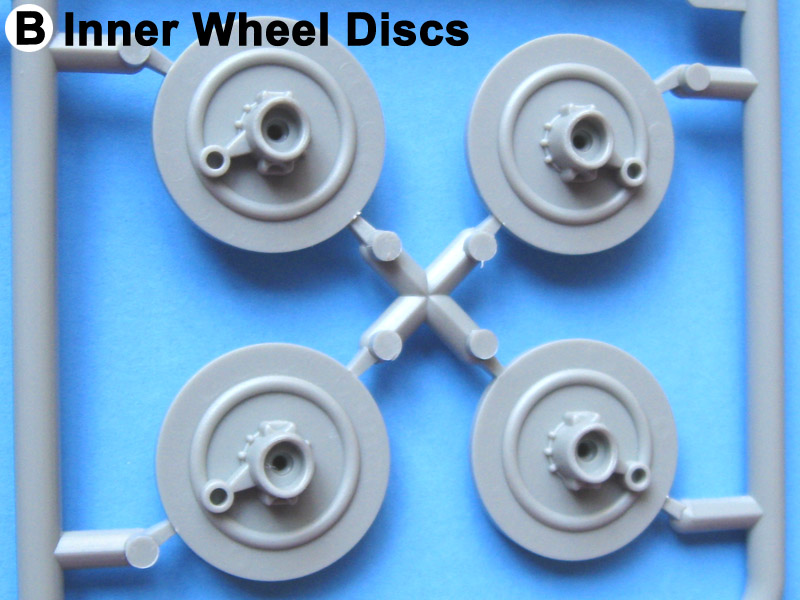
The Sd.Kfz. 221 wore at least four different tires over the course of production and use. The Bronco kit includes two varieties, one seen on initial production vehicles and another seen throughout World War II. The early tires, correct for Chinese vehicles in 1937, include good tread pattern in all directions thanks to a six part mold. (You have to look very closely to see the mold lines.) The tread on these tires actually looks a bit worn compared to new ones. The later tires also look excellent. Either set will fit Tamiya 222 and 223 models without modification, though the slightly different Bronco parts leave a gap that requires filler. Hubs for both sets of tires look identical. The kit includes armored guards for all four wheel hubs. Crews and mechanics often removed these for maintenance, giving the modeler yet another option for presentation. The inner hubs on a Sd.Kfz.221 feature mirror details, front wheel versus back wheel, so take care to put the correct tire in the correct position. The kit instructions correctly illustrate this.
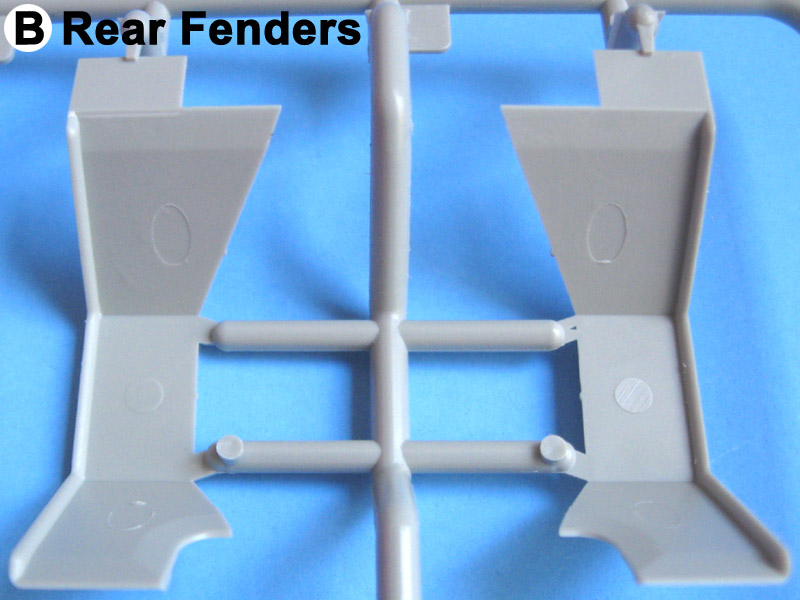
All storage boxes along the lower hull come as separate parts. The side doors include separate hinges, allowing construction in the open or closed position. All fenders feature beveled edges and fit very well. The front fenders slide into location points that become hidden after construction. The fastidious modeler will want to deal with the ejector pin marks under each fender, as the small wheels of a Sd.Kfz.221 do not fill the large wells. Steps 20 and 21 include the installation of numerous photo-etched brass parts serving as fender supports. Though not the best drawings, careful study should reveal the correct way to install these parts. Given the nature of the parts and their location, some modelers may choose to leave them off. All four mud flaps come as separate brass parts for scale thickness. The tread plate pattern on the fender steps looks very nice.
Upper Hull:
The upper hull features correct visors for an early Sd.Kfz.221, with both open and closed positions possible. The kit does not include later style visors with bullet splash ridges around the vision slit. The rain gutters that fit over the visors lack the actual gutter grooves and look like bars of thick metal rather than troughs. When assembling the interior first, remember to install the visor supports on the inside of the vehicle before sealing the hull.
The grate on top of the hull, allowing the engine to draw in air through the fighting compartment, comes as a photo-etched brass part. In reality, this part consists of thin metal strips welded into a grate and has some thickness, unlike the brass part. However, the brass screen still looks way better than solid plastic with some indentions. The model allows construction of this grate in the open or closed position.
All four engine hatches include proper hinges, allowing construction in the open or closed position. The louver pattern and hinges on the rear plate vary slightly from vehicle to vehicle. I found at least two variations but cannot determine the correct pattern for a Chinese Sd.Kfz.221. The Bronco kit most closely matches a rear access hatch with squared hinges.
The kit comes with exactly two external toolsa shovel and a fire extinguisher. The shovel lacks a proper clamp. The instructions for attaching the fire extinguisher leave the issue largely in doubt. The front headlights feature separate lenses and optional blackout covers. Each muffler assembly consists of 6 parts and the resulting seams may need attention. The very fine width indicator poles and pennant flag mast will require careful removal.
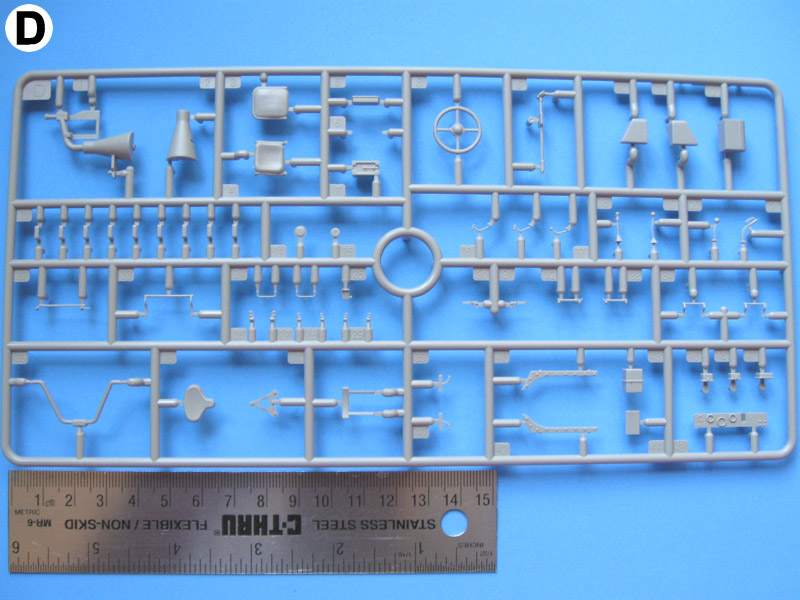
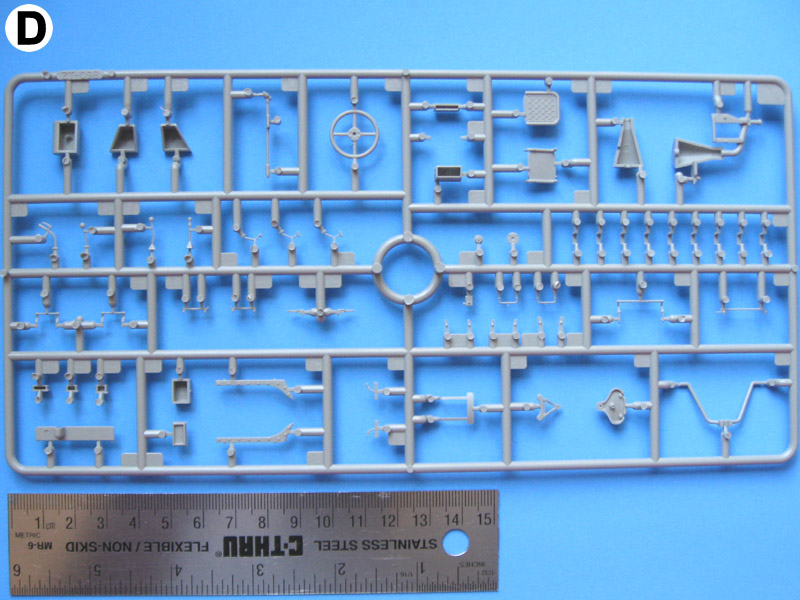
Interior:
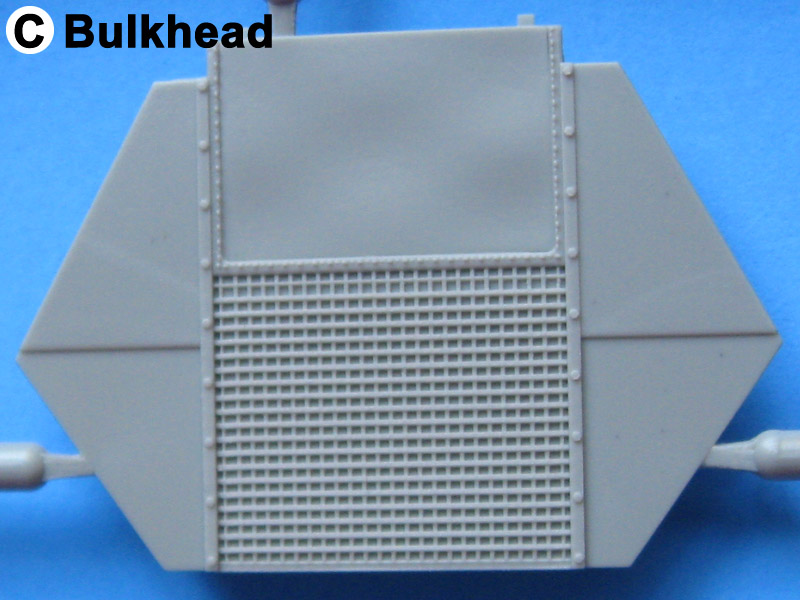
Construction starts with assembly of the drivers station and rear bulkhead. The grate in the bulkhead, leading to the engine compartment, comes as a solid molding. The bulkhead itself fits exceptionally well. The color callouts for the Sd.Kfz.221 interior only touch the surface of what a real vehicle looks like. If you want to paint this area more accurately, seek out interior pictures of the restored Sd.Kfz.222 in the Littlefield Tank Collection. Though not exactly the same vehicle, the 221 and 222 shared most mechanical components. The instructions list white as the basic interior color, but the Germans very probably painted the interior ivory (elfenbein).
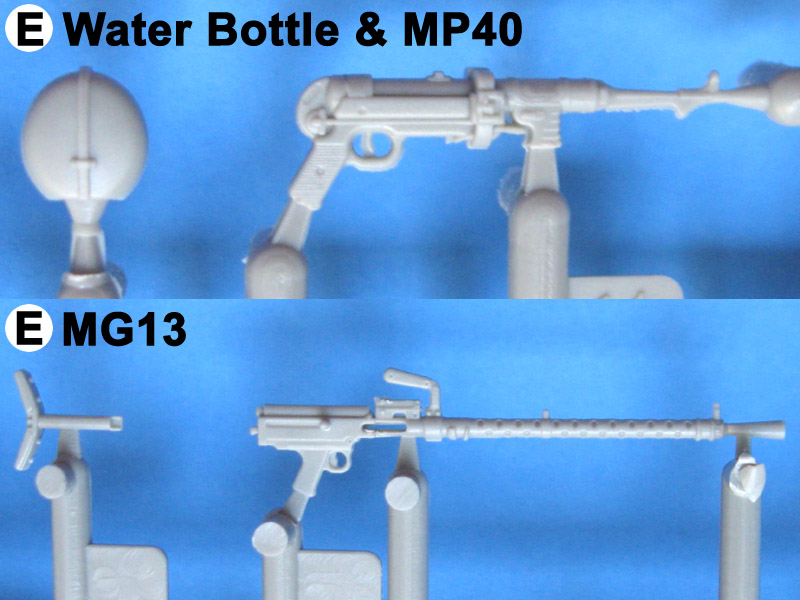
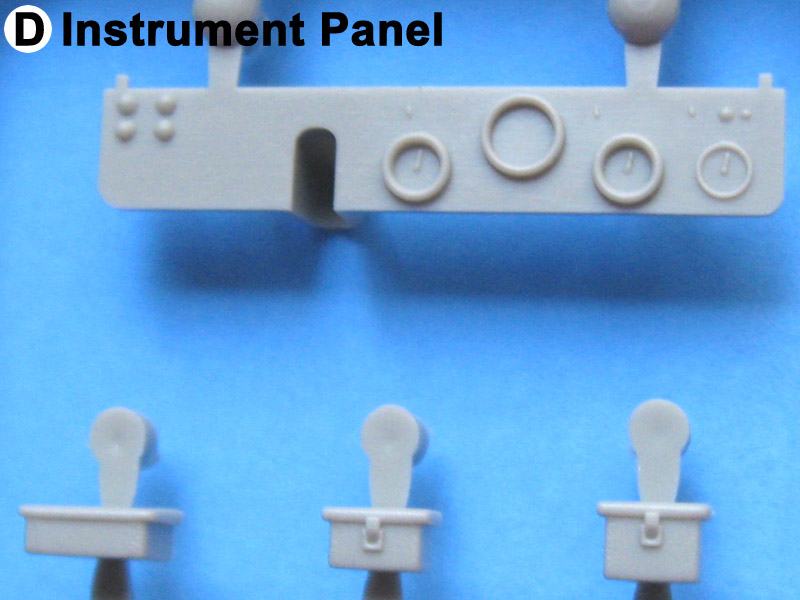
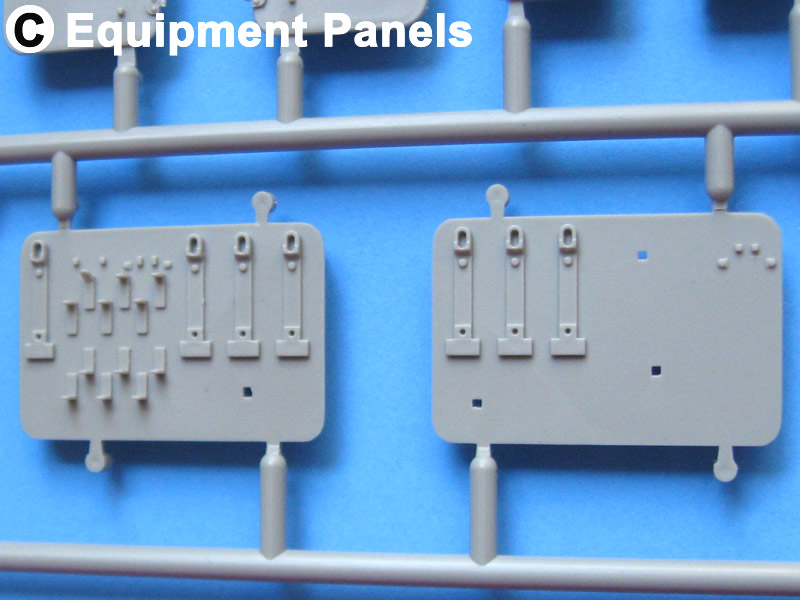
Interior assembly continues with various internal stowage panels. Again, color callouts only scratch the surface of how to paint this equipment. The German stick grenades, gas mask canister, hand axe, and slide-molded helmet all look good, but the kit lacks spare ammunition stowage for the MG13 and proper internal stencils. Two raised ejector pin marks interfere with installation of the gun mount. Eliminate the marks or carve out the base of the gunners station to fit around them. The gunners seat features real springs, easily visible through the side access doors in most turret positions. The instrument panel looks correct, but without decals for the dials the builder must undertake a difficult painting job.
Turret:
The rudimentary turret of the Sd.Kfz.221 matches photos and features very petite weld lines. Beveled edges create the appearance of thin walls, though they actually come in on the thick side. Three faint ejector pin marks inside the turret shell and 7 on the base need attention. The slits on each side of the turret come as indentions rather than holes. The delicate MG13 includes a shallow, slide molded bore that requires some attention with a pin vise.
Markings:
The kit comes with markings for a single vehicle, part of the 48th Armored Reconnaissance Battalion fighting near Nanjing in 1937. The painting guide shows a vehicle painted in overall panzer gray, but Germany did not adopt that color for armored vehicles until late 1938. The vehicle was probably delivered in German three tone camouflage consisting of erdgelb (dark yellow), braun, and gruen. I can find no documentation that definitively establishes how these vehicles were painted after the Chinese received them. Since the core Chinese military units during this period were trained and equipped by Germans, I suspect these armored cars went into battle exactly as the Germans delivered them.
Accuracy:
The Bronco Sd.Kfz.221 matches period photographs and modern restorations of similar vehicles very well. Some hull angles vary from plans in Panzer Tracts 13, but photographic evidence indicates the model matches at least one real vehicle in this respect. Both internal and external details match my references for the Sd.Kfz.221 in general. External details match Chinese examples in particular, with minor exceptions noted in the text above.
Conclusion
Every modeler expects different things from a model kit. Some demand complete accuracy. Some demand ease of construction. Some just want something that looks like the real thing and slaps together in a weekend. Who does the reviewer write a conclusion for? I direct mine as to a friend interested in the kit; an average model builder with average expectations.
Broncos Sd.Kfz.221 in Chinese service looks very good in the box, with crisp molding, a complete interior, a good selection of photo etched brass parts, and lots of nice details. The major parts all fit very well. You can pose every external hatch or visor in the open or closed position to show off the interior. There are a few ejector pin marks to deal with but nothing difficult and you may want to ignore most of them. Most people will not notice an unfilled pin mark on a frame member, underneath a fender, or on the interior roof.
The decals look good and accurate but I wish Bronco had included internal stencils and instrument dials. The painting guide is almost certainly wrong with regards to basic interior and exterior colors. Take my word for it, do you own research, or just paint it as you see fit. Though expensive, the kit represents a major improvement over equivalent Tamiya kits.
References:
▪Panzer Tracts No.13 Panzerspaehwagen, Armored Cars Sd.Kfz.3 to Sd.Kfz.263; Thomas L. Jentz; Illustrated by Hillary Louis Doyle; Panzer Tracts; ISBN 0-9708407-4-8; 2001
▪Panzerspahwagen; Uwe Feist and Robert Johnson; Translations by David Johnson; Ryton Publications; ISBN 1-930571-30-5; 2004
▪A Military History of Modern China 1924-1949; F. F. Liu; Greenwood Press; ISBN 0-313-23012-9; 1956; Reprinted 1981
▪Personal photo collection of Sd.Kfz.222 in Littlefield Tank Collection, photographed in 2007
SUMMARY
Highs: Accurate. Complete interior. Very good detail. Excellent marking option.Lows: Painting guide probably includes major errors. No decals for stencils or instrument dials. No MG13 ammunition stowage.Verdict: With this model Bronco offers a great kit of a great subject in a very unusual marking scheme. It will make a great out of the box subject but I find the painting guide extremely dubious.
Our Thanks to Stevens International! This item was provided by them for the purpose of having it reviewed on this KitMaker Network site. If you would like your kit, book, or product reviewed, please contact us.
That's a really superior review, one the rest of us could use as a model for our efforts. Nice work, Doug!
One minor addition: it's important to differentiate between the Nationalist government (KMT or Kuomintang) and the Chinese Communists (PLA or People's Liberation Army) in speaking about "China" during this period. The Nationalists never really had full control of the country, and the Communists (supplied intermittently by the Soviet Union depending on Stalin's mood and alliances) controlled parts of the West throughout. That's probably more information than the average kitbuilder is looking for, but it happens to be one of my areas of interest.
Hi Bill,
Thank you for the kind words and I sincerely appreciate your feedback.
Rather than attempt to explain the complex political situation involving various warlords, the Kuomintang, and the Communists, I chose to focus on nationalist Chinese efforts to create a core national military and industrialize. The nationalists began the modernization effort, the nationalists approached the Soviets, the nationalists approached Germany, the nationalists bought the Sd.Kfz.221 armored cars, and the nationalists eventually worked with the US. The Chinese communists came into existence as a result of this process, and eventually vied for political supremacy with the nationalists, but I left them out of my brief introduction because, as I see it, they are tangental to the story.
All that being said, I am not happy with the introduction and continue to seek more information about these vehicles.
Hi Gary and thank you. My inspirations were Terry Ashley of Perth Military Modeling and Jack Webb.
-Doug
Doug, it is an OUTSTANDING review, really sets the bar higher for us all. I think you made the right choice. Interestingly, the Communists were annoyed that Stalin was giving aid to the KMT (Nationalists), but Stalin always did what benefited the Soviet Union, not what advanced the cause of "world Communism" (which turns out to have been largely a myth).


Comments