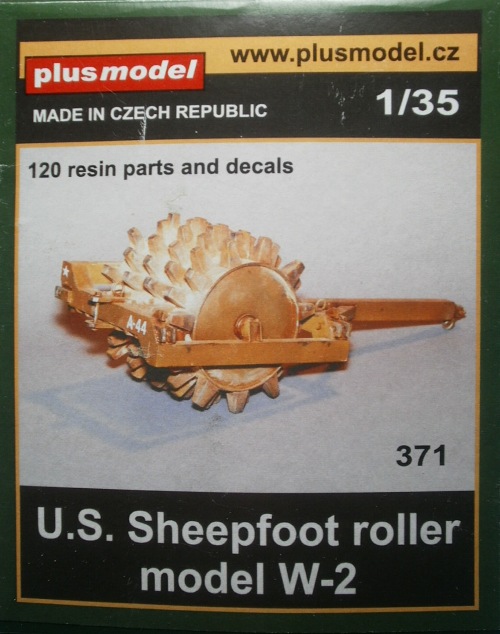
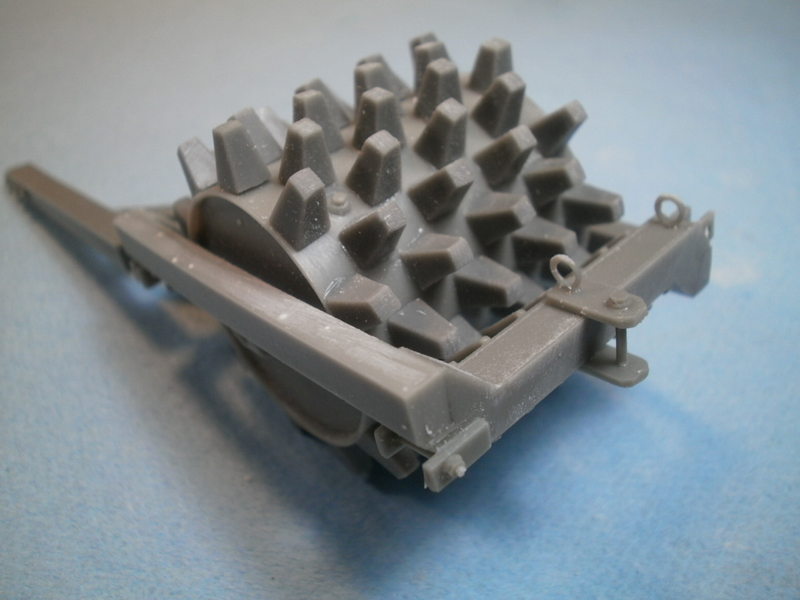
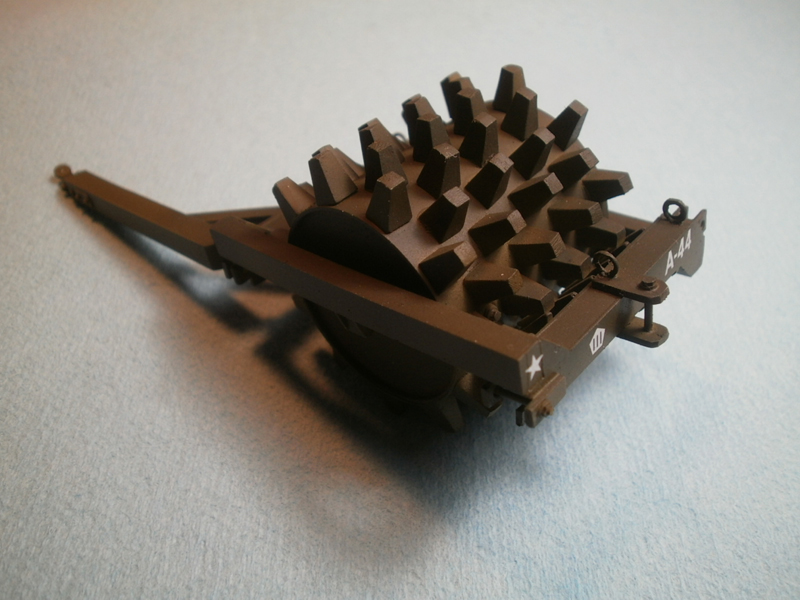
It seems every major plastic model company has more than plenty kits of vehicles from the sharp end of the spear, but those pieces of equipment that keep the logistical sinews of war flexible are still a bit few and far between. One of the more original ideas in a long while has been realized with Plus Models release of a 1/35 resin kit of a US Army W-2 sheepsfoot roller. If the name throws you, the picture is surely worth a thousand words. A sheepsfoot roller was, and still is, used for soil compaction of the type most often associated with road and runway construction. This and other kinds of engineering equipment like scrappers, graders, dozers, etc., were used on all fronts wherever troops needed a regular flow of supplies.
Review
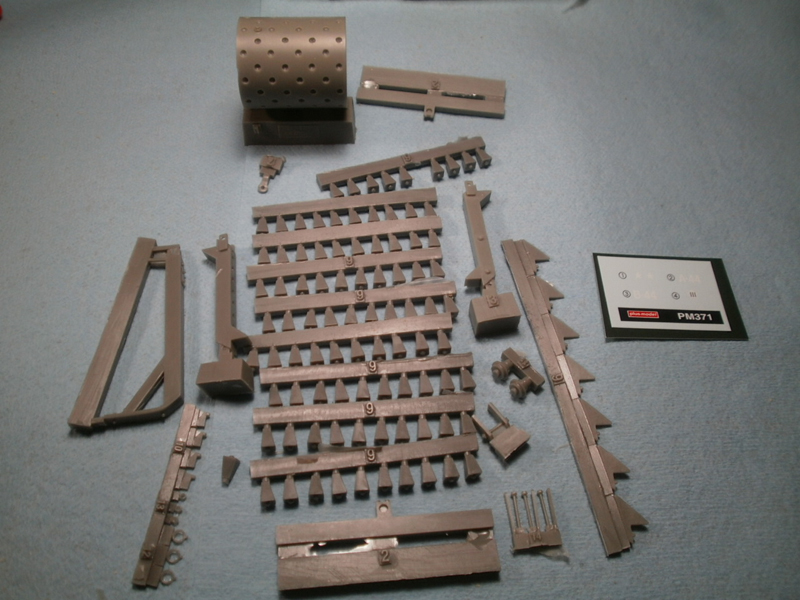
Plus Model packs the kit of the sheepsfoot roller in the very common smaller sized end opening box so typical of many mid-sized resin kits and detail sets. The parts are well packaged in a zip lock bag wrapped inside a sheet of bubble wrap that helped to insure that everything was all in one piece when I opened it up, with no broken parts at all which is sometimes all too common with resin kits.
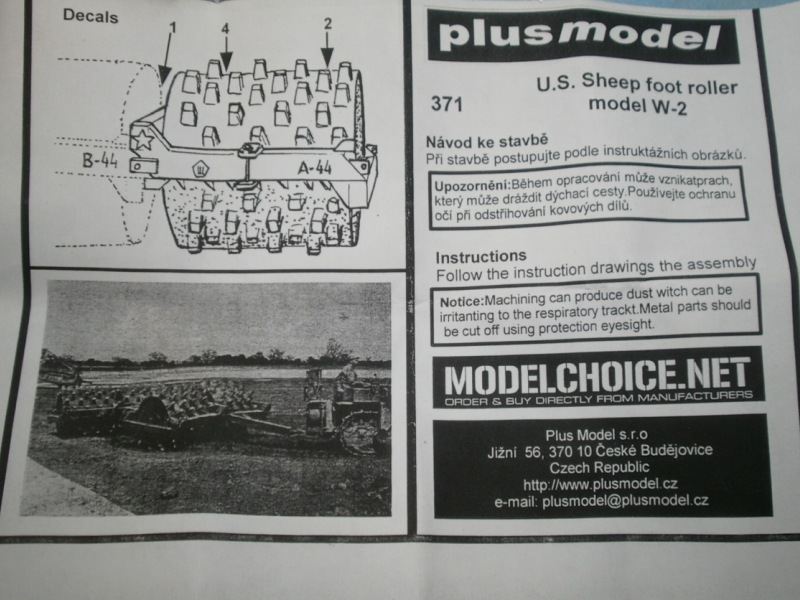
The kit consists of 120 resin parts, a small decal sheet, and a set of instructions with hand drawn exploded drawings with the arrows in the standard stick this part here kind of advice. However, the kit is simple enough that the provided directions are more than adequate (in other words, even I could follow them without ever putting any parts in upside down or backwards!).
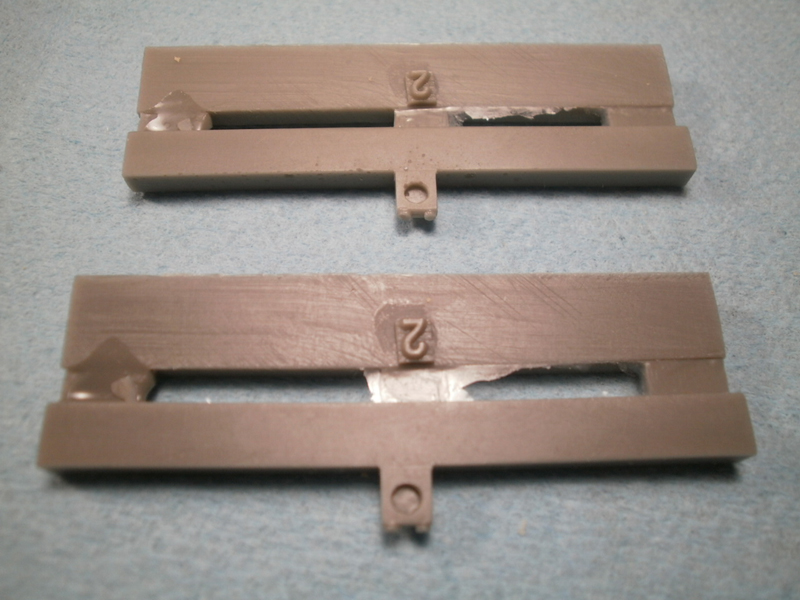
The parts are all firmly attached to sturdy resin sprue runners that removed easily enough with a razor saw and cleaned up with one or two passes with a sanding stick.
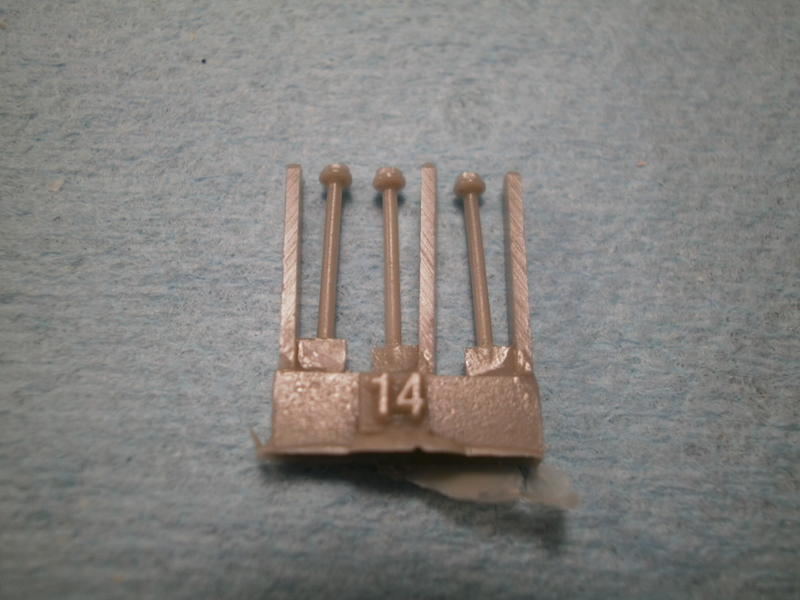
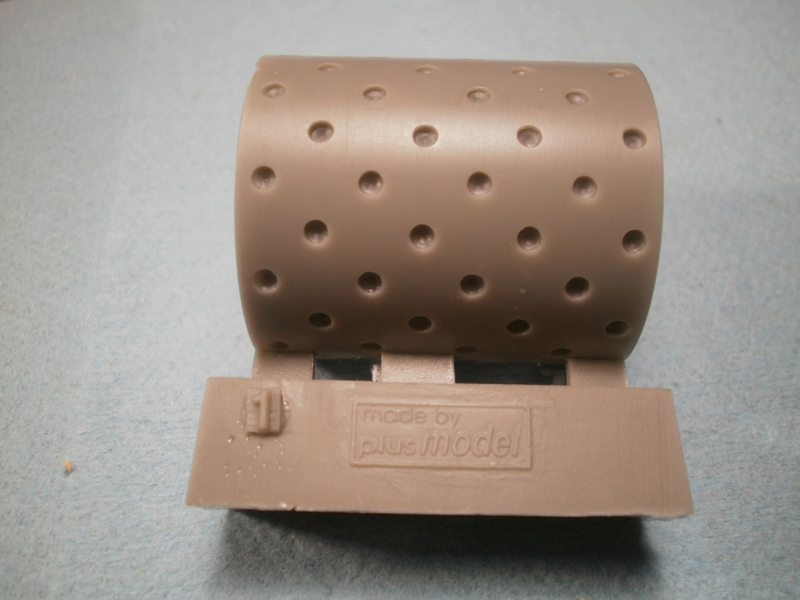
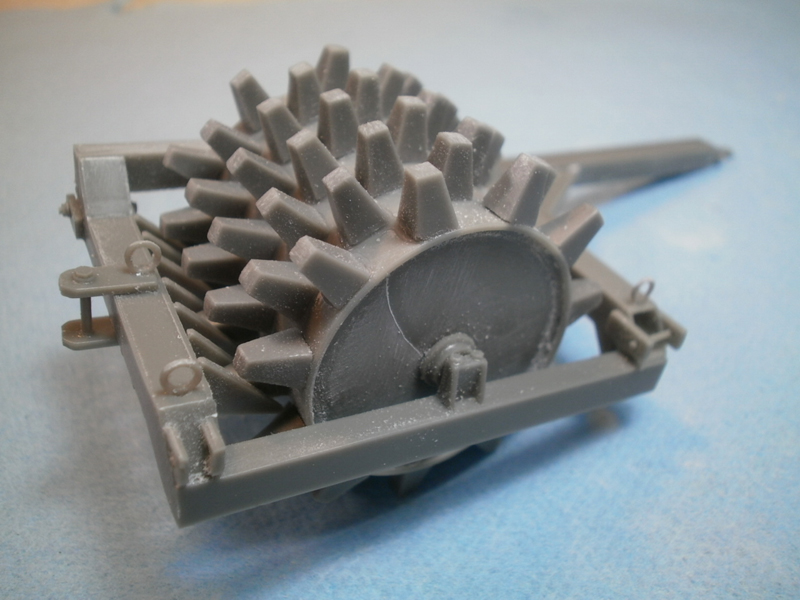
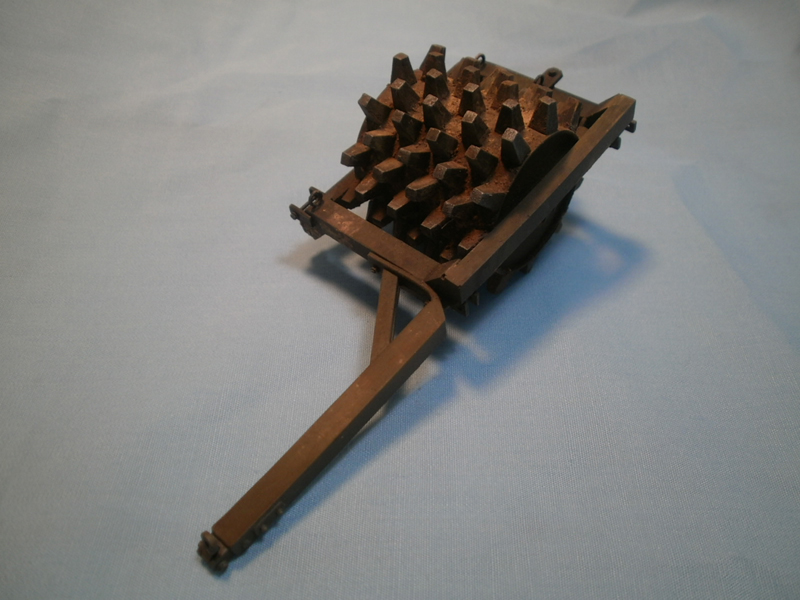
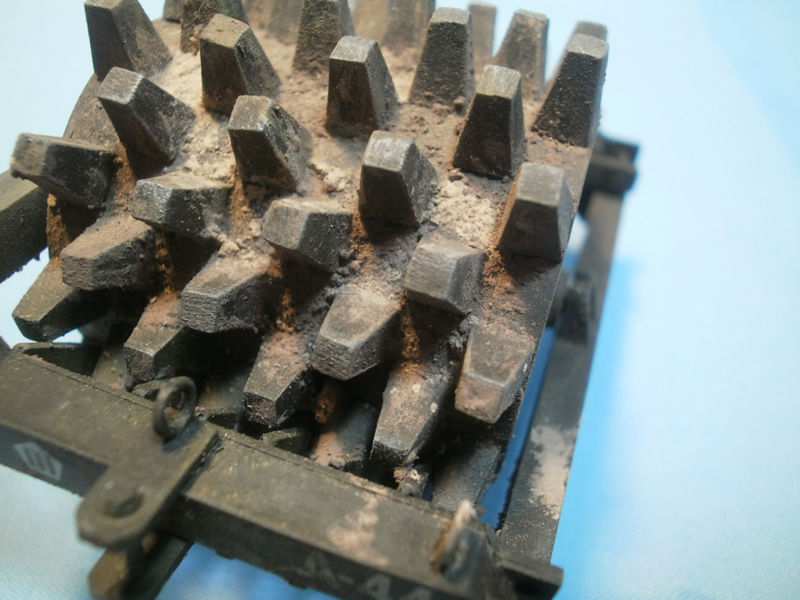
The majority of the parts, an even 90 of them, are the individual sheepsfoot compaction points that all need to be glued one by one by one by one by one by one(get the picture!) onto the large roller. When you are putting these seemingly endless resin knobs on, take care to keep them as aligned as possible, it will help to ensure that they will clear the mud-rake piece later in the construction. Each of these points, as well as the large roller, have been molded nearly flawlessly and the seemingly daunting task of removing and cleaning up each of the individual sheepsfoot (sheepsfeet?), actually moves along remarkably quickly. I had the 88 needed for the roller (you end up with 2 spares) done in about 20 minutes.
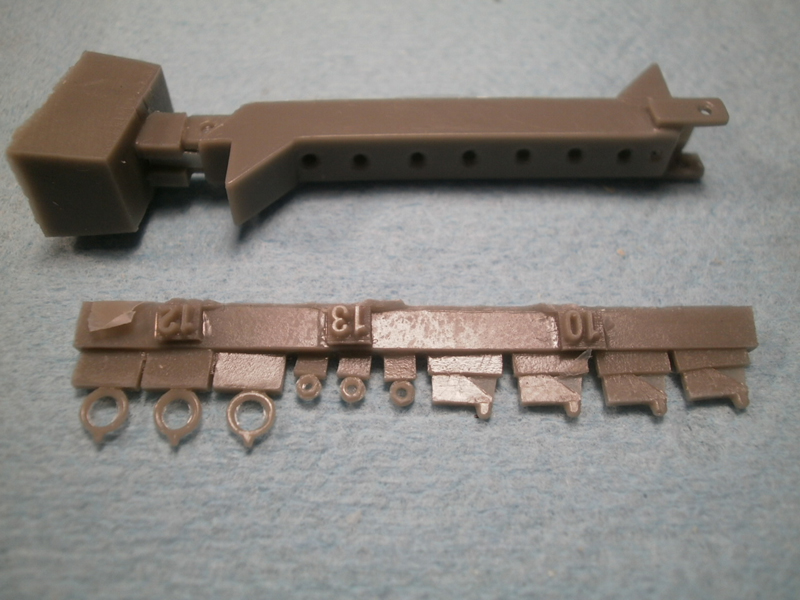
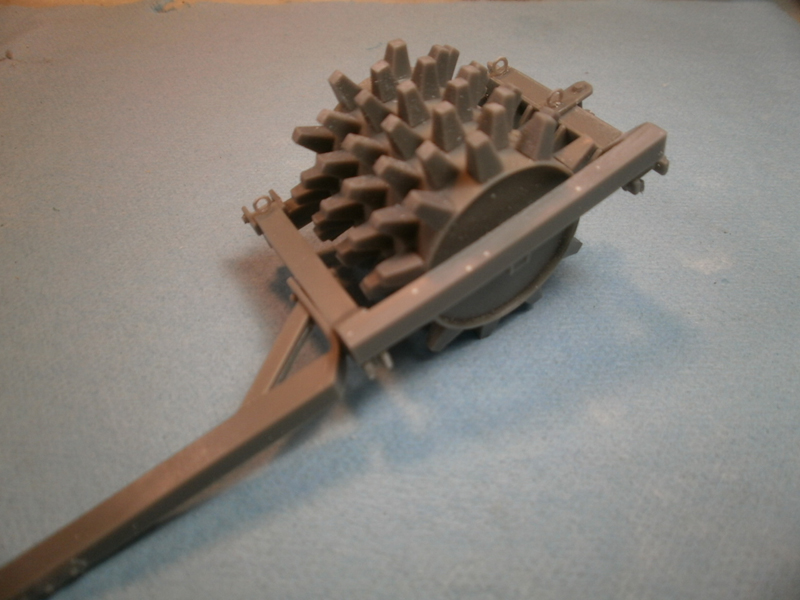
After that task is complete the only real obstacle to a rapid finish is the construction of the mud rake. Now I am not an operating engineer, so the name of this apparatus may not be a mud rake, but that sure appears to be more or less its function, but if I have the nomenclature wrong please let me know and I will correct it. The rake is located on the underside of the rear end of the frame and is made from 7 flat, roughly triangular pieces. The tines of the rake are supposed to pass seamlessly between the compaction points on the large roller. Mine took a bit of finessing to get lined up to a somewhat satisfactory degree, a better understanding of the instructions would have helped me and I hope if you build this kit you will pay more attention than I did and do a better job of it.
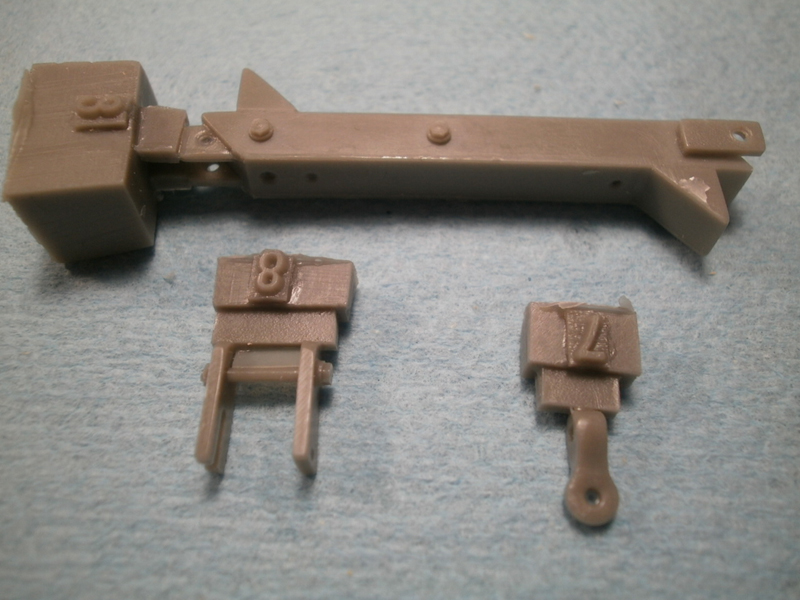
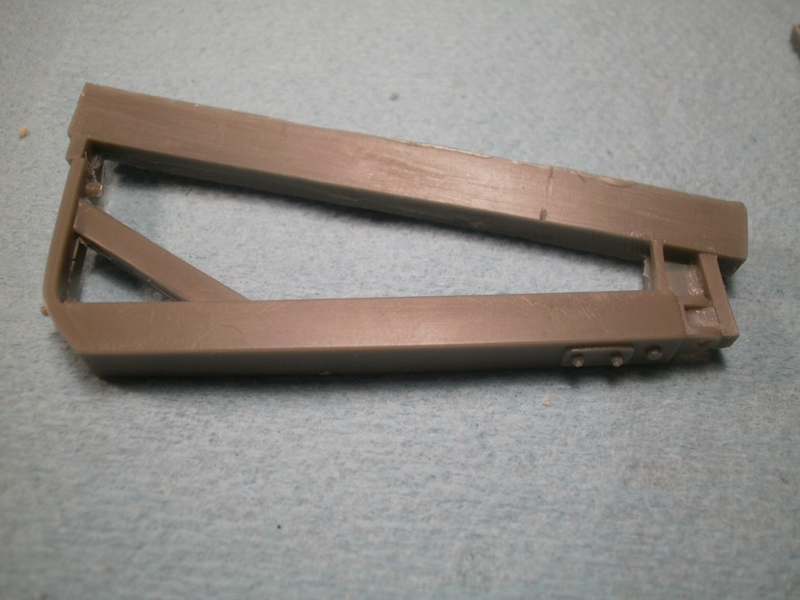
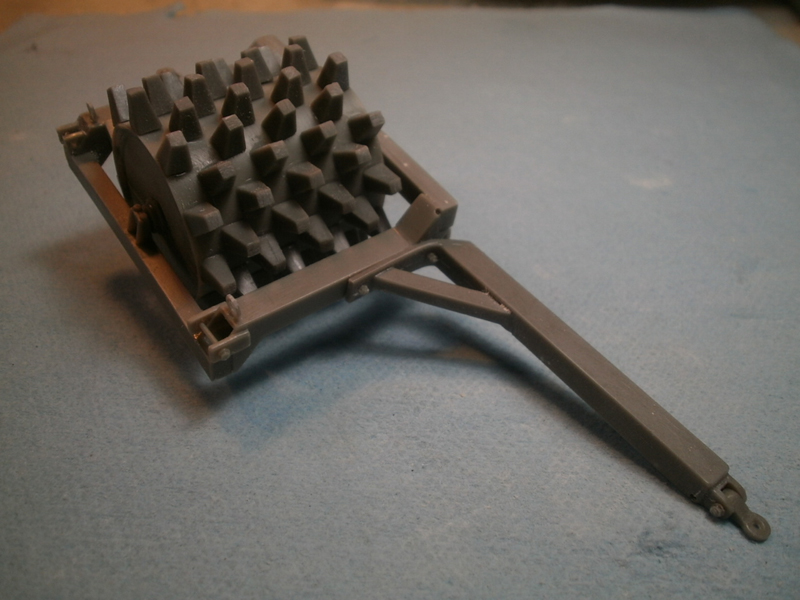
Once you have the rake and the roller complete it moves quickly toward the end, square up the 4 pieces to the frame, a couple drops of super glue and you are ready for the last phase. In the final phase of construction you will be adding the tongue as well as several smaller fittings, pintle hitch, lunette, and the like. The tongue is reversible to allow two rollers to be used in tandem. When I built mine I put the tongue in the tandem position just to add a bit of extra visual interest even though I had only the one roller.
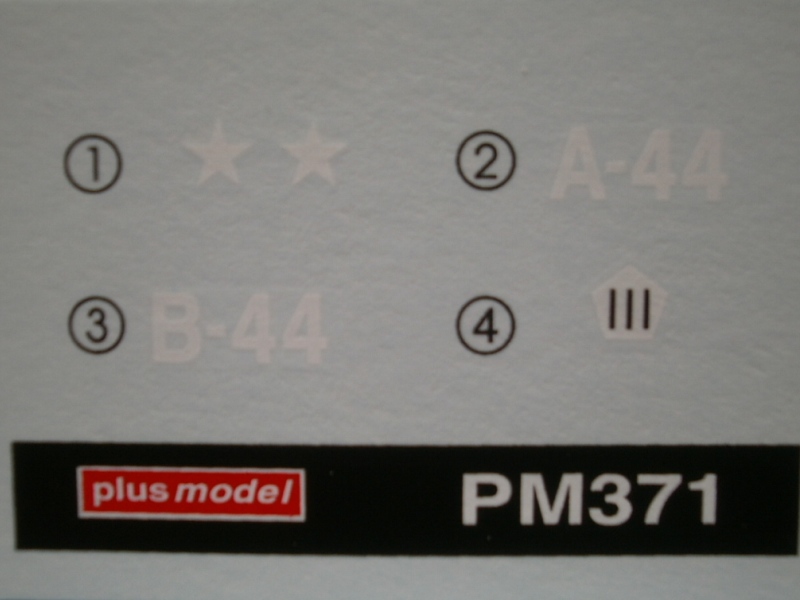
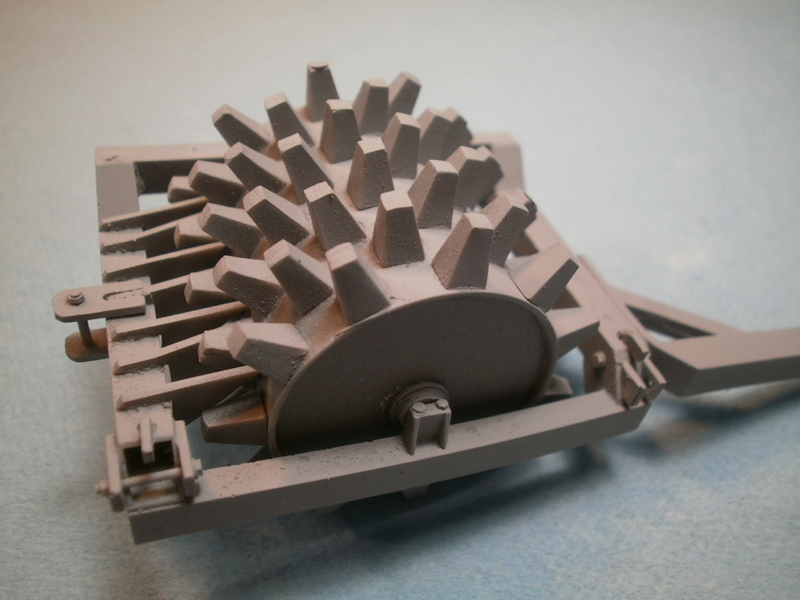
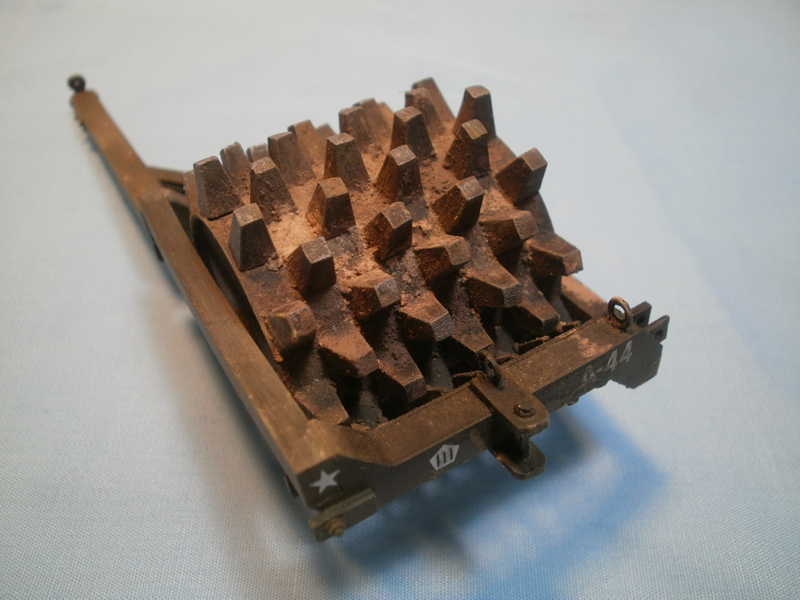
For the painting and finishing I started out with a nice coat of primer from Mr. Surfacer 500. I shot a couple of thin coats of Tamiya Olive Drab XF-62, through the airbrush and sealed it all with a misted coat of Vallejo Model Air satin varnish. After that cured completely I added the decals from the kit. Plus Model gives no indication what unit the markings are from so I just set aside my mild case of AMS and used what they provided. If anyone knows just what unit these markings are from please share with the rest of us. (The unit marking is a white pentagon with three black hash marks inside?). Another misted on coat of Vallejo varnish and I was ready for the weathering.
Before I started the weathering process I dry brushed the compaction points with some Xtracolor natural steel to give it a bit more of a worn look. I used AK Interactives new three part Weathering Set for Green Vehicles, AK 064, which includes Dark Brown Wash which I applied over the whole piece to give that nice dirty look, the Dark Streaking Grime from the set I used in random spots here and there. While that was still drying I applied some of the third component of the set, Light Rust Wash to the roller sides and various points along the frame. After all that had dried to a pleasing flat finish I ended with some pigment work to bring it all home. I used a 75-25 mix of old, and long out of production, MMP Weathering Powders 007 Earth Dirt and 012 Tropical Earth respectively, with just the slightest touch of the new MIG pigment, P043 Faded Russian Khaki, just for fun.
Conclusion
Other than the non-identified unit marking this is a very nice little kit. It adds a dimension that has been sorely lacking to our growing stable of Allied kits. It goes together quickly, the fit is great, and it offers lots of possibilities for different states of weathering and wear. I cant wait to see how some of you will incorporate this little gem into future dioramas and vignettes. Highly recommended.
SUMMARY
Highs: Very unusual subject, well packaged and easy to build.Lows: Markings for unknown unit, care needs to be taken when removing parts.Verdict: A small gem, very unusual piece of equipment that can be a real eye catcher.
Our Thanks to Plus Model! This item was provided by them for the purpose of having it reviewed on this KitMaker Network site. If you would like your kit, book, or product reviewed, please contact us.
About Rick Cooper (clovis899) FROM: CALIFORNIA, UNITED STATES
I have been modeling for about 30 years now. Once upon a time in another century I owned my own hobby shop; way more work than it was worth. I tip my opti-visor to those who make a real living at it. Mainly build armor these days but I keep working at figures, planes and the occasional ship.


Comments