Introduction
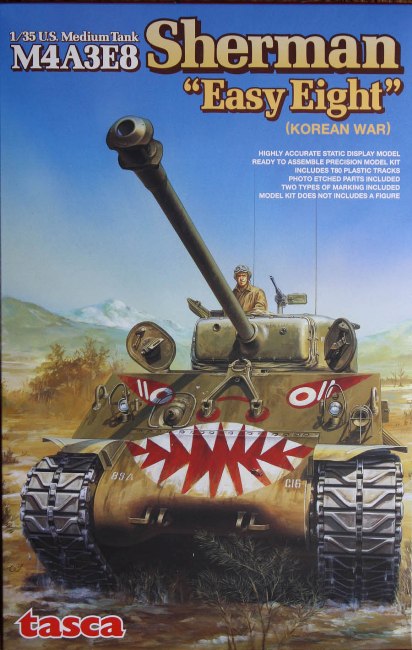
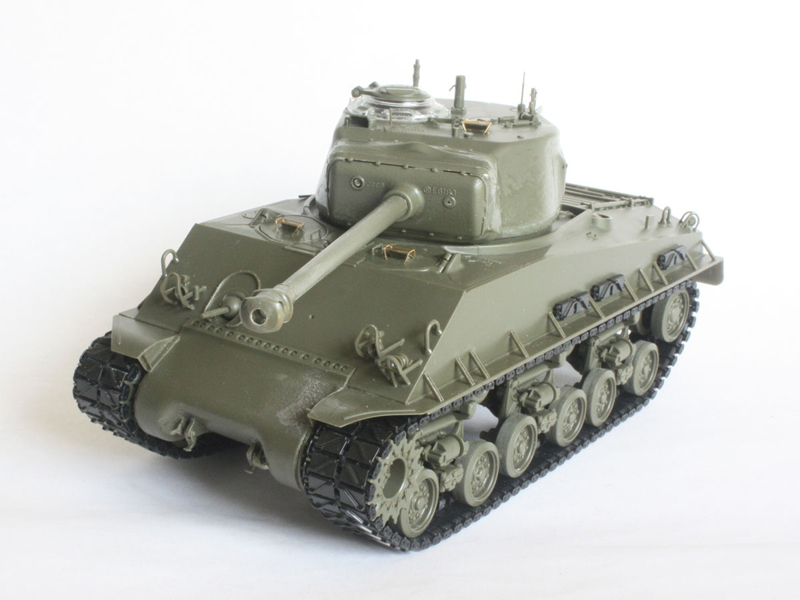
As the Second World War dragged on, the US kept improving its standard medium tank, the M4 Sherman. By wars end it had evolved into the M4A3E8, with a Ford V8 engine, wide tracks on HVSS suspension, and a 76mm M1A2 gun in the T23 turret. These tanks were called up again to fight in Korea a few years later, and many had long post-US careers with new owners.
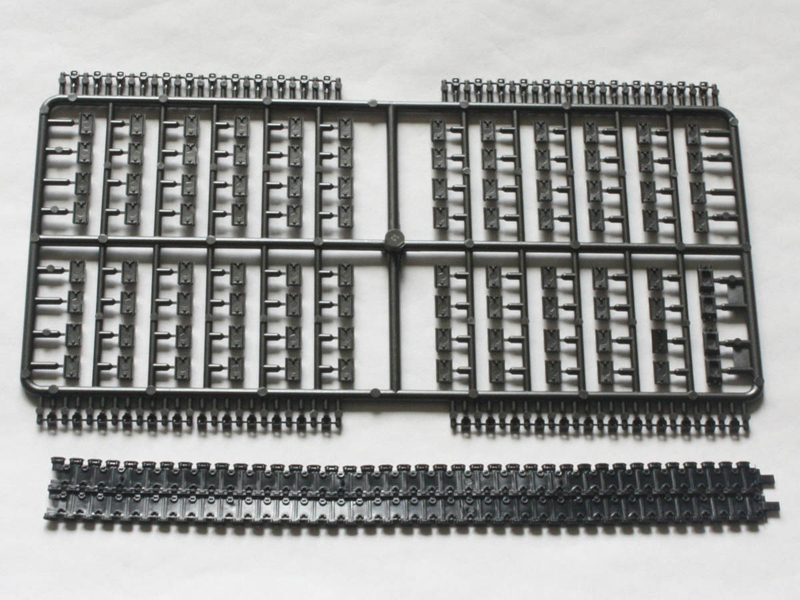
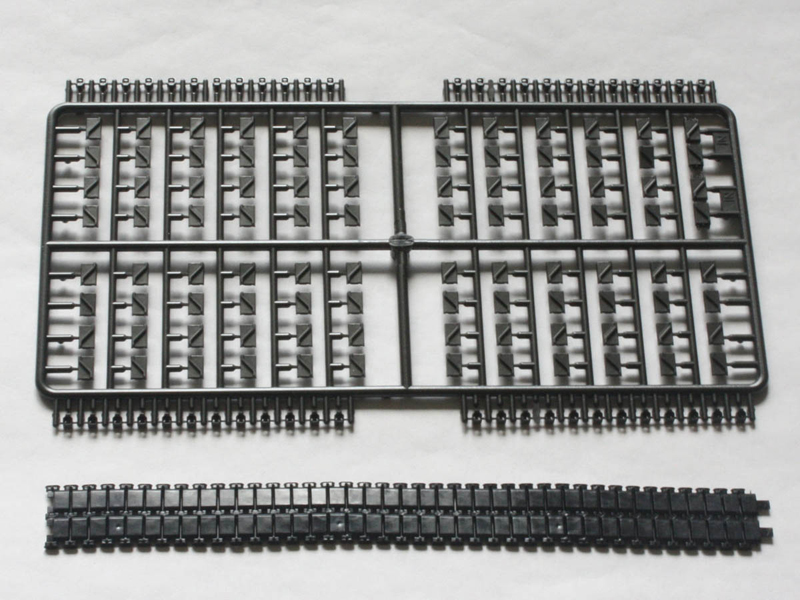
Tasca released a version of the M4A3E8 a year ago aimed at the WWII market, with the single-link steel T66 track and other features of early Easy-Eight production. This new kit is aimed at the post-war modeller wanting a typical Korean-War variant with T80 steel-chevron tracks.
Please note that Jim Starkweather has already posted a first look review of the contents
Here on Armorama, the contents of the kit can also be viewed at the bottom of this review.
Contents
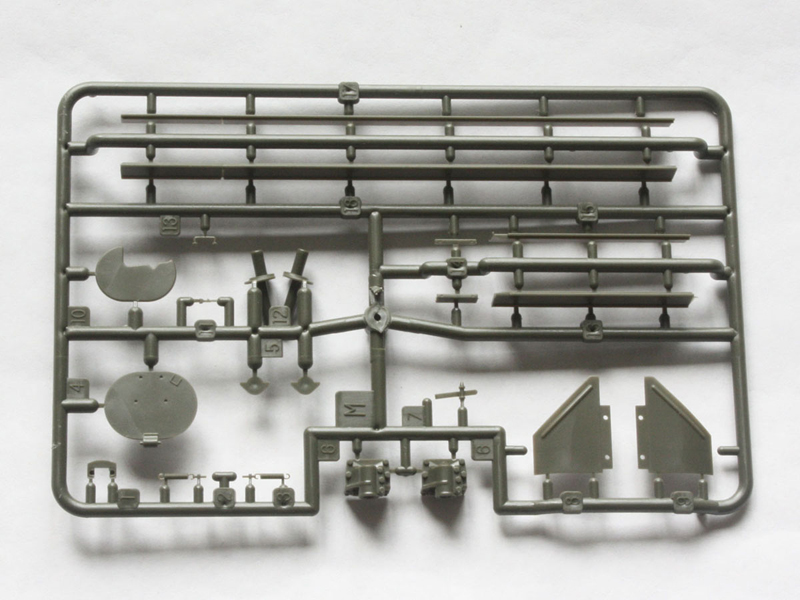
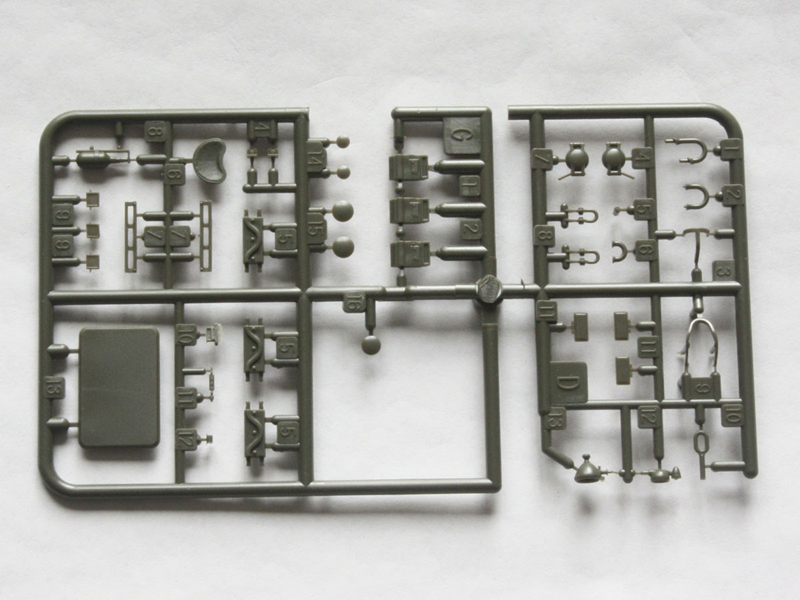
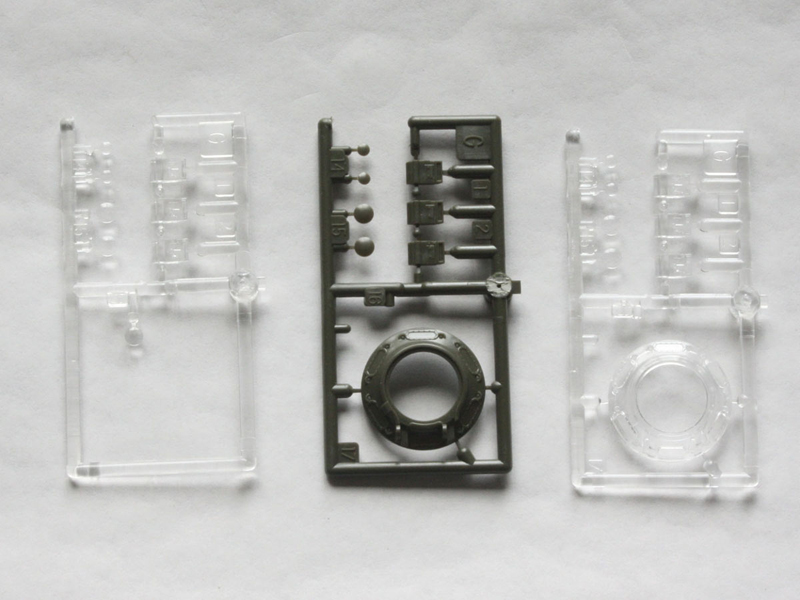
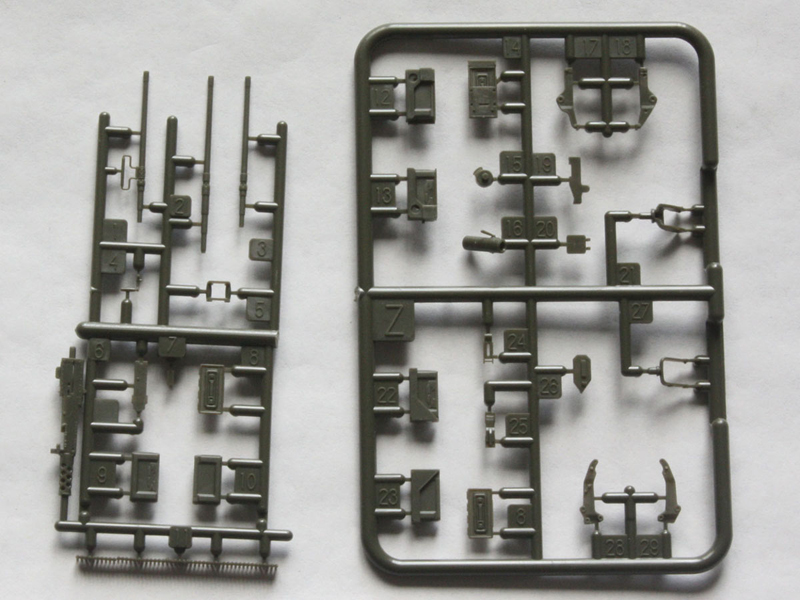
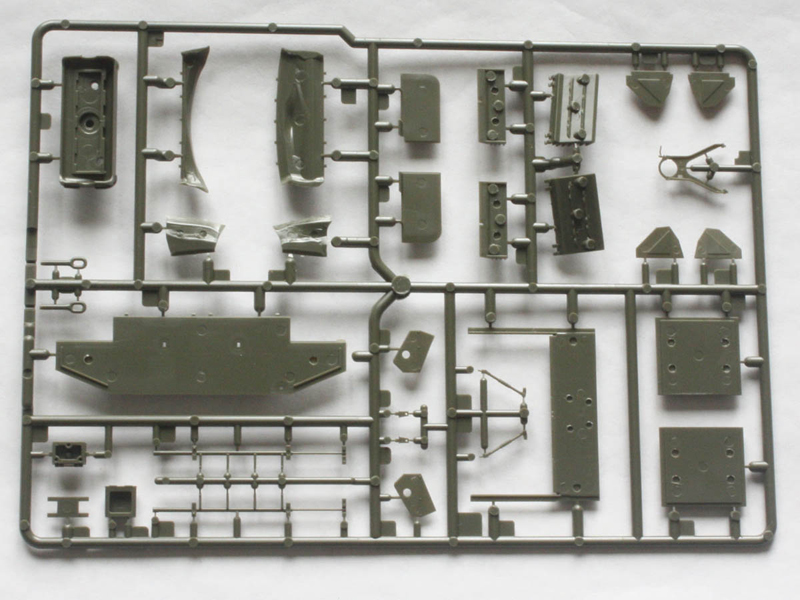
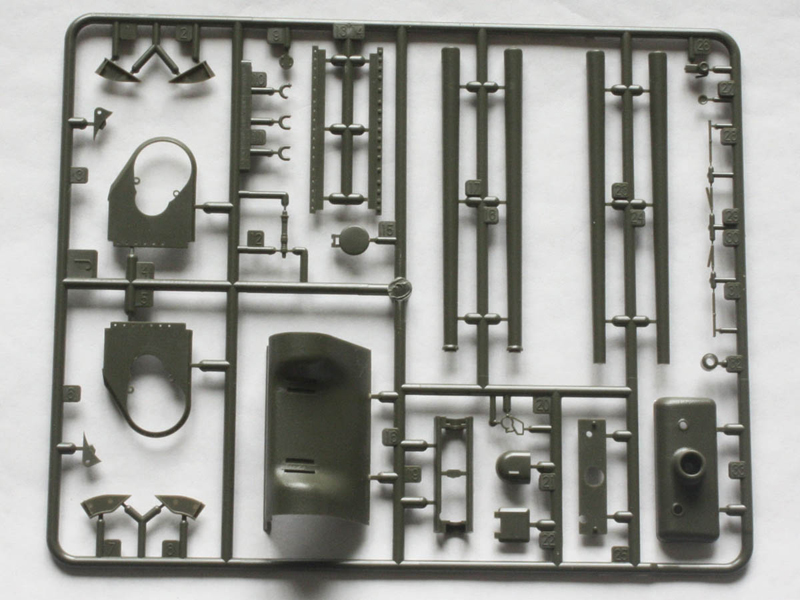
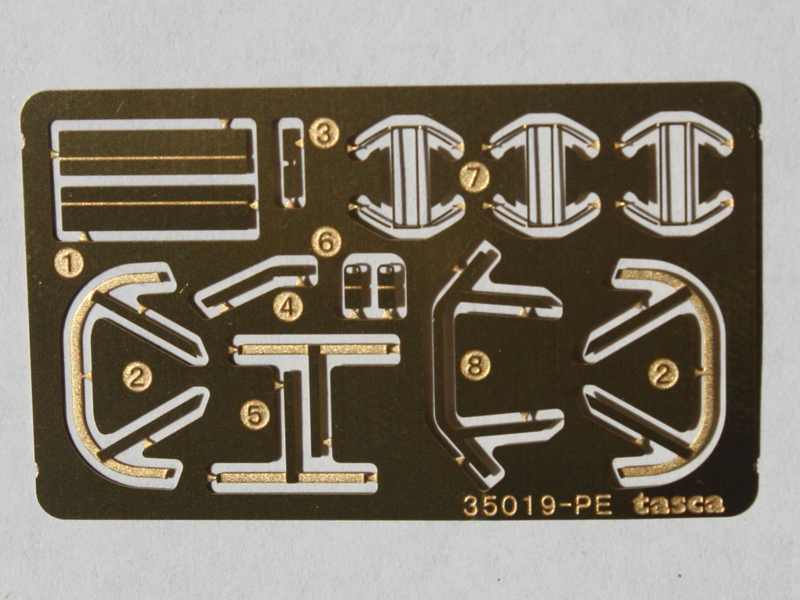
Opening the large box revealed 20 sprues in green plastic, 4 in black plastic, 2 in clear, 4 lengths of vinyl tracks, one sprue of poly caps, one etched fret, and a decal sheet. Thats a whopping total of 1168 parts, of which a fair number are surplus to feed the spares box. This is because many of the sprues are from earlier kits where only some of the parts are needed. As Ive come to expect from Tasca, the moulding is very crisp and flash-free.
In fact, this kit is essentially the earlier M4A3E8 kit (#35020) reviewed
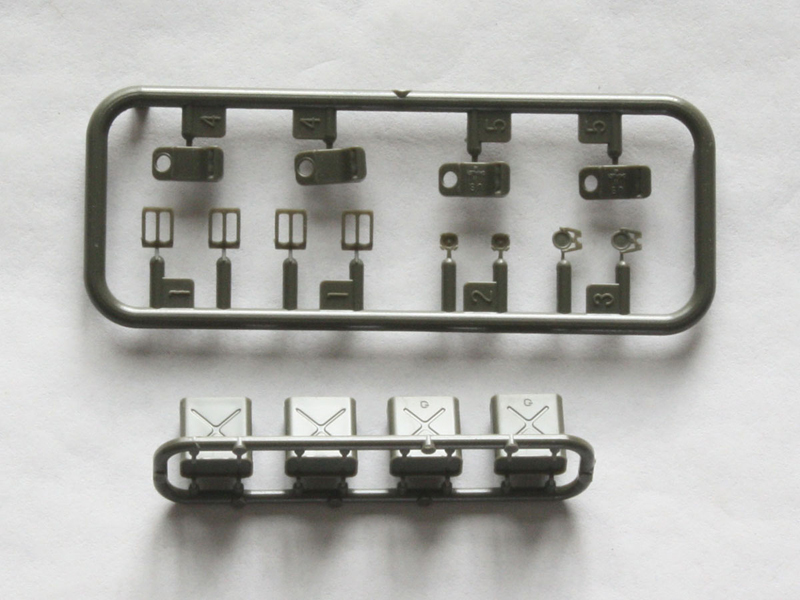
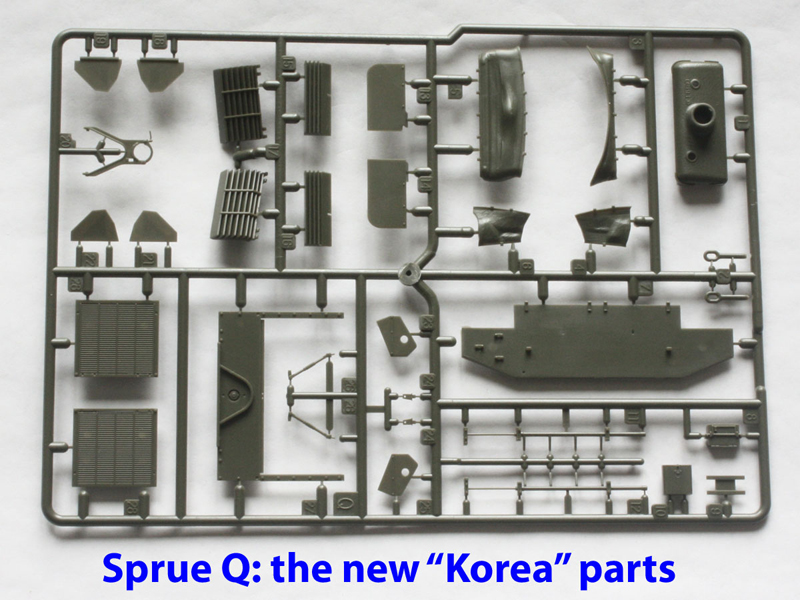
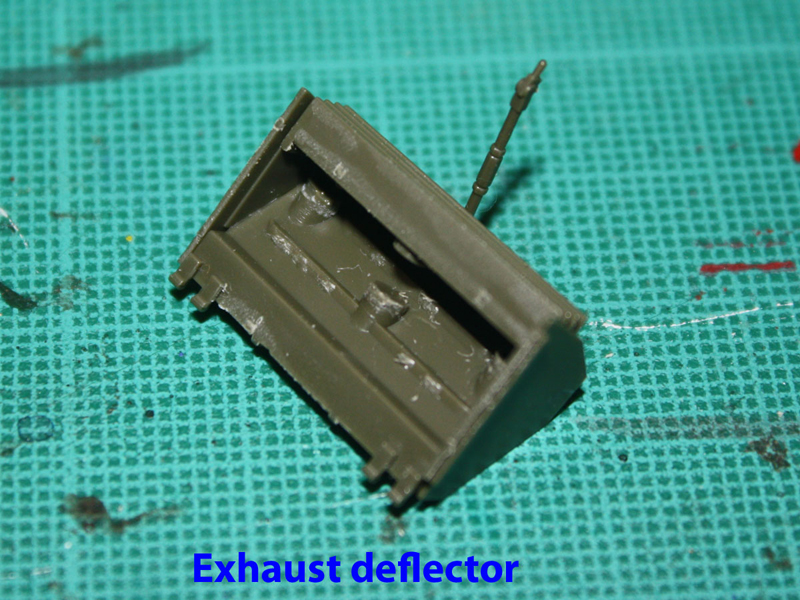
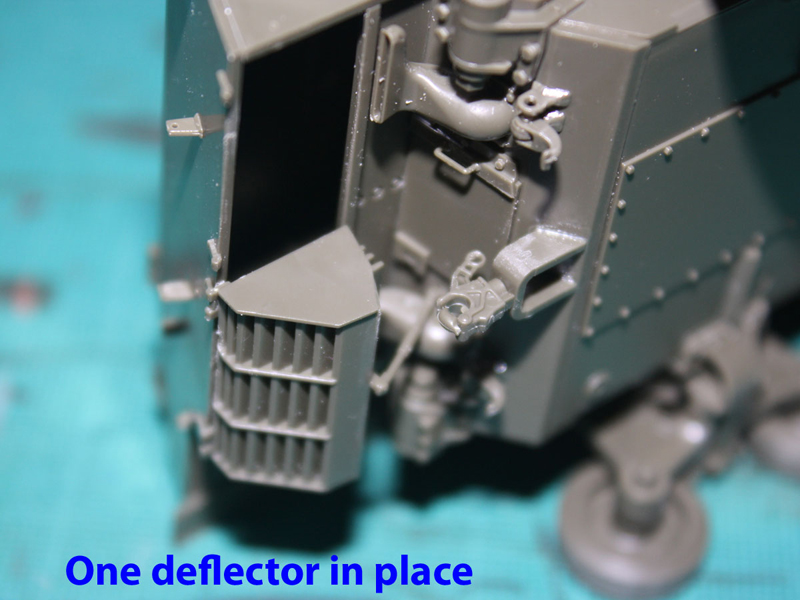
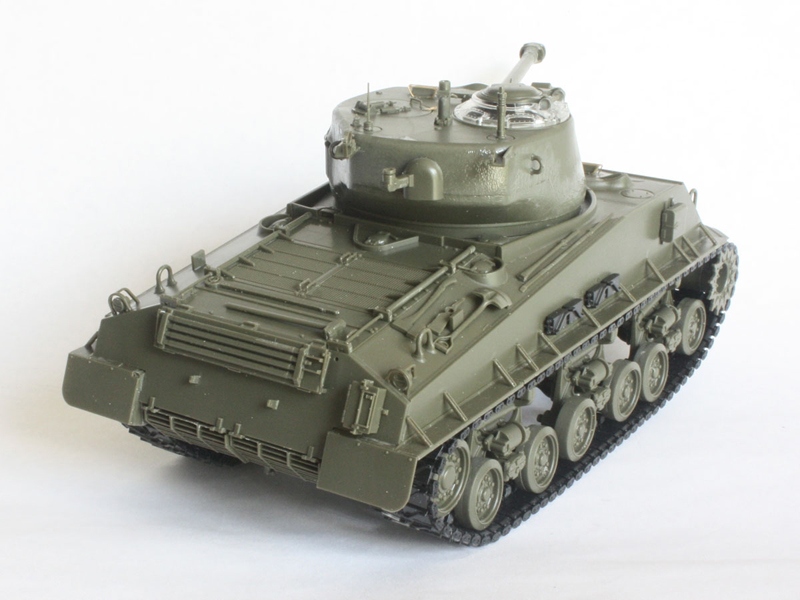
Here, also by Jim Starkweather, with the only differences being replacement of the tracks, different decals, and a new sprue (sprue Q) with the mantlet dust-cover and other post-war parts like the rear deck with long bar hinges. The new parts are very nicely done, but the new engine hatches are still only detailed on the outside (so leaving them open is problematic) and the new dust cover locks the gun at a fixed horizontal elevation. The new sprue also includes the two-piece post-war exhaust deflectors seen on most (but not all) Korean-War Shermans, as well as an infantry phone box and first-aid box.
Review
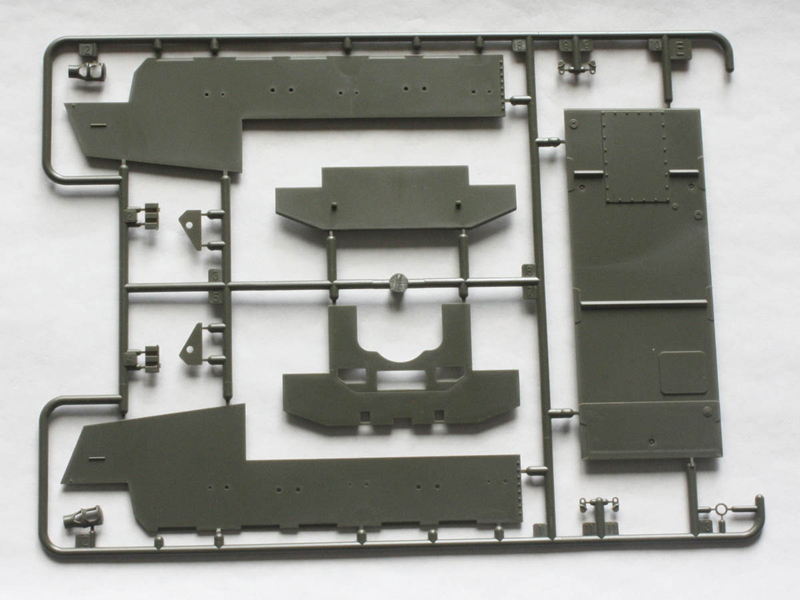
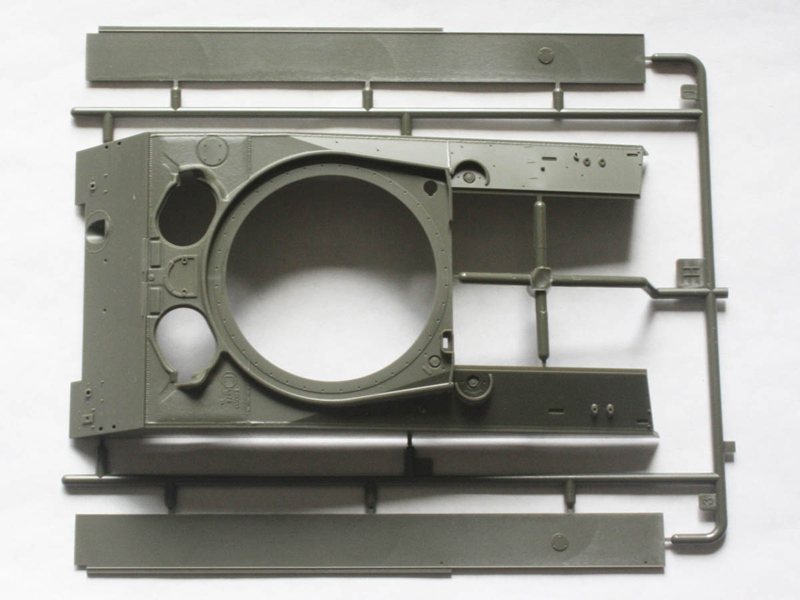
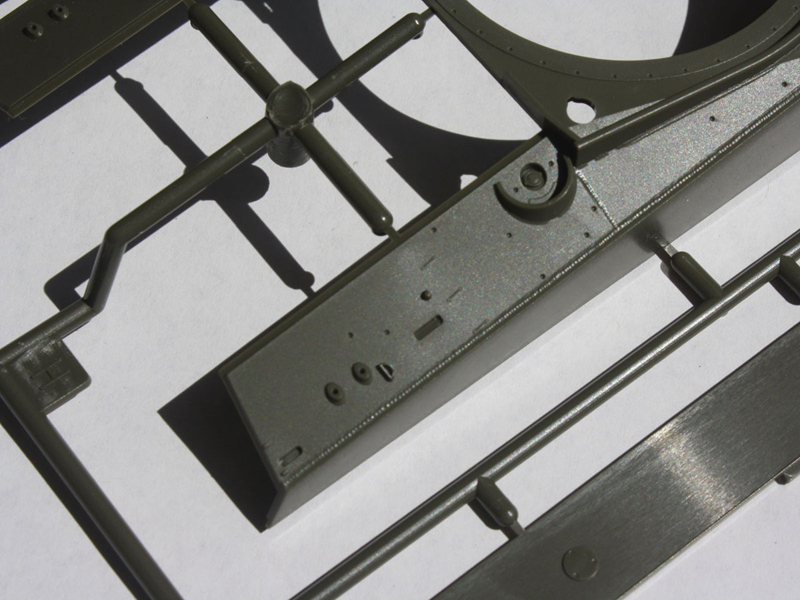
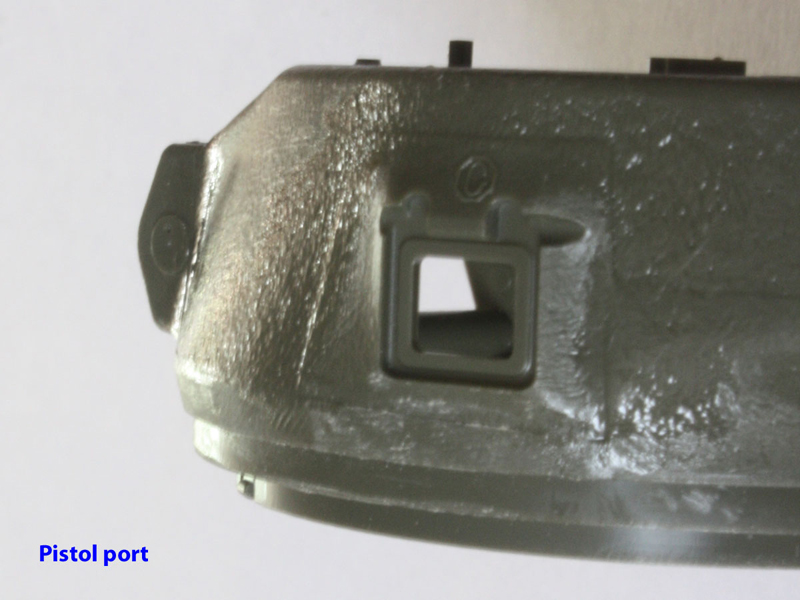
The main components look spot-on in detail, size, and shape. The cast panel with the drivers hatches looks good compared with the real thing, and all the welds are in the correct places. As with Tascas other Shermans, all the welds are properly raised. And the only areas I could see that lacked weld detail were the hull sides, where the glacis is welded on. However, a quick trawl of photos shows that these side welds were often ground so flat they are hardly noticeable. Cast parts like the transmission, turret, and the panel around the hull hatches have a very nicely done subtle casting texture that looks right for new American tanks of this vintage. (Other makers of Sherman kits have offered texture based on 60-year old monuments that look like relief-maps of the Moon
) There are appropriate foundry marks on the turret, gun mantlet, and upper hull, but none on the transmission. Archer recently released a set dedicated to the Easy-Eight (
reviewed here) that can fill the gaps. The only potential fault I could see with the upper hull is the provision of dimples to locate the tools, since leaving them off would mean filling and sanding.
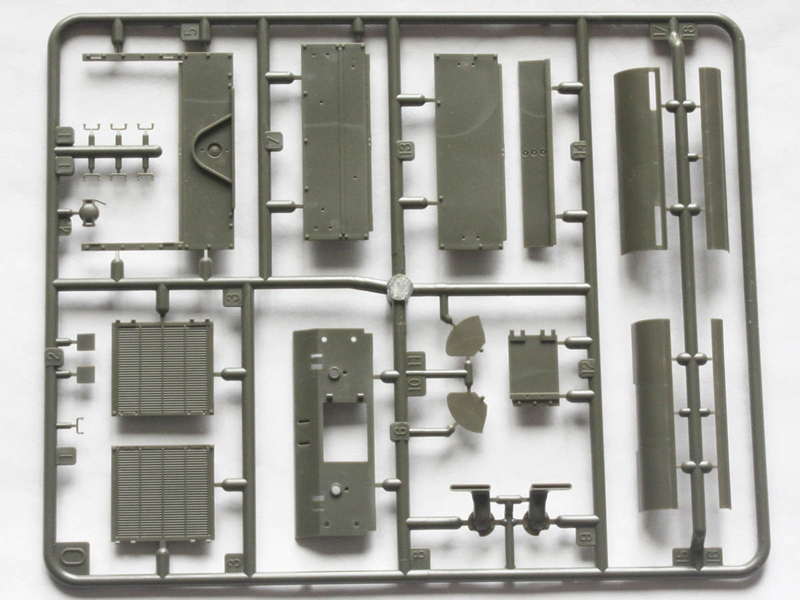
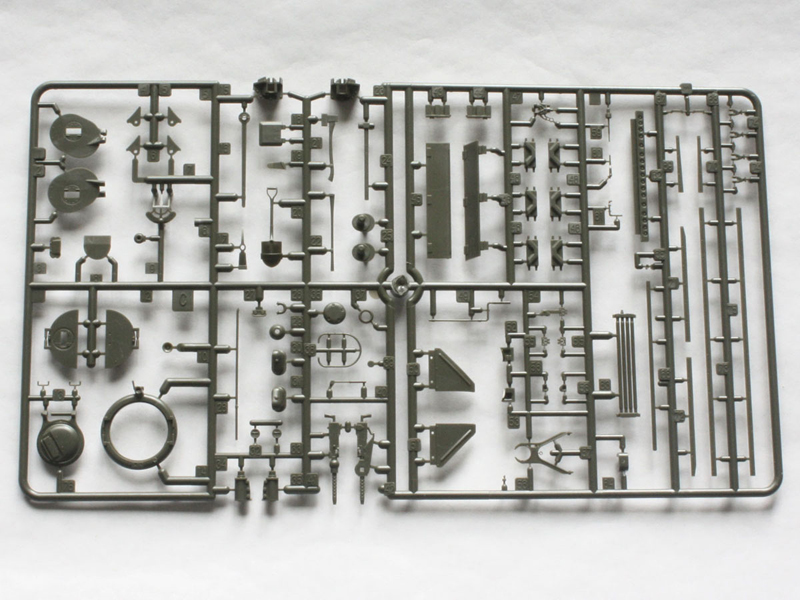
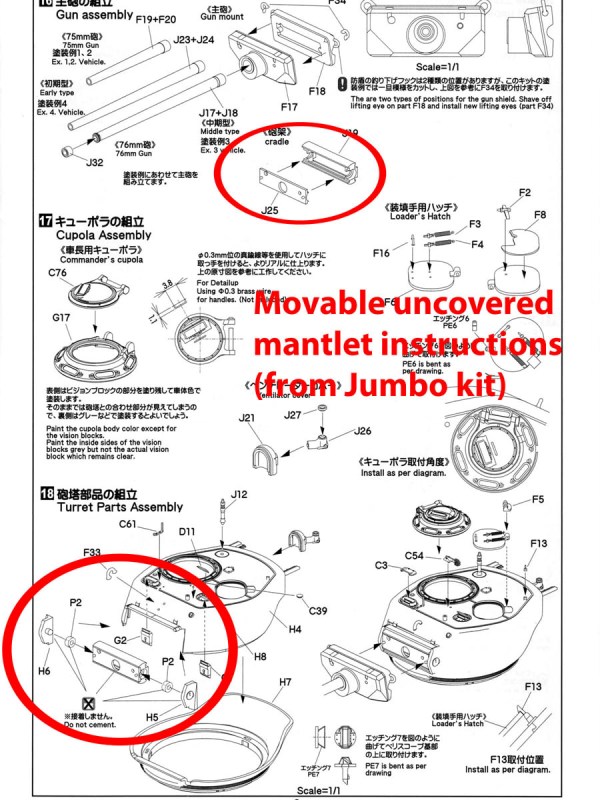
With all the left-overs in the kit, it is possible to have spotting features from M4A3s in service in WWII, or any stage in the transition to the final form seen in Korea. The early-style exhaust deflector parts are still here on sprue O, the early hull rear plate, the very early gun tube without muzzle brake, and all the parts for the exposed gun mantlet. There is even a fine rendition of the late-version two-piece split commanders hatch and ring. However, there are no instructions for these left-overs, so either familiarity or access to instructions from earlier kits is advisable. (Ive added scans of the relevant pages from the recent M4A3E2 Jumbo kit for reference.)
If this kit has a major flaw, it is Tascas habit of providing absolutely nothing to see inside if the hatches are open. At least the ancient Italeri 76mm-gunned Sherman came with a full gun breach to fill the void! So, for the purposes of the following build I have chosen to close all the hatches despite the fact that they all have details to show off.
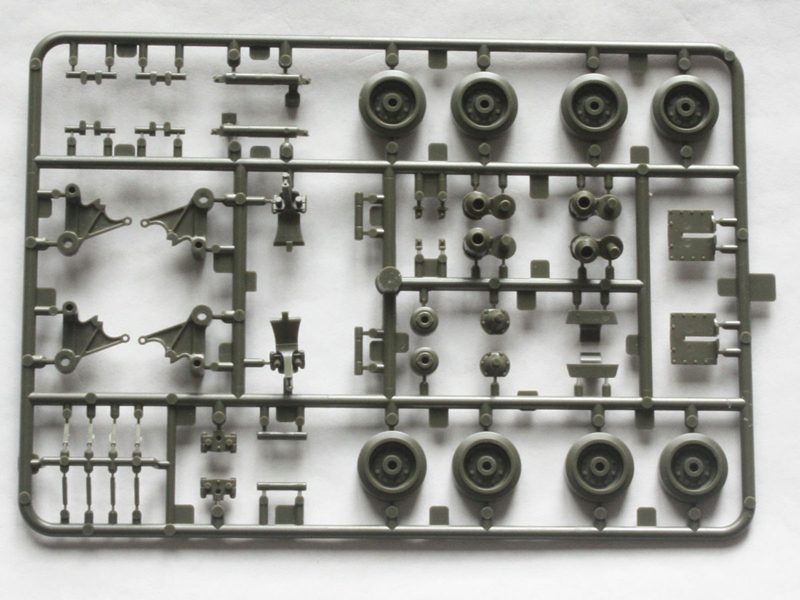
As soon as the initial pictures of this kit were released it was pointed out that it lacked the spare road wheels and drive-sprocket rings seen on tanks that were overhauled at the Tokyo Ordnance Depot at the start of the Korean War. Tasca has an unfortunate reputation for not providing much in the way of extra stowage for its otherwise-excellent kits. However, the kits road wheel and sprocket sprues can be had separately from the Tasca website for about $9 plus postage and can be modified to become spares as long as you scratch-build the mounting brackets.
Decals:
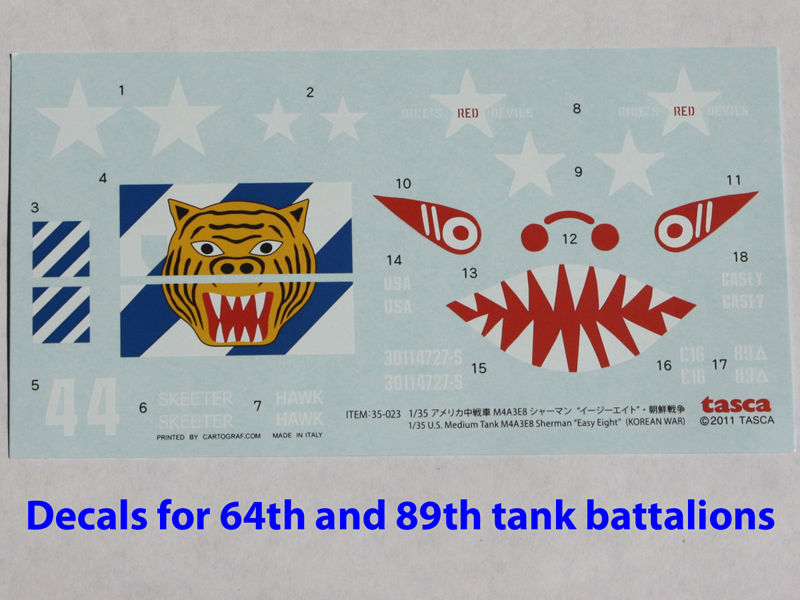
There are markings for two tanks one from Rices Red Devils and another from the 64th TB. Given that the basic kit builds into a tank with details seen in photos as diverse as a Canadian column in Korea on one hand and a US one seen in Germany in April 1945 on the other, there is wide scope for after-market decals.
The Rices Red Devils markings are one of three variations Ive seen on tanks from the 89th TB commanded by Captain Rice, with a mouth and eyes painted onto the glacis. The other variations include one much the same but with the mantlet and muzzle also painted (presumably red?), and another (again with painted mantlet) where the eyes have been moved up to either side of the gun on the mantlet face. Photos show a variety of stowage some have spare wheels, some spare sprockets, and others have neither.
The Build
Hull:
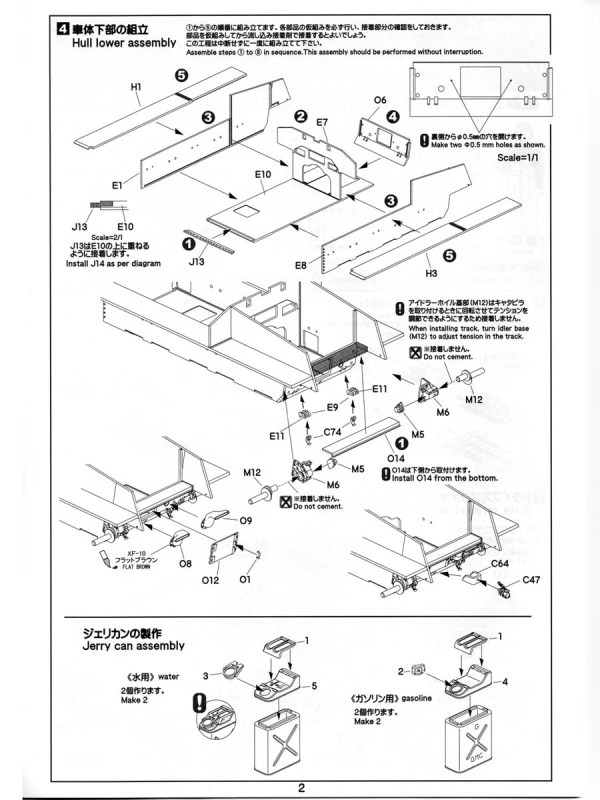
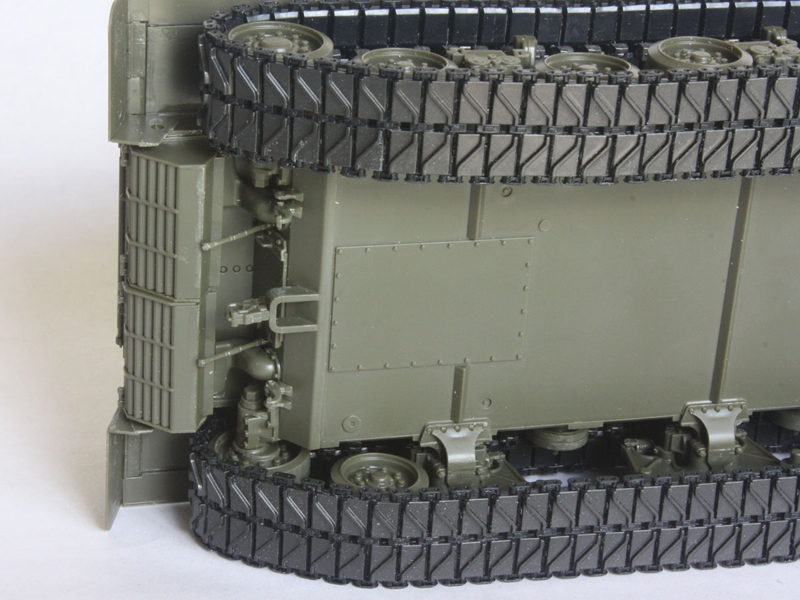
Tasca parts are very well engineered, so I took care to file all the sprue-attachment nubs completely flat before assembly. The lower hull looks like a recipe for misalignment, but if you prepare all the pieces shown in Step 4 and take care the result is very sturdy and squared. In fact, there are little raised ridges inside the panels to line up the joints. I used liquid cement painted onto the joints while carefully holding them together, but tube glue applied before assembly should do just as well. Remember to open those two holes in the lower rear plate as indicated before assembly I forgot, and paid the price of aching fingers from an awkward drill position inside the engine compartment because the holes are needed for the struts that hold the exhaust deflectors added later in the build. These deflectors are very well done, offering lots of diorama potential, unlike earlier attempts by the likes of Italeri. Of course, if you want the very late ones that were notched to allow more room around the towing pintle then reach for the Academy M36.
The transmission housing has a very fiddly arrangement for the towing eyes the little braces are a right pain to fit. (Mine spent more time on the floor than on the workbench because they pinged out of the tweezers so often!) I used the later T-hook attachments typical of the post-war era, but Tasca still include the earlier D-rings on sprue D/G if you need them to match a photo. However, Tasca missed out on the two drain plugs that should be on the underside of the main casting, as well as the foundry marks typically placed between the towing eyes. I drilled shallow dimples for the drain plugs, and will add some Archer resin decal markings from the set I reviewed earlier, but most folk wouldnt even notice if I hadnt.
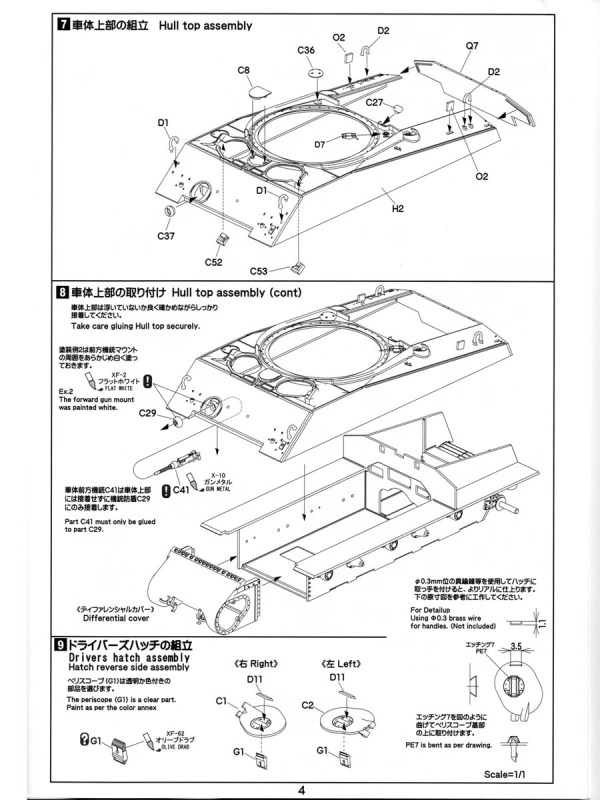
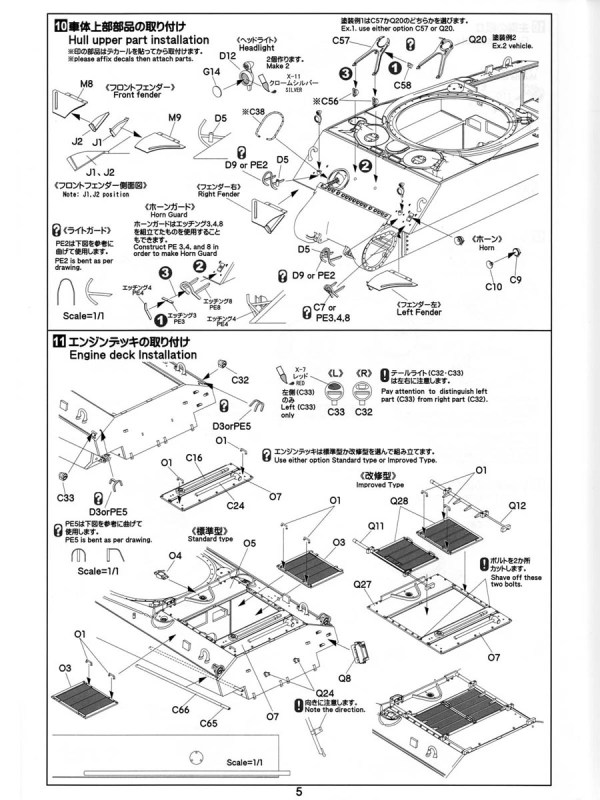
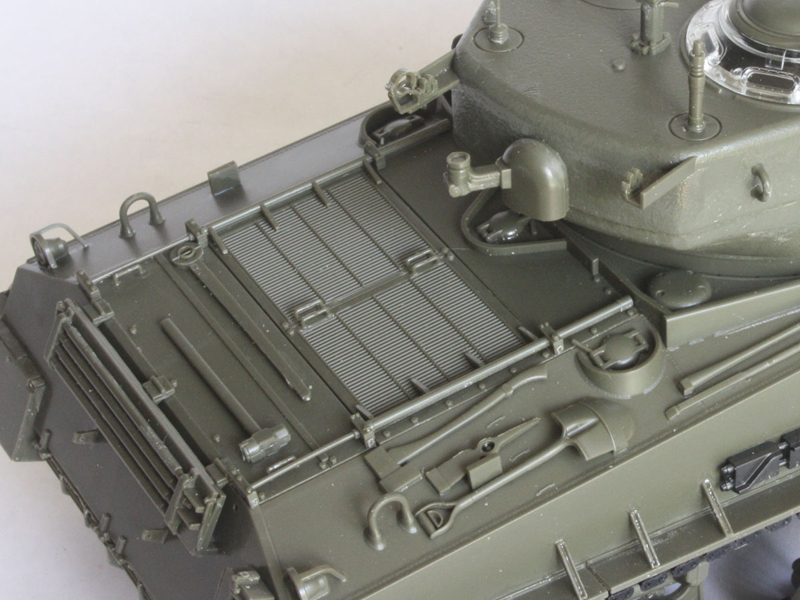
Up on top I chose the later engine deck with the big torsion-bar hinges. I also noticed the tools still dont have any securing straps these will have to be added via AM parts or scratch-building. (My own technique uses Evergreen 0.010x0.040 strips for the straps, and short lengths of 0.010 rod to make up the buckles. It takes ages, but does the job.) Likewise Tasca still insist on not providing any handles for the hatches. There is a diagram for detailup (whatever that means) to bend some from wire, but at Tasca prices they really should do better. Even the ancient Italeri kits have handles! Fortunately the unused two-piece hatch on sprue C has two handles (parts C13) that are fine for the hull hatches. There is also a choice of clear or green periscopes, but as yet I cannot see how to assemble, mask, and paint something that small just to keep the tiny glass face unpainted. Perhaps theyre better if left loose as diorama accessories? (I will use them in the turret though, where they can be painted off the model and added at final assembly.)
There are plastic and PE parts for the headlamp brush guards, but unlike earlier Tasca kits this one doesnt come with a plastic PE-bending saddle jig. Also, it would have been useful if the PE slotted into some kind of grooves in the hull for security a razor-thin butt-joint with superglue just isnt very robust. In the end I chose to use the plastic parts. The periscope guards are a different matter, as there are no alternatives. They are a nightmare to fit the brass is very soft and bendy, and it is hard to get the legs all bent up and glued down without collateral damage.
Turret:
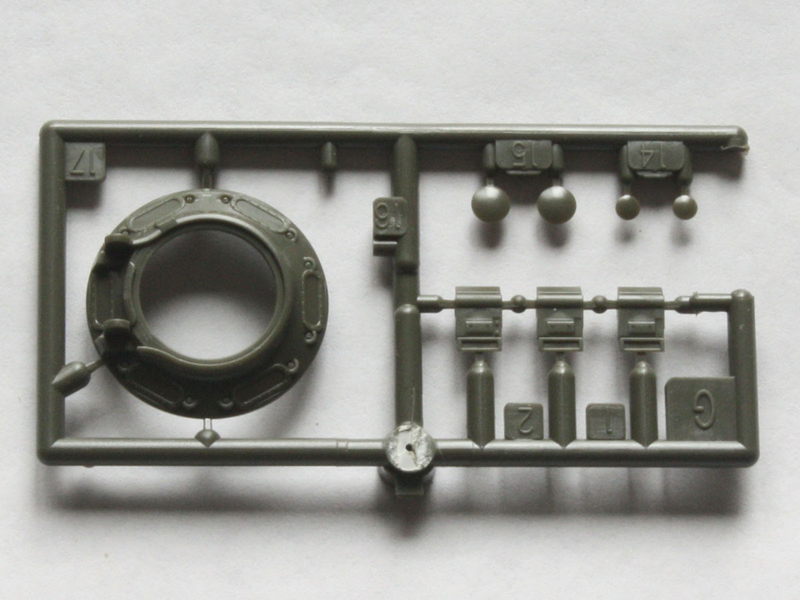
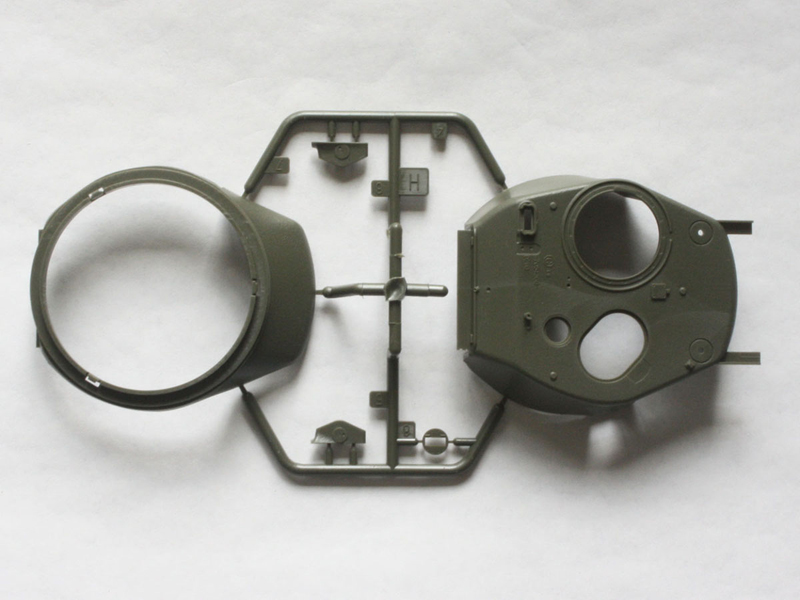
The turret looks to be accurately shaped, with the two halves joining along the scar lines seen on the real thing. It has fine casting marks and a very good texture on the cast parts, so I declined to add more. You could add markings to the ventilator dome, but many tanks had these ground off. (Thanks to Kurt Laughlin for that info!) The one thing that does need attention is the join between upper and lower turret shells. The real things was usually ground flat along the underside of this join, so in pictures it shows up as a rough flat band around the turret base, against the gentle curves of the turret side. After gluing and a little glue-stippling, a file was employed to create it. Im less sure about the join around the shell-ejection port on the left side Tasca moulded it with a prominent outline but most photos of real ones show either a subtle bump or no discernable join at all. However, it was a separate part of the sand casting mould, and fragments of join lines can be found in various places on some turrets. I chose to gently sand it to make it less obvious, and again did a little glue-stippling to replace casting texture.
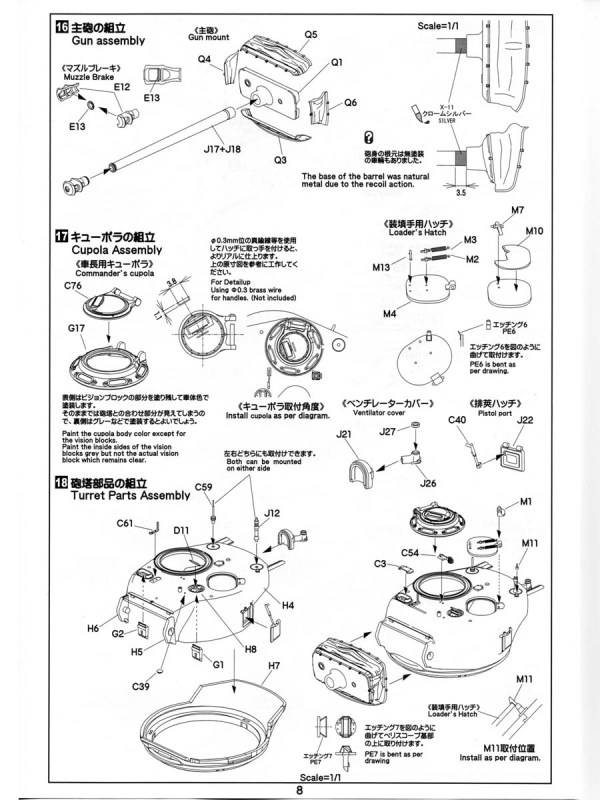
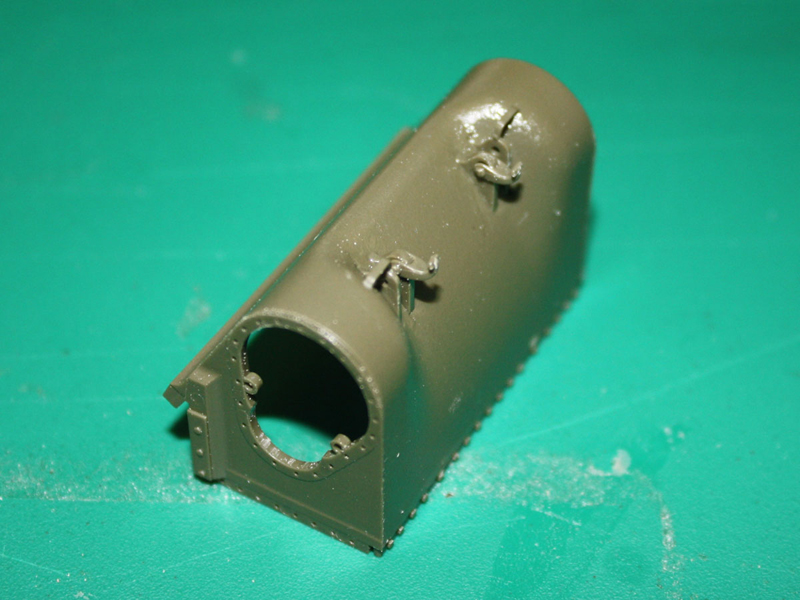
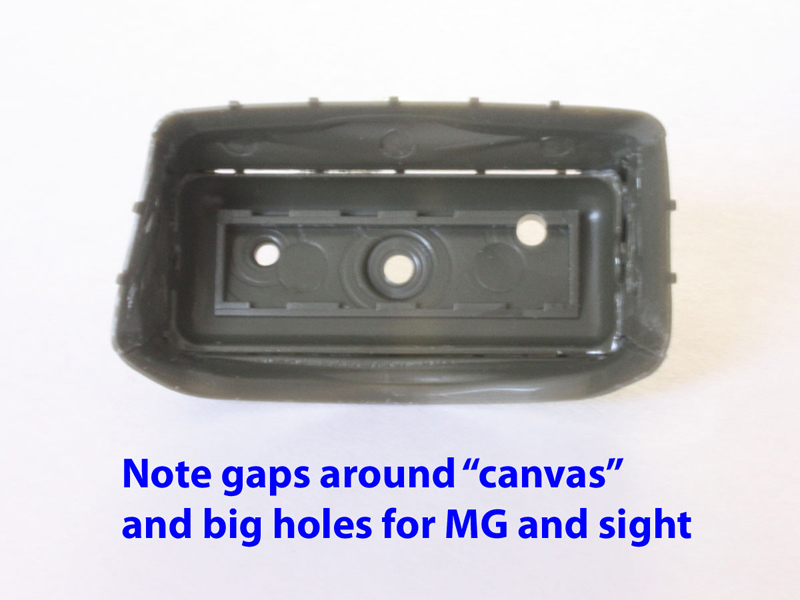
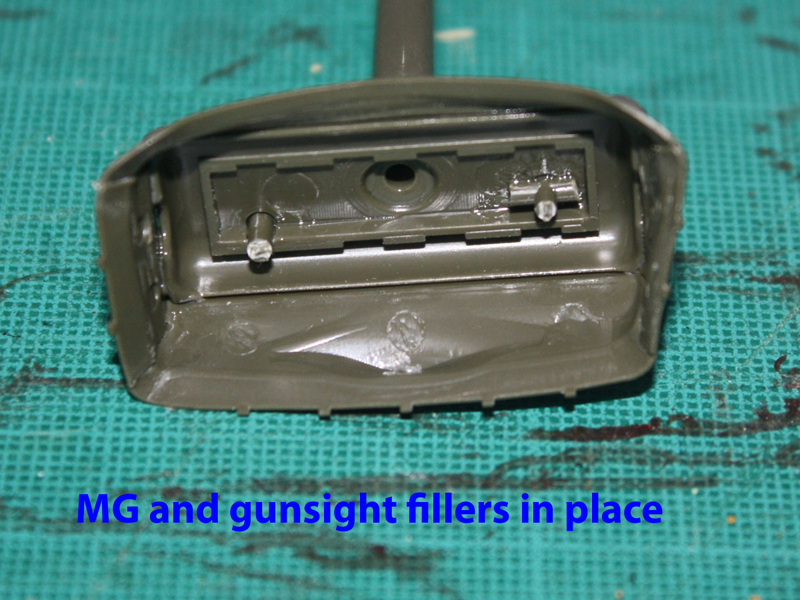
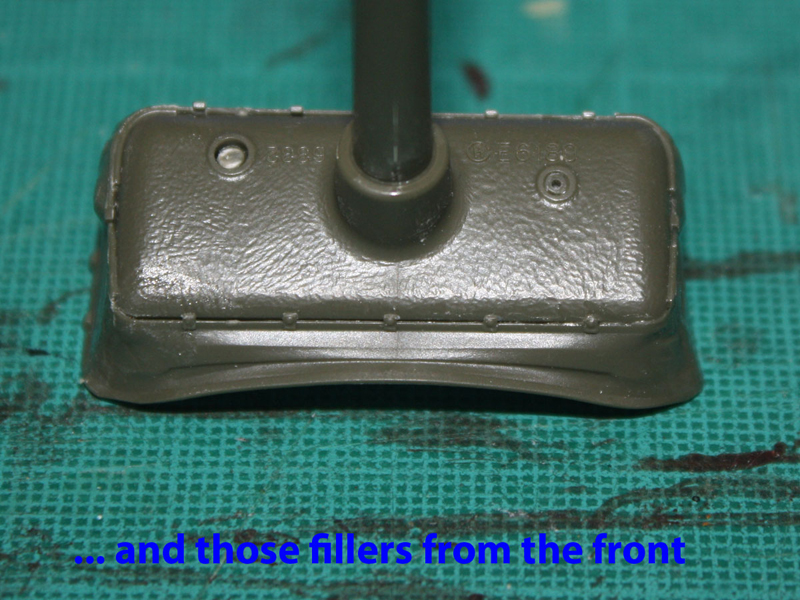
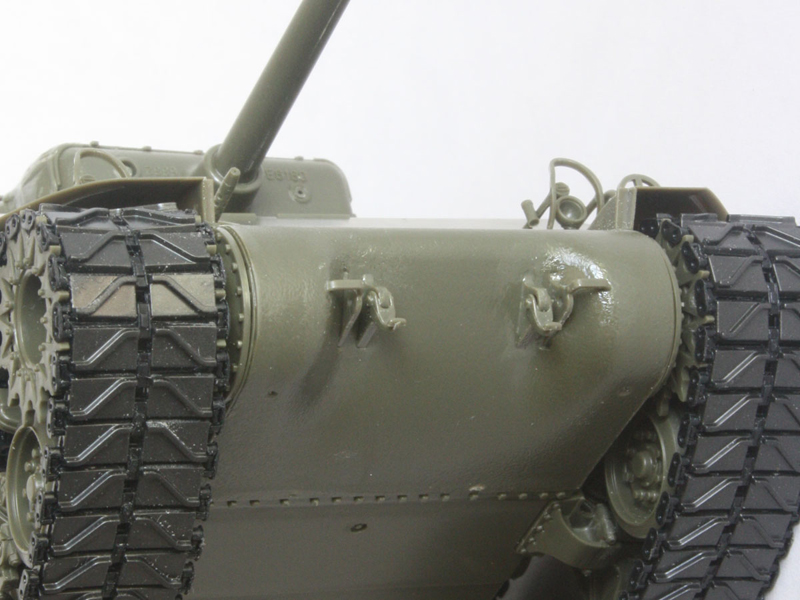
Building the canvas gun mantlet took more adjusting (and more fingers!) than Id hoped. It also comes out a bit too unrealistically smooth for my liking Id be tempted to replace it with tissue and PVA glue. The parts are a loose fit around the mantlet, and without the backing parts used to mount the mantlet in the earlier Easy-Eight kit there is a whole lot of nothing behind the holes for the gun sight and the MG. I decided to add some backing for these with scrap plastic cut from the frame of sprue C (because it has a handy variety of frame sizes) to represent the gun sight and the .30cal MG muzzle. Note that the kit includes the un-covered mantlet (part 33, sprue J), backings (parts 19&25, sprue J) and trunions (parts 5&6, turret sprue H) to build a tank without the canvas cover. Photos of tanks in Korea show some with and some without, but many without still have the clips and hardware that Tasca moulded onto the canvas parts.
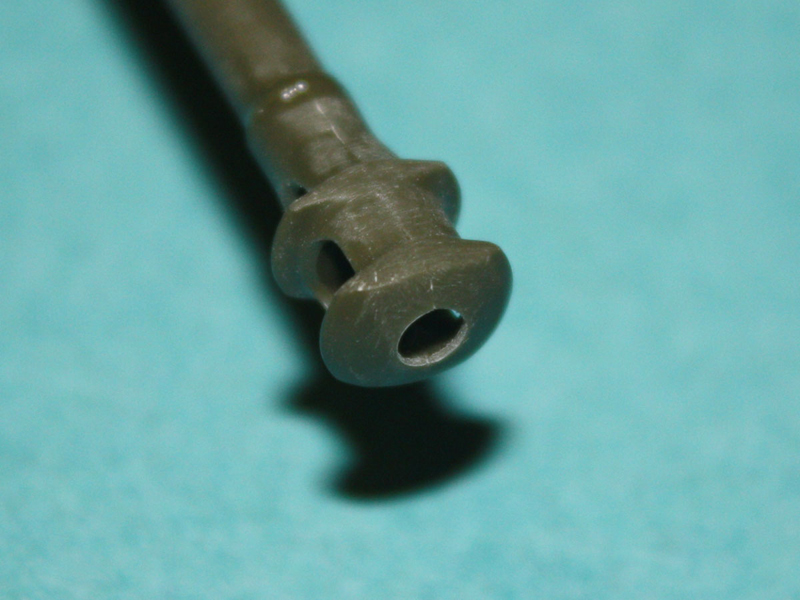
The main gun is a two-piece tube, onto which is added a two-piece muzzle brake with a strange ring insert. With very careful gluing the parts will line up without any big joints to fill, but alignment is loose and purely by eye for lack of pins or pegs. And that strange ring inside the muzzle is a real pain! I tacked it in place on one half, glued on the other half, and then poked it into place through the side vent with a knife. There should be four small rivet-like lumps on the front face of the brake, but these are missing. A quick trawl of available AM barrels shows the same lack of lumps, and I think itd be easier to add them to the plastic kit part rather than to brass. Terry Ashleys review of an Armorscale M1A2 barrel offers a length from front of the mantlet sleeve to tip of brake as 117 or 85mm in 1:35 the kit barrel matches this exactly.
There are two antenna mounting points on the turret, and the kit includes one MP-48 style spring mount for a whip antenna (J12), and a smaller AB-15 mount (C59). Photos I have seen of US tanks in Korea generally show two whip antennas with the tall MP-48 mounts, so to be accurate Id need to scrounge a second one from somewhere. There is also a circular blanking plate (J9) to seal off one radio opening.
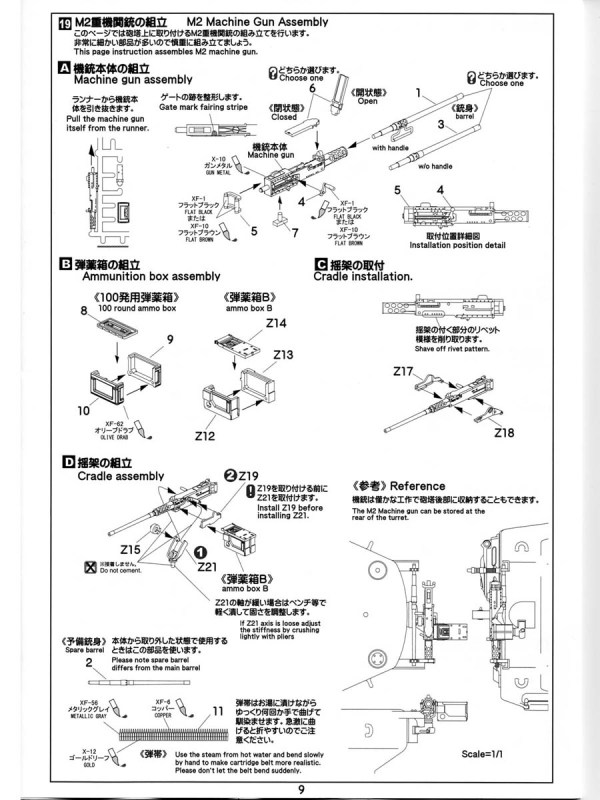
On top there is the well-known Tasca .50cal M2HB machine-gun a fine kit in its own right. Because of the way it is assembled it really lends itself to being mounted disassembled on the rear stowage brackets. However, that assumes the model is not combat ready, because virtually all the shots Ive seen from Korea show the gun in position ready for use.
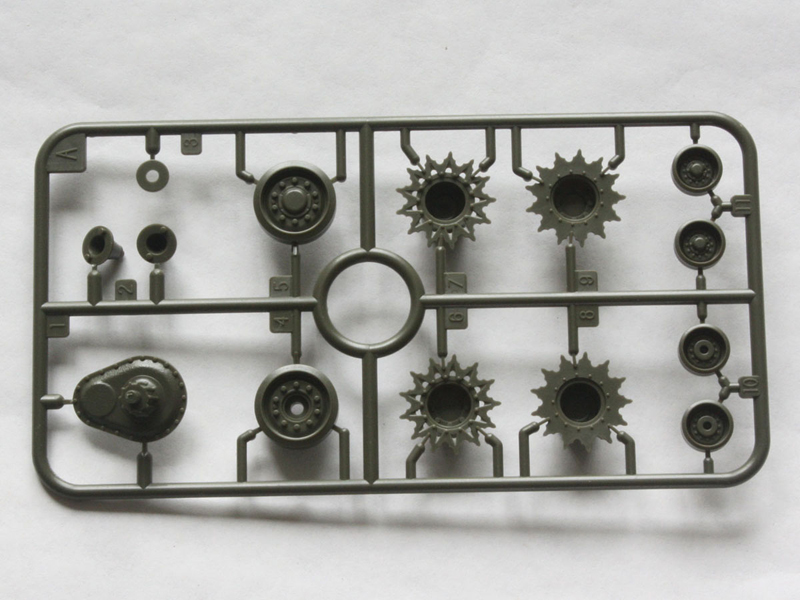
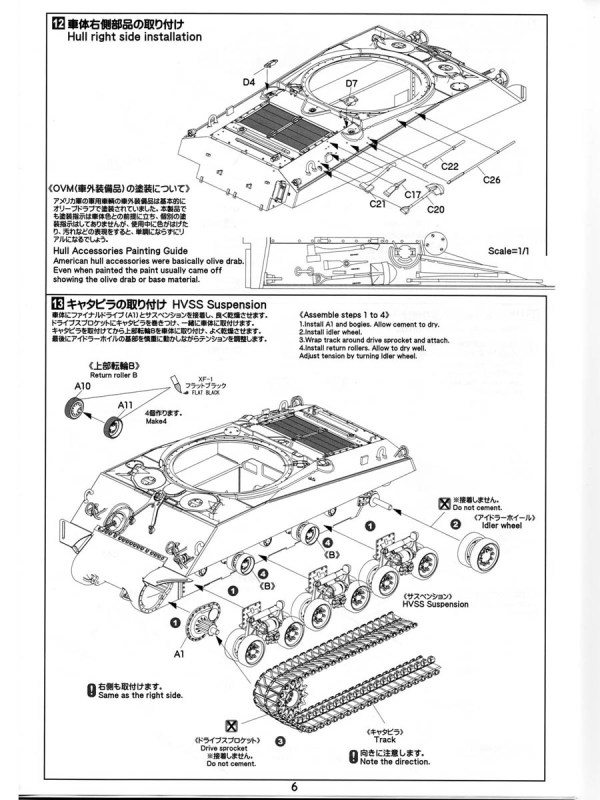
Suspension:
I decided to use the fancy sprockets on mine, but Tasca also provide the plain type since Easy-Eights could be seen with either. Detail on the sprockets is good, with bolt detail on the back faces too, but Im not sure about the visible seam around the drum where the two halves meet. I may even slice up the plain ones to add spare sprocket rings to the hull side
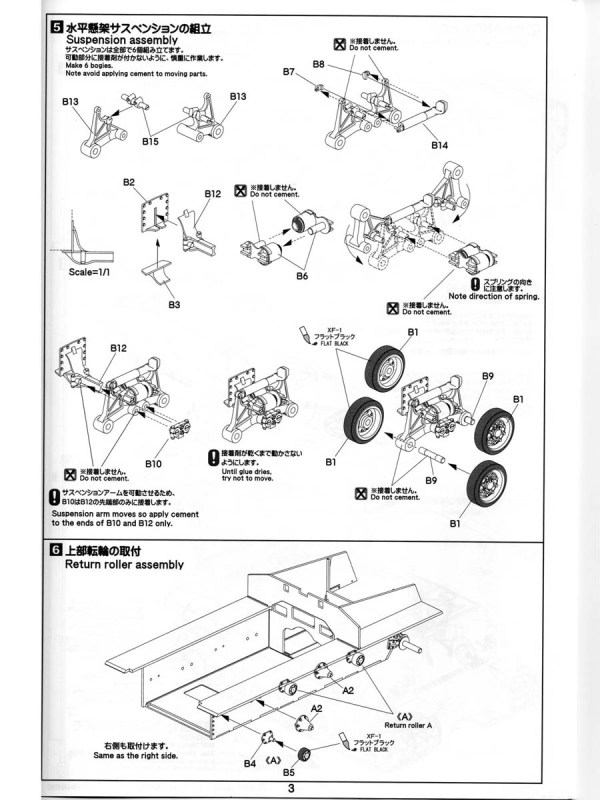
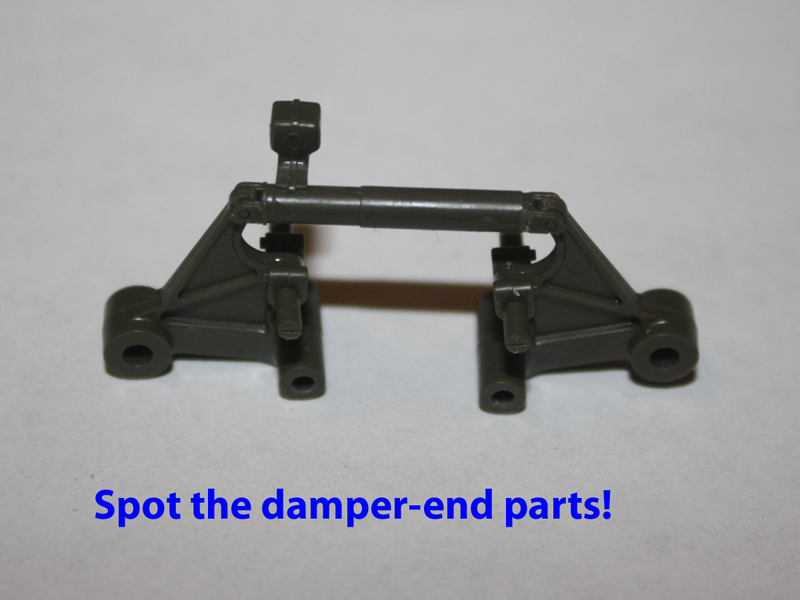
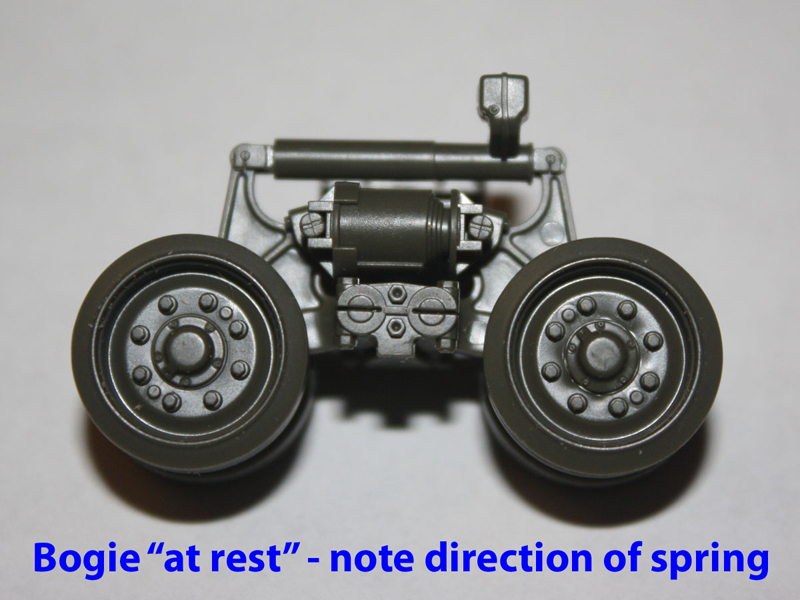
Tascas take on the horizontal volute suspension system allows for some movement if carefully built, and with flexible tracks the modeller doesnt need to jump into any irreversible decisions about displaying the finished model while building. The motion is not entirely accurate (unlike the recent Dragon kits) but is instead a variation on the push me pull you fashion reminiscent of the ancient Italeri rocking horse effect. This is because the hydraulic damper across the top is one piece (rather than telescoping like the real thing) so the volute springs just slide a tiny bit without any stiffness rather than compressing to allow either arm to lift independently. This is very similar in design to the AFV Club HVSS set. Unfortunately the otherwise-nice suspension arms lack the casting marks seen on sets from AFV Club and Dragon, but these would have been barely visible behind the road wheels so Im not too worried. Building them is easy enough if you are a micro-surgeon (look at the size of hinge pieces B7 & B8 next to the strut in the exploded view!), but be very careful about glue placement. Fortunately there is no flash at all to remove. I did find that the pivots are a bit stiff and tight, so I gave the lower pivot holes on each arm a quick twist of the knife to help ream them a bit for easier movement. (This came back to bite me later, though
) The axles just pass through the arms, with a wheel glued on each end, so I left the inboard wheels loose on the axles that way I can just pull off the outer wheel and axle to remove the lot for painting. Be warned that these axles are slightly fatter at the ends than in the middle, so if you sand down the ends for an easier push through the hole in the suspension arm the wheels will not fit snugly and you might get alignment problems.
Tracks:
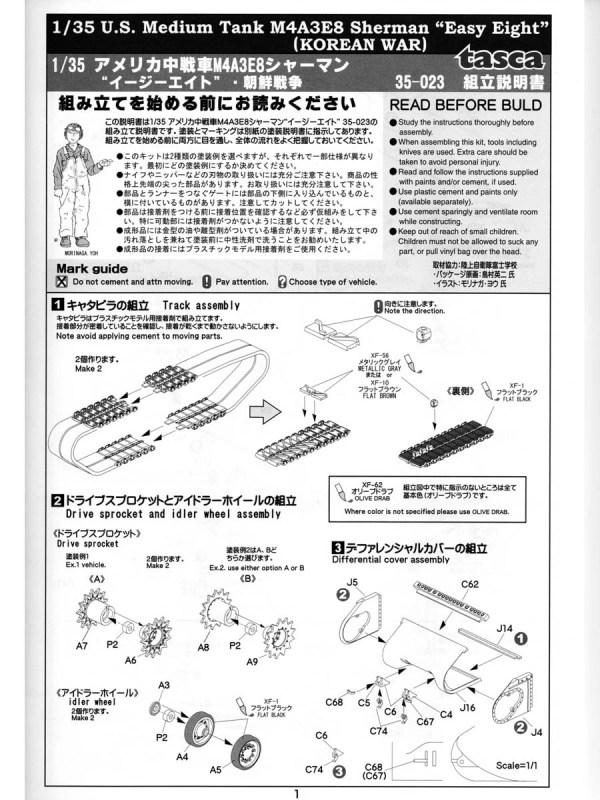
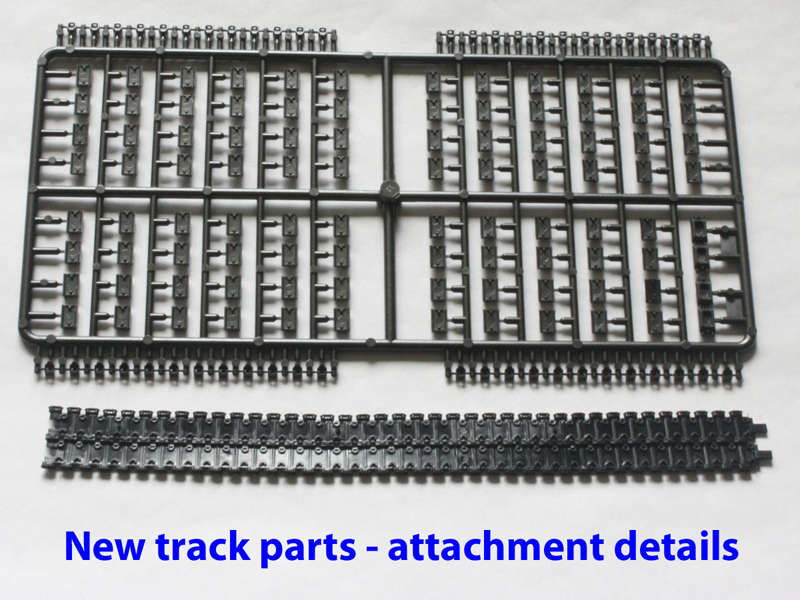
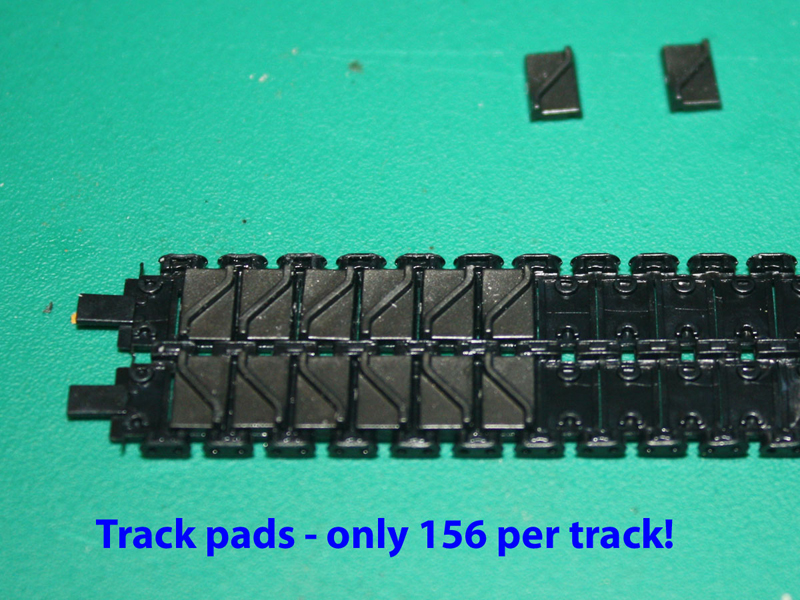
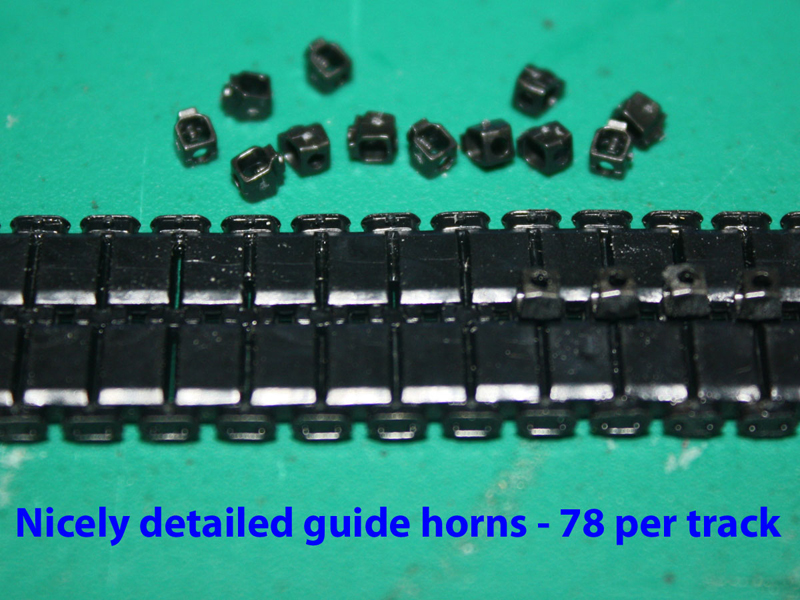
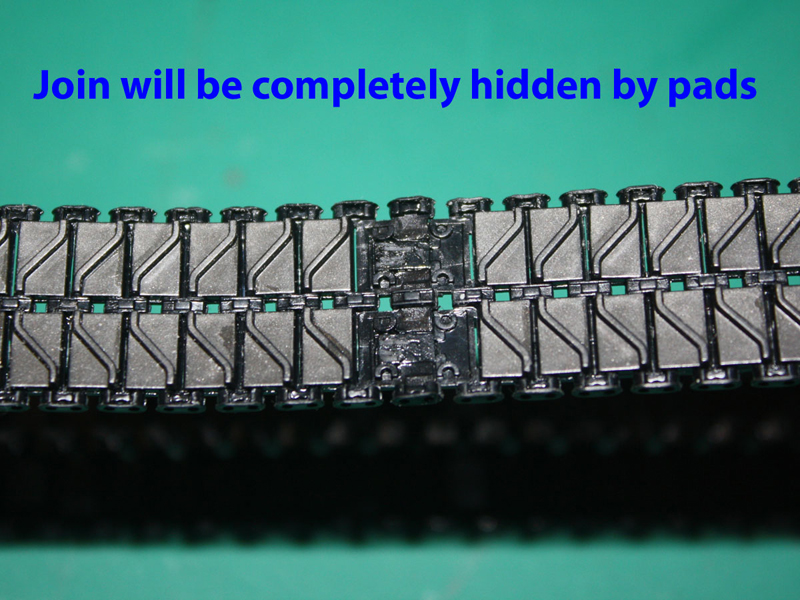
Step One of the instructions tells you to begin the build with the tracks dont! I skipped to the suspension and hull before I touched the tracks, and Im glad I did. The sheer joy of assembling the hull helped me overcome the tedium of the tracks, whereas if I did it the other way round Id have abandoned the build through depression long before ever touching the green sprues. Tasca has followed Dragons lead by making gluable vinyl tracks with separate plastic guide horns for maximum detail. However, they took it one step further by making all the steel-cleated outer pads separate too. The result is a finely detailed track where the pads themselves dont curve unrealistically around the sprockets a typical complaint against rubber band tracks. Tasca even used a multi-part mould on the vinyl sections so the two characteristic holes in each connector (actually dimples in the heads of the track pins) are included. The flip side is that the tracks account for nearly half the parts in the kit! Although the instructions would have you glue the track bands together into a loop before adding the details, I instead left the tracks flat while adding the pads and guide horns. Only afterwards did I close the loops and add the last few pads over the joint. Fortunately I could appease the Carpet gods without worrying, because there are lots of spare pads and guide horns. It took ages to clip, clean up, and glue all those track pads those were low times when I dearly wished for simple one-piece rubber bands
Since the instructions say to leave the idler axle loose until the tracks are fitted I chose to hurry to this step before adding too many breakable details to the hull. I found I could slip them off by pulling the idler and its mount off the tank so the tracks could be painted separately. Despite being a bit stretchy the tracks themselves are a bit tight around the suspension, leading to the dreaded smile effect familiar with Italeri kits I plan to add lots of ballast inside the hull to counteract it. Please note that the outer halves of the bigger return rollers (parts A11) have to be left off until the track is fixed because there isnt enough room to slip the track over them. (The instructions say to leave the whole assembly off, but I thought it best to have the inboard wheel in place when tensioning the track.)
Conclusion
This is a great kit of the later M4A3E8 despite being a bit fiddly, and builds up with very little need for fixes. (The missing handles and lack of interior are minor irritations that Tasca ought to look at in future.) It can represent tanks from early 1945 right through to the end of Sherman use in the US Army, and indeed many soldiered on with new owners for decades. Best of all, it positively fills the spares box with lots of details that can be used to upgrade other Sherman kits. The only big negatives are the limited choice of markings and accessories, but thats what after-market is for.
If you want an Easy-Eight, this kit is hard to beat.
References:
Pictures of late Easy-Eights I had on hand are in two Osprey books. A good photo of Rices Red Devils tank C4 is on page 42 of Zaloga, Steven, 1993,
Sherman Medium Tank 1942-45, Osprey New Vanguard 3.
A photo of a column of the 89th TB showing what appear to be red-painted mantlets and muzzles is on page 43 of Zaloga, Steven, 2003,
M4 (76mm) Sherman Medium Tank 1943-65, Osprey New Vanguard 73. This volume also has a photo of a Canadian tank in Korea, named Catherine, as well as a photo of a late E8 crossing a river in Austria in 1945, and another rather spectacular tiger faced tank in Korea. The drawn illustrations include a rendition of C4 mentioned above, as well as side and end views of Catherine
Terry Ashleys review of Armorscale barrel (for correct length figure):
Armorscale barrel
Pat McGraths review of the RB Model barrel:
RB Model barrel


Comments