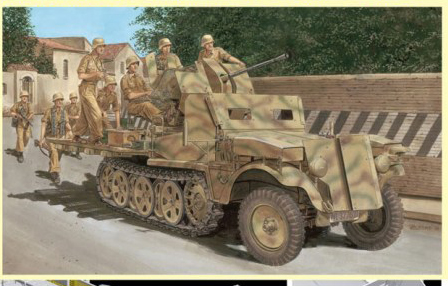
introduction
References for the Sd.Kfz. 10/5 are scarce, at least in my meager library. The SdKfz 10/5 was a mid- to late-war production vehicle mounting the Flak 38 2cm anti-aircraft gun. The SdKfz 10/5 was a modified version of the SdKfz 10/4 ( mounting the older Flak 30, which deleted the provision for dismounting the gun and used the newer Flak 38 2cm AA gun). According to my references, approximately 200 of the SdKfz 10/5 were manufactured between early 1942 and 1945. Many of these vehicles were modified further with the addition of an armored cab to protect the driver & co-driver, and also armor plates to protect the radiator, a modification found on other types of haltracks. Most of my references dont distinguish between the two (10/4 & 10/5), or refer to the 10/5 version as merely a self-propelled mount for light anti-aircraft guns. Whatever you call it, DML has released several versions of the base vehicle, including the basic chassis (reviewed on Armorama
here),and the unarmored version (kit #6676 reviewed on Armorama
here). Now comes the armored cab version.
Whats in the box
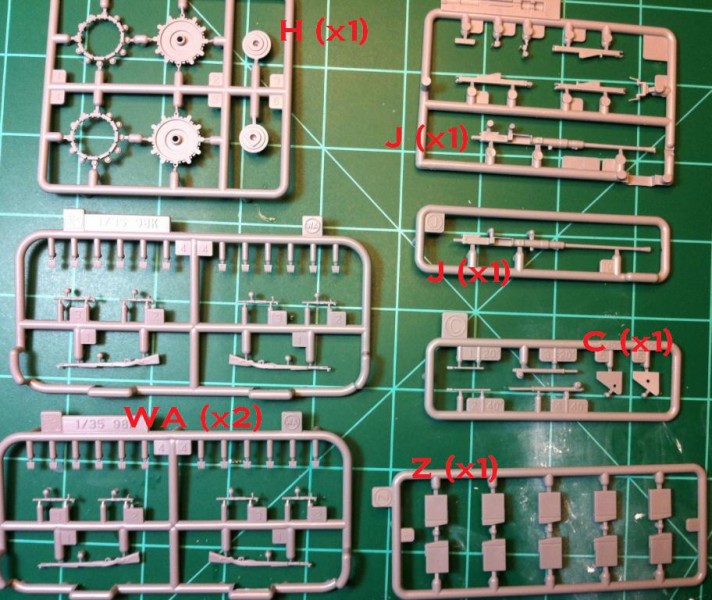
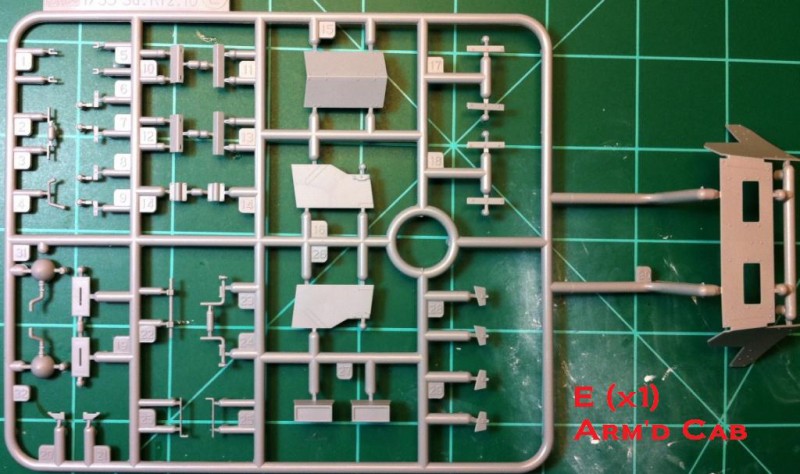
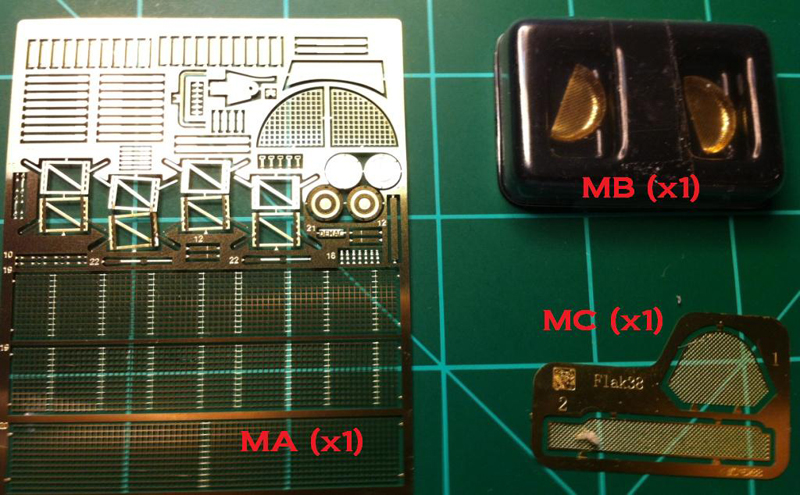
The Armored Cab version consists of the same parts as DMLs previous release of the un-armored version, plus an additional sprue E for the armored cab/radiator armor, and a modified sprue J for the additional 2cm Flak barrel.
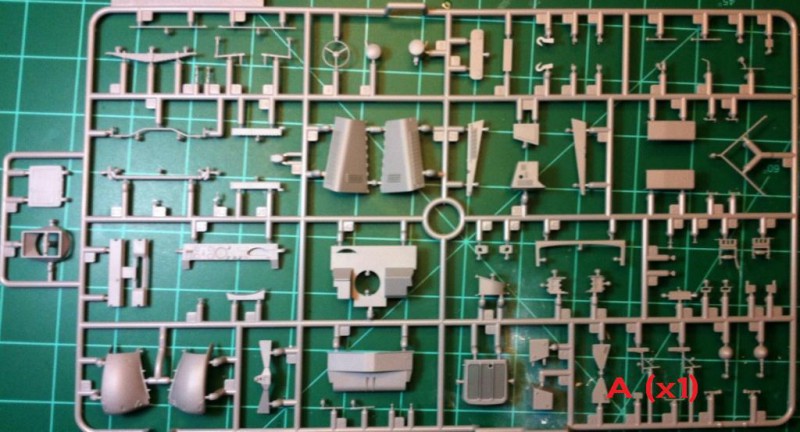
16 injection molded styrene sprues (1 clear)
2 photo-etched brass frets
2 pre-shaped (pressed) photo etched parts
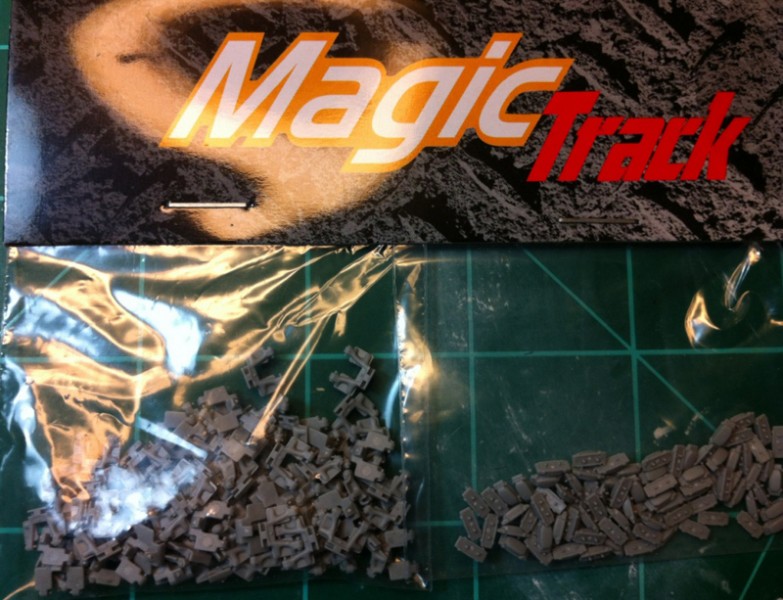
96 each of 2-part Magic Tracks
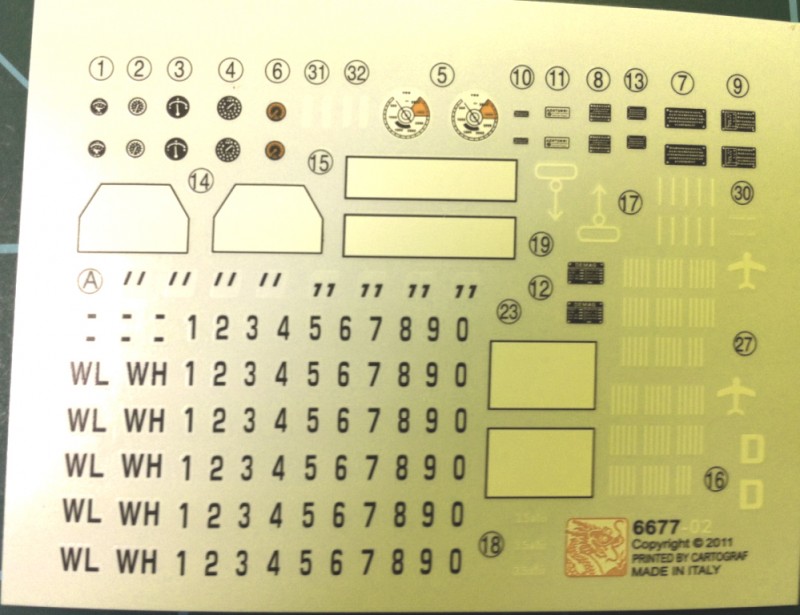
1 Decal sheet by Cartograf
10 page Instruction sheet with construction divided into 25 steps with multiple sub-assemblies
the review
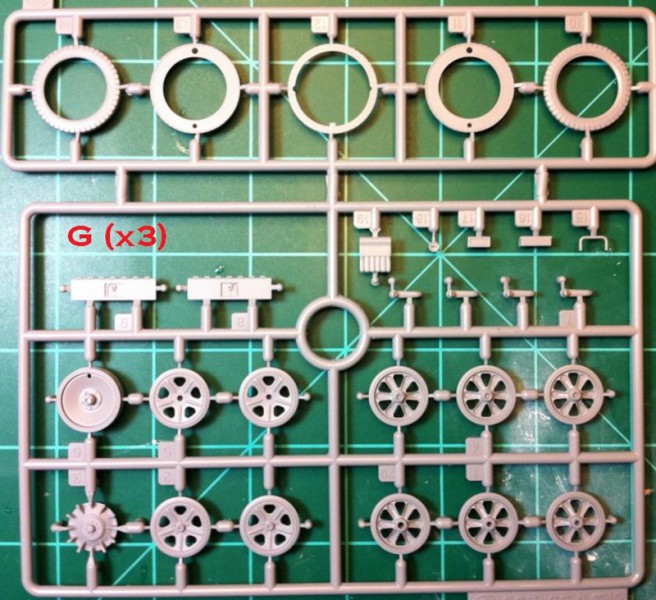
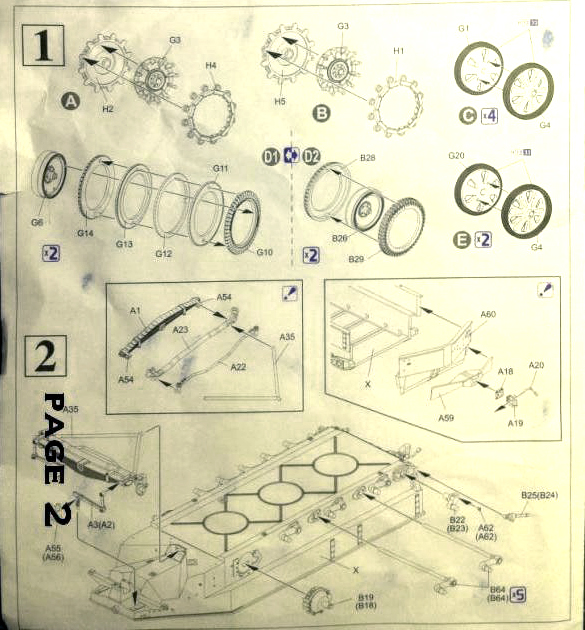
Construction begins with the suspension. The lower hull is provided as the conventional tub to which separate full torsion bars, multi-piece sprockets and very nicely-detailed road/idler wheels are attached. With very minor modifications, the torsion bars can be assembled to articulate for un-even ground on a diorama if so desired. The road/idler wheels appear to be very accurate with raised and recessed casting detail. The sprockets appear to have the correct details with the offset rollers, but apparently are about 1mm too small in diameter and a tad too narrow, though should go un-noticed to all but the most determined rivet-counter.
The tracks are also very well-detailed, two-part Magic Tracks that are workable after assembly (if care is taken assembling them). The tracks also appear to have incorrect guide horns compared to some photos, but again will definitely look the part. At the rear is the lower rear hull portion with a multi-part trailer hitch which looks very good to me. The front suspension consists of the full width leaf spring, axles, stabilizer arm, shock absorbers and steering arm, all as separate parts. Take note that a small mounting bracket (part A-72) is not shown in the instructions, and should be attached to the hull before the rear stabilizer bar pin is glued in place. The front axles are fixed in the neutral forward position, but could be easily modified if you wish to animate the wheels in one direction or another.
For the front wheels you are given two options: the first is the older, and more conventional, two-parts with the hub sandwiched between them. These have just the basic details and probably should be added to the spares bin. The other (and much better-detailed) front wheels consist of five-part slices sandwiched together for superb tire tread detail and a sixth hub part. The tires have the now infamous CONTINENTAU embossing, which is easily corrected with a sharp Xacto blade. All that is needed is the tire valve added from a short piece of wire.
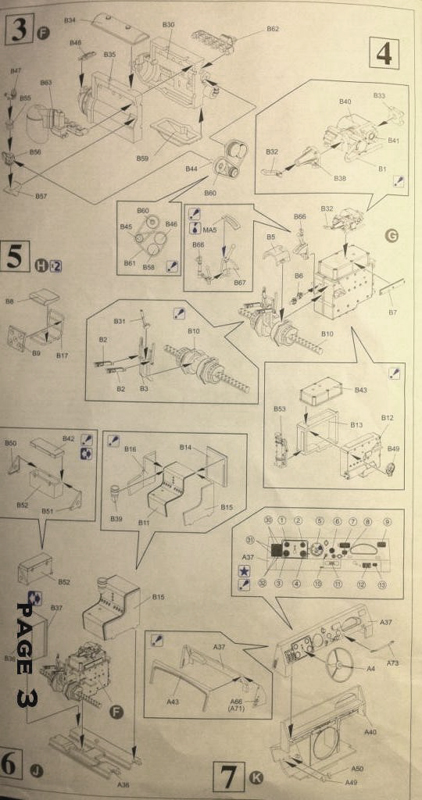
The engine is constructed next, and is very basic indeed, missing many vital parts and details. But it will provide the basics of you dont care to show it off with the hood panels opened up. For those more industrious and detail-oriented among us tread-heads wishing to show off a detailed engine and compartment, I strongly recommend Terry Ashleys modified/scratch-built/aftermarket Maybach HL-42 TRKM engine build review at the Perth Military Modeling Site (found
here).
Construction continues behind the engine compartment to the drivers compartment with a multi-part firewall, dashboard, separate foot pedals, dashboard grab handle and steering wheel. The dashboard is provided with engraved dials, knobs and switches, and included on the decal sheet are two sets of instrument dials and dashboard placards that will greatly enhance the look of the drivers compartment. The extra decals and placards can be used on any of the SdKfz 10/250 series kits, and are a nice bonus. Interior detail also includes a separate clutch housing with separate foot pedals. The transmission and gearbox/transfer casings are very well-detailed, but are missing some minor plumbing that can be easily remedied with minor scratch-building and adequate references. Also missing from the transmission is the gear selector assembly, and this will need some attention as well. In my opinion, the selector for the transmission should be added at the very least; how else can the driver change gears? Added next are the five-part fuel tank, one of two optional storage boxes and the drivers seat. Take care with the fuel filler cap for proper fitting of the seat back. For the optional storage boxes, part B-36 appears as the most common in reference photos.
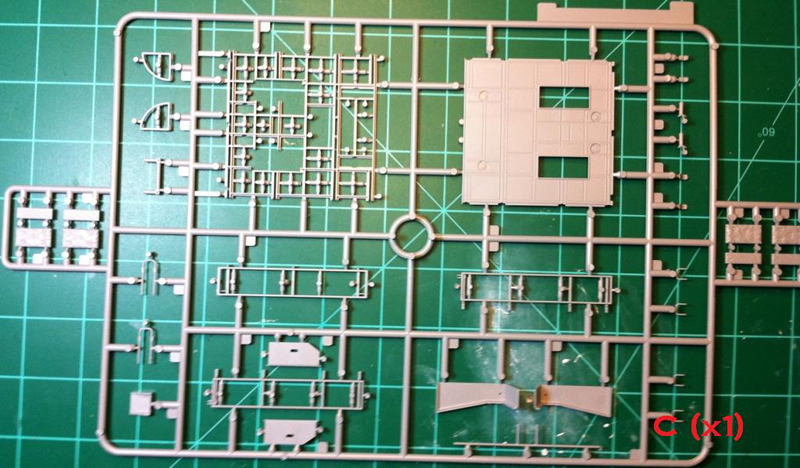
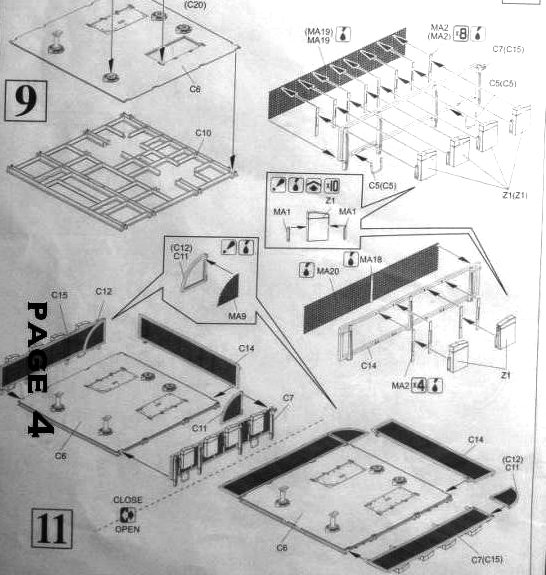
The flatbed mount for the FlaK gun is assembled next. The bed mount is provided as a large, flat piece with a well-detailed sub-frame that provides excellent detail. Added to the flatbed are the folding side panels with styrene frames, and photo-etched screens with other optional (PE or styrene) parts for more detail. The side panels can be assembled in the up (travel mode) or down (combat mode). Also included are 10 ammo boxes that are stored on the folding side panels.
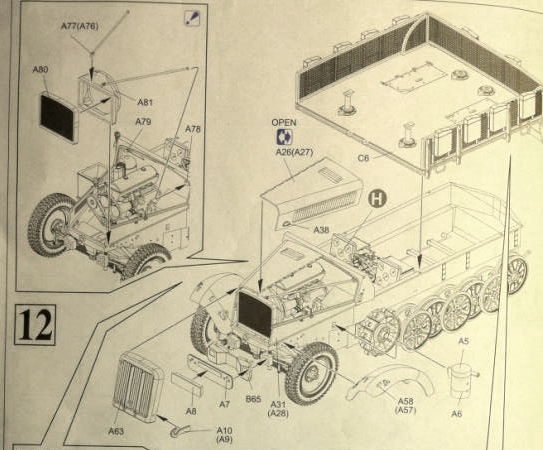
Added to the front of the vehicle is a nicely-rendered radiator with brace frame and slide molded radiator housing having accurate detail. The hood (bonnet?) is also applied at this stage, along with very impressive side engine panels with opened-up cooling slot louvers and tiny locking clasps. The side hood panels can be posed open if you wish to show off the engine compartment. The fenders and tool boxes are added next, along with headlights (optional clear lenses or the slotted blackout light covers) and a multi-part Notek light with PE base. The kit also provides the often seen fender mounted rifle racks with dust covers. These can be posed open or closed with 4 rifles provided to put in the racks. Very delicate multi-part turn signal indicators and a rear-view mirror are also provided, and care will be needed to remove them from the sprue for clean up.
Next up are the trademark armored cab and radiator panels. These are very well-rendered and appropriately thin plastic parts at scale thickness. Added to the cab armor are multi-part visors with clear parts for the armored glass vision blocks. These should be very impressive after assembly and painting. For the radiator, three armored pieces are provided with delicate mounting brackets. Im not really a rivet counter, but the cab and radiator armor compares well to reference photos and should look very accurate after assembly and painting.
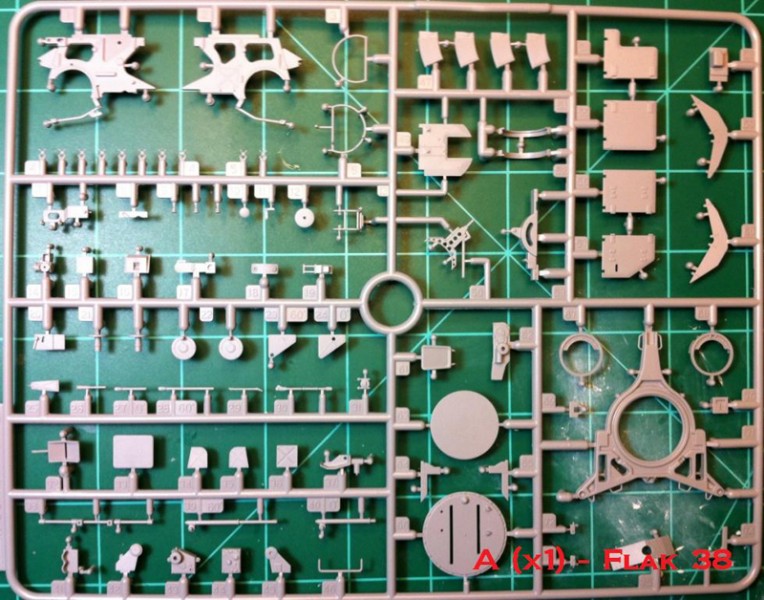
The 2cm FlaK 38 gun provided is the same as in DML kit #6288 but without the PE shields and the trailer. DMLs un-armored version of the SdKfz 10/5 (kit #6676) only included the short KwK 38 barrel for the 2cm Flak gun, but for this kit, there is also the longer FlaK 38 barrel more appropriate and common for this type of vehicle. This appears to be the only error that was fixed between the two kits. The instructions make no mention of the new FlaK barrel, and have you install incorrect one (part J-1); the new longer barrel (part J-10) should be used instead. This barrel has the bore drilled out and the appropriate muzzle recoil slots/holes (courtesy of slide molding), but these slots/holes might need further drilling for better definition.
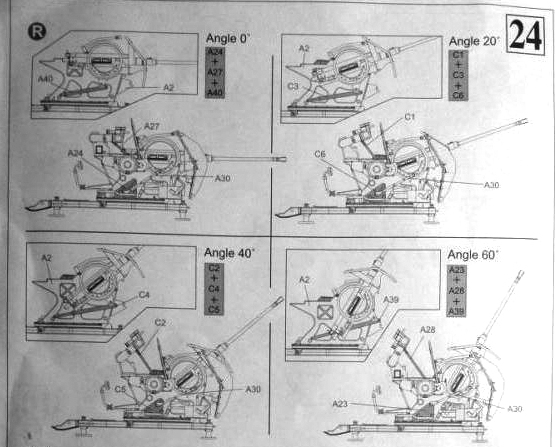
The styrene shields are very well-rendered, but maybe a tad too thick, though there is detailing on both sides that was lacking on the previous kits photo-etched shields. Various other PE parts are also provided for the spent shell case basket with delicate plastic frames. Other details include very nice hand wheel controls, gun sight, gunners seat and superb weld detail around the base. The gun can be traversed 360º, but cannot articulate in elevation. Instead, you have a choice of four elevation angle poses: 0º, 20º, 40º and 60º, each pose provided for with different length telescoping elevation arms. Despite some minor dimensional errors, the overall gun looks very good to me.
Decals & Painting
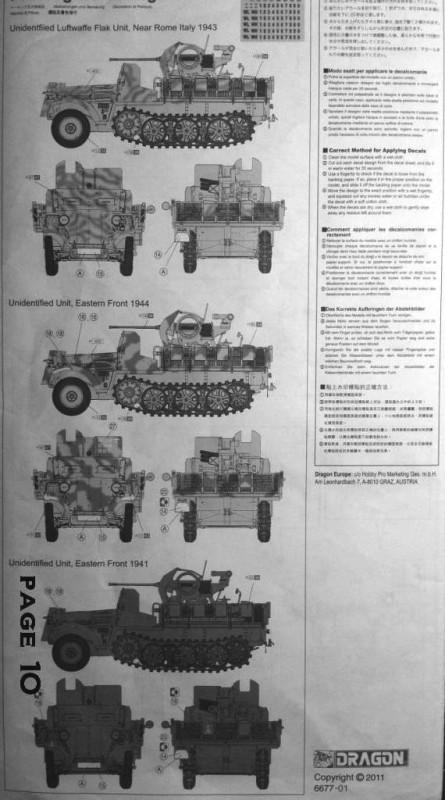
The decals (by Cartograf) provide the number jumble for custom license plates, a couple of generic tactical markings for Luftwaffe and Heer anti-aircraft units, tire pressure markers for the front fenders, some kill markings for the gun shield and the above-mentioned dashboard dials & placards. All of the decals appear to be well registered with closely-cropped carrier film.
The three painting options are:
Unidentified Luftwaffe FlaK Unit, Near Rome Italy 1943 Base dark yellow with dark green camo pattern
Unidentified Unit, Eastern Front 1944 Base dark yellow with dark green camo pattern
Unidentified Unit, Eastern Front 1941 Overall dark gray
The instruction sheet is typical DML: somewhat confusing and having a few errors and omissions. Careful study is recommended. I will never understand why DML continues with these instruction errors and omissions when the rest of the kits they manufacture set the standard for the industry. Maybe its just another puzzle for us modelers.
Conclusion
Even given the errors on this kit, it will build into a nice representation of this vehicle, and far exceeds the (until now) dated Italeri kit. All of the errors can be fixed, but even OOB these are not noticeable to all but the most die-hard accuracy nuts. As is always the case, there is room for improvement and super-detailing, so plenty for the cottage industry to provide. The instructions leave something to be desired as well, and I strongly recommend careful study of them before and during assembly. For me, at least, I will need nothing other than a decent crew figure set to liven it up.
References
Halbkettenfahrzeuge German half-track vehicles, 1939-1945; Wehrmacht Illustrated No. 4; by J. Williamson Almark Publications (1972)
Die Halbkettenfahrzeuge Des Deutschen Heeres 1909-1945, Walter J. Spielberger, Motorbuch Verlag (Stuttgart, 1993)
German Light Half-Tracked Prime Movers 1934-1945, Reinhard Frank, Schiffer Military History Publications (1997)
Military Machines No.13: SdKfz 10/4 Demag, Tornado Publications, Moscow (unknown author & date) Russian Language Publication
Deutsche Flak-Selbsfahrlafetten auf Fahrgestellen der Halbkettenkraftwagen 1939-1945: Waffen Arsenal Special Issue No. 78, Walter F. Seifert, Podzun-Pallas Publishers (2005)
Sd. Kfz. 10/4: Wydawnictwo Militaria No. 172, Janusz Ledwoch & Robert Sawicki (Warsaw, 2003)


Comments