Historical Background
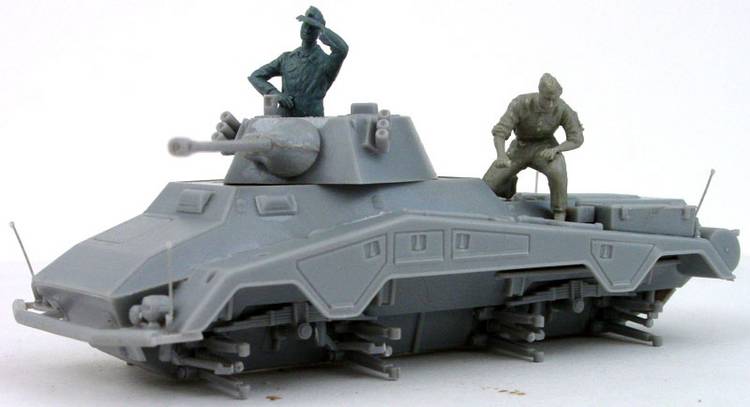
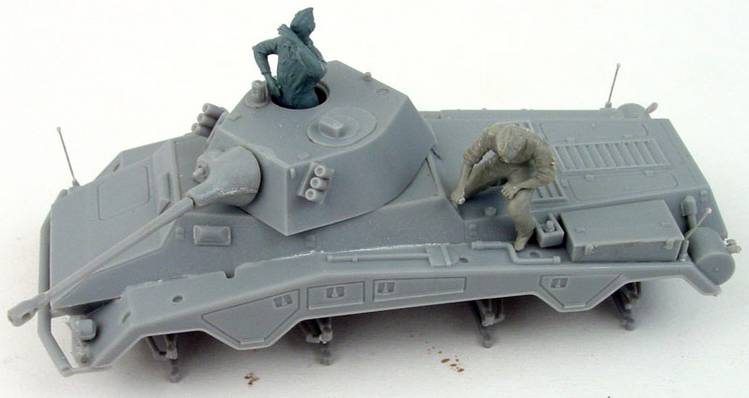
The campaigns in Poland and France showed the 231 series of vehicles needed to be replaced with a more robust 8 wheel drive series, better suited to handle rough terrain. Bussing-NAG was tasked with the development of these vehicles and the first production model of the 234 series was the 234/2. It carried a 5cmKwk39/1L/60 gun mounted in the turret originally designed for the Leopard light tank. This earned the vehicle the nickname Puma.
101 of the 234/2 were manufactured between December, 1943 until September, 1944 and most, though not all, saw service on the Western front as fast recon vehicles.
(History taken from the Hasegawa instructions)
The Kit
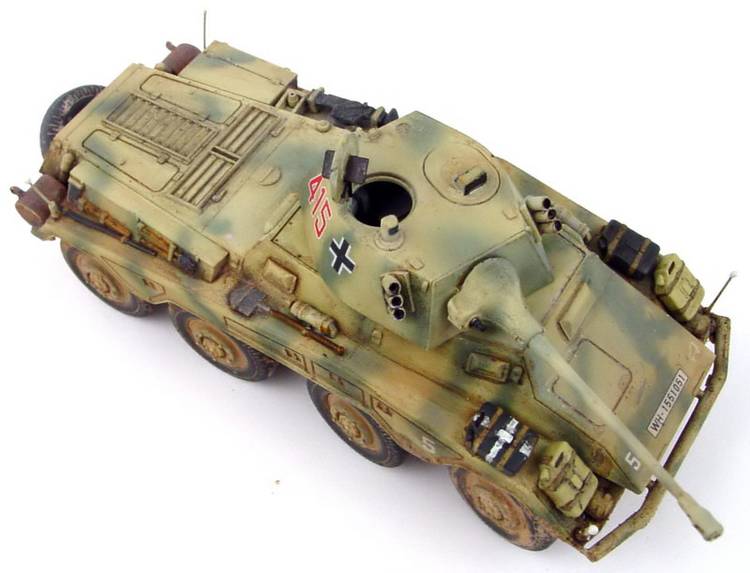
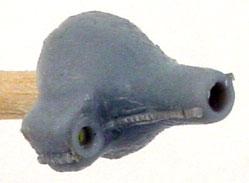
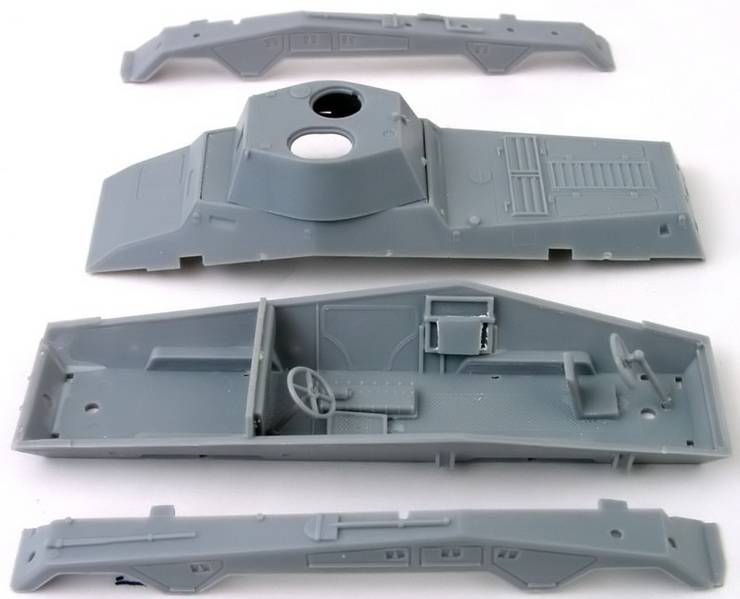
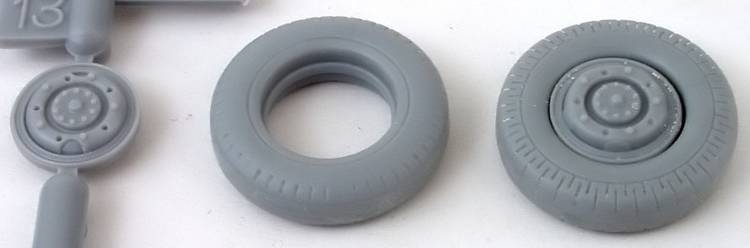
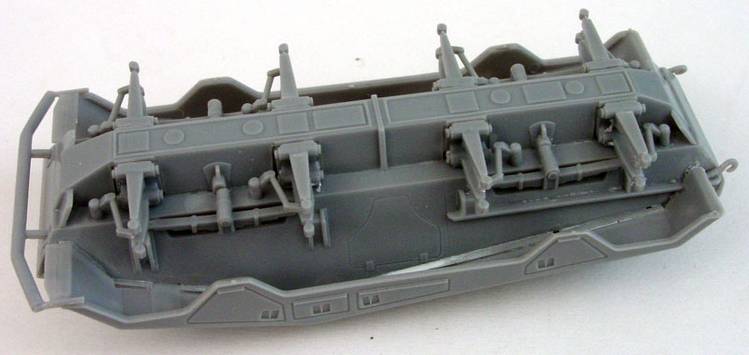
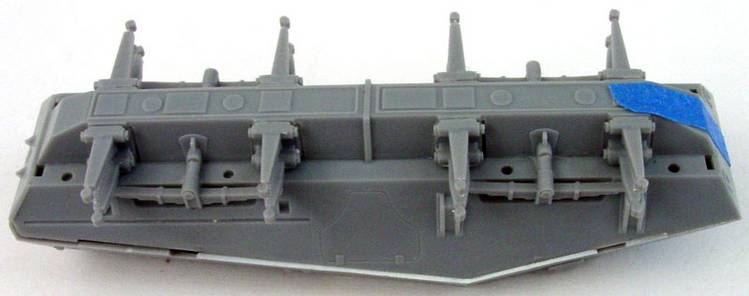
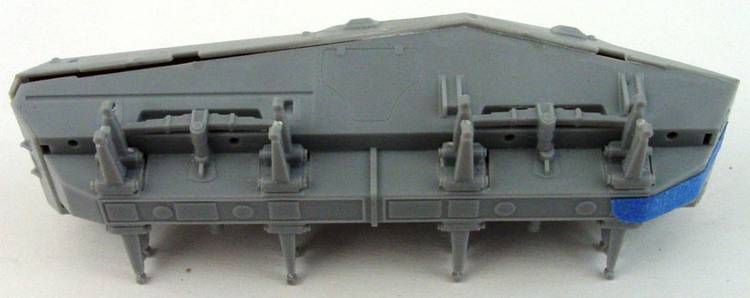
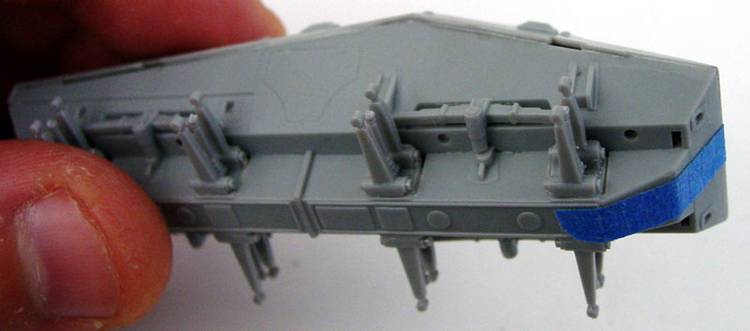
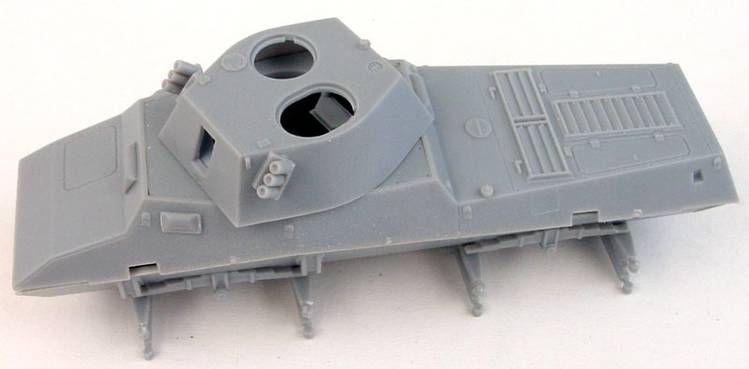
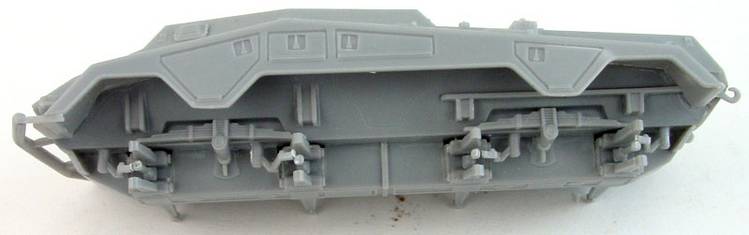
The box contains 6 sprues of light gray Hasegawa plastic. Detail is crisp with no flash. Sprue attachment points are relatively small and in good locations. There are no release marks in areas that will be seen. The modeler is given two types of wheel and tire, an early type as well as a late type, but only two of the late type are provided. These are called for in the instructions, but more on that later. The wheels and tires are molded separately and this is a very nice touch indeed; it makes painting very easy. One trouble spot is the barrel; the muzzle brake is molded in two pieces and being as small as it is will no doubt make for a fiddly assembly and it not really up to todays molding standards in small scale armor. The turret hatches are molded so they can be positioned open or closed but there is no detail for the periscopes on the inside. There is also a fair amount of interior detail, a well-done plated floor and transmission as well as both drivers positions, turret seats and a really nice little radio, but little can be seen through the turret hatches once assembled. Hopefully these details are present for further planned releases of the 234 series where more will be seen. The tools are molded on the hull, something I wish Hasegawa had not done, but the jerry cans and fire extinguishers as well as some of the other upper hull bits are separate. The kit comes with a very crisply molded MG42, but it is not needed on the Puma and is yet another sign of future versions. One last thing to note is the inclusion of a figure should the modeler wish to pose him in an open hatch.
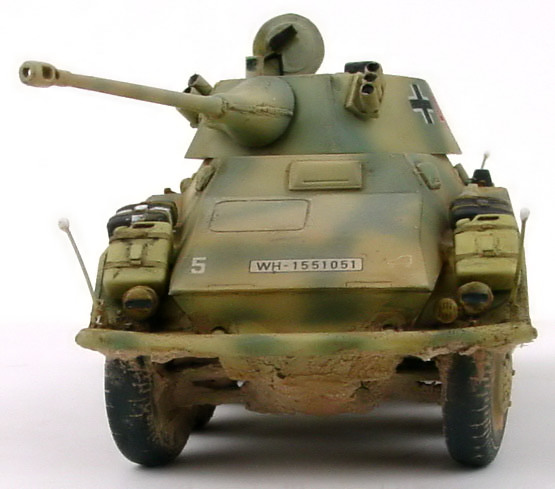
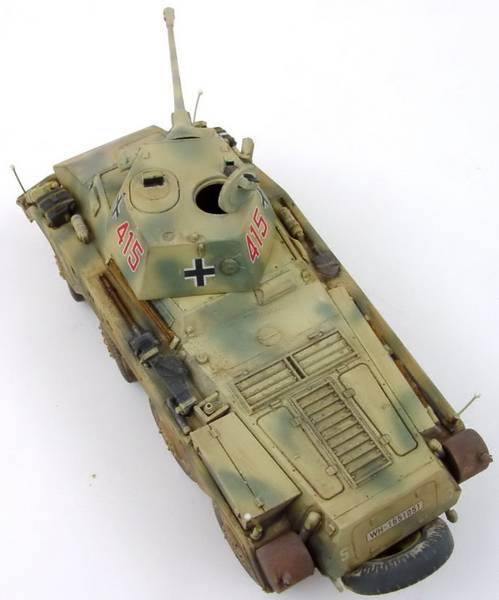
Three sets of markings are provided, but only one set of painting instructions, this is for 111 of Pz.Aufkl. Abt.2, 2. Pz-Div, France, 1944. Other decal call-outs assume the camo pattern was the same on all Pumas, but this was not the case so the modeler should research their subject. The inclusion of a full range of numbers in black and red is a nice touch allowing the modeler to build most Pumas.
The instructions are very complete and concise consisting of seven steps.
Assembly
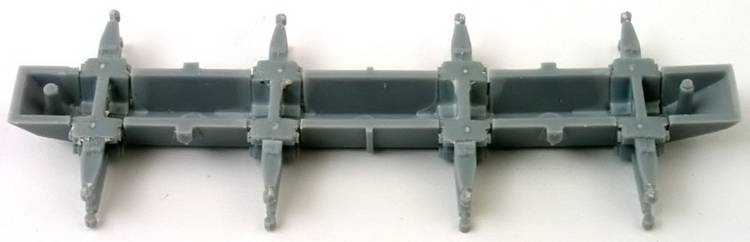
The kit goes together with extreme ease and is well designed. First up is the interior followed by the lower hull and suspension parts. These assemble well, but the join for the leaf springs and the lower hull will require a little filler because of the kits engineering. Or you can do as I did and cover it with a little mud. With the lower hull/suspension finished the upper hull can be attached. Alignment points on the front and rear make this an easy task and the slight overhang of armor on either side is normal for the 234. My examples lower hull was a little warped and required clamping but it was no problem and dried fine. At this point I put on the fenders and all the small bits that would be there for base paint such as headlights and the tool boxes, but I left off the jerry cans and fire extinguishers until later. The wheel hubs are designed so the wheels can be positioned, a nice touch. With the hull assembly drying I assembled the turret. This is straightforward and everything fits as it should. The only thing you will need to do either open the hatches or close them. If you are going to leave them open you will need to scratch build the detail on the inside as none is supplied on the kit part. One thing to note with the turret is an inaccurate representation of the smoke canister dischargers. They were not mounted to the side of the turret as depicted in the kit and should also the drilled and thinned. I mounted them per the instructions and went only with drilling and thinning them. With everything assembled and prepped for paint I turned my attention to the tires, wheels and jerry cans. Note you will need to decide soon if you wish to use the late type spare tires and wheels provided by Hasegawa. These are well done parts, but I didnt see them in use on the Pumas I looked at. One interesting thing to note is the standard wheels have the lightening holes depicted as raised detail while the late two hole type are recessed. I wish Hasegawa had made both types with the recessed holes.
Painting & Markings
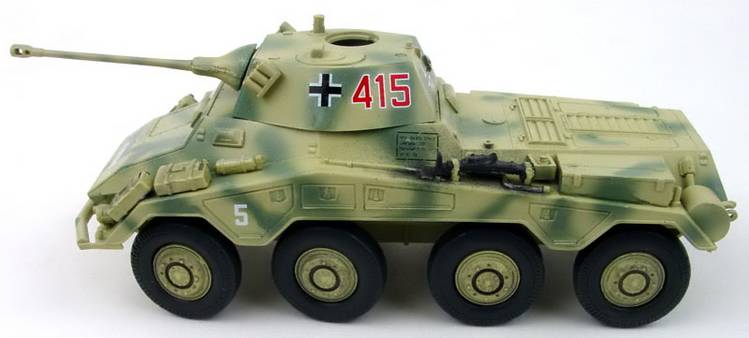
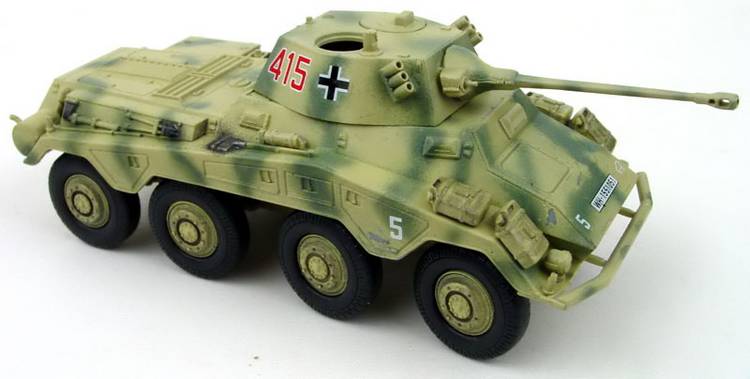
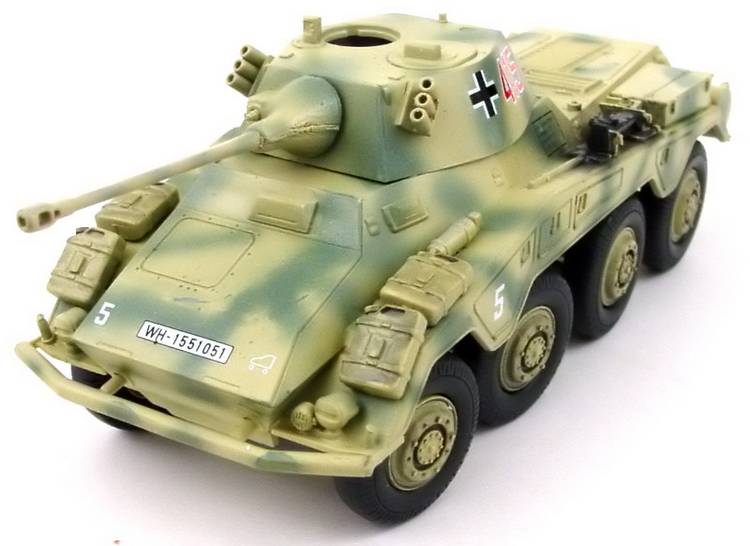
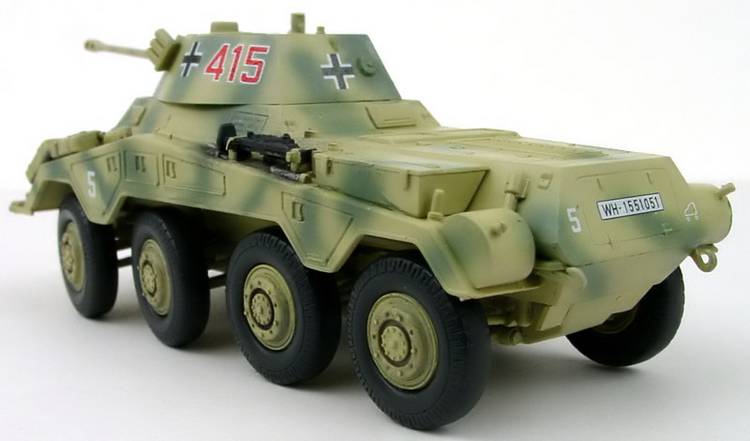
I wanted to do a two-tone yellow/olive scheme of the 234 rather than a tri-color camouflage scheme and I liked the subject 415. I used decals from the Kagero book which are printed by Techmod and are quite good. I applied a base of yellow and freehanded the olive camo on top and then glossed the model and applied the decals setting them with Solveset. Weathering was done using plaster for mud mixed with paint and woodland scenics grass. Pigment powder and pastels were used for dust and the like. In between a wash of raw umber was applied.
Recommendation
I enjoyed building Hasegawas 234/2. It builds into and accurate representation and with the interior there are hopefully other versions on the way. My only complaints, the oddly detailed wheels and lack of interior hatch detail as well as the two part muzzle brake. I really think Hasegawa could have done better here. However all these are easy things to deal and the final effect is, in my opinion, captured very well. The quality of the molding is excellent and the detail crisp. If you are looking for a quick interesting build and youre a fan of German armor, then Id recommend this kit to you.
Thanks go to Dragon USA, via Saul Garcia, for the review sample.