I had been playing about with the idea of putting a coat of zimmerit on one of my German armour pieces but was having trouble deciding on what technique or compound to use that would be both easy to work with and give the best results. After ruling out the hot knife technique, I knew it had to be some sort of putty, but most had the drawbacks of quick drying and poor spread ability. While perusing a model magazine I saw an ad for this stuff called Apoxie Sculpt put out by Aves Studio. The ad told of its ease of use, water clean up, non toxic, multiple colors, blah, blah, save the Earth, blah, blah, sculpt a whale with it, blah, blah, etc, etc. I figured what the heck and sent out my $11 for a 1lb. tub. The stuff can be found at www.avesstudio.com.

A few days later my Apoxie Sculpt arrived. I decided to use my 1/30 scale Panther as a test bed for this stuff figuring if I trash the model in the process it wont be that big of a loss.
The stuff is a 2 part compound and comes in two ½ lb. Containers, (Photo 1). It is relatively odorless and each part has the consistency of hard clay. I had ordered it in white figuring that would be the easiest to paint, but it is available in 11 other colors. Basically all you need to do is mix equal parts of A & B and its ready for use.
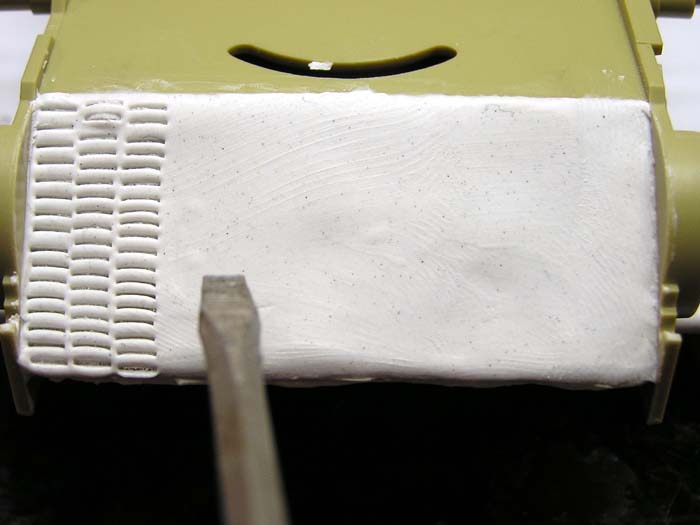
After kneading a marble size ball together for a couple of minutes the stuff turns very soft and feels like clay. It tended to stick a little to my hands but dipping my fingers in water quickly kept it from sticking. I started to apply small globs to the model with a spatula and spread it to the thickness that I wanted. This worked well but I found it easier and more effective if I just rubbed it down into place with a wet finger. Too much water diluted it to the point of wet mud but after a few minutes of drying it started to return to its clay like state. Excess clay was easily wiped away with the spatula or in very thin spots, just diluted with water to the point that it could be wiped away with a paper towel.
Once having the surface of the model covered with the thickness I wanted I reached for my 1/30 scale zimmerit tool, (a.k.a. 1/8 Craftsman screwdriver) and started to press in my rows of ridges, (photo 2). The clay stuck to the tool a few times tearing away from the model but since I wasnt going for the factory-applied look I didnt care. Dipping the tip of the screwdriver in water solved any further sticking problems.
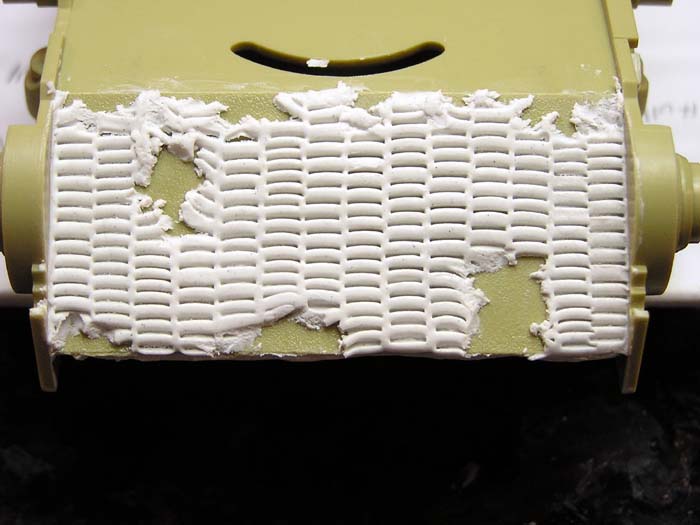
In less than 15 minutes I had completely covered and textured on side of the model. Considering that I had a three hour drying time to work with, I had plenty of time to fix any mistakes or redo any areas that I was not satisfied with. This was easily done by scraping off the clay and re applying it. Since the stuff does not shrink and blends easily you could do a section at a time either right away or days later.
After 24 hours its completely dry and ready to sand, drill or whatever. I sanded off any rough peaks and then chipped away some of the clay to simulate pieces that have fallen off the tank, (photo 3). I also tried this while the clay was wet; either way the result was the same. Next I turned to my attention to the lower hull.
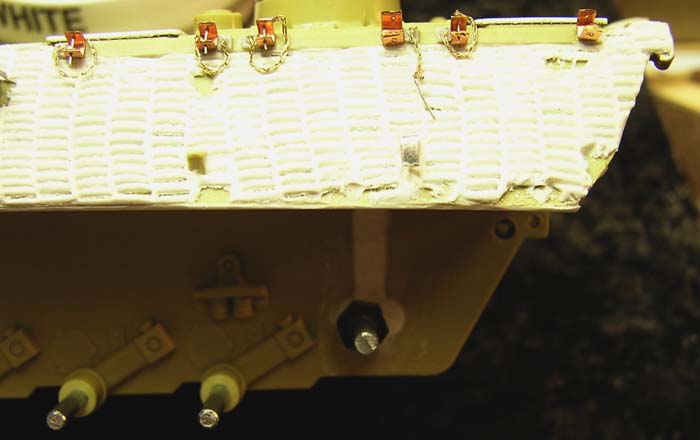
Since this was a motorized model there was a gaping hole on both sides of the lower hull to allow the gears, motor and axel to be put in place. After adjusting the placement of the idler wheel axels I glued some evergreen across the gap on the inside of the hull. This gave me the support I needed when I put the Apoxie Sculpt into the gap. Once the hole was completely filled on the hull and around the axel I just smoothed it over with a wet finger. Once dry it looked as if the hole never existed. Since there was no shrinkage of the clay there wasnt even a gap to be seen, (photo 4).
In conclusion I have to say that this stuff works really great. Its easy to work with, cleans up well and the best part is the three hour working time. Although my test subject was a 1/30 scale model this stuff could just as easily been used on any other scale. Best of all its not just limited to zimmerit. Sandbags, bunker walls and pillboxes are just a few of the other ideas I came up with. With the right size die you could punch out dozens of wheels, gears, Frisbees or whatever.