Intrroduction
LMTV/FMTV History
The Family of Medium Tactical Vehicles (FMTV) consists of tactical wheeled vehicles based on a common truck cab, chassis, and internal components and two tactical trailers. The FMTVs all have an automatic transmission, come in 14 variations of 2.5-ton cargo and van models and 5-ton cargo, tractor, van, wrecker, tanker and dump-truck models. They are built by the Stewart and Stevenson Services Company of Texas. It is based on the European Steyr design and have 80% commonality of parts same engines, transmissions, drivelines, power trains, tires, cabs in the new trucks, which will save the Army millions of dollars in maintenance costs. The FMTVs has pretty much replaced all M35 series 2.5 ton and M900 series 5 ton trucks in the US Army inventory.
The M1078 LMTV Cargo Truck is designed to transport cargo and soldiers. It has a payload capacity of 5,000 pounds (2.5-ton) and to facilitate loading/unloading, the bed side rails are mounted on hinges and can be lowered. The cargo bed is equipped with a bench seat kit for transport of soldiers. The seats can be folded up and stowed when not in use. Soldiers are assisted in climbing in and out of the cargo bed area with the aid of a ladder stowed on the vehicle when not in use. A canvas and bows kit is available to keep soldiers and cargo protected from the elements. The M1078 can be equipped with an optional electrically operated MHE crane and self-recovery winch kit capable of fore and aft vehicle recovery operations.
The Low Signature Armored Cab (LSAC) is a purpose built cab which replaces the standard FMTV cab. Based on experiences gained in Iraq, the need for more heavily armored vehicles was realized. The LSAC was designed to fill that need and does so very well. It can be either fully integrated on the production line or interchanged with a standard cab in approx. 8 hrs. LSAC Cabs have been applied to existing soft cab vehicles and new build vehicles. Additionally, LSACs can be added to any vehicle in the FMTV line, not just M1078s. This makes it a very flexible and desired modification. Lastly, many Soldiers also added Gunners Protection Kits (GPK) to the top of their LSAC LMTVs to give the gunner a bit more protection as well. As with other early GPKs, armored HMMWV windshield glass was added to raise the side armor for even more protection.
The Kit and Build
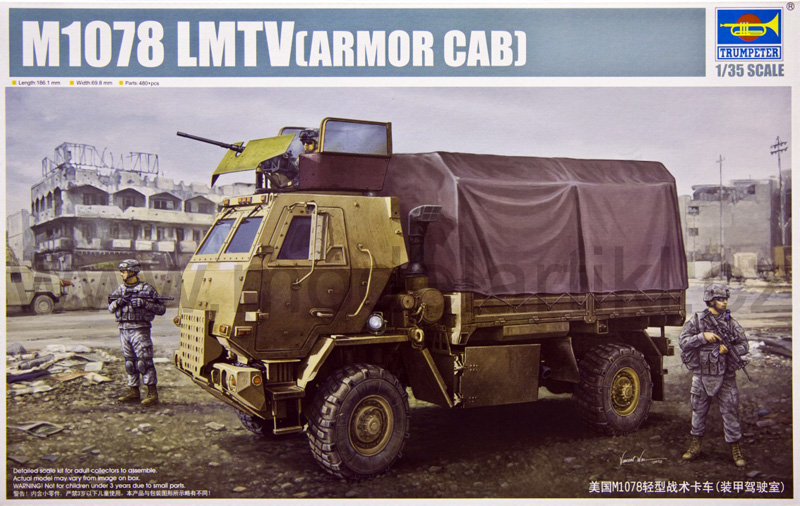
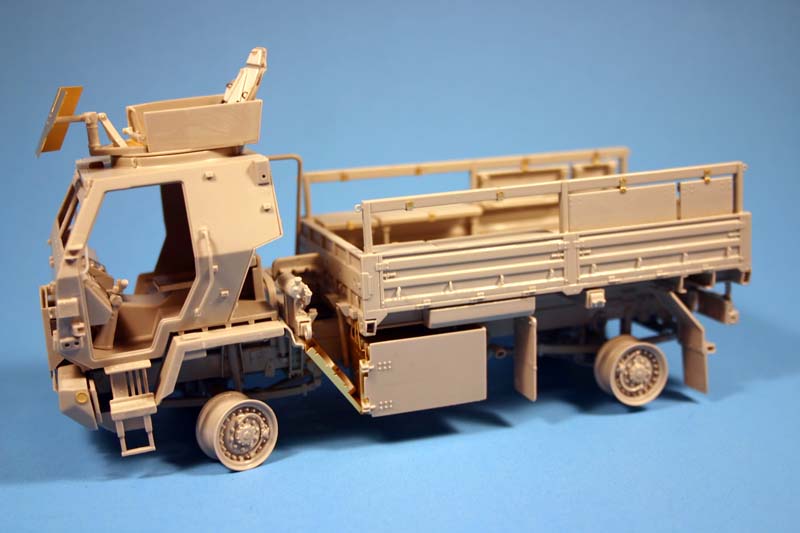
Trumpeters most recent kit from the FMTV family is an early version of an LMTV with the LSAC cab and Gunners Protection Kit (GPK) with an M2 .50 cal on top with added HMMWV armored windshield glass to the GPK sides and rear. The vehicle in this configuration is representative of one that could be seen in Iraq or Afghanistan after about 2005. These were used as general cargo and troop transport vehicles throughout both warzones. Most current LMTVs are now outfitted with LSAC cabs. This kit has been on many a modelers wish list for a few years, since Trumpeter originally announced it and showed pre-production shots of it. It was well worth the wait.
The build starts in
steps 1-3 with the frame. The parts go together well and I had no issues with assembly or frame alignment. All parts have large keyed tabs that provide a tight and square fit. In step 1 you also attach the shocks for the suspension (parts B35 and F35). These should really be left off until after the suspension is added so they can be properly aligned with the parts of the shocks on the leaf springs.
In
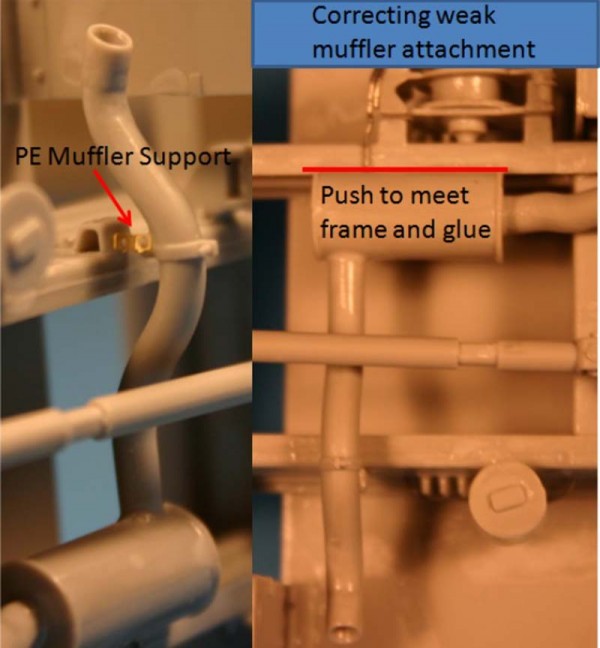
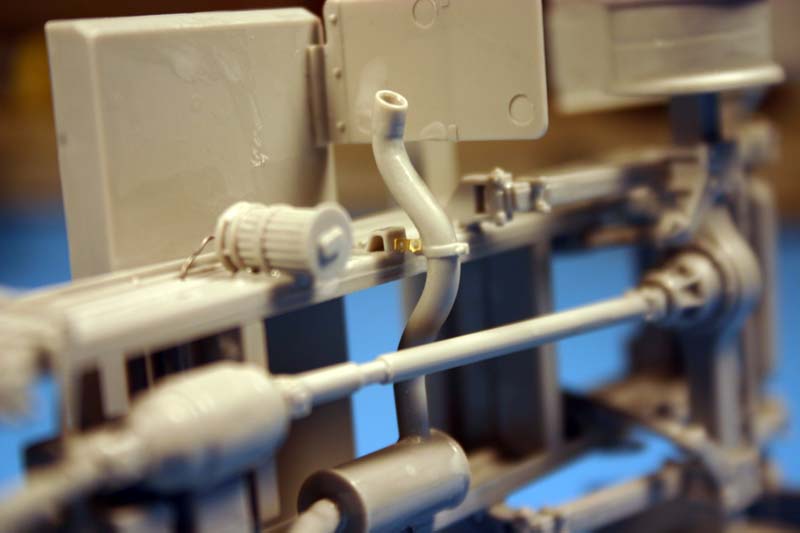
step 3, you continue frame construction and also add the exhaust pipe. It has a small, PE hanger on the end by the rear wheels. While this looks great and is in scale, it is a pretty weak attachment and is the only one, other than where the front of the exhaust pipe attaches to the engine. I pushed the large muffler piece a little to the side and glued it to the frame to make this section stronger. Step 3 also has you building the battery box and air tanks and their armored cover. These are straight forward with no issues.
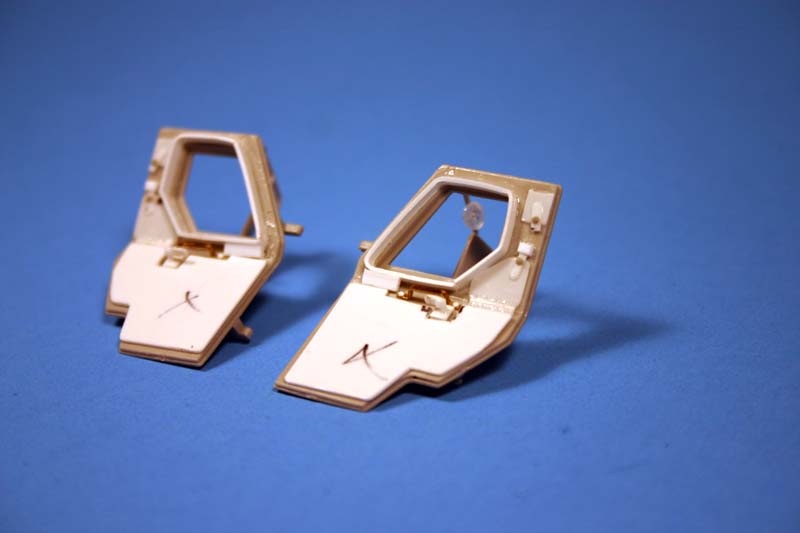
Step 4 builds the leaf springs and adds them to the frame. This can be a little tricky to get the springs to sit correctly. I didnt have a problem, but have heard from other modelers that it was an issue area. If you follow the pointers in the instructions and do not glue the shackles (parts B34, B66 and F34, F16) to the springs, but to each other, this will allow them to be freely moved into place to get the springs sitting correctly on the frame. Once they are in place, I hit the assembly with liquid glue to tighten it all up and ensure the suspension is solidly glued. You also build the front and rear differentials and axles in step 4. These did not present any issues. Be sure not to glue parts B18 and B19 (just slip them on) if you want a steerable front suspension.
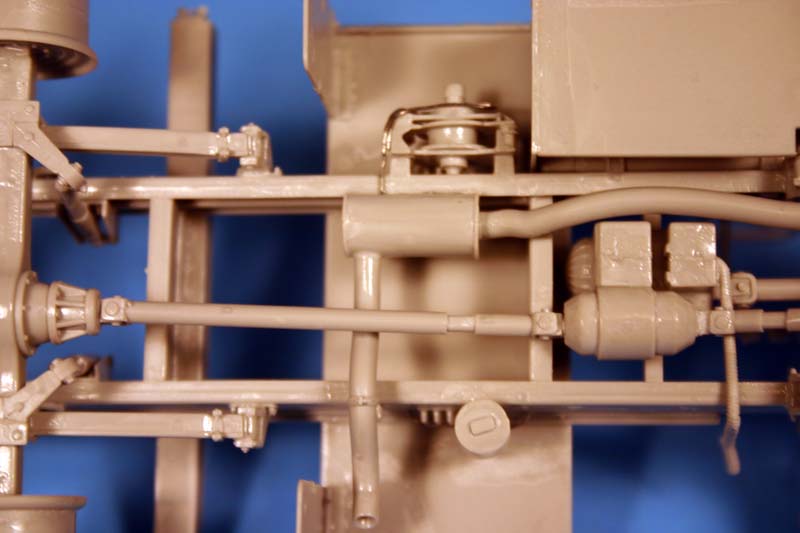
Step 5 has you adding the axles and building a lot of sub-steps that get added later. It is all pretty straight forward with the addition of the axles and drive shafts, front bumper, hydraulic fluid filter, battery box, and rear mud flaps. I recommend adding the shocks form step 2 now. This will allow them to be properly aligned with their ends which are on the differentials. You also build the wheels and tires, accessory box, fuel tank, and a few other pieces that get added later. None presented any issues.
Step 6 has you adding many of the subassemblies you built earlier. No issues were noted. You may want to leave the wheels or at least the rubber tires off until later, to ease painting though.
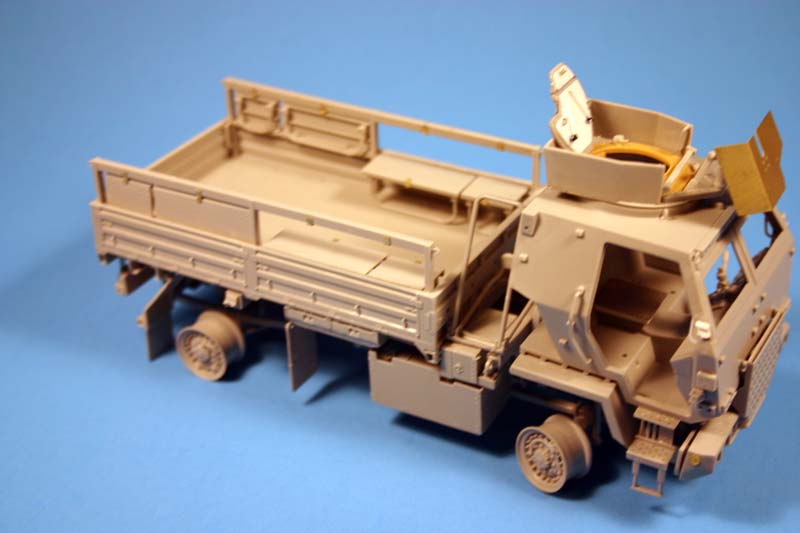
Step 7 and 8 are the construction of the troop seats and their supports. You can either build the seats in the up or down position. The construction is without issues. I decided to show the front half of the seats up and the rear half down. This shows them off well and will allow some cargo to be placed in the bed as well. Also, the entire seat and support assemblies could be left off the truck since they are removable for a pure cargo carrier to make loading and unloading from the drop down sides easier.
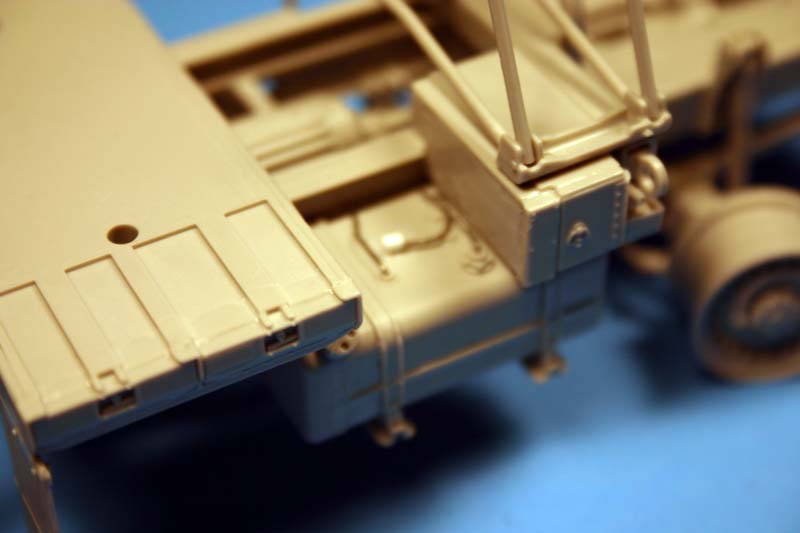
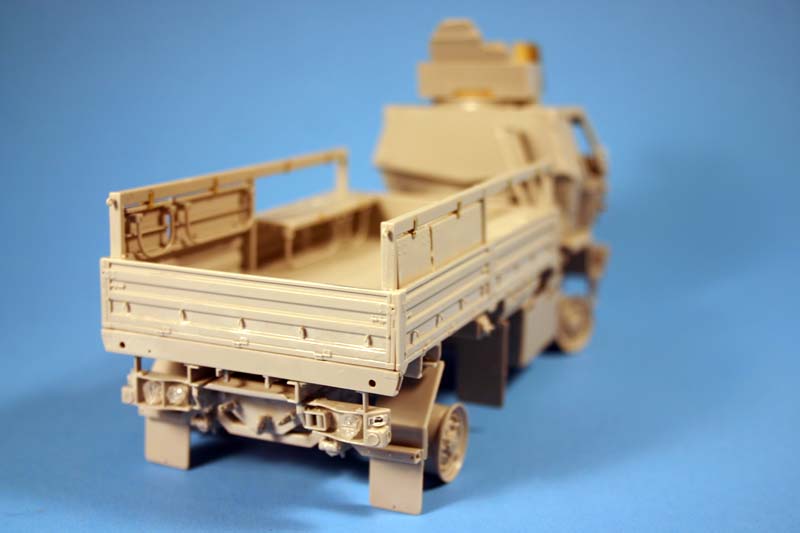
Step 9 and 10 are the construction of the cargo box. This too went together without issues with large, keyed locating pins for an accurate and secure connection of parts. There are a bunch of little hooks (H9) for the tie-downs for a canvas top (not included in the kit). Be careful with these. They are small and fly off the tweezers easily. I made a few sacrifices to the carpet monster with them. Luckily, Trumpeter provides about 6 extras to cover this.
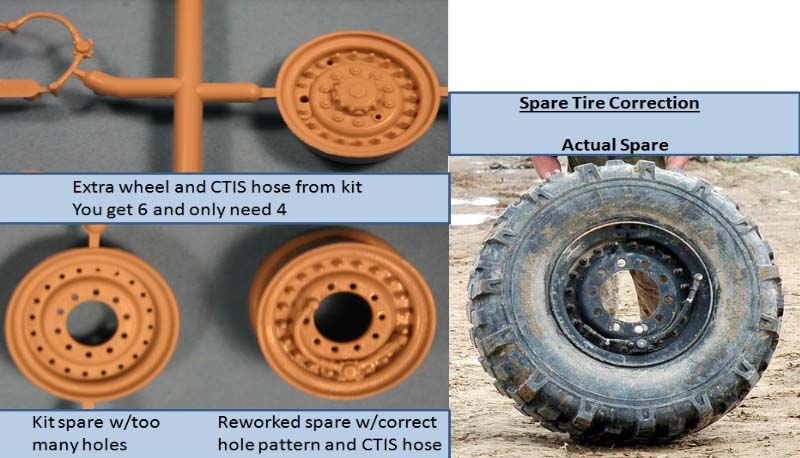
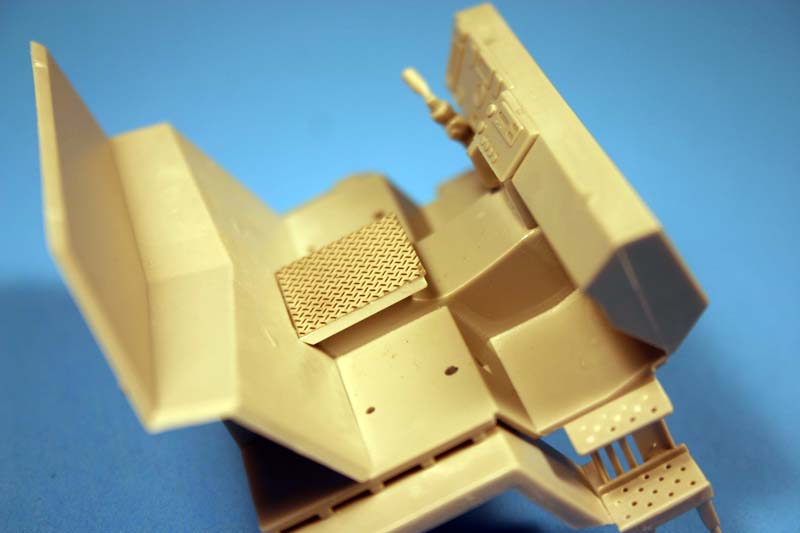
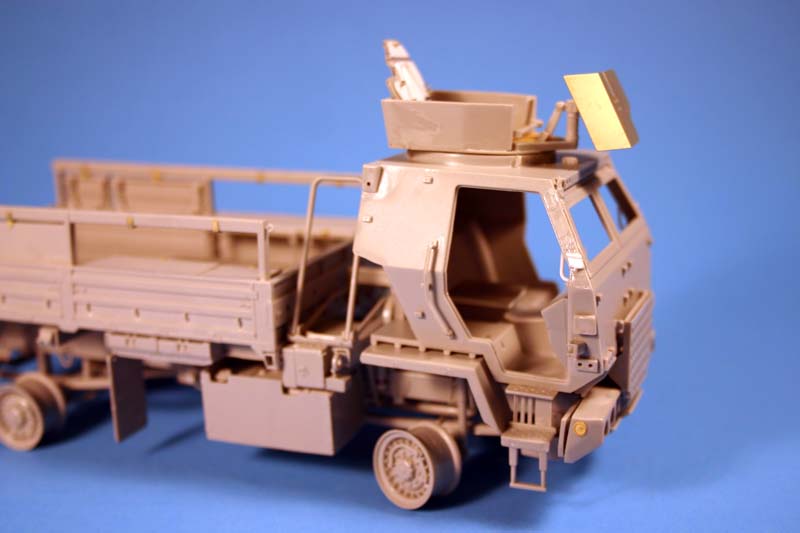
Step 11 and 12 starts the construction of the armored cab. There are no surprises here either. The interior is a little sparse, but adequate. The instrument panel decals look nice. There is no call out for interior colors though. The walls and floor could be either forest green or sand. The seats should be OD green with black for the supports (parts WJ42, 43), as is the steering wheel (WJ16) and shift lever (WJ41). There is also a subassembly for the spare wheel here. There is no issue with construction, but the wheel itself is incorrect. It has too many bolts removed from the rim and is missing the CTIS (Central Tire Inflation System) hose.
The rims are a two-part design that bolts together with a ring of bolts around the outer rim. The outer bolts are only removed when the rim is separated to remove the rubber tire from the rim. This outer ring of bolts has been left off the spare as well. You will need to fill the outer ring of holes with nut and bolt details to represent the spare correctly. To tackle this issue, I used one of the extra wheels (you get 6 sets of wheel parts on the sprue since it is common to the M1078 and M1083 kits). I drilled out the center hub from the back first. Next I shaved off the lug nuts. Then I used a pin-vise to drill out the lugnut holes. Lastly, I added the hose for the CTIS from the spares on the sprue. This leaves you with a correct spare wheel with only the lugnut bolts removed.
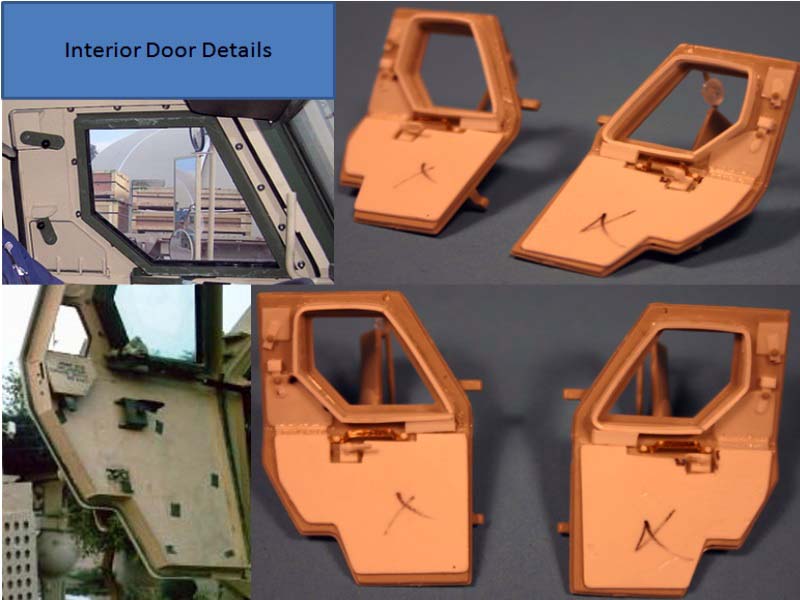
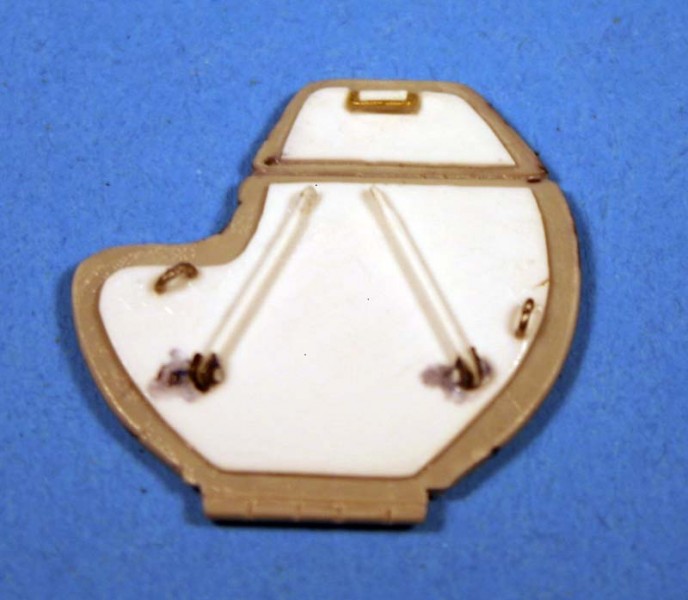
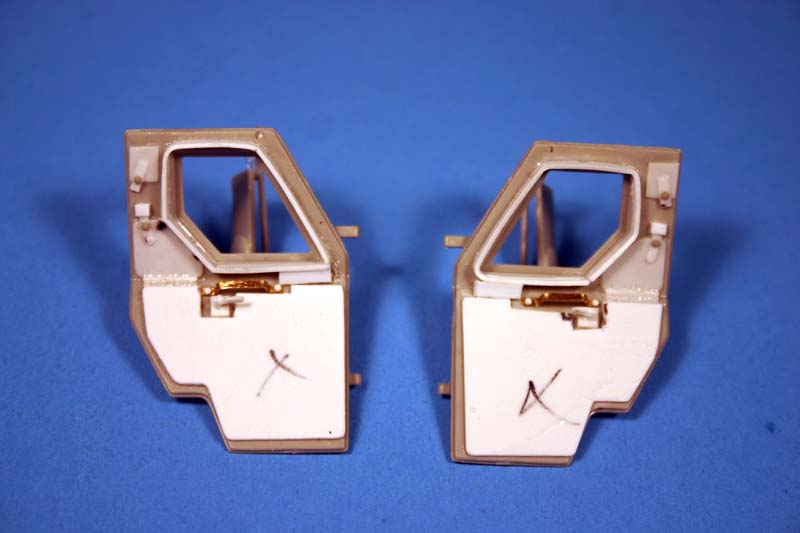
Step 13 continues the cab assembly with smaller details such as lights, windshield wipers, and the doors and door handles. The doors are another area that need some attention. Trumpeter listened to modelers and left them as separate pieces in this kit, unlike their M1078 soft cab where they were molded onto the cab shell. However, the doors are void of interior details. There should be padding around the window and inner door handle and latch details on them. I have represented these with sheet styrene again.
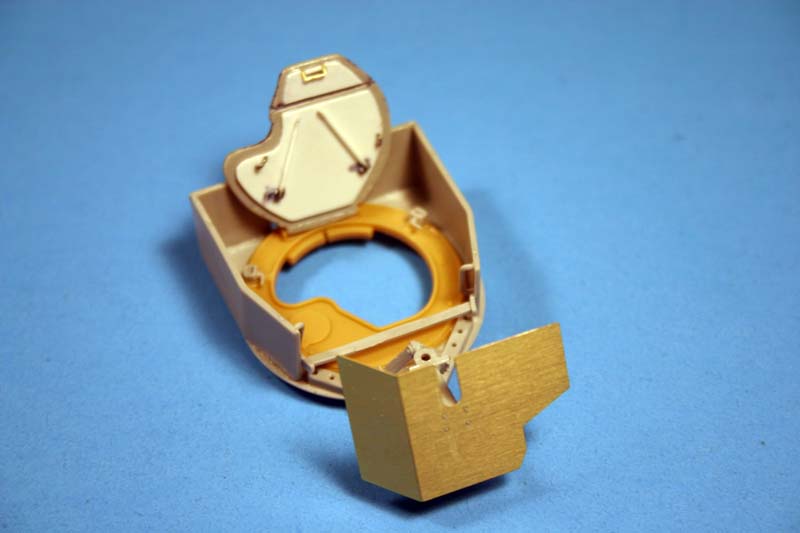
Step 14 builds the gunners protective kit and gun mount. The construction is straight forward and without issues. This is another area that could use some attention though. The issue here is a molded on hatch for the ring mount, which precludes you from adding a gunner or seeing inside from the top. To fix this, I cut the top hatch out of the mount base and detailed the hatch interior with sheet styrene again. I cut a round hole out of the top of the mount plate and added a spare Bronco HMMWV ring mount on top of the kits base to accept the hatch. It is now an open hatch with ring mount details. You also have the option of a PE or plastic gunshield here. I like the PE one better, but either looks good. The .50 cal is really nice as well. The details are crisp and the barrel is already drilled out. A nice touch.
Step 15 completes the cab with the addition of smaller items such as side mirrors, grill, marker lights, and optional side fender spot lights. The completed gunmount is also added at this time. Leave it loose and do not glue if you want to make it movable to allow it t be positioned in different directions.
Steps 16 and 17 complete the build by bringing all the subassemblies together and adding a couple other smaller pieces such as a nice PE armor plate/mudguard with chock blocks stored on it and the air cleaner/filter canister. There is one issue here as well. There are no inner fenders under the cab to blank off the area that is empty where an engine should be. I used a couple pieces of sheet styrene glued to the sides of the cab floor supports (WJ10) to fill the sides and not allow the viewer to see straight through the empty engine compartment.
Conclusion
Overall this is a great kit that goes together well. There are no major issues with it and only a couple minor ones that are easy to overcome. The assembly sequence and subassemblies allow for ease of painting. It looks really tough once done as well. Anyone with average modeling skills will find this a joy to build. I highly recommend this kit to anyone who loves modern vehicles.
For a review that talks more about the sprues and parts, refer to my earlier In-Box Review here:
In-Box Review Live links


Comments