1⁄35Tasca Sherman Firefly VC
8
Comments
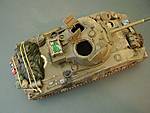
Oils of various colours were dotted over the surface of the model, then streaked off with a large brush full of white spirit. Around fuel fillers darker streaks of oils, very dark Blues, Brown and Black were left running down the sides of the hull. The model was then put aside for about 48 hours to allow the oils to totally dry.
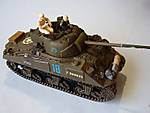
Next all the detail painting was completed, while experiments with stowage and crew figures began. The kit commander figure was retained but his head swapped for a helmeted tanker head from the spares box. A new commander figure, from Ultracast was also put use and a half figure from the same company poked his head from the loader’s hatch. I was struggling for inspiration, with the stowage, only having a knapsack from the spares box and a Resicast road wheel in place. Salvation came in the form of Legend’s huge stowage set, specifically designed for Fireflies. There are easily enough parts for two, or even more, vehicles and some parts could be used on any commonwealth Sherman type. The main parts used were a large, brilliantly sculpted, pile of stowage for the rear deck and a nice long bundle that was a perfect fit over the blanked off glacis MG position. Some ammo cans and a cloth were then stuck onto the top of the rear plate stowage bin. Painting up these pieces was really fun and brought them to life.
For another splash of colour I decided to paint up the cloth on the rear deck as a captured Nazi flag. I was careful to paint the flag so the swastika was hinted at but the full shape was not visible. Legend’s large block for the rear deck has depressions made by rope already sculpted in and they provide a piece of rope, in their set, to tie it in place. The only problem is that once I’d fitted it, it was obviously over scale and just didn’t look right and a smaller gauge piece of twine was used to replace it.
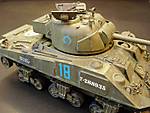
Another souvenir collected by the crew was a case of wine, wired down to the top of the turret bin. The case was filled with clear resin wine bottles from plus model, their sparkle beating any effect achievable with paint. With everything now in place a final layer of dust was applied, with Mig pigments of various earth shades, to pull all the different parts together. No build up of mud was applied to the tracks or lower hull as the Firefly would be splashing through a stream and I reckoned this would have given the bottom part of the ol’ girl a good wash off.
Comments
Hmmmm...Why does it say I'm not authorized to see that article?
Rick
DEC 08, 2008 - 03:53 PM
sorry, a problem has arisen with the banner for the home page ( it went for a walk... o.k., I forgot... ) As soon as I get it sorted out, the feature will be back up.
Henk
DEC 08, 2008 - 04:03 PM
Hi Paul,
Thanks for the article, interesting insight into the water. Grand looking Firefly and a nice scene.
Overall a very neat build. I'm not sure about the water spilling off the front of the tracks, depending on which angle you view it from it lools a little thick, ie too much as that part of the tank is well out of the water if you know what I mean?
Still a very cleaver use of the clingfilm, and lots off food for thought.
Figures and general setting are great and I'd be happy if my 1st/2nd or 3rd lol, lol efforts with water turn out half as good.
Did you consider any submerged rocks, mud, wood etc under the water or paint any alternative shades below? Water certainly poses a big challenge, very useful read indeed and always great to see a Commonwealth kit.
Cheers
Al
DEC 12, 2008 - 08:45 PM
Sorry for taking so long to answer, I'm new to getting articles posted here and didn't realise anyone had commented on it
Anyway in answer, Alan, i agree the water on the front of the tracks looks a bit thick, it comes from making several attempts to get it to look right. Too much fiddling and too many layers make it a little bulky, i'll know better next time. I had planned on some rocks iand details in the bottom of the river, and there are actually weeds and things there but once the rippled layer went on they became almost invisible.
Thanks for the positive feed back.
Paul
JAN 07, 2009 - 09:10 AM
Copyright ©2021 by Paul Chatfield. Images and/or videos also by copyright holder unless otherwise noted. The views and opinions expressed herein are solely the views and opinions of the authors and/or contributors to this Web site and do not necessarily represent the views and/or opinions of Armorama, KitMaker Network, or Silver Star Enterrpises. All rights reserved. Originally published on: 2008-12-08 00:00:00. Unique Reads: 26082


