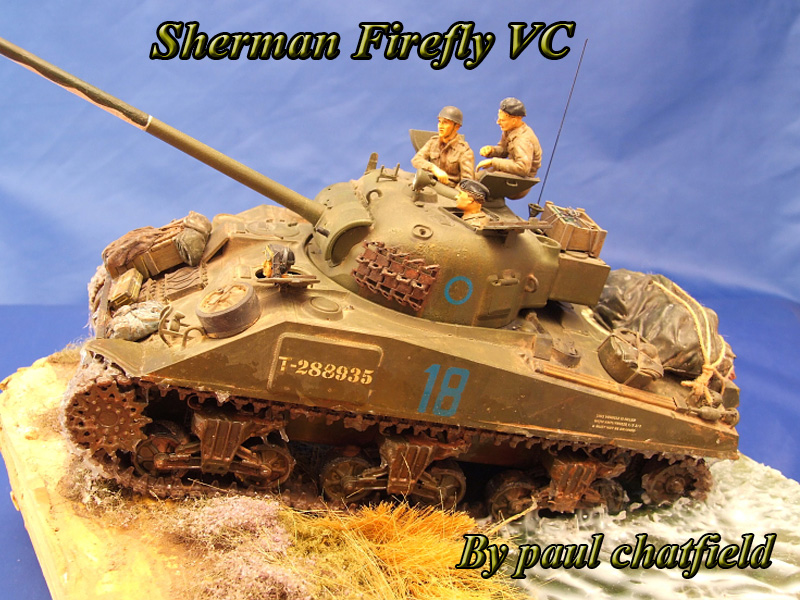
1⁄35Tasca Sherman Firefly VC
8
Comments
Introduction
When I opened the Tasca 1/35 Sherman Firefly kit I was eager to get a look at this much anticipated (and hyped) release. A quick sort through sprues and instructions, and things were looking good. The mouldings were excellent and showed a lot of attention to detail. On the Hull the weld seams were, like the recent Dragon Shermies, subtle and raised (no time wasted filling weld seams on this kit!). Something else that was new to me in this kit, and that I was looking forward to playing with, was Tasca’s “working” VVSS suspension.The first decision is which version of the Firefly VC to make from the kit options. I picked the Kiwi tank based in Italy in the last days of World War Two. As this was a very late War tank, the idea came to me that I could depict a tank and crew after the end of hostilities. Almost all my builds of the previous year had been of combat situations or knocked out vehicles. This was a chance to show a relaxed crew heading for de-mobilisation, having survived the War, job done. I didn’t want a large scale diorama just a small vignette, to show off the Firefly and to put over the story. As I also wanted to show off the movable suspension the first thought was to have the Sherman climbing a bank or coming out of a ditch. While pondering this I visited a model show, at which I bought some of Vallejo’s water effects. With that came the final idea for the scenario, a Tank emerging up a river bank, time to start work. At that time (April 2007) I never imagined it would take such a long time to get to the stage where I could happily say it was finished.
Comments
Hmmmm...Why does it say I'm not authorized to see that article?
Rick
DEC 08, 2008 - 03:53 PM
sorry, a problem has arisen with the banner for the home page ( it went for a walk... o.k., I forgot... ) As soon as I get it sorted out, the feature will be back up.
Henk
DEC 08, 2008 - 04:03 PM
Hi Paul,
Thanks for the article, interesting insight into the water. Grand looking Firefly and a nice scene.
Overall a very neat build. I'm not sure about the water spilling off the front of the tracks, depending on which angle you view it from it lools a little thick, ie too much as that part of the tank is well out of the water if you know what I mean?
Still a very cleaver use of the clingfilm, and lots off food for thought.
Figures and general setting are great and I'd be happy if my 1st/2nd or 3rd lol, lol efforts with water turn out half as good.
Did you consider any submerged rocks, mud, wood etc under the water or paint any alternative shades below? Water certainly poses a big challenge, very useful read indeed and always great to see a Commonwealth kit.
Cheers
Al
DEC 12, 2008 - 08:45 PM
Sorry for taking so long to answer, I'm new to getting articles posted here and didn't realise anyone had commented on it
Anyway in answer, Alan, i agree the water on the front of the tracks looks a bit thick, it comes from making several attempts to get it to look right. Too much fiddling and too many layers make it a little bulky, i'll know better next time. I had planned on some rocks iand details in the bottom of the river, and there are actually weeds and things there but once the rippled layer went on they became almost invisible.
Thanks for the positive feed back.
Paul
JAN 07, 2009 - 09:10 AM
Copyright ©2021 by Paul Chatfield. Images and/or videos also by copyright holder unless otherwise noted. The views and opinions expressed herein are solely the views and opinions of the authors and/or contributors to this Web site and do not necessarily represent the views and/or opinions of Armorama, KitMaker Network, or Silver Star Enterrpises. All rights reserved. Originally published on: 2008-12-08 00:00:00. Unique Reads: 26077


