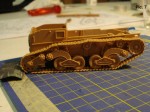
1⁄35Carro Armato L6/40
5
Comments
Building the Carro Armato L6/40 Italian Light Tank
IntroductionAfter my review (which you can find here) I have started a build blog, only to find that my review proved to be too optimistic. With the goal of keeping my findings available to all of the Armorama community, I have decided to write this feature. I refer you to the review of the kit for historical notes to the tank and references.
Building the Hull and Suspension
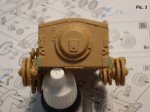
The lower hull is parted to a separate front, back, sides and floor. Care is need here to get correct alignment. There is a lip on the corner of the side and back plates that should not be there and could be easily filled with some plastic card (Pic. 1).
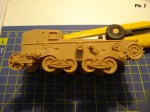
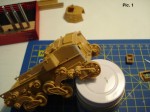
The suspension was a bit fiddly but went together without any problems (Pic. 2). There are, however, two mistakes to watch out for in the instructions: As mentioned in the review, parts A22 and A23 are mounted vice versa and in the idler wheel assembly parts A14 and A15 should be the other way around. Some filler was needed to get a correct fit between the back hull plate and the idler wheel assembly (Pic. 3).
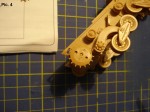
The drive sprocket is designed in a way that it can't be turned after assembly as the little cap that goes inside the wheel goes through to the other side (Pic. 4). I recommend adding the drive sprocket with the tracks to get correct alignment.
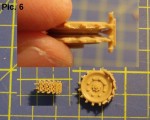
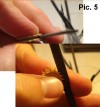
One of the major issues with this kit is the fit of the tracks to the drive sprocket. At first, I thought it was about the sprocket teeth not fitting the holes of the tracks, so I took a file and started sanding the sprockets' teeth. When this did not lead to the desired result, I found out that the issue was the space between the drive sprocket halves: There was just not enough space for the guide teeth to fit. A file between the (already glued) sprocket halves solved this problem effectively with the result of a nice track fit (Pics. 5 & 6).
The problem of the track lengths not having the sag that is seen on most pictures of the L6/40 was solved by gently bending the track lengths. This was done after marking the position of the return rollers on the tracks (Pic. 7).
For those not keen on using the Italeri Tracks there are (to my knowledge) two alternatives by Friul Models (ATL-95) and Model Victoria (no. 4082).
Comments
Hi Stefan,
Very useful article and a good job on the kit.
Many thanks
Al
AUG 06, 2010 - 06:44 AM
Stefan, very well done feature on this interestng vehicle. Articles that feature observations and potential pitfalls of a kit are always more than helpfull.
Cheers,
Jan
AUG 06, 2010 - 11:41 AM
Glad you like it guys.
Hey Jan, this would be a good opportunity to change over to 1/35 scale, it's almost braille scale in size.
Cheers!
Stefan
AUG 07, 2010 - 09:30 AM
Stefan, please! Where would be the challenge in dropping back to a scale that is equivalent to a walker or training wheels on a tricycle. If anything, I am dying to try 1/144 detailed figure painting.
Cheers,
Micro tread_geek
AUG 07, 2010 - 11:52 AM
Copyright ©2021 by Stefan Halter. Images and/or videos also by copyright holder unless otherwise noted. The views and opinions expressed herein are solely the views and opinions of the authors and/or contributors to this Web site and do not necessarily represent the views and/or opinions of Armorama, KitMaker Network, or Silver Star Enterrpises. All rights reserved. Originally published on: 2010-08-06 00:00:00. Unique Reads: 21137


